Sea of Madness - Arborell · Sea of Madness by Andrew Wright ... the Isle of the Amazons that lies...
42
Sea of Madness by Andrew Wright _______________________________________________________________________ Sea of Madness _______________________________________________________________________ An Entry in the 2011 Windhammer Prize for Short Gamebook Fiction by Andrew Wright Like the Odyssey but shorter… An Entry in the 2011 Windhammer Prize for Short Gamebook Fiction
Transcript of Sea of Madness - Arborell · Sea of Madness by Andrew Wright ... the Isle of the Amazons that lies...
Sea of Madness by Andrew Wright
_______________________________________________________________________
Sea of Madness
_______________________________________________________________________
An Entry in the 2011 Windhammer Prize for Short Gamebook Fiction
by Andrew Wright
Like the Odyssey but shorter…
An Entry in the 2011 Windhammer Prize for Short Gamebook Fiction

Sea of Madness by Andrew Wright
In this epic adventure, set on the storm-tossed waves of the Sea of Madness, you play a mighty hero
sailing homewards to the city-state of Lopenos, after sacking the Citadel of Praj. Pick one of the three
heroes below and copy their details onto your Quest Sheet.
Kasilios the Great
Male Warrior
MIGHT: 5
SORCERY: 2
HEALTH: 4
Weapon: Battle Axe (POWER 3)
Gear: Javelin
Gold: 1 talent
God: Morez
Kasilios is the foremost hero of Lopenos. His list of accomplishments is both long and bloody, and
includes slaying the vampiric Death Hyena of Hesados, besting the Wave Raider champion Ixilytl the Red
in single combat, and slaughtering Kadmus of Praj’s elite Skull Legion to a man. Despite these
achievements, Kasilios is also a spectacularly bad gambler, and has lost much of the fortune he acquired
in the sack of Praj to the wily adventurer Ithaqua. Thus he sails homewards somewhat diminished in
funds but hoping to do a spot of looting during the voyage to makeup for his current shortfall in gold.
Vethena Wave-Dancer
Female Enchantress
MIGHT: 2
SORCERY: 5
HEALTH: 4
Weapon: Staff (POWER 1)
Gear: Shield
Gold: 3 talents
God: Fosydos
An acolyte of Fosydos, god of the sea, Vethena is the most powerful spellcaster ever born in the city of
Lopenos. She becalmed the waters of the Sea of Madness to allow the fleet of the Mellenic Alliance safe
passage to Praj. During the siege Vethena also brought down wave upon wave onto the docks of Praj,
reducing its stone causeways to rubble and much of its armada to shattered kindling. She sails home with
much loot that she hopes to use to build a sorcerous college devoted to training more enchantresses of
Fosydos.
Pellenthe of Pythia
Female Adventurer
MIGHT: 4
SORCERY: 3
HEALTH: 3
Weapon: Sword (POWER 2)
Gear: Javelin and Shield
Gold: 2 talents
Goddess: Zephis
An Entry in the 2011 Windhammer Prize for Short Gamebook Fiction

Sea of Madness by Andrew Wright
Pellenthe is an exile from Pythia, the Isle of the Amazons that lies beyond the Straits of Skalos. Lopenos
is her adopted home now, and she distinguished herself greatly in the final battle against the forces of
Praj. The wandering hero Ithaqua devised a ruse of presenting the Prajans with the gift of an enormous
wooden elephant constructed from teak. Concealed inside the ‘gift’ was Pellenthe, along with a crack
squad of elite troops, who, having successfully infiltrated the citadel, opened the gates and allowed
entrance to the cohorts of the Mellenic Alliance. With victory over the Prajans achieved, and her personal
fame assured, Pellenthe now returns to Lopenos with a ringing endorsement of adulation from her fellow
comrades in arms.
HOW TO SURVIVE THE SEA OF MADNESS
Introduction
It is not necessary to read all the rules before play. If you wish you may just pick a hero and start
reading, referring back to the relevant rules section as needed. Alternatively, you could read all the rules
beforehand to get a clear idea of how to play Sea of Madness. Note that there is also a section of Optional
Rules at the back of the adventure, including rules for creating your own heroes.
MIGHT, SORCERY, and HEALTH
Your hero is defined by three scores:
MIGHT: This is a measure of how brawny and strong your hero is. You use this score in combat,
and also test it when you’re attempting to succeed in a great feat of strength. You also test this score when
hurling a Javelin at an enemy. It can have a minimum value of 2 and a maximum value of 6.
SORCERY: This shows how skilled your hero is in the arts of magic and wizardry. You test this score
when you’re trying to cast a powerful enchantment upon a foe. It can have a minimum value of 2 and a
maximum value of 6.
HEALTH: This represents how much damage your hero can take before dying. It will change a lot
as you play Sea of Madness, and can even go as low as 1. If it reaches zero, your hero has died, and you
must turn to 13.
You can replenish lost HEALTH points by recuperating at the halls of your fellow heroes who dwell in
the great city-states that dot the shores of the Sea of Madness. You may have to prove to them how
mighty a hero you are, but once you have done that, you are able to stay as long as you like and recover
all lost HEALTH points back to your original starting total.
Lastly, every melee weapon you use has a given POWER value. This is the number of points deducted
from the HEALTH score of an enemy wounded by this weapon.
Testing Your Scores
You will often be told to roll one die and compare the result to one of your scores. The simple rule is
that:
An Entry in the 2011 Windhammer Prize for Short Gamebook Fiction
Sea of Madness by Andrew Wright
If you roll under your score, you have succeeded.
If you roll equal to, or over your score, you have failed.
Sometimes you will be told to add a number to the die roll due to the increased difficulty of what your
character is attempting.
Example: Your hero is trying to lift a boulder that blocks the entrance to a cave, and you are told to roll one die
and add one to the result, and compare it to your MIGHT score (which is 5). You roll a four, which would normally
be a success. However, adding 1 takes it to 5, which is the same as your MIGHT score, and thus you fail in your
attempt to lift up the boulder.
Missile Combat
At the start of a battle, you will often be told “You may hurl a Javelin at your opponent if you have
one”. To do this, roll one die and compare the result to your MIGHT score, then:
If you roll under your MIGHT score, your Javelin has hit your opponent. Deduct 1 point from
their HEALTH score, and then start the battle (or if this kills them outright, turn to the next
paragraph number indicated).
If you roll equal to or over your MIGHT score, your Javelin has missed the target. You must fight
them as normal. After the battle, assuming you do not die or flee, you may retrieve your Javelin
and use it again in your next conflict.
You can only carry one Javelin at a time.
Melee Combat
Fighting is something you will do a lot of while sailing the Sea of Madness. It takes place using a
sequence of events called Battle Turns. Whenever you are told to fight an opponent, use the following
instructions for each Battle Turn:
1. Roll one die and add your MIGHT score. This is your total Battle Strength for this Battle Turn.
2. Roll one die and add your opponent’s MIGHT score. This is your opponent’s total Battle Strength
for this Battle Turn.
3. If both Battle Strengths are the same, your blows have cancelled each other out. Return to step 1
and start the next Battle Turn.
4. If your Battle Strength is higher than your opponent’s, you have wounded them. Deduct the
POWER value of your weapon from their HEALTH score. If their HEALTH score is zero, you have
slain them and can turn to the paragraph number indicated. If their HEALTH score is greater than
zero, they are still alive and you must return to step 1 and start the next Battle Turn.
5. If their Battle Strength is higher than yours, you have been wounded. Deduct your opponent’s
POWER value from your HEALTH score. If your HEALTH score is zero, you have been slain and
must turn to 13. If your HEALTH score is greater than zero, you are still alive and can return to
step 1 and start the next Battle Turn.
An Entry in the 2011 Windhammer Prize for Short Gamebook Fiction

Sea of Madness by Andrew Wright
Using a Shield
Your hero may start with or acquire a Shield while on their travels. Using a Shield in combat may help
prevent you from suffering wounds. Whenever you have been wounded during a Battle Turn, roll one
die. On a roll of a 1, the Shield has deflected the blow and you suffer no damage. On the roll of a 2-6, you
are wounded as normal. Note that a Shield can only be used in combat if your hero is armed with a one-
handed weapon such as a Sword or Staff. Weapons requiring two hands to use, such the Battleaxe,
preclude the use of Shield as well.
Fleeing
Should the battle be going badly for you, you may wish to flee the fight. You must deduct one point
from your HEALTH score as your opponent gets a glancing blow on your fleeing backside (and this may
be deflected by using a Shield; see above). If your HEALTH score is at least 1, you have successfully fled
and can turn to the new paragraph number indicated when fleeing is given as an option.
If you have thrown a Javelin at your opponent at the start of combat and then decide to flee later, you
must cross the Javelin off from your Quest Sheet as you cannot retrieve it before you flee.
Gear
You start this game with the bare minimum of equipment, known here as Gear. Your hero has one of
the following weapons (see their descriptions above to see which one):
Staff (POWER 1)
Sword (POWER 2)
Battleaxe (POWER 3)
The higher the POWER value of a weapon the better! You can only carry one weapon at a time. Your
hero may also have a Javelin and/or a Shield. Javelins are for throwing (see above) and you can only carry
one Javelin at a time. Shields are for protection (see above), and you can only carry one Shield at a time
also.
You can carry a maximum of 8 items on this adventure, including your weapon, and a Javelin and/or
Shield, but not including Gold. There is space on your Quest Sheet for recording any items you might
find or buy during the adventure. If you are carrying 8 items already and wish to take or buy another
item, you will have to drop and cross off one item from your Quest Sheet before you can record details of
your new acquisition.
Gold
The amount of Gold your hero has demonstrates how wealthy they are and is measured in units called
talents. Gold can be acquired by raiding, trading or selling items. You can spend Gold on new equipment,
trade goods, buying a new ship, or hiring a better crew. Keep a careful tally of your Gold in the Gold box
on your Quest Sheet.
An Entry in the 2011 Windhammer Prize for Short Gamebook Fiction

Sea of Madness by Andrew Wright
Gods and Goddesses
Although a host of minor demigods are worshipped by the city-states of the Sea of Madness, your hero
will be a follower of one of the three major deities:
Morez: The god of war, who takes the form of a mighty warrior clad in blood-stained bronze armour.
The greatest temple to Morez can be found in the Kingdom of Karta.
Fosydos: The god of the sea. Fosydos has been known to manifest himself as a gigantic half-human,
half-fish being, and those who sail the Sea of Madness pay him devout fealty. White-walled Mellene hosts
the biggest shrine dedicated to the sea god.
Zephis: Goddess of the wind. A nebulous spirit whose form varies from a gentle breeze to a howling
gale, Zephis is, along with Fosydos, one of the most important deities for any sailor on the Sea of
Madness. The citadel of Praj held the biggest church dedicated to this changeable goddess.
Each of the starting heroes already has a designated god to follow. Record this detail on your hero’s
Quest Sheet. You can visit the various temples of these gods to gain Blessings to help you on your
journey. However, Blessings for the god your hero worships will be cheaper than those for the gods your
hero does not follow.
Ships
To sail the Sea of Madness, your hero will need a ship. Full details of the ship that your hero
commands at the start of the adventure can be found in ‘The Saga So Far…’ section below. Record these
details carefully on your Quest Sheet. During the adventure you may have the opportunity to acquire a
better or different type of ship. When this happens, erase the details of your old ship and enter the details
of your new one on your Quest Sheet.
Your Crew
What use is a ship without a crew to sail her? Your starting ship also comes with a crew and further
details on this can be found in ‘The Saga So Far…’ section below. Record these details carefully on your
Quest Sheet. Your crew is defined by two scores:
CREW MIGHT: This is a measure of how strong and skilled your crew are. You use this score in
mass combat (see below), and also test it when your crew are attempting to succeed in a great feat of
nautical ability. It can have a minimum value of 2 and a maximum value of 6.
CREW HEALTH: This represents how much damage your crew can take before they are decimated.
It will change a lot as you play Sea of Madness, and can even go as low as 1. If it reaches zero, your crew
are all dead (and likely so are you), and your adventure is over. Turn immediately to 13.
You can replenish lost CREW HEALTH points by hiring new crewmembers at the docks of any major
Sea of Madness city-state. Details will be given in the adventure as to how many CREW HEALTH points
you can restore, and how much Gold it will cost you to do so.
An Entry in the 2011 Windhammer Prize for Short Gamebook Fiction
Sea of Madness by Andrew Wright
Testing Your Crew’s Scores
You will often be told to roll one die and compare the result to one of your crew’s scores. The simple
rule is that:
If you roll under your crew’s score, they have succeeded.
If you roll equal to, or over your crew’s score, they have failed.
Sometimes you will be told to add a number to the die roll due to the increased difficulty of what your
crew is attempting to do.
Mass Combat
Fighting is something your crew will do a lot of while sailing the Sea of Madness. It is nearly identical
to Melee Combat (see above), and takes place using a sequence of events called Battle Turns. Whenever
your crew is told to fight an opponent, use the following instructions for each Battle Turn:
1. Roll one die and add your CREW MIGHT score. This is your total Battle Strength for this Battle
Turn.
2. Roll one die and add your opponent’s MIGHT score. This is your opponent’s total Battle Strength
for this Battle Turn.
3. If both Battle Strengths are the same, your attacks have cancelled each other out. Return to step 1
and start the next Battle Turn.
4. If your Battle Strength is higher than your opponent’s, your crew have inflicted casualties. Deduct
1 point their HEALTH score. If their HEALTH score is zero, your crew have defeated them in
battle and can turn to the paragraph number indicated. If their HEALTH score is greater than
zero, they are still undefeated, and you must return to step 1 and start the next Battle Turn.
5. If their Battle Strength is higher than yours, your crew have suffered casualties. Deduct 1 point
your CREW HEALTH score. If your CREW HEALTH score is zero, your crew and yourself have
been defeated and must turn to 13. If your CREW HEALTH score is greater than zero, your crew
are still undefeated, and you can return to step 1 and start the next Battle Turn.
Retreat
Should the battle be going badly for your crew, you may wish to retreat from the fight. You must
deduct one point from your CREW HEALTH score as your opponents get a series of glancing blows on
your fleeing backsides. If your CREW HEALTH score is at least 1, you have successfully retreated from
the battle and can turn to the new paragraph number indicated when retreat is given as an option.
Codewords
At certain points in the adventure you will check whether you have a certain codeword on your Quest
Sheet, and must turn to a new paragraph number if you do so. Codewords measure what
accomplishments your hero has achieved and how they have left their mark on the lands surrounding the
Sea of Madness. Make sure you keep a scrupulous record of which codewords you have recorded,
because the continuity of your adventure will be compromised otherwise.
An Entry in the 2011 Windhammer Prize for Short Gamebook Fiction
Sea of Madness by Andrew Wright
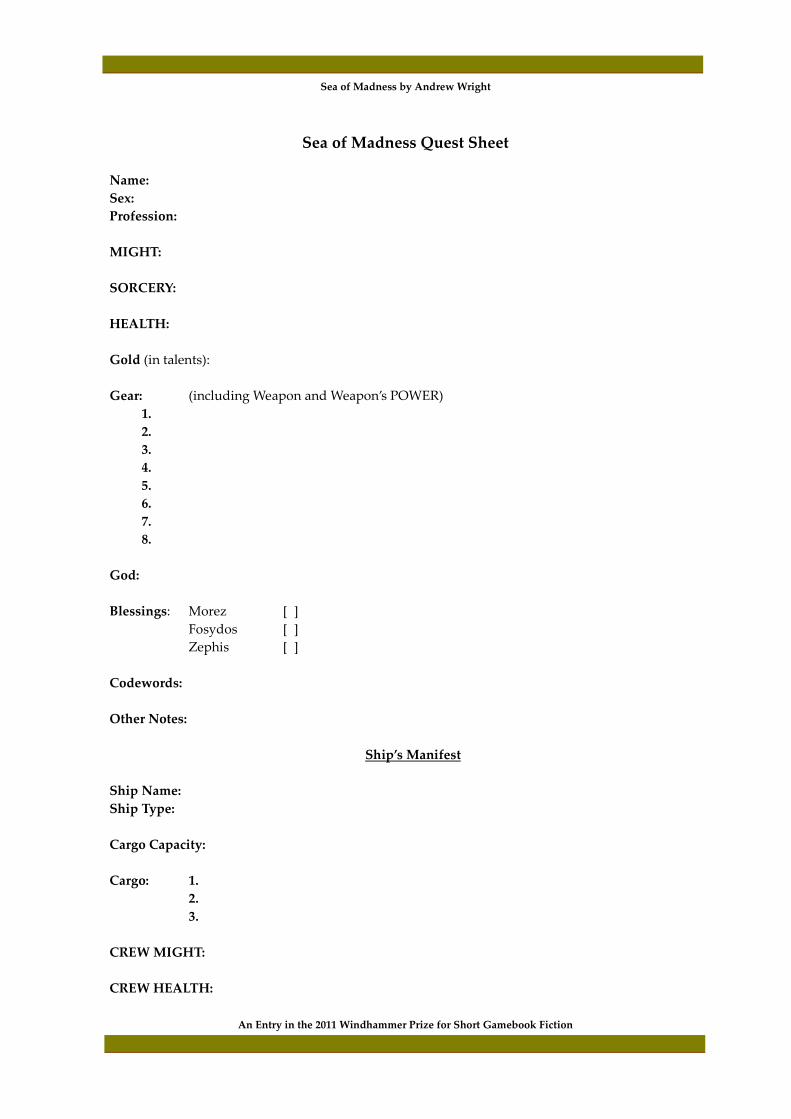
Sea of Madness Quest Sheet
Name:
Sex:
Profession:
MIGHT:
SORCERY:
HEALTH:
Gold (in talents):
Gear: (including Weapon and Weapon’s POWER)
1.
2.
3.
4.
5.
6.
7.
8.
God:
Blessings: Morez [ ]
Fosydos [ ]
Zephis [ ]
Codewords:
Other Notes:
Ship’s Manifest
Ship Name:
Ship Type:
Cargo Capacity:
Cargo: 1.
2.
3.
CREW MIGHT:
CREW HEALTH:
An Entry in the 2011 Windhammer Prize for Short Gamebook Fiction

Sea of Madness by Andrew Wright
The Saga So Far…
“When all you do can only bring you sadness,
out on the Sea of Madness…” (Smith, 1986)
The Prajan War was finally over! For ten long years the legions of the Mellenic Alliance had battered
endlessly against the ramparts of the great Citadel of Praj. Kadmus of the Black Helmet, the mad warlord
of Praj, had sacked the peaceful trading port of Sathalene, his forces razing it to the ground. Outraged, the
other city-states of the Sea of Madness had formed an alliance led by the Archon of fair white-walled
Mellene, and including Karta and Lopenos. They had sailed off across the sea and laid siege to Praj,
seeking bloody retribution.
What won the war was the ruse of the hero Ithaqua and his gigantic wooden Teak Elephant which was
gifted to the Prajans. An elite unit concealed within the elephant had snuck out during the dead of night
and unlocked the gates of Praj, allowing entry for the forces of the Mellenic Alliance. The citadel was
taken, its populace enslaved, and its insane overlord Kadmus imprisoned for life. Loot was distributed
among the survivors of the war, a local garrison established to watch over the citadel, and then it was
time for the remaining forces to leave and return home at long last.
YOU are a hero of the distant city-state of Lopenos, on the far south-eastern coast of the Sea of
Madness. After a long war of attrition your sole command consists of the following vessel and her crew:
Ship Name: Pride of Lopenos
Ship Type: Trireme
Ship Cargo Capacity: 1 unit
Ship Cargo: Slaves
CREW MIGHT: 3
CREW HEALTH: 3
Record these details on your Quest Sheet.
It is time to return home to Lopenos, and its fertile vineyards and shady olive groves. Sea birds wheel
and call in the early morning air, as you stand on the foredeck of your ship, consulting a map and
plotting a homeward course with the helmsman.
‘Southwards lie the Straits of Skalos, where the Mellenic marines continue to battle renegades loyal to
the dead lord of Praj. Meanwhile, to the east are the ruins of god-cursed Sathalene,’ says the helmsman,
tapping his forehead to ward off the taint of ill-fortune.
‘What about the south-east?’ you ask, fingering the map. ‘Surely it is the quickest way home?’
The helmsman sighs. ‘It is the heart of the Sea of Madness. Storms, raiders, monsters, and worse. You
do know there is a reason why we hugged the coastline sailing here these ten years past?’
‘Quite,’ you reply, somewhat chastened. Nevertheless, you are the captain of your fate. Whither are you
bound? South to the Straits of Skalos (turn to 25), east to the ruins of Sathalene (turn to 65), or south-east,
into the Sea of Madness (turn to 1)?
An Entry in the 2011 Windhammer Prize for Short Gamebook Fiction
Sea of Madness by Andrew Wright
1
There is indeed a reason they call it the Sea of Madness. It may not actually inspire insanity directly,
but there is no telling what horrors may befall you as you sail straight through this nautical heart of
darkness.
‘Steady on the oars, lads!’ yells the helmsman, gripping the railing on the rear-deck with whitened
knuckles. ‘Piper, slow and careful on the rhythm!’
A sonorous dirge goes up from the piper in charge of aligning the strokes of the rowers as your ship
sails out into open waters. Roll one die and consult the following table:
Roll a 1: turn to 10.
Roll a 2: turn to 20.
Roll a 3: turn to 30.
Roll a 4: turn to 40.
Roll a 5: turn to 50.
Roll a 6: turn to 60.
2
The traders’ bazaar of Karta is a seething mass of commerce overseen by the ever-present red-cloaked
soldiers of King Lykos. Of particular note are the heavily tattooed Numasean tribesmen from the west
who deal in warclan totems, and the oxen caravans of the bull-headed Taurines from the south, who sell
weapons and armour. You can buy any of the items listed below as long as you have enough gold to buy
it and space to carry it. You may also sell any items you own that are listed below, for the price stated.
Don’t forget to update your Quest Sheet in either case. Items with no purchase price are not available
locally.
Weapons:
Staff (POWER 1) To buy: 1 talent To sell: 1 talent
Sword (POWER 2) To buy: 2 talents To sell: 1 talent
Battleaxe (POWER 3) To buy: 3 talents To sell: 2 talents
Javelin To buy: 1 talent To sell: 1 talent
Armour:
Shield To buy: 1 talent To sell: 1 talent
Breastplate To buy: 2 talents To sell: 1 talent
The Breastplate allows you to deduct 1 point from an enemy’s POWER down to a minimum of 1.
Other Gear:
Healing Potion To buy: 2 talents To sell: 1 talent
One use only: restores your HEALTH to its starting level.
Enchanted Amulet To buy: - To sell: 3 talents
Cloak of Shadows To buy: - To sell: 3 talents
Pipes of Pandemonium To buy: - To sell: 3 talents
War Banner To buy: 4 talents To sell: 3 talents
The War Banner adds 1 to your CREW MIGHT during Mass Combat.
When you are ready to venture elsewhere in the city, turn to 66.
An Entry in the 2011 Windhammer Prize for Short Gamebook Fiction
Sea of Madness by Andrew Wright
3
You ready your weapon and stride forward to attack the Luskapine Behemoth. It snarls in defiance and
reaches for you with tentacled talons, attempting to drag you into its wide, tooth-lined maw. Defend
yourself!
LUSKAPINE BEHEMOTH: MIGHT 4, POWER 2, HEALTH 4
You may hurl a Javelin at the creature if you have one. You cannot Flee from this battle. If you slay the
Luskapine Behemoth, turn to 16. If the Luskapine Behemoth kills you, it goes on to destroy your ship and
feast on your crew. Your adventure is over (turn to 13).
4
Your expedition is walking through a blasted landscape of blackened lava flows close to the base of
Mount T’sufanda, when there is great tearing noise from the now violently shaking ground beneath your
feet.
‘Phaistos is angry!’ screams the helmsman. ‘Save yourself!’
But his warning comes too late! A sudden explosion sends a plume of glowing magma up into the sky
and down again, raining fiery death upon your crew. Quickly you attempt to cast a protective
enchantment. Roll a die and Test your SORCERY.
If you roll equal to or over your SORCERY, your powers have no effect and your crew is decimated by
the blast. Roll one die and divide the result by 2, rounding fractions up. Deduct the result from your
CREW HEALTH down to a minimum score of 1.
If you roll under your SORCERY, you invoke a shielding ward that protects the majority of your crew
from the blast. Deduct 1 from your CREW HEALTH, down to a minimum score of 1.
The survivors pick themselves up off the ground and tend to the wounded. If you want to return to the
ship and set sail, turn to 53. If you want to continue through the highlands, turn to 48.
5
The north-western reaches of the Sea of Madness are where fertile green plains gradually lead up to
the icy mountainous wilderness of Thulios. On the coast lies the great stone fortress-city of Praj, now
garrisoned by the legions of the Mellenic Alliance following their victory over the mad warlord Kadmus.
‘I’ve heard tell that the adventurer Ithaqua rules Praj these days,’ says the quartermaster, chewing on a
chicken bone that he later flings overboard for the fish to nibble. ‘If you ask me that’s like putting the wolf
in charge of the sheep flock, given the wealth supposed to be hidden within the vaults of the Citadel!’
You can dock your ship at Praj (turn to 33), or sail elsewhere, to other ports-of-call (turn to 89).
6
The Temple of Zephis the wind goddess is an alabaster dome supported by fluted pillars on a breezy
hilltop located a mile inland from Praj. Inside the dome Zephis is represented by a gold and ivory statue
of a regal-looking woman holding the bag of the four winds in her left hand. Bell-chimes hanging from
the roof of the dome give off a continuous tinkling sound as the wind blows through the sanctum.
If you are a follower of Zephis it will cost 1 talent to make an offering. If you are not a follower of
Zephis, it will cost 2 talents for an offering. Making an offering gives you the Blessing of Zephis. If you do
this, cross the gold off your Quest Sheet and tick the Blessing box for Zephis.
The Blessing works by allowing you to summon the wind if you need it while at sea. When you use the
Blessing, cross it off your Quest Sheet. You can have only one Blessing of Zephis at a time. Once it is used
up, you will need to return here to obtain a new one
When you have finished here, you can return to the centre of the city-state of Praj. Turn to 33.
An Entry in the 2011 Windhammer Prize for Short Gamebook Fiction

Sea of Madness by Andrew Wright
7
You raise your hands and perform an invocation of banishment, trying the send the Asipatra demon
back to its rightful home in the lands of the dead. The creature hisses at you in outrage, its metallic
feathers bristling and creating a chiming sound that contrasts weirdly with the dire peril you find
yourself in. Roll a die and Test your SORCERY. Add one to the die roll as the Asipatra is imbued with
powerful counter-spells.
If you roll equal to or over your SORCERY, your powers have no effect. You will have to engage the
beast in combat (turn to 23)!
If you roll under your SORCERY, you summon a black oval in the air, coruscating with crimson fire.
With a mournful howl the Asipatra is sucked into the hole, which is a portal to the Deadlands and it
closes immediately after disposing of the demon. All that remains are a few stray feathers scattered on the
temple flagstones.
Congratulations! You have defeated the Asipatra. Turn to 41.
8
The ship sails almost silently towards the Tower of Xaxes, and your crewmembers are white-faced with
fear. Many of them are no doubt thinking they would not have signed aboard had they known their
captain would be challenging the power of an incarnate wizardly demigod. As you approach the tower,
weird cephalopods rise from the sea and grasp at the ship with leprous tentacles, while dark-winged
beasts flutter about the cavities of the great titan’s skull which stares down at you with a sightless glare.
If you wish to turn back and sail away from here, turn to 73.
If you continue, you get the uncanny sensation that Xaxes is watching you from a chamber deep within
the tower. Will you challenge the ancient master of the night to a trial of combat (turn to 32), or sorcery
(turn to 44)?
9
The harbour of Mellene is the biggest and busiest in all the city-states of the Sea of Madness. Luxurious
goods are transported here from all points of the compass for the delectation of the Archon and his court
of ruling aristocrats.
Ships are available at the following prices:
Trireme: Cost: 4 talents Cargo Capacity: 1 cargo unit
Quadrireme: Cost: 6 talents Cargo Capacity: 2 cargo units
Quinquereme: Cost: 8 talents Cargo Capacity: 3 cargo units
You can sell your current ship for half the above price (so if you sold a quadrireme you would get 3
talents in return). Note that you cannot leave Mellene without a ship, so if you sell your ship make sure
you have enough funds to buy a new one, otherwise your adventure will be over!
If you wish to upgrade your crew, it costs 1 talent to raise either your CREW MIGHT or CREW
HEALTH by 1 point, up to a maximum score of 6 each (so if you spent 2 talents you could raise your
CREW MIGHT by 2 points, or your CREW HEALTH by 2 points, or both scores by 1 point each).
You can also buy and sell cargo units at the prices listed below. Each price is for one cargo unit.
Copper: To buy: 3 talents To sell: 2 talents
Ivory: To buy: 4 talents To sell: 3 talents
Slaves: To buy: 3 talents To sell: 2 talents
Spices: To buy: 4 talents To sell: 3 talents
Teak: To buy: 4 talents To sell: 3 talents
An Entry in the 2011 Windhammer Prize for Short Gamebook Fiction

Sea of Madness by Andrew Wright
When you have finished here, you can return to the city (turn to 22). Alternatively, you can board your
ship and set sail (turn to 74).
10
The days have been calm, balmy even, as your crewmembers are lured into a false sense of security
steering the ship across the Sea of Madness. White clouds streak the horizon and the sun is a glowing orb
shining down from a vaulted blue sky.
‘Rock ahead!’ yells the lookout in the bow, and the rowers slow their pace appreciably as the ship
coasts towards a rugged black outcrop poking above the surface of the waves.
Suddenly, the waters surrounding the ship bubble furiously and the ‘rock’ rises up to reveal itself as
the top of the skull of an immense sea monster whose gaping jaws are lined with row upon row of
recurved teeth. Rivulets of sea water stream down the dark rubbery hide of the beast’s flanks as long,
claw-tipped tentacles reach for the crew of your ship!
‘It’s a Luskapine Behemoth!’ exclaims the helmsman, petrified with fear like most of the crew. Racing
towards the bow of the ship you will have to decide how best to attack the creature. With your weapon
(turn to 3), or with the power of sorcery (turn to 19)?
11
Record the codeword Bellerophon on your Quest Sheet.
Your crew slays most of the Piscians and the rest flee back into the Sea of Madness, diving off the docks
and into the depths. The people of Sathalene are overjoyed when you free them from their captivity.
‘We have nothing with which to repay you!’ says a woman called Elliadia who is the daughter of the
last lord of Sathalene. ‘But you are free to stay here whenever you are passing by!’
You can rest here for as long as you like and restore your HEALTH score to its original starting total.
The survivors get to work on restoring their city-state to its former glory. You help out for several days
before your crew starts to get restless and it is decided to venture onwards. The crew takes the ship out
from the harbour, and sail away from the ruins of Sathalene, now a hive of rebuilding activity. Turn to 42.
12
You raise your arms above your head in readiness for a spell of power. Given that Spirullans are
creatures of muck and slime, you reason a cleansing blast of flame should slaughter plenty of them and
drive the rest off. Roll a die and Test your SORCERY.
If you roll equal to or over your SORCERY, your sorcerous flames slay a few of the creatures but the
rest press relentlessly forward. You will have to either engage their champion in single combat (turn to
36), or order a mass charge by your crew (turn to 82).
If you roll under your SORCERY, your flames fan outwards in a coruscating halo of destruction that
boils the creatures alive in their shells. Those that are not cut down by your retributive fires silently sink
under the water’s surface and disappear.
‘I wonder what they taste like?’ muses the quartermaster, sniffing at the smell of charred shellfish that
now permeates the air around the ship.
You have defeated the Spirullans. Turn to 64.
13
You are either dead or have been incapacitated in some unfortunate and ignoble fashion. Assuming
you are not keeping a record of your failed would-be heroes, erase all their details from your Quest Sheet
(or print out a new sheet), and start again. You can use either the same or a different starting character,
taken from the start of this adventure. Alternatively, you may like to have a go at creating your own
An Entry in the 2011 Windhammer Prize for Short Gamebook Fiction
Sea of Madness by Andrew Wright
unique hero or heroine, using the Optional Rules for Creating New Characters at the end of this
adventure. The choice, as always, is yours.
14
You are sailing away from the Kingdom of Karta, the gleaming sunshine reflected off from the bronze
armour of the massed sentries that guard the walls of this war-like city-state.
‘Bleedin’ Kartans!’ scowls the shipwright, a Mellenian by birth. ‘Three hundred of their best soldiers
die in the mountains fighting the tribesmen of Numasea and they think that makes them all heroic battle
companions of Morez the war god…’
Ignoring his outburst, you plot a course onwards. You can sail west, towards the foreboding Tower of
Xaxes (turn to 55), east, to the equally infamous Jungle of T’suf (turn to 85), or north, out into the open
waters of the Sea of Madness (turn to 1).
15
If you have the codeword Evdominta, you should also have a number associated with it. Turn to that
number immediately. If not, read on below.
You sail into the picturesque bay that encloses your home port of Lopenos. Or, at least you try. Some
huge hemispherical magical barrier of sparkling motes of lights appears and prevents you from sailing
any closer. Further experiments, such as landing outside the bay, also show it prevents you reaching
Lopenos by land as well.
‘What manner of sorcery is this?’ mutters the helmsman, utterly baffled. ‘Perhaps we should sail to the
other cities and consult with their leaders.’
If you want to sail elsewhere in search of answers to your dilemma, turn to 28.
If you want to cast a spell and try to divine the origin of the barrier, roll one die and Test your
SORCERY.
If you roll equal to or over your SORCERY, turn to 63.
If you roll under your SORCERY, turn to 98.
16
It was an epic battle but you have finally killed the Luskapine Behemoth. As its blob-like carcass sinks
into the depths of the sea, your crew cheers and applauds your victory. Your shining example of bravery
has inspired them all!
Roll one die. If the result is higher than your CREW MIGHT, you may increase your CREW MIGHT by
one point as they feel much bolder sailing with a hero of such obvious power. If you roll equal to or
under your CREW MIGHT there is no effect.
‘A resounding triumph, Captain,’ says the boatswain, clapping you on the shoulder. ‘I’ve not heard tell
of a mortal slaying one of those beasts since Koseus the Grey killed a Behemoth that swam into the
harbour at Port Mellene half a century ago!’
And so you sail on across the sea. Turn to 80.
17
You and your crew follow a game trail through the stifling gloom of the jungle, heading for the
highlands and Mount T’sufanda. Strange bird calls and clouds of stinging insects dog your every footfall
upon the mossy ground. Gradually the landscape rises as a series of limestone hills, carved into fantastic
shapes by wind and water, and overgrown with tangled clumps of lianas and strangler figs. Mist rolls
down into the valleys, muffling all sounds and obscuring your view, while the ground beneath your feet
An Entry in the 2011 Windhammer Prize for Short Gamebook Fiction

Sea of Madness by Andrew Wright
occasionally shudders and heaves, as though you walked upon the restlessly sleeping form of a Titan.
‘I don’t like this one bit,’ says the helmsman. ‘Surely we’re better off heading back to the ship, Captain?’
If you want to return to the ship and sail on, turn to 53.
If you want to explore the coastal jungles instead, turn to 38.
If not, roll one die to see what you have encountered in the foothills surrounding Mount T’sufanda:
Roll a 1 or 2: turn to 78.
Roll a 3 or 4: turn to 4.
Roll a 5 or 6: turn to 31.
18
Your valiant crew defeats the barbarians of Thulios, and you can enslave the survivors if you wish.
Add a cargo unit of Slaves to the Ship’s Manifest on your Quest Sheet if you have space on board your
ship (if you don’t you can always dump cargo and cross it off your Quest Sheet to make more space).
There’s not much in the way of additional valuables to find among the ruins of Sathalene. ‘I think the
Prajans took most of it when Kadmus destroyed the city,’ says the quartermaster. ‘The barbarians here are
just picking over scraps.
Still, roll one die. If you roll a 6 you can add 1 talent of Gold to your Quest Sheet.
Where will you explore next? You can head to the ruined temple complex on a low hill overlooking the
port (turn to 34), or explore the docks, where there appear to be more than a few fires, wafting columns of
smoke high into the sky (turn to 57).
Or, you could leave this place entirely, and return to your ship (turn to 42).
19
You stand defiant on the prow of your ship, calling upon mystical powers to aid you in halting the
attack of the Luskapine Behemoth. A coruscating halo of fiery violet light surrounds both you and the
monster.
Roll one die and Test your SORCERY. If you roll equal to or over your SORCERY, your powers have no
effect. Turn to 3 and fight the creature with your weapon.
If you roll under your SORCERY, your spell has succeeded and you are able to command the beast to
cease its onslaught. In fact, the Luskapine Behemoth is so cowed by your sorcerous prowess that it will
follow your ship and fight in place of you or your crew in the next sea battle you face. The monster’s
ability scores are as follows (make sure to note them on your Quest Sheet):
LUSKAPINE BEHEMOTH: MIGHT 4, POWER 2 (Melee Combat only), HEALTH 4
If the Luskapine Behemoth dies during the battle you or your crew will have to take over and finish the
conflict. If the Luskapine Behemoth defeats its opponent(s), it will return to the depths of the sea. In either
case, cross it off from your Quest Sheet. Note that this applies to sea battles only.
Slightly nervous by the large black shadow in the water that now trails your ship, you sail on
elsewhere. Turn to 80.
20
You are making good time sailing the Sea of Madness, when the lookout starts screaming: ‘Wave
Raiders! Wave Raiders! To arms! To arms!’
Off to the starboard side of the ship are a row of black dots on the horizon, rapidly enlarging as they
approach your ship. Wave Raiders are nomadic human marauders who patrol the Sea of Madness riding
on giant manta rays, attacking all they encounter. Your crew is still scrambling to arm themselves by the
time the Wave Raiders attack. Scrawny bronze-skinned men, clad in shagreen armour and wielding
An Entry in the 2011 Windhammer Prize for Short Gamebook Fiction

Sea of Madness by Andrew Wright
driftwood spears tipped with the venomous barbs of stingrays, they hurl themselves at your ship in a
frenzied rampage!
WAVE RAIDERS: MIGHT 4, HEALTH 2
Fight a Mass Combat battle between the Wave Raiders and your crew. You cannot Retreat from this
battle. If your crew defeats the Wave Raiders, turn to 26. If the Waver Raiders defeat your crew, they
slaughter all the survivors (including yourself), take your loot if you have any, and scuttle the ship. Your
adventure is over. Turn to 13.
21
Such is the reputation of Xaxes the Sorcerer that the ruins of his tower still lie largely undisturbed
following his death at your hands. Your crewmembers therefore are able to find further riches among the
toppled basalt bricks and shattered statuary that once formed Xaxes’ lair. Roll one die and divide the
result by 2, rounding all fractions up. The end result is the number of talents you may add to the Gold
box on your Quest Sheet. However, once you have visited here three times then there is no more gold to
discover and you must leave empty-handed.
When you have finished here it is time to sail on. Turn to 73.
22
There is no denying that Mellene is truly the jewel among the city-states of the Sea of Madness. Its
broad, cypress-lined colonnades and ornate marble architecture lend it an air of refinement and
sophistication rarely seen in the more rustic and provincial settlements elsewhere. Having docked your
ship at Mellene, you can do any of the following:
Visit the harbour to trade cargo, hire more sailors, or sell your ship and buy a new one (turn to 9).
Buy and sell personal equipment at the agora (turn to 90).
Make an offering at the Temple of Fosydos, god of the sea (turn to 99).
Call on the Palace of the Archon, ruler of all Mellene (turn to 43).
Or, as long as you have not sold your ship (and failed to replace it with a new one), put to sea and set
sail (turn to 74).
23
You stand firm, weapon in hand, and face the onslaught of the Asipatra. Its face is a disturbing mix of
bird and man, dominated by a curved black beak that snaps at you. The feathers on its wings are razor-
sharp, as are the cruel grasping talons on its feet that lash out in a blinding blur. Worse though is the
miasma of hopelessness that settles on your soul. This is the insidious enchantment of the Asipatra and its
baleful influence will be hard to resist. You must deduct one from your die roll every Battle Turn for the
duration of this Melee Combat. This will be a difficult battle!
ASIPATRA DEMON: MIGHT 4, POWER 2, HEALTH 4
You may hurl a Javelin at the Asipatra if you have one. Note that the Asipatra is immune to the power
of the Sargazan Flower. If you want to Flee from this battle and escape back to the ship with your crew,
reduce your HEALTH by one, and turn to 53. If you slay the Asipatra, turn to 41. If the Asipatra kills you,
it flings your body contemptuously aside and goes after your crew. They are unable to resist its dire
sorcery and are slowly picked off one by one as they flee back towards the ship. Only one survivor
remains and he has been driven mad by his ordeal. When a merchant trireme from Karta picks him up a
few weeks later, all he can say is ‘The bird of doom!’ repeatedly in an insane cackle. Your adventure is
over (turn to 13).
An Entry in the 2011 Windhammer Prize for Short Gamebook Fiction

Sea of Madness by Andrew Wright
24
If you have the codeword Perseus, turn immediately to 76. If not, read on below.
The slave mines of Bhintos are where merchants come to buy copper in exchange for slaves and timber.
The mines are run by the nomad tribes of the wastes and overseen by mercenary renegades from the
various city-states. As a result, the slaves are treated appallingly. Those who try to escape are crucified
outside the mines as examples to their fellows, and it pains you to see entire families enslaved in chains,
scratching in the dirt, trying to find nuggets of copper under knife-like shards of shale.
‘Welcome, trader,’ says an overseer, clad entirely in black, with a barbed whip on one side of his belt
and a scabbarded sword on the other. ‘Do you have any slaves you’d like to sell?’ In the distance on a far
hill you see a legion of armoured mercenaries supervising the erection of yet more crucifixes.
You can buy and sell cargo units at the prices listed below. Each price is for one cargo unit.
Copper: To buy: 2 talents To sell: 1 talent
Ivory: To buy: 3 talents To sell: 1 talent
Slaves: To buy: 4 talents To sell: 3 talents
Spices: To buy: 3 talents To sell: 1 talent
Teak: To buy: 4 talents To sell: 3 talents
Record any transactions on your Quest Sheet. When you have finished here you can board your ship
and sail on to other shores (turn to 68). Or, if you are horrified by their short and brutal lives, you can try
to free the slaves (turn to 51).
25
The Straits of Skalos are the rocky jaws that close upon the western reaches of the Sea of Madness.
Beyond the straits lie the great Ocean of Furies and the fabled island of Pythia. Here though, in the
hidden inlets and secret coves of Skalos lurk dark ships of doom: Prajan renegades, lone pirate vessels
and free-lance privateers.
The helmsman gives the sign to mute the pipes, and your ship sails near-silently, aside from the creak
of wood or occasional splash, through tattered wreathes of mist and across the straits.
Roll one die. If you roll a 1-3, turn to 92. If you roll 4-6, turn to 81.
26
Your crew has slain most of the Wave Raiders in an epic battle, and the bloodied survivors flee on the
backs of their swift-swimming manta rays. Searching the bodies of the dead Wave Raiders yields one
talent’s worth of gold ornaments, which you may add to the Gold box on your Quest Sheet.
‘Best we leave this area soon, Captain,’ says the helmsman. ‘The Wave Raiders will be back for
vengeance, and in greater numbers than before.’
You sail on through the Sea of Madness. Turn to 80.
27
Record the codeword Heracles on your Quest Sheet.
A rousing cheer goes up from the arena spectators as your final blow sends the Taurine gladiator
crashing into the sandy floor, where he lies unmoving. Warriors and guards throughout the stands beat
their weapons against their shields and armour in a clattering roar of approval. King Lykos comes down
from the royal dais to crown you himself, as the new gladiator champion of the arena.
Of course in your case the role is largely ceremonial and a surprisingly festive celebration is held later
that night to recognize your real ascension to the status of Honoured Guest of Karta. You sit at the right
hand of King Lykos and are the subject of many long epic poems sung in the favoured pentameter of the
An Entry in the 2011 Windhammer Prize for Short Gamebook Fiction
Sea of Madness by Andrew Wright
times.
In a lull between dueling battle-poets, King Lykos turn to you and says: ‘I have heard of unrest in your
home port of Lopenos. A villainous band of usurpers have seized control of the city. Daringly, they have
engaged the aid of Xaxes the Sorcerer to prevent the return of Lopenos’ heroes of the Prajan War, such as
yourself. In this manner they rule unopposed and in an ever-worsening climate of fear. More than this, I
do not know.’
For the rest of the night you brood on the King’s troublesome words. If what he says is true, your
return home will not be so easy and you will face more foes that you could have possible imagined at the
start of this voyage.
For now, the arena games are over. Turn to 66.
28
You are sailing away from the city-state of Lopenos.
‘Look, Captain! Red herrings!’ says the quartermaster, pointing at a crimson shoal of fish that dart
about haphazardly in the water, changing their speed and direction with dazzling irregularity.
You refrain from drawing comparisons to your current voyage. Where are you heading anyway? West,
to the Jungle of T’suf (turn to 85), north, to the Melloskine Marshes (turn to 75), or north-west, into the Sea
of Madness (turn to 1)?
29
The people of Sathalene are overjoyed to see the return of their saviours. You and your crew are feted
with celebrations and feasts, and toasted long into the night.
‘Recently we had a ship here that had just come from the land of T’suf,’ says Elliadia, the newly-
appointed Watch-Lady, to you, during a feast. ‘They said the jungles there conceal the ruins of ancient
civilizations. I replied that at least in this ruined city we still have real citizens and not creatures of the
night…’
You can rest here for as long as you like and restore your HEALTH score to its original starting total.
After that you can either visit the temple of Zephis (turn to 34), or sail on from here (turn to 42).
30
A titanic storm brews up on the western horizon like a livid black bruise in the sky. Gargantuan rolling
waves, hurricane-like winds, and a deluge of rain split by jagged blasts of lightning rapidly catch up with
your ship and hurl it about like a broken toy.
‘This is no normal storm,’ screams the helmsman above the howl of the wind. ‘Do something Captain,
quickly!’
If you have a Blessing of the sea god Fosydos, cross it off your Quest Sheet and turn to 37.
Otherwise, you will have to use your sorcerous powers in a bid to placate the storm-clouds and abate
the tempest. Roll one die and Test your SORCERY. If you roll under your SORCERY, you succeed in
spellbinding the thunderous gale and bringing it under control. Turn to 37.
If you roll equal to or over your SORCERY, you fail to control the storm. The main-mast splits and
topples to the deck, crushing both crew and rowers alike. The force of the impact cracks the side of the
vessel, and seawater begins to pour into the hold in an unstoppable torrent. Your ship sinks rapidly down
into the depths, leaving just wave-tossed debris and the occasional survivor clutching at flotsam (of
which you are not one) to mark its passing. The Sea of Madness has claimed yet more victims and your
adventure is over. Turn to 13.
An Entry in the 2011 Windhammer Prize for Short Gamebook Fiction
Sea of Madness by Andrew Wright
31
Your expedition is picking their way across a jungle clearing, littered with bones, when a green vine
suddenly snakes around your ankle and drags you towards a strange-looking bush. Attached to the
centre of the bush is an enormous gourd that splits open to reveal a blood-red mouth studded with
curved barbs.
‘Fight it, Captain!’ yells the helmsman, hesitating to throw any javelins in case he or the crew spear you
by mistake.
You face the dreaded Fangpod Plant! More green tendrils thrash about in the long grass, trying to cram
you into the plant’s maw. Frantically you try to tear the vines off you and slay the vegetable monster.
FANGPOD PLANT: MIGHT 4, POWER 1, HEALTH 3
You may hurl a Javelin at the carnivorous plant if you have one. If you want to Flee from this battle and
escape back to the ship with your crew, reduce your HEALTH by one, and turn to 53. If the Fangpod
Plant kills you, it devours your carcass. Your horror-stricken crewmembers are quickly picked off by
other jungle predators as they attempt to return to the ship. Your adventure is over (turn to 13).
If you kill the Fangpod Plant, you can search through the remains of its less fortunate victims. Roll one
die and consult the table below to see what you find:
Roll 1 or 2: a Shield
Roll 3 or 4: a Javelin
Roll 5 or 6: a talent of Gold
You can add what you find to your Quest Sheet if you wish. When you are finished here, you continue
trekking towards Mount T’sufanda. Turn to 48.
32
‘Xaxes, you scabrous old goat!’ you yell into the silence surrounding the tower as your ship cruises in
the brush against its stone dock. ‘Come out here and fight like a man!’
Your crew whimpers in fear at your temerity but this is drowned out by the sound of deep and
mocking laughter. A glowing sphere of green light materializes on the dock, and within it stands Xaxes
the Sorcerer.
He steps out of the sphere, which dissolves around him and you see he is an unnaturally tall man with
golden skin and long dark hair held back by a silver circlet upon his brow. In one hand he brandishes
long curved sword made from some unknown gleaming metal and under his purple robes he is wearing
a jeweled bronze breastplate. Because of this, you must reduce your weapon’s POWER by 1 point, down
to a minimum of 1.
His sword’s blade flares with green fire and he strides forward to attack you, a grim smile upon his
face.
XAXES THE SORCERER: MIGHT 6, POWER 3, HEALTH 6
You may hurl a Javelin at Xaxes if you have one. Note that Xaxes is immune to the power of the
Sargazan Flower. You cannot Flee from this battle. If you slay Xaxes the Sorcerer, your crew gives a
rousing cheer (turn to 61). If Xaxes the Sorcerer kills you, he then turns and blasts your ship out of the
water with a jagged bolt of searing ebony flame. You have been vanquished by the greatest wizard of the
age. Your adventure is over (turn to 13).
An Entry in the 2011 Windhammer Prize for Short Gamebook Fiction
Sea of Madness by Andrew Wright
33
Despite being heavily damaged during the decade-spanning Prajan War, the port of Praj looks quite
presentable thanks to a large-scale rebuilding effort by those citizens not enslaved to the Mellenic
Alliance. Having been made Governor of the newly-established Prajan Protectorate, the adventurer
Ithaqua has largely left the status quo in place, as long as everyone renounces the works of the fallen
warlord Kadmus and instead embrace the new spirit of change sweeping through the city-state. Once
your ship is docked at Praj, you can do any of the following:
Visit the harbour to trade cargo, hire more sailors, or sell your ship and buy a new one (turn to 96).
Buy and sell personal equipment at the merchants’ market (turn to 88).
Make an offering at the Temple of Zephis, goddess of the wind (turn to 6).
Call on the Citadel of Praj, where the wily hero Ithaqua holds court over the local Mellenic garrison
(turn to 71).
Or, as long as you have not sold your ship (and failed to replace it with a new one), put to sea and set
sail (turn to 89).
34
If you have the codeword Jason, turn immediately to 77. If not, read on below.
At the summit of the breeze-caressed hill above Sathalene lies a ruined sanctuary dedicated to the
wind goddess Zephis. The temple has been desecrated and Zephis’ statue is a missing. An old and
crippled priest shuffles out to greet you.
‘Hail, travellers,’ he says. ‘I am Ionnos the Priest. I have need of an image of the goddess to rebuild this
shrine. Do you have a statuette of Zephis by any chance?’
If you have the Golden Idol of Zephis, turn to 91.
If not, there is naught you can do here but leave. Turn to 83.
35
The southern coastal waters gleam azure-blue under a cloudless sky. Nearby, the walls of the war-like
city-state of Karta are visible, looming out into the sea atop a rocky promontory. Karta is a kingdom and a
member of the Mellenic Alliance, and its soldiers are famed for their bravery in the face of certain death.
Their leader, King Lykos is a devout disciple of the war god Morez.
‘King Lykos slew the Numasean Lion with his bare hands and claims direct descent from Morez
himself!’ says the helmsman reverentially.
You can dock your ship at Karta (turn to 66), or sail on, to parts elsewhere (turn to 14).
36
You stride forward to the prow of you ship with your weapon in hand, ready to face the leader of the
piratical Spirullans. One of them takes a conch shell and blows it, sounding a discordant note. There is a
ferocious frothing in the water and an enormous Spirullan surfaces, waving a rusty trident in one hand
and a barbed scimitar in another. Twice the height of a man, it easily clambers aboard your ship using its
powerful tentacles and launches into an attack.
The Spirullan’s armoured shell offers excellent protection. Because of this, you must reduce your
weapon’s POWER by 1 point, down to a minimum of 1.
SPIRULLAN CHAMPION: MIGHT 4, POWER 2, HEALTH 4
You may hurl a Javelin at the Spirullan if you have one. You cannot Flee from this battle. If you slay the
Spirullan Champion, the other creatures sink suddenly back into the water (turn to 64). If the Spirullan
Champion kills you, the rest of the marauders go on to slaughter your demoralized crew and loot your
ship. Your adventure is over (turn to 13).
An Entry in the 2011 Windhammer Prize for Short Gamebook Fiction

Sea of Madness by Andrew Wright
37
The storm quickly blows itself out and leaves little to mark its passing other than a mass of wave-
tossed debris and weeds sloshing about in the water. You take stock of your vessel and crew. You have
lost some of your rowers who were swept overboard and must deduct one point from your CREW
HEALTH, unless it is 1 already, in which case there is no effect. You also lose one cargo unit from your
hold if you have any (you get to choose which cargo you lose and must cross it off your Quest Sheet).
‘I thought we were done in there for sure,’ says the quartermaster, clutching at the rail with both
hands, his face still a bilious shade of green. ‘Perhaps we should make offerings to Fosydos as thanks, the
next time we visit his temple…’
You sail on across the Sea of Madness. Turn to 80.
38
If you have the codeword Achilles, turn immediately to 94. If not, read on below.
Your expedition stumbles across a cyclopean ruin constructed from huge stone blocks of rust-red
laterite, and overgrown with a profusion of lianas and sickle-leafed chanyan trees. The dominant
sculptural motif in this ancient city of the dead appears to be birds, particularly vultures, serpent eagles
and great crested hornbills. Your crewmembers are keen to search the ruins for hidden riches but also
somewhat afraid.
‘I can’t put my finger on it, Captain,’ says the shipwright, lifting up several smaller flagstones in the
temple precinct to see if anything lies beneath. ‘But something just doesn’t feel right…’
There does seem to be a choking feeling of despair and melancholy settling across the ruins. It is most
disturbing.
If you want to continue exploring the ruins, turn to 79.
If you want to sail on to other shores, turn to 53.
If you want to explore the highlands instead, turn to 17.
39
Record the codeword Odysseus on your Quest Sheet.
You wake up in a simple stone cell within the Citadel of Praj. You wear a white shift and the rest of
your clothes and equipment are piled in a corner of the room. Ithaqua stands before you, a great black
helmet cradled under one arm. He appears more gaunt and haggard than before, but in some ways more
closely resembles the Ithaqua of old.
‘Friend, I am sorry for what we did to you,’ he says. ‘But even though we won the war these are still
desperate times. Unfortunately, we need this helmet, even though I would rather give it to you as a gift to
help you on your travels. As compensation for your suffering however, I can tell you about another even
mightier treasure.’
‘Though Kadmus comprehensively sacked the city of Sathalene, he could not find the most legendary
artefact reputed to be hidden there. Somewhere in the ruins lies the Gauntlet of Power, crafted by the
forge god Phaistos for Morez himself. If you find the Gauntlet of Power you will truly be a hero beyond
compare.’
‘What of my wounds? And the pain?’ you say with a shudder, looking at your unmarked body.
‘Healed back to normal,’ Ithaqua replies. ‘The pain was so great you fell unconscious though you kept
screaming all the same. We unchained you immediately once we had the helmet from Kadmus, and
brought you here. Kadmus was an evil man, and continues to be punished. You however, are now free to
go.’
Ithaqua leaves the cell. Turn to 33.
An Entry in the 2011 Windhammer Prize for Short Gamebook Fiction

Sea of Madness by Andrew Wright
40
After several days of fine sailing, the wind dies and dwindles away to nothing. Following several more
days of becalmed weather, the rowers are exhausted and, owing to a cloudless blue sky, the freshwater
supplies on board are running very close to empty. The crew begins to mutter and look to you for
leadership. How will you solve this problem?
If you have a Blessing of the wind goddess Zephis, cross it off your Quest Sheet and turn to 46.
Otherwise, you will have to use what sorcerous powers you have to summon up some rain clouds and
a friendly wind. Roll one die and Test your SORCERY. Deduct one from the die roll if you have the
Golden Idol of Zephis. If you roll under your SORCERY, you succeed in summoning some magical
weather to aid you, and can turn to 46.
If you roll equal to or over your SORCERY, there is a mutiny on board the ship as the conditions
worsen. You are tossed overboard to feed the sharks! Your ship may eventually reach a safe port, but you
will not. Your adventure is over. Turn to 13.
41
Record the codeword Achilles on your Quest Sheet.
Having bested the guardian demon, you set about exploring the ruined temple it kept watch over. It
appears to be consecrated to an earlier incarnation of Zephis, but more in her capacity as queens of the
birds rather than mistress of the four winds.
‘Over here, Captain,’ says the helmsman with a note of urgency in his voice. ‘What do you make of this
then?’
By pulling back the foliage in a forgotten inner sanctum they have discovered a large idol of Zephis,
shown here in flowing robes with an eagle perched on her wrist, made from solid gold!
If you wish you can add the Golden Idol of Zephis to your Quest Sheet. It is extremely valuable and
can be sold at any city-state market for 6 talents of Gold!
Your crewmembers have also stumbled upon further riches in the lost city. Roll one die and divide the
result by 2, rounding all fractions up. The end result is the number of talents you may add to the Gold
box on your Quest Sheet. When you have finished here it is time to leave the temple and the lost city.
Decide what future path you will take:
If you want to sail on to other shores, turn to 53.
If you want to explore the highlands instead, turn to 17.
42
You leave the waters surrounding Sathalene, and head onwards in search of new directions.
‘Stavros of the Blue Monkey taverna once owed me fourteen obols a lifetime ago now,’ mutters the
helmsman, gesturing at the ruins of Sathalene as they drop away to the stern. ‘There’s no chance of
collecting that debt now…’
You can sail east to fair, white-walled Mellene, jewel among the city-states of the Sea of Madness (turn
to 95), west to the citadel of Praj, garrisoned now by forces loyal to the Mellenic alliance (turn to 5), or
south, into the eye of the storm that is the centre of the Sea of Madness (turn to 1).
43
If you have the codeword Theseus, turn immediately to 54. If not, read on below.
The Palace of the Archon of Mellene is an impressive marble building heavily guarded by elite purple-
robed warriors armed with two-handed swords. You are allowed to enter the Archon’s hall, where he
holds court amid a refined crowd of sycophants, catamites, catechists, ideologists, and mystagogues. The
Archon, clad in robes of gold with a simple laurel-leaf crown atop his grey and balding pate, stares at you
with calculating eyes.
‘My friend, we are all in debt to you for your courageous efforts during the Prajan War.’ he says in a
An Entry in the 2011 Windhammer Prize for Short Gamebook Fiction
Sea of Madness by Andrew Wright
clear and commanding voice. ‘However, times have changed, and this new era calls for new
demonstrations of loyalty. If you can complete my chosen task I will grant you the status of Near-Equal
while you are in Mellene.’
A collective gasp goes up from the crowd of courtiers. Near-Equal status is a reverential title indeed!
‘The task is this,’ continues the Archon. ‘Sophos, greatest of my philosopher-aides, has attempted to
devise a means for man to fly. However, all of his attempts thus far have ended in failure, and the deaths
of many slaves and Sophos’ own son Karos. If you can improve upon Sophos’ design, I will consider you
Near-Equal.’
You are taken to the workshop of Sophos, a grey-bearded wild-haired man now slightly deranged
following the death of his son. His flying device is a set of articulated golden wings attached to a leather
harness. Calling upon all the powers of your intellect, you attempt to decipher its flaws. Roll one die and
Test your SORCERY.
If you roll equal to or over your SORCERY, you sadly tell the Archon that this task is too great for you
at this time. You announce that you will travel the land seeking solutions before returning here to try
again. Your audience with the Archon has ended (turn to 22).
If you roll under your SORCERY score, turn to 69.
44
‘Xaxes, you senile lump of decrepit slag!’ you yell into the silence surrounding the tower as your ship
cruises in the brush against its stone dock. ‘Come out here and duel like a true wizard!’
Your crew whimpers in fear at your temerity but this is drowned out by the sound of deep and
mocking laughter. A glowing sphere of green light materializes on the dock, and within in stands Xaxes
the Sorcerer.
He steps out of the sphere, which dissolves around him and you see he is an unnaturally tall man with
golden skin and long dark hair held back by a silver circlet upon his brow. Xaxes wears silk robes of
amber and vermilion, and each hand is encased in a glowing blue nimbus of arcane energy. His right
hand holds the silvery screen of a warding charm while his left hand summons up a ball of fire. Smirking
at you, he prepares to launch it in your direction. Defend yourself!
For this sorcerous duel, replace your MIGHT score with your SORCERY score, and note that your
POWER score is equal to half your SORCERY score with fractions rounded up. Otherwise all rules are the
same for normal Melee Combat.
XAXES THE SORCERER: SORCERY 6, POWER 3, HEALTH 6
Note that Xaxes is immune to the power of the Sargazan Flower. You cannot Flee from this battle. If
you defeat Xaxes the Sorcerer, your crew gives a rousing cheer (turn to 61). If Xaxes the Sorcerer bests you
in magical battle, he then turns and blasts your ship out of the water with a jagged bolt of searing ebony
flame. You have been vanquished by the greatest wizard of the age. Your adventure is over (turn to 13).
45
The land of Bhintos is an arid waste of orange dunes and strange rock formations. Few would dwell
here by choice, excepting the desert nomads and their shaggy-haired camels. However, copper has been
discovered in abundance in the flinty hills that border the wastes. As it is needed by all the city-states to
smelt into bronze, a thriving series of mines has sprung up along the coast, using slave labour to extract
the metal from the bowels of the earth.
‘Might be a good idea to put in here and buy some copper,’ says the quartermaster. ‘You won’t find it
available anywhere else at such low prices.’
If you want to dock at the slave mines, turn to 24. If you want to leave this area and sail onwards, turn
to 68.
An Entry in the 2011 Windhammer Prize for Short Gamebook Fiction
Sea of Madness by Andrew Wright
46
From nowhere a gale blows up amid racing clouds and propels your vessel out from the dead-calm
doldrums and back into a familiar wave-tossed seascape. Your ship has escaped being becalmed.
‘Thanks Zephis for that!’ exclaims the helmsman. ‘The only thing worse than a quick death by
drowning is a slow death from thirst…’
And so you sail on across the Sea of Madness. Turn to 80.
47
The Temple of Morez the war god is a great hall built from blocks of black basalt, and is found right
next to the king’s fortress. Inside there is a statue of Morez clad in bronze armour and holding a
broadsword aloft. The walls of the temple are adorned with trophies from battle: several lion-skins, two
stuffed Taurine heads, the huge tusked skull of a Hesadean war-pig, and innumerable weapons and
shields.
If you are a follower of Morez it will cost 1 talent to make an offering. If you are not a follower of
Morez, it will cost 2 talents for an offering. Making an offering gives you the Blessing of Morez. If you do
this, cross the gold off your Quest Sheet and tick the Blessing box for Morez.
The Blessing works by allowing you to add 1 to your MIGHT score for any one Melee Combat you are
involved in. When you use the Blessing, cross it off your Quest Sheet. You can have only one Blessing of
Morez at a time. Once it is used up, you will need to return here to obtain a new one
When you have finished here, you return to the main plaza of the city-state of Karta. Turn to 66.
48
On a heavily cultivated hill near Mount T’sufanda you make contact with a prosperous village of tribal
farmers who wear magnificent robes adorned with colourful bird feathers. Their leader, the mighty
Warrior-Queen Ubaye, is eager to do business and will trade you one cargo unit of Copper for one of the
following (roll a die to determine which):
Roll 1 or 2: A cargo unit of Teak
Roll 3 or 4: A cargo unit of Ivory
Roll 5 or 6: A cargo unit of Spices
If you wish to make the trade, cross the Copper off your Quest Sheet and add the cargo unit of
whatever you traded it for. If you have no Copper, you cannot trade. Either way, the soldiers of Ubaye,
carrying your trade goods, lead you carefully back through the jungle to your boat, to pick up the copper
from your hold.
If you want to sail on to other shores, turn to 53.
If you want to explore the coastal jungles instead, turn to 38.
49
As an Honoured Guest of Karta, you are always welcome at the Fortress of King Lykos, and are able to
stay in the sparse but clean guest-chambers to rest and recuperate. The arena is close by, and many
gladiatorial contests are held while you are here. You note that your battle against the Taurine champion
is now considered a classic, and has been immortalized in a rare architectural display of ornamental
sculpture above the arena’s entrance portal.
You can rest here for as long as you like and restore your HEALTH score to its original starting total.
When you are ready to leave, turn to 66.
An Entry in the 2011 Windhammer Prize for Short Gamebook Fiction

Sea of Madness by Andrew Wright
50
You have been sailing across the Sea of Madness for some time, when, one night, there is a great
commotion on deck.
‘Fish men!’ screams the helmsman, laying about himself with a flaming torch in one hand and a barbed
harpoon in the other.
The amphibious fish-creatures called Piscians have clambered on to your ship in search of slaves. They
are man-sized beings, covered in blue-green scales, with bulbous yellow eyes and a wide, thick-lipped
mouth full of tiny triangular teeth. A crested scarlet fin flares up on the top of their skull when they are
angry, which is now! Armed with shark-hide whips and giant crab-claw clubs, the Piscians grapple
mightily with your crew.
PISCIAN SLAVERS: MIGHT 2, HEALTH 3
Fight a Mass Combat battle between the Piscians and your crew. You cannot Retreat from this battle. If
your crew defeats the Piscians, turn to 59. If the Piscians defeat your crew, they enslave all the survivors
(including yourself), and put them in bizarre bubble craft, taking them to the Piscian’s undersea spiral-
towered city. Here you are sacrificed to the terrible fish god Xiphius. Your adventure is over. Turn to 13.
51
You are enraged by the terrible conditions that the slaves of Bhintos endure. You give an impassioned
speech to your crew, reminding them that in Lopenos, alone in all the city-states of the Sea of Madness, all
men are free.
‘We must give them liberty, now!’ you shout, raising your weapon over your head as your men
respond with rousing cheers.
Charging at the nearest of the slave mines, you face an army of mercenary foot-soldiers augmented
with camel-riding nomad irregulars. It looks like a difficult fight, but at the last moment you are aided by
a slave rebellion led by a charismatic ex-gladiator called Kartacus. His slaves will fight alongside your
crew, so for this Mass Combat only you may add one to both your CREW MIGHT and CREW HEALTH
scores.
ARMOURED MERCENARIES: MIGHT 5, HEALTH 5
Fight a Mass Combat battle between the mercenaries and your crew. You cannot Retreat from this
battle. If your crew defeats the mercenaries, turn to 87. If the mercenaries defeat your crew, they
immediately crucify all the survivors (including yourself), as an example to any other would-be
liberators. Your adventure is over. Turn to 13.
52
For helping Ithaqua, you are given a simple set of rooms in the Citadel and overlooking the Sea of
Madness, where you can rest and recuperate. You hope to see Ithaqua during your stay but alas the
Governor is always busy and unable to meet you in person.
You can rest here for as long as you like and restore your HEALTH score to its original starting total.
When you are ready to leave, turn to 33.
53
Your ship is sailing away from the humid green hell that is the Jungle of T’suf.
‘Think I picked up an illness from the local food,’ mutters the quartermaster, wiping his feverish and
pallid brow with a rag.
An Entry in the 2011 Windhammer Prize for Short Gamebook Fiction
Sea of Madness by Andrew Wright
‘More likely you drunk too much of the local firewater,’ smirks the helmsman. ‘Captain, where to
now?’
You can sail west to the war-like Kingdom of Karta (turn to 35), east towards your home city-state of
Lopenos (turn to 15), or north, into the bane of mariners that is the centre of the Sea of Madness (turn to
1).
54
As a Near-Equal of Mellene, you approach the Archon in status and are able to stay in the guest-
chambers of the Archon’s Palace to rest and recuperate. Many parties are held while you are here, and the
newly-devised golden wings of Sophos are currently the must-have item of courtier apparel (though few
would appear to know how to use them properly!).
You can rest here for as long as you like and restore your HEALTH score to its original starting total.
When you are ready to leave, turn to 22.
55
If you have the codeword Evdominta, turn immediately to 21. If not, read on below.
The Numasean Peninsula juts out into the Sea of Madness like the broken tusk of a giant war-pig. It is a
bleak region of dusty valleys and soaring pinnacles of jagged stone. Dominating the coastal landscape is
an unnamed isle on which stands the Tower of Xaxes, an enormous basalt edifice topped by the horned
skull of Geos the Titan.
Xaxes the Sorcerer has dwelt here for centuries, meddling in the affairs of kings and heroes as a game-
player would push his pawns callously across a chequered board. The tower is supposedly protected by
magic wards and guardian demons, and you cannot recall a single successful attempt to rob or depose
the mighty wizard.
‘Best sail on from here sharpish, captain,’ says the helmsman nervously, nodding at the island. ‘Lest we
attract the attention of he who cannot be named…’
Will you order your ship onwards (turn to 73), or will you instead approach the Tower of Xaxes (turn
to 8)?
56
Your crew has defeated the ship of Skalian pirates. The last few survivors dive overboard and swim for
the coast, rather than facing your wrath. Before sinking their vessel you search it for loot and treasure.
Roll two dice and check the result below to see what you find:
Roll a 2 or 3: one talent of Gold and a Healing Potion
(One use only; restores your HEALTH to its starting level)
Roll a 4: a cargo unit of Ivory.
Roll a 5: a cargo unit of Teak.
Roll a 6: one talent of Gold.
Roll a 7: nothing! (that’s why they attacked you!).
Roll an 8: a cargo unit of Copper.
Roll a 9: a cargo unit of Spices.
Roll a 10: a Breastplate
(Deduct 1 from enemy’s POWER down to a minimum of 1)
Roll an 11 or 12: two talents of Gold.
Add whatever you find to your Quest Sheet, assuming you have the space. If you do not, you’ll have to
ditch something (cross it off your Quest Sheet), before you can add your new booty.
When you have finished here, turn to 92.
An Entry in the 2011 Windhammer Prize for Short Gamebook Fiction

Sea of Madness by Andrew Wright
57
The docklands of ruined Sathalene are like a madman’s vision of the underworld. Survivors from the
city are kept in crude cages like beasts, held captive by goggle-eyed Piscian fish-men. Some are loaded
onto the Piscian’s undersea bubble ships, some are sacrificed to a great idol of a spike-toothed fish god,
and some are cooked on large fires to feed the Piscians and their attendant sea creatures.
You and your crew are outraged at the barbarity, and charge forward to attack the fish-men. ‘Let’s gut
the fiends, Captain,’ says the helmsman. ‘Then we can feed them to the fishes!’
The Piscians start in alarm at your attack but quickly pick up spikes clubs and whips to defend
themselves. Let the battle of Sathalene commence!
PISCIAN SLAVERS: MIGHT 3, HEALTH 3
Fight a Mass Combat battle between the Piscians and your crew. You cannot Retreat from this battle. If
your crew defeats the Piscians, turn to 11. If the Piscians defeat your crew, they enslave all the survivors
(including yourself), and you join the people of Sathalene in the cages. Soon you will be put in bizarre
bubble craft, and taken them to the Piscian’s undersea spiral-towered city beneath the Sea of Madness.
Here you are sacrificed to the terrible fish god Xiphius. Your adventure is over. Turn to 13.
58
You sail away from the Melloskine Marshes, trailing a wake of silty grey mud behind you.
‘Might need to keelhaul the hull at some stage, Captain,’ says the shipwright, eyeing a few stray
mangrove crabs still clinging to your ship by their claws. ‘There’s no telling what parasites we may have
picked up below the waterline.’
From here you can sail south to your home of Lopenos (turn to 15), north to the dusty wastes of
Bhintos (turn to 45), or west, out into the open waters of the Sea of Madness (turn to 1).
59
Your crew has slain most of the Piscians and begin scrubbing the ink-dark blood of the fishmen out
from the deck of the ship. One of the Piscian’s strange bubble-craft, looking like a cross between a pigskin
bladder and a giant jellyfish, still lies tethered to your ship, though it is slowly capsizing.
Searching it you find a cargo unit of Ivory, taken from the teeth of dead tusk-whales. You can add the
Ivory to your Ship’s Manifest if you have enough space for it. If you do not, you will have to jettison
another cargo unit (cross it off your Quest Sheet) to make room.
‘Hideous creatures, those Piscians,’ says the helmsman, as the tether-line is cut and you watch the
bubble-craft gradually slip beneath the surface of the sea and sink into the depths. ‘Fosydos preserve us
from whatever atrocities they practice in their distant sunken cities.’
You sail on across the sea. Turn to 80.
60
Your ship is sailing across a deceptively peaceful Sea of Madness, when it comes to a shuddering halt.
Even with all the rowers straining every muscle and sinew at the oars, the ship cannot move.
Several of your deck crew are pointing at the water and talking excitedly.
‘What is it?’ you ask them.
‘Weeds of Sargazan,’ replies the helmsman. ‘We’re going to have to try and hack them off.’
You look down and see a mass of green plant-like tendrils enmeshed with the oars in a tangled mess.
Dotted here and there about the entire mess are large golden flowers that sway seductively in the current.
‘It’s a difficult job,’ says the helmsman, as the first team of rowers clamber down the oars armed with
knives and daggers to commence slashing at the thick fibres. ‘The scent of the flowers puts men to sleep
An Entry in the 2011 Windhammer Prize for Short Gamebook Fiction
Sea of Madness by Andrew Wright
so you have to be extra-careful.’
Even as he says this, one of the rowers crumples and collapses into the sea, a dazed expression on his
face. The other rowers redouble their efforts.
To see how successful they are, roll one die and Test your CREW MIGHT. If you roll under your CREW
MIGHT, your crew completes the job successfully without too many further casualties. Turn to 67.
If you roll equal to or under your CREW MIGHT, your crew suffers more losses as other rowers
succumb to the sleep-inducing pollen of the Sargazan flowers. Reduce your CREW HEALTH by one
point, unless it is at 1 already (in which case there is no effect). Turn to 67.
61
Xaxes lies dying on the bloodstained docks adjoining his tower. Grimacing in pain, he utters his first
and only words to you: ‘The seventy usurpers will get you yet!’ And with that enigmatic final remark, he
is dead. Record the codeword Evdominta on your Quest Sheet, and note the number of usurpers.
You have slain Xaxes the Sorcerer, demigod of dark magic, and a feat so unbelievable that your
crewmembers still cower in the ship, expecting the wizard to rematerialize at any second and begin an
epic battle of retribution! The body of Xaxes and all his accoutrements dissolve into shadow, fading away
on the still air like the lingering fear of a bad dream.
However, now that Xaxes is dead, the magic holding together his improbable tower is dispelled, and
the whole edifice begins to crumble, topple and fall. Soon, all that is left is a pile of rubble surmounted by
the great horned skull of the dead Titan Geos. Eagerly, your rowers scrabble through the rubble searching
for treasure.
Roll one die. This is the number of talents of Gold you find. Also, there is one magical treasure of great
value. Roll one die and consult the table below to see what you have discovered.
Roll 1: a War Banner
(The War Banner adds 1 to your CREW MIGHT during Mass Combat)
Roll 2: an Enchanted Amulet
(Deduct 1 from the die roll every time you must Test your SORCERY)
Roll 3 or 4: a Healing Potion
(One use only: restores your HEALTH to its starting
level)
Roll 5: a Cloak of Shadows
(Allows you to Flee Melee Combat without deducting 1 from your HEALTH
score)
Roll 6: Pipes of Pandemonium
(Allows your crew to Retreat from Mass Combat without deducting 1 from
their CREW HEALTH score)
Once you have added this booty to your Quest Sheet, you sail away from the ruined tower of the now-
dead sorcerer. Turn to 73.
62
At last the Parander lies dead in a pool of blood at your feet, coincidentally at the same time the rest of
the crew catches up with you.
‘Well done Captain,’ says the helmsman in admiration. ‘Those Paranders are lethal beasts and
rumoured to be magical.’
Indeed, you may attempt to skin the creature and transform its pelt into an enchanted cloak. Roll one
An Entry in the 2011 Windhammer Prize for Short Gamebook Fiction
Sea of Madness by Andrew Wright
die and Test your SORCERY.
If you roll equal to or over your SORCERY, your powers have no effect.
If you roll under your SORCERY, your spells have worked and you have created a Parander Cloak and
can add it to your Quest Sheet. It works by enhancing the shifting hues and camouflage-like nature of the
creature’s fur. If you wear the Parander Cloak while in Melee Combat you may deduct 1 from your
enemy’s die roll down to a minimum of 1. Note that you can only craft one such Parander Cloak in your
lifetime, so once you have made one of them you will be unable to make another. You can sell the
Parander Cloak at any market for 3 talents of Gold. Also, you will not be able to wear a Cloak of Shadows
and a Parander Cloak at the same time.
Your crewmembers have also stumbled upon further riches in the lost city. Roll one die and divide the
result by 2, rounding all fractions up. The end result is the number of talents you may add to the Gold
box on your Quest Sheet. However, once you have visited here two times then there is no more gold to
discover and you must leave empty-handed. When you have finished here it is time to decide what future
path you will take.
If you want to sail on to other shores, turn to 53.
If you want to explore the highlands instead, turn to 17.
63
Despite your best efforts, the enchanted nature of the magical barrier remains indecipherable to you. It
is clearly powerful sorcery, but it is a mystery whoever created it and why they would want to prevent
you from returning to Lopenos.
‘Like I said, Captain,’ confides the helmsman. ‘Maybe we should call on the leaders of the other city-
states. Maybe the Archon of Mellene or the King of Karta knows something.’
You sail away from your home port, deeply troubled. Turn to 28.
64
The Spirullans are defeated! Unfortunately those that you slew were carrying no real treasure of note.
Given the maze-like nature of this swampy delta, you are also loath to attempt to find their lair, where
they must store all their loot. Instead you give the order to get the ship off the mud bank as soon as
possible and set sail.
‘Not now Captain, but perhaps one day,’ says the helmsman seeing you eye the mangroves. ‘We will
return and put those buggers to the sword!’
Before long your ship is no longer stranded and you are ready to sail elsewhere. Turn to 58.
65
You are sailing along the north-eastern coast, close to the site of the ruined city of Sathalene. It was here
that the Prajan War began when the forces of the overlord Kadmus razed this peaceful trading port to the
ground. From the deck of your ship the shoreline appears barren and deserted, with burnt and
blackened fields only now smudged with the faint green of new plant growth, and with it, life.
‘Smoke on land!’ yells the lookout from the bow. Several small columns of smoke from what look like
campfires can be seen rising from the rubble of the destroyed city. Obviously the place is not entirely
uninhabited.
You can dock at the ruins of Sathalene (turn to 83), or sail on, away from here (turn to 42).
66
If Mellene is a haven of intelligence and good-taste, then the city-state of Karta is the martial capital of
the region. Most buildings here are simple, functional, and often fortified. Patrols of bronze-armoured
An Entry in the 2011 Windhammer Prize for Short Gamebook Fiction
Sea of Madness by Andrew Wright
soldiers regularly patrol the avenues, their red cloaks swirling behind them like battle banners.
Everywhere are sculptures and inscriptions dedicated to the heroic ancestors of Karta, as well as
exhortations to the current populace to uphold the virtues of bravery, discipline and order. Having
docked your ship at Karta, you can do any of the following:
Visit the harbour to trade cargo, hire more sailors, or sell your ship and buy a new one (turn to 84).
Buy and sell personal equipment at the traders’ bazaar (turn to 2).
Make an offering at the Temple of Morez, the war god (turn to 47).
Call on the Fortress of King Lykos, ruler of all Karta (turn to 93).
Or, as long as you have not sold your ship (and failed to replace it with a new one), put to sea and set
sail (turn to 14).
67
Your sailors finally clear the Sargazan Weeds away from the oars in a bout of frenzied hack-and-slash,
and row the ship away from this area before the severed green stumps that bob helplessly in the water
can start to re-grow.
One of the crew brings you a bud from the golden flowers, while carefully covering his face.
‘For you, Captain,’ he says in muffled tones. ‘Perhaps you can use it for something or the other…’
You quickly find an amphora to contain it, and stopper it tightly. Note the Sargazan Flower on the list
of Gear on your Quest Sheet. In any future combat you may throw the Sargazan Flower like a Javelin at
your foe. If you hit, the Sargazan Flower immediately puts your enemy to sleep and they count as
defeated, allowing you to turn to the appropriate paragraph number. Beware though, for some creatures
are immune to Sargazan Flowers and this will be noted in the text. Regardless of whether you hit or miss,
you must cross the Sargazan Flower off from your Quest Sheet as it can only be used once.
You sail on through the Sea of Madness. Turn to 80.
68
Powerful oar-strokes from your rowers take your ship swiftly away from the wastes of Bhintos.
Perhaps the thought of the slave mines has given them extra motivation.
‘Seas of blood!’ you exclaim suddenly, noticing that the water in these parts is a deep scarlet in colour.
‘No, Captain,’ explains the shipwright. ‘It’s dust and sand from the desert, blown out here into the sea
by the wind goddess Zephis.’
‘I heard it’s a type of seaweed,’ says the quartermaster. ‘And it tastes quite nice when dried in the sun.’
‘Enough of this!’ exclaims the helmsman. ‘What course next, Captain?’
You can sail west, to the mighty city-state of Mellene (turn to 95), south, to the treacherous and fly-
blown Melloskine Marshes (turn to 75), or south-west, into the marine realm that is the middle of the Sea
of Madness (turn to 1).
69
Record the codeword Theseus on your Quest Sheet.
Studying the golden wings of Sophos you discover several fatal flaws; namely the use of heavy springs
in the wing joints, non-heat resistant wax for feather attachment, and a lack of wing-beat protective
reinforcement for the wearer’s leather harness. Overjoyed at your solution, Sophos quickly constructs a
new prototype, straps it on himself, and soon the insane philosopher is flitting about the marble towers of
Mellene, twittering like a bird.
An epic celebration is held to recognize both your ascension to Near-Equal status and the success of
both your and Sophos’ modified golden wings. You sit at the right hand of the Archon and are the subject
of many long toasts, while the entertainments carry on long into the night.
An Entry in the 2011 Windhammer Prize for Short Gamebook Fiction

Sea of Madness by Andrew Wright
During a quiet moment, the Archon leans over and whispers to you: ‘I have heard you may need to
seek out Xaxes the Sorcerer, now, or perhaps sometime in the future. Know this, he is but a fiend in
mortal guise and almost impossible to defeat in combat. One of the only methods known to best him is to
wear the Gauntlet of Power, whether you employ a hand weapon or cast spells.’
‘Where can I find the Gauntlet of Power?’ you ask.
The Archon spreads his hands delicately, examining his nails. ‘Alas, that I cannot say…’
You are also given a set of Golden Wings as a gift. This flying device greatly improves your agility
during Melee Combat and you may add 1 to the die roll for any battle in which you wear the Golden
Wings. The Golden Wings will also allow you to Flee from Melee Combat without incurring a loss of one
HEALTH point. Note however that you cannot wear the Golden Wings and the Cloak of Shadows or the
Parander Cloak at the same time. If you need to, you can also sell the Golden Wings in any market for 4
talents of Gold. Record the details of the Golden Wings on your Quest Sheet.
For now, the party is over. Turn to 22.
70
With Xaxes dead, the magical barrier has dissolved and you sail unchallenged into the harbour of
Lopenos. Docking your ship you note the whole city-state is cursed with a listless air of despondency, and
the few people you see appear gaunt and emaciated.
There is a sudden shout: ‘There they are! Destroy the traitors!’
Turning around you see the seventy usurpers of Lopenos, armed with the best weapons and armour
ransacked from the city, scream and charge at your crew, just as they are disembarking.
‘Well, well, well,’ says the helmsman with a grim smile, hefting a barbed fishing spear. ‘It’s time to
settle a few scores.’
You realize that the usurpers of Lopenos are all the men that you despise. Too weak, cowardly, rich or
powerful to go to war against Praj, they sat here in Lopenos like a festering plague of parasites, preying
on the weak and the sick while the real heroes of this city were dying half a world away on distant bloody
shores. With cold fury in your blood you give vent to a ragged battle-cry and lead your men into one last
glorious conflict. Who will win the Final Battle of Lopenos?
SEVENTY USURPERS: MIGHT 4, HEALTH 4
Fight a Mass Combat battle between the usurpers and your crew. You cannot Retreat from this battle.
However, you can use the Luskapine Behemoth if it is recorded on your Quest Sheet. If your crew defeats
the usurpers, turn to 100. If the usurpers defeat your crew, they put all the survivors to the sword. You are
brutally cut down by several of the usurpers on the docks of your home port, so close to victory and yet
now so far. Your adventure is over. Turn to 13.
71
If you have the codeword Odysseus, turn immediately to 52. If not, read on below.
The Citadel of Praj, home to Ithaqua, Governor of the Prajan Protectorate, has largely been rebuilt
following the war. Garrison soldiers of the Mellenic Alliance stare out across the Sea of Madness from
battlements where Kadmus and his Skull Legion once prowled. You are allowed to enter Ithaqua’s hall,
where he holds court amid a host of merchants and traders all looking to profit from the new regime in
control of Praj. Ithaqua, no longer the lean mean adventurer of myth but instead a well-fed grey-
whiskered autocrat, regards you blankly with a wall-eyed stare.
‘I’m sure we have met before,’ he says in a quiet, sibilant tone that nevertheless silences the audience
chamber. ‘But I have moved on from those petty times and now seek meaning and order among the
sorrowful chaos of life. I can help you more than you can even think, but first you will have to help me.
An Entry in the 2011 Windhammer Prize for Short Gamebook Fiction

Sea of Madness by Andrew Wright
Guards! Clear this chamber at once and take us to the prisoner.’
A short while later you are standing by a seaside cliff-face a short distance from Praj. Chained to the
cliff amid rolling waves of surf, is the gaunt and bloodstained form of Kadmus the warlord, instantly
recognizable owing to the black battle-helmet that covers his entire head! You are about to speak, but
Ithaqua holds up his hand and points to the prisoner.
A pack of rapacious death-auks, brutal carnivorous seabirds, erupt from the water and tear at the
prisoner with razor-sharp bills, inflicting many horrific wounds while Kadmus writhes and screams
incoherently. Having eaten their fill, the birds return to the sea, while to your amazement, the wounds on
Kadmus’ body instantly heal themselves.
‘The punishment of Kadmus, as ordered by the war god Morez,’ says Ithaqua, shrugging his shoulders.
‘Unfortunately, we need that helmet upon his head for it is an artefact of Morez and thus useful for
bargaining with the Kartans about who should patrol the Straits of Skalos. But the cycle of punishment
cannot be broken. Your task is to take Kadmus’ place for one day in chains while we remove the helmet.
What do you say?’
If you wish to decline, turn immediately to 33.
If not, you agree to the deal and are chained up while Kadmus is taken away. Almost immediately,
death-auks leap out of the surf and commence feasting upon your body while stinging waves of salty
brine crash down upon you. The pain is indescribable. Roll one die and Test your HEALTH.
If you roll equal to or over your HEALTH, the pain is too much and you scream piteously to be
released. You are, and escorted back into the city, a broken person (deduct 1 from your HEALTH score
down to a minimum of 1). Your audience with Governor Ithaqua has ended (turn to 33).
If you roll under your HEALTH score, turn to 39.
72
The agora of Sathalene is a barren wasteland of bones and rubble. A rowdy band of barbarian raiders
from Thulios have set up camp here, systematically looting what little treasure remains in the great
public buildings surrounding the square. Clad in furs, battle-leathers and horned helms, they charge
towards you waving bronze axes and frothing at the mouth in berserk fury. Your crewmembers get ready
to defend themselves against this rabble horde!
THULIAN BARBARIANS: MIGHT 3, HEALTH 3
Fight a Mass Combat battle between the barbarians and your crew. If you want to Retreat from this
battle and flee back to the ship, reduce your CREW HEALTH by one, and turn to 42. If your crew defeats
the Thulians, turn to 18. If the Thulians defeat your crew, they enslave the survivors (including yourself)
as thralls, destined to spend your days in the ice-cold mountains of Thulios, serving your barbarian
overlords. Your adventure is over. Turn to 13.
73
You sail away from the strange waters that lap at the unnamed isle of Xaxes the Sorcerer. Once the isle
drops away below the horizon and is no longer visible, your crew immediately recommences fishing.
‘I wouldn’t eat anything I caught swimming in the waters by that island,’ says the quartermaster. ‘Only
Fosydos knows how tainted the fish are from the magical effluence leaking out from Xaxes’ tower.’
Where are you bound? North, to the Straits of Skalos (turn to 25), east, to the Kingdom of Karta (turn to
35), or north-east, into the boundless main that is the centre of the Sea of Madness (turn to 1)?
An Entry in the 2011 Windhammer Prize for Short Gamebook Fiction
Sea of Madness by Andrew Wright
74
Your vessel sails away from the crowded coastal waters which surround the rich trading city-state of
Mellene. The sun shines down so enticingly on its fair white walls that you almost give the order to
return there immediately, so you may sit in the leafy shade outside a dockland taverna and drink several
jugs of rich Mellenian wine.
‘Fair winds ahead, Captain,’ says the helmsman, breaking your reverie. ‘What course shall we set?’
You can sail west, to the ruins of Sathalene (turn to 65), east, to the wastes of Bhintos (turn to 45), or
south, into the Sea of Madness (turn to 1).
75
The Melloskine Marshes are a salty estuary so vast in size the river that empties into them has never
been named. To sail here is to weave your ship through a tangled maze of shiny-leaved mangroves and
mud banks of fine grey silt. Giant wading birds trawl the channels for fish, and you feel the weight of
hidden eyes watching you from the foliage.
‘Who lives here?’ you ask the helmsman.
‘Monsters, certainly,’ he replies. ‘Most ships that sail into the Melloskine Marshes never return.’
To see if your crew can safely navigate the treacherous waterways, roll one die and Test your CREW
MIGHT. Deduct one from the die result if your ship is a Trireme. Add one from the die result if your ship
is a Quinquereme (larger ships are more difficult to maneuver than smaller vessels).
If you roll under your CREW MIGHT, you leave this place in search of fairer shores (turn to 58).
If you roll equal to or over your CREW MIGHT, you become stranded in the swamp (turn to 97)!
76
The new mines of Bhintos are governed by the ex-gladiator Kartacus and he is glad to see you again.
‘Welcome, friend!’ he says, clapping you on the back. ‘Stay as long as you like! If you want to trade
cargo, bring us teak timber from the slopes of Mount T’sufanda. It’s the strongest wood for bracing the
mine tunnels and preventing cave-ins.’
You can rest here for as long as you like and restore your HEALTH score to its original starting total.
You can also buy and sell cargo units at the prices listed below. Each price is for one cargo unit. Cargo
units with no listed prices are not available to buy or sell here.
Copper: To buy: 1 talent To sell: 1 talent
Ivory: To buy: 3 talents To sell: 1 talent
Slaves: To buy: - To sell: -
Spices: To buy: 3 talents To sell: 1 talent
Teak: To buy: 5 talents To sell: 4 talents
Record any transactions on your Quest Sheet. When you have finished here you can board your ship
and sail on to other shores (turn to 68).
77
Ionnos the Priest is happy to see you return to the temple of Zephis. Construction work is well under
way to rebuild the sanctuary and there is a heavily-armed squad of temple guards stationed here at all
times to keep watch over the legendary golden idol.
‘Zephis welcomes her saviours with open arms!’ he tells you. ‘Would you care to make a donation to
the cause?’
If you are a follower of Zephis it will cost 1 talent to make an offering. If you are not a follower of
Zephis, it will cost 2 talents for an offering. Making an offering gives you the Blessing of Zephis. If you do
An Entry in the 2011 Windhammer Prize for Short Gamebook Fiction
Sea of Madness by Andrew Wright
this, cross the gold off your Quest Sheet and tick the Blessing box for Zephis.
The Blessing works by allowing you to summon the wind if you need it while at sea. When you use the
Blessing, cross it off your Quest Sheet. You can have only one Blessing of Zephis at a time. Once it is used
up, you will need to return to a temple of Zephis to obtain a new one.
When you have finished here, you return to Sathalene. Turn to 83.
78
The rower who was acting as a scout stumbles back through the jungle towards you, bleeding
profusely from a savage head wound that seems to have removed most of his scalp.
‘Apes! Apes in the mist!’ he screams, before collapsing on the leaf-strewn ground.
Sure enough, a mob of great gray apes, each as tall as a man but with long muscular arms, descend
from the highlands in a fury of howling and chest-beating, and attack your expedition. This will be a
desperate battle!
GRAY APE MOB: MIGHT 2, HEALTH 4
Fight a Mass Combat battle between the apes and your crew. If you want to Retreat from this battle and
flee back to the ship, reduce your CREW HEALTH by one, and turn to 53. If your crew defeats the apes,
turn to 48. If the apes defeat your crew, there is no mercy in the jungle. Half of your crewmembers are
eaten where they fall, and the others are brutally dismembered (including yourself), and taken back to
the apes’ lair to feed the rest of the pack. Your adventure is over. Turn to 13.
79
Deep within the ruins you enter what looks like a temple courtyard where the roots of an ancient
chanyan tree coil protectively around the fallen statue of a forgotten god. Roosting in the tree is a huge
bird-like creature with metallic feathers and grasping talons. Glaring at you with yellow eyes, it drops
from its perch in one swift movement and spears towards you on wings like feathered blades.
You face no normal foe but an Asipatra demon, whose duty in the Elder Days was to harvest the souls
of the dead and dying. The creature is surrounded by an air of despair and despondency and it is all you
can do to face up to its onslaught. Your crewmembers are less fortunate, and hang back in hand-wringing
fear, unable to aid you in this battle. You must fight it alone! Will you favour sorcery (turn to 7), or do you
prefer to use your weapon (turn to 23)?
80
Even though you may feel you have survived the worst the Sea of Madness can throw at you, you do
not escape so easily. The centre of the sea is home to an immense vortex of slow and yet near-inescapable
currents.
‘All hands on oars,’ yells the helmsman. ‘Steady, and … PULL!’
To see if your crew have successfully picked their way through the marine maelstrom, roll one die and
test your CREW MIGHT. Add one to the die result if your ship is a Trireme. Deduct one from the die
result if your ship is a Quinquereme.
If your crew are successful, consult the list of paragraph numbers below and choose which one you
wish to turn to.
If your crew is unsuccessful, roll two dice and consult the table below for the paragraph number of
your next destination:
Roll a 2 or 3: turn to 45.
Roll a 4: turn to 25.
An Entry in the 2011 Windhammer Prize for Short Gamebook Fiction

Sea of Madness by Andrew Wright
Roll a 5: turn to 85.
Roll a 6: turn to 5.
Roll a 7: turn to 95.
Roll an 8: turn to 35.
Roll a 9: turn to 75.
Roll a 10: turn to 65.
Roll an 11 or 12: turn to 55.
81
A dark-prowed ship glides silently out from the misty gloom. From the blood-red pennants hanging
from the masts, to the grim-faced warriors lining its decks, there’s no mistaking the ill intentions of this
vessel. You face a pirate ship for which the Straits of Skalos are justly infamous. Defend your vessel!
SKALIAN PIRATES: MIGHT 3, HEALTH 2
Fight a Mass Combat battle between the pirates and your crew. If you want to Retreat from this battle,
reduce your CREW HEALTH by one, and turn to 92. If your crew defeats the pirates, turn to 56. If the
pirates defeat your crew, they scuttle your ship and enslave the survivors (including yourself), selling all
of you to the slave mines of Bhintos. Your adventure is over. Turn to 13.
82
The Spirullans are surprisingly agile and swarm up the sides of your ship, intent on plunder. You crew
responds valiantly, grabbing whatever weapon comes to hand in order to beat back the molluscoid
menace…
SPIRULLAN MARAUDERS: MIGHT 3, HEALTH 4
Fight a Mass Combat battle between the Spirullans and your crew. You cannot Retreat from this battle.
If your crew defeats the Spirullans, turn to 64. If the Spirullans defeat your crew, they slaughter all the
survivors (including yourself), take your loot if you have any, and scuttle the ship. Your adventure is over.
Turn to 13.
83
If you have the codeword Bellerophon, turn immediately to 29. If not, read on below.
The once-peaceful port of Sathalene is a maze of rubble and blackened timbers. Scrawny packs of feral
dogs pick their way through the debris-strewn streets, fighting over bones and refuse, while in the
shadows, rats as long as your arm dart from one shattered hovel to another.
‘Careful, Captain,’ says the helmsman, with his sword in hand. ‘I have a bad feeling about this place.’
Behind him your crew mutters nervously among themselves, glancing about the ruins as if expecting an
ambush at any second.
Where will you explore? You can head to the ruined temple complex on a low hill overlooking the port
(turn to 34), search the agora and its nearby public buildings (turn to 72), or explore the docks, where
there appear to be more than a few fires, wafting columns of smoke high into the sky (turn to 57).
Or, you could leave this place entirely, and return to your ship (turn to 42).
An Entry in the 2011 Windhammer Prize for Short Gamebook Fiction

Sea of Madness by Andrew Wright
84
Trading with the Kingdom of Karta is a laborious affair, conducted under the watchful eyes of the
king’s representatives to ensure fiscal transparency. Still, there are some profits to be made, particularly if
you deal in copper, which the Kartan armies are always hungry for in order to make bronze.
Ships are available at the following prices:
Trireme: Cost: 4 talents Cargo Capacity: 1 cargo unit
Quadrireme: Cost: 6 talents Cargo Capacity: 2 cargo units
Quinquereme: Cost: 8 talents Cargo Capacity: 3 cargo units
You can sell your current ship for half the above price (so if you sold a quadrireme you would get 3
talents in return). Note that you cannot leave Karta without a ship, so if you sell your ship make sure you
have enough funds to buy a new one, otherwise your adventure will be over!
If you wish to upgrade your crew, it costs 1 talent to raise either your CREW MIGHT or CREW
HEALTH by 1 point, up to a maximum score of 6 each (so if you spent 2 talents you could raise your
CREW MIGHT by 2 points, or your CREW HEALTH by 2 points, or both scores by 1 point each).
You can also buy and sell cargo units at the prices listed below. Each price is for one cargo unit.
Copper: To buy: 4 talents To sell: 3 talents
Ivory: To buy: 3 talents To sell: 1 talent
Slaves: To buy: 3 talents To sell: 2 talents
Spices: To buy: 3 talents To sell: 1 talent
Teak: To buy: 3 talents To sell: 2 talents
When you have finished here, you can return to the city (turn to 66). Alternatively, you can board your
ship and set sail (turn to 14).
85
The coastline in these parts is fringed with palm trees, which give way to rugged limestone uplands
covered in the lush and tangled Jungle of T’suf. Looming above all of this is the cloud-wreathed summit
of Mount T’sufanda, an active volcano some claim as the home of the forge god Phaistos.
‘The land of T’suf is a dangerous place,’ says the helmsman. ‘The riches of this region are as plentiful as
its perils, true, but few survive to enjoy them.’
‘I’ve heard tell of lost cities in the jungle,’ chimes in the shipwright. ‘Where ghosts of dead empires
guard a fortune in gold and jewels.’
‘Bah! Yet more tales to lure greedy folk to their doom!’ snarls the helmsman and storms off to berate
the rowers.
‘His brother died here,’ shrugs the shipwright in apology. ‘Torn to pieces by jungle beasts, or so the
stories say…’
You can venture inland towards the villages at the base of the mountain in search of trade goods (turn
to 17). Alternatively, you could explore the jungle, to see if the rumours of long-lost civilizations are true
(turn to 38). Or, if you wish to leave these balmy climes, you can sail your ship to parts elsewhere (turn to
53).
86
Hoping to at least save the lives of yourself and your crew, you throw all your gold overboard as
tribute to the Spirullans. Cross off all the talents of Gold on your Quest Sheet.
The Spirullans accept your tribute. They gather up all the gold and retreat, sinking back into the
An Entry in the 2011 Windhammer Prize for Short Gamebook Fiction

Sea of Madness by Andrew Wright
muddy waters of the estuarine marsh. Your crew do not need to be ordered, and immediately get to work
easing the ship off the mud back and back into open water.
Before long you are at sea and sailing away from here, poor, and yet still alive (turn to 58).
87
Record the codeword Perseus on your Quest Sheet.
You have defeated a major force of mercenaries and nomads that loosely commanded the lands of
Bhintos. In doing so you have lit the spark that ignites a slave rebellion which will grow to encompass all
the mines in this area, and free all of the slaves.
‘We cannot thank you enough!’ says Kartacus, the new leader of the mines of Bhintos. ‘You alone have
acted bravely where others failed to do so, and in turn have brought hope to all our people here.’
As a sign of their appreciation, Kartacus will gift you up to three free cargo units of Copper, or as much
as you can fit on your ship. If you need to dump your current cargo to free up space for the Copper, he
will also pay you one talent of Gold per cargo unit of dumped cargo (including slaves, which he will then
set free!). Amend your Quest Sheet accordingly.
You can also rest here for as long as you like and restore your HEALTH score to its original starting
total.
As you leave, you notice Kartacus forcing the surviving nomads and mercenaries into working in the
mines.
‘Don’t worry,’ he says cheerfully. ‘There’ll be no more crucifixions. We just need someone to work the
seams of copper, and it gives these fine fellows a chance to understand how much hard work we put in
when we did the mining!’
You sail on. Turn to 68.
88
The merchants’ market, held in the open area in front of the Citadel of Praj, is a cultural melting pot of
Prajan traders, Thulian barbarians, and exiles from Sathalene all scheming on getting as wealthy as
possible as quickly as possible. You can buy any of the items listed below as long as you have enough
gold to buy it and space to carry it. You may also sell any items you own that are listed below, for the
price stated. Don’t forget to update your Quest Sheet in either case. Items with no purchase price are not
available locally.
Weapons:
Staff (POWER 1) To buy: 1 talent To sell: 1 talent
Sword (POWER 2) To buy: 2 talents To sell: 1 talent
Battleaxe (POWER 3) To buy: 3 talents To sell: 2 talents
Javelin To buy: 1 talent To sell: 1 talent
Armour:
Shield To buy: 1 talent To sell: 1 talent
Breastplate To buy: 2 talents To sell: 1 talent
The Breastplate allows you to deduct 1 from an enemy’s POWER down to a
minimum of 1.
Other Gear:
Healing Potion To buy: 2 talents To sell: 1 talent
One use only: restores your HEALTH to its starting level.
Enchanted Amulet To buy: - To sell: 3 talents
An Entry in the 2011 Windhammer Prize for Short Gamebook Fiction
Sea of Madness by Andrew Wright
Cloak of Shadows To buy: - To sell: 3 talents
Pipes of Pandemonium To buy: 4 talents To sell: 3 talents
Allows your crew to Retreat from Mass Combat without deducting 1 from their
CREW HEALTH score.
War Banner To buy: - To sell: 3 talents
When you are ready to venture elsewhere in the city, turn to 33.
89
Cold winds blow down from the Thulian highlands and fill your sails as you sail away from the
Citadel of Praj. These distant shores are about as far from Lopenos as you can get, without sailing
through the Straits of Skalos and into the Ocean of Furies.
‘The entirety of the Sea of Madness lies before us, Captain,’ says the helmsman, gesturing expansively
with broad calloused hands. ‘What is our course?’
Will you sail south, to the Straits of Skalos (turn to 25), east, to the ruins of Sathalene (turn to 65), or
south-east, heading straight for the centre of the azure-blue sea (turn to 1)?
90
The Mellene agora is an immense square whose marble flagstones are covered with a bewildering
array of covered stalls buying and selling goods and equipment of every conceivable description. You can
buy any of the items listed below as long as you have enough gold to buy it and space to carry it. You
may also sell any items you own that are listed below, for the price stated. Don’t forget to update your
Quest Sheet in either case. Items with no purchase price are not available locally.
Weapons:
Staff (POWER 1) To buy: 1 talent To sell: 1 talent
Sword (POWER 2) To buy: 2 talents To sell: 1 talent
Battleaxe (POWER 3) To buy: - To sell: 2 talents
Javelin To buy: 1 talent To sell: 1 talent
Armour:
Shield To buy: 1 talent To sell: 1 talent
Breastplate To buy: - To sell: 1 talent
Other Gear:
Healing Potion To buy: 2 talents To sell: 1 talent
One use only: restores your HEALTH to its starting level.
Enchanted Amulet To buy: 4 talents To sell: 3 talents
Deduct 1 from the die roll every time you must Test your SORCERY.
Cloak of Shadows To buy: 4 talents To sell: 3 talents
Allows you to Flee Melee Combat without deducting 1 from your HEALTH
score.
Pipes of Pandemonium To buy: - To sell: 3 talents
War Banner To buy: - To sell: 3 talents
When you are ready to venture elsewhere in the city, turn to 22.
An Entry in the 2011 Windhammer Prize for Short Gamebook Fiction
Sea of Madness by Andrew Wright
91
Record the codeword Jason on your Quest Sheet.
You give the Golden Idol of Zephis to Ionnos the Priest. Make sure you cross it off your Quest Sheet.
Ionnos is overjoyed. Tears stream down his face as he says: ‘Stranger, I cannot thank you enough for
your deed of piety! Now the temple of Zephis can be rebuilt and we can once again worship the wind
goddess in Sathalene.’
There is an additional reward for your generosity. While Ionnos is clearing a space on the altar for the
new statue, he discovers a secret compartment containing a gauntlet crafted from meteoric iron. Despite
it being an artefact of great power, he presents it to you, saying: ‘Zephis has spoken. This is her gift to you
for all your help.’
Record the Gauntlet of Power on your Quest Sheet. While you wear the gauntlet it will add 1 to your
MIGHT, SORCERY, HEALTH and weapon POWER scores, up to a maximum of 6. If you want to, it can
also be sold in any city-state market for 6 talents of Gold.
Word of the temple’s restoration soon spreads like wildfire through the ruins and surrounding
hamlets. Within a few days a fanatical guard of survivors has sprung up to help Ionnos protect the
temple from further raids. Construction work begins anew and before long the sanctuary is approaching
its former glory.
With the gratitude and well-wishes of Ionnos ringing in your ears, you leave the temple of Zephis and
return to Sathalene. Turn to 83.
92
You sail away from these eerie shores, with their sudden mists, hidden reefs, and lurking pirates.
‘The Straits of Skalos are no place to tarry, Captain,’ says the helmsman. ‘Best we depart here with all
haste!’
Will you sail south, to the Tower of Xaxes the Sorcerer (turn to 55), north, to the Citadel of Praj (turn to
5), or east, braving a passage through the Sea of Madness (turn to 1).
93
If you have the codeword Heracles, turn immediately to 49. If not, read on below.
The Fortress of King Lykos of Karta is a forbidding keep of grey stone, guarded by a throng of red-
cloaked soldiers. You are allowed to enter the King’s hall, where he holds court amid a horde of warriors
and minor heroes garbed in gleaming armour and wearing crested helmets. King Lykos is clad with the
skin of the Numasean Lion over a red battle-kilt, and a battered golden crown sits atop his flowing mane
of dark hair. He looks at you with inscrutable black eyes.
‘Comrade, well met!’ he says in booming voice that fills the hall. ‘Before I can admit you as an
Honoured Guest of Karta, you will have to compete in a display of martial prowess. Your task is to defeat
our latest champion gladiator in the arena!’
There is a roar of approval from the warriors at this news.
You are taken to the Kartan arena. It is a circular stone building with high tiers of ranked seating, and a
sandy-floored central area where gladiators do battle with wild beasts and each other. The arena is full of
spectators today. King Lykos and his court take their place in the royal viewing area, and you stand alone
on the arena sands. A jagged portcullis is raised and you hear a snorting sound as your enemy shambles
out into the sunlight.
Your opponent in the arena is a great bull-headed Taurine warrior. Originally from the southern
badlands, he was captured when young by Kartan soldiers and trained as a gladiator in the arena. Armed
with a notched battleaxe and wearing a bronze breastplate inscribed with a labyrinthine design, he will
be a difficult opponent to defeat!
Because of his breastplate you must reduce your weapon’s POWER score by 1, to a minimum of 1, for
this combat.
An Entry in the 2011 Windhammer Prize for Short Gamebook Fiction
Sea of Madness by Andrew Wright
TAURINE GLADIATOR: MIGHT 4, POWER 3, HEALTH 4
You may hurl a Javelin at the Taurine if you have one. If you want to Flee from this battle, you give the
signal for the King to end the combat and you are escorted away from the arena (reduce your HEALTH
by one, and turn to 66). If you slay the Taurine, turn to 27. If the Taurine kills you, you fall the blood-
stained sands of the arena, breathing your last desperate breath. Your ship is impounded by the King of
Karta to use in his navy and your crew becomes mercenary marines under the leadership of a Kartan
captain. Your adventure is over (turn to 13).
94
Once again you find the overgrown ruins of the ancient city in the jungle. However, since you slew the
Asipatra demon, the atmosphere of gloom and foreboding has lifted somewhat, though the ruins are still
a dangerous place. This is confirmed when, while scouting ahead, you hear a deep growl and a hideous
beast leaps down from a shattered portico to attack you.
The creature is a Parander; a relatively common jungle predator hereabouts that resembles a vicious
bear-like creature but with scythe-shaped horns and cloven hooves. Its velvet coat is a bewitching mix of
dark brown, black, and deep blue that appears to change colour as it stalks through the undergrowth
towards you. Defend yourself against this predatory fiend!
PARANDER: MIGHT 3, POWER 2, HEALTH 3
You may hurl a Javelin at the Parander if you have one. If you want to Flee from this battle and escape
back to the ship with your crew, reduce your HEALTH by one, and turn to 53. If you slay the Parander,
turn to 62. If the Parander kills you, it devours your carcass. Your horror-stricken crewmembers are
quickly picked off by other jungle predators as they attempt to return to the ship. Your adventure is over
(turn to 13).
95
You are sailing in the coastal waters near the mighty city-state of Mellene. There are many other
seafaring vessels here, including fishing coracles, trade barges and the multi-oared polyremes of the
Mellenic Armada. Mellene itself lies in a fertile bowl-shape valley, surrounded by golden fields of wheat
and barley, and rolling hills covered in rows of leafy green vineyards. The city, constructed almost
entirely from bricks of marble and quartz, glitters enticingly in the bright sunshine.
‘Mellene is ruled by the Archon,’ says the quartermaster, chewing on an olive. ‘Some say he is the
richest man in all the lands surrounding the Sea of Madness.’
You can dock at the port of Mellene (turn to 22), or you can sail away to other lands (turn to 74).
96
The port of Praj was badly destroyed during the war, but has since been hurriedly rebuilt to better
facilitate trade into the occupied city. Everywhere you look there is a hive of activity, as people buy and
sell ships, hire extra rowers and crew, and trade in different kinds of cargo.
Ships are available at the following prices:
Trireme: Cost: 4 talents Cargo Capacity: 1 cargo unit
Quadrireme: Cost: 6 talents Cargo Capacity: 2 cargo units
Quinquereme: Cost: 8 talents Cargo Capacity: 3 cargo units
An Entry in the 2011 Windhammer Prize for Short Gamebook Fiction

Sea of Madness by Andrew Wright
You can sell your current ship for half the above price (so if you sold a quadrireme you would get 3
talents in return). Note that you cannot leave Praj without a ship, so if you sell your ship make sure you
have enough funds to buy a new one, otherwise your adventure will be over!
If you wish to upgrade your crew, it costs 1 talent to raise either your CREW MIGHT or CREW
HEALTH by 1 point, up to a maximum score of 6 each (so if you spent 2 talents you could raise your
CREW MIGHT by 2 points, or your CREW HEALTH by 2 points, or both scores by 1 point each).
You can also buy and sell cargo units at the prices listed below. Each price is for one cargo unit.
Copper: To buy: 3 talents To sell: 2 talents
Ivory: To buy: 3 talents To sell: 2 talents
Slaves: To buy: 1 talent To sell: 1 talent
Spices: To buy: 3 talents To sell: 2 talents
Teak: To buy: 4 talents To sell: 3 talents
When you have finished here, you can return to the city (turn to 33). Alternatively, you can board your
ship and set sail (turn to 89).
97
It looks like you have successfully navigated the Melloskine Marshes but then there is a slow, drawn-
out groaning noise as your ship beaches itself on a tidal mud bank, sending great plumes of grey silt into
the water. Working with feverish speed, your rowers descend to hull level with planks and ropes in a bid
to free the ship before the denizens of the swamp arrive. They are too late.
‘Spirullans! Spirullans on all sides! To arms! To arms!’ screams the lookout, frantically waving his arms.
Your ship is surrounded by a rapidly-surfacing force of Spirullan marauders. These strange mollusk-
like beings resemble man-sized spiral-shelled snails, with four eyes on stalks, muscular grasping tentacles
and a saw-toothed radullan maw. Spitting acidic yellow bile in anticipation, they relentlessly attack.
How will you deal with this estuarine menace? Single combat to the death against their leader (turn to
36), powerful sorcery (turn to 12), or will you lead your crew in defending your ship (turn to 82)?
Alternatively, if you have at least 2 talents of Gold, you could throw it all overboard as tribute (turn to 86).
98
Your spell works! By touching the barrier and studying its patterns of enchantment, you are able to
discern its creator. The answer is unpleasant: Xaxes the Sorcerer, master of the dark arts who dwells in a
tower on a rocky isle off the shores of Numasea, far to the west. But why would Xaxes do this to you? You
know him only through reputation.
Your crew reacts nervously to the news.
‘Do we go and take him on ourselves?’ asks the helmsman anxiously, licking his lips. ‘I’ve heard tales
he wrestles with demons for sport! Maybe we should sail to Mellene or Karta first and gather
information.’
You now know who was responsible for the magical barrier around Lopenos. All that remains is to
find out why. And so you sail away from your home port, seeking the truth. Turn to 28.
99
The Temple of Fosydos the sea god is a marble pavilion built on a rocky crag overlooking the harbour.
Inside is a huge statue of the god made from greenstone and bearing a golden crown. In one hand he
holds a silver trident signifying retribution, and in the other a golden net indicating plentiful sustenance.
If you are a follower of Fosydos it will cost 1 talent to make an offering. If you are not a follower of
Fosydos, it will cost 2 talents for an offering. Making an offering gives you the Blessing of Fosydos. If you
An Entry in the 2011 Windhammer Prize for Short Gamebook Fiction
Sea of Madness by Andrew Wright
do this, cross the gold off your Quest Sheet and tick the Blessing box for Fosydos.
The Blessing works by allowing you to ignore any one storm at sea. When you use the Blessing, cross it
off your Quest Sheet. You can have only one Blessing of Fosydos at a time. Once it is used up, you will
need to return here to obtain a new one
When you have finished here, you return to the centre of Mellene. Turn to 22.
100
You personally cut down the last of the usurpers, and the few survivors from your crew’s wrath are
dragged off immediately to the dungeons. During the battle, the rest of the citizens of Lopenos have
emerged from their houses to stand at doorways and windows, watching the battle rage through the
docklands of the city. When it becomes clear to them that the usurpers are defeated and the victors are
returning heroes from the Prajan War, a cheer goes up from every household in the port. Tyranny has
been defeated, and the prodigal ones have come home. The people of Lopenos are free once more, thanks
to you, a heroic individual who braved all the perils of the Sea of Madness! Congratulations!
T H E E N D
OPTIONAL RULES
Creating New Characters
Once you’ve played through Sea of Madness with the starting characters, you might like to start
creating your own. This is extremely easy to do, using the following process:
1. Split 16 points among the following:
a. MIGHT (anywhere from 2 to 6)
b. SORCERY (anywhere from 2 to 6)
c. HEALTH (anywhere from 2 to 6)
d. A weapon from the following (cost in points equals POWER score):
i.Staff (POWER 1)
ii.Sword (POWER 2)
iii.Battleaxe (POWER 3)
e. Any of the following extra equipment at 1 point each:
i.A Shield
ii.A Javelin
f. 1 to 3 talents of Gold (1 point per talent)
2. Chose your character’s Sex and give them a Name.
3. Chose your character’s Profession. If they have a high MIGHT score they are a Warrior. If
they have a high SORCERY score they are an Enchanter or Enchantress. If all their scores are
around the same, they are an Adventurer. Profession has no impact on game-play but simply
helps you better visualize your character.
4. Pick a God or Goddess to follow: Morez, Fosydos, or Zephis.
5. Give your character a colorful background, and unleash them upon the Sea of Madness!
An Entry in the 2011 Windhammer Prize for Short Gamebook Fiction

![The Games! The Upsets! The Madness!: March Madness [INFOGRAPHIC]](https://static.fdocuments.us/doc/165x107/577cdcc71a28ab9e78ab621f/the-games-the-upsets-the-madness-march-madness-infographic.jpg)