SDx Environments Release Notes, Installation, and ... · SDx Environments Release Notes,...
29
SDx Environments Release Notes, Installation, and Licensing Guide UG1238 (v2016.4) April 24, 2017
Transcript of SDx Environments Release Notes, Installation, and ... · SDx Environments Release Notes,...
SDx Environments
Release Notes, Installation, and Licensing Guide
UG1238 (v2016.4) April 24, 2017

SDx Environments Release Notes, Installation, and Licensing 2UG1238 (v2016.4) April 24, 2017 www.xilinx.com
Revision HistoryThe following table shows the revision history for this document.
Date Version Revision
04/24/2017 2016.4 Updates to 2016.4 version.
Added Batch Mode Installation Flow.
03/14/2017 2016.4 Updates to reflect new software release.
Added What’s New in 2016.4.
Added Known Issues in 2016.4.
12/02/2016 2016.3 Corrected document title.
11/30/2016 2016.3 Initial release.
Send Feedback
SDx Environments Release Notes, Installation, and Licensing 3UG1238 (v2016.4) April 24, 2017 www.xilinx.com
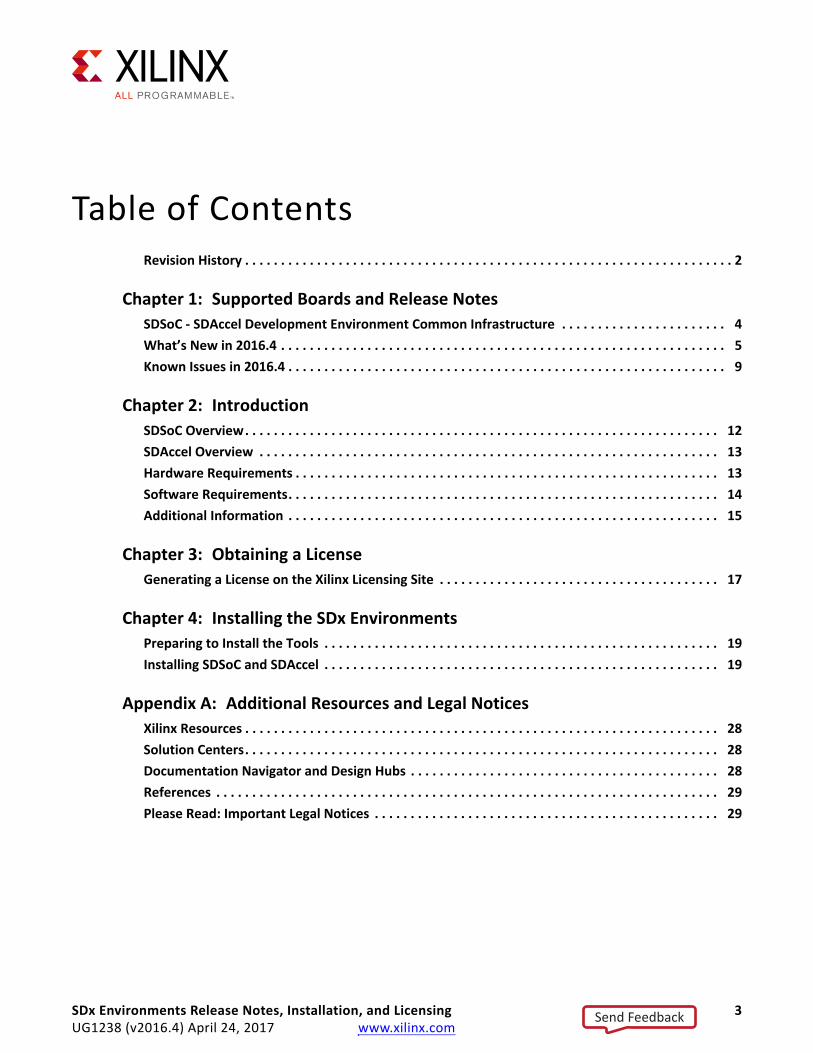
Table of ContentsRevision History . . . . . . . . . . . . . . . . . . . . . . . . . . . . . . . . . . . . . . . . . . . . . . . . . . . . . . . . . . . . . . . . . . . . 2
Chapter 1: Supported Boards and Release NotesSDSoC - SDAccel Development Environment Common Infrastructure . . . . . . . . . . . . . . . . . . . . . . . 4What’s New in 2016.4 . . . . . . . . . . . . . . . . . . . . . . . . . . . . . . . . . . . . . . . . . . . . . . . . . . . . . . . . . . . . . . 5Known Issues in 2016.4 . . . . . . . . . . . . . . . . . . . . . . . . . . . . . . . . . . . . . . . . . . . . . . . . . . . . . . . . . . . . . 9
Chapter 2: IntroductionSDSoC Overview. . . . . . . . . . . . . . . . . . . . . . . . . . . . . . . . . . . . . . . . . . . . . . . . . . . . . . . . . . . . . . . . . . 12SDAccel Overview . . . . . . . . . . . . . . . . . . . . . . . . . . . . . . . . . . . . . . . . . . . . . . . . . . . . . . . . . . . . . . . . 13Hardware Requirements . . . . . . . . . . . . . . . . . . . . . . . . . . . . . . . . . . . . . . . . . . . . . . . . . . . . . . . . . . . 13Software Requirements. . . . . . . . . . . . . . . . . . . . . . . . . . . . . . . . . . . . . . . . . . . . . . . . . . . . . . . . . . . . 14Additional Information . . . . . . . . . . . . . . . . . . . . . . . . . . . . . . . . . . . . . . . . . . . . . . . . . . . . . . . . . . . . 15
Chapter 3: Obtaining a LicenseGenerating a License on the Xilinx Licensing Site . . . . . . . . . . . . . . . . . . . . . . . . . . . . . . . . . . . . . . . 17
Chapter 4: Installing the SDx EnvironmentsPreparing to Install the Tools . . . . . . . . . . . . . . . . . . . . . . . . . . . . . . . . . . . . . . . . . . . . . . . . . . . . . . . 19Installing SDSoC and SDAccel . . . . . . . . . . . . . . . . . . . . . . . . . . . . . . . . . . . . . . . . . . . . . . . . . . . . . . . 19
Appendix A: Additional Resources and Legal NoticesXilinx Resources . . . . . . . . . . . . . . . . . . . . . . . . . . . . . . . . . . . . . . . . . . . . . . . . . . . . . . . . . . . . . . . . . . 28Solution Centers. . . . . . . . . . . . . . . . . . . . . . . . . . . . . . . . . . . . . . . . . . . . . . . . . . . . . . . . . . . . . . . . . . 28Documentation Navigator and Design Hubs . . . . . . . . . . . . . . . . . . . . . . . . . . . . . . . . . . . . . . . . . . . 28References . . . . . . . . . . . . . . . . . . . . . . . . . . . . . . . . . . . . . . . . . . . . . . . . . . . . . . . . . . . . . . . . . . . . . . 29Please Read: Important Legal Notices . . . . . . . . . . . . . . . . . . . . . . . . . . . . . . . . . . . . . . . . . . . . . . . . 29
Send Feedback
Chapter 1
Supported Boards and Release Notes
SDSoC - SDAccel Development Environment Common InfrastructureThe common infrastructure includes:
• Integrated installer to download and install SDSoC™ and SDAccel™ Development environments
° Complete installation environment containing the required tools and data files for supported devices and platforms
° Web-based installer support
° Option to install SDSoC or SDAccel environments
• Supported Operating Systems
° Windows 7 and 7 SP1 Professional (64-bit) (SDSoC only)
° Windows 10 Professional (64-bit) (SDSoC only)
° Linux Support
- Red Hat Enterprise Workstation/Server 7.1-7.2 (64-bit)
- Red Hat Enterprise Workstation 6.7 and 6.8 (64-bit)
- CentOS 6.8, CentOS 7.2 (64-bit) (SDAccel only)
- Ubuntu Linux 16.04.3 LTS (64-bit) (SDSoC only)
• Integrated IDE supporting both SDSoC and SDAccel Development environments
° Eclipse based IDE with support for project creation, emulation, performance estimation, implementation and debug
° One-stop Reports View to access all reports
• Several stability improvements of SDx GUI around project creation, emulation, and license checking.
SDx Environments Release Notes, Installation, and Licensing 4UG1238 (v2016.4) April 24, 2017 www.xilinx.com
Send Feedback

Chapter 1: Supported Boards and Release Notes
What’s New in 2016.4
SDSoC Development Environment FeaturesThe SDSoC development environment updates are included in this release:
• ARM® compiler tool chain support
° Linaro-based gcc 5.2-2015.11-2 32-bit and 64-bit tool chains
• Target OS support
° Linux (kernel 4.6, Xilinx branch xilinx-v2016.4_sdsoc), bare-metal and FreeRTOS 8.2.3
° Example PetaLinux BSP for ZC702 platform with documentation in the SDSoC Environment Platform Development Guide (UG1146) [Ref 4].
• Device support
° Zynq®-7000 support
° Enhanced Zynq UltraScale+™ MPSoC support, including
- Support for ES1 and ES2 silicon 64-bit addressing
- Support for performance estimation flows
- Additional 150MHz, 200 MHz, and 300 MHz clocks in the ZCU102 platform
- Enhanced Vivado® Tcl APIs to export hardware meta data specification for custom platforms
- Supports Zynq UltraScale™ MPSoC Base Targeted Reference Design 2016.4 (embedded video processing platform).
- Supports Zynq UltraScale MPSoC Software Acceleration TRD 2016.4 (embedded signal processing
• Beta: New Emulator based on QEMU and RTL co-simulation (Zynq target, Linux Host OS only)
° Support for ZC702, ZC706, Zybo, ZedBoard, MicroZed platforms
° Command line interface with graphical waveform viewer
° Integrated flows within the Eclipse IDE (Beta release)
• Early Access: OpenCL™ compilation flows are now supported for Zynq and Zynq UltraScale+ MPSoC devices
° Emulation flows and profile reports are not supported in 2016.4 for OpenCL platforms
Contact your sales representative to request early access.
SDx Environments Release Notes, Installation, and Licensing 5UG1238 (v2016.4) April 24, 2017 www.xilinx.com
Send Feedback
Chapter 1: Supported Boards and Release Notes
• Integrated Eclipse UI
° Project import from 2016.3 SDSoC
° Debug, Release, and user-defined build configurations with independent project settings
° Support for platform repositories
• System compiler enhancements
° Support for class members in SDS copy pragmas
° Support for coincident HLS dataflow and multi-buffered BRAM-mapped array arguments at the function top level
° Support of packed structs and scalar widths up to 1024-bits (was 32-bits)
° Support for class members in SDS copy pragmas
° Improved scheduling for standalone and FreeRTOS
° Support for SG-DMA on MIG accessible DDR
° Bug fixes
• C/C++ runtime enhancements
° sds_alloc support for up to 4K buffers
° Support for up to 64 UIO devices
° Performance improvements
° Bug fixes
• Platform updates
° zcu102_es2 platform supporting Zynq UltraScale+ (ES2 silicon)
• Enhanced user-defined platform support
° sdspfm utility to assist in SDSoC platform creation
° Enhanced error handling in the sdspfm utility
• New and updated sample applications
° Lucas-Kanade dense optical flow performance enhancements
• Bug fixes and infrastructure updates
° Improved error checking and handling
° Updated and enhanced accelerator driver API software
SDx Environments Release Notes, Installation, and Licensing 6UG1238 (v2016.4) April 24, 2017 www.xilinx.com
Send Feedback
Chapter 1: Supported Boards and Release Notes
SDAccel Development Environment Features• Production release of DSA supporting Xilinx Accelerator Board XIL-ACCEL-RD-KU115
• Onboarding examples, including several examples of RTL kernels demonstrating packaging of RTL designs, integrating multiple RTL kernels, as well as RTL kernels with 2 clocks
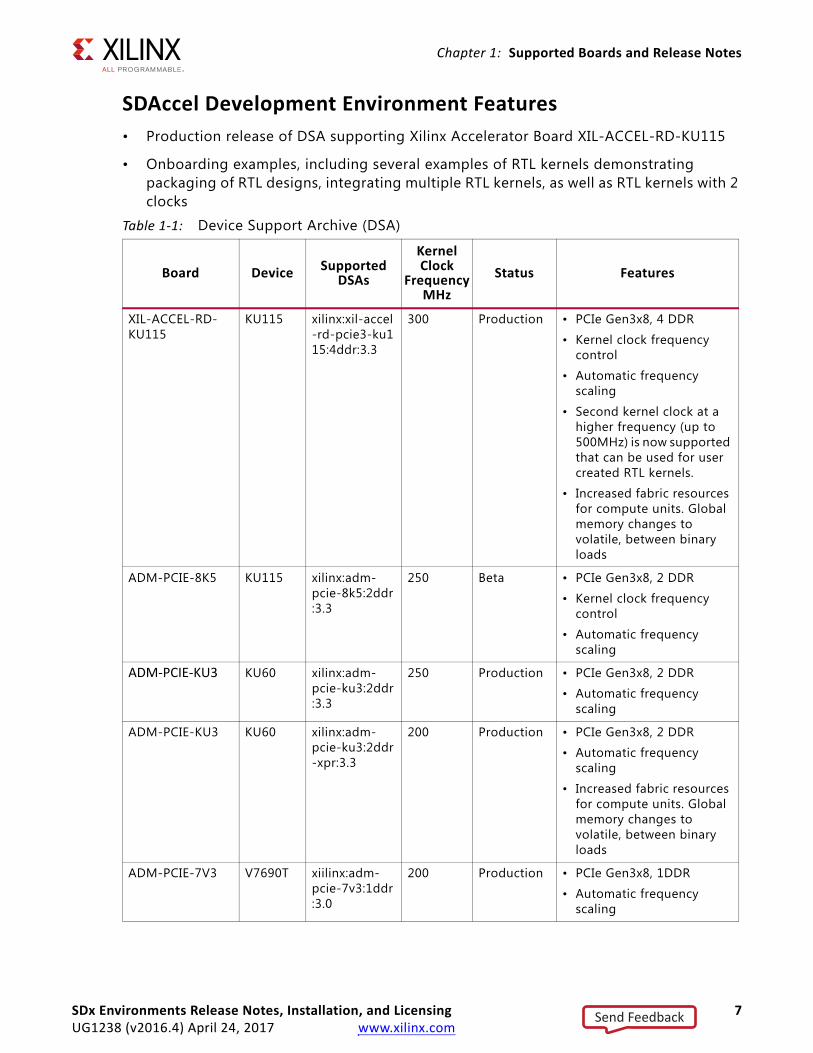
Table 1-1: Device Support Archive (DSA)
Board Device Supported DSAs
Kernel Clock
Frequency MHz
Status Features
XIL-ACCEL-RD-KU115
KU115 xilinx:xil-accel-rd-pcie3-ku115:4ddr:3.3
300 Production • PCIe Gen3x8, 4 DDR
• Kernel clock frequency control
• Automatic frequency scaling
• Second kernel clock at a higher frequency (up to 500MHz) is now supported that can be used for user created RTL kernels.
• Increased fabric resources for compute units. Global memory changes to volatile, between binary loads
ADM-PCIE-8K5 KU115 xilinx:adm-pcie-8k5:2ddr:3.3
250 Beta • PCIe Gen3x8, 2 DDR
• Kernel clock frequency control
• Automatic frequency scaling
ADM-PCIE-KU3 KU60 xilinx:adm-pcie-ku3:2ddr:3.3
250 Production • PCIe Gen3x8, 2 DDR
• Automatic frequency scaling
ADM-PCIE-KU3 KU60 xilinx:adm-pcie-ku3:2ddr-xpr:3.3
200 Production • PCIe Gen3x8, 2 DDR
• Automatic frequency scaling
• Increased fabric resources for compute units. Global memory changes to volatile, between binary loads
ADM-PCIE-7V3 V7690T xiilinx:adm-pcie-7v3:1ddr:3.0
200 Production • PCIe Gen3x8, 1DDR
• Automatic frequency scaling
SDx Environments Release Notes, Installation, and Licensing 7UG1238 (v2016.4) April 24, 2017 www.xilinx.com
Send Feedback
Chapter 1: Supported Boards and Release Notes
2016.4 updates include:
• SDAccel Runtime
° Driver fixes for xilinx:adm-pcie-7v3:1ddr:3.0 to avoid hangs.
° Improved memory usage in the driver to enable long running applications.
• xocc has been enhanced to set target kernel frequency. Overriding kernel clock frequency with lower frequency might help with designs that fail to meet timing on platform clocks.
° --kernel_frequency<arg> sets a user-defined clock frequency in MHz for kernel, overriding a default value from DSA.
° For a kernel compilation to change target to 150 MHz, add --kernel_frequency 150.
• Usability
° Utilization reports are automatically generated during compilation. These reports show utilization of LUTS, Registers, BRAMs, and DSPs for both the platform region, as well as for each of the kernels.
° Enhanced debug checks in HW Emulation Flow covering
- Kernel or System transactions hangs.
- Uninitialized memory read by kernel.
- Out of DDR Range access.
- Out of Bounds array access.
- Periodic aliveness status during long HW Emulation runs.
• SDAccel Compiler
° 2016.4_sdx delivers 5% better clock frequency on complex designs compared to 2016.3_sdx.
° An enhanced QOR optimization methodology documented in the SDAccel Optimization Guide (UG1207) [Ref 3] with appropriate reference to the onboarding examples for demonstrating key concepts.
SDx Environments Release Notes, Installation, and Licensing 8UG1238 (v2016.4) April 24, 2017 www.xilinx.com
Send Feedback
Chapter 1: Supported Boards and Release Notes
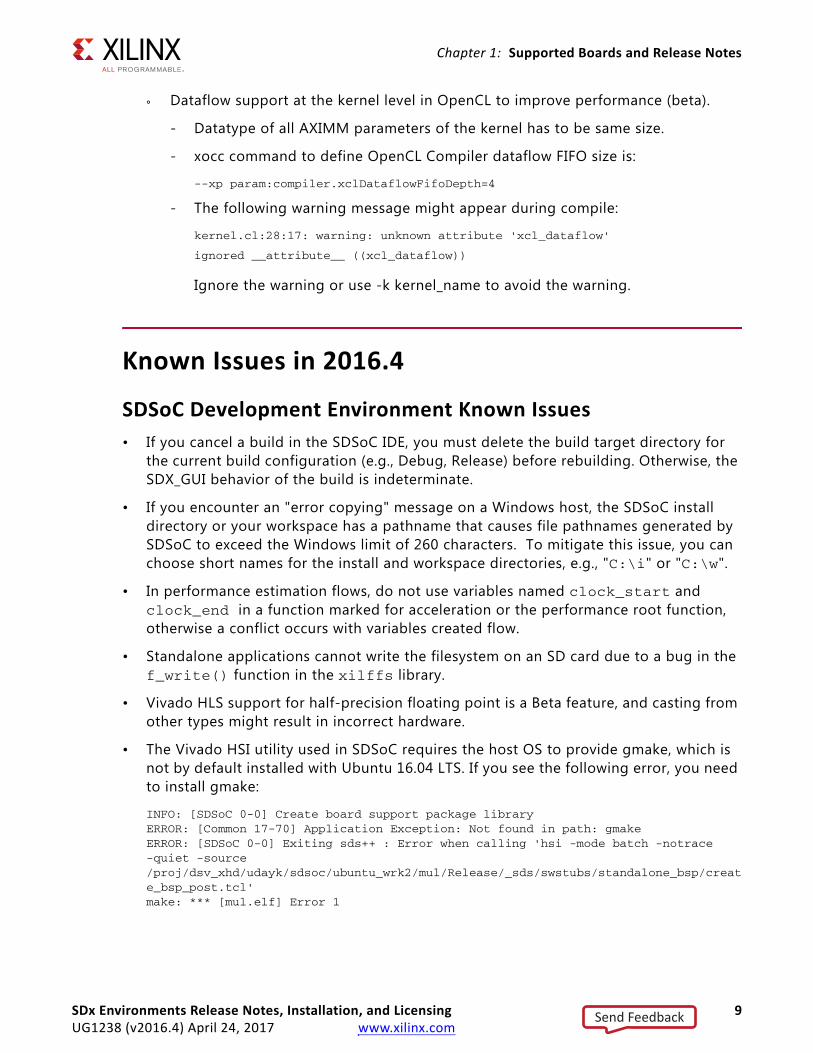
° Dataflow support at the kernel level in OpenCL to improve performance (beta).
- Datatype of all AXIMM parameters of the kernel has to be same size.
- xocc command to define OpenCL Compiler dataflow FIFO size is:
--xp param:compiler.xclDataflowFifoDepth=4
- The following warning message might appear during compile:
kernel.cl:28:17: warning: unknown attribute 'xcl_dataflow'
ignored __attribute__ ((xcl_dataflow))
Ignore the warning or use -k kernel_name to avoid the warning.
Known Issues in 2016.4
SDSoC Development Environment Known Issues• If you cancel a build in the SDSoC IDE, you must delete the build target directory for
the current build configuration (e.g., Debug, Release) before rebuilding. Otherwise, the SDX_GUI behavior of the build is indeterminate.
• If you encounter an "error copying" message on a Windows host, the SDSoC install directory or your workspace has a pathname that causes file pathnames generated by SDSoC to exceed the Windows limit of 260 characters. To mitigate this issue, you can choose short names for the install and workspace directories, e.g., "C:\i" or "C:\w".
• In performance estimation flows, do not use variables named clock_start and clock_end in a function marked for acceleration or the performance root function, otherwise a conflict occurs with variables created flow.
• Standalone applications cannot write the filesystem on an SD card due to a bug in the f_write() function in the xilffs library.
• Vivado HLS support for half-precision floating point is a Beta feature, and casting from other types might result in incorrect hardware.
• The Vivado HSI utility used in SDSoC requires the host OS to provide gmake, which is not by default installed with Ubuntu 16.04 LTS. If you see the following error, you need to install gmake:
INFO: [SDSoC 0-0] Create board support package libraryERROR: [Common 17-70] Application Exception: Not found in path: gmakeERROR: [SDSoC 0-0] Exiting sds++ : Error when calling 'hsi -mode batch -notrace -quiet -source /proj/dsv_xhd/udayk/sdsoc/ubuntu_wrk2/mul/Release/_sds/swstubs/standalone_bsp/create_bsp_post.tcl'make: *** [mul.elf] Error 1
SDx Environments Release Notes, Installation, and Licensing 9UG1238 (v2016.4) April 24, 2017 www.xilinx.com
Send Feedback
Chapter 1: Supported Boards and Release Notes
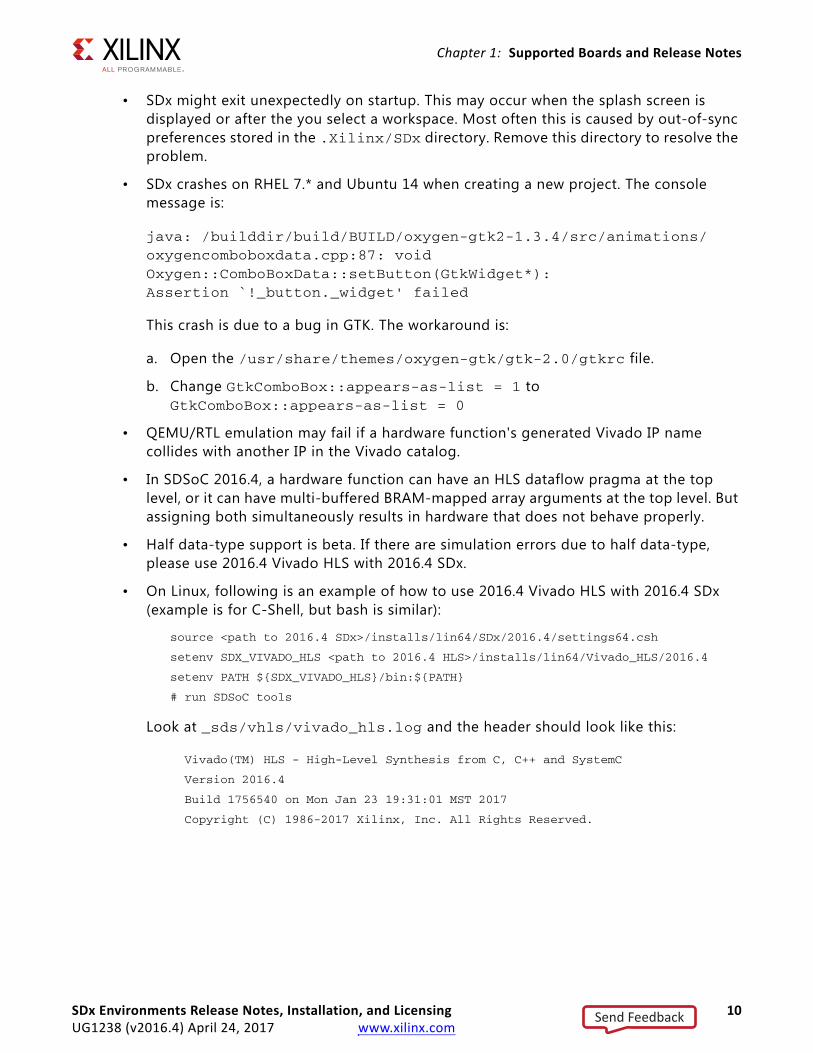
• SDx might exit unexpectedly on startup. This may occur when the splash screen is displayed or after the you select a workspace. Most often this is caused by out-of-sync preferences stored in the .Xilinx/SDx directory. Remove this directory to resolve the problem.
• SDx crashes on RHEL 7.* and Ubuntu 14 when creating a new project. The console message is:
java: /builddir/build/BUILD/oxygen-gtk2-1.3.4/src/animations/oxygencomboboxdata.cpp:87: void Oxygen::ComboBoxData::setButton(GtkWidget*): Assertion `!_button._widget' failed
This crash is due to a bug in GTK. The workaround is:
a. Open the /usr/share/themes/oxygen-gtk/gtk-2.0/gtkrc file.
b. Change GtkComboBox::appears-as-list = 1 to GtkComboBox::appears-as-list = 0
• QEMU/RTL emulation may fail if a hardware function's generated Vivado IP name collides with another IP in the Vivado catalog.
• In SDSoC 2016.4, a hardware function can have an HLS dataflow pragma at the top level, or it can have multi-buffered BRAM-mapped array arguments at the top level. But assigning both simultaneously results in hardware that does not behave properly.
• Half data-type support is beta. If there are simulation errors due to half data-type, please use 2016.4 Vivado HLS with 2016.4 SDx.
• On Linux, following is an example of how to use 2016.4 Vivado HLS with 2016.4 SDx (example is for C-Shell, but bash is similar):
source <path to 2016.4 SDx>/installs/lin64/SDx/2016.4/settings64.csh
setenv SDX_VIVADO_HLS <path to 2016.4 HLS>/installs/lin64/Vivado_HLS/2016.4
setenv PATH ${SDX_VIVADO_HLS}/bin:${PATH}
# run SDSoC tools
Look at _sds/vhls/vivado_hls.log and the header should look like this:
Vivado(TM) HLS - High-Level Synthesis from C, C++ and SystemC
Version 2016.4
Build 1756540 on Mon Jan 23 19:31:01 MST 2017
Copyright (C) 1986-2017 Xilinx, Inc. All Rights Reserved.
SDx Environments Release Notes, Installation, and Licensing 10UG1238 (v2016.4) April 24, 2017 www.xilinx.com
Send Feedback

Chapter 1: Supported Boards and Release Notes
SDAccel Development Environment Known Issues• High-Capacity DSA has the following limitations
° Global memory changes to volatile, between binary loads.
° Xilinx_xil-accel-rd-ku115-4ddr may run into timing/routing issues for large numbers of kernels (approximately10 or more compute units).
° Runtime on Xilinx_xil-accel-rd-ku115-4ddr is longer than other DSAs, total runtime takes 3 to 10 hours, depending on the size and complexity of the kernel.
° Auto-scaling of kernel clocks may fail if the platform clock does not meet timing
- Overriding kernel clock frequency with lower frequency may help to meet platform clock as well.
• Multiple kernels with same name will cause the tool to crash during emulation.
• Designs with a large number of AXI transactions can lead to long runtime.
° Check the SDAccel Environment Optimization Guide (UG1207) [Ref 3] guide or onboarding example for guidance on rewriting the code.
• Running OpenCL application on HW from SDx GUI might fail if you change XILINX_OPENCL.
° Need to select the Replace native environment with specified environment radio button.
• In SDx GUI, if a project is already built once and then Host Debug check box is toggled, it does NOT cause the next build to compile the host executable again. You need to make clean and rebuild the host. Reflashing a new DSA using xbsak might require hard rebooting.
SDx Environments Release Notes, Installation, and Licensing 11UG1238 (v2016.4) April 24, 2017 www.xilinx.com
Send Feedback
Chapter 2
IntroductionThe 2016.4 SDx™ Environments software release consists of the SDSoC™ Development Environment and the SDAccel Development Environment, each targeting different types of designers. They are both installed together but are licensed separately. The Vivado® Design Suite is also installed with the SDx Environment for programming the device and for custom hardware platform development.
SDSoC OverviewThe SDSoC (Software-Defined System On Chip) environment is an Eclipse-based Integrated Development Environment (IDE) for implementing heterogeneous embedded systems using the Zynq®-7000 All Programmable SoC and Zynq UltraScale+™ MPSoC platforms. The SDSoC environment provides an embedded C/C++ application development experience with an easy-to-use Eclipse IDE, and comprehensive design tools for heterogeneous Zynq-7000 AP SoC and Zynq UltraScale+ MPSoC development to software engineers and system architects.
The SDSoC environment includes a full-system optimizing C/C++ compiler that provides automated software acceleration in programmable logic combined with automated system connectivity generation. The application programming model within the SDSoC environment should be intuitive to software engineers. An application is written as C/C++ code, with the programmer identifying a target platform and a subset of the functions within the application to be compiled into hardware. The SDSoC system compiler then compiles the application into hardware and software to realize the complete embedded system implemented on a Zynq device, including a complete boot image with firmware, operating system, and application executable.
The SDSoC environment abstracts hardware through increasing layers of software abstraction that includes cross-compilation and linking of C/C++ functions into programmable logic fabric as well as the ARM CPUs within a Zynq device. Based on a user specification of program functions to run in programmable hardware, the SDSoC environment performs program analysis, task scheduling and binding onto programmable logic and embedded CPUs, as well as hardware and software code generation that automatically orchestrates communication and cooperation among hardware and software components.
SDx Environments Release Notes, Installation, and Licensing 12UG1238 (v2016.4) April 24, 2017 www.xilinx.com
Send Feedback

Chapter 2: Introduction
SDAccel OverviewSDAccel™ is a development environment for OpenCL™ applications targeting Xilinx FPGA based accelerator cards. This environment enables concurrent programming of the in-system processor and the FPGA fabric without the need for extensive FPGA design experience. The application is captured as a host program written in OpenCL C and a set of computation kernels expressed in C, C++, OpenCL C, or RTL.
Hardware Requirements
SDSoCThe 2016.4 SDSoC environment release includes support for the following development boards:
• ZC702, ZC706, MicroZed, ZedBoard, and Zybo development boards featuring the Zynq-7000 AP SoC
• ZCU102 development board featuring the Zynq UltraScale+ MPSoC.
Additional platforms are available from partners. For more information, visit the SDSoC Developer Zone web page [Ref 7].
You also need a mini-USB cable to observe the UART output from the board.
SDAccelThe SDAccel environment requires the following hardware:
• Acceleration Card. Use one of the following:
° Alpha Data ADM-PCIE-KU3 card. The card is based on the Kintex® UltraScale™ XCKU060T-2FFVA1156E FPGA.
° Alpha Data ADM-PCIE-7V3 card. The card is based on the Virtex®-7 XC7VX690T-2FFG1157C FPGA.
° Xilinx Xil-ACCEL-RD-KU115 card. The card is based on the Kintex UltraScale XCKU115-FLVB2104-2-E FPGA.
SDx Environments Release Notes, Installation, and Licensing 13UG1238 (v2016.4) April 24, 2017 www.xilinx.com
Send Feedback

Chapter 2: Introduction
• Host computer: Desktop computer for hosting the acceleration card. The host computer must provide:
° Motherboard with a PCIe Gen3 X8 slot
° 16 GB RAM
° 100GB free disk space
° DVD drive
• Programming computer: Laptop or desktop computer running the supplied Vivado Design Suite 2016.4 for programming the FPGA.
• Xilinx® Platform Cable USB 2, part number HW-USB-II-G for connecting the programming computer to the acceleration card. See the Platform Cable USB II Data Sheet (DS593) [Ref 5].
• Additional platforms are available from partners. For more information, visit the SDAccel Developer Zone web page [Ref 8].
Software RequirementsThe SDx Development Environment runs on both Linux and Windows operating systems. The supported operating systems are listed below.
• Windows 7 and 7 SP1 Professional (64-bit) (SDSoC only)
• Windows 10 Professional (64-bit) (SDSoC only)
• Linux Support
° Red Hat Enterprise Workstation/Server 7.1-7.2 (64-bit)
° Red Hat Enterprise Workstation 6.7 and 6.8 (64-bit)
° CentOS 6.8, CentOS 7.2 (64-bit) (SDAccel)
° Ubuntu Linux 16.04.3 LTS (64-bit) (SDSoC only)
SDx Environments Release Notes, Installation, and Licensing 14UG1238 (v2016.4) April 24, 2017 www.xilinx.com
Send Feedback
Chapter 2: Introduction
Additional Information
About the SDSoC InstallationThe installation of SDSoC includes the following:
• SDSoC environment 2016.4, including an Eclipse/CDT-based GUI, high-level system compiler, and ARM GNU toolchain
• Vivado® Design Suite System Edition 2016.4, with Vivado High-Level Synthesis (HLS) and the Xilinx Software Development Kit (SDK)
The SDSoC environment includes the same GNU ARM toolchain included with the Xilinx® Software Development Kit (SDK) 2016.4, which also provides additional tools used by the SDSoC environment. The SDSoC environment setup script sets PATH variables to use this toolchain.
More information about the SDSoC installation:
• The provided toolchains contain 32-bit executables, requiring your Linux host OS installation to include 32-bit compatibility libraries.
• RHEL 6 and 7 64-bit x86 Linux installations might not include the 32-bit compatibility libraries, and might need to be added separately; see https://access.redhat.com/site/solutions/36238.
• On RHEL, 32-bit compatibility libraries can be installed by becoming a superuser (or root) with root access privileges and running the yum install glibc.i686 command.
• On Ubuntu, 32-bit compatibility libraries can be installed by becoming a superuser (or root) with root access privileges and running the following commands. Refer to SDSoC Development Environment Features for additional information.
sudo dpkg --add-architecture i386sudo apt-get updatesudo apt-get install libc6:i386 libncurses5:i386 libstdc++6:i386sudo apt-get install libgtk2.0-0:i386 dpkg-dev:i386sudo ln -s /usr/bin/make /usr/bin/gmake
• The version of the toolchain can be displayed by running the arm-linux-gnueabihf-g++ -v command.
• The last line of the output printed in the shell window should be GCC version 4.9.2 20140904 (prerelease)(crosstool-NG linaro-1.13.1-4.9-2014.09 - Linaro GCC 4.9-2014.09).
SDx Environments Release Notes, Installation, and Licensing 15UG1238 (v2016.4) April 24, 2017 www.xilinx.com
Send Feedback
Chapter 2: Introduction
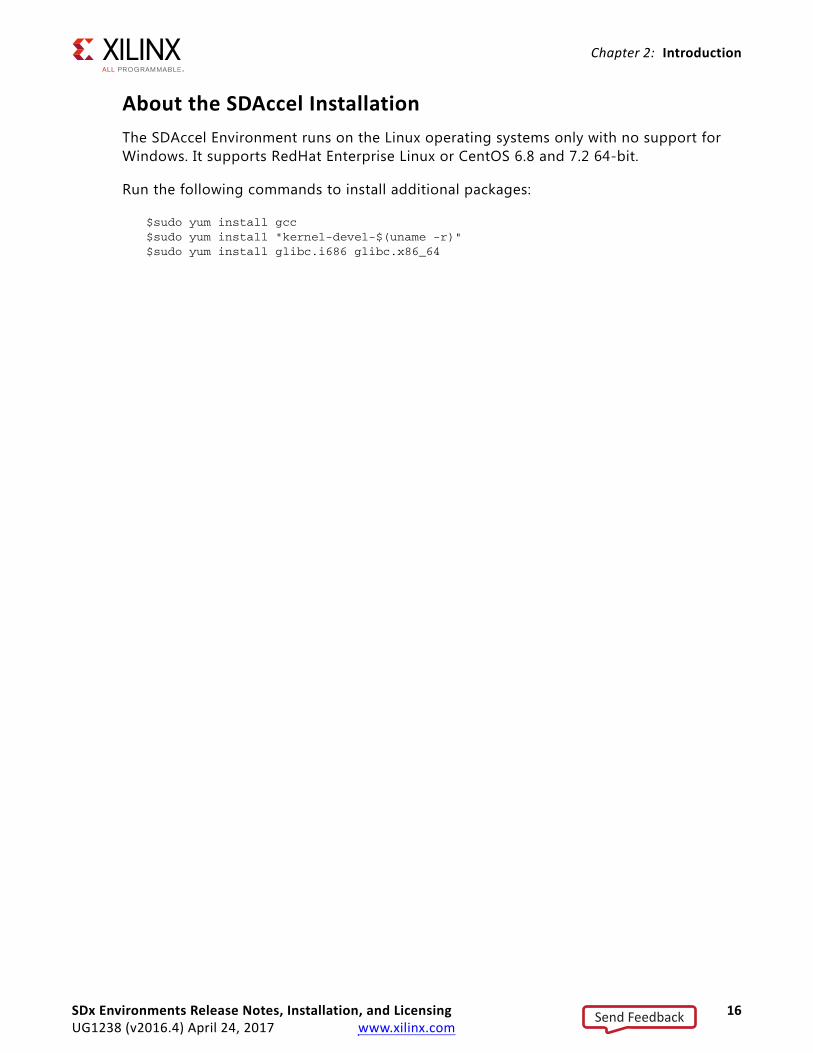
About the SDAccel InstallationThe SDAccel Environment runs on the Linux operating systems only with no support for Windows. It supports RedHat Enterprise Linux or CentOS 6.8 and 7.2 64-bit.
Run the following commands to install additional packages:
$sudo yum install gcc$sudo yum install "kernel-devel-$(uname -r)"$sudo yum install glibc.i686 glibc.x86_64
SDx Environments Release Notes, Installation, and Licensing 16UG1238 (v2016.4) April 24, 2017 www.xilinx.com
Send Feedback

Chapter 3
Obtaining a LicenseThe steps to obtain a license for the SDx development environment are described below.
Generating a License on the Xilinx Licensing Site1. Sign in to the Xilinx® licensing website [Ref 6]. See the following figure.
IMPORTANT: You need a valid account for www.xilinx.com to sign in and generate licenses.
Note: If this is your first time generating a license for the SDAccel™ - Xilinx OpenCL™ Design Environment, contact your Xilinx representative to enable your access to the SDAccel licensing website.
Note: SDSoC comes with a 60-day evaluation license, so you should be able to see it in your available license list.
2. In the account drop-down menu, select XILINX - SDSoC Environment or SDAccel Environment.
Note: This only shows up if you have purchased or redeemed an SDSoC or SDAccel license.
TIP: If you are interested in SDSoC, you should also see a "SDSoC 60-day evaluation license" for the first time use.
X-Ref Target - Figure 3-1
Figure 3-1: Xilinx Licensing Site Sign-in Screen
SDx Environments Release Notes, Installation, and Licensing 17UG1238 (v2016.4) April 24, 2017 www.xilinx.com
Send Feedback
Chapter 3: Obtaining a License
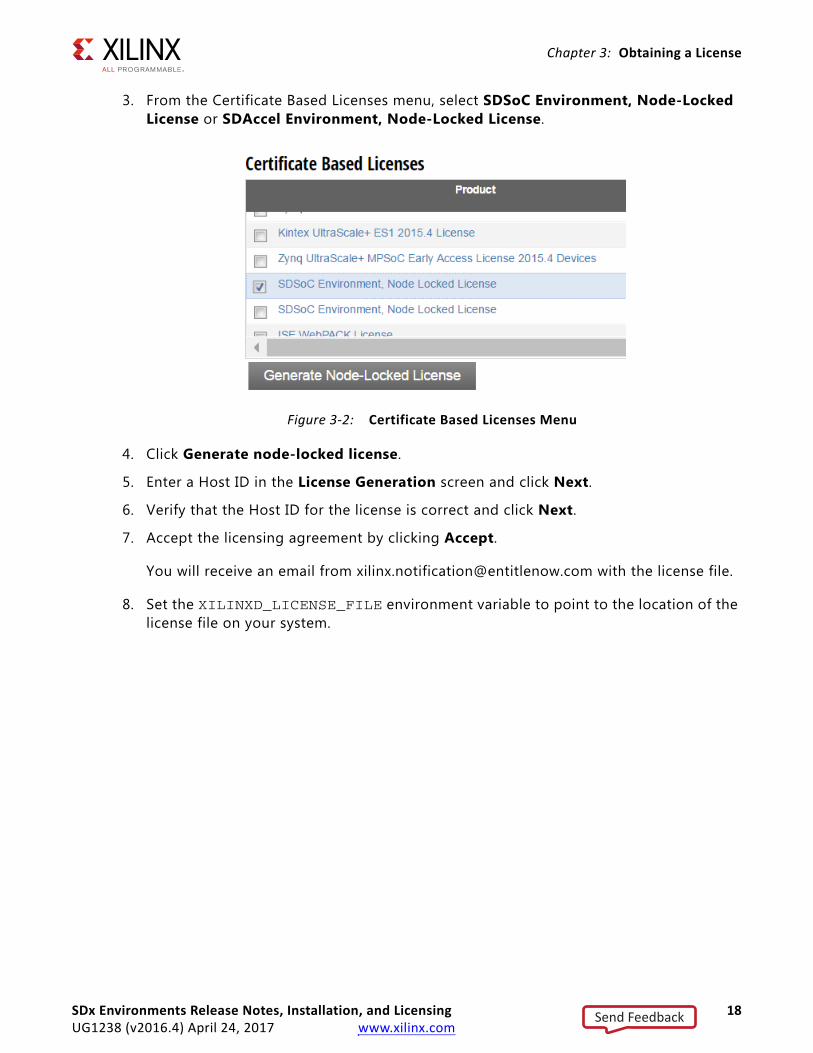
3. From the Certificate Based Licenses menu, select SDSoC Environment, Node-Locked License or SDAccel Environment, Node-Locked License.
4. Click Generate node-locked license.
5. Enter a Host ID in the License Generation screen and click Next.
6. Verify that the Host ID for the license is correct and click Next.
7. Accept the licensing agreement by clicking Accept.
You will receive an email from [email protected] with the license file.
8. Set the XILINXD_LICENSE_FILE environment variable to point to the location of the license file on your system.
X-Ref Target - Figure 3-2
Figure 3-2: Certificate Based Licenses Menu
SDx Environments Release Notes, Installation, and Licensing 18UG1238 (v2016.4) April 24, 2017 www.xilinx.com
Send Feedback

Chapter 4
Installing the SDx EnvironmentsThis chapter explains the installation process for either the SDSoC™ environment or the SDAccel™ environment.
Preparing to Install the ToolsIMPORTANT: Before starting installation, you must complete the following steps.
• Make sure your system meets the requirements described in Hardware Requirements and Software Requirements.
• Disable anti-virus software to reduce installation time.
• Close all open programs before you begin installation.
Installing SDSoC and SDAccelYou have two options for installation of SDSoC and SDAccel. Both installation types are available on the Xilinx® Downloads Website.
IMPORTANT: There are separate installers for SDSoC and SDAccel. When you launch the installer for the product you want to use, the devices are preselected for you.
SDx Environments Release Notes, Installation, and Licensing 19UG1238 (v2016.4) April 24, 2017 www.xilinx.com
Send Feedback

Chapter 4: Installing the SDx Environments
Using the Web InstallerUsing the web installer is recommended.
TIP: Using the web installer you can pick and choose what you would like to install up front and that is the only data that will need to get downloaded for installation. Also, in the case of a network failure, you can resume from where you last stopped, instead of starting from the beginning again.
IMPORTANT: The following devices are pre-selected in the individual installers:- For the SDAccel-specific web installer, 7 Series, UltraScale™, and UltraScale+™ are pre-selected.- For the SDSoC-specific web installer, Zynq®-7000 and UltraScale+ MPSoC are pre-selected. - For the combined SDx SFD (single file download) image, no devices are pre-selected.
Downloading and Installing the Full Installation FileIf you downloaded the full product installation, decompress the file and run xsetup (for Linux) or xsetup.exe (for Windows – not available for SDAccel) to launch the installation.
If you downloaded the web installer client, launch the downloaded file.You are prompted to log in and use your regular Xilinx login credentials to continue with the installation process.
RECOMMENDED: Xilinx recommends the use of 7-zip or WinZip (v.15.0 or newer) to decompress the downloaded tar.gz file.
• The Download and Install Now choice allows you to select specific tools and device families on following screens, downloads only the files required to install those selections, and then installs them for you. After entering your login credentials, you can select between a traditional web-based installation or a full image download.
• The Download Full Image requires you to select a download destination and to choose whether you want a Windows only, Linux only, or an install that supports both operating systems. There are no further options to choose with the Download Full Image selection, and installation needs to be done separately by running the xsetup application from the download directory.
Batch Mode Installation FlowThe installer can be run in an unattended batch process. To run unattended, a standard Edition and install location must be specified or a configuration file must be present which tells the installer the install location and which of the tools, devices and options you wish to install. The installer has a mode in which it can generate a reference option file for you based on common configurations, which you can further edit to customize your installation.
RECOMMENDED: It is recommended that you generate this reference for each new quarterly release, so that new devices, tools, options or other changes will be accounted for in your options file.
SDx Environments Release Notes, Installation, and Licensing 20UG1238 (v2016.4) April 24, 2017 www.xilinx.com
Send Feedback

Chapter 4: Installing the SDx Environments
To begin using batch mode, open a command shell and change to the directory where you have stored your extracted installer.
Note: For Windows, open the command window with administrator privileges and run the xsetup.bat file, found in the \bin directory, and not xsetup.exe with the options below.
Generate Configuration File
Run: xsetup -b ConfigGen
This will put you in an interactive mode where you will see the following menu. Choose the SDx IDE for SDSoC and SDAccel development environments edition.
After you make a selection, you will be prompted with the location/filename for your configuration file and the interactive mode will exit.
Below is a sample configuration file:
#### SDx IDE for SDSoC and SDAccel development environments Install Configuration ####Edition=SDx IDE for SDSoC and SDAccel development environments
# Path where Xilinx software will be installed.Destination=/opt/Xilinx
# Choose the Products/Devices the you would like to install.Modules=DocNav:1,UltraScale+:0,7 Series:0,Zynq UltraScale+ MPSoC:0,Zynq-7000:0,UltraScale:0
# Choose the post install scripts you'd like to run as part of the finalization step. Please note that some of these scripts may require user interaction during runtime.InstallOptions=Enable WebTalk for SDx to send usage statistics to Xilinx:1
## Shortcuts and File associations ### Choose whether Start menu/Application menu shortcuts will be created or not.CreateProgramGroupShortcuts=1
# Choose the name of the Start menu/Application menu shortcut. This setting will be ignored if you choose NOT to create shortcuts.ProgramGroupFolder=Xilinx Design Tools
# Choose whether shortcuts will be created for All users or just the Current user. Shortcuts can be created for all users only if you run the installer as administrator.CreateShortcutsForAllUsers=0
# Choose whether shortcuts will be created on the desktop or not.CreateDesktopShortcuts=1
# Choose whether file associations will be created or not.
CreateFileAssociation=1Basically, each option in the configuration file matches a corresponding option in the GUI. A value of 1 means that option is selected, a value of 0 means the option is unselected.
SDx Environments Release Notes, Installation, and Licensing 21UG1238 (v2016.4) April 24, 2017 www.xilinx.com
Send Feedback
Chapter 4: Installing the SDx Environments
IMPORTANT: In this configuration file, by default there are no devices selected for installation (all devices have a value of 0). You MUST update a device to a value of 1 in order to install that device.
Run the Installer
Now that you have edited your configuration file to reflect your installation preferences, you are ready to run the installer. As part of the installer command-line, you will need to indicate your acceptance of the Xilinx End-User License Agreement [Ref 9] and Third Party End-User License Agreement [Ref 10], and confirm you understand the WebTalk Terms and Conditions.
WebTalk Terms and Conditions
By indicating I AGREE, I also confirm that I have read Section 13 of the terms and conditions above concerning WebTalk and have been afforded the opportunity to read the WebTalk FAQ posted at http://www.xilinx.com/webtalk. I understand that I am able to disable WebTalk later if certain criteria described in Section 13(c) apply. If they don't apply, I can disable WebTalk by uninstalling the Software or using the Software on a machine not connected to the internet. If I fail to satisfy the applicable criteria or if I fail to take the applicable steps to prevent such transmission of information, I agree to allow Xilinx to collect the information described in Section 13(a) for the purposes described in Section 13(b).
There is a command-line switch, -a or --agree for you to indicate your agreement to each of the above. If one of the above is left out of the list, or the agree switch is not specified, the installer will exit with an error and will not install.
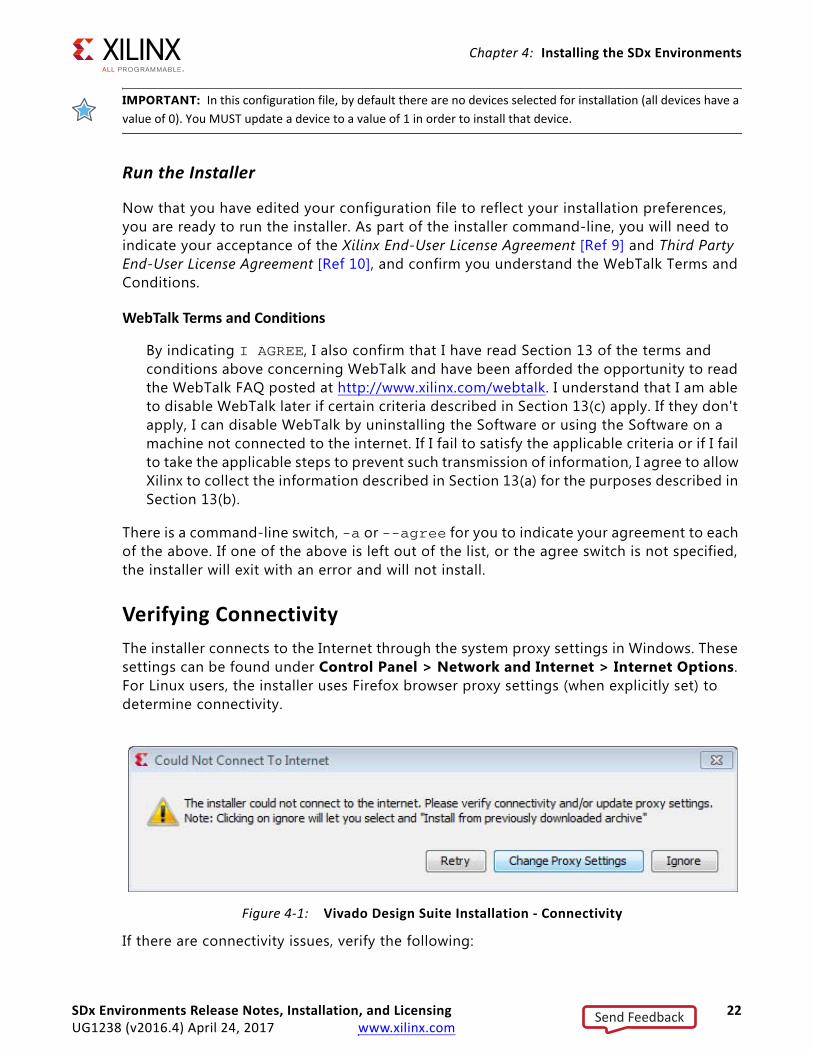
Verifying ConnectivityThe installer connects to the Internet through the system proxy settings in Windows. These settings can be found under Control Panel > Network and Internet > Internet Options. For Linux users, the installer uses Firefox browser proxy settings (when explicitly set) to determine connectivity.
If there are connectivity issues, verify the following:
X-Ref Target - Figure 4-1
Figure 4-1: Vivado Design Suite Installation - Connectivity
SDx Environments Release Notes, Installation, and Licensing 22UG1238 (v2016.4) April 24, 2017 www.xilinx.com
Send Feedback

Chapter 4: Installing the SDx Environments
1. If you are using alternate proxy settings to the ones referred to, select the Manual Proxy Configuration option to specify the settings.
‘
2. Check whether your company firewall requires a proxy authentication with a user name and password. If so, select the Manual Proxy Configuration option in the dialog box above.
3. For Linux users, if either the Use System settings or the Auto detect settings option is selected in the Firefox browser, you must manually set the proxy in installer.
X-Ref Target - Figure 4-2
Figure 4-2: Vivado Design Suite Installation - Change Proxy Settings
SDx Environments Release Notes, Installation, and Licensing 23UG1238 (v2016.4) April 24, 2017 www.xilinx.com
Send Feedback
Chapter 4: Installing the SDx Environments
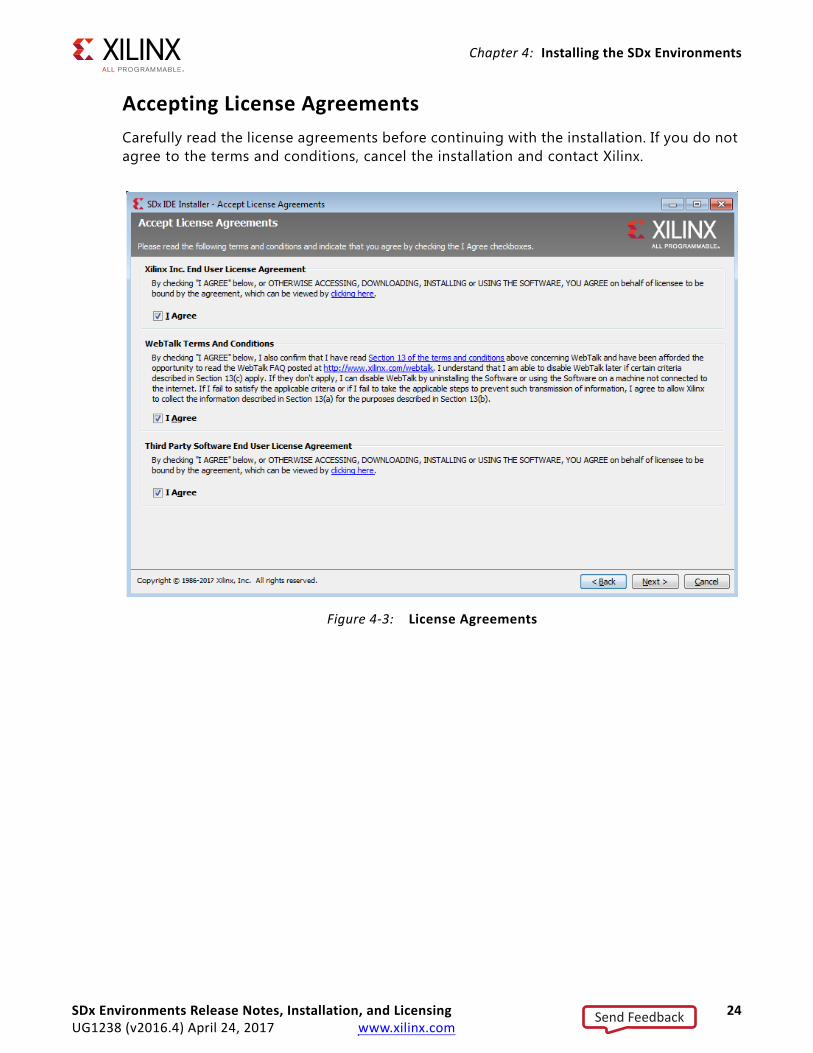
Accepting License AgreementsCarefully read the license agreements before continuing with the installation. If you do not agree to the terms and conditions, cancel the installation and contact Xilinx.X-Ref Target - Figure 4-3
Figure 4-3: License Agreements
SDx Environments Release Notes, Installation, and Licensing 24UG1238 (v2016.4) April 24, 2017 www.xilinx.com
Send Feedback
Chapter 4: Installing the SDx Environments
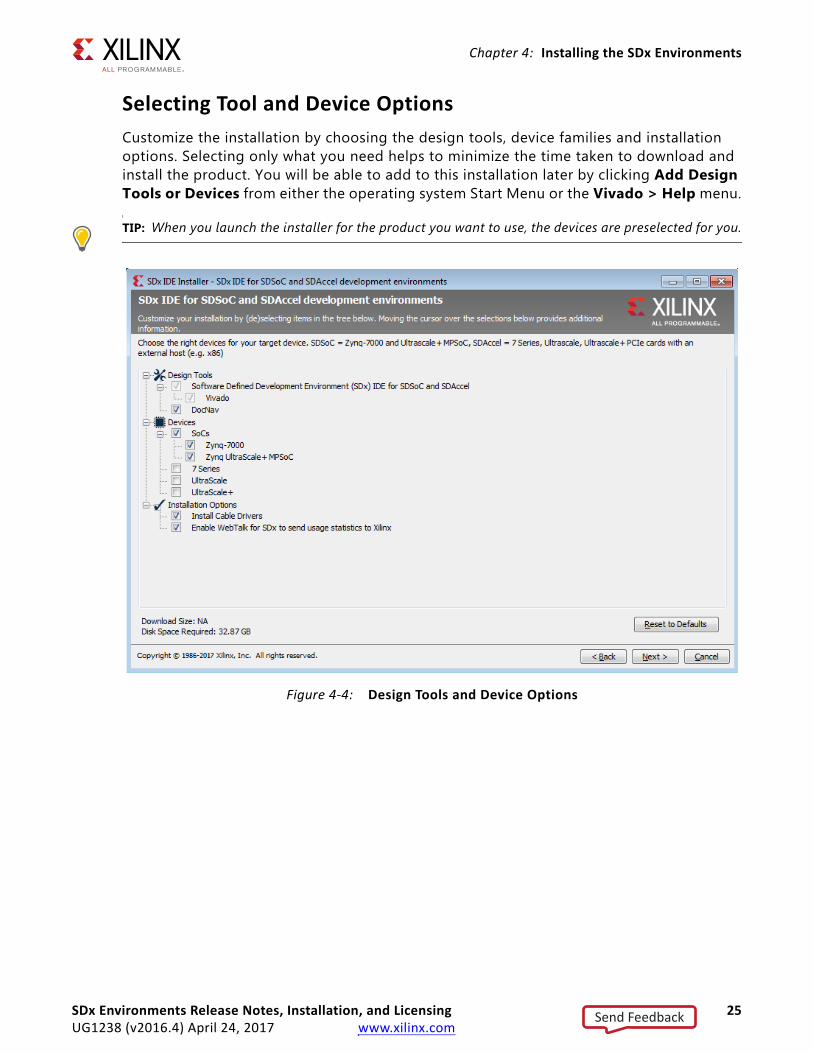
Selecting Tool and Device OptionsCustomize the installation by choosing the design tools, device families and installation options. Selecting only what you need helps to minimize the time taken to download and install the product. You will be able to add to this installation later by clicking Add Design Tools or Devices from either the operating system Start Menu or the Vivado > Help menu.
TIP: When you launch the installer for the product you want to use, the devices are preselected for you.
X-Ref Target - Figure 4-4
Figure 4-4: Design Tools and Device Options
SDx Environments Release Notes, Installation, and Licensing 25UG1238 (v2016.4) April 24, 2017 www.xilinx.com
Send Feedback
Chapter 4: Installing the SDx Environments
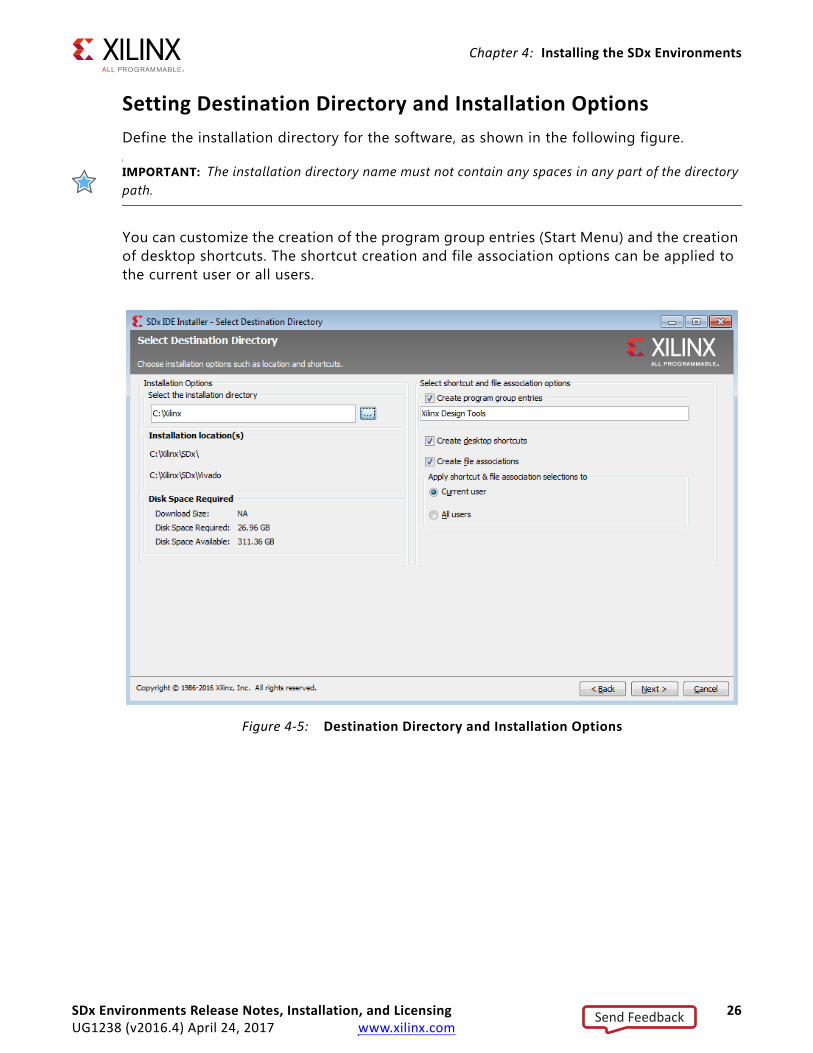
Setting Destination Directory and Installation OptionsDefine the installation directory for the software, as shown in the following figure.
IMPORTANT: The installation directory name must not contain any spaces in any part of the directory path.
You can customize the creation of the program group entries (Start Menu) and the creation of desktop shortcuts. The shortcut creation and file association options can be applied to the current user or all users.X-Ref Target - Figure 4-5
Figure 4-5: Destination Directory and Installation Options
SDx Environments Release Notes, Installation, and Licensing 26UG1238 (v2016.4) April 24, 2017 www.xilinx.com
Send Feedback
Chapter 4: Installing the SDx Environments
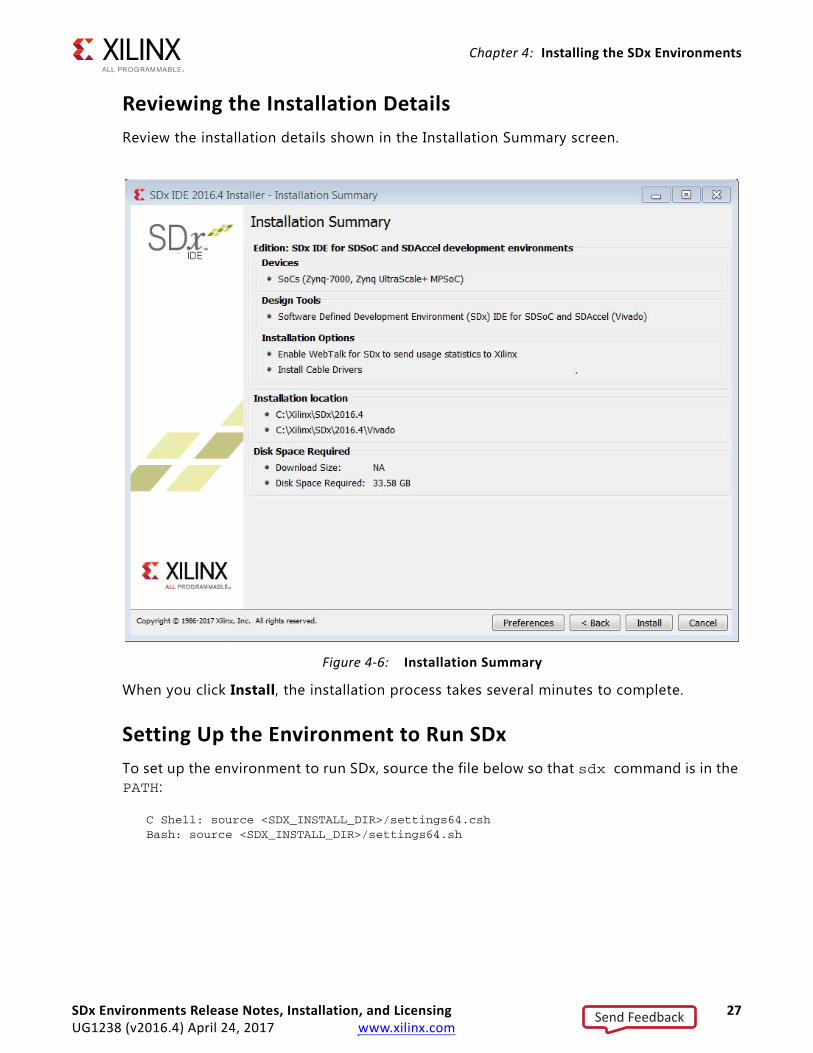
Reviewing the Installation DetailsReview the installation details shown in the Installation Summary screen.
When you click Install, the installation process takes several minutes to complete.
Setting Up the Environment to Run SDxTo set up the environment to run SDx, source the file below so that sdx command is in the PATH:
C Shell: source <SDX_INSTALL_DIR>/settings64.cshBash: source <SDX_INSTALL_DIR>/settings64.sh
X-Ref Target - Figure 4-6
Figure 4-6: Installation Summary
SDx Environments Release Notes, Installation, and Licensing 27UG1238 (v2016.4) April 24, 2017 www.xilinx.com
Send Feedback
Appendix A
Additional Resources and Legal Notices
Xilinx ResourcesFor support resources such as Answers, Documentation, Downloads, and Forums, see Xilinx Support.
Solution CentersSee the Xilinx Solution Centers for support on devices, software tools, and intellectual property at all stages of the design cycle. Topics include design assistance, advisories, and troubleshooting tips.
Documentation Navigator and Design HubsXilinx Documentation Navigator provides access to Xilinx documents, videos, and support resources, which you can filter and search to find information. To open the Xilinx Documentation Navigator (DocNav):
• From the Vivado IDE, select Help > Documentation and Tutorials.
• On Windows, select Start > All Programs > Xilinx Design Tools > DocNav.
• At the Linux command prompt, enter docnav.
Xilinx Design Hubs provide links to documentation organized by design tasks and other topics, which you can use to learn key concepts and address frequently asked questions. To access the Design Hubs:
• In the Xilinx Documentation Navigator, click the Design Hubs View tab.
• On the Xilinx website, see the Design Hubs page.
Note: For more information on Documentation Navigator, see the Documentation Navigator page on the Xilinx website.
SDx Environments Release Notes, Installation, and Licensing 28UG1238 (v2016.4) April 24, 2017 www.xilinx.com
Send Feedback
Appendix A: Additional Resources and Legal Notices
References1. SDAccel Environment Tutorial: Introduction, (UG1021)
2. SDAccel Environment User Guide, (UG1023)
3. SDAccel Environment Optimization Guide, (UG1207)
4. SDSoC Environment Platform Development Guide, (UG1146)
5. Platform Cable USB II Data Sheet, (DS593)
6. Xilinx® licensing website: https://www.xilinx.com/getproduct
7. SDSoC Developer Zone: https://www.xilinx.com/products/design-tools/software-zone/sdsoc.html.
8. SDAccel Developer Zone: http://www.xilinx.com/products/design-tools/software-zone/sdaccel.html
9. Xilinx End-User License Agreement
10. Third Party End-User License Agreement
Please Read: Important Legal NoticesThe information disclosed to you hereunder (the “Materials”) is provided solely for the selection and use of Xilinx products. To the maximum extent permitted by applicable law: (1) Materials are made available "AS IS" and with all faults, Xilinx hereby DISCLAIMS ALL WARRANTIES AND CONDITIONS, EXPRESS, IMPLIED, OR STATUTORY, INCLUDING BUT NOT LIMITED TO WARRANTIES OF MERCHANTABILITY, NON-INFRINGEMENT, OR FITNESS FOR ANY PARTICULAR PURPOSE; and (2) Xilinx shall not be liable (whether in contract or tort, including negligence, or under any other theory of liability) for any loss or damage of any kind or nature related to, arising under, or in connection with, the Materials (including your use of the Materials), including for any direct, indirect, special, incidental, or consequential loss or damage (including loss of data, profits, goodwill, or any type of loss or damage suffered as a result of any action brought by a third party) even if such damage or loss was reasonably foreseeable or Xilinx had been advised of the possibility of the same. Xilinx assumes no obligation to correct any errors contained in the Materials or to notify you of updates to the Materials or to product specifications. You may not reproduce, modify, distribute, or publicly display the Materials without prior written consent. Certain products are subject to the terms and conditions of Xilinx’s limited warranty, please refer to Xilinx’s Terms of Sale which can be viewed at http://www.xilinx.com/legal.htm#tos; IP cores may be subject to warranty and support terms contained in a license issued to you by Xilinx. Xilinx products are not designed or intended to be fail-safe or for use in any application requiring fail-safe performance; you assume sole risk and liability for use of Xilinx products in such critical applications, please refer to Xilinx’s Terms of Sale which can be viewed at http://www.xilinx.com/legal.htm#tos.
AUTOMOTIVE APPLICATIONS DISCLAIMERAUTOMOTIVE PRODUCTS (IDENTIFIED AS “XA” IN THE PART NUMBER) ARE NOT WARRANTED FOR USE IN THE DEPLOYMENT OF AIRBAGS OR FOR USE IN APPLICATIONS THAT AFFECT CONTROL OF A VEHICLE (“SAFETY APPLICATION”) UNLESS THERE IS A SAFETY CONCEPT OR REDUNDANCY FEATURE CONSISTENT WITH THE ISO 26262 AUTOMOTIVE SAFETY STANDARD (“SAFETY DESIGN”). CUSTOMER SHALL, PRIOR TO USING OR DISTRIBUTING ANY SYSTEMS THAT INCORPORATE PRODUCTS, THOROUGHLY TEST SUCH SYSTEMS FOR SAFETY PURPOSES. USE OF PRODUCTS IN A SAFETY APPLICATION WITHOUT A SAFETY DESIGN IS FULLY AT THE RISK OF CUSTOMER, SUBJECT ONLY TO APPLICABLE LAWS AND REGULATIONS GOVERNING LIMITATIONS ON PRODUCT LIABILITY.
© Copyright 2016-2017 Xilinx, Inc. Xilinx, the Xilinx logo, Artix, ISE, Kintex, Spartan, Virtex, Vivado, Zynq, and other designated brands included herein are trademarks of Xilinx in the United States and other countries. OpenCL and the OpenCL logo are trademarks of Apple Inc. used by permission by Khronos. All other trademarks are the property of their respective owners
SDx Environments Release Notes, Installation, and Licensing 29UG1238 (v2016.4) April 24, 2017 www.xilinx.com
Send Feedback