Scottish Dental cep Clinical Effectiveness Programme · Scottish Dental Clinical Effectiveness...
34
Cleaning of Dental Instruments Dental Clinical Guidance Second Edition Scottish Dental Clinical Effectiveness Programme SD cep October 2014
Transcript of Scottish Dental cep Clinical Effectiveness Programme · Scottish Dental Clinical Effectiveness...

Cleaning of Dental InstrumentsDental Clinical Guidance
Second Edition
The Scottish Dental Clinical Effectiveness Programme (SDCEP) is an
initiative of the National Dental Advisory Committee in partnership with
NHS Education for Scotland. The Programme aims to provide user-friendly,
evidence-based guidance on topics identified as priorities for oral health
care.
SDCEP guidance aims to support improvements in patient care by bringing
together, in a structured manner, the best available information that is
relevant to the topic, and presenting this information in a form that can be
interpreted easily and implemented.
Cleaning of Dental Instruments is the first part of the SDCEP series
Decontamination Into Practice, which aims to support compliance with
relevant statutory and mandatory requirements and standards. Cleaning of Dental Instruments provides advice on all aspects of cleaning, including
organisation within the local decontamination unit, cleaning methods and
testing of equipment.
© Scottish Dental Clinical Effectiveness ProgrammeSDCEP operates within NHS Education for Scotland. You may copy or reproduce the information in this document for use within NHS Scotland and for non-commercial educational purposes. Use of this document for commercial purpose is permitted only with written permission.
ISBN 978 1 905829 20 0
Scottish Dental Clinical Effectiveness ProgrammeDundee Dental Education Centre, Frankland Building, Small’s Wynd, Dundee DD1 4HN
Email [email protected] 01382 425751 / 425771Website www.sdcep.org.uk
Scottish DentalClinical Effectiveness Programme SDcep
October 2014
Text Box
Last reviewed January 2016 No substantive changes to the legislation, regulations or generic national guidance on which the current SDCEP Decontamination Into Practice guidance is based were found. This guidance remains unchanged and extant until the next review.

Scottish DentalClinical Effectiveness Programme SDcep
The Scottish Dental Clinical Effectiveness Programme (SDCEP) is
an initiative of the National Dental Advisory Committee (NDAC) in
partnership with NHS Education for Scotland. The Programme provides
user-friendly, evidence-based guidance on topics identified as priorities
for oral health care.
SDCEP guidance aims to support improvements in patient care by
bringing together, in a structured manner, the best available information
that is relevant to the topic and presenting this information in a form
that can be interpreted easily and implemented.
Supporting the provision of safe, effective, person-centred care.
Scottish DentalClinical Effectiveness Programme SDcep
Cleaning of Dental InstrumentsDental Clinical Guidance
Second EditionDecontamination Into Practice: Part 1
October 2014
Text Box
Last reviewed January 2016 No substantive changes to the legislation, regulations or generic national guidance on which the current SDCEP Decontamination Into Practice guidance is based were found. This guidance remains unchanged and extant until the next review.
© Scottish Dental Clinical Effectiveness ProgrammeSDCEP operates within NHS Education for Scotland. You may copy or reproduce the information in this document for use within NHS Scotland and for non-commercial educational purposes. Use of this document for commercial purpose is permitted only with written permission.ISBN 978 1 905829 20 0First published 2007Second edition published October 2014
Scottish Dental Clinical Effectiveness ProgrammeDundee Dental Education Centre, Frankland Building, Small’s Wynd, Dundee DD1 4HN
Email [email protected] 01382 425751 / 425771Website www.sdcep.org.uk
iii
Cleaning of Dental Instruments
1 Introduction 1
2 Organising Cleaning Within the Local Decontamination Unit 2
2.1 Purchasing Instruments and Training Staff 2 2.2 Setting Up a Local Decontamination Unit 2 2.3 Hand Hygiene 4 2.3.1 Good Practice Points 4
3 Before Cleaning 6
3.1 During Treatment 6 3.2 Taking Instruments to the Local Decontamination Unit 6 3.3 Segregating Instruments 7 3.4 Items for Disposal 8 3.5 Reusable Instruments 9 3.6 Items Unsuitable for Immersion 9
4 Cleaning Methods 10
4.1 General Requirements 10 4.2 Washer-disinfectors 11 4.2.1 Points to Consider Before Purchasing a Washer-disinfector 12 4.2.2 Using a Washer-disinfector 13 4.3 Ultrasonic Cleaning 14 4.3.1 Points to Consider Before Purchasing an Ultrasonic Cleaner 15 4.3.2 Ultrasonic Cleaning Procedure 15 4.4 Manual Cleaning 17 4.4.1 Workflow and Facilities 17 4.4.2 Cleaning Procedure 17 4.4.3 Avoiding Instrument Damage 18
5 Rinsing, Drying, Inspection and Care of Instruments 19
5.1 Rinsing and Drying of Instruments after Cleaning 19 5.2 Inspection and Care of Instruments before Sterilizing 19 5.2.1 Inspection for Cleanliness and Functionality 19 5.2.2 Lubrication 20 5.2.3 Handpiece Care 20 5.3 Out-of-hours Use of Instruments 21
6 Validation, Periodic Testing and Maintenance of Cleaning Equipment 22
6.1 Washer-disinfectors 22 6.1.1 Installation and Validation22 6.1.2 Testing 22 6.1.3 Housekeeping and Maintenance 24 6.2 Ultrasonic Cleaners 25 6.2.1 Installation and validation 25 6.2.1 Testing 25 6.2.2 Housekeeping and Maintenance 25
Cleaning of Dental Instruments

iv
Cleaning of Dental Instruments
1
Cleaning of Dental Instruments
Decontamination Into Practice is part of a national initiative to promote and standardise good instrument decontamination practice in dental primary care.
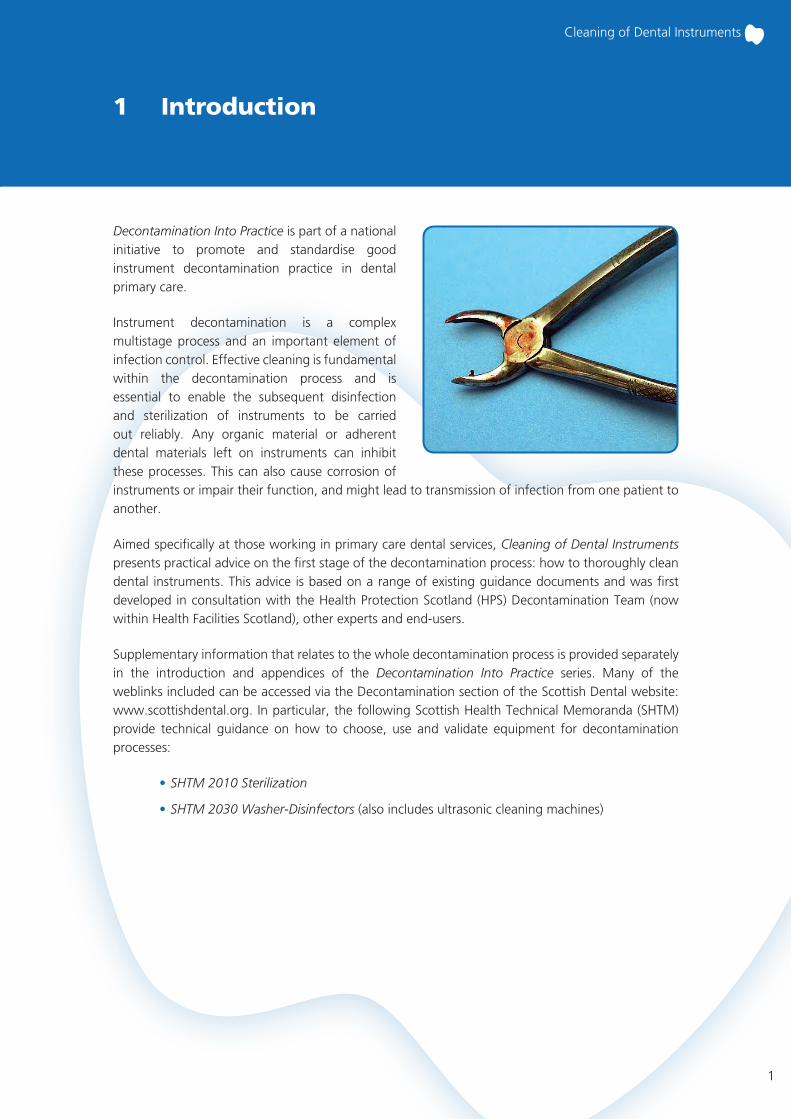
Instrument decontamination is a complex multistage process and an important element of infection control. Effective cleaning is fundamental within the decontamination process and is essential to enable the subsequent disinfection and sterilization of instruments to be carried out reliably. Any organic material or adherent dental materials left on instruments can inhibit these processes. This can also cause corrosion of instruments or impair their function, and might lead to transmission of infection from one patient to another.
Aimed specifically at those working in primary care dental services, Cleaning of Dental Instruments presents practical advice on the first stage of the decontamination process: how to thoroughly clean dental instruments. This advice is based on a range of existing guidance documents and was first developed in consultation with the Health Protection Scotland (HPS) Decontamination Team (now within Health Facilities Scotland), other experts and end-users.
Supplementary information that relates to the whole decontamination process is provided separately in the introduction and appendices of the Decontamination Into Practice series. Many of the weblinks included can be accessed via the Decontamination section of the Scottish Dental website: www.scottishdental.org. In particular, the following Scottish Health Technical Memoranda (SHTM) provide technical guidance on how to choose, use and validate equipment for decontamination processes:
•SHTM 2010 Sterilization
•SHTM 2030 Washer-Disinfectors (also includes ultrasonic cleaning machines)
1 Introduction
Cleaning of Dental Instruments
2
2 Organising Cleaning Within the Local Decontamination Unit
2.1 Purchasing Instruments and Training Staff
Before buying instruments:
•check the manufacturer’s decontamination instructions to ensure that the instruments can be decontaminated with the equipment and facilities that you have available, or buy single-use instruments;
•give preference to buying instruments that can be cleaned using a washer-disinfector.
Train all staff in the basics of infection control procedures, including:
•how infections are transmitted;
•how to prevent transmission of infections;
•what to do in the event of an accident or personal injury;
•your practice policy on infection control.
Ensure staff are fully vaccinated against hepatitis B.
For staff involved in cleaning instruments, give practical training in all stages of the decontamination process.
Record and retain details of all staff training.
Ensure personal protective equipment (PPE) (i.e. gloves, protective facewear, eye protection, plastic disposable aprons and adequate footwear) is available and worn.
2.2 Setting Up a Local Decontamination Unit
When setting up new premises or planning significant modification to existing premises, if space allows, a local decontamination unit (LDU) separate from the patient treatment area(s) that comprises two rooms should be considered: one for dirty activity (the Wash Room) and one for clean activity (inspection, sterilization and wrapping instruments – the Sterilization Room).
A single room LDU is acceptable for general dental practice. In this situation, as the clean and dirty activity is undertaken in the same room, tight procedural control is required.
A single room LDU preferably comprises a single run of sealed, easily cleaned worktop with the following items arranged in the order listed:
•a separate hand-washing facility with PPE storage;
•a setting-down area for dirty instruments;
•a washing sink with detergent for cleaning instruments;
•a setting-down area for washed instruments;
•an ultrasonic cleaner, if appropriate (see Sections 4 and 6);
•a rinsing sink;
Cleaning of Dental Instruments
3
Cleaning of Dental Instruments
•a setting-down area for rinsed instruments;
•an automated washer-disinfector (includes drying cycle);
•a setting-down area with task lighting and magnifier for inspection of all instruments and, if appropriate a dental handpiece lubricator (see Section 5.2.3);
•an area for wrapping instruments (only if a vacuum sterilizer is to be used);
•a steam sterilizer;
•an area for setting down and wrapping instruments sterilized in a non-vacuum sterilizer.
Instruments are stored prior to use in a clean, orderly, enclosed storage area (not open shelving that ideally is located in an area separate from the LDU. There should be a specific area for administration.
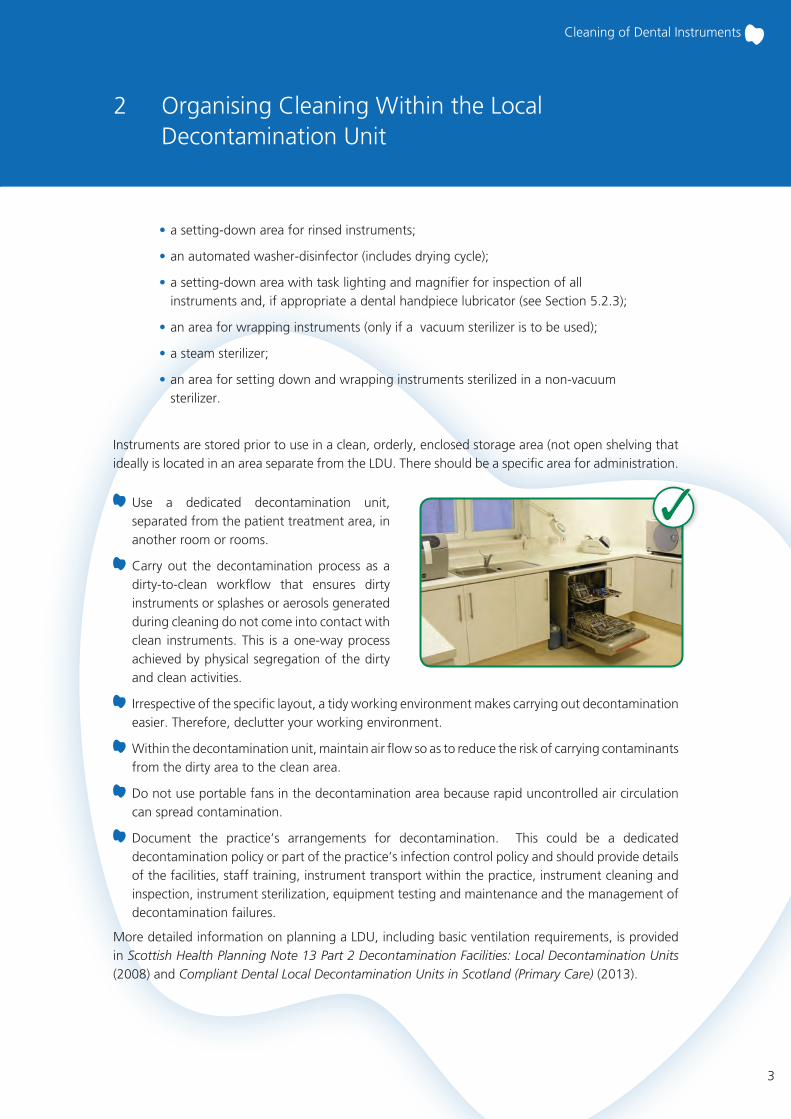
Use a dedicated decontamination unit, separated from the patient treatment area, in another room or rooms.
Carry out the decontamination process as a dirty-to-clean workflow that ensures dirty instruments or splashes or aerosols generated during cleaning do not come into contact with clean instruments. This is a one-way process achieved by physical segregation of the dirty and clean activities.
Irrespective of the specific layout, a tidy working environment makes carrying out decontamination easier. Therefore, declutter your working environment.
Within the decontamination unit, maintain air flow so as to reduce the risk of carrying contaminants from the dirty area to the clean area.
Do not use portable fans in the decontamination area because rapid uncontrolled air circulation can spread contamination.
Document the practice’s arrangements for decontamination. This could be a dedicated decontamination policy or part of the practice’s infection control policy and should provide details of the facilities, staff training, instrument transport within the practice, instrument cleaning and inspection, instrument sterilization, equipment testing and maintenance and the management of decontamination failures.
More detailed information on planning a LDU, including basic ventilation requirements, is provided in Scottish Health Planning Note 13 Part 2 Decontamination Facilities: Local Decontamination Units (2008) and Compliant Dental Local Decontamination Units in Scotland (Primary Care) (2013).
2 Organising Cleaning Within the Local Decontamination Unit
Cleaning of Dental Instruments
4
2.3 Hand Hygiene
Hand hygiene is crucial in preventing the spread of infection.
Gloves are not a substitute for hand hygiene. Therefore, perform hand hygiene before and after using gloves.
2.3.1 Good Practice Points
Staff
Keep nails short and clean. Do not wear artificial nails or extensions or nail varnish if working in the clinical environment, including the decontamination unit.
Cover all cuts and abrasions with a waterproof dressing.
Remove wrist and hand jewellery, including wrist watches, before working in the clinical environment or the decontamination unit. A plain metal finger ring is acceptable but this must be moved or removed when performing hand hygiene to ensure the area under the ring is cleaned and dried thoroughly.
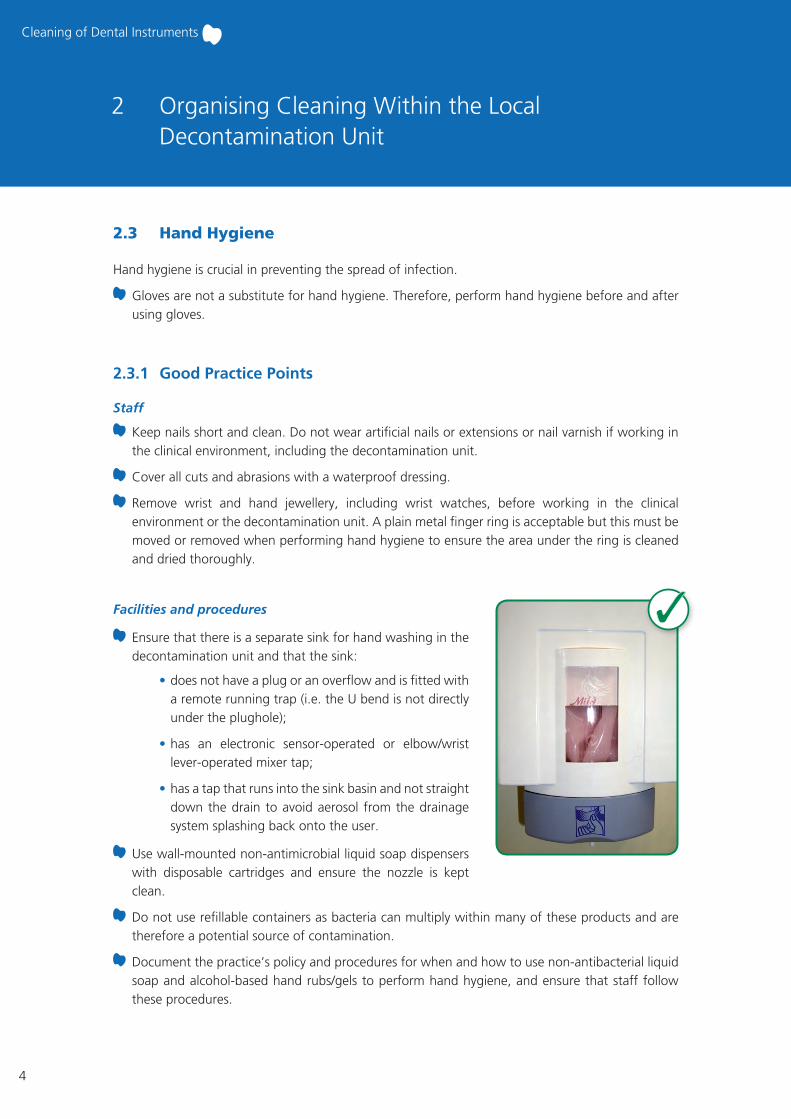
Facilities and procedures
Ensure that there is a separate sink for hand washing in the decontamination unit and that the sink:
•does not have a plug or an overflow and is fitted with a remote running trap (i.e. the U bend is not directly under the plughole);
•has an electronic sensor-operated or elbow/wrist lever-operated mixer tap;
•has a tap that runs into the sink basin and not straight down the drain to avoid aerosol from the drainage system splashing back onto the user.
Use wall-mounted non-antimicrobial liquid soap dispensers with disposable cartridges and ensure the nozzle is kept clean.
Do not use refillable containers as bacteria can multiply within many of these products and are therefore a potential source of contamination.
Document the practice’s policy and procedures for when and how to use non-antibacterial liquid soap and alcohol-based hand rubs/gels to perform hand hygiene, and ensure that staff follow these procedures.
2 Organising Cleaning Within the Local Decontamination Unit
Cleaning of Dental Instruments
5
Cleaning of Dental Instruments
Apply non-antimicrobial liquid soap to wet hands to reduce the risk of irritation, and wash all surfaces of the hands thoroughly before rinsing under running water.
Do not use bar soap.
Do not use scrub or nail brushes because these can cause abrasion of the skin, and can be a source of infection.
Use paper hand-towels and dispose of in foot-operated or sensor-operated waste bins.
Ensure your paper towels and drying technique do not damage the skin.
Use a hand cream following hand washing at the end of a session to counteract dryness but do not use hand cream under gloves because this can encourage growth of microorganisms.
Alcohol-based hand rubs/gels formulated for use without water can be used on visibly clean hands following manufacturer’s instructions.
•Follow local infection control guidance or manufacturers’ instructions on the maximum number of applications of alcohol-based hand rubs/gels that can be used on physically clean hands before hand washing is required. Be aware that build-up of product on the hands occurs with repeated application.
Do not use alcohol-impregnated wipes as a substitute for alcohol-based hand rubs/gels.
Health Protection Scotland’s National Infection Prevention and Control Manual includes step-by-step illustrated guides for hand washing and use of alcohol-based hand rubs.
Moving from dirty to clean areas
During the decontamination process, hands should be cleaned between dirty and clean activities. PPE should be changed and hand hygiene performed.
Ensure your local infection control or decontamination policy specifies when PPE is to be worn and changed.
2 Organising Cleaning Within the Local Decontamination Unit
Cleaning of Dental Instruments

6
3 Before Cleaning
Have in place written procedures for instrument decontamination that include transport and segregation of instruments, each cleaning method used in the practice and details of equipment used based on manufacturers’ instructions.
Train staff in how to prepare properly for decontamination, including transporting contaminated instruments, disposing of single-use items correctly, recognising the range of reusable devices used in the practice, how to dismantle instruments, where appropriate, and selecting the correct cleaning method for each instrument (see below and Section 4).
Remember to include new instruments in staff training and keep staff training records up to date.
Draw up and follow a written waste disposal policy. For further information refer to the SDCEP Practice Support Manual.
3.1 During Treatment
Keep your standard kits to a minimum. Do not put out instruments you do not need.
Regard all instruments set out for each patient as contaminated after the treatment whether or not they have been used.
When working with substances that can harden on instruments (e.g. cements), wipe reusable instruments immediately with a non-linting swab.
•To avoid risk of sharps injuries, it is the operator’s responsibility to ensure that residues are removed from sharp hand instruments used in the patient’s mouth, such as scalers.
3.2 Taking Instruments to the Local Decontamination Unit
Transport instruments to the LDU as soon as possible so that decontamination can begin with minimum delay.
Use a rigid, durable, leak-proof container that has a tight-fitting lid and is easy to clean and disinfect.
Ensure that containers for transporting dirty instruments are clearly distinguishable from those used for clean instruments, for example by colour coding or with permanent labelling.
Ideally, clean containers in a washer-disinfector (WD). If this is not possible, clean with a fresh detergent solution, rinse and dry. Do not use bleach or hypochlorite solution because residues might damage the instruments.
Cleaning of Dental Instruments
7
Cleaning of Dental Instruments
3 Before Cleaning
Further advice on transporting instruments is provided within Local Decontamination Units: Guidance on the Requirements for Equipment, Facilities and Management (2007) and Scottish Health Planning Note 13 Part 2 Decontamination Facilities: Local Decontamination Units (2008).
3.3 Segregating Instruments
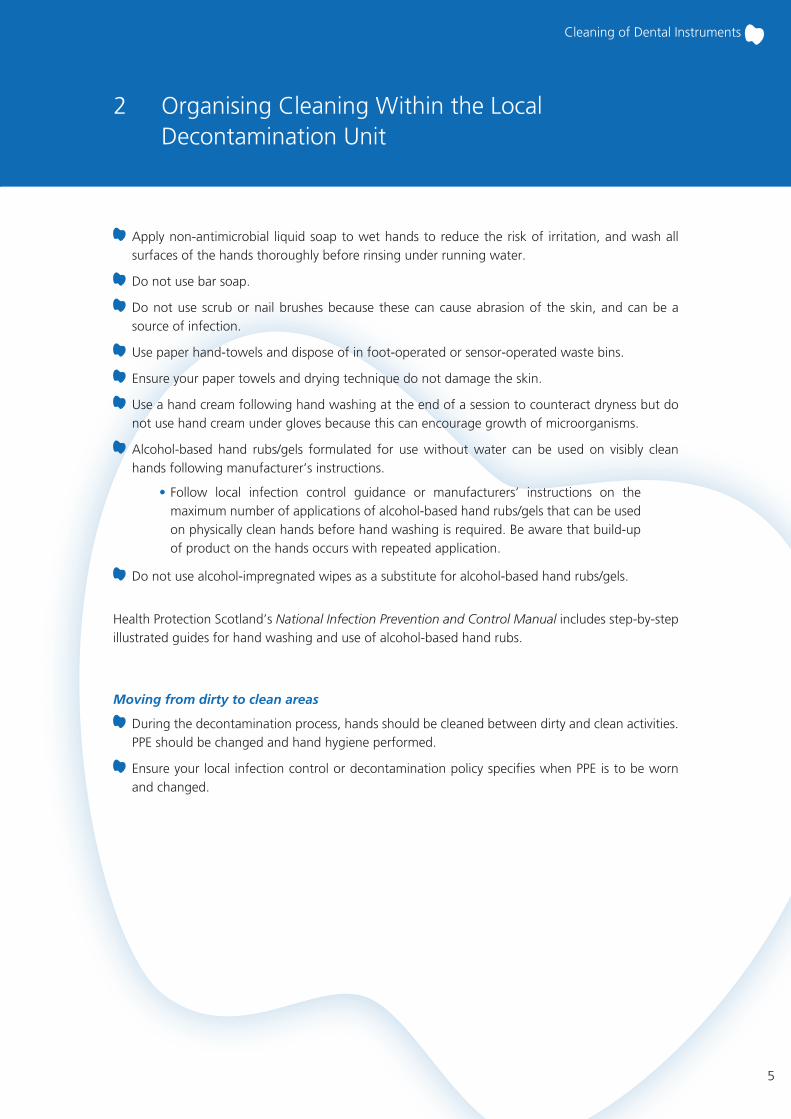
A used dental kit contains a wide variety of instruments and contaminated material.
Following clinical procedures, segregate disposable and reusable items.
Dispose of all disposable items in the clinical area.
Place reusable items in the appropriate transport container to be transferred to the LDU for decontamination.
Cleaning of Dental Instruments

8
3.4 Items for Disposal
Shown below is the symbol that identifies single-use items. This symbol identifies the device as disposable and not intended to be reprocessed for use on the same or another patient. This will appear on packaging but might not be present on individual items.
Always check packaging for the single-use symbol before use and note that it might be difficult to see, as indicated in the photographs.
Use single-use instruments only on an individual patient during a single procedure and then discard. The re-use of a single-use device has legal implications. Anyone who reprocesses or re-uses a device intended for use on a single occasion bears full responsibility for its safety and effectiveness.
Health Facilities Scotland (HFS) has provided guidance for NHSScotland on waste management in Scottish Health Technical Note 3, including an overview of best practice, policy and procedures. Healthcare waste (including clinical waste) is now categorised as a type of special waste and an additional colour-coded stream (Red) has been introduced for individual potentially toxic products (e.g. dental radiography chemicals, amalgam and amalgam-filled teeth) that require specialized disposal. These regulations specify the labelling and paperwork associated with clinical waste.
Ensure that appropriate waste containers are available for all types of waste (i.e. paper, plastic or special waste, including sharps).
•Assemble all colour-coded waste-disposal containers correctly before use and ensure the lids are firmly clicked into place. A large number of sharps injuries are caused by containers separating when in use.
•Check with your local waste contractor to ensure that all your colour-coded waste containers and labels comply with the latest HFS guidance.
3 Before Cleaning
Cleaning of Dental Instruments

9
Cleaning of Dental Instruments
3 Before Cleaning
Dispose of single-use items according to their category (as outlined in your waste disposal policy).
• Identify and dispose of single-use sharps, matrix bands, used and partly used local anaesthetic cartridges in Yellow Stream waste-disposal containers (formerly known as sharps bins) kept close to the point of use.
•Dispose of amalgam and extracted teeth without amalgam into a designated Red Stream waste-disposal container that is clearly labelled for amalgam waste.
•Dispose of extracted teeth containing amalgam into a separate Red Stream container that is clearly labelled for extracted teeth with amalgam.
•Do not fill colour-coded waste-disposal containers above the specified level.
3.5 Reusable Instruments
Decontaminate all reusable instruments according to manufacturers’ instructions. Some instruments will require to be dismantled before cleaning.
After these steps, instruments should be cleaned in a washer-disinfector according to manufacturers’ instructions. For heavily soiled instruments, pre-cleaning might be necessary either by submerging instruments in cold water or by using an ultrasonic cleaner.
3.6 Items Unsuitable for Immersion
Identify items that cannot be immersed in aqueous solution or processed in a washer disinfector and clean them according to manufacturers’ instructions.
Cleaning of Dental Instruments
10
Three methods of cleaning reusable dental instruments are currently available:
•washer-disinfector (WD);
•ultrasonic cleaning;
•manual cleaning.
The use of a WD is the preferred method of cleaning as it includes a thermal disinfection stage that renders instruments safe for handling and inspection and is an automated process that can be validated.
4.1 General Requirements
Selecting a method of cleaning: Unless manufacturers’ instructions state otherwise, clean instruments in a WD. Maintain a list of instruments to be cleaned by each method..
Staff training: Train all practice staff involved in cleaning dental instruments so that they:
•understand the key principles and importance of effective cleaning;
•are able to use all cleaning methods and decontamination equipment in your practice properly and safely;
•can perform periodic testing and housekeeping of the equipment and maintain accurate records (see Section 6 for details).
Validation: Validation is the means by which an entire process is documented, tested and able to be repeated. Ensure washer-disinfectors and ultrasonic cleaners used in your practice are validated. This is to demonstrate that all items cleaned by these methods are reliably and consistently cleaned using predetermined and reproducible conditions (see Section 6 for details).
Hepatitis B vaccination: Ensure staff are fully vaccinated against hepatitis B.
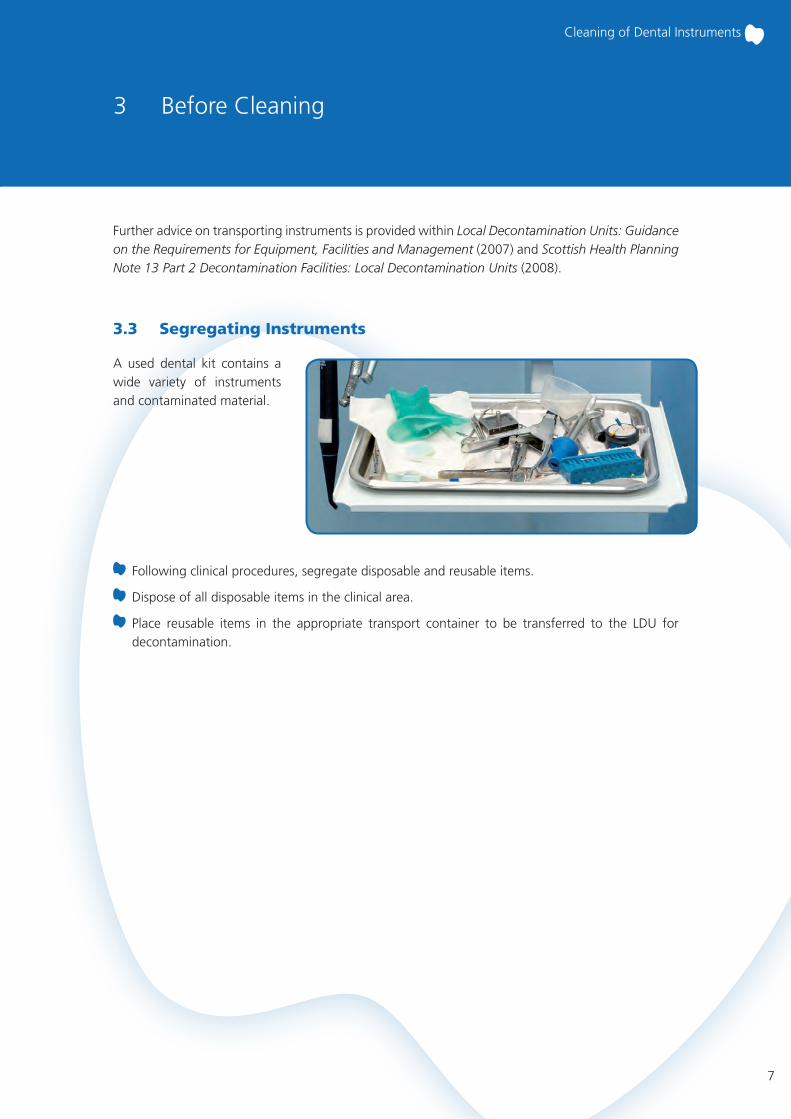
Personal protective equipment (PPE): PPE provides a protective barrier against the spread of infections through contact with blood or body fluids either directly or via splatter or aerosol spray. Wear PPE that is appropriate to the cleaning method e.g. household gloves, facemasks, eye protection, plastic disposable aprons and adequate footwear are required for manual cleaning. Include this information in the practice’s COSHH assessment of blood, saliva and other biological materials. Wash household gloves with detergent and hot water and dry after each use to remove visible soil. Replace these gloves regularly or if worn or torn or if there is any difficulty in removing soil.
4 Cleaning Methods
Cleaning of Dental Instruments

11
Cleaning of Dental Instruments
4 Cleaning Methods
4.2 Washer-disinfectors
Use of a washer-disinfector (WD) is a requirement for compliant reprocessing of dental instruments in a LDU [Compliant Dental Local Decontamination Units in Scotland (Primary Care) (2013)]. Using a washer-disinfector is the preferred method for cleaning dental instruments because it offers the best option for the control and reproducibility of cleaning, and the cleaning process can be validated. WDs are used to carry out the processes of cleaning and disinfection consecutively. A typical WD cycle for instruments includes the following five stages:
Flush – Removes ‘difficult’ gross contamination, including blood, tissue debris, bone fragments and other fluid and solid debris. Latest standards indicate that a water temperature of <45°C is used to prevent protein coagulation and fixing of soil to the instrument.
Wash – Removes any remaining soil. Mechanical and chemical processes loosen and break up contamination adhering to the instrument surface. Detergents used in this process must be specified by the manufacturer as suitable for use in a WD.
Rinse – Removes detergent used during the cleaning process. This stage can contain several sub-stages.
Thermal disinfection – The temperature of the load is raised and held at the pre-set disinfection temperature for the required disinfection holding time: for example, 80˚C for 10 minutes, or 90˚C for 1 minute.
Drying – Purges the load and chamber with heated air to remove residual moisture.
The cycle time depends on the model of the WD.
It is essential that each WD is correctly installed, validated, operated, maintained and regularly tested to ensure it is safe, is cleaning dental instruments effectively and to protect your rights should any clinical or decontamination equipment failures occur.
Install and validate each washer-disinfector in accordance with the current technical guidance (SHTM 2030).
Ensure periodic testing, maintenance and operation of each washer-disinfector is in accordance with the manufacturer’s instructions.
Ensure staff are trained in the operation of the washer-disinfectors, including testing.
Keep records of all of these activities.
Cleaning of Dental Instruments

12
4.2.1 Points to Consider Before Purchasing a Washer-disinfector
Different models of WDs are available that vary in size, design and capacity. Pass-through models have doors on two sides, which can facilitate the dirty-to-clean work-flow between the Wash Room and the Sterilization Room in a two room LDU.
NHS National Services Scotland negotiates a national contract for LDU equipment. This includes several washer-disinfectors and gives details of the additional costs for installation, commissioning, testing and maintenance. As items are added periodically, it is important to check the contract for the latest information.
All GDC registered dentists in Scotland can view the contract via the Catalogue Content Management (https://scot-ccm.eurodyn.com/ccm/). Email [email protected] to request login details. The suppliers listed on the national contract need to be contacted directly to purchase equipment.
Health Facilities Scotland and the Chief Dental Officer recommend that all decontamination equipment (ultrasonic cleaners, washer-disinfectors and sterilizers) is purchased using the national contract as a guide. Purchase of the additional installation, commissioning, testing and maintenance package will ensure that current specifications are met.
Consult the LDU equipment contract via Catalogue Content Management to inform purchasing decisions and consider quoting it to the supplier when buying new equipment.
Ensure recommendations from instrument manufacturers are in accordance with those of the washer-disinfector and detergent manufacturer.
If any instruments you are considering buying cannot be satisfactorily decontaminated using a washer-disinfector, source alternatives that can be decontaminated using this method.
Considerations for cleaning handpieces
Check handpiece and WD manufacturers’ instructions to confirm that handpieces can be cleaned in your WD and for the correct procedure. However, note that there is little published research to demonstrate the efficacy of the cleaning of the internal mechanism of handpieces by this method.
WDs might remove all lubricant during the cleaning cycle and so handpieces might require further lubrication after cleaning. Follow the handpiece manufacturer’s recommendations for lubrication. Consider the use of automated handpiece lubrication equipment. These machines are not validated for cleaning and do not disinfect. However, their use may prolong handpiece life and can be particularly useful after handpieces are cleaned in a washer-disinfector.
4 Cleaning Methods
Some manufacturers mark handpieces with the symbol on the left
to indicate that they can be cleaned in a washer-
disinfector
Cleaning of Dental Instruments
13
Cleaning of Dental Instruments
4 Cleaning Methods
Practice resources
Using a WD requires several resources, including:
•appropriate staff training in operating the WD (e.g. on installation)
•adequate space and provision of utilities (drainage, water, electricity)
•compatible instruments and tray systems
•a sufficient quantity of instruments
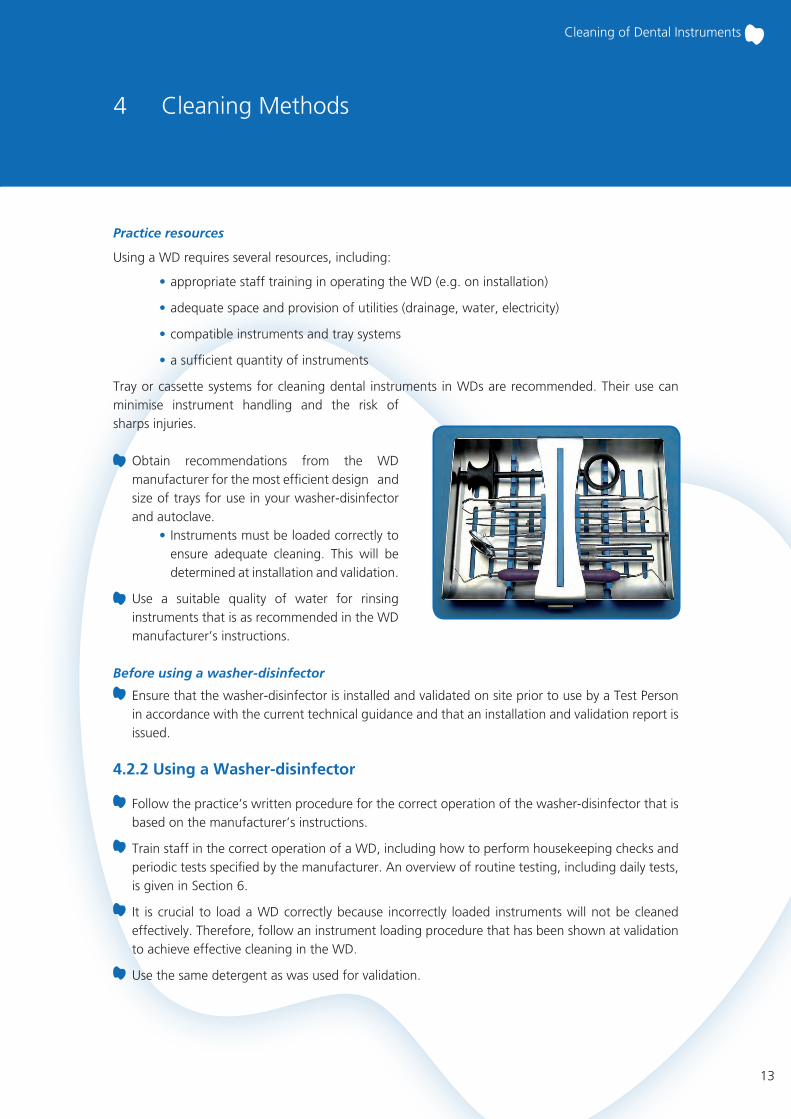
Tray or cassette systems for cleaning dental instruments in WDs are recommended. Their use can minimise instrument handling and the risk of sharps injuries.
Obtain recommendations from the WD manufacturer for the most efficient design and size of trays for use in your washer-disinfector and autoclave.
• Instruments must be loaded correctly to ensure adequate cleaning. This will be determined at installation and validation.
Use a suitable quality of water for rinsing instruments that is as recommended in the WD manufacturer’s instructions.
Before using a washer-disinfector
Ensure that the washer-disinfector is installed and validated on site prior to use by a Test Person in accordance with the current technical guidance and that an installation and validation report is issued.
4.2.2 Using a Washer-disinfector
Follow the practice’s written procedure for the correct operation of the washer-disinfector that is based on the manufacturer’s instructions.
Train staff in the correct operation of a WD, including how to perform housekeeping checks and periodic tests specified by the manufacturer. An overview of routine testing, including daily tests, is given in Section 6.
It is crucial to load a WD correctly because incorrectly loaded instruments will not be cleaned effectively. Therefore, follow an instrument loading procedure that has been shown at validation to achieve effective cleaning in the WD.
Use the same detergent as was used for validation.
Cleaning of Dental Instruments
14
4 Cleaning Methods
In general:
•do not overload instrument carriers or overlap instruments;
•open instrument hinges and joints fully;
•use appropriate instrument carriers and trays for use in the WD
Record whether each cycle was satisfactory (e.g. check and sign printouts and keep them as a record).
•Printouts can be scanned in batches to store electronically.
After processing in a WD, inspect instruments for cleanliness and, where possible, check functionality as described in Section 5, before sterilization.
4.3 Ultrasonic Cleaning
Use of a washer-disinfector (WD) is a requirement for compliant reprocessing of dental instruments in a LDU.
Although not an essential requirement, an ultrasonic cleaner can be useful for removal of debris prior to processing in a WD, particularly from instruments with hinges and/or intricate parts. Ultrasonic cleaning may also be used as a backup automated cleaning process in the event of WD failure. It is essential that ultrasonic cleaners are shown to be effective through regular testing and maintenance.
To enable consistent cleaning of instruments, follow the manufacturer’s operating instructions and ensure all staff use a specified and documented operating procedure (see Section 4.3.2).
Do not use ultrasonic cleaners to clean dental handpieces.
Test your ultrasonic cleaner as specified in the manufacturer’s instructions to ensure that it is fully functional (see Section 6).
Cleaning of Dental Instruments
15
Cleaning of Dental Instruments
4 Cleaning Methods
4.3.1 Points to Consider Before Purchasing an Ultrasonic Cleaner
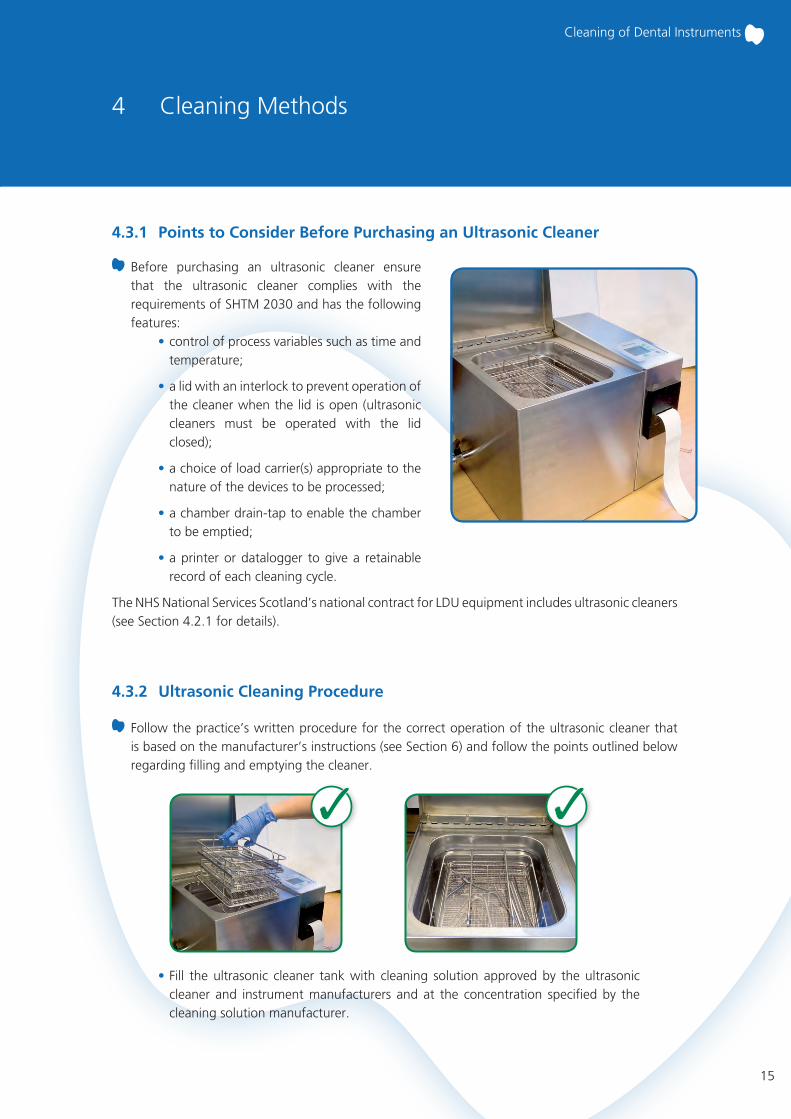
Before purchasing an ultrasonic cleaner ensure that the ultrasonic cleaner complies with the requirements of SHTM 2030 and has the following features:
•control of process variables such as time and temperature;
•a lid with an interlock to prevent operation of the cleaner when the lid is open (ultrasonic cleaners must be operated with the lid closed);
•a choice of load carrier(s) appropriate to the nature of the devices to be processed;
•a chamber drain-tap to enable the chamber to be emptied;
•a printer or datalogger to give a retainable record of each cleaning cycle.
The NHS National Services Scotland’s national contract for LDU equipment includes ultrasonic cleaners (see Section 4.2.1 for details).
4.3.2 Ultrasonic Cleaning Procedure
Follow the practice’s written procedure for the correct operation of the ultrasonic cleaner that is based on the manufacturer’s instructions (see Section 6) and follow the points outlined below regarding filling and emptying the cleaner.
•Fill the ultrasonic cleaner tank with cleaning solution approved by the ultrasonic cleaner and instrument manufacturers and at the concentration specified by the cleaning solution manufacturer.
Cleaning of Dental Instruments

16
4 Cleaning Methods
•Run the ultrasonic cleaner while filled with the cleaning solution but without a load for the manufacturer’s specified time to de-gas the solution on start up and on subsequent re-fillings.
•Ensure that joints or hinges are opened fully and instruments that need taking apart are fully disassembled before they are immersed in the solution.
•Place instruments in a suspended basket and fully immerse in the cleaning solution ensuring that all surfaces are in contact with the solution.
•Do not overload the basket or overlap instruments because this results in poor cleaning and can cause wear to the instruments.
•Do not place instruments on the floor of the ultrasonic cleaner because this results in poor cleaning and excessive instrument movement, which can damage the instruments.
•To avoid damage to delicate instruments, a modified basket or tray system might also be necessary.
•Close the lid and do not open until the cycle is complete.
•Select the correct cycle settings for the validated cleaning procedure and start the cleaning cycle.
•After the cycle is complete, drain the basket of instruments before rinsing.
•Change the solution when it becomes visibly contaminated or otherwise every 4 hours because the build-up of debris will reduce the effectiveness of cleaning. Keep a record of each change of solution. Ensure staff are aware of the need to assess when a change of solution is necessary.
•Rinse out the tank after emptying the solution to remove soil before refilling.
•Drain, clean with a neutral detergent solution, rinse and dry the cleaner when not in use (e.g. overnight).
Record whether each cycle was satisfactory (e.g. check and sign printouts and keep them as a record).
•Printouts can be scanned in batches to store electronically.
If, due to WD failure, ultrasonic cleaning is used as a back-up process, rinse dry and inspect instruments prior to sterilisation as described in Section 5.
Cleaning of Dental Instruments

17
Cleaning of Dental Instruments
4 Cleaning Methods
4.4 Manual Cleaning
Manual cleaning of dental instruments cannot be validated because it is difficult to ensure that it is carried out effectively on each occasion. Compared with other cleaning methods, manual cleaning presents a greater risk of sharps injury to staff. Consequently, a washer-disinfector should be used to clean all items where manufacturer’s instructions allow. However, despite the limitations of manual cleaning, it is important for each practice to have the facilities, documented procedures and trained staff to carry out manual cleaning as a backup for when other methods fail, are unavailable during maintenance or are not appropriate. This method must have systems in place to avoid recontamination of clean instruments.
Put in place an effective system for manual cleaning, as outlined below, and ensure all staff are trained to follow an agreed, written procedure.
Use manual cleaning only when it is required by the instrument manufacturer’s instructions or when the WD fails.
4.4.1 Workflow and Facilities
Maintain a dirty-to-clean workflow throughout the cleaning procedure.
Use two sinks: one for manual cleaning and one for rinsing.
Always use detergents specifically formulated for manual cleaning of instruments according to manufacturer’s instructions. NB: do not use chlorhexidine handscrub (e.g. Hibiscrub), washing-up liquid, cleaning creams or soap. Chlorhexidine in particular makes proteins stick to steel.
Use appropriate PPE to avoid skin contact. Refer to the detergent manufacturer’s instructions regarding hazards.
4.4.2 Cleaning Procedure
Measure the volume of water and detergent to achieve the exact concentration specified by the detergent manufacturer. A line painted on the sink is useful to indicate the required volume of water.
Using a thermometer, monitor the temperature of the water throughout the cleaning procedure to ensure the temperature is maintained within the range recommended by the detergent manufacturer.
Where manufacturers’ instructions permit, fully submerge items to be cleaned in the detergent solution.
Cleaning of Dental Instruments

18
4 Cleaning Methods
Scrub instruments using long-handled brushes with soft plastic bristles. To minimise aerosol risk, do not scrub under running water.
Following cleaning, drain the water, avoiding splashing.
If the water is heavily soiled, repeat the cleaning procedure.
Wash brushes with detergent and hot water after each use to remove visible soil and store dry and head up.
Replace brushes at least weekly or more frequently if worn or if soil cannot be removed (as shown).
4.4.3 Avoiding Instrument Damage
Most dental instruments are made of high-quality materials designed to minimise corrosion if reprocessed correctly. The corrosion resistance is based on their alloy composition and structure, which forms a protective layer on the surface. The ability of the instruments to resist corrosion depends on the quality and thickness of this layer. It is important to avoid damage to the protective layer during cleaning.
Avoid the use of wire brushes as this can compromise the protective layer and increase the chance of breakage.
Remove from use any instruments that have rust spots. On no account use wire brushes to remove rust spots.
Do not use wire pot scourers to clean instruments because these will damage the surface of instruments.
Avoid contact with chemicals that could damage instruments.
If manual cleaning is used either as a back-up process due to WD failure or for items that cannot be processed by an automated method, rinse, dry and inspect instruments before sterilization as described in Section 5.
Cleaning of Dental Instruments

19
Cleaning of Dental Instruments
5 Rinsing, Drying, Inspection and Care of Instruments
Ensure staff are trained in how to rinse, dry and inspect instruments in accordance with the manufacturer’s instructions.
Note that instruments processed in a washer disinfector do not need to be rinsed and dried as this is part of this automated process.
5.1 Rinsing and Drying of Instruments after Cleaning
After cleaning either manually or in an ultrasonic cleaner, instruments must be rinsed thoroughly to remove residual soil and detergents and then dried thoroughly. Instruments must not be allowed to air dry as inadequate drying might enable moisture to be trapped, promoting corrosion and/or microbial growth.
Immerse clean instruments in clean water in a separate sink dedicated for rinsing instruments. Preferably, use the same quality of water for rinsing as is used for sterilization. However, it is acceptable to use freshly drawn soft tap water. In hard-water areas, use purified water for rinsing.
Use disposable, low-linting towels to dry instruments immediately after rinsing.
5.2 Inspection and Care of Instruments before Sterilizing
5.2.1 Inspection for Cleanliness and Functionality
All instruments that have been through any cleaning procedure, including processing by a washer-disinfector, need to be inspected to ensure they are clean, functional and in good condition. Using an illuminated magnifier is recommended because it makes it much easier to see residual contamination, debris or damage.
Cleaning of Dental Instruments
20
5 Rinsing, Drying, Inspection and Care of Instruments
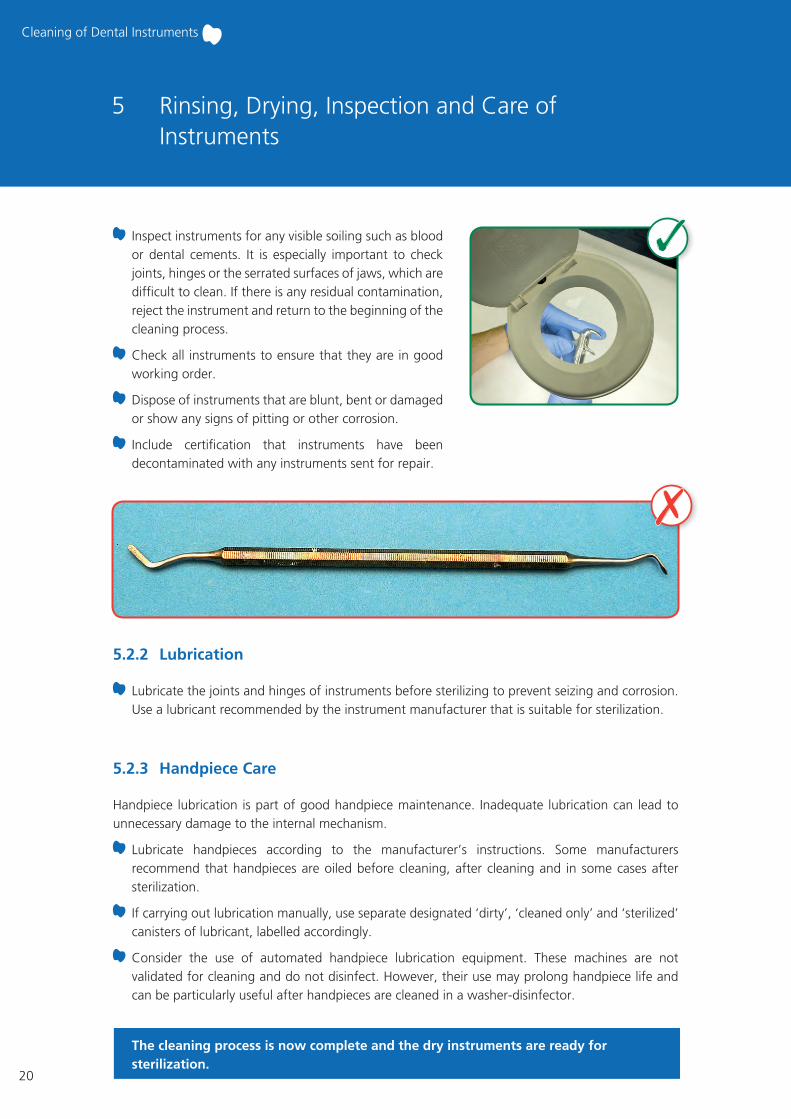
Inspect instruments for any visible soiling such as blood or dental cements. It is especially important to check joints, hinges or the serrated surfaces of jaws, which are difficult to clean. If there is any residual contamination, reject the instrument and return to the beginning of the cleaning process.
Check all instruments to ensure that they are in good working order.
Dispose of instruments that are blunt, bent or damaged or show any signs of pitting or other corrosion.
Include certification that instruments have been decontaminated with any instruments sent for repair.
5.2.2 Lubrication
Lubricate the joints and hinges of instruments before sterilizing to prevent seizing and corrosion. Use a lubricant recommended by the instrument manufacturer that is suitable for sterilization.
5.2.3 Handpiece Care
Handpiece lubrication is part of good handpiece maintenance. Inadequate lubrication can lead to unnecessary damage to the internal mechanism.
Lubricate handpieces according to the manufacturer’s instructions. Some manufacturers recommend that handpieces are oiled before cleaning, after cleaning and in some cases after sterilization.
If carrying out lubrication manually, use separate designated ‘dirty’, ‘cleaned only’ and ‘sterilized’ canisters of lubricant, labelled accordingly.
Consider the use of automated handpiece lubrication equipment. These machines are not validated for cleaning and do not disinfect. However, their use may prolong handpiece life and can be particularly useful after handpieces are cleaned in a washer-disinfector.
The cleaning process is now complete and the dry instruments are ready for sterilization.
Cleaning of Dental Instruments

21
Cleaning of Dental Instruments
5 Rinsing, Drying, Inspection and Care of Instruments
5.3 Out-of-hours Use of Instruments
Fully decontaminate instruments as soon as possible after use. However, if a patient is seen late or out of normal working hours, clean and dry instruments at the end of the treatment session. If instruments are not to be sterilised, clearly label them as unsafe for handling or use and reprocess them through the full decontamination cycle the next working day.
Put together written policies for staff regarding out-of-hours use of instruments and ensure the details of these policies are included in staff training.
Cleaning of Dental Instruments

22
6 Validation, Periodic Testing and Maintenance of Cleaning Equipment
Validation is a documented procedure used to show that the decontamination process will repeatedly and consistently take place to a satisfactory standard when defined operating conditions are used.
Validation of cleaning equipment involves a series of checks and tests that are performed by a Test Person (Sterilizers) as specified in SHTM 2030. These checks and tests are carried out after installation of new equipment as part of commissioning. Thereafter, validation checks and tests are carried out at least annually, which is referred to as revalidation.
Detailed information is available in SHTM 2030 Washer-disinfectors, Part 3 Validation and Verification.
6.1 Washer-disinfectors
6.1.1 Installation and Validation
Before installation contact the manufacturer to obtain drawings and layouts to help local tradesmen to prepare the site for installation of your machine correctly to conform to specifications.
On delivery of the WD the contractor is expected to install and validate as specified in SHTM 2030 to establish that the WD:
•has been provided and installed correctly;
• is safe to operate;
•performs as it should (i.e. according to the purchase specification);
•does not interfere with other equipment;
• is satisfactorily linked to all connected services to ensure that the cleaning and disinfection performance of the WD is achieved.
6.1.2 Testing
Periodic testing is required to ensure that WDs perform consistently as specified at validation. Daily and weekly testing will normally be carried out by practice personnel to ensure there is no variation in performance between other tests that are performed by a Test Person. The legal requirement is to carry out periodic tests as specified in the manufacturer’s instructions.
Daily tests usually involve:
• inspecting instruments visually for cleaning efficacy, using a magnifier to help;
• conducting an automatic control test (see below).
Cleaning of Dental Instruments
23
Cleaning of Dental Instruments
6 Validation, Periodic Testing and Maintenance of Cleaning Equipment
Automatic control test
This is a test for ensuring that the WD continues to function correctly and involves checking readings and timings during a normal cycle. Printers or data loggers record this information and give notice if a cycle has failed.
Test procedure
• Place a normal standard load, typical of that used throughout the day, in the chamber of the WD.
• Select the operating cycle to be tested.
• Start the cycle.
• Check the printout or data logger to ensure that the required parameters have been met.
The test is considered satisfactory if the following criteria are met.
• A visual display indicating ‘cycle complete’ occurs.
• During the whole cycle the variables indicated on the WD or on the printout are within the limits established as satisfactory by the manufacturer or set during validation.
• During the disinfection hold period, the temperature and time are within the range specified by the manufacturer or established at validation. This is to ensure that the load is maintained at temperatures within the disinfection temperature band for the time specified in SHTM 2030.
• The door cannot be opened until the cycle is complete.
• The person conducting the test does not observe any mechanical or other anomaly.
If any of these criteria are not met, record the test as a fail and do not use the WD until the fault has been resolved. In this case, return any instruments that were loaded in the WD to the start of the decontamination process.
Efficacy testing
Cleaning efficacy tests are used to demonstrate the ability of the WD to remove soiling and contamination. Methods to determine whether instruments are being cleaned effectively include:
• visual inspection (as above, conducted routinely each day);
• residual protein detection which involves a test for residual protein on instruments;
• a chemical test which involves removal of artificial soil from a test device designed for use in WDs.
Cleaning of Dental Instruments
24
6 Validation, Periodic Testing and Maintenance of Cleaning Equipment
SHTM 2030 provides details of these tests.
Carry out daily and weekly tests as per manufacturer’s instructions.
Record and retain the results of all of these tests.
If the WD fails to perform to set parameters, contact an engineer immediately.
Arrange for a Test Person (Sterilizers) to carry out quarterly (if specified by the manufacturer) and annual tests (e.g. through purchase of a full support package via the NHSScotland contract or by arrangement with a contractor).
A Washer Disinfector Logbook is available to download from the Health Facilities Scotland website. Alternatively, example logbook test record pages can be downloaded from the SDCEP website and adapted to record information as recommended by the WD manufacturer.
6.1.3 Housekeeping and Maintenance
General housekeeping as specified by the WD manufacturer is required each day and usually involves:
• checking the spray arm for rotation;
• checking the spray nozzles for blockage;
• removing and cleaning strainers and filters.
A planned programme of preventative maintenance carried out by a qualified maintenance person aims to minimise equipment failure.
Obtain a maintenance contract to carry out the programme of preventative maintenance tasks as specified in the manufacturer’s instructions.
Ensure details of all maintenance work are recorded in the equipment logbook, including problems, faults, preventative and corrective actions.
Cleaning of Dental Instruments
25
Cleaning of Dental Instruments
6 Validation, Periodic Testing and Maintenance of Cleaning Equipment
6.2 Ultrasonic Cleaners
6.2.1 Installation and validation
It is important that an ultrasonic cleaner is installed correctly and that an operating procedure that cleans instruments effectively is validated, documented and used consistently.
Ensure new machines are validated at installation to the requirements specified in SHTM 2030.
Test, maintain and revalidate ultrasonic cleaners according to manufacturer’s instructions.
6.2.1 Testing
Tests carried out during installation and validation are intended to establish the variation in activity at different positions and levels within the bath and the time required for each test.
Foil ablation testing has been used to test the ultrasonic activity of ultrasonic cleaners. This involves reviewing the erosion pattern which is created on aluminium foil exposed in the cleaner tank for a short period. Although practice staff can perform this test, it would usually be carried out by a Maintenance Person. Electronic testing is now more commonly used by engineers to monitor the efficiency and operating frequency of ultrasonic cleaners.
Cleaning efficacy testing is likely to be recommended by the manufacturer to determine whether the ultrasonic cleaner is functioning correctly. This may involve a test for residual protein on instruments and/or a soil test involving removal of artificial soil from a test device.
Carry out tests of cleaning efficacy and ultrasonic activity using methods and at intervals as recommended by the ultrasonic cleaner manufacturer.
•An Ultrasonic Cleaner Logbook is available to download from the Health Facilities website. Alternatively, example logbook test record pages can be downloaded from the SDCEP website and adapted to record information as recommended by the ultrasonic cleaner manufacturer.
6.2.2 Housekeeping and Maintenance
Always leave the ultrasonic tank clean and dry when not in use to ensure that the surfaces are undamaged and the inlets and drains are free from obstructions, and check regularly.
Ensure regular checks of electrical safety are made and keep a record of these checks.
Cleaning of Dental Instruments

26
Notes
Cleaning of Dental Instruments

Cleaning of Dental InstrumentsDental Clinical Guidance
Second Edition
The Scottish Dental Clinical Effectiveness Programme (SDCEP) is an
initiative of the National Dental Advisory Committee in partnership with
NHS Education for Scotland. The Programme aims to provide user-friendly,
evidence-based guidance on topics identified as priorities for oral health
care.
SDCEP guidance aims to support improvements in patient care by bringing
together, in a structured manner, the best available information that is
relevant to the topic, and presenting this information in a form that can be
interpreted easily and implemented.
Cleaning of Dental Instruments is the first part of the SDCEP series
Decontamination Into Practice, which aims to support compliance with
relevant statutory and mandatory requirements and standards. Cleaning of Dental Instruments provides advice on all aspects of cleaning, including
organisation within the local decontamination unit, cleaning methods and
testing of equipment.
© Scottish Dental Clinical Effectiveness ProgrammeSDCEP operates within NHS Education for Scotland. You may copy or reproduce the information in this document for use within NHS Scotland and for non-commercial educational purposes. Use of this document for commercial purpose is permitted only with written permission.
ISBN 978 1 905829 20 0
Scottish Dental Clinical Effectiveness ProgrammeDundee Dental Education Centre, Frankland Building, Small’s Wynd, Dundee DD1 4HN
Email [email protected] 01382 425751 / 425771Website www.sdcep.org.uk
Scottish DentalClinical Effectiveness Programme SDcep
October 2014