ScopTEL IP PBX Software - ScopServ · ScopTELTM IP PBX Software Asterisk 11 T.38 Fax Gateway...
28
ScopTEL TM IP PBX Software ScopTEL TM IP PBX Software Asterisk 11 T.38 Fax Gateway Configuration
Transcript of ScopTEL IP PBX Software - ScopServ · ScopTELTM IP PBX Software Asterisk 11 T.38 Fax Gateway...

ScopTELTM IP PBX Software
ScopTELTM IP PBX Software
Asterisk 11 T.38 Fax Gateway Configuration
ScopTELTM IP PBX Software
2
T.38 Fax Gateway Configuration
ScopTEL Asterisk 11 T.38 Fax Gateway
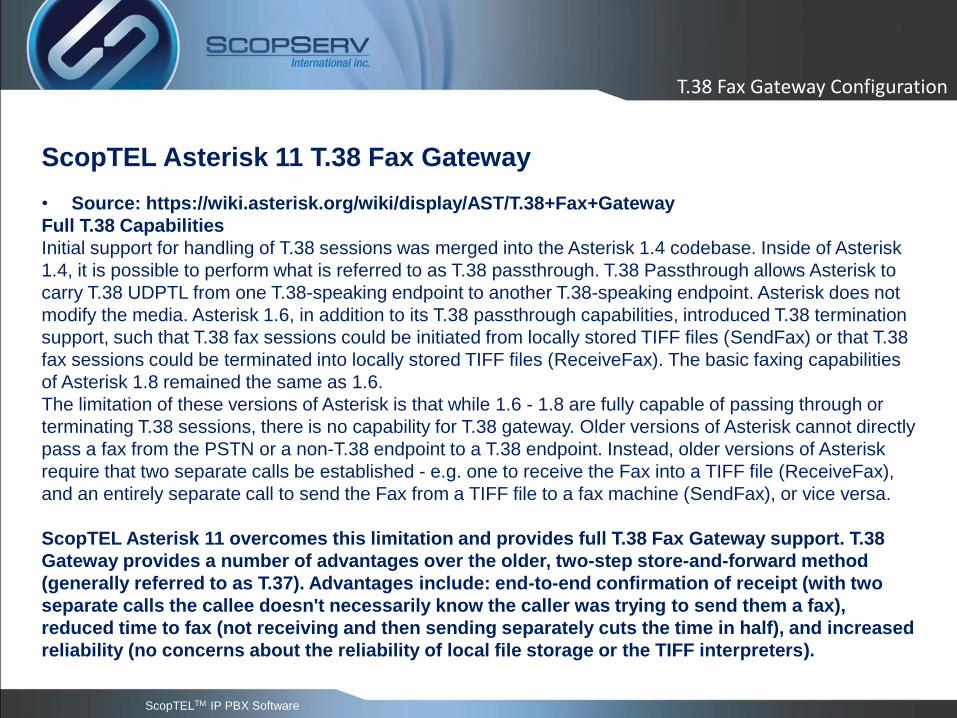
• Source: https://wiki.asterisk.org/wiki/display/AST/T.38+Fax+Gateway
Full T.38 Capabilities
Initial support for handling of T.38 sessions was merged into the Asterisk 1.4 codebase. Inside of Asterisk
1.4, it is possible to perform what is referred to as T.38 passthrough. T.38 Passthrough allows Asterisk to
carry T.38 UDPTL from one T.38-speaking endpoint to another T.38-speaking endpoint. Asterisk does not
modify the media. Asterisk 1.6, in addition to its T.38 passthrough capabilities, introduced T.38 termination
support, such that T.38 fax sessions could be initiated from locally stored TIFF files (SendFax) or that T.38
fax sessions could be terminated into locally stored TIFF files (ReceiveFax). The basic faxing capabilities
of Asterisk 1.8 remained the same as 1.6.
The limitation of these versions of Asterisk is that while 1.6 - 1.8 are fully capable of passing through or
terminating T.38 sessions, there is no capability for T.38 gateway. Older versions of Asterisk cannot directly
pass a fax from the PSTN or a non-T.38 endpoint to a T.38 endpoint. Instead, older versions of Asterisk
require that two separate calls be established - e.g. one to receive the Fax into a TIFF file (ReceiveFax),
and an entirely separate call to send the Fax from a TIFF file to a fax machine (SendFax), or vice versa.
ScopTEL Asterisk 11 overcomes this limitation and provides full T.38 Fax Gateway support. T.38
Gateway provides a number of advantages over the older, two-step store-and-forward method
(generally referred to as T.37). Advantages include: end-to-end confirmation of receipt (with two
separate calls the callee doesn't necessarily know the caller was trying to send them a fax),
reduced time to fax (not receiving and then sending separately cuts the time in half), and increased
reliability (no concerns about the reliability of local file storage or the TIFF interpreters).

ScopTELTM IP PBX Software
3
T.38 Fax Gateway Configuration
ScopTEL Background and Pre-requisites
• You must already be using a currently supported version of asterisk11.scopserv.rpm
• Refer to version switcher documentation and use the version switcher to deploy Asterisk 11 if
you have not done so already
• You must be using minimum scopserv-server version 2.4.1
• You must be using minimum scopserv-telephony version 5.1.0.0.20131114
• You must be using minimum scopserv-core version 3.5.27
• Package hylafax must be installed
• Package avantfax must be installed
• Package iaxmodem must be installed
• Package sendmail or postfix must be installed
• Valid VoIP Account
• Use the Packages Manager>Versions Information tab to install any missing or non-compliant
packages

ScopTELTM IP PBX Software
T.38 Fax Gateway Configuration
Packages Manager Review:
• Server>Packages Manager>Versions Information
ScopTELTM IP PBX Software
5
T.38 Fax Gateway Configuration
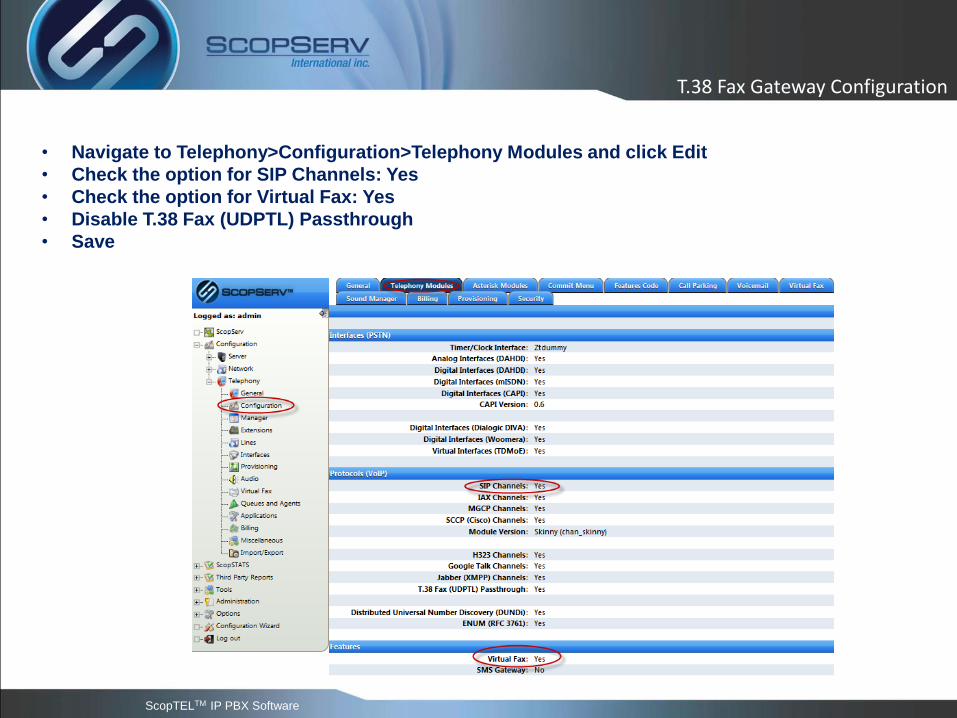
• Navigate to Telephony>Configuration>Telephony Modules and click Edit
• Check the option for SIP Channels: Yes
• Check the option for Virtual Fax: Yes
• Disable T.38 Fax (UDPTL) Passthrough
• Save
ScopTELTM IP PBX Software
6
T.38 Fax Gateway Configuration
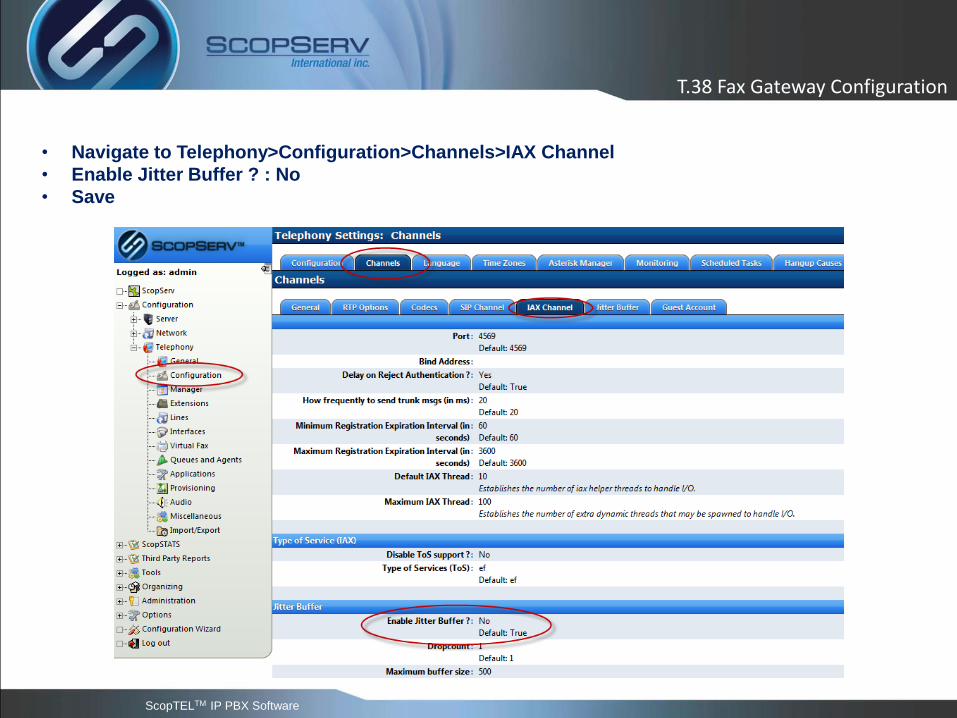
• Navigate to Telephony>Configuration>Channels>IAX Channel
• Enable Jitter Buffer ? : No
• Save

ScopTELTM IP PBX Software
7
T.38 Fax Gateway Configuration
Navigate to: • Telephony>Interfaces
• Edit an existing or new SIP VoIP Account
• Click on the Options tab
• Check the option for Enable Fax T.38 Gateway: [x]
• Save
NOTE: This will enable T.38
Gateway support on all
incoming calls to this
interface. You will still
need to set a
destination(s) for
incoming faxes.
And you will need to
configure DNIS routing
for each DID so the
Virtual Fax Routing can
set the proper
destination.
ScopTELTM IP PBX Software
8
T.38 Fax Gateway Configuration
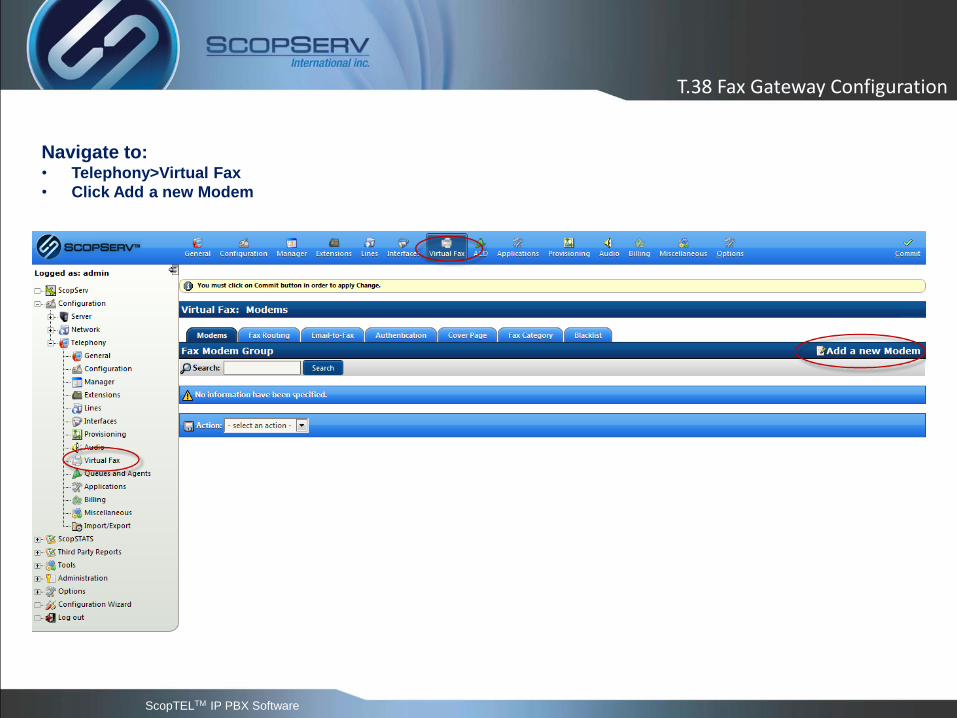
Navigate to: • Telephony>Virtual Fax
• Click Add a new Modem

ScopTELTM IP PBX Software
9
T.38 Fax Gateway Configuration
Virtual Fax: Modems>General • Mode: Virtual Modem from drop down list
• Name: must be unique
• Port ID: must be numerical and unique
• Click on Options tab when finished

ScopTELTM IP PBX Software
10
T.38 Fax Gateway Configuration
Virtual Fax: Modems>Options • Choose the desire d Class of Services (Outgoing): object from the drop down list
• Click on the Identification tab when done

ScopTELTM IP PBX Software
11
T.38 Fax Gateway Configuration
Virtual Fax: Modems>Identification • Enter custom values in each text field
• This example shows default values and subsequent prefixes
• Click Add when done
ScopTELTM IP PBX Software
12
T.38 Fax Gateway Configuration
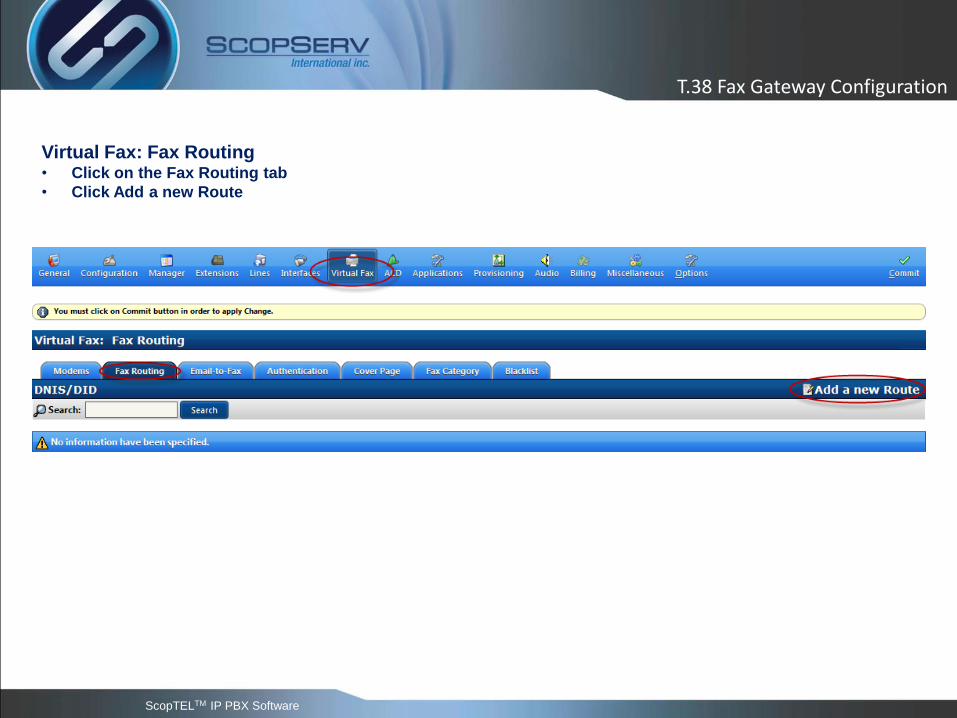
Virtual Fax: Fax Routing • Click on the Fax Routing tab
• Click Add a new Route
ScopTELTM IP PBX Software
13
T.38 Fax Gateway Configuration
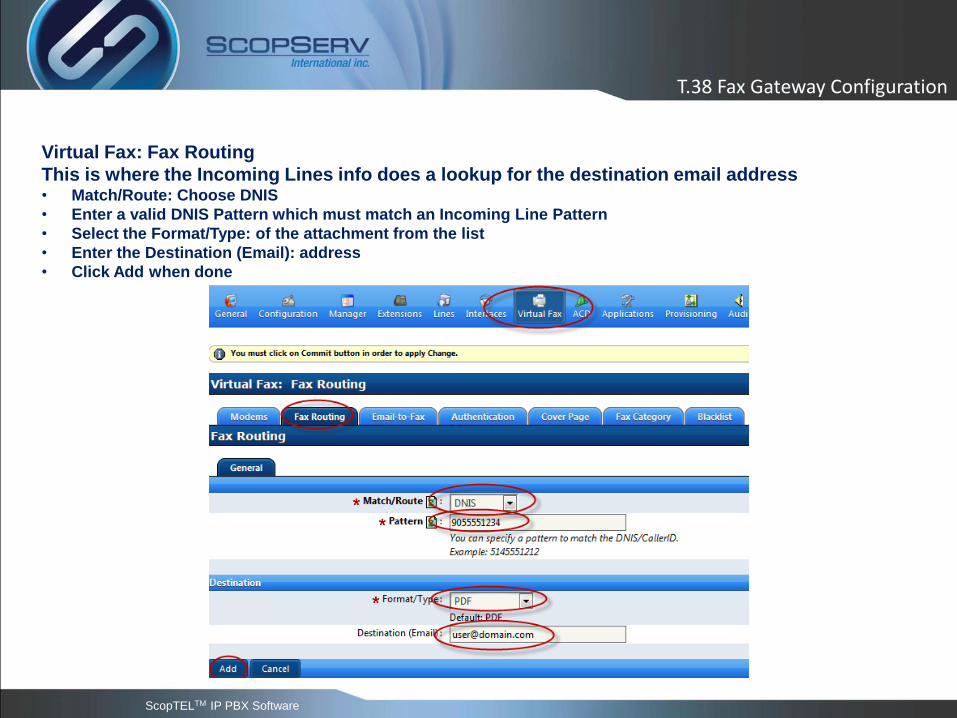
Virtual Fax: Fax Routing
This is where the Incoming Lines info does a lookup for the destination email address • Match/Route: Choose DNIS
• Enter a valid DNIS Pattern which must match an Incoming Line Pattern
• Select the Format/Type: of the attachment from the list
• Enter the Destination (Email): address
• Click Add when done
ScopTELTM IP PBX Software
14
T.38 Fax Gateway Configuration
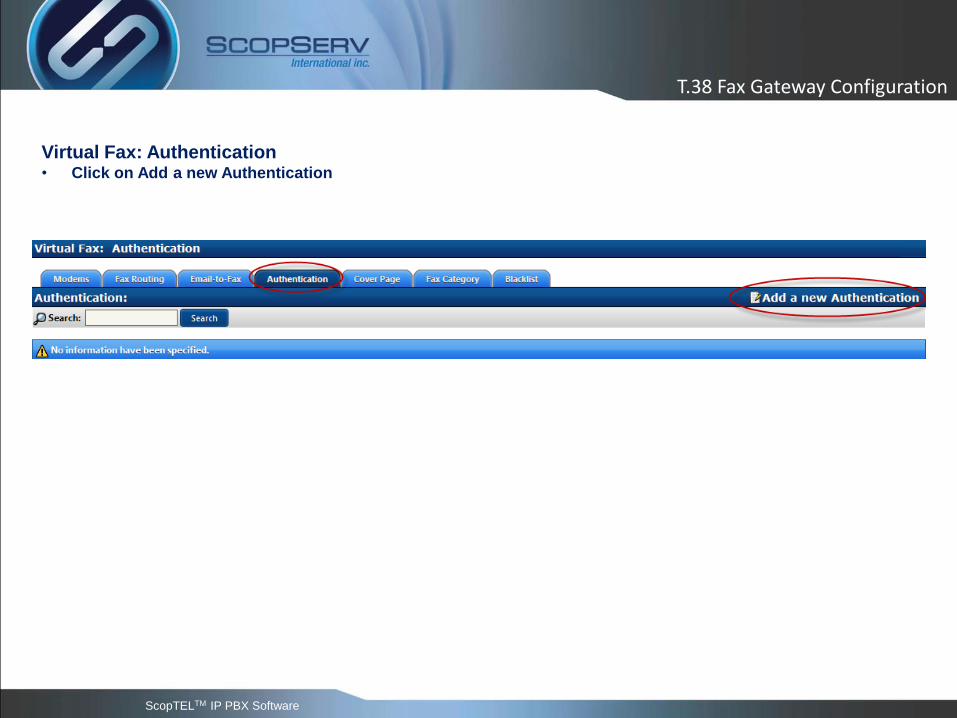
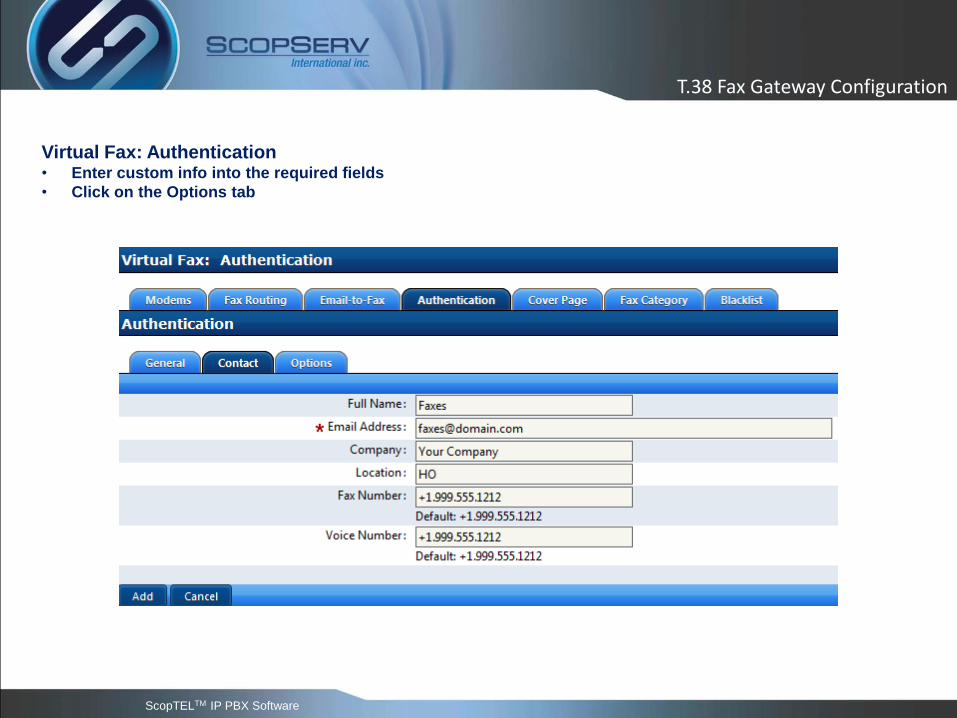
Virtual Fax: Authentication • Click on Add a new Authentication

ScopTELTM IP PBX Software
15
T.38 Fax Gateway Configuration
Virtual Fax: Authentication • Enter a Username
• Enter a secure Password
• Click on the Contact tab
ScopTELTM IP PBX Software
16
T.38 Fax Gateway Configuration
Virtual Fax: Authentication • Enter custom info into the required fields
• Click on the Options tab
ScopTELTM IP PBX Software
17
T.38 Fax Gateway Configuration
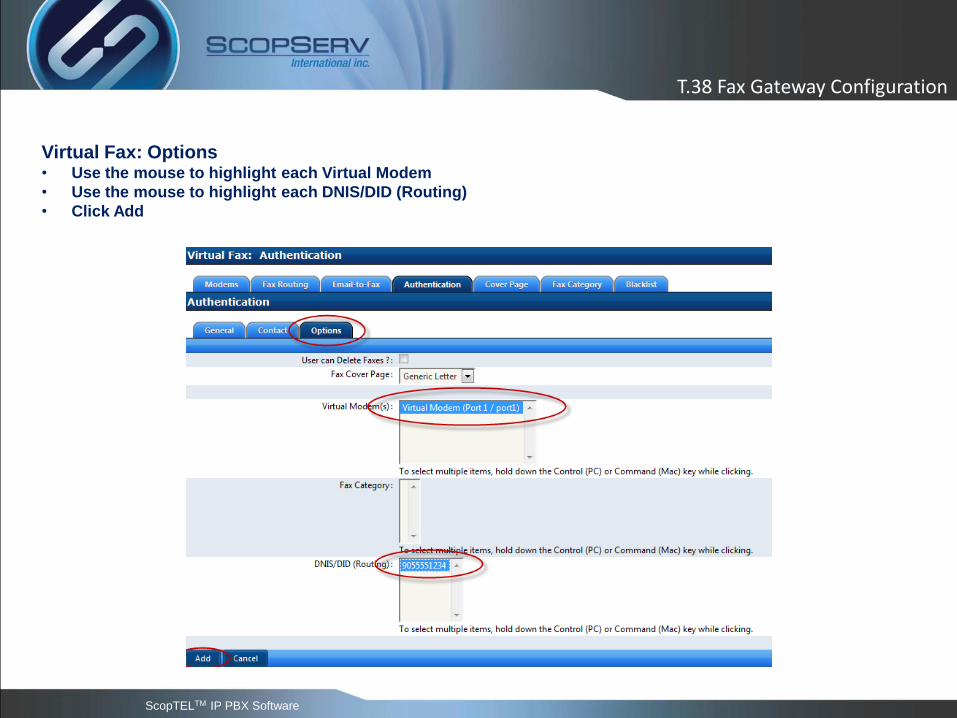
Virtual Fax: Options • Use the mouse to highlight each Virtual Modem
• Use the mouse to highlight each DNIS/DID (Routing)
• Click Add

ScopTELTM IP PBX Software
Incoming Lines
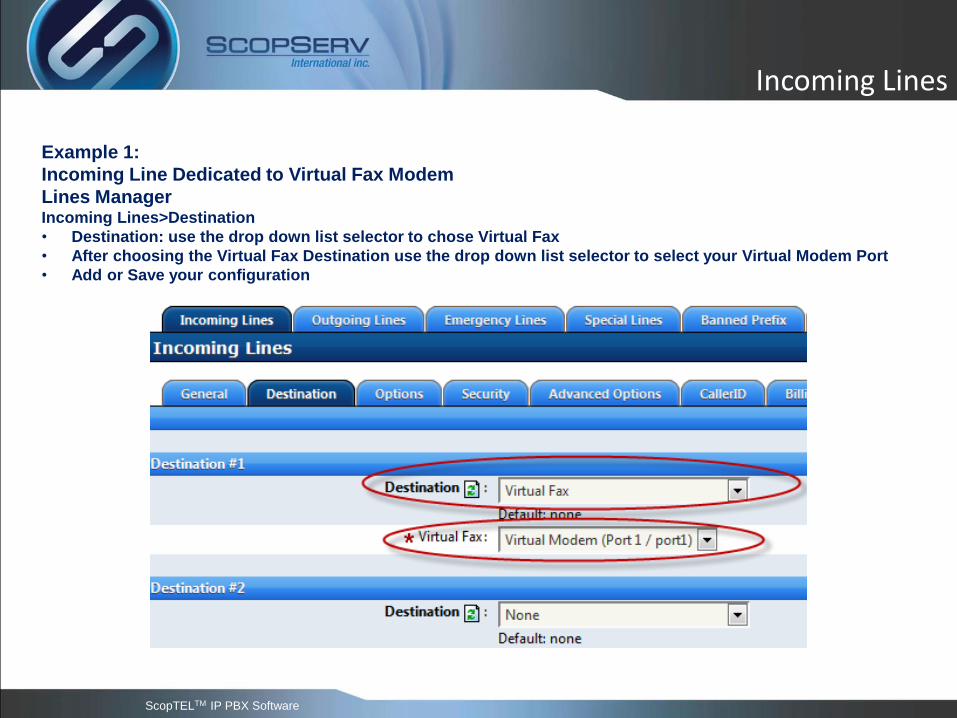
Example 1:
Incoming Line Dedicated to Virtual Fax Modem
Lines Manager Incoming Lines>General
Example: 9055551234
• Type = Extension (DNIS)
• Extension (DNIS) = 9055551234
• Trunk = 9055551234

ScopTELTM IP PBX Software
Incoming Lines
Example 1:
Incoming Line Dedicated to Virtual Fax Modem
Lines Manager Incoming Lines>Options
• Fax Extension (Routing): can be left blank. The default is to use the General tab’s DNIS value to Virtual Fax
Route
• A custom DNIS value can be used to override the default incoming DNIS
• Examples:
• Telco sends DNIS 2234 and you want to send the fax to virtual fax route 9055551234
• POTS lines do not support DNIS but you still want to send them to a virtual fax route
• You want to send many Incoming Lines to the same virtual fax route 9055551234
• In any of these examples you could set the Fax Extension (Routing) : <DNIS> to a custom
numerical value
ScopTELTM IP PBX Software
Incoming Lines
Example 1:
Incoming Line Dedicated to Virtual Fax Modem
Lines Manager Incoming Lines>Destination
• Destination: use the drop down list selector to chose Virtual Fax
• After choosing the Virtual Fax Destination use the drop down list selector to select your Virtual Modem Port
• Add or Save your configuration

ScopTELTM IP PBX Software
Incoming Lines
Example 2:
Incoming Line Shared between Voice and Fax
Lines Manager Incoming Lines>General
Example: 9055551234
• Type = Extension (DNIS)
• Extension (DNIS) = 9055551234
• Trunk = 9055551234

ScopTELTM IP PBX Software
Incoming Lines
Example 2:
Incoming Line Shared between Voice and Fax
Lines Manager Incoming Lines>Destination
• Destination: use the drop down list selector for your default destination

ScopTELTM IP PBX Software
Incoming Lines
Example 2:
Incoming Line Shared between Voice and Fax
Lines Manager Incoming Lines>Options
• Fax Extension (Routing): can be left blank. The default is to use the General DNIS value to Virtual Fax Route
• A custom DNIS value can be used to override the default incoming DNIS
• Examples:
• Telco sends DNIS 2234 and you want to send the fax to virtual fax route 9055551234
• POTS lines do not support DNIS but you still want to send them to a virtual fax route
• You want to send Incoming Lines to the same virtual fax route 9055551234
• In any of these examples you could set the Fax Extension (Routing) : <DNIS> to a custom
numerical value

ScopTELTM IP PBX Software
Incoming Lines
Example 2:
Incoming Line Shared between Voice and Fax
Lines Manager Incoming Lines>Options
• You must check Enable Fax Detection ? [x] to share between voice and fax routing
• You should check Indicate Ringing during Fax Detection ? [x] to supply ring back to voice callers
• Add or Save your configuration

ScopTELTM IP PBX Software
Outgoing Lines
Outgoing Lines:
You must enable Fax T.38 Gateway :[x] to allow Asterisk to enable T.38 Gateway processing for
outgoing faxes.
• Lines>Outgoing Lines>Dial Options>Advanced Options>Enable Fax T.38 Gateway :[x]

ScopTELTM IP PBX Software
26
T.38 Fax Gateway Configuration
Telephony General Services • Check HylaFAX (Virtual Fax): [x]
• Check IAXmodem (Virtual Modem): [x]
• Click Apply Change

ScopTELTM IP PBX Software
27
T.38 Fax Gateway Configuration
Telephony General Services • Commit
• Start IAXmodem (Virtual Modem)
• Restart HylaFAX (Virtual Fax)

ScopTELTM IP PBX Software
28