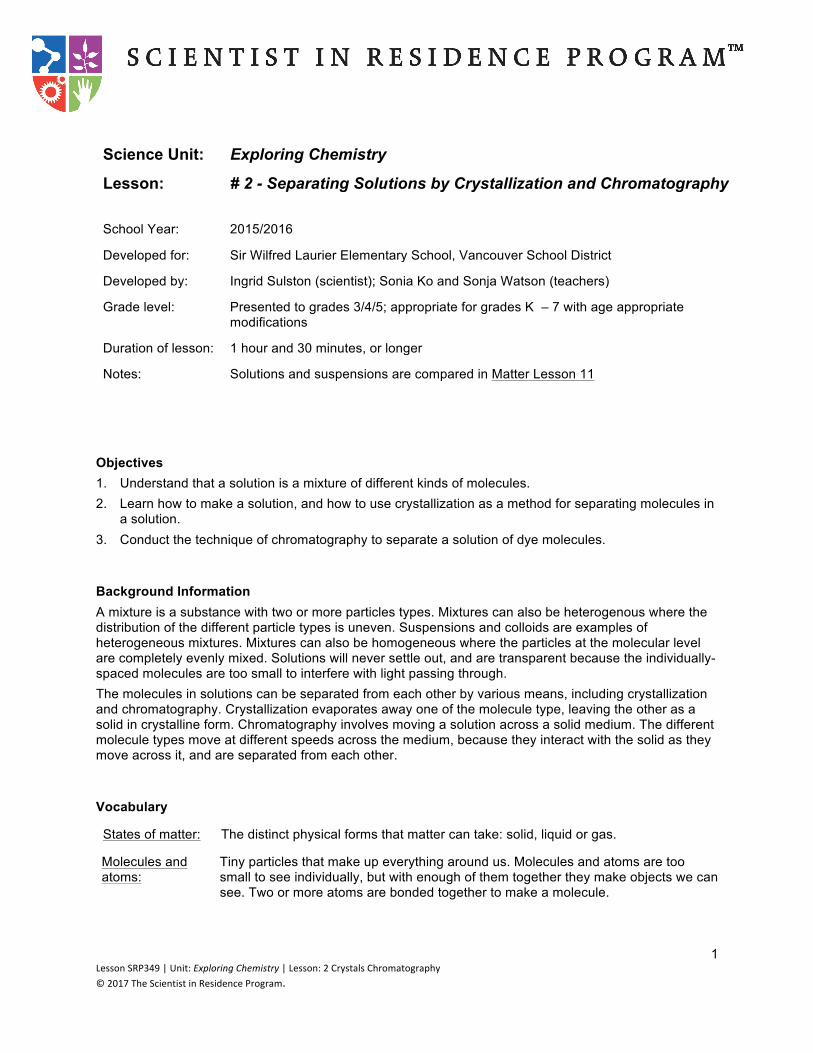
Science Unit: Exploring Chemistry Lesson: # 2 - Separating ...
6
1 Lesson SRP349 | Unit: Exploring Chemistry | Lesson: 2 Crystals Chromatography © 2017 The Scientist in Residence Program. Science Unit: Exploring Chemistry Lesson: # 2 - Separating Solutions by Crystallization and Chromatography School Year: 2015/2016 Developed for: Sir Wilfred Laurier Elementary School, Vancouver School District Developed by: Ingrid Sulston (scientist); Sonia Ko and Sonja Watson (teachers) Grade level: Presented to grades 3/4/5; appropriate for grades K – 7 with age appropriate modifications Duration of lesson: 1 hour and 30 minutes, or longer Notes: Solutions and suspensions are compared in Matter Lesson 11 Objectives 1. Understand that a solution is a mixture of different kinds of molecules. 2. Learn how to make a solution, and how to use crystallization as a method for separating molecules in a solution. 3. Conduct the technique of chromatography to separate a solution of dye molecules. Background Information A mixture is a substance with two or more particles types. Mixtures can also be heterogenous where the distribution of the different particle types is uneven. Suspensions and colloids are examples of heterogeneous mixtures. Mixtures can also be homogeneous where the particles at the molecular level are completely evenly mixed. Solutions will never settle out, and are transparent because the individually- spaced molecules are too small to interfere with light passing through. The molecules in solutions can be separated from each other by various means, including crystallization and chromatography. Crystallization evaporates away one of the molecule type, leaving the other as a solid in crystalline form. Chromatography involves moving a solution across a solid medium. The different molecule types move at different speeds across the medium, because they interact with the solid as they move across it, and are separated from each other. Vocabulary States of matter: The distinct physical forms that matter can take: solid, liquid or gas. Molecules and atoms: Tiny particles that make up everything around us. Molecules and atoms are too small to see individually, but with enough of them together they make objects we can see. Two or more atoms are bonded together to make a molecule.
Transcript of Science Unit: Exploring Chemistry Lesson: # 2 - Separating ...
1 Lesson SRP349 | Unit: Exploring Chemistry | Lesson: 2 Crystals Chromatography © 2017 The Scientist in Residence Program.
Science Unit: Exploring Chemistry
Lesson: # 2 - Separating Solutions by Crystallization and Chromatography School Year: 2015/2016
Developed for: Sir Wilfred Laurier Elementary School, Vancouver School District
Developed by: Ingrid Sulston (scientist); Sonia Ko and Sonja Watson (teachers)
Grade level: Presented to grades 3/4/5; appropriate for grades K – 7 with age appropriate modifications
Duration of lesson: 1 hour and 30 minutes, or longer
Notes: Solutions and suspensions are compared in Matter Lesson 11
Objectives 1. Understand that a solution is a mixture of different kinds of molecules. 2. Learn how to make a solution, and how to use crystallization as a method for separating molecules in
a solution. 3. Conduct the technique of chromatography to separate a solution of dye molecules.
Background Information A mixture is a substance with two or more particles types. Mixtures can also be heterogenous where the distribution of the different particle types is uneven. Suspensions and colloids are examples of heterogeneous mixtures. Mixtures can also be homogeneous where the particles at the molecular level are completely evenly mixed. Solutions will never settle out, and are transparent because the individually-spaced molecules are too small to interfere with light passing through. The molecules in solutions can be separated from each other by various means, including crystallization and chromatography. Crystallization evaporates away one of the molecule type, leaving the other as a solid in crystalline form. Chromatography involves moving a solution across a solid medium. The different molecule types move at different speeds across the medium, because they interact with the solid as they move across it, and are separated from each other.
Vocabulary
States of matter: The distinct physical forms that matter can take: solid, liquid or gas.
Molecules and atoms:
Tiny particles that make up everything around us. Molecules and atoms are too small to see individually, but with enough of them together they make objects we can see. Two or more atoms are bonded together to make a molecule.
2 Lesson SRP349 | Unit: Exploring Chemistry | Lesson: 2 Crystals Chromatography © 2017 The Scientist in Residence Program.
Mixture Mixtures have two or more particle types. The kind of mixture depends on the how clumped the different particle types are, and whether they can settle out. Solutions, suspensions and colloids are all mixtures.
Solution A homogeneous mixture of particles, where the different particle types are completely uniformly distributed. As the individual molecules are spaced out solutions are transparent, and the particles do not settle out.
Dissolve When one type of molecule (the solute) mixes evenly into another (the solvent) to form a solution. A common example is solid sugar dissolving into liquid water.
Evaporate To turn from a liquid to a gas, as the particles gain energy.
Crystallize A method for separating the components of a solution. One particle type (often water) is evaporated off to leave another particle type as solid crystals.
Chromatography A technique for separating mixtures into their components. A fluid containing the molecules to be separated moves over a solid surface.
Materials for Crystal Activities
• epsom salts, at least 2 cups • paintbrushes (one per student)
• wooden spoon
• small and large heatproof jar; the large jar must hold 3 cups
• flashlights (one per student or student pair)
• small baking dish
• kettle and water • saucepan and stovetop • mesh (to support clothes pegs) e.g. plastic plant pot tray, washed
• shallow containers (one per table group)
• 4 cups sugar • popsicles sticks (one per student)
• black smooth paper, artist quality (a small sheet per student)
• 1.3 cups water • clothes pegs (one per student)
Materials for Chromatography Activity
• cardboard template per student (11X2cm piece of cereal box, with a line drawn across 2cm from one end). See photo with activity 3.
• water based marker pens (a pack of at least 12 for the class)
• mini binder clips (4 per student)
• scissors and pencil (per student) • large square tub e.g. 1.75kg yogurt tub (one per student pair)
• paper towels
• coffee filters (two per student) • coffee stirrer sticks (two per student)
3 Lesson SRP349 | Unit: Exploring Chemistry | Lesson: 2 Crystals Chromatography © 2017 The Scientist in Residence Program.
In the Classroom
Introductory Discussion 1. Review with students that matter is made up of particles, and explain that some matter is made up of
different kinds of particles. In this lesson they will be mixing different kinds of particles together, then separating them again.
2. Processes of science that the students will focus on: exploration, curiosity, mechanical manipulation, close observation, inferring, concluding.
3. Safety guidelines: making sugar crystals involves pouring sugar syrup hotter than boiling water, so keep a distance from the students while initially pouring it. (Set-up a “no-kid” zone using tape on the floor around the kettle.
Activity 1: Epsom salt crystal painting Purpose of Activity: To observe dissolving and crystallization, while understanding these processes at the molecular level. Methods and Instructions: Set-up prior to experiment: prepare the epsom salt solution by mixing 2 cups of epsom salts in 2 cups of boiling water in a heat proof jar, or equivalent. Heat further in a microwave if necessary to completely dissolve the epsom salts in the water to produce a clear solution. A jar of epsom salt solution will not crystallize out again for an hour or so. Pre-boil a small kettle of water. Students will work individually. 1. Show students the jar of epsom salt solution. Tell them that although it looks like water, it is a mixture
of water molecules and epsom salt molecules. Demonstrate how the epsom salt solution was made: pour some recently boiled water into a small heat proof jar, then sprinkle in a few epsom salt crystals. Show students the jar as the epsom salts appear to disappear - they are dissolving in the water, until they become completely evenly mixed in the water to form a solution. (Later discard this solution as it is not at a high enough concentration for the activity.)
2. Distribute the previously prepared epsom salt solution between the shallow containers on each desk. 3. Demonstrate to students how they will paint epsom salt solution onto black paper, in any design they
wish. Explain that as the water molecules evaporate from the solution on the paper, the epsom salt molecules will be left behind, and will organize into crystals - the process is called crystallization. Small crystals will form rapidly where the epsom salt solution is thin and water evaporates from it fast. In the deeper puddles, the water takes longer to evaporate and longer, spiky crystals have more time to form.
4. Emphasize to students that to make the longest crystals, do not repaint over a wet area, as this will disrupt crystal formation that has already started.
5. Once the students have painted for a few minutes, distribute the flashlights, and show students how they can use them to reveal the sparkly epsom salt crystals that are forming. If they are lucky, and hold the flashlight from the side, they may be able to see crystals growing from the edge of a puddle. Where students have larger crystals forming point out their shape: long and spiky (technically a “monoclinic prism”). Crystals made from other substances have their own characteristic shape.
6. While their paintings start to dry, distribute the worksheet for students to fill out for reviewing the process of dissolving and crystallization at the molecular level.
7. The paintings can be displayed under holiday lights, or other bright lights so that they sparkle.

4 Lesson SRP349 | Unit: Exploring Chemistry | Lesson: 2 Crystals Chromatography © 2017 The Scientist in Residence Program.
Activity 2: Sugar crystals Purpose of Activity: To observe crystallization, while making a candy snack Methods and Instructions: Set-up prior to experiment: Immediately before this activity, mix 4 cups of granulated sugar and 1.5 cups water in a pan. Heat on the stove until boiling and the sugar is completely dissolved. Use within 45 mins, as it crystallizes rapidly. Students will work as one large group, with part of this activity a demonstration. 1. While the students observe, show the (hot) solution of
sugar in water, and pour it into the small baking tray. Tell them that in the same way as the epsom salt activity, the water will evaporate, leaving behind the sugar molecules, which will group together to form sugar crystals.
2. Lay the mesh over the tray, and use it to support clothes pegs clamped onto popsicle sticks, one for each student (see photo). The popsicle sticks should be lowered into the sugar solution as far as possible. The clothes pegs can be laid on top of each other to fit enough for the class. (While the teacher sets this up, the students can complete the epsom salt worksheet.)
3. The crystallization of sugar crystals takes longer than epsom salts - ideally leave undisturbed for a
week or more. Then remove the clothes pegs and the mesh, then break the popsicle sticks out of the syrupy crystal mess one by one. Briefly rinse the crystal mass at the end of each popsicle stick under cold water, then stand in a cup to dry, or hand out right away.
4. When the sugar crystals are distributed to the students to eat, ask them to first look closely at the sugar crystal shapes. They should be able to see that they are long with a pointed tip (technically monoclinic prisms, the same as epsom salt crystals). All sugar crystals form this shape because of how this particular molecule organizes itself during crystallization.
5 Lesson SRP349 | Unit: Exploring Chemistry | Lesson: 2 Crystals Chromatography © 2017 The Scientist in Residence Program.
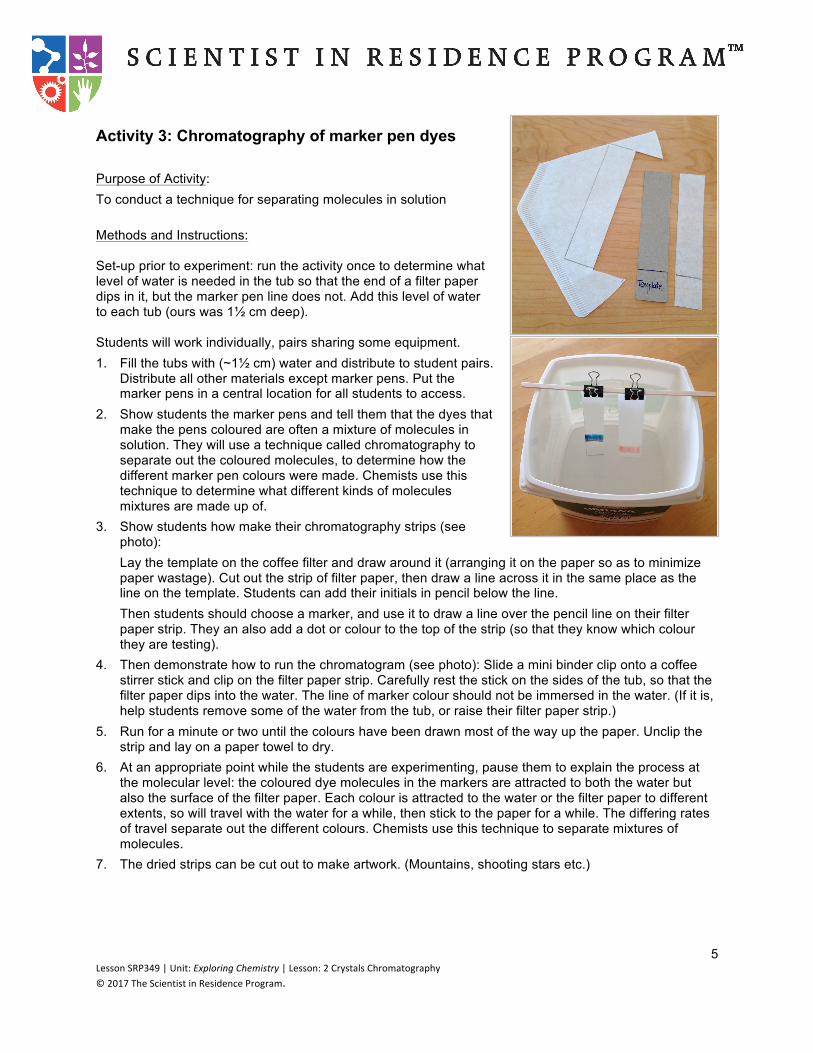
Activity 3: Chromatography of marker pen dyes Purpose of Activity: To conduct a technique for separating molecules in solution Methods and Instructions: Set-up prior to experiment: run the activity once to determine what level of water is needed in the tub so that the end of a filter paper dips in it, but the marker pen line does not. Add this level of water to each tub (ours was 1½ cm deep). Students will work individually, pairs sharing some equipment. 1. Fill the tubs with (~1½ cm) water and distribute to student pairs.
Distribute all other materials except marker pens. Put the marker pens in a central location for all students to access.
2. Show students the marker pens and tell them that the dyes that make the pens coloured are often a mixture of molecules in solution. They will use a technique called chromatography to separate out the coloured molecules, to determine how the different marker pen colours were made. Chemists use this technique to determine what different kinds of molecules mixtures are made up of.
3. Show students how make their chromatography strips (see photo): Lay the template on the coffee filter and draw around it (arranging it on the paper so as to minimize paper wastage). Cut out the strip of filter paper, then draw a line across it in the same place as the line on the template. Students can add their initials in pencil below the line. Then students should choose a marker, and use it to draw a line over the pencil line on their filter paper strip. They an also add a dot or colour to the top of the strip (so that they know which colour they are testing).
4. Then demonstrate how to run the chromatogram (see photo): Slide a mini binder clip onto a coffee stirrer stick and clip on the filter paper strip. Carefully rest the stick on the sides of the tub, so that the filter paper dips into the water. The line of marker colour should not be immersed in the water. (If it is, help students remove some of the water from the tub, or raise their filter paper strip.)
5. Run for a minute or two until the colours have been drawn most of the way up the paper. Unclip the strip and lay on a paper towel to dry.
6. At an appropriate point while the students are experimenting, pause them to explain the process at the molecular level: the coloured dye molecules in the markers are attracted to both the water but also the surface of the filter paper. Each colour is attracted to the water or the filter paper to different extents, so will travel with the water for a while, then stick to the paper for a while. The differing rates of travel separate out the different colours. Chemists use this technique to separate mixtures of molecules.
7. The dried strips can be cut out to make artwork. (Mountains, shooting stars etc.)

6 Lesson SRP349 | Unit: Exploring Chemistry | Lesson: 2 Crystals Chromatography © 2017 The Scientist in Residence Program.
Closure Discussion The three activities in this lesson showed how mixtures of molecules in solution can be separated, using crystallization and chromatography.
References 1. Epsom salt crystal painting taken from <http://www.ingridscience.ca/node/98>. Accessed May. 17,
2016. 2. Chromatography taken from <http://www.ingridscience.ca/node/277>. Accessed May. 17, 2016.