SCHOOL OF CHEMISTRY UNIVERSITY OF KWAZULU-NATAL DURBAN …cheminnerweb.ukzn.ac.za/Files/CHEM120...
121
Name: _____________________________ Student number: _____________________________ Laboratory Day: _____________________________ Laboratory number: _____________________________ Seat number: _____________________________ SCHOOL OF CHEMISTRY UNIVERSITY OF KWAZULU-NATAL DURBAN CENTRE Chemical Reactivity CHEM 120 LABORATORY MANUAL 2 nd SEMESTER 2010
Transcript of SCHOOL OF CHEMISTRY UNIVERSITY OF KWAZULU-NATAL DURBAN …cheminnerweb.ukzn.ac.za/Files/CHEM120...
Name: _____________________________
Student number: _____________________________
Laboratory Day: _____________________________
Laboratory number: _____________________________
Seat number: _____________________________
SCHOOL OF CHEMISTRY
UNIVERSITY OF KWAZULU-NATAL DURBAN CENTRE
Chemical Reactivity CHEM 120
LABORATORY MANUAL 2nd SEMESTER 2010
1
UNIVERSITY OF KWAZULU-NATAL DURBAN CENTRE
SCHOOL OF CHEMISTRY
I, the undersigned (please print your full name):
___________________________________________________________________
Student Number: ____________________
do hereby acknowledge having read and understood the documents headed Occupational Health
and Safety and Laboratory Regulations. Furthermore, I accept that contravention of these rules and
regulations may lead to my expulsion from the laboratory class, or classes, with subsequent loss of
my Duly Performed (DP) certificate.
I agree to abide by any additional laboratory regulations or safety rules presented in writing in the
laboratory manuals/books or issued verbally by the lecturer-in-charge, or other responsible member
of staff, during pre-laboratory lectures or in the laboratory.
In addition, I understand that I must attend at least 80% of the scheduled laboratory classes and that
failure to do so, irrespective of the reasons, may result in the loss of my DP certificate.
DATE: ___________________________ SIGNATURE: ___________________________
2
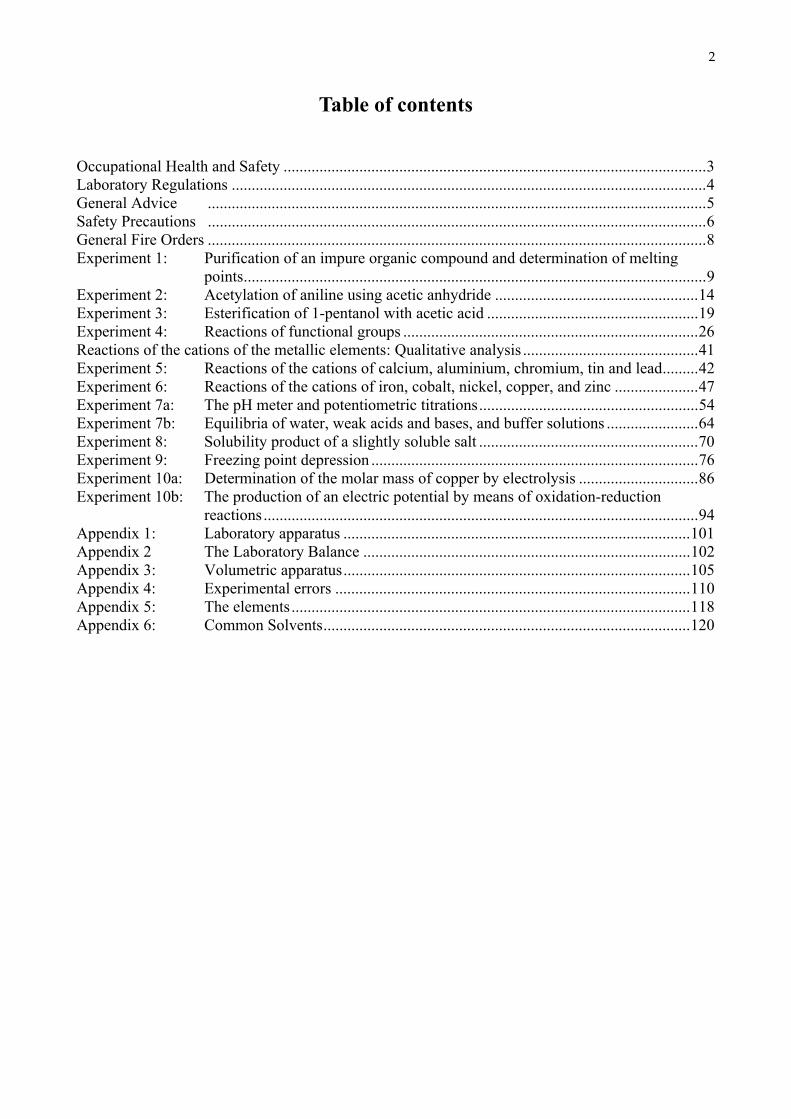
Table of contents Occupational Health and Safety .......................................................................................................... 3 Laboratory Regulations ....................................................................................................................... 4 General Advice ............................................................................................................................. 5 Safety Precautions ............................................................................................................................. 6 General Fire Orders ............................................................................................................................. 8 Experiment 1: Purification of an impure organic compound and determination of melting
points .................................................................................................................... 9 Experiment 2: Acetylation of aniline using acetic anhydride ................................................... 14 Experiment 3: Esterification of 1-pentanol with acetic acid ..................................................... 19 Experiment 4: Reactions of functional groups .......................................................................... 26 Reactions of the cations of the metallic elements: Qualitative analysis ............................................ 41 Experiment 5: Reactions of the cations of calcium, aluminium, chromium, tin and lead ......... 42 Experiment 6: Reactions of the cations of iron, cobalt, nickel, copper, and zinc ..................... 47 Experiment 7a: The pH meter and potentiometric titrations ....................................................... 54 Experiment 7b: Equilibria of water, weak acids and bases, and buffer solutions ....................... 64 Experiment 8: Solubility product of a slightly soluble salt ....................................................... 70 Experiment 9: Freezing point depression .................................................................................. 76 Experiment 10a: Determination of the molar mass of copper by electrolysis .............................. 86 Experiment 10b: The production of an electric potential by means of oxidation-reduction
reactions ............................................................................................................. 94 Appendix 1: Laboratory apparatus ....................................................................................... 101 Appendix 2 The Laboratory Balance .................................................................................. 102 Appendix 3: Volumetric apparatus ....................................................................................... 105 Appendix 4: Experimental errors ......................................................................................... 110 Appendix 5: The elements .................................................................................................... 118 Appendix 6: Common Solvents ............................................................................................ 120
Health and Safety
3
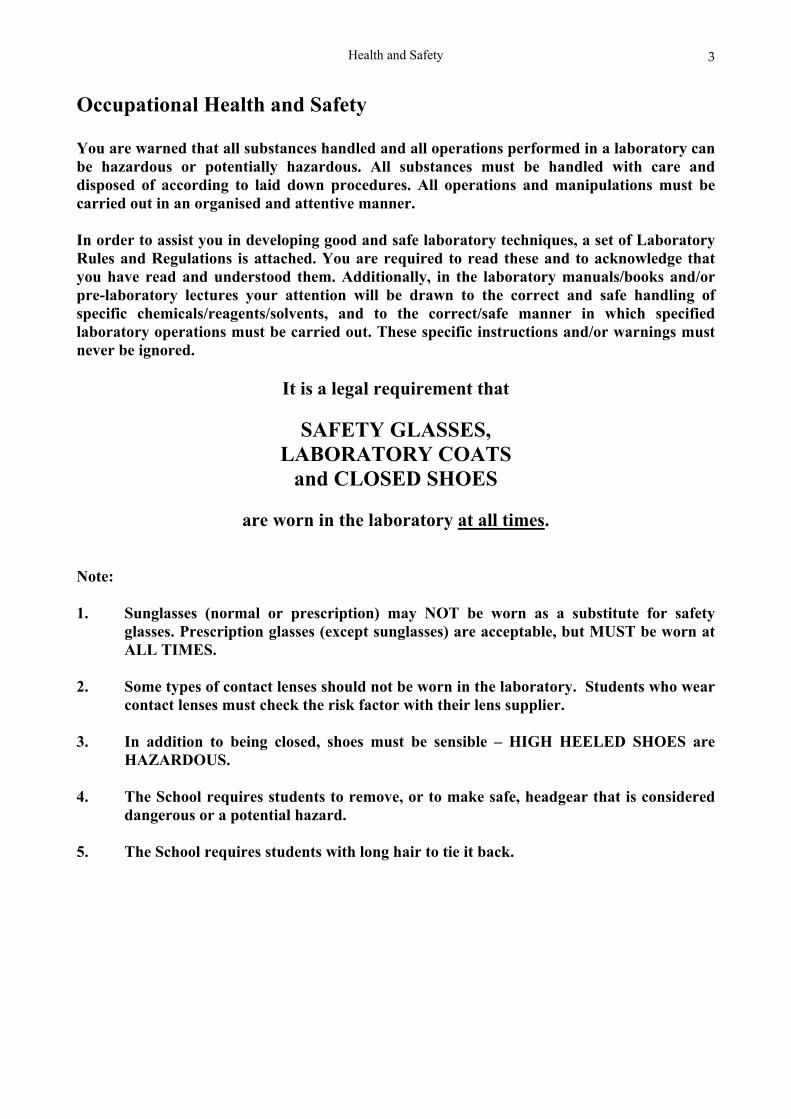
Occupational Health and Safety You are warned that all substances handled and all operations performed in a laboratory can be hazardous or potentially hazardous. All substances must be handled with care and disposed of according to laid down procedures. All operations and manipulations must be carried out in an organised and attentive manner. In order to assist you in developing good and safe laboratory techniques, a set of Laboratory Rules and Regulations is attached. You are required to read these and to acknowledge that you have read and understood them. Additionally, in the laboratory manuals/books and/or pre-laboratory lectures your attention will be drawn to the correct and safe handling of specific chemicals/reagents/solvents, and to the correct/safe manner in which specified laboratory operations must be carried out. These specific instructions and/or warnings must never be ignored.
It is a legal requirement that
SAFETY GLASSES, LABORATORY COATS
and CLOSED SHOES
are worn in the laboratory at all times.
Note: 1. Sunglasses (normal or prescription) may NOT be worn as a substitute for safety
glasses. Prescription glasses (except sunglasses) are acceptable, but MUST be worn at ALL TIMES.
2. Some types of contact lenses should not be worn in the laboratory. Students who wear
contact lenses must check the risk factor with their lens supplier. 3. In addition to being closed, shoes must be sensible – HIGH HEELED SHOES are
HAZARDOUS. 4. The School requires students to remove, or to make safe, headgear that is considered
dangerous or a potential hazard. 5. The School requires students with long hair to tie it back.
Laboratory Regulations
4
Laboratory Regulations 1. Students shall present themselves ten minutes before the start of each scheduled laboratory
session. Latecomers will be refused entry to the laboratory.
2. No student is permitted to work in the laboratory outside scheduled laboratory hours.
3. Students are not allowed to enter the preparation room, which is located along the side of the laboratory. If reagent bottles need to be refilled, broken apparatus replaced, etc., students should request assistance from a demonstrator.
4. Apparatus and chemicals are NOT to be removed from the laboratory.
5. You will find the laboratory bench clean upon your arrival, and it should be clean when you
leave the laboratory. Bench tops should be wiped and glassware and other apparatus should be left clean and dry.
6. Balances and other expensive equipment must be treated with care and kept clean and tidy
at all times. Do not spill chemicals on the balance pan! 7. All solids must be discarded in the bins at the outer ends of each bench. Do not throw
matches, paper, or any insoluble chemicals into the sink. Liquids must be discarded into the ceramic sinks or designated disposal bottles.
8. All students are required to wear a laboratory coat, and no student will be permitted to work
in the laboratory without one. 9. All students who do not wear conventional spectacles must wear a pair of safety spectacles.
No student will be permitted to work in the laboratory without eye protection. 10. All students must wear closed shoes in the laboratory. 11. All students must have a laboratory towel to dry apparatus and clean the bench top. 12. No food or drink is allowed in the laboratory. Eating is not permitted in the laboratory. 13. Cell phones must be switched off whilst you are in the laboratory.
General Advice
5
General Advice In order to work quickly and accurately, students should carefully plan their work before coming into the laboratory. A schedule of the experiments to be performed will be posted on the notice board and students are expected to read the relevant portions of the notes in their laboratory manuals before their practical session. The pre-laboratory problems on the green sheets should be completed at home prior to the relevant laboratory. These exercises are designed to familiarise you with certain aspects of the theory of the experiment you are to carry out, as well as giving you practice in the calculations involved. It is thus very important that you complete them before coming to the laboratory. The laboratory exercises will contain questions which are very similar to those found in the pre-lab exercises. These exercises thus serve as preparation for the laboratory exercises, and it is thus in your own interest to ensure that you have mastered the material. You will not be allowed entry into the laboratory unless you have completed your green sheet beforehand. The demonstrators will check that these sheets have been completed satisfactorily. You must record all your results neatly in ink on the sheets provided. If you forget your laboratory manual, borrow a friend’s and make a copy of the relevant sheets before coming to the laboratory. All results sheets for a particular laboratory must be handed in at the end of that session; students who do not do so will be deemed to have been absent, with possible subsequent DP implications. All absences from practicals will automatically be graded as 0 unless a suitable written excuse (medical or other) is furnished. Written excuses should be provided within one week of re-attendance, or they will not be accepted. Please keep in mind that a DP certificate will be refused to any student who has not attended the required minimum number (80%) of laboratory sessions, irrespective of the reasons for absences.
Safety Precautions
6
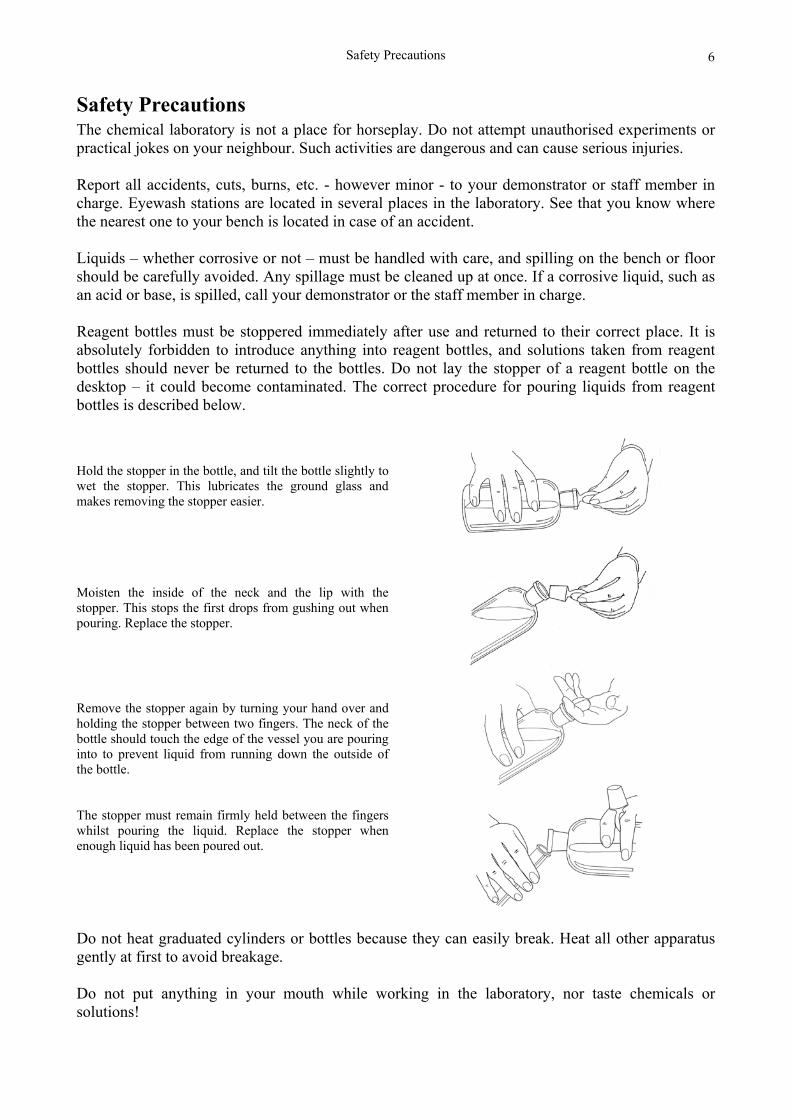
Safety Precautions The chemical laboratory is not a place for horseplay. Do not attempt unauthorised experiments or practical jokes on your neighbour. Such activities are dangerous and can cause serious injuries. Report all accidents, cuts, burns, etc. - however minor - to your demonstrator or staff member in charge. Eyewash stations are located in several places in the laboratory. See that you know where the nearest one to your bench is located in case of an accident. Liquids – whether corrosive or not – must be handled with care, and spilling on the bench or floor should be carefully avoided. Any spillage must be cleaned up at once. If a corrosive liquid, such as an acid or base, is spilled, call your demonstrator or the staff member in charge. Reagent bottles must be stoppered immediately after use and returned to their correct place. It is absolutely forbidden to introduce anything into reagent bottles, and solutions taken from reagent bottles should never be returned to the bottles. Do not lay the stopper of a reagent bottle on the desktop – it could become contaminated. The correct procedure for pouring liquids from reagent bottles is described below. Hold the stopper in the bottle, and tilt the bottle slightly to wet the stopper. This lubricates the ground glass and makes removing the stopper easier.
Moisten the inside of the neck and the lip with the stopper. This stops the first drops from gushing out when pouring. Replace the stopper.
Remove the stopper again by turning your hand over and holding the stopper between two fingers. The neck of the bottle should touch the edge of the vessel you are pouring into to prevent liquid from running down the outside of the bottle. The stopper must remain firmly held between the fingers whilst pouring the liquid. Replace the stopper when enough liquid has been poured out.
Do not heat graduated cylinders or bottles because they can easily break. Heat all other apparatus gently at first to avoid breakage. Do not put anything in your mouth while working in the laboratory, nor taste chemicals or solutions!

Safety Precautions
7
Breakages of expensive items of glassware such as burettes, pipettes, thermometers, graduated cylinders, etc. will be charged for. Examination results can be withheld at the end of a semester until such charges have been settled.
Safety Precautions
8
General Fire Orders These orders should be read in conjunction with any fire fighting instructions that are displayed in the laboratory. In the event of a fire:
Alert your demonstrator or staff member in charge (if they haven’t already noticed…) and obey any instructions that they give you.
On hearing a fire evacuation alarm:
Stop normal work immediately. Make any apparatus safe – turn off Bunsen burners, stirrers, vacuum pumps, etc. Unless your demonstrator or staff member in charge has given you any other special instructions, follow the green emergency exit signs out of the building. Assemble on the grassed area between J and L blocks.
You should make sure that you know the location of the fire extinguisher in your lab.
Experiment 1
9
Experiment 1: Purification of an impure organic compound and determination of melting points
AIM To introduce the elementary technique of removal of impurities; to illustrate the techniques of hot filtration and crystallisation; and to provide practice in the determination of the melting point of a solid. INTRODUCTION
Removal of impurities An insoluble impurity is easily removed from a solution by means of filtration. Similarly, a soluble impurity can be removed if it is first extracted from solution by adsorption onto a suitable solid. Activated charcoal is a very good adsorbent by virtue of its large surface area (200 m2 g-1). It is used in gas masks to adsorb noxious gases such as CO, CO2, and COCl2, and in the wine and gelatine industries to deodorise and decolorise. In this experiment activated charcoal will be used to adsorb a soluble dye from an aqueous solution of an organic compound. The organic compound is sparingly soluble in cold water (0.5 g per 100 cm3 at 10 °C) and appreciably soluble in hot water (2.7 g per 100 cm3 at 90 °C). Thus it is imperative that filtration be done on a hot solution in a preheated filter.
Crystallisation To obtain a uniform crystalline product from solution, three conditions are necessary: (a) having a reasonable concentration at a high temperature (b) ensuring a slow rate of cooling (c) preventing evaporation of solvent. In this experiment quantities of solute and solvent have been selected to fulfil requirements (a) and (c).
Melting points Most organic substances consist of molecules held together by covalent bonds. The crystals are held together by weak van der Waals attractions between the molecules and thus have low melting points - in the range 30 to 360 °C. The melting point of a pure substance is defined as that temperature at which its crystalline state co-exists in equilibrium with its liquid state. At this temperature any addition of heat energy will cause the liquid to increase at the expense of the crystalline solid, and any removal of heat energy will cause the amount of solid to increase at the expense of the liquid. With very good equipment it can be shown that there is no change in temperature as solid turns to liquid and vice versa. With the equipment available in this experiment it will suffice to record the melting point as that temperature range from when the solid first melts to the point at which the last trace of solid disappears. If the substance under test is pure, the change from all solid to all liquid will occur within a temperature change of 0.5 °C. If impure, it does not have a melting point - it has a melting range often exceeding 5 °C in extent. The melting point of a pure substance is as characteristic of that substance as is its density, refractive index, boiling point, etc. and thus can: (i) prove a substance to be pure or impure (ii) identify an unknown substance.
Experiment 1
10
The melting points of all known substances are recorded in books of tables, making identification of an unknown substance easy. Once a match has been obtained between the melting point of the substance under test and a listed substance, further confirmation of identity is possible. Some of the substance under test is mixed with its listed match and the melting point of the mixture is determined. If the mixture has the same melting point as the substance under test, then the identity of the unknown is established beyond doubt. If, however, the mixture melts at a lower temperature range, then the unknown substance has not been correctly identified. NOTES
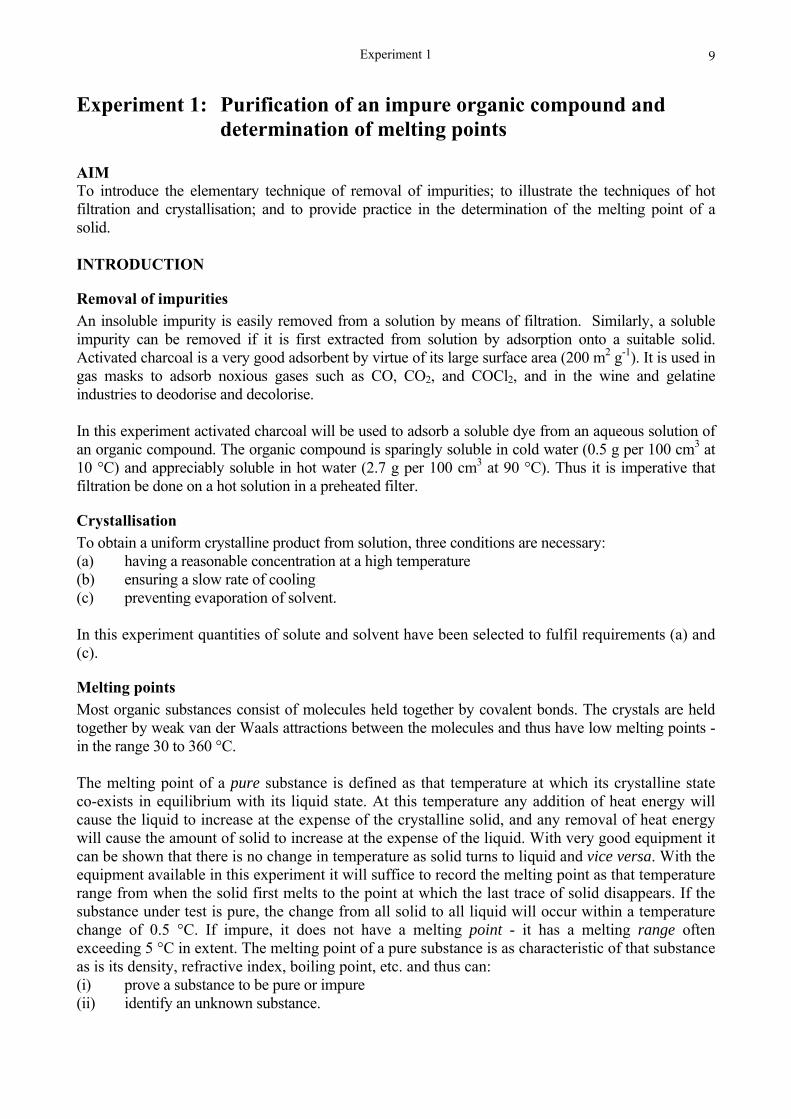
Filtration The separation of solids from suspensions requires a septum of suitable pore size that will allow the molecules of the solvent and solute to pass whilst retaining particles of insoluble substances. Normally a piece of filter paper is sufficient, but in organic chemistry it is sometimes necessary to build up a composite septum of several layers in order to retain amorphous solids. A composite septum usually consists of a piece of filter paper on which is spread an even layer of filter aid. Common filter aids are: paper pulp, asbestos fibres, glass wool, diatomaceous earth, etc. In this experiment a diatomaceous earth called kieselguhr will be used. Because a composite septum is rather thick, filtration tends to be slow. In order to speed up the rate of filtration, a vacuum is applied to the underside of the septum as shown in the Figure below.
The procedure for preparing and using a composite septum is: (i) make a slurry of two heaped spatulae of kieselguhr in approximately 15 cm3 of water (ii) place a Buchner funnel in the receiver (iii) connect the side-arm of the receiver to the vacuum pump (iv) open the water tap of the vacuum pump fully and leave running till end of filtration (v) put a circle of filter paper on the funnel and wet it with a few drops of water; ensure the
paper lies flat and covers the perforations completely (vi) pour the slurry of kieselguhr onto the filter paper and cover with another piece of filter
paper (vii) close the relief valve and suck dry (viii) open the relief valve and empty the receiver (ix) if a hot filtration is to be done, rest the funnel on a beaker of hot water until required.
NOTE: Buchner funnels and Hirsch funnels are expensive and must be handled with care.
To vacuum tap

Experiment 1
11
Determination of melting point The apparatus used to determine melting point consists of a heat source around a space holding three sample tubes (under a magnifying glass), and a thermometer. The heating device consists of a boost heater which serves to raise the temperature quickly to within 20 °C of the expected melting point, at which point it is switched off. Thereafter, the infinitely variable heater is switched on and set to raise the temperature at the desired number of degrees per minute.
M
Melting Point Apparatus
Usually a quick run is done at 10 °C per minute to obtain an approximate melting point. The apparatus is then cooled by means of the cooling plug to 20 °C below the roughly determined melting point. Now a second and much slower run is done on a fresh sample at a rate of 2 °C per minute temperature rise in order to obtain an accurate melting point. For practice in melting point determination two substances A and B are supplied. This practice can be done during the period when the filtrate is cooling and crystals are forming. A small quantity of A is crushed on a watch glass and introduced into a melting point tube to a depth of about 5 mm. A second tube is similarly charged with B and a third tube with a mixture of approximately equal proportions of A and B (provided). All three tubes are inserted in the apparatus and a preliminary run done. A and B will melt at their respective melting temperatures. The mixture of A and B will melt at a temperature lower than either A or B and the melting process will be spread over a range of some five degrees, illustrating the certainty with which purity or identification mentioned in the Introduction can be inferred. A second and slower run on fresh samples of A and B will allow the two melting points to be accurately determined. The booster heater in this run must be switched off at a temperature of about 20 °C below the melting point obtained in the preliminary run.
Experiment 1
12
Remember to cool the instrument between runs by making use of the cooling plug as described above. EXPERIMENTAL PROCEDURE 1. Prepare a Buchner funnel as described in the filtration notes. 2. Empty the vial of sample into a 50 cm3 conical flask, add 25 cm3 of water, add 4 anti-bumping
granules and bring to the boil. Swirl frequently to avoid "bumping". 3. Remove burner and allow two minutes for the contents to cool. Add approximately 0.1 g of activated charcoal and boil for two minutes, with swirling. 4. Filter hot through the previously prepared Buchner funnel fitted with an empty, clean receiver.
The filtrate should be clear and colourless. DO NOT WASH. Open the relief valve and close the water tap.
5. Preheat a 50 cm3 conical flask in the beaker of hot water. Reheat the filtrate in the Buchner receiver and transfer to the warm conical flask. Cover with foil and set aside to cool to room temperature.
6. Practise the determination of melting point as described in “Determination of melting point” above.
7. When the conical flask and contents have reached room temperature transfer to an ice bath for 10 minutes.
8. Prepare a Hirsch funnel by putting a damp piece of filter paper on the perforated bed and mounting the funnel on the Buchner receiver. Open the water tap of the vacuum pump fully and close the relief valve.
9. Swirl the contents of the conical flask and pour the crystals into the Hirsch funnel. If it is necessary to rinse the flask in order to get all the crystals onto the funnel, use the filtrate for this purpose.
10. Invert the Hirsch funnel over a square of absorbent paper and scrape all the crystals onto it, cover with another square of paper and gently squeeze out excess moisture.
11. Transfer the two squares of paper and crystals to a clean marked 50 cm3 beaker and dry in the oven for 10 minutes.
12. Determine the melting point of the crystals. 13. Weigh a 50 cm3 beaker and ask a demonstrator to verify the reading entered on your report
sheet. Transfer the crystals to the beaker and ask a demonstrator to verify the mass as you re-weigh it.
Experiment 1
13
Experiment 1: Purification of an impure organic compound and determination of melting points
Name: _____________________________
Student no.: _____________________________
Lab. number: _____________________________
Seat Number: _____________________________
Date: _____________________________
Demonstrator:
________________________
Practical Mark:
Laboratory Mark:
RESULTS Mass of vial + compound + lid _____________________ g
Mass of empty vial + lid _____________________ g
Mass of pure compound _____________________ g
Melting point range of pure compound _____________________ °C
Rough melting point of A _____________________ °C
Accurate melting point range of A _____________________ °C
Rough melting point of B _____________________ °C
Accurate melting point range of B _____________________ °C
Rough mixed melting point range of A and B _____________________ °C
N.B.: Demonstrator's initials must be obtained for all weighings.
Experiment 2
14
Experiment 2: Acetylation of aniline using acetic anhydride AIM To introduce the procedure of acetylation, to introduce the technique of refluxing and to introduce the concept of yield in an organic synthesis. INTRODUCTION Many inorganic reactions are instantaneous and quantitative. Many organic reactions, however, proceed slowly, and, unconsumed reactants are still present as impurities in the final equilibrium mixture. The acetylation of an amine is a good example of this.
RNH2 + (CH3CO)2O → RNHCOCH3 + CH3COOH At equilibrium, the reaction mixture contains the desired product (acetanilide), as well as an unwanted by-product (acetic acid), unreacted aniline and unreacted acetic anhydride. The ratio of the mass of desired product obtained experimentally to the mass obtainable stoichiometrically is a measure of the yield. A yield of 60% is typical not only because of the incompleteness of the reaction but also because of loss of desired product in the various processes needed to remove unwanted products and unconsumed reactants. NOTES
Handling of Ground Glass Joints The apparatus used in this experiment is fitted with ground glass joints. When used correctly, these joints are leak-proof. Both surfaces must be clean and free of grit. Surfaces must be engaged and disengaged with a turning motion. When caustic alkalies are used in preparations (e.g. saponification reactions), the apparatus must be dismantled immediately after conclusion of the experiment and thoroughly washed to prevent etching of the ground surfaces by the alkali. In this case, a THIN layer of vacuum grease may be used to prevent the glassware from sticking. All clamps used to support glass apparatus must be rubber covered or plastic covered, and minimum pressure should be used in fastening the clamps.
The Reflux Condenser When used in the vertical position (as shown in the figure), a condenser serves to return volatile reactants and products to the reaction vessel when the reaction is carried out at elevated temperature. The cooling water enters at the lower side-arm and leaves at the upper. The flow rate of cooling water must be set at approximately 1/2 litre per minute and must be checked at frequent intervals. When the flow rate is correctly set, condensation of vapours will be seen to occur in the lower third of the condenser.
Engaging Flask and Condenser The reaction flask is clamped in the fixed clamp of the bracket and the condenser in the movable clamp. In this way the condenser can be lowered and raised to effect a sliding engagement or disengagement of the reaction flask.

Experiment 2
15
When inserting the condenser into its clamp, great care must be taken to ensure that the upper side arm is not pressed against the bracket.
Regulating the Heating The volume of reagents used is small and heating must be carefully controlled. It is possible to turn the flame down by partially closing the gas tap, but this is a hazardous practice as the flame is likely to "strike back". Control is far better exercised by altering the height of the wire gauze above the flame. The most suitable position is that where only the tip of the flame touches the wire gauze. If, at this setting, boiling is not sufficiently vigorous, the ring supporting the wire gauze can be lowered a centimetre or two and then the bracket holding the condenser and reaction flask can be lowered until the flask again touches the wire gauze. At a suitable position, the vapours will be seen condensing in the lower third of the condenser. The tubes carrying cooling water must be arranged so that they do not touch the hot gauze. EXPERIMENTAL PROCEDURE 1. Wash the 10 cm3 measuring cylinder, the pear-shaped flask and the condenser with ethanol and
then with ether, IN THE FUME CUPBOARD. Pour the washings into the waste bottle provided.
2. Clamp the bracket to the upright by means of the bosshead. Make sure the fixed clamp is below and the movable clamp is above.
3. Clamp the condenser in the movable clamp of the bracket as shown in the figure below. Connect the cooling water tubes and set the flowrate of water. Measure 2 cm3 of aniline into the measuring cylinder and then pour this into the pear-shaped flask.
4. Next measure 2.5 cm3 of acetic anhydride into the measuring cylinder. Pour this slowly into the flask whilst stirring. Measure 2 cm3 of glacial acetic acid and add to the flask as well. Add 3 anti-bumping granules and install the flask in the fixed clamp of the bracket.
5. Slide the condenser down till engaged in the neck of the reaction flask. 6. Boil the mixture for 30 minutes. Adjust the boiling rate as described in the notes section.
Whilst boiling carry out steps 7 - 9 below.
7. Pour approximately 90 cm3 of deionised water into a 100 cm3 beaker and cool in an ice bath. 8. Prepare a composite septum in a Buchner funnel as described in Experiment 5. 9. Prepare a Hirsch funnel.
Experiment 2
16
10. After boiling the reaction mixture for 30 minutes, shut off the burner, disengage the condenser, shut off the condenser cooling water flow, unclip the flask and rest it in the wooden stand until cool enough to handle.
11. Pour 10 cm3 of the cold water prepared in 7 above into the measuring cylinder. 12. Pour the contents of the flask into the remaining 80 cm3 of cold water slowly and with stirring. 13. Filter through the Hirsch funnel. Use the 10 cm3 of cold water in the measuring cylinder in two
lots to rinse the beaker and to wash the crystals. 14. Transfer the crystals to a 50 cm3 wide-necked conical flask, add approximately 30 cm3 of
water and boil with frequent swirling till complete redissolution has occurred. Any brown globules visible at the bottom of the flask are unreacted aniline; this will be removed by the activated charcoal in step 15.
15. Remove the burner, let the boiling subside, add 1 spatula of activated charcoal and re-boil CAREFULLY for approximately one minute.
16. Insert the prepared, pre-heated Buchner funnel into the receiver and filter the contents of the flask hot.
17. Heat the contents of the receiver to redissolve the crystals, transfer the hot solution to a beaker, cover with foil and set aside to cool. When it has cooled to room temperature, cool the beaker further in an ice bath for 10 minutes.
18. Filter off the crystals into a Hirsch funnel, transfer to absorbent paper, blot dry, place in a marked beaker and dry in the oven for 15 minutes.
19. Determine the melting point of the product, as explained in Experiment 5. 20. Transfer the crystals to a pre-weighed 50 cm3 beaker and reweigh. Ask a demonstrator to
verify the weighings and to initial these entries on your report sheet. 21. Show your sample to a demonstrator for marking.

Experiment 2
17
Experiment 2: Acetylation of aniline using acetic anhydride Name: _____________________________
Student no.: _____________________________
Lab. number: _____________________________
Seat Number: _____________________________
Date: _____________________________
Demonstrator:
________________________
Mark:
PRE-PRAC CALCULATION
C6H5NH2 + (CH3CO)2O → C6H5NHCOCH3 + CH3COOH
aniline acetanilide
Molecular formula C6H5NH2 C6H5NHCOCH3
Molar mass _________ g mol-1 _________ g mol-1
Density 1.02 g cm-3
Volume 2.0 cm3
g ____________
mol g x aniline mol 1
eacetanilid mol 1x
mol g
aniline g 2.0 eacetanilid of mass Expected 1
1
Experiment 2
18
Experiment 2: Acetylation of aniline using acetic anhydride Name: _____________________________
Student no.: _____________________________
Lab. number: _____________________________
Seat Number: _____________________________
Date: _____________________________
Demonstrator:
________________________
Practical Mark:
Laboratory Mark:
RESULTS
Mass of weighing bottle + amide = ________________ g
Mass of empty weighing bottle = ________________ g
Mass of amide = ________________ g
% Yield = ________________ %
Melting point of product ________________ °C
Experiment 3
19
Experiment 3: Esterification of 1-pentanol with acetic acid AIM To introduce the procedure of esterification using an acid as a catalyst, to introduce the use of the separating funnel for washing a product to remove unused reagents and catalyst, to introduce the use of an anhydrous salt for drying a product, and to introduce the technique of distillation to recover a product in pure form. INTRODUCTION Esterification is the reaction of a carboxylic acid and an alcohol with the elimination of water to form an ester.
RCOOH + HOR → RCOOR + H2O The rate of reaction is slow, but reaching equilibrium can be speeded up by the application of heat and by the addition of a catalyst, such as a small quantity of concentrated sulphuric acid. The equilibrium of the reaction can be shifted to the right, i.e. the yield of ester can be improved, by increasing the active mass of one of the reactants or by removing the unwanted product, water. In this experiment a 30% excess of acetic acid will be used. Thus the calculation of percentage yield must be based on the mass of the alcohol used (alcohol is the limiting reagent). At equilibrium, the reaction flask will contain: (a) pentyl acetate (the wanted product) (also called pentyl ethanoate) (b) 1-pentanol (unreacted reagent) (c) acetic acid (unreacted reagent) (also called ethanoic acid) (d) sulfuric acid (catalyst) By exploiting differences in physical properties, the unwanted constituents can be removed in three steps: (i) The two organic substances, 1-pentanol and ester, are insoluble in water and have a lower
density than water, whereas acetic and sulphuric acids are of higher density than water and infinitely soluble in water. The 2 phases (soluble in water and insoluble in water) are separated with a separating funnel which is described below. The removal of the acids is also described below.
(ii) Traces of water can be removed by certain anhydrous salts that absorb water but do not absorb esters. This means of dehydration is described below.
(iii) 1-Pentanol and the ester are of similar density and are soluble in one another. Thus it is necessary to exploit some other difference in physical properties to separate them. 1-Pentanol boils at 138 °C whereas the ester boils at 148 °C. Thus distillation is used for the final purification as described below.
NOTES
Esterification Care is needed in the addition of concentrated sulfuric acid to the mixture of acetic acid and pentanol. Esterification takes place whilst the mixture is boiled under reflux exactly as in Experiment 6. The use of anti-bumping granules here is essential.

Experiment 3
20
The separating funnel On completion of esterification, the contents of the flask must be cooled before being washed into the separating funnel. In the funnel, two distinct layers will form: the upper layer of unreacted 1-pentanol and pentyl acetate (the organic phase) being of a lower density, will float on the lower layer (the aqueous phase) of dilute sulfuric acid and acetic acid. The interface between the two layers is clearly visible. By opening the stopcock, the aqueous phase can be drained into a beaker. (It is advisable to run the aqueous phase into a small beaker so that if the stopcock is not closed in time and some of the organic phase has passed through the stopcock, it can be returned to the funnel and re-separated.) As much of the aqueous layer as possible is drained off without loss of organic phase. Now the organic phase is washed several times with water to remove residual acid. This is carried out as follows: Approximately 20 cm3 of water is poured into the funnel, and the funnel is stoppered and shaken to enable acid absorbed in the organic phase to transfer to the aqueous phase. It is not advisable to shake too vigorously as this will cause emulsification of the ester in the water and consequent loss of product. It is best to hold the funnel with the thumb and third finger straddling the body of the funnel and the index finger holding the stopper in place, and turn the funnel upside down, right side up, upside down a few times. Then the funnel must be held upside down while the stopcock is opened to release pressure. After closing the stopcock, the shaking cycle with pressure release is repeated. After one minute's shaking, the funnel is clamped in the upright position to allow the phases to separate. Then the aqueous phase is drained off and a second and a third wash can be done. Three water washes will remove most of the acid, but traces of acid in the ester have to be removed by neutralisation. In order to neutralise the acid, the organic layer is washed with a saturated solution of sodium bicarbonate. Reaction between bicarbonate and acid will release carbon dioxide gas, so pressure release must be done frequently. The release of gas can be used to decide whether all the acid has been neutralised. When, on turning the funnel upside down and opening the stopcock, there is no escape of gas then one can conclude that either all the acid has been neutralised, or all the bicarbonate has been consumed. If the aqueous phase is now run into a beaker it can be tested with litmus paper. If the red litmus paper turns blue, then there was sufficient bicarbonate to neutralise the acid. If, however, the red litmus paper does not change to blue, then there has been insufficient bicarbonate to neutralise the acid and another bicarbonate wash must be carried out. To remove the traces of sodium bicarbonate a water wash is used. After draining this aqueous layer, the funnel must be tapped sharply to allow the last traces of water to sink. Then the last drop or two of water must be drained. Now the organic phase is ready for dehydration.

Experiment 3
21
Dehydration Calcium chloride, the well-known dehydrating agent, cannot be used here as it absorbs esters. Anhydrous sodium sulfate is suitable for use here. The organic phase is POURED from the separating funnel into a 50 cm3 conical flask and anhydrous sodium sulfate is added whilst swirling vigorously. A contact time of a couple of minutes must be allowed for dehydration and the flask must be swirled frequently. A clear solution indicates a dried product.
Fluting a filter paper Esters tend to swell the fibres of a filter paper and then the paper becomes glued to the surface of the funnel, making filtration very slow. To overcome this, the filter paper is fluted. This style of folding a filter paper will be demonstrated during the practical. After sufficient contact with the anhydrous sodium sulfate, the organic phase is filtered through a fluted filter paper into a clean, dry round-bottom distillation flask.
Distillation The reflux apparatus is modified to serve as a distillation apparatus. The bracket is clamped in a near horizontal position - the immovable clamp end slightly higher than the horizontal. The round-bottom flask is clamped in the immovable clamp and the condenser in the movable clamp. A stillhead is fitted into the neck of the round-bottom flask. This holds the thermometer in place and connects the round-bottom flask with the condenser. It is necessary to tilt the round-bottom flask and stillhead slightly downward and the condenser slightly upward to engage the condenser and stillhead. A delivery tube is fitted onto the discharge end of the condenser. This directs the condensate into a receiver. As before, the cooling water enters at the lower side-arm and exits at the upper side-arm as shown in the Figure. The thermometer is held in position by an adaptor that clamps onto the stem of the thermometer. It has two teflon gaskets which make a leak-proof seal around the stem of the thermometer. Great care must be taken that these are correctly positioned when the thermometer is inserted into the adaptor. The bulb of the thermometer is positioned at the point where the vapour leaves the flask. Some of the vapour will be seen to condense on the bulb of the thermometer. Thus the reading shown by the thermometer will be the temperature of condensing vapours as is required by the definition of boiling point. Because of the small quantity of liquid being distilled and the small difference in boiling points (10
°C), the heating of the distillation flask requires a special technique. Furthermore, a constant watch must be kept on the thermometer so that a switch in receptacle for the condensate can be made at the right moment. Heating of the flask is done without the usual wire gauze. The naked flame is passed over the bottom of the flask so as to induce gentle boiling. The temperature will rise quite rapidly to about 138 °C where the 1-pentanol will boil off. Then, after a dip, the temperature will rise again. At 140 °C the beaker receiving the condensate must be changed to a weighed sample tube and the ester collected. Great care must be taken not to heat the flask to dryness. The temperature at which the ester distils must be recorded, as well as the ambient pressure.
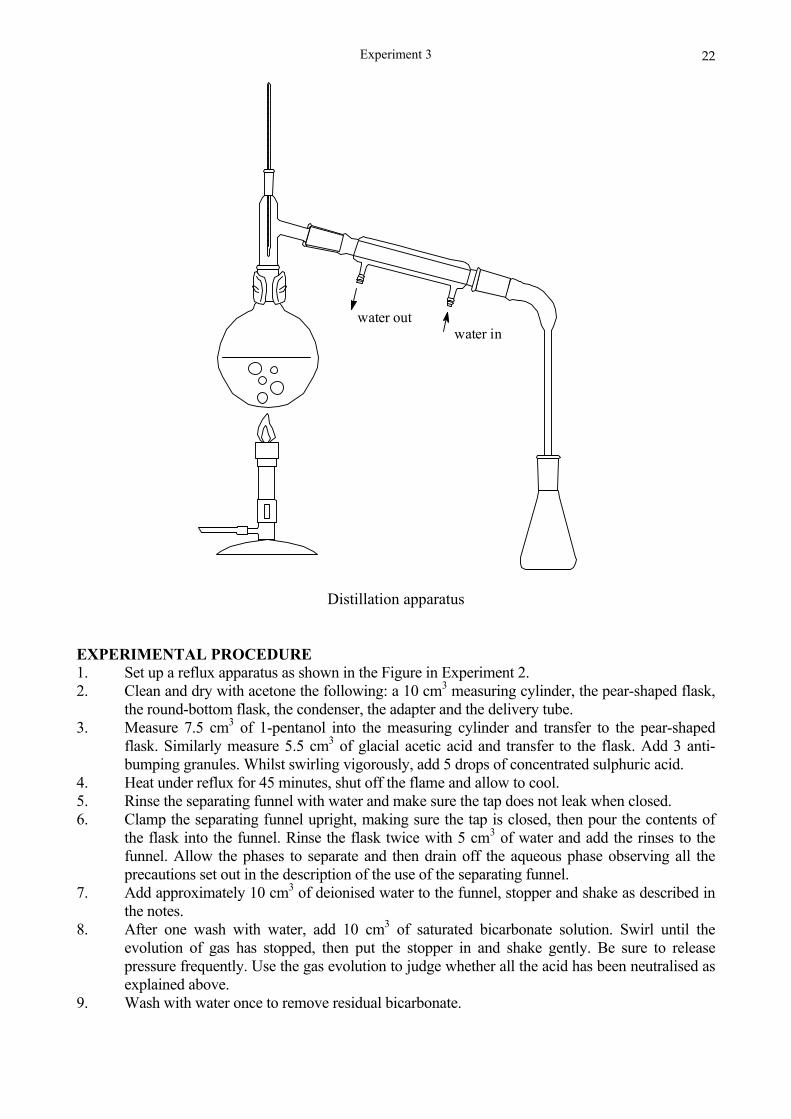
Experiment 3
22
water inwater out
Distillation apparatus
EXPERIMENTAL PROCEDURE 1. Set up a reflux apparatus as shown in the Figure in Experiment 2. 2. Clean and dry with acetone the following: a 10 cm3 measuring cylinder, the pear-shaped flask,
the round-bottom flask, the condenser, the adapter and the delivery tube. 3. Measure 7.5 cm3 of 1-pentanol into the measuring cylinder and transfer to the pear-shaped
flask. Similarly measure 5.5 cm3 of glacial acetic acid and transfer to the flask. Add 3 anti-bumping granules. Whilst swirling vigorously, add 5 drops of concentrated sulphuric acid.
4. Heat under reflux for 45 minutes, shut off the flame and allow to cool. 5. Rinse the separating funnel with water and make sure the tap does not leak when closed. 6. Clamp the separating funnel upright, making sure the tap is closed, then pour the contents of
the flask into the funnel. Rinse the flask twice with 5 cm3 of water and add the rinses to the funnel. Allow the phases to separate and then drain off the aqueous phase observing all the precautions set out in the description of the use of the separating funnel.
7. Add approximately 10 cm3 of deionised water to the funnel, stopper and shake as described in the notes.
8. After one wash with water, add 10 cm3 of saturated bicarbonate solution. Swirl until the evolution of gas has stopped, then put the stopper in and shake gently. Be sure to release pressure frequently. Use the gas evolution to judge whether all the acid has been neutralised as explained above.
9. Wash with water once to remove residual bicarbonate.

Experiment 3
23
10. Clamp the separating funnel in the upright position and allow sufficient time for separation of phases. Run off the aqueous phase until the organic phase has entered the tap.
11. Pour the organic phase into a 50 cm3 conical flask. Do not run it out, the tap and stem are wet with water. Add a spatula-tipful of anhydrous sodium sulfate to the conical flask, cover with foil and set aside for dehydration to occur. Occasional swirling is necessary.
12. Set up the distillation apparatus shown in the Figure and described in the notes section. 13. Weigh a clean 50 cm3 beaker and ask a demonstrator to verify the mass. 14. Filter the ester through a fluted filter paper into a clean dry round-bottom distillation flask. Add
anti-bumping granules and install the flask in the distillation apparatus. 15. Heat the flask carefully with the naked flame as described above. Use a beaker to receive the
initial condensate. 16. When the temperature has reached 140 °C replace the beaker with the weighed beaker and
collect the ester. Do not take the flask to dryness. 17. Note the temperature at which the ester distils and enter this value on your report sheet together
with the ambient pressure. 18. Reweigh the beaker and ask a demonstrator to verify the mass. 19. Show your sample to the demonstrator for marking.
Experiment 3
24
Experiment 3: Esterification of 1-pentanol with acetic acid Name: _____________________________
Student no.: _____________________________
Lab. number: _____________________________
Seat Number: _____________________________
Date: _____________________________
Demonstrator:
________________________
Mark:
PRE-PRAC CALCULATION
H+ CH3COOH + CH3CH2CH2CH2CH2OH → CH3COOCH2CH2CH2CH2CH3 + H2O
acetic acid 1-pentanol pentyl acetate
Molecular formula C2H4O2 C5H12O C7H14O2
Molar mass ________ g mol-1 ________ g mol-1 ________ g mol-1
Density 1.05 g cm-3 0.81 g cm-3
Volume used 11.0 cm3 15.0 cm3
Mass used 11.0 x 1.05 g 15.0 x 0.81 g
= 11.5 g 12. g
expected mass of pentyl acetate (remember which is the limiting reagent)
= _________________ g
Experiment 3
25
Experiment 3: Esterification of 1-pentanol with acetic acid Name: _____________________________
Student no.: _____________________________
Lab. number: _____________________________
Seat Number: _____________________________
Date: _____________________________
Demonstrator:
________________________
Practical Mark:
Laboratory Mark:
RESULTS Mass of beaker + ester = ______________ g
Mass of beaker = ______________ g
Mass of ester recovered = ______________ g
% Yield = ______________ %
Boiling point of sample = ______________ °C
Ambient pressure = ______________ Pa
Experiment 4
26
Experiment 4: Reactions of functional groups AIM To supplement the theory of the lecture course by performing standard tests which identify functional groups of organic compounds. Also to emphasise that the rate of a reaction gives additional information which may enable the experimenter to distinguish between isomers, to illustrate that these tests can be carried out on small quantities of materials, and to emphasise the advantage of tests being carried out in logically grouped series instead of uncoordinated single operations. INTRODUCTION
Primary, secondary and tertiary alcohols Alcohols contain hydroxyl groups which are replaceable by other groups or atoms. The ease with which a hydroxyl group is replaced decreases in the order:
tertiary > secondary > primary > methanol and thus the time required to carry out replacement increases in the order:
tertiary < secondary < primary < methanol R3COH < R2CHOH < RCH2OH < CH3OH
In this experiment the hydroxyl group will be replaced by a chlorine atom using the Lucas Reagent (zinc chloride dissolved in hydrochloric acid).
R2CH2OHHCl
ZnCl2RCH2Cl + H2O
The halide produced is insoluble in the reaction medium and will show as turbidity (cloudiness). The turbidity will appear earliest in the test tube containing the tertiary alcohol and last in the test tube containing the primary alcohol.
Nature and strength of halide bonds Halogen atoms in organic compounds may be ionically bonded or covalently bonded. Those which are ionically bonded dissociate in solution, giving halide ions which react with silver ions instantly to form an insoluble silver chloride precipitate.
RNH3+Cl- + Ag+NO3
- → RNH3+NO3
- + AgCl(s) Those which are covalently bonded take longer to react with silver nitrate, and may even require the use of additional solvents and the application of heat. Of the covalently bonded haloalkanes, only a tertiary compound will react with aqueous silver nitrate. The formation of the silver halide is not instantaneous, it takes some ten seconds to appear.
R3CCl + AgNO3 → R3CNO3 + AgCl(s) A secondary haloalkane, when heated with ethanolic silver nitrate, will yield a precipitate after about ten minutes whilst a primary compound may yield only a slight turbidity after heating for half-an-hour with ethanolic silver nitrate.
Experiment 4
27
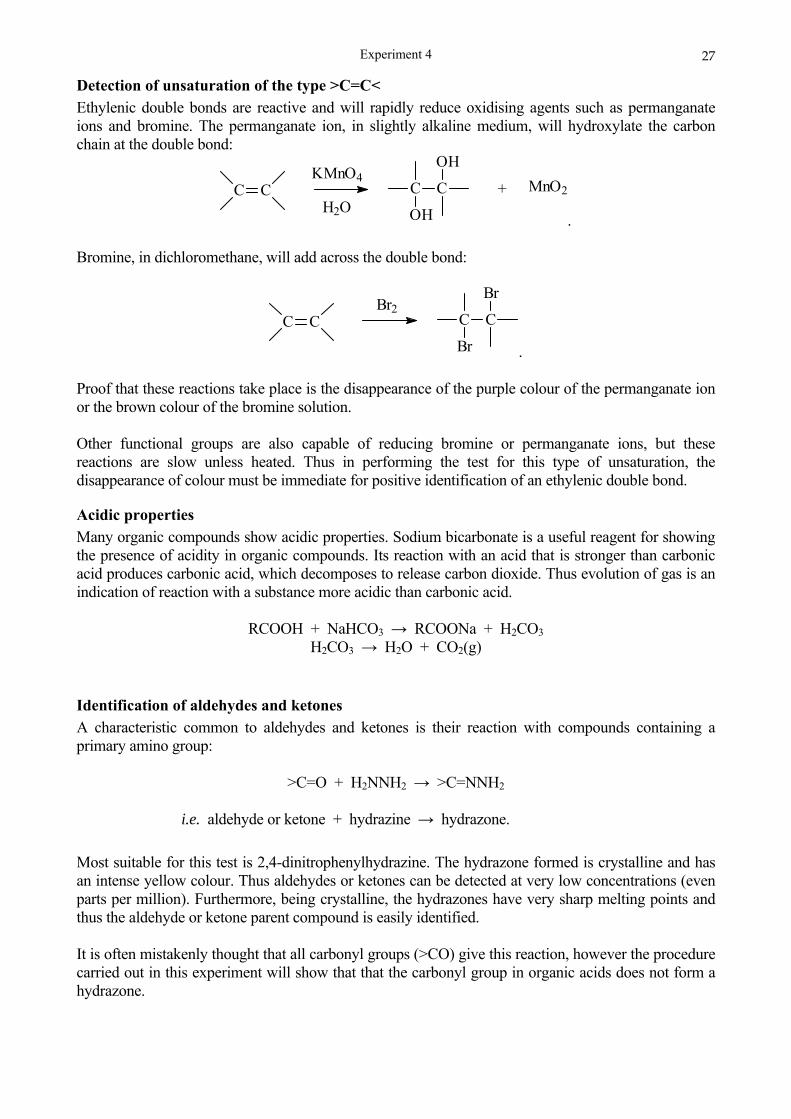
Detection of unsaturation of the type >C=C< Ethylenic double bonds are reactive and will rapidly reduce oxidising agents such as permanganate ions and bromine. The permanganate ion, in slightly alkaline medium, will hydroxylate the carbon chain at the double bond:
C CKMnO4
H2OC C
OH
OH
+ MnO2
. Bromine, in dichloromethane, will add across the double bond:
C C C C
Br
Br
Br2
. Proof that these reactions take place is the disappearance of the purple colour of the permanganate ion or the brown colour of the bromine solution. Other functional groups are also capable of reducing bromine or permanganate ions, but these reactions are slow unless heated. Thus in performing the test for this type of unsaturation, the disappearance of colour must be immediate for positive identification of an ethylenic double bond.
Acidic properties Many organic compounds show acidic properties. Sodium bicarbonate is a useful reagent for showing the presence of acidity in organic compounds. Its reaction with an acid that is stronger than carbonic acid produces carbonic acid, which decomposes to release carbon dioxide. Thus evolution of gas is an indication of reaction with a substance more acidic than carbonic acid.
RCOOH + NaHCO3 → RCOONa + H2CO3 H2CO3 → H2O + CO2(g)
Identification of aldehydes and ketones A characteristic common to aldehydes and ketones is their reaction with compounds containing a primary amino group:
>C=O + H2NNH2 → >C=NNH2 i.e. aldehyde or ketone + hydrazine → hydrazone.
Most suitable for this test is 2,4-dinitrophenylhydrazine. The hydrazone formed is crystalline and has an intense yellow colour. Thus aldehydes or ketones can be detected at very low concentrations (even parts per million). Furthermore, being crystalline, the hydrazones have very sharp melting points and thus the aldehyde or ketone parent compound is easily identified. It is often mistakenly thought that all carbonyl groups (>CO) give this reaction, however the procedure carried out in this experiment will show that that the carbonyl group in organic acids does not form a hydrazone.
Experiment 4
28
Reducing properties Many organic compounds have reducing properties. The most frequently encountered reducing agent is the aldehyde group which occurs in most of the "sugars". This mild reducing property is used in industry for the manufacture of high precision reflectors for optical instruments, and in the pathology laboratory for the diagnosis of diabetes in humans. The so-called "silver mirror test" for reducing properties uses Tollens' Reagent, a solution containing [Ag(NH3)2]
+, which deposits a layer of bright silver metal on reduction - hence the name.
RCHO + 2[Ag(NH3)2]+ OH- → RCOONH4 + 3NH3 + H2O + 2Ag(s)
In the pathology laboratory Benedict's Reagent is used. It contains complexed cupric ions which have an intense blue colour. The cupric ion, on reduction, is converted to red cuprous oxide which is insoluble. Thus the disappearance of the blue colour and the appearance of a red precipitate indicate the presence of an aldehyde.
RCHO + Cu(OH)2 → RCOOH + Cu2O(s) NOTES
Heating Most of the tests require the mixture of unknown compound and test reagent to be heated. Since heating a test tube in a Bunsen flame may be hazardous, test tubes are heated in a hot water bath.
Marking test tubes Several test tubes will be in the hot water bath at any one time. In order to avoid confusion, all test tubes must be clearly marked and a written record must be kept of the contents of each tube.
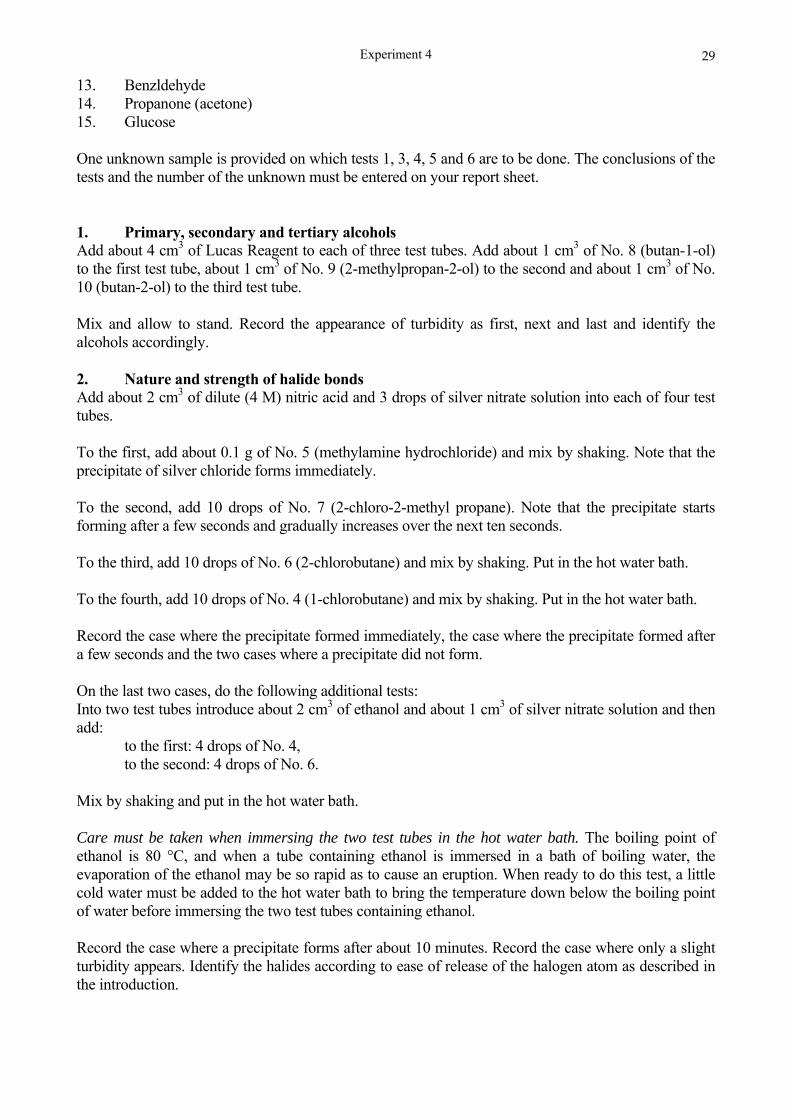
Measurement of reagents Most reagents are supplied in bottles fitted with droppers. This enables one to add the specified number of drops. Please ensure that the correct dropper is returned to a bottle. If a volume is given in cm3 and not in drops, it is easily converted on the scale of 20 drops is approximately 1 cm3. The test tubes provided are approximately 1.2 cm in diameter, thus a depth of 1 cm in the tube is approximately 1 cm3, and 2 cm in the tube is approximately 2 cm3. As these tests are qualitative, there is no need to measure exact volumes. The same result would be obtained if the volume were 4 cm3, 5 cm3 or 6 cm3. EXPERIMENTAL PROCEDURE The following fifteen substances are provided on which the six tests outlined in Points 1 to 6 are to be practised. 1. Acetic acid, glacial 2. Cinnamic acid - solid 3. Toluene 4. 1-Chlorobutane 5. Methylamine hydrochloride - solid 6. 2-Chlorobutane 7. 2-Chloro-2-methylpropane 8. Butan-1-ol 9. 2-Methylpropan-2-ol 10. Butan-2-ol 11. Oxalic acid - solid 12. Methanol
Experiment 4
29
13. Benzldehyde 14. Propanone (acetone) 15. Glucose One unknown sample is provided on which tests 1, 3, 4, 5 and 6 are to be done. The conclusions of the tests and the number of the unknown must be entered on your report sheet. 1. Primary, secondary and tertiary alcohols Add about 4 cm3 of Lucas Reagent to each of three test tubes. Add about 1 cm3 of No. 8 (butan-1-ol) to the first test tube, about 1 cm3 of No. 9 (2-methylpropan-2-ol) to the second and about 1 cm3 of No. 10 (butan-2-ol) to the third test tube. Mix and allow to stand. Record the appearance of turbidity as first, next and last and identify the alcohols accordingly. 2. Nature and strength of halide bonds Add about 2 cm3 of dilute (4 M) nitric acid and 3 drops of silver nitrate solution into each of four test tubes. To the first, add about 0.1 g of No. 5 (methylamine hydrochloride) and mix by shaking. Note that the precipitate of silver chloride forms immediately. To the second, add 10 drops of No. 7 (2-chloro-2-methyl propane). Note that the precipitate starts forming after a few seconds and gradually increases over the next ten seconds. To the third, add 10 drops of No. 6 (2-chlorobutane) and mix by shaking. Put in the hot water bath. To the fourth, add 10 drops of No. 4 (1-chlorobutane) and mix by shaking. Put in the hot water bath. Record the case where the precipitate formed immediately, the case where the precipitate formed after a few seconds and the two cases where a precipitate did not form. On the last two cases, do the following additional tests: Into two test tubes introduce about 2 cm3 of ethanol and about 1 cm3 of silver nitrate solution and then add: to the first: 4 drops of No. 4, to the second: 4 drops of No. 6. Mix by shaking and put in the hot water bath. Care must be taken when immersing the two test tubes in the hot water bath. The boiling point of ethanol is 80 °C, and when a tube containing ethanol is immersed in a bath of boiling water, the evaporation of the ethanol may be so rapid as to cause an eruption. When ready to do this test, a little cold water must be added to the hot water bath to bring the temperature down below the boiling point of water before immersing the two test tubes containing ethanol. Record the case where a precipitate forms after about 10 minutes. Record the case where only a slight turbidity appears. Identify the halides according to ease of release of the halogen atom as described in the introduction.

Experiment 4
30
3. Detection of unsaturation of the type >C=C<
3.1 By means of permanganate ion Into three test tubes introduce the following: into (i) about 1 cm3 of water 6 drops of No. 1 (acetic acid) and then sufficient solid sodium carbonate to
make the solution alkaline to litmus paper into (ii) 1 cm3 of water about 0,1 g of No. 2 (cinnamic acid) and then sufficient solid sodium
carbonate to make the solution alkaline to litmus paper. into (iii) 6 drops of No. 3 (toluene). Do not heat. To each add 3 drops of potassium permanganate solution and mix by shaking. Record the case in which the permanganate colour disappears on your report sheet.
3.2 By means of bromine Into three test tubes introduce the following: into (i) 6 drops of No. 1 (acetic acid) into (ii) about 0.1 g of No. 2 (cinnamic acid) into (iii) 6 drops of No. 3 (toluene). To each add 6 drops of bromine solution and mix. Record the case in which the brown colour of bromine disappears, thus identifying the compound containing an ethylenic double bond.
4. Acidic properties Into three test tubes introduce about 1 cm3 of saturated bicarbonate solution and then add to (i) 4 drops of No. 1 (acetic acid) to (ii) about 0.1 g of No. 11 (oxalic acid) to (iii) 4 drops of No. 12 (methanol). Record the cases where gas effervescence occurs, thus identifying acids stronger than carbonic acid.
5. Formation of hydrazones Into four test tubes introduce 5 drops of 2,4-dinitrophenylhydrazine and then add: to (i) 2 drops of No. 1 (acetic acid) to (ii) 2 drops of No. 13 (benzaldehyde) to (iii) 2 drops of No. 14 (propanone). Record the cases where a yellow precipitate forms, identifying the presence of either an aldehyde or a ketone carbonyl group. Note particularly that the carbonyl group in a carboxyl group does not form a hydrazone.
6. The reducing properties of aldehydes
6.1 Benedict's reagent Into four test tubes introduce about 5 cm3 of Benedict's solution and then add: to (i) 15 drops of No. 1 (acetic acid) to (ii) 15 drops of No. 13 (benzaldehyde) to (iii) 15 drops of No. 14 (propanone) to (iv) about 0.1 g of No. 15 (glucose).

Experiment 4
31
Mix and heat in the waterbath. Record observations as: (a) total disappearance of blue colour and copious brown precipitate (b) partial disappearance of blue colour and slight brown precipitate (c) no visible change In one case the reaction is quick and quantitative, hence the total disappearance of the blue colour. In one case the reaction is much slower and after several minutes, only a reduction in the intensity of the blue colour can be seen. Nevertheless, loss in blue-colour intensity and/or a slight brown precipitate is positive proof of the presence of an aldehyde.
6.2 Tollens' reagent Into four test tubes introduce about 2 cm3 of silver nitrate and 2 drops of sodium hydroxide solution. A precipitate will form. Add aqueous ammonia dropwise and with shaking until the precipitate is redissolved. Then add: to (i) 5 drops of No. 1 (acetic acid) to (ii) 5 drops of No. 14 (propanone) to (iii) about 0,1 g of No. 15 (glucose). Mix by shaking. Dip each tube in the hot water bath for a few seconds. Record the cases where a silver mirror forms in the tube. [To remove the silver deposit from the tube, pour in nitric acid and heat in the water bath as soon as the test is completed.]
7. Analysis of unknown compound Record the number of the unknown compound on the appropriate page of your report, and then do the analyses prescribed.
Experiment 4
32
Experiment 4: Reactions of functional groups Name: _____________________________
Student no.: _____________________________
Lab. number: _____________________________
Seat Number: _____________________________
Date: _____________________________
Demonstrator:
________________________
Mark:
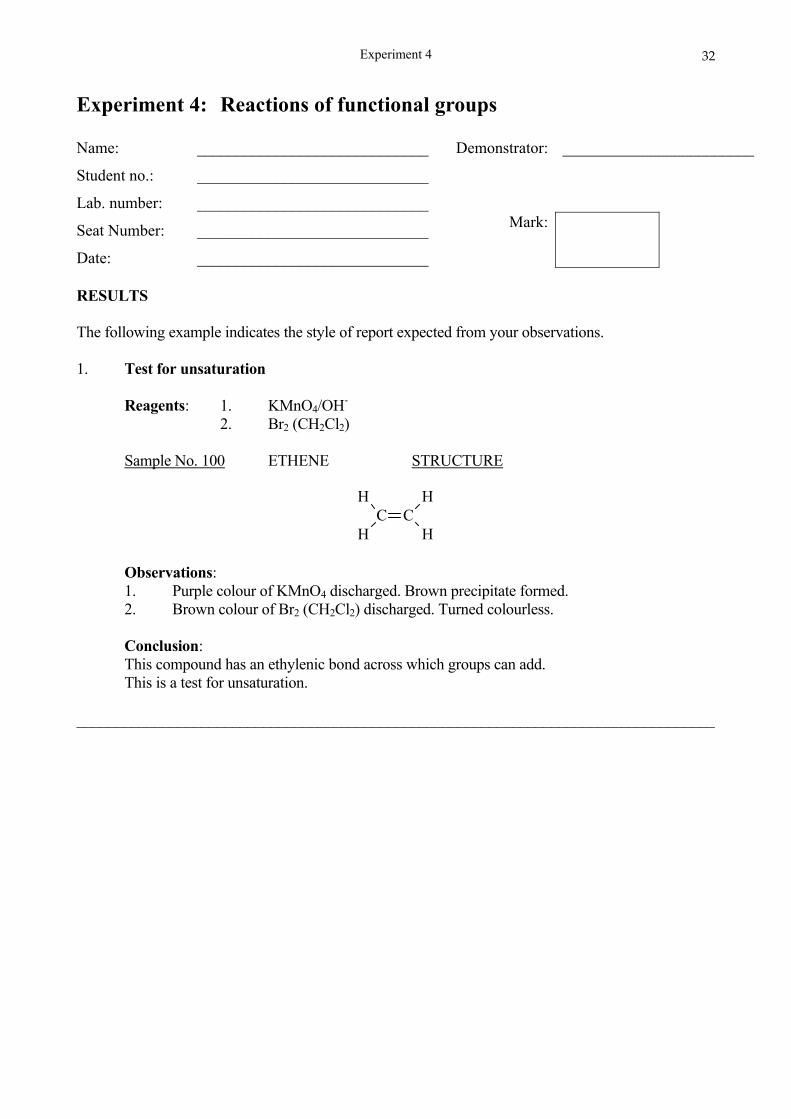
RESULTS The following example indicates the style of report expected from your observations. 1. Test for unsaturation Reagents: 1. KMnO4/OH- 2. Br2 (CH2Cl2) Sample No. 100 ETHENE STRUCTURE
C CH
HH
H
Observations: 1. Purple colour of KMnO4 discharged. Brown precipitate formed. 2. Brown colour of Br2 (CH2Cl2) discharged. Turned colourless. Conclusion: This compound has an ethylenic bond across which groups can add. This is a test for unsaturation. __________________________________________________________________________________
Experiment 4
33
1. Reactivity of primary, secondary and tertiary alcohols Reagents: Sample No. 8 1-BUTANOL STRUCTURE Observations: __________________________________________________________________________________ Sample No. 9 2-METHYL-2-PROPANOL STRUCTURE Observations: __________________________________________________________________________________ Sample No. 10 2-BUTANOL STRUCTURE Observations: __________________________________________________________________________________ Conclusion: (Indicate whether the alcohol is 1°, 2°, or 3° in your answer.) The rate of reaction of alcohols with the Lucas reagent is in the order:
Experiment 4
34
2. Strengths of halide bonds Reagents: Sample No. 5 METHYLAMINE HYDROCHLORIDE STRUCTURE Observations: __________________________________________________________________________________ Sample No. 7 2-CHLORO-2-METHYLPROPANE STRUCTURE Observations: __________________________________________________________________________________ Sample No. 6 2-CHLOROBUTANE STRUCTURE Observation: __________________________________________________________________________________ Sample No. 4 1-CHLOROBUTANE STRUCTURE Observations: __________________________________________________________________________________ Conclusion (Indicate whether halide bond is 1°, 2°, 3°, or ionic in your answer.) The strength of the halide bond INCREASED in the order:
Experiment 4
35
3. Test for unsaturation Reagents: 1. 2. Sample No. 1 ACETIC ACID STRUCTURE Observations: 1. 2. __________________________________________________________________________________ Sample No. 2 CINNAMIC ACID STRUCTURE Observations: 1. 2. __________________________________________________________________________________ Sample No. 3 TOLUENE STRUCTURE Observations: 1. 2. __________________________________________________________________________________ Conclusion: Of the compounds tested above, typical results for unsaturation were shown by:
Experiment 4
36
4. Test for acidity Reagents: Sample No. 1 ACETIC ACID STRUCTURE Observations: __________________________________________________________________________________ Sample No. 11 OXALIC ACID STRUCTURE Observations: __________________________________________________________________________________ Sample No. 12 METHANOL STRUCTURE Observations: __________________________________________________________________________________ Conclusion: The substances with acidic properties (stronger than that of carbonic acid) in order of DECREASING acidic strength are:
Experiment 4
37
5. Hydrazone formation Reagents: Sample No. 1 ACETIC ACID STRUCTURE Observations: __________________________________________________________________________________ Sample No. 13 BENZALDEHYDE STRUCTURE Observations: __________________________________________________________________________________ Sample No. 14 PROPANONE STRUCTURE Observations: __________________________________________________________________________________ Conclusion: Of the compounds tested above, those showing typical nucleophilic addition reactions
characteristic of the carbonyl group were:
Experiment 4
38
6. Reducing properties Reagents: 1. 2. Sample No. 1 ACETIC ACID STRUCTURE Observations: 1. 2. __________________________________________________________________________________ Sample No. 13 BENZALDEHYDE STRUCTURE Observations: (Benedict's Solution) __________________________________________________________________________________ Sample No. 14 PROPANONE STRUCTURE Observations: 1. 2. __________________________________________________________________________________
Experiment 4
39
Sample No. 15 GLUCOSE STRUCTURE Observations: 1. 2. __________________________________________________________________________________ Conclusion: Of the compounds tested above, those showing good reducing properties were:
Experiment 4
40
7. Identification of "unknown" functional group(s) Sample No. ______________ TEST OBSERVATION ______________________________________________________________________ (a) Test for unsaturation (b) Test for acidity (c) Lucas test (d) Test with (2,4-dinitrophenylhydrazine) (e) Test with Benedict's reagent ____________________________________________________________________________ Conclusion The following functional group(s) is/are present:

Experiments 5‐6 Introduction
41
Reactions of the cations of the metallic elements: Qualitative analysis INTRODUCTION The aim of the next two experiments (6-7) is to learn about the relationship between the position of the metal in the periodic table and its chemical properties. To achieve this we will study methods of separating metallic elements from each other based on differences in solubility of their various compounds. For simplicity we will limit ourselves to ten metals, which have been grouped in fours in the order that they will be studied:
1 Calcium, Aluminium, Chromium, Tin, Lead 2 Iron, Cobalt, Nickel, Copper, Zinc
These metals are either related in vertical groups or in horizontal periods, and they are found together either in nature or in alloys commonly encountered in industry. GENERAL PROCEDURES In each Experiment, set up four test tubes and add 10 drops of each cation solution to a test tube. Then add 3 drops of the reagent to each. Observe what occurs. Repeat this for each reagent. The precipitates are sometimes slow to form; always scratch the inside wall of the test tube with a thin glass rod both to mix the solutions and to encourage crystallization of the insoluble compound. If in doubt: ask your demonstrator for help. Also, read your textbook, which contains details of the properties of the compounds that you will prepare in these experiments. CENTRIFUGE You will need to separate the precipitates in some cases. This is done by using the centrifuge on the window bench. Ask your demonstrator for help.
Experiment 5
42
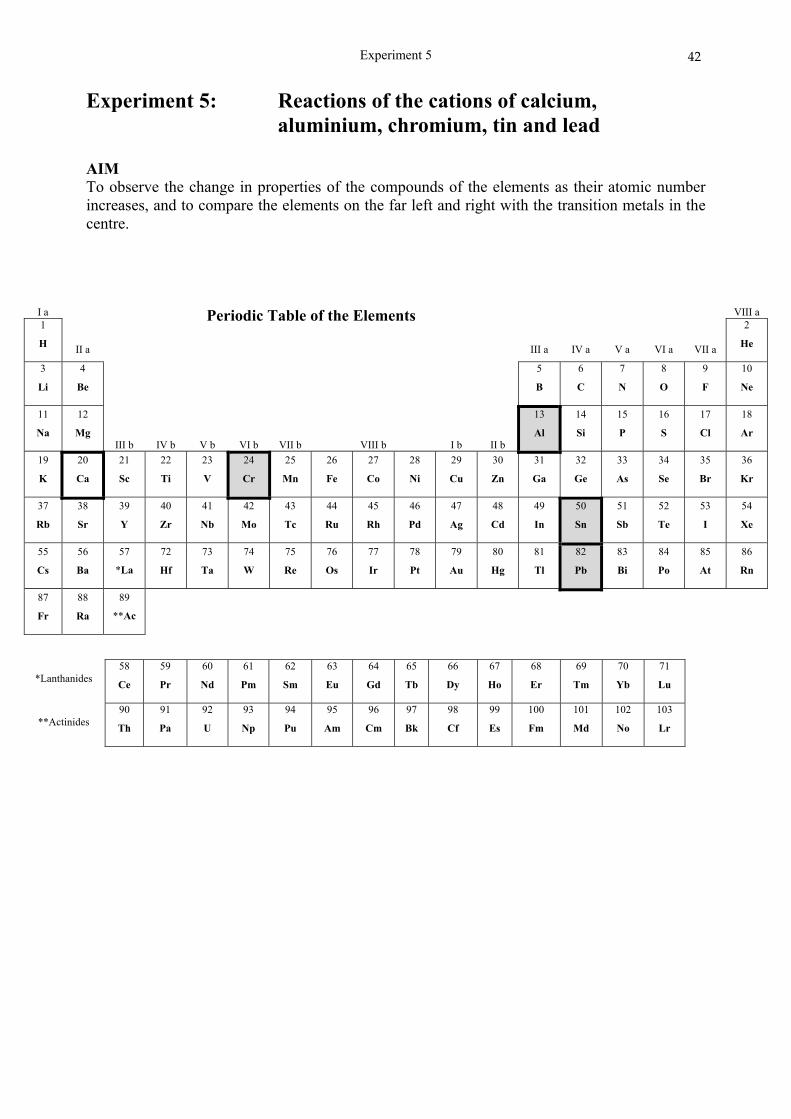
Experiment 5: Reactions of the cations of calcium, aluminium, chromium, tin and lead
AIM To observe the change in properties of the compounds of the elements as their atomic number increases, and to compare the elements on the far left and right with the transition metals in the centre.
I a Periodic Table of the Elements VIII a 1
H
II a
III a
IV a
V a
VI a
VII a
2
He
3
Li
4
Be
5
B
6
C
7
N
8
O
9
F
10
Ne
11
Na
12
Mg
III b
IV b
V b
VI b
VII b
VIII b
I b
II b
13
Al
14
Si
15
P
16
S
17
Cl
18
Ar
19
K
20
Ca
21
Sc
22
Ti
23
V
24
Cr
25
Mn
26
Fe
27
Co
28
Ni
29
Cu
30
Zn
31
Ga
32
Ge
33
As
34
Se
35
Br
36
Kr
37
Rb
38
Sr
39
Y
40
Zr
41
Nb
42
Mo
43
Tc
44
Ru
45
Rh
46
Pd
47
Ag
48
Cd
49
In
50
Sn
51
Sb
52
Te
53
I
54
Xe
55
Cs
56
Ba
57
*La
72
Hf
73
Ta
74
W
75
Re
76
Os
77
Ir
78
Pt
79
Au
80
Hg
81
Tl
82
Pb
83
Bi
84
Po
85
At
86
Rn
87
Fr
88
Ra
89
**Ac
*Lanthanides
58
Ce
59
Pr
60
Nd
61
Pm
62
Sm
63
Eu
64
Gd
65
Tb
66
Dy
67
Ho
68
Er
69
Tm
70
Yb
71
Lu
**Actinides
90
Th
91
Pa
92
U
93
Np
94
Pu
95
Am
96
Cm
97
Bk
98
Cf
99
Es
100
Fm
101
Md
102
No
103
Lr
Experiment 5
43
INTRODUCTION Commonly found compounds of these metals are: Calcium (Ca2+): Calcite, limestone, marble, CaCO3; Plaster of Paris, 2(CaSO4).H2O; Whewellite in kidney and bladder stones, Ca(oxalate).H2O. Tin (Sn4+): Cassiterite, SnO2. Lead (Pb2+): Litharge, PbO; Galena, PbS; Red lead, Pb3O4. Aluminium (Al3+): Bauxite Al2O3.2H2O; Corundum Al2O3; Alum (Potassium) KAl(SO4).12H2O. Chromium: Chrome green Cr2O3; Chromite FeCr2O4; Zinc chromate ZnCrO4. EXPERIMENTAL PROCEDURE First note the colour of each metal solution. Then test solutions of the metals systematically to determine which compounds are insoluble or coloured and therefore could be used to identify the cationic species. Test each metal by adding the following solutions to a solution of the metal: 2 NaOH 3 Excess NaOH 4 NH3(aq) 5 KI, dilute, then heat 6 K2SO4 7 Na2CO3
8 (NH4)2CO3 9 NH3, NH4Cl, Na2HPO4 10 Acid H2S 11 Na oxalate 12 K2CrO4 13 NaOH + H2O2
Record your observations on the report sheet. Give the formulae of the insoluble and/or coloured species in the appropriate spaces. Note that redox reactions can occur, e.g. Cr3+ + OH¯ + H2O2 → CrO4
2¯, and the solution becomes bright yellow. To get H2S, add 10 drops of thioacetamide solution and warm gently in a water bath. You will be provided with two unknown solutions. Identify the cations present in these solutions. Explain your reasoning in the appropriate space on your report sheet.

Experiment 5
44
COMMENTS ON THE REACTIONS 2 The oxides and hydroxides are generally insoluble. 3 Aluminium, chromium and lead are amphoteric, dissolving in excess OHˉ to give
[M(OH)4]xˉ.
4 The Ksp’s of the group II metal compounds are not exceeded because [OHˉ] is too
low in aqueous NH3. 5 PbCl2 and PbI2 are insoluble in cold water, but dissolve in hot water. Note how
yellow PbI2 dissolves to give a colourless solution. Allow it to cool; PbI2 crystallises as “golden spangles”.
6 The anhydrous sulfates are insoluble: PbSO4. 7, 8 All form insoluble carbonates in basic medium. 10 Only lead sulphide is insoluble in water (and acid). Note the black colour. 11 Insoluble calcium oxalate allows Ca2+ to be separated conveniently from Mg2+. 12 Note the parallel between the insoluble sulfates and chromates, due to SO4
2ˉ and CrO4
2ˉ having the same shape, size and charge. 13 The oxidation of Cr3+ to bright yellow CrO4
2ˉ is quite characteristic.
Experiment 5
45
Experiment 5: Reactions of the cations of calcium, aluminium, chromium, tin and lead
Name: _____________________________
Student no.: _____________________________
Lab. number: _____________________________
Seat Number: _____________________________
Date: _____________________________
Demonstrator:
________________________
Mark:
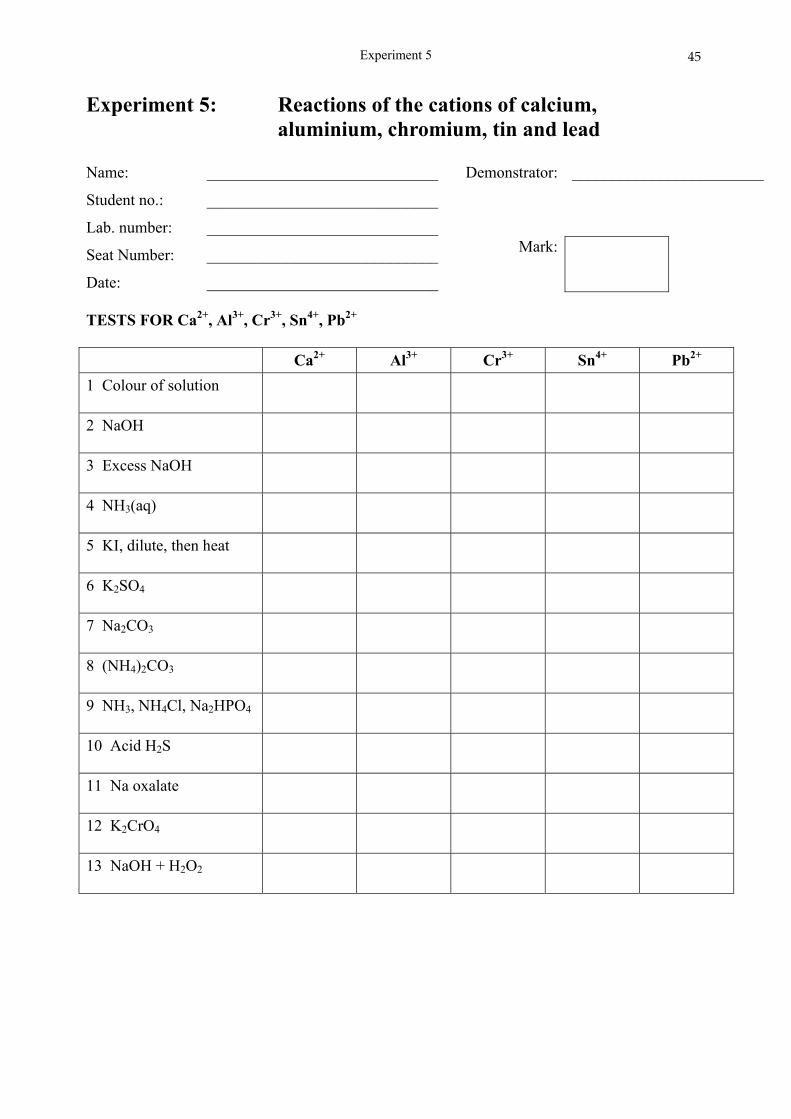
TESTS FOR Ca2+, Al3+, Cr3+, Sn4+, Pb2+ Ca2+ Al3+ Cr3+ Sn4+ Pb2+
1 Colour of solution
2 NaOH
3 Excess NaOH
4 NH3(aq)
5 KI, dilute, then heat
6 K2SO4
7 Na2CO3
8 (NH4)2CO3
9 NH3, NH4Cl, Na2HPO4
10 Acid H2S
11 Na oxalate
12 K2CrO4
13 NaOH + H2O2
Experiment 5
46
ANALYSES OF UNKNOWNS
Unknown 1: Identification number _______ This solution contains ONE of the four cations. Identify it, giving details of your reasoning. Cation _________________________
Unknown 2: Identification number _______ This solution contains TWO of the four cations. Identify both, giving details of your reasoning. Cations ____________
Experiment 6
47
Experiment 6: Reactions of the cations of iron, cobalt, nickel, copper and zinc
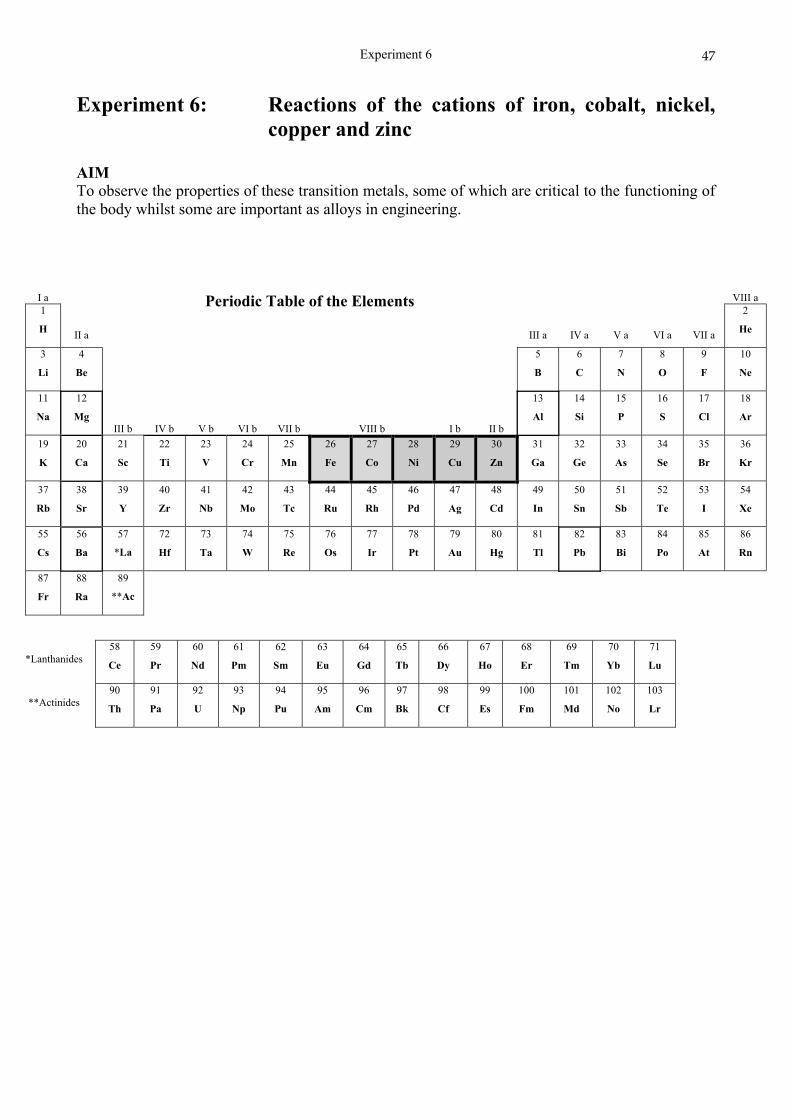
AIM To observe the properties of these transition metals, some of which are critical to the functioning of the body whilst some are important as alloys in engineering.
I a Periodic Table of the Elements VIII a 1
H
II a
III a
IV a
V a
VI a
VII a
2
He
3
Li
4
Be
5
B
6
C
7
N
8
O
9
F
10
Ne
11
Na
12
Mg
III b
IV b
V b
VI b
VII b
VIII b
I b
II b
13
Al
14
Si
15
P
16
S
17
Cl
18
Ar
19
K
20
Ca
21
Sc
22
Ti
23
V
24
Cr
25
Mn
26
Fe
27
Co
28
Ni
29
Cu
30
Zn
31
Ga
32
Ge
33
As
34
Se
35
Br
36
Kr
37
Rb
38
Sr
39
Y
40
Zr
41
Nb
42
Mo
43
Tc
44
Ru
45
Rh
46
Pd
47
Ag
48
Cd
49
In
50
Sn
51
Sb
52
Te
53
I
54
Xe
55
Cs
56
Ba
57
*La
72
Hf
73
Ta
74
W
75
Re
76
Os
77
Ir
78
Pt
79
Au
80
Hg
81
Tl
82
Pb
83
Bi
84
Po
85
At
86
Rn
87
Fr
88
Ra
89
**Ac
*Lanthanides
58
Ce
59
Pr
60
Nd
61
Pm
62
Sm
63
Eu
64
Gd
65
Tb
66
Dy
67
Ho
68
Er
69
Tm
70
Yb
71
Lu
**Actinides
90
Th
91
Pa
92
U
93
Np
94
Pu
95
Am
96
Cm
97
Bk
98
Cf
99
Es
100
Fm
101
Md
102
No
103
Lr

Experiment 6
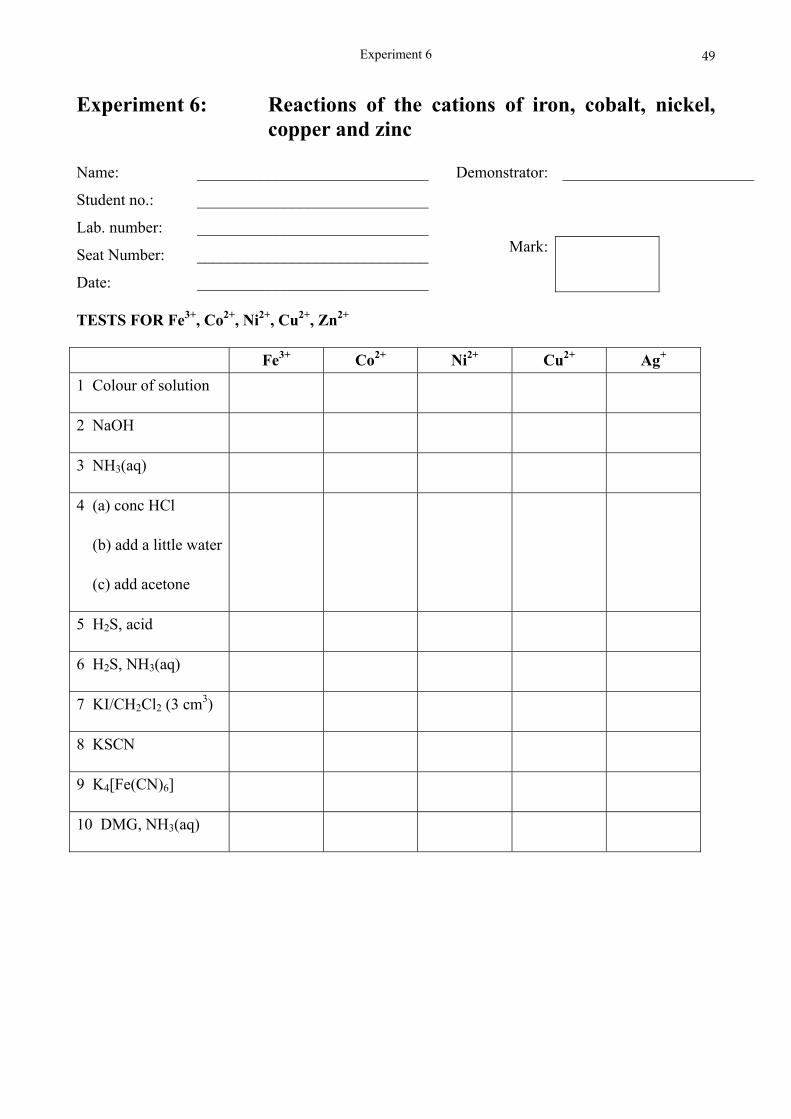
48
INTRODUCTION The commonly found compounds of these elements are: Iron (Fe3+): Haematite Fe2O3, Magnetite Fe3O4, Pyrites FeS2. Cobalt (Co2+): in Vitamin B12, CoSO4.7H2O as food supplement for cattle. Nickel (Ni2+): no common compounds; the metal is used for alloying, e.g. in coins. Copper (Cu2+): blue vitriol, CuSO4.5H2O. Zinc (Zn2+): ZnO in ointments and sunguard, Sphalerite, Wurzite ZnS, in proteins, and with copper in brass. EXPERIMENTAL PROCEDURE First note the colour of each metal solution. Then test solutions of the metals systematically to determine which compounds are insoluble or coloured and therefore could be used to identify the cationic species. Carry out the tests by adding the following solutions to a solution of the metal: 2 NaOH 3 NH3(aq) 4 conc. HCl, water, acetone 5 H2S, acid 6 H2S, NH3(aq)
7 KI/CH2Cl2 8 KSCN 9 K4[Fe(CN)6] 10 DMG, NH3(aq)
Give the formulae of all insoluble and coloured compounds. Note that redox reactions occur for these transition metals. To get H2S, add 10 drops of thioacetamide solution, and warm gently in a water bath. You will provided with two unknown solutions. Identify the cations present in these solutions. Explain your reasoning in the appropriate space on your report sheet. COMMENTS ON THE REACTIONS 2 All hydroxides are insoluble, but zinc is amphoteric and forms [Zn(OH)4]
2-. Note the brilliant blue of Co(OH)2.
3 Initially the hydroxides precipitate but these dissolve in excess ammonia with the formation
of ammine complexes: [Cu(NH3)4]2+ and [Ni(NH3)6]
2+. 5 CuS is formed in acid medium. CoS, NiS and ZnS form only in base medium. 8 The deep red compound [Fe(SCN)]2+ is characteristic of iron. 9 The deep green [Co{Fe(CN)6}] complex is characteristic. The deep blue Prussian
(Turnbull’s) blue is a classic compound, characteristic of iron. 10 The deep red insoluble [Ni(DMG)2] complex is unique. It is destroyed by dilute acid.
Experiment 6
49
Experiment 6: Reactions of the cations of iron, cobalt, nickel, copper and zinc
Name: _____________________________
Student no.: _____________________________
Lab. number: _____________________________
Seat Number: _____________________________
Date: _____________________________
Demonstrator:
________________________
Mark:
TESTS FOR Fe3+, Co2+, Ni2+, Cu2+, Zn2+ Fe3+ Co2+ Ni2+ Cu2+ Ag+
1 Colour of solution
2 NaOH
3 NH3(aq)
4 (a) conc HCl
(b) add a little water
(c) add acetone
5 H2S, acid
6 H2S, NH3(aq)
7 KI/CH2Cl2 (3 cm3)
8 KSCN
9 K4[Fe(CN)6]
10 DMG, NH3(aq)
Experiment 6
50
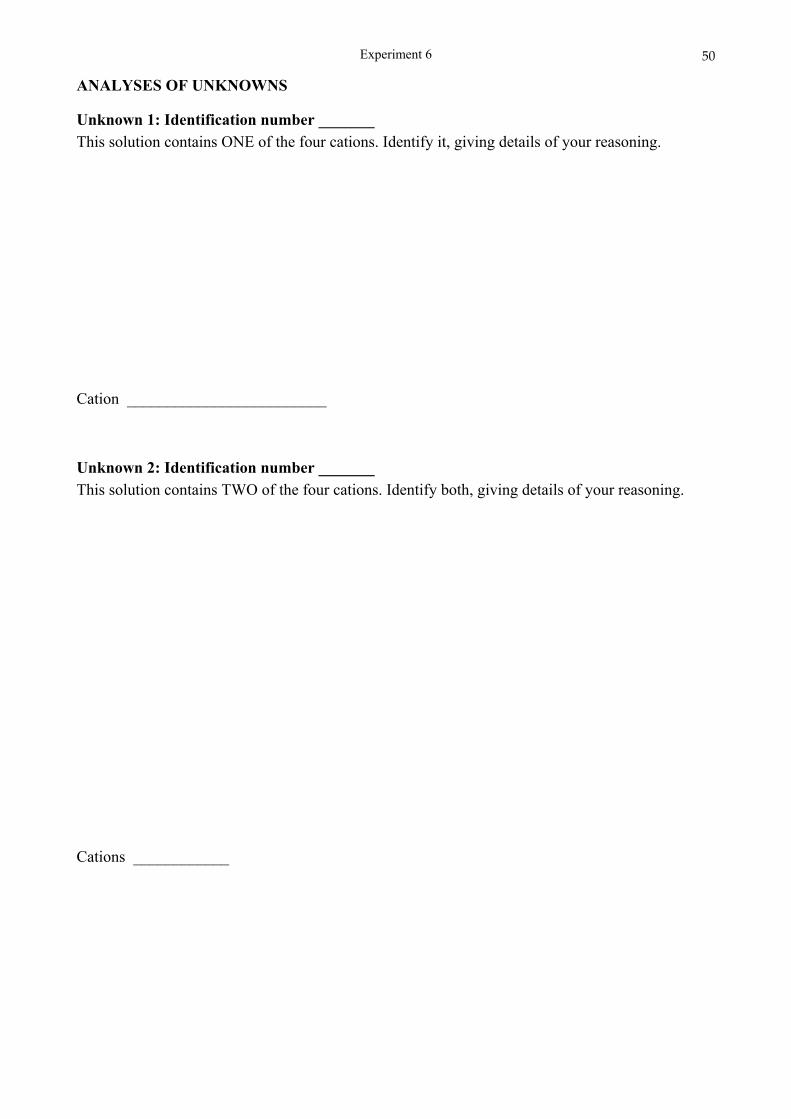
ANALYSES OF UNKNOWNS
Unknown 1: Identification number _______ This solution contains ONE of the four cations. Identify it, giving details of your reasoning. Cation _________________________
Unknown 2: Identification number _______ This solution contains TWO of the four cations. Identify both, giving details of your reasoning. Cations ____________
Experiment 12
51
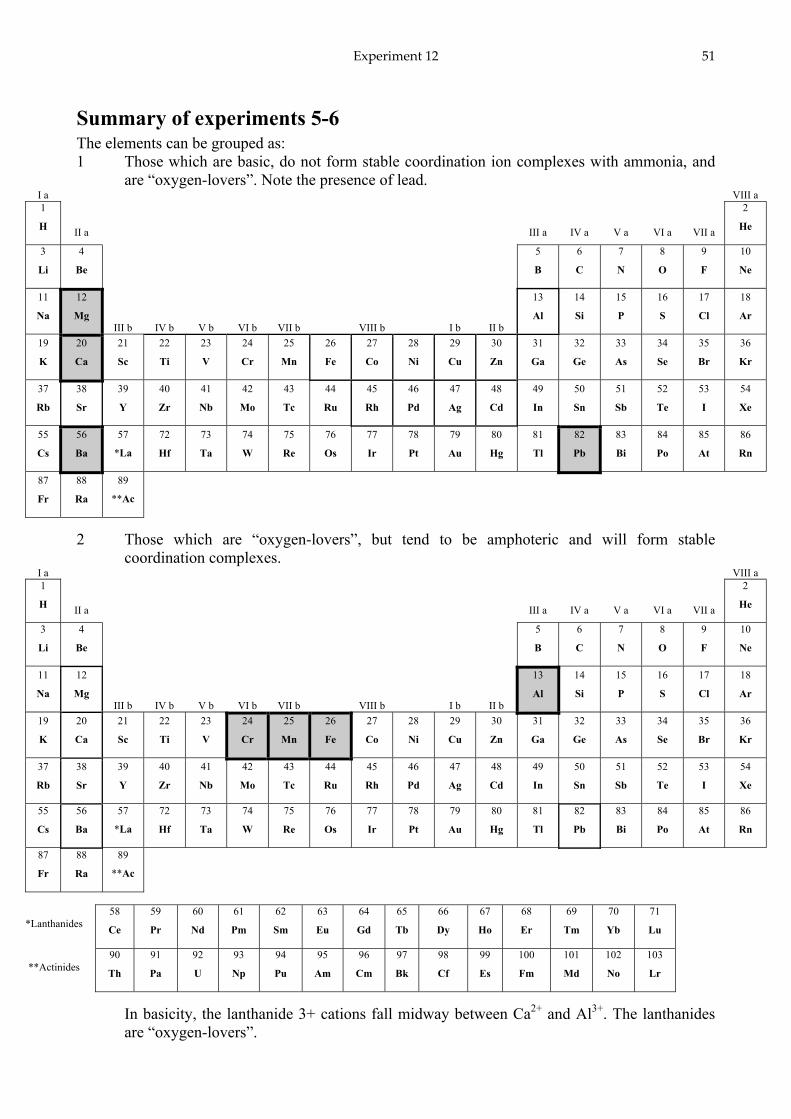
Summary of experiments 5-6 The elements can be grouped as: 1 Those which are basic, do not form stable coordination ion complexes with ammonia, and
are “oxygen-lovers”. Note the presence of lead. I a VIII a 1
H
II a
III a
IV a
V a
VI a
VII a
2
He
3
Li
4
Be
5
B
6
C
7
N
8
O
9
F
10
Ne
11
Na
12
Mg
III b
IV b
V b
VI b
VII b
VIII b
I b
II b
13
Al
14
Si
15
P
16
S
17
Cl
18
Ar
19
K
20
Ca
21
Sc
22
Ti
23
V
24
Cr
25
Mn
26
Fe
27
Co
28
Ni
29
Cu
30
Zn
31
Ga
32
Ge
33
As
34
Se
35
Br
36
Kr
37
Rb
38
Sr
39
Y
40
Zr
41
Nb
42
Mo
43
Tc
44
Ru
45
Rh
46
Pd
47
Ag
48
Cd
49
In
50
Sn
51
Sb
52
Te
53
I
54
Xe
55
Cs
56
Ba
57
*La
72
Hf
73
Ta
74
W
75
Re
76
Os
77
Ir
78
Pt
79
Au
80
Hg
81
Tl
82
Pb
83
Bi
84
Po
85
At
86
Rn
87
Fr
88
Ra
89
**Ac
2 Those which are “oxygen-lovers”, but tend to be amphoteric and will form stable coordination complexes.
I a VIII a 1
H
II a
III a
IV a
V a
VI a
VII a
2
He
3
Li
4
Be
5
B
6
C
7
N
8
O
9
F
10
Ne
11
Na
12
Mg
III b
IV b
V b
VI b
VII b
VIII b
I b
II b
13
Al
14
Si
15
P
16
S
17
Cl
18
Ar
19
K
20
Ca
21
Sc
22
Ti
23
V
24
Cr
25
Mn
26
Fe
27
Co
28
Ni
29
Cu
30
Zn
31
Ga
32
Ge
33
As
34
Se
35
Br
36
Kr
37
Rb
38
Sr
39
Y
40
Zr
41
Nb
42
Mo
43
Tc
44
Ru
45
Rh
46
Pd
47
Ag
48
Cd
49
In
50
Sn
51
Sb
52
Te
53
I
54
Xe
55
Cs
56
Ba
57
*La
72
Hf
73
Ta
74
W
75
Re
76
Os
77
Ir
78
Pt
79
Au
80
Hg
81
Tl
82
Pb
83
Bi
84
Po
85
At
86
Rn
87
Fr
88
Ra
89
**Ac
*Lanthanides 58
Ce
59
Pr
60
Nd
61
Pm
62
Sm
63
Eu
64
Gd
65
Tb
66
Dy
67
Ho
68
Er
69
Tm
70
Yb
71
Lu
**Actinides
90
Th
91
Pa
92
U
93
Np
94
Pu
95
Am
96
Cm
97
Bk
98
Cf
99
Es
100
Fm
101
Md
102
No
103
Lr
In basicity, the lanthanide 3+ cations fall midway between Ca2+ and Al3+. The lanthanides are “oxygen-lovers”.
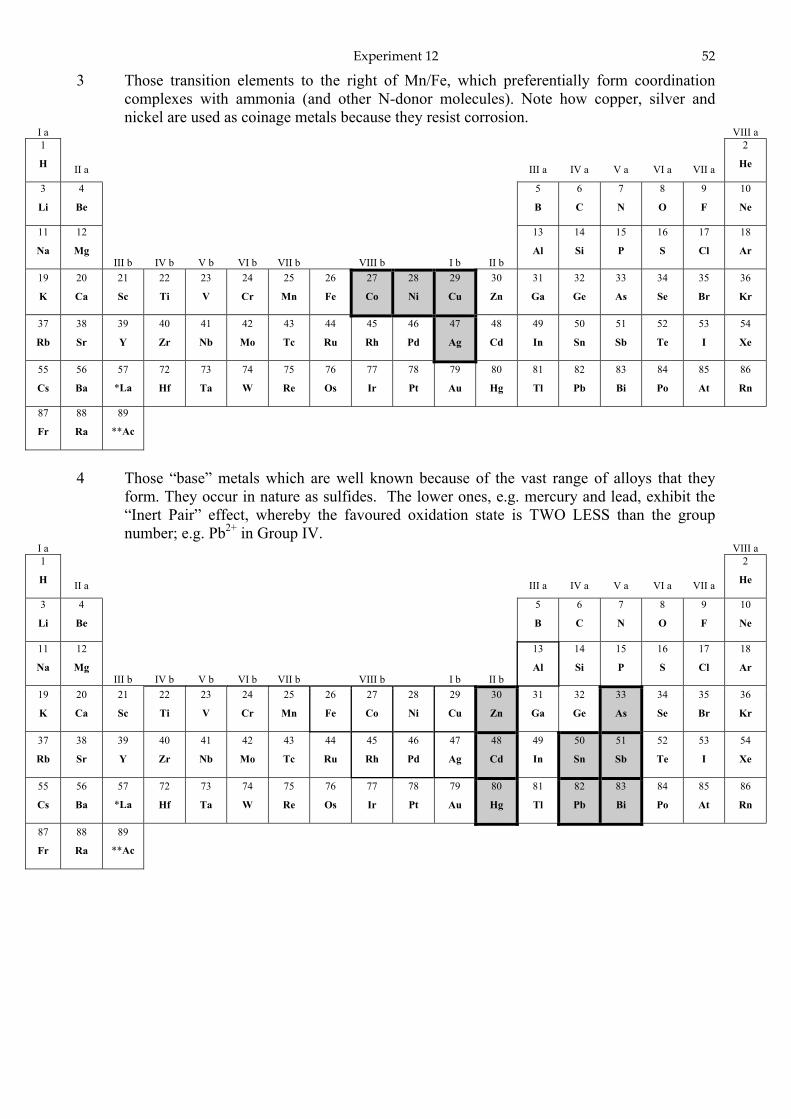
Experiment 12
52
3 Those transition elements to the right of Mn/Fe, which preferentially form coordination complexes with ammonia (and other N-donor molecules). Note how copper, silver and nickel are used as coinage metals because they resist corrosion.
I a VIII a 1
H
II a
III a
IV a
V a
VI a
VII a
2
He
3
Li
4
Be
5
B
6
C
7
N
8
O
9
F
10
Ne
11
Na
12
Mg
III b
IV b
V b
VI b
VII b
VIII b
I b
II b
13
Al
14
Si
15
P
16
S
17
Cl
18
Ar
19
K
20
Ca
21
Sc
22
Ti
23
V
24
Cr
25
Mn
26
Fe
27
Co
28
Ni
29
Cu
30
Zn
31
Ga
32
Ge
33
As
34
Se
35
Br
36
Kr
37
Rb
38
Sr
39
Y
40
Zr
41
Nb
42
Mo
43
Tc
44
Ru
45
Rh
46
Pd
47
Ag
48
Cd
49
In
50
Sn
51
Sb
52
Te
53
I
54
Xe
55
Cs
56
Ba
57
*La
72
Hf
73
Ta
74
W
75
Re
76
Os
77
Ir
78
Pt
79
Au
80
Hg
81
Tl
82
Pb
83
Bi
84
Po
85
At
86
Rn
87
Fr
88
Ra
89
**Ac
4 Those “base” metals which are well known because of the vast range of alloys that they
form. They occur in nature as sulfides. The lower ones, e.g. mercury and lead, exhibit the “Inert Pair” effect, whereby the favoured oxidation state is TWO LESS than the group number; e.g. Pb2+ in Group IV.
I a VIII a 1
H
II a
III a
IV a
V a
VI a
VII a
2
He
3
Li
4
Be
5
B
6
C
7
N
8
O
9
F
10
Ne
11
Na
12
Mg
III b
IV b
V b
VI b
VII b
VIII b
I b
II b
13
Al
14
Si
15
P
16
S
17
Cl
18
Ar
19
K
20
Ca
21
Sc
22
Ti
23
V
24
Cr
25
Mn
26
Fe
27
Co
28
Ni
29
Cu
30
Zn
31
Ga
32
Ge
33
As
34
Se
35
Br
36
Kr
37
Rb
38
Sr
39
Y
40
Zr
41
Nb
42
Mo
43
Tc
44
Ru
45
Rh
46
Pd
47
Ag
48
Cd
49
In
50
Sn
51
Sb
52
Te
53
I
54
Xe
55
Cs
56
Ba
57
*La
72
Hf
73
Ta
74
W
75
Re
76
Os
77
Ir
78
Pt
79
Au
80
Hg
81
Tl
82
Pb
83
Bi
84
Po
85
At
86
Rn
87
Fr
88
Ra
89
**Ac

Experiment 12
53
The Diagonal Relationship is found in the top left-hand corner, where the solution properties of lithium and scandium are remarkably like those of magnesium. Similarly, the properties of Be2+ and Ti4+ are remarkably like those of Al3+. This is due to the ratio: (charge on cation) ÷ (radius of cation)2 being similar.
3
Li
4
Be
5
B
6
C
7
N
8
O
9
F
11
Na
12
Mg
13
Al
14
Si
15
P
16
S
17
Cl
19
K
20
Ca
21
Sc
22
Ti
23
V
24
Cr
25
Mn
37
Rb
38
Sr
39
Y
40
Zr
41
Nb
42
Mo
43
Tc
55
Cs
56
Ba
57
*La
72
Hf
73
Ta
74
W
75
Re
Titanium, zirconium and hafnium occur commonly in Nature and are “oxygen-lovers”, e.g. Ilmenite FeTiO3; Zircon ZrSiO4; Baddeleyite ZrO2. However, the chemistry of zirconium is almost identical with that of hafnium because the radii of the 4+ cations are identical. This is the result of the “Lanthanide Contraction”.

Experiment 7a
54
Experiment 7a: The pH meter and potentiometric titrations AIM To introduce the use of the pH meter, and the technique of potentiometric titrations. INTRODUCTION The theoretical aspects of the pH concept are covered adequately in your textbook and were covered in the first semester. The following notes are thus restricted to background information on the pH meter and potentiometric titrations.
The pH meter Cell potentials can be used to determine the concentration of a specific ion in a solution. This is possible due to the availability of two types of electrodes:
reference electrodes, which maintain a constant half-cell potential independent of solution composition
indicator electrodes, which respond to the changes in the concentrations of specific ions. One of the most familiar applications of this relationship is found in the use of pH meters to determine the [H3O
+] of a solution. A species to which an electrode responds is called an electro-active species. The potential of an electrode changes when the concentration of the electro-active species for that electrode is varied. When H3O
+ is the electro-active species both the electrode potential and the pH change when the H3O+
concentration is varied. This implies that the pH of a solution can be related to the potential of a cell in which H3O
+ is the electro-active species. It can be shown that a change of one pH unit (ten-fold [H3O
+] change) causes an overall change in the cell potential of 0.059 V. The pH meter is an electronic instrument which measures the potential difference between a reference half-cell and a half-cell whose potential changes when [H3O
+] varies. The dial of the meter is often graduated in both pH and millivolt units. A "glass" electrode is sensitive to changes in [H3O
+] and is therefore used to sense pH. A silver-silver chloride electrode is commonly used as a reference electrode. The half-cell reaction for this electrode is
AgCl(s) + eˉ → Ag+ + Clˉ E = 0.222 V For convenience and ease of use these two electrodes are often mounted on the same electrode body to form a combination electrode (see figure on next page). The thin glass bulb on these electrodes is very fragile. Use great caution not to touch the bottom of the beaker with it.
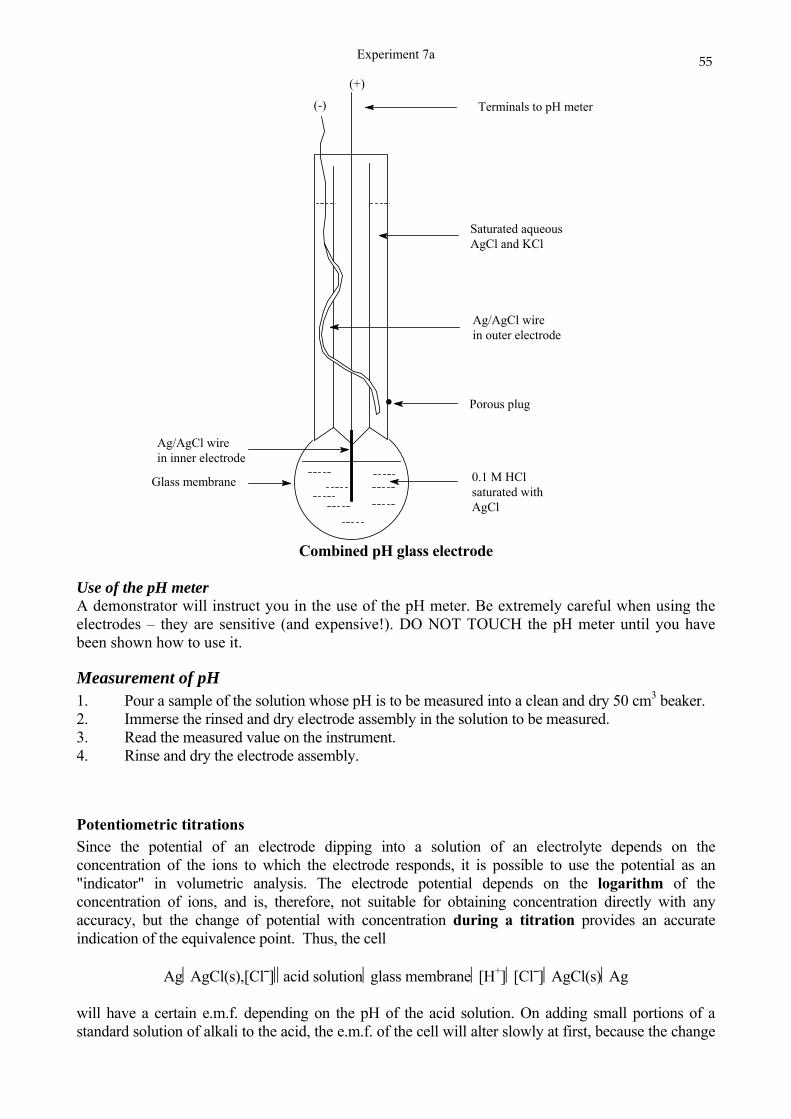
Experiment 7a
55
Terminals to pH meter (-)
Saturated aqueousAgCl and KCl
Ag/AgCl wirein outer electrode
Ag/AgCl wirein inner electrode
Porous plug
Glass membrane 0.1 M HCl saturated withAgCl
.
(+)
Combined pH glass electrode
Use of the pH meter A demonstrator will instruct you in the use of the pH meter. Be extremely careful when using the electrodes – they are sensitive (and expensive!). DO NOT TOUCH the pH meter until you have been shown how to use it.
Measurement of pH 1. Pour a sample of the solution whose pH is to be measured into a clean and dry 50 cm3 beaker. 2. Immerse the rinsed and dry electrode assembly in the solution to be measured. 3. Read the measured value on the instrument. 4. Rinse and dry the electrode assembly.
Potentiometric titrations Since the potential of an electrode dipping into a solution of an electrolyte depends on the concentration of the ions to which the electrode responds, it is possible to use the potential as an "indicator" in volumetric analysis. The electrode potential depends on the logarithm of the concentration of ions, and is, therefore, not suitable for obtaining concentration directly with any accuracy, but the change of potential with concentration during a titration provides an accurate indication of the equivalence point. Thus, the cell
AgAgCl(s),[Clˉ] acid solutionglass membrane[H+][Clˉ]AgCl(s)Ag will have a certain e.m.f. depending on the pH of the acid solution. On adding small portions of a standard solution of alkali to the acid, the e.m.f. of the cell will alter slowly at first, because the change
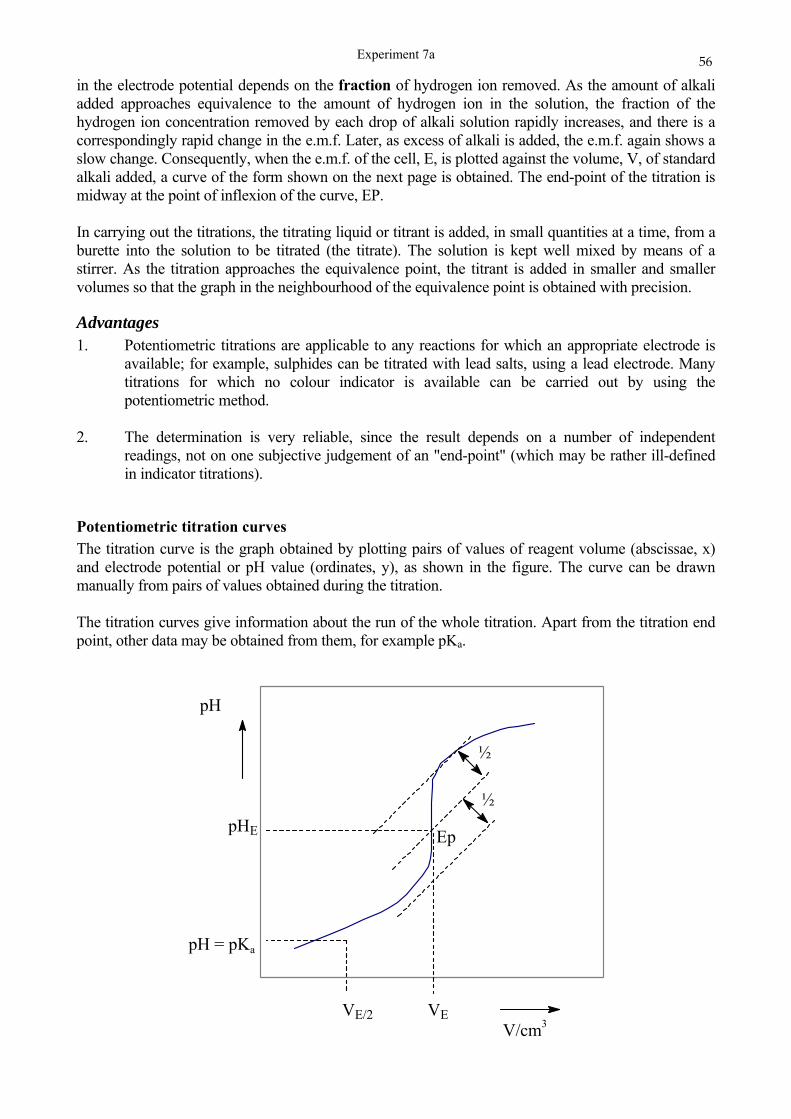
Experiment 7a
56
in the electrode potential depends on the fraction of hydrogen ion removed. As the amount of alkali added approaches equivalence to the amount of hydrogen ion in the solution, the fraction of the hydrogen ion concentration removed by each drop of alkali solution rapidly increases, and there is a correspondingly rapid change in the e.m.f. Later, as excess of alkali is added, the e.m.f. again shows a slow change. Consequently, when the e.m.f. of the cell, E, is plotted against the volume, V, of standard alkali added, a curve of the form shown on the next page is obtained. The end-point of the titration is midway at the point of inflexion of the curve, EP. In carrying out the titrations, the titrating liquid or titrant is added, in small quantities at a time, from a burette into the solution to be titrated (the titrate). The solution is kept well mixed by means of a stirrer. As the titration approaches the equivalence point, the titrant is added in smaller and smaller volumes so that the graph in the neighbourhood of the equivalence point is obtained with precision.
Advantages 1. Potentiometric titrations are applicable to any reactions for which an appropriate electrode is
available; for example, sulphides can be titrated with lead salts, using a lead electrode. Many titrations for which no colour indicator is available can be carried out by using the potentiometric method.
2. The determination is very reliable, since the result depends on a number of independent
readings, not on one subjective judgement of an "end-point" (which may be rather ill-defined in indicator titrations).
Potentiometric titration curves The titration curve is the graph obtained by plotting pairs of values of reagent volume (abscissae, x) and electrode potential or pH value (ordinates, y), as shown in the figure. The curve can be drawn manually from pairs of values obtained during the titration. The titration curves give information about the run of the whole titration. Apart from the titration end point, other data may be obtained from them, for example pKa.
½
½
EppHE
pH
V/cm3VEVE/2
pH = pKa
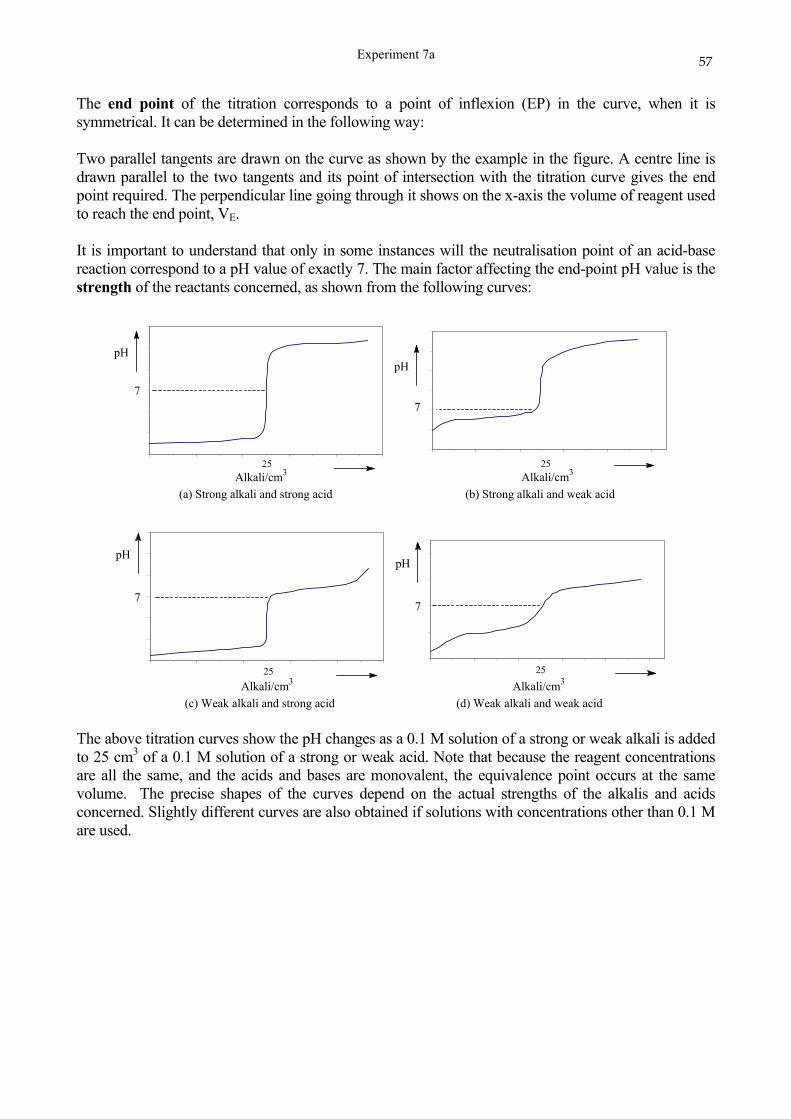
Experiment 7a
57
The end point of the titration corresponds to a point of inflexion (EP) in the curve, when it is symmetrical. It can be determined in the following way: Two parallel tangents are drawn on the curve as shown by the example in the figure. A centre line is drawn parallel to the two tangents and its point of intersection with the titration curve gives the end point required. The perpendicular line going through it shows on the x-axis the volume of reagent used to reach the end point, VE. It is important to understand that only in some instances will the neutralisation point of an acid-base reaction correspond to a pH value of exactly 7. The main factor affecting the end-point pH value is the strength of the reactants concerned, as shown from the following curves:
(a) Strong alkali and strong acid
Alkali/cm3
7
pH
25
(b) Strong alkali and weak acid
Alkali/cm3
7
pH
25
(c) Weak alkali and strong acid
Alkali/cm3
7
pH
25
(d) Weak alkali and weak acid
Alkali/cm3
7
pH
25
The above titration curves show the pH changes as a 0.1 M solution of a strong or weak alkali is added to 25 cm3 of a 0.1 M solution of a strong or weak acid. Note that because the reagent concentrations are all the same, and the acids and bases are monovalent, the equivalence point occurs at the same volume. The precise shapes of the curves depend on the actual strengths of the alkalis and acids concerned. Slightly different curves are also obtained if solutions with concentrations other than 0.1 M are used.
Experiment 7a
58
EXPERIMENTAL PROCEDURE The instructor in charge will demonstrate the use of the pH meter. Refer also to the instructions on the use of the pH meter given earlier.
1(a) pH of "unknown" solutions Measure the pH of the two "unknown" solutions provided and enter the results in Table 1. Also
measure the pH of tap water and enter this in Table 1. Record all pH values to the nearest 0.05 of a pH unit. Measure the pH of de-ionised water. Note how the value drifts. Why does this occur?
(b) pH of solutions of typical acids and bases Use the pH meter to measure the pH of the following: 0.1 M H3BO3 0.1 M H3PO4 0.1 M NH3 0.02 M Ca(OH)2 Arrange them into a list according to decreasing H3O
+ concentration (Table 2).
2 Potentiometric titration of 0.1 M HCl against approximately 0.1 M NaOH Pipette 10.00 cm3 of the 0.1 M acid into the titration vessel (250 cm3 beaker) and add
approximately 100 cm3 of distilled water. Place the titration vessel in position and introduce the electrode assembly. Stir the solution by means of the magnetic stirrer and record the pH value. Add the alkali from the burette 1 cm3 at a time, recording pH values and volumes after each addition. As the equivalence point of the titration is approached (approximately 9.0 cm3), a sharp increase in the pH will be observed. At this stage add the alkali in 0.2 cm3 portions and continue until past the end point (approximately 12.0 cm3). Then, once again, add the alkali in 1.0 cm3 portions until a total volume of about 15.0 cm3 has been added.
Plot a curve of pH (ordinate, y) against volume of NaOH added (abscissa, x) and determine the
equivalence point of the titration from the point of inflexion of the curve. From your equivalence point, determine the concentration of the NaOH solution.
List two indicators that you could use for this titration if you wished to determine the
equivalence point using a colour indicator. (Refer to Table on next page.)
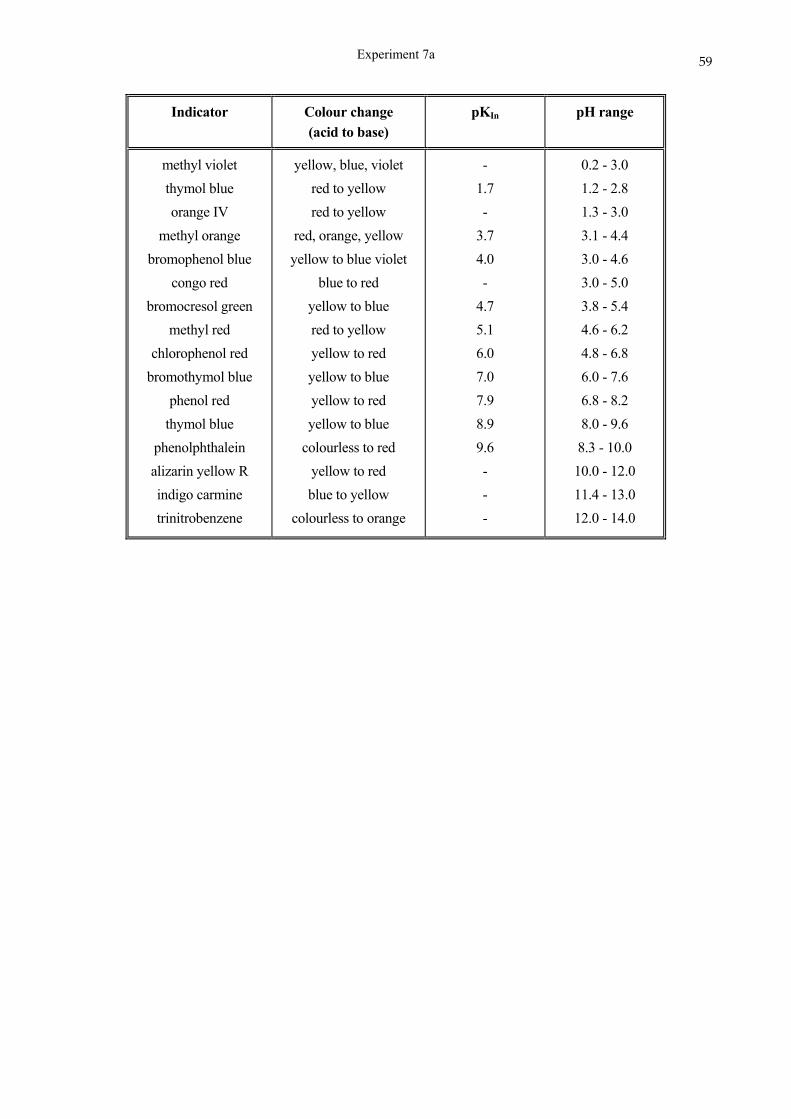
Experiment 7a
59
Indicator Colour change (acid to base)
pKIn pH range
methyl violet
thymol blue
orange IV
methyl orange
bromophenol blue
congo red
bromocresol green
methyl red
chlorophenol red
bromothymol blue
phenol red
thymol blue
phenolphthalein
alizarin yellow R
indigo carmine
trinitrobenzene
yellow, blue, violet
red to yellow
red to yellow
red, orange, yellow
yellow to blue violet
blue to red
yellow to blue
red to yellow
yellow to red
yellow to blue
yellow to red
yellow to blue
colourless to red
yellow to red
blue to yellow
colourless to orange
-
1.7
-
3.7
4.0
-
4.7
5.1
6.0
7.0
7.9
8.9
9.6
-
-
-
0.2 - 3.0
1.2 - 2.8
1.3 - 3.0
3.1 - 4.4
3.0 - 4.6
3.0 - 5.0
3.8 - 5.4
4.6 - 6.2
4.8 - 6.8
6.0 - 7.6
6.8 - 8.2
8.0 - 9.6
8.3 - 10.0
10.0 - 12.0
11.4 - 13.0
12.0 - 14.0

Experiment 7a
60
Experiment 7a: The pH meter and potentiometric titrations Name: _____________________________
Student no.: _____________________________
Lab. number: _____________________________
Seat Number: _____________________________
Date: _____________________________
Demonstrator:
________________________
Mark:
PRE-PRAC PROBLEM A potentiometric titration of 10.00 cm3 0.1 M HCl against NaOH was carried out. An endpoint volume of 9.23 cm3 NaOH was obtained. Calculate the molarity of the NaOH solution.
Experiment 7a
61
Experiment 7a: The pH meter and potentiometric titrations Name: _____________________________
Student no.: _____________________________
Lab. number: _____________________________
Seat Number: _____________________________
Date: _____________________________
Demonstrator:
________________________
Mark:
RESULTS 1 The determination of the pH of solutions
(a) Table 1: pH of "unknowns"
Sample pH Value Sample Code pH Value
Tapwater Unknown 1
De-ionised water Unknown 2
Reason for the drift in pH with de-ionised water: ____________________________
________________________________________________________________________
(b) Table 2: pH of solutions of typical acids and bases
Sample pH [H3O+] [OHˉ]
0.1 M H3BO3
0.1 M H3PO4
0.1 M NH3
0.02 M Ca(OH)2
Order of decreasing H3O
+ concentration:

Experiment 7a
62
2 Potentiometric titration of 0.1 M HCl against approximately 0.1 M NaOH:
Vol/cm3 NaOH pH Vol/cm3 NaOH pH
0.00 10.00
1.00 10.20
2.00 10.40
3.00 10.60
4.00 10.80
5.00 11.00
6.00 11.20
7.00 11.40
8.00 11.60
9.00 11.80
9.20 12.00
9.40 13.00
9.60 14.00
9.80 15.00
Volume at end point of titration (from your graph) __________ cm3 NaOH
Molarity of HCl (given) __________
Hence molarity of NaOH __________
(Show your calculations.) Suitable indicators you could use as an alternative to the pH meter
pH range
indicator

Experiment 7a
63
Volume of titrant added/cm3
pH
Experiment 7b
64
Experiment 7b: Equilibria of water, weak acids and bases, and buffer solutions
AIM To study the principles relating to the equilibria which exist between hydronium and hydroxide ions in pure water, and in aqueous solutions of acids and bases. To investigate the behaviour of buffer solutions. INTRODUCTION
The ionisation of water Very pure water shows a very small but measurable electrical conductivity, thus showing slight dissociation into ions as follows:
H2O + H2O H3O+ + OHˉ
hydronium hydroxide ion ion As can be seen above, [H3O
+] = [OHˉ] and this is found to be equal to 10-7 mol dm-3. The equilibrium constant, in terms of concentration, for the above equilibrium is:
Since for all practical purposes [H2O] is a constant, the expression becomes:
Kw = [H3O+][OHˉ] = 10-14 mol2 dm-6 at 25 °C.
Kw is known as the ionic product of water. The ionic product for water applies to all aqueous solutions, i.e. the relative concentrations of H3O
+ and OHˉ are always interdependent: in other words as the concentration of either ion is varied, so the other will change accordingly, so that the product remains at 10-14 mol2 dm-6 at 25 °C.
Weak acid or weak base equilibria A comparison of experimentally measured [H3O
+] or [OHˉ] of a weak acid or a weak base with its total concentration enables one to calculate the degree of ionisation. This is one measure of the relative weakness of a given acid or base. For example, if a saturated carbonic acid (H2CO3) solution (about 0.04 M) has a pH of 4 ([H3O
+] = 1 x 10⁻⁴ mol dm-3) we may calculate, from its primary dissociation step, the extent to which it has been converted into H3O
+ and HCO3ˉ, i.e. its degree of ionisation, as follows:
H2CO3 + H2O H3O+ + HCO3ˉ
This means that 5 out of every 2 000 H2CO3 molecules are dissociated in aqueous solution.
0.25%0.25x104x10
1x10
ionconcentrat Total
ionconcentrat OH Actual 22
43
22
3
O][H
]][OHO[HK
Experiment 7b
65
Buffer solutions A buffer solution is one having both a reserve of acidity and a reserve of alkalinity, i.e. a solution which shows only a small change in pH on addition of small quantities of either acid or base. One type of buffer solution is a mixture containing a weak base and its salt, e.g. NH3 and NH4Cl. If a strong acid is added to a mixed solution of NH3 and NH4
+ ions we have:
NH3 + H3O+ → NH4
+ + H2O (i.e. the base in the buffer solution reacts with the added acid). Similarly if a strong base is added we have:
NH4
+ + OHˉ → NH3 + H2O (i.e. the acid in the buffer solution reacts with the added base) and the mixture does not greatly change its pH in either case. This is further explained by the equilibrium expressions for the ionisation of ammonia,
NH3 + H2O NH4
+ + OHˉ
Since [NH3] represents the concentration of free base in equilibrium with its ammonium salt ([NH4
+]), we can rewrite the above expression as:
We see that the [OHˉ] depends upon the ratio of concentrations of the ammonium salt, NH4
+, to free ammonia. As long as there is a considerable amount of both salt and base present, the ratio will not change greatly upon the addition of small amounts of acid or base. The [OHˉ] will be correspondingly more or less constant. Other types of buffer solutions are those containing weak acids and their salts. An example of such a buffer is a mixture of acetic acid and its salt, sodium acetate. The dissociation constant for acetic acid is 1.82 x 10⁻⁵, and once again it can be shown that:
CH3COOH + H2O H3O+ + CH3COOˉ
][NH
][NHK][OH
1.8x10K][NH
]][OH[NH
4
3b
3b
3
4
[base]
[salt]logpKpOH
[salt]
[base]loglogK]log[OH
[salt]
[base]K][OH
b
b
b
Experiment 7b
66
A solution containing equal concentrations of acetic acid and sodium acetate (i.e. a half neutralised solution of the acid) has the maximum buffer capacity. In such a case pH = pKa. Thus a half neutralised solution of 0.1 M acetic acid will have [H3O
+] = 1.82 x 10⁻⁵ mol dm-3 and hence pH = 4.74. Addition of a small concentration of H3O
+ ions to such a solution will result in the H3O+ ions
combining with CH3COO- ions to form undissociated CH3COOH as follows:
H3O+ + CH3COOˉ CH3COOH + H2O
Likewise, if a small concentration of OH- ions is added, these will combine with H3O
+ ions arising from the dissociation of acetic acid, and result in unionised water. The equilibrium will be disturbed, and more acetic acid will dissociate to replace the H3O
+ removed by the base. In either case, the concentration of acid or salt will not be appreciably changed, and so the pH of the solution will essentially not be affected. EXPERIMENTAL PROCEDURE Since acetic acid and ammonia have about the same value for their respective ionisation constants, a solution of ammonium acetate will be practically neutral. Place 5 cm3 of 1 M CH3COONH4 in a 15 cm3 test tube; place 5 cm3 of deionised water in a second 15 cm3 test tube. Add 2 drops of methyl orange indicator to each. Fill your 10 cm3 graduated cylinder to the mark with 1 M HCl. Now add a drop of the HCl to the 5 cm3 sample of water. Add more HCl if needed, until the methyl orange turns red, i.e. until the water has been changed to about 10-3 M in H3O
+. What volume of the 1 M HCl was needed to do this? Now determine what volume of 1 M HCl is required to produce the same colour change, using the 5 cm3 sample of 1 M CH3COONH4 instead of water. Similarly, test the buffering action of ammonium acetate against the addition of a base. Prepare two more 5 cm3 samples of H2O and 1 M CH3COONH4, respectively. To each add 2 drops of alizarin yellow R indicator. Fill your 10 cm3 graduated cylinder with the 1 M NaOH. Add a drop of this, and more if needed, to the water sample until the indicator colour changes (about 10-2 M OHˉ). Also add the base from the 10 cm3 graduated cylinder, a little at a time, to the ammonium acetate sample, until the hydroxide ion concentration has been increased to 10-2 M OH-. Note the respective volumes of 1 M NaOH needed. Explain why the ammonium acetate solution is able to neutralise both acids and bases.
5
3
33a 1.82x10
COOH][CH
]COO][CHO[HK
[acid]
[salt]logpKpH
[acid]
[salt]K
]COOCH
COOH][CHK]O[H
a
a3
3a3
Experiment 7b
67
Experiment 7b: Equilibria of water, weak acids and bases, and buffer solutions
Name: _____________________________
Student no.: _____________________________
Lab. number: _____________________________
Seat Number: _____________________________
Date: _____________________________
Demonstrator:
________________________
Mark:
PRE-PRAC PROBLEM One dm3 of solution was prepared by dissolving 0.25 mol of formic acid, HCOOH, and 0.18 mol of sodium formate, HCOONa, in water. What was the pH of the solution? Ka for formic acid is 1.7 x 10⁻⁴. Let x = mol dm-3 of acid that ionize, then
Concentration/mol dm-3
HCOOH(aq) H+(aq) + HCOOˉ(aq)
starting 0.25 0 0.18 change -x equilibrium
Ka = = = 1.7 x 10⁻⁴ x = pH = What is the pH of this solution if 50.0 cm3 of 1.00 mol dm-3 sodium hydroxide is added to 1.00 dm3 of solution? moles NaOH added = equation for acid-base reaction:
OHˉ(aq) + HCOOH(aq)
moles HCOOˉ now in solution =
Experiment 7b
68
total volume of solution = [HCOOH] = [HCOOˉ] = Let x = mol dm-3 of acid that ionize, then
Concentration/mol dm-3
HCOOH(aq) H+(aq) + HCOOˉ(aq)
starting
change -x equilibrium
Ka = = = 1.7 x 10⁻⁴
x = pH = What was the pH change?
pH =
If instead of adding the NaOH solution to the buffer solution it had been added to 1 dm3 of a solution containing 0.25 mol HCl, what would have been the corresponding pH change? Initial pH of HCl solution:
HCl
[H+] = pH = pH of HCl solution after NaOH addition:
NaOH + HCl
moles NaOH added = moles HCl left after reaction with NaOH = moles H+ left = total volume of solution = [H+] = pH =
pH =
Experiment 7b
69
Experiment 7b: Equilibria of water, weak acids and bases, and buffer solutions
Name: _____________________________
Student no.: _____________________________
Lab. number: _____________________________
Seat Number: _____________________________
Date: _____________________________
Demonstrator:
________________________
Mark:
RESULTS The volume of 1 M HCl needed to increase the acidity to pH 3 for: 5 cm3 water was ______ drops, and for 5 cm3 1 M CH3COONH4 was ______ cm3. The volume of 1 M NaOH needed to increase the basicity to pH 12 for: 5 cm3 water was ______ drops, and for 5 cm3 1 M CH3COONH4 was ______ cm3. Suppose the same volume of 1 M HCl which you added to the 5 cm3 of 1 M CH3COONH4 to produce a pH value of 3 were added to the 5 cm3 of H2O instead. What would the H3O
+ concentration of this solution now be? Determine the pH of this solution. Show calculations. Explain, by discussion and equations, how ammonium acetate (a strong electrolyte) is able to buffer the solution against the addition of both acids and bases.
Experiment 8
70
Experiment 8: Solubility product of a slightly soluble salt AIM To undertake a quantitative study of chemical equilibrium as applicable to the case of a saturated solution of a slightly soluble salt, and to determine the solubility product (Ksp) of potassium hydrogen tartrate (K+HTa-) at room temperature. INTRODUCTION For an elementary reversible reaction taking place at a fixed temperature
A + B C + D the rate at which A and B react is proportional to the product of their concentrations, that is,
Ratef = kf[A][B] where kf is the rate constant and the square brackets denote the concentrations in mol dm-3. The rate of the reverse reaction is given by:
Rater = kr[C][D]. At equilibrium the rates of the forward and reverse reactions will be equal
Ratef = Rater
kf[A][B] = kr[C][D]
Kk
k
]B][A[
]D][C[
r
f .
K is the equilibrium constant of the reaction at the given temperature. For a solid AB(s) dissolving to form ions A+ and B-:
AB(s) A+(aq) + Bˉ(aq) the theoretical equilibrium equation is:
[AB(s)]
]][B[AK
.
If the solution of AB is saturated, i.e. the solution is in contact with undissolved salt, the concentration of AB does not change, or
[AB(s)] = constant. This constant can be incorporated into K to give
Ksp = [A+][Bˉ]. This equation states that the product of the molar concentrations of anion and cation from a binary electrolyte (a salt that dissolves to give two ions) is a constant at a specific temperature. This statement will be verified experimentally by using sparingly soluble potassium hydrogen tartrate, the half-neutralised salt of a dihydroxy dicarboxylic acid, tartaric acid, abbreviated for convenience to KHTa.
HOOC C
OH
H
C
OH
H
COOK
Experiment 8
71
In this experiment a saturated solution of KHTa in pure water is made, and the concentration of HTaˉ(aq) is determined by titration with a standard base. As this is a binary salt, the concentration of K+ is the same as that of HTa- thus Ksp = [K+][HTaˉ] = . [HTaˉ]2. Thereafter a series of saturated solutions of KHTa is made in water containing various concentrations of KCl. As the presence of KCl in the solution increases the concentration of the common ion, K+, the concentration of HTaˉ must decrease if Ksp is to remain constant. The concentration of HTaˉ can decrease only if less KHTa dissolves. Titration will show that the concentration of HTa- is lower. The concentration of K+, however, is now the sum of the contribution equivalent to HTaˉ and the contribution from the dissociated KCl. Thus Ksp = [HTaˉ ][K+
ex KHTa + K+ex KCl]
EXPERIMENTAL PROCEDURE In this practical, students work in groups of at least two members. It is thus essential that members of each group divide the tasks among themselves so as to avoid congestion at the balances. 1. Prepare 0.01, 0.02 and 0.04 M KCl solutions by pipetting 5, 10 and 20 cm3 of the 0.5 M stock
solution provided into the numbered volumetric flasks and diluting to 250 cm3 with deionised water.
2. Rinse the four bottles marked 1-4 with deionised water and then rinse bottles 2, 3 and 4 with
small quantities of 0.01, 0.02 and 0.04 M KCl solution respectively. There is no need to dry the bottles.
3. Weigh four portions of KHTa into bottles 1-4. The mass of KHTa need not be weighed
accurately but must not be less than 1.0 g or more than 1.4 g. 4. Then add to bottle 1 deionised water to bottle 2 0.01 M KCl to bottle 3 0.02 M KCl to bottle 4 0.04 M KCl until the bottle is about two thirds full (approximately 80 cm3). The volume of water or KCl
solution need not be measured accurately. Stopper the bottles and shake them for 5 minutes to ensure saturation. Place the bottles in the water bath provided and leave to stand for at least 20 minutes so that the suspended solid can settle and the solutions equilibrate to the set temperature.
5. Set up a burette with the standard base provided (0.02 M NaOH). Rinse the conical titration
flasks with deionised water. Rinse the pipette with a small volume of the solution to be measured taking care not to disturb the sediment at the bottom of the bottle.
6. Check that the supernatant liquor is perfectly clear. If so, pipette three 5 cm3 aliquots from the
first bottle, observing all the precautions outlined below. Precaution:
When pipetting the supernatant liquor from the bottle, great care must be taken not to disturb the sediment at the bottom. Thus the tip of the pipette must not be more than 1 cm below the surface and must be kept steady. Special care must be taken that the liquid in the pipette is not allowed to run back into the bottle and thus stir up the sediment. In case of a mistake, the contents of the pipette must be discarded in the sink and a fresh attempt made.
Experiment 8
72
7. Add 2 to 3 drops of phenolphthalein indicator solution to the titration flask and use standard
titration techniques to titrate the KHTa sample. Titrate all three aliquots before pipetting from the next bottle. If the agreement between any two of the three is within the prescribed range of 0.10 cm3, the next bottle can be done. If the agreement is not within the range, it is most probably due to the sediment having been disturbed during pipetting. It is then best to re-do that bottle after all the others have been done so as to allow the maximum time for the sediment to settle again.
8. Repeat steps 6 to 7 for bottles 2-4. 9. Read the thermometer in the water bath where you placed your bottles and enter this
temperature on your report sheet. 10. Calculate the molarity of HTaˉ from the titrations and the molarity of K+ from the value of
HTaˉ plus the known molarity (0.00, 0.01, 0.02 and 0.04 M KCl). Calculate Ksp and record the value in the form B.BB x 10-4 mol2 dm-6 or BB.B x 10-4 mol2 dm-6.
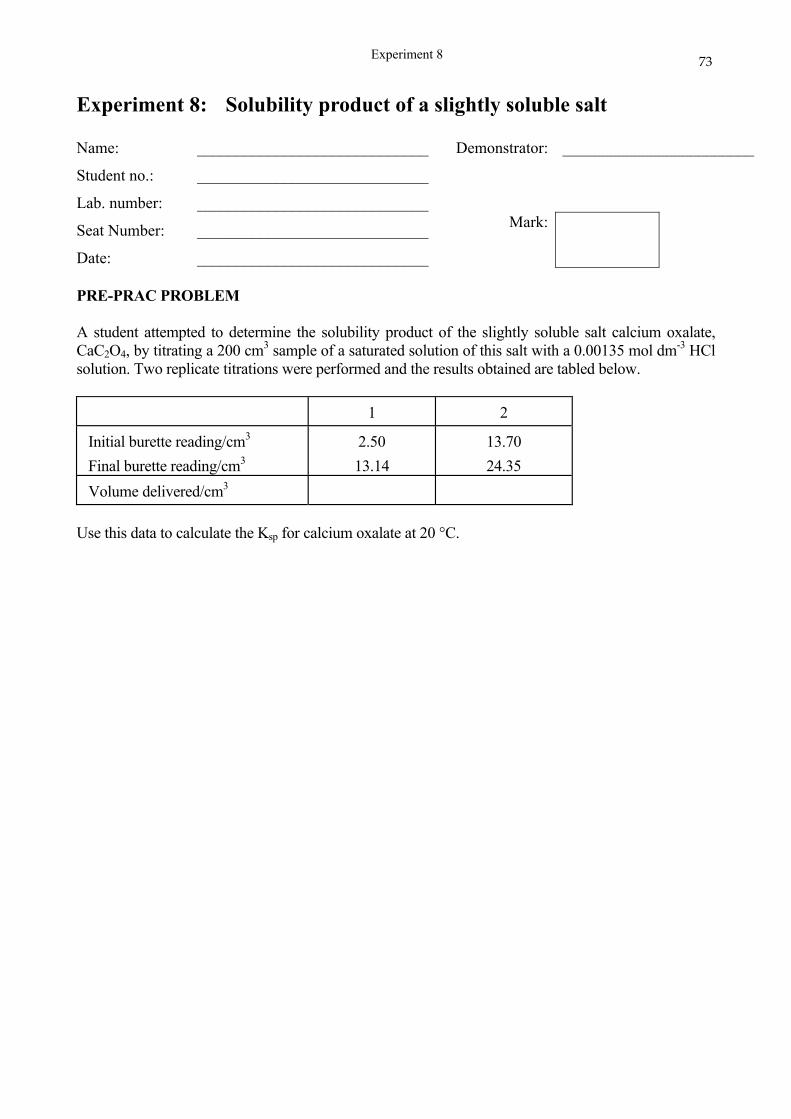
Experiment 8
73
Experiment 8: Solubility product of a slightly soluble salt Name: _____________________________
Student no.: _____________________________
Lab. number: _____________________________
Seat Number: _____________________________
Date: _____________________________
Demonstrator:
________________________
Mark:
PRE-PRAC PROBLEM A student attempted to determine the solubility product of the slightly soluble salt calcium oxalate, CaC2O4, by titrating a 200 cm3 sample of a saturated solution of this salt with a 0.00135 mol dm-3 HCl solution. Two replicate titrations were performed and the results obtained are tabled below.
1 2
Initial burette reading/cm3
Final burette reading/cm3
2.50
13.14
13.70
24.35
Volume delivered/cm3
Use this data to calculate the Ksp for calcium oxalate at 20 °C.
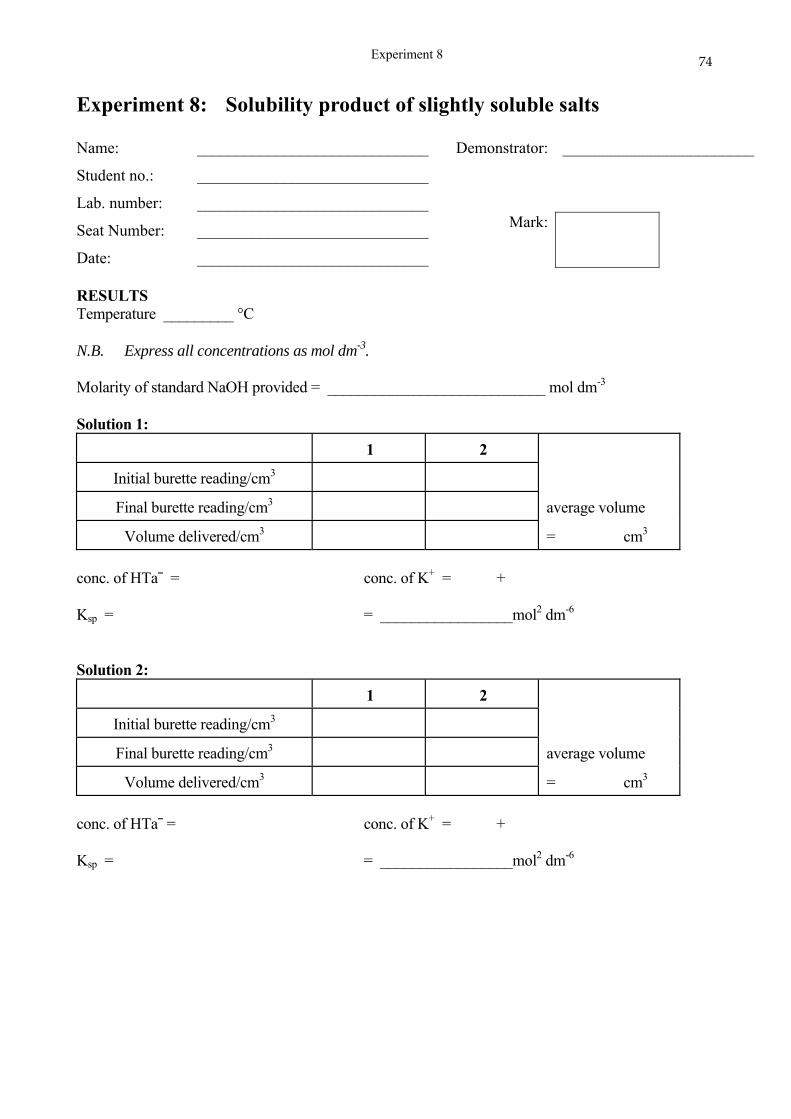
Experiment 8
74
Experiment 8: Solubility product of slightly soluble salts Name: _____________________________
Student no.: _____________________________
Lab. number: _____________________________
Seat Number: _____________________________
Date: _____________________________
Demonstrator:
________________________
Mark:
RESULTS Temperature _________ °C N.B. Express all concentrations as mol dm-3. Molarity of standard NaOH provided = ____________________________ mol dm-3 Solution 1:
1 2
Initial burette reading/cm3
Final burette reading/cm3 average volume
Volume delivered/cm3 = cm3
conc. of HTaˉ = conc. of K+ = + Ksp = = _________________mol2 dm-6 Solution 2:
1 2
Initial burette reading/cm3
Final burette reading/cm3 average volume
Volume delivered/cm3 = cm3
conc. of HTaˉ = conc. of K+ = + Ksp = = _________________mol2 dm-6

Experiment 8
75
Solution 3:
1 2
Initial burette reading/cm3
Final burette reading/cm3 average volume
Volume delivered/cm3 = cm3
conc. of HTaˉ = conc. of K+ = + Ksp = = _________________mol2 dm-6 Solution 4:
1 2
Initial burette reading/cm3
Final burette reading/cm3 average volume
Volume delivered/cm3 = cm3
conc. of HTaˉ = conc. of K+ = + Ksp = = _________________mol2 dm-6 Average value for Ksp for four solutions = _________________________mol2 dm-6
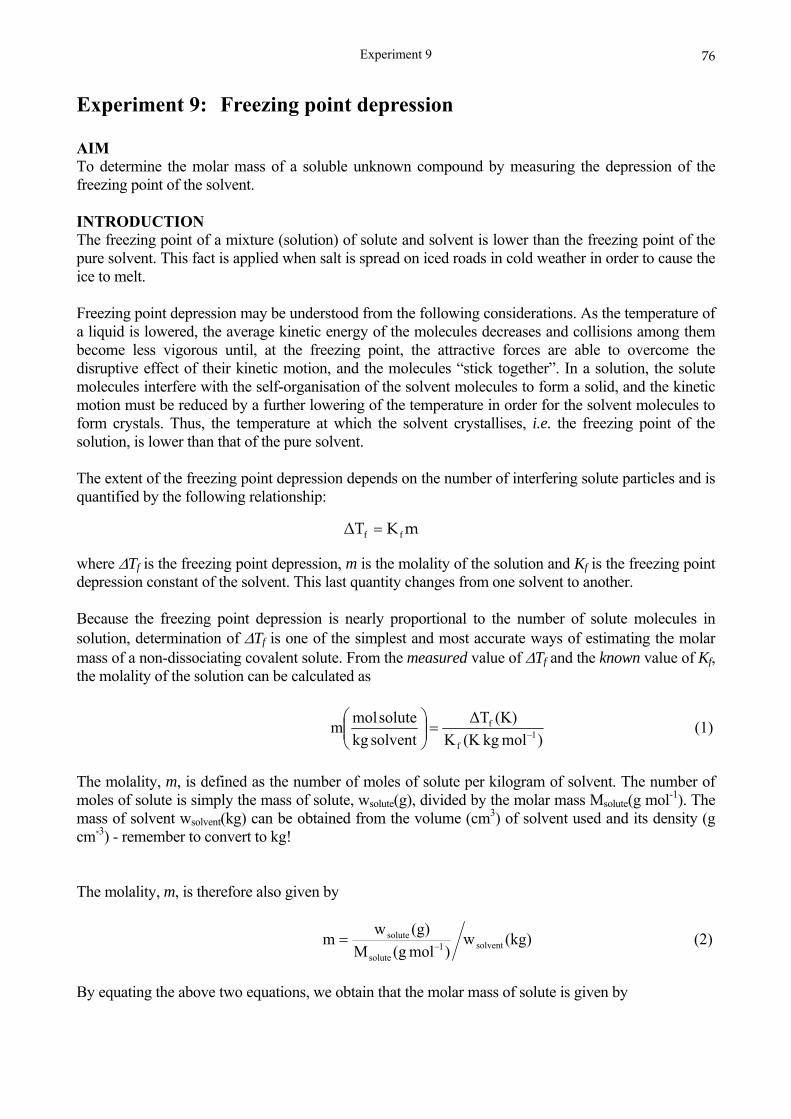
Experiment 9
76
Experiment 9: Freezing point depression AIM To determine the molar mass of a soluble unknown compound by measuring the depression of the freezing point of the solvent. INTRODUCTION The freezing point of a mixture (solution) of solute and solvent is lower than the freezing point of the pure solvent. This fact is applied when salt is spread on iced roads in cold weather in order to cause the ice to melt. Freezing point depression may be understood from the following considerations. As the temperature of a liquid is lowered, the average kinetic energy of the molecules decreases and collisions among them become less vigorous until, at the freezing point, the attractive forces are able to overcome the disruptive effect of their kinetic motion, and the molecules “stick together”. In a solution, the solute molecules interfere with the self-organisation of the solvent molecules to form a solid, and the kinetic motion must be reduced by a further lowering of the temperature in order for the solvent molecules to form crystals. Thus, the temperature at which the solvent crystallises, i.e. the freezing point of the solution, is lower than that of the pure solvent. The extent of the freezing point depression depends on the number of interfering solute particles and is quantified by the following relationship:
where Tf is the freezing point depression, m is the molality of the solution and Kf is the freezing point depression constant of the solvent. This last quantity changes from one solvent to another. Because the freezing point depression is nearly proportional to the number of solute molecules in solution, determination of Tf is one of the simplest and most accurate ways of estimating the molar mass of a non-dissociating covalent solute. From the measured value of Tf and the known value of Kf, the molality of the solution can be calculated as
(1) )molkg(KK
(K)TΔ
solventkg
solutemolm
1f
f
The molality, m, is defined as the number of moles of solute per kilogram of solvent. The number of moles of solute is simply the mass of solute, wsolute(g), divided by the molar mass Msolute(g mol-1). The mass of solvent wsolvent(kg) can be obtained from the volume (cm3) of solvent used and its density (g cm-3) - remember to convert to kg! The molality, m, is therefore also given by
(2) (kg)w)mol(gM
(g)wm solvent1
solute
solute
By equating the above two equations, we obtain that the molar mass of solute is given by
mKΔT ff
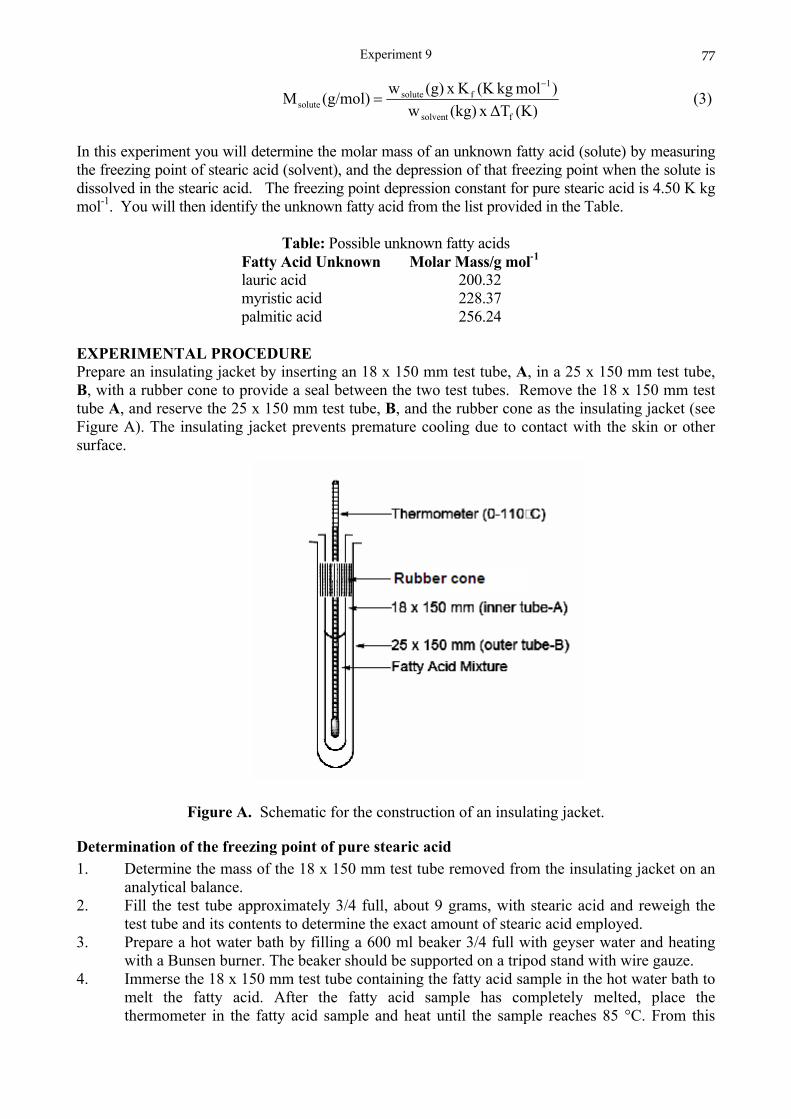
Experiment 9
77
(3) (K)TΔx(kg)w
)molkg(KKx(g)w(g/mol)M
fsolvent
1fsolute
solute
In this experiment you will determine the molar mass of an unknown fatty acid (solute) by measuring the freezing point of stearic acid (solvent), and the depression of that freezing point when the solute is dissolved in the stearic acid. The freezing point depression constant for pure stearic acid is 4.50 K kg mol-1. You will then identify the unknown fatty acid from the list provided in the Table.
Table: Possible unknown fatty acids Fatty Acid Unknown Molar Mass/g mol-1 lauric acid 200.32 myristic acid 228.37 palmitic acid 256.24
EXPERIMENTAL PROCEDURE Prepare an insulating jacket by inserting an 18 x 150 mm test tube, A, in a 25 x 150 mm test tube, B, with a rubber cone to provide a seal between the two test tubes. Remove the 18 x 150 mm test tube A, and reserve the 25 x 150 mm test tube, B, and the rubber cone as the insulating jacket (see Figure A). The insulating jacket prevents premature cooling due to contact with the skin or other surface.
Figure A. Schematic for the construction of an insulating jacket.
Determination of the freezing point of pure stearic acid 1. Determine the mass of the 18 x 150 mm test tube removed from the insulating jacket on an
analytical balance. 2. Fill the test tube approximately 3/4 full, about 9 grams, with stearic acid and reweigh the
test tube and its contents to determine the exact amount of stearic acid employed. 3. Prepare a hot water bath by filling a 600 ml beaker 3/4 full with geyser water and heating
with a Bunsen burner. The beaker should be supported on a tripod stand with wire gauze. 4. Immerse the 18 x 150 mm test tube containing the fatty acid sample in the hot water bath to
melt the fatty acid. After the fatty acid sample has completely melted, place the thermometer in the fatty acid sample and heat until the sample reaches 85 °C. From this
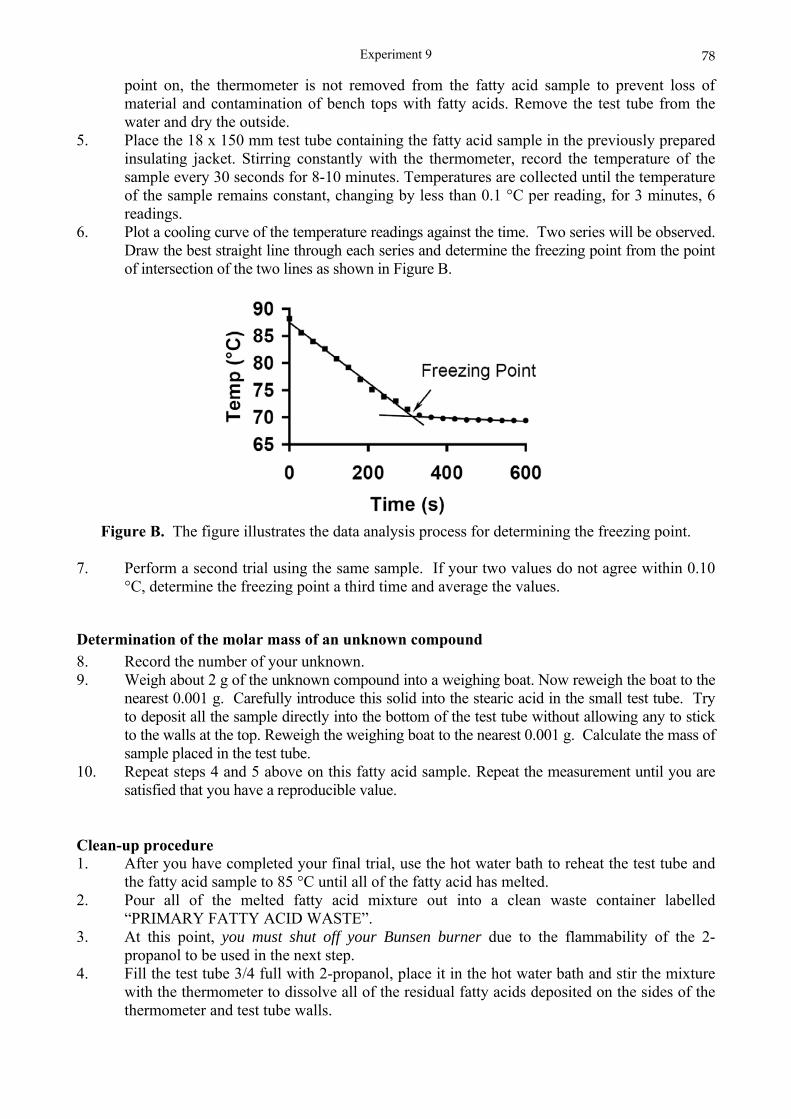
Experiment 9
78
point on, the thermometer is not removed from the fatty acid sample to prevent loss of material and contamination of bench tops with fatty acids. Remove the test tube from the water and dry the outside.
5. Place the 18 x 150 mm test tube containing the fatty acid sample in the previously prepared insulating jacket. Stirring constantly with the thermometer, record the temperature of the sample every 30 seconds for 8-10 minutes. Temperatures are collected until the temperature of the sample remains constant, changing by less than 0.1 °C per reading, for 3 minutes, 6 readings.
6. Plot a cooling curve of the temperature readings against the time. Two series will be observed. Draw the best straight line through each series and determine the freezing point from the point of intersection of the two lines as shown in Figure B.
Figure B. The figure illustrates the data analysis process for determining the freezing point.
7. Perform a second trial using the same sample. If your two values do not agree within 0.10
°C, determine the freezing point a third time and average the values.
Determination of the molar mass of an unknown compound 8. Record the number of your unknown. 9. Weigh about 2 g of the unknown compound into a weighing boat. Now reweigh the boat to the
nearest 0.001 g. Carefully introduce this solid into the stearic acid in the small test tube. Try to deposit all the sample directly into the bottom of the test tube without allowing any to stick to the walls at the top. Reweigh the weighing boat to the nearest 0.001 g. Calculate the mass of sample placed in the test tube.
10. Repeat steps 4 and 5 above on this fatty acid sample. Repeat the measurement until you are satisfied that you have a reproducible value.
Clean-up procedure 1. After you have completed your final trial, use the hot water bath to reheat the test tube and
the fatty acid sample to 85 °C until all of the fatty acid has melted. 2. Pour all of the melted fatty acid mixture out into a clean waste container labelled
“PRIMARY FATTY ACID WASTE”. 3. At this point, you must shut off your Bunsen burner due to the flammability of the 2-
propanol to be used in the next step. 4. Fill the test tube 3/4 full with 2-propanol, place it in the hot water bath and stir the mixture
with the thermometer to dissolve all of the residual fatty acids deposited on the sides of the thermometer and test tube walls.
Experiment 9
79
5. Once the sample is dissolved, pour the 2-propanol mixture into the waste bucket labelled “SECONDARY FATTY ACID WASTE”.
6. Repeat steps 4 and 5 once or twice more until the test tube is completely clean.
Calculations Each student must perform the calculations individually. Calculate: the mass of stearic acid used as solvent; the freezing point depression for the solution; the molality of the solution; and the molar mass of your unknown.
Hence identify your unknown and calculate the percent error in the molar mass determined.
Experiment 9
80
Experiment 9: Freezing point depression Name: _____________________________
Student no.: _____________________________
Lab. number: _____________________________
Seat Number: _____________________________
Date: _____________________________
Demonstrator:
________________________
Mark:
PRE-PRAC PROBLEM Do colligative properties depend on the number of particles dissolved, the identity of the particles dissolved, or both? Show, in detail, how equation (3) in the Introduction can be obtained from equation (1).

Experiment 9
81
Experiment 9: Freezing point depression Name: _____________________________
Student no.: _____________________________
Lab. number: _____________________________
Seat Number: _____________________________
Date: _____________________________
Demonstrator:
________________________
Mark:
RESULTS
Mass of stearic acid used Mass of test tube + stearic acid __________ g Mass of empty test tube __________ g Mass of stearic acid __________ g
Determination of the freezing point of pure stearic acid
Run 1 Run 2 Run 3
time/s temperature/°C time/s temperature/°C time/s temperature/°C

Experiment 9
82
C
t/s
C
t/s
C
t/s
Run 1 T/ °C
freezing point of pure stearic acid ________ °C
Run 2
T/ °C
freezing point of pure stearic acid ________ °C
Run 3
T/ °C
freezing point of pure stearic acid ________ °C
Average freezing point __________ °C
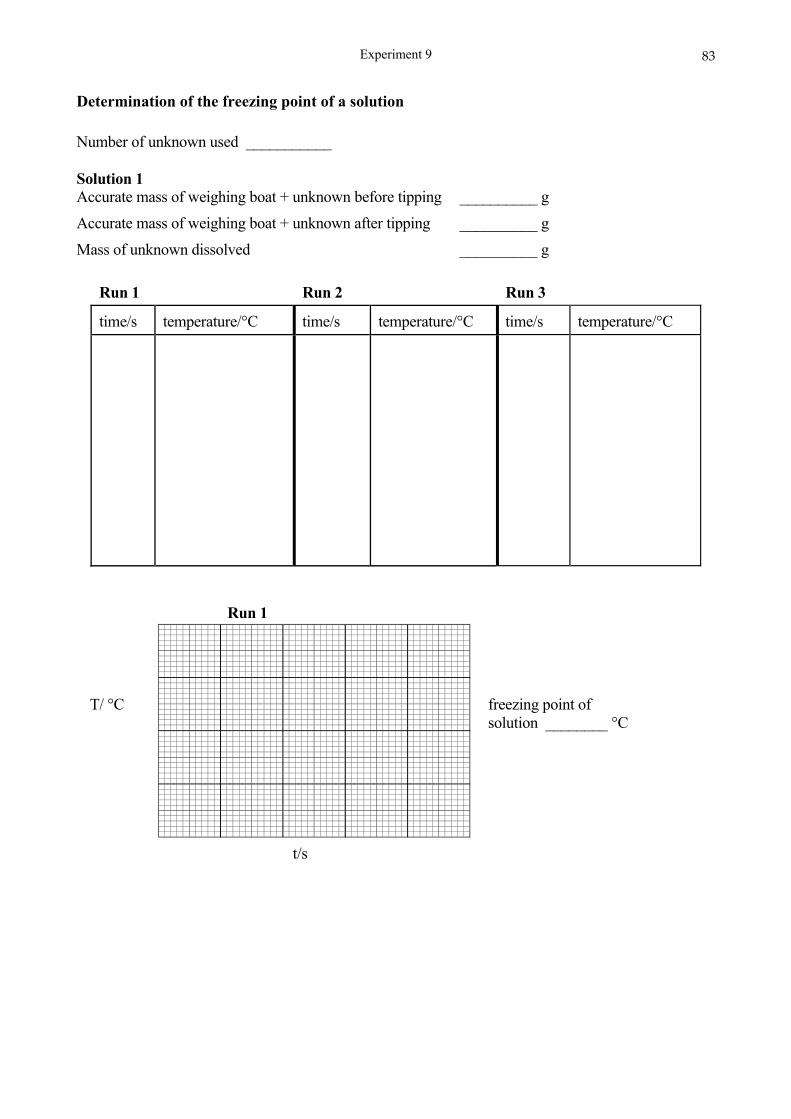
Experiment 9
83
C
t/s
Determination of the freezing point of a solution Number of unknown used ___________ Solution 1 Accurate mass of weighing boat + unknown before tipping __________ g
Accurate mass of weighing boat + unknown after tipping __________ g
Mass of unknown dissolved __________ g
Run 1 Run 2 Run 3
time/s temperature/°C time/s temperature/°C time/s temperature/°C
Run 1
T/ °C
freezing point of solution ________ °C

Experiment 9
84
C
t/s
C
t/s
Run 2
T/ °C
freezing point of solution ________ °C
Run 3
T/ °C
freezing point of solution ________ °C
Average freezing point of solution __________ °C
Experiment 9
85
Calculations freezing point depression of solution = = = __________ °C molality of solution 1 = = = __________ mol kg-1
molar mass of unknown from solution = = = __________ g mol-1
Identity of unknown: ____________________________ Percent error in molar mass determined = = = ___________ %
Experiment 10a
86
Experiment 10a: Determination of the molar mass of copper by electrolysis
AIM To introduce Faraday's First Law of Electrolysis, and to determine the molar mass of copper by electrolysis. INTRODUCTION
Electrolysis An electric current flows in a solid conductor by the movement of electrons. In an electrolyte current flows by the movement of cations and anions through the solution to the cathode (negative electrode) and to the anode (positive electrode) respectively. Upon arrival at the negative electrode, cations accept electrons and so are reduced to atoms, e.g.
H+(aq) + eˉ → H
Cu2+(aq) + 2eˉ → Cu
Upon discharge, the atoms can: (i) form molecules and escape as a gas
H + H → H2(g) (ii) deposit on the cathode
Cu → Cu(s)
Faraday's Laws of Electrolysis Faraday was the first scientist to quantify chemical change at an electrode. His first law states:
"The mass of an element liberated at an electrode is proportional to the quantity of electric charge passed".
The quantity of electric charge is measured in coulombs - 1 coulomb is the quantity of charge passing when a current of 1 ampere flows for a period of 1 second, i.e. 1 C = 1 A s. Faraday's first law can thus be written:
m It (mass liberated current x time)
The quantity of charge required to liberate 1 mole of a monovalent element is called the Faraday, F. Thus 1 F is the charge associated with 1 mole of electrons, or, in practical units, 96485 C. It is thus possible to determine the molar mass of an element by the measurement of time, current and mass. In this experiment, the mass of copper deposited on an electrode by a measured quantity of charge will be determined, and from this its molar mass will be calculated. The equipment available is rather elementary and fluctuations in the current occur continuously. For this reason a water electrolysis cell is inserted in series with the copper electrolysis cell and the volume of hydrogen liberated is used as a second measurement of the quantity of charge passed for calculation of the molar mass of copper.

Experiment 10a
87
EXPERIMENTAL PROCEDURE 1. Fill the beaker of the water electrolysis cell to within 2 cm of the brim with 1% H2SO4. Fill the
eudiometer tube with 1% H2SO4, close the mouth with your thumb and up-end the tube in the H2SO4 solution in the beaker. Insert the tube in the clamps on the column.
2. Remove the cathode from its clamp and insert it in the eudiometer tube. Reclamp it and
position it, as shown in the Figure, not more than 2 cm inside the mouth of the tube. If it is positioned higher up the eudiometer tube, the resistance will be too high to attain the required current.
3. Pour about 200 cm3 of the saturated CuSO4 solution into the beaker of the copper electrolysis
cell. 4. Clean one of the copper electrodes with the sandpaper provided. Wipe it with a paper towel,
dry it in the hot air oven and weigh it on a fine balance in the balance room. 5. Insert the two copper electrodes in the perspex lid and position the spacer between them. Rest
the lid on the beaker containing CuSO4. Clamp the black lead onto the prepared electrode by means of the crocodile clip. Clamp the red lead onto the other electrode and plug both leads into their respective sockets.
6. Turn the control knob of the DC supply fully counterclockwise. Make sure the switch of the
DC supply is in the OFF position. Plug in the DC supply to the bench socket and switch on. 7. As a potential of approximately 8 V is required to drive a current of 150 mA through the
circuit, ensure that the DC power supply reads about 8 V when the ammeter is reads as close to 150 mA as possible.
8. Move the switch on the DC supply to the ON position, start the timer and turn the “adjust”
knob on the DC power supply clockwise until the ammeter shows 150 mA, and keep it at 150 ± 1 mA by adjusting the same control knob.
9. Run until approximately 50 cm3 of hydrogen has collected in the eudiometer tube. 10. Switch off and stop the timer. Record the running time. 11. Remove the copper cathode, rinse it in a stream of deionised water, dry it in the oven and
weigh it. 12. Calculate the quantity of charge and then the molar mass of copper. 13. Record the volume of hydrogen collected. Convert this volume to STP. 14. From the STP value of the volume of hydrogen collected calculate the molar mass of copper. 15. Do NOT discard the H2SO4 in the large beaker or the CuSO4 in the small beaker.
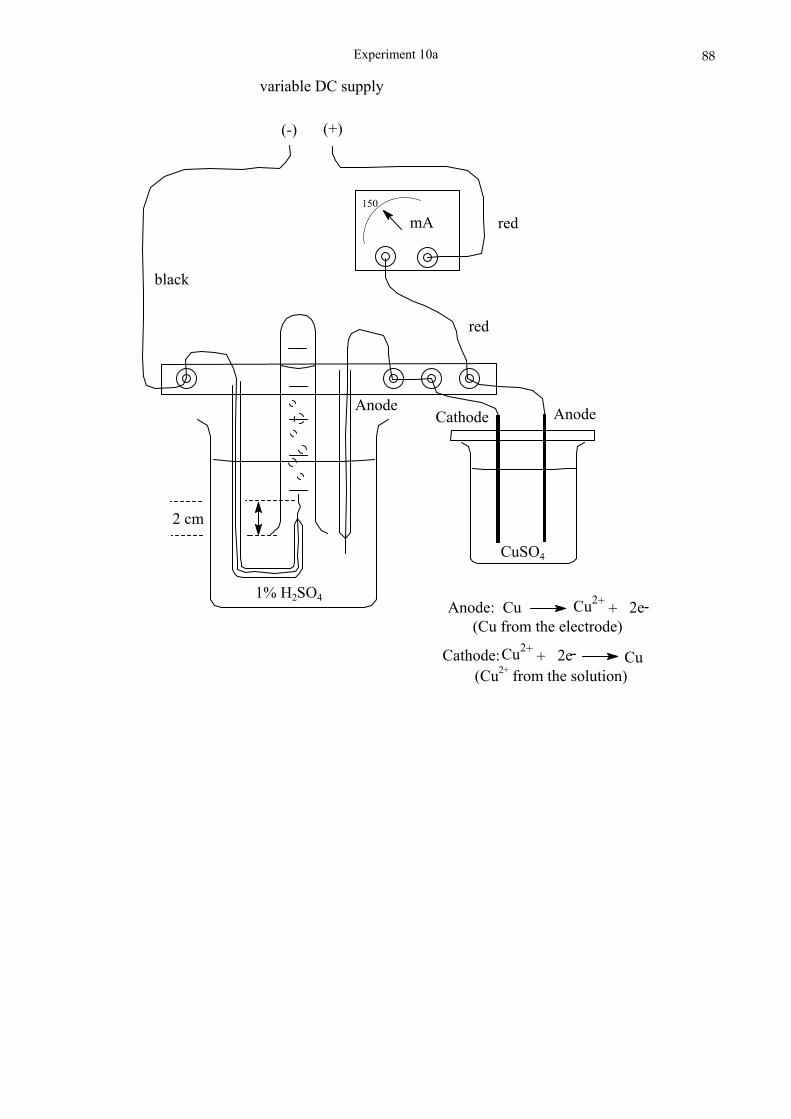
Experiment 10a
88
150
mA
1% H2SO4
2 cm
Cathode
(Cu2+ from the solution)
(Cu from the electrode)
CuCathode: Cu2++ 2e
2e+Cu2+Anode: Cu
black
red
(-) (+)
CuSO4
AnodeAnode
red
-
-
variable DC supply
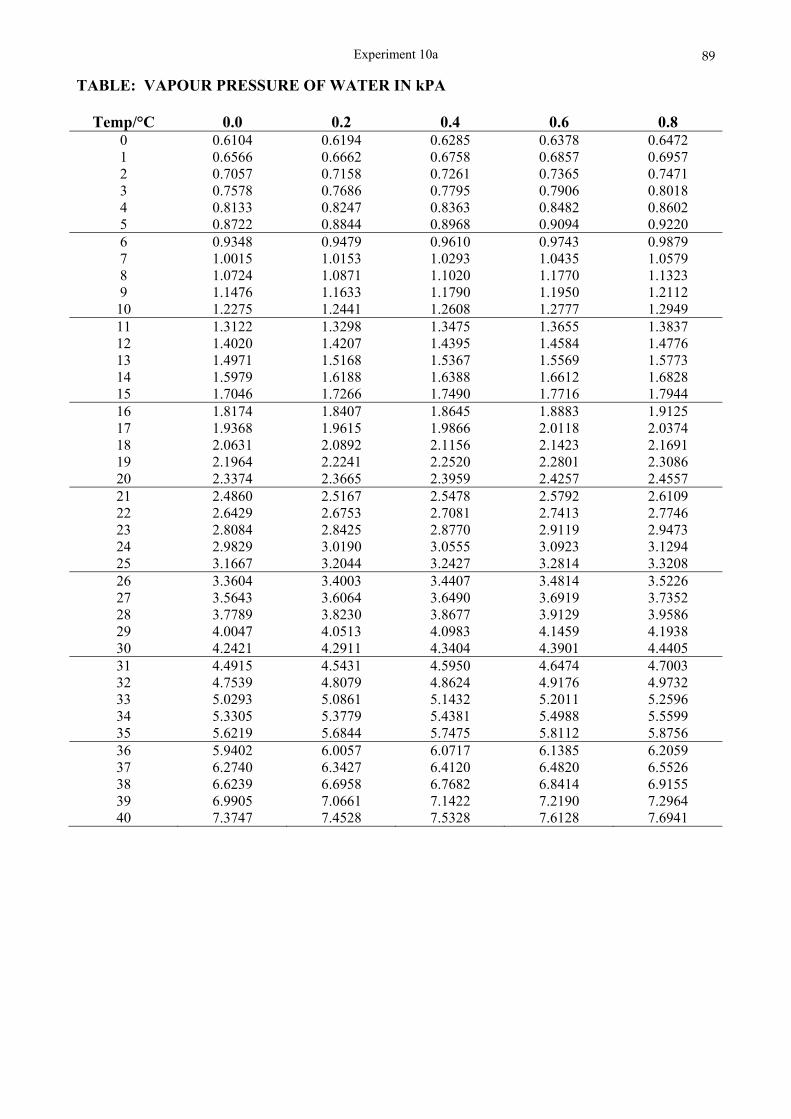
Experiment 10a
89
TABLE: VAPOUR PRESSURE OF WATER IN kPA
Temp/°C 0.0 0.2 0.4 0.6 0.8 0 0.6104 0.6194 0.6285 0.6378 0.6472 1 0.6566 0.6662 0.6758 0.6857 0.6957 2 0.7057 0.7158 0.7261 0.7365 0.7471 3 0.7578 0.7686 0.7795 0.7906 0.8018 4 0.8133 0.8247 0.8363 0.8482 0.8602 5 0.8722 0.8844 0.8968 0.9094 0.9220 6 0.9348 0.9479 0.9610 0.9743 0.9879 7 1.0015 1.0153 1.0293 1.0435 1.0579 8 1.0724 1.0871 1.1020 1.1770 1.1323 9 1.1476 1.1633 1.1790 1.1950 1.2112 10 1.2275 1.2441 1.2608 1.2777 1.2949 11 1.3122 1.3298 1.3475 1.3655 1.3837 12 1.4020 1.4207 1.4395 1.4584 1.4776 13 1.4971 1.5168 1.5367 1.5569 1.5773 14 1.5979 1.6188 1.6388 1.6612 1.6828 15 1.7046 1.7266 1.7490 1.7716 1.7944 16 1.8174 1.8407 1.8645 1.8883 1.9125 17 1.9368 1.9615 1.9866 2.0118 2.0374 18 2.0631 2.0892 2.1156 2.1423 2.1691 19 2.1964 2.2241 2.2520 2.2801 2.3086 20 2.3374 2.3665 2.3959 2.4257 2.4557 21 2.4860 2.5167 2.5478 2.5792 2.6109 22 2.6429 2.6753 2.7081 2.7413 2.7746 23 2.8084 2.8425 2.8770 2.9119 2.9473 24 2.9829 3.0190 3.0555 3.0923 3.1294 25 3.1667 3.2044 3.2427 3.2814 3.3208 26 3.3604 3.4003 3.4407 3.4814 3.5226 27 3.5643 3.6064 3.6490 3.6919 3.7352 28 3.7789 3.8230 3.8677 3.9129 3.9586 29 4.0047 4.0513 4.0983 4.1459 4.1938 30 4.2421 4.2911 4.3404 4.3901 4.4405 31 4.4915 4.5431 4.5950 4.6474 4.7003 32 4.7539 4.8079 4.8624 4.9176 4.9732 33 5.0293 5.0861 5.1432 5.2011 5.2596 34 5.3305 5.3779 5.4381 5.4988 5.5599 35 5.6219 5.6844 5.7475 5.8112 5.8756 36 5.9402 6.0057 6.0717 6.1385 6.2059 37 6.2740 6.3427 6.4120 6.4820 6.5526 38 6.6239 6.6958 6.7682 6.8414 6.9155 39 40
6.9905 7.3747
7.0661 7.4528
7.1422 7.5328
7.2190 7.6128
7.2964 7.6941
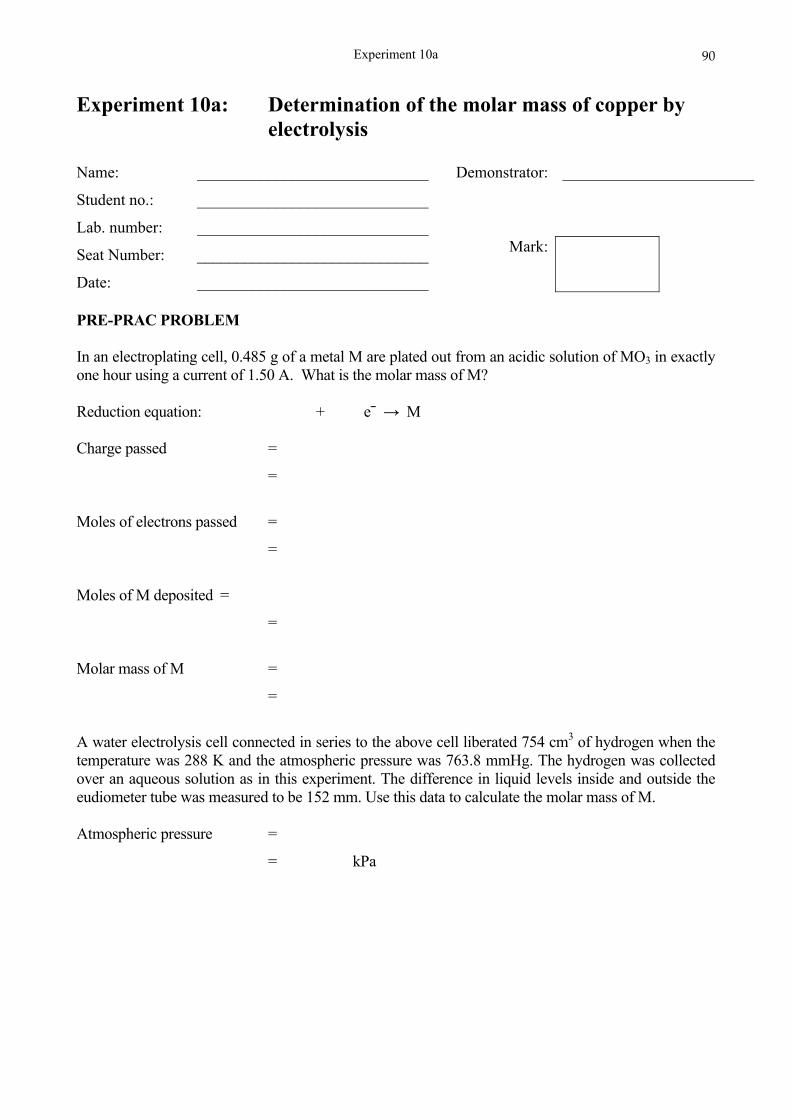
Experiment 10a
90
Experiment 10a: Determination of the molar mass of copper by electrolysis
Name: _____________________________
Student no.: _____________________________
Lab. number: _____________________________
Seat Number: _____________________________
Date: _____________________________
Demonstrator:
________________________
Mark:
PRE-PRAC PROBLEM In an electroplating cell, 0.485 g of a metal M are plated out from an acidic solution of MO3 in exactly one hour using a current of 1.50 A. What is the molar mass of M? Reduction equation: + eˉ → M Charge passed =
=
Moles of electrons passed =
=
Moles of M deposited =
=
Molar mass of M =
=
A water electrolysis cell connected in series to the above cell liberated 754 cm3 of hydrogen when the temperature was 288 K and the atmospheric pressure was 763.8 mmHg. The hydrogen was collected over an aqueous solution as in this experiment. The difference in liquid levels inside and outside the eudiometer tube was measured to be 152 mm. Use this data to calculate the molar mass of M. Atmospheric pressure =
= kPa
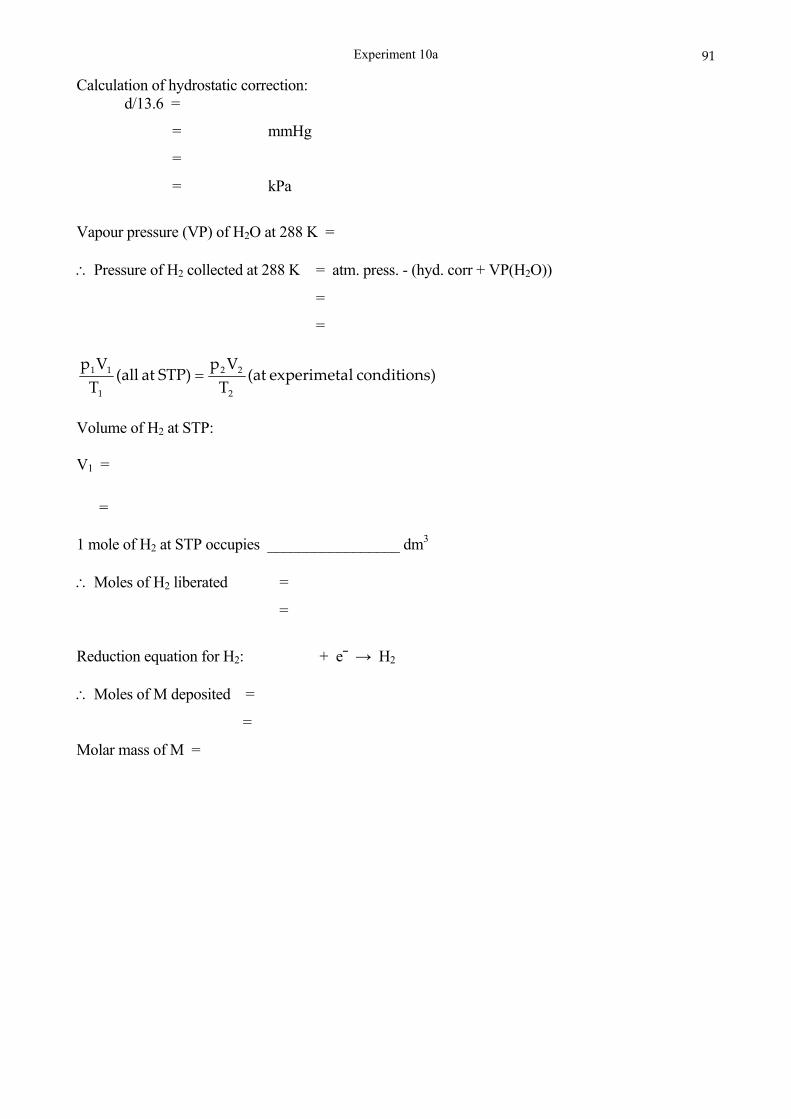
Experiment 10a
91
Calculation of hydrostatic correction: d/13.6 =
= mmHg
=
= kPa
Vapour pressure (VP) of H2O at 288 K = Pressure of H2 collected at 288 K = atm. press. - (hyd. corr + VP(H2O))
=
=
Volume of H2 at STP: V1 =
= 1 mole of H2 at STP occupies _________________ dm3 Moles of H2 liberated =
=
Reduction equation for H2: + eˉ → H2 Moles of M deposited =
=
Molar mass of M =
)conditions lexperimeta (atT
VpSTP) at (all
T
Vp
2
22
1
11

Experiment 10a
92
Experiment 10a: Determination of the molar mass of copper by electrolysis
Name: _____________________________
Student no.: _____________________________
Lab. number: _____________________________
Seat Number: _____________________________
Date: _____________________________
Demonstrator:
________________________
Mark:
RESULTS Mass of cathode before electrolysis = ______________ g
Mass of cathode after electrolysis = ______________ g
Mass of copper deposited during electrolysis = ______________ g
1 Time = ___________ s
Current = ___________ A
Charge passed during electrolysis =
= ______________ C
Hence molar mass of copper (show your reasoning):

Experiment 10a
93
2 Volume of gas collected = _____________ cm3
Barometric pressure = ____________ mmHg
= ____________ kPa
Difference in liquid levels inside and outside
eudiometer tube (d) = _____________ mm
Equivalent to a height that a mercury column
would have under these conditions (d/13.6) = _____________ mmHg
Hydrostatic correction = _____________ kPa
Temperature of dilute acid = _____________ °C
Vapour pressure of H2O at this temperature
(from Table above) = _____________ kPa
Pressure of H2 at temperature taken above is barometric pressure –
(hydrostatic correction + VP(H2O)) = _____________
= _____________ kPa
Volume of H2 corrected to STP conditions =
= _____________ cm3
Hence molar mass of copper (show your reasoning): (NB : 1 mmHg = 133.3 Pa)
Experiment 10b
94
Experiment 10b: The production of an electric potential by means of oxidation-reduction reactions
AIM To introduce the concept of an electrochemical half-cell, to illustrate the construction of an electrochemical cell by the combination of two half-cells, to measure the potential difference between two connected half-cells, to compare measured potential differences with values calculated from the table of E° potentials, and to show the variation in potential due to change in concentration of the electrolyte in a half-cell. INTRODUCTION
The electrochemical cell All elements show a tendency to become oxidised, i.e. to lose electrons,
M → Mn+ + neˉ.
In some elements, e.g. sodium, the tendency is strong and oxidation is violent; in other elements, e.g. gold, the tendency is very weak and the extent of oxidation is negligible. When a metal is immersed in an electrolyte, atoms enter into solution in the electrolyte as cations:
M → Mn+(aq) + neˉ The electrons remain on the metal and thus the metal acquires a negative charge. Equilibrium is soon reached - when the number of atoms going into solution as cations is equal to the number of cations leaving the solution to return to the metal and become united with electrons to form atoms. When a metal has a strong tendency to become oxidised, equilibrium is reached when the concentration of cations in the electrolyte is high and thefore electron charge on the metal (the electrode) is high. The electrode thus has a high negative charge. When a metal has a weak tendency to become oxidised, equilibrium is reached when the concentration of cations in the electrolyte is low. The electrode thus has a low negative charge. Thus if two different metals are immersed in an electrolyte, the electron charges on them will be different, i.e. a potential difference will exist between the electrodes, and the magnitude of this difference will be determined by the respective oxidation tendencies of the two metals. If the two electrodes are connected externally by means of a conductor, electrons will flow from the electrode having the higher electron density to the electrode having the lower electron density, i.e. from the more negative electrode to the less negative electrode. The loss of electrons from an electrode will promote the forward reaction:
M → Mn+ + neˉ and the influx of electrons into the other electrode will promote the reverse reaction
Mn+ + neˉ → M. An electrochemical cell thus consists of two half-cells, one being the half-cell in which oxidation takes place and the other being the half-cell in which reduction takes place.

Experiment 10b
95
The notation for such a cell is: MaMa
n+ Mbm+Mb
where the solid vertical line denotes a change of phase and the dotted vertical line denotes a connection between the electrolyte containing Ma
n+ and the electrolyte containing Mbm+. In this
experiment, four metals will be used: zinc, copper, iron and lead. Each will be immersed in a solution of its own ions as its electrolyte. The connection between electrolytes will be made by means of a salt bridge (a U tube containing a gel of saturated potassium nitrate), which allows the passage of ions between the two electrolytes and thus constitutes the internal connection between the two half-cells as shown in the Figure.
Electrochemical cell with salt bridge
Conventions Various conventions exist for writing cell notations. In this practical it will be convenient to write the notation in such a way that electrons in the external circuit flow from left to right. This means that the half-cell in which oxidation takes place is on the left. eˉ
ZnZn2+ Cu2+Cu I The half-cell in which oxidation takes place is called the anodic half-cell and its electrode is called the anode. The other half-cell is called the cathodic half-cell and the electrode is called the cathode. When the concentration of ions in the electrolyte is unit molarity (1 M), and the temperature of the electrolyte is 25 °C, the half-cell is said to be in its standard state and its potential is designated by E°. It is of course impossible to measure the potential of one half-cell; only a difference of potential between two half-cells can be measured. The measured potentials will be compared with the values calculated from the list of E° potentials given in the table on page 59. For this practical, it will be convenient to use the equation:
E°cell = E° (reduction half-cell) – E° (oxidation half-cell) or
E°cell = E°RHE – E°LHE when using notation I above.
E° Values The table of E° values was established by choosing a reference electrode against which to measure. For this reference electrode the half-reaction
2H+ + 2eˉ → H2
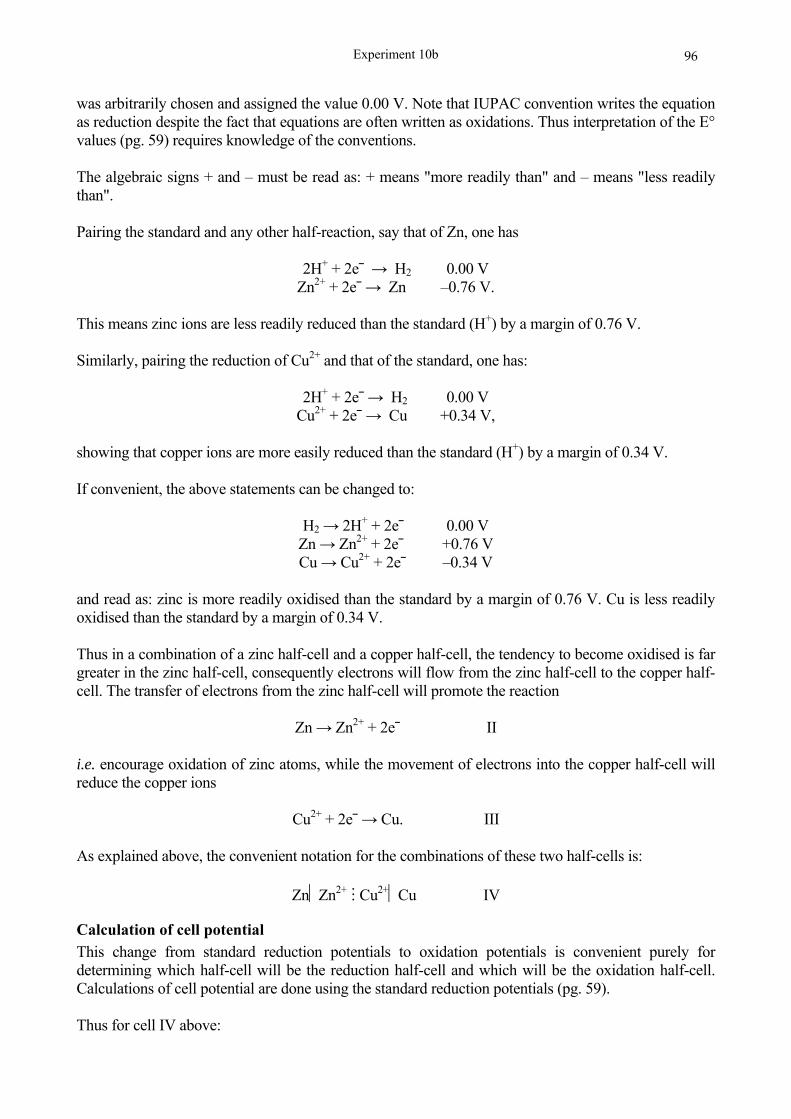
Experiment 10b
96
was arbitrarily chosen and assigned the value 0.00 V. Note that IUPAC convention writes the equation as reduction despite the fact that equations are often written as oxidations. Thus interpretation of the E° values (pg. 59) requires knowledge of the conventions. The algebraic signs + and – must be read as: + means "more readily than" and – means "less readily than". Pairing the standard and any other half-reaction, say that of Zn, one has
2H+ + 2eˉ → H2 0.00 V Zn2+ + 2eˉ → Zn –0.76 V.
This means zinc ions are less readily reduced than the standard (H+) by a margin of 0.76 V. Similarly, pairing the reduction of Cu2+ and that of the standard, one has:
2H+ + 2eˉ → H2 0.00 V Cu2+ + 2eˉ → Cu +0.34 V,
showing that copper ions are more easily reduced than the standard (H+) by a margin of 0.34 V. If convenient, the above statements can be changed to:
H2 → 2H+ + 2eˉ 0.00 V Zn → Zn2+ + 2eˉ +0.76 V Cu → Cu2+ + 2eˉ –0.34 V
and read as: zinc is more readily oxidised than the standard by a margin of 0.76 V. Cu is less readily oxidised than the standard by a margin of 0.34 V. Thus in a combination of a zinc half-cell and a copper half-cell, the tendency to become oxidised is far greater in the zinc half-cell, consequently electrons will flow from the zinc half-cell to the copper half-cell. The transfer of electrons from the zinc half-cell will promote the reaction
Zn → Zn2+ + 2eˉ II i.e. encourage oxidation of zinc atoms, while the movement of electrons into the copper half-cell will reduce the copper ions
Cu2+ + 2eˉ → Cu. III As explained above, the convenient notation for the combinations of these two half-cells is:
ZnZn2+ Cu2+Cu IV
Calculation of cell potential This change from standard reduction potentials to oxidation potentials is convenient purely for determining which half-cell will be the reduction half-cell and which will be the oxidation half-cell. Calculations of cell potential are done using the standard reduction potentials (pg. 59). Thus for cell IV above:
Experiment 10b
97
E°cell = E° (reduction half-cell) – E° (oxidation half-cell) = 0.34 V – (–0.76 V) = 1.10 V. If a combination of a copper half-cell and a silver half-cell is made, the values of Table III show that Cu is more readily oxidised than Ag. Thus the cell notation will be:
CuCu2+ Ag+Ag and the cell potential will be
E° = 0.80 V – 0.34 V = 0.46 V. If a combination of a magnesium half-cell and a zinc half-cell is made, the values on page 59 show that Mg is more readily oxidised than Zn. Thus the cell notation will be:
MgMg2+ Zn2+ Zn and the cell potential will be:
E° = –0.76 V – (–2.34 V) = 1.58 V.
Variation of cell potential It is worthwhile to note that change of concentration of ions in the electrolyte causes changes in the potential of a half-cell, but that the size and shape of the metal electrode is immaterial. EXPERIMENTAL PROCEDURE 1. Clean the metal electrodes with the sandpaper provided. This must be done on the reverse side
of the tiles provided. It is essential that the surfaces of the electrodes be clean and free of oxide. Lead foil is very soft and its cleaning requires some dexterity.
2. Pour approximately 50 cm3 of 1.0 M zinc nitrate into one beaker and approximately 50 cm3 of 1.0 M copper nitrate into another. Place them side by side and connect them with the salt bridge. Put a copper strip into the copper solution and a zinc strip into the zinc solution.
3. Set the multitester (also known as an AVO meter, because it can measure current (amp), potential (volt) and resistance (ohm)) to the following:
DC (meaning direct current) V (meaning potential measurement) and
0-2 (meaning range 0-2 V). 4. Zero the multitester. Some of these multitesters can be zeroed by short-circuiting the leads and
pressing the "zero adjust" button. After zeroing, the "zero adjust" mode must be cancelled by pressing the button again. Connect the red lead by means of its crocodile clip to the reduction half-cell electrode and the black lead to the oxidation half-cell electrode.
5. Record the highest reading obtained in the initial 30 seconds. Rinse the salt bridge with deionised water and return it to its beaker.
6. Remove the zinc half-cell and substitute the lead half-cell. Insert the salt bridge, reconnect the multitester, zero it and record the cell potential.
7. Remove the lead half-cell and substitute the iron half-cell. Record the cell potential. 8. Discard the electrolyte from the copper half-cell and replace it with a 0.1 M solution made by
diluting 10 cm3 of the 1.0 M solution to 100 cm3 in a measuring cylinder. Combine this half-cell with the zinc half-cell and measure the potential. Explain why this potential is less than the potential measured in 5 above.
9. Switch off the multitester. Rinse the salt bridge and return it to its beaker. Discard the electrolytes in the sink and flush with water.

Experiment 10b
98
STANDARD REDUCTION POTENTIALS IN VOLTS AT 25 °C E° F2(g) + 2eˉ 2F-(aq) + 2.85 Co3+(aq) + eˉ Co2+(aq) + 1.82 MnO4
-(aq) + 8H+(aq) + 5eˉ 4H2O + Mn2+(aq) + 1.52 ClO4
-(aq) + 8H+(aq) + 8eˉ 4H2O + Clˉ(aq) + 1.39 Cl2(g) + 2eˉ 2Clˉ(aq) + 1.36 Cr2O7
2-(aq) + 14H+(aq) + 6eˉ 7H2O + 2Cr3+(aq) + 1.33 MnO2(s) + 4H+(aq) + 2eˉ 2H2O + Mn2+(aq) + 1.23 O2(g) + 4H+(aq) + 4eˉ 2H2O(l) + 1.23 Br2(l) + 2eˉ 2Brˉ(aq) + 1.06 NO3ˉ(aq) + 4H+(aq) + 3eˉ 2H2O +NO(g) + 0.96 Hg2+(aq) + 2eˉ Hg(l) + 0.85 Ag+(aq) + eˉ Ag(s) + 0.80 Fe3+(aq) + eˉ Fe2+(aq) + 0.77 MnO4ˉ(aq) + 2H2O + 3eˉ 4OHˉ(aq) + MnO2(s) + 0.59 I2(s) + 2eˉ 2Iˉ(aq) + 0.54 Cu2+(aq) + 2eˉ Cu(s) + 0.34 Sn4+(aq) + 2eˉ Sn2+(aq) + 0.15 2H+(aq) + 2eˉ H2(g) 0.00 Pb2+(aq) + 2eˉ Pb(s) – 0.13 Sn2+(aq) + 2eˉ Sn(s) – 0.14 Ni2+(aq) + 2eˉ Ni(s) – 0.24 Cd2+(aq) + 2eˉ Cd(s) – 0.40 Fe2+(aq) + 2eˉ Fe(s) – 0.44 Zn2+(aq) + 2eˉ Zn(s) – 0.76 Mn2+(aq) + 2eˉ Mn(s) – 1.18 Al3+(aq) + 3eˉ Al(s) – 1.66 Mg2+(aq) + 2eˉ Mg(s) – 2.34 Na+(aq) + eˉ Na(s) – 2.71 Ca2+(aq) + 2eˉ Ca(s) – 2.87 Li+(aq) + eˉ Li(s) – 3.04
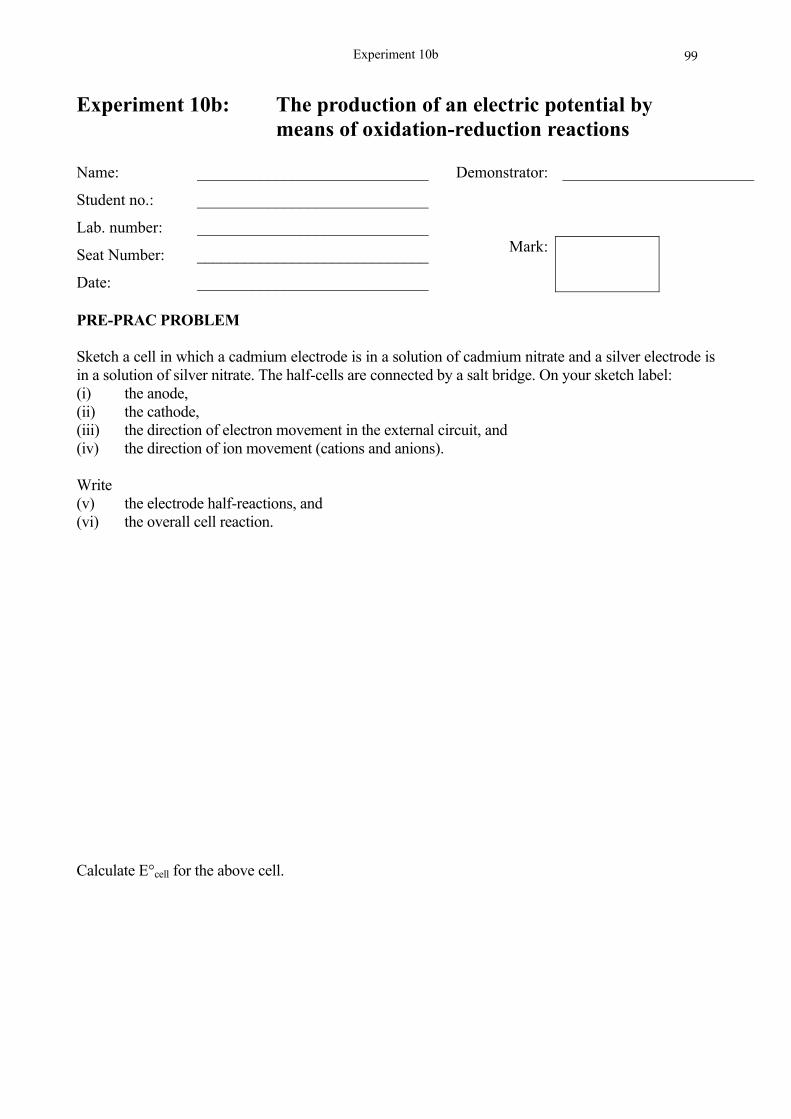
Experiment 10b
99
Experiment 10b: The production of an electric potential by means of oxidation-reduction reactions
Name: _____________________________
Student no.: _____________________________
Lab. number: _____________________________
Seat Number: _____________________________
Date: _____________________________
Demonstrator:
________________________
Mark:
PRE-PRAC PROBLEM Sketch a cell in which a cadmium electrode is in a solution of cadmium nitrate and a silver electrode is in a solution of silver nitrate. The half-cells are connected by a salt bridge. On your sketch label: (i) the anode, (ii) the cathode, (iii) the direction of electron movement in the external circuit, and (iv) the direction of ion movement (cations and anions). Write (v) the electrode half-reactions, and (vi) the overall cell reaction. Calculate E°cell for the above cell.
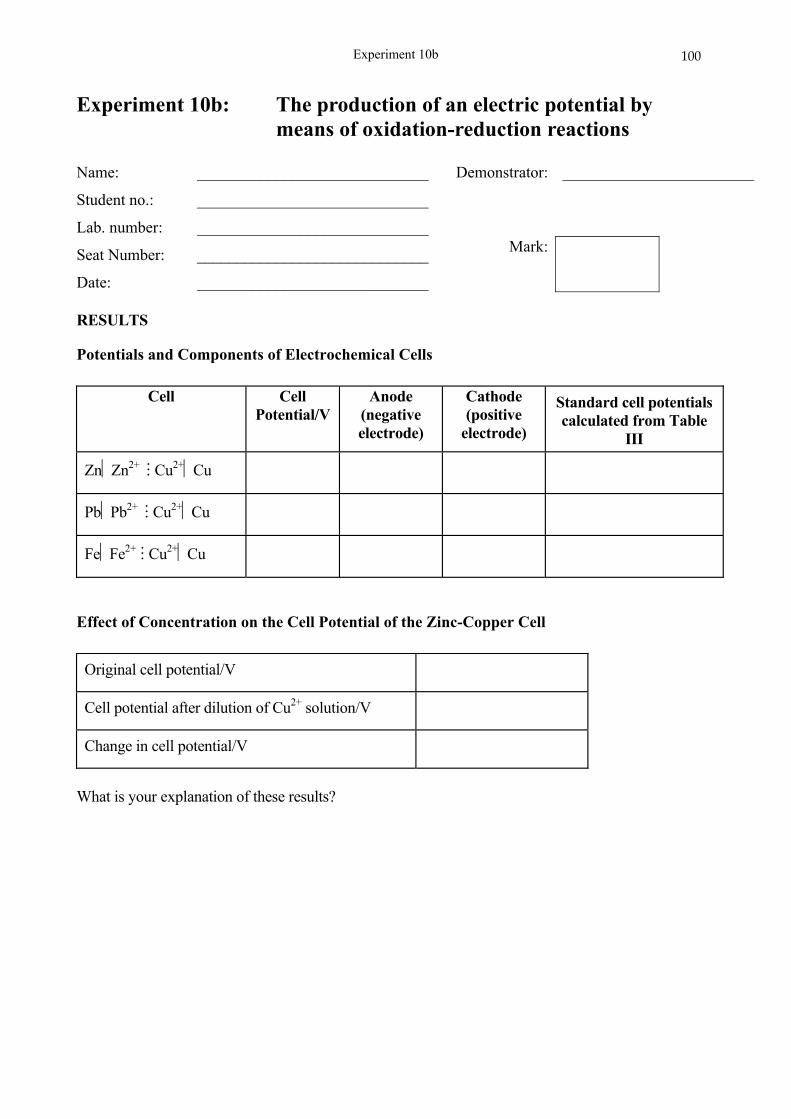
Experiment 10b
100
Experiment 10b: The production of an electric potential by means of oxidation-reduction reactions
Name: _____________________________
Student no.: _____________________________
Lab. number: _____________________________
Seat Number: _____________________________
Date: _____________________________
Demonstrator:
________________________
Mark:
RESULTS
Potentials and Components of Electrochemical Cells
Cell Cell Potential/V
Anode (negative electrode)
Cathode (positive
electrode)
Standard cell potentials calculated from Table
III
ZnZn2+ Cu2+Cu
PbPb2+ Cu2+Cu
FeFe2+ Cu2+Cu
Effect of Concentration on the Cell Potential of the Zinc-Copper Cell
Original cell potential/V
Cell potential after dilution of Cu2+ solution/V
Change in cell potential/V
What is your explanation of these results?
Appendix 1
101
Appendix 1: Laboratory apparatus Each student workbench is supplied with the following apparatus, which should be returned to its correct locker at the end of each laboratory session. Item Description Quantity Erlenmeyer (conical) flasks 250 cm3 4 Erlenmeyer (conical) flasks 50 cm3 1 Beakers 100 cm3 2 Beakers 50 cm3 2 Measuring cylinder 50 cm3 1 Measuring cylinder 10 cm3 1 Volumetric flask 250 cm3 1 Pyrex filter funnel 45 mm diameter 1 Pyrex filter funnel 75 mm diameter 1 Weighing bottles No. 4 vial 2 Weighing boat (plastic) 1 Pipette filler Pi-pump type 1 Glass rod 4mm diameter. 1 Droppers and teats Pasteur 2 Buchner funnel 5.5 cm 1 Hirsch funnel 45 mm 1 Pasteur pipette 1 Pyrex filter flask 100ml 1 Spatula (medium) 1 Retort Clamps 1 Boss heads 1 Washbottle Plastic-250 cm3 1 Wooden peg 1 Test tube rack 1 Test tubes 10 Test tube brush (small) 1 Tripod stand 1 Gauze mats 1 Nutec Mat 1 Mini Quickfit clamp 1 Rubber adaptor for Buchner funnel 1 Ice bucket 1 Vacuum pipe 1 Bunsen burner (on bench) 1

Appendix 1
102
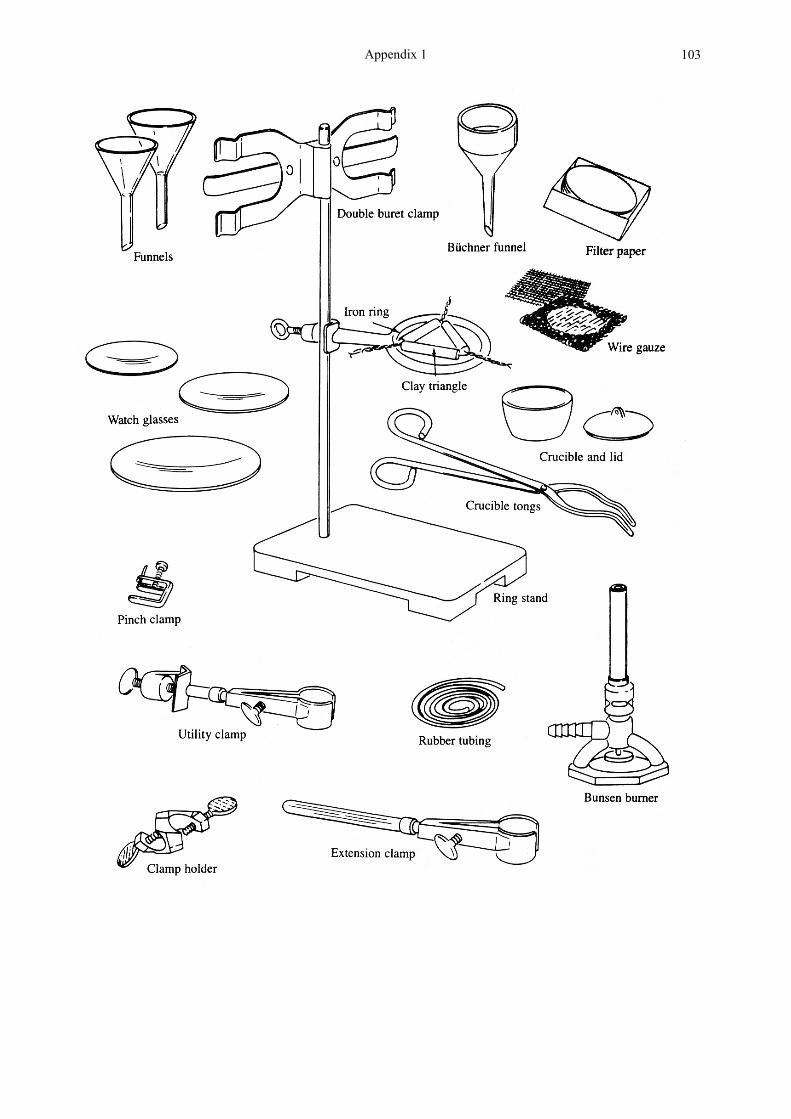
Appendix 1
103

Appendix 2
104
Appendix 2: The laboratory balance Of all the instruments used by a chemist, the balance is the most important. It is, therefore, essential that students should learn to weigh accurately and rapidly from the beginning. However, a balance is an extremely delicate instrument and in order that it should retain its accuracy it is imperative that it is handled with the utmost care. The most important attributes of a chemical balance are its sensitivity and rapidity of action, and the student should appreciate that, since most errors in analysis arise from faulty weighing, it is impossible to take too much care using the balance. Using the Balance The balances used in this laboratory are both extremely expensive and highly sensitive! Please be
CAREFUL when using them!
1. Do not move the balance on the balance bench.
2. Never touch the balance pan with your fingers, or breathe on it.
3. Items to be weighed must always be at room temperature.
4. Never weigh corrosive or volatile substances in an open vessel. A stoppered weighing bottle should be used for such substances to eliminate the danger of corrosion. Do not spill chemicals on the balance pan, in the balance or on the balance bench. To minimise this danger, when weighing a substance, never add or remove any of the substance from the weighing receptacle while it is on the balance pan. First remove it from the balance case and then add or remove substance as necessary.
5. Report immediately any accidental spilling of chemicals on the balance to your demonstrator so that the spill may be cleaned at once.
6. Please leave the balance in the condition in which you would wish to find it, i.e. perfectly clean.
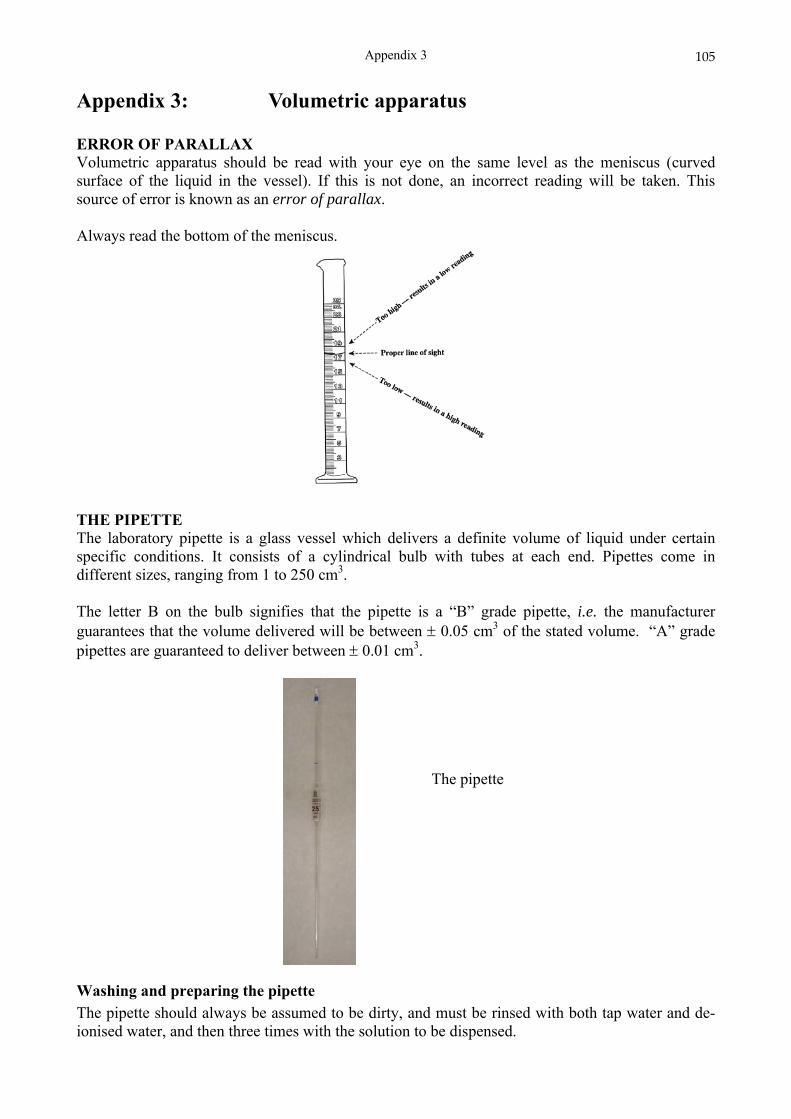
Appendix 3
105
Appendix 3: Volumetric apparatus ERROR OF PARALLAX Volumetric apparatus should be read with your eye on the same level as the meniscus (curved surface of the liquid in the vessel). If this is not done, an incorrect reading will be taken. This source of error is known as an error of parallax. Always read the bottom of the meniscus.
THE PIPETTE The laboratory pipette is a glass vessel which delivers a definite volume of liquid under certain specific conditions. It consists of a cylindrical bulb with tubes at each end. Pipettes come in different sizes, ranging from 1 to 250 cm3. The letter B on the bulb signifies that the pipette is a “B” grade pipette, i.e. the manufacturer guarantees that the volume delivered will be between 0.05 cm3 of the stated volume. “A” grade pipettes are guaranteed to deliver between 0.01 cm3.
The pipette
Washing and preparing the pipette The pipette should always be assumed to be dirty, and must be rinsed with both tap water and de-ionised water, and then three times with the solution to be dispensed.

Appendix 3
106
After rinsing the pipette with both tap water and de-ionised water, dispense ~20 cm3 of the solution provided into a clean, dry 100 cm3 beaker. Insert the upper end of the pipette into the lower end of the pipette filler and rotate the pipette carefully to work no more than 0.5 cm of the glass bore into the rubber sleeve (If you push the pipette further in the filler will not work properly). Do NOT suck up solutions by mouth; use the pipette filler at all times for filling the pipette with solution. Use the wheel on the pipette filler to suck solution into the pipette. Remove the pipette from the solution, detach the filler and immediately place your finger over the end (why?). Hold the pipette as level as possible, and rotate the pipette on the fingertips to ensure that solution flushes over the entire inner surface, including a length of 2-3 cm above the graduation mark. Allow the pipette to drain through the lower end only, and repeat the process twice.
Using the Pipette In volumetric analysis the procedure of pipetting is the single largest source of error for beginners. The technique of pipetting requires careful practice, and will be demonstrated to you, in addition to the notes on the pages that follow. If a thorough study is made of these pages before the laboratory session, you should be able to follow the demonstration and subsequently be able to use the pipette correctly and accurately.
After preparing the pipette, discard the remainder of the solution in the 100 cm3 beaker and refill it. Reassemble the pipette and pipette filler and draw up solution sufficient to fill the pipette to ~2-3 cm above the graduation mark on the pipette (a). Do not allow any liquid to enter the pipette filler; if you accidentally do so, or you think that the filler has liquid in it already, show your demonstrator. Remove the pipette filler and place your finger over the open end of the pipette (b). Wipe the outside of the pipette with a tissue, being careful not to touch the point of the pipette with the tissue otherwise solution will be lost by capillary action (c). Keeping the pipette at eye level and in a vertical position (using both hands), allow the liquid level to fall by lifting your finger slightly, so that the bottom of the meniscus becomes just level with the graduation mark on the pipette. If a small drop of solution remains at the pipette tip at this stage, it can be removed by touching the bottom of the pipette against the side of the beaker (d).
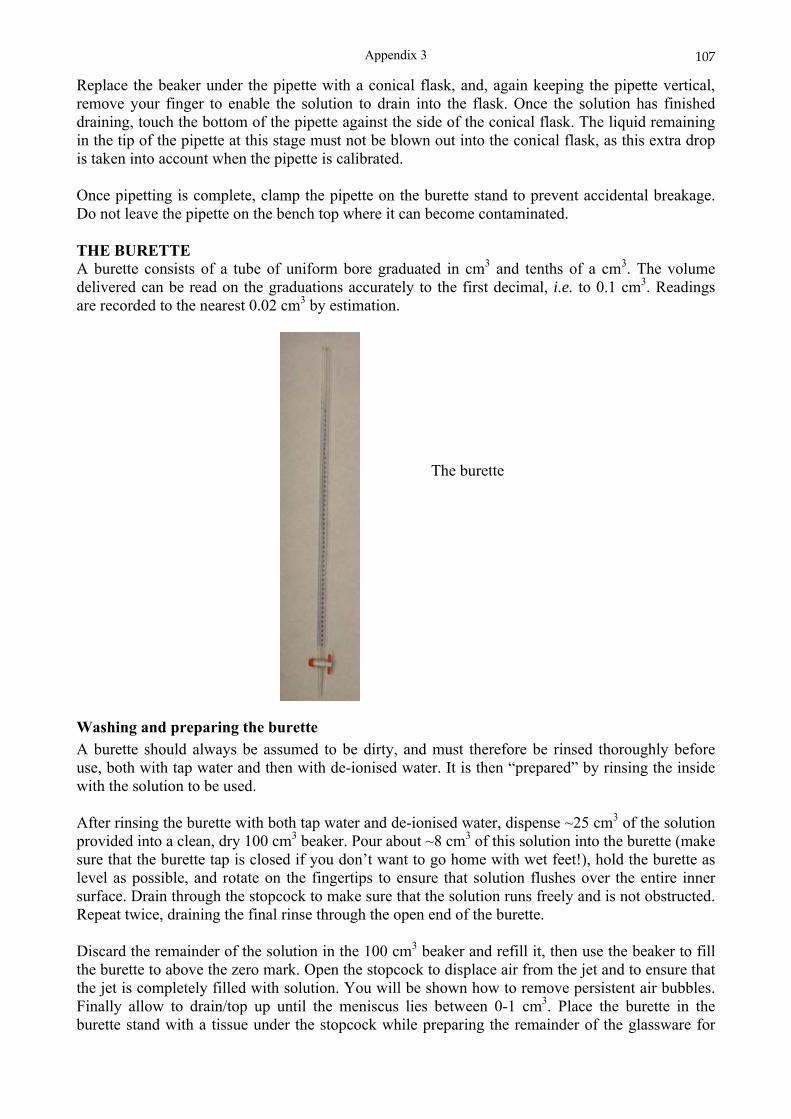
Appendix 3
107
Replace the beaker under the pipette with a conical flask, and, again keeping the pipette vertical, remove your finger to enable the solution to drain into the flask. Once the solution has finished draining, touch the bottom of the pipette against the side of the conical flask. The liquid remaining in the tip of the pipette at this stage must not be blown out into the conical flask, as this extra drop is taken into account when the pipette is calibrated. Once pipetting is complete, clamp the pipette on the burette stand to prevent accidental breakage. Do not leave the pipette on the bench top where it can become contaminated. THE BURETTE A burette consists of a tube of uniform bore graduated in cm3 and tenths of a cm3. The volume delivered can be read on the graduations accurately to the first decimal, i.e. to 0.1 cm3. Readings are recorded to the nearest 0.02 cm3 by estimation.
The burette
Washing and preparing the burette A burette should always be assumed to be dirty, and must therefore be rinsed thoroughly before use, both with tap water and then with de-ionised water. It is then “prepared” by rinsing the inside with the solution to be used. After rinsing the burette with both tap water and de-ionised water, dispense ~25 cm3 of the solution provided into a clean, dry 100 cm3 beaker. Pour about ~8 cm3 of this solution into the burette (make sure that the burette tap is closed if you don’t want to go home with wet feet!), hold the burette as level as possible, and rotate on the fingertips to ensure that solution flushes over the entire inner surface. Drain through the stopcock to make sure that the solution runs freely and is not obstructed. Repeat twice, draining the final rinse through the open end of the burette. Discard the remainder of the solution in the 100 cm3 beaker and refill it, then use the beaker to fill the burette to above the zero mark. Open the stopcock to displace air from the jet and to ensure that the jet is completely filled with solution. You will be shown how to remove persistent air bubbles. Finally allow to drain/top up until the meniscus lies between 0-1 cm3. Place the burette in the burette stand with a tissue under the stopcock while preparing the remainder of the glassware for

Appendix 3
108
the titration; if the stopcock leaks, even very slowly, the wet tissue will alert you and you can remedy the problem before wasting time performing inaccurate and meaningless titrations.
Using the Burette After pipetting, the greatest sources of error in volumetric analysis stem from students not being able to master the techniques of estimating the volume correctly, and adding a single drop from a burette.
Adding a single drop of solution is a technique that requires a little practice. For a right-handed person it is customary to swirl the conical flask with the right hand whilst operating the tap with the left hand, as shown in the picture. You will be shown how to do this - ask your demonstrator to check that you are doing it correctly.
As mentioned before, only the first decimal place of a volume can be read directly from the burette; the second decimal place is then estimated to the nearest 0.02 cm3. Being able to estimate correctly is thus of great importance if your volumetric analyses are to be accurate. Study the sketch below to give you an idea, and then get your demonstrator to check that you are doing it correctly.
21
22
21.30
21
22
21.34
21
22
21.36
21
22
21.38
21
22
21.40
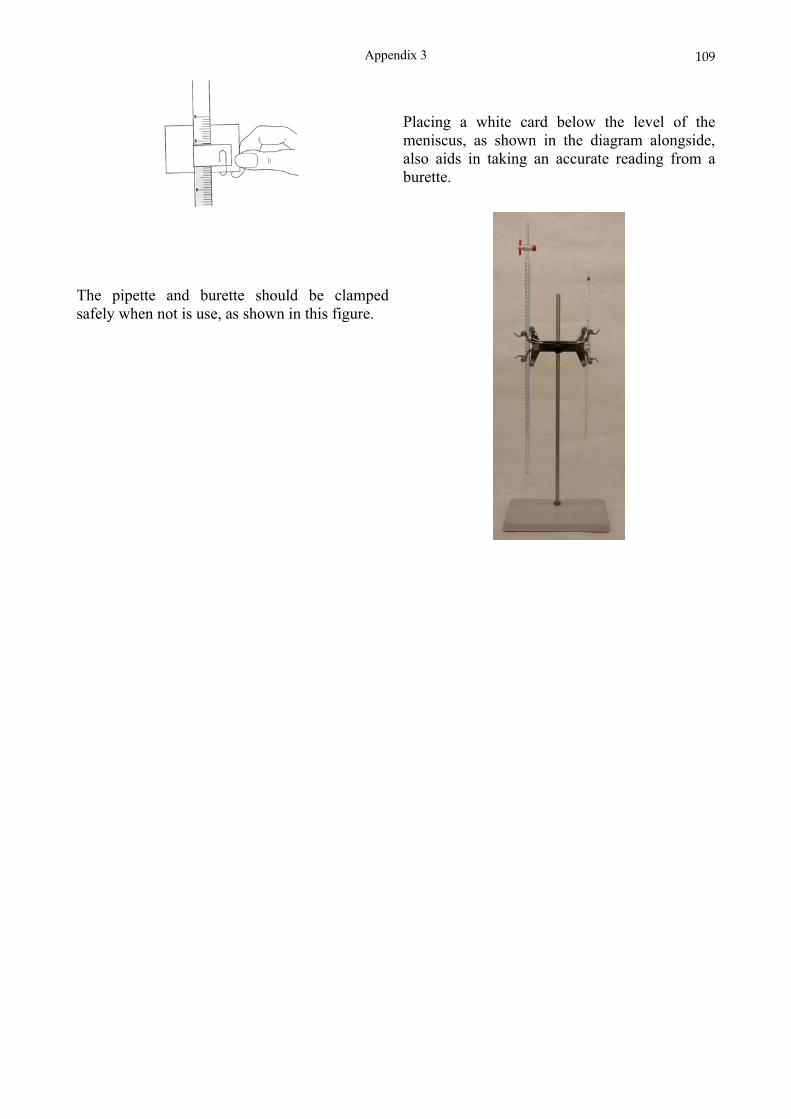
Appendix 3
109
Placing a white card below the level of the meniscus, as shown in the diagram alongside, also aids in taking an accurate reading from a burette.
The pipette and burette should be clamped safely when not is use, as shown in this figure.
Appendix 4
110
Appendix 4: Experimental errors INTRODUCTION In nearly all scientific endeavours, measurements are made and the data so obtained used in calculations to arrive at a result on which a final conclusion is based. In practice it is seldom possible to make exact measurements. There are unavoidable errors inherent in the apparatus used, in the methods employed and in the observational powers of the experimenter. In some instances, errors may not affect the result or the conclusion, but in most instances the result is open to a degree of doubt and the extent of the error in the result must be conveyed by following established convention. An example of the first instance is the result and conclusion based on the following data: The mass of a consignment of apples is 123 kg. If the mass of a box of apples is 20 kg, how many boxes are there in the consignment? The result of dividing 123 kg by 20 kg per box is 6.15 boxes, but the conclusion will be that there are 6 boxes in the consignment. An example of the second instance is a determination of the STP molar volume of a gas which gave a value of 22.1 dm3. As the accepted value is 22.4 dm3, it is obvious that errors inherent in the apparatus, method and operation have (in combination) caused a deviation of 0.3 dm3 from the accepted value, i.e. an error of
%3.14.22
1003.0
.
SOURCES OF ERROR In scientific endeavour, errors arise from:
imperfections in apparatus imperfections in method variations in the environment imperfections in technique.
Imperfections in apparatus Most of the apparatus used in a first course are produced in large batches in order to reduce cost. Consequently the items are not individually calibrated. However, the manufacturers issue certificates with each batch indicating the limit of inherent error in any one item of a batch. For example: a B grade burette certificate may state: Tolerance 50 cm3 0.1 cm3 and a B grade pipette certificate may state: Tolerance 10 cm3 0.05 cm3. These statements mean that a titration volume could be in error up to a maximum of 0.2% when using a B grade burette and a 10 cm3 aliquot pipetted by means of a B grade pipette could be in error up to a maximum of 0.5% due to imperfections in the shapes of these glass vessels. Mass measurement apparatus has much lower tolerances than volume measurement apparatus, and, for all practical purposes, mass measurement errors are negligible in comparison with volume measurement errors.
Appendix 4
111
Imperfections in method Imperfections in method likely to be encountered in a first course are: solubility of a precipitate, co-precipitation, decomposition and/or volatilisation during drying in an oven, absorption of moisture or carbon dioxide from the air, oxidation on exposure to the atmosphere, attack on glass vessels by caustic substances, etc.
Variations in the environment Variations in temperature, pressure and humidity of the air in a laboratory occur due to change in weather conditions, change of the seasons and diurnal fluctuations.
Imperfections in technique Operator error is usually far greater than all previously mentioned errors combined. Some errors are unavoidable, for example the perception of indicator colour change is a subjective judgement on the part of the operator and is bound to differ from the perceptions of other operators. Avoidable errors are many and often occur because of inattention. The most frequent and serious error in a first course is incorrect pipetting procedure. Next come the errors due to ineffectual washing of a precipitate and excessive washing of a precipitate. More serious is physical loss of reagent through spillage. In assessing the results of first year students in quantitative analysis, an error of 2% is regarded as acceptable and may earn full marks. This 2% is made up of 1% operator error and 1% for all other sources of error combined. SIGNIFICANT DIGITS If, in the example above of the determination of STP molar volume, the experimenter reported his result as 22.100 dm3, he would have been guilty of an absurdity. The accepted value of 22.414 dm3 has been obtained in advanced research using sophisticated equipment and working under ideal conditions. According to the conventions of statistics, the number 22.414 guarantees the value to be closer to 22.414 than it is to 22.413 and to 22.415, i.e. it lies within the range 22.4135 and 22.4145. (If the uncertainty had been greater, the range would have been given as, e.g. 22.414 0.001). When given as 22.414, the uncertainty, and therefore the likely error, is:
%00446.0414.22
100001.0
. i.e. less than 0.005%.
In terms of the 2% error allowed in a first course, a result within the range 22.4 22.4 x 0.02 (i.e. within the range 22.8 and 22.0) would have been acceptable. Thus even if the experimenter’s calculator showed a final result of say 22.100, the result is still reported as 22.1 in order not to claim a degree of certainty that does not exist. To be able to decide on the correct procedure, the student must understand the meaning of the term significant digits. The number system has ten digits 0, 1, 2… 8, 9. Any given number/figure/value consists of one or more digits. Thus the statement “12 apples” leaves no doubt as to the quantity. The number has been obtained by counting, and, except for a blunder, is definite and indisputable. However, a statement such as “12 km” is the outcome of a measurement and immediately the question arises how the measurement was made. If the person making the statement had measured
Appendix 4
112
the distance by walking, the reader would interpret the distance as 12 1 km or even 12 2 km, knowing how fallible the measuring procedure was. If the measurement had been made by a surveyor using a tellurometer, he would give the distance as 12.0000 km. The four zeroes following the decimal are not an attempt at pedantism, they are given deliberately to assure the reader that the surveyor is prepared to guarantee that the value is closer to 12.0000 than it is to 11.9999 or to 12.0001, i.e. it lies within the range 11.9995 and 12.0005. The surveyor thus implies that his error is not greater than 1 dm. In statistical language it is said that the number is given to six significant digits, the first five being beyond dispute and the last digit being uncertain because it is a “best estimate”. Whereas the zeroes in the surveyor’s 12.000 km are deliberate and therefore significant, the zeroes in the distance 0.0012 km are not significant because they can be dispensed with by reporting the distance as 1.210-3 km or 1.2 m or 12 dm. In all three forms there are two significant digits. However, if this distance were given as 120 cm, it would have three significant digits and thus claim greater accuracy, i.e. a smaller uncertainty. The value 12 dm implies that the distance lies within the range 11.5 and 12.5 dm – a variation of 1 dm or 10 cm. The value of 120 cm implies that the distance lies within the range 119.5 and 120.5 cm – a variation of 1 cm or 0.1 dm. Similarly, if the distance were given as 1200 mm, i.e. to four significant digits, the variation would be 1 mm or 0.1 cm or 0.01 dm. Round numbers such as 100, 10 and 1 are considered to have only one significant digit because the zero’s merely indicate the order of magnitude.
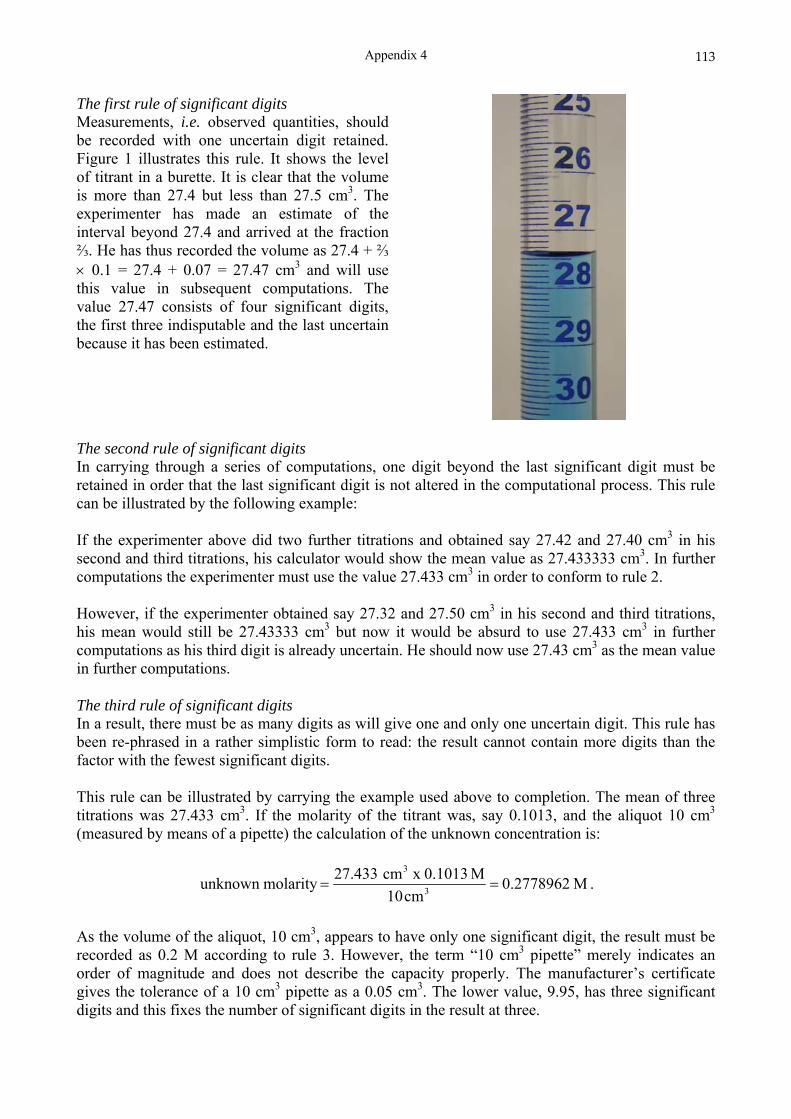
Appendix 4
113
The first rule of significant digits Measurements, i.e. observed quantities, should be recorded with one uncertain digit retained. Figure 1 illustrates this rule. It shows the level of titrant in a burette. It is clear that the volume is more than 27.4 but less than 27.5 cm3. The experimenter has made an estimate of the interval beyond 27.4 and arrived at the fraction ⅔. He has thus recorded the volume as 27.4 + ⅔ 0.1 = 27.4 + 0.07 = 27.47 cm3 and will use this value in subsequent computations. The value 27.47 consists of four significant digits, the first three indisputable and the last uncertain because it has been estimated.
The second rule of significant digits In carrying through a series of computations, one digit beyond the last significant digit must be retained in order that the last significant digit is not altered in the computational process. This rule can be illustrated by the following example: If the experimenter above did two further titrations and obtained say 27.42 and 27.40 cm3 in his second and third titrations, his calculator would show the mean value as 27.433333 cm3. In further computations the experimenter must use the value 27.433 cm3 in order to conform to rule 2. However, if the experimenter obtained say 27.32 and 27.50 cm3 in his second and third titrations, his mean would still be 27.43333 cm3 but now it would be absurd to use 27.433 cm3 in further computations as his third digit is already uncertain. He should now use 27.43 cm3 as the mean value in further computations. The third rule of significant digits In a result, there must be as many digits as will give one and only one uncertain digit. This rule has been re-phrased in a rather simplistic form to read: the result cannot contain more digits than the factor with the fewest significant digits. This rule can be illustrated by carrying the example used above to completion. The mean of three titrations was 27.433 cm3. If the molarity of the titrant was, say 0.1013, and the aliquot 10 cm3 (measured by means of a pipette) the calculation of the unknown concentration is:
M2778962.0cm10
M 0.1013 x cm 27.433molarityunknown
3
3
.
As the volume of the aliquot, 10 cm3, appears to have only one significant digit, the result must be recorded as 0.2 M according to rule 3. However, the term “10 cm3 pipette” merely indicates an order of magnitude and does not describe the capacity properly. The manufacturer’s certificate gives the tolerance of a 10 cm3 pipette as a 0.05 cm3. The lower value, 9.95, has three significant digits and this fixes the number of significant digits in the result at three.
Appendix 4
114
Thus the result is given as 0.278 M. Had the calculator shown a final value of say 0.27741879 M, the value reported would be 0.277 M to conform to the rule of rounding off. The fourth rule of significant digits The precision of a result must not be diminished by a computation. In the calculation
4858.118.141081.0 the factor 0.081 contains two significant digits and the inclination might be to limit the product to two significant digits, i.e. to report the product as 11 according to the simplistic version of rule 3 above. Although the factor 0.081 has only two significant digits, its uncertainty is 1 in 81 whereas the uncertainty of the product is 1 in 11. Thus the precision of the result has been diminished. In order to conform to rules 3 and 4, the result must be reported as 11.5. The computations below show that the first decimal place is the first variable digit, 0.0805 x 141.8 = 11.4149 0.0815 x 141.8 = 11.5567 and a result must always contain one uncertain digit according to rule 3. By contrast, in the calculation 0.012 x 141.8 = 1.7016 the product would be given to two significant digits, viz. 1.7 because the second digit in 1.7 is uncertain as shown by the computations below: 0.0115 x 141.8 = 1.6307 0.0125 x 141.8 = 1.7725
Appendix 4
115
Multiplication or division by a factor merely changes the order of magnitude; it does not affect the precision. Thus if 100.0 g is required to make 1000 cm3 of 1 M solution, then the mass required to make 200 cm3 of 0.1 M solution is:
g2.000M1.0
M0.1
cm1000
cm200g 100.0
3
3
.
Subtraction can reduce the number of significant digits. When the mass of substance is obtained by difference, then the difference of two balance readings will have fewer significant digits than the balance readings. e.g. mass of vial + substance 12.106 g 5 significant digits
mass of vial 11.271 g 5 significant digits mass of substance 0.835 g 3 significant digits
The converse is not true, i.e. addition cannot increase the number of significant digits, e.g. 0.603 + 0.731 = 1.33 g. DRILL PROBLEMS (You may refer to the answers to some of these problems, after solving them on your own initiative). 1. Carry out the operations on the data given in each of the following cases to calculate the quantity
called for. Show your method, including the dimensions of measurement. (These units will tell you which mathematical operation to perform). (a) Velocity = 50 km h-1, time = 0.5 h, distance = ? (b) Velocity = 300 000 km s-1, distance = 150 000 000 km, time = ? (c) Time = 9.3 s, distance = 100 m, velocity = ? (d) Density Al = 2.70 g cm-3, mass = 2700 g, volume = ? (e) Mass Hg = 272 g, volume = 20 cm3, density = ? (f) Mass apples = 120 kg, mass in each box = 20 kg box-1, number of boxes = ? (g) Mass H2O = 180 g, molar mass = 18 g mol-1, number of moles = ?
2. How many significant digits are there in each of the following numbers? (a) 3005 (d) 0.350 (b) 3500 (e) 3.050 (c) 0.035 (f) 3.0005
3. Carry out the following operations, recording the answer correctly in accordance with the rules
of significant digits:
(a) Subtract 5.1 from 28.347 (b) Subtract 5.10 from 28.347 (c) Multiply 0.020 by 1.111 (d) Divide 36.02 by (3.0)2
4. A beaker of water has a mass of 1200 grams. How would you write this number so as to avoid
ambiguity, if the mass is known to the nearest: (a) ten grams (b) one hundred grams

Appendix 4
116
(c) gram (d) tenth of a gram.
5. The length of a table is measured as 2 metres, 3 centimetres, and 4 millimetres. Express this
length as: (a) metres (b) centimetres (c) millimetres (d) kilometres.
How many significant digits in each case?
6. A series of beakers have the following masses: 125.2 g, 90.3 g, 56.2 g and 20.237 g. How should
you record the sum of these masses so as to avoid any incorrect conclusions as to the precision of measurements?
7. Three determinations of the percentage of chlorine in sodium chloride were 60.1%, 60.5% and
60.3%, averaging 60.3%. The accepted value, based on the atomic masses (Na 22.9979 amu; Cl 35.4571 amu), is 60.650% Cl. What is the percentage error in the analysis, and to how many significant digits should it be expressed?
8. What is the percentage of uncertainty in measuring 50 cm3 of water in a 50 cm3 graduated
cylinder given that the precision of measurements is 0.2 cm3?
Appendix 4
117
ANSWERS TO DRILL PROBLEMS 1. (b) 500 s
(d) 1000 cm3 (f) 6 boxes
2. (b) 2
(d) 3 (f) 5
3. (a) 23.2
(c) 0.022 5. (b) 203.4 cm
(d) 0.002034 km Four significant digits regardless of the units used.
7. 0.6%
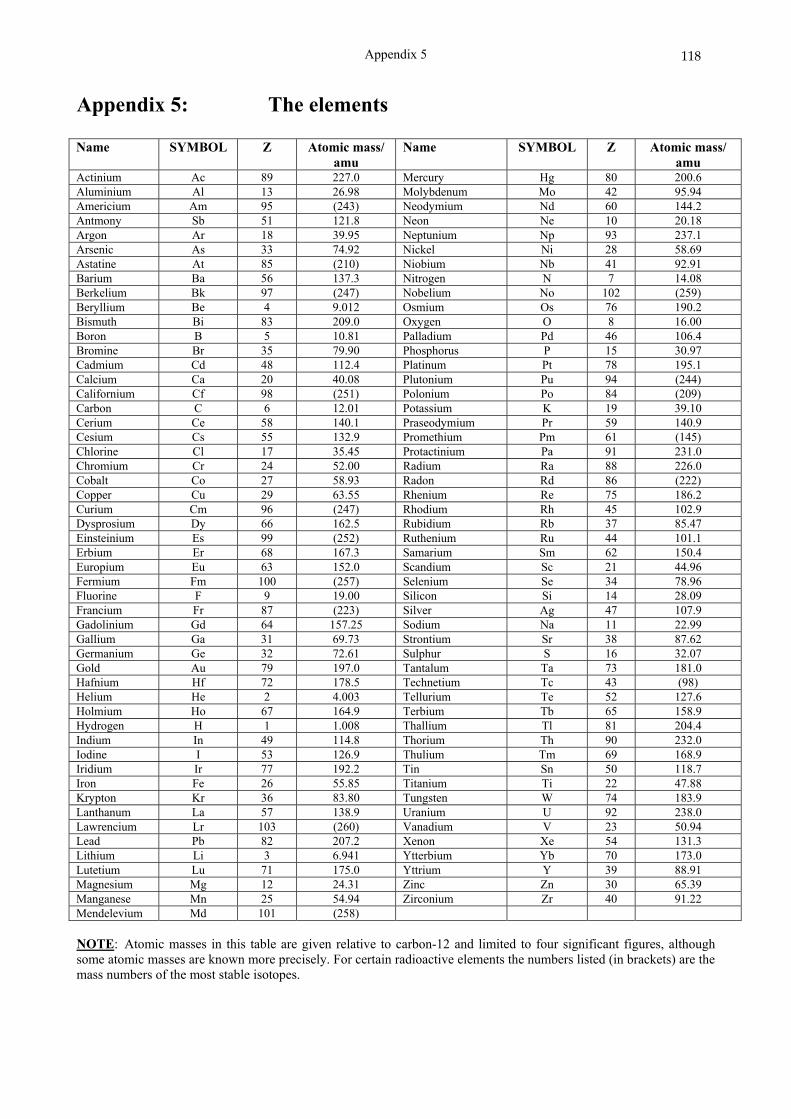
Appendix 5
118
Appendix 5: The elements Name SYMBOL Z Atomic mass/
amu Name SYMBOL Z Atomic mass/
amu
Actinium Ac 89 227.0 Mercury Hg 80 200.6 Aluminium Al 13 26.98 Molybdenum Mo 42 95.94 Americium Am 95 (243) Neodymium Nd 60 144.2 Antmony Sb 51 121.8 Neon Ne 10 20.18 Argon Ar 18 39.95 Neptunium Np 93 237.1 Arsenic As 33 74.92 Nickel Ni 28 58.69 Astatine At 85 (210) Niobium Nb 41 92.91 Barium Ba 56 137.3 Nitrogen N 7 14.08 Berkelium Bk 97 (247) Nobelium No 102 (259) Beryllium Be 4 9.012 Osmium Os 76 190.2 Bismuth Bi 83 209.0 Oxygen O 8 16.00 Boron B 5 10.81 Palladium Pd 46 106.4 Bromine Br 35 79.90 Phosphorus P 15 30.97 Cadmium Cd 48 112.4 Platinum Pt 78 195.1 Calcium Ca 20 40.08 Plutonium Pu 94 (244) Californium Cf 98 (251) Polonium Po 84 (209) Carbon C 6 12.01 Potassium K 19 39.10 Cerium Ce 58 140.1 Praseodymium Pr 59 140.9 Cesium Cs 55 132.9 Promethium Pm 61 (145) Chlorine Cl 17 35.45 Protactinium Pa 91 231.0 Chromium Cr 24 52.00 Radium Ra 88 226.0 Cobalt Co 27 58.93 Radon Rd 86 (222) Copper Cu 29 63.55 Rhenium Re 75 186.2 Curium Cm 96 (247) Rhodium Rh 45 102.9 Dysprosium Dy 66 162.5 Rubidium Rb 37 85.47 Einsteinium Es 99 (252) Ruthenium Ru 44 101.1 Erbium Er 68 167.3 Samarium Sm 62 150.4 Europium Eu 63 152.0 Scandium Sc 21 44.96 Fermium Fm 100 (257) Selenium Se 34 78.96 Fluorine F 9 19.00 Silicon Si 14 28.09 Francium Fr 87 (223) Silver Ag 47 107.9 Gadolinium Gd 64 157.25 Sodium Na 11 22.99 Gallium Ga 31 69.73 Strontium Sr 38 87.62 Germanium Ge 32 72.61 Sulphur S 16 32.07 Gold Au 79 197.0 Tantalum Ta 73 181.0 Hafnium Hf 72 178.5 Technetium Tc 43 (98) Helium He 2 4.003 Tellurium Te 52 127.6 Holmium Ho 67 164.9 Terbium Tb 65 158.9 Hydrogen H 1 1.008 Thallium Tl 81 204.4 Indium In 49 114.8 Thorium Th 90 232.0 Iodine I 53 126.9 Thulium Tm 69 168.9 Iridium Ir 77 192.2 Tin Sn 50 118.7 Iron Fe 26 55.85 Titanium Ti 22 47.88 Krypton Kr 36 83.80 Tungsten W 74 183.9 Lanthanum La 57 138.9 Uranium U 92 238.0 Lawrencium Lr 103 (260) Vanadium V 23 50.94 Lead Pb 82 207.2 Xenon Xe 54 131.3 Lithium Li 3 6.941 Ytterbium Yb 70 173.0 Lutetium Lu 71 175.0 Yttrium Y 39 88.91 Magnesium Mg 12 24.31 Zinc Zn 30 65.39 Manganese Mn 25 54.94 Zirconium Zr 40 91.22 Mendelevium Md 101 (258) NOTE: Atomic masses in this table are given relative to carbon-12 and limited to four significant figures, although some atomic masses are known more precisely. For certain radioactive elements the numbers listed (in brackets) are the mass numbers of the most stable isotopes.
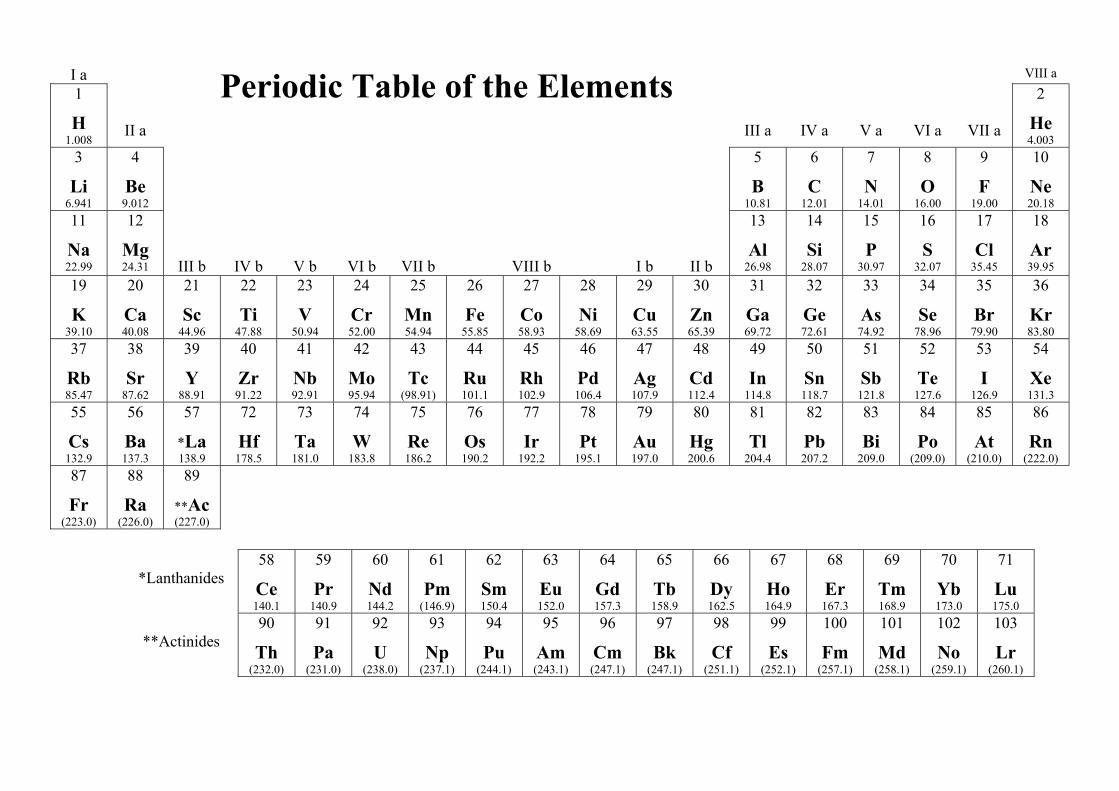
I a Periodic Table of the Elements VIII a
1
H 1.008
II a
III a
IV a
V a
VI a
VII a
2
He 4.003
3
Li 6.941
4
Be 9.012
5
B 10.81
6
C 12.01
7
N 14.01
8
O 16.00
9
F 19.00
10
Ne 20.18
11
Na 22.99
12
Mg 24.31
III b
IV b
V b
VI b
VII b
VIII b
I b
II b
13
Al 26.98
14
Si 28.07
15
P 30.97
16
S 32.07
17
Cl 35.45
18
Ar 39.95
19
K 39.10
20
Ca 40.08
21
Sc 44.96
22
Ti 47.88
23
V 50.94
24
Cr 52.00
25
Mn 54.94
26
Fe 55.85
27
Co 58.93
28
Ni 58.69
29
Cu 63.55
30
Zn 65.39
31
Ga 69.72
32
Ge 72.61
33
As 74.92
34
Se 78.96
35
Br 79.90
36
Kr 83.80
37
Rb 85.47
38
Sr 87.62
39
Y 88.91
40
Zr 91.22
41
Nb 92.91
42
Mo 95.94
43
Tc (98.91)
44
Ru 101.1
45
Rh 102.9
46
Pd 106.4
47
Ag 107.9
48
Cd 112.4
49
In 114.8
50
Sn 118.7
51
Sb 121.8
52
Te 127.6
53
I 126.9
54
Xe 131.3
55
Cs 132.9
56
Ba 137.3
57
*La 138.9
72
Hf 178.5
73
Ta 181.0
74
W 183.8
75
Re 186.2
76
Os 190.2
77
Ir 192.2
78
Pt 195.1
79
Au 197.0
80
Hg 200.6
81
Tl 204.4
82
Pb 207.2
83
Bi 209.0
84
Po (209.0)
85
At (210.0)
86
Rn (222.0)
87
Fr (223.0)
88
Ra (226.0)
89
**Ac (227.0)
*Lanthanides 58
Ce 140.1
59
Pr 140.9
60
Nd 144.2
61
Pm (146.9)
62
Sm 150.4
63
Eu 152.0
64
Gd 157.3
65
Tb 158.9
66
Dy 162.5
67
Ho 164.9
68
Er 167.3
69
Tm 168.9
70
Yb 173.0
71
Lu 175.0
**Actinides
90
Th (232.0)
91
Pa (231.0)
92
U (238.0)
93
Np (237.1)
94
Pu (244.1)
95
Am (243.1)
96
Cm (247.1)
97
Bk (247.1)
98
Cf (251.1)
99
Es (252.1)
100
Fm (257.1)
101
Md (258.1)
102
No (259.1)
103
Lr (260.1)
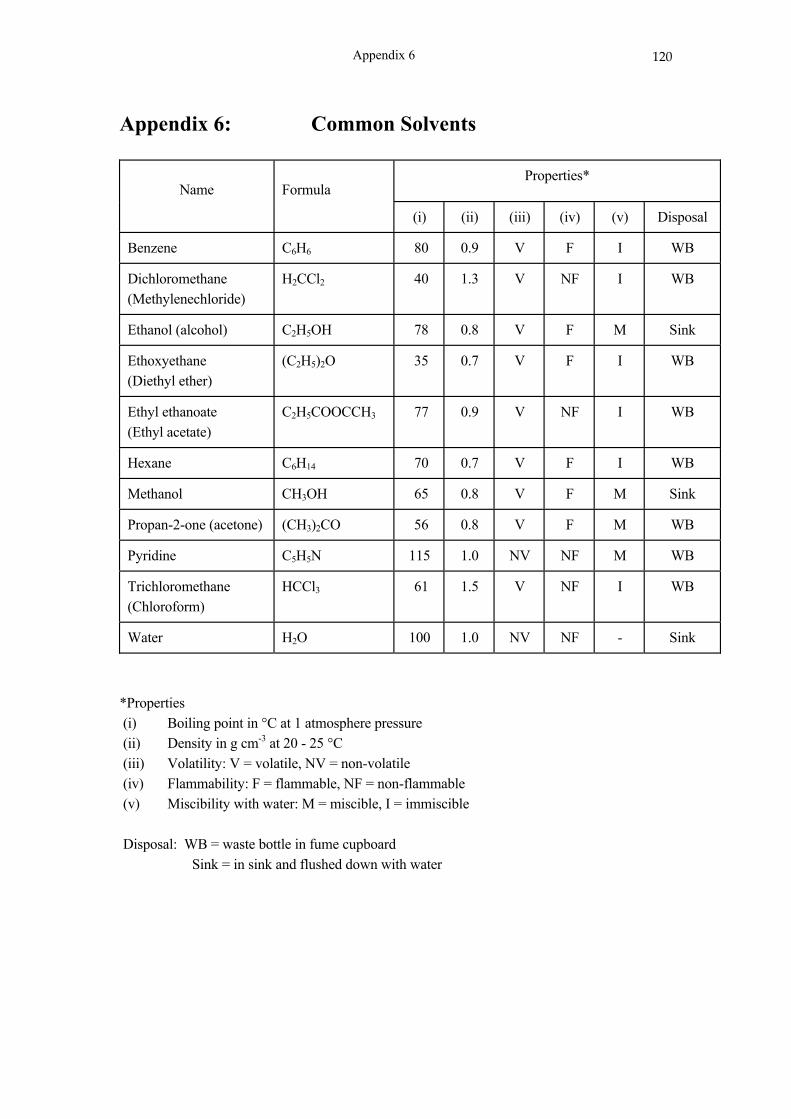
Appendix 6
120
Appendix 6: Common Solvents
Name
Formula
Properties*
(i) (ii) (iii) (iv) (v) Disposal
Benzene C6H6 80 0.9 V F I WB
Dichloromethane (Methylenechloride)
H2CCl2 40 1.3 V NF I WB
Ethanol (alcohol) C2H5OH 78 0.8 V F M Sink
Ethoxyethane (Diethyl ether)
(C2H5)2O 35 0.7 V F I WB
Ethyl ethanoate (Ethyl acetate)
C2H5COOCCH3 77 0.9 V NF I WB
Hexane C6H14 70 0.7 V F I WB
Methanol CH3OH 65 0.8 V F M Sink
Propan-2-one (acetone) (CH3)2CO 56 0.8 V F M WB
Pyridine C5H5N 115 1.0 NV NF M WB
Trichloromethane (Chloroform)
HCCl3 61 1.5 V NF I WB
Water H2O 100 1.0 NV NF - Sink
*Properties (i) Boiling point in °C at 1 atmosphere pressure (ii) Density in g cm-3 at 20 - 25 °C (iii) Volatility: V = volatile, NV = non-volatile (iv) Flammability: F = flammable, NF = non-flammable (v) Miscibility with water: M = miscible, I = immiscible Disposal: WB = waste bottle in fume cupboard Sink = in sink and flushed down with water


![arXiv:1804.00633v1 [quant-ph] 2 Apr 2018 · 2018. 4. 3. · University of KwaZulu-Natal, Durban 4000, South Africa 2National Institute for Theoretical Physics, KwaZulu-Natal, Durban](https://static.fdocuments.us/doc/165x107/60b9b8795595e351032df161/arxiv180400633v1-quant-ph-2-apr-2018-2018-4-3-university-of-kwazulu-natal.jpg)