
School Management Information...
14
School Management Information System - User Guide for School ` Department of School Education, Haryana ` 26-Feb-15
Transcript of School Management Information...
School Management Information System - User Guide for School
Department of School Education, Haryana 26-Feb-15

School Management Information System
Page 1
About School Management Information System
Is an initiative to a build a comprehensive and integrated system for school for transforming public school education in Haryana, to ensure high-learning level outcomes sustainably. In order to ensure ready availability of authentic data while simplifying data collection processes, the Department of School Education seeks to create a consolidated and comprehensive
Management Information System as a single source of authentic data.
Stakeholders of the system:
Teaching and Administrative Staff Schools Students Parents Governing Bodies, etc.
MIS

School Management Information System
Page 2
Contents
SCHOOL DEFINITION ............................................................................................................................................................. 4 DEFINE SCHOOL .............................................................................................................................................................. 5 SECTION DEFINITION .................................................................................................................................................... 12

School Management Information System
Page 3
Versions
Version Comments V0.1 School Definition: 1. Define School: Basic Information, Address and Contact and 2.
Section Definition menus are covered under this version.
School Management Information System
Page 4
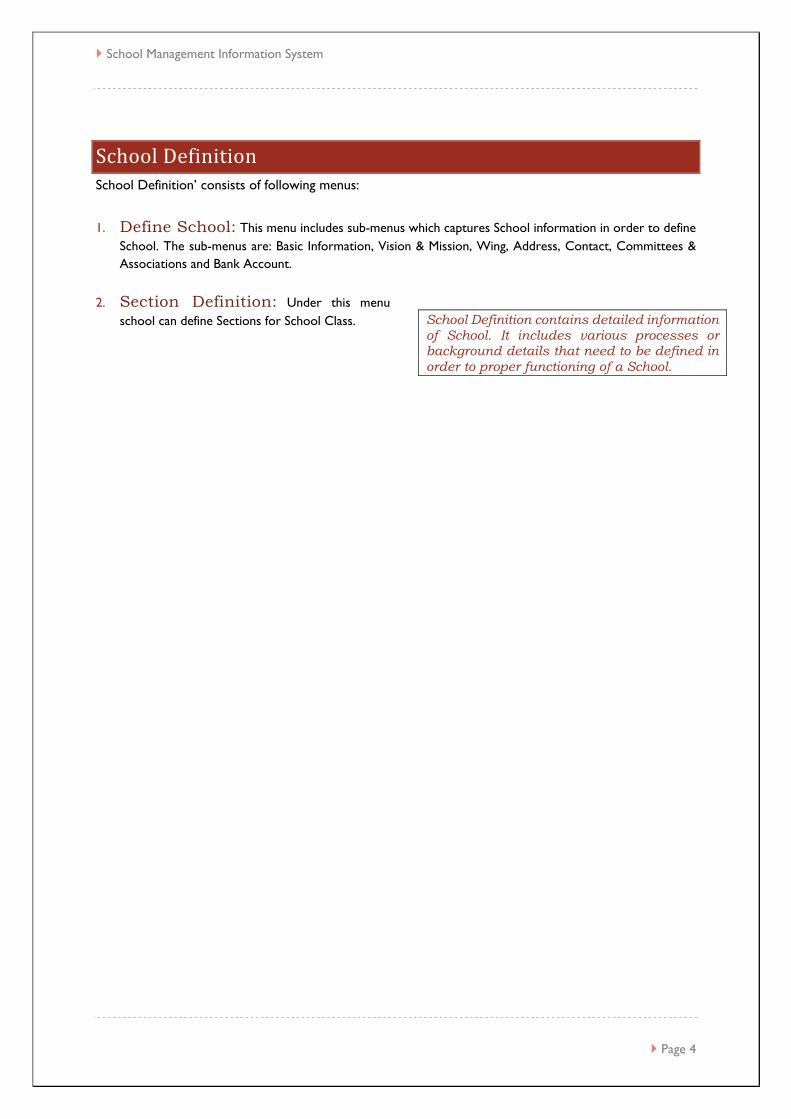
School Definition School Definition’ consists of following menus:
1. Define School: This menu includes sub-menus which captures School information in order to define School. The sub-menus are: Basic Information, Vision & Mission, Wing, Address, Contact, Committees & Associations and Bank Account.
2. Section Definition: Under this menu school can define Sections for School Class.
School Definition contains detailed information of School. It includes various processes or background details that need to be defined in order to proper functioning of a School.

School Management Information System
Page 5
Define School Define your School in MIS System by filling actual information asked in sub-menus under Define School menu.
How to go to School Definition?
School Definition >> Define School
This menu covers School related information as per the following sub-menus.
Basic Information:
Don’ts:
1. DO NOT enter fake or dummy data. 2. DO NOT enter wrong School code. 3. DO NOT enter wrong UDISE code.

School Management Information System
Page 6
Please follow the below mentioned steps for entering Basic Information of School:
1. School Name: This column is not editable. If any change is required, then please report to the Department suggesting the change required.
2. School is named after: This field is also not editable. If any name is to be entered for school, please report to the Directorate through email alongwith copy of order to this effect.
3. School Short Name: This field is also not editable. ‘School Short Name’. e.g. GHS 4. School Code: This column is also not editable. 5. UDISE Code: UDISE Code shall also be available. However, in case of some schools, field of UDISE code
shall be empty. Please enter accurate UDISE code given to the School. 6. School Type: Here School types are Aarohi School, Common School, Kasturba Gandhi Balika Vidyalaya,
Kendriya Vidyalaya, Kisan Aadarsh Vidyalaya, Model Sanskriti School, Navodya Vidyalaya, Sainik School and Sarthak School. This field is also not editable. However, to make sure that selected ‘School Type’ of your School is correct please report through e-mail to the Directorate, alogwith documentary proof, to change the name.
7. School For: ‘School For’ means school is for boys only, girls only or coeducation. This field is also not editable. However, if you think that there is any change, please report through e-mail to the Directorate, alogwith documentary proof, to change the name. Make sure that the value of ‘School For’ is checked against correct one.
8. Choose File: By using this tab you can upload photograph of the school on the web portal. Please Attach
recent photograph of School taken from school entrance. The image should be in .jpeg, .jpg or .png format and should not greater than 50 KB in size.
9. Affiliated To: This field is relevant to High and Senior Secondary Schools and by default “Board of School Education” shall appear. No need to change this field.
10. Date of Establishment: Date of opening of the school is to be entered in this field. Select the date on which the School established from the calendar. If you are not sure about the date of opening. Please keep this field empty.
11. Date of Recognition: This field may be similar to date of establishment. 12. School Minority Status: This data field is also not editable. Since no school is having Minority Status,
hence need not to be filled up. By default the status is “No” in respect of all Government Schools..

School Management Information System
Page 7
13. Religion of Minority: This data field is also not editable and does not relevant to Government Schools. Hence no need to fill up information in this data field.
14. Is this School for Special Education Facilities (CWSN)? : Select ‘Yes’ if School is having facility of Integrated Education for Disabled else select ‘No’.
15. Is School with National Skills Qualification Framework (NSQF)? : Select ‘Yes’ if School is having National Skill Qualification Framework (NSQF) else select ‘No’.
16. Does School have Playground? : Select ‘Yes’ if School is having playground else select ‘No’. 17. Is School Residential? : This field is also non-editable. By default, schools other than KGBV are non-
residential. 18. Whether school is approachable by roads in all Seasons? : Select ‘Yes’ if there is road available to reach
School in any season else select ‘No’. 19. Save: Click on ‘Save’ button to save the data. 20. School user need to update Basic Information whenever there is change corresponding to the fields
mentioned above.

School Management Information System
Page 8
Address: Enter proper address of School.
Don’ts:
1. DO NOT enter fake or dummy data. 2. DO NOT enter wrong Latitude and Longitude coordinates.
School Management Information System
Page 9
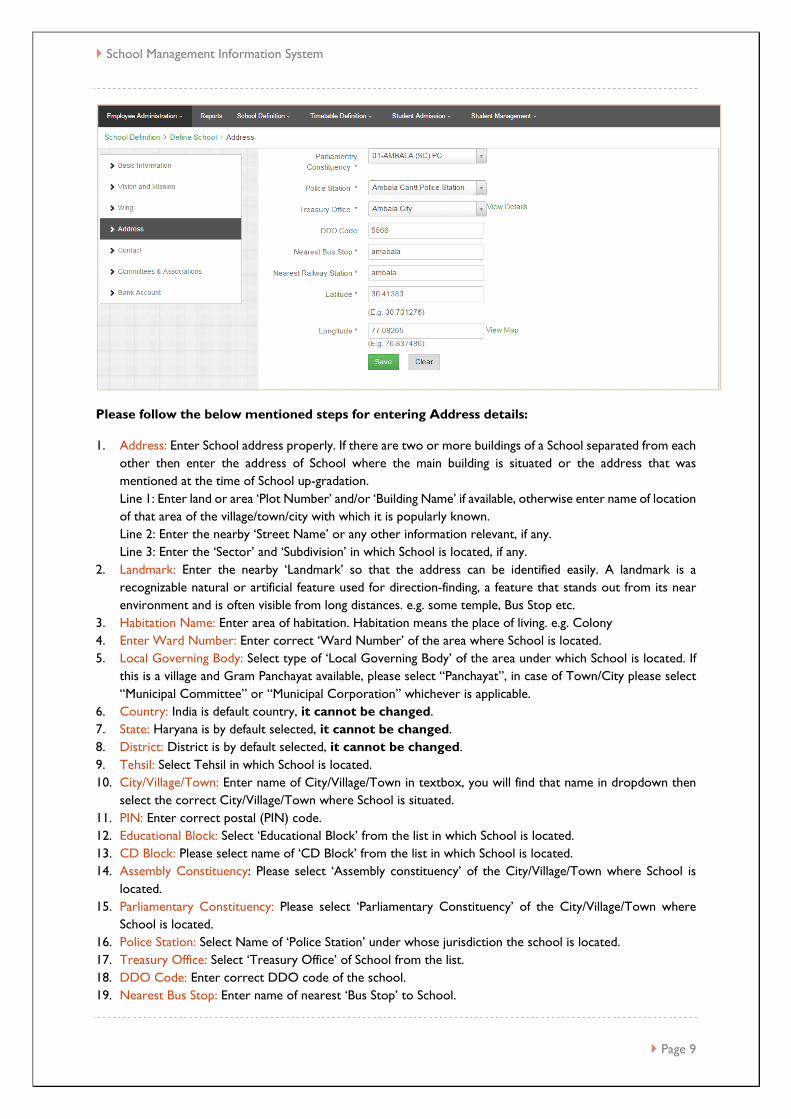
Please follow the below mentioned steps for entering Address details:
1. Address: Enter School address properly. If there are two or more buildings of a School separated from each other then enter the address of School where the main building is situated or the address that was mentioned at the time of School up-gradation. Line 1: Enter land or area ‘Plot Number’ and/or ‘Building Name’ if available, otherwise enter name of location of that area of the village/town/city with which it is popularly known. Line 2: Enter the nearby ‘Street Name’ or any other information relevant, if any. Line 3: Enter the ‘Sector’ and ‘Subdivision’ in which School is located, if any.
2. Landmark: Enter the nearby ‘Landmark’ so that the address can be identified easily. A landmark is a recognizable natural or artificial feature used for direction-finding, a feature that stands out from its near environment and is often visible from long distances. e.g. some temple, Bus Stop etc.
3. Habitation Name: Enter area of habitation. Habitation means the place of living. e.g. Colony 4. Enter Ward Number: Enter correct ‘Ward Number’ of the area where School is located. 5. Local Governing Body: Select type of ‘Local Governing Body’ of the area under which School is located. If
this is a village and Gram Panchayat available, please select “Panchayat”, in case of Town/City please select “Municipal Committee” or “Municipal Corporation” whichever is applicable.
6. Country: India is default country, it cannot be changed. 7. State: Haryana is by default selected, it cannot be changed. 8. District: District is by default selected, it cannot be changed. 9. Tehsil: Select Tehsil in which School is located. 10. City/Village/Town: Enter name of City/Village/Town in textbox, you will find that name in dropdown then
select the correct City/Village/Town where School is situated. 11. PIN: Enter correct postal (PIN) code. 12. Educational Block: Select ‘Educational Block’ from the list in which School is located. 13. CD Block: Please select name of ‘CD Block’ from the list in which School is located. 14. Assembly Constituency: Please select ‘Assembly constituency’ of the City/Village/Town where School is
located. 15. Parliamentary Constituency: Please select ‘Parliamentary Constituency’ of the City/Village/Town where
School is located. 16. Police Station: Select Name of ‘Police Station’ under whose jurisdiction the school is located. 17. Treasury Office: Select ‘Treasury Office’ of School from the list. 18. DDO Code: Enter correct DDO code of the school. 19. Nearest Bus Stop: Enter name of nearest ‘Bus Stop’ to School.

School Management Information System
Page 10
20. Nearest Railway Station: Enter name of nearest ‘Railway Station’ from School. 21. Latitude and Longitude: These are geographic coordinates which specify the east-west and north-south
position of a point on the Earth's surface. If you don’t have coordinates or though there are coordinates but it showing incorrect location on
Google map then follow the below mentioned steps. a. If you know the coordinates of School location correctly then enter those coordinates in its
respective field. To ensure that the coordinates mentioned are correct, click on ‘View Map’ link to view location of school on Google map.
b. If you don’t know the coordinates of School location then find your location on map and click on school building structure showing in the map. You will find the coordinates of School location in the URL tab. Copy and Paste that coordinates in respective text boxes.
c. If the location pointer on Google map is pointing to incorrect location then repeat the step ‘b’. 22. Save: Click on ‘Save’ button to save the data. 23. Clear: This will clear all fields on the page. So, before clicking on this button, please make sure that you
really wanted to clear the data. 24. School user need to update Address whenever there is change corresponding to the fields mentioned above.

School Management Information System
Page 11
Contact: Enter accurate School contact details as it will be used for communication.
Don’ts:
1. DO NOT enter fake or dummy data. 2. DO NOT enter wrong Area Code. 3. DO NOT enter wrong phone number. 4. DO NOT enter wrong email Ids.
Please follow the below mentioned steps for entering Contact details:
1. Head of School: Provide landline number of Head of School/Principal. Enter correct phone number as ‘Area Code’ in first textbox and ‘Landline Number’ in second textbox.
2. Respondent: Provide landline number of person who attends the phone in School office, if any. If not please keep it unfilled. Please, ensure to enter correct phone number as ‘Area Code’ in first textbox and ‘Landline Number’ in second textbox.
3. Email ID 1: Enter correct primary official Email Id of School. 4. Email ID 2 (if any): Enter correct secondary official Email Id of School, if any. 5. School Website: Enter School website address, if any. 6. Click on ‘Save’ button to save the data. 7. Clear: This will clear all fields on the page. So make sure that you really wanted to clear the data. 8. School user need to update School Contact Details whenever there is change corresponding to the fields
mentioned above.

School Management Information System
Page 12
Section Definition Using this menu School user can define Sections of Class. A Class may have multiple sections. Each section of a Class is associated to specific medium of instruction.
You need to define Section for each and every class. The defined sections of the Classes will be used to allocate or transit students admitted in the School. Hence this task is of high importance.
How to go to Section Definition?
School Definition >> Section Definition
Don’ts:
1. DO NOT enter fake or dummy data. 2. DO NOT create extra Sections for a class if not required. 3. DO NOT select wrong Medium of Instruction for the Section.
Please follow the below mentioned steps for defining Sections and its Medium of Instruction:
1. Academic Year: The current academic year will be shown. This is non-editable field. School user cannot change academic year.
2. Class for Section Allocation: Select a ‘Class’ for which you want to define or create Sections. 3. Stream: In case of Class 11th and 12th, select stream for which you want to define sections. 4. Section Name: Enter ‘Section Name’ e.g. ‘A’, ‘B’, ‘C’ etc. 5. Medium of Instruction: Select ‘Medium of Instruction’ from the dropdown list. ‘Medium of Instruction’ is
major language in which all subjects are taught to the Section. (Only one medium of instruction can be added for a section).
6. Add More Sections: Click on ‘Add Section’ button if more sections to be added for the same class (with same or different Medium of Instructions).
7. Remove: If you want to remove section then click on remove button against that particular Section entry. 8. Save: Click on ‘Save’ button to save the data.

School Management Information System
Page 13
9. Clear: This will clear all fields on the page. So make sure that you really wanted to clear the data. 10. Update: If you have defined some sections for a particular class previously and now for the next time you
want to add some more sections for the same class then click on ‘Update’ button against the entry of that particular class shown in the table at the bottom of screen. Now you will find the class to update. Click on ‘Add More Sections’ button to add new section entry for class selected. Enter Section name and Medium of Instruction for new section and click on save. The new section will be saved.


![Directorate of School Education GOVERNMENT OF ...schooleducationharyana.gov.in/downloads_pdf/daily_orders/...49 [021413] Bani Singh Master Mathematics GSSS Chattar (Jind) [1525] M](https://static.fdocuments.us/doc/165x107/5b0835a47f8b9a520e8c4114/directorate-of-school-education-government-of-sc-021413-bani-singh-master-mathematics.jpg)


![wet %gift . we er t - Directorate of School Education, Haryanaschooleducationharyana.gov.in/downloads_pdf/daily_orders/...Sukhwant Singh W/O Sirsa [2986] Mahinder Singh Vpo. Talwara](https://static.fdocuments.us/doc/165x107/5adf5ed17f8b9af05b8c61ec/wet-gift-we-er-t-directorate-of-school-education-haryanasc-singh-wo-sirsa.jpg)


