Scanning Ne gat i ves -...
16
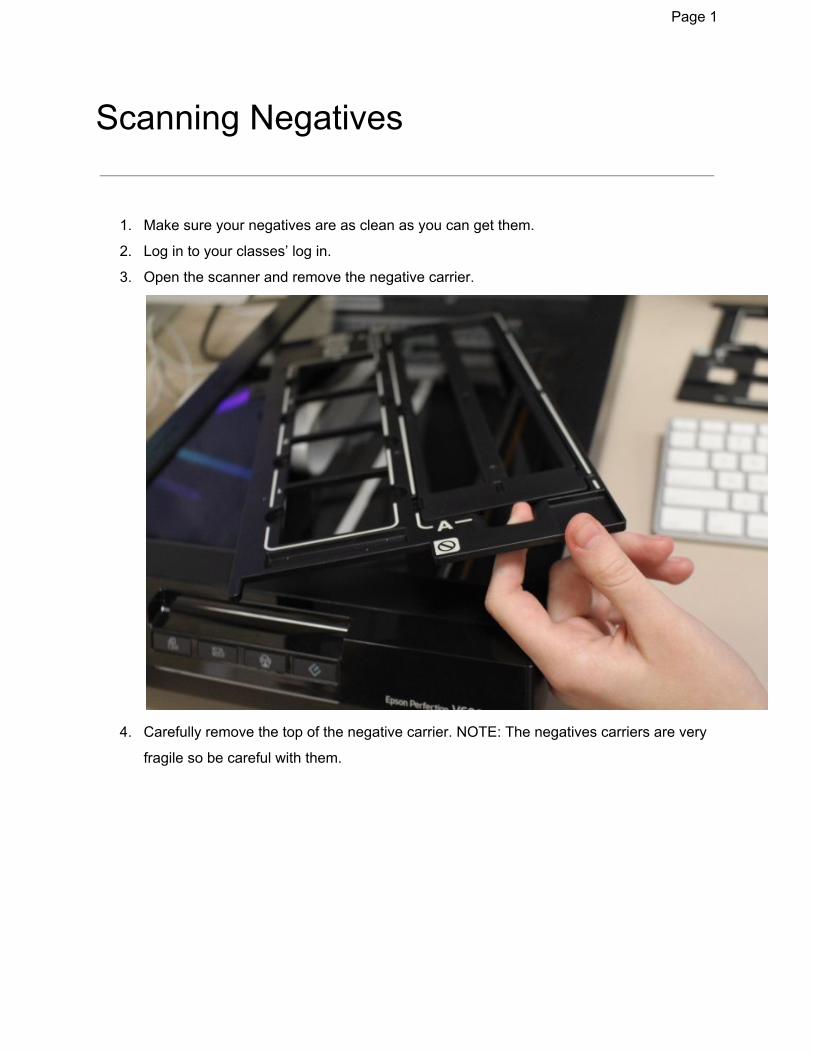
Page 1 Scanning Negatives 1. Make sure your negatives are as clean as you can get them. 2. Log in to your classes’ log in. 3. Open the scanner and remove the negative carrier. 4. Carefully remove the top of the negative carrier. NOTE: The negatives carriers are very fragile so be careful with them.
Transcript of Scanning Ne gat i ves -...
Page 1
Scanning Negatives
1. Make sure your negatives are as clean as you can get them.
2. Log in to your classes’ log in.
3. Open the scanner and remove the negative carrier.
4. Carefully remove the top of the negative carrier. NOTE: The negatives carriers are very
fragile so be careful with them.

Page 2
5. CAREFULLY wipe off the scanner glass. Anything on the glass, including dust, will affect
the quality of your negatives.
Page 3
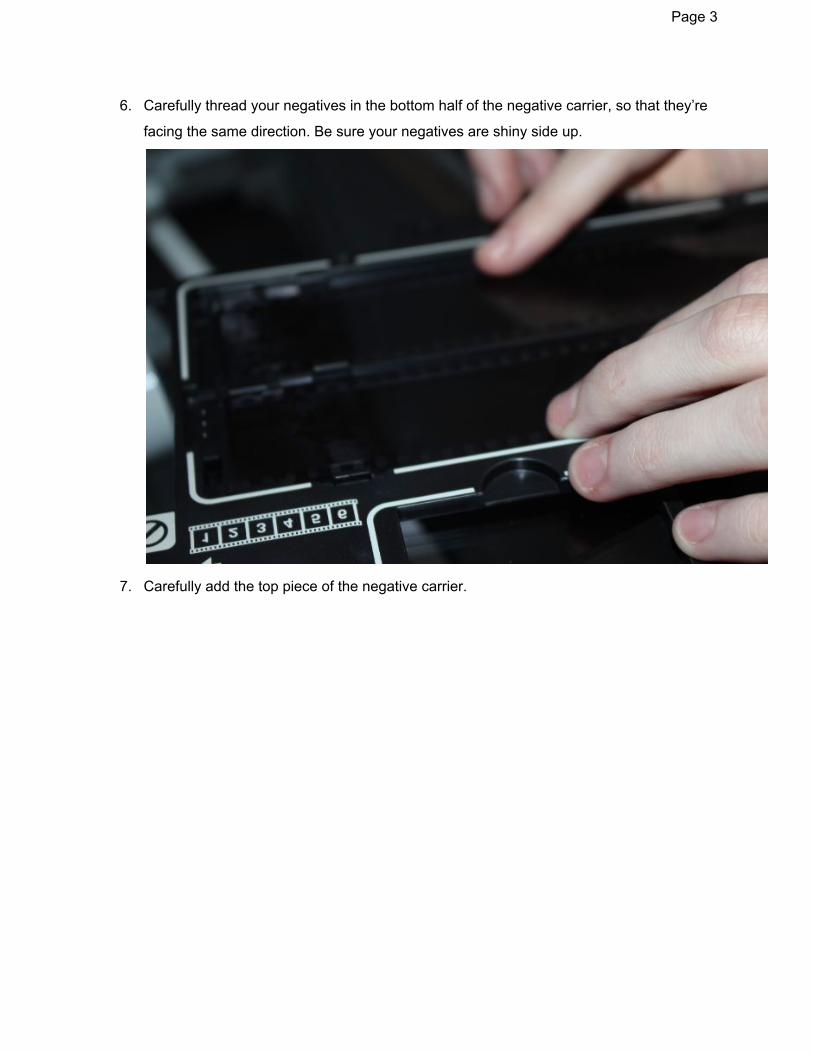
6. Carefully thread your negatives in the bottom half of the negative carrier, so that they’re
facing the same direction. Be sure your negatives are shiny side up.
7. Carefully add the top piece of the negative carrier.

Page 4
8. Align the “A” tabs and close the scanner lid.
9. Open Launchpad.
Page 5
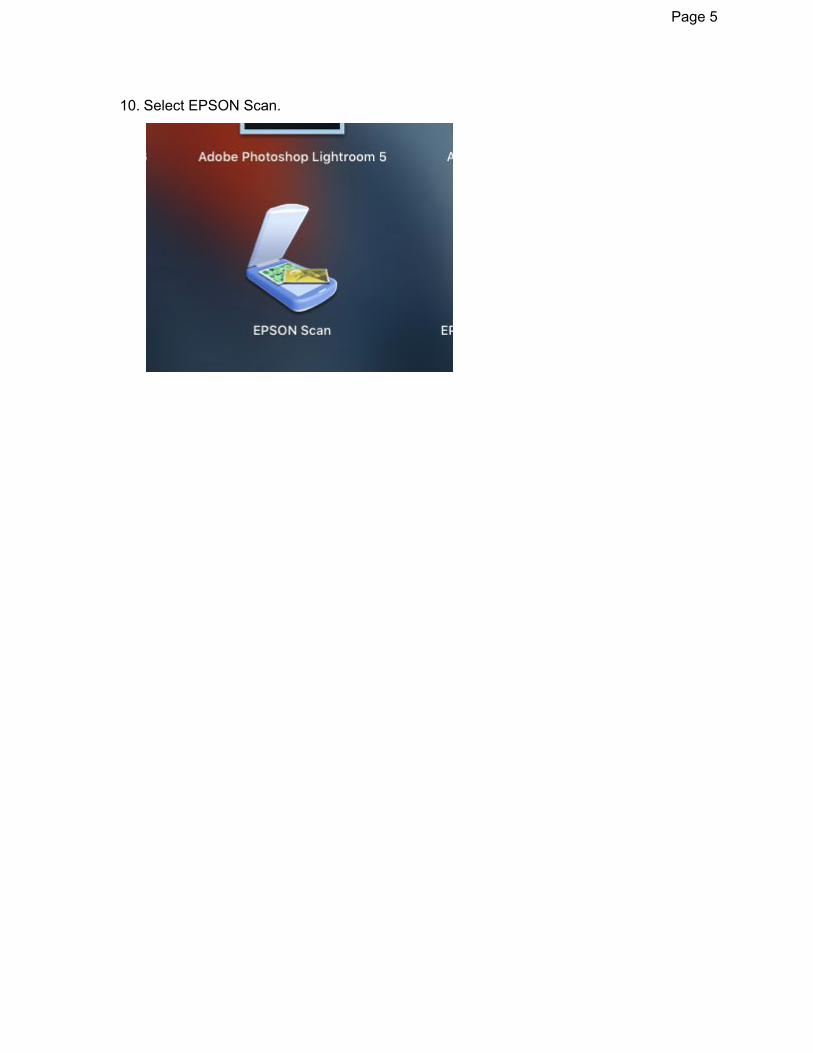
10. Select EPSON Scan.

Page 6
11. Check your scanner model and select the appropriate driver.

Page 7
12. Be sure you are on Professional Mode.

Page 8
13. For Black and White scans, change the settings as follows:

Page 9
14. Click Preview at the bottom left of the panel to get a preview of your pictures.
15. Your preview scans will appear.
16. Now, mirror them. Select the All button. This will select all of your images. We scanned
them reversed.
17. Now, click on Mirror.

Page 10
18. If they come in upside down, click Rotation until they are right side up.
19. Now your images should look the way they ded when you took them. Uncheck any
photos that you do not want to scan.

Page 11
20. Go to the EPSON Panel.
Page 12
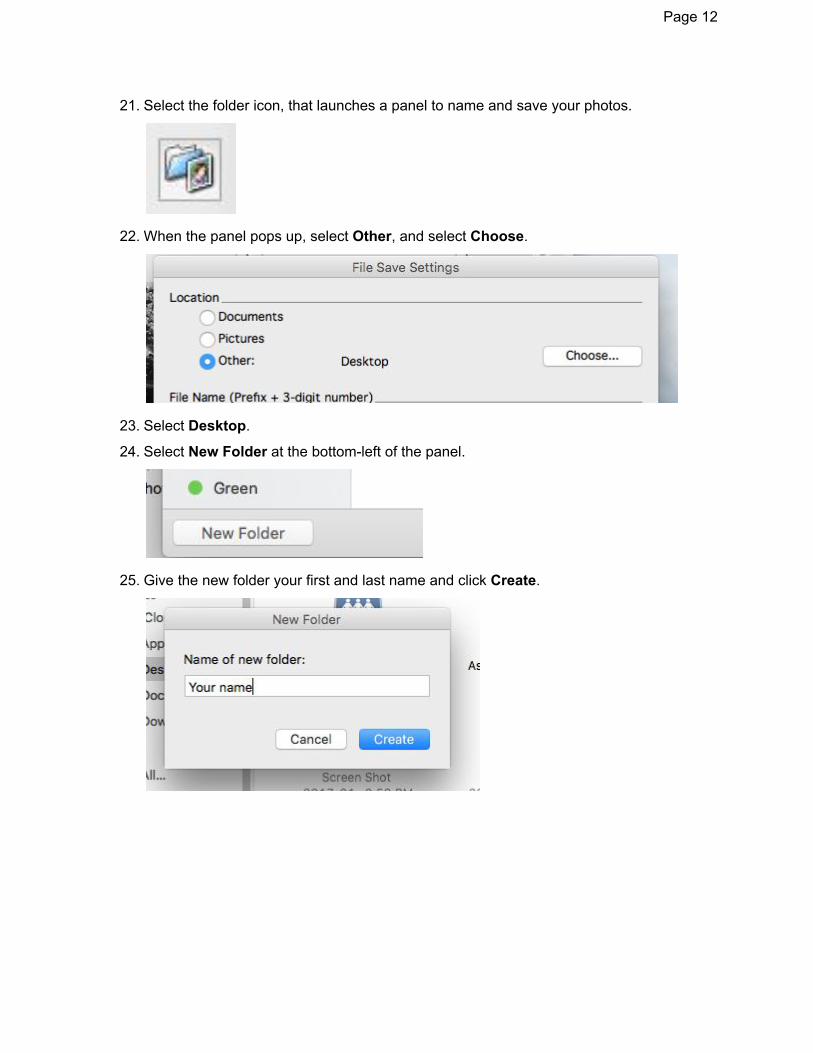
21. Select the folder icon, that launches a panel to name and save your photos.
22. When the panel pops up, select Other, and select Choose.
23. Select Desktop. 24. Select New Folder at the bottom-left of the panel.
25. Give the new folder your first and last name and click Create.

Page 13
26. Now find your folder and select Choose.

Page 14
27. In the following panel, name your images.
28. Click OK.

Page 15
29. Click Scan.
30. Click OK.

Page 16
31. After each photo scans, tap the mouse to scan the next photo.
32. Double-click your folder on your desktop to make sure they are there.
Thanks to Hope Roach for helping me make this handout! :)