Saskatchewan 4-H - Government of Prince Edward Island · Saskatchewan 4-H Archery Project - Leaders...
53
Saskatchewan 4-H Leader’s Guide Archery www.4-h.sk.ca 3830 Thatcher Ave. Saskatoon SK S7K 2H6 Ph: (306) 933-7727 Fax: (306) 933-7730
Transcript of Saskatchewan 4-H - Government of Prince Edward Island · Saskatchewan 4-H Archery Project - Leaders...

Saskatchewan 4-H
Leader’s Guide
Archery
www.4-h.sk.ca
3830 Thatcher Ave. Saskatoon SK S7K 2H6 Ph: (306) 933-7727 Fax: (306) 933-7730

Saskatchewan 4-H
Archery Project - Leaders Guide
Table of Contents
Page• General 4-H Information 1• Introduction 2• Section 1 - Safety, Tackle, Eye Dominance and
Range Procedure 2• Section 2 - Developing Proper Shooting Form 8• Section 3 - Instinctive Shooting with a High
Anchor 15• Section 4 - Shooting With Sights 17• Section 5 - Shooting Compound Bows 19• Section 6 - Making Archery Equipment 22• Section 7 - Bow Tuning 27• Section 8 - Target Archery Games 31• Appendix 1 – Determining Eye Dominance 35• Appendix 2 – Trajectory 37• Appendix 3 – Making Arrows 42• Appendix 4 – Ground Quivers 46• Appendix 5 – Basic Steps in Archery 47
The material has been compiled and edited by the
Saskatchewan 4-H Council
for the use and benefit of
4-H members and leaders in Saskatchewan. The material has been formatted to fit with the Saskatchewan 4-H Program.
Permission for reproduction in
whole or in part must be obtained from the
Saskatchewan 4-H Council
3830 Thatcher Ave. Saskatoon SK S7K 2H6
PH: (306) 933-7727 FAX: (306) 933-7730
Developed in 2004

General 4-H Information
Mission Saskatchewan 4-H is a project-based youth organization, devoted to strengthening the skills of responsible citizens. We focus on the growth and development of our members, leaders, volunteers and staff through our motto: “Learnto do by doing”.
Core Values We respect the importance of family and honour our 4-H traditions by upholding all of these core values:
Honour and Integrity: Treating one another respectfully, fairly and justly.
Reliability: Being dependable and responsible for our actions.
Co-operation: Working as a team to achieve our goals.
Fun: Creating positive and enjoyable experiences.
We do this within a safe, caring and positive environment. 4-H Pledge I Pledge: My HEAD to clearer thinking My HEART to greater loyalty My HANDS to larger service, and My HEALTH to better living, for My Club, My Community and My Country 4-H Motto Learn to do by doing. 4-H Grace (Tune of “Auld Lang Syne”) We thank Thee Lord for blessings great On this our own fair land Teach us to serve Thee joyfully With Head, Heart, Health and Hands Saskatchewan 4-H Although the 4-H program has its roots in rural Saskatchewan, the Saskatchewan 4-H Council
serves all youth, 6 - 21 years of age. 4-H members develop leadership skills and responsible citizenship primarily through the completion of projects. In 4-H club work, members direct their own activities, learn to work effectively through their association with others and work in partnership with adults. The 4-H program strives to encourage individual growth in young people by developing self-confidence, the ability to make wise decisions and responsible attitude toward community service. Creating a deeper interest, understanding and appreciation of our natural environment are important objectives of the 4-H program development. The Saskatchewan 4-H Council recognizes adult leadership and volunteerism as the foundation to its success in accomplishing its mission. 4-H Emblem The national 4-H emblem is a green four-leaf clover with a letter ‘H’ inscribed on each leaf and the word ‘Canada’ forming the base. The four ‘H’s stand for Head, Heart, Health and Hands. These symbolize the ideals and objectives of this educational movement for young people through: ♦ Training the head to think, plan and reason. ♦ Training the heart to be kind, true and
sympathetic. ♦ Training the hands to be useful, helpful and
skilful. ♦ Promoting good health for effective home
and community service. The Canadian 4-H Council officially adopted this four-leaf clover in 1952. The four-leaf clover signifies “good luck” and “achievement”. The official colours in Canada are green and white. The white is for purity. Green is nature’s most common colour and is symbolic of youth, life and growth.
Saskatchewan 4-H Archery Leaders Guide Page 1

Trademark and copyright protect the 4-H name, emblem, pledge and motto. This means they cannot be changed in any way. In order to preserve continuity of meaning and to engender public awareness, alterations, additions or deletions to the 4-H name, pledge, emblem and/or motto are strongly discouraged.
Introduction Archery involves a fascinating group of sports for members of all ages. The fundamentals are simple. The requirements are few. A new archer can be shooting fairly well within a short time, if he or she has the benefit of a planned approach to developing the basics of form. The sections in this project cover the basics of archery. They present the beginning archer with a broad, sound foundation for learning the discipline, and enjoying archery for a lifetime. The safety section may be shortened if members are already familiar with shooting safety. Only the safety considerations of archery equipment and shooting may need to be covered. The sequence of the first four sections, however, was carefully and deliberately chosen to maximize learning and minimized the risk of developing form fault. Avoid the temptation to jump directly to sight shooting with compound bows. Instinctive shooting with light recurve bows optimizes shooting form development, so good principles are best established in that context. Note the value of repetition in several of the sections. Try to avoid rushing members through development of their basic skills. The repetition is helpful. If you have lesson plans that have proven themselves effective, use this manual only to make a good thing better. If not, try this sequence as a means of introducing members to archery. This portion of the material about safety, basic archery form, instinctive shooting and sight shooting, should be an absolute minimum of instruction for all beginning archers. It may prove to be a helpful review for those with more experience.
As a project leader for the archery project, you will need both the member and leader manual to teach the project. The leader's manual has only the teaching outlines for the topics covered in the member's manual. There is also valuable information on the Internet on the "Federation of Canadian Archers Inc." website at www.fca.ca
Section 1 – Safety, Tackle, Eye Dominance, and Range Procedure Objectives 1. Become familiar with the history of archery. 2. Understand the basic rules of safe archery
shooting. 3. Recognize and understand range
commands. 4. Recognize and demonstrate various pieces
of archery tackle and their parts. 5. Determine eye dominance. 6. Learn how to select an appropriate bow. 7. Learn how to string and unstring a recurve
bow properly. 8. Have fun while learning.
Roles for Junior Leaders • Present portions of the lesson. • Lead demonstrations. • Tutor or quiz younger members on
identifying equipment and accessories. • Act as range officers for demonstrations. • Assist in setting up bows for the next
meeting. Parental Involvement • Arrange for transportation to meeting site. • Arrange for refreshments. • Deliver part of the program. • Demonstrate shooting safety points.
Saskatchewan 4-H Archery Leaders Guide Page 3

Teaching Outline Introduction Presentation Application
1. Hunters and Warriors 2. Shooting at “long” range
• Hunting or warfare • Target Shooting
3. Types of early bows • Self and composite bows • Shapes and length
4. Modern archery (mid-1800s) • Influence of Civil War • Ishi, Saxon Pope, Art Young
5. Developments in materials and engineering • Bow technology
− Fiberglass, graphite and laminated limbs
− Compound bows − Wheeled bows − Cam bows − Cam-limb bows − Overdraws − Sights
6. Arrow technology • Shaft material • Fletching
7. String changes • Dacron • Kevlar • Fastflight • Cables
8. Similarities to the old days • Hand-eye coordination • Need for practice • Shooting principles • Safety considerations
Display illustrations of early hunters and/or ancient warriors. How long was the bow the main tool for the hunter, and weapon for the warrior? Try to get answers spanning pre-history to the 1600's. How is archery the same today, as it was long ago? Discuss the types of early bows; possibly show pictures of then and now to see the differences. Discuss arrow technology - shaft material and fletching. Discuss the changes in string. Demonstrate the equipment as it is discussed. How is archery the same today, as it was long ago? Look for answers mentioned here.
Archery Safety 1. Arrow actions
• Penetrating • High momentum • Low shock • Dangerous until stopped
2. Relative penetration ability • Greater than rifle • Straight up dangerous
3. Offensive parts • Arrow at both ends • Fletching • Bow limbs • String • Nocking point indicator
Demonstrate the penetration and shock differences between arrows and bullets, if a safe range is available. Why is an arrow shot straight up dangerous? Discuss responses. Use an airbow or a demonstration shot in a safe area to stimulate thinking. Ask what are some of the possible safety concerns with archery tackle or shooting? Add any item members fail to mention.
Saskatchewan 4-H Archery Leaders Guide Page 4
4. Faulty inadequate or mismatched equipment
5. Weapon or fun • Your choice • Mental control or physics • Yours while on the string • Need for respect and care
− User responsibilities − Enforcing safety
6. Principles of archery safety • Clear zone of fire • Pointed in safe direction • Target identification • Watch nocks and points • Loaded only for shots • Always treat with respect • Avoid shooting if tired, distracted
or under the influence of any drug
• Be extremely careful when retrieving arrows
• Be sure all tackle is in perfect working condition and free from damage
• Always hold to strictest • Codes of conduct, ethics and
sportsmanship
What makes the difference between a weapon and a recreational tool? Look for answers that stress the intent and use of the equipment. Your choice Discuss firearm safety and how it relates to archery safety. What differences between bows and firearms result in changes in safety considerations? Discuss the penetration and sharp points on both ends of arrows. Discuss also the need for a larger cleared area for the limbs to operate safely.
Archery Tackle 1. Bows
• Riser − Grip or handle − Arrow shelf − Sight window -handedness − Arrow rest − Arrow plate − Plunger or button
2. Limbs • Face or belly • Back • Tips and string nocks • Cams or eccentric wheels
3. Bowstrings • Construction
− Dacron, Kevlar or Fastflight − One-looped strand
• Servings • End loops • Center (mono) • Nocking point indicator
Demonstrate each item as it is discussed. Be sure all participants can see clearly.
Saskatchewan 4-H Archery Leaders Guide Page 5
4. Arrows • Shaft materials
− Wood (cedar) − Fiberglass
Hollow Solid
− Graphite tubing − Aluminum alloy
• Spine or stiffness − Matched to bow − Need for matching
• Nocks − String holding device − Different types
• Points − Target points − Field points − Broadheads − Blunts − Other types
• Fletching − Feathers and vanes − Index (cock) vane − Types of fletching
Straight Offset Helical Flu-flu
− Purposes − Matching to use
Target Hunting Others
• Cresting or signature − Decoration and identification − Identifying each shaft
individually 5. Other accessories
• Arm guard − Purposes − Location
• String-hand protection − Finger tab
Clean release How worn
− Shooting glove − Mechanical release
• Quivers − Types − Purpose − Types used here
Discuss advantages and disadvantages and uses of each material. Illustrate "archer's paradox" - need to bend in order to fly straight. Demonstrate the use of an arm guard and finger tab or glove. What is the main purpose of an arm guard? Lead members to conclude: 1) keeping the clothing away from the string and 2) preventing string slap. Have members put on a tab with supervision and help.
Saskatchewan 4-H Archery Leaders Guide Page 6

Eye Dominance 1. Determining eye dominance
• Importance of master eye − Naturally aligns with target − Ease in retraining hands − Difficulty in retraining eyes
• Use partner method − Overlapped hands − Looking at partner’s nose − Bringing hands to eye − Watch for “cheating”
• Selecting bow for eyedness − String-hand and dominant eye
on same side − Sight window on bow-hand side
(opposite side from dominant eye)
2. Terminology for instructions • String-hand side
− Dominant-eye side − Refers to drawing hand
• Bow hand side − 0ff or non-dominant side − Hand that holds bow
Demonstrate how to determine the dominant eye. Have members pick a partner and determine their dominant eye. See Appendix 1 “Determining eye Dominance”. Illustrate bow selection. Help members pick a bow for their eyedness. Have members stand with their bow hand toward their partner and draw their string hand back. Check to be sure they understand the terminology.
Stringing and Un-stringing 1. Safety for shooter and bow
• Unacceptable methods − Step-through − Push-pull
• Acceptable methods − Cord stringers − Wall stringers − Box stringers − Bow presses − Bow relaxers
Demonstrate, without stringing the bow, the dangers in using these methods. Stress that they are not recommended. Demonstrate the proper use of one or more bow stringing devices. Have members’ practice stringing and unstringing bows under supervision of adult or junior leaders.
Range Procedures 1. Relationship to other shooting
• Need for control • Need to assure safety • Everyone responsible
− Watch for unsafe conditions − Obey all commands
immediately 2. Voice and whistle commands
• Shooters to the line − Straddling line − No bow drawn or arrow
placed on string • Is the line ready
Discuss a useful set of range procedures. List some reasons for standard range commands. Review shooter responsibilities. Discuss the appropriate ways to be sure commands are obvious. Illustrate each one using adult or junior leaders. Have each shooter work through a series of commands without equipment.
Saskatchewan 4-H Archery Leaders Guide Page 7
• Commence firing − One whistle blast − Range is active
• Cease firing − Two whistle blasts
Normal end of round Immediately stop
shooting Retrieve arrows
− Multiple whistle blasts Safety problem Try to stop even in mid-
release • Retrieve arrows
− Two whistle blasts − Line captain or other assigned
person leads − Wait at arm’s length for
scorer or remove arrows Rules for scorers Danger from arrows
being pulled − One person at butt − Watch for undershot arrows
Danger to shooters – sharp nocks – tripping
Danger to shafts – bending or breaking
− Line captain observes searches for overshot arrows
− Tell shooters to be prepared to shoot next meeting Signal to other archers –
bow over target – arrow upright
Search as a group Line captain returned to
line last 3. Field shooting changes
• Toe to line or stake • Bow across target face
4. Spacing on shooting line • Beginners at least 2-3 meters (6-
10 feet) apart • More advanced shooters need
less room • Change in arrow handling
− Arrows nocked on upright bow
5. No bows drawn or arrows nocked except on shooting line
6. Range behaviour and etiquette • Appropriate clothing • Distraction • Sportsmanship and ethics
Why should the line captain be the first one down range? Why is it important to limit the number of members at a target? Emphasize potential danger from nocks on pulled arrows. Why is it important to watch where you are stepping? Emphasize the damage to either anatomy or arrows. Why must persons be so careful when looking for overshot arrows? Stress being out of sight down range. Why should the line captain be the last one back? Demonstrate the proper way to nock an arrow, first using the bow, as a shelf (beginners), then coming straight over should and upper limb. Emphasize the need for concentration, respect for others and caution in all forms of shooting.
Saskatchewan 4-H Archery Leaders Guide Page 8
Activities 1. Have junior leaders or parents review archery terms and safety considerations with small groups
of participants. 2. Have junior leaders or parents supervise members in stringing and unstringing bows using cord,
box and wall stringers. 3. Without equipment, have participants’ practice range rules and behaviours either inside or on an
outdoor range. 4. If they are not already equipped with nock sets, have each member locate and attach a nocking
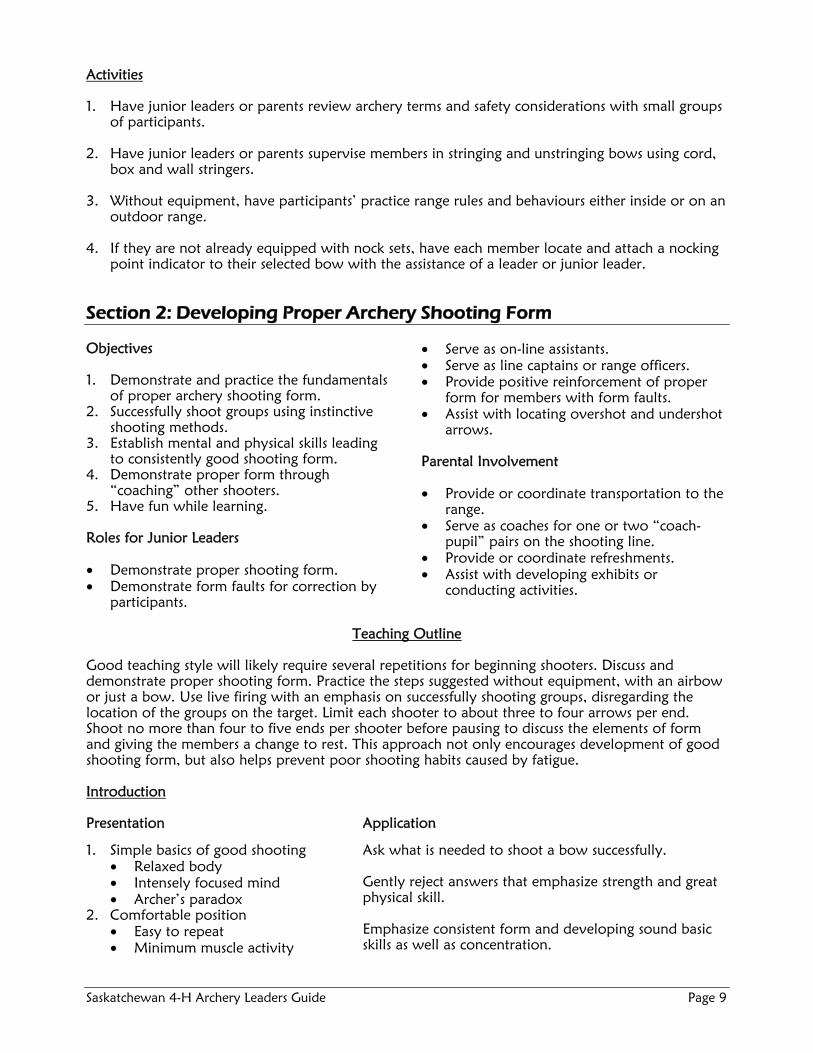
point indicator to their selected bow with the assistance of a leader or junior leader. Section 2: Developing Proper Archery Shooting Form Objectives 1. Demonstrate and practice the fundamentals
of proper archery shooting form. 2. Successfully shoot groups using instinctive
shooting methods. 3. Establish mental and physical skills leading
to consistently good shooting form. 4. Demonstrate proper form through
“coaching” other shooters. 5. Have fun while learning. Roles for Junior Leaders • Demonstrate proper shooting form. • Demonstrate form faults for correction by
participants.
• Serve as on-line assistants. • Serve as line captains or range officers. • Provide positive reinforcement of proper
form for members with form faults. • Assist with locating overshot and undershot
arrows. Parental Involvement • Provide or coordinate transportation to the
range. • Serve as coaches for one or two “coach-
pupil” pairs on the shooting line. • Provide or coordinate refreshments. • Assist with developing exhibits or
conducting activities.
Teaching Outline
Good teaching style will likely require several repetitions for beginning shooters. Discuss and demonstrate proper shooting form. Practice the steps suggested without equipment, with an airbow or just a bow. Use live firing with an emphasis on successfully shooting groups, disregarding the location of the groups on the target. Limit each shooter to about three to four arrows per end. Shoot no more than four to five ends per shooter before pausing to discuss the elements of form and giving the members a change to rest. This approach not only encourages development of good shooting form, but also helps prevent poor shooting habits caused by fatigue. Introduction Presentation Application
1. Simple basics of good shooting • Relaxed body • Intensely focused mind • Archer’s paradox
2. Comfortable position • Easy to repeat • Minimum muscle activity
Ask what is needed to shoot a bow successfully. Gently reject answers that emphasize strength and great physical skill. Emphasize consistent form and developing sound basic skills as well as concentration.
Saskatchewan 4-H Archery Leaders Guide Page 9

3. Practiced form needed • Concentration on one form item • Instilling good habits • Consistency needed
− Form − Results − Perfect practice
• Successful form taught − Same for all archery − Basic to good shooting
Archery Form Basics 1. Ten Steps to Success:
• Stance and posture • Bow-hand grip • Nocking an arrow • Setting a hook • Raising the unit • Draw • Anchor • Aim • Release • Follow through
2. Need to establish each step • Good shooting routine • Mind free to concentrate • Always emphasize safety
3. Stance • Normal standing position
− Relaxed − Comfortable
• Foot position − Straddling line − Shoulder width apart − Line through toes to target − Square stance value
Straight line to target String slap avoided Muscle fatigue
• Hips and shoulders in line with target
• Head − Erect and relaxed − Rotate toward bow-hand
shoulder 4. Bow-hand position and grip
• Relaxed grip − Bow floats in hand − Touch tips of index finger − And thumb − Use sling to hold bow in
hand
Have a parent or junior leader demonstrate one shot with a bow or with an airbow indoors. What are the parts of this shooting sequence? Use questions to get the members to list the items included here. See Appendix 5 "Basic Steps in Archery" for additional visual pictures on the proper form. Reinforce the need for constant safety awareness. Using a rope, tape or other shooting line, have each member practice taking a comfortable and square stance. Using an arrow in place of the string or an airbow, demonstrate why a square stance keeps the string away from the body. Note that this is particularly important for female archers. Have members’ practice gripping a bow with a light touch.
Saskatchewan 4-H Archery Leaders Guide Page 10

• Handshake with bow − Hand vertical − Bow handle in web between
thumb and fingers (U-shape) • Bow-arm elbow rotated out
− Arm swings parallel with the ground
− Bow-arm shoulder and elbow locked out
• Two primary wrist positions − High wrist: wrist in line with
forearm One contact point Bow floats in web of hand Similar to free-floated
rifle barrel Less sensitive to minor
changes in grip and hand position
Preferred by many bowhunters
− Low wrist: hand above line of forearm Handle seated in relaxed
hand Similar to glass-bedded
rifle barrel Uniform grip yields
consistent results Preferred by target
archers Reduced fatigue Consistent seating of bow
in hand 5. Nocking an arrow
• Bow used as shelf for beginners − At least 10 feet apart − Sight window up − Slide arrow forward − Set arrow on rest − Rotate index vane up − Draw back to string − Nock under nocking point
indicator (between if 2 used) • Bow held vertically
− Reasons in target shooting − Cant bow slightly to drawing
hand side − Rotate slightly to left shaft
clear string Keep the shaft pointed
down range − Reach forward, placing
arrow on rest − Index vane out − Slide back to string − Nock under indicator
Practice elbow rotation by pushing against a wall or post with a flat hand and rotating the elbow out. Check rotation by swinging hand toward chest. Demonstrate high-wrist position. Discuss its advantages/disadvantages and normal use. Why might bowhunters prefer this style? Good answers focus on changes in form because of excitement. Demonstrate low-wrist position. Discuss its advantages/disadvantages and common uses. Why might target archers prefer this type of wrist position? Good answers focus on reduced effects of muscle fatigue and consistent form. Demonstrate nocking an arrow using both techniques. Have each member practice each technique with arrows pointed in a safe direction, and without actually placing them on the string.
Saskatchewan 4-H Archery Leaders Guide Page 11
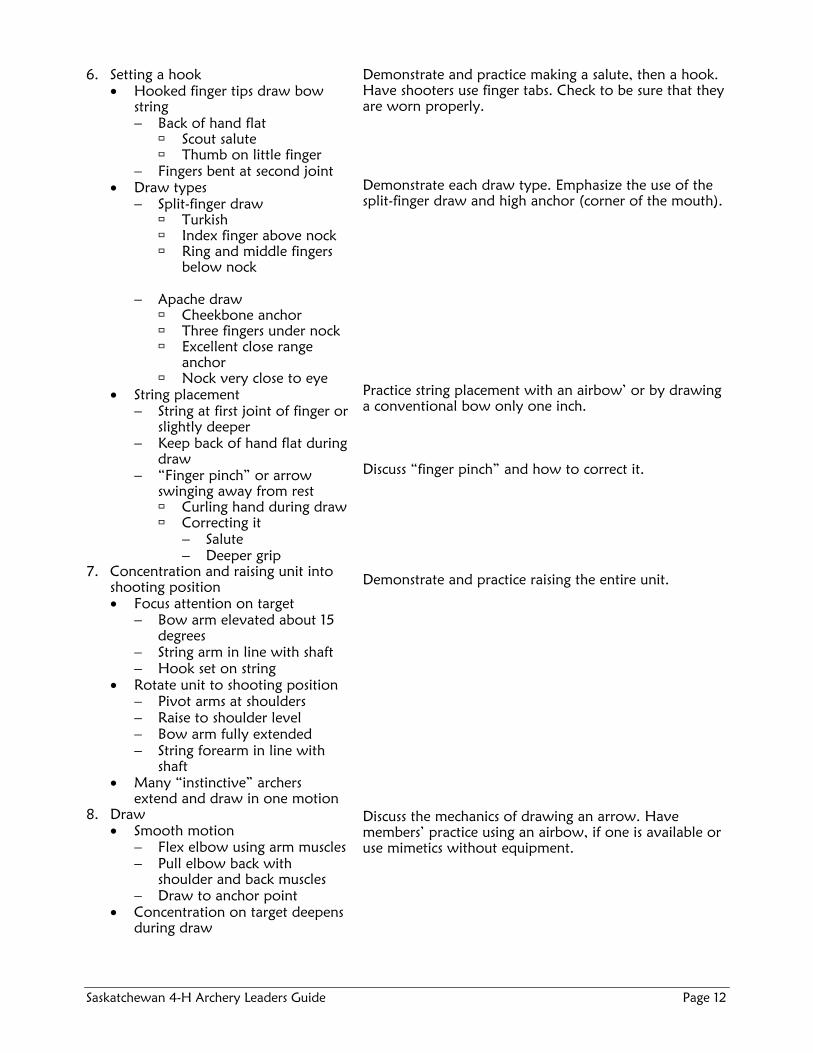
6. Setting a hook • Hooked finger tips draw bow
string − Back of hand flat
Scout salute Thumb on little finger
− Fingers bent at second joint • Draw types
− Split-finger draw Turkish Index finger above nock Ring and middle fingers
below nock
− Apache draw Cheekbone anchor Three fingers under nock Excellent close range
anchor Nock very close to eye
• String placement − String at first joint of finger or
slightly deeper − Keep back of hand flat during
draw − “Finger pinch” or arrow
swinging away from rest Curling hand during draw Correcting it
− Salute − Deeper grip
7. Concentration and raising unit into shooting position • Focus attention on target
− Bow arm elevated about 15 degrees
− String arm in line with shaft − Hook set on string
• Rotate unit to shooting position − Pivot arms at shoulders − Raise to shoulder level − Bow arm fully extended − String forearm in line with
shaft • Many “instinctive” archers
extend and draw in one motion 8. Draw
• Smooth motion − Flex elbow using arm muscles − Pull elbow back with
shoulder and back muscles − Draw to anchor point
• Concentration on target deepens during draw
Demonstrate and practice making a salute, then a hook. Have shooters use finger tabs. Check to be sure that they are worn properly. Demonstrate each draw type. Emphasize the use of the split-finger draw and high anchor (corner of the mouth). Practice string placement with an airbow’ or by drawing a conventional bow only one inch. Discuss “finger pinch” and how to correct it. Demonstrate and practice raising the entire unit. Discuss the mechanics of drawing an arrow. Have members’ practice using an airbow, if one is available or use mimetics without equipment.
Saskatchewan 4-H Archery Leaders Guide Page 12

9. Anchor • Consistent anchor point
− “Rear sight” − Checkpoints
• High anchor − Corner of mouth
Index finger tip on upper canine tooth
Thumb behind angle of jaw
Thumb along back of jaw and behind ear
− Point of cheekbone for Apache draw
• Low anchor discussed later with sights
10. Aim • Instinctive shooting
− Concentrate on spot − Small spot gives more
accuracy and precision • Pause to check alignment
− Make sure you are set − Shoot or let down within a
few seconds − Deliberate shooting
• Drawing hand firmly anchored • Bow arm fully extended
11. Release • Very simple action
− Relax hook − Pull elbow back
• “Live” release − Relax fingers − Draw elbow back − Fingers flow along side of
face − Bow rocks forward
12. Follow through critical to good shooting • Hold release position
− Until arrow hits target − Bow arm extended in
shooting position − String hand at end of release
position • Avoid shooting when tired
− Leads to poor form − Faults with follow through − Poor shooting − Frustration
• Relax before next shot − Concentration on entire end
or match impossible − Treat each arrow as the only
one
Why is a consistent anchor point important? Discuss the dominant eye’s function as a rear right. Demonstrate the corner of the mouth anchor and secondary checkpoints used with it. Have members try various combinations with or without equipment. Point out that true instinctive shooters do not aim, but concentrate on the target. Compare to throwing a ball. Reinforce the importance of pausing momentarily at full draw to check position and hold. Have members draw one inch and relax fingers to feel a release. Demonstrate and practice a live release by pulling hooked fingers against each other with the hands across the chest, relaxing the string hand while pulling. Note movement of the hands and arms. Demonstrate a proper follow through using an airbow or shooting on the range. Discuss the bow arm and string arm. Why is it important to hold the follow through until the arrow hits? Seek answers that center on avoiding bad form, like letting hands drop. Discuss the importance of treating each arrow as if it were the only one.
Saskatchewan 4-H Archery Leaders Guide Page 13
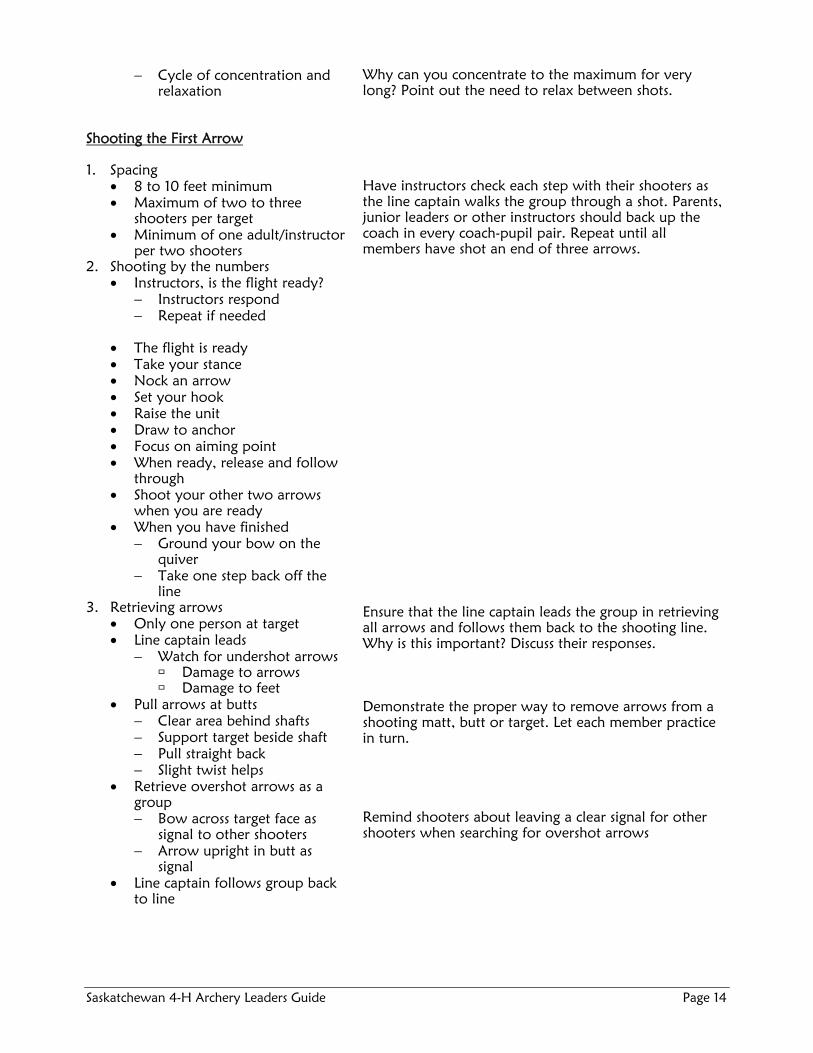
− Cycle of concentration and relaxation
Why can you concentrate to the maximum for very long? Point out the need to relax between shots.
Shooting the First Arrow 1. Spacing
• 8 to 10 feet minimum • Maximum of two to three
shooters per target • Minimum of one adult/instructor
per two shooters 2. Shooting by the numbers
• Instructors, is the flight ready? − Instructors respond − Repeat if needed
• The flight is ready • Take your stance • Nock an arrow • Set your hook • Raise the unit • Draw to anchor • Focus on aiming point • When ready, release and follow
through • Shoot your other two arrows
when you are ready • When you have finished
− Ground your bow on the quiver
− Take one step back off the line
3. Retrieving arrows • Only one person at target • Line captain leads
− Watch for undershot arrows Damage to arrows Damage to feet
• Pull arrows at butts − Clear area behind shafts − Support target beside shaft − Pull straight back − Slight twist helps
• Retrieve overshot arrows as a group − Bow across target face as
signal to other shooters − Arrow upright in butt as
signal • Line captain follows group back
to line
Have instructors check each step with their shooters as the line captain walks the group through a shot. Parents, junior leaders or other instructors should back up the coach in every coach-pupil pair. Repeat until all members have shot an end of three arrows. Ensure that the line captain leads the group in retrieving all arrows and follows them back to the shooting line. Why is this important? Discuss their responses. Demonstrate the proper way to remove arrows from a shooting matt, butt or target. Let each member practice in turn. Remind shooters about leaving a clear signal for other shooters when searching for overshot arrows
Saskatchewan 4-H Archery Leaders Guide Page 14
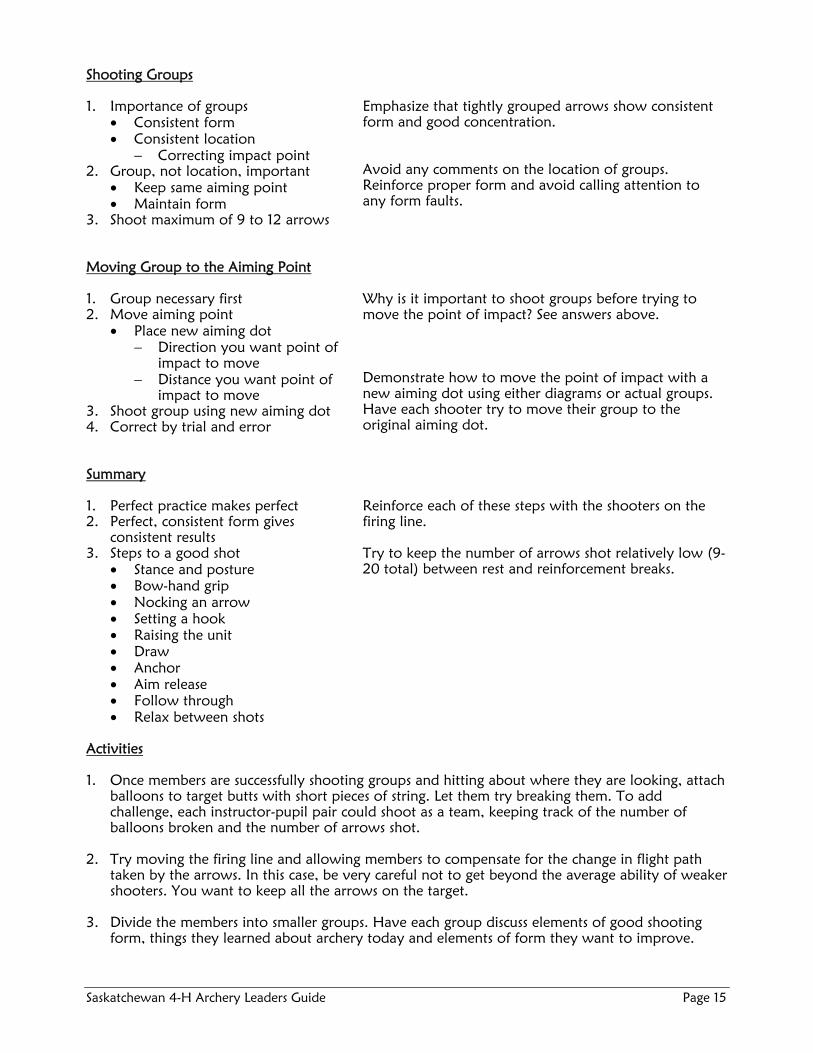
Shooting Groups 1. Importance of groups
• Consistent form • Consistent location
− Correcting impact point 2. Group, not location, important
• Keep same aiming point • Maintain form
3. Shoot maximum of 9 to 12 arrows
Emphasize that tightly grouped arrows show consistent form and good concentration. Avoid any comments on the location of groups. Reinforce proper form and avoid calling attention to any form faults.
Moving Group to the Aiming Point 1. Group necessary first 2. Move aiming point
• Place new aiming dot − Direction you want point of
impact to move − Distance you want point of
impact to move 3. Shoot group using new aiming dot 4. Correct by trial and error
Why is it important to shoot groups before trying to move the point of impact? See answers above. Demonstrate how to move the point of impact with a new aiming dot using either diagrams or actual groups. Have each shooter try to move their group to the original aiming dot.
Summary 1. Perfect practice makes perfect 2. Perfect, consistent form gives
consistent results 3. Steps to a good shot
• Stance and posture • Bow-hand grip • Nocking an arrow • Setting a hook • Raising the unit • Draw • Anchor • Aim release • Follow through • Relax between shots
Reinforce each of these steps with the shooters on the firing line. Try to keep the number of arrows shot relatively low (9-20 total) between rest and reinforcement breaks.
Activities 1. Once members are successfully shooting groups and hitting about where they are looking, attach
balloons to target butts with short pieces of string. Let them try breaking them. To add challenge, each instructor-pupil pair could shoot as a team, keeping track of the number of balloons broken and the number of arrows shot.
2. Try moving the firing line and allowing members to compensate for the change in flight path
taken by the arrows. In this case, be very careful not to get beyond the average ability of weaker shooters. You want to keep all the arrows on the target.
3. Divide the members into smaller groups. Have each group discuss elements of good shooting
form, things they learned about archery today and elements of form they want to improve.
Saskatchewan 4-H Archery Leaders Guide Page 15
Section 3 – Instinctive Shooting with a High Anchor Objectives 1. Demonstrate the ability to shoot effectively
using instinctive shooting techniques and proper form.
2. Practice the elements of safe, responsible and accurate archery shooting in a coach-pupil context.
3. Demonstrate the ability to shoot groups and move them to the desired point of impact without the aid of sights.
4. Have fun while learning. Roles for Junior Leaders • Serve as line captain, scorer or assistants. • Demonstrate shooting technique and ways
of correcting the point of impact.
• Observe coach-pupil teams to reinforce elements of proper shooting form.
• Assist shooters having particular difficulty. • Assist with locating overshot arrows. • Prepare balloons or other materials for the
fun shoot. • Conduct, score or officiate at the fun shoot. Parental Involvement • Arrange or provide transportation to the
range. • Arrange for or provide refreshments., • Give personal examples of shooting
experiences. • Participate in the fun shoot, giving both
coach and pupil a chance to teach an adult.
Teaching Outline Introduction Presentation Application
1. Stance
• Feet • Posture • Head • Hips • Shoulders
2. Hand positions • Bow hand and grip • Elbow rotation • String hand and hook • Grip on string
3. Drawing process • Raised as unit • Flexing elbow • Pulling elbow back • Fixing on anchor point
4. Anchor and aim • Consistent anchor point • Target concentration
5. Release • Relax fingers • Pull elbow back
6. Follow through • Fingers flow along face • Bow rocks forward • Hold until arrow hits target
What are the basics of good archery shooting form? Have members list the elements of form that lead to consistently good shooting. Have members or junior leaders demonstrate proper shooting form step by step. Have shooters mimic the process without equipment.
Saskatchewan 4-H Archery Leaders Guide Page 16

Conduct Active Shooting Sessions Live Shooting With Aiming Dot 1. Caution “coaches”
• Watch form • Reinforce proper form • Avoid citing poor form
2. Caution shooters • Perfect practice • Concentrate on form • Concentrate on groups
3. Repeat until satisfied
Remember to pause frequently to let members rest. Avoid going more than 2-4 ends without resting, reinforcement and positive evaluation. Use comparison with shotgun shooting of throwing a ball.
Live Shooting with Target Face 1. Compare groups with “dot groups”
• Increase in group size • Increase in aiming area • Concentrate on small shot
2. Move groups to gold using the techniques from last session
How many had bigger groups this time than on the dot target? Compare size of “aiming” points. Reinforce proper form and concentration on a small spot. Refer to previous lesson for form.
Practice with Live Shooting 1. Light competition
• Emphasis on improvement • Personal progress
2. Change distances or games • Avoid boredom or excess
challenge • Introduce game for fun
− Balloons − Bow bird − Clout
3. Conclude with summary and review • Steps in good shooting • Perfect practice • Consistent form
4. Repeat lesson until satisfied
Introduce one or more of the proposed activities to offer a different type of shooting experience for members. Have members review the activities of the day and discuss things they need to practice to help their shooting. The lesson may be repeated as many times as necessary to have members shooting confidently. If it is repeated, be sure to vary the format to keep interest high.
Activities 1. Have small groups repeat the steps of good archery shooting form, reinforcing the steps. 2. Conduct a shoot, using one or more of the games listed. Let members shoot within their known
accuracy range, and be sure that all of them have a reasonable chance for success. Try multiple events if time permits.
3. Discuss form with the group, letting each one discuss parts of the action they find difficult. Also
discuss what steps they might take to correct and practice that form.
Saskatchewan 4-H Archery Leaders Guide Page 17

Section 4 – Shooting With Sights Objectives 1. Demonstrate ability to shoot effectively
using simple pin sights and proper shooting form.
2. Practice the elements of safe, responsible and accurate archery shooting in a coach-pupil context.
3. Demonstrate the ability to shoot groups and adjust the sights to move the point of impact to the desired location.
4. Have fun while learning. Roles for Junior Leaders • Serve as line captain, scorer or assistants. • Demonstrate techniques.
• Observe coach-pupil teams to reinforce elements of proper shooting form.
• Assist shooters having particular difficulty. • Prepare balloons for the fun shoot. • Score or officiate at the fun shoot. Parental Involvement • Arrange or provide transportation to the
range. • Assist with locating overshot arrows. • Arrange or provide refreshments. • Share personal shooting experiences. • Participate in the fun shoot, giving both
coach and pupil a chance to teach an adult.
Teaching Outline
Review of Basic Shooting Form Presentation Application
1. Stance
• Feet • Posture • Head • Hips • Shoulders
2. Hand positions • Bow hand and grip • Elbow rotation • String hand and hook • Grip on string
3. Drawing process • Raised as unit • Flexing elbow • Pulling elbow back • Fixing on anchor point
4. Anchor and aim • Centered under chin
− Consistent anchor Cleft of chin Center of lips Tip of nose
• Reasons for low anchor − Sight adjustment room − Raising rear sight − Longer range shooting
Repeat the review from the previous to sections. Discuss and demonstrate the low (under the chin) anchor and checkpoints to be sure it is consistent. Why is it helpful to lower the anchor point? Note the relationship to raising the rear sights on a rifle or pistol.
Saskatchewan 4-H Archery Leaders Guide Page 18

• Process − Raise chin slightly − Draw string to center − Lower chin until lips and tip
of nose touch string • Release
− Relax fingers − Pull elbow back
• Follow through − Fingers flow along neck − Bow rocks forward − Hold until arrow hits target
Demonstrate and have each member practice the low anchor without equipment or with an airbow. Repeat with live shooting on range. Watch forearm alignment with the arrow shaft.
Setting up to Shoot with Sights 1. Making a pin sight
• Put tape on back of the bow at the sight window
• Align bow with target ad check approximate level of sight window with bull
• Insert pin between tape and back of bow at noted spot
• Align pinhead with outside edge of arrow
2. Shoot three arrows • Consistent aiming point • Consistent anchor
3. Chase group center with pin • Low arrow: lower pin • High arrow: raise pin • Left arrow: move pin left • Right: move pin right
4. Repeat trial and error until arrows hit where aimed
5. Mark tape for distance and archer 6. Repeat for other distances
Have an adult or junior leader assist members to set up their sights. Emphasize the need for tight groups in order to properly adjust sights. How do the anchor point and the eye form a rear sight? Demonstrate sight adjustment and the change in impact point. Stress importance of using the same aiming point and good groups.
Sight Selection 1. Target sights
• Extended sight bar • Long sight radius
2. Hunting sights • Single pin • Multiple pins • Lighted pins • Tree-stand sights
Demonstrate bows with different types of sights. Discuss reasons for the single pin and the long sight radius. Emphasize precise aiming. Discuss advantages and disadvantages of the various hunting sights. Why might you want a lighted pin or a special sight for shooting from tree stands? Note the need for consistent form and sights that do not confuse the archer during a time when excitement may be high.
Saskatchewan 4-H Archery Leaders Guide Page 19

Other Gear 1. Release aids
• Clean release • Extra equipment to carry • Potential for errors
− Forgetting it − Improper use
2. Aperture sights • Precise aiming • Better scores • Loss of light • Confusion during shot
3. Other gear and gadgets
Demonstrate the use of a mechanical release and discuss the advantages and disadvantages. Have members who have used them, or who have quit using them discuss why. Why might an archer use a string peep in field shooting or hunting? Discuss some possible advantages and disadvantages. Discuss and demonstrate addition items of your choice.
Activities 1. Use coach-pupil method to check shooting form and sight adjustment on the range. 2. Let members set the sights on their bows for the type of shooting and distances used. Consider
the type of shooting the member is planning to do when selecting a sight combination. 3. Illustrate and demonstrate sight correction procedures and proper adjustment of sights. 4. Hold a shoot with courses of fire appropriate for skill levels of members. Use a handicapping
system or some other type of grouping to make sure members compete on an equal basis. 5. Hold a novelty shoot where members can use sights if they desire. Section 5 – Shooting Compound Bows Objectives 1. Understand the functioning and variety of
compound bows. 2. Be able to select compound bows to fit
their uses. 3. Be able to match archery equipment for
optimum performance. 4. Develop shooting skill with compound
bows. 5. Have fun while learning. Roles for Junior Leaders • Demonstrate use of bows.
• Demonstrate trajectory curves. • Aid shooters with equipment. • Serve as assistant range officers or line
captains. • Score targets. Parental Involvement • Conduct shooting demonstrations. • Arrange or coordinate transportation. • Arrange or provide refreshments. • Assist in record keeping, scoring or range
management.
Saskatchewan 4-H Archery Leaders Guide Page 20

Teaching Outline Introduction Presentation Application
1. Bow materials
• Wood • Composites • Fiberglass • Glass composites • Graphite and boron
2. Bow styles • Longbow • Reflex • Recurve • Compound
Discuss the changes in archery equipment over time. Emphasize the similarity in functions and recent advances in archery engineering. Demonstrate materials if available. Demonstrate bows or show illustrations of various designs.
Basic Compound Bow Design 1. Basic parts
• Riser or handle • Limbs • Wheels or cams • Cables • String
2. Compound bow advantages • Mechanical advantage
− Relaxation at full draw − Ease of holding anchor − Redistributing draw force
• Increased energy transfer − Greater energy recovery − Higher arrow speed − Reduced arrow stress
3. Compound bow disadvantages • More moving parts
− Noise − Complex tuning − Possible damage
• Aesthetics • Not allowed in FITA events
4. Comparison of compound types • Wheels
− Multi-wheel bows − Two-wheel bows
• Cams • Cam limbs • Overdraws • Arrow mass and speed
− Flatter trajectory − Sensitivity to form
Pivot point of bow and arrow not the same
Exaggeration of errors
Point out the parts of a typical compound bow. Illustrate several types if possible. Diagram draw force curves of various bow types. Ask members to discuss some advantages and disadvantages of the various types. Supply any basic elements they miss. Compare draw force curves, energy transfer and shooting “feel” of wheels, cams and cam limbs. Discuss and illustrate overdraw use and need for very consistent form.
Saskatchewan 4-H Archery Leaders Guide Page 21

− Minimum arrow mass of six grains per pound of draw weight
Shooting Compound Bows 1. Basic shooting form 2. Extra noise sources
• String noise • Cable noise • Rest noise • Axle noise
3. Equipment safety precautions • Mismatched equipment • Damaged equipment
4. Trajectory comparison
• Relationship of velocity and trajectory Acceleration of gravity Time in flight
• Flatter trajectory increases ability to hit Reduced demand on range
estimation Quicker flight time
Ask members to review the basic elements of good shooting form. Demonstrate ways of reducing noise levels. Stress the potential danger of mismatched equipment and the need to inspect for damage. Have members or assistant shoot compound and recurve bows of like draw weight using similar arrows and arrows matched to the bows. See Appendix 2 “Trajectory and Trajectory Experiments”. Ask members to compare the results and discuss possible reasons for differences observed. Summarize findings and use of compound bows.
Activities 1. Have members try a variety of compound bow types to compare the performance and “feel”. 2. Have members practice shooting a compound bow of their choice until they are proficient. 3. Have members shoot a compound bow with several different arrow weights to see the impact
on arrow speed and accuracy. 4. Have members select and set up a compound bow for target or hunting purposes.
Saskatchewan 4-H Archery Leaders Guide Page 22

Section 6 – Making Archery Equipment Objectives 1. Understand the basics of constructing
personal archery equipment like strings and arrows.
2. Construct selected pieces of archery equipment.
3. Develop skills related to making archery tackle.
4. Determine other types of archery equipment they may wish to make with the aid of instructors or alone.
5. Have fun while learning. Roles for Junior Leaders • Provide extra hands and tutor members
who need help.
• Demonstrate procedures for making specific items.
• Demonstrate use of personally made items. • Encourage and assist members with tasks
that give them trouble. • Conduct workshops to make a particular
item of interest. Parental Involvement • Provide shop space and equipment for
workshops. • Arrange for or provide transportation. • Assist with other types of equipment they
make. • Arrange for additional leadership on this
topic. • Arrange for or provide refreshments.
Teaching Outline Value of Making Equipment Presentation Application
1. Increases enjoyment
• Greater investment − Time − Energy − Fun
• Doing it yourself − Independence − More understanding − Personal satisfaction − Increasing involvement
2. Leopold on archery • Risk of failure • Avoiding gadgets
Ask members if they prefer homemade things like jelly, bread, berry pies or soups better than the ones they can buy in bags or cans at the grocery store. Why do we have preferences? Seek answers like just the way I like it, better quality, did it myself, etc. use the mood set to start discussion of making archery equipment. Read Leopold’s A Sand County Almanac” “A Man’s Leisure Time” to show the role of uncertainty in recreation.
Types of Equipment to Make 1. Simple equipment
• Climbing blocks • Hauling lines • Safety lines • Ground quivers • Strings • Arro9ws • Wall bow stringers • Dip tubes
Show examples of various things a young archer can make to increase their enjoyment of the sport.
Saskatchewan 4-H Archery Leaders Guide Page 23
2. Moderately complex equipment • String jigs • Bow or arrow stands • Bow stringers • Wooden bow boxes • Bow or arrow racks • Target stands
3. Complicated equipment • Tree stands • Cresting lathes • Cut-off tools
Use either personally constructed or purchased equipment as examples. Point out that some archery equipment projects may be major.
Making Arrows 1. Materials needed
• Shafts • Nocks • Adapter inserts or points • Fletching material • Adhesives • Lacquer
2. Equipment needed • Fletching jig • Dip tube • Cresting lathe
3. Procedure • Shaft selection
− Materials − Spine − Length
• Shaft preparation − Cleaning
Cleanser and hot water Lacquer thinner Alcohol
− Base lacquer dip Optional but wise Bonding base Ventilation needed
• Clean base of fletching − Remove mold release agents − Lacquer thinner or alcohol
• Nock application − Clean, true base for nock
Sandpaper pinched against nock taper
Rotate shaft One drop of cement
− Straight alignment Press and twist Check alignment
• Adapter or point installation − Adhesives
Meltable adhesives Epoxy
If a workshop is going to be held, be sure to prepare members for it by handing out a list of needed materials after this demonstration is completed. See Appendix 3 “Making Arrows”. Have a junior leader or parent demonstrate making one or more arrows while you discuss the process. Use arrows in different stages of completion as examples. Point out dangers of using these materials without adequate ventilation. Demonstrate this and discuss its importance. Explain the importance of the steps in this process. Emphasize the need to have the insert in line with the shaft.
Saskatchewan 4-H Archery Leaders Guide Page 24

− Alignment with shaft − Precautions
Avoid getting adhesive Inside threads Test for alignment
• Fletching − Select fletching pattern − Adjust for proper vane
placement − Apply fletching of choice
Feathers more forgiving Vanes faster and tougher Clamp according to
directions on adhesive • Cresting
− Personal signature − Arrow identification
Discuss the uses of different fletching patterns and materials. Explain some factors in selecting vanes or feathers. Illustrate the impact of poor quality bonding, using a junk shaft and poorly applied fletching.
Making A Bowstring 1. Materials needed
• String material − Dacron − Fastflight
• Nylon serving thread • Monofilament serving material • String wax • Chalk or grease pencil
2. Equipment needed • String jig • Serving jig
3. Procedure • Adjust string jig to length
− Use old string − Set on previous mark
• Attach string material to lower loop post
• Wind string material tightly around posts − Follow manufacturer’s
instructions − Use for fine tuning − Finish on same end as begun
• Rotate end block • Serve center of lower loop • Rotate end block • Wrap loose ends of string
material around loop base • Finish serving end loop • Whip finish • Mark location of upper look • Repeat above process with upper
look taking care to keep the upper look centered
Have a junior leader or other adult construct a bowstring as a demonstration. Discuss the uses of each material and piece of equipment. Demonstrate using an old bowstring. Illustrate the proper way to attach string material. Discuss why a single broken strand in a string is significant. Be sure the lower loop is properly sized to fit the bow fairly snugly. Demonstrate the whip finish and have members try to do one on scraps of material.
Saskatchewan 4-H Archery Leaders Guide Page 25
• Twist string to adjust length • Wax string and work with small
leather pad • Switch to monofilament serving
material • Mark center serving location • Push monofilament end through
enter of string • Serve center of string • Whip finish monofilament • Place on bow and set nocking
point(s)
Discuss need for keep the loop centered. Discuss the purpose of the center serving and the value of monofilament for this purpose.
Making Climbing Blocks 1. Materials needed
• 2 x 4 (inch) stock • Rope (400 pound test) • Camouflage paint as desired
2. Equipment needed • Saw • Drill with ½ inch bit • Sander or rasp
3. Procedure • Cut 5-inch section of 2 x 4 • Locate center of 2 inch side
about 1 3/;4 to 2 inches from top• Drill ½ inch hole at mark • Rasp or sand all eight corners to
a slight bevel • Sand bevels smooth • Spray paint to camouflage • Pass one end of rope through
hole, around block and through once again
• Tie bowline on end of rope • Melt ends of rope to seal
Pass around some climbing blocks and demonstrate or discuss their use. Point out that many of the items needed are available as scraps. A drill press is helpful but not necessary. Measurements are not critical. Discuss the significance of the beveled corners. Demonstrate and have members’ practice tying a bowline.
Making a Hauling Line 1. Materials needed
• Parachute cord or similar line • Small snap(s)
2. Equipment needed • Knife • Small lighter or match
3. Procedure • Cut line to desired length • Seal ends with lighter • Secure snap(s) at end(s)
If members are interested in bowhunting, have each one make a hauling line. Demonstrate the use of a hauling line for members, and let them practice using their own.
Saskatchewan 4-H Archery Leaders Guide Page 26
Making a Safety Line 1. Materials
• Heavy breaded Dacron line
2. Equipment needed • Knife • Lighter or match
3. Procedure • Cut line to desired length
− Depends on size of shooter and tree diameter
− 15 to 25 feet usually enough • Seal ends of rope with flame
− Use caution 4. Using a safety line
• Tie a bowline around the upper body
• Rotate the knot to the center of the back
• Attach the rope to the tree − Chest high or higher − Enough line to shoot − Keep line short enough to
prevent stepping off stand 5. Automotive or airline seatbelts may
be used too
Demonstrate the use of a safety line or belt. Stress that every tree stand hunter should use a safety line. Have each member make a shooting safety line and practice using it from a low tree stand. Discuss the reason for keeping the line high on the body and relatively short. Demonstrate how the safety line can help in shooting.
Other Items to Make 1. Ground Quivers 2. Tree Stands 3. Skinning gambrels 4. Bows 5. Leather accessories 6. Flint arrowheads 7. Others you determine 8. Care, caution and effort
See Appendix 4 “Ground Quivers” Brainstorm other items that could be made to enhance archery or bowhunting enjoyment.
Activities 1. Have members complete a selected project from the lesson. Select one that will be useful to
nearly all members, like a hauling line or a shooting safety line for bowhunters. 2. Have members make at least one arrow, simultaneously with the entire group. 3. Have members participate in making one or more bowstrings. Demonstrate the proper
technique first, and then let members try their hand at applying the servings.
Saskatchewan 4-H Archery Leaders Guide Page 27
Section 7 – Bow Tuning Objectives 1. Understand the principles of bow tuning. 2. Set up a bow for their shooting style and
purposes. 3. Understand relationships among various
bow tuning factors. 4. Have fun while learning.
Roles for Junior Leaders • Assist members with interpreting bow
tuning situations. • Demonstrate tuning problems and
solutions. • Supervisor range use and operation. Parental Involvement • Arrange for or provide transportation to
the range. • Arrange for or provide refreshments. • Reinforce tuning solutions at home.
Teaching Outline Importance of Tuning Equipment Presentation Application
1. Balance and adjustment 2. Effects on performance
• Accuracy • Success in shooting • Safety
3. Typical tuning elements • Arrow characteristics
− Shaft stiffness or spine − Diameter − Wall thickness − Weight − Shaft length − Point mass − Fletching − Type − Style − Amount
• Bow characteristics − Nocking point location − Arrow plate location − Plate or plunger tension − Feather or vane clearance − Noise reduction
Why do you think it could be important to have archery equipment properly tuned? Seek answers that cover the range of reasons for tuning. Why parts of each bow and arrow combination should be considered in balancing and tuning your equipment to meet your shooting purposes? Discuss all responses and add any that might not have been considered.’’ Note that every combination of archer, bow, arrow and other equipment tends to alter the tuning at least slightly.
Matching Shafts to Shooters 1. Archer’s paradox
• Arrow bends to fly straight • Spine or stiffness critical
Introduce the notion of the archer’s paradox: arrows have to bend in order to fly straight.
Saskatchewan 4-H Archery Leaders Guide Page 28

2. Selecting length • Differs with purpose
− Target arrows cut to actual draw length
− Hunting arrows cut slightly long
• Spine changes with length − Shorter arrow stiffer than
longer one of same diameter Ratio of diameter to
length important Relate findings to spine
chart • Speed and momentum change
with length − Mass increases with length − More energy needed to
accelerate greater mass − Momentum the product of
mass and velocity 3. Selecting stiffness
• Using selection guides − Draw weight − Shaft length − Choices of shafts
Diameter Wall thickness Material
• Relationship to length • Relationship to point mass • Influence of style and form
4. Effect of spine variation • Deviation to bow-hand side
− Too stiff − Improper bow set up − Shooting form
• Deviation to string-hand side – too soft − Improper bow set up − Heavy arrowhead − Shooting form
Why having arrows too long or too short not be wise? Discuss all answers, referring back to first section. Use a draw-check arrow, have each pair of shooters record their actual draw length. Demonstrate by having a volunteer attempt to bend two pieces of thin dowel. Why is the short one harder to bend? Note that the same applied to arrow shafts. Which can you throw farther – a baseball or a lead ball of the same size? Discuss the reasons. Provide and have members study a shaft selection chart. Note that several weights or diameters of shafts may be listed for a given draw weight and length. Point out that bowhunters may prefer too stiff a shaft to one that is too soft, but personal shooting style and other factors have a strong influence. Urge each one to experiment until they find the optimum shaft for their bow, purpose and shooting style. Illustrate the effects of these factors by having an assistant shoot several groups using carefully selected shafts. Caution: do not use excessively soft shafts in heavy bows - they may shatter under pressure!
Fletching and Points 1. Purpose
• Assist in flight control • Provide stability
2. Fletching types • Feathers
− More resistance − More forgiving
• Vanes − Less affected by weather − Less drag – faster
Use an arrow for a visual aid. What purpose does the fletching serve? Demonstrate and discuss the types and styles of fletching material available. Lead members in considering the factors in selecting a proper fletching type and style for some selected purposes.
Saskatchewan 4-H Archery Leaders Guide Page 29

− More sensitive to changes in release
3. Styles and amount • Styles
− Spin wings − Straight fletch − Offset fletch − Helical fletch − Flu-flu fletching − Others
• Materials − Soft or stiff plastics − Feathers − Fur
• Amounts − Adequate for task
Small amounts for light target shafts
Larger ones for heavy hunting shafts
Extreme amount to limit flight
− Balancing speed and control − Personal preference and style
4. Points • Form follows function
− Mass Target only Practice for hunting
− Shape Conical Bullet Field point Broadhead Blunt Other types
Discuss trade-offs in speed and control, using specific situations as examples. Pass around samples of different fletching materials for close up observation. Use arrows for different purposes as examples to start a discussion of this topic. Have a leader shoot several styles under different conditions to show effect or discuss their reasons for choosing a given style, type and amount. Display and discuss several types of heads. Discuss advantages and disadvantages of the various shapes and the reasons for more weight in heads used for hunting practice.
Tuning Considerations for Bows 1. Nocking point location
• First adjustment for vertical flight stability
• Two low or too high causes porpoising or planning
• Typically about 9 millimeters (3/8 inch) above arrow rest
• Placement more critical when shooting broadheads
• Bare shaft correction method 2. Arrow plate thickness or cushion
plunger adjustment • Second adjustment for horizontal
flight stability • Errors cause fishtailing • Bare-shaft method
Demonstrate the influence of moving the nocking point too high or too low by moving the arrow on the string.l discuss the critical placement of nocking points with broadheads. Demonstrate the bare-shaft method of adjusting this feature. Demonstrate this feature using a cushion plunger, adjustable arrow plate or thin layers of leather or moleskin. Demonstrate the bare-shaft method and pass out samples of bow or cushion plunger tuning directions from archery manufactures.
Saskatchewan 4-H Archery Leaders Guide Page 30

• Other instructions for tuning − Manufacturer − Good manual or text
3. Checking arrow clearance • Shaft or vanes striking bow
during shot may cause poor shooting
• Adjust for clearance with cushion plunger, arrow plate or change in peak weight − String-hand side – too stiff or
peak weight low − Bow-hand side – too soft or
peak weight high • Re-checking for fishtailing after
checking clearance
Spray foot powder on the riser near the arrow rest to demonstrate ways of checking for vane clearance.
Basic Bow Tuning 1. Select appropriate shaft size and
length 2. Select appropriate fletching 3. Tune for vertical stability (getting rid
of porpoising) 4. Tune for horizontal stability (getting
rid of fishtailing) 5. Tune for clearance (re-check
horizontal tuning afterward)
Suggest a workshop on bow tuning (at this time or later) to adjust personal equipment for optimal performance.
Activities 1. Have each member tune his or her bow in a clinic setting. 2. Have assistants or shooters fire groups and let members analyze what tuning considerations
should be made. If possible, include some form or dominant eye faults to challenge them.
Saskatchewan 4-H Archery Leaders Guide Page 31

Section 8 – Target Archery Games Objectives 1. Understand some of the shooting games
available in the archery discipline. 2. Select a type of shooting that interests them. 3. Experience some of the shooting
opportunities available in the local area. 4. Have fun while learning. Roles for Junior Leaders • Demonstrate various shooting games. • Act as line captains, scorers and judges.
• Lead groups of shooters through courses of fire.
• Present descriptive discussions of shooting games.
Parental Involvement • Arrange for or provide transportation to
field events. • Arrange for or provide refreshments. • Arrange for and/or manage specific
shooting events. • Conduct shoots during field trips or
workshops.
Teaching Outline
Archery Games Varied Presentation Application
1. Informal shooting games
• Roving • Other practice games
− Backyard practice sessions − Balloon − Other types
2. Formal archery games • Target archery • Field archery • Bowhunting targets • Novelty shoots
− Creativity reigns − Some formal types
How many have ever shot a target archery game? Try to extract idea that any shooting can be a type of target archery. Point out various types of formal games but keep descriptions brief.
Target Archery 1. International shooting (FITA)
• Limited to conventional tackle • Outdoor FITA events
− Faces 122 cm and 80 cm Five colour targets 1-10 scoring 1440 points possible
− Twelve ends of 3 arrows at each distance Men: 30, 50, 70, 90 meters Women: 30, 50, 70, 70 meters Juniors: 12 to 15 years old - 30,
40, 50, 60 meters Cadets: Under 12 years old - 15,
25, 35, 45 meters
Outline rules and types of shooting in FITA/NAA competitive events. If possible, set up event based on rules of one or more events listed. An extremely valuable experience for most archery participants is to observe or participate in an organized shoot of some type. Local archery clubs may be willing to put on a shoot for 4-H members, or invite them to participate in the regular shoots of the club. Explore opportunities close to home before deciding what your limitations are.
Saskatchewan 4-H Archery Leaders Guide Page 32

Saskatchewan 4-H Archery Leaders Guide Page 33
• Indoor FITA events − Target faces
Five colours 1 – 10 scoring 40 cm face at 18 meters 60 cm face at 25 meters 30 arrows in 10 ends 300 possible points
2. NAA events • NAA 900 Outdoor
− 15 ends of 6 arrows − 5 ends per distance
Adults: 40, 50, 60 meters Juniors: 30, 50, 50 meters Cadets: 20, 30, 40 meters
− Five colour, 122 cm faces • Easton Team event
− Similar to − NAA 900 − 12 ends of 5 arrows − 4 ends per distance
• Columbia Round − Similar to NAA 900 − 12 ends of 6 arrows − 4 ends per distance − Adults: 30, 40, 50 meters − Juniors: 20, 30, 40 meters
• Collegiate 600 − 12 ends of 5 arrows − 4 ends per distance – 30, 40, 50
meters − Five colour, 122 cm faces
• Durye Round − 15 to 18 year old youths − Five colour, 80 cm faces − 30 yards − 90 arrows in 15 ends of 6
3. NFAA • Multiple classes based on equipment
being used • Flint rounds
− 56 arrows from 7 positions − Scoring 3, 4, 5 − Four arrows per end − Positions for 30-yard flint round
25 yards, 12-inch face 20 feet, 6-inch face 30 yards, 12-inch face 15 yards, 6-inch face 20 yards, 12-inch face 10 yards, 6-inch face 12-inch face, 1 arrow each at 30,
25, 20 and 15 yards • Positions for 20-yard flint round
− 50 feet, 8-inch face
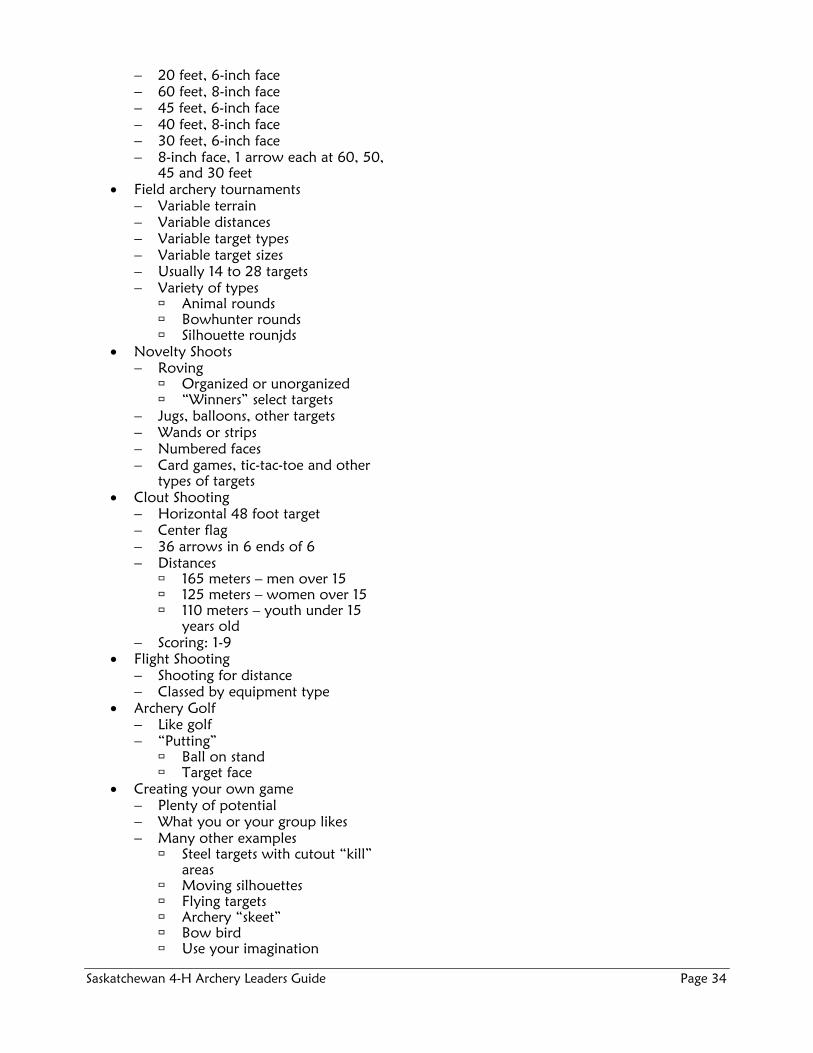
Saskatchewan 4-H Archery Leaders Guide Page 34
− 20 feet, 6-inch face − 60 feet, 8-inch face − 45 feet, 6-inch face − 40 feet, 8-inch face − 30 feet, 6-inch face − 8-inch face, 1 arrow each at 60, 50,
45 and 30 feet • Field archery tournaments
− Variable terrain − Variable distances − Variable target types − Variable target sizes − Usually 14 to 28 targets − Variety of types
Animal rounds Bowhunter rounds Silhouette rounjds
• Novelty Shoots − Roving
Organized or unorganized “Winners” select targets
− Jugs, balloons, other targets − Wands or strips − Numbered faces − Card games, tic-tac-toe and other
types of targets • Clout Shooting
− Horizontal 48 foot target − Center flag − 36 arrows in 6 ends of 6 − Distances
165 meters – men over 15 125 meters – women over 15 110 meters – youth under 15
years old − Scoring: 1-9
• Flight Shooting − Shooting for distance − Classed by equipment type
• Archery Golf − Like golf − “Putting”
Ball on stand Target face
• Creating your own game − Plenty of potential − What you or your group likes − Many other examples
Steel targets with cutout “kill” areas
Moving silhouettes Flying targets Archery “skeet” Bow bird Use your imagination

Saskatchewan 4-H Archery Leaders Guide Page 35
Activities 1. Shoot at least one type of formal target archery game. If possible try several different types of
target shooting during a series of field trips where the sites and the opportunities present themselves.
2. Have members’ research different archery games and present a summary of the rules and courses
of fire to the group. 3. Attend an archery shoot and observe the processes used in conducting it. Assist or co-sponsor a
shoot if the members are prepared to do so. 4. Organize and conduct an invitational archery shoot of your choice for youth in your area or in
neighbouring communities.
Saskatchewan 4-H Archery Leaders Guide Page 36
Determining Eye Dominance Appendix 1 Most people have a dominant eye, just as they have a dominant hand or foot. When a person looks at an object with both eyes, the dominant eye aligns directly with the object unless an obstruction interferes with a clear line of sight. Under normal conditions, when a finger is pointed at an object, or two or more objects are aligned visually, the dominant eye determines the alignment. Just as some people are truly ambidextrous, a very small number of people have indeterminant eye dominance. The majority, however, have a dominant eye. In most cases eye dominance and hand dominance are on the same side, but many people are cross dominant. That is, their handedness and eyedness are on opposite sides. Humans have binocular vision - they get slightly different images from each eye and blend them in the brain to yield one image and a sense of depth or distance. With both eyes open, you have a wider field of vision with more peripheral vision and better motion detection. In short, you simply see better when both eyes are used. Experience shows that shooting skills are learned more easily and often better developed when a shooter learns from the
dominant eye side. Where eyedness and handedness are the same side, new shooters easily use the dominant side. Cross dominant shooters have a greater challenge, but they do better when they learn to shoot with the dominant eye. Some shooters, particularly those with successful experience in shooting with the non-dominant eye, are reluctant to switch. The switching process usually involves a brief period of reduced success and frustration, followed by improved skill levels beyond their original level. Some experienced shooters have learned to shoot-one-eyed, closing the dominant eye or obstructing it with a shield, blinder, spot of tape or a small object on the lens of the shooting glasses. Others have learned to override their dominant eye through practiced concentration or to compensate in some other fashion. Less than 1 percent of all shooters must shoot one-eyed because of dominance switching. In most cases, the shooter learns to use both eyes and shoot from the dominant eye side. Learning one-eyed or with the dominant eye obstructed or closed increases stress and fatigue and reduces concentration and quickness. Results indicate reduced performance levels,
increased frustration for the shooter and slower learning. Learning to shoot well is a challenge. You need every advantage to meet that challenge effectively. Learning from the dominant eye side is a major advantage. How to Determine Eye Dominance Four basic methods for determining eye dominance are described. Those that provide a check for "cheating" are more effective in an instructional setting. Regardless of the method selected, the exercise should be repeated several times. Instructors should remain alert for eye dominance related problems with shooting performance. 1. Coach-Pupil Method Shooters should get into their coach-pupil pairs, standing several arm lengths apart and facing each other squarely. The pupil should place one thumb over the other, then cross the fingers of the top hand over those of the bottom one. This leaves a small, triangular opening. Raise the hands, keeping both eyes open and center the coach's nose in the triangular opening. At this point the coach should note which eye is visible in

the opening. Then the pupil should bring his or her hands slowly back to the face, keeping the coach's nose in the opening. The hands should come to the dominant eye. Coaches must watch closely for wavering between the eyes, an indication of cheating or forcing the hands to a predetermined eye. The exercise should be repeated several times to confirm the original results with both partners checking their eye dominance.
With a pointing method, a distant object or a partner is used. The finger is pointed naturally at the object with both eyes open and the face square to the object. The eyes are covered or closed alternately. When the dominant eye is closed or covered the finger appears to jump away from the original location.
Option: Shooters could cup their hands together, leaving small openings between the bases of the little fingers and the thumbs. A card or a sheet of notebook paper with a small hole centered in it could also be used. 2. Distant-Object Method Use any of the methods of making an aiming devise outlined above. Center a distant object in the opening. Make sure both eyes stay open and face the object squarely. Without losing sight of the opening, bring the hands, card or paper to the face. The aiming devise will come to the dominant eye. 3. Finger-Point Method
4. Tube Methods Kaleidoscopes, toilet paper tubs and similar objects can be used with many young people to determine eye dominance. When the person is not aware of being tested for eye dominance, the tube will almost always be brought to the dominant eye. This also occurs with spotting scopes, telescopes and similar tools when one-eyed viewing is needed. Troubleshooting for Coaches Some shooters will bring the opening back to their own noses because they are looking at the paper or their hands rather than at the target. Those who use the finger-point method will see two fingers if they focus on their hand rather than on the target. If inconclusive results are obtained, try another
method. Make note of that shooter, however, and watch for evidence of switching dominance in the act of shooting. Consistently missing to one side of the target usually indicates an eye dominance related problem.
A Note of Caution Vision problems can have a serious impact on shooting ability. Often they go undetected by the shooter or those around them. Unless you are an ophthalmologist or optometrist, avoid diagnosing vision problems, but be aware of the types of problems a shooter with vision problems may face. Discuss any potential problems you observe with the shooter and his or her parents. Like teachers who notice reading problems or other vision related difficulties, the shooting instructor may notice things that even the shooter misses. Finally, be sure that all shooters are wearing adequate eye protection while they are on or near the firing line. Some people recommend the use of shooting glasses even for archers. Eyes are precious and vision is vital to shooting. Let's do our part in protecting them.
Saskatchewan 4-H Archery Leaders Guide Page 37
Trajectory and Trajectory Experiments Appendix 2
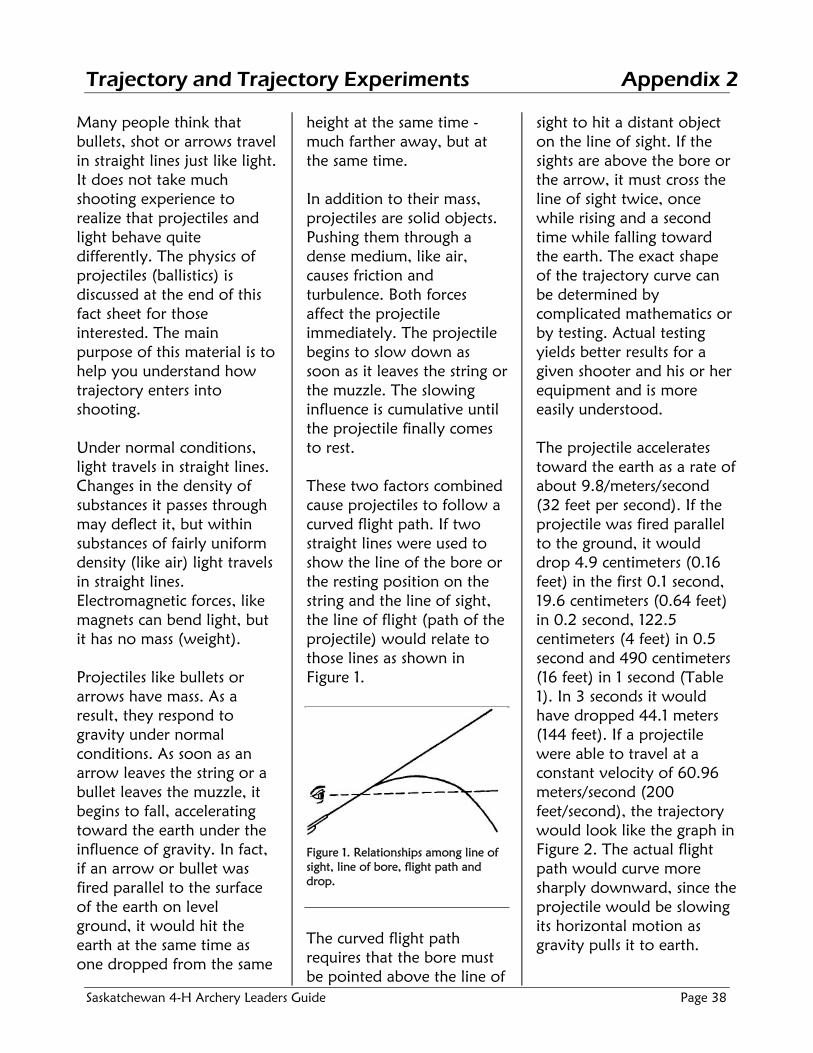
Many people think that bullets, shot or arrows travel in straight lines just like light. It does not take much shooting experience to realize that projectiles and light behave quite differently. The physics of projectiles (ballistics) is discussed at the end of this fact sheet for those interested. The main purpose of this material is to help you understand how trajectory enters into shooting. Under normal conditions, light travels in straight lines. Changes in the density of substances it passes through may deflect it, but within substances of fairly uniform density (like air) light travels in straight lines. Electromagnetic forces, like magnets can bend light, but it has no mass (weight). Projectiles like bullets or arrows have mass. As a result, they respond to gravity under normal conditions. As soon as an arrow leaves the string or a bullet leaves the muzzle, it begins to fall, accelerating toward the earth under the influence of gravity. In fact, if an arrow or bullet was fired parallel to the surface of the earth on level ground, it would hit the earth at the same time as one dropped from the same
height at the same time - much farther away, but at the same time. In addition to their mass, projectiles are solid objects. Pushing them through a dense medium, like air, causes friction and turbulence. Both forces affect the projectile immediately. The projectile begins to slow down as soon as it leaves the string or the muzzle. The slowing influence is cumulative until the projectile finally comes to rest. These two factors combined cause projectiles to follow a curved flight path. If two straight lines were used to show the line of the bore or the resting position on the string and the line of sight, the line of flight (path of the projectile) would relate to those lines as shown in Figure 1.
Figure 1. Relationships among line of sight, line of bore, flight path and drop.
The curved flight path requires that the bore must be pointed above the line of
sight to hit a distant object on the line of sight. If the sights are above the bore or the arrow, it must cross the line of sight twice, once while rising and a second time while falling toward the earth. The exact shape of the trajectory curve can be determined by complicated mathematics or by testing. Actual testing yields better results for a given shooter and his or her equipment and is more easily understood. The projectile accelerates toward the earth as a rate of about 9.8/meters/second (32 feet per second). If the projectile was fired parallel to the ground, it would drop 4.9 centimeters (0.16 feet) in the first 0.1 second, 19.6 centimeters (0.64 feet) in 0.2 second, 122.5 centimeters (4 feet) in 0.5 second and 490 centimeters (16 feet) in 1 second (Table 1). In 3 seconds it would have dropped 44.1 meters (144 feet). If a projectile were able to travel at a constant velocity of 60.96 meters/second (200 feet/second), the trajectory would look like the graph in Figure 2. The actual flight path would curve more sharply downward, since the projectile would be slowing its horizontal motion as gravity pulls it to earth.
Saskatchewan 4-H Archery Leaders Guide Page 38

Figure 2. Trajectory of an idealized projectile traveling at a constant 60.96 meters/second (200 feet/second)
You can calculate the trajectory of your personal equipment as you have it set up using the worksheet attached. Shoot the same arrows throughout the experiment if possible. If not, shoot matched arrows with matched fletching. Leave the sight setting the same for all shots and use the same aiming point for each shot and all distances. Measure from the aiming point to the center of the group of arrows and carefully record the distance (+) or below (-) the point of aim for each distance. Stop shooting if the arrows are falling short (or nearly falling short) of the target. Plot the flight path of the arrows relative to the line of sight. The elevation angle can be calculated if desired by following these steps. 1. Measure the true draw
length of the arrow at full draw (the distance from the anchor point to the arrow rest).
2. Measure the height of the sight pin above the arrow rest.
3. Measure the height of the center of the eye
above the bottom of the arrow shaft at the anchor point.
4. Subtract the sight pin height from the eye height.
5. Divide the length by the true draw length.
6. The dividend is the natural sine of the angle of elevation from the horizontal
7. Use a sine table to locate the angle with the sine value.
8. Plot a horizontal line through the eye and sight the center of the target.
9. Plot a line starting with the distance from the eye to the anchor point below the line of sight at the calculated angle of elevation above horizontal. This is the line of the shaft or the line of the bore.
10. Plot the true line of flight at the distances selected.
This same procedure can be used with rifle bullets, but a longer range is needed and the differences in impact points should be recorded in centimeters or inches rather than meters or feet. For Those Who Want to Know More Ballistics is the science of projectiles. It focuses on the dynamics of projectile flight and the energy stored and released by the projectile. One of the components of
ballistics is the study of trajectory, the flight path of projectiles. In shooting, trajectory relates the straight line of sight to a target with the curved flight line of the projectile. The ballistics of bullet or arrow trajectory involves complex concepts in physics and engineering. Newton's first law, the law of inertia, states that objects tend to remain at rest or to travel in a straight line at a constant speed unless they are acted upon by an outside force. For projectiles, the forces include the energy that accelerates them initially, the acceleration of gravity, friction of the air and drag. Projectile mass, shape and even construction can influence those forces. Complex formulas have been developed to calculate the projectile's ability to retain its energy and velocity (speed in a direction). Sectional density and ballistic coefficient are two measures of the "slipperiness" of a projectile A projectile starting at rest is accelerated by the stored energy of the limbs, air charge of expanding gases of the fired round. The internal ballistics (those inside the firearm bore or while the arrow is on the rest) limits the motion to horizontal and vertical vectors (components of the total velocity of the projectile).
Saskatchewan 4-H Archery Leaders Guide Page 39

Under most conditions the horizontal velocity is greatest. External ballistics are more complex and they begin as soon as the projectile leaves the bore or the bow. The horizontal vector of velocity is measured by its horizontal speed toward the target. The vertical vector is measured by its speed upward, perpendicular to the surface of the earth. Both the horizontal and vertical vectors of velocity begin to decrease immediately. Friction and turbulence in the air reduce the horizontal velocity. The pull of gravity reduces the vertical velocity. Note that a negative acceleration or velocity in the vertical component means the projectile is moving toward the earth rather than away from it. Wind currents or the rotation of the projectile may cause a lateral movement. High initial and retained velocities result in a "flatter" trajectory. That is, the arc of the projectile from the shooter to the target is less peaked. The less time the projectile is in flight, the less outside forces influence it. The obvious conclusion is that "faster is better." However, obtaining optimum ballistic performance involves
balancing competing factors rather than simple maximization of any one factor. Limits are imposed by the chemical structure of the powder, strength of the materials used, mass of the firearm and the strength or recoil resistance of the shooter. Other factors, like barrel life, consistency in energy release, economics, projectile construction and many more reduce the upper limit toward some optimum value. Changing the single factor of the internal ballistics can result in major changes in external ballistics. Altering the mass of a projectile results in changing its shape. Both sectional density (a measure of the mass divided by the diameter or basal area) and ballistic coefficient (a measure of the bullet's ability to overcome resistance of the air, which involves sectional density in its calculation) are related to the shape of the bullet. Optimizing mass and initial velocity with performance and terminal velocity involves many factors. The results of changing bullet mass may be surprising. An empirical test could be done using bullets of similar shape and diameter but different weights. Thirty caliber bullets are available in flat-based spitzer shapes in weights from about 110
grains to 200 grains. Interested shooters could fire a test series with each bullet weight and compare trajectory curves to determine the optimum bullet weight for that shape in their rifle. Both momentum and energy are related to the velocity and mass of the projectile. Momentum is the product of the mass and the velocity. Kinetic energy (the energy of moving objects) is the product of the mass and the square of the velocity divided by two. Projectile use is a major determining factor in balancing momentum and energy. When a projectile comes to rest, the remaining energy and momentum are translated into penetration and shock. One target ranges bullets and arrows need only enough momentum and striking force to penetrate the target. The shot must have enough remaining energy and momentum to break clay targets. In hunting situations, small game arrows, shot and bullets kill by hydrostatic shock. The energy of the striking bullet displaces water in the tissue, causing immediate disruption of vital functions. Momentum is not critical, but kinetic energy is. Big game arrows kill by penetration and hemorrhage. Very little hydrostatic shock is
Saskatchewan 4-H Archery Leaders Guide Page 40

produced, so momentum is much more important than kinetic energy. Big game bullets must combine shock with adequate penetration to reach vital areas. Considering the use of the projectile adds complexity to making ballistic decisions. This may explain the large array of arms and ammunition available today. Many ballistic experiments can be tried by shooting
sports participants. Most would be worthy of entry in science fair competitions under the categories of physics and engineering. Altering one factor at a time, such as sectional density or velocity, may offer easier explanations of the events taking place. For the shooter more interested in performance on targets or game, the arms and ammunition companies have tables that can assist in
selecting the appropriate combinations of factors to do the job at hand. Wise shooters will test the listed values for themselves using their own firearms, particularly where the shape of a trajectory curve is concerned. Their observed data is much more valuable than the theoretical data from the tables.
Table 1. Theoretical values for drop from the acceleration of gravity and distance traveled for idealized projectiles fired parallel to the surface of the earth at a constant velocity of 60.96 meters/second (200 feet/second) and 914 meters/second (3000 feet/second) is given below. The lower velocity corresponds to a very fast arrow. The higher velocity approximates a high velocity center-fire rifle cartridge.
Time Distance Dropped Distance Traveled @200 ft/sec
Distance Traveled @3000 ft/sec
(sec) (cm) (ft) (m) (ft) (m) (ft) 0.1 4.9 0.16 6.1 20 91.4 300
0.2 19.6 0.64 12.2 40 182.8 600
0.3 44.1 1.44 18.3 60 274.2 900
0.4 78.4 2.56 24.4 80 365.6 1200
0.5 122.5 4.00 30.5 100 457.0 1500
0.6 176.4 5.76 36.6 120 584.4 1800
0.7 240.1 7.84 42.7 140 639.0 2100
0.8 313.6 10.24 48.8 160 731.0 2400
0.9 369.9 12.96 54.9 180 822.6 2700
1.0 490 16.00 61.0 200 914.0 3000
1.25 765.6 25.00 76.2 250 1142.5 3750
1.5 1102.5 36.00 91.4 300 1371.0 4500
1.75 1500.6 49.00 106.7 350 1599.5 5250
2.0 1960 64.00 121.9 400 1828.0 600
Saskatchewan 4-H Archery Leaders Guide Page 41

Trajectory Worksheet This worksheet will help you determine trajectory of an arrow using your equipment. Distances and trajectory measures should be made in the same measurement units, either metric or English units. The suggested increment of distance for English units is about 5 feet. For metric units try an increment of 1 or 2 meters. Measure the distances above or below the line of sight in either inches or centimeters. If those distances become too great, feel free to convert them to fee or meters. Record the following information before you start. Height of sight above arrow rest (bore)
Height of pupil above nock of drawn arrow
Distance (m or ft) Point of Impact (cm or in) + = Above line of sight - = Below line of sight
Saskatchewan 4-H Archery Leaders Guide Page 42

Making Arrows Appendix 3
Many archers enjoy making their own arrows because it allows them to exercise personal quality control, add special features, personalize the arrows in other ways or add to their shooting enjoyment. Making arrows involves several steps, but it is not difficult. High quality arrows can be made with care and attention to detail. Shaft Selection The first step is selecting the shaft type and size desired. Arrow shafts are available in wood, fiberglass, graphite, aluminum and graphite-aluminum combinations. Wood shafts are traditional. Historically they have been fairly inexpensive, but quality shafts may be difficult to find. Finding shafts that match in spine and weight can be a challenge and keeping them straight can be an even greater one. American Indians used several hardwoods for shafts. The most common material is Port Orford cedar. Some wooden shafts, like Forgewood shafts, are compressed to reduce their diameter without sacrificing strength. Bow hunters seeking very large game sometimes insert a compressed wood shaft in another type of arrow shaft to increase arrow mass. Wooden shafts must be lacquered or painted full length to protect them from moisture. Fiberglass shafts are lighter than wooden shafts of the same
spine weight. They remain relatively straight and they can be matched in spine and arrow mass much better than wooden shafts. Although fiberglass is a tough material, these shafts are subject to splitting on impact. They also tend to shatter or splinter if struck along their length. Shafts with internal damage may even shatter during a release. Fiberglass has been an excellent arrow material for beginning archers, combining toughness, durability and reasonable consistency with modest cost. However, fiberglass shaft material has become much more difficult to obtain. Another composite material used in arrow production uses graphite fibers for its strength. Graphite (carbon) is must stiffer than fiberglass (silica) even though it is lighter in weight, which results in a thinner, lighter arrow for any given spine. Graphite fibers are also more expensive than glass fibers. Arrow manufacturers recently recommended that graphite not be used for hunting arrows unless care was taken to remove all meat that might have been exposed to the graphite fibers. Those fibers are hard, stiff and fine. They survive cooking well and can cause injury if swallowed. Many target archers, particularly those shooting bows equipped with overdraws, prefer graphite shafts. Aluminum shafts have been the standard of both target archers
and bowhunters for many years. The shafts can be made to very close tolerances in a variety of alloys, offering easy matching in spine and weight. Aluminum shaft materials may be obtained in inexpensive soft alloys that are easily bent or straightened, or very hard ones that are durable but hard to straighten and expensive. The range of materials makes finding an optimum shaft material for your shooting application possible. Aluminum-graphite combinations combine features of both materials. Arrows must be matched in ass and spine and they must be straight to allow accurate and precise shooting. Shaft manufacturers and archery supply houses provide graphs or tables to assist the shooter in selecting the proper shafts for his or her bow and shooting purpose. In most cases, any given draw weight and length will have a range of sizes suggested. Most target archers can use the lightest shaft that will fly well in their bows. Bowhunters are often wiser to select a shaft on the stiff side. The heavier, more massive heads used in bowhunting tend to "soften" shaft behaviour. Consider your personal experience with your bow and turning when selecting the proper shaft. Cutting to Length Once the shaft type is selected, the shafts must be cut to the appropriate length. Extra
Saskatchewan 4-H Archery Leaders Guide Page 43

length may be helpful for young members, but it adds arrow mass and softens the spine of the shaft. That results in reduced arrow speed, greater drop at any given distance and higher trajectories. Errors in distance estimation become more critical with slower arrows. Missing high or low is a greater problem for archers using them. Wooden shafts may be manufactured full length, then cut to length and tapered just before the arrowhead is attached. Other types of shafts are cut to length before the arrow is made. Cutting requires use of an abrasive cut-off wheel. Home cutting is not recommended without proper tools, because of some techniques alter the diameter, shape or character of the shaft around the cut end. Target archers usually cut their shafts to true draw length. The base of the head reaches the rest at full draw. For young members and beginning archers, draw length changes over time. Cutting to true draw length gives maximum performance, but it may result in arrows that are "out-grown" in a short time span. Hunting archers and many field archers cut their shafts a little longer. The broadhead needs to clear the back of the bow, the archer's hand or the rest on the overdraw. Usually an allowance of about two centimeters (3/4 inch) is added to the length. This compensates for overdrawing the shaft when the shooter is excited.
Specifically the draw length or cut length of the arrows when ordering shafts. Draw length is measured from the bottom of the string notch in the nock. One of the best ways to measure draw length is with a draw-check arrow in a light bow. Draw to your anchor and have a friend note the true draw or the distance to the face of the bow or the rest on the overdraw. Once that distance is known, determine the length the shafts should be cut. Be sure the person cutting the shafts de-burrs them when they are cut. Attaching the Inserts Wooden shafts are tapered with a cutting tool resembling a hand pencil sharpener to receive the nock and the point. Other shafts are tubular. They are inserts or built-in tapers for the nock and the point. Some types of inserts have screw-in adapters that accept several types of points. The type of shaft material influences the way the inserts are fixed in place. Meltable adhesives, like ferrule cement, are usually used on aluminum shafts. The cement forms a solid bond that is slightly flexible and durable. It is applied by melting a small amount of the adhesive on the insert, warming the end of the shaft and pushing the insert into the shaft with a twisting motion. The insert needs to be held in place until the adhesive sets or cools. If screw-in adapters are used, a precaution should be used to prevent glue from getting into the threads.
Apply a liberal amount of petroleum jelly to the threads of a broadhead (without blades) or a field point. Screw the head into the adapter, being careful not to get the petroleum jelly on the outside of the adapter. Then attach the insert as described above. An added advantage of having the head screwed into the adapter is the ability to check the alignment of the adapter in the shaft. Spin the arrow on its point. If it wobbles, re-heat the adapter area and adjust it until it spins true. Composite shafts may have adapters at both ends. Most archers prefer to use epoxy adhesives to attach the inserts. The epoxy is mixed according to manufacturers instructions. It is applied to the body of the insert and inserted into the body of the shaft with a pushing and twisting motion. If screw-in adapters are used, the precautions outlined above to prevent fouling the threads with glue should be followed. Be sure to use the appropriate adapters in each end of the shaft. Cleaning and Preparing the Shaft Spending a little time and effort preparing the shaft before applying the fletching can pay great dividends in durability. Most adhesive manufacturers encourage applying a base of lacquer to aid in the bonding process. A clean surface is essential for good adhesion by the lacquer base.
Saskatchewan 4-H Archery Leaders Guide Page 44

Lacquer manufacturers supply instructions on preparing the shafts for good adhesion. Metal shafts may be scrubbed with a mild cleanser, rinsed and dried. They can also be cleaned with a lacquer thinner or lacquer remover and rubbed dry. Composite shafts can be scrubbed with a cleanser and rinsed, washed with alcohol or otherwise prepared as instructed by the manufacturer. Care taken with the cleaning pays off over the life of the shaft. If the shafts are going to be dipped full length, they may be sipped as soon as they are completely dry. If they are going to be dipped only partially, each shaft should be lightly marked with a pencil at the end of the dipped area. Lacquer is best applied by dipping the shafts one at a time into a tube filled with the desired lacquer. If you want to keep the natural colour of the shafts, use a clear lacquer instead of a coloured lacquer if you prefer. After the arrows have been dipped, allow them to drip for a moment to remove the excess lacquer. Hang them by their tips in a clean, well-ventilated place to cure. The lacquer is extremely durable, so make sure the floor and other surfaces are protected. Once the arrows have dried completely, they are ready to finish. Applying the Nock Nocks come in several styles, and the choice is primarily a matter of preference. The nocks may fit rather loosely, or
they may snap onto the string. Snap-on nocks are available from several manufacturers in several styles. All nocks come in a variety of sizes. Shaft manufacturers specify the proper nock size for their shafts. Before the nock is applied, the nock insert or nock taper must be cleaned thoroughly. Excess adhesive or lacquer should be removed by scraping or with a small piece of sandpaper. Use a rotation motion to avoid making flat spots or irregularities in the nock taper. Place a drop of fletching cement on the tip of the nock taper. Turn the shaft to spread the glue around the taper. Attach the nock with a twisting motion, much like placing a nut on a bolt. The nock must be aligned with the shaft for best shooting results, so care in placing it is essential. Some serious hunters and target shooters use a jig to ensure proper nock alignment. Set the shaft aside for a few minutes to let the adhesive set. By the time a dozen nocks have been applied, the first one will be set up firmly enough to allow the fletching to be applied. Applying the Fletching Selection of fletching material is a matter of both personal preference and use. Feathers offer more control. In archer's jargon, they are more forgiving. They hiss in flight, are affected by inclement weather and tend to slow the
shaft's flight more than plastic vanes. Feathers are also the traditional fletching material. Soft plastic vanes yield more arrow speed but at the cost of some control. They are more durable and weather resistant than feathers. Several specialized types of vanes are available to the target shooter. Many target shooters use feathers indoors and vanes outdoors. The use of the arrow dictates the amount of fletching needed for stability. Light target arrows can be shot with only three small vanes for guidance. Heavy broadhead hunting arrows may require three or four much larger vanes to achieve the same amount of stability. Flight arrows have very small amounts of fletching. On the other end of the spectrum, there are arrows designed for limited flight. Flu-flu arrows use massive amounts of fletching, six full-length feathers for example, to slow the arrow rapidly after a short flight. The fletching style represents a compromise. Straight fletching, with the vanes aligned with the shaft gives less control and more speed than those types that impart more spin to the shaft in flight. Some archers like to angle the vanes slightly to give the shaft additional spin. Others prefer a helical fletch to give the shaft a higher spinning rate, accepting the sacrifice in speed for the extra control. Whether three or four vanes are used is largely a matter of preference. Archers argue over the merits of fletching styles.
Saskatchewan 4-H Archery Leaders Guide Page 45

Experiment to determine your own preferences. With plastic vanes, selecting a right or left helical or off-set fletching pattern is a matter of preference and string or cable clearance. When feathers are used, the direction of the off-set or spiral must match the curvature of the wing. For example, left helical or left off-set fletch requires use of feathers from the left wing. Plastic vanes are bought cut to shape. Feathers may be purchased in that condition, but they may be applied full height. Unless the height is desired to slow the arrow, those feathers must be die-cut or burned to length. Most are burned with a hot wire to the shape desired. Most feathers are cut or burned in shield or parabolic shapes. Availability, control, noise in flight and personal preference are involved in selecting a feather shape. The best shape remains a matter of debate. The fletching should be applied using a properly set-up fletching jig. Each vane should be the same distance from the nock and they should be positioned precisely. The vane should be cleaned before it is used and be held firmly in place until the bead of fletching cement has dried. After all the fletching has been applied to an arrow, a tiny
spot of fletching cement should be applied to the leading and trailing edges of each vane. Customizing Your Arrows Many archers like to apply a crest or signature to their arrows as a personal symbol. They identify their arrows when several people are shooting at the same target or in other situations where identification is needed. Sometimes archers add decals or individual markings to each arrow, so it can be distinguished from others in the set. That permits individual evaluation. If one shaft tends to give erratic flight or consistently poorer flight, it can be checked for alignment or straightness. Cresting is a series of lacquer bands. It is applied with brushes while the shaft rotates in a cresting lathe. The lathe has a collet or receiver that holds the nock and one or more padded rests on which the arrow rotates. Usually it includes a series of pins or markers that can be set to ensure uniform application of the stripes. Lighter colours should be applied as a base coat, with darker ones covering them. Thy several designs on a junked shaft before deciding on one that pleases you. A few archers go one step further and add a minute "crest" at the base of
the nock. Many of today's archers dispense with the crest completely. You decide how you want to have your arrows look. Attaching the Point If screw-in adapters were used, the point of choice would simply be screwed into the adapter to finish the shaft. If other inserts were selected, the points need to be attached with ferrule cement. Those points are attached using the same procedure as in attaching the inserts of aluminum shafts. Heat the insert and the point. Apply a small amount of ferrule cement to the insert and rotate the shaft while heating the insert to spread the cement evenly around the taper. Using a twisting motion, seat the point fully on the taper of the insert. Check it for alignment by spinning the shaft on the point and watching for any wobble in the spinning shaft. If the point is true, allow to cool and remove any excess ferrule cement from the base of the ferrule. If it is not, re-heat the point and adjust it. Making arrows takes some time and attention to detail. It can add to your enjoyment as an archer. Try making your own to see if you want to be involved with this part of archery.
Saskatchewan 4-H Archery Leaders Guide Page 46
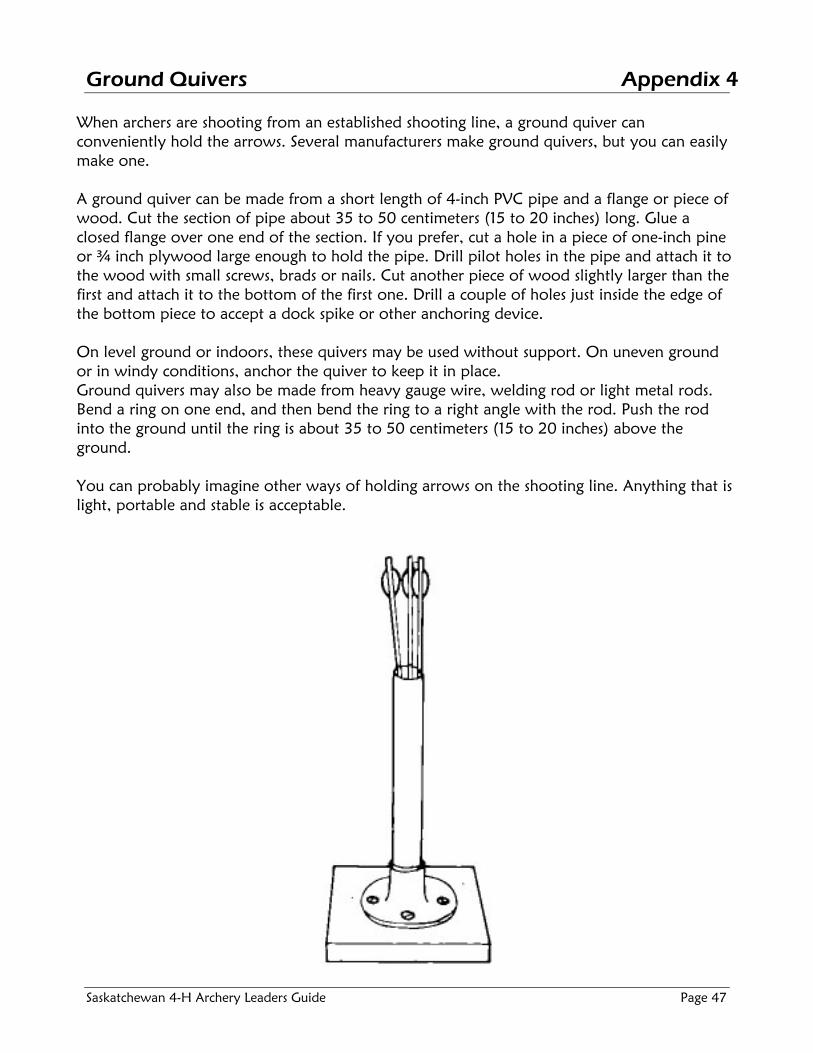
Ground Quivers Appendix 4
When archers are shooting from an established shooting line, a ground quiver can conveniently hold the arrows. Several manufacturers make ground quivers, but you can easily make one. A ground quiver can be made from a short length of 4-inch PVC pipe and a flange or piece of wood. Cut the section of pipe about 35 to 50 centimeters (15 to 20 inches) long. Glue a closed flange over one end of the section. If you prefer, cut a hole in a piece of one-inch pine or ¾ inch plywood large enough to hold the pipe. Drill pilot holes in the pipe and attach it to the wood with small screws, brads or nails. Cut another piece of wood slightly larger than the first and attach it to the bottom of the first one. Drill a couple of holes just inside the edge of the bottom piece to accept a dock spike or other anchoring device. On level ground or indoors, these quivers may be used without support. On uneven ground or in windy conditions, anchor the quiver to keep it in place. Ground quivers may also be made from heavy gauge wire, welding rod or light metal rods. Bend a ring on one end, and then bend the ring to a right angle with the rod. Push the rod into the ground until the ring is about 35 to 50 centimeters (15 to 20 inches) above the ground. You can probably imagine other ways of holding arrows on the shooting line. Anything that is light, portable and stable is acceptable.
Saskatchewan 4-H Archery Leaders Guide Page 47

Basic Steps in Archery Appendix 5 Stance
• Put the tip of your toes against an imaginary straight line towards the center of the target.
• Put your feet on both sides of the line.
• Put your fees about shoulder width apart.
• Try and relax.
Finger Placement
• Place your fingers in such a way, that you hold the string with your index finger above the nock and middle and ring finger under the nock
• Hook the string between first and second joint. Make sure to maintain a deep hook.
Bow Hand Placement
• The pressure of the bow should be distributed along the pressure line.
• Relax your fingers. • The back of your hand
should make an angel of 45 degrees.
• The tips of thumb and index finger may touch each other in a relaxed way.
Saskatchewan 4-H Archery Leaders Guide Page 48

Extending the Bow Arm
• Bring the bow arm to shoulder height.
• The elbow of the bow arm is turned away from the string.
Drawing the Bow
• Draw the string along the bow arm in a straight horizontal line to the anchor point.
• Draw with our back muscles, moving the shoulder blades towards each other.
• Keep both shoulders as low as possible.
Draw the string along the bow arm.
Saskatchewan 4-H Archery Leaders Guide Page 49

Anchoring
• The string should touch the middle of the chin. • The index finger is placed under the chin. • Keep your teeth together.
Holding
• Keep the back muscles under tension. • Bow hand, draw hand and allow shoulders to
form a straight line. • Keep both shoulders as low as possible.
Aiming
• Aiming is done with the dominant eye. • Shut the other eye. • Keep the sight at the target. • Keep the string a little left of the sight.
Saskatchewan 4-H Archery Leaders Guide Page 50

Release
• Keep pulling the shoulder blades towards each other, while relaxing the fingers of the draw hand.
• A relaxed bow hand will automatically move backwards.
• Relax your bow hand. Let the bow drop.
Follow Through
• The draw hand should be relaxed and near or behind your ear.
• Keep aiming until after the arrow hits the target.
Saskatchewan 4-H Archery Leaders Guide Page 51