SA+P Fab Lab Handbook - University of New Mexico in which there is a risk of injury or health in the...
27
SA+P Fab Lab Handbook 2013/2014 The fabrication laboratory supports students and faculty in the exploration and investigation of material research including wood, metals, plastics and concrete. The 3600-square-foot fabrication laboratory plays an integral role in student work and faculty research, supporting experimentation with materials and fabrication. The school is equipped with state of the art computer controlled (CNC) machines, including two laser cutters, a 3-axis CNC router, 3-D scanner, an ABS plastic 3D printer and a CNC Plasma Cutter. The lab is overseen by the Director, and is staffed by the Manager, a Lab Tech and Student Assistants, who instruct and guide users in the use of the equipment.
Transcript of SA+P Fab Lab Handbook - University of New Mexico in which there is a risk of injury or health in the...

SA+P Fab Lab Handbook
2013/2014
The fabrication laboratory supports students and faculty in the exploration and investigation of material research including wood, metals, plastics and concrete. The 3600-square-foot fabrication laboratory plays an integral role in student work and faculty research, supporting experimentation with materials and fabrication. The school is equipped with state of the art computer controlled (CNC) machines, including two laser cutters, a 3-axis CNC router, 3-D scanner, an ABS plastic 3D printer and a CNC Plasma Cutter. The lab is overseen by the Director, and is staffed by the Manager, a Lab Tech and Student Assistants, who instruct and guide users in the use of the equipment.

1
SA+P Fabrication Lab Handbook
Table of Contents General Information
Fab Lab Mission Overview
Policies and Procedures
Fab Lab Access Student Prices
Research Safety Lab Guests and Visitors Fab Lab Use and Safety Training Test Requirements Fab Lab Occupancy Limit Reserving the Lab for Class Use Open Lab Hours Personal Projects General Terminology
General Lab Safety Rules
Eye Protection Non-Injury Accidents Injury-Causing Accidents Storage of Materials and Projects Cleaning of Fabrication Lab Facility Materials Hand Tool Safety Understanding Power Tools Hand-held Power Tools Machine Safety
Machine Instructions
Conclusion
Agreement Form

2
Test
General Information University of New Mexico School of Architecture and Planning Fabrication Lab 2401 Central Ave NE
The Fabrication Lab is located on the first floor of George Pearl Hall and is a support and research facility for the students, faculty and staff of the SA+P.
The safety of students, faculty, staff and visitors is a principal consideration in every activity.
The goal of the UNM School of Architecture + Planning Safety Program is to develop positive attitudes regarding safety among all members. It is essential that Deans, Directors, Department Heads, faculty and staff supervisors take an active part in initiating preventive measures to control hazards associated with activities under their direction. Safety is an integral part of all programs in which there is a risk of injury or health in the academic, research and service areas.
The success of this program depends upon the cooperation and support of everyone.
The rules and guidelines in this document apply to the entire fab lab area including the patio accessed by the garage doors and any other lab related work environment including impromptu installation work locations.
Special Attention and/or Personal Needs
The fab lab requires any student with a medical condition to consult with their personal physician prior to using the fab lab. UNM does not assume responsibility for any harm that might occur to anyone as a result of prior a medical condition. Should such a medical condition be present, a doctor’s approval in writing must be provided to the lab.
Once read, please sign your initials next to each condition that may apply to you. Please inform the Fab-Lab supervisor immediately if you are sensitive to the following or have issues with any of the following. It will be your responsibility to inform the Fab-Lab supervisor on duty each time you enter the lab.
1. Dust allergies. 2. Latex allergies 3. Any other allergies that may be present. 4. Physical contact with your Fab-Lab supervisor. (If a supervisor notices you working
improperly they may physically move you for guidance or safety purposes.) 5. Loud background noises and/or commotion caused by machines. 6. Any other need that may require special attention.
Fab Lab Mission

3
The fabrication laboratory supports students and faculty in the exploration and investigation of material research including wood, metals, plastics and concrete. The 3600-square-foot fabrication laboratory plays an integral role in student work and faculty research, supporting experimentation with materials and fabrication.
The school is equipped with state of the art computer controlled (CNC) machines, including two laser cutters, a 3-axis CNC router, 3-D scanner and an ABS plastic 3D printer. The lab is overseen by the Director, and is staffed by the Coordinator and Graduate Assistants, who instruct and guide students in the use of the equipment.
Overview An important part of your experience in woodworking will be learning to follow practices and procedures that will prevent injuries to YOURSELF and OTHERS. Develop a good attitude toward safety. This means that you have a strong feeling toward the importance of safety and are willing to give time and attention to learning the safest way to perform your work. It means that you will be certain to work carefully and follow the rules – even when no one is directly watching you. Carefully study the safety rules which follow. The Lab supervisor may also recommend some additional rules. If you follow the rules and directions carefully, many of them will soon become safety habits that you will perform automatically. Please note that experience in a Lab does not equal good safety awareness. Many accidents occur not to beginners but from experienced workers that feel more comfortable in the Lab and therefore become more casual in their approach to safety guidelines. NEVER be afraid to ask a supervisor for help.
NEVER use a new machine without first asking for assistance from a supervisor.
Policies and Procedures
The safety of students, faculty, staff and visitors is a principal consideration in every activity.
The goal of the UNM School of Architecture + Planning Safety Program is to develop positive attitudes regarding safety among all members. It is essential that Deans, Directors, Department Heads, faculty and staff supervisors take an active part in initiating preventive measures to control hazards associated with activities under their direction. Safety is an integral part of all programs in which there is a risk of injury or health in the academic, research and service areas.
The rules and guidelines in this document apply to the entire fab lab area including the patio accessed by the garage doors and any other lab related work environment including impromptu installation work locations.
All tools must remain in the Fabrication Lab at all times and may NOT be checked out. At no point will tools will be allowed outside of the lab and its adjacent support areas.
Fab Lab Access
Currently enrolled SA+P students, full-time faculty and staff may access the Lab during open Lab hours or by appointment to work on research related projects (see section on personal projects). Adjunct faculty may use the lab upon written request and written approval of the Associate Dean. Adjunct faculty use is limited to research and development of course related
4
material only. All users must attend a Safety Training session, pass the safety test and perform and pass skills tests on selected woodworking tools to become certified. (Swipe Card Access) Faculty and Staff are required to pay a yearly subscription fee in order to gain access to the lab. All users will gain card swipe access to the Fabrication Lab. Card swipe access will remain valid for a maximum three years from date of signed Safety Agreement form. Any Faculty member that does not access the lab for a period of one year must re-take the Use and Safety training. Under no circumstances will anyone be allowed to have extended usage outside of standard operating hours.
Faculty/Staff who are interested in using the Laser Cutter must use the online sign up. Lab access may be limited during peak times. Any faculty or staff who use the Fab Lab must fill out a record of use form at time of use. The Record of Use form is available on the Fab Lab web page.
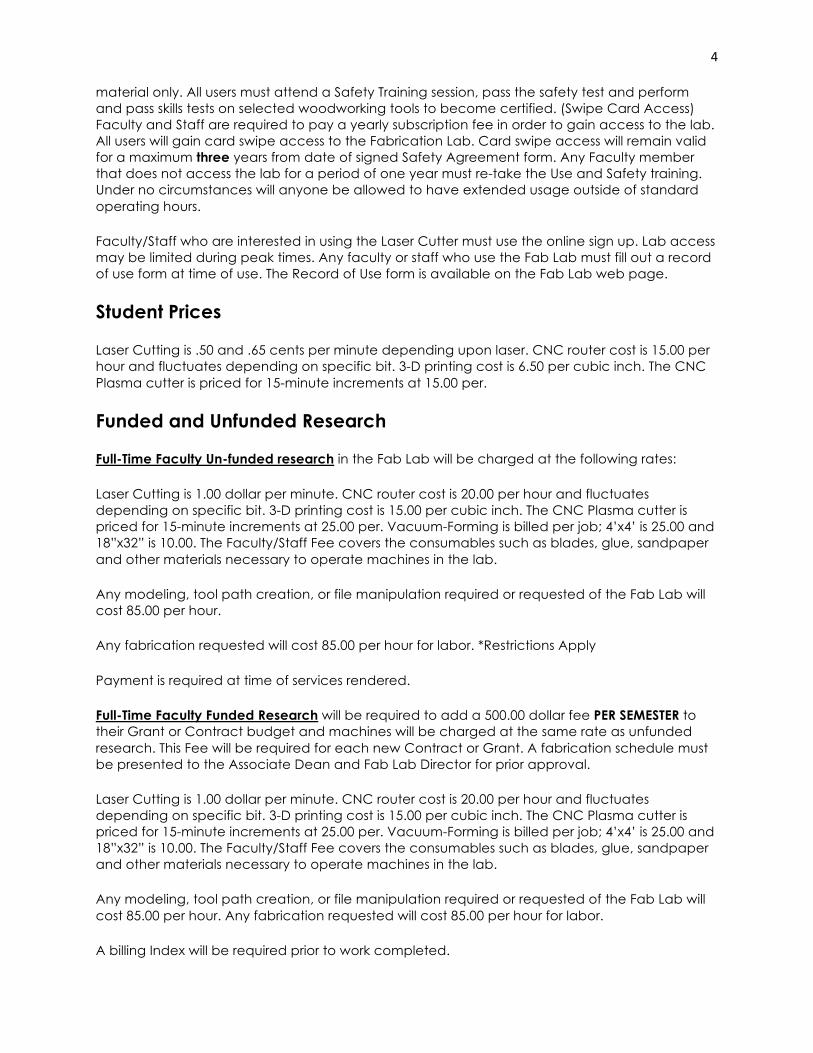
Student Prices
Laser Cutting is .50 and .65 cents per minute depending upon laser. CNC router cost is 15.00 per hour and fluctuates depending on specific bit. 3-D printing cost is 6.50 per cubic inch. The CNC Plasma cutter is priced for 15-minute increments at 15.00 per.
Funded and Unfunded Research
Full-Time Faculty Un-funded research in the Fab Lab will be charged at the following rates:
Laser Cutting is 1.00 dollar per minute. CNC router cost is 20.00 per hour and fluctuates depending on specific bit. 3-D printing cost is 15.00 per cubic inch. The CNC Plasma cutter is priced for 15-minute increments at 25.00 per. Vacuum-Forming is billed per job; 4’x4’ is 25.00 and 18”x32” is 10.00. The Faculty/Staff Fee covers the consumables such as blades, glue, sandpaper and other materials necessary to operate machines in the lab.
Any modeling, tool path creation, or file manipulation required or requested of the Fab Lab will cost 85.00 per hour.
Any fabrication requested will cost 85.00 per hour for labor. *Restrictions Apply
Payment is required at time of services rendered.
Full-Time Faculty Funded Research will be required to add a 500.00 dollar fee PER SEMESTER to their Grant or Contract budget and machines will be charged at the same rate as unfunded research. This Fee will be required for each new Contract or Grant. A fabrication schedule must be presented to the Associate Dean and Fab Lab Director for prior approval.
Laser Cutting is 1.00 dollar per minute. CNC router cost is 20.00 per hour and fluctuates depending on specific bit. 3-D printing cost is 15.00 per cubic inch. The CNC Plasma cutter is priced for 15-minute increments at 25.00 per. Vacuum-Forming is billed per job; 4’x4’ is 25.00 and 18”x32” is 10.00. The Faculty/Staff Fee covers the consumables such as blades, glue, sandpaper and other materials necessary to operate machines in the lab.
Any modeling, tool path creation, or file manipulation required or requested of the Fab Lab will cost 85.00 per hour. Any fabrication requested will cost 85.00 per hour for labor.
A billing Index will be required prior to work completed.

5
Safety
Safety in the Fabrication Lab is the highest priority. Accidents may result in serious bodily harm or death. Following proper safety procedures and conforming to the Fabrication Lab policies as outlined in this handbook will greatly reduce any chance of injury.
Do not experiment with the tools or try to figure out how to use a machine on your own. If you do not use a tool or machine exactly how you have been shown or neglect to follow all safety rules, severe injury could result.
Lab Guests and Visitors
Any individual who has completed the requirements for access may accompany Lab guests and visitors. He or she is responsible for that guest. Guests and visitors are not permitted to use any machines or tools and are not allowed in the machine use areas. Visits must be scheduled and approved by the Fab Lab Director or Manager. Visits should be as brief as possible.
Fab Lab Use and Safety Training
In order to use the fabrication lab, students must attend Safety Use and Orientation Training, sign the attached policy form, and pass all testing requirements. (See Testing Requirements). Upon completion, students will gain card swipe access to the Fabrication Lab. Card swipe access will remain valid for a maximum three years from date of signed Safety Agreement form. If the student remains enrolled in the program for longer than three years, they must be retrained. This access is reliant on your enrollment in the UNM SA+P. Any student entering the fabrication lab will be required to verify they have completed all required safety training. SA+P students must be currently enrolled in; LA (Grad), CRP (Grad), BAEPD (U-Grad), ARCH (Grad), ARCH 211 or higher (U-Grad). Access to the lab can be revoked if a student is found breaking any of the Fab Lab rules or not following Fab Lab pro
Test Requirements
All users must complete the Use and Safety Training module to gain access to the Lab and become certified.
Lab certification consists of: attending the Use and Safety session, reading and completing the Safety policy, successfully completing the written test and demonstrating safe practices during the skills tests on selected pieces of equipment. Test scores must be 80% or greater to gain access. Users can take the test a maximum of two times before they have to re-take training.
The Safety Training schedule will be made available to you by the Director of the Fab Lab.
Individuals must receive additional training for machines not included in the standard orientation. Certification is good for three years from date of signed Safety Agreement Form.
All requirements must be completed within the same semester.

6
Fab Lab Occupancy Limit
In order to maintain a safe work environment, strict user limits will be enforced. Faculty need to be aware of this limit when planning Lab use and should utilize some type of rotation or other strategy to avoid exceeding the occupancy limit.
The maximum number of individuals allowed to work in the Lab at any given time is 5 students per employee.
This occupancy limit was decided upon in consultation with the department of Health and Safety at UNM in a meeting 4.30.13. The official report and recommendation can be made available upon request.
Reserving the Lab for Class Use
At least one weeks’ notice must be given to reserve the Lab for class use and should include a brief proposal. This includes demonstrations and student use.
In order to ensure that there are sufficient open Lab hours for all users, only one class per day may reserve the Lab.
A trained monitor must be present at all times while students are working in the Lab.
When the Lab is reserved for a class, it is closed to other students. The Lab can be reserved Monday, Wednesday and Friday between 1:00pm and 5:00pm.
Open Lab Hours Hours are posted on the Lab window on a semester basis. Lab hours may vary, depending on the activities taking place in Pearl Hall. If the Lab is reserved for a class, there are no open hours during that time. At the discretion of the Lab supervisor, the Lab may be closed. If the university is closed, so is the Lab. Staff absence may cause closure of the Lab.
Personal Projects
SA+P Faculty, Staff and Students currently enrolled, may not use the Lab for non-course related projects. Personal projects are prohibited.
A “Personal Project” is any use of the Lab that is not related to completing work for a course (student), teaching a course (faculty/staff) or performing work that supports course-work in the SA+P.
(See CRAF+T for personal use)

7
General Terminology Grain: the fibrous structure of the wood, evident in the light and dark streaking of the soft spring
growth (light) and hard summer growth (dark) of the tree
Grain figure: the pattern formed by the grain on the surface of a longitudinal cut (along the
grain); the character of this pattern depends on the cross-section of the wood Knots: areas of dense, twisted grain that occur where limbs branch apart (literal knots in the
grain) Softwoods: wood of evergreen trees (not necessarily soft) Hardwoods: wood of deciduous or broad-leafed trees (not necessarily hard) Milled lumber: wood that has been processed (cut, planed, and sanded) into regular
dimensions (also called stock) Rip-cut: a cut in a board along its long dimension, with the grain Crosscut: a cut in a board across its short dimension, across the grain Kerf: the groove or cut made by a blade Miter: refers to an angle; a miter joint is one in which both pieces are cut at an angle, and a
miter gauge is a guide used hold the wood at a set angle Fence: the metal bar used to guide the wood along a straight path, or against which the wood
is held when making a cut Butt joint: 90 degree joint in which the end of one piece abuts the side of another Hold-down: a simple clamping mechanism used to hold a piece of wood while cutting Jig: any specially constructed mechanism used to facilitate a specific cutting procedure Kickback: the sudden backward force produced when the blade stalls or binds in the wood
during a cut Dado: a groove cut into a piece of flat wood Rabbet: a step cut into the end or edge of a piece of flat wood (a half-‐dado) ***Please see “The Complete Manual of Woodworking” ISBN 0-‐34-‐56488-‐X for a complete
list***
General Lab Safety Rules
The hazards associated with fabrication work require special safety considerations. Whether you work in a metal lab, wood lab, or any other lab, the potential hazards for injury can be numerous.
In an emergency call 9-911 from the fab lab office phone, or 911 from a cell phone.
The fabrication lab is located in Pearl Hall room 106.
8
All students entering the fab lab must acquire the appropriate safety gear prior to operating any machine or tool.
All students must clean up after themselves; students who do not clean up after themselves will lose all lab privileges for a minimum of 1 week. Lab privileges will not be re-instated until the offending student returns to clean the entire lab.
Personal Protection
There are several measures you must take to protect yourself from work hazards.
1. Do not wear loose fitting clothing 2. Do not long sleeve shirts/sweatshirts 3. Do not wear neckties 4. No jewelry should be worn in the fabrication lab. (Including earrings, watches and rings) 5. Snug fitting clothing is essential to your safety 6. Make certain that long hair is not loose, but is pulled back away from equipment. 7. Always wear safety glasses when working with any lab equipment. Additional protection
using goggles or face shields may be necessary for work such as grinding, chiseling or chipping.
Notify your supervisor/professor if you notice any unsafe work conditions.
Inform other employees if you see an unsafe work practice; however, be careful not to distract a person who is working with power tools.
Safety Guidelines
Follow these guidelines for general work safety:
1. Never work alone. There must always be at least two adults present in the fabrication lab. 2. Always wear appropriate safety gear and protective clothing, including closed toed shoes. 3. Eye protection is required while operating any machine. 4. Know where the fire extinguishers are located and how to use them. 5. Never work impaired. This also does not simply mean impaired from drugs or alcohol, but also
from sleep deprivation. 6. Know the hazards associated with your work. Be sure you are fully educated on the proper
use and operation of any tool before beginning a job. If you cannot do a job safely in the fabrication lab, don’t do it. Think through the entire job before starting.
7. If you are unsure about how to safely execute the operation of a tool, ask for help. Have the fabrication lab supervisors assist, demonstrate, and observe to help you become familiar and comfortable.
8. If you have not worked with a specific material before, consult the fabrication lab supervisor for precautions, methods and instruction prior to beginning work.
9. Do not work in the lab if you are in a hurry, this almost always ruins the work and often results in injury.
10. Leave tool and equipment guards in place. This is especially true with the table saw. The guard with the anti-kickback device should always be on the saw unless the operation is not possible with it in place.
11. Before starting any machine be sure to check that it is set up correctly and fully operational. 12. Check power cords and plugs on portable tools before using them. 13. Use a brush, or special tool for the removal of chips, shavings and debris. Do not use your
hands to clean shavings or cuttings – they can be sharp! 14. When doing heavy sanding face masks or respirators should always be worn.

9
15. Keep your fingers clear from the point of operation of machines by using special tools and devices such as push sticks and paddles. Never use a rag near moving machinery.
16. Keep the work area free from debris, clean spills immediately and remove all sawdust and wood chips. Do not bring food or drink in to the fabrication lab.
17. Clean up after yourself. Before you leave the lab be sure all tools are returned to their appropriate position and all the machines are clean and the floor is swept. Allow a minimum of 20 minutes for your cleanup procedure.
18. Earphones, cell phone use and texting are not allowed in the Lab. We need to be able to get your attention and you need to hear what’s going on around you. Cell phone use and texting are distractions. Simply go elsewhere to use your phone.
Eye Protection
Eye protection must be worn at all times while working in the Lab - Safety glasses are provided.
Consistent failure to wear eye protection will result in loss of access.
Non-Injury Accidents
In the event of accidents resulting in machine damage, material “kick-back” or other unsafe events, the following procedure must be followed:
If gross negligence is determined to be involved in the course of a non-injury accident a meeting is required between the user(s) and the Lab supervisor before Lab access may resume.
If an individual is consistently working in an unsafe manner, Lab privileges will be revoked.
Injury-Causing Accidents In the event of an injury-causing accident, the following procedures must be followed: Notify the Lab supervisor or monitor on duty immediately. Lab personnel will follow established first-aid procedures.
All injury-causing accidents requiring outside medical attention requires a meeting with the Lab supervisor to determine the cause of the accident and as a preventive measure against similar accidents in the future before Lab access may resume.
Storage of Materials and Projects Storage of materials in the Lab is prohibited. The lab is not responsible for any projects left unattended. Any project left overnight should have all necessary contact information. Projects left overnight must be retrieved by 9:00 am the following morning. Projects left for longer durations will be disposed of. Cleaning of Fabrication Lab Facility Each user is responsible for clean-up and tool return. Each machine and work area should be cleaned immediately after use. Machines should be blown off using the air hose and the floor area around it should be swept clean. The last person to use a machine is responsible for cleaning the machine and surrounding work area.

10
Users who consistently fail in their clean-up responsibilities will be denied Lab access. Materials Tools and Machinery in the Lab each have an intended use to specific materials. Please see the Lab supervisor if you wish to work with unique materials in the Lab. Used wood and wood based materials may be processed in the Lab as long as the material is clean, free of dirt, grit, grime, metal, paint, varnishes, enamel, moisture or abrasive materials. Material that is excessively contaminated with any of the above will not be permitted. Lab users using used materials may be found liable for damage to the tools and equipment caused by those materials, No pressure treated/chemically treated wood allowed in the Lab. No green wood - tree limbs, etc. unless they are completely dry. Consult with Brad Smith before attempting to cut unstable materials (limbs, etc) as they pose potential dangers when processing. Plaster objects may not be worked on any of the equipment or machines in the Lab. With the exception of the scrap bins below the table saw and miter saw table, the Lab does not provide free materials. The Lab does sell a limited selection of plastics. Purchases can only be made through Lobo Cash. These rules are meant to insure a safe and orderly work environment; please respect them.
Hand tool Safety These tools, while they do not involve the same dangers as power machinery, should be used cautiously. Often, the type of injury sustained while misusing these tools are small cuts and lacerations - sometimes requiring stitches. Please observe the following guidelines while using hand tools.
Hand tools are non-powered tools. They include wrenches, hammers, chisels, screw drivers, and other hand-operated mechanisms. Even though hand tool injuries tend to be less severe than power tool injuries, hand tool injuries are more common. Because people take everyday hand tools for granted, simple precautions for safety are easily forgotten.
Hand tools must remain in the Fabrication Lab at all times and may NOT be checked out. At no point will tools will be allowed outside of the lab and its adjacent support areas.
The most common hand tool accidents are caused by the following: 1. Failure to use the right tool 2. Failure to use a tool correctly 3. Failure to keep edged tools sharp 4. Failure to replace or repair a defective tool 5. Failure to safely store tools
IMPORTANT: Use the right tool for the job to complete a job safely, quickly, and efficiently.
Follow these guidelines for general hand tool safety:

11
1. Wear safety glasses whenever you hammer or cut, especially when working with surfaces that chip or splinter.
2. Do not use a screwdriver as a chisel. The tool can slip and cause a deep puncture wound.
3. Do not use a chisel as a screwdriver. The tip of the chisel may break and cause an injury. 4. Do not use a knife as a screwdriver. The blade can snap and cause an injury. 5. Never carry a screwdriver or chisel in your pocket. If you fall, the tool could cause a
serious injury. Instead, use a tool belt. 6. Use the proper wrench to tighten or loosen nuts. Pliers can chew the corners off a nut
and the pliers can become damaged. 7. When using a chisel, always chip or cut away from yourself. 8. Do not use a wrench if the jaws are sprung. 9. Direct saw blades, knives, and other tools away from aisle areas, students and
employees. 10. Keep knives and scissors sharp. Dull tools are more dangerous than sharp tools.
Improper tool storage is responsible for many fab lab accidents. Return each tool to its marked location for proper tool storage. Never use a dull tool - it is actually much more dangerous than a sharp one. Think about the direction your energy is going while performing an operation. If you are holding material in your hands, be sure the action if going away from your body. Better yet, clamp the material in a vise or to the surface of a workbench. Like power tools, think through a procedure before you attempt it. Many times, we become complacent or are rushing through a job - that is when accidents are most likely to occur.
Hand-held Power Tools Only change blades, bits, etc., when the tool is off and unplugged. It is very easy to accidentally turn the tool on. Know what direction it moves and be prepared to compensate for the torque of the motor. Wear eye protection at all times - some tools such as the lathe may also require the use of a face shield. Always keep your hands a safe distance from cutters and blades. Make sure all guards and safety devices are in place. Do not use a machine without the proper guards. Keep the machine clean. Know the physics of the machine and where the cutting force wants to throw the material. Make sure to turn all power tools off before unplugging, and always check that it is turned off before plugging in. All hand held power tools must remain in the lab and may NOT be checked out. At no point will tools will be allowed outside of the lab and its adjacent support areas.
Understanding Power Tools The most dangerous parts of power tools are the moving parts. All of the machinery in this Lab is powered by electric motors, and the radial forces produced by spinning shafts, pulleys, blades and belts can be particularly dangerous. This danger arises from two effects of spinning parts: (1) outward forces—wood and debris can become violent projectiles when thrown by spinning blades, and (2) inward forces—loose clothing, jewelry, hair, and fingers can be grabbed, wound up, and pulled in and mangled by any spinning machinery. Always be aware of the danger of

12
these radial forces. Always wear eye protection, never stand in line with circular blades, and always maintain a safe distance from spinning parts when the tool is operating.
Power tools can be extremely dangerous if they are used improperly. Common accidents associated with power tools include abrasions, cuts, lacerations, amputations, burns, electrocution, and broken bones. These accidents are often caused by the following: 1. Touching the cutting, drilling, or grinding components 2. Getting caught in moving parts 3. Suffering electrical shock due to improper grounding, equipment defects, or operator
misuse 4. Being struck by particles that normally eject during operation 5. Touching hot tools or work-pieces 6. Falling in the work area 7. Being struck by falling tools
When working around power tools, you must wear personal protective equipment and avoid wearing loose clothing or jewelry that could catch in moving machinery. In addition to general lab guidelines, follow these guidelines for working with power tools:
1. University employees or students shall not turn on, use, repair, or operate any machine, tool, equipment unless authorized by a fabrication lab supervisor.
2. Use the correct tool for the job. Do not use a tool or an attachment for something it was not designed to do.
3. Select the correct bit, blade, cutter, or grinder wheel for the material at hand. This precaution will reduce the chance for an accident and improve the quality of your work.
4. Keep all guards in place. Cover exposed belts, pulleys, gears, and shafts that could cause injury.
5. Always operate tools at the correct speed for the job at hand. Working too slowly can cause an accident just as easily as working too fast.
6. Watch your work when operating power tools. Stop working if something distracts you. 7. Do not rely on strength to perform an operation. The correct tool, blade, and method
should not require excessive force. If undue force is necessary, you may be using the wrong tool or have a dull blade.
8. Before clearing jams or blockages on power tools, disconnect from power source. Do not use your hand to clear jams or blockages, use an appropriate tool.
9. Never reach over equipment while it is running. 10. Never disable or tamper with safety releases or other automatic switches. 11. When the chance for operator injury is great, use a push stick to move material through a
machine. 12. Disconnect power tools before performing maintenance or changing components. 13. Keep a firm grip on portable power tools. These tools tend to "get away" from operators
and can be difficult to control. 14. Never leave chuck key in chuck. 15. Keep bystanders away from moving machinery. 16. Do not operate power tools when you are sick, fatigued, or taking strong medication. 17. When possible, secure work pieces with a clamp or vise to free the hands and minimize
the chance of injury. Use a jig for pieces that are unstable or do not lie flat. 18. Always work in a clean environment. A unkempt work place can result in injury,
especially when sawdust accumulates on concrete floors. You must always be responsible for cleaning up after yourself.

13
Machine Safety To operate a machine safely, you must know more than just how to turn it on and off. You must know how to perform the basic operations and how to make simple adjustments. Always maintain a healthy respect for the tool’s capabilities and limits. Never use a machine for a job it was not designed for and never experiment - if you are unsure about how to perform a certain operation, ask for help. The more you know about a machine, the safer you will be. Don’t become over confident - that leads to carelessness, which causes accidents. The following are general guidelines for stationary machines. Wear eye protection at all times - some tools may also require the use of a face shield. Always keep your hands a safe distance from cutters and blades. Make sure all guards and safety devices are in place and in perfect operating order. Do not use a machine without the proper guards. Know the physics of the machine and where the cutting force wants to throw the material. When feeding material through a machine with the hands, be aware of the direction you are pushing (away from blade or cutter). Never operate a power tool when alone in the Lab. Defects in material can be dangerous. Check the stock carefully for knots, splits, and other defects. Keep the machine clean. Remove all tools, lumber, and unnecessary materials. Objects left on the machine can vibrate into revolving cutters. They can then be thrown from the machine with great force. Never clean a machine while it is running. Always work with a plan of procedure. Consider and think through each step ahead of time. Never make an adjustment unless the power is off. The tool must come to a complete stop. Your stance is also important - stand in a comfortable, balanced (defensive) position when working with power tools. Both feet should be firmly on the floor. If something doesn’t sound right, or feel right - turn off the machine and inform the supervisor or monitor. Above all, think before you perform any task. Know the tool’s capabilities and the work it is intended for. If you feel unsure, STOP and ask for assistance.

14
MACHINE INSTRUCTIONS
Table Saw Saw Stop 10” Cabinet Saw. Students Name____________________________ Graduation Date___________________________ Supervisor Name_________________________ Today’s Date__________ Machine Description + Typical Uses: The Table Saw is arguably the most important and most dangerous wood cutting tool in the Lab. Its main use is performing long straight very accurate cuts on sheet wood or boards up to a maximum of 4” thick. It is also capable of a wide range of angled straight cuts dado cuts and miters. Types of cuts: Ripping, Miters, Angles, Crosscutting, Dado, **This tool can only be used for straight cuts. **This machine is designed to cut WOOD ONLY—it is not designed to cut metal. **Maximum cutting height is 4”. Basic Safety Instructions: !!Wear Safety Glasses!! DO NOT operate while under the influence of drugs, alcohol, sleep deprivation or medication. SECURE any loose fitting jewelry or clothing, tie back long hair - they can get caught in moving parts ALWAYS BE AWARE of where your fingers are in relation to the blade and material feed area. Use a push stick. WHEN RIPPING always make sure the ripping fence is in place and locked. WHEN CROSSCUTTING always use the crosscutting sled only, and DO NOT use the ripping fence. MAKE SURE the blade is set to the correct height (at least 1/4” above the top the material) and locked. MAKE SURE the dust collector is turned on before using the planer, and the work surface is clear of any debris. ALWAYS push the material ALL THE WAY clear of the blade. NEVER let go of the material while it is in contact with the blade. (This will cause the material to fly VIOLANTLY backward) DO NOT adjust the blade while the saw is running. DO NOT start the saw with the material in contact with the blade. DO NOT attempt to clear material while the saw is running. Turn the saw off immediately after you finish cutting. DO NOT TRY to change the blade or perform any other kind of maintenance on the saw. Find a lab supervisor. ALWAYS seek assistance from a lab supervisor if you are NOT COMFORTABLE using this tool. DO NOT OPERATE any machine if you are not trained.

15
I _____________________ have been trained on the ______________________ and feel that I am knowledgeable and safe to use it without the assistance of a Lab supervisor. If a supervisor feels that I am not operating a machine safely I understand they may pull my certification and require I be re-trained. I understand the dangerous nature of the Lab environment and I take full responsibility for my own safety in the fabrication laboratory. I understand the School of Architecture and Planning at the University of New Mexico is not responsible for accidents that might occur from the improper use of the tools in the fabrication laboratory. By signing below I acknowledge I have been properly trained.
Supervisor Signature______________________________
Student Signature________________________________ Planar Powermatic 201HH, 22” Planer w/ helical cutter head Students Name____________________________ Graduation Date___________________________ Supervisor Name_________________________ Today’s Date__________ Machine Description + Typical Uses: A planer is a floor anchored power tool used for smoothing rough lumber or reducing the thickness of a board. With a planer every board on a project can be a perfect match. Planing The main function of a planer is to slightly reduce the thickness of a board and create a smooth uniform surface. The planer’s cutter head is a helical design with 150 four sided knife inserts. Basic Safety Instructions: !!Wear Safety Glasses!! DO NOT operate while under the influence of drugs, alcohol, sleep deprivation or medication. SECURE any loose fitting jewelry or clothing, tie back long hair - they can get caught in moving parts ALWAYS BE AWARE of where your fingers are in relation to the knives and material feed area. DO NOT USE to remove more than 1/16” of material in any single pass. THIS WILL CAUSE TEAROUT, DAMAGING THE WOOD AND THE PLANER! MAKE SURE the board is flush with the feed surface and slowly feed the wood into the machine. If the material is not flush, this will cause snipe. (A tapered edge on your material) MAKE SURE the dust collector is turned on before using the planer, and the work surface is clear of any debris. NEVER force the material into the planer. DO NOT start the planer with the material in contact with the knives. DO NOT wear neckties or loose clothing when operating the planer. If you have long hair, wear it up or back (Away from the planer) ALWAYS seek assistance from a lab supervisor if you are NOT COMFORTABLE using this tool. DO NOT OPERATE any machine if you are not trained.
I _____________________ have been trained on the ______________________ and feel that I am knowledgeable and safe to use it without the assistance of a Lab supervisor. If a supervisor feels that I am not operating a machine safely I understand they may pull my certification and require I be re-trained. I understand the dangerous nature of the Lab environment and I take full responsibility for my own safety in the fabrication laboratory. I understand the School of Architecture and Planning at the University of New Mexico is not responsible for accidents that might occur from the improper use of the tools in the fabrication laboratory. By signing below I acknowledge I have been properly trained.

16
Supervisor Signature__________________________ Student Signature________________________________
Drill Press Powermatic PM2800 Variable Speed Drill Press Students Name____________________________ Graduation Date___________________________ Supervisor Name_________________________ Today’s Date__________ Machine Description + Typical Uses: A drill press is a motor-motor driven piece of machinery that lowers and raises a rotating tool into work pieces. Work pieces are generally metals and woods. A drill press is an upright-standing, fixed drill is mounted to the floor. Holes The main function of a drill press is to drill holes into work pieces. Drill presses use a variety of spindles to drill varying amounts and sizes of holes. Reaming Drill presses are also used for reaming. Reaming is when existing holes are made bigger and or more accurate. Reaming is most often done on metalwork pieces. Counter-boring Counter-boring can be done on drill presses to make the ends of pre-drilled holes bigger. Counter-boring also allows screw heads or bolts to fit in the hole. Countersinking Drill presses can countersink screws or bolts. Countersinking screws or bolts allows the head of the screw or bolt to be flush with the surface of the work piece. Basic Safety Instructions: !!Wear Safety Glasses!! DO NOT operate while under the influence of drugs, alcohol, sleep deprivation or medication. SECURE any loose fitting jewelry or clothing, tie back long hair - they can get caught in moving parts ALWAYS BE AWARE of where your fingers are in relation to the drill bit DO NOT USE bits that are dull, bent or damaged MAKE SURE bit is centered in chuck and tightened before operating the drill. (The Powermatic drill press uses a keyless chuck) USE A CLAMP when drilling any material, this will help prevent the material from spinning into your body or hand and never hold materials in your bare hands while drilling. NEVER turn the drill press "on" before clearing the table of all objects (tools, scrap pieces, etc.) DO NOT start the drill press with the drill bit in contact with the work piece ALWAYS let the drill chuck come to a complete stop on its own. Never grasp the chuck in an attempt to stop the drill bit TO PREVENT ROTATION OF THE WORKPIECE, ALWAYS clamp work securely to the table if it is too short to contact the column or when using a hole saw or cutting tools larger than 1/2" diameter DO NOT wear gloves, neckties, or loose clothing when operating the drill press. ALWAYS seek assistance from a lab supervisor If you are NOT COMFORTABLE using this tool. DO NOT OPERATE any machine if you are not trained.
I _____________________ have been trained on the ______________________ and feel that I am knowledgeable and safe to use it without the assistance of a Lab supervisor. If a supervisor feels that I am
17
not operating a machine safely I understand they may pull my certification and require I be re-trained. I understand the dangerous nature of the Lab environment and I take full responsibility for my own safety in the fabrication laboratory. I understand the School of Architecture and Planning at the University of New Mexico is not responsible for accidents that might occur from the improper use of the tools in the fabrication laboratory. By signing below I acknowledge I have been properly trained.
Supervisor Signature__________________________ Student Signature________________________________
Band Saw G0555X 14” Extreme Band saw Students Name____________________________ Graduation Date___________________________ Supervisor Name_________________________ Today’s Date__________ Machine Description + Typical Uses: The band saw is one of the most versatile wood cutting tools in the Lab. It is capable of performing the following types of cuts: Straight Cuts: Miters, Angles, Compound Angles, Re-sawing, Ripping, and Crosscutting Irregular Cuts: Simple and Complex Curves, Duplicate Parts, Circles, Beveled Curves **This machine is designed to cut WOOD ONLY—it is not designed to cut metal. **Maximum cutting height is 6”. Basic Safety Instructions: !!Wear Safety Glasses!! DO NOT operate while under the influence of drugs, alcohol, sleep deprivation or medication. SECURE any loose fitting jewelry or clothing, tie back long hair - they can get caught in moving parts DO NOT wear neckties or loose clothing when operating the bandsaw. If you have long hair, wear it up or back (Away from the bandsaw) Damage to your eyes, lungs, and ears could result from using this machine without proper protective gear. Always wear safety glasses, a respirator, and hearing protection when operating this machine. MAKE SURE the dust collector is turned on before using the bandsaw, and the work surface is clear of any debris. DO NOT operate with a dull, cracked, or badly worn blade. DO NOT operate this band saw without the blade guard in place. When replacing blades, make sure the machine is off and UNPLUGGED. Make sure the teeth face toward the work piece and the blade is properly tensioned before operating. In order to cut accurately and safely, the bottom of the blade guide assembly must be no more than 1" from the work piece at all times. Allow blade to reach full speed before cutting. Use the sled to cut accurate angles MAKE SURE the board is flush with the feed surface and slowly feed the wood into the machine. ALWAYS BE AWARE of where your fingers are in relation to the knives and material feed area. NEVER position fingers or thumbs in line with the cut. Serious personal injury could occur. NEVER hold small work pieces with your fingers when cutting. Always support/feed the work piece with push stick, table support, vise, or some type of clamping fixture. Plan your cuts so you always cut through the wood. DO NOT back the work piece away from the blade while the saw is running. If you need to back the work out, turn the band saw OFF and wait for the blade to come to a complete stop, and DO NOT twist or put excessive stress on the blade while backing work away. Allow the band saw to come to a complete stop before leaving unattended.

18
ALWAYS seek assistance from a lab supervisor if you are NOT COMFORTABLE using this tool. DO NOT OPERATE any machine if you are not trained.
I _____________________ have been trained on the ______________________ and feel that I am knowledgeable and safe to use it without the assistance of a Lab supervisor. If a supervisor feels that I am not operating a machine safely I understand they may pull my certification and require I be re-trained. I understand the dangerous nature of the Lab environment and I take full responsibility for my own safety in the fabrication laboratory. I understand the School of Architecture and Planning at the University of New Mexico is not responsible for accidents that might occur from the improper use of the tools in the fabrication laboratory. By signing below I acknowledge I have been properly trained.
Supervisor Signature__________________________ Student Signature________________________________
Miter Saw 10” Sliding Dual Compound Miter Saw Students Name____________________________ Graduation Date___________________________ Supervisor Name_________________________ Today’s Date__________ Machine Description + Typical Uses: The Hitachi C10FSB Compound Miter Saw works effectively in both wood and aluminum sash applications. The saw provides clean, accurate bevel and miter cuts. The saws vice assembly mounts on either the right or left side of the base and can be raised or lowered according to the work piece height. Mitering: 57 Degree miter angle, to the right for ultra-flexibility. 45 Degree miter to the Left. 45 Degree bevel angle range to the right and left allowing users to quickly and easily flip the saw blade and leave the material. Materials: Ideal for cutting various types of wood, plywood, decorative panels, soft fiberboard, hard board and aluminum sashes. Adjustable Fence: Adjustable pivot fence supports work piece for stability while cutting. Basic Safety Instructions: !!Wear Safety Glasses & A Safety Mask/Respirator!! DO NOT operate while under the influence of drugs, alcohol, sleep deprivation or medication. SECURE any loose fitting jewelry or clothing, tie back long hair - they can get caught in moving parts. ALWAYS BE AWARE of where your fingers are in relation to the rotating disk. ALWAYS turn the DUST COLLECTOR on and off, before and after using the saw. ALWAYS OPERATE with two hands. ALWAYS adjust a fence that allows you to work with confidence. Be sure you adjust the fence for whatever cut desired rather than use a freehand approach. USE A CLAMP or Hands when cutting materials, this will help prevent the material from jumping and shaking preventing fragments from flying around the room and/or into you. NEVER hold materials in your bare hand while grinding or cutting. ALWAYS keep table clean and clear debris before and after use to prevent injuries and poor cuts. ALWAYS let the saw blade come to a complete stop on its own. Never grasp the blade in an attempt to stop the saw blade. DO NOT wear gloves, neckties, or loose clothing when operating the saw. ALWAYS seek assistance from a lab supervisor If you are NOT COMFORTABLE using this tool. DO NOT OPERATE any machine if you are not trained.
I _____________________ have been trained on the ______________________ and feel that I am knowledgeable and safe to use it without the assistance of a Lab supervisor. If a supervisor feels that I am not operating a machine safely I understand they may pull my certification and require I be re-trained. I understand the dangerous nature of the Lab environment and I take full responsibility for my own safety in the fabrication laboratory. I understand the School of Architecture and Planning at the University of New
19
Mexico is not responsible for accidents that might occur from the improper use of the tools in the fabrication laboratory. By signing below I acknowledge I have been properly trained.
Supervisor Signature__________________________ Student Signature________________________________
Angle Grinder Angle Grinder Students Name____________________________ Graduation Date___________________________ Supervisor Name_________________________ Today’s Date__________ Machine Description + Typical Uses: An angle grinder is a two handed power tool that can be used to chase, cut, and polish metal, stone, or concrete work by using different types of grinding wheels. Grinding Wheel Used to grind curved or flat surfaces. Flap Disk Used to sand and grind curved or flat surfaces at a faster rate than a grinding wheel. Cutting Wheel/Cut-Off Disk Used to cut through materials *For masonry work diamond wheels should be used* Sanding Disk Used to sand metal and stone work. Polishing Wheel Used to polish metal and stone work. Basic Safety Instructions: !!Wear Safety Glasses & A Safety Mask/Respirator!! DO NOT operate while under the influence of drugs, alcohol, sleep deprivation or medication. SECURE any loose fitting jewelry or clothing, tie back long hair - they can get caught in moving parts . ALWAYS BE AWARE of where your fingers are in relation to the rotating disk. ALWAYS OPERATE with two hands. MAKE SURE disk is centered in the angle grinder and tightened with the tool key before operating. USE A CLAMP when cutting materials, this will help prevent the material from jumping and shaking which can break/shatter the disk and fragments will fly around the room and/or into you. DO NOT bend/use the angle grinder at a different angle other than the original angle used to cut while cutting through a material. You will shatter the disk and fragments will fly around the room and/or into you. NEVER hold materials in your bare hand while grinding or cutting. DO NOT start the angle grinder with the disk in contact with the work piece. ALWAYS let the angle grinder come to a complete stop on its own. Before setting it down Never grasp the blade in an attempt to stop the angle grinder. ALWAYS place the angle grinder upside down (disk away from the table) when not in use. ALWAYS unplug the angle grinder when changing disk. DO NOT wear gloves, neckties, or loose clothing when operating the angle grinder. ALWAYS seek assistance from a lab supervisor If you are NOT COMFORTABLE using this tool. DO NOT OPERATE any machine if you are not trained.
I _____________________ have been trained on the ______________________ and feel that I am knowledgeable and safe to use it without the assistance of a Lab supervisor. If a supervisor feels that I am

20
not operating a machine safely I understand they may pull my certification and require I be re-trained. I understand the dangerous nature of the Lab environment and I take full responsibility for my own safety in the fabrication laboratory. I understand the School of Architecture and Planning at the University of New Mexico is not responsible for accidents that might occur from the improper use of the tools in the fabrication laboratory. By signing below I acknowledge I have been properly trained.
Supervisor Signature__________________________ Student Signature________________________________
Welding Welding Equipment Students Name____________________________ Graduation Date___________________________ Supervisor Name_________________________ Today’s Date__________ Machine Description + Typical Uses: Welding is a process of joining metals via heat and or electricity. There are 4 types of welding processes which each use a different kind of equipment. All welding processes are limited in their ability to weld certain types of metals. -Gas Welding uses a torch which mixes Oxygen and Acetylene to produce a flame hot enough to melt the metals that are being joined. Once they reach their melting point the metals will become molten and fuse. The final three types of welding (Arc, MIG and TIG) all use an electric current to produce an arc which in turn creates enough heat to melt the metals together. For these processes a power supply is used to produce voltages high enough to melt the steel. -Arc Welding: This process uses a hand held electrode holder which one places an electrode into. This electrode is simply a metal rod, not just any rod though. The electrodes are made up of different alloys specific to the type of metals that are being joined. In addition to that the electrodes are coated with a flux. As the welding is taking place the flux is melted and it creates a shielding gas which in turn creates a micro-climate that is conducive for the joining of the metals. The tricky part of Arc welding is that the electrode deteriorates and the flux can get into your weld puddle. As with all processes proper hand eye coordination is required. -MIG (Metal Inert Gas) Welding: MIG welding is often referred to as wire feed welding. This is true, but it is not the wire feed that makes this process MIG welding but the fact that it uses an inert gas instead of flux to create the proper micro-climate. Along with the shielding gas MIG welding uses a power supply to provide the voltage and it has a spool of wire that is fed through a hose and out of a gun. This wire feed acts as the welding electrode and the filler rod. The use of wire feed welding without a shielding gas, as is the case with flux cored wire, is not technically MIG welding but wire feed arc welding. -TIG (Tungsten Inert Gas) Welding: As with MIG welding the process of TIG welding uses an inert gas for its shielding gas, generally Argon. Instead of a wire feed for the electrode it uses a torch outfitted with an electrode made out of Tungsten. The advantage of this is that in the micro-climate created with the Argon gas the Tungsten’s melting point is much higher than the welding temperature. Therefore the ability to weld with an electrode that does not deteriorate is created. This gives the advantage of having much more control over the weld and affords the ability to weld with minimum filler metal thus creating a smaller cleaner weld. Basic Safety Instructions: !!Wear Proper Eye Protection, and Remember You’re Working With Heat and High Voltage!! DO NOT operate while under the influence of drugs, alcohol, sleep deprivation or medication. SECURE any loose fitting clothing, tie back long hair - they can catch on fire Welding operation and safety
1. When dealing with pressurized gas cylinders understand that the cylinders are as you may think, under high pressure. Up to 2500 P.S.I.

21
2. Always keep cylinders fastened to something so that they will not fall over. If the valve at the top of the cylinder gets knocked off it could become a missile.
3. Never back out the pressure regulating knob on the regulator in order to lower the gas pressure
with the gas cylinder on. This causes there to be high pressure from the bottle on the valve, and if it is backed out enough to be unseated it could shoot out like a bullet.
4. Proper pressure adjustment of the regulator. With the valve of the gas cylinder off, back out the
adjusting knob on the regulator making sure to not back it out so much that it becomes unseated. Turn the pressure on from the cylinder. Now turn the pressure regulating knob on the regulator clockwise until desired pressure on the gauge is achieved.
MIG welder operation and safety
1. Make sure that you are wearing proper safety gear. This includes closed toe shoes, gloves, proper eye protection and no frayed clothing that could start on fire.
2. Mig welders use high voltage to weld via an electric arc. All precautions should be taken to avoid electric shock. Do not stand in water and avoid contact with the electrode when welding.
3. Make sure that your work space is clean and dry, and that you are not tripping over or tied up in cords.
4. Once you are safe and are ready to weld turn the weld gas on and adjust the pressure regulator to about 15 P.S.I. on the low pressure side.
5. Clamp the ground clamp from the welder to your metal work surface. 6. Plug the welder in, preferably directly into a wall receptacle. The voltage travels more efficiently
without an extension cord. 7. Adjust voltage and wire speed with the knobs on the welder. There is a chart inside the side cover
of the welder that describes setting for different materials. 8. Turn on the welder. 9. Make sure all of your safety gear is on your being. Be sure to use a welding helmet adjusted to the
proper shade setting for the type of welding that you’re doing. 10 or 11 is a good shade. 10. Begin welding, be safe and have fun.
ALWAYS seek assistance from a lab supervisor If you are NOT COMFORTABLE using this tool. DO NOT OPERATE any machine if you are not trained.
I _____________________ have been trained on the ______________________ and feel that I am knowledgeable and safe to use it without the assistance of a Lab supervisor. If a supervisor feels that I am not operating a machine safely I understand they may pull my certification and require I be re-trained. I understand the dangerous nature of the Lab environment and I take full responsibility for my own safety in the fabrication laboratory. I understand the School of Architecture and Planning at the University of New Mexico is not responsible for accidents that might occur from the improper use of the tools in the fabrication laboratory. By signing below I acknowledge I have been properly trained.
Supervisor Signature__________________________ Student Signature________________________________

22
Conclusion While this handbook does cover numerous safety issues, it is not a replacement for time spent practicing safe work habits in the Lab. Ultimately, it is the responsibility of the Lab user to follow all safety procedures as outlined. Failure to do so could result in serious injury. Completing the process to become Lab Certified in no way makes the user an expert. Becoming accomplished at fabrication with many materials and the equipment used to shape them takes time, patience and hard work. One should plan ahead and ask for assistance. The Lab staff is available to help and offer advice. Finally, the user needs to understand the limits of the equipment, the materials, their own technical ability and the size and scope of the project when considering work in the Lab.

23
SAFETY AGREEMENT FORM UNM SA+P Fabrication Lab
Failure to follow these guidelines, procedures and the instructions of the fabrication supervisors will result in the loss of privileges of the entire fabrication facility indefinitely. I have read and understand the general guidelines for the operation of the SA+P Fabrication Laboratory and agree to comply with them. I agree to attend the introductory safety orientation and to operate all UNM SA+P owned equipment in compliance with the applicable safety policies posted in the lab and at each machine. I also agree to individual instruction and orientation in order to gain certification to use a piece of equipment on my own. I agree to abide by all of the applicable safety requirements for the use of the lab, including the wearing of protective safety gear. I agree never to operate any machine without eye protection. I understand that I may not bring in my own personal tools to work on a project. I agree not to operate any machine on my own without certification. I am solely responsible for understanding and abiding by the proper operation of the fabrication lab and that I do so at my own risk. I understand working in a fabrication environment involves an element of risk, which I accept. I also acknowledge that orientation and certification is required for my use of the lab. I understand that the Fab-Lab supervisors are present to help ensure my safety. In order to help me use the tools provided, I understand that they may need to oversee my use and possibly correct me if a tool is being used incorrectly. This oversight may include a small amount of physical contact with a Fab-Lab supervisor and I fully understand that this is strictly for my safety and the safety of others. I understand that users of the fabrication lab should not operate power tools or equipment if they are taking any medication that impairs their mental faculties or physical ability to operate tools or equipment. I also understand that the fabrication lab should not be used by persons who are tired or in a hurry. By signing this form, I confirm that I will not enter the fabrication lab or operate tools or equipment under any impaired state (mental, physical, or any other, including sleep deprivation). I HAVE READ AND UNDERSTAND THE TERMS AND CONDITIONS OF THIS POLICY. I UNDERSTAND THE USE OF THE FABRICATION LAB IS NOT A RIGHT, BUT A PRIVELEGE AND ANY UNSAFE ACTION ON MY PART MAY RESULT IN THE REVOCATION OF MY PRIVELEGES INDEFINATELY, AT THE DISCRETION OF THE FAB LAB DIRECTOR/ MANAGER. I HAVE BEEN TRAINED AND INSTRUCTED ON THE PROPER AND SAFE USE OF THE FAB LAB EQUIPMENT. I UNDERSTAND THAT FAILURE TO FOLLOW THE INSTRUCTIONS OUTLINED IN TRAINING AND IN THIS DOCUMENT WILL RESULT IN LOSS OF LAB PRIVELEGES AND ACCESS. IF GROSS NEGLIGENCE IS DETERMINED TO BE INVOLVED IN THE COURSE OF A NON-INJURY ACCIDENT A MEETING IS REQUIRED BETWEEN THE USER(S) AND THE LAB SUPERVISOR BEFORE
24
LAB ACCESS MAY RESUME. IF AN INDIVIDUAL IS CONSISTENTLY WORKING IN AN UNSAFE MANNER, LAB PRIVILEGES WILL BE REVOKED. Student (Legibly Printed) Name ____________________________ Date______________ Student Signature _____________________________________ Date______________ STUDIO SECTION _______________________ GRADUATION DATE_______________ Test Score: Pass__________ Fail________________ No. of Attempts:_________

25
Fab Lab Safety Test Name Date Select one answer for each question 1 Eye protection must be worn:
Only when working at a machine. At all times .
When the Lab Supervisor reminds me.
2. Proper footwear for the Lab is:
Work boots. Any type of shoe. Closed- Toed Footwear that cover the toes, heel and top of foot.
3. Those persons allowed to work in the Lab are:
Anyone with previous experience. Only individuals that have completed the safety and training program and are currently enrolled in the SA+P
Any student currently enrolled at UNM.
4. Equipment and tools available to use are:
Only machines, equipment and tools that I have been properly trained on. Any tools in the Lab. Any machine or tool that I can figure out how to use on my own.
5. Materials are not provided, except for:
Anything I can find in the Lab. Materials left on workbenches. Any material in the bins below the table saw and miter saw table.
6. The FIRST priority when working at a machine is:
Don't make any mistakes. Watch what others are doing around me.
Always think about safety.
7. Before turning on a stationary machine:
Turn on your iPod so you can't hear the machine. Turn on the dust collection system or confirm that it is on.
Announce to everyone that you are starting-up a machine.
8. On the band saw, the correct blade guard setting is:
1/8 - 1/4 inch above the material. Holding material tight against the table. The guard can be placed any height above the material.
9.When holding material at the miter saw, the safety zone is:
Anywhere, as long as I am holding firmly. As far away from the blade as possible. Six inches away from the blade.
10. When using the sanding machines it is best to:
Know the direction the sandpaper is going.
26
Hold the material firmly. All of the above.
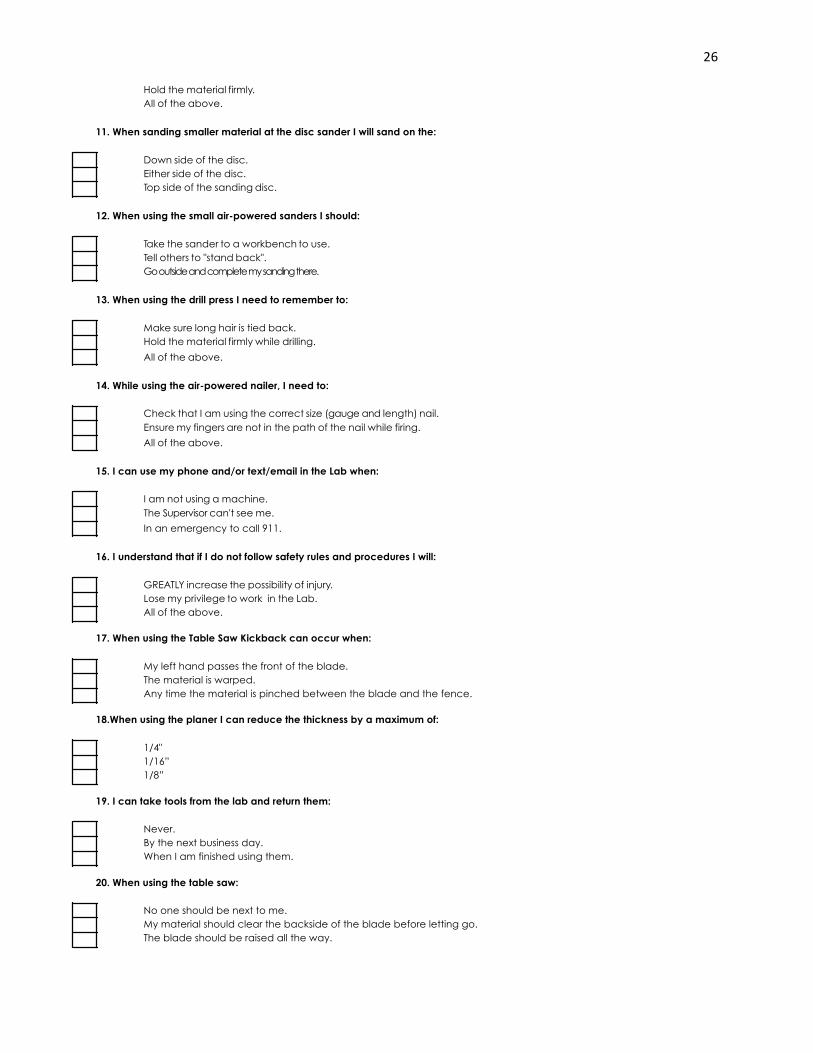
11. When sanding smaller material at the disc sander I will sand on the:
Down side of the disc. Either side of the disc. Top side of the sanding disc.
12. When using the small air-powered sanders I should:
Take the sander to a workbench to use. Tell others to "stand back". Go outside and complete my sanding there.
13. When using the drill press I need to remember to:
Make sure long hair is tied back. Hold the material firmly while drilling.
All of the above.
14. While using the air-powered nailer, I need to:
Check that I am using the correct size (gauge and length) nail. Ensure my fingers are not in the path of the nail while firing.
All of the above.
15. I can use my phone and/or text/email in the Lab when:
I am not using a machine. The Supervisor can't see me.
In an emergency to call 911.
16. I understand that if I do not follow safety rules and procedures I will:
GREATLY increase the possibility of injury. Lose my privilege to work in the Lab. All of the above.
17. When using the Table Saw Kickback can occur when:
My left hand passes the front of the blade. The material is warped. Any time the material is pinched between the blade and the fence.
18.When using the planer I can reduce the thickness by a maximum of:
1/4" 1/16” 1/8”
19. I can take tools from the lab and return them:
Never. By the next business day. When I am finished using them.
20. When using the table saw:
No one should be next to me. My material should clear the backside of the blade before letting go. The blade should be raised all the way.