SAP cProjects
257
Collaboration Projects Release 4.5 SP05 HELP.EPPLMCPRO
-
Upload
nishant333 -
Category
Documents
-
view
143 -
download
0
description
SAP cProjects
Transcript of SAP cProjects

Collaboration Projects
Release 4 .5 SP05
HE
LP
.EP
PL
MC
PR
O

SAP Online Help 12.09.2008
Collaboration Projects 2
Copyright
© Copyright 2008 SAP AG. All rights reserved.
No part of this publication may be reproduced or transmitted in any form or for any purposewithout the express permission of SAP AG. The information contained herein may bechanged without prior notice.
Some software products marketed by SAP AG and its distributors contain proprietarysoftware components of other software vendors.
Microsoft, Windows, Excel, Outlook, and PowerPoint are registered trademarks of MicrosoftCorporation.
IBM, DB2, DB2 Universal Database, System i, System i5, System p, System p5, System x,System z, System z10, System z9, z10, z9, iSeries, pSeries, xSeries, zSeries, eServer, z/VM,z/OS, i5/OS, S/390, OS/390, OS/400, AS/400, S/390 Parallel Enterprise Server, PowerVM,Power Architecture, POWER6+, POWER6, POWER5+, POWER5, POWER, OpenPower,PowerPC, BatchPipes, BladeCenter, System Storage, GPFS, HACMP, RETAIN, DB2Connect, RACF, Redbooks, OS/2, Parallel Sysplex, MVS/ESA, AIX, Intelligent Miner,WebSphere, Netfinity, Tivoli and Informix are trademarks or registered trademarks of IBMCorporation.
Linux is the registered trademark of Linus Torvalds in the U.S. and other countries.
Adobe, the Adobe logo, Acrobat, PostScript, and Reader are either trademarks or registeredtrademarks of Adobe Systems Incorporated in the United States and/or other countries.
Oracle is a registered trademark of Oracle Corporation.
UNIX, X/Open, OSF/1, and Motif are registered trademarks of the Open Group.Citrix, ICA, Program Neighborhood, MetaFrame, WinFrame, VideoFrame, and MultiWin aretrademarks or registered trademarks of Citrix Systems, Inc.
HTML, XML, XHTML and W3C are trademarks or registered trademarks of W3C®, WorldWide Web Consortium, Massachusetts Institute of Technology.
Java is a registered trademark of Sun Microsystems, Inc
JavaScript is a registered trademark of Sun Microsystems, Inc., used under license fortechnology invented and implemented by Netscape.
SAP, R/3, xApps, xApp, SAP NetWeaver, Duet, PartnerEdge, ByDesign, SAP BusinessByDesign, and other SAP products and services mentioned herein as well as their respectivelogos are trademarks or registered trademarks of SAP AG in Germany and in several othercountries all over the world. All other product and service names mentioned are thetrademarks of their respective companies. Data contained in this document servesinformational purposes only. National product specifications may vary.
These materials are subject to change without notice. These materials are provided by SAPAG and its affiliated companies ("SAP Group") for informational purposes only, withoutrepresentation or warranty of any kind, and SAP Group shall not be liable for errors oromissions with respect to the materials. The only warranties for SAP Group products andservices are those that are set forth in the express warranty statements accompanying suchproducts and services, if any. Nothing herein should be construed as constituting anadditional warranty.

SAP Online Help 12.09.2008
Collaboration Projects 3
Icons in Body Text
Icon Meaning
Caution
Example
Note
Recommendation
Syntax
Additional icons are used in SAP Library documentation to help you identify different types ofinformation at a glance. For more information, see Help on Help General InformationClasses and Information Classes for Business Information Warehouse on the first page of anyversion of SAP Library.
Typographic Conventions
Type Style Description
Example text Words or characters quoted from the screen. These include fieldnames, screen titles, pushbuttons labels, menu names, menu paths,and menu options.
Cross-references to other documentation.
Example text Emphasized words or phrases in body text, graphic titles, and tabletitles.
EXAMPLE TEXT Technical names of system objects. These include report names,program names, transaction codes, table names, and key concepts of aprogramming language when they are surrounded by body text, forexample, SELECT and INCLUDE.
Example text Output on the screen. This includes file and directory names and theirpaths, messages, names of variables and parameters, source text, andnames of installation, upgrade and database tools.
Example text Exact user entry. These are words or characters that you enter in thesystem exactly as they appear in the documentation.
<Example text> Variable user entry. Angle brackets indicate that you replace thesewords and characters with appropriate entries to make entries in thesystem.
EXAMPLE TEXT Keys on the keyboard, for example, F2 or ENTER.

SAP Online Help 12.09.2008
Collaboration Projects 4
Collaboration Projects ......................................................................................................... 10
Work with cProjects ......................................................................................................... 10
Navigation.................................................................................................................... 10
Adjustment or Enhancement of the User Interface ........................................................ 11
Personalization of the User Interface......................................................................... 11
Project Elements .......................................................................................................... 12
Project Definition....................................................................................................... 12
Project Roles ............................................................................................................ 13
Phase ....................................................................................................................... 14
Checklist................................................................................................................... 14
Checklist Item........................................................................................................ 15
Task ......................................................................................................................... 15
Typical Functions for Project Leads .............................................................................. 15
Typical Functions for Project Participants ..................................................................... 16
Typical Functions for Project Resource Planners .......................................................... 16
Typical Functions for Decision Makers.......................................................................... 16
Functions on the Start Page............................................................................................. 17
Opening a Project or Project Version ............................................................................ 17
Creating a Project Definition ......................................................................................... 18
Creating a Project Charter for a Project Definition......................................................... 19
Dashboard ................................................................................................................... 20
Favorites List................................................................................................................ 24
Adding Objects to the Favorites List .......................................................................... 24
Project List ................................................................................................................... 25
Search Function ........................................................................................................... 26
Vacant Role Search ..................................................................................................... 27
Selection by Qualification.......................................................................................... 28
Making User Settings ................................................................................................... 28
Creation of a Project ........................................................................................................ 30
Creating a Project Definition ......................................................................................... 31
Creating Project Elements............................................................................................ 32
Deactivation of Object Types........................................................................................ 34
Task Hierarchies .......................................................................................................... 34
Mass Data Entry........................................................................................................... 35
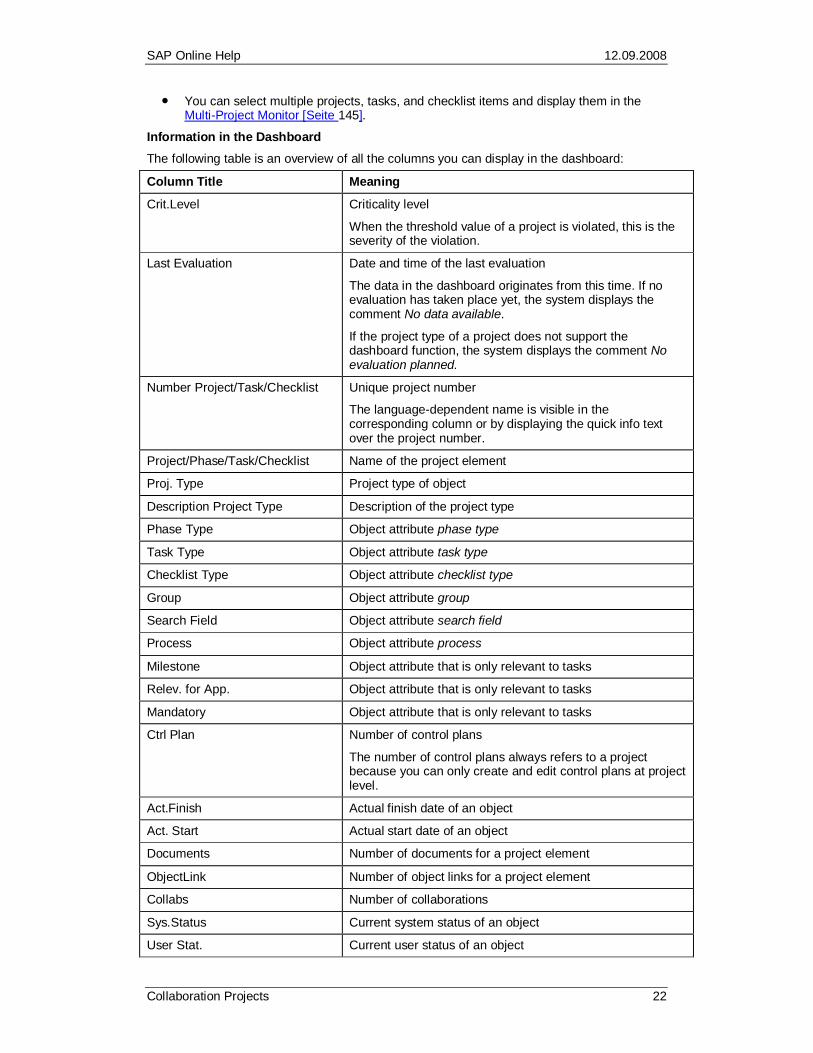
Templates .................................................................................................................... 36
Creating a Template ................................................................................................. 36
Work with Checklist References................................................................................ 40
Including Subtrees from Templates ........................................................................... 41
Structure Tree .............................................................................................................. 41

SAP Online Help 12.09.2008
Collaboration Projects 5
Creation of Data for the Project Definition ..................................................................... 42
Creating Basic Data for a Project Definition............................................................... 43
Creating Additional Data for a Project Definition ........................................................ 44
Creation of Data for a Phase ........................................................................................ 46
Creating Basic Data for a Phase ............................................................................... 46
Creating Additional Data for a Phase......................................................................... 48
Creating Data for a Checklist ........................................................................................ 48
Creating Basic Data for a Checklist ........................................................................... 49
Creating Additional Data for a Checklist .................................................................... 50
Creating Data for a Checklist Item ................................................................................ 50
Creating Basic Data for a Checklist Item ................................................................... 51
Creating Additional Data for a Checklist Item............................................................. 52
Creation of Data for a Task........................................................................................... 53
Creating Basic Data for a Task.................................................................................. 54
Creating Additional Data for a Task........................................................................... 55
Editing Project Structures................................................................................................. 56
Basic Functions............................................................................................................ 58
Table View................................................................................................................ 58
Working with the Table View.................................................................................. 60
List View................................................................................................................... 60
Graphical View.......................................................................................................... 61
Setting the Filter........................................................................................................ 63
Saving the Filter........................................................................................................ 65
Printing an Object ..................................................................................................... 66
Workflow................................................................................................................... 66
Alerts........................................................................................................................ 67
Lock Logic ................................................................................................................ 70
Multilingual Capabilities............................................................................................. 70
Using Language-Dependent Functions.................................................................. 72
Recording Changes .................................................................................................. 73
Archiving................................................................................................................... 74
Notes........................................................................................................................ 74
Project Planning ........................................................................................................... 75
Editing a Project Element.......................................................................................... 75
Deletion of Objects.................................................................................................... 76
Editing the Relationship Between Tasks.................................................................... 78
Scheduling................................................................................................................ 79
Time Constraints ................................................................................................... 81
Scheduling Manually ............................................................................................. 81
Releasing Project Elements ...................................................................................... 82

SAP Online Help 12.09.2008
Collaboration Projects 6
Import and Export of Data ......................................................................................... 83
Export to Microsoft Project (Client)......................................................................... 83
Export to Microsoft Project (Server) ....................................................................... 85
Export to an XML File............................................................................................ 86
Importing of Project Data....................................................................................... 87
Confirmation................................................................................................................. 88
Confirming Checklist Items........................................................................................ 89
Confirming Tasks...................................................................................................... 89
Time Recording Using the Cross-Application Time Sheet.......................................... 90
Project Resource Planning............................................................................................... 93
Project Roles................................................................................................................ 94
General Definition of a Project Role .......................................................................... 96
Creating a Project Role............................................................................................. 97
Sorting Project Roles ................................................................................................ 99
Views........................................................................................................................ 99
Distribution of Required Capacity over Periods........................................................ 100
Task Assignment........................................................................................................ 102
Assigning Tasks and Project Roles ......................................................................... 104
Deleting a Task Assignment.................................................................................... 105
Assignment of Project Roles to Tasks ..................................................................... 106
Definition of Qualifications .......................................................................................... 108
Defining Qualifications ............................................................................................ 109
Deleting Qualifications ............................................................................................ 110
Staffing Process ......................................................................................................... 110
Staffing Process Tab Page...................................................................................... 112
Staffing Process - Status ..................................................................................... 113
Accepting Responsibility for Roles....................................................................... 114
Synchronize Project Roles to Staffing Process..................................................... 115
Resource Search........................................................................................................ 116
General Selection Criteria ....................................................................................... 118
Selection According to Organizational Structure...................................................... 118
Selection According to Qualifications....................................................................... 119
Selection According to Availability........................................................................... 121
Running a Search ................................................................................................... 122
Search Results ....................................................................................................... 122
Suitability Percentage ............................................................................................. 123
Vacant Role Search................................................................................................ 125
Selection by Qualification .................................................................................... 126
Staffing of Project Roles with Resources .................................................................... 126
Candidates ............................................................................................................. 130

SAP Online Help 12.09.2008
Collaboration Projects 7
Staffing Actions....................................................................................................... 131
Creating a Business Partner ................................................................................... 131
Storing Resources As Candidates........................................................................... 133
Notifying a Selected Resource by E-Mail................................................................. 133
Staffing Project Roles with Resources..................................................................... 134
Reserving Resources.............................................................................................. 136
Generic Interval Check............................................................................................ 137
Creating a Soft Booking for a Resource .................................................................. 137
Workflow for Resource-Booking Statuses................................................................ 138
Creating a Groupware Task........................................................................................ 139
Resource Manager ..................................................................................................... 140
Multi-Project Management ............................................................................................. 140
Work with Subprojects................................................................................................ 140
Work with Mirrored Tasks ........................................................................................... 142
Work with Programs ................................................................................................... 144
Multi-Project Monitor................................................................................................... 145
Setting the Filter in the Multi-Project Monitor ........................................................... 147
Project Versions............................................................................................................. 148
Work with Versions..................................................................................................... 150
Creation of Simulations and Snapshots ...................................................................... 151
Creation of Snapshots in the Background ................................................................... 153
Reconciliation and Comparison of Versions................................................................ 153
Performing Reconciliations and Comparisons ......................................................... 155
Deletion of Project Versions........................................................................................ 156
Object Links................................................................................................................... 157
Creating an Object Link .............................................................................................. 158
Editing an Object Link................................................................................................. 160
Opening a Linked Object for Editing............................................................................ 160
Displaying Linked Object Data.................................................................................... 161
Deleting an Object Link .............................................................................................. 161
Accounting Integration ................................................................................................... 162
General Information About Accounting Integration ...................................................... 164
Costing Logic.......................................................................................................... 164
Assignment of Cost/Revenue Rates........................................................................ 167
Derivation of Organizational Data............................................................................ 168
From the Opportunity to the Sales Order .................................................................... 169
Preliminary Costing and Quotation Creation ............................................................... 173
Ad Hoc Cost Estimate for cProjects......................................................................... 176
Sales Pricing for cProjects ...................................................................................... 178
Controlling.................................................................................................................. 180

SAP Online Help 12.09.2008
Collaboration Projects 8
Controlling Cockpit.................................................................................................. 181
Single-Object Controlling for Internal Orders ........................................................... 182
Multilevel Controlling............................................................................................... 183
Manual Creation of the Controlling Structure........................................................ 185
Automatic Creation of the Controlling Structure.................................................... 187
Integration with Supplier Relationship Management ....................................................... 189
Creating a Shopping Cart ........................................................................................... 190
Canceling a Shopping Cart......................................................................................... 191
Staffing Tasks with External Resources ...................................................................... 191
Control Plan................................................................................................................... 192
Creating and Opening a Control Plan ......................................................................... 192
Editing a Control Plan................................................................................................. 193
Creating a Control Plan Version.................................................................................. 196
Creating Objects in the Control Plan........................................................................... 196
Work with Documents.................................................................................................... 197
Documents................................................................................................................. 198
Assigning Documents and Creating Folders............................................................ 198
Editing the Document or Folder............................................................................... 199
Using Document Templates .................................................................................... 201
Content Versions .................................................................................................... 202
Tabular Document View.......................................................................................... 202
Integration with SAP Document Management............................................................. 203
Working with Document Info Records...................................................................... 204
Integration with a WebDAV Client............................................................................... 206
Technical Description and Configuration Information............................................... 209
Configuration of a WebDAV Repository Manager................................................. 211
Defining the WebDAV URL.................................................................................. 212
Editing Functions for Project and Collaboration Structures ...................................... 214
Function Details .................................................................................................. 216
Objects with the Same Name .............................................................................. 217
Editing Project and Collaboration Structures............................................................ 218
Integration with cFolders................................................................................................ 219
Creating a Collaboration............................................................................................. 219
Assigning an Existing Collaboration to a Project Element............................................ 220
Transferring Documents ............................................................................................. 221
Renaming a Collaboration or a Folder ........................................................................ 222
Maintaining a Collaboration ........................................................................................ 223
Deleting a Link to a Collaboration ............................................................................... 223
Integration with SAP Enterprise Portal............................................................................ 224
Integration with Virtual Rooms .................................................................................... 225

SAP Online Help 12.09.2008
Collaboration Projects 9
Integration with SAP xRPM............................................................................................ 227
Project Status Reports ................................................................................................... 228
Creating Project Status Reports.................................................................................. 228
Editing Project Status Reports .................................................................................... 230
Evaluations.................................................................................................................... 231
Creating and Displaying Evaluations........................................................................... 232
Exporting Evaluations................................................................................................. 234
Search ....................................................................................................................... 234
Favorites .................................................................................................................... 235
Approving a Phase ........................................................................................................ 236
Creating an Approval.................................................................................................. 237
Beginning an Approval ............................................................................................... 238
Granting or Rejecting Individual Approvals.................................................................. 238
Canceling an Approval ............................................................................................... 239
Rejecting an Approval ................................................................................................ 240
Beginning an Approval Again...................................................................................... 240
Granting an Approval.................................................................................................. 241
Authorizations................................................................................................................ 242
Assigning Authorizations ............................................................................................ 245
Assigning Administration Authorization.................................................................... 247
User Groups............................................................................................................... 248
Substitute................................................................................................................... 249
Superuser .................................................................................................................. 250
Status Management....................................................................................................... 250
Status of the Project Definition.................................................................................... 250
Status of Phases ........................................................................................................ 252
Status of Templates.................................................................................................... 253
Status of Tasks .......................................................................................................... 254
Status of Checklists.................................................................................................... 254
Status of Checklist Items ............................................................................................ 255
Status of Control Plan Versions .................................................................................. 256
Status of Documents .................................................................................................. 256
Status Information for Project Element........................................................................ 257

SAP Online Help 12.09.2008
Collaboration Projects 10
Collaboration ProjectsPurposeCollaboration Projects (cProjects) is a cross-industry tool that you use to plan and monitordevelopment and consultant projects.
For more information about cProjects analyses with BI Content, see SAP Libraryfor SAP NetWeaver under SAP NetWeaver Library SAP NetWeaver by KeyCapability Information Integration by Key Capability BI Content ProductLifecycle Management BW: cProjects.
Work with cProjectsNavigation [Seite 10]
Project Elements [Seite 12]
Typical Functions for Decision Makers [Seite 16]
Typical Functions for Project Leads [Seite 15]
Typical Functions for Project Participants [Seite 16]
Typical Functions for Project Resource Planners [Seite 16]
NavigationUseNote the following special features of navigation in cProjects:
When you navigate in the project structure, the system displays the path with thesuperior elements below the different views (breadcrumb [Extern]). You can open eachelement by clicking the link.
To navigate backwards and forwards between pages in the documentation, use theBack function in the context menu via the secondary mouse button.
Use the Exit function in the top right-hand corner to leave the application. Do not leavethe application by closing the browser before exiting the application.
No standard logoff page is supplied with cProjects. You can define your ownpage and use this.

SAP Online Help 12.09.2008
Collaboration Projects 11
Adjustment or Enhancement of the User InterfaceUseThe user interface of cProjects 4.0 was created with Web Dynpro for ABAP.
A number of different options are available for enhancing or changing the user interface. Youcan either make adjustments that are specific to the cProjects application or you can makegeneral changes to Web-Dynpro-ABAP applications.
For more information about adjusting or enhancing the cProjects user interface, see SAPNote 942560.
FeaturescProjects-Specific Adjustments
The following application-specific adjustments to the cProjects user interface are possible:
Defining a customer-specific tab page
For more information, see the Collaboration Projects Implementation Guide (IMG)under Global Enhancements to Project Elements Show Additional Tab Page incProjects.
Defining a tab page for customer-specific fields
For more information, see the Collaboration Projects Implementation Guide underGlobal Enhancements to Project Elements Define Field Groups for Customer Fields.
Defining fields as required entry fields or hiding fields
For more information, see SAP Notes 947936 and 942672.
Inserting new or customer-specific columns in the table view [Seite 58]
For more information, see SAP Note 972339.
Displaying new or customer-specific fields in the dashboard [Seite 20]
For more information, see SAP Note 971394.
General Changes to Web-Dynpro-ABAP Applications
You can also carry out general enhancements to Web-Dynpro-ABAP applications, forexample, if you want to display a new customer-specific field. You can use the framework formodification-free enhancements for this. For more information, see SAP Library for SAPNetWeaver under SAP NetWeaver by Key Capability Application Platform by KeyCapability ABAP Technology UI Technology Web UI Technology Web DynproABAP Web Dynpro ABAP: Development in Detail Advanced Concepts Modification-Free Enhancements.
For more information about using the modification-free enhancement concept in cProjects,see SAP Note 950896.
Personalization of the User InterfaceUseWeb Dynpro for ABAP provides a general, cross-application concept for personalizing theuser interface. You can use this to personalize the user interface on a user-specific basis oran administrator can use it to personalize the user interface on a general basis for all users in

SAP Online Help 12.09.2008
Collaboration Projects 12
a client of a particular system. For more information about the personalization optionsprovided by Web Dynpro ABAP applications, see SAP Library for SAP NetWeaver under SAPNetWeaver by Key Capability Application Platform by Key Capability ABAP Technology
UI Technology Web UI Technology Web Dynpro ABAP
Reference End User and Administrator Personalization
Web Dynpro ABAP: Development in Detail Advanced Concepts Personalizationand Configuration Personalization.
FeaturesYou can personalize the cProjects interface according to your requirements, for example, youcan hide interface elements, such as table columns. If you use the cross-applicationpersonalization option, you can hide and change the order of tab pages. If you use the user-specific personalization option, you can hide tab pages.
ActivitiesTo personalize interface elements in cProjects, click your chosen element with the secondarymouse button and make your selection from the menu that appears.
Project ElementsDefinitionSuperordinate concept for all structuring elements in cProjects. These elements include:
Project definition [Seite 12]
Phases [Seite 14]
Checklists [Seite 14]
Checklist items [Seite 15]
Tasks [Seite 15]
Project roles [Seite 94]
Project DefinitionDefinitionProject element at the highest hierarchy level of a project. The project definition containsgeneral data of the project and information that is valid for the whole project.
IntegrationBelow the project definition, a project is structured using phases [Seite 14].
Below the project definition, you can create tasks [Seite 15], checklists [Seite 14], andchecklist references [Seite 40].
Below the phases, you can create tasks and checklists with checklist items [Seite 15].

SAP Online Help 12.09.2008
Collaboration Projects 13
Project Roles
DefinitionA project role represents a position in a project that is to be filled by a business partner, forexample, the role of consultant in a consulting project.
The project role describes which type of resource is required in a project, that is, whichfunction the resource carries out in the project. The project role includes information about thequalifications that the resource should have and when and for how long the resource shouldbe available.
A similar resource description exists in Organizational Management. Here, thepositions describe the resources required for the organizational plan.
UseYou create project roles according to the planned requirement for a project, thereby creatingthe foundation of Resource Planning. You can only assign tasks, staff roles with resources,and therefore complete resource planning, once you have created the project roles.
For more information about creating project roles, see Creating a Project Role[Seite 97].
Project roles can have the following statuses:
A red icon if the project role is not staffed
A yellow icon if the project role is partially staffed
A green icon if the project role is fully staffed
You can define the following attributes for each project role:
The qualifications a resource requires to be able to fulfill the project role
The tasks that a resource is to work on
The work and time frame for the individual tasks
Once you have assigned tasks to the project role and staffed the project role with resources,you can check whether all assignments and staffings are consistent. To do so, choose Check.
You use the DPR_TRUNCATE Business Add-In (BAdI) to control whether orhow the system is to delete or truncate the project roles and staffings when anoperational project is completed or if it is canceled. For more information, seeCustomizing for Collaboration Projects under Resource Management BasicSettings for Project Roles BAdI: Control Truncation and Deletion of Roles andStaffings.

SAP Online Help 12.09.2008
Collaboration Projects 14
StructureThe project role overview with the current status and assigned resources is always displayedin the screen area on the left in the project role definition.
You can sort the project roles at any time to get a better overview. See SortingProject Roles [Seite 99]. You can also hide the role list to gain more space forediting a project role.
In the screen area on the right, you define the business attributes of each project role andassign persons to it. The following tab pages are available:
General [Seite 96] (detail view for the project role)
Tasks [Seite 102]
Staffing Process [Seite 110]
Qualifications [Seite 108]
Costing [Seite 167]
Staffing [Seite 126]
Documents [Seite 198]
Notes [Seite 74]
Shopping Cart [Seite 190]
Object Links [Seite 157]
Recording Changes [Seite 73]
PhaseDefinitionA clearly defined period in a project. A phase begins with the release and ends with theapproval [Seite 236]. A phase is considered released when the status Released is set in thephase. For more information about statuses, see Status Management [Seite 250].
IntegrationYou can further subdivide a phase using checklists [Seite 14] and tasks [Seite 15].
ChecklistDefinitionControl list with items that must be processed.

SAP Online Help 12.09.2008
Collaboration Projects 15
UseChecklists ensure that all important aspects of a project or of a phase are taken into account.
StructureA checklist consists of checklist items [Seite 15].
Checklist ItemDefinitionPart of a checklist [Seite 14].
UseChecklist items represent important requirements that have to be met in order to achieve theproject goal. Project participants check off the items they have finished.
TaskDefinitionSmallest part of a project.
UseIn projects, tasks help to record and structure necessary processing steps.
IntegrationYou can assign tasks to a project definition [Seite 12], a phase [Seite 14], or a checklist item[Seite 15]. If your system administrator permitted subtasks for a project type, you can alsocreate tasks below other tasks. However, you cannot create any subtasks for tasks below aproject definition.
Typical Functions for Project LeadsCreation of a Project [Seite 30]
Multi-Project Management [Seite 140]
Object Links [Seite 157]
Scheduling [Seite 79]
Project Versions [Seite 148]
Substitute [Seite 249]
Accounting Integration [Seite 162]
Evaluations [Seite 231]
Beginning an Approval [Seite 238]

SAP Online Help 12.09.2008
Collaboration Projects 16
Archiving [Seite 74]
Project Status Reports [Seite 228]
Work with Documents [Seite 197]
Typical Functions for Project ParticipantsEvaluations [Seite 231]
Work with Documents [Seite 197]
Confirming Tasks [Seite 89]
Confirming Checklist Items [Seite 89]
Integration with cFolders [Seite 219]
Control Plan [Seite 192]
Object Links [Seite 157]
Typical Functions for Project Resource PlannersCreating a Project Role [Seite 97]
Task Assignment [Seite 102]
Definition of Qualifications [Seite 108]
Staffing Process [Seite 110]
Resource Search [Seite 116]
Staffing of Project Roles with Resources [Seite 126]
Notifying a Selected Resource by E-Mail [Seite 133]
Staffing Project Roles with Resources [Extern]
Creating a Groupware Task [Seite 139]
Typical Functions for Decision MakersGranting or rejecting individual approvals [Seite 238]

SAP Online Help 12.09.2008
Collaboration Projects 17
Functions on the Start PageUseThe start page is the central access page in the cProjects application.
FeaturesHeader area
In the header area, you can display your own logo or a user-specific URL. You makethe required settings in Customizing for Collaboration Projects under Basic SettingsMake General Interface Settings.
You see the header area on every screen in the application. However, you can hide it ifyou want to (see Making User Settings [Seite 28]).
Initial views
There are many ways to access a project. The initial views you see depend on yourrole.
When you call the application for the first time, the Projects initial view appears.
The initial view you choose depends on your concrete role and tasks. For example,project leads open projects for editing while project members who want to confirmchecklist items access the checklist items directly.
You see the initial views on every screen in the application.
Dashboard [Seite 20]
Opening a Project or Project VersionPrerequisitesYou are in the Projects or Versions initial view in the Open area.
ProcedureProject...
1. Enter the project number of the project you want to open.
If you do not know the number, you can find it by using the search function [Seite 26].
2. Choose Continue.
The system opens the project in the view in which you were last working. You can nowedit the project (see Editing Project Structures [Seite 56]).
Version...
1. Select the version type you want to open.
2. Enter a version number.
3. Enter the number of the project version you want to open.

SAP Online Help 12.09.2008
Collaboration Projects 18
The number of a snapshot is always the same as the number of the operationalproject it belongs to, whereas a simulation has its own number.
4. Choose Continue.
You can also open a project from the project list [Seite 25] or favorites list [Seite24].
Creating a Project DefinitionUseThe first step in creating a project is creating a project definition [Seite 12]. This is where youdefine the data for your project. If you use a template, you create a complete project.
Prerequisites...
You already defined and released templates, if applicable (see Templates [Seite 36]).
You have authorization for the authorization object CPRO_PTYPE for the project typesyou want to use.
You are in the Projects initial view.
Procedure...
1. Choose Create.
2. Enter a project number for the new project.
You can enter any string of characters. The system checks whether the number hasbeen assigned yet.
3. Choose a template type (project template or simulation).
For a project template:
Choose a project type from the dropdown box.
Select a template.
You can only use templates with the project type you selected in the previousstep. You cannot use operational projects as templates.
For a simulation:
Select a version as the version for copy. The input help displays the simulationversions that are available.
Select a project number as the template. The input help displays the existingsimulation project numbers.
4. Enter the original language.
5. Choose Create.

SAP Online Help 12.09.2008
Collaboration Projects 19
The editing screen of the new project appears. You can continue to structure yourproject here and enter all the necessary data. For more information, see Creation of aProject [Seite 30].
6. Save your entries.
Note that the system creates your project only after you have saved the data.
Creating a Project Charter for a Project DefinitionUseIn the project charter you define current values and target values along with the scope andbenefits of a project. The project charter helps you to plan and carry out Six Sigma projects.
PrerequisitesYou have created a project definition whose project type permits the use of the projectcharter. You have selected the Project Charter indicator in Customizing for CollaborationProjects under Structure Define Project Types.
You are in the editing view of this project definition on the Project Charter tab page.
In the Language field, you have selected the language in which you want to enter language-dependent texts.
You cannot make any changes if you opened a snapshot [Extern] or simulation. You cannotedit the project charter in the template.
FeaturesDetail tab page:
Here you can enter descriptions for the problem, scope, and goals for the project charter.These fields are not language-dependent.
Metrics tab page:
Here you can select a group for the project charter. This enables you to define a logical groupof project charters. You can display the object attribute group in the dashboard [Seite 20].
You can define key figures for the project charter by means of generic metrics management.You can adjust the content displayed in Customizing for Collaboration Projects. For moreinformation, see the Collaboration Projects Implementation Guide (IMG) under MetricsManagement
Define Object Types
Define Metrics Groups
Define Metrics
Define Currencies
Define Quantities
Define Metrics Value Types
Assign Metrics Value Type to Metrics Groups
Define Metrics-Independent Groups

SAP Online Help 12.09.2008
Collaboration Projects 20
Two metrics groups are supplied with the standard system:
o Financial data:
You can enter the actual and target data for the financial key figures Return on Investmentand Savings. You can define the currency in which the values are to be entered for each keyfigure. In the Validated field, you can specify for each metrics value type whether the valueshave been validated.
o Key figures:
You can enter the basic, actual, and target data for the self-defined key figures and Sigmavalue. You can define the unit in which the values are to be entered for each key figure. Youcan select the Final Value indicator for each metric. Once this indicator has been selected,the metrics value type fields of the metric can no longer be changed and the system displaysthe date of the final value.
You can enter the benefits that come from using the project charter; these entries arelanguage-dependent.
We recommend that you use the URL parameter if you want to change thelanguage for a short amount of time and adjust your browser settings if youneed to change the language long term. Note that the browser language thenonly applies if the URL does not specify a language. For more information, seeMultilingual Capabilities [Seite 70].
Dashboard
UseThis function gives you an overview of various Key Performance Indicators [Extern] (KPIs) foryour projects. The dashboard [Extern] is available in a number of initial views, such as theProjects and Tasks initial views.
You can display additional or customer-specific fields in the dashboard. Formore information, see SAP Note 971394.
IntegrationThe KPIs are partly read straight from the project data and partly calculated in the evaluations[Seite 231].
If you change data in the project that affects the KPIs that were calculated, thedashboard is only updated after a new evaluation has taken place.
PrerequisitesYou made the following settings in Customizing for Collaboration Projects:
You activated the dashboard function for the appropriate project type and specifiedwhen evaluations are to be performed by choosing Evaluations and Dashboard in theDefine Project Types IMG activity. If you do not do this, you only see the project nameand the criticality level, for example, and no KPIs for the project.

SAP Online Help 12.09.2008
Collaboration Projects 21
You assigned the extract layout for the dashboard evaluations to the relevant projecttypes in the Assign Extract Layouts to Project Types IMG activity. SAP supplies the0_DASHBOARD layout with the standard system. You can display additionalinformation in the dashboard by including new attributes in the layout for thedashboard evaluations.
You assigned icons to the attributes for the evaluations in the Define Attributes andObject Types for Evaluations IMG activity.
FeaturesDashboard Views
Depending on which initial view you are in, you can choose from a number of differentdashboard views, for example:
Projects: Displays a project list [Seite 25].
The Projects, Control Plan, and Versions initial views for the version type simulationalways display aggregated values of the project element. The other initial views displaynon-aggregated values of the project element.
Favorites: Displays the objects that you added to your favorites [Seite 24].
Last Used Tasks, Projects, or Checklist Items: Displays all the objects you havealready edited. You can delete entries from the list.
Substitute: Displays all objects for which you are acting as a substitute.
PersonalizationUnder Settings you have the following options for personalizing the dashboard:
You can show or hide columns.
You can save your selection of columns as a view.
You can specify the order of the columns.
You can use filter functions.
You can adjust the table design, for example, you can change the number of rows thatare displayed.
General Functions
In the task and checklist views you can also select multiple project elements at a timeand open them for editing. This is even possible if the project elements belong todifferent projects.
The data for a project is displayed in the dashboard once an evaluation exists. If youchange any data, the information in the dashboard is updated accordingly when thenext evaluation is performed. The Customizing settings for the project type dictatewhen evaluations are created. However, they are only created in connection with theProjects entry object.
If you change project elements in the Tasks or Checklist Items views, thesystem does not update the dashboard when you save. The system onlyupdates the dashboard if the whole project is loaded in change mode but this isnot the case for these two views.
You can print the table or export it to Microsoft® Excel.
SAP Online Help 12.09.2008
Collaboration Projects 22
You can select multiple projects, tasks, and checklist items and display them in theMulti-Project Monitor [Seite 145].
Information in the DashboardThe following table is an overview of all the columns you can display in the dashboard:
Column Title Meaning
Crit.Level Criticality level
When the threshold value of a project is violated, this is theseverity of the violation.
Last Evaluation Date and time of the last evaluation
The data in the dashboard originates from this time. If noevaluation has taken place yet, the system displays thecomment No data available.
If the project type of a project does not support thedashboard function, the system displays the comment Noevaluation planned.
Number Project/Task/Checklist Unique project number
The language-dependent name is visible in thecorresponding column or by displaying the quick info textover the project number.
Project/Phase/Task/Checklist Name of the project element
Proj. Type Project type of object
Description Project Type Description of the project type
Phase Type Object attribute phase type
Task Type Object attribute task type
Checklist Type Object attribute checklist type
Group Object attribute group
Search Field Object attribute search field
Process Object attribute process
Milestone Object attribute that is only relevant to tasks
Relev. for App. Object attribute that is only relevant to tasks
Mandatory Object attribute that is only relevant to tasks
Ctrl Plan Number of control plans
The number of control plans always refers to a projectbecause you can only create and edit control plans at projectlevel.
Act.Finish Actual finish date of an object
Act. Start Actual start date of an object
Documents Number of documents for a project element
ObjectLink Number of object links for a project element
Collabs Number of collaborations
Sys.Status Current system status of an object
User Stat. Current user status of an object

SAP Online Help 12.09.2008
Collaboration Projects 23
Stat.Prof. Status profile that is used
Pers.Resp. Person responsible for a project element
Max.Sever. Maximum severity of a project element
If a manual severity exists, this is the maximum severity. Ifno manual severity exists, the highest severity of a projectelement is the highest degree of severity of all your ownseverities, both automatic and aggregated (see alsoEvaluations [Seite 231]).
ManualSev. Manual severity of the threshold value
Agg.Sever. Aggregated severity of a threshold value
Maximum severity of the actual project element and itslower-level project elements. See also Evaluations [Seite231].
Result Result of a checklist item; this is only relevant for checklistitems
Note that the following KPIs always refer to the project even if you are in the Tasks initial view,for example.
Priority Project’s priority
You specify the priority for the project definition. You definethe possible values in Customizing.
Work Cmpl. Percentage of work completed
This is calculated from the total work confirmed for all tasksand the remaining work.
Start Met Start date of project was met
Checks whether the actual start date is after the latestplanned start date.
Finish Met Finish date of project was met
Checks whether the actual finish date is after the latestplanned finish date.
Scope Met Scope of project was met
Checks whether the amount of project work has exceededthe amount planned.
Deadl. Met Tasks that met the deadline
Shows what percentage of tasks that should have beencompleted by the current date, have actually beencompleted.
Proj.Delay Project delay
Based on the average amount of work confirmed each day,the system calculates the number of days by which theproject is delayed.
Staff.Stat Staffing status
Shows whether a project is under- or overstaffed.
Plan. Costs Planned costs

SAP Online Help 12.09.2008
Collaboration Projects 24
Act. Costs Actual costs
Budget Budget
Currency Currency of the costs and of the budget
Favorites ListUseIn the favorites list you can display objects you process or open often. You show the favoritesby choosing the Favorites application view in the dashboard [Seite 20].
PrerequisitesIf you want to display the criticality level of an object, you have to schedule evaluations [Seite231] for the objects in the favorites lists.
FeaturesYou can open the objects displayed here by clicking once with your mouse.
The system displays all objects apart from user groups with an icon [Extern]. This iconshows whether the threshold values have been violated in a project. If no results areavailable, the system displays the No Value Set icon. For more information, seeEvaluations [Seite 231].
You can create your own views in the settings.
ActivitiesAdd an object to your favorites list. For more information, see Adding Objects to theFavorites List [Seite 24].
To delete an object from the favorites list, select it and then choose Delete fromDashboard.
Adding Objects to the Favorites ListUseYou can create a personal favorites list for the following objects:
Projects
Tasks
Checklist items
Evaluations

SAP Online Help 12.09.2008
Collaboration Projects 25
User groups
Templates
Versions
PrerequisitesYou are in the editing view or in the search results of an object.
ProcedureAdding an Object from the Editing View to the Favorites List
This procedure is not valid for evaluations or user groups....
1. In the structure tree in the left screen area, select the object you want to add to thefavorites list.
2. Choose Add to Favorites.
Note that this pushbutton is only active for the objects for which you can create afavorites list.
Adding a Project Element from the Search Results to the Favorites List...
1. In the Search Results screen area, select the project element you want to add to thefavorites list.
2. Choose Add to Favorites.
This pushbutton appears only for the object in whose initial view you arelocated. If, for example, you want to access a project from the Tasks initial view,and start the search there, you can only add tasks to your favorites list and notprojects or checklist items.
Project List
The following table shows what the system displays in your personal project list on thevarious tab pages and which prerequisites must be met.
Tab Page Information Displayed Other Prerequisites
ProjectsProjects view: All projects which contain projectsor project elements to which you are assigned bymeans of a role.
The project has not beencompleted yet.
Tasks
Projects view: All projects which contain tasks towhich you are assigned by means of a role.
Tasks view: All tasks to which you are assignedby means of a role.
The tasks have beenreleased.
Checklist Projects view: All projects which contain checklist The checklist items have been

SAP Online Help 12.09.2008
Collaboration Projects 26
Items items to which you are assigned by means of arole.
Checklist Items view: All checklist items to whichyou are assigned by means of a role.
released.
ControlPlans
All projects to which you are assigned by meansof a role and whose project type supports controlplans (see Customizing for Collaboration Projectsunder Structure Define Project Types ).
Templates All templates in which you are specified as theTemplate Responsible.
You can only enter a businesspartner as the templateresponsible (see Creating aBusiness Partner).
Versions All simulations or snapshots for which you haveadministration authorization.
For more information about the assignment of roles, see Project Resource Planning.
See also:
Dashboard
Search FunctionUseYou use the search function to search for project elements and documents. You can open theobjects displayed in the Search Results area by clicking once with your mouse.
If there are more than 10 entries in the search results, you can carry out a search in thesearch results. Enter one or more search criteria and choose Search in Results.
You can adjust the search result list by means of the BAdI DPR_DPR_SEARCH. For moreinformation, see the Collaboration Projects Implementation Guide (IMG) under GlobalEnhancements to Project Elements Business Add-Ins (BAdIs) BAdI: Adjust Search-Result List.
IntegrationYou can add a project element that is displayed as a search result to your favorites list [Seite24] by choosing Add to Favorites.
Activities...
1. Enter the required search criteria or choose an entry from the dropdown box.
The search criteria that you can enter are dependent on what you are searching for.
2. If necessary, you can limit the number of search results by specifying a MaximumNumber of Hits.
A maximum of 100 hits will be displayed by default.
3. Choose Find.

SAP Online Help 12.09.2008
Collaboration Projects 27
Vacant Role Search
You use this function to find roles that have not been fully staffed that are available within acertain time frame. This enables you to search worldwide for the best available talent in anenterprise.
The project lead marks a role as vacant so that it can be recognized as an unstaffed orpartially staffed role from outside the project.
PrerequisitesYou are in the Projects, Tasks, or Checklist Items initial view and choose Vacant Roles.
FeaturesYou can enter the following criteria for the search:
Time frame
Project type
Role type
Area
Location
Function
Qualifications
The system displays the search result in a table. From here you can:
Create a print version in PDF
Export the data to Microsoft Excel
Display detail data
Select a project role and choose Detail Data.
If a contact person has been specified and this business partner has an e-mailaddress, the system displays an e-mail link which you can use to contact this person.
Send detail data to yourself in an e-mail
Select a project role and choose Send E-Mail.
You can send the detail data of the selected role to yourself if an e-mail address isspecified for your user in the system.
Note
In cProjects, you can enter your e-mail address in the E-Mail Address field underUser Settings User . This data only becomes available the next time you open
the search.
End of the note.

SAP Online Help 12.09.2008
Collaboration Projects 28
Selection by QualificationUseYou can choose qualifications as selection criteria for the vacant role search.
IntegrationThe system automatically displays all qualifications that exist in the system. See Definition ofQualifications [Seite 108].
PrerequisitesYou are in the vacant role search.
FeaturesYou can add qualifications you want to use as search criteria or delete those you no longerrequire.
There are only two types of priority for qualifications: essential requirements and optionalrequirements.
If a qualification is an essential requirement, the system only takes those roles that have atleast this qualification into account.
You can specify a minimum suitability percentage in the selection criteria. The systemcalculates a role’s suitability percentage from the difference between the required proficiencyof a qualification and the degree to which the role fulfills this. Note that in resourcemanagement, alternative qualifications are not taken into account in the calculation of thesuitability percentage. The system also takes roles into account which have the qualificationbut not at the required level of proficiency. Example: For language proficiency, you specify"fluent". The system also takes roles into account for the suitability percentage that have alanguage proficiency below this level.
Activities4. Select qualifications by expanding the qualifications catalog and selecting the required
qualification(s). Then choose >> (Add Selected Qualification to QualificationRequirements).
5. You can also use the search function: Make an entry in the Search Term field andchoose Search. The system displays a search results list from which you can select thequalifications you require.
6. Specify the required proficiency for each qualification.
7. To run the search, choose Find Vacant Roles.
Making User SettingsPrerequisitesYou are in the User Settings area.
ProcedureMaking General Settings
1. Select the processing mode you want to set as default for opening projects.

SAP Online Help 12.09.2008
Collaboration Projects 29
If you open a project element in the Display processing mode, the system does notset a lock indicator and other project participants can edit the project.
2. Under Earl./Lst Dates, choose whether the system should display the earliest or latestdates in the Gantt chart.
3. If applicable, select a date type.
The date type is only relevant if you use object links. It affects how the dates of theSAP objects are displayed in the graphical view.
If you want to hide the user-specific header area in the application, deselect theDisplay Header indicator.
4. Select the Scheduling Only Manually indicator if you want the dates of the projectelements to be calculated by calling scheduling manually or by saving and you do notwant the system to calculate them automatically. Calling scheduling manually canhave a positive effect on performance if you are working with large project structures.
5. Decide whether you want to display the Change Documents tab page and select ordeselect the Display Change Documents checkbox accordingly.
6. If you want to adjust the width of the structure tree, enter the required number ofpixels under Tree Width (Px). The system uses this value for the width of thestructure tree in the table and detail views.
7. Choose whether you want to view and edit your project texts in the original languageor in the logon language and make the default setting in the dropdown box (seeMultilingual Capabilities).
8. Save your settings.
Note
If you are using cProjects via SAP Enterprise Portal, the Display Header indicator is hiddenbecause the system uses the header area of the portal by default.
End of the note.
Setting Default Values
1. Select the values cProjects displays by default when you create a project or template.
2. Save your entries.
Note
If, in the user settings, you set up object types that were deactivated at a later point in time,they are no longer used here.
End of the note.
Making User Settings
1. Enter your user data in the Own Data area or edit the data there.
2. Choose the time zone, the required date format, and the decimal point format.
3. Save your data.
4. If you want to change your password, enter your old password in the Password fieldin the Password Change area.

SAP Online Help 12.09.2008
Collaboration Projects 30
5. Enter your new password in the New Password field and again in the RepeatPassword field.
6. Save your new password.
Making Technical Settings
1. In the URL Info. Page field, enter the absolute URL you want to see on the Info tabpage.
Caution
Some pages cannot be viewed within the application, but are displayed as fullscreens instead. As a result, the system immediately jumps to the page you specifiedwhen you call cProjects.
Do not enter cProjects itself as a URL. By doing so you create an infinite loop,causing the application to call itself again and again. In either case, you are no longerable to change the URL in the application. Only your system administrator can undothe setting.
End of the caution.
Note
You see the URL Info. Page field only if your system administrator specified that youcan enter your own URL. For more information about setting up the URL, seeCustomizing for Collaboration Projects under Basic Settings Make GeneralInterface Settings .
End of the note.
2. Decide whether you want to create a new version of a document or whether you wantto overwrite the existing version when you upload documents. Make this defaultsetting in the dropdown box. You can change this setting each time you upload adocument if need be.
Making Settings for the Graphic
Select the Without Relationships checkbox if you do not want to display or editrelationships in the graphical view.
Under Hidden Table Columns select the table columns that you do not want thesystem to display in the table part of the graphic.
Note
You can only make user-specific settings for those columns that are not alreadyhidden by the CPRO_GANTT enhancement spot. For more information, seeCustomizing for Collaboration Projects under Global Enhancements to ProjectElements Business Add-Ins (BAdIs) BAdI: Check or Change Graphical ViewDisplay ..
End of the note.
Creation of a ProjectPrerequisites...
1. You already defined templates, if applicable (see Templates [Seite 36]).

SAP Online Help 12.09.2008
Collaboration Projects 31
2. You created a project definition [Seite 12] (see Creating a Project Definition [Seite 31]).
Process Flow...
1. The project lead enters the required data for the project definition (see Creating BasicData for a Project Definition [Seite 43]).
2. The project lead structures the project through the project elements....
a. The project lead creates phases [Seite 14] and enters the data for the phase[Seite 46].
b. The project lead creates checklists [Seite 14] with checklist items [Seite 15] andenters the data for the checklist [Seite 48] and for the checklist item [Seite 50].
c. The project lead creates tasks [Seite 15] and enters the data for the tasks [Seite53].
3. The project lead performs scheduling [Seite 79].
4. The project lead creates roles, assigns them to tasks, and then assigns persons to theroles (see Project Resource Planning [Seite 93]).
5. A project participant creates a control plan for the project (see Creating and Opening aControl Plan [Seite 192]).
6. A project participant creates object links to the project elements (see Creating anObject Link [Seite 158]).
7. A project participant assigns documents to the project elements and creates acollaboration in cFolders (see Creating a Collaboration [Seite 219]).
ResultThe project is available in the system and all of the relevant entries have been made. Theproject can now be processed (see Editing Project Structures [Seite 56]).
Creating a Project DefinitionUseThe first step in creating a project is creating a project definition [Seite 12]. This is where youdefine the data for your project. If you use a template, you create a complete project.
Prerequisites...
You already defined and released templates, if applicable (see Templates [Seite 36]).
You have authorization for the authorization object CPRO_PTYPE for the project typesyou want to use.
You are in the Projects initial view.
Procedure...
1. Choose Create.
2. Enter a project number for the new project.
You can enter any string of characters. The system checks whether the number hasbeen assigned yet.

SAP Online Help 12.09.2008
Collaboration Projects 32
3. Choose a template type (project template or simulation).
For a project template:
Choose a project type from the dropdown box.
Select a template.
You can only use templates with the project type you selected in the previousstep. You cannot use operational projects as templates.
For a simulation:
Select a version as the version for copy. The input help displays the simulationversions that are available.
Select a project number as the template. The input help displays the existingsimulation project numbers.
4. Enter the original language.
5. Choose Create.
The editing screen of the new project appears. You can continue to structure yourproject here and enter all the necessary data. For more information, see Creation of aProject [Seite 30].
6. Save your entries.
Note that the system creates your project only after you have saved the data.
Creating Project ElementsUseYou structure your project by creating new project elements.
PrerequisitesYou created a project definition (see Creating a Project Definition [Seite 31]).
You opened a project for processing (see Opening a Project or Project Version [Seite17]).
You created a checklist template [Seite 36], as required.
Procedure...
1. In the structure tree [Seite 41] in the left screen area, select the project element forwhich you want to create new project elements.
In the dropdown box above the structure tree, the system displays all the projectelements that you can insert beside the selected project element or directly below theselected project element. The following table provides an overview of the possibleproject elements:
Project Element Possible Parallel Possible Lower-Level What Else You should

SAP Online Help 12.09.2008
Collaboration Projects 33
Project Elements Project Elements Know
Projectdefinition
- Phase
Checklist
Task
You can only createchecklists and tasksdirectly below the projectdefinition if the project typeof the current projectallows this.You cannot createsubtasks for tasks directlybelow the projectdefinition.
Phase Phase Checklist
Task
Checklist Checklist
Task
Checklist item
Checklist item Checklist item Task
Task Task
Checklist
Subtask You can only createsubtasks if the project typeof the current projectallows this.
See also:
Task Hierarchies [Seite34]
2. Select the project element that you want to create and then choose Create.
The system creates parallel project elements beside the selected project element andlower-level project elements below the selected project element.
3. Enter the data for your new project element.
For more information, see:
Creation of Data for a Phase [Seite 46]
Creating Data for a Checklist [Seite 48]
Creating Data for a Checklist Item [Seite 50]
Work with Checklist References [Seite 40]
Creation of Data for a Task [Seite 53]
4. Save your entries.
See also:
Including Subtrees from Templates [Seite 41]

SAP Online Help 12.09.2008
Collaboration Projects 34
Deactivation of Object TypesUseYou can deactivate the following object types:
a. Project type
b. Phase type
c. Checklist type
d. Task type
In Customizing for Collaboration Projects, deselect the Active indicator under Structure
e. Define Project Types
f. Define Phase Types
g. Define Checklist Types
h. Define Task Types
A deactivated object type no longer appears as a value for selection when youcreate a new object. If an existing object uses an object type that wasdeactivated after the object was created, this object type is still visible and canbe selected.
If an object uses an object type that is not active and you change the objecttype, save your changes, and then want to undo your changes afterwards, youmust activate this object type again in Customizing before you can undo yourchanges.
If an object uses an object type that is not active, the system continues todisplay the object type in this object.
The BAdI DPR_DEACTIVATE_TYPES provides you with more options fordeactivating object types. For more information, see the documentation for theBAdI.
If you create objects with a template or copy objects from templates or otherobjects in the project, the system copies the existing object type. The systemdoes not check whether the Active indicator is selected for this object type.Therefore, we recommend that the administrator checks the project andchecklist templates for objects types that are not active and should no longer beused and adjusts the templates accordingly.
Task HierarchiesUseYou use this function to structure the tasks that belong to a project in a hierarchy.
IntegrationYou can only use summary tasks in bottom-up scheduling [Seite 79].

SAP Online Help 12.09.2008
Collaboration Projects 35
PrerequisitesIn Customizing for Collaboration Projects you specified that task hierarchies are allowed, bychoosing Structure Define Project Types.
FeaturesTask hierarchies are formed when you create subtasks for tasks.
You cannot create subtasks for tasks directly below the project definition.
You specify in Customizing whether you want to use task hierarchies with or without summarytasks [Extern].
Hierarchies with Summary TasksOnce you create a subtask for a task, this task becomes a summary task. Some activities canonly be carried out for tasks that are not summary tasks. These include:
Confirming time
Entering qualifications
Assigning project roles
Planning work
Assigning cost and revenue rates
Some of the information from the subtasks is aggregated in the summary task.
Hierarchies Without Summary TasksYou can perform all activities at any level of the task hierarchy. There are no summary tasks.
Mass Data EntryUseThis function enables you to display larger numbers of tasks or checklist items in a tabularoverview and create and edit them there.
IntegrationThe Criticality Level button allows you to display the threshold value violations for a task orchecklist item and set a manual severity.
PrerequisitesYou are in the screen for processing a project element, for which you can create tasks orchecklist items (see Creating Project Elements [Seite 32]).
FeaturesYou can display the basic data for a checklist item or task using the Detail button.
The Tasks or Subtasks button allows you to display the tasks or subtasks of a checklistitem or task.
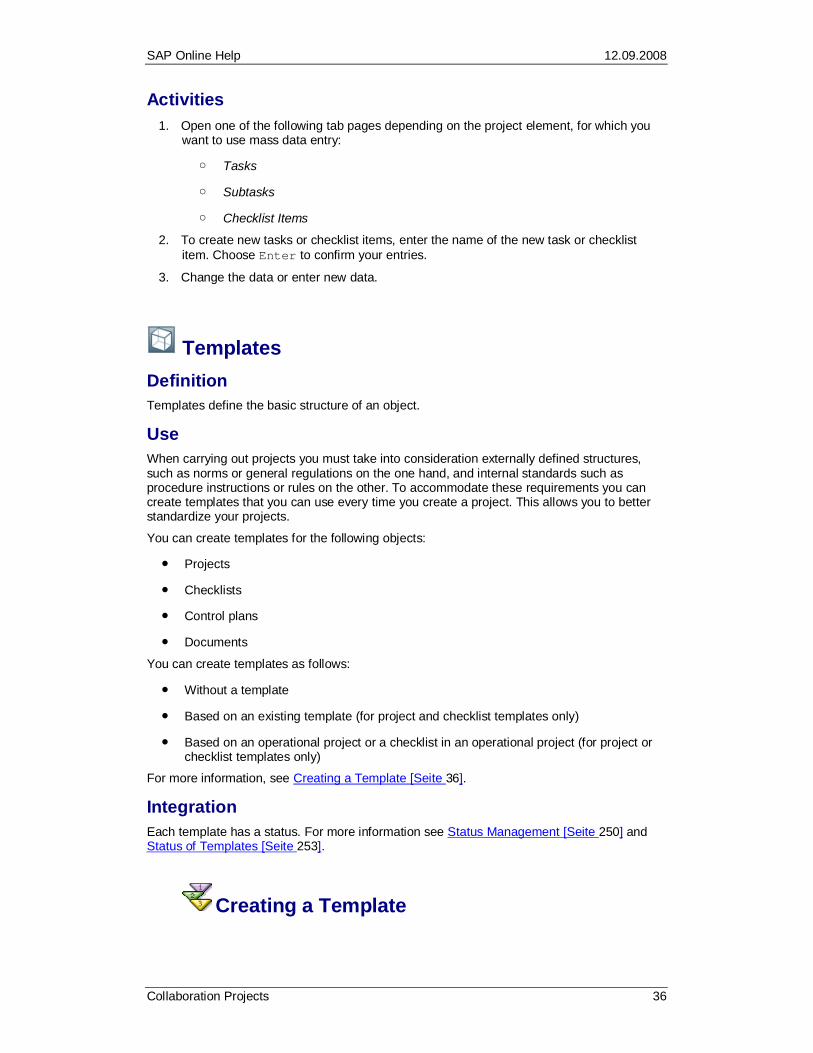
SAP Online Help 12.09.2008
Collaboration Projects 36
Activities...
1. Open one of the following tab pages depending on the project element, for which youwant to use mass data entry:
Tasks
Subtasks
Checklist Items
2. To create new tasks or checklist items, enter the name of the new task or checklistitem. Choose Enter to confirm your entries.
3. Change the data or enter new data.
TemplatesDefinitionTemplates define the basic structure of an object.
UseWhen carrying out projects you must take into consideration externally defined structures,such as norms or general regulations on the one hand, and internal standards such asprocedure instructions or rules on the other. To accommodate these requirements you cancreate templates that you can use every time you create a project. This allows you to betterstandardize your projects.
You can create templates for the following objects:
Projects
Checklists
Control plans
Documents
You can create templates as follows:
Without a template
Based on an existing template (for project and checklist templates only)
Based on an operational project or a checklist in an operational project (for project orchecklist templates only)
For more information, see Creating a Template [Seite 36].
IntegrationEach template has a status. For more information see Status Management [Seite 250] andStatus of Templates [Seite 253].
Creating a Template

SAP Online Help 12.09.2008
Collaboration Projects 37
UseYou can create templates [Seite 36] in a variety of ways:
Without a template
Based on an existing template (for project and checklist templates only)
Based on an operational project or a checklist in an operational project (for project andchecklist templates only)
PrerequisitesYou are in the Templates initial view in cProjects.
Procedure
The authorizations you specify for templates are simply authorization templates.They are not used for the authorization check in the template, but in theoperational project. When you create an operational project in the template theyare copied to the project.
Creating a Template Without a Template...
1. Select the template category you want to create and choose Create.
If you chose the template category Document Template, the system branches directlyto the editing view for creating new document templates. You can exit the editingscreen for document templates in the following ways:
...
By selecting a different template category in the upper left-hand area.
By selecting a different initial view.
For more information, see Assigning Documents and Creating Folders [Seite 198].
For all other templates, proceed as follows:
2. Enter a number for the new template.
The number uniquely identifies the template. It is language-independent. You can enterany combination of letters and numbers.
The system checks whether the number has been assigned yet. The systemchecks the following objects:
Project template
Checklist template
Control plan template
Operational project
Control plan
If you do not enter a number, the system generates a number. You can change thisnumber at a later date, if required.
3. Choose No Template for project and checklist templates.
You are not required to make this selection for control plan templates.
You can enter the project type or checklist type either straight away or later on.

SAP Online Help 12.09.2008
Collaboration Projects 38
4. Choose Create.
5. Enter all the data you want to save in the template. The table below shows you whereyou can find more information about the necessary data entries.
Creating a Template with a Template
This procedure applies to project and checklist templates only....
1. Select the template category you want to create and choose Create.
2. Enter a number for the new template.
3. Choose Project Template or Checklist Template as the template.
4. Enter the number of the project or checklist template you want to use as a template inthe Template field.
You can use the search [Seite 26] to find the number.
5. Choose Create.
The system opens the template you specified.
6. Change the existing data. The table below shows you where you can find moreinformation about the necessary data entries.
Creating a Template Based on an Operational Project
This procedure applies to project and checklist templates only....
1. Select the template category you want to create and choose Create.
2. Enter a number for the new template.
3. Choose Project or Checklist as the template.
4. Enter the number of the template project or template checklist in the Template field.
5. A project template only contains checklist references and no operational checklists.Therefore, when you create a project template, you have to decide under NewChecklist Templates whether the existing checklists of the operational project are to bechanged into templates. You have the following options:
a. None
No new templates are created. Existing checklist references are transferred tothe project template and resolved checklist references are replaced by theoriginal reference. Checklists without a reference are not transferred to theproject template and changes you made to checklists from resolved referencesare lost.
b. Only Checklists Without a Reference
The system creates new checklist templates from operational checklists withouta reference and the new checklist templates are automatically included in thenew project template. Existing checklist references are transferred to the projecttemplate and resolved checklist references are replaced by the originalreference.
c. From All Checklists
The system creates new checklist templates from operational checklists withouta reference and from resolved checklist references and the new checklisttemplates are automatically included in the new project template. Existingchecklist references are transferred to the project template.

SAP Online Help 12.09.2008
Collaboration Projects 39
6. Choose Create.
The system opens the object you specified. The system does not transfer operationaldata.
7. Enter new data, if required, or change the existing data. The table below shows youwhere you can find more information about the necessary data entries.
TemplateCategory
Procedure What You Should Know
Project template...
1. Enter the data as described inCreation of a Project [Seite 30].
2. Enter the following on theAdditional Data tab page:
The business partner number ofthe person responsible in theTemplate Responsible field.
If you want to use your userstatus in the operational project,enter a Status Profile Template.
...
1. Not all fields exist thatare available when youcreate an operationalproject because youcannot enter operationaldata, such as fixeddates.
2. You first have to createthe business partnersyou want to assign here.If you have not yet doneso, you now have theopportunity. For moreinformation, see Creatinga Business Partner [Seite131].
Specify the following in theproject template:
Whether the checklistreferences you are usingin the template areautomatically resolvedwhen you create aproject from thistemplate.
What happens to theproject roles from achecklist template (seealso Work with ChecklistReferences [Seite 40]).
Checklisttemplate
...
1. Enter the data as described inCreating Data for a Checklist[Seite 48].
2. Enter the following on theAdditional Data tab page:
The business partnernumber of the personresponsible in theTemplate Responsiblefield.
Under Changeability[Extern], select the
...
1. Not all fields exist thatare available when youcreate an operationalchecklist because youcannot enter operationaldata, such as fixeddates.
2. You first have to createthe business partnersyou want to assign here.For more information,see Creating a BusinessPartner [Seite 131].

SAP Online Help 12.09.2008
Collaboration Projects 40
degree to which thedefined data from thechecklist template ischangeable when youcreate a checklist withthis template.
If you want to use youruser status in theoperational project, entera Status ProfileTemplate.
Control plantemplate
Enter the data as described in Creatingand Opening a Control Plan [Seite192].
Versioning does not take placefor control plan templates. Forthis reason, the functionsCreate Version and CreateVersion with Template are notavailable.
Documenttemplate
Proceed as described in AssigningDocuments and Creating Folders[Seite 198].
ResultOnce you have saved your entries, the templates are created. These templates have theinitial status Created. If you want to use them in cProjects, you must first release them bysetting the status to Released.
Work with Checklist ReferencesUseYou use this function to create a reference to a checklist template (checklist reference). Youcan resolve the reference later on so that you include the checklist with the checklist items inyour project. The checklist template then becomes the operational checklist in which you canenter operational data, such as dates.
Once you release the corresponding phase, the system resolves the checklistautomatically.
PrerequisitesYou created a checklist template [Seite 36].
FeaturesYou can display the checklist template in a separate window
You can resolve a checklist reference
If you are in an operational project you can resolve the reference. The checklisttemplate is then included in the project structure.
If you are in a project template, you can select the Resolve Reference indicatorto specify that the system resolves the checklist reference straight away if an

SAP Online Help 12.09.2008
Collaboration Projects 41
operational project is created based on this project template. If you do not selectthe indicator, the checklist reference is transferred to the operational project.
When you resolve checklist references, the system creates the project roles from thechecklist template again by default. This even happens if roles with the same projecttype and name already exist.
The Use Project Roles function enables you to specify that project roles that alreadyexist are not created again via the checklist template. If it is possible to make a uniqueassignment, the system assigns the existing project roles to the project elements of thechecklist template instead. It is possible to make a unique assignment in the followingcases:
If one role exists in the project that has the same role type as the role in thechecklist template.
If several roles exist in the project that have the same role type as that of thechecklist template but the name of one role also matches the name of thechecklist role.
The role attributes from the checklist template, such as the general data,qualification requirements, or staffing are lost when the system transfers theexisting project templates.
If it is not possible to make a unique assignment after you have carried out thesechecks, the system does not transfer the existing roles automatically.
Including Subtrees from TemplatesUseYou can include phases, tasks, and checklist items from project templates or checklisttemplates in operational projects or other templates along with the lower-level projectelements that belong to them. The subtrees are copied when you do this.
Procedure...
1. In the structure tree in the screen area on the left, select the project element belowwhich or next to which you want to insert a subtree from a template.
2. Select whether you want to create a phase, task, or checklist item and choose Include.
3. Use the search dialog box to choose the project element you require.
ResultThe system then includes the selected project element and all its lower-level elements in thestructure tree below or next to the project element currently selected.
Structure TreeUseThe structure tree offers you an overview of your project structure with the project elements[Seite 12].

SAP Online Help 12.09.2008
Collaboration Projects 42
IntegrationIf you schedule evaluations [Seite 231], the system uses icons [Extern] to display the criticalitylevel of your project elements. This enables you to see at a glance whether threshold valueshave been violated.
FeaturesThe individual project elements are depicted by symbols:
Project definition
Phase
Checklist
Checklist item
Task
If these symbols are filled, you are in change mode. If the symbols are not filled ( ),you are in display mode.
You can use pushbuttons to expand or collapse the structure or parts of the structure.
You can navigate in the structure and display the data for a project element in theright-hand screen area by clicking on that project element.
You can set filters [Seite 63] for project elements.
Creation of Data for the Project DefinitionPurposeIn this process, you enter all the data for the project definition.
PrerequisitesYou created a project definition (see Creating a Project Definition [Seite 31]).
Process Flow...
1. You enter the basic data for the project definition (see Creating Basic Data for a ProjectDefinition [Seite 43]).
2. You enter the additional data for the project definition (see Creating Additional Data fora Project Definition [Seite 44]).
3. You check the status information for the project element [Seite 257].
4. You assign documents (see Assigning Documents and Creating Folders [Seite 198]).
5. You create collaborations (see Creating a Collaboration [Seite 219]).
6. You link objects with the project definition (see Creating an Object Link [Seite 158]).
7. You create a control plan for the project definition (see Creating and Opening a ControlPlan [Seite 192]).
8. You create roles and assign these to people (see Project Roles [Seite 94]).
9. You assign authorizations for the project definition (see Assigning Authorizations [Seite245]).

SAP Online Help 12.09.2008
Collaboration Projects 43
Creating Basic Data for a Project DefinitionPrerequisites
You created a project definition (see Creating a Project Definition [Seite 31]) and are inthe editing view of this project definition on the Basic Data tab page (see also Openinga Project or Project Version [Seite 17]).
You cannot make any changes if you opened a snapshot.
You created project roles (see Creating a Project Role [Seite 97]).
In the Language field (upper right-hand corner) you selected the language you want touse for creating language-dependent texts (see also Multilingual Capabilities [Seite70]).
ProcedureGeneral Area...
1. Enter a Name for your project.
The name is language-dependent but you can enter a name of your choice.
2. The unique, language-independent Number has been entered by default. You canchange this number provided that the project has not yet been transferred to theaccounting system. The system checks whether the number has been assigned yet.
3. Select a Project Type.
You must create a project type before you can release a project. It defines whether theaccounting integration [Seite 162] functions are active, for example.
4. Select a Reason for Project.
The project reason indicates why the project is being created.
5. Specify persons responsible (see Persons Responsible for Project Elements [Extern]).
6. Enter a Priority from 0-9 for the project.
The priority solely indicates the importance of the project. It does not affect any othersettings.
7. Enter a Description, as required.
The description is language-dependent.
8. If you want to release the project for processing, choose the entry Release from theChange Status dropdown box.
The system changes the current status from Created to Released. The project is nowreleased for processing (see Editing Project Structures [Seite 56]).
Once you release the project you can no longer change the project type or theproject reason and you cannot delete the project. You cannot change the orderof the phases either.
For more information about the status and the effects of changing the status,see Status of the Project Definition [Seite 250].

SAP Online Help 12.09.2008
Collaboration Projects 44
Task That Belongs to Master Project AreaThis area only appears if the current project is a subproject. If you have at least displayauthorization for the master project it belongs to, you can open it in display mode by clickingthe name. The system goes straight to the task that represents the subproject in the masterproject.
For more information about subprojects, see Work with Subprojects [Seite 140].
Program Assignments AreaThis area only appears if the current project is part of a program. If you have at least displayauthorization for the program, you can open it in display mode.
For more information about programs, see Work with Programs [Seite 144].
Dates Area
You can also edit the dates in the graphical view [Seite 61] or in the table view[Seite 58].
...
1. Enter dates in the Fixed Start Date and Fixed Finish Date fields, as required.
If you do not enter any dates, the system uses the current date as the start date. Thefinish date field remains empty. The system calculates the finish date from theremaining project data during scheduling.
Provided that the project has the status Created, the system automatically carries outscheduling as soon as you perform the next action in the system or press Enter. Thenthe system displays the result in the Calculated Start and Calculated Finish fields. Ifyou already changed the status, you must trigger scheduling manually. If there is aconflict of dates, the system issues an appropriate message.
For more information, see Scheduling [Seite 79].
2. Select the Calendar you want to use for this project.
The calendar influences scheduling. You use it to determine, for example, whether allweekdays or only working days are taken into consideration.
See also:
Creation of Data for the Project Definition [Seite 42]
Creating Additional Data for a Project DefinitionPrerequisitesYou created a project definition (see Creating a Project Definition [Seite 31]) and are in theediting view of this project definition on the Additional Data tab page (see also Opening aProject or Project Version [Seite 17]).
You cannot make any changes if you opened a snapshot.

SAP Online Help 12.09.2008
Collaboration Projects 45
ProcedureAdvanced Area...
1. Enter the Sold-to Party Number and the Customer Number, as required, or select anumber using the search function [Seite 26].
The system transfers the numbers to the Sold-to Party or Customer fields accordingly.
2. Enter a Grouping, if required.
Grouping allows you to group together projects in one category. You can select thegrouping of your choice. It is an additional search criterion in the search function forfinding a project.
3. Enter a search term in the Search Field, if required.
The system also uses the search term as an additional search criterion in the searchfunction.
4. If you activated time recording for the project definition in the Define Project Typesactivity in Customizing for Collaboration Projects, the Confirmation field is also activeon the Additional Data tab page. The field is only ready for input once the project hasbeen released.
Responsible Organizational Unit AreaEnter the organizational unit responsible for the project, or select it using the searchfunction [Seite 26].
The organizational unit can be used to determine organizational data for costing (see CostingLogic [Seite 164] and Derivation of Organizational Data [Seite 168]).
Default Values for Resources Area
If you enter an area and a location, the system offers you this data again when youcreate new project roles. You can change this information for each project role.
The distribution unit and period type you enter here form the basis for the distributionof required capacity [Seite 100].
If you change the required capacity distribution unit, the system adjusts thedistribution values of the project roles accordingly. This can lead to roundingerrors in particular if the new unit is significantly larger than the old one, forexample, changing the unit from day to year.
Administration AreaHere you see which project template the project is based on and who the person responsiblefor the template is. Furthermore, you check who created and changed the project and when.
See also:Creation of Data for the Project Definition [Seite 42]
Editing Project Structures [Seite 56]

SAP Online Help 12.09.2008
Collaboration Projects 46
Creation of Data for a PhasePurposeIn this process, you enter all the data for the phase.
PrerequisitesYou created a phase (see Creating Project Elements [Seite 32]).
Process Flow...
1. You enter the basic data for the phase (see Creating Basic Data for a Phase [Seite46]).
2. You enter the additional data for the phase (see Creating Additional Data for a Phase[Seite 48]).
3. You check the Status Information for Project Element [Seite 257].
4. You assign documents (see Assigning Documents and Creating Folders [Seite 198]).
5. You create collaborations (see Creating a Collaboration [Seite 219]).
6. You link objects with the phase (see Creating an Object Link [Seite 158]).
7. You create an approval (see Creating an Approval [Seite 237]).
You cannot create the approval until later; however, the latest by which it must beavailable is when the approval is started.
8. You assign authorizations for the phase (see Assigning Authorizations [Seite 245]).
Creating Basic Data for a PhasePrerequisites
You created a phase in a project (see Creating Project Elements [Seite 32]) and are inthe editing view of this phase on the Basic Data tab page (see also Opening a Projector Project Version [Seite 17]).
You cannot make any changes if you opened a snapshot.
You created project roles (see Creating a Project Role [Seite 97]).
In the Language field (upper right-hand corner) you selected the language you want touse for creating language-dependent texts (see also Multilingual Capabilities [Seite70]).
ProcedureGeneral Area...
1. Enter a Name for the phase.
The name is language-dependent but you can enter a name of your choice. Theunique, language-independent number has been entered by default. However, you canchange it.
2. Select a Phase Type.

SAP Online Help 12.09.2008
Collaboration Projects 47
You must create a phase type before you can release a phase.
3. Specify whether the phase has a Predecessor Phase in the dropdown box.
You use this setting to determine the order of the phases. If you make changes to theorder, you see them in the structure tree [Seite 41].
The system allows you to select phases from all phases that have already beencreated. Select No Predecessor for the first phase.
4. Specify persons responsible (see Persons Responsible for Project Elements [Extern]).
5. Enter a Description, as required.
The description is language-dependent.
6. If you want to release the phase for editing, choose the entry Release from the ChangeStatus field.
The system changes the current status from Created to Released. This releases thephase for editing (see Editing Project Structures [Extern]). At the same time, otherexisting checklist references are resolved and the tasks that belong to the phase arereleased for editing.
Once you have released the phase, you can no longer change the phase type.You cannot change the order of the phases or delete the phase either.
For more information about the status and the effects of changing the status, seeStatus of Phases [Seite 252].
Dates Area
You can also edit the dates in the graphical view [Seite 61] or in the table view[Seite 58].
...
1. Select constraints.
2. Enter a start date and a finish date, as required.
The fields are only ready for input if you selected the Must start on or Must finish onconstraint. The current date is entered for both dates by default in the standard system.
3. Enter a Duration, as required.
The field is relevant or taken into account only if you have not entered a date or haveonly entered one date in the Fixed Start Date and Fixed Finish Date fields. Otherwisethe system calculates the duration automatically.
4. Select the Calendar you want to use for this task.
For more information, see Scheduling [Seite 79].
See also:Creation of Data for a Phase [Seite 46]
Editing Project Structures [Seite 56]

SAP Online Help 12.09.2008
Collaboration Projects 48
Creating Additional Data for a PhasePrerequisitesYou have created a phase (see Creating Project Elements [Seite 32]) and are in themaintenance view of this phase on the Additional Data tab page.
You cannot make any changes if you opened a snapshot.
ProcedureAdvanced Area...
1. Enter a Grouping, if required.
Grouping allows you to group together phases in one category. You can select thegrouping of your choice. It is an additional search criterion in the search function forfinding a phase.
2. Enter a search term in the Search Field, if required.
The system also uses the search term as an additional search criterion in the searchfunction.
3. Select the Calendar you want to use for this project, if required.
The calendar influences scheduling. You use it to determine, for example, whether allweekdays or only working days are taken into consideration.
In the standard system, the same calendar is used for the phase and the projectdefinition. If you want to use a different calendar select it here.
Administration AreaHere you see who created and changed the phase on which date.
See also:Creation of Data for a Phase [Seite 46]
Editing Project Structures [Seite 56]
Creating Data for a ChecklistPurposeIn this process, you enter all the data for the checklist.
PrerequisitesYou created a checklist (see Creating Project Elements [Seite 32]).
Process Flow......
1. You enter the basic data for the checklist (see Creating Basic Data for a Checklist[Seite 49]).

SAP Online Help 12.09.2008
Collaboration Projects 49
2. You enter the additional data for the checklist (see Creating Additional Data for aChecklist [Seite 50]).
3. You check the Status Information for Project Element [Seite 257].
4. You assign documents (see Assigning Documents and Creating Folders [Seite 198]).
5. You create collaborations (see Creating a Collaboration [Seite 219]).
6. You link objects with the checklist (see Creating an Object Link [Seite 158]).
7. You assign authorizations for the checklist (see Assigning Authorizations [Seite 245]).
Creating Basic Data for a ChecklistPrerequisites
You created a checklist (see Creating Project Elements [Seite 32]) and are in theediting view of this checklist on the Basic Data tab page (see also Opening a Project orProject Version [Seite 17]).
You cannot make any changes if you opened a snapshot.
You created project roles (see Creating a Project Role [Seite 97]).
In the Language field (upper right-hand corner) you selected the language you want touse for creating language-dependent texts (see also Multilingual Capabilities [Seite70]).
ProcedureGeneral Area...
1. Enter a name for the checklist.
The name is language-dependent but you can enter a name of your choice. Theunique, language-independent number has been entered by default. However, you canchange it.
2. Select a checklist type.
You must enter a checklist type before you can release a checklist.
3. Specify persons responsible (see Persons Responsible for Project Elements [Extern]).
4. Enter a description, as required.
The description is language-dependent.
5. If you want to release the checklist for processing, choose the entry Release in theChange Status field.
The system changes the current status from Created to Released. The checklist is nowreleased for processing (see Editing Project Structures [Seite 56]).
Once you have released the checklist, you can no longer change the checklisttype. You cannot delete the checklist either.
For more information about the status and the effects of changing the status, seeStatus of Checklists [Seite 254].

SAP Online Help 12.09.2008
Collaboration Projects 50
See also:Creating Data for a Checklist [Seite 48]
Editing Project Structures [Seite 56]
Creating Additional Data for a ChecklistPrerequisitesYou have created a checklist (see Creating Project Elements [Seite 32]) and are in themaintenance view of this checklist on the Additional Data tab page.
You cannot make any changes if you opened a snapshot.
ProcedureAdvanced Area...
1. Enter a Grouping, if required.
Grouping allows you to group together checklists in one category. You can select thegrouping of your choice. It is an additional search criterion in the search function forfinding a checklist.
2. Enter a search term in the Search Field, if required.
In addition to grouping, the system uses the search term as an additional searchcriterion in the search function.
3. The system displays the extent to which the checklist can be modified in theChangeability field. For more information, see Changeability [Extern].
Administration AreaHere you see which checklist templates you used to create a checklist and the personresponsible for the template. Here you check who resolved, created, and changed thechecklist and when.
See also:Creating Data for a Checklist [Seite 48]
Editing Project Structures [Seite 56]
Creating Data for a Checklist ItemPurposeIn this process, you enter all the data for the checklist item.

SAP Online Help 12.09.2008
Collaboration Projects 51
PrerequisitesYou created a checklist item (see Creating Project Elements [Seite 32]).
Process Flow...
1. You enter the basic data for the checklist item (see Creating Basic Data for a ChecklistItem [Seite 51]).
2. You enter the additional data for the checklist item (see Creating Additional Data for aChecklist Item [Seite 52]).
3. You check the Status Information for Project Element [Seite 257].
4. You assign documents (see Assigning Documents and Creating Folders [Seite 198]).
5. You create collaborations (see Creating a Collaboration [Seite 219]).
6. You link objects with the checklist item (see Creating an Object Link [Seite 158]).
7. You assign authorizations for the checklist item (see Assigning Authorizations [Seite245]).
Creating Basic Data for a Checklist ItemPrerequisites
You created a checklist item (see Creating Project Elements [Seite 32]) and are in theediting view of this checklist item on the Basic Data tab page (see also Opening aProject or Project Version [Seite 17]).
You cannot make any changes if you opened a snapshot.
You created project roles (see Creating a Project Role [Seite 97]).
In the Language field (upper right-hand corner) you selected the language you want touse for creating language-dependent texts (see also Multilingual Capabilities [Seite70]).
ProcedureGeneral Area...
1. Enter a Name for the checklist item.
The name is language-dependent but you can enter a name of your choice.
2. Change the Sort Number, as required.
When you create a checklist item the system enters the sort number according to itsposition in the checklist, by default. If you want to position a checklist item between twoexisting items, enter a sort number that lies between the sort numbers of the existingitems.
3. Select the Process to which the checklist item belongs.
You can use the process in the evaluations. A process is independent of a phase interms of time and can extend across phase boundaries.
4. Specify persons responsible (see Persons Responsible for Project Elements [Extern]).
5. Enter a Description, as required.

SAP Online Help 12.09.2008
Collaboration Projects 52
The description is language-dependent.
6. If you want to release the checklist item for processing, choose the entry Release fromthe Change Status field.
The system changes the current status from Created to Released. The checklist item isnow released for processing (see Editing Project Structures [Seite 56]). You cannotdelete the checklist item now.
For more information about the status and the effects of changing the status, seeStatus of Checklist Items [Seite 255].
Dates Area
You can also edit the dates in the graphical view [Seite 61] or in the table view[Seite 58].
...
1. Select a constraint for the finish date.
2. Enter a finish date, as required.
This field is only ready for input if you have chosen the Must finish on constraint.
For more information, see Scheduling [Seite 79].
See also:Creating Data for a Checklist Item [Seite 50]
Confirming Checklist Items [Seite 89]
Editing Project Structures [Seite 56]
Creating Additional Data for a Checklist ItemPrerequisitesYou have created a checklist item (see Creating Project Elements [Seite 32]) and are in themaintenance view of this checklist item on the Additional Data tab page.
You cannot make any changes if you opened a snapshot.
ProcedureAdvanced Area...
1. If completion of the checklist item is mandatory, set the Mandatory indicator.
In this case, you can only complete the phase to which the checklist item belongs if thechecklist item has the status Finished.
2. If the checklist item must be finished so that the phase to which it belongs can beapproved, select the Relev. for App. indicator.
3. Enter a Grouping, if required.

SAP Online Help 12.09.2008
Collaboration Projects 53
Grouping allows you to group together checklist items in one category. You can selectthe grouping of your choice. It is an additional search criterion in the search function forfinding a checklist item.
4. Enter a search term in the Search Field, if required.
The system also uses the search term as an additional search criterion in the searchfunction.
5. Set the changeability [Extern] of the checklist item.
Confirmation Area...
1. Leave the Actual Finish Date field empty. The field becomes relevant once you confirmthe checklist item [Seite 89]. The field is ready for input once the checklist item has thestatus Released.
2. Leave the Result field as it is. The field becomes relevant once you confirm thechecklist item [Seite 89].
3. Enter a value for the severity (see FMEA [Extern]).
4. Enter a value for the detection (see FMEA [Extern]).
5. Enter a value for the occurrence (see FMEA [Extern]).
The three FMEA fields are ready for input once the checklist item has the statusReleased.
6. In the Risk Priority Number field, the system displays the product of the description,detection, and occurrence values (see FMEA [Extern]).
Administration AreaHere you see who created and changed the checklist item on which date.
See also:Creating Data for a Checklist Item [Seite 50]
Editing Project Structures [Seite 56]
Creation of Data for a TaskPurposeIn this process, you enter all the data for the task.
PrerequisitesYou created a task (see Creating Project Elements [Seite 32]).
Process Flow...
1. You enter the basic data for the task (see Creating Basic Data for a Task [Seite 54]).
2. You enter the additional data for the task (see Creating Additional Data for a Task[Seite 55]).
3. You check the status information for the project element [Seite 257].
4. You assign documents (see Assigning Documents and Creating Folders [Seite 198]).

SAP Online Help 12.09.2008
Collaboration Projects 54
5. You create collaborations (see Creating a Collaboration [Seite 219]).
6. You link objects with the task (see Creating an Object Link [Seite 158]).
7. You enter the qualifications necessary for completing the task (see DefiningQualifications [Seite 109]).
8. You define the relationships of the task (see Editing the Relationship Between Tasks[Seite 78]).
9. You assign authorizations for the tasks (see Assigning Authorizations [Seite 245]).
Creating Basic Data for a TaskPrerequisites
You created a task (see Creating Project Elements [Seite 32]) and are in the editingview of this task on the Basic Data tab page (see also Opening a Project or ProjectVersion [Seite 17]).
You cannot make any changes if you opened a snapshot.
You created project roles (see Creating a Project Role [Seite 97]).
In the Language field (upper right-hand corner) you selected the language you want touse for creating language-dependent texts (see also Multilingual Capabilities [Seite70]).
ProcedureGeneral Area...
1. Enter a Name for the task.
The name is language-dependent but you can enter a name of your choice.
2. Change the Sort Number, as required.
When you create a task, the system enters the sort number according to the position ofthe task. If you want to position a task between two existing tasks, enter a sort numberthat lies between the sort numbers of the existing tasks.
3. Select a Task Type.
You must enter a task type before you can release a task.
4. Select the Process to which the task belongs.
You can use the process in the evaluations. A process is independent of a phase interms of time and can extend across phase boundaries.
5. Specify persons responsible (see Persons Responsible for Project Elements [Extern]).
This person does not have to carry out the task; you can enter a personresponsible on an organizational level, for example, while the actual projectparticipants are responsible for completing the task. You assign the projectparticipants who have to complete the task on the Roles tab page (seeAssignment of Project Roles to Tasks [Seite 106]) or in the Resources area onthe Tasks tab page (see Task Assignment [Seite 102]).
6. Enter a Description, as required.

SAP Online Help 12.09.2008
Collaboration Projects 55
The description is language-dependent.
7. Enter a subproject, as required.
For more information, see Work with Subprojects [Seite 140].
8. If you want to release the task for processing, choose the entry Release from theChange Status field.
The system changes the current status from Created to Released. The task is nowreleased for processing (see Editing Project Structures [Seite 56]).
Once you have released the task, you can no longer change the task type. Youcannot delete the task either.
For more information about the status and the effects of changing the status, seeStatus of Tasks [Seite 254].
Dates Area
You can also edit the dates in the graphical view [Seite 61] or in the table view[Seite 58].
...
1. Select constraints.
2. Enter a start date and a finish date, as required.
The fields are only ready for input if you selected the Must start on or Must finish onconstraint.
3. Enter a Duration, as required.
The field is relevant or taken into account only if you have not entered a date or haveonly entered one date in the Fixed Start Date and Fixed Finish Date fields. Otherwisethe system calculates the duration automatically.
4. Select the Calendar you want to use for this task.
For more information, see Scheduling [Seite 79].
See also:Creation of Data for a Task [Seite 53]
Confirming Tasks [Seite 89]
Creating Additional Data for a TaskPrerequisitesYou have created a task (see Creating Project Elements [Seite 32]) and are in themaintenance view of this task on the Additional Data tab page.

SAP Online Help 12.09.2008
Collaboration Projects 56
You cannot make any changes if you opened a snapshot.
ProcedureAdvanced Area...
1. Enter the work you have planned for the completion of the task, and choose a unit fromthe dropdown box.
The work you enter for subtasks does not depend on the work for the superiortask: The work for all tasks is additive.
2. Set the Milestone indicator if the task is a milestone.
You can use this information in the evaluations.
Tasks that are milestones can be identified by the icon in the graphical view. Thesetasks can be identified by the icon in the structure tree of the table and graphicalview if you are in display mode. If you are in change mode, the icon is used.
3. If the task must be completed urgently, set the Mandatory indicator.
In this case, you can only complete the phase to which the task belongs if the task hasthe status Completed.
4. If the task must be completed so that the phase to which it belongs can be approved,select the Relev. for App. indicator.
5. Enter a Grouping, if required.
Grouping allows you to group together tasks in one category. You can select thegrouping of your choice. It is an additional search criterion in the search function forfinding a task.
6. Enter a search term in the Search Field, if required.
The system also uses the search term as an additional search criterion in the searchfunction.
Confirmation AreaThe fields in this area only become relevant once you confirm a task [Seite 89]. They areready for input once the task has the status Released.
Administration AreaHere you see who created and changed the task on which date.
See also:Creation of Data for a Task [Seite 53]
Editing Project Structures [Seite 56]
Editing Project Structures

SAP Online Help 12.09.2008
Collaboration Projects 57
General Functions for Editing Project StructuresIf you have administration authorization for a project, you can cut, copy, and paste projectelements using the appropriate pushbuttons when editing project structures. Each pushbuttonis only active if it is possible to carry out the function for the project element you areprocessing in the structure.
You can paste the selected project element multiple times but the selection is reset when youchange views, for example, when you change from the detail view to the table view or whenyou mark the project element as a focus object.
Example
You have cut a checklist item and want to paste it somewhere else. This function is onlyavailable if you are in a checklist because checklist items can only be found below checklists.
End of the example.
To get a clearer view, choose Position to position the structure tree in such a way that aselected project element appears at the top. To display the rest of the structure above theselected element again afterwards, you can scroll to the top of the structure.
Recommendation
When working with large projects, we recommend that you only expand the project elementsor subtrees in the structure tree that you require for immediate editing because the responsetime of the system increases with the number of expanded project elements. If you have fullyor almost fully expanded the project structure, the time the system requires for each furtheraction, for example, switching to the detail view, table view, graphical view, or multi-projectmonitor, may increase. For more information, see SAP Note 976787.
End of the recommendation.
ProcessBasic FunctionsRecording Changes
Archiving
Graphical View
Multilingual Capabilities
Printing an Object
Lock Logic
Table View
Workflow
Project PlanningEditing a Project Element
Deletion of Objects
Editing the Relationship Between Tasks
Scheduling

SAP Online Help 12.09.2008
Collaboration Projects 58
Releasing Project Elements
Import and Export of Data
ConfirmationConfirming Checklist Items
Confirming Tasks
Basic Functions
Table ViewUseA table view is available in addition to a graphical view and a detail view, for editing projects.Here you can enter and edit the following project data, depending on which initial view youare in:
Initial View Modifiable Data
Projects
Templates
Approvals
Name
Start date constraint and start date
Finish date constraint and finish date
Responsible role
Responsible resource
Status
Priority
Grouping
Search field
Process
Milestone indicator
Relevant for Approval indicator
Mandatory indicator

SAP Online Help 12.09.2008
Collaboration Projects 59
Tasks Name
Percentage complete
Work
Start date constraint and start date
Finish date constraint and finish date
Status
Priority
Grouping
Search field
Process
Milestone indicator
Relevant for Approval indicator
Mandatory indicator
Checklist items Name
Result
Finish date constraint and finish date
Status
Priority
Grouping
Search field
Process
Mandatory indicator
You can display additional or customer-defined columns in the table view. Formore information, see SAP Note 972339.
You cannot make any changes if you opened a snapshot.
PrerequisitesYou opened a project, template, task, or checklist item for editing.
FeaturesAlong with other data, you see here how many documents, collaborations, and objects areassigned to the project elements of the current project.
The number refers only to the corresponding documents, collaborations, andobjects of the project element on a given level, and not the lower-level elements.

SAP Online Help 12.09.2008
Collaboration Projects 60
By clicking the number of documents, collaborations, or objects, you can branch to the detailview.
See also:
Working with the Table View [Seite 60]...
Working with the Table ViewOpening the Table View...
1. To open the tabular project view, choose Table in the upper right-hand corner of thescreen.
2. Expand a project element as required, by positioning your mouse pointer on it andchoosing Expand Subtree.
3. Make the required changes.
4. Save your entries.
Personalizing the Table View...
1. Click the secondary mouse button.
2. Choose which columns are to be visible in the table and the order in which the systemis to display them.
List ViewUseYou can switch from the table view to a list view, in which you can use the standard functionsof the ABAP List Viewer (ALV) in addition, such as setting the filter, sorting, printing, andexporting.
FeaturesIn the list view, you can do the following by choosing the Settings link:
Add or remove columns
Sort columns
Define filters for the individual columns
Adjust the table display (for example, change the design of the table)
Modify print versions (for example, change the format of the paper)
Since the list view cannot display a structure, you cannot perform any actionshere that change the structure, such as create.

SAP Online Help 12.09.2008
Collaboration Projects 61
Graphical View
Along with the table view and the detail view, a graphical view is available in the form of aGantt chart for you to use when processing projects. By moving, lengthening, or shorteningthe bar, you can change the start and finish dates, as well as the duration of a projectelement. You can obtain information about the project element by positioning your mouse onthe bar.
Furthermore, you can create relationships between two tasks.
Note
You cannot make any changes if you opened a snapshot.
End of the note.
PrerequisitesYou opened a project, template, task, or checklist item for editing.
FeaturesGeneral Functions
You can choose which view of the calendar you want the system to display in thegraphic from the View dropdown box. If you selected the Overview view, the systemautomatically uses the calendar view that best suits the duration of the project. Theview does not contain the dates from the object links.
When you select a project element in the structure, the system automaticallypositions the calendar in such a way that the start of the project element appears atthe left edge.
The Navigate button allows you to specify the section of the project you want thegraphic to display.
You use the Print button to print the current project. The Print Preview button allowsyou to set print parameters and display the current appearance of the graphic forprinting. In the standard system, the entire duration of the project and all displayedrows are printed. If you want to create a title for the printout, you can change theheader of the graphical view.
The system expands all subtrees of the project structure in the structure tree bydefault. You can restrict the expansion of the subtrees to certain levels by selectingthe required level in the Expand Subtree dropdown box (for example, Expand toLevel 2). The setting you make is automatically saved and applies the next time youcall the graphic.
In the table part of the graphic, the column with the project hierarchy is alwaysdisplayed on the left. You can change the order of the other columns using drag anddrop and you can change the width of all columns. The changes are automaticallysaved for your user.
Display If you use object links and have specified a date type in the user settings, the linked
SAP objects are displayed as separate bars. You can also specify in the user settingswhich columns are displayed in the table part of the graphic.

SAP Online Help 12.09.2008
Collaboration Projects 62
Tasks you marked as milestones are indicated by (Milestone).
Tasks whose buffer is less than or equal to 0 are part of the critical path. These aredisplayed in red unless they have already been marked as milestones. If the task isonly part of the critical path due to the must start on or must finish on constraints, it isdisplayed in yellow.
Tasks with duration 0 are represented in the same way in the graphic as tasks withduration 1.
You can determine the percentage complete of a task by looking at the degree towhich the corresponding bar in the graphic is filled.
Checklists do not appear in the graphic. Checklist items are marked by (ChecklistItem).
Editing Project Elements
You can change the duration by selecting the date bar and lengthening or shorteningit whilst holding down the mouse button.
If the constraints must start on or must finish on are set for the start and finish dates,you can only adjust the duration by changing the constraint dates. If you use theconstraints finish no earlier than or finish no later than, you can only adjust theduration in line with the constraints that are set. Changing the duration here has thesame effect as changing the duration in the detail view.
Example
The following constraints are defined for a task: Must start on January 26 and finishno later than March 11, duration 46 days. You can reduce the duration of the task, forexample, to 30 days. When you increase the duration of a task, the system permits amaximum of the duration specified by the constraint on the finish date.
End of the example.
You can move a project element without changing the duration by placing the mousepointer on the bar and moving the bar to the left or right holding down the mousebutton.
When you move a project element, the system automatically sets the constraint muststart on if the constraint must finish on has not already been set.
The system calculates the duration of the project element automatically from the startand finish dates. You can change the duration within the time frame of the constraintdates, as described above.
Note
If the constraint must finish on is set, the system updates the finish date of the projectelement when it moves it.
If the constraint must start on is set, the system updates the start date of the projectelement when it moves it.
If both constraints are set, the system updates the start date and the finish date of theproject element when it moves it.
End of the note.

SAP Online Help 12.09.2008
Collaboration Projects 63
You can also change the dates by selecting a project element in the structure andchoosing Specify Dates or by setting the constraints and dates in the table part of thegraphical view.
You can create a relationship. To do this, choose one of the following options:
o Choose the Create Relationship node in the context menu of the bar that is tobe the predecessor in the relationship and pull the joining line to the start ofthe successor with the mouse button held down.
o Hold the Alt key down and pull a joining line from the predecessor to thesuccessor.
After creation, you can change the link type in the context menu of the relationship.The type of relationship can only be changed once the link to the subsequent taskhas been created.
To delete a relationship, use the context menu or choose Remove.
ActivitiesTo open the graphical view, choose Graphic.
Setting the Filter
You can set a filter with certain conditions for project elements. The system then filters theproject element you selected along with its lower-level elements. You can call the filterfunction from all views in the cProjects application, for example, from the table view, detailview, or graphical view.
Procedure1. Open a project.
2. Select the project element you want to filter with its lower-level elements, from thetree structure.
3. Choose Set Filter.
Select the object types you want to include, for example, projects, phases, or tasks.
Note
If you set the filter for the object type tasks, the system also takes mirrored tasks intoaccount. Since mirrored tasks do not have all the attributes of a task, the system onlyfilters the task by the conditions project element name, time frame, and systemstatus.
If you set the filter for the object type checklist, the system also takes checklistreferences into account. Here, the system only filters the checklist by the conditionproject element name.
End of the note.
4. Enter a generic character string as the project element name. You can use thestandard wildcard characters here. The character * represents any character stringand the character + stands for any character. The system does not differentiatebetween upper and lower case.

SAP Online Help 12.09.2008
Collaboration Projects 64
Example
If you enter Proj*, the system filters by all project elements whose names start with"Proj", for example, "Project A", "Project B", or "proj. xyz".
End of the example.
5. Select a start and finish date for the time frame. The system then displays all projectsin the filter result whose time frame (calculated start date to calculated finish date) ispartly or completely within the time frame specified. The system uses the earliest orlatest dates that are defined in the user settings to calculate the start and finish dates.
Note
The filter condition time frame is not relevant to checklists or checklist referencesbecause these project elements do not have any dates.
End of the note.
6. Select one or more values for the status. The dropdown list contains system statusesand customer statuses from the status profiles that are used in the project structure.
7. Select one or more values for the criticality level.
8. Select one or more values for the priority.
9. Enter a generic character string for the group and search field, as required. You canuse the standard wildcard characters here. The character * represents any characterstring and the character + stands for any character. The system does not differentiatebetween upper and lower case.
10. Select the responsible project role type you require. The filter result then contains allthe project elements whose responsible role belongs to the project role type selectedhere.
11. Under Responsible, select a person or business partner who is responsible for theproject elements to be filtered. You can use the search help to do this by searchingfor the person or business partner by their role, user, or name.
12. Choose Apply to start the filter function.
13. Choose Cancel if you do not want to start the filter function.
If you choose Reset Filter, the system resets the filter to the initial conditions.
If you set the filter for tasks and/or checklist items, the system shows attributes that you canonly set for these two object types. The system then displays the following fields that you canuse to define additional filter conditions:
Process
Mandatory
Relevant for Approval
If you set the filter for tasks, the system shows attributes that you can only set for tasks. Thesystem then displays the following fields that you can use to define additional filter conditions:
Milestone
Task Type

SAP Online Help 12.09.2008
Collaboration Projects 65
Percentage Complete
ResultIf you called the filter from the detail view or table view, the filter result is displayed as an ALVlist in a popup. You can use the filter function in the ALV list to restrict the result further ifnecessary. If you have defined a filter, the system displays the Delete Filter button on theresult screen and you can use this to reset the filter conditions. You can return to the tableview from the ALV list by choosing Structure View.
If you called the filter from the graphical view (Gantt chart), the filter result is displayed withinthe Gantt chart. You can further restrict the result as required by choosing Set Filter again.The system retains the previous filter conditions, which you can refine. The filter functionapplies to the same project elements as were previously filtered: the project element youoriginally selected along with its lower-level elements. It does not apply to the project elementcurrently selected in the filter result. If you choose Delete Filter or you go to the detail view ortable view, the system displays the non-filtered view with all project elements again.
Saving the Filter
You can save the filter conditions you set so that you can use them again by default. You candefine and save multiple filters. The defined filters are user-specific.
ProcedureDefining FiltersChoose Set Filt er.
If you have already saved more than one filter, the system displays them in a list box.Choose Setting s.Select or cha nge the s elect ed filt er conditio ns.
The system copies the current settings and displays them.Choose Save As.. ..
A dialog box appears.Enter a desc riptio n of the filter .Select th eSave as Def ault Se tting c heck box if y ou w ant t o us e this filter by d efault.Choose OK to s ave t he filt er.Choose Prop ertie s... if y ou want t o displ ay th e filte r d escrip tion or t he Save as D efault Setting che ckbox .Choose Apply if y ou w ant t o us e the selec ted conditi ons f or t he curr ent filter.Choose Canc el if yo u wan t to ret urn to yo ur c urr ent filter condi tions and do not w ant t o ap ply th e saved c onditio ns.
Changing Filters1. Choose Set Filter.
If you have already saved more than one filter, the system displays them in a list box.
2. Select the filter that you want to change.
The system copies the current settings and displays them.
3. Change the filter conditions as required.
4. Choose Save.
5. Choose Apply if you want to use the selected conditions for the current filter.
6. Choose Cancel if you want to return to your current filter conditions and do not wantto apply the saved conditions.
Deleting Filters1. Choose Set Filter.
If you have already saved more than one filter, the system displays them in a list box.

SAP Online Help 12.09.2008
Collaboration Projects 66
2. Select the filter that you want to delete.
3. Choose Settings.
4. Delete the filter.
Note
If a filter is set as default, the system always uses these filter conditions when you use thefilter function. This applies to all sessions.
End of the note.
Printing an ObjectUseYou can print objects in cProjects using the printing functions in the Adobe Acrobat Reader®.
PrerequisitesYour system administrator defined a print template for the object.
You opened an object to edit or display.
The Adobe Acrobat Reader® or the corresponding plug-in is installed.
You have authorization to edit or display the object.
Procedure...
1. Choose Print.
2. Select a print template.
3. Select a language.
4. Change the print options for the individual objects, as required.
5. Choose Preview.
The system formats the template and displays it in Adobe Acrobat Reader®. You canchange the print template, language, or options by choosing Print Parameters.
6. Print the document.
Workflow
UsecProjects offers you a workflow function when you make certain changes to project elements.
IntegrationThe workflow is linked to a recorded change [Seite 73] or a change in status (see StatusManagement [Seite 250]).

SAP Online Help 12.09.2008
Collaboration Projects 67
FeaturesYou can use the workflow function for the following project elements when the status ischanged :
Tasks
Checklist items
Phases
Projects
Once the project leader releases one of these elements, or if a phase is ready to beapproved, the person responsible for processing it receives a message by e-mail that theproject element needs to be processed. The e-mail contains a link to the correspondingproject element.
Furthermore, you receive an e-mail informing you if changes have been made to a projectelement for which you are responsible.
If required, your system administrator can make other workflows available.
AlertsUseAlerts [Extern] are sent in the following project situations:
Once all the tasks in a checklist item have been completed or once all the checklistitems in a checklist have been finished, the person responsible for the checklist item orchecklist receives an alert message informing him or her of this.
Alerts are sent if you create an inter-project link in Multi-Project Management. The alertrecipient depends on the type of inter-project link. For more information, see the“Features” section of the following topics:
Work with Subprojects [Seite 140]
Work with Mirrored Tasks [Seite 142]
Work with Programs [Seite 144]
Your system administrator can configure the system so that one or more personsresponsible receive an alert message if there is a threshold value violation for one ofthe following objects:
Project element
Object link
Assignment
Staffing
Business partner
Project participant
In addition, alerts can be sent for project elements and object links if the severity hasbeen set manually or if a threshold value violation exists for a subobject.

SAP Online Help 12.09.2008
Collaboration Projects 68
For more information on severities and threshold value violations, see Evaluations[Seite 231].
IntegrationSending alerts does not depend on the status of an object.
Project versions and templates do not trigger alerts.
PrerequisitesYou system administrator made the necessary settings for sending alert messages. For moreinformation, see SAP Service Marketplace at service.sap.com/instguidesInstallation and Upgrade Guides mySAP Business Suite Solutions mySAP PLM in thesection entitled “Making Settings for Alerts”.
Features
The following information applies to alerts triggered by threshold value violationsand severities.
Determining the RecipientThe following table shows which recipients receive alerts for different objects:
Object Alert Recipient
Project definition Project lead
Phase Phase responsible and decision maker
Task Task responsible and persons who staff the project roles for thistask
Checklist Checklist responsible
Checklist item Checklist item responsible
Object link Person responsible for project element that the object linkbelongs to.
Assignment...
1. Task responsible
2. If there is no person responsible for the task: the projectlead
Staffing If the staffing process has the status In Process:
Staffing manager or responsible candidatemanager if known;
If not known: all responsible staffing managers orcandidate managers of the organizational unitassigned to the staffing process
For all other statuses: Project lead
Business partner Project lead
Project participant See recipient for staffing

SAP Online Help 12.09.2008
Collaboration Projects 69
If a user is assigned to the business partner, the system uses thisuser’s e-mail address.
If the business partner’s user does not have an address, the systemcannot send an e-mail even if you have specified an e-mail address forthe business partner.
The system only uses the business partner’s e-mail address if nouser has been assigned to the business partner.
If the system cannot determine a recipient that meets theserequirements, it does not send an alert.
A user who sets a severity manually does not receive an alert.
Your system administrator can make certain changes using the DPR_ALERTS BAdI, forexample, specify a different recipient.
Content and Language of an Alert MessageAn alert contains a standard message which informs you of the reason for the alert. Thiscould be:
A threshold value violation that was checked automatically
A threshold value that was set manually
An aggregation of the threshold value violations of a lower-level project element
You can open the object in question via a link. When you open the object, the system checkswhether you have authorization for this object.
The following table shows where each of the links leads to:
Object Target of the URL
Project element Current project element
Object link Project element that the object link belongs to,Object Links tab page
The system selects the relevant object linkautomatically.
Project participant Project definition, Resources tab page
The system selects the relevant project roleautomatically.
Staffing Project definition, Resources tab page
The system selects the relevant project roleautomatically.
Assignment Task or project role depending on thesecondary object type
Business partner Project definition, Resources tab page
The language of an alert message depends on how the alert is sent:

SAP Online Help 12.09.2008
Collaboration Projects 70
If you send an alert to a user name, the language is the same as the language fromthe user master data. If no language has been entered here, the logon languageapplies.
If the alert is sent to the e-mail address of the business partner, the system uses thelanguage of the relevant business partner. If no language has been entered or if thislanguage has not been installed, the original language of the current project applies.
Time at which the Alert Is SentAlerts are checked and sent each time you save the project or create an evaluation.
Lock LogicUsecProjects supports efficient execution of projects by using the following lock logic:
When you edit a project all dependent project elements are locked. This enables theproject lead, for example, to plan the dates for the whole project.
If you process an individual approval, you only lock the approval that the individualapproval belongs to. This enables multiple decision makers to process their individualapprovals simultaneously.
You can continue to edit all other project elements at this stage:
If the individual approval causes the status of the approval to change, thesystem also locks the phase.
If the approval causes the status of the phase to change, the system also locksthe project definition.
You can edit tasks and checklist items in parallel. This allows multiple users toconfirm various tasks or checklist items in the system at the same time, withoutcreating a lock conflict, for example. If you are editing a task or a checklist item in aproject, you also lock the phase that the project element belongs to. You can continueto edit the project definition and other phases provided that you do not make anychanges to them that also affect the locked phase.
If you edit checklist, project, or control plan templates, all dependent elements arelocked.
Multilingual CapabilitiesUsecProjects distinguishes between application languages [Extern] and text languages [Extern].Not all application languages are text languages.
PrerequisitesYou defined text languages in Customizing for Collaboration Projects under Specify TextLanguages. You can only enter texts in cProjects in these languages. One of these textlanguages is the default language [Extern].

SAP Online Help 12.09.2008
Collaboration Projects 71
Application LanguageYou can log on to cProjects in various languages. The system first attempts to determine theapplication language using the language parameter in the cProjects URL (for example, sap-language=DE). If no parameter has been specified in the URL, the system uses thelanguage settings in your browser to determine the application language. If no language hasbeen entered there either, the user settings in the back-end system apply.
Text LanguageYou can enter the texts for a project in any of the languages you specified in Customizing.The following texts in cProjects are language-dependent:
Project element name
Project element description
Name of responsible project role
If no texts exist in the text language currently set, the corresponding text fields are blank.
When you create projects, project templates, or checklist templates, the system provides anoriginal language [Extern]. You cannot change the original language once the objects havebeen created. The original language applies to the whole project or template – all projectelements have the same original language.
Original language when creating objects without a templateIf you create a project, project template, simulation version, or checklist template without atemplate and the logon language is a permitted text language, the system sets the logonlanguage as the original language. If the logon language is not a permitted text language, thesystem sets the default language. You can also select an original language of your choice.
Original language when creating objects with a template
If you create a project, project template, or checklist template with a template, you can usethe appropriate pushbutton to specify that the original language of the template is also theoriginal language for the new project or template. Otherwise the same conditions apply as forcreating objects without a template.
Opening objects
In the user settings you make the default setting for whether you want to open objects in thelogon language or in the original language:
Logon language
If the logon language is not a permitted text language, the object is opened in thedefault language. If no texts exist in the default language, the text fields are blank.
Original language
If you open several objects with different original languages, they are opened in thelogon language provided that this is a permitted text language. If this language is notpermitted, the default language is used.
Resolving checklist references in operational projects
When you resolve checklist references, the original language of the project also becomes theoriginal language for the checklist and the checklist elements. The system transfers the textsin all existing languages.
If the checklist template has a different original language to the project, the checklist templatecan contain project elements for which no text has been entered in the original language ofthe project. If this is the case, the system copies the texts in the original language of thechecklist template when it resolves the reference. If, for example, the original language of theproject is English and the checklist template only contains German texts, the German textsare copied and are displayed for both the text language German and text language English.

SAP Online Help 12.09.2008
Collaboration Projects 72
Required-entry-field check for language-dependent fieldsHere, the system only checks whether you made the entries in the original language withwhich the project was opened. If you change the language afterwards, the system does notcarry out any more checks.
See also:
Using Language-Dependent Functions [Seite 72]
Using Language-Dependent FunctionsChanging the Logon Language...
1. Check whether your cProjects URL contains a language parameter (for example, sap-language=DE). If so, use this parameter to change the language (for example, tosap-language=EN).
2. If your cProjects URL does not contain a language parameter, change the logonlanguage using the language settings in your browser.
Proceed as follows in the Microsoft® Internet Explorer:...
a. Choose Tools Internet Options Languages.
b. Add the language you require to the list.
c. Move the language you want to log on in to the first position in the list.
d. If you are already logged on, you must first exit the application and log on againbefore the new settings take effect.
We recommend that you use the URL parameter if you want to change thelanguage for a short amount of time and adjust your browser settings if youneed to change the language long term. Note that the browser language thenonly applies if the URL does not specify a language. For more information, seeMultilingual Capabilities [Seite 70].
Entering and Translating Language-Dependent TextsIf you want to create or display texts in a different language, choose the required language inthe maintenance view of an object from the Language dropdown box (upper right-handcorner).
If you want to translate the language-dependent text in a project element into anotherlanguage, proceed as follows:...
1. Select the target language in the Language field.
The system hides the Original Language pushbutton.
2. Show the original text by choosing Original Language.
The system displays the original text in a special area. You cannot edit this text.
3. Translate the text in the General area.
4. Close the original text by choosing No Display from the Language dropdown box in thearea where the original text is located.

SAP Online Help 12.09.2008
Collaboration Projects 73
Recording Changes
cProjects provides you with a means of recording changes that you can activate for thefollowing objects:
Checklist templates
Project templates
Projects
Control plans
Control plan templates
IntegrationThe change documents trigger a workflow.
Prerequisites Your system administrator has activated the recording changes option for the
individual objects in Customizing for Collaboration Projects, by choosing ActivateChange Documents.
You have selected the Display Change Documents indicator in the user settings onthe General tab page.
You need administration authorization for an object to be able to see the changesrecorded for the object.
FeaturesIf the option for recording changes is active for an object, changes you make to dependentobjects are also recorded. For example, for projects, the system not only records changesyou make to the project itself, but also records the changes to dependent objects such as thephases, checklists, approvals, and project roles. If, for example, you want to record changesto project roles, the recording option must be active for projects.
You can display a selection of the changes made within a certain period of time for all projectelements as well as for checklist templates and project templates. This function is on theChange Documents tab page.
Caution
Change documents with long text fields, such as notes for a staffing, are not displayed on theChange Documents tab page.
End of the caution.

SAP Online Help 12.09.2008
Collaboration Projects 74
ArchivingUseYou are not allowed to delete a project or template that has been released within thecProjects application. From the status Released onwards, you can only delete projects andtemplates by archiving them first. The project or template then no longer exists in thedatabase, but can be read from the archive for display purposes.
Your system administrator carries out archiving. As the user, you only flag a project incProjects for archiving.
Prerequisites To display a project or a template that has already been archived, you must have read
authorization for the archived object. If you have granted authorizations to user groups ororganizations in an archived project, you can grant a user read authorization for anarchived project at a later point in time, by assigning the user to a user group ororganization that holds read authorization for the archived project.
You can only flag projects for archiving that have the status Completed or Canceled.
You can only flag templates for archiving that have the status Obsolete.
FeaturesYou can archive projects as well as project, checklist, and control plan templates.
ActivitiesTo flag a project for archiving, set the To Be Archived status.
To display a project that was already archived, call it by choosing it from the search[Seite 26] (search using Archive) result list or the favorites list.
If you add a project to your favorites list before you archive it, it remains in yourfavorites list after archiving. You can call it from the favorites list directly. Youcan also add an archived project listed in a search result list to your favorites list.
NotesUseThis function is available for all project elements and for resources on the Notes tab page.
PrerequisitesYou have change authorization for the project element or resource.
FeaturesYou save a note by saving the project. The system saves the text with your name, and thedate and time it was created.
You can also print all notes saved for a project element. For more information, see Printing anObject [Seite 66].

SAP Online Help 12.09.2008
Collaboration Projects 75
You can change the note if you have not already saved the project. Once youhave saved, you cannot make any more changes to it.
Project Planning
Editing a Project ElementPrerequisites
You opened a project element you want to edit and are on the Basic Data tab page.
The project element you want to edit has been released.
ProcedureLocking a Project Definition and Phase
You can lock a project definition or a phase even if it has the status Created....
1. Choose Lock from the Change Status dropdown box.
The system changes the status [Seite 250] of the project element to Locked. The entireproject or the entire phase with all dependent objects is thereby protected fromchanges. The checklist items, tasks, and if required, approvals of the locked projectelement no longer appear in the project list or under My Approvals in the initial view.
2. You can unlock the project by choosing Unlock.
3. Save your data.
Setting a Checklist and Checklist Item to Not Relevant...
1. Choose Set ‘Not Relevant’ from the Change Status dropdown box.
The system changes the status and sets the result to Not Relevant for the checklistitem. You can no longer make entries in any of the fields.
For more information about the effects of changing the status, see Status of Checklists[Seite 254] and Status of Checklist Items [Seite 255].
2. If you want to reset the status, choose the Reset ‘Not Relevant’ entry.
3. Save your data.
Editing a TaskWhen you start to edit a task, you want to document the progress of your work in the system....
1. Choose Set for Processing from the Change Status dropdown box.
The system changes the status to In Process.
2. Go to the Additional Data tab page.
3. Enter an actual start date in the Confirmation area.

SAP Online Help 12.09.2008
Collaboration Projects 76
4. Enter values in the Percentage Complete field and Confirmation field on a regularbasis.
5. Once you have completed the task, enter the actual finish date.
Now you can confirm the task [Seite 89].
Deletion of ObjectsUseYou use this function to delete objects without having to set a deletion flag.
IntegrationIn order to delete an object, certain prerequisites must be met. These prerequisites areinfluenced by the status [Seite 250] and the lock logic [Seite 70] of the object and theauthorizations [Seite 242] you have for the object.
Prerequisites
Object Prerequisites
Project element [Seite 12] The project element still has the statusCreated
The project element and the superiorproject element (if one exists) are notlocked
For checklist items: the checklist itemis changeable [Extern]
You have administration authorizationfor the project element
Document [Seite 198] The document has the status InProcess
The document is not locked
The document is not checked out byanother user
The project element to which thedocument is assigned meets theprerequisites for deletion
You have write authorization for thedocument
Template [Seite 36] The template still has the statusCreated
The template is not locked
You have administration authorizationfor the template

SAP Online Help 12.09.2008
Collaboration Projects 77
Collaboration [Seite 219] The project element to which thecollaboration belongs is not locked andnot completed/finished
You have write authorization for thecollaboration
Object link [Seite 157] The project element to which theobject link belongs is not locked andnot completed/finished
You have write authorization for theobject link
Process step, tool, or characteristic of acontrol plan. You cannot delete a control planitself.
The control plan still has the statusCreated
The control plan is not locked
The project element to which thecontrol plan belongs is not locked andnot completed
You have administration authorizationfor the control plan
Individual approval or decision maker [Seite237]
You have not yet begun the approval.
However, your system administratorcan set up the system so that you canstill delete individual approvals after theapproval process has begun.
The individual approval has not beengranted or rejected yet
The approval for the phase is notcomplete yet
You have administration authorizationfor the approval
ActivitiesThe following table shows you how and where you can delete various objects:
Object to be deleted Where you must be located What you must do
Project element In the editing view of a project Select the project element inthe structure tree and chooseDelete
Document In the editing view of a project onthe Documents tab page
Select the document in thedocument folder and chooseDelete
Template In the editing view of a template Select the template andchoose Delete
Collaboration In the editing view of a project onthe Collaborations tab page
Select the collaboration andchoose Delete Link
Object link In the editing view of a project onthe Objects tab page
Select the link and chooseDelete

SAP Online Help 12.09.2008
Collaboration Projects 78
Process steps, tools, orcharacteristics of acontrol plan version
In the editing view of a controlplan version
Select the element you wantto delete in the overview andchoose Delete
Individual approval ordecision maker
In the editing view of a phase onthe Approval tab pageDecision Maker
Select the individual approvaland choose Delete
Editing the Relationship Between TasksUseYou specify how tasks within a project are related to one another by creating links betweenthe tasks:
You can create links between tasks at the same level of the project structure orbetween tasks at different levels of the project structure.
A number of different link types are available. The links have a time interval which canalso be a negative value. The relationship influences the scheduling [Seite 79] of theproject.
You can also create relationships with all four link types in the graphical view [Seite61].
PrerequisitesYou are in the detailed view of a project and in the structure tree [Seite 41] you have selectedthe task for which you want to edit or enter relationships. In the detail view, you have selectedthe Relationship tab page.
Procedure...
1. Choose Task (Same Level) or Task (Any Level).
For links between tasks at the same level, you can choose from all possible tasks andtasks that have not yet been linked, in the dropdown box. If there are no tasks at thesame level as the task you want to link or if all tasks at the same level are alreadylinked to this task, the field is not ready for input.
For links between tasks at any level, select the task from the project structure bychoosing Find.
2. Select a task and a link type.
3. Choose Predecessor or Successor.
The system enters the task in the corresponding table.
4. Choose Edit.
5. Enter the time interval that should be between the two tasks.
6. Select the calendar you want to use for the relationship.
7. Save your entries.
8. To remove a predecessor or successor from the list, choose Delete.

SAP Online Help 12.09.2008
Collaboration Projects 79
SchedulingUseWhen you schedule a project you must take many factors into consideration, such as:
Basic dates for the project and individual phases, for example, specified by thecustomer
Empirical values, for example, for the duration of phases and tasks
Dependencies between tasks which, for example, specify the time frame of execution(see Editing the Relationship Between Tasks [Seite 78]).
Confirmed dates for tasks and checklist items (see Confirming Tasks [Seite 89] andConfirming Checklist Items [Seite 89])
To meet these requirements, the system offers you a scheduling function. For each projecttype, you can choose whether you want to use bottom-up scheduling or top-down scheduling.
PrerequisitesYou specified a scheduling type in Customizing for Collaboration Projects under DefineProject Types.
FeaturesGeneral
You can enter fixed dates for the project elements. If you do not enter fixed dates forthe project, the system sets the current date as the start date. The finish date fieldremains empty. The system calculates the finish date from the remaining project dataduring scheduling.
In order to change attributes that influence dates and to carry out scheduling, yourequire administration authorization.
You can enter phase dates that overlap as well as task dates or checklist item datesthat are outside the phase dates. The system informs you if the dates overlap bydisplaying messages in the log.
The system uses messages to inform you of any conflict situations during scheduling,for example, if task dates are outside the time frame of phases during top-downscheduling.
The time unit for the duration of project elements is Day.
You can enter a duration for project definitions, phases, and tasks, fixed dates for theplanned start and the planned finish, and create a calendar. Checklist items do nothave a duration or a start date and you can only enter a fixed date for the plannedfinish.
You can also edit dates in the table view [Seite 58] and the graphical view [Seite 61].
You can schedule each project element individually. When the dates are scheduled,the dates of the dependent project elements (lower-level elements and linkedelements) are taken into account and also scheduled.

SAP Online Help 12.09.2008
Collaboration Projects 80
Dependencies
The system calculates the start and finish dates of the project elements (for checklistitems only finish dates) in earliest and latest position:
Dates in the earliest position are determined by forward scheduling starting fromthe start date of the project definition.
Dates in the latest position are determined by backward scheduling startingfrom the finish date.
The dates of the checklist items are determined from the latest finish date of theassigned tasks, or if no tasks have been assigned, from the finish date of the phase orproject.
Top-Down Scheduling
The dates of the phases are calculated on the basis of the dates of the projectdefinition, taking into account their order, duration, and fixed dates. Tasks are nottaken into account.
The dates of the tasks of a phase are calculated on the basis of the dates of thephase, taking into account their links, duration, fixed dates, and actual dates, if anyexist. The dates of the subtasks are calculated in the same way, using the dates fromthe higher-level tasks.
The dates of the tasks that belong to a checklist item are calculated based on thedates of the phase or project to which the checklist item belongs.
Bottom-Up Scheduling
The dates of a project element are calculated from the dates of the lower-level projectelements. This takes into account the order and the duration, as well as the fixed dates.
Scheduling Types
Provided that a project element has the status Created, the dates of this projectelement and its dependent elements are recalculated automatically when you makedate-relevant changes to a dependent project element. The system recalculates onceyou perform the next action in the system (for example, if you change to a new tabpage or save your data) or choose Enter on your keyboard.
After releasing a project element, the system no longer automatically calculates thedates of the lower-level project elements, it only does this if you call schedulingmanually [Seite 81]. If you make changes to a project element below a released projectelement, only thedates of this one project element are recalculated.
Once you release the project, the system automatically schedules only the projectelements that still have the status Created.
Determining DatesYou can define the earliest or latest calculated dates as fixed dates in phases, checklist items,and tasks, thereby preventing dates from being changed when scheduling is carried outagain. To do so, choose the Earliest Dates and Latest Dates pushbuttons located in the detailview of the relevant project element on the Basic Data tab page. In scheduling, fixed dateshave priority over outline dates specified by the higher-level project element, and have priorityover links to other tasks.

SAP Online Help 12.09.2008
Collaboration Projects 81
Time ConstraintsUseYou can define constraints for when a project element should start and finish. The followingconstraints are considered to be fixed dates in scheduling:
Must start on
Must finish on
The following constraint types are also available:
Start no earlier than
Finish no earlier than
Start no later than
Finish no later than
When the following constraints are used, the start date and finish date of the project elementare determined by scheduling. You cannot specify any other constraints or enter any dates.
Earliest possible
Latest possible
ExampleYou create a task in a phase that lasts from 01.01. to 06.30 in a single year. The duration ofthe task is 30 days. This task cannot start earlier than 06.15 due to delivery dates. Therefore,you enter "Start no earlier than" as the start date constraint for the task and 06.15 as the startdate. The system takes this date constraint into account, and if top-down scheduling takesplace, it reports that the finish date of the task conflicts with the finish date of the phase. Ifbottom-up scheduling takes place, the postponement of the finish date of the task means thatthe finish date of the phase is adjusted accordingly.
Scheduling ManuallyUseWhen you enter dates for a project element, the system carries out scheduling automaticallywhen you carry out the next action in the system or choose Enter.
However, once you have released the project element, scheduling no longer takes placeautomatically for this project element because the system presumes that the dates are fixedfrom this point onwards and can only be changed in exceptional situations.
The dates are not calculated automatically either if you have selected the Scheduling OnlyManually indicator in your user settings [Seite 28].
PrerequisitesYou are in the editing view of a project element you want to schedule.
You have administration authorization for this project element and for its dependentproject elements (lower-level elements and linked elements that are scheduledtogether with the current element).

SAP Online Help 12.09.2008
Collaboration Projects 82
If you do not have the necessary authorization for the dependent projectelements, the start dates of this element apply as fixed dates in scheduling.
Procedure...
1. Choose Schedule.
The system calculates the dates of the selected project element as well as thedependent project elements again.
2. Save the changes.
See also:Scheduling [Seite 79]
Releasing Project ElementsUseOnce you have entered the basic data for a project element and want to start processing it,you have to release the project element for processing.
As a rule, all project elements below the project definition are automatically released once thehigher-level project element is released. This is also true if the higher-level element wasreleased automatically. You only have to release a project element manually if theprerequisites for the release were not met.
PrerequisitesYou entered a project type, phase type, checklist type, or task type for projects,phases, checklists, and tasks.
If you want to release a phase, the project it belongs to and the predecessor phasemust both have already been released.
FeaturesThe manual or automatic release of individual project elements has the followingconsequences:
Project definition:
The project is released for processing (see Editing Project Structures [Seite56]).
The project is no longer scheduled automatically.
You cannot change the project type.
The first phase of the project is released.
Phase:
The phase is released for processing.
The lower-level project elements are no longer scheduled automatically.

SAP Online Help 12.09.2008
Collaboration Projects 83
You cannot change the phase type.
Any existing checklist references are resolved.
The subtasks and lower-level checklists are released for processing.
You cannot move the phase or insert another phase ahead of it.
Checklist:
The checklist is released for processing.
You cannot change the checklist type.
The lower-level checklist items are released for processing.
Checklist item:
The checklist item is released for processing.
The subtasks are released for processing.
Task:
The task is released for processing (see Confirming Tasks [Seite 89]).
You cannot change the task type.
The subtasks are released for processing.
ActivitiesTo release a project element manually, choose the entry Release from the Change Statusdropdown box in the editing view of this project element in the General area on the BasicData tab page. Save the project.
Import and Export of DataExport to Microsoft Project (Client) [Seite 83]
Export to Microsoft Project (Server) [Seite 85]
Export to an XML File [Seite 86]
Importing of Project Data [Seite 87]
Export to Microsoft Project (Client)
You can export a project or version in cProjects to Microsoft Project (Client). After the export,you can use all the functions available in Microsoft Project.
Note

SAP Online Help 12.09.2008
Collaboration Projects 84
Due to different scheduling types and calendars, the scheduling results in Microsoft Projectcould differ from those in cProjects.
For more information about the export to Microsoft Project (Client), see SAP Note 958210.
End of the note.
Prerequisites You installed Microsoft Project (Client) 2002 or a higher release on your PC.
You performed the corresponding activities in Customizing for Collaboration Projectsunder Connection to External Systems Microsoft Project Integration .
You have write authorization for the project.
FeaturesExporting ObjectsThe following table shows which objects are transferred to Microsoft Project (Client) andwhich objects they are mapped to there:
Object in cProjects Object in Microsoft Project
Project definition Project summary task
Phase
Task
Checklist
Checklist item
Task and summary task
Role Resource
Furthermore, when you transfer project elements, you transfer the attributes as well:
Information about the phase type is automatically displayed in a Microsoft Project textfield for the phase. The task type and checklist type are also displayed for tasks andchecklists.
For the project elements, you can transfer additional attributes that were specified byyour system administrator in Customizing.
Transferring DatesIf you have set the start constraint in cProjects, the Microsoft Project system sets forwardscheduling. If you have set the finish constraint in cProjects, the Microsoft Project system setsbackward scheduling.
When you export to Microsoft Project, dates are transferred for each task. This can causeproblems because Microsoft Project has its own scheduling logic.
Note
In the standard system Microsoft Project does not process any calendar information fromcProjects. Since Microsoft Project carries out its own scheduling, thereby taking its owncalendar into account, the duration values in Microsoft Project and cProjects may differ.However, you can use the calendar information from cProjects via a Business Add-In (BAdI)

SAP Online Help 12.09.2008
Collaboration Projects 85
(see Customizing for Collaboration Projects under Connection to External SystemsMicrosoft Project Integration ).
You cannot directly influence the start and finish dates for summary tasks in Microsoft Project.They are always derived from the dates of lower-level tasks (subtasks). For this reason, datesfor project elements that are depicted as summary tasks in Microsoft Project can differ incProjects and Microsoft Project.
If your project is in the planning phase, the Duration and Work fields in Microsoft Project areindependent of each other. Therefore, the cProjects system can fill both fields during theexport. If your project is in the execution phase, the Duration and Work fields in MicrosoftProject are dependent on each other. Therefore, the duration and work data in MicrosoftProject may differ from that in cProjects. The system either exports the work or thepercentage complete, depending on what settings you made in Customizing, and the othervalue is calculated automatically by Microsoft Project.
End of the note.
Input TableYou can assign standard fields and user-defined fields (enterprise fields) to cProjects fields inthe configuration. If you assign enterprise fields, the system automatically copies the namesof the corresponding fields from cProjects. If there are fixed values or value tables for thefields in cProjects, a list of values is generated in Microsoft Project in the appropriate field.
Transferring Project RolesProject roles are transferred to Microsoft Project (Client) as resources and assigned to thecorresponding tasks as in cProjects. You can assign attributes to the resources inCustomizing for Collaboration Projects. Microsoft Project does not set any attributes when itassigns the tasks.
Note
Microsoft Project uses its own logic to calculate values for work and resources from the taskassignments. There is no direct equivalent for these values in cProjects. Depending on thesettings in Microsoft Project, other values can be produced for work and required capacity.
End of the note.
ActivitiesYou can start the export of an operational project from the editing view of a project at projectdefinition level or from the Projects initial view. Choose Export and enter your data. You canstart the export of a project version from the editing view of an open version or via theVersions initial view.
More InformationExport to Microsoft Project (Server)
Importing of Project Data
Export to Microsoft Project (Server)UseYou can export a project or version in cProjects to Microsoft® Project. After the export, youcan use all the functions available in Microsoft Project.

SAP Online Help 12.09.2008
Collaboration Projects 86
Due to different scheduling types and calendars, the scheduling results inMicrosoft Project could differ from those in cProjects.
For more information about the export to Microsoft Project (Server), see SAPNote 983597.
Prerequisites You have set up a connection between your cProjects system and Microsoft Project
Server 2003.
You performed the relevant activities in Customizing for Collaboration Projects underConnection to External Systems Microsoft Project Integration Microsoft ProjectServer Integration.
You have write authorization for the project.
FeaturesExporting ObjectsYou can only export the project definition from cProjects to a new Microsoft Project project inMicrosoft Project Server (by selecting a Microsoft Project Server project template). Youcannot export other project elements, for example, phases, tasks, and checklists.
The system automatically transfers the description and the start and finish date from theproject definition. Your system administrator can also specify other attributes in Customizing.
ActivitiesYou can start the export of an operational project from the editing view of a project at projectdefinition level or from the Projects initial view. Choose Export and enter your data. You canstart the export of a project version from the editing view of an open version or from theVersions initial view.
See also:Export to Microsoft Project (Client) [Seite 83]
Importing of Project Data [Seite 87]
Export to an XML FileUseYou can export a project or version to an XML file to exchange data with another application,for example. SAP supplies a predefined XML schema for this purpose (see transaction SE80for the BSP application CPROJECTS_TRA under Mimes XML cProjects_xsd).
ConstraintsThe system only exports the project or version data that is defined in the XML schema.Therefore, it does not export shopping carts or any external staffings that belong to them.
PrerequisitesYou have write authorization for the project.

SAP Online Help 12.09.2008
Collaboration Projects 87
ProcedureFor Projects...
1. Choose Export in the Projects initial view or in an open project.
2. Select XML File.
3. Enter the number of the project you want to export.
4. Choose Export.
5. Open the XML file or save it to the hard drive.
For Versions...
1. Choose Export in the Versions initial view or in an open version.
2. Select XML File.
3. Enter the number of the version you want to export and the number of the project forthis version.
If you start the export from an open version, you do not need to enter the number of theversion or the number of the project for this version.
4. Choose Export.
5. Open the XML file or save it to the hard drive.
See also:
Importing of Project Data [Seite 87]
Importing of Project Data
You can import a project or version into Microsoft Project or import project data from an XMLfile into cProjects. SAP supplies a predefined XML schema for importing XML data (seetransaction SE80 for the BSP application CPROJECTS_TRA under Mimes XML
cProjects_xsd ).
PrerequisitesThe following prerequisites must be met before you can import a project from MicrosoftProject:
You have installed Microsoft Project Client 2002 (or a higher release) on your PC oryou already have a connection to Microsoft Project Server 2003.
You performed the corresponding activities in Customizing for Collaboration Projectsunder Connection to External Systems Microsoft Project Integration .
FeaturesBefore the import, the system checks whether a project already exists in cProjects that hasthe same external ID as the ID in the import file:

SAP Online Help 12.09.2008
Collaboration Projects 88
If the project does not exist yet, the system creates a new project and opens it. Youcan now edit the project and save it.
If the project already exists, the system creates a simulation from the imported datawith the simulation version 0IMPORT and the project number and displays the newsimulation.
Caution
You can only import data to a simulation if you have read authorization for the projectthat already exists in cProjects.
End of the caution.
If the system generated a version, you can reconcile it with the operational project.
Special Features of the Import from Microsoft ProjectYou can include phases, checklists, and tasks in cProjects on the basis of a Microsoft Projectupload. To do this, you have to assign the phase, checklist, or task type to a correspondingenterprise field (user-defined field) in Microsoft Project. You do this in Customizing forCollaboration Projects.
If you have set forward scheduling in Microsoft Project, the cProjects system sets the startconstraint. If you have set backward scheduling in Microsoft Project, the cProjects systemsets the finish constraint. The duration of the project elements is not imported but thedependencies between the project elements and their constraints are. The cProjects systemcarries out scheduling by default straight after the import. The duration of the project elementsin cProjects is calculated from this.
ActivitiesChoose the Import button in the Projects initial view, select the format, and enter your data.
See also:
Export to Microsoft Project (Client)
Export to Microsoft Project (Server)
Export to an XML File
Confirmation
Confirming Checklist Items [Seite 89]
Confirming Tasks [Seite 89]
Time Recording Using the Cross-Application Time Sheet [Seite 90]

SAP Online Help 12.09.2008
Collaboration Projects 89
Confirming Checklist ItemsUseYou are defined as the person responsible for a checklist item and have finished the checklistitem. You now want to confirm the checklist item as finished in the system.
PrerequisitesAll tasks that belong to the checklist item have the status Completed. For moreinformation, see Confirming Tasks [Seite 89].
You are on the Additional Data tab page in the Checklist Items or Projects initial view.
The checklist item has the status Released or In Process.
Procedure...
1. In the structure tree [Seite 41], navigate to the checklist item you want to confirm andclick on it.
2. Enter an actual finish date in the Confirmation area, if required.
3. Select the entry OK or Not OK from the Result dropdown box.
4. Go to the Basic Data or Status tab page.
5. Choose Finish from the Change Status dropdown box.
ResultThe finished checklist item is given the status Finished and is confirmed in the system. It nolonger appears under My Checklist Items in the Checklist Items initial view.
Confirming TasksUseYou are defined as the person responsible for a task and have started to edit the task or havealready completed it. You now want to confirm the task in the system.
PrerequisitesYou are on the Additional Data tab page in the Tasks or Projects initial view.
The task has the status Released or In Process.
The project type of the current project allows confirmation for tasks.
You can also confirm times for project roles and for the project definition.
Time recording using the cross-application time sheet [Seite 90] (CATS) is not active.
Procedure...
1. In the structure tree [Seite 41] navigate to the task you want to confirm and click it.
2. Enter your confirmation data.

SAP Online Help 12.09.2008
Collaboration Projects 90
The system calculates the remaining work from the difference between the plannedwork (see the Work field in the Advanced screen area) and the time you entered in theConfirmation field. If you want to enter the remaining work manually, set theRemainWork Man.: indicator.
3. Once you have completed the task, change to the Basic Data tab page and choose theentry Complete from the Change Status dropdown box.
When you complete the task, the system checks the actual start and finish dateson the Additional Data tab page. If the actual finish date has not been entered,the system automatically enters the current date as the actual finish date. If theactual start date has not been entered either, the system also enters the currentdate in this field.
ResultThe task is given the status Completed and is confirmed in the system. It no longer appearsunder My Tasks in the Tasks initial view.
Time Recording Using the Cross-Application TimeSheet
You use this function to record the work you carried out for a cProjects project in the Cross-Application Time Sheet (CATS). If you are using SAP ECC 6.0 EhP03, you can view thefollowing, additional detail data for tasks and make changes to it:
Actual start
Actual finish
Percentage complete
Notes
Remaining work
Work
Caution
Once you have activated CATS confirmation, manual confirmation is no longer possible.
End of the caution.
IntegrationThe system creates a worklist in CATS to enable you to record your time for a role or task.The system selects all objects (tasks, project roles, or project definitions) to which you areassigned in the confirmation time frame:
If you set up confirmation via project roles, the worklist displays all roles forconfirmation to which your user is assigned for the confirmation time frame.

SAP Online Help 12.09.2008
Collaboration Projects 91
If you set up confirmation via tasks, the worklist displays all tasks for confirmation towhich your user is assigned by means of a role for the confirmation time frame andwhich have been released. For the confirmation time frame, the system first checksthe time frame you specified on the Staffing tab page. Then it checks the time frameyou specified in the Tasks Assigned to Selected Project Role group box on the Taskstab page. If you only made entries on one of the tab pages, these apply.
Note
You cannot confirm for summary tasks.
End of the note.
Note
If you have not assigned any roles to the tasks, the system cannot determine thetasks for which you are responsible. In this case, the system response is as follows:
End of the note.
1. If you have allowed confirmation for the project, the system displays theproject definition for time recording.
2. If you have not allowed confirmation for the project, the system cannot createa worklist and you cannot record your time.
Note that the planned times in cProjects are only transferred to CATS if you are usingSAP ECC 6.0 EhP03.
The worklist also contains information about the project’s account assignment object.
Prerequisites Your system administrator activated the time recording function in Customizing for
Collaboration Projects under Define Project Types.
Your system administrator set up accounting integration; see Customizing forCollaboration Projects under Accounting Integration.
Your system administrator set up communication via Application Link Enabling (ALE);see Customizing for SAP Web Application Server under Application Link Enabling(ALE). For more information about setting up ALE for cProjects integration withCATS, see SAP Note 954860.
Note
This setting is not required if ERP and cProjects are installed on the same system.
End of the note.
The cProjects system is available at the time of confirmation
If you want to display detail data during confirmation, your system administratoractivated the business function BF CA_CATS_CPR_CORE.
FeaturesWhen the times you recorded in CATS have been released and approved, the systemautomatically transfers them to cProjects and SAP Controlling. The system also transferssaved detail data.

SAP Online Help 12.09.2008
Collaboration Projects 92
In SAP Controlling, the system generates actual costs from the records that weretransferred based on plan prices from cost center accounting and posts them to theaccount assignment object.
When determining costs and updating the actual costs, the system does not supportthe assignment of personnel costs to the recipient object (not updating CO directlyfrom CATS but via HR) because in this scenario the origin of the costs is unclear.
In cProjects, the transferred records for times are saved in table DPR_CONF_LI. Thetransferred detail data is saved in table DPR_CONF_DET. You use theDPR_CATS_CPR_TRANSF program to transfer the total time recorded and thesaved detail data to the cProjects UI. We recommend that you schedule the programin a batch run.
The actual start date is also transferred for tasks and project roles. The systemalways displays the earliest date. If, for example, you record time for a task for thefirst time on 07.01. the system makes 07.01. the actual start date. If you record timeslater on for 06.30. the system changes the actual start date to 06.30.
Transferring the recorded times to cProjects does not change the status of theconfirmation object. Even if the percentage complete is 100%, the confirmation objectis not automatically closed.
However, saved detail data and times that have already been recorded for an objectthat is closed are still totaled up and displayed.
Example
On 12.10. you record time for a task. The data is transferred to cProjects the sameday but the DPR_CATS_CPR_TRANS program is scheduled for 12.15. On 12.12. theproject lead changes the status of the task to Closed. However, the times recordedare still totaled up and displayed on 12.15.
End of the example.
Activities Create a worklist in CATS from a particular date and with the cProjects profile. This
profile also specifies the length of the confirmation time period.
Note
You can only confirm for the objects that appear in the worklist. You cannot add anymore objects automatically. You can only enter detail data for tasks if you have therelevant authorization.
End of the note.
Copy the line in which you want to confirm from the upper area to the lowerconfirmation area.
Enter the required detail data and save your entries.
Record your time and save your entries.
For more information about working with the Cross-Application Time Sheet, see SAP Libraryunder Logistics Customer Service (CS) Cross-Application Time Sheet (CATS) .

SAP Online Help 12.09.2008
Collaboration Projects 93
Project Resource PlanningPurposeHaving the right employees at the right place at the right time is one of the centralrequirements of today’s human resource management.
Project Resource Planning provides a planning tool for you to optimize your human resourcedeployment. It focuses on using your employees efficiently and assigning them to projects ororders based on demand, qualifications, and availability.
The project lead first uses project roles to depict which type of resource is required in aproject, that is, which function the employee (resource) carries out in the project. The projectrole includes information about the qualifications the resource should have and when and forhow long the resource should be available. The project lead can assign tasks to the roles orresources straight away.
In the resource search, the system determines suitable resources for each role and task onthe basis of their qualifications. The project lead’s or customer’s preferred resources can bestored as candidates in the system.
In the staffing process, staffing or candidate managers can also determine resources basedon their availability.
The project lead or resource manager can first reserve their preferred resource or assign theresource straight away. At the same time, the project lead can send e-mails to resources withdetails of the project, directly from the application.
You have the following options for carrying out project resource planning:
You can do all your planning in cProjects.
You can select the resources by their availability. To do this, you can either use theresource planning application (RPA) from Service Resource Planning in SAPCustomer Relationship Management (SAP CRM) or you can predefine the capacity ofthe resources by means of Customizing in cProjects; the latter is the simpler option.
You can schedule the resources with SAP xRPM [Extern].
PrerequisitesYou created a project [Seite 31].
You created resources [Seite 126] as business partners in Resource Management.
You created the role of the person responsible for the project.
If you want to use groupware integration [Extern], you require SAP CRM andmiddleware, as well as Workforce Deployment.
You can transfer organization types, qualifications, and approximate availabilityfrom SAP Human Capital Management.
Process Flow...
1. You create a project role. For more information, see Creating a Project Role [Seite 97].
2. You assign tasks [Seite 102] to the project role.
3. You define the qualifications [Seite 108] that the resource needs to meet therequirements profile of the role.

SAP Online Help 12.09.2008
Collaboration Projects 94
4. When using project resource planning for direct staffing, you staff the role withresources [Seite 126]. You can either assign resources straight away or first search[Seite 116] for suitable and available resources.
When using project resource planning as a staffing process [Seite 110], projectmanagers and staffing managers work together to locate and assign resources toprojects. To do this, you have to select the Resource Manager via ResponsibleOrganization staffing type in Customizing for Collaboration Projects, by choosingResource Management Basic Settings for Project Roles Define Project RoleTypes.
5. To reserve suitable resources provisionally, you can first save them as candidates[Seite 130] until you have clarified whether the employee or the employee's manageragrees to his or her participation in the project. You can also reserve [Seite 136] aresource for a particular project role.
6. You can staff a project role and define corresponding attributes without having tospecify the resource straight away.
7. You can staff [Extern] the project role with the chosen resource.
8. You notify [Seite 133] the relevant resource or his or her manager by e-mail or by agroupware task [Seite 139] if there is groupware integration.
9. You schedule appointments for your resources.
You can set up staffings in cProjects but you cannot schedule appointments. Ifyou want to schedule appointments, you can use the RPA.
The time units from the RPA must be defined as permitted time units incProjects so that they can be transferred from the RPA to cProjects. For moreinformation, see SAP Note 866776.
ResultThe project is staffed with suitable resources. You have assigned tasks, the required capacityfor these tasks, and the period in which they are to be carried out, to each resource.
Project Roles
DefinitionA project role represents a position in a project that is to be filled by a business partner, forexample, the role of consultant in a consulting project.
The project role describes which type of resource is required in a project, that is, whichfunction the resource carries out in the project. The project role includes information about thequalifications that the resource should have and when and for how long the resource shouldbe available.
A similar resource description exists in Organizational Management. Here, thepositions describe the resources required for the organizational plan.

SAP Online Help 12.09.2008
Collaboration Projects 95
UseYou create project roles according to the planned requirement for a project, thereby creatingthe foundation of Resource Planning. You can only assign tasks, staff roles with resources,and therefore complete resource planning, once you have created the project roles.
For more information about creating project roles, see Creating a Project Role[Seite 97].
Project roles can have the following statuses:
A red icon if the project role is not staffed
A yellow icon if the project role is partially staffed
A green icon if the project role is fully staffed
You can define the following attributes for each project role:
The qualifications a resource requires to be able to fulfill the project role
The tasks that a resource is to work on
The work and time frame for the individual tasks
Once you have assigned tasks to the project role and staffed the project role with resources,you can check whether all assignments and staffings are consistent. To do so, choose Check.
You use the DPR_TRUNCATE Business Add-In (BAdI) to control whether orhow the system is to delete or truncate the project roles and staffings when anoperational project is completed or if it is canceled. For more information, seeCustomizing for Collaboration Projects under Resource Management BasicSettings for Project Roles BAdI: Control Truncation and Deletion of Roles andStaffings.
StructureThe project role overview with the current status and assigned resources is always displayedin the screen area on the left in the project role definition.
You can sort the project roles at any time to get a better overview. See SortingProject Roles [Seite 99]. You can also hide the role list to gain more space forediting a project role.
In the screen area on the right, you define the business attributes of each project role andassign persons to it. The following tab pages are available:
General [Seite 96] (detail view for the project role)
Tasks [Seite 102]
Staffing Process [Seite 110]
Qualifications [Seite 108]

SAP Online Help 12.09.2008
Collaboration Projects 96
Costing [Seite 167]
Staffing [Seite 126]
Documents [Seite 198]
Notes [Seite 74]
Shopping Cart [Seite 190]
Object Links [Seite 157]
Recording Changes [Seite 73]
General Definition of a Project RoleUseThis function provides an overview of the general data for a project role. When defining newproject roles, you use this function to specify the general data.
PrerequisitesYou are in the Projects initial view [Seite 17] on the Resources General tab page.
FeaturesThe left area of the screen displays an overview of all project roles that you have alreadycreated with the status and the resources already assigned.
The General tab page displays the detail data for the selected project role and the scheduledstart and finish dates of the project derived from the project data. You can create new projectroles or copy existing project roles (see Creating a Project Role [Seite 97]).
When you do this, you can specify or view the following attributes:
Project role type
The system displays default project role types according to the project type. Youcan make these settings in Customizing for Collaboration Projects by choosingResource Management Basic Settings for Project Roles Define ProjectRole Types.
You make a role available for the staffing process by choosing one of theResource Manager... options in the Staffed By column in this IMG activity.
A name for the project role
A function for the project role (for example, developer or decision maker)
A name for the project role
The validity period of the project role
The confirmed times, including the time unit

SAP Online Help 12.09.2008
Collaboration Projects 97
This field is only available if you selected time recording for project roles inCustomizing for Collaboration Projects by choosing Structure Define ProjectTypes. Otherwise you record your times for tasks [Seite 89].
The calculated start and finish
If you do not specify an explicit validity period for the role, the system determines anddisplays the calculated start and calculated finish from the validity period of the project.
The planned required capacity using the time unit of your choice
The urgency of the project role, which indicates how important the project role is
The Vacant indicator to document that the role has not been staffed (this is relevant tothe vacant role search [Seite 125])
The area and location in which the role is required
If tasks are assigned to a project role and the project role type does not permit distribution[Extern], the system displays the following data for the task assignment [Seite 102] underTask Assignments for Project Role:
The number of tasks assigned
Earliest start and latest finish date of the tasks
The total work assigned
Choose Transfer This Data for Project Role to transfer this data to the project role definition.
If you chose a project role with distribution, you can no longer manually edit the requiredcapacity in the project role (that is, in the Required Capacity field). The data then alwayscomes from the distribution data, which you can edit manually (see Distribution of RequiredCapacity Over Periods [Seite 100]).
Creating a Project Role
You can create new project roles or copy existing ones.
PrerequisitesYou have created a project. See Creating a Project Definition.
You are on the Resources tab page in the Projects initial view.
ProcedureCreating a new project role
1. Choose Create Role.
2. In the General group box, select the required project role type.

SAP Online Help 12.09.2008
Collaboration Projects 98
Note
The system displays default project role types according to the project type. You canmake the required settings in Customizing for Collaboration Projects, by choosing
Resource Management Basic Settings for Project Roles Define Project RoleTypes .
End of the note.
3. Enter a name for the project role.
4. Enter a description of the project role, as required.
5. Specify the time frame, as required.
6. Specify the required capacity and the time unit.
Copying an existing project role
If you have the administrator role, you can copy existing project roles. The system transfersthe staffing, candidates, and attributes (required capacity, qualification requirements, and taskassignments) of the project role too. If you are using the extended staffing process, thesystem checks whether the user has the required authorization (staffing manager orcandidate manager).
1. Select the project role you want to copy.
2. Choose Copy Role.
When performing direct staffing, the project role is copied along with its attributes(required capacity, qualification requirements, and task assignments) and candidates.
When using the staffing process, the project role is copied along with its attributes(required capacity, qualification requirements, and task assignments) only.
Including a project role
1. Choose Include Role.
2. Enter the required search criteria.
3. The system displays a results list.
4. Select the required role by clicking the link.
Note
You can only select roles from project templates that have been released.
End of the note.
See also:
Project Roles
General Definition of a Project Role
ResultThe new project role is displayed in the group box on the left. You can now assign tasks,qualifications, and resources to the project role.

SAP Online Help 12.09.2008
Collaboration Projects 99
Sorting Project RolesUseProject roles appear as a list in the Resources tab page in the Projects initial view. You canchange the sequence of project roles in this list to suit your needs.
PrerequisitesYou are in the Resources tab page in the Projects initial view.
Procedure...
1. Choose the project role in the list that you want to move.
2. Display the Sort Role drop-down list.
3. Choose the new position for the selected project role.
You see the project role list in the new order.
4. Save your data.
ResultThe selected project role is moved to the new position in the project role list. The other projectroles are moved down to accommodate the new position.
ViewsUseThe Project Roles and Project Role Staffing views give you a quick overview of the currentproject.
PrerequisitesYou are in the Projects initial view on the Resources tab page.
FeaturesProject Roles view
This view provides an overview of all existing project roles in the current project. You can alsodisplay the following information about the roles:
Type of project role and name
Status of the project role
Whether the role has already been staffed and if so, which resource staffed the role
Required capacity of the role
How much of the capacity is already covered by a resource

SAP Online Help 12.09.2008
Collaboration Projects 100
Validity period of the role
Calculated start date and finish date
Function
Area and location
Urgency
Vacant indicator
Project Role Staffing view
This view provides an overview of whether all project roles are fully staffed with resources andthe resources with which the project roles have been staffed. You can also display thefollowing information about the roles:
Whether the resources have been reserved for the role or whether they are alreadyassigned to the role
The work assigned to the role (through tasks)
The period for which the role is staffed with the resource
Required capacity (resulting from the staffing of the role with a resource)
Validity period of the role
Notes about the staffing
Status
Type of resource
Name of resource
Name and number of role
Text for role type
Vacant indicator
ActivitiesSelect the view you require from the View list box.
Distribution of Required Capacity over Periods
You use this function to distribute the required capacity of a project role or project role staffingover a number of periods.
IntegrationIf Workforce Deployment (WFD) is active, the system receives information about theavailability of resources from here. If WFD is not active, the availability is determined asfollows:

SAP Online Help 12.09.2008
Collaboration Projects 101
From the resource availability or location (see Customizing for Collaboration Projectsunder Resource Management Business Partner Employee Overview ).
From the calendar or hours per day (see Customizing for Collaboration Projectsunder Resource Management Basic Settings for Project Roles Make GeneralSettings for Distribution ).
Prerequisites You are editing a project role whose project role type supports distribution (see
Customizing for Collaboration Projects under Resource Management BasicSettings for Project Roles Define Project Role Types ).
You are on the Resources tab page in the General or Staffing view.
Note
For staffing, the system only displays the Req. Capacity Distribution over Periodsarea in the General view if you selected a resource.
End of the note.
FeaturesGeneralIf you use distribution for a project role, you can plan the required capacity for each individualperiod. In this case, you do not enter the total required capacity yourself; it is calculated by thesystem from the total of the individual required capacities you entered. The system displaysthe distribution of required capacity over periods. The required capacities must be within thevalidity period of the project role.
Once distributed values exist, fixed dates must also exist for the role or resource. If there areno fixed dates, the system sets them automatically.
You can enter a period type and a distribution unit for the distribution at project definitionlevel. You do this on the Structure tab page in the Additional Data view. If you select a genericinterval as the period type, you can plan the periods as you choose. There must not be anygaps between the periods and they must not overlap. You can check the intervals.
If you do not enter any data here, the information you entered in Customizing forCollaboration Projects under Resource Management Basic Settings for Project Roles
Make General Settings for Distribution applies.
In addition to the table display, you can display the distribution of required capacity overperiods as a chart.
A chart is available on the General tab page: The red curve shows the required capacity ofthe project role; the yellow bar shows the total of all reserved required capacities from the rolestaffings; the green bar shows the total of all fixed role staffings.
Two charts are available on the Staffing tab page:
Required Capacity: Here you compare the availability of a staffed resource with yourexisting staffings for this and other project roles. The red curve shows the availablecapacity of the resource; the gray bar shows the other booked capacity; the yellowbar shows the other reserved capacity, and the green bar shows the requiredcapacity of the project role.
Free Capacity: Here you compare the remaining required capacity of the project rolewith the capacity the staffed resource still has available. The blue curve shows the

SAP Online Help 12.09.2008
Collaboration Projects 102
free capacity and the red bar shows the remaining required capacity of the projectrole.
If you make changes to entries in the table and then choose Enter, the systemupdates the chart.
Note
You can determine the required capacity of a distributed role automatically from the assignedtasks. To do this, choose Update in Accordance with Tasks. The system then recalculates therequired capacity from the role to task assignments.
End of the note.
Distribution FunctionsYou use distribution functions if you want to make the same changes to the required capacityin several different periods. You can use this function for the following types of changes:
Adding required capacity to the existing required capacities of a period
Subtracting required capacity from the existing required capacities of a period
Setting the required capacity as a new required capacity for a period
For more information, see Advanced Distribution.
Task AssignmentUseYou use this function to assign tasks [Seite 104] to project roles.
IntegrationYou use this function if you want to assign multiple tasks to a project role. If, on theother hand, you want to assign multiple project roles to a task, you can use theassignment of project roles to tasks [Seite 106] view.
The Tasks initial view provides an overview of all tasks to which you are assigned bymeans of a project role (see Project List [Seite 25]).
PrerequisitesYou created tasks on the Structure tab page of the Projects initial view. For moreinformation, see Task [Seite 15] and Creating Basic Data for a Task [Seite 54].
You have administration authorization for the tasks you want to assign.
FeaturesThe group box on the left shows the project roles with their status and assigned resources.Here, you select the project role you want to edit on this tab page.
The upper area of the group box on the right shows the tasks you have already assigned tothe current project role. You can enter the following data:
Time frame of the assignment
The system displays the possible time frame to help you.

SAP Online Help 12.09.2008
Collaboration Projects 103
Work that the current project role is expected to carry out for a task
The planned work for a task does not restrict staffing: You can exceed it asrequired.
Time unit for the work
You can assign more tasks in the lower area of this group box. On the left, the systemdisplays the project structure with all the tasks and the roles that are already assigned to thetasks. The following information is displayed for each task:
The time frame in which you want the task to be carried out
The required capacity you have already assigned (assigned required capacity orplanned required capacity)
Status
Icon Description
Red icon No project roles are assigned to thetask.
The task has been assigned work = 0.
Yellow icon The task is not fully staffed: Requiredcapacity of task > required capacity ofassigned project role(s).
Green icon The task is fully staffed: Required capacity oftask = required capacity of project role(s).
Green-yellow icon The task is overstaffed: Required capacity oftask < required capacity of role.
In the screen area on the lower right, the system displays the resources in the Resourcesgroup box that belong to the staffings of the project role currently selected.
ActivitiesYou have the following options:
You can assign any number of tasks to each project role in a single work step.
It is not possible to assign multiple tasks to multiple roles. If you do this, thesystem issues the error message Selection for assignments between roles andtasks is invalid.
Instead of assigning a project role to a task and leaving it open as to which resourcesare participating in the completion of the task, you can also select one or moreresources that staff the role and assign them to the task straight away. You can alsoreplace a resource that exists in an assignment by selecting the assignment in therelevant group box, selecting the new resource in the Resources group box, and thenchoosing Assign Resource.
You can distribute the work of one task over multiple project roles.

SAP Online Help 12.09.2008
Collaboration Projects 104
A task can only be selected for a role if the validity period of the task overlapswith that of the project role.
You can restrict the time period of a task assignment.
If you use staffing by the project lead you can delete assignments at any time. If, onthe other hand, you use staffing by the resource manager, you can only delete taskassignments if they have the status Staffing in Preparation (see Deleting a TaskAssignment [Seite 105]).
You specify the staffing type in Customizing for Collaboration Projects bychoosing Resource Management Basic Settings for Project Roles DefineProject Role Types.
The project lead can change the role to task assignment irrespective of what the statusis. To do this, you must have chosen the extended staffing process and have selectedthe Flexible Assignment indicator in Customizing for Collaboration Projects, bychoosing Resource Management Basic Settings for Project Roles Define ProjectRole Types.
Assigning Tasks and Project RolesPrerequisitesYou created tasks on the Structure tab page of the Projects initial view.
To assign project roles to these tasks, the following prerequisites must be met:
You have administration authorization for these tasks.
The validity period of a task does not overlap with the validity period of the project role.
You are in the Projects initial view on one of the following tab pages:
Structure Roles
You see the Roles tab page only if you have your cursor on a task in the groupbox on the left in the project definition.
Resources Tasks
The system uses the following values to calculate the required capacity:
a. Remaining required capacity of the role: Total required capacity of the roleminus the required capacity of all tasks assigned to the role.
b. Remaining required capacity of the task: Planned work minus the total requiredcapacity of all role to task assignments that affect this task.
c. Remaining availability of the business partner in the role: Total required capacityof the role staffing of the business partner minus the total required capacity of allrole to task assignments for the same business partner and the same role.

SAP Online Help 12.09.2008
Collaboration Projects 105
If you assign a task to a project role, the system uses the minimum from value aand value b as the default value.
If you assign a task to a resource, the system uses the minimum from value cand value b as the default value.
If the required capacity of the project role or resource staffing is 0, the systemalways uses value b as the default value.
ProcedureYou are on the Structure tab page Roles:...
1. Choose the project role or resource to which you want to assign the selected task.
2. Enter the period for which you want the role to be assigned.
3. Enter the amount of work that you want to assign to the role.
The Project Roles with Assigned Tasks area displays how much work is plannedfor the current task and how much of this work has already been assigned. Youcan see this for each role. You can assign the total required capacity to one roleor distribute it over various roles.
4. Save your data.
You are on the Resources tab page Tasks:...
1. Select the role to which you want to assign tasks in the screen area on the left.
2. Choose the task that you want to assign to the selected project role.
3. Choose Assign Project Role to assign the task to the project role or select a resourceand choose Assign Resource, to assign the resource to the task directly.
4. Enter the period in which you want the task to be carried out.
5. Enter the amount of work that you want to assign to the role.
The Tasks with Assigned Project Roles area displays how much work is plannedfor the current task and how much of this work has already been assigned. Youcan see this for each task. You can assign the total required capacity to one roleor distribute it over various roles.
6. Save your data.
See also:
Deleting a Task Assignment [Seite 105]
Deleting a Task AssignmentUseYou use this function to delete the assignment of a task to a project role.

SAP Online Help 12.09.2008
Collaboration Projects 106
This function deletes the assignment of the task to the project role, it does notdelete the entire task from the system.
Deleting the task from the project role does not affect the availability of thecorresponding resource.
PrerequisitesYou have administration authorization for the task whose assignment you want todelete.
You are in the Projects initial view. Select a task here and then choose one of thefollowing paths:
Structure tab page Roles
Resources tab page Tasks
If you are using the staffing process, you are in the status Staffing in Preparation.
Procedure......
1. In the area on the left, select the project role or task for which you want to delete theassignment.
2. In the upper right area select the tasks or roles whose assignment you want to delete.
3. Choose Delete Assignment.
4. Save your data.
ExampleYou want a lead consultant, and not the project lead as originally planned, to carry out thetask Create Project Plan.
This means that you first have to delete the task assignment to the project lead. You thenreassign the task to the lead consultant.
See also:
Assigning Tasks and Project Roles [Seite 104]
Assignment of Project Roles to Tasks
You use this function to assign project roles to individual tasks.
You have the following options:
You can assign any number of project roles to each task.
You can distribute the work of one task over multiple project roles.
Note

SAP Online Help 12.09.2008
Collaboration Projects 107
Note that the validity periods of the tasks and project roles must overlap. If they donot, the system issues a message.
End of the note.
You can restrict the time frame of a project role assignment.
You can delete assignments (see Deleting a Task Assignment).
Integration You use this function if you want to assign multiple project roles to a single task. If, on
the other hand, you want to assign multiple tasks to a single project role, you can usethe task assignment view.
The Tasks initial view provides an overview of all tasks to which you are assigned bymeans of a role (see Project List).
Prerequisites You created tasks on the Structure tab page of the Projects initial view. For more
information, see Task and Creating Basic Data for a Task.
You have administration authorization for the tasks you want to assign.
You are in the editing view of a task on the Roles tab page.
FeaturesThe project structure displays the tasks with their current status.
You see the project roles that are already assigned to the selected task in the upper screenarea. You can make new assignments. You specify the following:
The time frame for which you want the project role to be assigned
The work that you want to assign to the role
Note
The work planned for a task does not restrict staffing. You can overbook if necessary.
End of the note.
The time unit for the work
The Project Roles for Current Project group box lists all roles. The following information isdisplayed for each role:
The status:
Icon Description
Red icono There are no tasks assigned to the role.
o The role has been assigned a task with work = 0.
Yellow icon The role is partially staffed: Required capacity of role > required capacity ofassigned task

SAP Online Help 12.09.2008
Collaboration Projects 108
Green icon o The role is fully staffed: Required capacity of role = requiredcapacity of task
Green-yellowicon The role is overstaffed: Required capacity of role < required capacity of task
o Assigned roles
Information about how much of the planned work you have assigned to therole and the period in which you want the task to be carried out.
o Validity period of the assignment
o Amount of planned work you have already assigned
o Instead of assigning a project role to a task and leaving it open as to whichresources are involved in the completion of the task, you can also select aresource that staffs the role and assign it to the task straight away.
Definition of QualificationsUseYou can set down the qualifications required for a project role or a particular task.
IntegrationYou define qualifications for tasks in the Projects initial view on the Structure tab page in thetask definition Qualifications or in the Tasks initial view on the Qualifications tab page.See Defining Qualifications [Seite 109].
You define qualifications for project roles in the Projects initial view on the Resources tabpage under Qualifications. See Defining Qualifications [Seite 109].
Qualifications you have already defined are displayed in the resource search [Seite 116] andare used as selection criteria for finding suitable resources. See Selection According toQualifications [Seite 119].
PrerequisitesTo be able to select qualifications, you must have defined the qualifications catalog inCustomizing. To do this, perform the activities in Customizing for Collaboration Projects underResource Management Qualification Management Edit Qualifications Catalog.
To be able to define proficiencies for the qualifications, you must have defined scales inCustomizing. To do this, perform the activities in Customizing for Collaboration Projects underResource Management Qualification Management Edit Scales.
FeaturesThe qualifications catalog represents all qualifications that you can assign to roles or tasks.
The Qualification Requirements group box displays the qualifications that are alreadyassigned to the role or task. You can create new qualifications.
You can define the following attributes for each qualification:
If the selected qualification is an essential prerequisite, you can flag it as a mandatoryqualification.

SAP Online Help 12.09.2008
Collaboration Projects 109
The resource search then only selects resources that have this qualification.
You can define the necessary proficiency for each qualification.
In the resource search, the system calculates a resource’s suitability percentagefrom the difference between the required proficiency of a qualification and thedegree to which the resource fulfills this.
You can delete qualifications at any time. See Deleting Qualifications [Seite 110].
Defining QualificationsPrerequisitesYou defined the qualifications catalog in Customizing for Collaboration Projects underResource Management Qualification Management Edit Qualifications Catalog.
ProcedureDefining Qualifications for a Project Role......
1. In the Projects initial view, go to the Resources tab page and then select the role forwhich you want to specify qualifications from the list of project roles.
2. Choose the Qualifications tab page.
3. Expand the qualifications catalog to select qualifications. Choose the appropriatequalification(s).
You can also use the search function to do this:
Make an entry in the Search Term field and choose Search. The system displays asearch result list from which you can select the qualifications you require.
4. Choose >> (Add Selected Qualification to the Qualification Requirements). Thequalification is then transferred to the screen area on the right. The system does nottransfer any qualification groups, only individual qualifications.
5. If the selected qualification is an essential prerequisite for carrying out the project role,select the Mandatory checkbox.
6. Enter the required proficiency of the qualification.
Defining Qualifications for a Task......
1. From the Structure tab page of the Projects initial screen, select a task.The task definition function appears.
2. Choose the Qualifications tab page.
3. Expand the qualifications catalog to select qualifications. Choose the appropriatequalification(s).
You can also use the search function to do this:
Make an entry in the Search Term field and choose Search. The system displays asearch result list from which you can select the qualifications you require.

SAP Online Help 12.09.2008
Collaboration Projects 110
4. Choose >> (Add Selected Qualification to the Qualification Requirements). Thequalification is then transferred to the screen area on the right. The system does nottransfer any qualification groups, only individual qualifications.
5. If the selected qualification is an essential prerequisite for carrying out the task, selectthe Mandatory checkbox.
6. Enter the required proficiency of the qualification.
Deleting QualificationsUseYou have created qualifications and you want to delete them.
PrerequisitesTo delete qualifications for a task, you have to be in the task definition (Projects initial viewStructure tab page Task Definition Qualifications).To delete qualifications for a project role, you have to be in the Projects initial view, then go tothe Resources tab page and the Qualifications tab.
Procedure...
1. Select the qualification(s) to be deleted in the Qualification Requirements group box.
2. Choose Delete Selected Objects.
3. Save your data.
Staffing ProcessUseYou use this function to staff project roles according to their status using a resourcemanagement application outside the project.
IntegrationIf staffing managers and candidate managers use the extended staffing process, they accessthe project roles from the Resources initial view. You activate this initial view in Customizingfor Collaboration Projects by choosing Basic Settings Define Initial Views for cProjects.
PrerequisitesYou use the staffing process for all project roles for which you set the Staffed by ResourceManager via Responsible Organization option for the project role type in Customizing forCollaboration Projects, by choosing Resource Management Basic Settings for Project

SAP Online Help 12.09.2008
Collaboration Projects 111
Roles Define Project Role Types. Only then does the Staffing Process tab page becomevisible for this project role.
The staffing and candidate managers are mapped as business partners and assigned to therelevant organizational units (the same as for resources). To do this, an organizational unit islinked to a position by the link A441 for staffing managers or A440 for candidate managers.This position then links the relevant business partner. Make these settings in transactionPPOME. For more information, see SAP Note 731177.
FeaturesUnlike direct staffing, the staffing process is divided into different phases in which differentpersons responsible take over the processing of the project role. The following table showsthese different phases:
Phase Status Performed By
1 Staffing in Preparation Project lead
2 Staffing in Process Staffing manager or candidate manager
3 Staffing Complete Project lead
ActivitiesStatus Performed By Manager Activities System Actions
Staffing inPreparation
Project lead Enters the initial projectparameters.
Enters requirements forproject roles.
Sets the status of the projectrole to Staffing in Process.
Adds a message to theproject role (optional).
Project role opened withautomatically set statusStaffing in Preparation.
Staffing inProcess
Staffing manager Takes responsibility forstaffing through StaffingProcess tab page.
Adds a message to theproject role (optional).
Can make changes to timeframe and capacity forexisting staffings.
Assigns resources to projectroles.
Advertises unstaffed projectroles (those roles for whichthe Vacant indicator isselected on the General tabpage) in a marketplace in theEnterprise Portal.
Enters a note for each staffingor candidate (optional).
Candidate manager Takes responsibility for findingcandidates through Staffing
Sets access to theGeneral tab page toread-only except for theVacant field and theproject description.
Deactivates theQualifications and Taskstab pages.

SAP Online Help 12.09.2008
Collaboration Projects 112
Process tab page.
Adds a message to theproject role (optional).
Performs resource searchesbased on new or changedproject or role criteria.
Chooses candidate(s) to addto candidate list.
Deletes undesirable orunsuitable candidates.
Enters a note for eachcandidate (optional).
Staffing manager Approves candidates andassigns them to theappropriate project roles.
Deselects the Vacantindicator for the relevantproject role on the Generaltab page.
StaffingComplete
Project lead Ends the staffing process forthe project role by setting thestatus to Staffing Complete.
Saves the entries.
Sets access to allinformation for thisproject role to read-onlyaccess. The project leadcan set the status backto In Process.
See also:
Staffing Process Tab Page [Seite 112]
Accepting Responsibility for Roles [Seite 114]
Resource Search [Seite 116]
Staffing Process Tab PageUseDepending on your role in the staffing process, you use the Staffing Process tab page to:
Set and change the status of the project role.
Assign the organization for a role or accept the responsibility for a role.
Make roles visible in the worklist for candidate managers.
PrerequisitesYou are on the Resources tab page.
You are using the staffing process and have a role that allows you to view and use theStaffing Process tab page.

SAP Online Help 12.09.2008
Collaboration Projects 113
ActivitiesYou use the Status group box to set the current status of a particular project role to be staffed.
Staffing managers use the Responsible for Staffing group box to accept the responsibility forstaffing a specific role.
Candidate managers use the Responsible for Resource Search and Candidate Managementgroup box to accept the responsibility for candidates for a specific role. This is also the areawhere project leads and staffing managers make the role visible in the candidate manager’sworklist by selecting the Visible in Worklist checkbox.
See also:
Staffing Process – Status [Seite 113]
Accepting Responsibility for Roles [Seite 114]
Staffing Process - StatusUseThe status of the staffing process specifies the types of tasks the staffing managers andcandidate managers can perform using Project Resource Planning (PRP). Each status has itsown activities. This allows the specialist with the most expertise in the specific area to performthe activities related to that area in the staffing process.
IntegrationYou set the status of the staffing process on the Staffing Process tab page.
Phase Status Performed By
1 Staffing in Preparation Project lead
2 Staffing in Process Staffing manager and/or candidate manager
3 Staffing Complete Project lead
ActivitiesStaffing in PreparationThe project role has status Staffing in Preparation. The project lead initiates the project byusing the following tab pages to complete the initial project parameters and defining therequirements for the role within the project:
General tab page
Tasks tab page
Qualifications tab page (available when using WFM Core)
Once this part of the process is complete, the project lead sets the status to Staffing inProcess.

SAP Online Help 12.09.2008
Collaboration Projects 114
Staffing in ProcessAs part of the staffing process, PRP sets access to the General tab page to read-only exceptfor the Vacant field and the project description. It also sets access to the Qualifications andTasks tab pages to read-only. Project roles for which the Vacant indicator is selected stillrequire resources.
At this point, the staffing manager takes over responsibility for staffing with the StaffingProcess tab page and uses an external application (such as the RPA) to access the projectroles in his or her worklist. The candidate manager carries out the following task:
Performs a resource search (in the external application or alternatively in cProjects).
He or she checks the candidate list (if the indicator has been selected so that thestaffing requirements can be seen in the worklist) and deletes undesirable orunsuitable candidates.
The staffing manager then approves the candidates and assigns them to the individual roles.
Staffing CompleteThe project lead deselects the Vacant indicator for the role (on the General tab page) andsets the status to Staffing Complete. At this point, PRP sets all role information for this projectrole to read-only.
See also:
Accepting Responsibility for Roles [Seite 114]
Resource Search [Seite 116]
Accepting Responsibility for RolesUseWhen using the staffing process, staffing managers and candidate managers are assigned toroles based on the manager’s organizational assignment. They can also choose to acceptpersonal responsibility for a role to which they were not initially assigned.
PrerequisitesYou are using the staffing process and are on the Staffing Process tab page.
Staffing managers and candidate managers have been assigned to organizationalunits.
FeaturesStaffing managers and candidate managers find resources for roles that appear in theirworklist. A role only appears in the worklist if it is assigned to a staffing manager or candidatemanager. Staffing managers and candidate managers review and edit roles assigned to themon the Staffing Process tab page.

SAP Online Help 12.09.2008
Collaboration Projects 115
ActivitiesYou use the Responsible for Staffing and Responsible for Resource Search and CandidateManagement areas on the Staffing Process tab page when assigning roles. In these areas,managers see only the roles within their own organizational unit, that is, the organizationalunit(s) to which they are assigned. Managers can change the responsibility for a role fromanother manager’s name to their name by choosing Take On Personally.
See also:
Staffing Process [Seite 110]
Staffing Process Tab Page [Seite 112]
Synchronize Project Roles to Staffing ProcessUseYou might have roles that you used in direct staffing that you want to synchronize to theextended staffing process. You use this transaction to make these roles available for theextended staffing process.
PrerequisitesYou are using the staffing process.
You have changed the project role that you want to make available for the extendedstaffing process in Customizing for Collaboration Projects, by choosing ResourceManagement Basic Settings for Project Roles Define Project Role Types.
ActivitiesYou run the report for synchronizing project roles from the SAP menu, by choosingCollaboration Projects Tools Synchronize Project Roles with Staffing Process.
You can also run this report from Customizing for Collaboration Projects, bychoosing Resource Management Basic Settings for Project RolesSynchronize Project Roles to Staffing Type.
You select the client(s) on which the report is run. The report:
Synchronizes all roles on the specified client(s) that were changed in the IMG activityDefine Project Roles for Project Type so that these roles are available for the staffingprocess.
Sets the status of the synchronized roles to Staffing in Preparation.
The report only supports the change from direct staffing to the staffing process. There is noautomated method to return a role from the staffing process to direct staffing.

SAP Online Help 12.09.2008
Collaboration Projects 116
See also:
Staffing Process – Status [Seite 113]
Staffing Process [Seite 110]
Resource SearchUseYou use the resource search function to find suitable and available project resources.
IntegrationAs search criteria, the search function uses all data required for the search from theproject role. The search criteria can be changed in the search function withoutchanging the attributes of the project role itself.
You have installed the WFD server as an add-on or connected it as an externalsystem. You use the WFD server to check the availability. You can also check theavailability more simply without using the WFD server.
PrerequisitesYou created project roles on the Resources tab page of the Projects initial view. Formore information, see Project Roles [Seite 94] and Creating a Project Role [Seite 97].
From the Projects initial view, choose the Resources tab page, then Find Resource.
FeaturesYou can enter the following resource search criteria:
Search Criteria See
General project role type that is to be staffed
Specified time period
Customer/ordering party
Area/location
Maximum number of hits in the search result
General Selection Criteria [Seite 118]
Organizational unit Selection According to OrganizationalStructure [Seite 118]
Qualifications Selection According to Qualifications [Seite119]
Availability Selection According to Availability [Seite 121]

SAP Online Help 12.09.2008
Collaboration Projects 117
You see a green checkmark when the search criteria is entered on one of thetab pages.
Candidates are always included in the search result, regardless of the selection criteria youenter or the resource’s suitability percentage.
You use the BAdI DPR_RES_SEARCH to change the following settings according to yourrequirements:
Search criteria (and the corresponding user interface)
Search logic
Search result list
For more information, see the Collaboration Projects Implementation Guide (IMG) underResource Management Basic Settings for Project Roles BAdI: Configure ResourceSearch and SAP Note 1009131.
For more information, see:
Running a Search [Seite 122]
Search Results [Seite 122]
Candidates [Seite 130]
ActivitiesWhen using Project Resource Planning (PRP) for direct staffing:......
1. Enter the required search criteria on the General, Organizational Structure,Qualifications, and Availability tab pages.
2. Choose Find Resource.
The system performs the search and displays the results.
3. E-mail the chosen resource or his or her manager to inform them that you want toinclude the resource in your project.
4. Assign the resource directly to your project, or add the resource to your list ofcandidates.
When using PRP for the extended staffing process:...
1. Enter the required search criteria on the General, Organizational Structure,Qualifications, and Availability tab pages.
2. Choose Find.
The system performs the search and displays the results.
3. Candidate managers choose candidates from the results of the search.
4. Candidate managers approve or reject candidates.
5. Staffing managers assign the candidates to the project roles.
See also:
General Selection Criteria [Seite 118]

SAP Online Help 12.09.2008
Collaboration Projects 118
Selection According to Organizational Structure [Seite 118]
Selection According to Qualifications [Seite 119]
Selection According to Availability [Seite 121]
Notifying a Selected Resource by E-Mail [Seite 133]
General Selection CriteriaPrerequisitesYou are in the Projects initial view on the Resources tab page and have chosen ResourceSearch and then the General tab page.
FeaturesYou can enter the following search criteria:
The project role type you are searching for, for example, senior consultant
In the search result, the system lists all the resources that have already carried out theduties of such a role.
If you leave the field blank, the project role is not used as a filter, that is, allresources are displayed.
The time frame required for searches: searches can be based on a selection accordingto organization, qualifications, or availability.
Maximum number of hits in the search result
You can reduce the search time by restricting the number of hits.
Customer/ordering party
You can restrict the search to resources who have already carried out work for thiscustomer or ordering party.
Area/location
You can restrict the search to resources that have the specified location or area. Youdefine areas and locations in Customizing for Collaboration Projects, by choosing BasicSettings Define Areas and Define Locations and assign them to the resources bychoosing Resource Management Business Partner Employee Overview.
Selection According to Organizational StructureUseYou can enter organizational units as selection criteria.

SAP Online Help 12.09.2008
Collaboration Projects 119
PrerequisitesYou are using organizational management in SAP Human Resources (HR).
You have distributed the HR master data.
For more information, see the Collaboration Projects Implementation Guide (IMG)under Resource Management Basic Settings for Resource ManagementApplication Link Enabling (ALE) for HR Integration and the SAP Notes 312090 and390380.
You are in the Projects initial view on the Resources tab page and have chosenResource Search and then the Organizational Structure tab page.
FeaturesYou can restrict the resource search to particular organizational units. The system thenselects only the business partners assigned to the selected organizational unit or a lower-level organizational unit.
ActivitiesSpecifying an Organizational Unit As a Search Criterion...
1. Expand the organizational structure and choose the required organizational unit(s).
You can also use the search function to do this:
Make an entry in the Search Term field and choose Search. The system displays asearch result list from which you can select the qualifications you require.
2. Choose >> (Add Selected Organizational Unit As Search Criterion). The organizationalunit is then transferred to the screen area on the right.
Deleting an Organizational Unit...
1. In the Selected Organizational Units group box, select the organizational unit(s) youwant to delete.
2. Choose Delete Selected Objects.
3. Save your data.
Selection According to QualificationsUseYou can enter the qualifications of resources as selection criteria.

SAP Online Help 12.09.2008
Collaboration Projects 120
IntegrationThe system automatically displays all qualifications entered so far for the role and the tasksassigned to this role. See Definition of Qualifications [Seite 108]. The icons by thequalifications indicate whether the qualification comes from the task definition or project roledefinition. If a task and a project role both have the same qualification, the qualification isdisplayed only once. The system then displays both the task icon and the role icon. Whensummarizing the same qualifications, the system always adopts the highest proficiency. Evenif the same qualification is an essential requirement in only one of the two objects (indicated inthe Mandatory field), the qualification as a whole is mandatory.
PrerequisitesYou are in the Projects initial view on the Resources tab page and have chosen ResourceSearch and then the Qualifications tab page.
FeaturesYou can add additional qualifications for the search or delete qualifications locally.
Any changes that you make to qualifications in the resource search aretemporary and apply only to the search, that is, they are not transferred to thequalifications in the task definition or project role definition.
If you have changed the qualifications, you always have the option of restoring them to theiroriginal state. To do this, choose Restore. The system then displays the qualifications fromthe task definition and project role definition again.
You can specify a minimum suitability percentage in the selection criteria. The systemcalculates a resource’s suitability percentage from the difference between the requiredproficiency of a qualification and the degree to which the resource fulfills this. Note that inresource management, alternative qualifications are not taken into account in the calculationof the suitability percentage. For more information, see Suitability Percentage [Seite 123].
In the search results list [Seite 122], the system always displays a resource's over-qualification as a 100% suitability.
Activities......
1. Select the project role for which you want to find resources.
2. Check whether you want to use all qualifications for tasks and roles as search criteria. Ifnot, delete the ones you do not require.
3. Check the proficiencies and mandatory qualification requirements.
4. If required, enter additional qualifications by expanding the qualifications catalog andselecting the required qualification(s). Then choose >> (Add Selected Qualification toQualification Requirements).
You can also use the search function to do this:
Make an entry in the Search Term field and choose Search. The system displays asearch results list from which you can select the qualifications you require.
5. Specify the required proficiency for each qualification.

SAP Online Help 12.09.2008
Collaboration Projects 121
Any changes that you make to qualifications in the resource search aretemporary and apply only to the search. They cannot be saved. When you exitthe resource search, the qualifications are reset to their initial value, that is, onlyqualifications for roles and tasks are displayed the next time they are called.
6. If required, enter additional selection criteria on the General, Organizational Structure,and Availability tab pages.
7. To run the search, choose Find Resource.
Selection According to AvailabilityUseYou can add availability as a search criterion when combined with qualifications and/ororganizational searches.
You cannot perform a search with availability as the sole search criterion.
PrerequisitesYou are in the Projects initial view on the Resources tab page and have chosen ResourceSearch and then the Availability tab page.
If you are not using Workforce Deployment (WFD), you have defined the availability for thebusiness partners in Customizing for Collaboration Projects, by choosing ResourceManagement Business Partner Employee Overview.
FeaturesYou can enter the following search criteria:
Required capacity
The system uses the scheduling engine to check the percentage of the requiredcapacity that a resource can fulfill based on the specified period entered on the Generaltab page.
Distribute required capacity
If you want to perform a search based on rules, you can choose a time pattern forrecurring required capacities. For example, you can choose a particular weekday andcombine it with a monthly recurrence (for example, the first Monday of each month).
You can only perform a search based on rules if you are using WFD.
Capacity utilization for the resource
You can select whether only hard-booked staffings are taken into account in theavailability calculation, or whether reservations are also included.

SAP Online Help 12.09.2008
Collaboration Projects 122
You can only select capacity utilization for the resource as a search criterion ifyou are using WFD.
Minimum availability
You can set the minimum percentage of availability for the resource to be consideredas a viable candidate. Only those resources that match the percentage you entered areconsidered in the availability calculation.
If you leave the field at its default value 0%, the minimum availability is not usedas part of the availability calculation.
Running a SearchPrerequisitesYou are on the Resources Find Resource page in the Projects initial view.
Procedure......
1. Enter the required search criteria.
2. Choose Find Resource.
ResultThe system displays the search result.
Search Results
After running the search function, the system displays a list of resources that it determined tobe suitable candidates on the basis of the search criteria you defined.
The list also contains the resources you have saved as candidates, regardless of theirsuitability percentage.
The list of search results provides information and functions that help you with furtherprocessing.
You can navigate to the detail data of a resource if you require more information.
Note
You define which information is displayed in the detail data on the General Data tab page, inCustomizing for Collaboration Projects by choosing Resource Management BusinessPartner Define Display Details for Business Partner .

SAP Online Help 12.09.2008
Collaboration Projects 123
In addition to the general data for a resource, you can view the profile matchup of theperson’s qualifications and the qualification requirements.
The Projects tab page displays an overview of all projects in which the resource is or wasinvolved.
End of the note.
You can store resources as candidates or firmly assign them to a project straight from the list.
The list provides a range of sort functions. To use them, choose the header of the column youwant to sort. You can also personalize the list to suit your requirements.
StructureThe list contains the following information:
Name of the person
The name is formatted as a link to the detail data for the resource.
Manager of the resource
Area and location
Location (as attribute of the business partner)
Cost/revenue rate
Existing assignments
The system indicates whether the resource is already assigned to the role that iscurrently selected or whether the resource is marked as a candidate.
Organizational unit
Suitability percentage
Location rate (as a percentage)
Availability rate (as a percentage)
Overall match (as a percentage)
Availability, capacity utilization, and free capacity, taking into account the softbookings and hard bookings.
If you are using WFD, note that the availability can only be made up of the hardbookings or the hard and soft bookings together. This depends on the selectioncriterion you entered on the Availability tab page.
See also:
Resource Search
Suitability PercentageDefinitionIf you use the Workforce Management Core planning service, the system uses a profilematchup in the resource search to compare the requirements profile with the resource's

SAP Online Help 12.09.2008
Collaboration Projects 124
qualification profile and thus determine a suitability percentage. The suitability rate can beused to generate hitlists for the staffing of a project.
Suitability percentage
100.00 %: The person is 100% suitable for the requirements profile
40.00 %: The person is 40% suitable for the requirements profile
The relative proficiencies are the deciding factor in the calculation of the suitabilitypercentage. A relative proficiency is determined by viewing the proficiency of the qualificationas specified in the resource search in relation to the maximum proficiency that is defined bythe qualification scale. The result is the relative proficiencies of the requirements and of thequalifications.
Note that in Resource Management alternative qualifications are not taken intoaccount in the calculation of the suitability percentage.
In Customizing, you can also store your own calculations to determine the suitability rate of aresource. To do so, process the following activity in the Implementation Guide forCollaboration Projects: Resource Management Workforce Management Core (WFM Core)
Business Settings for WFM Core BAdI: Suitability of Resources by Qualifications.
UseWhen you start the resource search, the system first checks whether each requirement iscovered by the qualification profile. If it is, the system compares the relative proficiencies: Theoptimum scenario is that they match, but the resource may instead be over- or under-qualified. If the proficiency of the qualification is greater than that of the requirement, theresource is overqualified; if the proficiency of the qualification is less than that of therequirement, the resource is under-qualified.
If the requirement is mandatory, the qualification is weighted more heavily. In this process, anover-qualification is weighted less heavily than an under-qualification.
To determine the degree of requirement satisfaction in relation to the entire profile, the systemthen multiplies the calculated value with the percentage of the overall requirements profile.
In the search results list [Seite 122], the system always displays over-qualifications as a 100% suitability.
There are only two types of priority in relation to requirements: essential requirements andoptional requirements. The priority of requirements is not split further because it would notmake sense from a business point of view and would not be user-friendly.
Essential requirements are weighted more heavily than optional requirements. The systemtakes account of the weighting when calculating the proportion of the individual requirementsto the entire profile, because an essential requirement within a requirements profile is moreimportant than an optional requirement of the profile.
IntegrationYou have edited the qualifications catalog and scales in the following section of theImplementation Guide: Collaboration Projects Resource Management QualificationManagement.
You have processed the following activity in the Implementation Guide: Collaboration ProjectsResource Management Qualification Management Activate Qualification Search and
Matchup Using WFM Core.

SAP Online Help 12.09.2008
Collaboration Projects 125
Vacant Role Search
You use this function to find roles that have not been fully staffed that are available within acertain time frame. This enables you to search worldwide for the best available talent in anenterprise.
The project lead marks a role as vacant so that it can be recognized as an unstaffed orpartially staffed role from outside the project.
PrerequisitesYou are in the Projects, Tasks, or Checklist Items initial view and choose Vacant Roles.
FeaturesYou can enter the following criteria for the search:
Time frame
Project type
Role type
Area
Location
Function
Qualifications
The system displays the search result in a table. From here you can:
Create a print version in PDF
Export the data to Microsoft Excel
Display detail data
Select a project role and choose Detail Data.
If a contact person has been specified and this business partner has an e-mailaddress, the system displays an e-mail link which you can use to contact this person.
Send detail data to yourself in an e-mail
Select a project role and choose Send E-Mail.
You can send the detail data of the selected role to yourself if an e-mail address isspecified for your user in the system.

SAP Online Help 12.09.2008
Collaboration Projects 126
Note
In cProjects, you can enter your e-mail address in the E-Mail Address field underUser Settings User . This data only becomes available the next time you open
the search.
End of the note.
Selection by QualificationUseYou can choose qualifications as selection criteria for the vacant role search.
IntegrationThe system automatically displays all qualifications that exist in the system. See Definition ofQualifications [Seite 108].
PrerequisitesYou are in the vacant role search.
FeaturesYou can add qualifications you want to use as search criteria or delete those you no longerrequire.
There are only two types of priority for qualifications: essential requirements and optionalrequirements.
If a qualification is an essential requirement, the system only takes those roles that have atleast this qualification into account.
You can specify a minimum suitability percentage in the selection criteria. The systemcalculates a role’s suitability percentage from the difference between the required proficiencyof a qualification and the degree to which the role fulfills this. Note that in resourcemanagement, alternative qualifications are not taken into account in the calculation of thesuitability percentage. The system also takes roles into account which have the qualificationbut not at the required level of proficiency. Example: For language proficiency, you specify"fluent". The system also takes roles into account for the suitability percentage that have alanguage proficiency below this level.
Activities3. Select qualifications by expanding the qualifications catalog and selecting the required
qualification(s). Then choose >> (Add Selected Qualification to QualificationRequirements).
4. You can also use the search function: Make an entry in the Search Term field andchoose Search. The system displays a search results list from which you can select thequalifications you require.
5. Specify the required proficiency for each qualification.
6. To run the search, choose Find Vacant Roles.
Staffing of Project Roles with Resources

SAP Online Help 12.09.2008
Collaboration Projects 127
You can staff project roles with resources.
The project role type determines how project roles are staffed with resources. You can usethe Staffed By field in Customizing for Collaboration Projects under Resource Management
Basic Settings for Project Roles Define Project Role Types to control which applicationis used to staff the project roles. You have the following options:
Project Lead:
The project lead staffs roles directly in cProjects.
Resource Manager via Authorization:
The role is staffed through an external application that has authorization for staffingvia the project definition. Staffing can also take place through cProjects.
Resource Manager via Responsible Organization:
The role is staffed through an external application. In this case, the user is the staffingmanager for the responsible organizational unit specified in cProjects. Staffing canalso take place through cProjects.
The following external options are available for resource planning: The Web-based ResourcePlanning Application (RPA) from service resource planning in SAP Customer RelationshipManagement (SAP CRM) and the Resources iView from SAP Resource and PortfolioManagement (SAP RPM).
Note
For more information about Service Resource Planning, see SAP Library under SAPBusiness Suite SAP Customer Relationship Management Components and Functions
Service Service Resource Planning .
End of the note.
When you create a staffing, the default value for the required capacity is taken from theminimum remaining, unstaffed capacity of the role and the minimum availability of theresource.
IntegrationTo staff project roles with internal resources, you have to create the resources as businesspartners in Project Resource Planning. You cannot staff any project roles with externalresources in cProjects. Project roles are staffed with external resources in SAP SupplierRelationship Management (SAP SRM).
You can create business partners in the following ways:
You can create business partners manually from the SAP menu by choosing:
Collaboration Projects Master Data Business Partner Maintain BusinessPartner .
If you use SAP Human Resources, you can transfer your master data.
For more information, see Customizing for Collaboration Projects under ResourceManagement Basic Settings for Resource Management Application Link Enabling(ALE) for HR Integration and SAP Notes 312090 and 390380.
You can create new business partners in Resource Management from the Projectsinitial view by choosing:

SAP Online Help 12.09.2008
Collaboration Projects 128
Resources Project Role Definition Staffing .
For more information, see Creating a Business Partner.
If you use Collaboration Projects together with the resource planning application (RPA) fromSAP CRM, note the following special feature: When the resource planner createsappointments (that is, concrete assignments) in the RPA, they appear as project role staffings(that is, capacitive staffing assignments) in cProjects. You cannot tell that these staffingscome from the RPA. If you then change and save one of these assignments, you actuallycreate a staffing. The staffing then appears in this (possibly unintentionally) changed form inthe RPA too.
Recommendation
When using cProjects with the RPA, we recommend that you only use role types that do notpermit distribution because distribution is not supported in the RPA.
End of the recommendation.
PrerequisitesYou are on the Resources tab page in the Projects initial view where you choose Project RoleDefinition and then the Person Assignment tab page.
FeaturesProject Role List
The project definition screen area on the left displays the project roles with their status andassigned resources.
Project Role Staffing in Time Frame <…>
This displays the resources assigned to the selected project role with the required capacityand time frame assigned. You can also choose to display a configurable staffing action thatsupports the staffing process.
You can display the percentage of availability for the role. This is based on the time frame andrequired capacity.
When making assignments, you have the following options:
Multiple resources to a single project role
If you select the Edit in Parallel indicator in Customizing for Collaboration Projectsunder Resource Management Basic Settings for Project Roles Define ProjectRole Types , staffings are allowed to overlap.
A single resource to multiple roles
You can assign a single resource to a role more than once, that is, for different timeframes.
When you select a row, you can display the distribution for the staffing, provided thatdistribution is permitted for the role.
If you click the link that is the name of the resource, you can display detailedinformation about the resource.
Note

SAP Online Help 12.09.2008
Collaboration Projects 129
You make the required settings in Customizing for Collaboration Projects, bychoosing Resource Management Business Partner Define Display Details forBusiness Partner .
End of the note.
If you want to staff the project role with a placeholder temporarily, use the Staff withN.N. function.
Note
You cannot delete, change, or copy staffings that were created using the ShoppingCart tab page via SRM directly at this point.
End of the note.
To staff a project role with a suitable resource, you can:
Use the resource search
Directly assign a preferred candidate
Save a preferred candidate and also use the resource search function to find othersuitable resources. For more information, see Candidates.
Resource Search for Project Role
You reach this view if you used the Resource field to search for a business partner that is notunique. The resource search opens with the search results. You also reach this view if youchoose Enter in the Resource field.
Select Resource
The following options are available in this group box:
Search for existing resources, organizations, or business partners
To select a resource in the search result, first select the relevant row. You can thenuse the pushbuttons to make the assignment.
Store resources as candidates
Staff project roles with resources
Create new resources and business partners
Note
Before creating a business partner, use the search function to check that it does notalready exist.
End of the note.
After storing resources as candidates or assigning them to a project, you can e-mail theselected resources or their managers from the application to notify them that they have beenassigned to a project or have received a task.
Candidates
You see all resources you have saved as candidates in this area. You can also choose todisplay a configurable staffing action that supports the staffing process. For more information,

SAP Online Help 12.09.2008
Collaboration Projects 130
see Candidates. To select candidates, you can either use the input help or enter the nameand choose Enter.
Note
When you click the name of a staffing in the Project Role Staffing group box or click the nameof a candidate in the Candidates group box, the system displays a dialog box that shows thedetails of the business partner. Here, the system displays the projects in which the businesspartner is responsible for at least one project element, on the Projects tab page. You can alsocreate a new tab page with the name Staffings that displays the project role staffings of thebusiness partner, enables you to branch to the relevant project role, and contains detailedinformation about previous staffings.
For more information about creating the Staffings tab page, see SAP Note 979978.
End of the note.
See also:
Staffing Actions
Creating a Business Partner
Reserving Resources
Staffing Project Roles with Resources
Storing Resources As Candidates
CandidatesDefinitionCandidates are resources that you want to designate for a particular project role. They mayinclude your personal preferences, a customer’s preferences, or resources that the resourcesearch found to be suitable but that you do not yet want to firmly book.
UseYou can define your candidates in the system. You can enter a note for each of yourcandidates, such as any agreements reached by telephone, or if the resource has acceptedbut you still have to speak with the manager.
The candidates are always included in the results list of the resource search, regardless ofyour selection criteria or the suitability rate determined by the system.
You can directly assign your candidates to the project at any time, or remove them from thecandidates list.
You can e-mail [Seite 133] candidates to notify them of the project.
When you have WFM Core [Extern] running you can display the availability percentage for thecandidate based on the period and the required capacity.
StructureThe candidates list displays the following information:
Name of the resource

SAP Online Help 12.09.2008
Collaboration Projects 131
The name is formatted as a link to the resource’s detail data.
Name of the person with personnel responsibility for the resource
Name of the organizational unit
Comments
A configurable project action used to support the staffing process
See also:
Staffing Actions [Seite 131]
Storing Resources As Candidates [Seite 133]
Staffing of Project Roles with Resources [Seite 126]
Staffing ActionsUseThe icons displayed in the Action column represent the status or the action for staffings andthe assignment of candidates. Depending on the implementation, actions for staffing andcandidates can differ.
PrerequisitesThe Action column is only displayed if you created actions and icons for these actions inCustomizing for Collaboration Projects by choosing Resource Management Basic Settingsfor Project Roles Define Staffing Actions.
See also:
Staffing of Project Roles with Resources [Seite 126]
Candidates [Seite 130]
Creating a Business PartnerUseTo be able to staff project roles with resources, you have to create the resources as businesspartners in Project Resource Planning.
You use this function to create resources or organizations as business partners.

SAP Online Help 12.09.2008
Collaboration Projects 132
PrerequisitesYou need structural authorizations (see Customizing for Collaboration Projects underResource Management Organizational Management Structural Organization AssignAuthorization Profiles to Users). In the application, you can only create business partners forproject role types that are not relevant to the WFD Server.
ProcedureCreating a business partner from the SAP menu
You first have to create a new business partner as a general business partner.Secondly, you create the new business partner in the employee role. Only thenis the business partner available in cProjects.
If you are using HR integration, note the information under “Creating a businesspartner with HR integration”.
...
1. In the SAP menu, choose Collaboration Projects Master Data Business PartnerMaintain Business Partner.
2. Choose Create Person or Create Organization.
3. Enter the required data.
4. Save your entries.
Creating a business partner with HR integrationIf you are using SAP Human Resources, you can transfer your master data.
For more information, see Customizing for Collaboration Projects under ResourceManagement Basic Settings for Resource Management Application Link Enabling (ALE)for HR Integration and the SAP Notes 312090 and 390380.
If you want to create extra external resources, you can do this in the SAP menu as describedabove. In this case use the business partner role resource.
Creating a business partner in the application
This function is only intended for cases where you want to assign a business partner in theapplication and notice that the business partner does not exist yet in the system. To avoidhaving to exit the application, you can enter the business partner directly from cProjects. Notethat you cannot enter all business partner data (for example, address, gender, or form ofaddress) if you do this. You have to complete the missing data later on by choosing MaintainBusiness Partner in the SAP menu. Therefore, we recommend that you always createbusiness partners via the SAP menu or transfer them using ALE....
1. In the Projects initial view, choose the Resources tab page, then the Staffing view.
2. Choose Show Search and then Create.
3. Enter the required data and choose Create.
The system creates the business partner in the resource role. You can use it straightaway as a resource or candidate.
See also:Staffing of Project Roles with Resources [Seite 126]

SAP Online Help 12.09.2008
Collaboration Projects 133
Storing Resources As CandidatesPrerequisitesThe resource has been created as a business partner in Resource Management. For moreinformation, see Staffing of Project Roles with Resources [Seite 126].
You are on the Resources tab page of the Projects initial view:
Project Role Definition Person Assignment or
Resource Search
You can also make resources from the search results list [Seite 122] candidates.To do so, select the resource and choose Add to Candidates.
Procedure...
1. In the Candidate field, enter the first and last name of the resource and choose AddCandidate.
If the name you entered matches only one candidate, the system assigns the resourceas a candidate straight away. If there is more than one match, the system displays thecompatible resources in the search result. Select the required resource in the list.
2. Choose Candidate.
The resource is displayed in the Candidates group box.
3. Create a comment, if required.
4. Save your data.
See also:
Candidates [Seite 130]
Notifying a Selected Resource by E-MailUseYou can e-mail the selected resources or their managers to notify them that they have beenassigned to a project or have received a task. The system automatically inserts project data,such as time periods and required capacities.Note that the system uses the e-mail address from the business partner data.
You can create templates for the e-mails in Customizing for CollaborationProjects by choosing Resource Management Basic Settings for Resource

SAP Online Help 12.09.2008
Collaboration Projects 134
Management Assign Forms for E-mail and Groupware Communication.
PrerequisitesYou have defined e-mail templates. If you have not defined any templates in yourproject language, the system sends a blank e-mail.
If you have Windows NT 4.0 Workstation as an operating system, the text doesnot appear completely when an e-mail is created. This is because Windows NT4.0 is restricted to 260 characters for hyperlinks with a mailto URL.
You have entered the e-mail address in the business partner data.
If you have not entered the e-mail address of a business partner, you can do solater on. To do this, carry out the steps described in the "Creating a businesspartner from the SAP menu" section under Creating a Business Partner [Seite131].
You are in the Projects initial view at one of the following places on the Resources tabpage:
On the Staffing tab page in the Project Role Staffing group box
On the Staffing tab page in the Candidates group box
In the Resource Search in the Search Result group box
ProcedureThere are functions for sending e-mails at various places in the application....
1. Choose the pushbutton to send e-mails.
The functions or pushbuttons for sending e-mails in a Unicode system differ tothose in a system that does not use Unicode. For more information, see SAPNote 945675.
The mail template is displayed (only in a non-Unicode system).
2. Make changes as required (only in a non-Unicode system).
3. Choose Send.
4. In the Candidates and Project Role Staffing group boxes, you can enter a note to theeffect that you have notified the resource about the project.
Staffing Project Roles with Resources

SAP Online Help 12.09.2008
Collaboration Projects 135
Once you have found a suitable resource for your project and the resource has agreed toparticipate in the project, you can staff the project role with the resource.
To allow you more flexibility in the assignment, you can staff project roles with resources atvarious places in the application.
PrerequisitesYou are on one of the following tab pages of the Projects Resources initial view:
Staffing, in the Project Role Staffing group box
Staffing, in the Candidates group box
In the Search Result in the Resource Search
ProcedureStaffing a project role with a resource on the Staffing tab page
1. In the project role overview in the screen area on the left, select the project role thatyou want to staff with a resource.
2. Enter the name or number of the business partner in the Resource field. If the nameor number is unique, the role is staffed straight away. If this is not the case, theresource search opens and the system displays the possible resources in the searchresult.
3. Select the relevant row in the search result.
4. Choose Staff.
5. Save your entries.
Note
If a row is selected in the table, the system replaces the existing resource with the resourceyou entered.
End of the note.
Staffing a project role with a resource on the Candidates tab page1. In the project role overview in the screen area on the left, select the project role that
you want to staff with a resource.
2. Select the candidate you require.
3. Choose Staff.
4. Save your entries.
Note
If a row is selected in the table, the system replaces the existing resource with the resourceyou entered.
End of the note.

SAP Online Help 12.09.2008
Collaboration Projects 136
Assigning a resource from the search result of the resource search1. In the project role overview in the screen area on the left, select the project role that
you want to staff with a resource.
2. Select the required resource.
3. Choose Staff Project Role.
4. Save your entries.
ResultThe resources are displayed in the project role overview in the screen area on the left, inparentheses after the project role that they are staffing.
Reserving ResourcesUseIf you have found a suitable resource for a project role in your project, you can first reservethe resource for the role. You may want to do so, for example, if you do not yet have acontract for the project or the resource's manager has not yet approved the assignment.
PrerequisitesYou are on one of the following tab pages of the Projects Resources initial view:
Staffing in the project role definition
Staffing, in the Candidates group box
In the Search Result in the Resource Search
Procedure...
1. Staff the required project role with the resource of your choice as described in StaffingProject Roles with Resources [Extern].
2. Select the Res. indicator on the Staffing tab page. The resource staffing is onlyreserved and not a hard booking.
3. Save your data.
If you want to create a hard booking for a reserved resource later on, deselect the indicator.
ResultThe resource is reserved for the project role.

SAP Online Help 12.09.2008
Collaboration Projects 137
Generic Interval CheckUseWhen you distribute the required capacity of a project role or staffing manually over severalintervals and then choose Check Intervals, the system checks the generic intervals in thebackground. The system checks whether the intervals follow on from one another without anygaps and whether they fill the entire time frame between the start and finish date of theproject role or staffing. It adjusts the intervals if necessary (see Features).
If you save the intervals without explicitly calling the function for checking the genericintervals, the system issues error messages as appropriate and does not automatically adjustany intervals.
PrerequisitesYou created a project role whose project role type supports distribution in Customizing forCollaboration Projects under Resource Management Basic Settings for Project RolesDefine Project Role Types.
FeaturesWhen you call the Check Intervals function, the system responds as follows:
If the start date of the first interval is before the start date of the role or staffing, thesystem moves the start date of the interval to the start date of the role or staffing.
If the finish date of the last interval is after the finish date of the role or staffing, thesystem brings the finish date of the interval forward to the finish date of the role orstaffing.
If the start date of the first interval is after the start date of the role or staffing, the systeminserts another interval in front of it to close the gap.
If the finish date of the last interval is before the finish date of the role or staffing, thesystem inserts another interval after it to close the gap.
If there is a gap between any two intervals, the system inserts an interval that closes thegap.
If two intervals overlap, the system issues an error message and you cannot save. Thesystem cannot know which of the two intervals you want to change. Therefore, you haveto adjust the intervals to remove the overlap and then save them.
Creating a Soft Booking for a ResourceUseYou use this procedure to create a soft booking a resource for a project. This proceduretriggers a workflow and your request is forwarded to the responsible line manager who canapprove or reject the booking. For more information, see Workflow for Resource-BookingStatuses [Seite 138].
PrerequisitesYou have the required staffing authorization.

SAP Online Help 12.09.2008
Collaboration Projects 138
You have defined Soft Booked as the default booking type for resources byimplementing the method SET_DEFAULTS_UPON_CREATION of the BAdI:Check/Change Fields in cProjects for the filter BAG (Business Partner Links). You canfind this BAdI in Customizing for Collaboration Projects under Global Enhancements toProject Elements Business Add-Ins (BAdIs) BAdI: Check/Change Fields incProjects.
Procedure4. Open a project and navigate to the Resources tab page within the project.
5. Create a new role or open an existing role.
6. Go to the Staffing tab page within the role.
7. Find and assign a resource to the role.
8. Select the Res. checkbox in the staffing table for the resource that was assigned in theprevious step.
ResultThe line manager of the soft booked resource receives an e-mail asking him or her to approveor reject the booking by executing a work item in the inbox of his or her universal worklist.
Workflow for Resource-Booking StatusesPurposeYou can use an SAP Business Workflow [Extern] in cProjects to trigger an approval orrejection of a resource booking or to change a soft booking of a resource to a hard booking.
PrerequisitesYou have completed the IMG activity Activate Workflows in Customizing for CollaborationProjects under Basic Settings.
Process Flow9. The workflow is triggered when a resource is assigned to a project role or an old
booking is changed and the booking type of a resource is marked as Soft Booked by aresource manager.
10. The line manager of the resource for whom a soft booking was created and for whomyou want to create a hard booking, receives a mail containing a link to the portal fromwhere he or she can approve or reject the booking.
11. A work item appears in the line manager’s inbox under Home Overview Inboxcontaining the booking details and the pushbuttons Approve Booking and RejectBooking.
12. If the line manager approves the booking, the workflow automatically converts thebooking from Soft Booked to Hard Booked in the background and the processcontinues. The line manager receives a mail if the conversion of the booking typefailed, for instance if the project or role is locked. If this is the case, he or she needs toexecute the booking again by means of a new work item. If the booking type issuccessfully converted from soft-booked to hard-booked, the resource manager(s),

SAP Online Help 12.09.2008
Collaboration Projects 139
project manager(s), and the resource receive a mail notifying them that the bookingwas confirmed.
13. If the line manager rejects the booking, the booking type remains unchanged as soft-booked and the resource manager(s), project manager(s), and the resource receive amail notifying them that the booking was rejected.
Resource managers can be assigned the following project role types:
Project Lead
Resource Manager via Authorization
Resource Manager via Responsible Organization
You can make the required assignments in the IMG for cProjects underResource Management Basic Settings for Project Roles Define ProjectRole Types.
Creating a Groupware TaskUseAfter staffing a project role with a resource, you can send a groupware task to the resource'smailbox. The groupware task contains information about the time frame and the requiredcapacity of the staffing.
PrerequisitesYou have imported cProjects to SAP CRM 5.0.
You are using Workforce Deployment (WFD) 2.0.
You are in the Projects initial view on the Resources tab page and have chosenStaffing.
Procedure......
1. Select the resource in the staffing list.
2. Choose Groupware Task.
3. Edit the required groupware task.
4. Choose Send.
5. Save your data.
ResultOnce you have saved, the system sends the data from the project role (required capacity andtime frame) as a groupware task to the resource's mailbox. The resource can now createconcrete appointments from this groupware task.

SAP Online Help 12.09.2008
Collaboration Projects 140
Resource ManagerTechnical name: SAP_CPR_RESOURCE_MANAGER
TasksThe resource manager staffs project roles with suitable and available resources.
Multi-Project ManagementUseProjects often depend on other projects that have different persons in charge of them. Youcan map these cross-project relationships in the structure of your project. The following inter-project link [Extern] scenarios are available for this purpose:
Subproject [Extern]
Mirrored task [Extern]
Program [Extern]
PrerequisitesYour system administrator has permitted the use of cross-project structures for the currentproject type (see Customizing for Collaboration Projects, IMG activity Define Project Types).
FeaturesFor more information on working with the individual types of inter-project links, see:
Work with Subprojects [Seite 140]
Work with Mirrored Tasks [Seite 142]
Work with Programs [Seite 144]
Work with SubprojectsUseWhen you work with subprojects, a task of a project is created as a separate subproject, forexample, because a different department or a subcontractor is responsible for the task. Tomap this relationship, you create an inter-project link between the task of the master projectand the project definition of the subproject.
A task of a master project can only ever be linked to a single subproject. The subproject can,however, also be the master project for other subprojects which enables you to map multilevelproject hierarchies.
The following graphic explains the scenario:

SAP Online Help 12.09.2008
Collaboration Projects 141
Loose Inter-Project Link Through Alerts
MasterProject
Subproject
Fixed StartFixed Finish
Fixed StartFixed Finish
Datechange
Manual datechange
in project
Alert AlertAssignSubproject
Datechange
Manual datechange in project
IntegrationA task that represents a subproject must not contain any subtasks in the master project. Apartfrom this, it behaves like a normal task that you can process and confirm.
PrerequisitesYour system administrator has permitted the use of subprojects for the current projecttype (see Customizing for Collaboration Projects, IMG activity Define Project Types).
You have at least display authorization in the subproject.
You have entered persons responsible for the task in the master project and for theproject definition of the subproject (see Creating Basic Data for a Task [Seite 54] orCreating Basic Data for a Project Definition [Seite 43]).
Note the prerequisites under Alerts [Seite 67] if you want the system to be able toinform the responsible persons about changes.
FeaturesWhen you create the inter-project link, the project lead of the subproject receives a messageto inform him about the inter-project link. The message contains the dates for the task thatbelongs to the master project. The project lead can adjust the dates of the subprojectmanually; there is no automatic adjustment.
Messages are also sent in the following cases:
If a date is changed in the master project or subproject
If the master project or subproject is deleted
If the inter-project link is deleted
A task that represents a subproject is shown by the following icon in the project structure ofthe master project: Task for Subproject. An additional area that contains information aboutthe master project appears on the Basic Data tab page for the project definition within thesubproject (see Creating Basic Data for a Project Definition [Seite 43]).

SAP Online Help 12.09.2008
Collaboration Projects 142
Activities...
1. Create a task that you want to represent a subproject or navigate to a task that alreadyexists.
2. On the Basic Data tab page, enter the number of the subproject that the task is torepresent.
When you save, the system creates the inter-project link and displays the name of thesubproject. You can display the subproject data by clicking the name of the subproject.If you have authorization to edit the subproject, you can switch to change mode afteryou have opened the subproject by choosing Display/Change.
3. To delete the inter-project link, delete the entry under Subproject.
Work with Mirrored TasksUseIf tasks or phases of a project are influenced by another task (original task [Extern]) in adifferent project, the project leader of the dependent project must be informed about changesmade to the original task. You can include the original task as a mirrored task in the structureof the existing project, for this purpose.
The following graphic explains the scenario:
Project with Original Task Dependent Project
Originaltask
Assignoriginal
task
Mirrored task(inherits dates of
original task)
Fixed StartFixed Finish
Fixed StartFixed Finish
The system transfers the earliest start date of the original task from those determined by thesystem as the fixed start date for the mirrored task and the latest finish date of the finish datesdetermined by the system as the fixed finish date for the mirrored task.
Earl./Latest Start: 7th March / 4th March
Earl./Latest Finish: 1st April / 29th March
Fixed dates of the task: 4th March – 1st April

SAP Online Help 12.09.2008
Collaboration Projects 143
If the dates for the mirrored task are outside the limits of the superior project element, thesystem issues a warning.
If you create relationships between the mirrored task and other tasks, the mirrored task datesinfluence the dates of the linked tasks when scheduling.
PrerequisitesYour system administrator has permitted the use of mirrored tasks for the currentproject type (see Customizing for Collaboration Projects, IMG activity Define ProjectTypes).
You need at least display authorization for the original task to be able to create amirrored task. To display the original task, you also need display authorization for theproject definition to which the original task belongs.
Note the prerequisites under Alerts [Seite 67] if you want the system to be able toinform the responsible persons about changes.
FeaturesYou can make the following changes to the mirrored task:
Enter a name
Change authorizations
Set a manual severity
Edit relationships with other tasks [Seite 78]
Delete mirrored tasks
This also deletes the link to the original task.
The data of the original task is visible in the dependent project but you cannot change it. Evenif you have authorization to make changes in the original task, you still cannot change thedata.
If the original task has subtasks, they are not visible here.
If the dates of the original task change or if the original task is deleted, the person responsiblefor the project element to which the mirrored task is assigned is informed. The personresponsible for the original task is only informed when the mirrored task is created anddeleted.
ActivitiesTo create a mirrored task, proceed as follows:...
1. In the project structure, navigate to the project element below which you want to createa mirrored task.
2. Choose Mirrored Task in the dropdown box above the structure tree and then chooseCreate.
The mirrored task appears with the following icon in the project structure: MirroredTask
3. Assign an original task.

SAP Online Help 12.09.2008
Collaboration Projects 144
Work with ProgramsUseLarger projects are often realized in several different projects that belong together. In order tomap these complex project structures, you can assign other projects or programs to a projectwith the project category program; this gives you an overview of the whole context.
A program has neither tasks nor checklists, only a project definition and the phases that arerelevant to all projects. The project definition and the phases can contain objects such asdocuments, collaborations, or object links.
The following graphic explains the scenario:
I IIIII
Program 1
I IIIIII IIIII
Project 1
I IIIII I IIIII
Project 3Project 2
Program 2
PrerequisitesYour system administrator has created a project type with the project categoryprogram (see Customizing for Collaboration Projects, IMG activity Define ProjectTypes).
You have at least display authorization for the projects or programs you want toassign.
Note the prerequisites under Alerts [Seite 67] if you want the system to be able toinform the responsible persons about changes.
FeaturesIf you assign a project or another program to a program, you can transfer the phases of theproject or program to the program automatically or manually according to the phase type.However, automatic assignment only works if no assignment already exists.
Changes made to the dates in the program phases trigger a message which informs thepersons responsible for the assigned phases. In the same way, the person responsible forthe program receives a message if the dates of the assigned phases change.
The assigned projects and phases do not appear in the project structure but on twoseparate tab pages:

SAP Online Help 12.09.2008
Collaboration Projects 145
On the Assigned Projects tab page, you assign the projects to the program that belongto the program. You also select the phases of the assigned projects that you want toassign to the program phases. The tab page is available on the project definition level.
The Assigned Phases tab page displays all phases that are assigned to the programphase. The tab page is available on the program phase level.
You can open the assigned projects or phases from the overview in display mode. If youhave the appropriate authorization, you can switch to change mode here.
Activities...
1. Create a project with the project type program (see Creating a Project Definition [Seite31] ).
2. Navigate to the project definition in the project structure.
3. Assign other projects to the project on the Assigned Projects tab page.
4. Select a project and choose Phase Assignment.
You get an overview of all phases in the current program and all phases in theassigned project.
5. Either choose Automatic Assignment or make an assignment manually.
In the automatic assignment, the system assigns the phases to each otheraccording to their phase type. If the assigned project contains several phaseswith the same phase type, the system assigns the first phase with this phasetype. If the program does not contain any phases with the same phase type, thesystem does not make an assignment.
In manual assignment, you can use the Assign Phases function to assign aselected project phase to a program phase.
Multi-Project Monitor
You use this function to call and compare multiple projects, tasks, or checklist items at thesame time. You can branch to the project elements from the multi-project monitor and editthem.
You can also use the multi-project monitor to display the following inter-project link scenariosin graphical form with more display options than in the graphical view:
Subproject
You can expand a task with a subproject to display the subproject and the structure itcontains. This enables you to display all objects below a subproject in graphical form.
Mirrored task
You can expand a mirrored task to display the original task and the structure itcontains. This enables you to display all objects below the original task.
Program
You can expand a program phase to display the assigned phases and the structuresthey contain.

SAP Online Help 12.09.2008
Collaboration Projects 146
Note
If an object is used in more than one project that you are displaying in the multi-projectmonitor, it is displayed multiple times. The relationships of a particular task are only displayedin the multi-project monitor if you are currently displaying the superior project of the task in themulti-project monitor.
End of the note.
PrerequisitesYou have selected multiple projects, tasks, or checklist items in the dashboard and chosenOpen Multi-Project Monitor.
FeaturesGeneral Functions
You can choose which view of the calendar you want the system to display in themulti-project monitor from the View dropdown box. If you selected the Overview view,the system automatically uses the calendar view that best suits the duration of theprocess. The view does not contain the dates from the object links.
When you select a project element in the structure, the system automaticallypositions the calendar in such a way that the start of the project element appears atthe left edge.
The Navigate button allows you to specify the section of the project you want thesystem to display in the multi-project monitor.
You use the Print button to print the current project. The Print Preview button allowsyou to set print parameters and display the current appearance of the graphic forprinting. In the standard system, the entire duration of the project and all displayedrows are printed. If you want to create a title for the printout, you can change theheader of the multi-project monitor.
Note
When you edit a project element in the multi-project monitor, the system opens a newwindow. You can close this window when you have finished making your changes. To makeyour changes visible in the multi-project monitor, choose Refresh.
End of the note.
Display
Tasks you marked as milestones are indicated by (Milestone).
Tasks whose buffer is less than or equal to 0 are part of the critical path. These aredisplayed in red unless they have already been marked as milestones.
Checklists are only displayed in the structure tree and not in the graphic. Checklistitems are indicated by (Checklist Item).
Note
When you select a project element in the structure, the system automatically positions thecalendar in such a way that the start of the project element appears at the left edge.
End of the note.

SAP Online Help 12.09.2008
Collaboration Projects 147
Setting the Filter in the Multi-Project Monitor
You can set a filter with certain conditions in the multi-project monitor.
Procedure1. Open one or more project elements in the multi-project monitor.
2. Choose Set Filter.
3. In the structure tree on the left, select the checkbox under Filter for all projectelements to which you want to apply the filter. The system automatically selects alllower-level elements of these project elements even if they are not currently visible inthe tree.
4. Select the object types you want to include, for example, projects, phases, or tasks.
Note
If you set the filter for the object type tasks, the system also takes mirrored tasks intoaccount. Since mirrored tasks do not have all the attributes of a task, the system onlyfilters the task by the conditions project element name, time frame, and systemstatus.
If you set the filter for the object type checklist, the system also takes checklistreferences into account. Here, the system only filters the checklist by the conditionproject element name.
End of the note.
5. Enter a generic character string as the project element name. You can use thestandard wildcard characters here. The character * represents any character stringand the character + stands for any character. The system does not differentiatebetween upper and lower case.
Example
If you enter Proj*, the system filters by all project elements whose names start with"Proj", for example, "Project A", "Project B", or "proj. xyz".
End of the example.
6. Select a start and finish date for the time frame. The system then displays all projectsin the filter result whose time frame (calculated start date to calculated finish date) ispartly or completely within the time frame specified. The system uses the earliest orlatest dates that are defined in the user settings to calculate the start and finish date.
Note
The filter condition time frame is not relevant to checklists or checklist referencesbecause these project elements do not have any dates.
End of the note.
7. Select one or more values for the status. The dropdown list contains system statusesand customer statuses from the status profiles that are used in the project structure.
8. Select one or more values for the criticality level.

SAP Online Help 12.09.2008
Collaboration Projects 148
9. Select one or more values for the priority.
10. Enter a generic character string for the group and search field, as required. You canuse the standard wildcard characters here. The character * represents any characterstring and the character + stands for any character. The system does not differentiatebetween upper and lower case.
11. Select the responsible project role type you require. The filter result then contains allthe project elements whose responsible role belongs to the project role type selectedhere.
12. Under Responsible, select a person or business partner who is responsible for theproject elements to be filtered. You can use the search help to do this by searchingfor the person or business partner by their role, user, or name.
13. Choose Apply to start the filter function.
14. Choose Cancel if you do not want to start the filter function.
If you choose Reset Filter, the system resets the filter to the initial conditions.
If you set the filter for tasks and/or checklist items, the system shows attributes that you canonly set for these two object types. The system then displays the following fields that you canuse to define additional filter conditions:
Process
Mandatory
Relevant for Approval
If you set the filter for tasks, the system shows attributes that you can only set for tasks. Thesystem then displays the following fields that you can use to define additional filter conditions:
Milestone
Task Type
Percentage Complete
ResultThe system displays the filter results in a list. You can restrict the result further as required bychoosing Set Filter again. The system retains the previous filter conditions, which you canrefine. If you choose Delete Filter, the system displays the unfiltered view with all projectelements.
Project VersionsUseThis function enables you to create project versions [Extern] based on project templates andfor operational projects. The following version types are available:
Snapshots
Snapshots enable you to create a momentary representation of an operational projectso that you can track the status of the project at different times. Snapshots cannot bechanged.
Simulations

SAP Online Help 12.09.2008
Collaboration Projects 149
You can create simulations for operational projects, for project templates, or without atemplate. Simulations enable you to test, for example, the effects certain changes willhave on an operational project. You can save simulations and call them again later on.If the changes produce the desired result, you can reconcile the simulation with anothersimulation or with the operational project.
The system copies all project data to the project version for both version types; you cannotchoose here. Existing object links are also transferred to the project version, but not theobjects themselves. The object links are references to the operational objects.
A project version is always based on a version [Extern]. The project version number is madeup of the version number and the project number. In a snapshot, the project number alwayscorresponds to the number of the operational project because there can only ever be onesnapshot for a project in a version. However, for a simulation you can assign any projectnumber because a project in a version can have several simulations.
The user interface is the same as that for an operational project although the fields for asnapshot are not ready for input.
PrerequisitesYour system administrator allows versions to be used for the current project type (seeCustomizing for Collaboration Projects, IMG activity Define Project Types).
Features
Note that the current Customizing settings always apply in the case of projectversions. The settings do not have versions.
Simulations
You can perform costing for project roles and resources for simulations.
If you create a simulation of an operational project that has not been transferred toControlling yet, the system copies the costing to the simulation and you can performcosting for the simulation again. If the project has already been transferred, you caneither display the accounting data of the operational project or perform costing for thesimulation again. The actual simulation data cannot be transferred to Controlling.
The system does not take the simulation data into account in Workforce ManagementCore [Extern].
You can change most of the simulation data. The status is an exception to this; itcannot be changed.
The actual costs are not transferred to a simulation.
SnapshotsIf you create a snapshot of an operational project that has not been transferred to Controllingyet, the system copies the costing to the snapshot. If the project has already been transferred,the system displays the accounting data of the operational project. The actual snapshot datacannot be transferred to Controlling.
See also:
Work with Versions [Seite 150]
Creation of Simulations und Snapshots [Seite 151]
Creation of Snapshots in the Background [Seite 153]

SAP Online Help 12.09.2008
Collaboration Projects 150
Reconciliation and Comparison of Versions [Seite 153]
Deletion of Project Versions [Seite 156]
Work with VersionsUseYou use this function to create, edit, and delete versions. There are global versions and localversions:
Global versions are intended for use across the whole enterprise.
Local versions are intended for use in your own evaluations.
We recommend that you assign authorizations for creating global versions andlocal versions separately. For more information, see SAP Solution Managerunder Solutions/Applications SAP PLM Configuration Structures SAPcProject Suite 4.50 Basic Settings for cProjects Business CustomizingMaking Settings for Version Management.
PrerequisitesYou defined input templates in Customizing for Collaboration Projects by choosingStructure Define Permitted Version Numbers.
You need authorization for the CPRO_VSHDR authorization object to create anddelete versions.
FeaturesVersions specify the basic data for project versions [Extern], for example, the version number,the validity, and the version type (simulation or snapshot).
A version for the version type simulation can contain any number of simulations.
A version for the version type snapshot can contain any number of snapshots fordifferent projects or project templates but only ever one snapshot for a project ortemplate. If you want to create more than one snapshot for a project or template, youhave to create an individual version for each snapshot.
Activities...
To open version management, go to the Versions initial view and select the Version Type.Then choose Version Management.
Note the following when entering data:
The input template specifies the form the version numbers take:
+ stands for a single character
* stands for a string of characters of any length at the end of the versionnumber; the maximum length is 24 characters

SAP Online Help 12.09.2008
Collaboration Projects 151
The version can only be used to create a simulation or snapshot if it has been releasedand is valid at the time of creating the simulation or snapshot. If you do not enter avalidity, you cannot use the version.
The system automatically transfers the Archived indicator from Customizing; If it hasbeen selected, you can archive the simulations and snapshots for this version butcannot delete them manually. They are then deleted in the archiving deletion run. Formore information, see Deletion of Project Versions [Seite 156].
You can only delete those versions that do not contain project versions.
ExampleYou select an input template SIM+++. Your version number must start with SIM andbe 6 characters long in total.
You select an input template SIM*. Your version number must start with SIM and canbe of any length although the maximum total length is 24 characters.
Creation of Simulations and SnapshotsPrerequisites
Your system administrator allows versions to be used for the current project type (seeCustomizing for Collaboration Projects, IMG activity Define Project Types).
You have administration authorization for the project or project template for which youwant to create simulations or snapshots.
If you create a simulation without a template, you only need the general authorizationfor creating projects.
You created a version (see Work with Versions [Seite 150]).
Procedure
Note the following:
If you create simulations or snapshots for a project that is linked to anotherproject (program, master project for a subproject, or a project with a mirroredtask), the link is copied and refers to the linked operational object. If, forexample, you create a simulation of a program, the simulation is also assignedthe operational projects that belong to the program. In the same way, thesimulation of a master project is assigned the link to the operational subproject.
If you create a project version for a project that is the target of a project link, thesystem does not copy the link. This applies to the following projects:
Part of a program
Subproject
Project that contains an original task for a mirrored task
For more information about linked projects, see Multi-Project Management[Seite 140].

SAP Online Help 12.09.2008
Collaboration Projects 152
Creating Simulations and Snapshots from the Initial View...
1. Open the Versions initial view.
2. Select the version type you want to create.
3. Choose Create.
4. Enter the version for which you want to create a project version.
5. Enter the following data:
For snapshots:
The project number of the project for which you want to create the snapshot.
For simulations:
The project number you want to assign to the simulation
The template type you want to use
If you choose No Template, you create a simulation manually. Therefore, thissimulation does not contain any data. You can enter a project type straight awayor after you created the simulation.
If you choose Project, Project Template, or Simulation, you create a simulationwith all the data and the project type of the template. When you choose Project,you create the simulation for the operational project you chose as the template.
6. Choose Create.
7. Once you have created a simulation, change the data if necessary and save thesimulation.
The system saves a snapshot automatically because you cannot change any datahere.
Creating Simulations and Snapshots from Project Processing...
1. Open the Project Versions tab page in your project.
2. Choose the Snapshots or Simulations tab page.
3. Choose Create and enter the data.
4. Choose Continue.
5. Save the project.
ResultYou created a project version. For a simulation you automatically keep the administrationauthorization. For a snapshot the system copies the authorizations from the operationalproject.
You can make changes to a simulation. You can also perform a reconciliation and acomparison [Seite 155].
See also:Creation of Snapshots in the Background [Seite 153]

SAP Online Help 12.09.2008
Collaboration Projects 153
Creation of Snapshots in the BackgroundUseYou can create snapshots manually or let the system create them automatically at a giventime. It is not possible to create them in accordance with specific business transactions.
FeaturesA log is available after you have carried out this function and contains the followinginformation:
Versions that match your selection criteria
Versions in which snapshots can currently be created
Success message stating that a snapshot was created for the project you entered
If a snapshot could not be created, it could be because:
The version has not been released
The version was not valid at the appropriate point in time
A snapshot already exists for the current project in the specified version
ActivitiesTo create a snapshot manually in the cProjects back-end system, chooseCollaboration Projects Versions Create Snapshots in the SAP Menu and enter aversion number and project number.
To schedule the creation of snapshots in the background, choose Tools CCMSJobs Definition in the cProjects back-end system.
Note that you have to create a separate version for each snapshot you create in thebackground because you can only use a version once for a project.
You want to create a snapshot every month for a whole year: Create twelveversions each with a validity period of one month and whose names all start withthe same characters. Then release them. Enter a placeholder for the firstcharacters of this name (for example, SNAP*) as a version in the batch job.When you carry out the batch job, the system checks the validity of the possibleversions and creates a project version with the version that is currently valid.
Messages in the log inform you about which versions are valid and in whichversion a snapshot was created.
Reconciliation and Comparison of Versions
You use this function to compare or reconcile certain project data. However, it is only possibleto compare or reconcile the project data if the projects are based on the same templates or ifthe project versions belong to the same project.

SAP Online Help 12.09.2008
Collaboration Projects 154
IntegrationYou use version reconciliation to upload Microsoft Project data to cProjects (see Importing ofProject Data).
Prerequisites Your system administrator has permitted the use of versions for the current project
type in Customizing for Collaboration Projects, by choosing Define Project Types.
You have authorization to display the project or version.
For a reconciliation, the status of the target project still permits changes (statusCreated or Released).
FeaturesIn a comparison the system displays two projects or versions next to each other. No data ischanged.
In a reconciliation you can transfer the data of a version to a simulation or an operationalproject. You decide which project elements are to be transferred; there is no automaticreconciliation. Snapshots are not reconciled.
In both cases, the system takes the following data into account:
Project element data
Status
Documents
Collaborations
Object links
Authorizations
Note
Some data cannot be reconciled, even if there are differences, for example:
o All project element data whose status in the target project does not permitany more changes
o Data that cannot be changed in general (for example, administration data)
o Relationships
o Resources
End of the note.
In both functions, the system uses red, yellow, and green traffic lights to show which parts ofthe data are different and which parts are the same. If the system does not display any trafficlights, no data exists. The system uses yellow traffic lights to display differences that youcannot change with a reconciliation. Clicking a traffic light gives you a detailed view of whichdata is different and which data is the same. Here you can choose whether you want thesystem to display all the values, only the differences, or only the matches. If you expand thestructure on one side, the system automatically expands the corresponding structure on the

SAP Online Help 12.09.2008
Collaboration Projects 155
other side. In the reconciliation, you cannot delete elements from the source version if they donot have a corresponding element in the target version.
Caution
You cannot delete project elements by reconciliation in an operational project.
End of the caution.
See also:
Performing Reconciliations and Comparisons
Performing Reconciliations and ComparisonsPerforming a Comparison...
1. Choose the version type you want to compare in the Versions initial view.
You have to start from the Projects initial view if you want to compare oneoperational project with another.
2. Choose Compare.
3. Enter the version and the operational project that you want to compare with anotherproject.
4. Choose Identify Projects for Comparison.
The system searches for projects that you can compare with the project you entered.
5. Select a project from under Project for Comparison and choose Compare.
The system compares the information in the selected projects.
6. If you want to see more detailed information about the traffic lights, click a traffic light.
The system only displays the differences at first. You can also display only the matchesor all the fields. In the column with the traffic lights, select the relevant entry and thenchoose Set Filter.
Performing a Reconciliation...
1. Choose the version type Simulation in the Versions initial view.
2. Choose Reconcile.
3. Enter the simulation you want to reconcile with another project.
4. Choose Identify Projects for Comparison.
The system searches for projects that you can reconcile with the project you entered.
5. Select a project from under Project for Comparison and choose Reconcile.
The system compares the information in the selected projects.
6. Select the project elements whose data you want to reconcile with the data of the targetproject.
7. If you want to reconcile all data of the selected project element, choose Reconcile.
8. If you want to reconcile individual parts of the project element data, open the detail viewby clicking a traffic light and then select the data you want to reconcile.

SAP Online Help 12.09.2008
Collaboration Projects 156
The system only displays the differences at first. You can also display only the matchesor all the fields. In the column with the traffic lights, select the relevant entry and thenchoose Set Filter.
You cannot select data that does not contain any differences orfor which a reconciliation is not possible.
If the simulation contains project elements that do not exist in thetarget project, you can only select the first project element eachtime below an element that exists on both sides.
ExampleYou reconcile the following structures:
Task C and subtask C1 do not exist in the target project. You can select task C but not C1because C1 does not have a superior element that exists in both structures. If you choosetask C for the reconciliation, the system creates subtask C1 in the target project automatically.
Deletion of Project VersionsUseYou use this function to delete snapshots and simulations.
A
A1
A2
B
CC1
A
A1
A2
B

SAP Online Help 12.09.2008
Collaboration Projects 157
IntegrationYou can only delete project versions [Extern] if archiving has not been activated in therelevant version. If archiving has been activated in the version, you can only delete the projectversions via archiving:
Deleting project versions with an operational project or a project template
When you archive a project, the system checks whether project versions exist for thisproject that have been marked as relevant to archiving. If such project versions exist,the system archives them together with the operational project or the project template.
If project versions exist for the operational project or template that is being archived,that are not relevant to archiving, the system deletes the project versions with thearchiving deletion run.
Deleting project versions without an operational project or project templateIf you want to delete a project version for which there is no template, or if you want todelete the project version independently of the template, use your own archiving run.
Activities...
1. Open a project version.
2. Choose Delete.
3. Confirm that you want to delete the object.
Object Links
Business objects important to a project can be located in different systems. Since it isimportant to have an overview of these objects directly in cProjects, you can connect theobjects which you defined or activated in Customizing for Collaboration Projects to theapplication as object links. You define or activate the objects under Connection to ExternalSystems Object Links in SAP Systems Make Settings for the Linked SAP Objects or
Structure Define Object Types for Object Links . The following objects support objectlinks:
Project definition in template
Project template
Checklist in template
Checklist template
Phase
Phase in template
Task
Task in template
Checklist item
Checklist item in template

SAP Online Help 12.09.2008
Collaboration Projects 158
Control plan version
Control plan version in template
Project role
Project role in template
Caution
If you are working with an initiative, "project" is synonymous with "initiative" in the followingsections.
End of the caution.
Note
You cannot make any changes if you opened a snapshot.
End of the note.
IntegrationYou can take linked objects into consideration in the evaluations you perform for your project.The Threshold Values pushbutton enables you to display the threshold value violations for anobject link and set a manual severity.
ActivitiesCarry out one of the following activities:
Creating an Object Link
Editing an Object Link
Opening a Linked Object for Editing
The option is available only if your system administrator made the appropriatesettings.
Displaying Linked Object Data
The option is available only if your system administrator made the appropriatesettings.
Deleting an Object Link
Creating an Object LinkUseYou can create object links to existing objects and other cProjects projects. If the object youwant to link to does not exist, you can plan a link and link to the object at a later point in time.
Special Characteristics of the Quality Notification (QM) Object TypeIf you want to create a link to a quality notification, you can create a new notification in theSAP system directly from cProjects and link it to a project element. To do this, choose theobject type Quality Notification (QM) (Creation Optional). If the notification type you enterrequires an external number assignment, you have to enter a number. If the notification type

SAP Online Help 12.09.2008
Collaboration Projects 159
does not permit external number assignment, the system assigns the number automaticallyand you cannot enter it manually.
You can use the OLR3_NOTIFICATION BAdI to specify that certain data, forexample, the number or the notification type is assigned automatically. The BAdIcan be found in the SAP system in Customizing for Integration with Other SAPComponents under BAdI: Creating a QM Notification.
PrerequisitesYou opened a project, task, or checklist item from the Projects, Tasks, or Checklist Itemsinitial view and are on the Object Links tab page (see also Opening a Project or ProjectVersion [Seite 17]).
An object type without a group is available when you create an object link if the object type isactive and the current project element type is permitted.
An object type with a group is available when you create an object link if the object type andits group are active and the current project element type is permitted.
When you copy or paste object types, the system does not check whether object types orgroups are active or whether there are restrictions on project element types.
Procedure
Depending on the settings made by your system administrator, the automaticexistence check and the search function may not be available.
Creating an Object Link to an Existing Object...
1. In the structure tree [Seite 41] navigate to the project element for which you want tocreate an object link.
2. Choose Create.
3. If you want to use the groups of object types for object links, select a grouping.
4. Under Link to, select the object type you want to link to.
5. Enter the data of the object.
6. Do not select the Identify Object Later indicator.
7. Enter a name, if required.
If you do not enter a name, the system transfers the name of the linked object duringthe existence check.
8. Choose Continue.
The system checks whether the object you entered exists in the source system andthen creates the link. You can edit the linked object [Seite 160].
9. Save the project.
Planning an Object Link to an Object That Does Not Exist Yet...
1. In the structure tree [Seite 41] navigate to the project element for which you want tocreate an object link.
2. Choose Create.
3. If you want to use the groups of object types for object links, select a grouping.
4. Under Link to, select the object type you want to link to.

SAP Online Help 12.09.2008
Collaboration Projects 160
5. Select the Identify Object Later indicator.
The system does not carry out an existence check in the source system of the object.The system carries out the check once you have entered the identification.
6. Enter a name, if required.
If you do not enter a name, the system transfers the name of the linked object later onduring the existence check.
7. Leave the remaining fields blank.
8. Choose Continue.
The system sets up the object link and marks it as Object has not been identified. Youcan edit the link later on (see Editing an Object Link [Seite 160]).
9. Save the project.
Editing an Object LinkPrerequisitesYou opened a project, task, or checklist item from the Projects, Tasks, or Checklist Itemsinitial view and are on the Object Links tab page (see also Opening a Project or ProjectVersion [Seite 17]).
The object of the object link has not been identified yet.
Procedure...
1. In the structure tree [Seite 41] navigate to the project element whose object link youwant to edit.
The system displays all existing object links for this project element.
2. Select the object link you want to edit and choose Edit.
3. Make the desired changes and choose Continue.
The system saves the changes. If you enter an identification for an object that has notyet been identified, the system checks whether the object exists in the source system(provided that your system administrator made this setting).
4. Save your entries.
Opening a Linked Object for EditingUseYou can edit a linked object by calling the application in the source system from cProjects.
This option is only available if your system administrator made the appropriatesettings.
PrerequisitesYou have opened a project, task, or checklist item from the Projects, Tasks, or ChecklistItems initial view and are on the Object Links tab page (see also Opening a Project or ProjectVersion [Seite 17]).
SAP Online Help 12.09.2008
Collaboration Projects 161
Procedure...
1. In the structure tree [Seite 41] navigate to the project element whose linked object youwant to edit.
The system displays all existing object links for this project element.
2. Choose Open in the Application column.
3. Select the transaction you want to use to edit the object, if required.
The selection appears if there is more than one possible initial access view.
4. Log on to the source system.
The system opens the application so you can edit the object in a separate window.
5. Edit the object and save your changes.
6. Close the window.
Displaying Linked Object DataUseYou can display the data of a linked object directly in cProjects, without having to call up theapplication in the source system.
The option is available only if your system administrator made the appropriatesettings.
PrerequisitesYou opened a project, task, or checklist item from the Projects, Tasks, or Checklist Itemsinitial view and are on the Object Links tab page (see also Opening a Project or ProjectVersion [Seite 17]).
Procedure...
1. In the structure tree [Seite 41] navigate to the project element whose object link youwant to edit.
The system displays all existing object links for this project element.
2. In the Identification column, click the link to the object link whose data you want todisplay.
The system displays the object data.
Deleting an Object LinkPrerequisitesYou have opened a task or a checklist item from the Projects, Tasks, or Checklist Items initialview and are on the Objects tab page (see also Opening a Project or Project Version [Seite17]).
Procedure...

SAP Online Help 12.09.2008
Collaboration Projects 162
1. In the structure tree [Seite 41] navigate to the project element whose object link youwant to delete.
The system displays all existing object links for this project element in an overview.
2. Select the object link you want to delete and choose Delete, located below theoverview.
3. Save your entries.
Accounting IntegrationUseYou want to monitor the costs and revenues throughout the duration of the project. You canuse this function to carry out preliminary costing for the costs and revenues. Quotationcreation is also supported, by the integration of sales pricing. Once the project has started,you can analyze the costs and compare them to the planning data at any time. You canactivate required capacity as work in progress. You can measure the success at the end ofthe project.
IntegrationTo be able to use the functions of accounting integration, you have to implement the InternalOrders (CO-OM-OPA) application component and Project System (PS) in SAP ECC 6.0.
PrerequisitesYou need to make settings in Customizing for Collaboration Projects and Customizing forSAP ECC:
Settings in Customizing for Collaboration Projects
You selected the Controlling in mySAP ERP setting as the Accounting Integration Scenario inCustomizing for Collaboration Projects, by choosing Connection to External SystemsAccounting Integration Activate Integration.
Settings in Customizing for SAP ECC
You made the settings in Controlling by choosing Integration with Other SAP ComponentsCollaboration Projects Controlling.
Project controlling is governed by the controlling method you assigned under DefineControlling Scenario, and depends on the project type. You can distinguish between thecontrolling methods by the following criteria:
Task-based or role-based
Account assignment object: Internal order or WBS element
Manual or automatic
The following table gives you an overview of the controlling methods that are available:
Internal Order WBS Element
Automatic Manual Automatic Manual
Task-based Internal Order(StructureElement,Manual) (I)
MultilevelControlling(StructureElement,Automatic) (C)
MultilevelControlling(StructureElement,Manual) (B)

SAP Online Help 12.09.2008
Collaboration Projects 163
Role-based Internal Order(ProjectDefinition,Automatic)
Internal Order(Project Role,Manual) (J)
MultilevelControlling(Project Role,Automatic) (D)
MultilevelControlling(Project Role,Manual) (A)
For more information about the individual controlling methods, see Customizing, in the fieldhelp for the Controlling Method column.
FeaturesPreliminary costing [Seite 173] gives you the option of planning costs and revenues beforethe project starts. You can also use it to determine a price for the quotation [Seite 178].
Controlling [Seite 180] for the operational project takes place for one or more accountassignment objects (internal orders or WBS elements). The data that is relevant to accountingin the project is transferred to the account assignment objects in SAP ECC for this purpose.For more information, see Single-Object Controlling for Internal Orders [Seite 182] orMultilevel Controlling [Seite 183]. The downstream processes, such as budgeting, billing,results analysis, and settlement also take place on the account assignment objects.
If you use a project type for which accounting integration is active, the Accounting tab page isavailable in cProjects with the following views:
Account Assignment
This view is available in multilevel controlling and is available in single-object controllingfor internal orders once the transfer has taken place.
When you click an account assignment element, the system displays functions(services) for this account assignment object. You can call these functions in SAPECC. You specify what these functions are in Customizing for Collaboration Projects,by choosing Connection to External Systems Accounting Integration Define ObjectLinks for Accounting Integration Service for an Object Type.
When you choose Detail Data, the system displays controlling information for theaccount assignment object read from SAP ECC. You use the system settings to definewhich information you can see in detail here.
Costing
If you have already created a costing, the system displays the costing results of the lastcosting.
You can create an ad hoc cost estimate [Seite 176] here before the transfer takesplace. Once you have created it, you can call it up for editing in SAP ECC.
If you have already assigned account assignment objects and have saved theassignment, it is only possible to call the cost estimate for the account assignmentobject as a service in the Account Assignment view. Easy Cost Planning is then calledfor the selected account assignment object in SAP ECC for editing. For moreinformation, see Easy Cost Planning for Internal Orders [Extern] or Easy Cost Planningin the Project System. Additions you make to costing are displayed in cProjects asaggregated to the project definition.
For more information about Easy Cost Planning in the Project System, see SAPLibrary for SAP ERP under SAP ERP Central Component FinancialsProject System (PS) Costs Cost Planning Easy Cost Planning andExecution Services Easy Cost Planning in the Project System.
If you made changes to the costing-relevant data in your project, you can performcosting again for these changes to determine the effects on costs and revenues. If youonly made a change to determine its effects on the costs and revenues, you can exitthe project without saving. This discards the changes and the new costing values and

SAP Online Help 12.09.2008
Collaboration Projects 164
the project and costing return to their previous states. If you save the project with thechanges and the new costing results, the costing with the new values is saved in theaccount assignment object in SAP ECC.
If you change the project type, this can have the following effect on the status[Seite 250], depending on the project type:
If accounting integration has not been activated for the newproject type (using the No Integration scenario in Customizing forCollaboration Projects under Activate Integration), the statusFlagged for Transfer or To Assign is automatically revoked.
If an automatic controlling method was assigned to the old projecttype, and a manual controlling method is assigned to the newproject type, the status Flagged for Transfer is automaticallychanged to the status To Assign. If, in the opposite case, thecontrolling method changes from manual to automatic, the statusautomatically changes from To Assign to Flagged for Transfer.
After transfer, the project type can no longer be changed.
General Information About Accounting IntegrationThe following documents contain information that applies to all aspects of accountingintegration:
Costing Logic [Seite 164]
Assignment of Cost/Revenue Rates [Seite 167]
Derivation of Organizational Data [Seite 168]
Costing LogicIn cProjects you can enter planned times as either required capacity for tasks or requiredcapacity for project roles or resources. In order to represent both of these options in costing,you can carry out task-based or role-based costing. This is governed by which controllingmethod you choose in Customizing. Projects with a task-based controlling method can onlyshow costing results for cProjects tasks. Projects with a role-based controlling method onlyshow costing results for roles. In the case of a task-based controlling method, the roles canonly have any influence by means of the assignments to the individual tasks.
Role-Based ControllingOnce you staff a project role with a resource, the system transfers the required capacity of theproject role and the cost/revenue rate of the resource to calculate the costs for the time frameof the staffing. The cost/revenue rate is specified in the attributes for the business partner roleresource. The system uses the cost/revenue rate you assigned in Assignment ofCost/Revenue Rates [Seite 167] for the required capacity of the project role not covered bythe staffing.

SAP Online Help 12.09.2008
Collaboration Projects 165
You planned a required capacity of 30 person days for a project role. However,you staffed this project role with a resource for 20 person days. The systemcalculates 20 person days using the cost/revenue rate of the resource and the10 unstaffed days with the cost/revenue rate of the project role.
If the role type of the project role permits distribution (if you selected the Distribution indicatorin Customizing for Collaboration Projects, by choosing Resource Management BasicSettings for Project Roles Define Project Role Types) and the required capacities havebeen entered in periods, only the total required capacity is used for costing as describedabove. If, however, you want to include the required capacities in periods in costing, the Distr.of Costs indicator must be selected in Customizing. If this indicator is selected, the systemtransfers the required capacity for each period and the cost/revenue rate for performingcosting for the relevant period. If the project role permits distribution, a distribution can also bespecified when staffing this project role with a resource. The required capacity of the projectrole is added to the required capacity of the resource as described above according to thedistribution over periods.
You distribute the required capacity for a project role according to the periodtype month and have planned a required capacity for 10 person days for themonth of February, 5 for March, and 10 for May. You have staffed this projectrole with a single resource. The resource plans to work 3 days in February, 1day in March, and 2 days in May. The system calculates 3 person days forFebruary using the cost/revenue rate of the resource and the 7 unstaffed dayswith the cost/revenue rate of the project role. The calculation is the same for theother periods.
If you want to use a different value for the costs and revenues in a particular project, you canoverwrite the cost/revenue rate of the resource by entering a cost rate in the Cost Differencefield or a revenue rate in the Revenue Difference field. Reports in SAP NetWeaver BusinessIntelligence allow you to compare these rates with those that come from the rates specified inCustomizing.
The following table shows in detail how costs and revenues for project roles and resourcesare calculated. The system first checks whether the first strategy can be used. The systemonly checks the second strategy and so on if the first strategy cannot be used.
Costs/Revenues
Calculation Strategy perActivity Unit
Evaluation Date Other Information
Costs forproject role
...
1. Different costs which youentered for the project role
2. Costs per activity unit forthe role in Customizing
3. Plan price from cost centeraccounting
Fixed orcalculated startof role
Revenuesfor projectrole
...
1. Different revenue whichyou entered for the projectrole
2. Costs per activity unit forthe role in Customizing
Fixed orcalculated startof role
Costs forinternalresources
...
1. Costs per activity unit forthe resource inCustomizing
2. Plan price for the resourcein cost center accounting
Start of staffingof role withresource or fixedor calculatedstart of role
Internal resourcesare resourcesassigned to theSAP businesspartner role

SAP Online Help 12.09.2008
Collaboration Projects 166
3. Different costs which youentered for the project role
4. Costs per activity unit forthe role in Customizing
5. Plan price for the role incost center accounting
employee.
Strategies three tofive are only usedif the resourcedoes not have itsown cost/revenuerate assigned to it.
Costs forexternalresources
...
1. Costs per activity unit forthe resource inCustomizing
2. Costs per activity unit forthe role in Customizing
Start of staffingof role withresource or fixedor calculatedstart of role
External resourcesare resources notassigned to thebusiness partnerrole employee.
Strategy two isonly used if theresource does nothave its owncost/revenue rateassigned to it.
Revenuesfor internalor externalresources
...
1. Different revenue whichyou entered for the projectrole
2. Revenue per activity unitfor the resource inCustomizing
3. Revenue per activity unitfor the role in Customizing
Start of staffingof role withresource or fixedor calculatedstart of role
Strategy three is onlyused if the resourcedoes not have its owncost/revenue rateassigned to it.
The cost/revenue rate can also depend on the responsible organizational unit: If you entereda responsible organizational unit for your project (see Creating Additional Data for a ProjectDefinition [Seite 44]) and if a special cost/revenue rate exists for it in Customizing forcProjects, costing uses this rate. If you have not defined a special rate, the general rate isused.
Task-Based ControllingIf you specified a cost/revenue rate in Customizing for the task type, this cost/revenue rate isincluded in costing too. If a role is assigned to the task, the cost/revenue rate of this role isused. Staffing a role with a resource does not influence costing in task-based controlling.
You planned a required capacity of 30 person days for a task. So far, you haveassigned a project role to this task for 20 person days. The system calculates 20person days using the cost/revenue rate of the project role and the 10 unstaffeddays with the cost/revenue rate of the task.
The following table shows in detail how costs and revenues for tasks and project roles arecalculated. The system first checks whether the first strategy can be used. The system onlychecks the second strategy and so on if the first strategy cannot be used.
Costs/Revenues
Calculation Strategy per ActivityUnit
Evaluation Date Other Information
Costs fortask
4. Different costs which youentered for the task
5. Costs per activity unit for thetask in Customizing
Fixed orcalculated startof task

SAP Online Help 12.09.2008
Collaboration Projects 167
Revenuesfor task
6. Different revenue which youentered for the task
7. Costs per activity unit for thetask in Customizing
Fixed orcalculated startof task
Costs forroles
8. Different costs which youentered for the project role
9. Costs per activity unit for therole in Customizing
10. Plan price for the role in costcenter accounting
11. Different costs which youentered for the task
12. Costs per activity unit for thetask in Customizing
Start ofassignment oftask to role
Strategies four andfive are used if therole does not have itsown cost/revenue rateassigned to it.
Revenuesfor Roles
13. Different revenue which youentered for the project role
14. Costs per activity unit for therole in Customizing
15. Different revenue which youentered for the task
16. Costs per activity unit for thetask in Customizing
Start ofassignment oftask to role
Strategies three andfour are used if therole does not have itsown cost/revenue rateassigned to it.
Assignment of Cost/Revenue RatesUseDepending on whether you want to perform costing based on tasks or based on roles, youassign a cost/revenue rate to the tasks or the project roles or resources for which you want toperform costing.
IntegrationFor more information about how cost and revenue rates affect costing, see Costing Logic[Seite 164].
Prerequisites...
1. Your system administrator activated accounting integration for the project type of thecurrent project. The tab page for accounting integration is then visible in cProjects.
Role-Based Scenario:
2. You are on the Resources tab page of a project and have selected a role. You canenter the cost/revenue rate on the Costing tab page.
Task-Based Scenario:
You are on the Structure tab page of a project and have selected a task. You can enter thecost/revenue rate on the Additional Data tab page.

SAP Online Help 12.09.2008
Collaboration Projects 168
FeaturesWhen you create a new task or project role, the system reads as the default value, the cost orrevenue rate valid at the time the task or role begins, for the task type or project role type fromCustomizing. You can select a different rate and enter a different revenue or different costs.This enables you to agree on individual rates with your customers.
If you entered a responsible organizational unit for your project and a special cost or revenuerate exists for this project in Customizing for Collaboration Projects, costing uses this rate. Ifyou have not defined a special rate, the general rate is used.
Derivation of Organizational DataUseThe SAP system requires the following data for creating an account assignment object andcarrying out costing:
Controlling scenario
The controlling scenario depends on the project type. You define it in ERP Customizingfor Integration with Other SAP Components, by choosing Collaboration ProjectsControlling Define Controlling Scenario.
Organizational data:Mandatory:
Controlling area
Company code
Business area
Cost center
Optional:
Profit center
PrerequisitesThe organizational units in cProjects are synchronized with those in OrganizationalManagement. For more information, see the Implementation Guide (IMG) for cProjects underResource Management Basic Settings for Resource Management Application LinkEnabling (ALE) for HR Integration.
FeaturesThe system determines the data for creating the account assignment object, as follows:...
If you make the data available externally, for example, in the form of a customerenhancement, this data is valid; it is not overwritten by the data determined in the SAPsystem.
If you do not make this data available externally, the system determines the data fromthe organizational units in Organizational Management that were replicated from SAPHuman Resources (HR) to the cProjects system (see "Prerequisites"). The systemdetermines the cost center by searching upwards in the organizational structure andusing the responsible organizational unit you specified in cProjects on the Structure

SAP Online Help 12.09.2008
Collaboration Projects 169
Additional Data tab page in the Responsible Organizational Unit area Org.Responsible. The system transfers the remaining data from this cost center.
If you did not specify a responsible organizational unit or the system could notdetermine its data, in single-object controlling for internal orders the system determinesthe data using the model order for the order type CPR1. You edit the model order inERP Customizing for Controlling, by choosing Internal Orders Order Master DataScreen Layout Define Model Orders. In multilevel controlling, the data is derivedfrom the project profile CPR0001. For more information, see SAP Note 977951.
The system determines the data for costing the account assignment object, as follows:
The controlling area and company code are determined from the account assignment object.
In task-based or role-based costing with no resource assignment:
To derive the cost center (as actual sender of the costs to the account assignmentobject), the system checks the Business Add-Ins (BAdIs) DPR_FIN_GECCO_ATTR inthe cProjects system and then IAOM_ATTRIBUTES (implementationATTRIBUTES_CPROJECTS) in the ERP system for task and project attributes orproject and role attributes. The BAdIs can be found in the Implementation Guide (IMG)for cProjects under Connection to External Systems Accounting IntegrationBusiness Add-Ins (BAdIs) BAdI: Additional Attributes for Replication Using Single-Object Controlling and in the IMG for the ERP system under Integration with Other SAPComponents Collaboration Projects Controlling Business Add-Ins (BAdIs)Characteristics of CO Account Assignment to Be Created or Changed. If no cost centercan be derived there, the system checks the organizational unit assigned in the projectdefinition. If no cost center can be found there either, the system checks in the accountassignment object whether a cost center has been entered in the Requesting CostCenter field. Since a sender has to exist for consistency reasons and to show theallocation in costing, the dummy attribute value NOT_KNOWN is used instead of a costcenter if the cost center is missing in the account assignment object.
In role-based costing with resource assignment:
The resource is relevant for deriving the data relevant to costing. Therefore, whenderiving the cost center, the system first checks the BAdIs DPR_FIN_GECCO_ATTRand IAOM_ATTRIBUTES (see above) for project and role attributes. If no cost centercan be derived from there, the system checks each organizational unit to which theresource is assigned. If no cost center is found there either, the system searches for acost center in the organizational unit of the project. If no cost center can be determinedthere either, the system searches in the master record of the account assignmentobject. If no cost center is found there, the dummy attribute value NOT_KNOWN isused instead of a cost center.
From the Opportunity to the Sales OrderPurposeIn this process you create a simulation in cProjects from a project opportunity, then create aquotation from the simulation based on the cost estimate. If your customer accepts thequotation, you can convert the simulation into an operational project and create a sales order.
If you do not use project opportunities, start the process with step three.
The process is particularly suitable for project business.

SAP Online Help 12.09.2008
Collaboration Projects 170
PrerequisitesYou are using cProjects and SAP ECC 6.0.
If you want to use opportunities to support your processes, you have to useOpportunity Management.
You are using a project type that supports accounting integration [Seite 162].
Process Flow1. An area manager creates a project opportunity in the SAP CRM system.
For more information, see SAP Library for SAP CRM under SAP CustomerRelationship Management Components and Functions Sales OpportunityManagement.
2. The area manager sets the status of the opportunity to In Process.
3. In SAP ECC, the area manager generates SD customer quotation 1 with a phantomitem as a follow-up document for the opportunity.
For more information, see SAP Library under SAP CRM SAP Customer RelationshipManagement Components and Functions Opportunity Management Creating aQuotation in SAP ECC from an Opportunity.
If you do not use opportunities, you have to create the customer quotation or acustomer inquiry manually.
4. The project lead creates simulation 1 in the cProjects system (see Creation ofSimulations and Snapshots [Seite 151]).
...
a. If you use opportunities, create an object link to the opportunity in the simulation(see Creating an Object Link [Seite 158]). The link to customer quotation 1 isestablished through the opportunity.
b. If you do not use opportunities, create an object link to customer quotation 1 orto a customer inquiry that was created manually.
5. The project lead costs simulation 1 in cProjects and adds costing items manually (forexample, travel expenses).
6. The area manager creates customer quotation 2 by accessing the sales pricing functionfrom within the cost estimate and creating the quotation there.
For more information on steps five and six, see Preliminary Costing and QuotationCreation [Seite 173].
The manager then submits the completed quotation to the customer.
For more information, see SAP Library under SAP ERP Central ComponentLogistics Sales and Distribution Sales Customer Inquiry/Quotation.
7. If the customer does not accept the quotation, the area manager creates simulation 2 incProjects based on simulation 1. The manager links the simulation to the opportunityand to customer quotation 1. Then the manager costs simulation 2 again and createscustomer quotation 3.
8. If the customer accepts quotation 3, the project manager transfers simulation 2 tooperational project A by means of a reconciliation (see Reconciliation and Comparisonof Versions [Seite 153]).
9. The project lead transfers the project to SAP ECC where it is assigned to one or moreaccount assignment objects. The following options are possible:
An internal order serves as the account assignment object (see Single-ObjectControlling for Internal Orders [Seite 182]). The internal order can be created

SAP Online Help 12.09.2008
Collaboration Projects 171
automatically during the transfer or created and assigned manually before thetransfer.
Multiple internal orders serve as account assignment objects.
In this case, the project lead has to manually create and assign the internalorders before the transfer (see Single-Object Controlling for Internal Orders[Seite 182]).
WBS elements serve as account assignment objects (see Multilevel Controlling[Seite 183]).
The project is recosted when it is transferred to SAP ECC.
10. The area manager manually creates a contract or sales order with reference toquotation 3. The manager manually assigns the account assignment objects to theitems of the contract or sales order.
If you want to create and edit the sales order in the People-Centric UI, you needto extend the People-Centric UI in Customizing accordingly. You make thenecessary settings in the SAP Implementation Guide (IMG) of SAP CRM underCustomer Relationship Management Layout of the User Interface (People-Centric UI).
For more information, see SAP Library for SAP CRM under SAP CustomerRelationship Management Components and Functions Sales SalesTransactions Sales Order Processing SAP ECC Sales Documents in SAP CRM.
The following graphic illustrates the entire process with the detailed steps:

SAP Online Help 12.09.2008
Collaboration Projects 172
SAP ECCSAP CRM
Create projectopportunity
Customer wantschanges
Add costing items(such as travelexpenses)
Create simulation 2
Sales pricingdetermines revenues
Generate quotation 2
Create object link toopportunity
Transfer simulation 2to operational projectA
SAP cPROJECTSUITECustomer
Cost the simulation
Customer acceptsnew quotation andsigns contract
Account assignmentobjects are createdand project A isrecosted
Set status to InProcess
Customer quotation 1is created withphantom item
Create simulation 1
Cost the simulation
Generate quotation 3
Create sales order orcontract withreference to quotation3
Assign accountassignment objects tothe items of theorder/contract
Generate follow-updocument
For more information about workflow support, see SAP Note 874434.

SAP Online Help 12.09.2008
Collaboration Projects 173
Preliminary Costing and Quotation CreationPurposeYou can calculate the planned costs and revenues for a project before this project has beentransferred. You can then create a quotation [Extern] on this basis.
The process described in the following illustrates steps five and six of theprocess From the Opportunity to the Sales Order [Seite 169] in detail. Thisexample uses only simulations, but that is sufficient to understand the function.You can also perform the process with operational projects.
To illustrate the entire process with all its functions, it is assumed that you havedecided to calculate revenues with the dynamic item processor [Extern] (DIP)and that you create the quotation from within sales pricing. If you do not want tocreate a quotation from sales pricing, do not carry out steps five and six listedhere. Then you can also use the revenue rates from cProjects (revenuecalculation type Use Cost/Revenue Rates from cProjects).
From cProjects 4.00, preliminary costing is in the form of an ad hoc costestimate.
PrerequisitesYou have made the necessary settings for cost calculation. For more information, seeCosting Logic [Seite 164].
You have selected the revenue calculation type Use Sales Pricing in SAP ERP for theproject type you are using for the simulation in Customizing for Collaboration Projectsby choosing Connection to External Systems Accounting Integration MakeGeneral Settings.
You have made the necessary settings for Easy Cost Planning [Extern]. For moreinformation, see Ad Hoc Cost Estimate for cProjects [Seite 176] under “Prerequisites.”
You have made the necessary settings for the DIP. For more information, see SalesPricing for cProjects [Seite 178] under “Prerequisites.”
This setting is only needed if you want to perform the process as it is described here.
You can use the fields Grouping and Search Field to specify the materials in thequotation. To do this, you must have executed the steps for adding the characteristicsGrouping or Search Field to the DIP profile. For more information, see SAP Note301117.
You have created a simulation, created an object link to an SD inquiry or quotation forit, and assigned an organizational unit. The first item of this SD document is used forreferencing in sales pricing. This SD document item must have a requirements typewith a requirements class to which an account assignment category is assigned thathas the value E (Accounting via sales order) in the Consumption Posting field. Thiscreates a separate CO object for each SD document. You define the requirementsclass in Customizing for SAP ECC, for example by choosing Sales and DistributionBasic Functions Account Assignment/Costing Maintain Requirements ClassesFor Costing/Account Assignment.
Process FlowThe following graphic shows the sequence of steps:

SAP Online Help 12.09.2008
Collaboration Projects 174
SAP ECCSAP cPROJECT SUITE
Add costing items (such astravel expenses)
Call up sales pricing andmodify
Create quotation
Plan required capacity andproject roles or resources
Call up costing (ECP)
Costs (including additionalcosts) and revenues aredisplayed
Save
Save
Perform costing
Costs and revenues aredisplayed
Save
Costs (includingadditional costs) andchanged revenues aredisplayed
Perform costingand save or startagain
Performcosting andsave or startagain
...
1. You plan the required capacity and the project roles and resources.
If you want to influence the items in the quotation that you create in step six, you canuse the fields Grouping or Search Field, for example. You can use the value that youenter here to derive materials for the quotation items through the DIP profile. Thisenables you to structure the quotation in cProjects according to the level of detail andlanguage that the customer has selected. The materials selected in this way areavailable in sales pricing (see step five) for manual conditions (surcharges ordiscounts).

SAP Online Help 12.09.2008
Collaboration Projects 175
In addition to the materials you specified with the fields Grouping or Search Field,materials and services for the quotation items can be determined in Easy CostPlanning if you have not entered anything in the fields for the individual phases or tasksor if additional items are added by means of a planning form in the ad hoc costestimate. There can also be additional items (such as for travel expenses) that youenter in the ad hoc cost estimate.
2. You calculate the costs and revenues. Choose Cost on the Accounting tab page. Formore information about calculating costs and revenues, see Costing Logic [Seite 164].
The costing result is displayed.
€4.400,00T5,00€4.400,00T5,00Caren Johnson
€4.000,00T5,00€8.400,00T10,00Consultant 1
€0,000,00€8.400,00T10,00Planning
CurrencyN-A. CostsUnitN-A.Req.Cap.CurrencyCostsUnitReq.
CapacityProject Element
The consultant Caren Johnson has the role Consultant 1. The planned requiredcapacity for this role is ten days. Five days are assigned to Caren Johnson,while an additional five days are still unassigned. The hourly rate for CarenJohnson from the business partner is €110, which differs from the project rolerate of €100.
The Costs column in the line for the project role has the total amount of €8,400for the project role based on the specific rate for Caren Johnson and the rate forthe project role for the unassigned days. The column for the non-aggregatedcosts (N-A.Costs) in the line for the project role only shows the €4,000 for theunassigned five days for which no resource has been assigned.
3. Save your entries.
4. You now call up Easy Cost Planning [Extern] (ECP) and can add additional costingitems. For more information, see Ad Hoc Cost Estimate for cProjects [Seite 176].
5. You call up sales pricing. For more information, see Sales Pricing for cProjects [Seite178].
6. You create a quotation. To do this, you choose Quotation in the sales pricingfunction.
Changes that you make to the quotation here are not transferred to sales pricing, thead hoc cost estimate, or cProjects.
You can also create the quotation later by calling up the ad hoc cost estimate again.
7. Save your entries and return to the project in cProjects. Perform costing for the projectin cProjects and save it.
ResultThe costing result with costs and revenues is displayed in cProjects. The quotation isavailable for further processing.
ExampleThe following graphic shows an example in which individual phases were assigned to thevalues Consulting and Course with the field Grouping. The materials that form the items in thequotation are selected through the DIP profile. In the initial quotation, the course is to beinvoiced using resource-related billing. The customer does not accept the quotation. A newquotation is therefore prepared in which the course has a fixed price. The customer acceptsthis new quotation. The items of the second quotation are added to the contract.

SAP Online Help 12.09.2008
Collaboration Projects 176
Cost controlling in this example is based on manually created [Seite 185] multilevel controlling[Seite 183]. The billing elements were created such that they correspond to the groupings. AWBS element was created for each phase. For the Realization phase, detailed costcontrolling at task level is to be performed. For this reason, additional WBS elements werecreated for the tasks Configuration and Test.
Acc
ount
Ass
ignm
entM
anag
er
cProjects 4.00
Project Preparation
Business Blueprint
Realization
Planning
Organization
Scope
Configuration
Course
Go Live & Support
Development
Execution
Go Live & Support
Transfer CCC
SAP Sales and Distribution
Inquiry/Quotation
ERP Imple-mentation
Quotation 1
ConsultingFixed Price
CourseResource-Related
SAP Project System
Test
ProjectPrep.
BusinessBlueprint
ERP Implementationand Course
Doc.
Flow
Obj
ectL
ink
GroupingCourse
Account
Assignm
ent
ERP Implementation and Course
Creation and Approval
GroupingConsulting
Order/Contract
Quotation 2
Go Live &Support
ERP Implementation(Billing Element)
Course(Billing Element)
Configuration Test
GroupingConsulting
GroupingConsulting
GroupingConsulting
Doc.
Flow
Doc.
FlowCourseFixed Price
ConsultingFixed Price
ConsultingFixed Price
CourseFixed Price
Realization
Ad Hoc Cost Estimate for cProjectsUseThis function enables you to create and edit ad hoc cost estimates [Extern] in SAP ECC fromwithin cProjects. The costing result is displayed in cProjects and saved when you save.
Once at least one account assignment exists, the system converts the ad hoccost estimate to a costing whose planned costs and revenues are posted over a

SAP Online Help 12.09.2008
Collaboration Projects 177
certain time period. This takes place for the cProjects project elements withaccount assignments according to the dates.
PrerequisitesYou are using a project type to which a Controlling scenario is assigned.
The assigned Controlling scenario contains a costing variant that you can use for adhoc cost estimates for cProjects. For more information, see the Implementation Guidefor Collaboration Projects under Single-Object Controlling for Projects Settings forEasy Cost Planning.
You have authorization for accounting and administration.
You have entered the data that is relevant to costing (quantities and prices).
If you want to use a planning form, it must exist in the system. For more information,see Editing Costing Models and Assigning Attributes [Extern].
If you want a planning form to be assigned to the cost estimate at the point when youstart the ad hoc costing function, that planning form must be assigned to the projecttype being used. You make this setting in Customizing for Collaboration Projects, bychoosing Single-Object Controlling for Projects Settings for Easy Cost Planning.
FeaturesThe cost planning function is executed by Easy Cost Planning [Extern] (ECP). The costestimate is always created at project level and is always single-level. The organizational datarelevant to costing (controlling area, company code, and master cost center for the derivationof the activity type under which the allocation is reported) is derived from the HRorganizational unit specified in the project definition. The costs are calculated based on therates for the resource, project role, or task. For more information, see Costing Logic [Seite164].
The revenues are calculated automatically if you have selected the option Use Cost/RevenueRates from cProjects or Use Sales Pricing in SAP ERP as the revenue calculation type for theproject type that you are using for the project. You make this selection in Customizing forCollaboration Projects, by choosing Connection to External Systems AccountingIntegration Make General Settings. With the last option, the revenues are calculated withthe dynamic item processor [Extern] (DIP). For more information, see Sales Pricing forcProjects [Seite 178]. Then you can also call up sales pricing from within the ad hoc costestimate.
You can archive the ad hoc cost estimate in SAP ECC (archiving object CO_ECP) if theproject has the status [Seite 250] To Be Archived.
Technically, the ad hoc cost estimate is saved in SAP ECC with reference to thecProjects project number. When the project is transferred, it is recosted and thecost estimate stored for the account assignment object.
ActivitiesYou are on the Accounting tab page, have costed the simulation or project (Cost button) andsaved it.
Choose Ad Hoc Cost Estimate.
The Change <name of project>: Easy Cost Planning screen appears.
If a planning form is available for the cost estimate and additional entries are required in theform, the entry screen of the planning form appears on the right. Enter the required data andchoose Transfer.

SAP Online Help 12.09.2008
Collaboration Projects 178
The costing result is displayed on the left side of the screen. The cost and revenue items canbe seen in the item view at the lower right.
If you want to add additional costing items but no planning form has been assigned, you canassign a planning form yourself. If you want to add additional items without a planning form,or in addition to the items in the planning form, you can do this in the item view. For moreinformation, see Use of Easy Cost Planning [Extern] under “Item View Area” and “Activities.”
Costing items that were manually added to an ad hoc cost estimate can neverbe transferred from one project to another (for example, with reconciliation [Seite153] or when creating with a template). Project simulations do not supportaccounting integration.
Once you have saved the cost estimate in SAP ECC, you need to choose Cost in cProjectsagain in order to import the new costing results. Exception: If, when you call the project incProjects again, the system displays the changed costing results automatically, you do nothave to choose Cost again.
Sales Pricing for cProjectsUseThis function calculates the sales price and displays the items [Extern] that flow into the price.You can add conditions (surcharges and discounts) and change individual prices. You cangenerate a quotation by transferring the items and prices.
IntegrationThis function is accessed from an ad hoc cost estimate for a simulation or operational project(before transfer).
PrerequisitesIn Customizing for Collaboration Projects under Connection to External SystemsAccounting Integration Make General Settings, you have selected the revenuecalculation type Use Sales Pricing in SAP ERP for the project type that you are usingfor the simulation or project.
You have defined a dynamic item processor profile [Extern] (DIP profile) with thesource Easy Cost Planning in Customizing for the Project System under Revenuesand Earnings Integration with SD Documents Creating Quotations and ProjectBilling Maintain Profiles for Quotations and Billing. This enables the system to usethe data from Easy Cost Planning for sales pricing.
You have entered this DIP profile in the item of the SD document (customer inquiry orquotation) for which you have created an object link in the simulation or operationalproject.
The Revenues from Sales Pricing indicator is selected in the header data of the ad hoccost estimate under Valuation.
FeaturesThe sales pricing function calculates the sales price:

SAP Online Help 12.09.2008
Collaboration Projects 179
Based on the quantity structure of the planning data from cProjects that was valuatedwith Easy Cost Planning (ECP)
Based on the settings in the DIP profile
Using the pricing functionality in the Sales and Distribution component (SD)
Starting with the planned costs, the system finds the items of the sales price basis using theDIP profile. The items of the sales price basis are called dynamic items. The system sorts thedynamic items based on the SD line items and determines the sales price with SD pricing[Extern]. The system finds the costing sheet based on the document category (from the DIPprofile). Additional data for pricing (such as the sold-to party) is located in the SD document.
If the material specified in the dynamic item processor profile carries a quantity, the systemcan only determine the quantity for the material from project planning if the quantities areconvertible.
The system takes the currency for the individual items in the dynamic item processor from theSD document.
Under Extras Settings you can specify whether the controlling area currency, objectcurrency, or transaction currency is relevant for the individual items.
Conversion into the SD currency is based on the exchange rate of the price date from the SDdocument.
If the currency of the customers changes, conversion only takes place after youhave called up sales pricing again and saved it.
Two views are available:
Sales price basis view [Extern], which is the internal view of pricing
This view displays the planned values by the items in the SD document. You cancontrol whether a planned value is used in pricing in full, only at a certain percentage,or not at all.
Do not make any changes here because they would not be transferred into thesimulation or project.
Sales price view [Extern], which is the customer view of pricing
In this view, the planned values are organized based on the structure in the quotation.If you have entered values in the fields Grouping or Search Field in cProjects, yourselected materials are displayed that the DIP derived from your entries, plus thematerials that were found by Easy Cost Planning.
Changes that you make here are transferred into the quotation and Easy CostPlanning, and are displayed in cProjects.
It is not possible to save the sales pricing results in a document for cProjects.
ActivitiesYou are in the ac hoc cost estimate.
8. Choose Sales Pricing.
Depending on the settings, the sales price basis view or the sales price view isdisplayed. See also the information on sales pricing available under Settings: SalesPricing and Billing [Extern].

SAP Online Help 12.09.2008
Collaboration Projects 180
9. If you are not in the sales price view, choose Sales Price.
The sales price view is displayed.
You can make changes and create a quotation. To do this, choose Quotation.
ControllingUseThe integration of Controlling allows you to monitor the costs and revenues in your projectand to periodically activate the required capacity as work in process.
FeaturesTwo different controlling variants are available:
In single-object controlling for internal orders [Seite 182] all costs and revenues for aproject are collected in one or more internal orders.
In multilevel controlling [Seite 183] all costs and revenues for a project are collected inone or more WBS elements.
The project is transferred to SAP ECC for this. If you use an automatic controlling method, aPS project with WBS elements or an internal order is automatically created for your project inSAP ECC. If you use a manual controlling method, you have to assign the internal orders orWBS elements yourself.
The transfer type specified in Customizing for Collaboration Projects under Connection toExternal Systems Accounting Integration Activate Integration dictates when the transferwill take place. It can take place:
Automatically when you save the project
Once you have set the status Flagged for Transfer or To Assign and saved the project
Once you have released the project and saved it
In the first transfer, the project is transferred once in its entirety and costing is performed(again) (see below). Once the transfer has taken place, you cannot delete the transferredproject elements. The controlling method that was used determines which project elementsare transferred.
Each time a change is made to the project definition, tasks or roles, and resources, theproject is transferred again when you save and costing is performed again. This causes thecosting and the planned costs to be updated. If an automatic method was used, the accountassignment objects are also updated if you made changes to the projects elements they arebased on in cProjects or to the assignment.
Costing
In the transfer, the system performs costing for the tasks and role assignments (for a task-based method) or for roles and staffings (for a role-based method) and saves the costing inthe account assignment object in SAP ECC. From a cost accounting point of view, thetransfer is an activity allocation from the cProjects project (sender) to the account assignmentobject (recipient).
For more information about costing, see General Information About Accounting Integration[Seite 164].

SAP Online Help 12.09.2008
Collaboration Projects 181
You can call the controlling cockpit [Seite 181] in SAP ECC. Here you can find errormessages that affect the transfer to Controlling.
Controlling CockpitUseThe controlling cockpit gives you an overview of all messages that are issued when youtransfer your projects to Controlling or carry out costing. Once you have corrected the reasonfor the message, you can flag the message as completed directly in the cockpit and delete itlater.
FeaturesThe controlling cockpit contains two types of error messages:
Serious errors that prevent you from creating or updating the account assignmentobject or carrying out costing.
Once you have corrected the errors you can recreate or update from within the cockpit.
You assign a responsible organizational unit to a project. The project istransferred to SAP ECC. When you create the internal order, the system tries todetermine a cost center for the responsible organizational unit. However, nocost center has been assigned to the unit. Therefore, the system cannot createthe internal order.
Once you have assigned a cost center to the responsible organizational unit,you can recreate the internal order within the controlling cockpit.
Less serious errors that do not prevent you from creating or updating internal orders.Nevertheless, you should correct these errors at a later point in time.
You release a project in cProjects, but the internal order in Controlling is lockedand therefore it cannot be released automatically. You can fix the problem byunlocking the internal order, releasing it, and then resetting the lock.
ActivitiesYou can call the controlling cockpit from within cProjects or in SAP ECC using transactionCOCPCPR.
For more information, see Controlling Cockpit Documentation.

SAP Online Help 12.09.2008
Collaboration Projects 182
Single-Object Controlling for Internal OrdersUse
For more information about the special features of simulations and snapshots,see the “Features” section of Project Versions [Seite 148].
You use this function to post all costs and revenues for a project to a cost collector. The costcollector is an internal order. It displays the account assignment object for all planned andactual postings in the project. You can also use multiple internal orders.
You can start costing directly from cProjects to monitor costs. Costing takes place inControlling and the results are displayed in cProjects.
Easy Cost Planning (ECP) is only supported in the Controlling version 0.
Integrated planning together with an ECP costing is not supported.
IntegrationOnce the data has been transferred to Controlling, you can use all standard businessprocesses that are available for internal orders, for example, programs for period-end closing.
PrerequisitesYour system administrator activated accounting integration for the project type of thecurrent project (see Customizing for Collaboration Projects under Define ProjectTypes).
One of the following controlling methods is assigned to the project type of the currentproject in Customizing for SAP ECC under Define Controlling Scenario:
Internal Order (Project Definition, Automatic)
Internal Order (Structure Element, Manual)
Internal Order (Project Role, Manual)
You have the following authorizations:
Accounting and administrative authorizations for displaying accountinginformation and carrying out costing
Authorization in the Controlling system for carrying out internal ordertransactions
Authorization for creating and changing the cost collector (for RFC users)
FeaturesThe internal order can be created and assigned manually or automatically, depending on thecontrolling method you choose. If you want to use more than one internal order, you have tocreate and assign them manually. In this case, follow the same procedure as for WBSelements, as described under Manual Creation of the Controlling Structure [Seite 185].Therefore, the following only describes automatic account assignment (controlling methodInternal Order (Project Definition, Automatic)).

SAP Online Help 12.09.2008
Collaboration Projects 183
Data TransferThe first time a project is transferred to Controlling, the system automatically creates aninternal order. There is only one internal order per project. No account assignment objects areassigned to the individual project elements. The following project definition characteristics aretransferred to Controlling:
Project number
Description in the original language
Project type
Project reason
Search field
Group
Responsible organization
Template number
Priority
System status
The system does not transfer user statuses.
These characteristics are stored for the internal order and are used to find the internal ordersfor your projects.
When the system creates the internal order it simultaneously creates the settlement rule.
Multilevel ControllingUseThis function enables you to manage all costs and revenues for a project using a workbreakdown structure in the Project System (PS). In order to do this, you create a multilevelcontrolling structure out of WBS elements that serve as cost collectors. You can do thismanually or automatically. You can create this structure independently of the project structurein cProjects or you can create a structure that is partly or completely identical. You decidewhich tasks or project roles you link to which WBS elements. This allows you to control howcosts incurred by work or other required capacities are posted to project elements. Forexample, you can assign a single WBS element to each project element for which costs andrevenues are incurred or summarize the costs and revenues of several project elements inone WBS element. Depending on the settings you made for the project type in Customizing,you assign project roles or tasks.
The following graphic explains the function (assignment of tasks):

SAP Online Help 12.09.2008
Collaboration Projects 184
IntegrationYou can use SAP NetWeaver Business Intelligence (BI) to evaluate cProjects projects or youcan use the evaluations in cProjects to do this. If you create complex multilevel controllingstructures manually, SAP recommends that you only use the evaluations in BI.
PrerequisitesYou set up a controlling method for multilevel controlling and the permitted controlling level inCustomizing for SAP ECC under Integration with Other SAP Components CollaborationProjects Controlling Define Controlling Scenario for the project type that is used. Thecontrolling method specifies the following:
Whether the controlling structure is to be created manually or automatically
Whether account assignment is to be carried out for project roles or for projectelements (tasks and project definition)
Make sure that the controlling method does not contradict the settings you makeunder Confirmation in Customizing for Collaboration Projects.
FeaturesYou can assign a cProjects project element to a single account assignment element.
You can only assign the project elements of a project to the WBS elements of a singlePS project. If you want to change this assignment, you first have to delete theassignment and then save the project. The search help for PS projects will then alsobe available.
An account assignment element can be assigned to several cProjects project elementsof the same project but not to the project elements of different cProjects projects.However, you can assign different WBS elements of a PS project to different cProjectsprojects.
When you assign an account assignment element to a cProjects project element, thesystem transfers this assignment for all lower-level elements down to the level at whichan assignment already exists. You can overwrite the default information. If you changean assignment, the assignments that were automatically transferred are also changed– assignments adjusted manually are not changed automatically.

SAP Online Help 12.09.2008
Collaboration Projects 185
Subprojects have their own assignments to account assignment objects; therefore theydo not inherit the account assignment objects of higher-level project elements either.
ActivitiesManual Creation of the Controlling Structure [Seite 185]
Automatic Creation of the Controlling Structure [Seite 187]
See also:
Accounting Integration [Seite 162]
Single-Object Controlling for Internal Orders [Seite 182]
Manual Creation of the Controlling StructureUseYou use this function to manually assign an existing project in the Project System (PS project)to a cProjects project. You then assign the work breakdown structure elements (WBSelements) to the cProjects project elements as account assignment objects.
For more information about creating a work breakdown structure, see Editing the WorkBreakdown Structure [Extern].
The description of this function also applies to the manual assignment of internalorders for the controlling methods Internal Order (Structure Element, Manual)and Internal Order (Project Role, Manual) from Single-Object Controlling forInternal Orders [Seite 182].
IntegrationYou can create enhancements for manual multilevel controlling using the Business Add-In(BAdI) DPR_FIN_GECCO_MANUAL. If the BAdI has been implemented, the DetermineDefault Assignment pushbutton is active.
PrerequisitesThe project has a project type to which one of the following controlling methods has beenassigned in Customizing for SAP ECC under Controlling Define Controlling Scenario:
Multilevel Controlling (Structure Element, Manual)
Multilevel Controlling (Project Role, Manual)
The project has the status To Assign.
FeaturesAccounting Tab Page
You assign the project elements to WBS elements on the Accounting tab page in the AccountAssignment view. If you have not already made an assignment to a PS project or internalorder, the system displays the search help which you can use to find the PS project yourequire. If the cProjects project is already assigned to a PS project, the system displays bothproject structures.

SAP Online Help 12.09.2008
Collaboration Projects 186
Assigning Account Assignment ElementsA manual assignment is only possible if the status To Assign is set for the project definition.
Depending on the settings you made in Customizing, you assign tasks or project roles. If youassign tasks, you can also select a phase and assign this too. When you do this, all tasks thatbelong to this phase are assigned to the account assignment element that is assigned to thephase. In the same way, all subtasks of a task that you assign are also automaticallyassigned. You can change the automatic assignments.
If you cannot assign an account assignment element because, for example, it has alreadybeen assigned to a project element of a different cProjects project, the account assignmentelement is grayed out.
Working with Existing Assignments
You can change the assignments provided that you have not released the project orprovided that the status of the project element permits this.
Once the data of a project element has been transferred to SAP ECC, you can nolonger delete the project element.
If an assignment already exists and you assign a new account assignment element,the old assignment is overwritten.
By clicking an account assignment element, you can display details of the element oryou can edit the element using one of the services offered.
Account Assignment
Once you have defined the account assignment objects, data can be transferred to SAP ECC.
Activities...
Assigning WBS Elements As Account Assignment Objects
1. Assign a PS project to the cProjects project. You cannot enter the PS projects yourself;you have to select them from the search help.
2. Select the cProjects project element and the WBS element you want to assign and thenchoose Assign.
The system checks whether the assignment is valid and enters the WBS element asthe account assignment element.
Assigning Internal Orders As Account Assignment Objects...
1. Select the cProjects project element and find an internal order using the search help.Internal orders that have already been used in other cProjects projects no longerappear in the search help.
2. Choose Assign.
The system checks whether the assignment is valid and enters the internal order as theaccount assignment element.
You cannot assign account assignment elements to checklists orchecklist items.
See also:Automatic Creation of the Controlling Structure [Seite 187]
Multilevel Controlling [Seite 183]

SAP Online Help 12.09.2008
Collaboration Projects 187
Automatic Creation of the Controlling StructureUseYou use this function to automatically create a project in the Project System (PS project) froma project in cProjects. The system creates a work breakdown structure element (WBSelement [Extern]) for each cProjects project element (apart from checklists and checklistitems) and assigns the elements to one another. The structure of the PS project matches thestructure of the cProjects project.
FeaturesCreating Account Assignment Elements
The system creates the controlling structure automatically once the project data has beentransferred to the Project System. No information relevant to project management, such asdates, duration, or required capacity is transferred to the WBS elements. The requiredcapacity is determined by costing.
The system creates a PS project definition and the top WBS element for the project definitionin cProjects. Therefore, the top WBS element does not have a project element number fromcProjects assigned to it.
The system creates WBS elements for the project elements phase and task up to the levelspecified in the controlling level parameter in Customizing. The relationship between thepredecessor and the successor in the hierarchy of the project elements remains during thetransfer from cProjects to the PS project. The order of the project elements from left to right isnot kept during the transfer.
The relationship between a project definition and a phase is a predecessor-successor relationship in this function. The relationship between a phase andthe task below it is also a predecessor-successor relationship. The relationshipbetween two phases is a left-to-right relationship.
The system uses the project element numbers as the name of the WBS elements. All WBSelements are relevant to account assignment, apart from those that were created fromphases.
Rules for Assigning Names
Task-based controlling
Project definition
In cProjects, the system displays the external project ID on the StructureBasic Data tab page in the Number field. The system uses this external projectID as the name of the PS project definition. You can only use any externalproject ID once in cProjects.
Phase
In cProjects, the system proposes the internal ID for the external ID on theStructure Basic Data tab page in the Number Initial field. If you have changedthe external ID, the internal ID is no longer visible on the cProjects interface.
SAP Online Help 12.09.2008
Collaboration Projects 188
The system uses the internal ID of the phase as the name of the WBS element.The internal ID is a unique key for all projects.
Task
In cProjects, the system displays the external ID of the task on the StructureBasic Data tab page in the Number field.
Role-based controlling
Project definition
In cProjects, the system displays the external project ID on the StructureBasic Data tab page in the Number field. The system uses this external projectID as the name of the PS project definition. You can only use any externalproject ID once in cProjects.
Role
In cProjects, the system displays the project role ID on the ResourcesGeneral tab page. The system uses this ID as the name of the WBS element.
We recommend that you use a unique name for all projects and that when naming PSprojects, you make sure that the rules for the project definition do not conflict with the derivednames.
You can use a name of a PS project or WBS element only once. The account assignmentmanager does not support the deletion of PS projects or WBS elements. For moreinformation, see SAP Note 923205.
Once the transfer to the Project System has taken place, it is no longer possible to changethe project element number in cProjects.
Working with Existing Assignments
If you add project elements once the structure has been transferred, the system alsocreates account assignment elements for these project elements.
You use the pushbutton Switch to Manual Assignment before the project is released toswitch to manual mode for making changes to the assignments. The same conditionsapply to this project as to a project you created with a project type to which a manualcontrolling method has been assigned. If this project had the status Flagged forTransfer, the status is automatically changed to To Assign. However, note that youcannot switch back to an automatic controlling method.
By clicking a WBS element, you can display details about the element or you can editthe element using one of the services offered.
See also:
Manual Creation of the Controlling Structure [Seite 185]
Multilevel Controlling [Seite 183]

SAP Online Help 12.09.2008
Collaboration Projects 189
Integration with Supplier RelationshipManagementUseYou use this function to order external materials and resources directly from cProjectsthrough Supplier Relationship Management (SRM). This function is available for projectelements and project roles on the Shopping Cart tab page.
IntegrationThe system posts the costs to the relevant account assignment object of the project element.Account assignment objects can be internal orders or WBS elements (see Single-ObjectControlling for Internal Orders [Seite 182] and Multilevel Controlling [Seite 183]). The systemposts the recorded time to cProjects according to the settings that were made for timerecording using the cross-application time sheet [Seite 90].
PrerequisitesYou are using accounting integration [Seite 162].
You have a user in SRM.
You activated the Time/Travel Expenses Rec. CATS/SRM/FIN function in Customizingfor Collaboration Projects by choosing Structure Define Project Types, for recordingtime for external resources.
You activated the Shopping in SRM function in Customizing for Collaboration Projectsby choosing Structure Define Project Types.
You performed the Specify Source System for SRM Categories activity in Customizingfor Collaboration Projects by choosing Connection to External Systems SRMIntegration.
For more information about the system settings required for using SRMintegration, see SAP Note 960237.
FeaturesTo carry out an external order, you create a shopping cart in SRM. You can only requestexternal resources for project roles but you can create material requests for all projectelements and project roles.
If you request an external resource for a project role, the system automatically transfers thequalifications of the project role to the description of the shopping cart. It also creates acorresponding resource assignment on the Staffing tab page. You cannot change or deletethis manually. You can only delete this resource assignment by canceling the shopping cart towhich it belongs. The system transfers the dates for the resource assignment from theshopping cart. If resources in the project role cannot be edited in parallel, the dates mayconflict with one another.
You can display shopping carts that exist in SRM from the shopping cart overview. To do this,follow the link in the Shopping Cart column. The SRM application opens in a separatewindow.
SRM contains all the functions you need for the shopping cart that was created, for example,purchasing, approval, and creating invoices. For more information, see SAP Library underSupplier Relationship Management Service Procurement and Self-Service Procurement.

SAP Online Help 12.09.2008
Collaboration Projects 190
The Shopping Cart column shows the current status of the shopping cart. The shopping carthas the status In Preparation if no shopping cart has been created for it in SRM. Once ashopping cart exists in SRM too, the shopping cart in cProjects has the status In Process.Once the shopping cart has been delivered, the system automatically sets the status toDelivery Completed. This is also indicated in the Delivered column.
You can also cancel the shopping cart created in cProjects. If you do this, the status in theShopping Cart column changes to Canceled. You can only cancel it if the shopping cart orparts of the shopping cart have not been delivered yet.
ActivitiesYou can create [Seite 190] or cancel [Seite 191] a shopping cart.
You can staff a task with an external resource [Seite 191].
Creating a Shopping CartUseTo order a material or an external resource in Supplier Relationship Management (SRM), youcreate a shopping cart via the Collaboration Projects user interface.
PrerequisitesYou can only create a shopping cart for the project elements of projects that have beenreleased.
ProcedureProject Element: Order Material
3. Choose Projects Structure Shopping Cart Create Shopping Cart.
4. Enter a description of the shopping cart.
5. Enter data in the Internal Information field, as required.
6. Enter the required quantity.
7. Enter a unit.
You can only select ISO units.
8. Enter a category.
9. Enter a delivery date.
10. Choose Create Shopping Cart.
Project Role: Order External Resource or Material...
1. Choose Projects Resources Shopping Cart Create Shopping Cart.
2. Choose whether you want to order an external resource or a material.
3. Enter a description of the shopping cart.
4. Enter data in the Internal Information field, as required.

SAP Online Help 12.09.2008
Collaboration Projects 191
For an external resource, the system copies the qualifications of the project role(Qualifications tab page) as qualification requirements to the Internal Informationfield. You can adjust this proposal before you create the shopping cart.
5. Enter the required quantity.
6. Enter a unit.
You can only select ISO units or ISO time units for materials and externalresources.
7. Enter a category.
8. If you are using an external resource, enter the start date in the From Date field and thefinish date in the To Date field. If you are using a material, enter a delivery date.
9. Choose Create Shopping Cart.
Canceling a Shopping CartUseYou can cancel a shopping cart that was created in Collaboration Projects (cProjects)provided that it does not have the status Delivery Completed. Depending on how advancedthe processing of the shopping cart is in SRM, for example, whether it has been ordered ordelivered, the system can also cancel the shopping cart there. If a direct cancellation is nolonger possible in SRM, the person responsible in SRM must contact you.
You cannot set the status of a shopping cart that has already been canceled back to InProcess.
Procedure...
1. Choose the Shopping Cart tab page.
2. Select a shopping cart from the shopping cart overview.
3. Choose Cancel Shopping Cart.
The system only actually cancels the shopping cart when you save the project.
Staffing Tasks with External ResourcesUseYou can use a shopping cart to order an external resource from Collaboration Projects(cProjects) for a project role.
You can schedule the external resource straight away as a resource with edit authorization oras part of the project role with edit authorization for a task.

SAP Online Help 12.09.2008
Collaboration Projects 192
Constraints
You cannot use the external resource as a responsible resource or as part of theresponsible role.
You cannot select the external resource as the decision maker for approving a phase.
If you cancel the shopping cart for an external resource, the system automaticallydeletes the corresponding resource assignment in the project role and the referencesof the external resource to the assigned tasks (resources with authorization to carryout tasks).
You cannot use an external resource for roles with distribution.
ProcedureFor more information, see Assignment of Project Roles to Tasks [Seite 106].
Control PlanDefinitionDescription of which measures and methods you use in a specific phase of the creation of aproduct to check whether you have adhered to predefined quality characteristics. You use acontrol plan throughout the entire product life cycle, updating it continuously.
The function and existing descriptions are oriented towards QS-9000.
UseYou can carry out the following functions:
Creating and opening a control plan [Seite 192]
Editing a control plan [Seite 193]
Creating a control plan version [Seite 196]
Creating objects in the control plan [Seite 196]
Creating and Opening a Control PlanPrerequisites
To create a control plan, you are in the Control Plans initial view.
To open a control plan, you are in the Control Plans initial view or in a project on theControl Plans tab page.
You created a control plan template, if required (see Creating a Template [Seite 36]).
ProcedureCreating a Control Plan...
1. Select the project for which you want to create a control plan.
SAP Online Help 12.09.2008
Collaboration Projects 193
Only those projects are displayed whose project type allows the use of control plans.
2. Enter a number for the new control plan.
The system checks whether the number has been assigned yet.
3. Select a template if required.
You can only use templates with the status Released.
4. Choose Create.
5. Edit the control plan (see Editing a Control Plan [Seite 193]).
6. Save your entries.
Opening a Control PlanTo open an existing control plan, click the control plan number in the control plan overview fora project.
Editing a Control PlanUseA control plan [Seite 192] consists of many parts:
A control plan header that contains general control plan data
Process steps for structuring the process
Tools for each process step
Characteristics to be checked for each process step
You can create object links [Seite 158] for each control plan on the appropriate tab page.
PrerequisitesYou created a control plan and opened it to edit data (see Creating and Opening a ControlPlan [Seite 192]). Note that you can only edit a control plan if you opened it in the ControlPlans initial view.
ProcedureEntering Header Data...
1. Fill out the control plan header fields.
The following table is an overview of the fields and their meanings (according toQS9000, 1999):
Field Meaning

SAP Online Help 12.09.2008
Collaboration Projects 194
Category Category of the product to be checked.
A category enables you to create a link between aphase and a control plan when you choose the samedescription for the category as for the phase. Yoursystem administrator must first assign the categorynames.
Contact/Telephone Name and telephone number of the contact personresponsible for the control plan
Date of First Release Date on which the control plan was released for the firsttime
Part Number/Last Change Status Number of the system to be checked, the assembly,the subgroup, or single parts, as well as the status ofthe last change made
Core Team Name of the team responsible for the most recent validcontrol plan
Date/Release by Customer Dev. Date on which the responsible developmentdepartment of the customer released the control planEnter data here only if a release is required.
Part Name/Description Name and description of the product to be checked
Vendor/Location/Release/Date Date on which the responsible production location ofthe customer released the control plan Enter data hereonly if a release is required.
Date/Release by Customer QM Date on which the responsible quality department ofthe customer released the control plan Enter data hereonly if a release is required.
Vendor Location Name of the vendor and business area, location, ordepartment that is responsible for carrying out thecontrol plan
Vendor Key Vendor identification key
Date of Further Release (Optional) Date of further releases, if required
2. Once you have entered all your data, release the control plan by choosing Releasefrom the Change Status dropdown box.
The system changes the status to Released.
If you want to protect the control plan from changes, choose Lock from theChange Status dropdown box. You can unlock the control plan later on.
Once you have completed the project or the control plan, choose Complete.This completes the control plan. You cannot make any more changes or createnew versions.
Creating a Process Step...
1. Choose the Items tab page.
2. In the dropdown box in the top left area of the screen, choose Process Step and thenchoose Create.
The system creates the entry in the Items area and assigns a process numberautomatically. You can change the process number.

SAP Online Help 12.09.2008
Collaboration Projects 195
3. Select a process name.
4. Enter a process description in the Additional Data/Results area.
The area is only ready for input if you have created a process step and if thecontrol plan is released.
Creating Tools...
1. Select the process step for which you want to create a tool.
2. In the dropdown box in the top left area of the screen, choose Tool(s) and then chooseCreate.
The system creates an entry below the selected process step with the same processnumber as the process step, automatically assigns a sequence number to the tool(ToolSeqNo.), and prepares the required fields for input. You can change the sequencenumber.
3. Choose the tool set you require under Tool Set.
4. In the Additional Data/Results area, enter the tool, device, or material you use to checkcharacteristics.
Creating Characteristics...
1. Select the tool for which you want to create a characteristic
2. In the dropdown box in the top left area of the screen, choose Char. and then chooseCreate.
The system creates an entry below the selected tool with the same process numberand sequence number (ToolSeqNo.) as the tool, and prepares the required fields forinput.
3. Select a product or a process characteristic.
4. You can specify only one of the two characteristics but you must specify one. If, forexample, you specified a process characteristic, the system deactivates the ProductCharacteristic input field. If you want to change the setting, you first have to delete thevalue in the Process Characteristic input field so that the system activates the field forthe product characteristic.
5. Enter a unique characteristic identification (Char.ID), the category of the characteristic(Class.Char.), and the system group.
6. If you are using master inspection characteristics from the QM system, enter the plantof the master inspection characteristic.
7. Enter the following additional data in the Additional Data/Results area:
Control method
Procedure used to monitor a step
Response plan
Specifies which measures should be taken to prevent the production of productswith errors
8. Enter the results in the Additional Data/Results area.
9. Save your entries.
See also:
Creating a Control Plan Version [Seite 196]

SAP Online Help 12.09.2008
Collaboration Projects 196
Creating Objects in the Control Plan [Seite 196]
Creating a Control Plan VersionUseYou can create different versions of a control plan. Only the latest version is ready for input.You can open all versions from the Control Plans tab page.
PrerequisitesYou opened a control plan in the Control Plans initial view. You can only create a new controlplan version for released control plans.
Procedure...
Note that you can no longer change the old version once you have created thenew version.
1. Choose one of the following options:
a. Create version
The system creates an empty version of the current control plan. All entries youpreviously made are deleted in the new version.
b. Create version with template
The system creates a new version of the current control plan and copies allentries you previously made.
2. Complete the new control plan version (see Editing a Control Plan [Seite 193]).
3. Save your entries.
Creating Objects in the Control PlanUseYou can generate inspection plans and routings in an SAP system from the control plan. Yousystem administrator specifies:
Whether inspection plans only, routings only, or both are created
How many plans are generated per control plan
Whether an object link should be generated automatically for the new plan on creation
You can generate inspection plans and routings only once for a control plan. If you want togenerate them a second time, you must first create a new control plan version [Seite 196]....
PrerequisitesYour system administrator activated the generation function in Customizing forCollaboration Projects: See the BAdI: Object Creation in Control Plan activity. If this isnot done, the corresponding pushbuttons are not active.

SAP Online Help 12.09.2008
Collaboration Projects 197
You can only generate objects for control plans that have been released.
You opened a control plan in the Control Plans initial view.
Procedure1. Set a filter.
The filter determines which data from the control plan is transferred.
2. Choose Generate Objects.
You receive a success message once the system has created the object in the SAPsystem.
3. Call the SAP system to call the inspection plans or routings and edit them. The relevantfunctions can be found in the SAP menu under Logistics Quality ManagementQuality Planning Inspection Planning Inspection Plan and Routing.
Work with DocumentsUseYou can manage your documents in cProjects using both the cProjects documentmanagement function and document management (SAP DMS).
If you are working with initiatives, "project" is synonymous with "initiative" in thefollowing sections.
We recommend that you manage your documents with DMS in the followingcases:
You are already using DMS and require access to the existingDMS documents.
You want to exchange your documents between DMS andcProjects.
You want to map your project structure via the DMS documentstructure.
You want to classify your documents.
In all other cases, we recommend that you use the document managementfunction in cProjects. This also gives you the option of managing yourdocuments in Microsoft® Windows File Explorer.
See also:
Documents [Seite 198]
Integration with SAP Document Management [Seite 203]

SAP Online Help 12.09.2008
Collaboration Projects 198
Documents
Information carriers that describe objects such as technical drawings, graphics, programs, ortext documents.
You can assign documents to each project element. You can structure the documents indocument folders. You can use templates to create documents.
Structure
A document consists of the following elements:
Document data, for example, document name, document description, or documentstatus
File data, for example, file name, file type, or file size
More InformationAssigning Documents and Creating Folders
Editing the Document or Folder
Using Document Templates
Content Versions
Tabular Document View
Integration with a WebDAV Client
Assigning Documents and Creating FoldersUseYou can check in the documents that you assign to a project element to document folders, toget a better overview. You can protect each document and folder from unauthorized accessusing authorizations [Seite 242].
Prerequisites You created the documents that you want to assign to a project element, as files.
You are in the detail view of a project element on the Documents tab page.
ProcedureCreating a Folder...
1. In the structure tree, navigate to the project element for which you want to create afolder.
The system displays the project element as the top node in the Document Foldercolumn.
2. If folders already exist, navigate to the place where you wish to insert the new folder.

SAP Online Help 12.09.2008
Collaboration Projects 199
3. Choose New Folder.
4. In the New Folder area, enter a different folder name, if necessary.
Note that the following characters should not be used in the name:
ü ä ö Ü Ä Ö ß ? ! " § / ( ) = { } [ ] \ * < >
5. Choose Continue.
The system creates your new folder. You can then edit [Seite 199] the new folder. Saveyour entries.
...
Assigning a Document1. In the structure tree, navigate to the project element to which you want to assign a
document.
2. In the Document Folder column, navigate to the place where you want to assign adocument.
3. Choose New Document.
4. If you want to check in the document to the system, enter the file path in the File fieldand then choose Check In.
5. If you want to create a link to the document, enter the file path in the URL field and thenchoose Check In As URL.
The system switches to the detailed information for the document and copies thedocument name to the document data.
6. Change the document name, if required.
Note that the following characters should not be used in the name:
ü ä ö Ü Ä Ö ß ? ! " § / ( ) = { } [ ] \ * < >
7. Enter a Description and assign a Status.
8. Save your entries.
ResultThe system checks in the document as a new content version [Seite 202]. You can edit thedocument [Seite 199] and assign authorizations [Seite 245].
Editing the Document or FolderUse
You can edit documents as follows:
Change document and folder data
Delete
Copy and paste
Cut and paste
Download documents

SAP Online Help 12.09.2008
Collaboration Projects 200
Upload documents
Display and change linked files
PrerequisitesYou assigned documents and created folders [Seite 198] for a project element.
You are editing a project element and are on the Documents tab page.
ProcedureChanging Document and Folder Data...
1. In the Document Folder column, navigate to a document or folder.
2. Change the data.
3. Save your entries.
Deleting a Document or Folder
Note that when you delete a folder, the system also deletes all subdocumentsand subfolders.
...
1. In the Document Folder column, navigate to a document or folder.
2. Choose Delete.
3. Confirm that you want to delete the object.
4. Save your entries.
Copying and Pasting a Document or Folder...
1. In the Document Folder column, navigate to a document or folder.
2. Choose Copy.
3. In the Document Folder column, navigate to the place where you want to insert thefolder or document.
4. Choose Paste.
The system creates a copy of the document there.
5. Save your entries.
Cutting and Pasting a Document or Folder...
1. In the Document Folder column, navigate to a document or folder.
2. Choose Cut.
3. In the Document Folder column, navigate to the place where you want to insert thefolder or document.
4. Choose Paste.
The system moves the document.
5. Save your entries.
Downloading Documents to Your PCYou can download a document to your local PC and lock it to prevent other users frommaking changes to it....

SAP Online Help 12.09.2008
Collaboration Projects 201
1. In the Document Folder column, navigate to a document.
2. Select the indicator Document cannot be changed by other users to lock the documentso that other users cannot make changes to the file data.
If you do not select this indicator, other users can overwrite your changes.
3. Save the document to your hard drive by clicking the secondary mouse button on thefile name and selecting the appropriate function from the context menu.
If you want to check this document in again later on, you must remember whereyou saved it.
Displaying and Changing Linked Files...
1. In the Document Folder column, navigate to a document.
2. In the File Data area, click the file name.
The system opens the file for editing.
3. Make changes, if required, and save the file to your hard drive.
If you want to check this file in again later on, you must remember where yousaved it.
Uploading Documents from Your PC...
1. In the Document Folder column, navigate to a document.
2. Choose Create Version.
3. Choose Browse and select the file that you want to check in.
4. Select Create New Version to create a new content version [Seite 202], or selectOverwrite Current Version.
5. Choose Check In to check the document in to the system, or choose Check In As URLto create a link to the document.
The system switches to the detailed information for the document and copies thedocument name to the document data.
6. Enter a Description, if required, and enter the Status.
7. Deselect the indicator Document cannot be changed by other users so that other userscan make changes to the document or check the document out.
8. Save your entries.
Using Document TemplatesPrerequisites
In the Templates initial view, you created and released document templates (seeCreating a Template [Seite 36]).
You are in the editing view of a project element and you are on the Documents tabpage.

SAP Online Help 12.09.2008
Collaboration Projects 202
Procedure...
1. Choose Templates.
In the left screen area, you can see your document folder and in the right screen area,you can see the document templates.
2. In the Doc. Templates area, position your cursor on the document that you want to useas a template or on the folder with the documents that you want to use as templates.
3. In the Document Folder area, position your cursor on the folder to which you want tocopy the template or the folder with the templates.
4. To create a link from the folder to the template, choose Create Link.
5. To copy the template or the folder with the templates to this folder, choose Copy.
6. Save your entries.
Content VersionsUseWhen you upload a document from your local PC to cProjects or check in a document youhave already checked in again, you can create new content versions of this document.
PrerequisitesYou opened a project element for editing and are on the Documents tab page under ContentVersions.
FeaturesYou can view all the versions of your document that you have already created.
You can display the individual versions by clicking the file name.
The system marks the current version of the document in the Act. column.
Tabular Document ViewUseThe tabular document view offers you a quick overview of all folders and documents assignedto a project element.
FeaturesYou can branch to the document using by choosing the file name link.

SAP Online Help 12.09.2008
Collaboration Projects 203
Integration with SAP Document ManagementUseYou can manage your documents using document management (SAP DMS) and exchangedocuments between DMS and cProjects.
Document management (SAP DMS) corresponds to the SAP applicationcomponent CA-DMS. It is part of SAP PLM and SAP ERP.
IntegrationYou can create collaborations [Extern] straight from the documents in SAP DMS or adddocuments to existing collaborations. You can insert documents from an existing collaborationin the document structure of a DMS folder that is linked to a project element.
PrerequisitesYour system administrator has permitted the use of SAP document management forthe current project type (see Customizing for Collaboration Projects under StructureDefine Project Types).
We recommend that you install SAP Easy Document Management 3.00 or a higherrelease on your PC.
FeaturesYou can link project elements to existing document info records via an SAP DMSobject link.
You can create new document info records (with or without templates) and link them toproject elements simultaneously.
You can exchange documents between cProjects and SAP DMS.
You can open the application by clicking the document number from the documentstructure display or the link overview. Then click the file name to display the documentor download it to your PC.
You can group the document structures for the individual project elements together toform an entire document structure that reflects the project structure. Then use theEntire Document Structure function to insert a document structure in documentstructures that are linked to superior project elements. If you display the documentstructure of a document info record that is linked to a superior project element, you willsee all the document structures of lower-level project elements.
You create an entire document structure for a project status report for a programand insert all project status reports of the assigned projects in the structure.
Furthermore, you can include a document structure in the folder of an SAP DMSproject status report and send it together with the report.
See also:
Working with Document Info Records [Seite 204]

SAP Online Help 12.09.2008
Collaboration Projects 204
Working with Document Info RecordsPrerequisites...
You are on the level of the required project element on the SAP DMS tab page in thedocument info records overview.
If a single document info record is linked to this project element, the systemdisplays the document structure straight away when you open the tab page. Ifthis is the case, choose Close Document Structure to go to the overview. Youcan only create new links from here.
ProcedureCreating a Document Link
1. Choose Create.
2. The system guides you through the creation process. Enter the required data and thenchoose Continue on each screen.
If you create a link to an existing document info record, note that the link is onlysaved when you save the project. If you leave the project without saving afteryou have created a link, the link will not be saved.
Note the following when you create a link to a new document info record:
The new info record with the link is only saved when you save theproject. If you leave the project after creating the link withoutsaving, the info record with the link will not exist in SAP DMS.
Depending on the settings made by your system administrator,the system either displays the info record ID as soon as you havesaved or only after you have chosen Refresh.
3. Once you reach the overview again, save your project.
If the first link you create is a link to an existing document info record, thesystem displays the document structure as soon as you have selected thedocument info record and does not automatically return to the overview.
Changing the Name of a Linked Document Info Record...
1. Select a document link.
2. Choose Change.
3. Enter the new name and choose Continue.
Deleting a Document Link...
1. Select a document link.
2. Choose Delete.
The system deletes the link. Note that the document info record still exists in DMS.

SAP Online Help 12.09.2008
Collaboration Projects 205
Displaying or Editing a Document Info Record...
1. To display the data of the document info record, click on the identification.
2. To open the document info record in SAP DMS for editing, click Open in the Applicationcolumn.
Displaying the Document Structure of a Document Info Record...
1. Select a document link.
2. Choose Display Document Structure.
3. To open the document info record for editing from the document structure in SAP DMS,click on the document number.
4. To display the original of a document info record from the document structure, click onthe file name (if it exists).
Including a Document Info Record in a Document Structure or Deleting it...
1. Select a document link.
2. Choose Entire Document Structure.
3. Choose whether you want to insert the document info record in the document structureof a superior project element or delete it from the document structure.
If you are in a project definition for which you have already created a projectstatus report in SAP DMS, the document structure of this status report is thesuperior document structure.
The system proposes all superior project elements and the document structures thatbelong to them.
4. Select a document structure and choose Continue.
5. Save the project.
The system inserts the document info record in the document structure or deletes itfrom the document structure. If you display the superior document structure, it might benecessary to choose Read SAP DMS document structure again.
Transferring Documents Between cProjects and SAP DMS....
1. Select a document link.
2. Choose Transfer Documents.
3. If necessary, choose whether you want to transfer project status reports or documentsto the project element you currently in.
This query appears in the project definition only and then only if you store your statusreports in cProjects. Otherwise, the system displays the overview of the cProjectsdocuments of the project element.
4. Transfer the required documents.
For more information, see Transferring Documents [Seite 221].
Displaying Threshold Value Violations for a Document Info Record...
1. Select a document link.
2. Choose Threshold Values.
The system displays the threshold value violations for this document link. You can set amanual severity here.

SAP Online Help 12.09.2008
Collaboration Projects 206
3. To close the area, choose Hide.
See also:
Integration with SAP Document Management [Seite 203]
Integration with a WebDAV ClientPurposeThe WebDAV interface (Web-Based Distributed Authoring and Versioning) enables aconnection to be set up between cProjects or cFolders and SAP Knowledge Management inthe SAP NetWeaver Portal. It also allows integration with Microsoft Windows File Explorer.
This connection enables project members from a cProjects or cFolders project to edit theproject and collaboration hierarchy structures contained in a cProjects or cFolders repository,using an external WebDAV-compatible application.
The connection to SAP Knowledge Management in the SAP NetWeaver Portal allowscProjects or cFolders documents to be used as a data source in the portal. You canthen process this data using functions provided by SAP Knowledge Management (forexample, the cross-repository search function).
The integration with Microsoft Windows File Explorer provides users with a userinterface comparable to the user interface of a file server. Employees can thennavigate in a familiar working environment within the nested structure elements andevaluate and edit the resources that exist there (for example, folders and documents).
IntegrationWebDAV ApplicationsThe standard system supports two WebDAV applications:
WebDAV repository manager in SAP Knowledge Management (application componentEP-KM)
You install a SAP NetWeaver portal with SAP Knowledge Management (KM) andconfigure a WebDAV repository manager for the cProjects or cFolders repository inContent Management in KM. Your system administrator for the cProjects or cFolderssystem defines the WebDAV access in Customizing for cFolders or cProjects.
SAP NetWeaver portal drive
This WebDAV application connects Microsoft Windows File Explorer to a configuredcProjects or cFolders repository.
You install the portal drive on your PC. Your system administrator for the cProjects orcFolders system defines the WebDAV access in Customizing for cFolders or cProjects.
For more information about the necessary configuration steps, see Technical Description andConfiguration Information [Seite 209].
For more information about the portal drive connection, see SAP Library for SAP NetWeaverunder Getting Started – Using SAP Software Working with Tools and Features Workingwith Folders Working with Folders in Windows (Portal Drive) Personalizing the PortalDrive Connect.

SAP Online Help 12.09.2008
Collaboration Projects 207
LanguageA WebDAV application creates a session in the cProjects or cFolders system. Language-dependent texts are output in the language of the current session in the cProjects or cFolderssystem.
If the WebDAV request is issued by KM in the portal, this session uses the languagethat is set up for the user in the portal, irrespective of the user-specific language settingin the cProjects or cFolders system.
If the WebDAV request comes from the portal drive, the user-specific language settingin the cProjects or cFolders system determines the language of the session. You makethe language setting by choosing System User Profile Own Data.
AuthorizationsA WebDAV application must authenticate itself each time it sends a request to the cProjectsor cFolders system. The user must enter his or her user name and password for the system.
Only those users who can log on directly to the cProjects or cFolders system have access tothe cProjects or cFolders repository via the WebDAV interface.
The authorizations for the user are checked in the cProjects or cFolders system:
The user only has access to cProjects or cFolders data via the WebDAV interface forwhich he or she has read authorization.
A user who has read authorization for a project element in cProjects should also haveread authorization for all the subfolders and subdocuments of this project element.Otherwise, the WebDAV interface cannot transfer the data correctly.
If the user wants to create, change, or delete data via the external WebDAVapplication, he or she requires special authorization in the cProjects or cFolderssystem.
FeaturesEvaluating the Hierarchy StructuresThe following overview contains the elements of the hierarchy structures from cProjects orcFolders that you can access via the WebDAV interface.
Structure Elements
Application Structure Elements
Project structure fromcProjects
Project elements: project definition, phase, checklist, checklistitem, task
Folder
DocumentThe system only displays documents that are also displayedon the Documents tab page in the standard system.
Collaboration structure fromcFolders
Collaboration, work area
Root folder, folder
Document
You have the option of connecting a WebDAV-compatible application to an entry object insuch a way that only the hierarchy is visible below the entry object. For more information, seeTechnical Description and Configuration Information [Seite 209].
Entry Objects

SAP Online Help 12.09.2008
Collaboration Projects 208
Application Entry Objects
Project structure from cProjects cProjects repository
Project elements: project definition, phase, checklist,checklist item, task
Collaboration structure fromcFolders
cFolders repository
Collaboration, work area, root folder, folder
Editing cProjects and cFolders StructuresIn the WebDAV application, you can navigate in the project and collaboration structure andaccess the structure elements (for example, documents) contained there.
For more information, see
Editing Functions for Project and Collaboration Structures [Seite 214]
Function Details [Seite 216]
ConstraintsIn order for the external WebDAV-compatible application to process all data from thecProjects or cFolders repository, note the following recommendations:
Documents
Document names can have a maximum of 35 characters.
In cProjects, the name of a folder can have a maximum of 35 characters.If documents or folders are created whose names have more than 35characters, the name is cut off after 35 characters and is uniquely defined by anumber. However, this is not WebDAV-compliant and can lead to names beingmisinterpreted by the WebDAV application.
Archived documents can no longer be accessed via the WebDAV interface.
cProjects:DMS documents, status reports and documents that are only checked in as alink cannot be accessed via the WebDAV interface.
cFoldersDocuments without a version (file) cannot be accessed via the WebDAVinterface.
Only the newest version of documents that have several versions can beaccessed via the WebDAV interface. A new version of the document is createdeach time you save.
Portal drive
This WebDAV application can currently only process paths of less than 240characters. If, for example, you specify a naming convention of 30 charactersfor each hierarchy level, you can work with a structure depth of eight levels.
This WebDAV application can currently process a URL of up to 180 charactersas the WebDAV URL for an entry object.
The date format for the Session Timeout is not WebDAV-compliant. If you useWebDAV applications that are not supported by SAP, multiple sessions are created fora user in the cProjects or cFolders system.

SAP Online Help 12.09.2008
Collaboration Projects 209
The WebDAV interface of the cProjects or cFolders repository does not support all thefunctions that are provided on the user interface of the WebDAV application. For a listof the functions, see Function Details [Seite 216].
The following special characters may have a special meaning in the URL: %, &, /, \,+, #, <, and spaces. Therefore, these special characters must not appear inthe names of the following objects: collaborations, work areas, root folders, projectelements, folders, and documents.
Technical Description and ConfigurationInformationPurposeIn addition to installing a SAP NetWeaver portal drive or a SAP NetWeaver portal asWebDAV clients, you have to make a number of settings in the cProjects or cFolders system.This section contains information about the configuration of the WebDAV interface in thecProjects or cFolders system and the configuration of a WebDAV repository manager in theportal.
PrerequisitesYou have to configure the following data in the cProjects or cFolders system:
You have to specify a server and a port for the HTTP protocol in the InternetCommunication Manager. For more information, see SAP Library underAdministration of the Internet Communication Manager.
You have to set up the HTTP communication with the SAP system as the server(transaction SICF Maintain Services). For more information, see SAP Library underComponents of SAP Communication Technology Communication Between ABAPand Non-ABAP Technologies Internet Communication Framework InternetCommunication Framework Administration: HTTP Communication Using the SAPSystem Administration: HTTP Communication Using the SAP System as a Server.
The standard system contains the host cpro in the HTTP service tree in thedefault_host sap entry. Activate the host cpro (WebDAV Interfacefor cProject Suite).
In the cross-client settings, for example, the timeout for the session is specifiedas being ten minutes in the cFolders and cProjects system. This means that asession in the cFolders or cProjects system is deleted if it has not been used formore than ten minutes.
For more information, see SAP Library under Activating an SICF Service.
You use an external alias to make the settings for a particular client. ChooseExternal Aliases and create a new alias for the cpro node. You can changethe timeout predefined in the cpro host from the standard system.
If you enter a high value, there will be a large number of active sessions in thestandard system, some of which may no longer be in use and this puts anunnecessary strain on the system performance.

SAP Online Help 12.09.2008
Collaboration Projects 210
If you enter a low value, the data that was buffered in a session is very quicklylost. For example, the WebDAV interface programs then have to read data fromthe database more frequently and this is detrimental to the system performance.
For more information, see SAP Library under Creating an Alias and Logging onto an SAP Web Application Server.
Process FlowExecuting IMG Activities in cProjects and cFolders
You make the system settings either in Customizing for cProjects or for cFolders. CallCustomizing in the SAP Reference IMG as follows:
cProjects
Choose Collaboration Projects Documents Settings for the WebDAV Interface.
cFolders
Choose Collaboration Folders Settings for the WebDAV Interface.
Carry out the following activities:
Edit External IDs for the WebDAV Entry Objects (optional)
Objects that can be used as entry objects [Seite 206] for the WebDAV interface areassigned a unique number (external ID). This number is part of the URL required forcommunication with the WebDAV application. Note the information in theImplementation Guide (IMG).
Make Settings for the WebDAV Interface (mandatory)
In this IMG activity, you set up the communication between a WebDAV application anda cProjects and/or cFolders repository. The following data is part of the settings:
WebDAV URL (mandatory):
You enter the WebDAV URL that is valid for the cProjects and cFoldersrepository according to predefined conventions. For more information about theWebDAV URL, see Defining the WebDAV URL [Seite 212] and theImplementation Guide (IMG).
Refresh time in seconds (optional)
The refresh time specifies the maximum amount of time that lapses before thebuffered data is read again from the database.If you do not enter a value for the refresh time, the buffered data is not readagain on a regular basis, but only if an error occurs.
Index service (only for cProjects, optional):
This setting is only relevant if you use Knowledge Management in the SAPNetWeaver Portal as a WebDAV application.
In the standard process, a user only sees those projects below the entry objectof the cProjects structure in which he or she is participating and for which theproject work has not yet been completed.For indexing (search function), a user is required who has read authorization forall the projects below the entry node. You specify this user here. In the portal,you have to map the user who carries out indexing to the user you entered forthe index service in the cProjects system.
Indicator for activating the WebDAV interface for cProjects or cFolders(mandatory)

SAP Online Help 12.09.2008
Collaboration Projects 211
Implementing Enhancement Spots (BAdIs)There is a BAdI for both cProjects and cFolders that you use to influence the selection of data(attributes of the objects) before transferring the data to the WebDAV application. TheseBAdIs provide methods that you use to perform the following actions:
Delete attributes that the standard system transfers to an object
Change values of an attribute
Add more attributes
For more information about creating enhancement implementations, see the ImplementationGuide (IMG).
Configuring WebDAV Applications
WebDAV Repository Manager in SAP Knowledge Management
In order to have a cProjects or cFolders repository as a data source in the portal, you have toconfigure a WebDAV repository manager in the portal.
For more information, see Configuration of a WebDAV Repository Manager [Seite 211].
Portal DriveThe portal drive is a desktop application that must be installed and configured on eachcomputer on which you want to use it. The user must have administrator rights on thecomputer on which you want to install the portal drive. Once the portal drive has beeninstalled, the user does not need any administrator rights to use the software.
For more information, see SAP Library under Introduction to Using SAP Software Workingwith Tools and Functions Working with Documents and Folders Working with Folders inWindows (Portal Drive).
Configuration of a WebDAV Repository ManagerConfigure a WebDAV repository manager in the portal, using the following steps:.........
1. Create a memory cache.
For more information, see SAP Library under Knowledge ManagementAdministration Guide System Administration System Configuration ContentManagement Configuration Utilities Caches and Components and Their Caches.
Choose Singleton. Enter a similar value to the refresh time for the DefaultTime-to-Live. See Technical Description and Configuration Information [Seite209].
The Capacity value depends on the number of frequently used resources withinthe repository.
2. Create an HTTP system for the cProjects or cFolders system.
For more information, see SAP Library under Knowledge ManagementAdministration Guide System Administration System Configuration ContentManagement Configuration Global Services System Landscape ServiceSystem Landscape Definitions HTTP System.
Enter a System ID for your cProjects or cFolders system (for example, QPL).

SAP Online Help 12.09.2008
Collaboration Projects 212
Enter the Server URL in the following format:<protocol>://<server>:<port>(for example, http://pwdf0500.wdf.sap.corp:44331).
Create a system in the portal system landscape, in addition. Enter an alias for thesystem. This alias must match the system ID for your cProjects or cFolders system.
For more information, see SAP Library under Knowledge ManagementAdministration Guide System Administration System Configuration ContentManagement Configuration Repositories and Repository Managers ExternalRepositories WebDAV Repository Manager Creating a System in the PortalSystem Landscape.
3. Create a WebDAV repository manager and configure it.
For more information, see SAP Library under Knowledge ManagementAdministration Guide System Administration System Configuration ContentManagement Configuration Repositories and Repository Managers ExternalRepositories WebDAV Repository Manager and the subdocuments of this topic.
Enter the following data:
Name and Prefix
System ID (Landscape Service)
Enter the ID of the HTTP system.
Cache
Enter the memory cache.
System Path
Enter the WebDAV URL part after the port.
The WebDAV URL of the cProjects repository ishttp://pwdf0500.wdf.sap.corp:44331/qpl090-webdav/dpr
In this case, enter the following value as the System Path:/qpl090-webdav/dpr
The WebDAV URL of the cFolders repository ishttp://pwdf0500.wdf.sap.corp:44331/qpl090-webdav/cfx/cwn
In this case, enter the following value as the System Path:/qpl090-webdav/cfx/cwn
4. If you want to assign a user, you have to create a system in the portal systemlandscape with the type HTTP System.Use an alias that is identical to the system ID of the HTTP system (see step 2). Enterthe admin user in the User Management property category.
Defining the WebDAV URLYou use the WebDAV URL to link a WebDAV application to an entry object from the cProjectsor cFolders system. You insert this WebDAV URL in the specified field in the WebDAVapplication.

SAP Online Help 12.09.2008
Collaboration Projects 213
WebDAV URL in CustomizingYou specify the first part of the WebDAV URL in Customizing for Collaboration Projects andCustomizing for Collaboration Folders by choosing the activity Make Settings for the WebDAVInterface.
You can use three fields to define the URL and you can enter a maximum of 132characters in each field.
The following convention applies to the URL:<protocol>://<server>:<port>/sap/cpro
Example:http://pwdf0500.wdf.sap.corp:44331/sap/cpro
You define a client-specific URL alias for /sap/cpro.
Example: system QPL and client 090:http://pwdf0500.wdf.sap.corp:44331/qpl090-webdav
For more information, see Technical Description and Configuration Information [Seite 209].
WebDAV URL for Entry ObjectscProjects.........
1. If you want to use a project element (project definition, phase, task, checklist, orchecklist item) as an entry object and you require the WebDAV URL that belongs to it,navigate to the relevant project element in the cProjects application.
2. Choose the Documents tab page and click WebDAV....
A popup appears that displays the WebDAV URL. See Editing Project andCollaboration Structures [Seite 218].
cFolders...
1. If you want to use a collaboration, work area, root folder, or a cFolders folder as anentry object and you require the WebDAV URL that belongs to it, navigate to therelevant object in the cFolders application.
2. Under Additional Functions, choose WebDAV URL.
A popup appears that displays the WebDAV URL. See Editing Project andCollaboration Structures [Seite 218].
WebDAV URL for the Entire RepositoryIf you want to use the entire cProjects or cFolders repository as an entry object, you have toextend the first part of the WebDAV URL.
The following overview describes how to add an extension to the URL.
Application Extension of URL
cProjects Add the following character string to the first part of theWebDAV URL that you defined in Customizing: /dpr
Example:
http://pwdf0500.wdf.sap.corp:44331/qpl090-webdav/dpr

SAP Online Help 12.09.2008
Collaboration Projects 214
cFolders Add the following character string to the first part of theWebDAV URL: /cfx/cwn
Example:
http://pwdf0500.wdf.sap.corp:44331/qpl090-webdav/cfx/cwn
Business Package for Design Collaboration 60.2
If you are using this business package and have integratedcollaborations from a cFolders 3.1 system in the collaborationroom, note the following:
In order to avoid losing links to the collaborations when youreplace the cFolders repository manager from the businesspackage named above with the WebDAV repository manager,add the following character string to the WebDAV URL:/cfx
Example:
http://pwdf0500.wdf.sap.corp:44331/qpl090-webdav/cfx
Editing Functions for Project and CollaborationStructuresUseThe project and collaboration structures in a cProjects or cFolders repository can be editedusing external WebDAV-compatible applications.
If you have installed a portal drive, you can conveniently edit these structures inthe familiar environment of the Microsoft Windows File Explorer user interface.
If you have configured a WebDAV repository manager in the SAP NetWeaverPortal for the cProjects or cFolders repository, you can edit these structures withthe user interface in Knowledge Management. For example, you can set up aTREX connection via the portal for the document search which ensures quickaccess to the documents in a cProjects or cFolders repository.
PrerequisitesSee Integration with a WebDAV Client [Seite 206] and Technical Description andConfiguration Information [Seite 209].
FeaturesThe following tables list the functions you can use to edit the objects from the projectstructures and collaboration structures. For more information about the functions, seeFunction Details [Seite 216].
Editing Functions for cProjects Objects
a. Function b. cProjects Objects
c. Create d. Folder

SAP Online Help 12.09.2008
Collaboration Projects 215
e. Document
f. Change,delete, rename
g. Folder
h. Document
i. Copy (to anexternalsystem):
j. from cProjectsto any localdirectory onyour PC orserver
k. Project elements are copied in the same way asnormal folders: project, phase, task, checklist,checklist item
l. Folder
m. Document
n. Copy (from anexternalsystem):
o. from any localdirectory onyour PC orserver tocProjects
p. Folder
q. Document
r. Lock s. Document
Editing Functions for cFolders Objects
Function cFolders Objects
Create, change, delete Folder
Document
Rename Root folder
Folder
Document
Copy (to an externalsystem)
The following objects are copied in the same way as normalfolders: collaboration, work area, root folder
Folder
Document
Copy (from an externalsystem)
Folder
Document
Lock Document
ActivitiesWebDAV Repository Manager
If you have configured a WebDAV repository manager in the portal for an entry object in thecProjects or cFolders system, you can edit the objects below it using the standard KnowledgeManagement functions.
Portal DriveIf you have installed a portal drive, you can link this external application to a cProjects orcFolders object and edit the objects below it.For more information, see Editing Project and Collaboration Structures [Seite 218].......

SAP Online Help 12.09.2008
Collaboration Projects 216
Function DetailsUseYou can edit the objects in the project and collaboration structures using a number of differentfunctions. For an overview of the objects you can edit using these functions, see EditingFunctions for Project and Collaboration Structures [Seite 214].
FeaturesThe WebDAV interface of the cProjects or cFolders repository does not support all thefunctions that are provided on the user interface of the WebDAV application.
The following table displays an overview of the functions you can execute via the WebDAVinterface.
Function Details
Create You can create an object (for example, a folder or document) belowa project element or folder.
You cannot create a folder or document directly below acollaboration or work area.
See Objects with the Same Name [Seite 217]
Change You can extend an existing structure by creating a new object.
You can edit and save an existing document. This process createsa new version of the document in the cProjects or cFoldersrepository.
You cannot change any attributes (status, description, and so on).
Delete You delete an object.
When you delete a folder, the system ignores the locks placed onthe subdocuments.Since the system does not check whether a subdocument islocked, it deletes all the subobjects including locked documents.Therefore, before you delete an object, check whether all thesubdocuments can be deleted too.
Rename You can rename root folders, folders, and documents.See Objects with the Same Name [Seite 217]
Copy (to an externalsystem)
You use a WebDAV client to copy an object from a cProjects orcFolders repository to an external system (for example, a local filesystem).
The WebDAV client first loads all the folders and files that are to becopied. It then writes them to the target system one by one.
Copy (from an externalsystem)
You use a WebDAV client to copy an object from an externalsystem (for example, a local file system) to a cProjects or cFoldersrepository.
The WebDAV client first loads all the folders and files that are to becopied. It then writes them to the target system one by one.
Lock You can lock documents. To do this, you need at least writeauthorization for the document. Note the information under Delete.

SAP Online Help 12.09.2008
Collaboration Projects 217
Objects with the Same NameThe WebDAV protocol specifies that each object in a collection (an object that can containother objects) has a unique name.
If, objects with the same name are permitted, do not use the WebDAV interface.
Displaying Existing Objects via the WebDAV InterfaceIf two documents or folders with the same name exist in a single folder, this causes errors inWebDAV applications.
In order to identify the existing objects correctly, the WebDAV interface uses thefollowing method to ensure that the names of project elements (cProjects) andcollaborations and work areas (cFolders) are unique: The object type and a uniquenumber are added on to the end of the name after a tilde.
The user must ensure that no folder names or document names appear more thanonce within a single folder.
Creating and Renaming Objects via the WebDAV InterfaceWhen folders or documents are created or renamed via the WebDAV interface, the WebDAVapplication checks whether the new name is unique.
This check only produces the correct result if the user has all the necessary authorizationsand can see all the objects in the folder.
For example, the user is editing folder A. This folder contains the document AB.doc.The user does not have read authorization for this object and therefore, cannot see it.If this user wants to create a new document with the name AB.doc in folder A, he orshe can do this without receiving any error messages.
A user who has read authorization for all the objects in folder A (for example, the userfor indexing) will then receive an error message for the content of folder A.
We recommend that all users who edit documents and folders in a collectionhave read authorization for all the objects in this collection.
Creating and Renaming Objects via cProjects and cFolderscProjectsYou cannot use the user interface of the cProjects application to create and changedocuments and folders that have the same name.
cFoldersIn the standard system, you can create folders with the same name by means of the userinterface of the cFolders application or using the APIs.
If you want to avoid duplicate names, you can implement and activate theCFX_UNIQUE_FOL_NAMES BAdI in Customizing for Collaboration Folders. If you dothis, the system issues an error message when the user tries to create a folder with thesame name as an existing one. The default implementation supplied by the systemcan be found in the class CFX_UNIQUE_FOL_NAMES_DEFAULT.
For more information, see Customizing for Collaboration Folders under Business Add-Ins (BAdIs) Check Whether Duplicate Folder Names Can Be Created.

SAP Online Help 12.09.2008
Collaboration Projects 218
If you want to check whether folders with the same name occur in the same collectionin your cFolders repository, use the CFX_UNIQUE_FOLDER_NAMES report. Thisreport also gives you the option of automatically renaming folders that have the samename. This ensures that the names are unique.
It is advisable to put organizational measures in place to ensure that documents arealways assigned unique names.
Editing Project and Collaboration StructuresPurposeYou use an external WebDAV-compatible application, for example, a portal drive, to edit theproject and collaboration structures.
PrerequisitesSee Integration with a WebDAV Client [Seite 206] and Technical Description andConfiguration Information [Seite 209].
Process Flow...
1. You display the object you want to edit in the external WebDAV application on the userinterface of the cProjects or cFolders system. This can be, for example, a projectelement, a folder, or a document.
2. Display the WebDAV URL. You call the WebDAV URL as follows:
cProjects
Choose WebDAV on the Documents tab page.
cFolders
Choose Additional Functions and then WebDAV URL in the application toolbar.
The system opens a separate window and displays the path for the WebDAV URL.
3. Copy the WebDAV URL to the clipboard.
4. Go to the WebDAV application and enter this WebDAV URL in the specified field. If, forexample, you set up a new connection between a portal drive and a cFolders folder,you have to enter this path as the server URL.
5. Depending on your WebDAV application, enter more data as required and start theconnection.
As soon as the external application sends a request to the cProjects or cFolderssystem, you enter your logon data to identify yourself for the cProjects or cFolderssystem.
If you are working in the portal, this is usually done by the portal itself, as youhave already authenticated your user here.
If you are working with a portal drive, you have to authenticate your user whenyou first connect to it. The portal drive then carries out the authentication foryou.
6. Edit the cProjects or cFolders objects using the user interface of the external WebDAVapplication. For example, create a new folder or a new document.
See Editing Functions for Project and Collaboration Structures [Seite 214].

SAP Online Help 12.09.2008
Collaboration Projects 219
7. The data from the external WebDAV application is transferred to the WebDAVapplication of the cProjects or cFolders system via the WebDAV interface.
Integration with cFoldersUseYou can use a collaboration [Extern] to exchange documents you created or assigned to aproject in cProjects or document management (DMS) with internal or external partners.
For more information about cFolders, see Design Collaboration with cFolders [Extern].
If you are working with initiatives, "project" is synonymous with "initiative" in thefollowing sections.
You cannot make any changes if you opened a snapshot.
Prerequisites...
1. You installed and configured cFolders.
2. Your system administrator has permitted the use of collaborations for the currentproject type (see Customizing for Collaboration Projects under Structure DefineProject Types).
FeaturesCreating a Collaboration [Seite 219]
Assigning an Existing Collaboration to a Project Element [Seite 220]
Transferring Documents [Seite 221]
Renaming a Collaboration or a Folder [Seite 222]
Maintaining a Collaboration [Seite 223]
Deleting a Link to a Collaboration [Seite 223]
Creating a CollaborationPrerequisites...
1. You installed and configured cFolders.
2. In Customizing for Collaboration Projects under Structure Define Project Types, youselected the cFolders checkbox in the Collaboration group box.
3. You are in the detail view of a project on the Collaborations tab page.
Procedure...
1. In the structure tree [Seite 41], select the project element for which you want to create acollaboration.
2. Choose Create.

SAP Online Help 12.09.2008
Collaboration Projects 220
3. Select the target system on which your cFolders application runs under cFoldersSystem, if required. If no target system is available, the system cannot create thecollaboration.
4. Change the name, if required.
5. Decide whether you want to use a collaborative scenario [Extern] or a competitivescenario [Extern].
6. If you want to use a different collaboration as a template for creating the newcollaboration, choose the template here.
This field only exists if collaborations already exist in cFolders, for which you haveauthorization and which are marked as templates (see Templates [Extern]).
7. Choose the source from which you want to assign documents to the collaboration.
You can use cProjects documents, cProjects status reports, DMS documents, or DMSstatus reports as the source. However, the last three are only available if thecorresponding documents already exist for the selected project element or the projecttype permits this function.
8. Create the collaboration in cFolders:
a. Choose Continue.
The system opens the view for transferring documents. You can transferdocuments straight away or later on (see Transferring Documents [Seite 221] ).
b. Save the collaboration.
The system creates the collaboration and displays the overview of thecollaborations again.
9. Save the project.
If you only save the collaboration, the assignment of the collaboration to aproject element in cProjects is lost.
Result
The collaboration is created in cFolders and assigned to a project element.
The collaboration inherits the authorizations [Seite 242] of the project element towhich it is assigned.
Assigning an Existing Collaboration to a ProjectElementUseYou can assign a collaboration or a folder of a collaboration to a project element, or link acollaboration or folder to a project element with a URL.
PrerequisitesIn Customizing for Collaboration Projects, you selected cFolders in the Collaboration groupbox under Define Project Types.
You are in the detail view of a project on the Collaborations tab page.

SAP Online Help 12.09.2008
Collaboration Projects 221
Procedure...
1. In the structure tree [Seite 41], select the project element to which you want to assign acollaboration.
2. Choose Assign Collaboration.
3. Select the target system on which your cFolders application runs under cFoldersSystem.
4. You can choose from two options (you can activate the other option by deleting thecurrent selection):
Assign Collaboration or Folder via Search Help (option 1)
Enter a collaboration or choose one using the search help.
When you confirm the collaboration by choosing Enter, you have the option ofassigning a single folder from the collaboration.
Link Collaboration or Folder via URL (option 2)
Enter the URL for a collaboration or folder.
5. Choose Continue.
6. Save the project.
Transferring DocumentsUseYou can exchange documents between cFolders and cProjects and between cFolders andSAP document management (DMS) in both directions.
PrerequisitesYou have a user in a cFolders system.
You have created [Seite 219] or assigned a collaboration [Seite 220].
You are in the detail view of a project on the Collaborations tab page.
Procedure...
1. In the structure tree [Seite 41] select the project element of the collaboration to whichyou want to transfer data.
2. Select the collaboration whose data you want to compare with the data in cProjects.
3. Choose Transfer Documents.
4. Choose the document source.
5. You can use cProjects documents, cProjects status reports, DMS documents, or DMSstatus reports as the source. However, the last three are only available if thecorresponding documents already exist for the selected project element or the projecttype permits this function.
The system opens the overview. In the left area you see the documents in cProjects orin DMS and in the right area you see the collaboration in cFolders. The followingfunctions are available:
You can expand the folder structures with Expand All and collapse them withCollapse All.

SAP Online Help 12.09.2008
Collaboration Projects 222
To open a document before transferring it, select the document and chooseDisplay.
The system opens the document in the appropriate application.
If you maintain the collaboration and the project at the same time, you can useReread Collaboration to be sure that you see the current status of the
collaboration.
6. Select the object you want to transfer [Extern] in one area and in the other area, selectthe target for the data you want to transfer.
If the object you select already exists in the other area, the system selects thecorresponding object in the other area automatically.
7. Choose with the quick info text Copy Folders/Documents from cFolders to cProjectsor with the quick info text Copy Folders/Documents from cProjects to cFolders.
The following table shows which transfer options are available:
Selected Objects System Activity During Transfer
One folder in each area The folder you want to transfer is assigned as asubfolder to the folder you selected as your targetfolder.
One document in each area The system transfers the current version of thedocument you want to transfer to the target system asthe new version. The old version remains in the targetsystem, but you cannot view it here. You can see it onthe Documents tab page or in the collaboration incFolders.
A document in an area, a folder inanother area
You can transfer the document only. You cannottransfer the folder in this case.
The system creates the document as a copy in thefolder.
8. Save the collaboration.
Renaming a Collaboration or a FolderPrerequisites
You have created [Seite 219] or assigned a collaboration [Seite 220].
You are in the detail view of a project on the Collaborations tab page.
Procedure...
1. In the structure tree [Seite 41] select the project element of the collaboration or folderyou want to rename.
2. Select the collaboration or folder you want to rename.
3. Choose Rename.
4. Enter the new name.
5. Choose Continue.
The system adopts the new name.

SAP Online Help 12.09.2008
Collaboration Projects 223
The system only changes the name of the collaboration or folder in cProjects and not incFolders. If you want to change the name in cFolders, you must make the change inthe cFolders system (see Maintaining a Collaboration [Seite 223]).
6. Save the project.
Maintaining a CollaborationUseYou can maintain a collaboration only in the cFolders system, and not in cProjects.
PrerequisitesYou have a user in a cFolders system.
You have created [Seite 219] or assigned a collaboration [Seite 220].
You are in the detail view of a project on the Collaborations tab page.
Procedure...
1. In the structure tree [Seite 41] select the project element of the collaboration you wantto maintain.
2. Select the collaboration you want to maintain.
3. Log on to the system, if necessary.
4. Maintain the collaboration. For more information, see Design Collaboration withcFolders [Extern].
Deleting a Link to a Collaboration...
1. In the structure tree [Seite 41] select the project element whose link to a collaborationyou want to delete.
2. Select the collaboration whose link you want to delete.
3. Choose Delete Link.
The system deletes the link to the collaboration.
The collaboration itself still exists in cFolders. The only way to delete thecollaboration is by opening it in cFolders and deleting it there (see Maintaining aCollaboration [Seite 223]).
4. Save the project.

SAP Online Help 12.09.2008
Collaboration Projects 224
Integration with SAP Enterprise PortalUseThis function enables you to use cProjects in the SAP Enterprise Portal by means of theBusiness Package for Projects, Portfolio Management, and Design Collaboration (PPMDC)[Extern]. Each user has access to various initial views (roles [Extern], worksets [Extern], andiViews [Extern]), depending on his or her authorizations and the portal roles assigned.
The back-end configuration of cProjects is not automatically reflected in the Portal becausethe content of the portal roles is static and is not adjusted to match. You create theappropriate portal roles and assign them to the PFCG roles so that the authorizations definedin the backend match the portal roles. To do this, you can use the predefined portal roleproject management [Extern] and the following showcase worksets as examples or templates:
Decision Maker [Extern]
Project Lead [Extern]
Project Member [Extern]
Template Responsible [Extern]
Alternatively, you can call cProjects in the Portal by means of a single iView. Since this iViewcontains the entire cProjects application, it is not necessary to adjust this iView to match thePFCG configuration of the backend. For more information, see SAP Note 938525.
There are differences between using cProjects in the Portal and using it as a stand-aloneversion:
When you use cProjects outside the Portal, the tab pages Info, Projects, Tasks,Checklist Items, and so on are available at the top navigation level in cProjects. Thesetab pages are not visible in the Portal unless you called cProjects by means of a singleiView. This is because the relevant tab pages in the Portal are available through theworksets, pages, and iViews in the Business Package for PPMDC. If, for example, youopen a project when using cProjects outside the portal, the top navigation bar (initialviews) is hidden. If you are working in the Portal, the worksets and portal pages remainvisible.
When you use cProjects outside the Portal, the Info tab page is available at the topnavigation level in cProjects provided that this setting was made in Customizing or inthe user settings. In the Business Package for PPMDC, there is no iView or portalpage that corresponds to the Info tab page. This is because any portal pages can beadded to the Portal straight from the relevant workset and therefore, an additional pageis not required as a standard setting.
When you use cProjects outside the Portal, the Resource Planning tab page isavailable in cProjects at the top navigation level if you are using the resource planningapplication (RPA). When you use cProjects in the Portal, you can use the ResourcePlanner portal role from SAP CRM instead. For more information, see SAP Note939501.
When you use cProjects outside the Portal, the header area of the application is visibleif the Display Header indicator is selected in the user settings. When you use cProjectsin the Portal, the header area of the application is not visible and the Display Header

SAP Online Help 12.09.2008
Collaboration Projects 225
indicator is grayed out in the user settings because the system uses the header area ofthe Portal by default.
The Exit link is not available when you use cProjects in the Portal because you log onto and log off from the Portal.
The integration with virtual rooms [Seite 225] is only fully available in the Portal.
For more information about using cProjects in the Portal, see SAP Note 938390.
You can also use cProjects functions in the Portal by means of the Business Package forProject Self-Service. For more information, see SAP Library under SAP ERP SAP ERPCentral Component Business Packages (Portal Content) Business Package for ProjectSelf-Service.
If you want to navigate away and have forgotten to save your changes, you canuse WorkProtect Mode in the Portal to avoid data loss. For example, you can setWorkProtect Mode up in such a way that the system asks the user whether theunsaved data should be saved before navigation. For more information aboutWorkProtect Mode, see SAP Library for SAP NetWeaver under Getting Started– Using SAP Software First Steps Portal Personalizing the PortalSetting Portal Preferences.
PrerequisitesYou installed SAP Enterprise Portal 7.0 and imported the Business Package for PPMDC.
Integration with Virtual RoomsUseYou use this function to make cProjects documents available in virtual rooms in the SAPEnterprise Portal. This gives you a single point of access to all documents you work with inyour enterprise. For more information, see SAP Library for SAP NetWeaver under SAPNetWeaver 2004 SAP NetWeaver People Integration Collaboration User GuideWorking with Virtual Rooms.
IntegrationIn addition to creating virtual rooms, cProjects also allows integration with cFolders [Seite219]. The two applications focus on different areas:
Virtual rooms focus on the collaboration between different departments within asingle enterprise. Together with cProjects, virtual rooms help you coordinate yourproject participants.
cFolders focuses on exchanging technical documents and product structures, such asbills of material or iPPE structures, between external partners. When used inconjunction with cProjects, external project participants can complete tasks withouthaving to access the cProjects system.
PrerequisitesYou have set up virtual rooms in the SAP Enterprise Portal.
Your system administrator has activated this function in Customizing for CollaborationProjects by choosing Define Project Types and created Webservice ports by choosingCreate Logical Ports.

SAP Online Help 12.09.2008
Collaboration Projects 226
SAP supplies the standard template cProjects_Standard_Template for virtual rooms incProjects. The template uses the cProjects KM Content (WebDAV) page(com.sap.pct.cprxrpm.kmwebdav) in the SAP Enterprise Portal. The page contains theiView Admin Explorer KM WebDAV(com.sap.pct.cprxrpm.admin_explorer_kmwebdav). You can only use this template ifyou implement WebDAV.
For more information about the prerequisites for WebDAV, see Defining the WebDAVURL [Seite 212].
To create a virtual room, you need write authorization for the relevant project element.
FeaturesCreating a Virtual RoomYou can create a single virtual room for each project element in a project structure. Youcannot assign rooms that already exist.
When you create a room, the system automatically creates all project participants of theproject element and lower-level project elements as room members, provided that they havea user in the SAP Enterprise Portal. The system assigns the initial role specified in thetemplate to the room members. The room owner and the project element responsible are alsoassigned the administrative role that was specified in the template. If you use the cProjectsstandard template, the system assigns the room members the following standard room roles:
The user who created the room and the project element responsible are both assignedthe administrator and member roles.
All other project participants are assigned the member role.
Initial roles and administrator roles are defined in the template. If you use a different template,you can define other roles. The room details show you which initial roles and whichadministrator roles are specified in the template.
Adding or Deleting Project Participants at a Later Date
If you delete project participants of a project element at a later date, the system doesnot delete these room members in the SAP Enterprise Portal automatically. You candelete them manually.
If you add project participants to a project element at a later date, they do notautomatically become members of the virtual room. You can either create the projectparticipants as room members manually or use the Assign Roles function.
Assigning RolesThe Assign Roles function allows you to assign a number of selected roles to all projectparticipants in a virtual room. Even project participants who were not members of a room areassigned these roles. The selection you make here overwrites the roles used so far.
Note that all project participants then have the same roles for the virtual room.The room owner and the project element responsible keep the administrativerole specified in the template, in addition.
Editing the Virtual Room from cProjects
If you are a member of a room, you can branch to the room by clicking the name of theroom. You have to log on to the SAP Enterprise Portal. Depending on yourauthorization, you see the document structure of the project element whose room youhave opened.

SAP Online Help 12.09.2008
Collaboration Projects 227
Click Detail to display the room’s administrative data.
You can also delete the room.
Making Changes to a Virtual Room in the SAP Enterprise PortalChanges to the room members in the SAP Enterprise Portal are not automatically transferredto cProjects. You can do this manually.
If you add room members to a room in the Portal, these members do notautomatically have access to the contents of cProjects because cProjectsauthorizations are required for this. The room members are only granted accessto cProjects content once they have been assigned to the appropriate projectelement in cProjects as a project participant.
If you delete a room that is assigned to a project element in cProjects, you have to delete thisassignment manually in cProjects too.
ActivitiesTo create a room, choose Create Room in the lower half of the Collaborations tab page andenter your data. You can use categories to filter the rooms in the room directory in the SAPEnterprise Portal. If you select Send Confirmation, the room members receive an e-mailinforming them that they are assigned to the room and they receive a link to the room.
All cProjects documents of the project element for which you are creating the room areavailable in the room once it has been created. DMS documents are not available.
Integration with SAP xRPMUseIn cProjects, you can assign projects to portfolio items in SAP xApp Resource and PortfolioManagement (xRPM). You can also assign phases in cProjects to decision points in SAPxRPM at a lower level. This assignment is the basis for a synchronization between the objectsin cProjects and SAP xRPM.
You can display the assigned SAP xRPM objects in cProjects by means of the Portfolio Datatab page.
For more information, see Related Objects Management [Extern].
PrerequisitesYou have selected the xRPM indicator in Customizing for Collaboration Projects underStructure Define Project Types.

SAP Online Help 12.09.2008
Collaboration Projects 228
Project Status ReportsUseYou use this function to summarize project data in reports and store them as project statusreports. The reports are created as interactive PDF documents and stored either in cProjectsor in document management (DMS) depending on the Customizing settings.
PrerequisitesYour system administrator has made the necessary settings for using project statusreports in Customizing for Collaboration Projects. For more information, see SAPSolution Manager under Solutions/Applications SAP PLM ConfigurationStructures SAP cProject Suite 4.50 Basic Settings for cProjects BusinessCustomizing Preparing the Creation of Project Status Reports.
You have installed Adobe Acrobat Reader® on your computer.
FeaturesThe system provides a number of different report templates depending on the project type.These can contain different kinds of data. If you want to store the reports in cProjects, thesystem generates a folder when creating a status report and the report is stored in this folder.If you want to store the reports in document management, you can either create your owndocument info records or store the reports in the document info records that already exist.
You can transfer other documents to the report folder that you can send together with thereport. However, the system creates a separate folder for each status report. The name of thefolder is made up of the name of the template you are using and a sequence number.
You can enter comments in the reports and save the comments so that they can be reused inthe next project status report.
You can send the reports that have been created by e-mail, for example, to conveniently andeasily keep stakeholders informed about the current status of the project. Once you have senta report, you receive a confirmation e-mail that it was sent.
See also:Creating Project Status Reports [Seite 228]
Editing Project Status Reports [Seite 230]
Creating Project Status ReportsPrerequisites
You are on the Status Reports tab page in a project.
You have write authorization for the project.
ProcedureCreating Project Status Reports (Document Management, SAP DMS)...
1. Choose one of the following options:

SAP Online Help 12.09.2008
Collaboration Projects 229
To create a new status report and a new document link at the same time,choose Create Status Report and enter the data for the link.
The system then inserts the new status report directly below the documentstructure header.
To create a new document link first and then create the status report in the nextstep, choose Create Link.
If you create a link to a new document info record, the system only displays thenew info record when you save the project and choose Refresh. This applies toboth steps. The project status report is also only created after the project hasbeen saved in document management (DMS).
For more information on creating the link, see Working with Document InfoRecords [Seite 204].
To create a new status report in an existing folder, open the document structureof a document info record and choose Create Status Report.
2. Select a template.
3. Choose Preview.
The system creates and displays the report.
4. Enter a comment, if required.
If you want to reuse the comments the next time you edit thereport, choose Transfer Comments.
If comments already exist that you do not want to reuse, chooseDelete Comments. The comments no longer appear the next timeyou call the status report.
5. Choose Continue or Send to send [Seite 230] the report straight away.
The project status report is only created after the project has been saved indocument management (DMS).
6. Save the project.
Creating Project Status Reports (cProjects)...
1. Choose New Status Report.
2. Select a template.
3. Choose Preview.
The system creates and displays the report.
4. Enter a comment, if required (see details above).
5. Choose Save to save the report or Save & Send to send [Seite 230] the report straightaway.
See also:
Editing Project Status Reports [Seite 230]

SAP Online Help 12.09.2008
Collaboration Projects 230
Editing Project Status ReportsPrerequisites
An e-mail address has been entered in your user master record.
The address is used as the sender’s address when sending a status report. If noaddress has been entered, you cannot send a report.
You have created a project status report [Seite 228].
You are on the Status Reports tab page.
You have write authorization for the project.
ProcedureSending Reports...
1. If you store your reports in document management (SAP DMS), you open thedocument structure of a document info record.
2. Select the folder or the document you want to send.
3. Choose Send (if the report is stored in cProjects) or Send Status Report (if the report isstored in document management).
4. Select the recipients of the e-mail in the list of recipients.
If the required recipients are not on the list, include them by choosing Add.
5. Enter a subject and then a text, if required.
Under Attachment, you can see all the documents that were sent with this e-mail.
6. Choose Send.
The system sends the document or report by e-mail including all the documents thatare in the relevant folder. A confirmation is sent to your e-mail address.
Transferring Documents from the Hard Disk to a Folder (Only forStorage in cProjects)...
1. Choose New Document.
2. Select the file you want to transfer and choose Continue.
3. Save the project.
Including Documents from the Hard Disk in the DMS FolderIf you want to include more documents in the report folder when storing reports in documentmanagement, you have the following options:
You can go to DMS from the overview page of the project status reports using the link(Open) and add your documents there.
You can transfer documents that are linked to the project definition from acollaboration.
For more information, see Transferring Documents [Seite 221].
You can use the Transfer Documents function to insert cProjects documents from theproject definition in the document structure of the status report.
For more information, see Working with Document Info Records [Seite 204] in thesection entitled “Transferring Documents Between cProjects and SAP DMS”.

SAP Online Help 12.09.2008
Collaboration Projects 231
Editing Documents in a Report (Only for Storage in cProjects)...
1. Choose Detail to go to the detail view of the documents.
2. Select a document.
The system displays the document data. For more information about other editingoptions, see Documents [Seite 198].
EvaluationsUseEvaluations give you an overview of your project data. When you create an evaluation, thesystem checks whether predefined threshold values [Extern] have been violated. You canbase your evaluation on the current project data or the last version of the data that was savedin the background. Data is saved in the background if you start a manual evaluation or if abackground program is performing an evaluation.
You can create evaluations for both operational projects and project versions [Seite 148] bymaking the appropriate selection under Evaluations for.
If a project contains a mirrored task [Seite 142], this is taken into account during theevaluation.
You can branch from an evaluation directly to the corresponding project.
IntegrationEvaluation results are used to highlight critical projects, for example, in the favorites list [Seite24] and the project list [Seite 25] on the start page. Furthermore, the threshold values appearon the Status tab page for a project element (see Status Information for Project Element[Seite 257]).
PrerequisitesYour system administrator defined evaluations and made the required settings (seeCustomizing for Collaboration Projects Evaluations).
In order for data to be stored in the background, one of the following prerequisitesmust be met:
Your system administrator has allowed the user to check threshold valueviolations or have them checked automatically when you save, for the currentproject type (see Customizing for Collaboration Projects Structure DefineProject Types).
Your system administrator scheduled regular data extraction in the backgroundin the SAP Menu under Collaboration Projects Evaluations Extract ProjectEvaluations.
FeaturesAggregating DataYour system administrator can specify for each project type that the severities in a project areto be displayed in aggregated form. The use of aggregated values allows you to tell at aglance if threshold value violations exist somewhere in the project.

SAP Online Help 12.09.2008
Collaboration Projects 232
The aggregated value of a project element is the highest severity of the subordinate elementsor of the corresponding project element itself; a severity that is set manually, however, takesprecedence over one set automatically. Therefore, the aggregated value is produced asfollows:
If a manual severity exists, this is the highest degree of severity for a project elementirrespective of whether there are higher automatic severities.
If no manual severity exists, the highest severity of a project element is the highestseverity out of all your own severities, both automatic and aggregated.
The following graphic explains the logic:
180180
--
Highest SeverityHighest Automatic SeverityManual SeverityAggregated Severity
100200100
-
100100
--
100300100
- 400400
--
200100200400
1800-
180
200200
-100
50050200
2000-
200
See also:
Favorites [Seite 235]
Search [Seite 234]
Creating and Displaying Evaluations [Seite 232]
Exporting Evaluations [Seite 234]
Creating and Displaying EvaluationsUseYou can create evaluations based on current data or based on the data that was last saved.You can display data from the evaluated project in the results view. When you do this, youcan switch between the aggregated data and the data that has not been aggregated.

SAP Online Help 12.09.2008
Collaboration Projects 233
PrerequisitesYour system administrator defined the evaluations and made the required settings (seeCustomizing for Collaboration Projects under Evaluations).
In order for data to be stored in the background, one of the following prerequisitesmust be met:
Your system administrator allowed the current project type to be tested forthreshold value violations either by the user or automatically by the systemwhen you save, in Customizing for Collaboration Projects by choosing Structure
Define Project Types.
Your system administrator scheduled regular data extraction in the backgroundin the SAP menu under Collaboration Projects Evaluations Extract ProjectEvaluations.
You have authorization for the authorization object CPRO_EVAL for the evaluationsyou want to use.
ProcedureCreating Evaluations...
1. Open the Evaluations initial view and go to the Evaluation tab page.
You have the following options:
If you want to create an evaluation or display a saved evaluation, select anevaluation from the favorites dashboard.
Choose Evaluations.
2. Select the evaluation you want to create.
3. Enter the project or project version you want to evaluate.
4. Choose Current Data or Saved Data to specify the data on which you want to base theevaluation.
The system creates the evaluation and displays the results in the lower screen area.
Checking Evaluation ResultsThe lower screen area displays the project data on which the evaluation is based. The systemdisplays the project in the structure tree [Seite 41] with an icon [Extern] that displays whetherthreshold values have been violated and how critical the violation is.
The threshold value violation that is displayed here may deviate from the displayin the project view because the project view also takes manual severities intoaccount that are not included in the evaluation.
If there are multiple violations of threshold values, the one with the highest severity isdisplayed. You can obtain information about this violation if you position your mouse on theicon....
1. Expand the project structure if necessary.
2. Display the severities: You can also display them in aggregated form by choosingAggregated.
3. To view information about a threshold value violation, choose the icon next to theproject element.

SAP Online Help 12.09.2008
Collaboration Projects 234
The system displays the information in the right-hand screen area. If there is more thanone threshold value violation for the same project element, the system displays all ofthem.
4. To return to the data of a project element, click the project element.
5. Click the link next to it to display details of a structure element. However, the systemdoes not generate a link for every element type.
6. Optional: Add evaluations that you use often to your favorites list.
Creating an Evaluation from Project Processing...
1. Open a project or navigate to the project definition in an open project.
2. Choose Check in the general functions.
3. The system creates the evaluations defined in Customizing and updates the iconsaccordingly. The data is saved in the background and is available for other evaluations(see the "Creating Evaluations" section).
See also:
Exporting Evaluations [Seite 234]
Exporting EvaluationsUseYou can export the data of an evaluation so that you can display it in a spreadsheetapplication.
Procedure...
1. Carry out an evaluation.
2. To export all evaluation data, choose Export All.
3. If you only want to export the parts of the project structure that are expanded, chooseExport.
4. Decide whether you want to save the file to the hard drive or whether you want to openit straight away.The system exports the data in CSV (Comma Separated Values) format and eithersaves it in a file or opens the data in Microsoft® Excel. However, you can also open thefile with any other spreadsheet application that converts CSV files.
See also:
Creating and Displaying Evaluations [Seite 232]
SearchUseYou use the evaluation search function to search for projects for which you want to carry outevaluations.

SAP Online Help 12.09.2008
Collaboration Projects 235
PrerequisitesYou are in the Evaluations initial view on the Favorites tab page.
Your system administrator defined the evaluations and made the required settings (seeCustomizing for Collaboration Projects under Evaluations).
One of the following prerequisites must be met if you want to use stored data:
Your system administrator scheduled regular data extraction in the backgroundin the SAP menu under Collaboration Projects Evaluations Extract ProjectEvaluations.
Your system administrator has allowed threshold value violations to be checkedby the user or checked automatically on saving, for the current project type (seeCustomizing for Collaboration Projects under Define Project Types).
FeaturesYou can search in the search results by re-entering one or more than one searchcriteria and then choosing Search in Results.
The system displays the date of the last data extraction in the Saved Data column. Youcan display the result of the evaluation on the Evaluation tab page by clicking the link.
If no saved data exists, the column is empty.
The system displays the Execute link in the Current Evaluation column. If you click thislink, the system creates an evaluation based on the current data and displays theresult on the Evaluation tab page.
For more information about creating evaluations, see Creating and Displaying Evaluations[Seite 232].
ActivitiesEnter the required search criteria or choose an entry from the dropdown box andchoose Find.
If required, add a project with the corresponding evaluation to the favorites list [Seite235] by choosing Add to Favorites.
FavoritesUseIn the favorites list you can display projects with the evaluations you have to perform mostoften.
PrerequisitesYou added a project with an evaluation to your favorites list on the Search [Seite 234]or Evaluation [Seite 232] tab page.
You are in the Evaluations initial view in the Favorites view of the dashboard.
If you want to use saved data, your system administrator must schedule dataextraction in the background.

SAP Online Help 12.09.2008
Collaboration Projects 236
FeaturesThe icon in the Criticality Level column shows whether an evaluation produced athreshold value violation and how severe the violation is.
The system displays the date of the last data extraction in the Saved Data column. Youcan display the result of the evaluation on the Evaluation tab page by clicking the link.
If no saved data exists, the column is empty.
The system displays the Execute link in the Current Evaluation column. If you click thislink, the system creates an evaluation based on the current data and displays theresult on the Evaluation tab page.
For more information, see Creating and Displaying Evaluations [Seite 232].
ActivitiesTo delete an object from the favorites list, select it and then choose Remove from Favorites.
Approving a PhasePurposeApprovals are part of phases in a project. They document that goals were attained during aphase which are required for the successor phases or for completing a project. However, yoursystem administrator can configure the settings in Customizing for Collaboration Projects sothat no approval is necessary. You do this under Define Phase Types.
The approval is made by any number of decision makers, defined by the project leader. Thedecision makers grant or reject the individual approval based on the approval document. Thisdocument contains all approval-relevant information and cannot be changed at this point. Thedecision makers can sign a document independently of one another and in any order.
The system uses signatures for individual approvals to ensure that the decision has actuallybeen made by the correct decision maker:
Normally, you enter the password for your user.
When you use signatures with user certificates, the system assigns digital signaturesusing the private key of the user certificate. There is no need to enter a user andpassword.
The phase can only be ultimately approved if all individual approvals have been granted, thatis, unless your system administrator has made different settings. Once a phase has beenapproved you can begin processing the following phase. An approval cannot be withdrawnonce it has been granted. After the approval, the maintenance of data for a phase is limited.For example, you can only confirm tasks that are not relevant to the approval. The phase isformally completed once it has the status [Seite 252] Completed. From then on you cannotchange the phase data.
Once the last phase has been approved, you can complete the project.
Process Flow...
1. The project leader creates an approval [Seite 237].
2. The project leader begins the approval [Seite 238].
3. The decision makers grant their individual approvals or reject them [Seite 238].
4. The project leader rejects the approval of the phase, if appropriate [Seite 240]..

SAP Online Help 12.09.2008
Collaboration Projects 237
5. The project leader begins the approval again [Seite 240].
6. The project leader grants the approval of the phase [Seite 241].
Until the phase has been approved, the project leader can cancel the approval [Seite 239] atany time.
Creating an ApprovalUseBefore you can begin the approval process you must create an approval, for example, todetermine decision makers.
PrerequisitesYou created project roles (see Creating a Project Role [Seite 97]).
You opened a project for processing (see Opening a Project or Project Version [Seite17]).
The phase type of the relevant phase requires an approval (see Customizing forCollaboration Projects under Structure Define Phase Types).
You selected a phase in the structure tree [Seite 41] of the project and are on theApproval tab page.
Procedure...
1. Choose Create.
The system offers you the required entry fields. The system automatically enters theapproval version: You cannot change it.
2. Enter a name for the approval and add a comment as required.
3. Go to the Decision Maker tab page and choose Add.
4. Select the project role you want to add as the decision maker.
Note that you can only specify roles to which a person with a user name hasbeen assigned as decision makers. You cannot specify an organization as thedecision maker. The Decision Maker dropdown box contains all projectparticipants who match these criteria.
5. Select a person as the Decision Maker.
You can also assign the decision maker at a later date. However, you must haveassigned a person by the time you want to begin the approval.
6. Choose Transfer.
The system enters the role and the assigned person as the decision maker. You canchange the person at a later date.
7. Add other decision makers, as required.
8. Save your entries.

SAP Online Help 12.09.2008
Collaboration Projects 238
ResultThe approval is created. Once all prerequisites have been met, you can begin the approval[Seite 238].
Beginning an ApprovalPrerequisites
You created an approval and entered a decision maker (see Creating an Approval[Seite 237]).
You opened a project for editing (see Opening a Project or Project Version [Seite 17])and are on the Approval tab page.
The phase to which the approval belongs has the status Released and all approval-relevant tasks and checklist items have been completed or finished (see ConfirmingTasks [Seite 89] and Confirming Checklist Items [Seite 89]).
Procedure...
1. In the structure tree [Seite 41] navigate to the phase you want to approve.
2. Choose Begin Approval.
3. The system starts the approval process:
It creates an approval document containing all phase-relevant data.
The approval appears in the Approvals initial view for the decision makers. Thedecision makers can grant or reject the individual approval [Seite 238].
The phase receives the status For Approval.
Granting or Rejecting Individual ApprovalsUseEach individual decision maker confirms that the intended results of a phase have beenachieved using an individual approval.
PrerequisitesYou opened an individual approval in the Approvals initial view.
Your system administrator must make the relevant settings if you want to use a digitalsignature with a user certificate for the individual approval.
ProcedureGranting an Individual Approval...
1. Check the approval document.
2. Create a comment, if required.

SAP Online Help 12.09.2008
Collaboration Projects 239
3. Choose Grant Approval.
4. To confirm the approval with your digital signature, either enter your cProjectspassword or sign the document in Adobe® Reader, depending on your system settings.
You can still change your decision at this point by choosing Change Decision.Once you have added your digital signature, you cannot make any morechanges.
5. Choose Transfer.
Rejecting an Individual Approval...
1. Check the approval document.
2. Create a comment, if required.
3. Choose Reject Approval.
You can still change your decision at this point by choosing Change Decision.
4. Choose Transfer.
ResultThe system saves your decision. Once all decision makers have either granted or rejected theapproval, you can also grant or reject the approval of the phase (see Granting an Approval[Seite 241] and Rejecting an Approval [Seite 240]).
Canceling an ApprovalUseYou can cancel an ongoing approval process at any time.
PrerequisitesYou opened a project for editing (see Opening a Project or Project Version [Seite 17]).
You selected a phase in the structure tree [Seite 41] of the project and are on theApproval tab page.
The approval of the phase has not yet been granted or rejected (see Granting anApproval [Seite 241] and Rejecting an Approval [Seite 240]).
Procedure...
1. Choose Cancel Approval.
The system cancels the approval process and sets the status of the phase [Seite 252]to Released.
2. Save your data.
ResultThe approval is canceled. You can begin [Seite 240] the approval again once you havecorrected the reason for which the approval was canceled.

SAP Online Help 12.09.2008
Collaboration Projects 240
Rejecting an ApprovalUseIf some decision makers did not approve a phase by rejecting their individual approvals, youreject the approval too, as a rule. You can check the individual decisions on the DecisionMaker tab page in the Decision column.
You can approve a phase despite not all individual approvals having beengranted if your system administrator made the appropriate settings.
Prerequisites You opened a project for processing (see Opening a Project or Project Version [Seite
17]).
You selected a phase in the structure tree [Seite 41] of the project and are on theApproval tab page.
Procedure...
1. Choose Reject Approval.
The system sets the status of the phase [Seite 252] to Approval Rejected.
2. Save your data.
The approval is rejected. You can begin the approval again [Seite 240]. However, youcan also complete the phase if you are of the opinion that the desired results of thephase cannot be achieved. If this is the case, proceed as follows:
If you complete the phase now, you cannot make any more changes to theproject. You can only cancel it.
3. Open the Basic Data tab page.
4. Choose Complete from the Change Status dropdown box.
The phase is assigned the status Completed.
5. Save your entries.
Beginning an Approval AgainUseIf you canceled or rejected an approval, you can begin the approval process again once youhave eliminated the reasons for the rejected approval. In this case the system creates a newversion of the approval. This means that the rejected approval remains documented in thesystem.
PrerequisitesYou opened a project for editing (see Opening a Project or Project Version [Seite 17]).

SAP Online Help 12.09.2008
Collaboration Projects 241
You selected a phase in the structure tree [Seite 41] of the project and are on theApproval tab page.
Procedure
Carry out the first step only if you rejected the approval. If you canceled theapproval, begin with the second step directly.
...
1. Choose Repeat Approval.
The system resets the status of the phase [Seite 252] to Released.
2. Choose Create Version.
The system generates a new version of the approval. You can check the versionnumber on the General Data tab page.
3. Choose Begin Approval.
The system starts the approval process:
It creates an approval document containing all phase-relevant data.
The approval appears in the Approvals initial view for the decision makers. Thedecision makers can grant or reject the individual approval [Seite 238].
The phase receives the status For Approval.
4. Save your entries.
Granting an ApprovalUseA phase can be approved once all individual approvals have been granted in an approvalprocess. This can happen in one of two ways:...
1. Automatic completion
If your system administrator has made the appropriate settings, the phase isautomatically approved as soon as all decision makers have granted their individualapprovals. It is also possible to complete the phase automatically once the approval iscomplete. In this case, you do not have to take any further action.
2. Manual completion
You grant the approval yourself and complete the phase yourself.
The following describes the process for manual completion.
Once you have granted the approval for a phase, you cannot add any new tasksor checklists to the phase although the phase has not been completed yet. Formore information, see SAP Note 982071.
You can approve a phase despite not all individual approvals having beengranted if your system administrator made the appropriate settings.
PrerequisitesYou opened a project for editing (see Opening a Project or Project Version [Seite 17]).

SAP Online Help 12.09.2008
Collaboration Projects 242
You selected a phase in the structure tree [Seite 41] of the project and are on theApproval tab page.
All decision makers have granted their individual approvals.
You can check this on the Decision Maker tab page in the Decision column.
If your system administrator has made the appropriate settings, you can approvea phase even if not all individual approvals were granted.
Procedure...
1. Choose Grant.
The system sets the status of the phase to Approval Granted.
2. Save your data.
If there are no more approval-relevant checklist items and tasks, you can complete thephase.
Once you have completed the phase, you cannot make any more changes to it.
3. Open the Detail Data tab page.
4. Choose Complete from the Change Status dropdown box.
The phase is given the status Completed.
5. Save your entries.
AuthorizationsUseAuthorizations ensure that only authorized persons can see or process a project or parts of aproject.
In cProjects there are two different types of authorizations:...
1. General authorizations
Your system administrator creates these authorizations in the authorization profiles inthe user master record.
2. Project-specific authorizations
You issue these authorizations to the project participants for individual objects.
PrerequisitesYour system administrator created users, roles, and organizational units.
Your system administrator created default authorizations for project roles inCustomizing for Collaboration Projects by choosing Resource Management BasicSettings for Project Roles Define Project Role Types.
You created user groups [Seite 248] as required.

SAP Online Help 12.09.2008
Collaboration Projects 243
FeaturesGeneral AuthorizationsThese authorizations safeguard the following functions:
Creating projects
Creating, changing, displaying, and deleting project templates, checklist templates,and control plan templates
Every cProjects user has authorization to execute these functions.
Project-Specific AuthorizationsYou can grant these authorizations. You automatically have administration authorization for aproject you created. Once you assign a user to a project role [Seite 126], the user is grantedthe default authorizations that belong to this role for the project definition.
Authorizations specific to a project element are inherited by lower-level project elements. Youcan, however, add any number of additional authorization holders at each hierarchy level orchange existing authorizations (see Assigning Authorizations [Seite 245]). If an authorizationhas been inherited, you can recognize this by the entry in the Inherited from column.
If you delete the assignment of a user to a project role, the userstill has the authorizations he or she obtained via the project role.If you want to remove the authorizations, you have to delete themmanually (see Assigning Authorizations [Seite 245]).
If you are adding users to a project element as authorizationholders, who have not been assigned to a project role yet or whodo not have any authorization via this role, you must at least givethem display authorization for the project definition, otherwisethey cannot open any project elements in this project. This alsoapplies if the users have more than just display authorization for aparticular project element, for example, if they have writeauthorization.
The authorizations that have specifically been granted to an authorization holder take priorityover the authorizations that have been inherited by this authorization holder. However, if aproject participant has different authorizations acquired via different authorization holders, aninherited authorization can also take priority over the others (see the section entitled“Prioritizing Authorizations”).
Authorization Holders
The following authorization holders are available:...
1. Individual users
2. User groups
3. Organizational units
4. Roles (single or composite roles)
Here you can also enter authorization holders to whom no project roles [Seite94] are assigned.

SAP Online Help 12.09.2008
Collaboration Projects 244
Prioritizing AuthorizationsThe so-called order of authorization holders represents a prioritization of authorizations. Thisis important if a user has acquired a number of different authorizations for an object viadifferent authorization holders. Individual users carry more weight than user groups and usergroups carry more weight than roles. If, for example, a single user has write authorization fora task and acquires read authorization for the same task via a user group, the authorizationof the single user applies, in this case, write.
Prioritization also applies to inherited authorizations, for example, an authorization inheritedby a user carries more weight than the authorization for a project element assigned to a userby means of a user group.
AuthorizationsThe following project-specific authorizations are available:
No authorization
This authorization withdraws all authorizations for an object from a user, even if he orshe has the authorization for a superior object.
Admin
You receive this authorization automatically from the system when you create a project.You can use this authorization to perform the following activities:
Change all the data in a project element or document
Delete project elements
Create additional project elements
Grant authorizations to other project participants
Plan the schedule for project elements
Initiate the approval of a phase
The authorization includes the read and write authorizations.
Write
You receive this authorization automatically from the system if you were entered as theperson responsible for or the processor of a project element. You can use thisauthorization for all the activities you have to perform as the person responsible for orthe processor of a project element or document:
Enter actual values for a task or checklist item
These are:
Checklist item: Actual finish date, result, detection, severity, occurrence, status
Task: Actual start date, actual finish date, confirmation, percentage complete,status
Change the status of a checklist.
Create, edit, and delete collaborations, object links, and control plans for aproject element.
Create, edit, and delete documents for a project element.
If you want to delete the project element, you require write authorization for thesuperior project element and administrative authorization for the document itself.

SAP Online Help 12.09.2008
Collaboration Projects 245
Set manual threshold value violations
Grant the individual approval of a phase
You cannot perform the following activities with this authorization:
Create and delete project elements
Change authorizations
Plan dates
Begin, cancel, or grant approvals
Create relationships for tasks
Change the status of the project definition or phase
The authorization includes read authorization.
Read
This authorization enables you to display all data for the project element or document.
In addition to admin, write, or read, you can grant the following authorizations for the projectdefinition:
Evaluate
This authorization enables you to perform evaluations for the project. When youperform the evaluation, the system checks for each displayed object whether theproject participant has at least read authorization.
Resource management
This authorization enables you to find and assign resources in a project.
Accounting
If you already have admin authorization, you can carry out costing and display datafrom accounting with this authorization.
Staffing manager
If you are a staffing manager, the system displays all project roles with the staffing typeResource Manager via Authorization and these are staffed by resources in the worklistof the external resource management application.
Candidate manager
If you are a candidate manager, the system displays all project roles with the staffingtype Resource Manager via Authorization and these are staffed by candidates in theworklist of the external resource management application.
Assigning AuthorizationsUse
The authorization holders to whom you grant authorization for a project elementmust have at least display authorization for the project definition that belongs tothe project element. Otherwise, he or she will not be able to open a projectelement even if they have authorization to do so.

SAP Online Help 12.09.2008
Collaboration Projects 246
Here you can assign authorizations for an object or change authorizations. You save yourentries by saving the project.
You cannot make any changes if you opened a snapshot.
The authorizations you enter for templates are only authorizationtemplates: They are not used for the authorization check in thetemplate, but in the operational project. When you create anoperational project in the template they are copied to the project.
The authorizations you specify for user groups are only valid forthe actual user group and not for the project elements to whichyou assign the group later on. You need at least readauthorization for a user group to be able to use it in a project.
In the authorization holder type Roles, the roles are not theproject roles you can create yourself in cProjects, but the rolesthat your system administrator created in SAP authorizationmanagement.
For more information, see Authorizations [Seite 242].
PrerequisitesYou accessed project processing through one of the following initial views:
Projects
Tasks
Checklist Items
User Groups
Templates
You are on the Authorizations tab page on the sub-tab page with the authorizationholder type for which you want to add, change, or delete authorizations.
ProcedureAdding Authorization Holders...
1. Choose Add.
The system opens an input area.
2. Enter the data of the new authorization holder.
If you enter incomplete data and choose Enter, the system checks whether it canassign a unique user and then adds the missing data automatically if possible. You canuse placeholders (* and +) here too.
A search function is also available.
3. Select one or more authorizations from the search results.
4. Choose Copy.
5. Add more authorization holders or close the input area.
Changing Authorizations...
Change the authorizations in the table.

SAP Online Help 12.09.2008
Collaboration Projects 247
You cannot change your own authorizations for Admin, Write, Read, or NoAuthorization.
Deleting Authorization Holders
Note that you can only delete authorizations at the level at which you assignedthem. Therefore, you cannot delete inherited authorizations.
...
Select an authorization holder in the list and choose Delete.
Assigning Administration AuthorizationUseHere you can create administration authorization for individual users. This is possible for theobject categories user group, document, and project.
PrerequisitesTo create new authorizations, a role or profile that contains the authorizations for theauthorization object Create Administration Authorizations for Each Object Type(ACO_OTYPE) must be assigned to your user in the user master (SU01).
You also require change authorization for the project, user group, or document or you needsuperuser [Seite 250] authorization.
Procedure1. Select an object category.
2. Select the required object or enter its name in the relevant input field.
The system checks whether the object exists and if it does, displays the existingauthorizations in a table. If the object does not exist, the system issues an errormessage.
3. Select a user or enter the name of the user in the relevant input field.
The system checks whether the user exists. If the user does not exist, the systemissues an error message.
You can only create a new administration authorization once the object and userhave been correctly selected or entered.
If the user is already entered as an administrator, the system issues an errormessage.
4. Choose Save to save the authorization you created to the database.
ResultThe system adds the new administration authorization to the table of existing authorizationsand issues a success message.
The table is only displayed in change mode here.

SAP Online Help 12.09.2008
Collaboration Projects 248
ExampleYou can select the object category user group and then select an object using the input help.Enter the required user in the relevant input field. The system checks whether the user exists.If the check is successful, choose Create Authorization; this button is now active. The systemthen calls the table of authorizations again and displays the new authorization in the table.
User Groups
You use user groups to grant the same authorizations for a project element to multiple projectparticipants. You group the project participants together in a user group and assign the groupto the project element.
A user group can be made up of both individual project participants and a number of otheruser groups.
FeaturesThis function is available in the User Groups initial view. The following views are available inthe User Groups initial view:
The User Groups view displays all the groups to which you are assigned.
The Favorites view displays all the groups you selected as your favorites.
You can either open the user groups straight from the list or use the appropriate pushbutton.To leave the user group once you have finished editing, choose Home.
List of MembersOnce you have opened a user group, you can add users to the group or delete users from thegroup in the left screen area. If you enter incomplete data in the Add screen area and chooseEnter, the system checks whether it can assign a unique user or a group and then adds themissing data automatically if possible. You can use placeholders (* and +) here too. A searchfunction is also available.
The system first sorts the list of members alphabetically by surname and then sorts the usergroups, also in alphabetical order.
Detail ViewOn the right side of the screen, you grant the user groups authorization to edit or display theuser group. You do this on the Basic Data tab page. By default the use of user groups doesnot depend on authorizations.
Note
The authorizations you specify here only apply to the actual user group and not to the projectelements to which you assign the group later on.
End of the note.
You can also delete the user group here or add it to your Favorites.
Once you have finished editing the user group, save your entries.

SAP Online Help 12.09.2008
Collaboration Projects 249
SubstituteUseThe following views are available in the Substitute initial view:
My Substitutes and As Project Lead.
In the My Substitutes view, the Substitute For field contains your name only. Here you canenter a substitute for each project to which you are assigned by means of a responsible orediting project role or resource. The same prerequisites apply to the list of your projects as tothe project list [Seite 25]. Your substitute is assigned the same authorizations as you. Thesubstitute remains in the project until you delete his or her name from the list of substitutes.
When you create or delete a substitute, the system sends an e-mail to each substituteaffected. The project member who you assigned as a substitute receives a copy of this e-mail.
In the As Project Lead view, the system determines all projects in which you are defined asthe project lead in the project definition by means of the responsible role or resource. TheSubstitute For field displays all users that are assigned to at least one project role in at leastone of these projects. In this field, select the name of the project member for whom you wantto define substitutes. Here you can enter a substitute for each project in which you are actingas project lead and to which the user that requires a substitute is assigned by means of aresponsible or editing project role or resource.
If the user that requires a substitute is staffed in a project role in a project for which you arethe project lead but the role or resource has not been used yet in the project structure, thesystem displays the name of the user in the Substitute For field but does not display theaffected project in the Substitute table.
The following applies to both views:
The substitute receives the same authorizations as the project member he or she issubstituting. The substitute remains in the project until you or the relevant project memberdeletes the name of the substitute from the list of substitutes.
As the substitute, you see the projects for which you are acting as a substitute in the Projects,Tasks, or Checklist Items initial views when you choose the Substitutes view from thedropdown box.
PrerequisitesThe system can only send an e-mail if an e-mail address has been entered in the user masterdata of the appropriate project members.
The system only displays a project in the project list on the Substitute tab page ifyou have at least read authorization for the project definition, you areparticipating in the project, and your business partner is linked to your user. Formore information, see SAP Note 999529.

SAP Online Help 12.09.2008
Collaboration Projects 250
SuperuserUse
This scenario allows you to bypass the authorization concept in cProjects andcFolders. Therefore, we recommend that you only use it if absolutely necessary.
At least one person is always assigned to an object who has administration authorization forthis object. However, it may be that no authorization holder with administration authorizationis available due to illness, for example, and the administrative tasks have to be given toanother person. In this case, a superuser can grant another user administration authorizationfor the object.
PrerequisitesTo grant a user superuser rights, you have to add a role or profile to the user’s user masterrecord (transaction SU01) that gives the user authorization for the authorization objectACO_SUPER.
Status ManagementUseProject elements, control plans, and templates in cProjects can have various processingstatuses. These are represented by statuses in the system.
The statuses of the following objects are depicted using status management:
Project definition [Seite 250]
Phase [Seite 252]
Checklist [Seite 254]
Checklist item [Seite 255]
Task [Seite 254]
Template [Seite 253]
Control plan [Seite 256]
IntegrationStatus management is coupled with the workflow [Seite 66].
Status of the Project DefinitionDefinitionThe following statuses exist for the project definition:

SAP Online Help 12.09.2008
Collaboration Projects 251
Status Meaning
Created The project has been created in the system (initial status).
Released See Releasing Project Elements [Seite 82].
Locked The project is temporarily protected against changes. You can setthe status at the same time as the status Created or Released.
Completed The project has been completed.
Canceled The project was not completed successfully.
If a project is canceled, project role staffings after the date theproject was canceled are also canceled.
To Be Archived The project can be archived.
Flagged for Transfer The project is selected for transfer to SAP ECC.
This status is only relevant if you selected an automaticcontrolling method for accounting integration [Seite 162].
To Assign The project is selected for transfer to SAP ECC.
This status is only relevant if you selected a manual controllingmethod for accounting integration or have switched to manualassignment.
Transferred The project has successfully been transferred to SAP ECC.
Assigned The project has successfully been assigned.
IntegrationThe following dependencies exist between the status of phases [Seite 252] and the status ofthe project definition:
The release of the project definition leads to the release of the first phase of theproject. Phases can only be released if the project definition has been released and isnot locked.
Phases may only be added, modified, or deleted if the project definition has the statusCreated or Released. New phases cannot be inserted before or between phases thathave already been approved.
Once a phase has been approved, the next phase is released.
If a phase has not been approved, the project cannot be completed, only canceled.The next phase is not released.
Locking a phase does not influence the status of the project definition. When a projectdefinition is locked or unlocked, the status Locked is not set or removed for thereleased phases.
The project definition can only be completed if the last phase has been approved.
If a project definition, phase, or template is locked, no dependent data (for example,checklist items) can be changed either. The project definition can only be unlocked.

SAP Online Help 12.09.2008
Collaboration Projects 252
Status of PhasesDefinitionThe following statuses exist for phases:
Status Meaning
Created The phase has been created in the system(initial status).
Released See Releasing Project Elements [Seite 82].
You can configure the system so that thisstatus is set automatically after the approval forthe preceding phase has been granted.
Locked The phase is temporarily protected againstchanges. You can set the status parallel to thestatus Created or Released.
For Approval The phase is to be approved.
Approval Granted The phase has been approved.
You can configure the system so that thisstatus is set automatically after the lastindividual approval has been granted.
Approval Rejected The phase has not been approved.
Completed The phase has been completed. No furtherchanges can be made.
You can configure the system so that thisstatus is set automatically after the approvalhas been granted.
IntegrationDependencies between the status of phases:
You cannot insert new phases before or between phases that have already beenapproved.
Depending on the settings you made in Customizing for Collaboration Projects underDefine Phase Types, the following dependencies apply:
You can release a phase only once the approval for the preceding phase (if oneexists) has been completed.
You can release a phase if the preceding phase has been released.
Dependencies between the status of the project definition [Seite 250] and the status ofphases:
The release of the project definition leads to the release of the first phase of theproject. Phases can only be released if the project definition has been released and isnot locked.
Phases may only be added, modified, or deleted if the project definition has the statusCreated or Released.

SAP Online Help 12.09.2008
Collaboration Projects 253
If a phase has not been approved, the project cannot be completed, but only canceled.The next phase is not released.
Locking a phase does not influence the status of the project definition. When a projectdefinition is locked or unlocked, the status Locked is not set or removed for thereleased phases.
The project definition can only be completed if the last phase has been approved.
If a project definition, a phase, or a template is locked, you cannot change anydependent data (for example checklist items) either. The project definition can only beunlocked.
Dependencies between the status of tasks [Seite 254], status of checklists [Seite 254],status of checklist items [Seite 255], and the status of phases:
The release of the phase leads to the release of all the tasks and checklists. It ispossible to release tasks and checklists before releasing the phase.
Locking a phase does not influence the status of the tasks or checklist items. However,it is not possible to process the tasks or checklist items if the phase is locked.
The release of a checklist item leads to the release of the assigned tasks.
Status of TemplatesDefinitionThe following statuses exist for checklist templates, project templates, and control plantemplates:
Status Meaning What you should know
Created The template has beencreated in the system(initial status).
You cannot use templates with thisstatus in cProjects yet. You mustrelease them first.
Released The template is releasedfor further use.
Locked The template istemporarily protectedagainst changes.
You can set this status parallelto the status Created orReleased.
If a template is locked, nodependent data (for example,checklist items) can bechanged either. The projectdefinition can only be unlocked.
Obsolete The template cannot beused any more.
For checklist templates:
You cannot create any newreferences to templates forwhich this status is active.Existing references can still beresolved.

SAP Online Help 12.09.2008
Collaboration Projects 254
If you set this status, thesystem warns you if not all theexisting references wereresolved.
To Be Archived The template can bearchived.
For checklist templates:
This status can only be set if all thereferences were resolved.
You can only use templates with the status Released to create checklists,projects, and control plans.
Status of TasksDefinitionThe following statuses exist for tasks:
Status Meaning
Created The task has been created in the system (initialstatus).
Released See Releasing Project Elements [Seite 82].
In Process The task is processed, actual data isconfirmed.
Completed The processing of the task is completed.
Canceled The task is not completed successfully.
If the task is canceled, the subtasks are alsocanceled.
IntegrationThe following dependencies exist between the status of phases [Seite 252] and the status oftasks:
The release of the phase leads to the release of all the tasks. It is possible to releasetasks before releasing the phase.
Locking a phase does not influence the status of the tasks. However, it is not possibleto process the tasks if the phase is locked.
Status of ChecklistsDefinitionThe following statuses exist for checklists:
Status Meaning

SAP Online Help 12.09.2008
Collaboration Projects 255
Created The checklist has been created in the system(initial status).
Released See Releasing Project Elements [Seite 82].
Not Relevant The checklist is not relevant.
Finished The checklist is finished.
IntegrationThe following dependencies exist between the status of phases [Seite 252], status of checklistitems [Seite 255], and status of checklists:
The release of the phase leads to the release of all the checklists. It is possible torelease a checklist before releasing the phase.
Locking a phase does not influence the status of the associated checklists. However,you cannot edit the checklists if the phase is locked.
The release of the checklist leads to the release of all the checklist items.
If a checklist has the status Not Relevant, you cannot process the checklist items thatbelong to it.
Status of Checklist ItemsDefinitionThe following statuses exist for checklist items:
Status Meaning
Created The checklist item has been created in thesystem (initial status).
Released See Releasing Project Elements [Seite 82].
Not relevant The checklist item is not relevant.
If this status is set, the system automaticallysets the result to Not relevant too.
Finished The checklist item is finished.
IntegrationThe following dependencies exist between the status of phases [Seite 252], status ofchecklists [Seite 254] and status of checklist items:
Locking a phase does not influence the status of checklist items, however it is notpossible to process a checklist item if the phase is locked.
The release of the checklist leads to the release of all the checklist items.
The following dependencies exist between the status of tasks [Seite 254] and the status ofchecklist items:
If a checklist item has the status Not Relevant, you cannot process the tasks that belong to it.

SAP Online Help 12.09.2008
Collaboration Projects 256
Status of Control Plan VersionsDefinitionThe following statuses exist for control plan versions:
Status Meaning
Created The new control plan version has been createdin the system (initial status).
Released The control plan version is released forprocessing.
Locked The control plan version is temporarilyprotected against changes. You can set thestatus parallel to the status Created orReleased.
Completed The control plan version is completed.
When you create a new control plan version, the system sets the status of the precedingversion automatically to Completed.
IntegrationIf the project is locked, completed or terminated, no changes can be made to thecontrol plan.
Status of DocumentsDefinitionThe following statuses exist for documents:
Status Meaning
In Process The document can be changed.
Invalid Do not use the document.
Only the functions Delete and Move arepossible in this status; you cannot make anyother changes.
You can set a document with this status to InProcess again.

SAP Online Help 12.09.2008
Collaboration Projects 257
Released The document has been released. You cannotmake any changes to the document.
You can change the status of the document toInvalid.
You can only copy released documents fromthe document templates to a project.
Status Information for Project ElementUseOn the Status tab page you see a detailed overview of the current status and the thresholdvalues of a project element.
Features
You cannot make any changes if you opened a snapshot.
Status
You can change the status.
If you want to use the user status, select the corresponding status profile here.
The system displays whether the status is a user status or a system status in theActive Statuses table.
Threshold Value Violation
The system displays the threshold value violations for the project element underThresh. Value Violation.
You can set a manual value for the severity. This value has precedence over the valuethat the system sets.