SAND, GRAVEL, AND CRUSHED STONE ON-THE-JOB … · · 2014-07-18module 16 handling material with a...
182
SAND, GRAVEL, AND CRUSHED STONE ON-THE-JOB TRAINING MODULES UNITED STATES DEPARTMENT OF LABOR ELAINE L. CHAO SECRETARY MINE SAFETY AND HEALTH ADMINISTRATION DAVE D. LAURISKI ASSISTANT SECRETARY Originally Published AUGUST 2000 INSTRUCTION GUIDE SERIES MSHA IG 40
-
Upload
dangkhuong -
Category
Documents
-
view
215 -
download
1
Transcript of SAND, GRAVEL, AND CRUSHED STONE ON-THE-JOB … · · 2014-07-18module 16 handling material with a...

SAND, GRAVEL, AND CRUSHED STONE ON-THE-JOB TRAINING MODULES UNITED STATES DEPARTMENT OF LABOR ELAINE L. CHAO SECRETARY
MINE SAFETY AND HEALTH ADMINISTRATIONDAVE D. LAURISKI ASSISTANT SECRETARY
Originally Published AUGUST 2000
INSTRUCTION GUIDE SERIES
MSHA IG 40
These training modules were developed cooperatively by MSHA and members of the sand, gravel, and crushed stone industry. We gratefully acknowledge the valuable contributions of Gifford-Hill and Company, Inc., National Gypsum Company, National Stone Association, The Spline Education Center, Martin-Marrietta Corp., W. W. Boxley Co.,and others, to this Instruction Guide.
Copies of this Instruction Guide, and others in this series, may be ordered by calling, or writing:
National Mine Health and Safety Academy Office of the Business Manager 1301 Airport Road Beaver, WV 25813
Phone: (304) 256-3257
or by contacting your local MSHA office.
This Instruction Guide is designed to supplement existing health and safety training programs. The material is not intended to cover all specific jobs at any given operation. Other modules may be added, and existing modules revised, in future printings of this Instruction Guide.
Individual modules in this Instruction Guide are designed to be used separately. The modules can be kept together in a three ring binder when not in use. General information and training recommendations are included at the end of each module.
DISCLAIMER
The information and recommendations contained in this publication have been compiled from sources believed to be reliable, and to represent the best current opinion on the subject matter. No warranty, guarantee, or representation is made by MSHA as to the absolute correctness or sufficiency of any representation contained in this publication, and MSHA assumes no responsibility in connection therewith. Nor can it be assumed that all acceptable safety measures are contained in this publication, or that other, or additional, measures may not be required under particular, or exceptional circumstances.

1
2
3
4
5
6
7
8
9
TABLE OF CONTENTS
MODULE STARTING THE PLANT
MODULE PLANT CLEAN-UP
MODULE PLANT SHUTDOWN
MODULE PLANT OPERATION
MODULE MAINTAINING CONVEYOR SYSTEMS
MODULE PLANT REPAIR
MODULE WELDING AND CUTTING
MODULE EQUIPMENT LOCK-OUT PROCEDURES
MODULE ELECTRICAL PROCEDURES FOR NON-ELECTRICIANS
MODULE 10 TRUCK HAULAGE
MODULE 11 GROUND CONTROL
MODULE 12 INSPECTING AND REPLACING CABLES (WIRE ROPES)
MODULE 13 REPLACING THE DRIVE CHAIN OR BELT ON A SCREW CONVEYOR
MODULE 14 MANUAL HANDLING OF MATERIALS
MODULE 15 USING AN OVERHEAD HOIST TO LIFT OR HANDLE PARTS OR MATERIALS
MODULE 16 HANDLING MATERIAL WITH A SHOP OVERHEAD TRAVELING CRANE
MODULE 17 PRIMARY CRUSHING OPERATION
MODULE 18 OPERATING DRILLING EQUIPMENT
MODULE 19 TRANSPORTATION, USE, AND STORAGE OF EXPLOSIVES

MODULE NUMBER 1OFINSTRUCTION GUIDE NUMBER 40
ON-THE-JOB TRAINING MODULESFOR THESAND, GRAVEL, AND CRUSHED STONE
STARTING THE PLANT
This module describes basic job steps, potential hazards and accidents, and recommended safe job procedures for plant start-up.
This job is usually done by the plant operator, but may be done by other occupations, such as utility worker, laborer, etc. The plant operator/utility worker must make sure that employees, and others, are protected from accidents and injuries resulting from plant start-up.
While both sand and gravel plants, and crushed stone plants, are built by many different manufacturers, the processes and equipment involved in the production effort are similar.
iv

SAND AND GRAVEL PLANTS
At a typical sand and gravel plant, raw material from a hopper at a dumping station is carried by a conveyor belt to a screening deck. The screening deck removes oversized material (large clay balls, roots, very large rocks, etc.), separates sand from gravel, and then separates the gravel into different sizes. Spray bars wash the gravel as it passes through the screening deck.
Large stones then go to log washers, while medium size material (chat and/or pea gravel) is carried to a screw. The large stone, after emerging from the log washer, and the finer material, after emerging from the screw, pass through separate final rinse stations on the way to storage areas. Transportation to a storage area may be by a fixed conveyor system, a radial stacker system, or an extendable belt conveyor system. A radial stacker is a conveyor system that rotates from a fixed pivot point, and stores the conveyed material in an arc-shaped stockpile. The extendable belt conveyor system has the capability of lengthening or shortening itself by moving the head section. The head section is mounted on wheels, and moves on rails, which allows the conveyor to supply several stockpiles, hoppers, or silos.
Sand, after being separated on a screening deck, flows to a classifier, where it is washed and sized. The sand is then carried by a screw, which separates the sand from the water, to a conveyor belt, which carries it to a storage area.
Water that is used in the plant is pumped from a freshwater pond. The discharged water is then pumped into a settling pond.
A crushed stone plant differs somewhat from a sand and gravel plant. Raw material is brought from a quarry to a primary crusher by rear dump haul trucks. Some primary crushers are fed by wobblers, which are chain driven conveying systems with eccentric rollers.
After primary crushing, material is conveyed by belt to a scrubber for washing. The scrubber is a cylindrical, rotary device with internal screens and auger type vanes that carry the material through the scrubber. Fine material is separated from the coarse material in the scrubber. The fine material is sent to a settling pond. The coarse material is sent to a surge pile, and then to a primary screening deck. Oversized material is carried from the primary screening deck to secondary crushers, and is then returned to the primary screening deck to be separated into desired products. A crushed stone plant contains a series of screening decks, crushers, and final rinse screening stations. Finished product travels through a final rinse stage, and is then stored in silos, bins, or stockpiles.
A sand and gravel, or crushed stone, plant consists of a number of interdependent production processes. Therefore, it is important to know how the plant operates in order to prevent a massive pile-up of material at a transfer point during plant start-up.
An improper start-up sequence can damage plant equipment, and also increase the risk of injury. Fresh-water, sand, and other pumps are started first. Other plant equipment must be
v

started in reverse order of material flow, beginning with the finished product conveyor, and working back through the primary hopper feeder belt.
In addition to following the proper start-up sequence, the person starting the plant must take every precaution to ensure that other people are clear of equipment before the equipment is started.
vi

The following safe job procedures will help to minimize incidents that may cause injuries, and adversely affect production.
REQUIRED, OR RECOMMENDED, PERSONAL PROTECTIVE EQUIPMENT: HARD HAT, STEEL-TOED SHOES, LIFE JACKET, GOGGLES
SEQUENCE OF POTENTIAL ACCIDENTS BASIC JOB STEPS OR HAZARDS
1. Start primary 1. A) Falling into water. pump.
B) Slipping/falling on platform.
C) Electrocution hazards.
D) Mechanical hazards.
2. Start all 2. A) Personnel caught in conveyors, conveyors and shakers, and other equipment. associated equipment in start-up sequence.
B) Spillage at transfer points.
C) Short circuit in switch box.
vii
RECOMMENDED SAFE JOB PROCEDURES
1. A) Wear life jacket.
B) Use designated walkways, and examine for slipping/tripping hazards.
C) Examine work area for exposed wires, frayed insulation, etc.
D) Examine work area for missing guards, exposed moving machine parts, etc. Sound warning horn, if applicable.
2. A) Check that all moving parts have guards in place. Make sure all personnel are clear of equipment. Sound alarm.
B) Proper start-up sequence begins with finished product belts, and continues to primary feeder.
C) Stand to the side of switch box, in case door blows open when activated.

SEQUENCE OF BASIC JOB STEPS
3. Inspect the operating plant for problems and hazards.
POTENTIAL ACCIDENTS OR HAZARDS
D) Problems with equipment at start-up, such as electric motor fires, belt slippage, etc.
3. A) Getting caught in moving parts.
B) Tripping hazards.
C) Burns.
D) Electrical hazards.
RECOMMENDED SAFE JOB PROCEDURES
D) Check piece of equipment after starting, before starting something else.
3. A) Check that all guards are in place. Cross belts only at designated crossovers. Do not extend any part of body beyond edge of belt.
B) Walkways should be kept clear of trash, tools, etc. Check for loose or missing handrails, walkway grating, or toeboards.
C) Check for overheated gearboxes (listen for grinding sound). Check if gearbox is loose on main shaft. Visually check bearings through guard while running. Look for orange color on shaft, or shaft wobbling.
D) Check for obvious electrical hazards, such as exposed wires, missing junction box covers, frayed insulation, missing light bulb guards, etc.
viii

GENERAL INFORMATION
This module is part of an Instruction Guide that was developed to assist the sand, gravel, and crushed stone industry in conducting effective on-the-job training (OJT) of new employees, or employees reassigned to different jobs. The use of training materials, such as this module, is an important part of an effective, systematic, OJT program.
This Instruction Guide uses a generic Job Safety Analysis (JSA) of jobs common to the industry. The JSA format facilitates uniform basic training in safe job procedures, while requiring only a minimum of time and effort on the part of the trainer. This material is generic to the industry; therefore, each company using this guide will need to tailor the material somewhat to fit their particular requirements. In some cases, the material must be general in nature, and will not include specific details of procedures or equipment that must be taught by the trainer.
Recommendations for an overall OJT program are contained in the Mine Safety and Health Administration (MSHA) guide: “Structuring Effective On-The-Job Training Programs,” June, 1983.
TRAINING RECOMMENDATIONS
On-the-job training is usually best done by the employee’s immediate supervisor. If the supervisor relies on another employee to do certain parts of the training, the supervisor should be present to monitor the training. OJT is conducted at the actual job site where the work will be done.
The supervisor/trainer should use the training materials (this module, or other materials) while the training is being done, to help ensure that all job steps are covered, and that no important safety precautions are omitted. Effective OJT should begin with an explanation (lecture and/or discussion) of the safe job procedure. The explanation should be followed by a hands-on demonstration of the proper job procedure. A good demonstration is, perhaps, the most important part of OJT. The demonstration is followed by supervised practice, during which the supervisor/trainer coaches (corrects and encourages) the employee, and evaluates when the employee is ready to do the job without direct supervision.
The first step - explaining the job to the employee - can be done in different ways. The supervisor/trainer and the employee can sit down and go through the training materials together. It may be advantageous to provide the employee with a copy of the training modules that are applicable to his/her job. The fact that most of the training is conducted at the job site does not preclude the use of a classroom, or a quiet office, for the first part of the training. Any general theory, or knowledge training, as well as the initial explanation of the job procedure, may be best done in an office/classroom setting, especially when noise levels, or other conditions at the job site, make communication difficult. A complete series of job steps could be presented through the use of slides developed at the mining operation.
ix

MODULE NUMBER 2OFINSTRUCTION GUIDE NUMBER 40
ON-THE-JOB TRAININGFOR THESAND, GRAVEL, AND CRUSHED STONE INDUSTRY
PLANT CLEAN-UP
For the job of plant clean-up, this module describes the basic job steps, potential accidents and hazards, and recommended safe job procedures.
A tremendous quantity of material passes through a typical plant every day. Obviously, an objective is to deliver all the material to its final destination. However, because of the characteristics of the material - variable nature, extremely abrasive, often coated with cohesive material - some spillage will occur, which may necessitate frequent clean-up activities.
Belt conveyors are a major source of spillage. Spillage usually can be found at return idlers, tail pulleys, take-up pulleys, and transfer points. Chutes and skirt boards, that are used at transfer points, are subject to corrosion and wear from wet and abrasive materials. Holes will eventually form in chutes and skirt boards, resulting in spillage at transfer points.
x
A considerable amount of fine material is present in unwashed material coming from the feeder hopper to the main feeder belt. This unwashed material is usually coated with clay, and tends to stick to the belt. Return idlers, tail pulleys, and take-up pulleys pick up this clay covered material, and sling it onto surrounding surfaces. Chute boxes (skirt boards) may not catch all of the material, thereby allowing it to accumulate at the tail pulley. Belts, other than the main feeder belt, are subject to smaller amounts of spillage and accumulated fine material.
Spillage can also occur around scrubbers, crushers, shaker decks, classifier stations, and final rinse screening stations. Spillage in these areas can be caused by worn chutes, excessively wet material, or excessively high material feed rate. Material can bounce or roll off shaker screens, especially when the screens become clogged with flat rocks or clay. Loose or broken connections at classifier dumping stations, just above splitting troughs, can cause considerable amounts of spillage.
Spillage around the plant area must be cleaned up, because it may create hazardous situations, as well as economic loss. Accumulated material on walkways can be a tripping hazard, and, if permitted to build up to the top of toeboards, could even allow a person to slide under the intermediate rail, and fall to the ground. Loose materials may also fall over the toeboards and strike persons passing underneath. Wet spillage, which cakes on walkways, accelerates the corrosion process, which can eventually weaken the structure to the point that it could fall under a person’s weight. Economic advantages of clean-up include reduction in rust, better operation of the plant, more efficient work by employees, and fewer accidents from spillage problems.
Spillage can be minimized if worn chutes, skirt boards, and other causes of spillage are reported and corrected. Mechanical belt cleaners reduce the clean-up job around conveyor systems. In general, hazards will be reduced, and money can be saved, if spillage can be minimized.
Typically, plant clean-up is done by utility workers, laborers, or conveyor belt crews. Where possible, clean-up activities should be scheduled to take place when the plant is shut down, in order to minimize hazards to employees working near moving equipment.
Clean-up workers use high pressure water hoses, shovels, and small front-end loaders. Injuries to clean-up workers include muscle strains (the most common), back injuries, and eye injuries (from water hoses).
xi

The following safe job procedures will help to minimize incidents that may cause injuries, and that may adversely affect production.
REQUIRED OR RECOMMENDED PERSONAL PROTECTIVE EQUIPMENT: HARD HAT, STEEL-TOED BOOTS (RUBBER BOOTS RECOMMENDED), SAFETY GLASSES OR GOGGLES, RUBBER GLOVES RECOMMENDED, SLICKER SUIT
SEQUENCE OF BASIC JOB
STEPS
1. Clean plant walkways with high pressure hose.
POTENTIAL ACCIDENTS OR HAZARDS
1. A) Eye injuries.
B) Struck by whipping water hose.
C) Electrocution.
D) Bruises (struck by water) from water nozzle.
E) Knocked into something.
xii
RECOMMENDED SAFE JOB PROCEDURES
1. A) Wear safety glasses or goggles.
B) Prevent hose from whipping by: 1. Securing your grip. 2. Using a helper. 3. Standing on hose near
nozzle. 4. Turning water on slowly to
a pressure with which you are able to walk.
C) Don’t aim water hose directly at electrical or junction boxes.
D) Don’t aim water hose at others. Watch for people at other levels of the plant.
E) Don’t stand with your back toward open walkways, stairways, etc.

SEQUENCE OF BASIC JOB
STEPS
2. Clean-up around tail pulleys and transfer points, tunnels, and other areas, as required, with a shovel.
POTENTIAL ACCIDENTS OR HAZARDS
F) Slips and falls.
2. A) Getting caught in head or tail pulley.
B) Getting shovel caught in idlers.
xiii
RECOMMENDED SAFE JOB PROCEDURES
F) Don’t climb or descend stairs while handling water hose under pressure. Stand with feet apart, one foot behind the other, and lean forward to brace yourself against pressure of hose. Where possible, brace yourself securely against a stationary object. Start from highest work area and work down, washing platforms, walkways, and other places where there is an accumulation of material. Remove water hose from the walkway after you finish, to eliminate a tripping hazard.
2. A) Use long-handled shovel in all areas, except where restricted clearance is a problem. This reduces the possibility of coming in contact with moving parts. Do not clean in guarded areas with the belt running. If you must clean-up in guarded areas, use proper lockout/tagout procedures.
B) When shoveling onto a moving conveyor, always shovel in the direction the belt is traveling. The shovel will be carried away from you, if it becomes hung in the belt.

SEQUENCE OF BASIC JOB
STEPS
3. Cleaning up ground area and plant with a small loader (bobcat, etc.)
POTENTIAL ACCIDENTS OR HAZARDS
C) Striking coworkers.
D) Back injuries.
E) Caught between moving radial stacker and stationary object.
3. A) Overturning loader.
B) Damaging equipment, or plant structure.
C) Striking other people.
RECOMMENDED SAFE JOB PROCEDURES
C) Watch out for others working in the area.
D) Load the shovel moderately. Move your feet when turning, rather than twisting your body. Lift with your legs, not your back.
E) When working near the tail pulley of a radial stacker, do not get between the tail pulley and a stationary object.
A) During clean-up, operate the loader at less than half throttle, with the clutch in low speed. Do not operate the loader in a manner that causes any of the wheels to leave the ground. Do not overload the bucket. Carry the bucket in a low position when transporting materials. Always fasten the seat belt.
B) Avoid bumping any equipment, or plant structures. Always check before changing direction. Look in the direction of travel. When parked, lower bucket, set parking brake, and chock wheels.
C) Always check before changing direction. Look in the direction of travel.
xiv

GENERAL INFORMATION
This module is part of an Instruction Guide that was developed to assist the sand, gravel, and crushed stone industry in conducting effective on-the-job training (OJT) of new employees, or employees reassigned to different jobs. The use of training materials, such as this module, is an important part of an effective, systematic, OJT program.
This Instruction Guide uses a generic Job Safety Analysis (JSA) of jobs common to the industry. The JSA format facilitates uniform, basic training in safe job procedures, while requiring only a minimum of time and effort on the part of the trainer. This material is generic to the industry; therefore, each company using this guide will need to tailor the material somewhat to fit their particular requirements. In some cases, the material must be general in nature, and will not include specific details of procedures or equipment that must be taught by the trainer.
Recommendations for an overall OJT program are contained in the Mine Safety and Health Administration (MSHA) guide: “Structuring Effective On-The-Job Training Programs”
TRAINING RECOMMENDATIONS
On-the-job training is usually best done by the employee’s immediate supervisor. If the supervisor relies on another employee to do certain parts of the training, the supervisor should be present to monitor the training. OJT is conducted at the actual job site, where the work will be done.
The supervisor/trainer should use the training materials (this module, or other materials) while the training is being done, to help ensure that all job steps are covered, and that no important safety precautions are omitted. Effective OJT should begin with an explanation (lecture and/or discussion) of the safe job procedure. The explanation should be followed by a hands-on demonstration of the proper job procedure. A good demonstration is, perhaps, the most important part of OJT. The demonstration is followed by supervised practice, during which the supervisor/trainer coaches (corrects and encourages) the employee, and evaluates when the employee is ready to do the job without direct supervision.
The first step - explaining the job to the employee - can be done in different ways. The supervisor/trainer and the employee can sit down and go through the training materials together. It may be advantageous to provide the employee with a copy of the training modules that are applicable to his/her job. The fact that most of the training is conducted at the job site does not preclude the use of a classroom, or a quiet office, for the first part of the training. Any general theory, or knowledge training, as well as the initial explanation of the job procedure, may be best done in an office/classroom setting; especially when noise levels, or other conditions at the job site, make communication difficult. A complete series of job steps could be presented through the use of slides developed at the mining operation.
xv

MODULE NUMBER 3OFINSTRUCTION GUIDE NUMBER 40
ON-THE-JOB TRAINING MODULESFOR THESAND, GRAVEL, AND CRUSHED STONE INDUSTRY
PLANT SHUT-DOWN
For the job of plant shut-down, this module describes basic job steps, potential accidents and hazards, and recommended safe job procedures.
The job of plant shut-down is usually done by the plant operator, but may be done by other occupations, such as utility worker, laborer, etc. The plant operator/utility worker must make sure that employees, and others, are protected from accidents and injuries that could result from plant shut-down operations.
Remember to observe two key precautions during normal plant shut-down:
xvi
1. Do not shut off any equipment that is still carrying material.
2. Do not shut off any equipment to which material is still being delivered.
Note that these precautions only apply to normal shut-down procedures. They do not apply to emergency situations.
Material left on, or in, equipment can cause problems during start-up. For example, attempting to start a loaded conveyor belt can cause slippage at the drive pulley, or motor overload. If equipment is shut-off while material is still being delivered to it, a pile-up of spilled material will occur at the transfer points.
An improper shut-down sequence can damage plant equipment, and can also increase the risk of injury, if extensive clean-up is required. For proper, normal shut-down, the feed of material into the plant must be stopped first, if sequence rollers are not in use. The rest of the shut-down procedure must then wait until the plant is clear of material, or at least until each piece of equipment is clear of material. The various plant equipment is generally shut-off in the same order as the material flow, starting with the primary feed system - pit material input - and working through the finished product conveyors. The fresh water pumps, sand pumps, and other pumps are shut off last.
xvii

The following safe job procedures will help minimize incidents which may cause accidents, and may adversely affect production.
REQUIRED, OR RECOMMENDED, PERSONAL PROTECTIVE EQUIPMENT: HARD HAT, STEEL-TOED SHOES, LIFE JACKET, SAFETY GLASSES
SEQUENCE OF BASIC JOB
STEPS
1. Stop primary feed system.
2. Move finished product belts to the next shift’s starting position (where applicable to plant operation).
POTENTIAL ACCIDENTS OR
HAZARDS
1. A) Leaving material, which may freeze, in the hopper or truck.
2. A) Catching someone between moving radial stacker and stationary object.
xviii
RECOMMENDED SAFE JOB PROCEDURES
1. A) Make sure that material input from pit has stopped for shift, where applicable (all trucks have dumped). Shut off primary feed system (hopper feeder belt, belt from surge pile, etc). Watch for all material to clear plant, or at least clear each piece of equipment before shut-down.
2. A) Look to make sure that all persons are in the clear and/or sound the alarm.

SEQUENCE OF BASIC JOB
STEPS
3. Stop all conveyors, stackers, and associated equipment, in plant sequence.
(Note to trainer: review your plant’s shut-down procedure in detail.)
4. Stop secondary pumps.
POTENTIAL ACCIDENTS OR
HAZARDS
3. A) Leaving materials on, or in, equipment, which can cause start-up problems for the next shift (belt slippage, motor overload, etc.)
B) Material pile-up and spillage at transfer points.
4. A) Slipping/falling.
RECOMMENDED SAFE JOB PROCEDURES
3. A) Be sure there is no material remaining on, or in, each piece of equipment before shutting it off.
B) After primary feed system is off, shut-down sequence usually begins with the primary belt from hopper, or surge pile, and proceeds to the finished product belts (suggest written sequence and labeled switches for training and reference purposes). Look, where possible, to ensure that each piece of equipment has actually stopped before shutting off the next piece of equipment.
4. A) Use designated walkways, and examine them for wet or icy conditions, and for tripping hazards.
xix

SEQUENCE OFBASIC JOB
STEPS
5. Stop primary pumps.
POTENTIAL ACCIDENTS OR
HAZARDS
B) Electrical hazards (exposed wires, frayed insulation, etc.)
C) Mechanical Hazards.
RECOMMENDED SAFE JOB PROCEDURES
B) Check for electrical hazards, especially if on/off switch is at pump.
C) Check for mechanical hazards, especially if on/off switch is at pump. Correct or report any hazards.
5. A) Wear life jacket.
B) Use designated walkways, and examine them for wet or icy conditions, and for tripping hazards.
C) Examine work area for electrical hazards.
D) Examine work area for in-place guards.
5. A) Falling into water.
B) Slipping/falling.
C) Electrical hazards.
D) Mechanical hazards.
xx

GENERAL INFORMATION
This module is part of an Instruction Guide that was developed to assist the sand, gravel, and crushed stone industry in conducting effective on-the-job training (OJT) of new employees, or employees reassigned to different jobs. The use of training materials, such as this module, is an important part of an effective, systematic, OJT program.
This Instruction Guide uses a generic Job Safety Analysis (JSA) of jobs common to the industry. The JSA format facilitates uniform basic training in safe job procedures, while requiring only a minimum of time and effort on the part of the trainer. This material is generic to the industry; therefore, each company using this guide will need to tailor the material somewhat to fit their particular requirements. In some cases, the material must be general in nature, and will not include specific details of procedures or equipment that must be taught by the trainer.
Recommendations for an overall OJT program are contained in the Mine Safety and Health Administration (MSHA) guide: “Structuring Effective On-The-Job Training Programs”
TRAINING RECOMMENDATIONS
On-the-job training is usually best done by the employee’s immediate supervisor. If the supervisor relies on another employee to do certain parts of the training, the supervisor should be present to monitor the training. OJT is conducted at the actual job site, where the work will be done.
The supervisor/trainer should use the training materials (this module, or other materials) while the training is being done, to help ensure that all job steps are covered, and that no important safety precautions are omitted. Effective OJT should begin with an explanation (lecture and/or discussion) of the safe job procedure. The explanation should be followed by a hands-on demonstration of the proper job procedure. A good demonstration is, perhaps, the most important part of OJT. The demonstration is followed by supervised practice, during which the supervisor/trainer coaches (corrects and encourages) the employee, and evaluates when the employee is ready to do the job without direct supervision.
The first step - explaining the job to the employee - can be done in different ways. The supervisor/trainer and the employee can sit down and go through the training materials together. It may be advantageous to provide the employee with a copy of the training modules that are applicable to his/her job. The fact that most of the training is conducted at the job site does not preclude the use of a classroom, or a quiet office, for the first part of the training. Any general theory, or knowledge training, as well as the initial explanation of the job procedure, may be best done in an office/classroom setting; especially when noise levels, or other conditions at the job site, make communication difficult. A complete series of job steps could be presented through the use of slides developed at the mining operation.
xxi

MODULE NUMBER 4OFINSTRUCTION GUIDE NO. 40
ON-THE-JOB TRAININGFOR THESAND, GRAVEL, AND CRUSHED STONE INDUSTRY
PLANT OPERATION
For the job of plant operation, this module describes the basic job steps, potential hazards and accidents, and the recommended safe job procedures.
These job steps are usually done by the plant operator, and other occupations, such as utility worker, laborer, etc. The plant operator/utility worker must make sure that employees, and others, are protected from accidents and injuries resulting from plant operations.
While both sand and gravel plants, and crushed stone plants, are built by many different manufacturers, the processes and equipment involved in the production effort are very similar.
xxii

SAND AND GRAVEL PLANTS
At a typical sand and gravel plant, raw material from a hopper at a dumping station is carried by conveyor belt to a screening deck. The screening deck removes oversized material (large clay balls, roots, very large rocks, etc.), separates sand from gravel, and then separates the gravel into different sizes. Spray bars wash the gravel as it passes through the screening deck.
Large stones then go to log washers, while medium size material (chat and/or pea gravel) goes to a screw. The large stones, after emerging from the log washer, and the finer material, after emerging from the screw, pass through separate final rinse stations on the way to storage areas. Transportation to a storage area may be by a fixed conveyor system, a radial stacker system, or an extendable belt conveyor system. A radial stacker is a conveyor system, that rotates from a stationary pivot point and stores the material in an arc-shaped stockpile. The extendable belt conveyor system has the capability of lengthening or shortening itself by moving the head section. The head section is mounted on wheels and moves on rails, which allows the conveyor to supply several stockpiles, hoppers, or silos.
Sand, after being separated on a screening deck, flows to a classifier, where it is washed and sized. The sand is then carried by a screw, which separates the sand from the water, to a conveyor belt, which carries the sand to a storage area.
Water, that is used in the plant, is pumped from a fresh water pond. After use, the discharged water is pumped into a settling pond.
CRUSHED STONE PLANTS
A crushed stone plant differs somewhat from a sand and gravel plant. Raw material, of various sizes, is brought from a quarry, to a primary crusher, by haul units. Some primary crushers are fed by wobblers, which are chain driven conveying systems, with eccentric rollers.
After primary crushing, material is conveyed by belt to a scrubber for washing. The scrubber is a cylindrical rotary device with internal screens, and auger-type vanes that carry the material through the scrubber. Very fine material is separated from coarse material in the scrubber. The very fine material is sent to a settling pond. Coarse material is sent first to a surge pile, and then to a primary screening deck. Oversized material is carried from the primary screening deck to a secondary crusher, and is then returned to the primary screening deck to be separated into desired sizes. A crushed stone plant contains a series of screen decks, secondary crushers, and final rinse screening stations. The finished product travels through a final rinse stage, and is then stored in silos, bins, and stockpiles.
A sand and gravel, or crushed stone, plant consists of a number of interdependent production processes, which occur simultaneously. Therefore, it is important to know how the plant operates, in order to prevent a massive pile-up of material at transfer points during plant start-up, operation, or shutdown.
xxiii

PRE-SHIFT INSPECTIONS
Before initial operation on production runs, a careful and detailed inspection of the plant, and all of its components, should be conducted. Check the alignment of all mechanical components. Also, check the operating alignment of the belts on the carrying rollers and the return idlers. Visually inspect the belts for defective splices. Be sure that all moving parts have guards in place.
Check that there are no construction materials, tools, or projecting members that can rub, tear, or cut the belt when it is started. Be sure that chute skirtboards are intact, and are not touching the belt. Adjust rubber edging strips on skirtboards, so that they touch lightly on the belt surface. Adjust belt scrapers, if necessary.
WALK-THROUGH INSPECTIONS
Walk through the plant soon after it has started. Listen for any unusual sounds made by idlers, pulleys, shafts, bearings, drives, bolts, and belt splices.
Walk-through inspections of all plant equipment should be made several times each day, during the operating shift. Guards, safety devices, and warning signs should be checked to determine that they are in proper position, and in good working order. Only competent, properly trained, and authorized persons should repair defective safety devices.
Although a stuck idler may not appear to be important, plant operators should realize that, if an idler is stuck under a high-speed belt that is handling abrasive material, the shell of the idler will soon wear through, causing a knife edge that will severely damage an expensive belt. Plant operators should be alert for impending idler failures, and correct the malfunction before the belt is damaged.
LUBRICATION AND REPAIR
A comprehensive lubrication program is essential to attain low maintenance costs, and dependable plant operations. Pay particular attention to lubrication of all bearings. Equipment life will be extended by following the manufacturer’s recommendations for types of lubricant, amount and frequency of application, and type of greasing equipment to be used.
People can become entangled in moving parts while lubricating equipment. Extended grease fittings and hoses allow moving equipment to be safely lubricated. Equipment must be shut down and locked out, if lubrication requires either the removal of guards or the placement of
xxiv

people in dangerous positions to perform the job.
Frequently used repair parts should be stocked at the plant site to maximize plant dependability and productivity, and to minimize maintenance costs and downtime.
Since plant equipment operates automatically after start-up, “plant operation” under normal conditions consists primarily of inspection, maintenance, and clean-up.
xxv

The following safe job procedures will help to minimize incidents which may cause injuries, and adversely affect production.
REQUIRED OR RECOMMENDED EQUIPMENT:HARD HAT, STEEL-TOED SHOES, LIFE JACKET, HEARING PROTECTION, SAFETY
SEQUENCE OF BASIC JOB
STEPS
1. A) Visually inspect “V” belts.
2. A) Visually inspect conveyor belt idlers, belt splices, and stop cord. Listen for noisy, defective bearings.
GLASSES
POTENTIAL ACCIDENTS RECOMMENDED SAFE JOB OR HAZARDS PROCEDURES
1. A) Slipping/falling. 1. A) Use designated walkways, and keep them clean, and clear of stumbling hazards.
B) Mechanical hazards B) Make sure guards are in (body or clothing place and adequate, and caught in that clothing fits snugly. machinery).
2. A) Slipping/falling. 2. A) Use designated walkways,
B) Mechanical hazards (body or clothing caught in machinery).
xxvi
and keep them clean, and clear of stumbling hazards.
B) Make sure guards are in place and adequate, and that clothing fits snugly. Do not touch idlers.

SEQUENCE OF BASIC JOB
STEPS
3. Visually inspect head section of conveyor for loose lagging. Report and/or repair defective lagging.
4. Check that tail pulley guard is in place, and that there is no build-up of material around tail pulley.
POTENTIAL ACCIDENTS RECOMMENDED SAFE JOB OR HAZARDS PROCEDURES
3. A) Slipping/falling. 3. A) Use designated walkways, and keep them clean, and clear of stumbling hazards.
B) Mechanical hazards. B) Make sure guards are in place and adequate, and that clothing fits snugly.
4. A) Slipping/falling. 4. A) Use designated walkways,
B) Mechanical hazards.
and keep them clean, and clear of stumbling hazards.
B) Visually check that guards are in place and adequate, and that clothing fits snugly. Do not touch any exposed moving parts. Report missing guards. For clean-up, use a long handled shovel in all areas, except where restricted clearance is a problem. This reduces possibility of coming in contact with moving parts. If a clean-up hopper is provided, shovel into hopper rather than directly onto belt.
xxvii

SEQUENCE OF BASIC JOB
STEPS
5. Check if guard is in place at power drive that moves radial stacker. (Note to trainer: Omit if radial stacker is not used, and add what is used.)
POTENTIAL ACCIDENTS OR HAZARDS
C) Getting shovel caught in return idlers.
D) Striking co-workers.
E) Back injuries.
F) Caught between moving radial stacker and stationary object, if stacker begins to move.
RECOMMENDED SAFE JOB PROCEDURES
C) When shoveling onto moving conveyor, always shovel in the direction that the belt is traveling - the shovel and any material will be carried away from you if the shovel becomes hung in the belt.
D) Watch out for other people in the area.
E) While shoveling, move your feet when turning, rather than twisting your body. Lift with your legs, not your back. Load your shovel moderately.
F) When working near tail pulley of a radial stacker, do not position yourself between tail pulley and stationary object. If your conveyor system is equipped with an audible alarm, immediately move away from belt if alarm sounds.
5. A) Slipping/falling. 5. A) Use designated walkways, and keep them clean, and clear of stumbling hazards.
xxviii

SEQUENCE OF BASIC JOB
STEPS
6. A) Visually check screens for problems with decks, “V” belts, leaking bearing seals, plugged spray bars, etc. Report any problems.
7. A) Inspect gear reducers at the conveyor head section.
POTENTIAL ACCIDENTS OR HAZARDS
B) Mechanical hazard.
RECOMMENDED SAFE JOB PROCEDURES
B) If guard is not in place, do not touch drive. Report to supervisor, or replace guard by first locking out and tagging power to motor drive. Restore power after guard is replaced.
6. A) Slipping/falling. 6. A) Use designated walkways, and keep them clean, and clear of stumbling hazards.
B) Mechanical hazards. B) Visually check that guards are in place and adequate, and that clothing fits snugly. Do not touch any exposed moving parts. Report missing guards.
7. A) Burned hand from 7. A) Visually check gear hot reducers. reducers to determine if
there is any wobble in main shaft. Listen to determine if gear reducers are wobbling or making any other unusual noise. Report any problems.
xxix

SEQUENCE OF BASIC JOB
STEPS
8. A) Visually inspect log washers (where used).
9. Inspect sand classifier (where used).
POTENTIAL ACCIDENTS RECOMMENDED SAFE JOB OR HAZARDS PROCEDURES
8. A) Slipping/falling. 8. A) Use designated walkways, and keep them clean, and clear of stumbling hazards.
B) Mechanical hazards. B) Visually check that guards are in place and adequate, and that clothing fits snugly. Do not touch any exposed moving parts. Report missing guards.
9. A) Slipping/falling from 9. A) Check for material build-up material spilled on walkway.
B) Struck by whipping water hose. Slipping/falling while handling clean-up hose.
C) Electrocution.
D) Eye injuries.
E) Bruises from water stream.
F) Knocked into something.
where stations dump into splitting troughs. Clean spilled material with a water hose.
B) Secure hose against whipping by having a secure grip, standing on hose near nozzle, or using a helper. Turn water on slowly to a pressure at which you are able to walk.
C) Do not aim water at any electrical boxes.
D) Wear eye protection. Be aware of others working in area.
E) Do not aim water hose at another person.
F) Do not stand with your back toward open stairways, walkways, or moving equipment.
xxx

SEQUENCE OF BASIC JOB
STEPS
10. Inspect gear boxes at sand screws (where used). Listen for unusual noise in gear boxes, and report any problems to supervisor.
11. Inspect rock crusher (where used), and clean up any spillage with a shovel and/or a water hose.
POTENTIAL ACCIDENTS RECOMMENDED SAFE JOB OR HAZARDS PROCEDURES
10. A) Slipping/falling. 10. A) Use designated walkways, and keep them clean, and clear of stumbling hazards.
11. A) Slipping/falling 11. A) Use designated from material spilled on walkway.
B) Struck by whipping water hose. Slipping/falling while handling clean-up hose.
C) Electrocution.
D) Eye injuries.
E) Bruises from water stream.
F) Knocked into something.
walkways, and keep them clean, and clear of stumbling hazards.
B) Secure hose against whipping by having a secure grip, standing on hose near nozzle, or using a helper. Turn water on slowly to a pressure at which you are able to walk.
C) Do not aim water at any electrical boxes.
D) Wear eye protection. Be aware of others working in area.
E) Do not aim water hose at another person.
F) Do not stand with your back toward open stairways, walkways, or moving equipment.
xxxi

SEQUENCE OF BASIC JOB
STEPS
12. Return to work station. Listen for any unusual sounds while returning to work station. Periodically walk plant area, as called for by company policy.
POTENTIAL ACCIDENTS OR HAZARDS
G) Finger caught between pulley and belt.
12. A) Tripping/slipping hazards.
RECOMMENDED SAFE JOB PROCEDURES
G) Check that all “V” belt drives and couplings are guarded. Do not touch “V” belts. Report any missing guards to supervisor.
12. A) Watch step, and remove any tripping hazards while traveling to work station.
xxxii

GENERAL INFORMATION
This module is part of an Instruction Guide that was developed to assist the sand, gravel, and crushed stone industry in conducting effective on-the-job training (OJT) of new employees, or employees reassigned to different jobs. The use of training materials, such as this module, is an important part of an effective, systematic, OJT program.
This Instruction Guide uses a generic Job Safety Analysis (JSA) of jobs common to the industry. The JSA format facilitates uniform basic training in safe job procedures, while requiring only a minimum of time and effort on the part of the trainer. This material is generic to the industry; therefore, each company using this guide will need to tailor the material somewhat to fit their particular requirements. In some cases, the material must be general in nature, and will not include specific details of procedures or equipment that must be taught by the trainer.
Recommendations for an overall OJT program are contained in the Mine Safety and Health Administration (MSHA) guide: “Structuring Effective On-The-Job Training Programs”
TRAINING RECOMMENDATIONS
On-the-job training is usually best done by the employee’s immediate supervisor. If the supervisor relies on another employee to do certain parts of the training, the supervisor should be present to monitor the training. OJT is conducted at the actual job site, where the work will be done.
The supervisor/trainer should use the training materials (this module, or other materials) while the training is being done, to help ensure that all job steps are covered, and that no important safety precautions are omitted. Effective OJT should begin with an explanation (lecture and/or discussion) of the safe job procedure. The explanation should be followed by a hands-on demonstration of the proper job procedure. A good demonstration is, perhaps, the most important part of OJT. The demonstration is followed by supervised practice, during which the supervisor/trainer coaches (corrects and encourages) the employee, and evaluates when the employee is ready to do the job without direct supervision.
The first step - explaining the job to the employee - can be done in different ways. The supervisor/trainer and the employee can sit down and go through the training materials together. It may be advantageous to provide the employee with a copy of the training modules that are applicable to his/her job. The fact that most of the training is conducted at the job site does not preclude the use of a classroom, or a quiet office, for the first part of the training. Any general theory, or knowledge training, as well as the initial explanation of the job procedure, may be best done in an office/classroom setting; especially when noise levels, or other conditions at the job site, make communication difficult. A complete series of job steps could be presented through the use of slides developed at the mining operation.
xxxiii
MODULE NUMBER 5OFINSTRUCTION GUIDE NUMBER 40
ON-THE-JOB TRAINING FOR THESAND, GRAVEL, AND CRUSHED STONE INDUSTRY
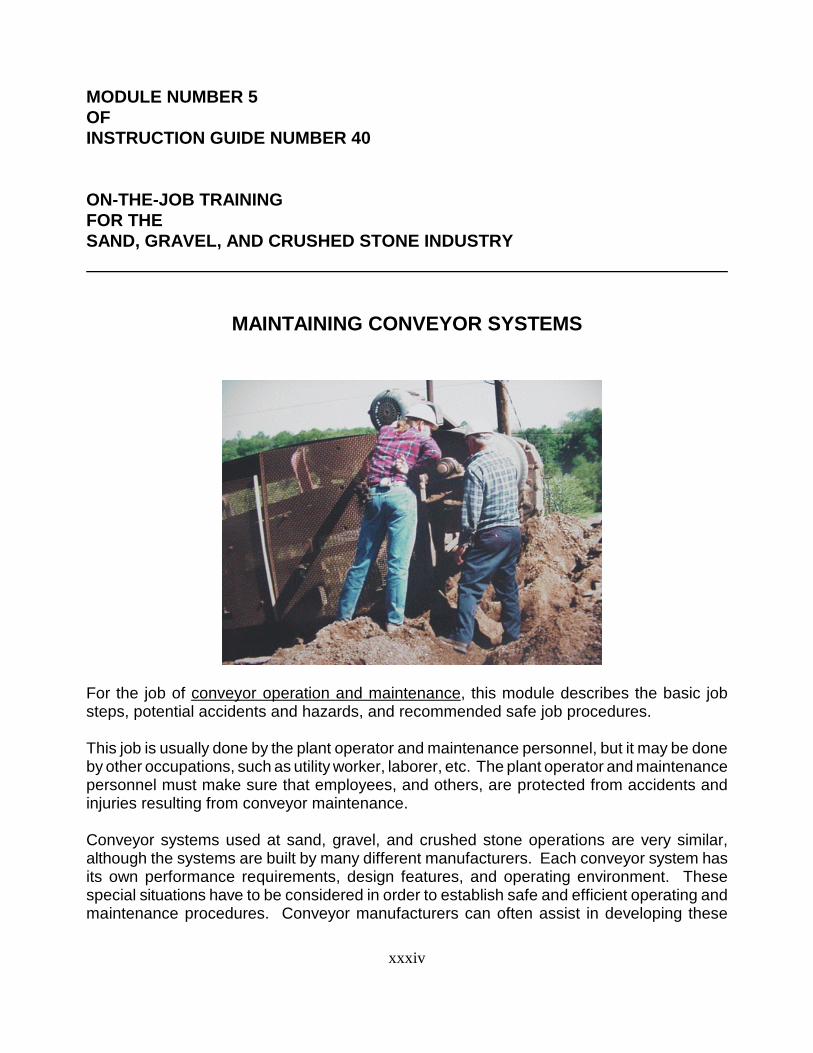
MAINTAINING CONVEYOR SYSTEMS
For the job of conveyor operation and maintenance, this module describes the basic job steps, potential accidents and hazards, and recommended safe job procedures.
This job is usually done by the plant operator and maintenance personnel, but it may be done by other occupations, such as utility worker, laborer, etc. The plant operator and maintenance personnel must make sure that employees, and others, are protected from accidents and injuries resulting from conveyor maintenance.
Conveyor systems used at sand, gravel, and crushed stone operations are very similar, although the systems are built by many different manufacturers. Each conveyor system has its own performance requirements, design features, and operating environment. These special situations have to be considered in order to establish safe and efficient operating and maintenance procedures. Conveyor manufacturers can often assist in developing these
xxxiv

procedures.
Many conveyor systems perform well with as few as one or two operators. Conveyor performance can be continuously monitored by electrical controls, safety sensors, closed circuit television, signal systems, and other devices.
Modern electrical controls use programmable controllers, or computers, to measure conveyor belt performance. Electrical controls can also be used to weigh, mix, and blend material, as well as to switch material flow paths. Sensors, and other devices used to indicate maintenance requirements and other unsafe conditions, are integral parts of some electrical control systems. These controls, sensors, and other devices are highly durable. Typically, they can only be maintained and serviced by specialists.
CONVEYOR ACCIDENTS AND DAMAGE PREVENTION
INTRODUCTION
Conveyor accidents that cause personal injuries do not normally occur because of faulty equipment design or component failure. These accidents are usually caused by human error, inadequate training, or lack of hazard awareness.
Employees should receive safety training, after the conveyor is designed and the system is installed by qualified personnel. Supervisory, operating, and maintenance personnel should be instructed in safe operating procedures, hazard recognition, and housekeeping skills. Periodic refresher training should be given in these subjects. Unauthorized employees should not be permitted to enter hazardous areas.
All workers - especially maintenance personnel - should be provided with proper tools and equipment to operate, and maintain, the conveyor in a safe condition.
COMMON ACCIDENTS
One common type of accident involving conveyors occurs when an employee stops a conveyor to perform work on it, but does not properly lockout and tag the electrical controls. Another employee, noticing that the belt is stopped, restarts it - injuring the employee that is performing the work.
Another common accident involving conveyors occurs when an employee becomes caught in unguarded, or inadequately guarded, moving equipment. The guards may not have been installed, or, more commonly, the guards may have been removed to perform work. Also, the guards may have been previously removed and not replaced. Employees should be sure that equipment guards are properly installed and maintained.
DAMAGE PREVENTION
xxxv

The belt is the most expensive item in a conveyor system. Therefore, proper belt operation, and belt maintenance, are particularly important in order to minimize repair and replacement costs.
Weather can affect belt operation. In sub-zero temperatures, special lubricants are sometimes necessary in order to avoid overloading the drive motor. The belt may sometimes be covered with moisture, frost, or frozen material. A belt scraper, installed just ahead of the point where the belt goes onto the drive pulley, may be useful for removing frost, or frozen material, that is stuck to the belt. Operating the belt for a brief period, at start-up, before loading it, may be advisable, in order to remove frost or frozen material.
Sticky or frozen material on pulleys or idlers can cause belt misalignment, or other damage. Pulley scrapers, and/or soft rubber pulley lagging, may help to correct this condition. No one should be allowed to remove stuck material from the belt, unless the belt is stopped and the master electrical control is locked out and tagged.
Belts can be damaged, or prematurely worn, if loaded with improper sizes or volumes of material. Foreign objects, such as tramp iron, spikes, or timbers, in the material flow can jam the belt, causing expensive shut-downs and repairs.
Stuck idlers, under a high speed belt, can wear through to a knife edge that can severely damage a belt. Plant operators should be alert for impending idler failures, and correct malfunctions before the belt is damaged.
SAFETY PRECAUTIONS
The following safety precautions are generally applicable to conveyor systems:
1. Conveyors should only be used to handle material for which they were designed.
2. Belt capacity, and belt speed design ratings, should not be exceeded.
3. Only trained personnel should be allowed to operate conveyor systems. Operators should have complete knowledge of conveyor operation, electrical controls, safety devices, and warning devices, and the capacity and performance limitation of the conveyor system.
4. All personnel should know the location and operation of all emergency controls and safety devices. Areas near emergency controls and safety devices must be kept free of obstructions at all times.
5. All equipment must be inspected at the beginning of the shift, before the equipment is started. Guards, safety devices, and warning signs should be maintained in proper positions and in good working order. Only competent and properly trained and authorized
xxxvi

persons should adjust and repair safety devices.
6. Another “walk-through” inspection should be made after the plant is started, in order to detect any problems with idlers, pulleys, shafts, bearings, drives, bolts, or belt splices. Listen for unusual sounds.
7. Poking at, or prodding, material on the belt, or any component of a moving belt, must be prohibited.
8. Contact with, or work on, a conveyor must occur only while the equipment is stopped, and the electrical control is properly locked out and tagged out.
9. People must not ride on, step on, or cross over a moving conveyor, except at designed cross-overs.
10. People should only walk, or climb, on conveyor structures by using the walkways, stairs, ladders, and cross-overs that are provided.
11. Good housekeeping is a prerequisite for safe conditions. All areas around a conveyor, particularly those areas around drives, walkways, safety devices, and control stations, should be kept free of debris or any other obstacles. Any posted warning signs or instructions should be kept current.
12. Conveyors that are in an unsafe condition for operation, or that do not have all guards and safety devices in good condition, must not be used until all necessary repairs have been made.
13. All people should be barred, by appropriate means, from entering an area where falling material may present a hazard. Warning signs and barricades can be used.
14. First-class maintenance is a prerequisite for the safest conveyor operation. Maintenance, including lubrication, must be performed with the conveyor power locked-out and tagged. Special lubricating equipment, lube extensions, pipes, etc., can be installed so that lubrication of an operating conveyor can be done without any hazards.
CONVEYOR SYSTEM MAINTENANCE
An equipment maintenance program includes the tasks of inspection, housekeeping, lubrication, and repair.
During inspections, check the alignment of all mechanical components, and the operating alignment of the belt on carrying and return idlers. Make sure there are no repair or
xxxvii

construction materials, tools, or projecting members that can rub, tear, or cut the belt when it starts up. Check that chute skirtboards are intact, and are not touching the belt. Adjust rubber edging strips on skirtboards so that the strips touch only lightly on the belt surface. Check and adjust belt scrapers, if necessary.
Good housekeeping is essential for dependable operation and low cost maintenance. Built-up material on the deck can rub against, and eventually stop, idlers, thereby increasing belt tension and possibly damaging the belt. Spillage on the return belt can also damage the belt, as lumps of material are squeezed between the belt and pulleys. Scrapers on the return belt, where the belt enters the tail pulley, may be desirable in some cases.
A comprehensive lubrication program is essential for low maintenance costs and dependable conveyor operation. Pay particular attention to the lubrication of all bearings. Equipment life will be extended by following the manufacturer’s recommendations for the type of lubricant, amount and frequency of application, and type of greasing equipment to be used.
Frequently used repair parts should be stocked at the plant site, in order to maximize plant dependability and productivity and minimize maintenance costs and downtime.
xxxviii

The remainder of this module covers safe job procedures for seven conveyor maintenance tasks. Following these procedures will help to minimize incidents which can cause injuries, and adversely affect production.
REQUIRED AND/OR RECOMMENDED PERSONAL PROTECTIVE EQUIPMENT:
HARD HAT, STEEL-TOED SHOES, GLOVES, SAFETY GLASSES WITH SIDE SHIELDS, OR GOGGLES, HEARING PROTECTION.
I. LACING CONVEYOR BELTS
SEQUENCE OF BASIC JOB STEPS
1. De-energize and lockout and tag belt power. Mechanically block belt from rolling without power.
POTENTIAL ACCIDENTS OR HAZARDS
1. A) Electrical hazard -face of breaker coming open and allowing contact with energized parts.
B) Mechanical hazard -power turned on due to improper lock-out procedure while working on equipment.
xxxix
RECOMMENDED SAFE JOB PROCEDURES
1. A) Stand on non-conductive mat. Wear gloves.
B) Never work on equipment unless you have locked-out power. Each person doing work must lockout and tag. Each person must keep their key in their possession. Confirm that proper equipment was locked-out by testing start switch.

SEQUENCE OF BASIC JOB STEPS
2. Select tools and supplies:
1. Two comealongs
2. Impact wrench
3. Hole punch 4. Two belt
clamps 5. Utility knife 6. Straight
edge 7. 5'x2"x10"
board 8. Template 9. Nails 10. Stud
breaker 11. Laces
3. Check/inspect tools and workplace. Ensure that counterweight is immobilized.
POTENTIAL ACCIDENTS OR HAZARDS
2. A) Strains from lifting tools.
B) Cuts from handling cable.
C) Cuts from utility knife.
3. A) Injury due to cable or chain break.
RECOMMENDED SAFE JOB PROCEDURES
2. A) Use proper bending and lifting technique by using knees and legs rather than back.
B) Wear gloves, and watch for broken wires in cable.
C) Wear protective gloves, and make sure knife is properly sheathed.
3. A) Inspect cable or chain. Repair/report if damaged.
xl

SEQUENCE OF BASIC JOB STEPS
4. Attach belt clamps to each end of belt about 3 feet back from place to be spliced. Insert belt between the clamps, and tighten bolts.
5. Attach both comealongs to belt clamps, using two holes in each clamp.
POTENTIAL ACCIDENTS OR HAZARDS
B) Shock from electrical impact wrench.
C) Slips/falls.
4. A) Falling off conveyor belt to ground.
B) Pinched fingers.
RECOMMENDED SAFE JOB PROCEDURES
B) Inspect impact wrench for damage and wear on case and insulation of wires. Inspect impact wrench for three prong plug, or other means of grounding, or a double insulated case. Dry damp equipment - clean greasy equipment. Do not stand in water or on damp surfaces if possible - wear rubber boots if needed.
C) Remove slipping/tripping hazards.
A) Use approved manlift if necessary for safe access. You must use fall protection if you are working in an elevated, exposed position.
B) Keep fingers clear of pinch points.
5. A) Cuts or scratches 5. A) Inspect cables. Wear due to burrs or gloves, and do not slide broken strands. hands along cable.
xli

SEQUENCE OF BASIC JOB STEPS
6. Use the straight edge and utility knife to cut the torn edge away.
7. Draw two edges together with come-along, checking progress periodically, to obtain desired tension.
POTENTIAL ACCIDENTS RECOMMENDED SAFE JOB OR HAZARDS PROCEDURES
6. A) Cuts. 6. A) Use a retractable blade knife. Cut away from, or beside, your body - never cut toward yourself. Keep a firm grip on tools. Do not try to cut through belt with only one cut - make several cuts until knife goes through. Use sharp blades.
B) Knife dropped on B) Place warning barricade people below. below.
7. A) Cable or chain 7. A) Stand to the side and face breaking. away from come-along
while operating the handle. If conveyor does not have gravity, or other type, take-up pulley, loosen tail pulley, and pull forward as much as necessary.
xlii
SEQUENCE OF BASIC JOB STEPS
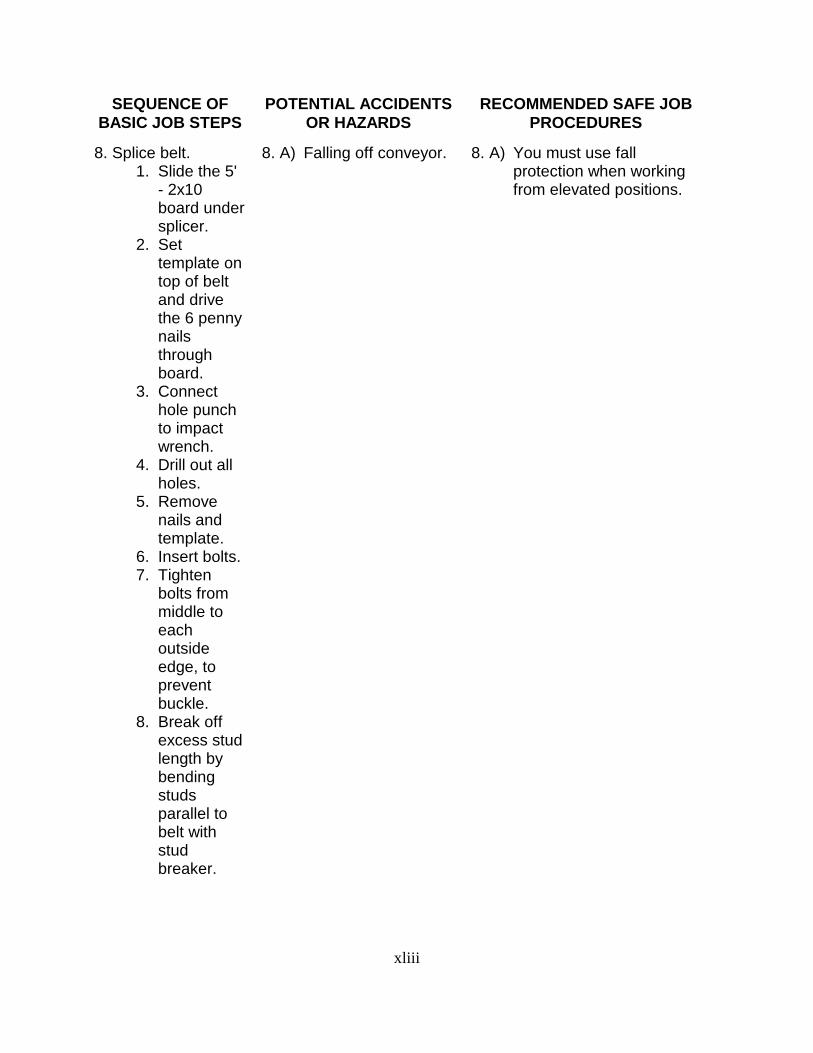
8. Splice belt. 1. Slide the 5'
- 2x10 board under splicer.
2. Set template on top of belt and drive the 6 penny nails through board.
3. Connect hole punch to impact wrench.
4. Drill out all holes.
5. Remove nails and template.
6. Insert bolts. 7. Tighten
bolts from middle to each outside edge, to prevent buckle.
8. Break off excess stud length by bending studs parallel to belt with stud breaker.
POTENTIAL ACCIDENTS RECOMMENDED SAFE JOB OR HAZARDS PROCEDURES
8. A) Falling off conveyor. 8. A) You must use fall protection when working from elevated positions.
xliii

SEQUENCE OF BASIC JOB STEPS
9. Loosen comealongs, and remove.
10. Remove clamps.
11. Realign and tension tail pulley, if previously loosened.
12. Remove any mechanical blocks. Remove your lock-out and tag. Restore power.
POTENTIAL ACCIDENTS RECOMMENDED SAFE JOBOR HAZARDS
9. A) Struck by handle.
10. A) Fall off conveyor.
B) Bruised knuckles.
11. A) Cut knuckles.
12. A) Persons caught in conveyor.
PROCEDURES
9. A) Grip handle firmly, flip safety latch to reverse, and stroke handle full stroke in both directions.
A) You must use fall protection if you are working in an elevated, exposed position.
B) Wear gloves, and grip tools firmly.
11. A) Wear gloves. Keep firm grip on tools.
12. A) Check that everyone is clear of equipment.
xliv

II. CHANGING BEARINGS ON CONVEYORS
SEQUENCE OF BASIC JOB STEPS
1. Lockout and tag belt power.
2. Select tools and supplies:
1. Ratchet and sockets
POTENTIAL ACCIDENTS OR HAZARDS
1. A) Electrical hazard -face of breaker coming open and allowing contact with energized parts.
B) Mechanical hazard -power turned on due to improper lock-out procedure while working on equipment.
2. A) Strains from lifting tools.
2. A come-along 3. Replacement
bearing 4. Burlap bag
and hammer 5. Cutting torch 6. Emery cloth 7. Grease
B) Cuts from handling come-along cable.
RECOMMENDED SAFE JOB PROCEDURES
1. A) Stand on non-conductive mat. Wear gloves.
B) Never work on equipment unless you have locked-out power. Each person doing work must lockout and tag. Each person must keep their key in their possession. Confirm that proper equipment was locked-out by testing start switch.
2. A) Use proper bending and lifting technique by using knees and legs rather than back.
B) Wear gloves, and watch for broken wires in cable.
xlv

SEQUENCE OF BASIC JOB STEPS
3. Check/inspect tools and workplace.
4. Remove guard. Hold guard securely if it could fall when disconnected. Get help when removing very large guards.
5. Attach come-along to shaft behind bearing, and to support frame.
POTENTIAL ACCIDENTS OR HAZARDS
3. A) Slipping/tripping hazards.
B) Come-along cable or chain break, injuring personnel.
C) Cutting/welding hazards.
D) Fire.
4. A) Cuts; bruised knuckles.
B) Tripping; foot injury.
5. A) Cable breaking.
B) Cuts due to burrs on cable.
RECOMMENDED SAFE JOB PROCEDURES
3. A) Remove, if possible, or avoid.
B) Inspect cable or chain -repair or replace if defective.
C) Make sure that hoses, gauges, and regulators are in good condition, and kept clean, and that cylinders are secured, and valves and gauges are protected.
D) Keep work area clear of combustible materials. Keep fire extinguisher available.
4. A) Use proper tools in the proper manner. Wear gloves.
B) Place guard, bolts, etc., out of the way
5. A) Inspect cable. Repair/report if damaged.
B) Wear gloves. Do not slide hand along cable.
xlvi

SEQUENCE OF BASIC JOB STEPS
6. Loosen the bearing by removing bolts.
7. Take up slack to relieve pressure on bearing.
8. Remove bearing.
9. Install new bearing. Buff shaft with emery cloth. Grease shaft lightly. Line up bearing with come-along.
POTENTIAL ACCIDENTS OR HAZARDS
6. A) Bruised knuckles.
7. A) Cable breaking.
8. A) Metal in eyes. Piece of metal in hand.
B) Hazards with cutting torch, if bearing must be cut away from shaft.
9. A) Cuts, bruised knuckles.
RECOMMENDED SAFE JOB PROCEDURES
6. A) Use tools properly.
7. A) Stand to the side, and face away from come-along while operating the handle.
8. A) If bearing is frozen, wear goggles and gloves, and cover the bearing with a burlap bag (or something similar). Knock housing away from race with a hammer.
B) Wear goggles or face shield. Check that tanks are secure, and equipment is in good working order. Check that work area is clear of extraneous combustible material, and that fire extinguisher is available.
9. A) Wear gloves. Use proper tools in proper manner.
xlvii

SEQUENCE OF POTENTIAL ACCIDENTS RECOMMENDED SAFE JOB BASIC JOB STEPS OR HAZARDS PROCEDURES
10. Restore power. 10. A) Person caught in 10. A) Make sure people conveyor. are clear of belt.
Remove lock and tag from switch.
xlviii

III. REPLACING “V” BELTS
SEQUENCE OF BASIC JOB STEPS
1. Lockout and tag belt power.
2. Remove guard. Hold guard securely if it could fall when disconnected. Get help when removing very large guards.
3. Loosen the adjustments.
POTENTIAL ACCIDENTS OR HAZARDS
1. A) Electrical hazard -face of breaker coming open and allowing contact with energized parts.
B) Mechanical hazard -power turned on due to improper lock-out procedure while working on equipment.
2. A) Cuts; bruised knuckles.
B) Tripping; foot injury.
3. A) Wrench slipping off and injuring hand.
RECOMMENDED SAFE JOB PROCEDURES
1. A) Stand on non-conductive mat. Wear gloves.
B) Never work on equipment unless you have locked-out power. Each person doing work must lockout and tag. Each person must keep their key in their possession. Confirm that proper equipment was locked-out by testing start switch.
2. A) Use proper tools in the proper manner. Wear gloves.
B) Place guard, bolts, etc., out of the way.
3. A) Use proper tools in the proper manner.
xlix

SEQUENCE OF BASIC JOB STEPS
4. Remove old belts.
5. Install new belts.
6. Replace guard and restore power.
POTENTIAL ACCIDENTS OR HAZARDS
4. A) Pinched finger.
5. A) Pinched finger.
6. A) Mechanical hazard.
RECOMMENDED SAFE JOB PROCEDURES
4. A) If necessary, cut old belt, or use tool to pry belt off.
5. A) If necessary, use a tool to carefully pry new belt onto pulley.
6. A) Make sure guard is reinstalled properly. Make sure people are clear of belt, and remove lock and tag.
l

IV. TRAINING CONVEYOR BELTS
SEQUENCE OF BASIC JOB STEPS
1. Install idlers.
2. Determine which idlers need adjusting by watching moving belt.
3. Lockout and tag power switch in “off” position.
4. Prepare to adjust idlers by loosening the mounting bolts on several idlers upstream of the location where the belt is running to one side.
5. Restore power to belt.
POTENTIAL ACCIDENTS RECOMMENDED SAFEOR HAZARDS
1. A) Falling from conveyor.
2. A) Mechanical hazard. Particles in eyes.
3. A) Mechanical hazard.
4. A) Wrench slipping -injuring hand.
5. A) Mechanical hazard. People caught in belt.
JOB PROCEDURES
1. A) If there is a possibility of falling, use a safety belt and line.
2. A) Do not touch moving belt or idlers. Wear safety glasses with side shields, or goggles.
3. A) Properly lockout and tag power.
4. A) Use tools in proper manner. Wear gloves.
5. A) Make sure people are clear of belt, and remove lock and tag.
li
SEQUENCE OF BASIC JOB STEPS
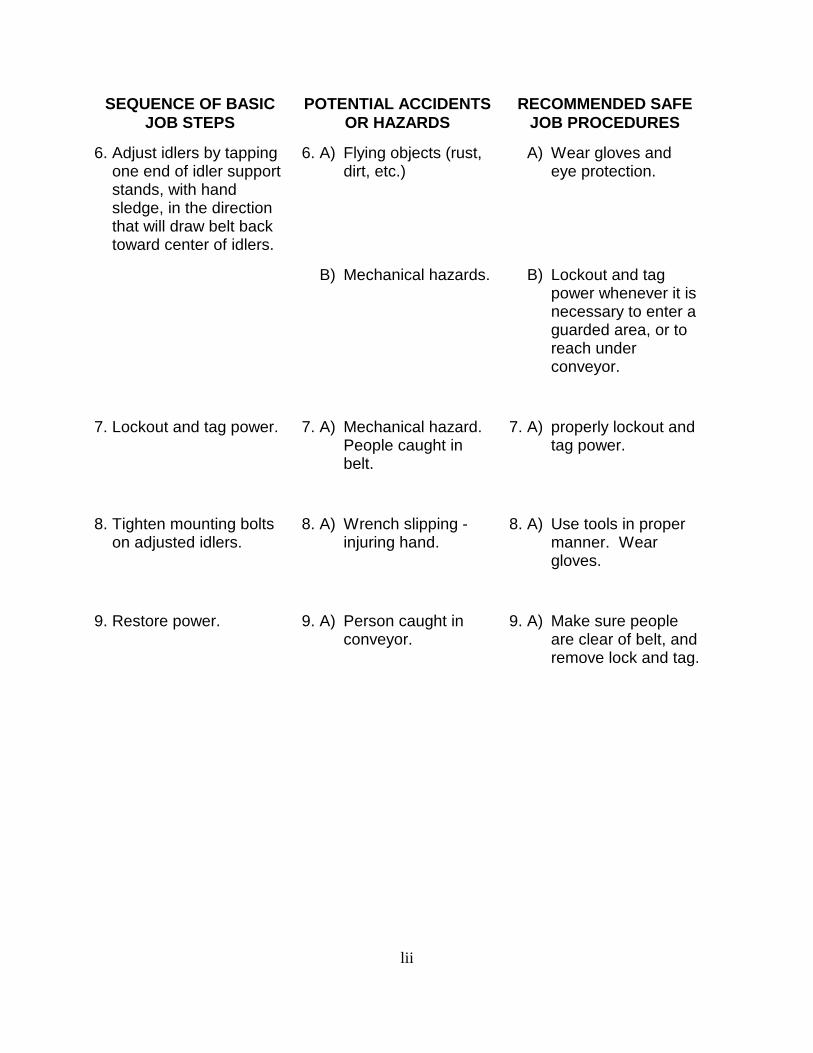
6. Adjust idlers by tapping one end of idler support stands, with hand sledge, in the direction that will draw belt back toward center of idlers.
7. Lockout and tag power.
8. Tighten mounting bolts on adjusted idlers.
9. Restore power.
POTENTIAL ACCIDENTS OR HAZARDS
6. A) Flying objects (rust, dirt, etc.)
B) Mechanical hazards.
7. A) Mechanical hazard. People caught in belt.
8. A) Wrench slipping -injuring hand.
9. A) Person caught in conveyor.
RECOMMENDED SAFE JOB PROCEDURES
A) Wear gloves and eye protection.
B) Lockout and tag power whenever it is necessary to enter a guarded area, or to reach under conveyor.
7. A) properly lockout and tag power.
8. A) Use tools in proper manner. Wear gloves.
9. A) Make sure people are clear of belt, and remove lock and tag.
lii

V. INSPECTION OF GEAR REDUCERS
SEQUENCE OF BASIC JOB STEPS
1. Check oil level. Add oil if needed.
2. Check condition of seals. Look for oil leaks.
3. A) Check tension of “V” belts.
4. A) Check if gear reducer is loose on shaft. Shake reducer. Repair, or report any problems.
5. A) After making any needed adjustments or repairs, replace guard and restore power.
POTENTIAL ACCIDENTS RECOMMENDED SAFE OR HAZARDS JOB PROCEDURES
1. A) Burned hand. 1. A) Wear gloves.
2. A) Mechanical hazard. 2. A) Do a visual inspection only, unless equipment power is locked-out and tagged.
3. A) Mechanical hazard 3. A) Never work on equipment unless you have locked-out power. Each person doing work must lock-out and tag. Each person must keep their key in their possession. Confirm that proper equipment was locked-out by testing start switch
4. A) Burned hands from 4. A) Wear gloves. hot reducer.
5. A) Mechanical hazards. 5. A) Make sure guard is reinstalled properly, and remove lock and tag.
liii

liv

VI. INSPECTION OF HEAD AND TAIL PULLEY BEARINGS
SEQUENCE OF BASIC POTENTIAL ACCIDENTS RECOMMENDED SAFE JOB STEPS
1. Inspect bearings, 3-4 times weekly, while conveyor is running.
OR HAZARDS JOB PROCEDURES
1. A) Mechanical hazard. 1. A) Leave guard on -inspect through guard. Look for orange coloration of shaft, or shaft wobbling. Look for smoke.
lv

VII. GENERAL CONVEYOR MAINTENANCE
SEQUENCE OF BASIC JOB STEPS
1. Check walkways for safety hazards.
2. Check belt for alignment. Inspect the lacing and splices. Make sure that all rollers are rolling, and not making noise. Check skirtboards for defects. When plant is
POTENTIAL ACCIDENTS OR HAZARDS
1. A) Trips and falls.
2. A) Mechanical hazards - caught in belt.
not processing material, pull emergency cord to check that it functions correctly.
3. Grease head and tail 3. A) Mechanical hazards pulley. - caught in pulley.
RECOMMENDED SAFE JOB PROCEDURES
1. A) Check walkways to be sure that they are free of waste material, and that there are no weak spots. Check that steps, handrails, guardrails, and toeboards are intact, and have no damage.
2. A) Only do visual inspections with belt running. Do not touch belt unless power is locked-out and tagged.
3. A) Only grease when power is locked-out and tagged, unless pulleys are equipped with extended grease fittings.
lvi
GENERAL INFORMATION
This module is part of an Instruction Guide that was developed to assist the sand, gravel, and crushed stone industry in conducting effective on-the-job training (OJT) of new employees, or employees reassigned to different jobs. The use of training materials, such as this module, is an important part of an effective, systematic, OJT program.
This Instruction Guide uses a generic Job Safety Analysis (JSA) of jobs common to the industry. The JSA format facilitates uniform basic training in safe job procedures, while requiring only a minimum of time and effort on the part of the trainer. This material is generic to the industry; therefore, each company using this guide will need to tailor the material somewhat to fit their particular requirements. In some cases, the material must be general in nature, and will not include specific details of procedures or equipment that must be taught by the trainer.
Recommendations for an overall OJT program are contained in the Mine Safety and Health Administration (MSHA) guide: “Structuring Effective On-The-Job Training Programs”
TRAINING RECOMMENDATIONS
On-the-job training is usually best done by the employee’s immediate supervisor. If the supervisor relies on another employee to do certain parts of the training, the supervisor should be present to monitor the training. OJT is conducted at the actual job site, where the work will be done.
The supervisor/trainer should use the training materials (this module, or other materials) while the training is being done, to help ensure that all job steps are covered, and that no important safety precautions are omitted. Effective OJT should begin with an explanation (lecture and/or discussion) of the safe job procedure. The explanation should be followed by a hands-on demonstration of the proper job procedure. A good demonstration is, perhaps, the most important part of OJT. The demonstration is followed by supervised practice, during which the supervisor/trainer coaches (corrects and encourages) the employee, and evaluates when the employee is ready to do the job without direct supervision.
The first step - explaining the job to the employee - can be done in different ways. The supervisor/trainer and the employee can sit down and go through the training materials together. It may be advantageous to provide the employee with a copy of the training modules that are applicable to his/her job. The fact that most of the training is conducted at the job site does not preclude the use of a classroom, or a quiet office, for the first part of the training. Any general theory, or knowledge training, as well as the initial explanation of the job procedure, may be best done in an office/classroom setting; especially when noise levels, or other conditions at the job site, make communication difficult. A complete series of job steps could be presented through the use of slides developed at the mining operation.
lvii

MODULE NUMBER 6OFINSTRUCTION GUIDE NUMBER 40
ON-THE-JOB TRAINING FOR THESAND, GRAVEL, AND CRUSHED STONE INDUSTRY
PLANT REPAIR
This module describes the basic job steps, potential hazards and accidents, and the recommended safe job procedures for repairing plant equipment.
Plant repair jobs are usually done by plant operators, maintenance personnel, and other occupations, such as utility worker, laborer, etc. Members of management, and persons doing repair work, must make sure that all employees, and others, are protected from accidents and injuries resulting from plant repair work.
lviii

ACCIDENT AND DAMAGE PREVENTION
Normally, accidents that cause personal injury are not the result of faulty design or component failure. They are usually caused by human carelessness, inadequate training in operations, or lack of awareness of possible hazards.
Operating and maintenance personnel, and their supervisors, should be initially, and then periodically, instructed in safe operating procedures, recognizable hazards, precautions, and maintenance of a safe work place. Operating and maintenance personnel should also be provided with the proper tools and equipment to operate, and maintain, plant equipment in a safe condition. Maintenance personnel should receive training in the value and conduct of a comprehensive preventive maintenance program. Employees, who do not have proper training, must not be allowed to enter hazardous areas.
PRE-SHIFT INSPECTIONS
Before initial operation on production runs, a careful and detailed inspection of the plant, and all of its components, must be conducted. Check alignment of all mechanical components. Also, check the operating alignment of the belts on the carrying and return idlers, and visually inspect belts for defective splices. Be sure that all moving parts have guards in place.
Check to see that there are no construction materials, tools, or projecting members that can rub, tear, or cut the belt when it is started. Be sure that chute skirtboards are intact, and not touching the belt. Adjust rubber edging strips on the skirtboards, so that they touch lightly on the belt surface. Adjust belt scrapers, if necessary.
WALK-THROUGH INSPECTIONS
Walk through the operating plant soon after it is started. Listen for any unusual sounds made by idlers, pulleys, shafts, bearings, drives, bolts, and belt splices.
Walk-through inspections of all plant equipment should be made several times each day, during operating shifts. Guards, safety devices, and warning signs should be checked, in order to determine that they are in proper position and in good working order. Only competent, properly trained, and authorized persons should repair defective safety devices.
LUBRICATION AND REPAIR
A comprehensive lubrication program is essential for low maintenance costs and dependable plant operations. Pay particular attention to lubrication of all bearings. Equipment life can be extended by following manufacturer’s recommendations for types of lubricant, amount and frequency of application, and type of greasing equipment to be used.
lix

People can become entangled in moving parts while lubricating equipment. Extended grease fittings, and hoses, allow the safe lubrication of moving equipment. Equipment must be shut down, and locked-out, if lubrication requires either the removal of guards, or people placing themselves in potentially dangerous positions to perform the job.
The remainder of this module covers safe job procedures for two repair and maintenance tasks. Repair and maintenance of conveyor belts is covered in Module 5 of this Instruction Guide. These procedures will help to minimize incidents which may cause injuries and adversely affect production.
lx

REQUIRED AND/OR RECOMMENDED PERSONAL PROTECTIVE EQUIPMENT:
HARD HAT, STEEL-TOED SHOES, GLOVES, SAFETY GLASSES OR GOGGLES,HEARING PROTECTION
I. REPLACING SCREENS
SEQUENCE OF BASIC JOB STEPS
1. Positively identify equipment to be locked out. Properly shut down and deenergize equipment. Lockout and tag power in the “off” position.
2. Select tools and supplies.
3. Check/inspect tools and workplace.
POTENTIAL ACCIDENTS OR
HAZARDS
1. A) Mechanical hazard - caught in, or struck by, equipment.
2. A) Strains from lifting.
3. A) Cable or chain break injuring personnel.
B) Shock from electrical impact wrench.
lxi
RECOMMENDED SAFE JOB PROCEDURES
1. A) Never work on equipment unless you have locked out power. Each person doing work must lockout and tag. Each person must keep their key in their possession. Confirm that proper equipment was locked out by testing start switch.
2. A) Use proper bending and lifting technique by using knees and legs rather than back.
3. A) Inspect cable or chain. Repair or report if damaged.
B) Inspect impact wrench for three-prong plug, or other means of grounding; or a double insulated case. Check that cord is not frayed or damaged. Dry damp equipment.

SEQUENCE OF BASIC JOB STEPS
4. Wash front part of screen, and use come-along to pull cover back.
5. Replace screens.
6. Restore power to screen.
POTENTIAL ACCIDENTS OR
HAZARDS
C) Slips and falls.
4. A) Dirt in eyes.
B) Cuts on hand from burrs on cable.
5. A) Falling through opening in chute box.
B) Back injury.
6. A) Person caught in, or struck by, screen deck.
lxii
RECOMMENDED SAFE JOB PROCEDURES
C) Remove slipping and tripping hazards from walkways and work areas.
4. A) Wear eye protection. Wash front part of screen to clean material out before pulling cover back.
B) Wear gloves. Do not slide hand along cable.
5. A) Cover opening in chute box with a used screen, and/or use fall protection.
B) Use proper lifting and handling methods for tools and screens.
6. A) Remove lock and tag, and make sure that area is clear of people. Sound start-up warning alarm if provided. Stand to side, and face away from breaker box when throwing switch.

II. CHECKING AND GREASING SHAKERS
SEQUENCE OF BASIC JOB STEPS
1. Inspect shakers daily at end of shift. Check screens for holes. Visually check for worn or stretched belts. Check for missing wedges.
2. Grease shakers daily, or weekly.
POTENTIAL ACCIDENTS OR
HAZARDS
1. A) Mechanical hazard.
2. A) Slips and falls.
B) Mechanical hazard.
RECOMMENDED SAFE JOB PROCEDURES
1. A) Do not remove guards, or climb on or near equipment, unless power is locked out and tagged.
2. A) Keep walkways and work areas clear of extraneous materials, snow, ice, etc.
B) Do not remove guards, or climb on or near equipment, unless power is locked out and tagged.
lxiii

GENERAL INFORMATION
This module is part of an Instruction Guide that was developed to assist the sand, gravel, and crushed stone industry in conducting effective on-the-job training (OJT) of new employees, or employees reassigned to different jobs. The use of training materials, such as this module, is an important part of an effective, systematic, OJT program.
This Instruction Guide uses a generic Job Safety Analysis (JSA) of jobs common to the industry. The JSA format facilitates uniform basic training in safe job procedures, while requiring only a minimum of time and effort on the part of the trainer. This material is generic to the industry; therefore, each company using this guide will need to tailor the material somewhat to fit their particular requirements. In some cases, the material must be general in nature, and will not include specific details of procedures or equipment that must be taught by the trainer.
Recommendations for an overall OJT program are contained in the Mine Safety and Health Administration (MSHA) guide: “Structuring Effective On-The-Job Training Programs”
TRAINING RECOMMENDATIONS
On-the-job training is usually best done by the employee’s immediate supervisor. If the supervisor relies on another employee to do certain parts of the training, the supervisor should be present to monitor the training. OJT is conducted at the actual job site, where the work will be done.
The supervisor/trainer should use the training materials (this module, or other materials) while the training is being done, to help ensure that all job steps are covered, and that no important safety precautions are omitted. Effective OJT should begin with an explanation (lecture and/or discussion) of the safe job procedure. The explanation should be followed by a hands-on demonstration of the proper job procedure. A good demonstration is, perhaps, the most important part of OJT. The demonstration is followed by supervised practice, during which the supervisor/trainer coaches (corrects and encourages) the employee, and evaluates when the employee is ready to do the job without direct supervision.
The first step - explaining the job to the employee - can be done in different ways. The supervisor/trainer and the employee can sit down and go through the training materials together. It may be advantageous to provide the employee with a copy of the training modules that are applicable to his/her job. The fact that most of the training is conducted at the job site does not preclude the use of a classroom, or a quiet office, for the first part of the training. Any general theory, or knowledge training, as well as the initial explanation of the job procedure, may be best done in an office/classroom setting; especially when noise levels, or other conditions at the job site, make communication difficult. A complete series of job steps could be presented through the use of slides developed at the mining operation.
lxiv

MODULE NUMBER 7OFINSTRUCTION GUIDE NUMBER 40
ON-THE-JOB TRAININGFOR THESAND, GRAVEL, AND CRUSHED STONE INDUSTRY
WELDING AND CUTTING
This module describes basic job steps, potential hazards and accidents, and recommended safe job procedures for welding and cutting.
Welding and cutting is done during repair, or modification, of existing equipment, and during construction of new equipment. Welders must protect themselves, and others, from accidents and injuries that might occur due to welding and cutting operations.
Welding is essential to the expansion and productivity of mining companies. Welding is one of the principal means of fabricating and repairing metal products. It is almost impossible to name an industry that does not use some type of welding. Welding is an efficient, dependable, and economical method of joining metal. Gas welding and arc welding are the
lxv

most commonly used methods of welding.
For gas welding, intense heat is generated by the combustion of gas - usually acetylene and oxygen. The welder uses the oxyacetylene equipment to control and direct the heat on the edges of the metal to be joined, while applying a suitable metal filler. The gas welder may also do flame cutting, with a cutting attachment and extra oxygen pressure. Flame, or oxygen, cutting is used to cut various metals to a desired size or shape, or to remove excess metal from castings. Gas welders need to adjust regulators, select proper tips and filler rods, prepare metal edges to be joined, and properly manipulate the flame and the filler rods.
For arc welding, intense heat is generated by a high amperage electric arc between an electrode and the metal pieces to be joined. Molten metal from the tip of the electrode is deposited in the joint, together with molten metal from the edges of the pieces to be joined. This metal solidifies to form a sound, uniform, connection. Arc welders need to properly select electric currents, select electrodes, prepare the metal edges to be joined, and manipulate the electrodes.
Welders are usually classified as skilled or semi-skilled. Skilled welders have the ability to plan, lay out work from drawings or written specifications, and weld all types of joints in various positions. Skilled welders also have a wide range of technical knowledge involving properties of metals, effects of heat on welded structures, control of expansion and contraction forces, and recognition of welding defects. A skilled welder may be proficient in several types of gas and arc welding processes. As a rule, when the quality and strength of a weld is critical, skilled welders are certified by their employer, a government agency, or an inspection authority, for the particular welding job they are required to perform.
Semi-skilled welders usually do repetitive work which usually does not involve critical strength requirements. They usually start on simple production jobs, and gradually work up to higher levels of skill. They primarily weld surfaces only in upright positions.
Welding equipment should not be used until exact instructions on its operation have been received. Manufacturer’s recommendations are very important, and should be followed at all times. Attempting to operate a piece of equipment without instruction may damage the equipment, or result in serious injury. Welding equipment is safe to use when it is used in the proper manner.
Welding must be done in a well ventilated area. There must be sufficient movement of air to prevent the accumulation of toxic fumes, or the possibility of oxygen deficiency. Adequate ventilation is extremely critical in confined spaces, where dangerous fumes and smoke are likely to collect. Where considerable welding is done, an exhaust system may be necessary in order to keep toxic gases and fumes within prescribed health limits. An adequate exhaust system is especially important when welding or cutting zinc, brass, bronze, lead, cadmium, or beryllium bearing metals. Fumes from these materials are very hazardous to your health.
Sparks, and dangerous ultraviolet and infrared radiation, are generated by any welding or cutting operation. Consequently, suitable clothing and proper eye protection are necessary.
lxvi

Sparks may lead to serious burns. Radiation is extremely dangerous to the eyes. Welders should know that these dangers exist during any welding operation, and know the safe practices to follow to prevent personal injury.
Sufficient precaution should be taken to ensure that containers, that are to be welded or cut, are safely vented. Accumulated air or gas in confined areas will expand when heated. The enclosed pressure may build up and cause an explosion. Welding and cutting should not be done on used drums, barrels, tanks, and other containers, unless they have been thoroughly cleaned of all combustible substances that may produce flammable vapors or gases. Flammable and explosive materials include gasoline, light oil, and non-volatile oils or solids that release vapors when heated. Containers of acids that can react with metals to form hydrogen gas must be thoroughly cleaned before welding or cutting.
Containers can be cleaned by flushing several times with water, chemical solutions, or steam. Water cleaning is satisfactory if the substance in the container is readily soluble in water. For all less soluble substances, containers should be cleaned with a strong commercial caustic cleaning compound, or by blowing steam into the container.
Fires often occur as a result of cutting operations, because proper precautions are not taken. Sparks and falling slag can pass through cracks out of sight of the welder. Persons responsible for welding and cutting should observe the following precautions:
1. Never use a cutting torch where sparks will be a hazard, such as near rooms containing flammable materials - especially dipping and spraying rooms.
2. If cutting is to be done over a wooden floor, sweep the floor clean and wet it down before starting the cutting. Provide a bucket or pan, containing water or sand, to catch dripping slag.
3. Keep a fire extinguisher nearby whenever any cutting is done.
4. Whenever possible, perform cutting operations in open areas, so sparks and slag will not become lodged in crevices or cracks.
5. If cutting is to be done near flammable materials, and the flammable materials cannot be moved, suitable fire-resistant guards, partitions, or screens must be used.
6. Practice good housekeeping - reduce any potential for fires and explosions by keeping work areas clean of combustible and flammable materials.
7. Keep flames, sparks, grease, and oily rags away from oxygen cylinders and hoses.
8. Never do any cutting near ventilating system intakes that could result in others being exposed to fumes.
9. Always have standby watchers nearby, with fire extinguishers, if the risk of fire is great.
lxvii

10. Never use oxygen to dust off clothing or work areas.
Arc welding includes shielded metal-arc, gas shielded-arc, and resistance welding. Only general safety measures can be listed for arc welding, because equipment varies considerably in size and type. Specific manufacturer’s recommendations should be followed. Safety practices that are, in general, common to all types of arc welding operations include:
1. Install welding equipment in accordance with provisions of the National Electric Code.
2. Be sure that a welding machine is equipped with a conveniently located power disconnect switch, so that power can be shut off quickly.
3. Be sure that power to welding equipment is locked out before making any repairs to the welder. High voltages used for arc welding machines can inflict fatal injuries.
4. Properly ground welding machines. Stray current may develop, which can cause severe shock if ungrounded parts are touched. Do not ground to pipes that carry gases or flammable liquids.
5. Keep connections tight between cables and electrode holders. Do not use electrode holders with defective jaws or poor insulation.
6. Do not change the polarity switch while the welding machine is under load. Wait until the machine idles and the circuit is open. Otherwise, the contact surface of the switch may be burned, and the person throwing the switch may receive a severe burn from the arcing.
7. Do not operate range switch under load. The range switch, which determines the current setting, should be changed only while the machine is idling and the circuit is open. Switching the current while the machine is under load will cause an arc to form between contact surfaces.
8. Weld only in dry areas, or use a dry board or rubber mat to stand on. Keep hands and clothing dry at all times. Never stand or lie in puddles of water, on damp ground, or against grounded metal when welding.
9. If other persons work nearby a welding site, the welding site must be partitioned off to protect people from the arc welding flash. Do not strike an arc if someone without proper eye protection is nearby.
10. Be careful not to touch pieces of hot metal which have just been welded or heated.
11. Make sure all hollow castings are properly vented before heating, in order to avoid an explosion.
lxviii

12. Be sure that press-type welding machines are effectively guarded.
13. Be sure that suitable spark shields are used around equipment when flash welding.
14. When welding is completed, turn machine off, pull power disconnect switch, and hang electrode holder in its designated place.
Remember, accidents do not just happen. Invariably, they occur because of indifference to safety rules and regulations, and lack of information or effective training. Injury of any kind is painful and very often can incapacitate a person, or even produce a permanent deformity. If more thought were given to the consequences of injuries, there would be less tendency to ignore safety precautions and, therefore, fewer accidents.
lxix

The following safe job procedures will help to minimize incidents that may cause injuries and adversely affect production:
REQUIRED AND/OR RECOMMENDED PERSONAL PROTECTIVE EQUIPMENT: HARD HAT, STEEL-TOED SHOES, WELDER’S SHIELD (HOOD) OR GOGGLES, LONG
CUFF GLOVES, PROTECTIVE CLOTHING, LEG BANDS, RESPIRATOR, HEARING PROTECTION
I. WELDING ON CONTAINERS, TANKS, AND OTHER OBJECTS
SEQUENCE OF BASIC JOB STEPS
1. Check work area.
2. Prepare container, tank, or other objects for work.
POTENTIAL ACCIDENTS OR HAZARDS
1. A) Struck by equipment, or caught between equipment and stationary objects.
B) Fire.
2. A) Exposure to bad weather conditions.
B) Exposure to noxious fumes or harmful liquids.
C) Skin contacted by harmful liquids or gases.
RECOMMENDED SAFE JOB PROCEDURES
1. A) Notify equipment operators of your presence and your work plan. Be sure that nearby equipment is shut down and secured in place. Post warning signs. Barricade area.
B) Be sure fire extinguishing equipment is available at site.
2. A) Dress for the weather. Do not arc-weld if weather creates shock hazard.
B) Determine type of material stored in tank or container. Determine safe procedure to vent or drain liquids or gases.
C) Wear gloves and proper protective clothing.
lxx
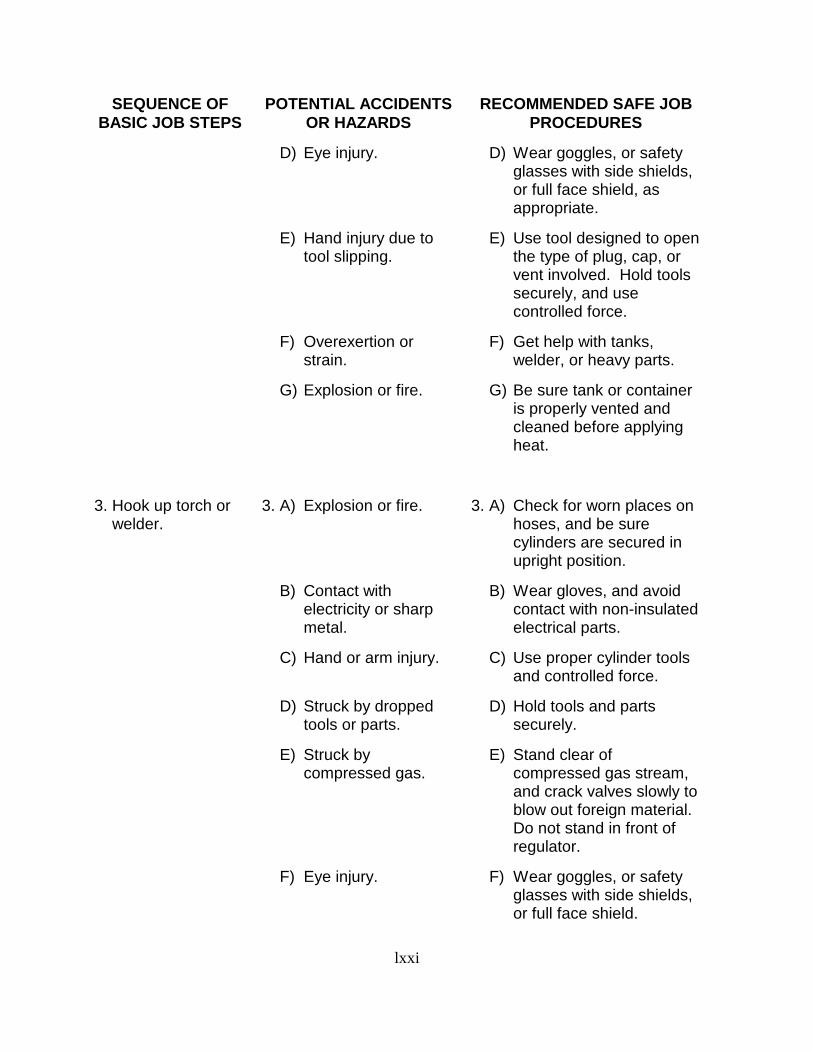
SEQUENCE OF BASIC JOB STEPS
3. Hook up torch or welder.
POTENTIAL ACCIDENTS RECOMMENDED SAFE JOBOR HAZARDS
D) Eye injury.
E) Hand injury due to tool slipping.
F) Overexertion or strain.
G) Explosion or fire.
3. A) Explosion or fire.
B) Contact with electricity or sharp metal.
C) Hand or arm injury.
D) Struck by dropped tools or parts.
E) Struck by compressed gas.
F) Eye injury.
PROCEDURES
D) Wear goggles, or safety glasses with side shields, or full face shield, as appropriate.
E) Use tool designed to open the type of plug, cap, or vent involved. Hold tools securely, and use controlled force.
F) Get help with tanks, welder, or heavy parts.
G) Be sure tank or container is properly vented and cleaned before applying heat.
3. A) Check for worn places on hoses, and be sure cylinders are secured in upright position.
B) Wear gloves, and avoid contact with non-insulated electrical parts.
C) Use proper cylinder tools and controlled force.
D) Hold tools and parts securely.
E) Stand clear of compressed gas stream, and crack valves slowly to blow out foreign material. Do not stand in front of regulator.
F) Wear goggles, or safety glasses with side shields, or full face shield.
lxxi

SEQUENCE OF BASIC JOB STEPS
4. Light torch or energize welder.
5. Perform welding on object.
6. Turn arc welding machine off, or extinguish torch and turn off tank valves.
POTENTIAL ACCIDENTS OR HAZARDS
G) Electrical shock.
4. A) Struck by compressed gas.
B) Burns.
5. A) Burns.
B) Exposed to arc, flash, or heat rays.
C) Inhalation of toxic fumes.
6. A) Electrical shock, or hand and arm injury
lxxii
RECOMMENDED SAFE JOB PROCEDURES
G) When arc welding, have material well grounded and securely clamped. Keep arc welding cables dry, free of grease and oil, and away from power cables. Do not weld in rain without taking proper precautions.
4. A) Turn torch away from yourself and others nearby.
B) Use a proper torch lighter (striker).
5. A) Blow metal away from body. Wear long cuff gloves and adequate clothing.
B) Wear adequate clothing. Use proper cutting goggles, or welding shield (hood), depending on type of work. Provide protective barriers in area to protect other workers.
C) Use ventilation system and/or respirators provided.
6. A) Turn switch off and reel in leads, or use proper cylinder tools.

SEQUENCE OF BASIC JOB STEPS
7. Check for fire, and remove hot parts.
8. Disassemble hoses and gauges from tanks.
9. Transport cylinders and hose to storage area.
POTENTIAL ACCIDENTS OR HAZARDS
7. A) Burns - contact with hot metal parts.
B) Fire, smoke, or explosion
8. A) Striking gauges or other protruding objects.
B) Hand or arm injuries.
C) Struck by dropped tools or parts.
9. A) Strains.
B) Slipping and tripping hazards.
C) Explosion hazard.
RECOMMENDED SAFE JOB PROCEDURES
7. A) Wear gloves and handle hot parts with tongs.
B) Search for fire or any smouldering areas. Wet down area with water, if available. Have fire extinguisher immediately available.
8. A) Observe and avoid projections.
B) Use proper cylinder tools, and seat them firmly.
C) Hold tools and parts firmly.
9. A) Get help, if needed, to handle or move cylinders.
B) Keep travelways clear.
C) Caps should be in place and hand tightened.
lxxiii

II. CUTTING WITH AN ACETYLENE TORCH
SEQUENCE OF BASIC JOB STEPS
1. Check work area.
2. Hook up gauges and torch.
3. Light acetylene torch.
POTENTIAL ACCIDENTS OR HAZARDS
1. A) Struck by equipment, or caught between equipment and stationary objects.
B) Fire.
2. A) Explosion or fire.
B) Hand or arm injury.
C) Struck by dropped tools or parts.
D) Struck by compressed gas.
E) Eye hazard.
3. A) Caught on protruding objects.
lxxiv
RECOMMENDED SAFE JOB PROCEDURES
1. A) Be sure nearby equipment is shut down and blocked against movement. Notify operators of equipment of your presence and work plan. Barricade off your work area.
B) Be sure that fire extinguishing equipment is readily available.
2. A) Check for worn places on hoses, and be sure cylinders are secured in upright position.
B) Use proper cylinder tools and controlled force.
C) Hold tools and parts securely.
D) Stand clear of compressed gas stream, and crack valves slowly to blow out foreign material. Do not stand in front of regulators.
E) Wear goggles, or safety glasses with side shields.
3. A) Wear gloves and snug fitting clothing.

SEQUENCE OF BASIC JOB STEPS
4. Cut material.
5. Extinguish torch and turn off tank valves.
6. Check for fire, and remove hot parts.
POTENTIAL ACCIDENTS OR HAZARDS
B) Dust, or other material, blown into eye.
C) Struck by compressed gas.
D) Burns.
4. A) Exposed to heat from torch.
B) Inhalation of toxic fumes.
C) Struck by material being cut.
D) Contacted by hot slag.
E) Contact with hot metal.
F) Fire or explosion.
5. A) Hand and arm injury.
6. A) Burns - contact with hot metal parts.
RECOMMENDED SAFE JOB PROCEDURES
B) Wear goggles.
C) Turn torch away from yourself and others nearby.
D) Use a torch lighter.
4. A) Wear adequate clothing and long cuff gloves.
B) Use ventilation system and/or respirators provided.
C) Stand clear of path of falling material.
D) Direct cutting action away from body, or anyone close by.
E) Wear gloves. Handle small hot parts with tongs.
F) Keep all connections tight. Keep torch and hoses in good repair, and free of oil and grease. Keep hoses where sparks and slag will not contact them.
5. A) Use proper cylinder tools, and seat them firmly.
6. A) Wear gloves and handle hot parts with tongs.
lxxv
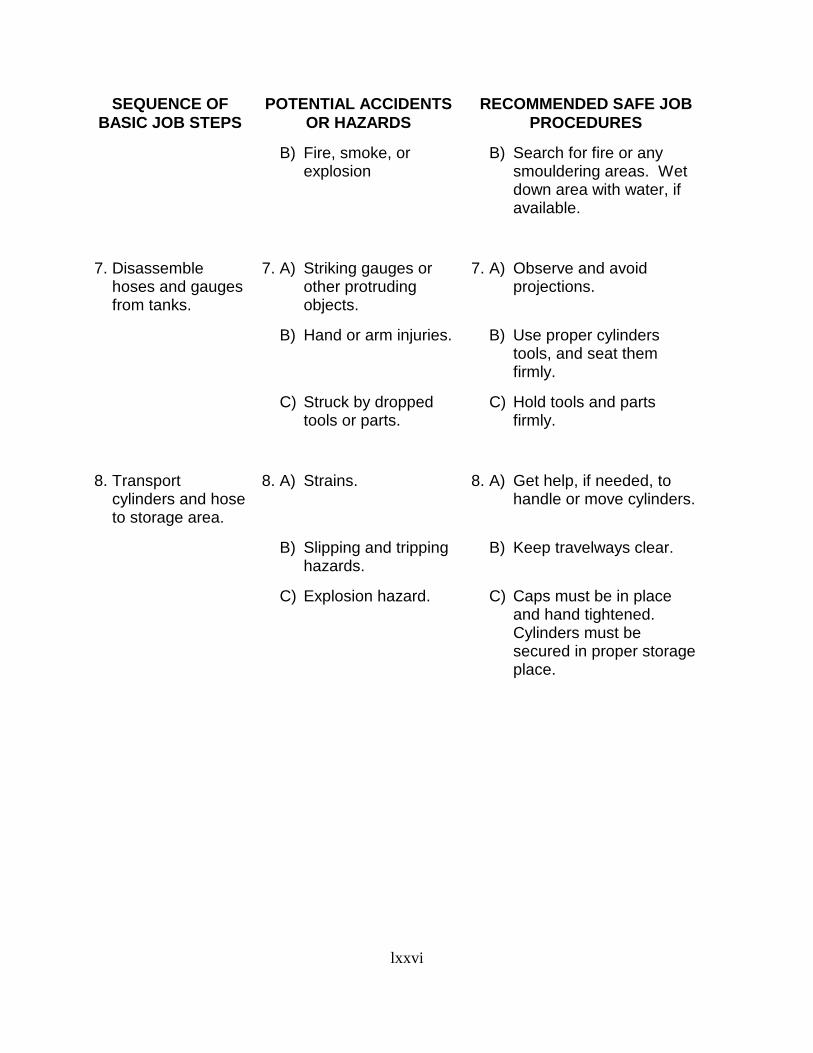
SEQUENCE OF BASIC JOB STEPS
7. Disassemble hoses and gauges from tanks.
8. Transport cylinders and hose to storage area.
POTENTIAL ACCIDENTS RECOMMENDED SAFE JOB OR HAZARDS PROCEDURES
B) Fire, smoke, or B) Search for fire or any explosion smouldering areas. Wet
down area with water, if available.
7. A) Striking gauges or 7. A) Observe and avoid other protruding projections. objects.
B) Hand or arm injuries. B) Use proper cylinders tools, and seat them firmly.
C) Struck by dropped C) Hold tools and parts tools or parts. firmly.
8. A) Strains. 8. A) Get help, if needed, to handle or move cylinders.
B) Slipping and tripping B) Keep travelways clear. hazards.
C) Explosion hazard. C) Caps must be in place and hand tightened. Cylinders must be secured in proper storage place.
lxxvi

GENERAL INFORMATION
This module is part of an Instruction Guide that was developed to assist the sand, gravel, and crushed stone industry in conducting effective on-the-job training (OJT) of new employees, or employees reassigned to different jobs. The use of training materials, such as this module, is an important part of an effective, systematic, OJT program.
This Instruction Guide uses a generic Job Safety Analysis (JSA) of jobs common to the industry. The JSA format facilitates uniform basic training in safe job procedures, while requiring only a minimum of time and effort on the part of the trainer. This material is generic to the industry; therefore, each company using this guide will need to tailor the material somewhat to fit their particular requirements. In some cases, the material must be general in nature, and will not include specific details of procedures or equipment that must be taught by the trainer.
Recommendations for an overall OJT program are contained in the Mine Safety and Health Administration (MSHA) guide: “Structuring Effective On-The-Job Training Programs”
TRAINING RECOMMENDATIONS
On-the-job training is usually best done by the employee’s immediate supervisor. If the supervisor relies on another employee to do certain parts of the training, the supervisor should be present to monitor the training. OJT is conducted at the actual job site, where the work will be done.
The supervisor/trainer should use the training materials (this module, or other materials) while the training is being done, to help ensure that all job steps are covered, and that no important safety precautions are omitted. Effective OJT should begin with an explanation (lecture and/or discussion) of the safe job procedure. The explanation should be followed by a hands-on demonstration of the proper job procedure. A good demonstration is, perhaps, the most important part of OJT. The demonstration is followed by supervised practice, during which the supervisor/trainer coaches (corrects and encourages) the employee, and evaluates when the employee is ready to do the job without direct supervision.
The first step - explaining the job to the employee - can be done in different ways. The supervisor/trainer and the employee can sit down and go through the training materials together. It may be advantageous to provide the employee with a copy of the training modules that are applicable to his/her job. The fact that most of the training is conducted at the job site does not preclude the use of a classroom, or a quiet office, for the first part of the training. Any general theory, or knowledge training, as well as the initial explanation of the job procedure, may be best done in an office/classroom setting; especially when noise levels, or other conditions at the job site, make communication difficult. A complete series of job steps could be presented through the use of slides developed at the mining operation.
lxxvii

MODULE NUMBER 8OFINSTRUCTION GUIDE NUMBER 40
ON-THE-JOB TRAININGFOR THESAND, GRAVEL, AND CRUSHED STONE INDUSTRY
EQUIPMENT LOCKOUT PROCEDURES
This module describes the basic job steps, potential hazards and accidents, and the recommended safe job procedures to follow prior to performing equipment repair or maintenance.
Numerous injuries and deaths result from someone starting machinery which another worker has stopped in order to make repairs or adjustments. The assigned worker may be in a dangerous position when the equipment starts unexpectedly. The precaution of switching off power and locking out the electrical switch control handle will prevent someone from starting the equipment. A good rule is to always cut off, lockout, and tag power whenever guards or covers must be removed from electrically powered equipment, or when work must be done
lxxviii

on, or near, moving parts or bare conductors.
If the electrical controls that supply power to the equipment are not properly designed or maintained, a worker can be burned or shocked while locking out the equipment. It is, therefore, necessary to wear gloves and rubber soled boots, and/or to stand on a rubber mat or dry board when operating disconnect switches. It is also wise to stand to the side - not directly in front - of the switch box, in case the cover comes off because of a loose fastener, or in case it flies off because of a short circuit.
Loaded equipment, or equipment with unbalanced drives, may have a tendency to turn without power. This danger may not become apparent until the worker has begun working within, or under, the moving parts of the equipment. The worker may be caught in the moving parts and injured when the equipment moves to a balanced position. Blocking of moving parts is required when any possibility exists of non-powered movement. To block equipment against motion, a block of wood, an iron bar, or other appropriate item is placed in a manner that prevents parts from moving far enough to cause injury. Some equipment is manufactured with provisions for blocking equipment motion. Manufacturer’s recommendations must be followed. Workers must be alert to always remove the block before removing the lock-out, in order to prevent damaging the machine at start-up.
Personnel may occasionally have to perform tests that require energized circuits and machinery motion. Such work must be done only when absolutely necessary, and then only by properly trained and qualified persons, using appropriate tools and protective equipment.
lxxix

The following safe job procedures will help to minimize incidents which adversely affect production and cause injuries:
REQUIRED AND/OR RECOMMENDED PERSONAL PROTECTIVE EQUIPMENT:
HARD HAT, STEEL-TOED BOOTS WITH RUBBER SOLES, GLOVES, SAFETY GLASSES OR GOGGLES
SEQUENCE OF BASIC JOB STEPS
1. Lock out equipment that is electrically powered.
POTENTIAL ACCIDENTS OR HAZARDS
1. A) Someone may start equipment during repairs or adjustments.
B) Arcing at disconnect may cause burns on hands or face if equipment is “on” when disconnected.
C) Electrocution by contact with interior of box, or any part which may have become “hot” because of wear, damage, or poor maintenance.
D) Someone may find key, if it is lying around, and start equipment during repairs or adjustments.
RECOMMENDED SAFE JOB PROCEDURES
1. A) Tell supervisor that repair has begun.
B) Move control to stop the equipment.
C) Stand on non-conductive mat. Move disconnect.
D) Place key to lock in your pocket, or on key ring on your belt. Do not give your key to another worker.
lxxx
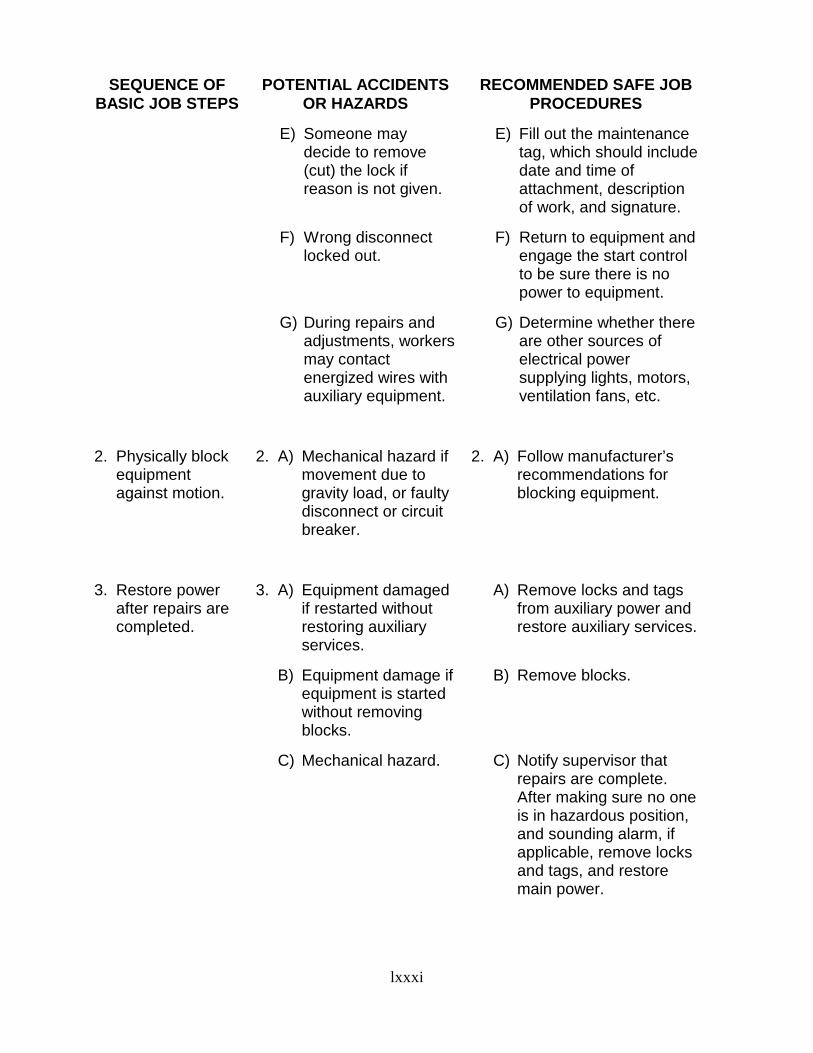
SEQUENCE OF BASIC JOB STEPS
2. Physically block equipment against motion.
3. Restore power after repairs are completed.
POTENTIAL ACCIDENTS RECOMMENDED SAFE JOB OR HAZARDS PROCEDURES
E) Someone may E) Fill out the maintenance decide to remove tag, which should include (cut) the lock if date and time of reason is not given. attachment, description
of work, and signature.
F) Wrong disconnect F) Return to equipment and locked out. engage the start control
to be sure there is no power to equipment.
G) During repairs and G) Determine whether there adjustments, workers are other sources of may contact electrical power energized wires with supplying lights, motors, auxiliary equipment. ventilation fans, etc.
2. A) Mechanical hazard if 2. A) Follow manufacturer’s movement due to recommendations for gravity load, or faulty blocking equipment. disconnect or circuit breaker.
3. A) Equipment damaged A) Remove locks and tags if restarted without from auxiliary power and restoring auxiliary restore auxiliary services. services.
B) Equipment damage if B) Remove blocks. equipment is started without removing blocks.
C) Mechanical hazard. C) Notify supervisor that repairs are complete. After making sure no one is in hazardous position, and sounding alarm, if applicable, remove locks and tags, and restore main power.
lxxxi

GENERAL INFORMATION
This module is part of an Instruction Guide that was developed to assist the sand, gravel, and crushed stone industry in conducting effective on-the-job training (OJT) of new employees, or employees reassigned to different jobs. The use of training materials, such as this module, is an important part of an effective, systematic, OJT program.
This Instruction Guide uses a generic Job Safety Analysis (JSA) of jobs common to the industry. The JSA format facilitates uniform basic training in safe job procedures, while requiring only a minimum of time and effort on the part of the trainer. This material is generic to the industry; therefore, each company using this guide will need to tailor the material somewhat to fit their particular requirements. In some cases, the material must be general in nature, and will not include specific details of procedures or equipment that must be taught by the trainer.
Recommendations for an overall OJT program are contained in the Mine Safety and Health Administration (MSHA) guide: “Structuring Effective On-The-Job Training Programs”
TRAINING RECOMMENDATIONS
On-the-job training is usually best done by the employee’s immediate supervisor. If the supervisor relies on another employee to do certain parts of the training, the supervisor should be present to monitor the training. OJT is conducted at the actual job site, where the work will be done.
The supervisor/trainer should use the training materials (this module, or other materials) while the training is being done, to help ensure that all job steps are covered, and that no important safety precautions are omitted. Effective OJT should begin with an explanation (lecture and/or discussion) of the safe job procedure. The explanation should be followed by a hands-on demonstration of the proper job procedure. A good demonstration is, perhaps, the most important part of OJT. The demonstration is followed by supervised practice, during which the supervisor/trainer coaches (corrects and encourages) the employee, and evaluates when the employee is ready to do the job without direct supervision.
The first step - explaining the job to the employee - can be done in different ways. The supervisor/trainer and the employee can sit down and go through the training materials together. It may be advantageous to provide the employee with a copy of the training modules that are applicable to his/her job. The fact that most of the training is conducted at the job site does not preclude the use of a classroom, or a quiet office, for the first part of the training. Any general theory, or knowledge training, as well as the initial explanation of the job procedure, may be best done in an office/classroom setting; especially when noise levels, or other conditions at the job site, make communication difficult. A complete series of job steps could be presented through the use of slides developed at the mining operation.
lxxxii

MODULE NUMBER 9OFINSTRUCTION GUIDE NUMBER 40
ON-THE-JOB TRAININGFOR THESAND, GRAVEL, AND CRUSHED STONE INDUSTRY
ELECTRICAL PROCEDURES FOR NON-ELECTRICIANS
This module describes the basic job steps, potential hazards and accidents, and recommended safe job procedures for maintaining and adjusting electrical equipment.
A great variety of electrically powered equipment is operated, partially maintained, and adjusted by workers who are not electricians. Equipment ranges in size from large milling machines, to water pumps, and heat guns used to thaw pipes.
Detailed instructions for operating each type of equipment is beyond the scope of this module. Representative equipment will only be discussed to the extent that hazards may be related, or procedures adapted, to other equipment and specific devices.
lxxxiii

Electrical burn and shock hazards are present for all electrically powered or controlled equipment. For non-electricians, these hazards exist primarily during mechanical repair and adjustment of equipment. Electrically powered equipment must be either unplugged at the receptacle, or the supplying power source must be disconnected or switched off, locked out, and tagged.
Mechanical hazards should also be recognized by operators of the equipment. These hazards are described, and safe procedures are discussed, in other training modules in this guide. Relevant sections of this Instruction Guide should be reviewed, along with any manufacturer’s literature for specific tools, in order to conduct on-the-job training in the use of hand tools.
Boots and gloves should be kept clean and dry at all times when working with electrically powered equipment or electrical supply apparatus (outlets, disconnect switches, etc). Otherwise, severe burn, or shock, may occur if the equipment develops a fault. Mining equipment that uses higher voltages and currents can yield more severe electrical shocks and burns.
lxxxiv

The following safe job procedures will help to minimize incidents that may cause injuries and adversely affect production.
REQUIRED OR RECOMMENDED PERSONAL PROTECTIVE EQUIPMENT: HARD HAT, STEEL-TOED BOOTS (RUBBER BOOTS RECOMMENDED), SAFETY
GLASSES OR GOGGLES, RUBBER GLOVES
SEQUENCE OF BASIC JOB STEPS
1. Operate electrically powered portable tools and other portable equipment.
POTENTIAL ACCIDENTS OR HAZARDS
1. A) Arcing at receptacle may burn fingers and/or damage receptacle and plug.
B) Damage, rust, or wear may cause short to case.
C) Wet or greasy equipment may cause short to case, or cause equipment to slip from hands.
lxxxv
RECOMMENDED SAFE JOB PROCEDURES
1. A) Move power switch to “off” - if plug is inserted with switch “on,” arcing may occur.
B) Inspect equipment for damage, rust, and wear on case, and for damage and wear on insulation of electrical wires.
C) Dry damp equipment -clean greasy equipment.

SEQUENCE OFBASIC JOB STEPS
POTENTIAL ACCIDENTS OR HAZARDS
D) Electrocution hazard due to alteration of equipment plug.
E) Electrocution hazard due to damaged or improper receptacle.
F) Damage to extension cord, and possible fire from overheating, if extension cord is too small.
RECOMMENDED SAFE JOB PROCEDURES
D) Examine the electrical plug to be sure that it has not been altered by someone cutting off ground prong, filing the polarizing prong, or by inserting three-wire plug into two-wire (“cheater”) adapter. If case is labeled “double insulated UL,” inspect the two prongs for polarity and general condition. Do not use equipment that has been altered. Notify electrician if any corrections are required.
E) Examine receptacle. If receptacle is cracked, dirty, or burned, ask electrician to check. Make sure receptacle matches plug - check shape and number of holes, and indicated voltage.
F) Find a power outlet near job site. If extension cord is necessary, make sure it is in good shape and is suitable for needed voltage and amperage.
lxxxvi

SEQUENCE OF BASIC JOB STEPS
2. Operating water pump.
POTENTIAL ACCIDENTS OR HAZARDS
G) Electrocution hazard due to water on floor and/or floor of metal, earth, or other conductive material.
H) Arcing at receptacle.
I) Damage to cord.
2. A) Electrocution hazard in vicinity of water.
RECOMMENDED SAFE JOB PROCEDURES
G) Examine work site to determine that work platform is dry. If workplace is not dry, non-conductive material; place energized tool on floor, such that metal case is in contact with floor. If circuit breaker trips due to short through the case to the floor, tool must be unplugged and repaired.
H) When work is completed, turn switch on tool to “off” position before pulling plug from receptacle.
I) Pull plug from receptacle by grasping the plug - not the cord.
2. A) Use lock-out procedure, as described in Module #8 of this I.G., while cleaning or repairing pump. Do not rely on a grounded electrical system to protect against shock.
lxxxvii

SEQUENCE OF BASIC JOB STEPS
3. Operate truck or other mobile equipment.
4. Operate circuit breaker or disconnect switch.
POTENTIAL ACCIDENTS OR HAZARDS
3. A) High voltage electrical wires near, or across, path of equipment may contact metal parts and start fires, or electrocute driver or nearby worker.
4. A) Burns and electrocution.
RECOMMENDED SAFE JOB PROCEDURES
3. A) Elevated parts of vehicles must not come within 10 feet of energized high voltage lines. Minimum distance is greater for high voltage cross-country lines.
4. A) Be sure, by label or location, that switch handle controls desired equipment. Make sure boots and gloves are clean and dry. Stand on dry, non-conductive platform. Touch handle with gloved fingers before grasping high voltage - shock will often cause a finger to recoil, but a grasping hand to hold.
lxxxviii

GENERAL INFORMATION
This module is part of an Instruction Guide that was developed to assist the sand, gravel, and crushed stone industry in conducting effective on-the-job training (OJT) of new employees, or employees reassigned to different jobs. The use of training materials, such as this module, is an important part of an effective, systematic, OJT program.
This Instruction Guide uses a generic Job Safety Analysis (JSA) of jobs common to the industry. The JSA format facilitates uniform basic training in safe job procedures, while requiring only a minimum of time and effort on the part of the trainer. This material is generic to the industry; therefore, each company using this guide will need to tailor the material somewhat to fit their particular requirements. In some cases, the material must be general in nature, and will not include specific details of procedures or equipment that must be taught by the trainer.
Recommendations for an overall OJT program are contained in the Mine Safety and Health Administration (MSHA) guide: “Structuring Effective On-The-Job Training Programs”
TRAINING RECOMMENDATIONS
On-the-job training is usually best done by the employee’s immediate supervisor. If the supervisor relies on another employee to do certain parts of the training, the supervisor should be present to monitor the training. OJT is conducted at the actual job site, where the work will be done.
The supervisor/trainer should use the training materials (this module, or other materials) while the training is being done, to help ensure that all job steps are covered, and that no important safety precautions are omitted. Effective OJT should begin with an explanation (lecture and/or discussion) of the safe job procedure. The explanation should be followed by a hands-on demonstration of the proper job procedure. A good demonstration is, perhaps, the most important part of OJT. The demonstration is followed by supervised practice, during which the supervisor/trainer coaches (corrects and encourages) the employee, and evaluates when the employee is ready to do the job without direct supervision.
The first step - explaining the job to the employee - can be done in different ways. The supervisor/trainer and the employee can sit down and go through the training materials together. It may be advantageous to provide the employee with a copy of the training modules that are applicable to his/her job. The fact that most of the training is conducted at the job site does not preclude the use of a classroom, or a quiet office, for the first part of the training. Any general theory, or knowledge training, as well as the initial explanation of the job procedure, may be best done in an office/classroom setting; especially when noise levels, or other conditions at the job site, make communication difficult. A complete series of job steps could be presented through the use of slides developed at the mining operation.
lxxxix

MODULE NUMBER 10OFINSTRUCTION GUIDE NUMBER 40
ON-THE-JOB TRAININGFOR THESAND, GRAVEL, AND CRUSHED STONE INDUSTRY
TRUCK HAULAGE
This module describes the proper procedures and the associated hazards involved in operating and loading quarry trucks, customer finished-product trucks, and pit-run trucks.
The safety of the truck driver and other personnel should be the primary concern of the mine operator. This training module is designed to present safe loading and haulage procedures, which will help ensure that customer truck drivers, mine employees, and other personnel are protected from accident and injury.
Heavy-duty trucks are used in mining to transport finished material to customer job locations, and to transport unfinished material from the quarry to the crusher, or from the pit to the primary dump station. Large haulage trucks may cause serious accidents and injuries on the
xc

road, or in the quarry, if safe haulage procedures are not followed at all times.
Persons can be struck or run over when working near or around trucks. Drivers can be injured if they lose control of their trucks, or over-travel a dump point. Even if truck accidents do not injure anyone, these mishaps often result in damaged equipment, lost efficiency, lowered production, and higher maintenance costs.
Safe driving procedures are generally the same for highway vehicles and for large over- the-road haulage trucks. Off-road trucks, however, have different hazards. Off-road truck drivers need to be trained in special procedures for vehicle loading and operation.
In order to reduce dangers to the operator from falling material, a truck should be spotted so that the bucket of a front-end loader, shovel, or drag-line that is loading the truck does not swing over the cab of the truck. The operator should dismount and stand in a designated safe area while the truck is loaded, if the truck does not have a protective cab, or cannot be spotted to avoid swinging the bucket over the cab.
Mobile equipment operators, who transport materials, must know haulage policies and procedures. Signs must be posted at the mine site to show traffic patterns and speed limits.
Equipment that has an obstructed view to the rear must be provided with a back-up alarm.
Modern, heavy-duty haul trucks are carefully engineered, expensive pieces of equipment. These trucks must only be operated by drivers who are qualified through training and experience. Prospective drivers must thoroughly familiarize themselves with the truck’s mechanical features, safety rules, and emergency procedures.
Truck accidents caused by unsafe operating practices outnumber truck accidents caused by unsafe equipment conditions. Therefore, the time required for effective training is well worth the effort. After drivers have had appropriate training, and demonstrated safe performance, constant supervision is necessary to make sure that drivers continue to operate haul units in the way in which they were instructed.
Mobile equipment operators must be especially cautious during bad weather. Potential hazards include slippery ladders and platforms, slippery haulageways, poor visibility, rock falls, and brake failure. Frozen material in truck beds could cause the truck to overturn while dumping.
xci
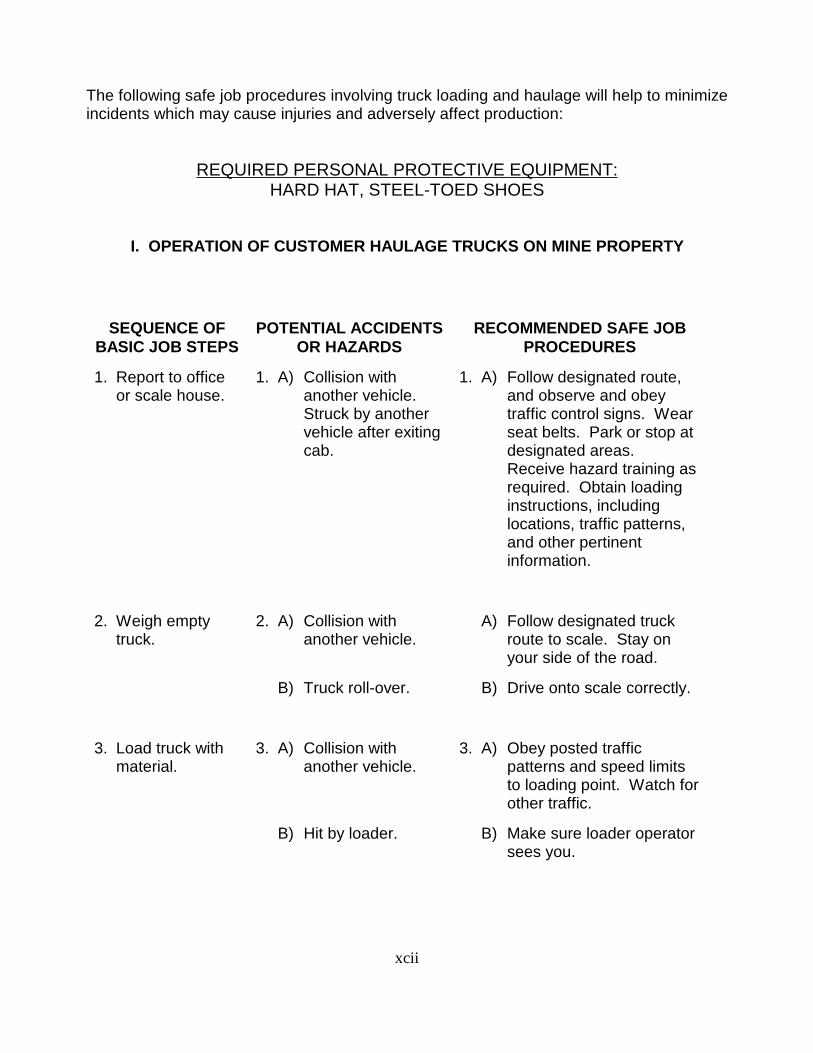
The following safe job procedures involving truck loading and haulage will help to minimize incidents which may cause injuries and adversely affect production:
REQUIRED PERSONAL PROTECTIVE EQUIPMENT: HARD HAT, STEEL-TOED SHOES
I. OPERATION OF CUSTOMER HAULAGE TRUCKS ON MINE PROPERTY
SEQUENCE OF BASIC JOB STEPS
1. Report to office or scale house.
2. Weigh empty truck.
3. Load truck with material.
POTENTIAL ACCIDENTS OR HAZARDS
1. A) Collision with another vehicle. Struck by another vehicle after exiting cab.
2. A) Collision with another vehicle.
B) Truck roll-over.
3. A) Collision with another vehicle.
B) Hit by loader.
RECOMMENDED SAFE JOB PROCEDURES
1. A) Follow designated route, and observe and obey traffic control signs. Wear seat belts. Park or stop at designated areas. Receive hazard training as required. Obtain loading instructions, including locations, traffic patterns, and other pertinent information.
A) Follow designated truck route to scale. Stay on your side of the road.
B) Drive onto scale correctly.
3. A) Obey posted traffic patterns and speed limits to loading point. Watch for other traffic.
B) Make sure loader operator sees you.
xcii

SEQUENCE OF BASIC JOB STEPS
4. Weigh full truck.
POTENTIAL ACCIDENTS OR HAZARDS
C) Struck by falling material.
D) Equipment failures, such as brakes, steering, engine, and tires.
4. A) Uneven load may affect vehicle control.
B) Collision with another vehicle.
C) Truck roll-over.
RECOMMENDED SAFE JOB PROCEDURES
C) Stay in cab of truck. Make sure truck is spotted correctly at hopper, or stockpile, so material does not strike cab.
D) Follow emergency safety procedures applicable to equipment and mine site.
A) Make sure material is loaded evenly.
B) Follow designated truck route to scale. Stay on your side of road.
C) Drive onto scales correctly.
xciii

II. LOADING TRUCKS USING FRONT-END LOADERS
SEQUENCE OF BASIC JOB STEPS
1. Conduct pre-shift inspection of loader -check the following: a. Tires and wheelsB) Area around vehicleC) Engine compartmentD) Fluid levelsE) Hydraulic linesF) Fire extinguisherG) Loader linkageH) Ladders, platforms1. Loose objects/debris
in cab j. Seat-belt k. Back-up alarm l. Clean windows m. Engine operation n. Wipers and lights o. Service and parking
brakes p. Steering
2. Spot the truck.
3. Load the truck.
POTENTIAL ACCIDENTS OR HAZARDS
1. A) Slips and falls.
B) Burns.
2. A) Run over by truck.
3. A) Running over someone.
B) Dropping material on cab and driver
RECOMMENDED SAFE JOB PROCEDURES
1. A) Make sure work area is clear of slipping hazards.
B) Wear gloves.
2. A) Make sure the truck drivers see you, if you are not in the loader.
3. A) Be aware of everyone’s location in the work area.
B) Do not move bucket near cab of truck.
xciv

SEQUENCE OF BASICJOB STEPS
POTENTIAL ACCIDENTS OR HAZARDS
C) Uneven loading may affect control of truck.
D) Equipment failures, such as brakes, steering, engine, and tires.
RECOMMENDED SAFE JOB PROCEDURES
C) Load truck evenly.
D) Follow emergency safety procedures applicable to equipment and mine site.
xcv

III. OPERATION OF HAUL UNITS AND PIT-RUN TRUCKS
SEQUENCE OF BASIC JOB STEPS
1. Conduct pre-shift inspection of truck - check the following: a. Tires and wheels b. Area around vehicle c. Engine compartment d. Fluid levels e. Hydraulic lines f. Fire extinguisher g. Loader linkage h. Ladders, platforms I. Loose objects/debris
in cab j. Seat-belt k. Back-up alarm l. Clean windows m. Engine operation n. Wipers and lights o. Service and parking
brakes p. Steering q. Gauges and warning
lights r. Retarder
2. Follow designated truck route to pit or quarry.
POTENTIAL ACCIDENTS OR HAZARDS
1. A) Slips and falls.
B) Burns.
2. A) Collision with another vehicle.
B) Run off road.
C) Loss of control of vehicle.
RECOMMENDED SAFE JOB PROCEDURES
1. A) Use handrails. Make sure that ladders and walkways are clean and in good repair.
B) Wear gloves.
2. A) Stay on your side of the road.
B) Watch for other traffic.
C) Follow posted traffic patterns and speed limits.
xcvi

SEQUENCE OF BASIC JOB STEPS
3. Load truck with raw material.
4. Follow designated route to crusher or pit run hopper.
POTENTIAL ACCIDENTS OR HAZARDS
D) Equipment failures, such as brakes, steering, engine, and tires.
3. A) Collision.
B) Struck by shovel or drag-line bucket, or falling material.
C) Run over by loader.
D) Covered by material.
E) Uneven load may affect control of vehicle.
4. A) Collision with another vehicle.
B) Run off road.
C) Loss of control of vehicle.
RECOMMENDED SAFE JOB PROCEDURES
D) Follow emergency safety procedures applicable to equipment and mine site.
3. A) Follow established procedure for loading trucks.
B) Spot truck in proper position.
C) Do not leave truck cab unless necessary, and then only after assuring loader operator is aware of your position.
D) Dismount truck and stand clear if a hazard of falling material exists.
E) Make sure material is loaded evenly.
4. A) Stay on your side of the road.
B) Watch for other traffic.
C) Follow posted traffic patterns and speed limits.
xcvii

SEQUENCE OF BASIC JOB POTENTIAL ACCIDENTS STEPS OR HAZARDS
D) Equipment failures, such as brakes, steering, engine, and tires.
5. Dump material. 5. A) Collision with another vehicle.
B) Run off road.
B) Backing into crusher.
6. Return to pit or quarry. 6. A) Collision with another vehicle.
B) Run off road.
RECOMMENDED SAFE JOB PROCEDURES
D) Follow emergency safety procedures applicable to equipment and mine site.
A) Stay on your side of road.
B) Watch for other traffic.
C) Back up slowly until rear tires reach stop block.
6. A) Stay on your side of the road.
B) Watch for other traffic.
xcviii

IV. WORKING AT NIGHT, AND NIGHT ILLUMINATION
SEQUENCE OF BASIC POTENTIAL ACCIDENTS RECOMMENDED SAFE JOB STEPS OR HAZARDS JOB PROCEDURES
1. Working at night, and 1. A) Driving off benches. 1. A) Drive slower at night illumination.
B) Run over.
C) Trips, slips, and falls.
D) Struck by falling material.
E) Running into objects (rocks, etc.) In haulageways.
F) Blinded by headlights.
night.
B) Watch out for moving equipment. Wear light colored, or reflective, clothing.
C) Watch step. Work areas must be safely illuminated.
D) Look out for, and avoid, overhead hazards.
E) Keep equipment lights on, and clean. Watch for obstacles.
F) Dim headlights when approaching equipment and personnel.
xcix

GENERAL INFORMATION
This module is part of an Instruction Guide that was developed to assist the sand, gravel, and crushed stone industry in conducting effective, on-the-job training (OJT) of new employees, or employees reassigned to different jobs. The use of training materials, such as this module, is an important part of an effective, systematic, OJT program.
This Instruction Guide uses a generic Job Safety Analysis (JSA) of jobs common to the industry. The JSA format facilitates uniform basic training in safe job procedures, while requiring only a minimum of time and effort on the part of the trainer. This material is generic to the industry; therefore, each company using this guide will need to tailor the material somewhat to fit their particular requirements. In some cases, the material must be general in nature, and will not include specific details of procedures or equipment that must be taught by the trainer.
Recommendations for an overall OJT program are contained in the Mine Safety and Health Administration (MSHA) guide: “Structuring Effective On-The-Job Training Programs”
TRAINING RECOMMENDATIONS
On-the-job training is usually best done by the employee’s immediate supervisor. If the supervisor relies on another employee to do certain parts of the training, the supervisor should be present to monitor the training. OJT is conducted at the actual job site, where the work will be done.
The supervisor/trainer should use the training materials (this module, or other materials) while the training is being done, to help ensure that all job steps are covered, and that no important safety precautions are omitted. Effective OJT should begin with an explanation (lecture and/or discussion) of the safe job procedure. The explanation should be followed by a hands-on demonstration of the proper job procedure. A good demonstration is, perhaps, the most important part of OJT. The demonstration is followed by supervised practice, during which the supervisor/trainer coaches (corrects and encourages) the employee, and evaluates when the employee is ready to do the job without direct supervision.
The first step - explaining the job to the employee - can be done in different ways. The supervisor/trainer and the employee can sit down and go through the training materials together. It may be advantageous to provide the employee with a copy of the training modules that are applicable to his/her job. The fact that most of the training is conducted at the job site does not preclude the use of a classroom, or a quiet office, for the first part of the training. Any general theory, or knowledge training, as well as the initial explanation of the job procedure, may be best done in an office/classroom setting; especially when noise levels, or other conditions at the job site, make communication difficult. A complete series of job steps could be presented through the use of slides developed at the mining operation.
c

MODULE NUMBER 11OFINSTRUCTION GUIDE NUMBER 40
ON-THE-JOB TRAININGFOR THESAND, GRAVEL, AND CRUSHED STONE INDUSTRY
GROUND CONTROL
This module describes basic job steps, potential hazards and accidents, and recommended safe job procedures for ground control. This module provides the miner with information on ground control, and hazards associated with highwalls, water pools, pits, spoil banks, and other dangers that are particular to sand and gravel, and to crushed stone operations.
This job is usually done by a supervisor, or a competent person assigned by the supervisor. The supervisor, or a competent person, must examine the working area and the working faces for unsafe conditions, at least at the beginning of each shift, and after blasting. Miners must examine their working places before starting work, and frequently thereafter. Any unsafe condition must be corrected.
ci

Highwalls must be controlled along haulageways, and all other work areas. A highwall is defined as the unexcavated face of exposed overburden and material on an open face or bank. Miners must be concerned with new mine development, as well as normal mining operations.
A variety of ground control hazards exist in sand and gravel operations, and in crushed stone operations. Very serious, and sometimes fatal, injuries can result from falls of highwall, and falling, rolling, or sliding material. All members of the work force need to know how to recognize these hazards.
Under federal regulations, standards for the safe control of pit walls, including the overall slope of the pit wall, must be established and followed by the operator. These standards shall be consistent with prudent engineering design, the nature of the ground, and the type of material mined; and shall ensure safe working conditions. Mining methods, including benching, shall be selected which will ensure wall and bank stability, in order to obtain a safe overall slope.
Three types of slope failure are the most serious hazards faced by surface miners: rock falls, plane shear, and rotational shear.
Rock fall slope failures are caused by planes of weakness. The most common types of rock fall slope failures are due to weaknesses caused by: bedding planes, fractured rock, faults, joints, and water pressure.
Plane shear (translational slope failure, or linear slope failure) occurs in highwalls or cliffs that have strata (layers) of different types of material. Most failures occur along existing fault planes, or other planes of weakness, causing a wedge shaped mass of earth to break free and fall.
Rotational shear (rotational slope failure) is uncommon in surface mining, because this type of failure usually occurs in banks, or highwalls, that are made of the same material throughout, with no natural planes of weakness. When a rotational shear does occur, a mass of the slope, or bank, breaks loose in a semi-circular, or bowl shaped form.
The highwall face should be uniformly straight. If a section juts out, watch for cracks that indicate that the section is about to fall. Be alert to potential slope failures promoted by extreme weather - rain, snow, freezing, thawing. A slope that is safe during dry weather can very quickly become unsafe during wet weather. Water control is necessary in order to minimize erosion of the highwall, and other slopes.
By being alert to possibly unsafe conditions, the miner is in a better position to be protected, see that appropriate corrective measures are taken, warn fellow workers of possible dangers, and change individual work habits when necessary.
Various techniques are used to control ground hazards, and reduce potential ground control problems.
cii

--
--
--
--
--
--
--
--
--
--
Earth-moving techniques of ground control include sloping, benching, and stripping overburden above the highwall.
Sloping:
Establishes a stable angle of ground.
Benching:
-- Establishes terrace-like steps in steep hillsides.
Used to prevent slides.
When used for roadways, usually built so that two haulage trucks can pass each other.
Mechanical techniques of ground control include the use of rock bolts and barriers.
Rock bolts:
Are metal rods at least 4 feet long.
Have bearing plates between the bolt head and the rock, in order to distribute the bolt tension.
Are installed in holes that are drilled into the highwall in a predetermined pattern.
Are tightened to a proper torque, which needs to be checked periodically.
Barriers:
Are nylon screens, metal fences, baffle boards, or wooden posts and planks.
Maintenance techniques for ground control include: scaling loose rock, controlling drainage, and using explosives.
Scaling:
Miners must approach loose rock from above, and scale from a safe location. When there is a danger of falling, miners must be properly tied off.
When scaling loose rock, use a long scaling bar.
ciii

--
--
--
--
Front-end loaders, power shovels, or draglines may be used to scale hazardous rock.
Controlling drainage:
Horizontal drain holes, or vertical drainage wells, are used to reduce subsurface water pressure in highwalls.
Collector drains located above highwalls are used to divert surface water away from highwalls.
Explosives:
Are used to bring down overhangs.
civ

The following safe job procedures will help minimize incidents which adversely affect production and cause injuries:
REQUIRED, OR RECOMMENDED, PERSONAL PROTECTIVE EQUIPMENT:
HARD HAT, STEEL-TOED SHOES, SAFETY GLASSES, HEARING PROTECTION
SEQUENCE OF POTENTIAL ACCIDENTS BASIC JOB STEPS OR HAZARDS
1. Examine working 7. A) Struck by falling areas. material.
B) Slips and falls.
RECOMMENDED SAFE JOB PROCEDURES
1. A) Inspect working areas for: 1. Overhanging material 2. Loose rock 3. Vertical and
horizontal cracks 4. Boulders, trees, or
other material which might fall
5. Jagged sections of highwall
6. Undercuts 7. Fallen material 8. Debris 9. Compliance with
standard procedures for degree of slope, benching, etc.
B) Be aware of weather changes which affect ground conditions, including rain, snow, freezing, and thawing. Be sure all work areas are sufficiently illuminated to inspect ground conditions.
cv

SEQUENCE OF BASIC JOB STEPS
2. Report and/or correct any hazardous conditions.
3. Perform drilling and blasting duties.
POTENTIAL ACCIDENTS OR HAZARDS
2. A) Personnel entering unsafe area.
B) Struck by falling material. Ground failure under weight of equipment or persons.
C) Fall over highwall or bank.
3. A) Overturning drilling equipment.
B) Ground failure under weight of drilling equipment.
RECOMMENDED SAFE JOB PROCEDURES
2. A) Report immediately to supervisor any unsafe conditions not readily corrected. Barricade and post areas where unsafe ground conditions have not been promptly corrected.
B) Do not perform other work where unsafe conditions exist until unsafe conditions are corrected. Approach loose rock from above. Use scaling bar long enough to remain out of danger of falling material.
C) Safety belts and lines shall be worn where there is a danger of falling. Stay at least 6 feet back from a stable creast.
3. A) Travel with drill mast (boom) in lowered position. Do not travel on steep grades where sliding or overturning could occur. Watch for soft shoulders.
B) Inspect drilling area for hazards, such as cracks in bench, before positioning drill.
C) Runaway equipment. C) Set brakes.
cvi

SEQUENCE OFBASIC JOB STEPS
POTENTIAL ACCIDENTS OR HAZARDS
D) Highwall hazards (jagged or loose material, overhangs) from improper drill-hole angle.
E) Highwall hazards from improper drilling pattern.
F) Struck by falling material.
G) Stepping into open drill hole.
H) Explosives and blasting hazards.
I) Overhangs and loose material created by blast may give way under a person’s weight. Overhanging frozen material during cold weather can be especially hazardous.
J) Caught or struck by shifting rock.
RECOMMENDED SAFE JOB PROCEDURES
D) Level drill. Be sure mast (boom) is set straight, or at proper angle, if angle drilling is done. Start drill hole slowly. Keep drill steel in guides.
E) Drill all holes to depth and pattern established by plan.
F) When drilling on lower levels, check ground above and correct any hazards.
G) Cover, or guard, any drill holes large enough to create hazards.
H) Load hole according to supervisor’s instructions.
I) Inspect blast area after air has cleared. Proceed carefully - do not hurry to highwall edge to see results of blast.
J) Perform secondary breaking of material as required. Work from a safe location. Position, or block, material (except hanging material) to prevent hazardous movement.
cvii

SEQUENCE OF BASIC JOB STEPS
4. Operate mobile equipment.
POTENTIAL ACCIDENTS OR HAZARDS
4. A) Collision with obstacles in roadway, or equipment overturning.
B) Failure of ground under weight of equipment.
C) Running equipment over the edge of a road, or work area.
RECOMMENDED SAFE JOB PROCEDURES
4. A) Watch for ground hazards, including boulders or other obstacles in roadway, or washed out roadbed. Adjust speed to visibility, roadway conditions, and traffic. Wear seat belts where provided.
B) At dump locations, dump material back from edge if there is evidence of unstable ground. Do not drive, or position, equipment too close to edge or on soft shoulders. Be aware of weather changes which may weaken or loosen ground, or conceal holes, ruts, or other roadway hazards.
C) Build berms at outer edge of elevated roadways. Be sure berms, bumper blocks, or equivalent are provided to prevent overtravel and overturning at dump points. Keep all wheels or tracks on solid ground.
cviii

SEQUENCE OF POTENTIAL ACCIDENTS BASIC JOB STEPS OR HAZARDS
5. Work around 5. A) Struck by falling highwalls. material.
RECOMMENDED SAFE JOB PROCEDURES
5. A) Be especially careful of potential rock fall hazards when working on foot around highwalls. Do not work between equipment and highwall where equipment may hinder escape.
cix

GENERAL INFORMATION
This module is part of an Instruction Guide that was developed to assist the sand, gravel, and crushed stone industry in conducting effective on-the-job training (OJT) of new employees, or employees reassigned to different jobs. The use of training materials, such as this module, is an important part of an effective, systematic, OJT program.
This Instruction Guide uses a generic Job Safety Analysis (JSA) of jobs common to the industry. The JSA format facilitates uniform basic training in safe job procedures, while requiring only a minimum of time and effort on the part of the trainer. This material is generic to the industry; therefore, each company using this guide will need to tailor the material somewhat to fit their particular requirements. In some cases, the material must be general in nature, and will not include specific details of procedures or equipment that must be taught by the trainer.
Recommendations for an overall OJT program are contained in the Mine Safety and Health Administration (MSHA) guide: “Structuring Effective On-The-Job Training Programs”
TRAINING RECOMMENDATIONS
On-the-job training is usually best done by the employee’s immediate supervisor. If the supervisor relies on another employee to do certain parts of the training, the supervisor should be present to monitor the training. OJT is conducted at the actual job site, where the work will be done.
The supervisor/trainer should use the training materials (this module, or other materials) while the training is being done, to help ensure that all job steps are covered, and that no important safety precautions are omitted. Effective OJT should begin with an explanation (lecture and/or discussion) of the safe job procedure. The explanation should be followed by a hands-on demonstration of the proper job procedure. A good demonstration is, perhaps, the most important part of OJT. The demonstration is followed by supervised practice, during which the supervisor/trainer coaches (corrects and encourages) the employee, and evaluates when the employee is ready to do the job without direct supervision.
The first step - explaining the job to the employee - can be done in different ways. The supervisor/trainer and the employee can sit down and go through the training materials together. It may be advantageous to provide the employee with a copy of the training modules that are applicable to his/her job. The fact that most of the training is conducted at the job site does not preclude the use of a classroom, or a quiet office, for the first part of the training. Any general theory, or knowledge training, as well as the initial explanation of the job procedure, may be best done in an office/classroom setting; especially when noise levels, or other conditions at the job site, make communication difficult. A complete series of job steps could be presented through the use of slides developed at the mining operation.
cx

MODULE NUMBER 12OFINSTRUCTION GUIDE NUMBER 40
ON-THE-JOB TRAININGFOR THESAND, GRAVEL, AND CRUSHED STONE INDUSTRY
INSPECTING AND REPLACING WIRE ROPES
This module describes basic job steps, potential hazards and accidents, and recommended safe job procedures for inspecting and replacing wire ropes. The term “wire rope” is used in this module, rather than “cable,” to avoid any possible confusion with electrical cables. This module is not intended to cover wire ropes that are used for hoisting persons.
In the sand, gravel, and crushed stone industry, wire ropes are used primarily on draglines, power shovels, and drilling equipment. Wire ropes, and wire rope slings, are used on cranes
cxi

and hoists of various types.
Wire ropes deteriorate, and will break if left in service long enough. Causes of rope deterioration may include wear, peening (hammer action), corrosion, bending, flexing, kinking, crushing, overloading, and heat damage.
Companies must provide for wire rope inspection and timely replacement. The purpose of the inspection program should be to obtain all possible service from wire ropes, while maintaining an adequate degree of safety. Wire rope replacement is costly, but if a wire rope breaks in service, there are risks of serious injury, equipment damage, and lengthy production delays.
Wire rope breakage can pose hazards to equipment operators, and persons working nearby. Persons can be injured by falling equipment and material, or by the whipping (backlash) action of the broken rope.
Wire rope failures can be fatal, although disabling injuries are more common. Two examples of fatal accidents follow:
A dragline operator at a sand and gravel operation was killed when the pendant rope of the dragline broke, and backlashed through the cab window.
A cement plant worker was killed when the boom hoist rope of a mobile crane broke, dropping the crane boom on him.
Much of the hazard of wire rope breakage can be eliminated by following a few simple safety rules:
1. Always assume a wire rope could break at anytime.
2. Do not work or pass under the buckets or booms of shovels, draglines, or cranes in operation.
3. Stay clear of suspended loads.
4. Do not ride on, or in dippers, clamshells, hoisted loads, hoisting hooks, buckets, or similar hoisting items, unless special provisions for hoisting personnel, in accordance with safety rules and regulations, are followed.
Even if the above precautions are observed, safety also depends on proper wire rope maintenance and inspection procedures, and the timely removal from service of worn or damaged wire rope.
Federal mining regulations contain few requirements relating directly to inspection and replacement of wire ropes that are not used to hoist persons. Some general federal requirements, however, do apply to such wire rope. Self propelled equipment, which is to be
cxii

used during a shift, must be inspected by the equipment operator before being placed in operation. Equipment defects affecting safety must be corrected before the equipment is used. Unsafe machinery and equipment must be removed from service immediately.
Additional information and guidance on wire rope inspection and replacement can be obtained from:
1. American National Standard for Wire Rope for Mines, ANSI M11.1, and other ANSI Standards relating to specific types of equipment.
2. Occupational Safety and Health Administration (OSHA) Standards for General Industry (29CFR 1910) and Construction Industry (29CFR 1926) .
3. State regulations.
4. Wire rope, and equipment, manufacturer’s specifications.
5. Safety rules of various associations, and various companies.
Each company should have a wire rope inspection program which establishes inspection personnel, procedures, and frequency; and provides for reporting and record keeping. An effective inspection program should establish two general types of inspections:
1. Frequent inspections - visual wire rope inspections conducted by equipment operators before, during, and after equipment use, in conjunction with routine inspection of other equipment components.
2. Periodic inspections - careful and detailed wire rope inspections, including diameter measurements, conducted by a person who has extensive knowledge, training, and experience in the inspection of wire ropes and related equipment. The procedures used, and the inspection frequency for each wire rope will vary depending on operating conditions, anticipated rope life, and critical nature of service.
In addition to inspecting wire rope itself, wire rope inspections should also include rope terminations (end attachments) at both ends of the particular rope, and items contacted by the rope, including sheaves, drums, and rollers.
Wire Rope Basics
The following summary provides equipment operators with basic information useful for frequent inspections of wire rope. Persons responsible for making periodic, detailed inspections should have a much more comprehensive knowledge of wire rope.
cxiii

Wire Rope Use
Some common uses of wire rope include:
1. Hoist and boom suspension (pendant) ropes on power shovels, draglines, clamshells, and mobile cranes.
2. Crowd, retract, and dipper trip ropes on power shovels.
3. Boom hoist ropes on draglines, clamshells, and mobile cranes.
4. Drag (rehaul) ropes on draglines.
5. Holding, closing, and tag ropes on clamshells.
6. Pull down, hoist, bull, and sandline ropes on drills.
7. Hoist ropes on overhead hoists, and overhead traveling cranes.
8. Slings.
Wire Rope Construction and Terminology
Most wire rope is constructed of many small diameter wires. This construction provides the flexibility necessary for wire rope to bend frequently in use, such as over sheaves.
Occasionally, large strands, or ropes constructed of a few wires of large diameter, will be used for applications where very little bending occurs, such as boom suspension (pendant) ropes on shovels, or draglines.
Most wire ropes consist of three parts:
1. A core, which forms the center of the rope. Cores may be either fiber cores (FC), or steel cores. Steel cores may be either “independent wire rope cores” (IWRC) -a miniature wire rope which serves as a core for larger rope, or “strand cores” (SC) - a strand, similar to other strands of the rope, which runs down the center of the rope.
2. Wires, which are twisted into strands. The individual wires that appear on the outside of the rope, and bear against sheaves and drums, are called crown wires, or simply “outer wires.”
cxiv

3. Strands, which are twisted around the core to form the rope.
Wire rope is designated by the number of strands, the number of wires per strand, and the rope diameter. For example, a wire that has 6 strands of 19 wires each is referred to as having a 6x19 “construction.” Wire ropes of similar construction are sometimes grouped into a general “classification.” The 6x19 classification usually includes 6x21 and 6x25 construction ropes, as well as 6x19 construction ropes.
Rope diameter is measured is measured by rotating a caliper around the circumference of a wire rope until the caliper is positioned to give the maximum possible reading. The length of rope needed for one strand to make a complete turn around the core is a “lay.”
Safety Factor/Design Factor
The rated breaking strength of a new rope, divided by the maximum normal load to be placed on the rope, is the “safety factor,” or “design factor”.
Safety Factor = Breaking Strength Max Normal Load
A rope with a 100,000 pound breaking strength, carrying a maximum normal load of 10,000 pounds, has a safety factor of 100,000/10,000=10.
The minimum safety factors for various wire rope applications are specified in the ANSI standards. In most cases, “load” is determined by the weight of the structure, and the material supported. In some cases, however, such as for drag ropes on draglines, the load is based on the maximum stall force of the power source.
Lubrication
Proper lubrication extends the service life of wire ropes. Proper lubrication:
1. Reduces wear
2. Protects against corrosion
3. Reduces friction between individual wires and strands, allowing wires and strands to move and to adjust to load and bending forces. This ease of movement increases the flexibility of the rope, allowing more even distribution of the load over all the wires, which reduces the probability of wire breakage.
New ropes need ample lubrication to ease the break-in period. The rope manufacturer should
cxv

be consulted to be sure that proper types of lubricant and application methods are used. Generally, the more severe the rope operation - higher speeds, heavier loads, greater number of bends, and more corrosive conditions - the more frequently the rope should be lubricated. Light, frequent lubrication is generally better than heavy, occasional lubrication.
cxvi

The following safe job procedures will help to minimize incidents which could cause injuries, and adversely affect production.
REQUIRED OR RECOMMENDED PERSONAL PROTECTIVE EQUIPMENT:
HARD HAT, SAFETY SHOES, SAFETY GLASSES, GLOVES, SAFETY HARNESS AND LINE.
I. INSPECTION OF WIRE ROPES
SEQUENCE OF BASIC JOB STEPS
10. Plan and schedule inspection. Schedule complete inspections for idle shifts, or scheduled maintenance periods, if possible. Obtain an accurate caliper, if diameter measurements
POTENTIAL ACCIDENTS OR HAZARDS
1. A) Not inspecting frequently enough -unnecessary down-time of expensive equipment.
are to be taken.
2. Clean rope, if 2. A) Falling necessary.
cxvii
RECOMMENDED SAFE JOB PROCEDURES
1. A) Schedule complete, detailed inspections on a regular basis. Interval between inspections is determined by operating conditions, anticipated wire rope life, critical nature of service, state regulations, company policy, and manufacturers recommendations. All wire ropes should be visually inspected, to the extent possible, before, during, and after use.
2. A) Work from safe location. Do not climb booms of equipment in operation, unless adequate steps, handholds, and railings are provided. Wear safety harness and line if there is a danger of falling.

SEQUENCE OF BASIC JOB STEPS
3. Visually inspect wire rope before, during, and after use, and watch equipment in operation.
POTENTIAL ACCIDENTS OR HAZARDS
B) Failure to detect broken wires, or other indications of rope deterioration.
C) Cut, or puncture, from broken wire snagging hand or glove.
D) Caught between rope and sheave, drum, or roller.
3. A) Unnecessary downtime of expensive equipment.
B) Improper reeving can cause ropes to wear faster, and hamper equipment operation.
RECOMMENDED SAFE JOB PROCEDURES
2. B) Wipe excess lubricant from section of rope to be examined.
C) Do not use bare or gloved hand alone on moving rope. Rag can be held around rope, while rope is run at a slow speed (50 feet per minute or less).
D) Do not wipe moving rope near where rope goes onto sheave, drum, or roller. Face direction rope is moving, so that rag will be pulled away from you if it snags on broken wires.
3. A) Carefully examine all wire ropes for obvious damage, such as kinking, bird caging, broken strands, or broken wires.
B) Check for proper reeving in accordance with manufacturer’s recommendations.
cxviii

SEQUENCE OF BASIC JOB STEPS
4. Position equipment and yourself for complete inspection.
POTENTIAL ACCIDENTS OR HAZARDS
C) Rope or sheave damage. Excessive vibration and stresses. Struck by falling or whipping rope; or falling load, if rope breaks.
D) Caught in moving equipment.
4. A) Failure to get close enough to wire rope and other components to detect defects.
B) Fall to lower levels.
RECOMMENDED SAFE JOB PROCEDURES
C) Avoid excessive pull-down pressure on drills. Be sure there are no hook-ups between bucket, boom, and hoist ropes. Operate equipment smoothly. Do not jerk or drop loads attached to wire ropes. Impact loading can break even a new rope. Check that backlash guards, where provided, are in place and secure.
D) Remove dirt from equipment, such as rope guards and dragline fairleads, as needed. Equipment must be shut down and locked out.
A) Lower booms and masts where possible, and/or place boom against a pile of material or a bank.
B) Do not climb booms of equipment in operation unless adequate steps, handholds, and railings are provided. Use safety harness and line where there is a danger of falling.
cxix

SEQUENCE OF BASIC JOB STEPS
5. Conduct complete visual/manual inspection of wire ropes.
POTENTIAL ACCIDENTS OR HAZARDS
5. A) Wire rope failure due to inadequate inspection.
B) Cuts, or punctures, from protruding wires.
C) Caught between rope and sheaves, drums, or rollers.
D) Rope failure due to excessive wear.
E) Rope failure due to corrosion.
RECOMMENDED SAFE JOB PROCEDURES
5. A) Have the wire rope run past your inspection point at a slow speed (50 feet per minute, or less). Check entire rope. Usually, entire length cannot be inspected from one location. If a potential problem is detected, signal equipment operator to stop rope, and examine rope more closely.
B) A rag, or cotton waste, can be held around the rope.
C) Face direction rope is moving. Do not wipe rope near where it enters sheaves, drums, or rollers.
D) Look for excessive wear on crown (outer) wires. If surface of strands looks almost smooth, and valley between crown wires appears almost as a fine line, wear could be approaching 50 percent, or ½ of crown wire diameter.
E) Look for corrosion which causes pitting of wires. Look for small flecks of rust in the lubricant, or pitting or scale in strand valleys, which may indicate internal corrosion.
cxx

SEQUENCE OF BASIC JOB STEPS
6. Evaluate condition of rope.
7. Report and record results of the inspection.
POTENTIAL ACCIDENTS OR HAZARDS
F) Rope failure due to distortion of rope structure.
RECOMMENDED SAFE JOB PROCEDURES
F) Look for distortion of rope structure, such as kinking, crushing, or heat damage.
6. A) Failure of wire rope. 6. A) Exercise judgement
7. A) Possible use of equipment already determined to be defective.
based on condition of rope, and operating conditions, critical nature of service, and manufacturer’s recommendation.
7. A) Report results of inspection to appropriate officials. Record results for later reference. Tag equipment, if appropriate.
NOTE: Although the following retirement criteria apply only to wire rope used for personnel hoisting, they should be considered as indicators for potential failure in all situations. Ropes that meet or exceed these retirement criteria should be considered for retirement if the damage or deterioration cannot be removed by cutoff:
1. The number of broken wires within a rope lay length, excluding filler wires, exceeds either:
a) Five percent of the total number of wires.
b) Fifteen percent of total number of wires within any strand.
2. On a regular lay rope, more than one broken wire in valley between strands in one rope lay length.
C) A loss of more than one-third of the original diameter of the outer wires.
cxxi

D) Rope deterioration from corrosion.
E) Distortion of rope structure.
F) Heat damage from any source.
G) Diameter reduction from wear that exceeds six percent of the baseline diameter measurement.
H) Loss of more than ten percent of rope strength as determined by nondestructive testing.
cxxii

II. INSPECT WIRE ROPE TERMINATIONS
SEQUENCE OF BASIC JOB STEPS
1. Plan, and schedule, inspection of rope terminations.
2. Check for proper lubrication.
3. Inspect socket terminations.
POTENTIAL ACCIDENTS OR HAZARDS
1. A) Equipment down-time, and possible injury due to failure of rope termination.
2. A) Inadequate lubrication causing failure at termination due to corrosion and/or wear.
3. A) Failure of socket, or failure of rope at socket.
RECOMMENDED SAFE JOB PROCEDURES
1. A) All terminations must be inspected before use of equipment. Schedule complete, detailed inspections on a regular basis. Terminations, and sections of ropes near terminations, may require more frequent inspections than the main body of rope.
2. A) Check for proper lubrication. If lubrication was cleaned off rope for inspection, reapply when done.
3. A) Check socket for cracks, deformation, and excessive wear. Check that socket is lined up square with the rope. Check for broken wires where rope enters socket.
cxxiii

SEQUENCE OF BASIC JOB STEPS
4. A) Inspect wedge socket terminations.
5. Inspect U-clip terminations.
6. Check other types of terminations (mechanical splices, swagged sockets, etc.).
POTENTIAL ACCIDENTS OR HAZARDS
4. A) Rope failure at wedge, or rope slipping through wedge socket.
5. A) Rope failure at termination.
B) Rope slipping through termination.
C) Failure of U-clips, or thimbles.
6. A) Failure of rope at termination, or failure of termination.
RECOMMENDED SAFE JOB PROCEDURES
4. A) Be sure wedge is seated properly. Check for evidence of slippage. Be sure at least one rope lay on dead end of rope extends beyond wedge. Check for broken wires on live end of rope. Check visible portion of wedge socket for cracks, deformation, and wear.
5. A) Check for broken wires throughout termination.
B) Check for evidence of slippage, such as scrubbed places on the rope, or U-clips slid together. Check for proper number, spacing, torque, and orientation of U-clips.
C) Check U-clips and thimbles for cracks, deformation, and excessive wear.
6. A) Check for broken wires, and corrosion, at termination. Check for proper installation. Check for cracks, deformation, and excessive wear.
cxxiv

SEQUENCE OF BASIC JOB STEPS
7. Evaluate condition of termination, and condition of rope at termination.
8. Report and record results of inspection.
NOTE: Although the
POTENTIAL ACCIDENTS OR HAZARDS
7. A) Failure of termination, or of rope at termination.
8. A) Possible use of equipment found to be defective.
RECOMMENDED SAFE JOB PROCEDURES
7. A) Exercise judgement based on condition of rope and termination, operating conditions, critical nature of service, and manufacturer’s recommendation.
8. A) Report results of inspection to appropriate officials. Record results for later reference. Tag equipment, if appropriate.
following end attachment retermination, and end attachment replacement standards apply only to wire rope used for personnel hoisting, they should be considered as indicators for potential failure in all situations:
1. End attachment retermination: damaged, or deteriorated, wire rope should be removed by cut off, and rope retermination where there is:
a) More than one broken wire at an attachment.
b) Improper installation of an attachment.
c) Slippage of an attachment.
d) Evidence of deterioration from corrosion at an attachment.
2. End attachment replacement: wire rope attachments should be replaced when cracked, deformed, or excessively worn.
cxxv

III. INSPECT SHEAVES, DRUMS, AND ROLLERS
SEQUENCE OF BASIC JOB STEPS
1. Plan, and schedule, inspections of sheaves, drums, and rollers.
2. Inspect sheaves, drums, and rollers in operation.
3. Check sheave guards.
POTENTIAL ACCIDENTS OR HAZARDS
1. A) Equipment down-time, and possible injury due to failure of sheaves, drums, or rollers, and damage to wire rope due to worn or damaged sheaves, drums, or rollers.
2. A) Sheave, drum, or roller failure.
B) Excessive rope wear or damage.
3. A) Broken, or badly damaged rope, if rope jumps off sheave.
RECOMMENDED SAFE JOB PROCEDURES
1. A) All sheaves, drums, and rollers must be inspected before use of equipment. Schedule complete detailed inspections on a regular basis.
2. A) Watch for any wobbling, or out of round motion. Be sure that bearings are properly lubricated, and not excessively worn. Be sure that mounting bolts are tight.
B) Notice if rope is being squeezed into sheave or drum grooves, or is scrubbing on side of the groove. Be sure that rope is spooling smoothly on drums - not cross-winding, or leaving gaps.
3. A) Check that rope guards are in place over sheaves which are subject to rope jumping off, such as point sheaves. Guards should usually be located about ½ inch above sheave.
cxxvi

SEQUENCE OF BASIC JOB STEPS
4. Check sheave grooves, drum grooves, and roller surface.
5. Check drum end terminations.
POTENTIAL ACCIDENTS OR HAZARDS
4. A) Rope wires being cut by sharp edges.
5. A) Rope pulling out of drum. Drum end termination failure, due to excessive stress, if rope is completely spooled out and stopped by termination.
RECOMMENDED SAFE JOB PROCEDURES
4. A) Check for sharp edges in sheave grooves, drum grooves, and on roller surfaces. Check for print of rope worn in these surfaces.
5. A) Wire rope should be attached securely by clips after making one full turn around drum spoke, or shaft, or by properly assembled anchor bolts, clamps, wedges, or other design feature of drum.
cxxvii

IV. REPLACING WIRE ROPE, AND TERMINATIONS
SEQUENCE OF BASIC JOB STEPS
1. Obtain new rope.
2. Remove old rope.
3. Attach new rope to drum.
4. Transfer new rope from reel to drum.
POTENTIAL ACCIDENTS RECOMMENDED SAFE JOBOR HAZARDS
1. A) Installing improper rope.
3. A) Damage to new rope.
4. A) Damage to new rope.
PROCEDURES
1. A) New rope should be the same size, grade, and construction, or as otherwise recommended by manufacturer due to operating conditions.
2. A) Secure load (bucket, etc.). Slack rope slightly. Detach old rope from load, and attach it to empty reel. Transfer old rope to reel. Depending on situation, use small ropes, and additional drums, reels, winches, or mobile cranes to safely control handling and transfer of old rope.
3. A) Avoid kinking rope.
4. A) Avoid reverse bending.
cxxviii

SEQUENCE OF BASIC JOB STEPS
5. Cut new rope if necessary.
6. Make a wedge termination, if used.
POTENTIAL ACCIDENTS RECOMMENDED SAFE JOB OR HAZARDS PROCEDURES
5. A) Not allowing 5. A) Allow sufficient length for sufficient length. maintaining minimum
recommended number of dead wraps on drum, for cutting off and remaking terminations at both ends, and for turning rope end-for-end to minimize local wear.
B) Unlaying of strands. B) Apply seizing, strapping, or other method to prevent unlaying of strands on both sides of cut.
C) Cutting hazards with C) Wear eye protection. torch, or shears, Wear gloves. Use abrasive wheel, etc. controlled force with
power tools.
6. A) Rope damage, or 6. A) Place live (long) end of termination failure rope on the eye side of due to improperly socket. Form a loop made termination. through socket, and insert
wedge. Pull wedge and rope into position - final tightening occurs under full load.
B) Mashed fingers. B) Wear gloves, and avoid pinch points.
cxxix

SEQUENCE OF BASIC JOB STEPS
7. Make other types of terminations, if used.
8. Record all new rope information.
POTENTIAL ACCIDENTS OR HAZARDS
7. A) Rope damage, or termination failure due to improperly made termination.
8. A) No record to establish normal rope life, and base diameter for wear comparisons.
RECOMMENDED SAFE JOB PROCEDURES
7. A) Make other types of terminations in accordance with ANSI Standards, or manufacturer’s recommendations. If U-clips are used, be sure to use proper number and spacing of clips, and proper torque values. U-clips must be retightened periodically. If zinc sockets are used, proper unlaying of wires, and proper zinc temperature are very important.
8. A) Record date, and rope diameter, length, manufacturer, construction, grade, and normal life. Take, and record, rope diameter measurements after initial rope stretch (break-in).
cxxx

GENERAL INFORMATION
This module is part of an Instruction Guide that was developed to assist the sand, gravel, and crushed stone industry in conducting effective on-the-job training (OJT) of new employees, or employees reassigned to different jobs. The use of training materials, such as this module, is an important part of an effective, systematic, OJT program.
This Instruction Guide uses a generic Job Safety Analysis (JSA) of jobs common to the industry. The JSA format facilitates uniform basic training in safe job procedures, while requiring only a minimum of time and effort on the part of the trainer. This material is generic to the industry; therefore, each company using this guide will need to tailor the material somewhat to fit their particular requirements. In some cases, the material must be general in nature, and will not include specific details of procedures or equipment that must be taught by the trainer.
Recommendations for an overall OJT program are contained in the Mine Safety and Health Administration (MSHA) guide: “Structuring Effective On-The-Job Training Programs”
TRAINING RECOMMENDATIONS
On-the-job training is usually best done by the employee’s immediate supervisor. If the supervisor relies on another employee to do certain parts of the training, the supervisor should be present to monitor the training. OJT is conducted at the actual job site, where the work will be done.
The supervisor/trainer should use the training materials (this module, or other materials) while the training is being done, to help ensure that all job steps are covered, and that no important safety precautions are omitted. Effective OJT should begin with an explanation (lecture and/or discussion) of the safe job procedure. The explanation should be followed by a hands-on demonstration of the proper job procedure. A good demonstration is, perhaps, the most important part of OJT. The demonstration is followed by supervised practice, during which the supervisor/trainer coaches (corrects and encourages) the employee, and evaluates when the employee is ready to do the job without direct supervision.
The first step - explaining the job to the employee - can be done in different ways. The supervisor/trainer and the employee can sit down and go through the training materials together. It may be advantageous to provide the employee with a copy of the training modules that are applicable to his/her job. The fact that most of the training is conducted at the job site does not preclude the use of a classroom, or a quiet office, for the first part of the training. Any general theory, or knowledge training, as well as the initial explanation of the job procedure, may be best done in an office/classroom setting; especially when noise levels, or other conditions at the job site, make communication difficult. A complete series of job steps could be presented through the use of slides developed at the mining operation.
cxxxi

MODULE NUMBER 13OFINSTRUCTION GUIDE NUMBER 40
ON-THE-JOB TRAININGFOR THESAND, GRAVEL, AND CRUSHED STONE INDUSTRY
REPLACING THE DRIVE CHAIN OR BELT ON A SCREW CONVEYOR
This module describes basic job steps, potential hazards and accidents, and recommended safe job procedures for replacing the drive chain or belt on a screw conveyor.
This job is normally done by a maintenance mechanic and a helper. The maintenance mechanic and helper must make sure that all other people in the area are protected from possible accidents and injuries resulting from replacing the drive chain or belt on screw conveyors.
Screw conveyors separate water from sand, chat, and pea gravel; and deliver these materials
cxxxii

to final rinse stations, or storage areas. Screw conveyors are made of curved metal plates arranged in a spiral shape on a shaft. The plates and shaft rotate in a semi-circular trough which is covered by a flat top. The material is carried forward in the trough as the screw rotates. Because the friction in screw conveyors is great, they require more power to operate than other types of short conveyors.
Hands and feet can get caught in screw conveyors; therefore, screw conveyor troughs must be covered by guards, unless power is properly locked out and any possible motion is blocked. Trough covers must be securely fastened, or electrically interlocked, so that power to the screw is cut off when a cover is raised.
The person who restarts a screw conveyor, after replacing the drive chain or belt, must take every precaution to ensure that employees are clear of the screw, and that all covers are replaced, before removing the lock-out device and restoring power.
cxxxiii

The following safe job procedures will help minimize incidents which may adversely affect production and cause injuries.
REQUIRED OR RECOMMENDED PERSONAL PROTECTIVE EQUIPMENT:
HARD HAT, STEEL-TOED SHOES, SAFETY GLASSES, HEARING PROTECTION
SEQUENCE OF BASIC JOB STEPS
1. Remove power from screw conveyor.
2. Select tools and supplies.
3. Hook rope, or chain block to guard.
4. Loosen bolts and remove guards.
POTENTIAL ACCIDENTS OR HAZARDS
1. A) Electrocution.
B) Caught in equipment.
C) Slip/trip.
2. A) Strains from lifting tools.
B) Injury from dropping tools.
3. A) Struck by chain or block, if dropped.
B) Struck against, or caught on metal structure.
4. A) Struck by wrench.
cxxxiv
RECOMMENDED SAFE JOB PROCEDURES
A) Lockout and tag.
B) Lockout and tag.
C) Avoid undue haste. Practice good house-keeping.
2. A) Use proper lifting techniques.
B) Keep firm grip on tools.
3. A) Hold firmly to lift device and chain used to lift guard until chain or rope is hooked and tightened.
B) Be aware of working environment, and location of coworkers. Avoid projections.
4. A) Get firm grip on tools. Use controlled force on tools.

SEQUENCE OF BASIC JOB STEPS
5. Loosen chain adjustment and remove old chain.
6. Install new chain.
7. Splice new chain.
POTENTIAL ACCIDENTS OR HAZARDS
B) Struck by guard.
5. A) Caught between movable links of chain.
B) Struck by chain.
C) Overexertion.
6. A) Caught on, or struck against, chain, sprockets, or structures.
B) Struck by chain falling off sprockets.
C) Fall from platform or screw conveyor.
7. A) Struck by wrench. Fall against structure if wrench slips.
RECOMMENDED SAFE JOB PROCEDURES
B) Have secure hook-up to guard. Check chain and lift device for defects. Keep co-workers clear of any sudden movement of guard.
5. A) Keep fingers out of pinch points.
B) Hold firmly to chain when removing.
C) Get help if chain is difficult to handle.
6. A) Wear gloves and snug fitting clothing. Avoid protruding objects.
B) Secure chain to keep it from rolling off sprockets.
C) Keep work area clear of slipping/tripping hazards. Maintain good balance. If work cannot be performed from adequate platform with guard-rails, use proper tie-off.
7. A) Select, or adjust, wrench to fit bolt heads. Use controlled force.
cxxxv

SEQUENCE OF BASIC JOB STEPS
8. Tighten chain.
9. Replace guard and bolt in place.
POTENTIAL ACCIDENTS OR HAZARDS
B) Oil splashing in eyes.
C) Struck by hammer or punch.
8. A) Struck by pry-bar.
B) Falling.
RECOMMENDED SAFE JOB PROCEDURES
B) Wear safety glasses or goggles. Use penetrating oil sparingly. Direct oil spray away from nearby persons.
C) Hold tools firmly - use pliers to hold punch. Strike with controlled action.
A) Use pry-bar of adequate size and length. Seat pry-bar firmly.
B) Keep guardrails around work platform, or remain tied-off.
9. A) Overexertion. 9. A) Get help with guard, or handle guard with a lifting device.
cxxxvi

PROCEDURES FOR REMOVING AND REPLACING DRIVE BELTS
SEQUENCE OF BASIC JOB STEPS
1. Remove power from screw conveyor.
2. Select tools and supplies.
3. Hook rope, or chain block to guard.
4. Loosen bolts and remove guards.
POTENTIAL ACCIDENTS OR HAZARDS
1. A) Electrocution.
B) Caught in equipment.
C) Slip/trip.
2. A) Strains from lifting tools.
B) Injury from dropping tools.
3. A) Struck by chain or block, if dropped.
B) Struck against, or caught on metal structure.
4. A) Struck by wrench.
B) Struck by guard.
RECOMMENDED SAFE JOB PROCEDURES
A) Lockout and tag.
B) Lockout and tag.
C) Avoid undue haste. Practice good house-keeping.
2. A) Use proper lifting techniques.
B) Keep firm grip on tools.
3. A) Hold firmly to lift device and chain used to lift guard until chain or rope is hooked and tightened.
B) Be aware of working environment and location of coworkers. Avoid projections.
4. A) Get firm grip on tools. Use controlled force on tools.
B) Have secure hook-up to guard. Check chain and lift device for defects. Keep coworkers clear of any sudden movement of guard.
cxxxvii

SEQUENCE OF BASIC JOB STEPS
5. Loosen belt adjustment and remove old belt.
6. Install new belts.
7. Tighten belts.
8. Replace guard and bolt in place.
POTENTIAL ACCIDENTS OR HAZARDS
5. A) Wrench slipping off and injuring hand.
B) Pinched finger.
6. A) Pinched finger.
B) Fall from platform or screw conveyor.
7. A) Struck by pry-bar.
B) Falling.
8. A) Overexertion.
RECOMMENDED SAFE JOB PROCEDURES
5. A) Keep firm grip on tools.
B) Use tool to pry belt off. Cut old belt if necessary.
6. A) Use a tool to carefully pry new belts onto pulley.
B) Keep work area clear of slipping/tripping hazards. Maintain good balance. If work cannot be performed from adequate platform with guardrails, use proper tie-off.
7. A) Use pry-bar of adequate size and length. Seat pry-bar firmly.
B) Keep guard-rails around work platform, or remain tied-off.
8. A) Get help with guard, or handle guard with a lifting device.
cxxxviii

GENERAL INFORMATION
This module is part of an Instruction Guide that was developed to assist the sand, gravel, and crushed stone industry in conducting effective on-the-job training (OJT) of new employees, or employees reassigned to different jobs. The use of training materials, such as this module, is an important part of an effective, systematic, OJT program.
This Instruction Guide uses a generic Job Safety Analysis (JSA) of jobs common to the industry. The JSA format facilitates uniform basic training in safe job procedures, while requiring only a minimum of time and effort on the part of the trainer. This material is generic to the industry; therefore, each company using this guide will need to tailor the material somewhat to fit their particular requirements. In some cases, the material must be general in nature, and will not include specific details of procedures or equipment that must be taught by the trainer.
Recommendations for an overall OJT program are contained in the Mine Safety and Health Administration (MSHA) guide: “Structuring Effective On-The-Job Training Programs”
TRAINING RECOMMENDATIONS
On-the-job training is usually best done by the employee’s immediate supervisor. If the supervisor relies on another employee to do certain parts of the training, the supervisor should be present to monitor the training. OJT is conducted at the actual job site, where the work will be done.
The supervisor/trainer should use the training materials (this module, or other materials) while the training is being done, to help ensure that all job steps are covered, and that no important safety precautions are omitted. Effective OJT should begin with an explanation (lecture and/or discussion) of the safe job procedure. The explanation should be followed by a hands-on demonstration of the proper job procedure. A good demonstration is, perhaps, the most important part of OJT. The demonstration is followed by supervised practice, during which the supervisor/trainer coaches (corrects and encourages) the employee, and evaluates when the employee is ready to do the job without direct supervision.
The first step - explaining the job to the employee - can be done in different ways. The supervisor/trainer and the employee can sit down and go through the training materials together. It may be advantageous to provide the employee with a copy of the training modules that are applicable to his/her job. The fact that most of the training is conducted at the job site does not preclude the use of a classroom, or a quiet office, for the first part of the training. Any general theory, or knowledge training, as well as the initial explanation of the job procedure, may be best done in an office/classroom setting; especially when noise levels, or other conditions at the job site, make communication difficult. A complete series of job steps could be presented through the use of slides developed at the mining operation.
cxxxix

MODULE NUMBER 14OFINSTRUCTION GUIDE NUMBER 40
ON-THE-JOB TRAININGFOR THESAND, GRAVEL, AND CRUSHED STONE INDUSTRY
MANUAL HANDLING OF MATERIALS
This module describes the basic job steps, potential hazards and accidents, and recommended safe job procedures for the manual handling of materials. Safe job procedures for standing, reaching, lifting, shoveling, and sweeping are included in this module.
This module concentrates on the prevention of back injuries. Back injuries account for a high percentage of the injuries that result from the manual handling of materials. Instances of lower back pain in the United States are increasing at epidemic proportions. The United States Department of Labor estimates that at least 75 percent of the population has had back pain. The use of good body mechanics at work, and at home, can prevent the causes of back pain -too much strain on back muscles, and too much pressure on back discs.
cxl

The spine consists of 24 bones (vertebrae) connected by interlocking joints. Most of the vertebrae are separated by shock absorbers called discs. Too much pressure on a disc can cause the disc to weaken, and bulge out to one side. This bulge can push a nerve into a bony part of the spine, and cause great pain. Doctors say that the disc has ”herniated,” or “ruptured.” Ruptured discs do not always require surgery, but this is the most common reason for back surgery.
Muscle strain, or spasm, is another type of back injury. Hundreds of muscles and ligaments connect to, and support, the spine. When a muscle is strained, it may swell and cause pain by increasing pressure on small nerves that pass through the muscle.
Lifting objects is not the only cause of back problems. Sitting, standing, bending, and stooping - everything we do with our bodies - either takes away from, or adds to the overall health of our backs.
cxli

The following safe job procedures will help minimize incidents which may adversely affect production and cause injuries.
REQUIRED OR RECOMMENDED PERSONAL PROTECTIVE EQUIPMENT:
HARD HAT, STEEL-TOED SHOES, GLOVES
SEQUENCE POTENTIAL ACCIDENTS OF BASIC JOB OR HAZARDS
STEPS
1. Standing. 1. A) Standing with knees locked, while bending forward at waist, puts 200 pounds of pressure on lower back discs.
2. Reaching 2. A) Placing extra over your pressure on your head. spine.
3. Lifting. 3. A) Bending from waist with locked knees, and holding anything in out-stretched arms, puts 10 times more pressure than normal on your back.
RECOMMENDED SAFE JOB PROCEDURES
1. A) Give your body a wide base of support. Put one foot in front of the other and bend the knees a little, in order to take pressure off your back. When possible, lean against something for support. When possible, stand with one foot propped up. Doing so can cut disc pressure in half.
2. A) If object cannot be conveniently reached, use a safe platform or ladder. Keep one foot in front of the other. If possible, store materials within safe reach of floor or other secure work platform.
3. A) Establish a good base of support. Hold the object as close to your body as possible. If possible, store materials on shelving, or slightly elevated from floor.
cxlii

SEQUENCE OF BASIC JOB
STEPS
4. Shoveling.
POTENTIAL ACCIDENTS OR HAZARDS
B) Picking up heavy items incorrectly is a common cause of injuries - especially back strains and sprains.
C) If weight is too heavy, excess pressure on back discs can cause injury.
4. A) Excessive pressure on discs in your back due to lifting and twisting.
RECOMMENDED SAFE JOB PROCEDURES
B) To pick up heavy items correctly: I) Kneel with one foot
forward. 2. Pull item in close. 3. Test weight by lifting one
end. 4. Tuck in chin to help keep
back straight. 5. Stand by pushing up with
your legs. 6. Shift weight to back leg
before walking, in order to test and maintain balance.
C) Test weight of object by trying to lift one end, as described above. If weight cannot be safely lifted by one person, get help, or use available hoists or other lifting aids.
4. A) When shoveling, pivot instead of twisting when you need to throw material to one side. When you need to throw material to the left, keep your left foot forward, with feet well separated. Load shovel moderately, and pull load in close. Keep right foot planted and move left foot back and to the left, toward where you are throwing the material. If throwing material to the right, keep left foot planted and pivot with the right foot.
cxliii

SEQUENCE OF BASIC JOB
STEPS
5. Using a push-broom.
POTENTIAL ACCIDENTS OR HAZARDS
5. A) Extra pressure on discs in your back by moving arms back and forth, or bending at the waist.
RECOMMENDED SAFE JOB PROCEDURES
5. A) Walk back and forth with handle of broom resting against hip-bone, keeping elbow bent.
cxliv

GENERAL INFORMATION
This module is part of an Instruction Guide that was developed to assist the sand, gravel, and crushed stone industry in conducting effective on-the-job training (OJT) of new employees, or employees reassigned to different jobs. The use of training materials, such as this module, is an important part of an effective, systematic, OJT program.
This Instruction Guide uses a generic Job Safety Analysis (JSA) of jobs common to the industry. The JSA format facilitates uniform basic training in safe job procedures, while requiring only a minimum of time and effort on the part of the trainer. This material is generic to the industry; therefore, each company using this guide will need to tailor the material somewhat to fit their particular requirements. In some cases, the material must be general in nature, and will not include specific details of procedures or equipment that must be taught by the trainer.
Recommendations for an overall OJT program are contained in the Mine Safety and Health Administration (MSHA) guide: “Structuring Effective On-The-Job Training Programs”
TRAINING RECOMMENDATIONS
On-the-job training is usually best done by the employee’s immediate supervisor. If the supervisor relies on another employee to do certain parts of the training, the supervisor should be present to monitor the training. OJT is conducted at the actual job site, where the work will be done.
The supervisor/trainer should use the training materials (this module, or other materials) while the training is being done, to help ensure that all job steps are covered, and that no important safety precautions are omitted. Effective OJT should begin with an explanation (lecture and/or discussion) of the safe job procedure. The explanation should be followed by a hands-on demonstration of the proper job procedure. A good demonstration is, perhaps, the most important part of OJT. The demonstration is followed by supervised practice, during which the supervisor/trainer coaches (corrects and encourages) the employee, and evaluates when the employee is ready to do the job without direct supervision.
The first step - explaining the job to the employee - can be done in different ways. The supervisor/trainer and the employee can sit down and go through the training materials together. It may be advantageous to provide the employee with a copy of the training modules that are applicable to his/her job. The fact that most of the training is conducted at the job site does not preclude the use of a classroom, or a quiet office, for the first part of the training. Any general theory, or knowledge training, as well as the initial explanation of the job procedure, may be best done in an office/classroom setting; especially when noise levels, or other conditions at the job site, make communication difficult. A complete series of job steps could be presented through the use of slides developed at the mining operation.
cxlv

MODULE NUMBER 15OFINSTRUCTION GUIDE NUMBER 40
ON-THE-JOB TRAININGFOR THESAND, GRAVEL, AND CRUSHED STONE INDUSTRY
USING AN OVERHEAD HOIST TO HANDLE MATERIALS
This module describes the basic job steps, potential accidents and hazards, and recommended safe job procedures for handling materials with an overhead hoist.
This job is normally done by a hoist operator, mechanic, mechanic’s helper, or other maintenance worker. Persons operating an overhead hoist must make sure that other people in the area are protected from possible accidents and injuries that might result from handling materials with the hoist.
cxlvi

Hoisting apparatus is used to raise, lower, and transport heavy loads for limited distances. The safe load capacity should be marked clearly on the hoist. All hoists should be attached to their supports (fixed member, or trolley) either with shackles, or with support hooks that have safety latches. Hoist supports should have an adequate safety factor for maximum loads to be lifted.
Scheduled, and detailed, inspection of a hoist is extremely important. Special attention should be given to load hooks, ropes, brakes, and limit switches. Flanges, on hoist drums with single layer, spiral grooves, should be free of projections that could damage the rope. A material hoist that is operating on rails, tracks, or trolleys, should have a positive stop, or limiting device, on the rails or tracks to prevent over-running the safe limits. The hoist should also be equipped with over-speed protection. A retaining cable, or chain, looped around the body of the hoist, and the support, can provide extra protection against failure of the supporting hook, shackle, or block.
A load should not be picked up until it is directly underneath the hoist. Improper lifting procedure places stresses on the hoist that it was not designed to handle. A floor operated electric, air, or hand powered hoist must not be used to lift, support, or transport people unless it is used in combination with safety devices that are approved by the hoist manufacturer. Standard commercial hoists do not provide a secondary means of supporting a load if the wire rope, or other suspension element, fails.
Electric Hoist
Electric hoists should have nonconducting control cords, unless they are grounded. Control cords should have handles that have distinctly different contours so that, even without looking, the operator will know which handle is the hoisting control, and which is the lowering control. Each control cord should be clearly marked “hoist,” or “lower.” An arrow can be attached to each control cord, showing the direction a load will move when the rope is pulled. Also, it may be advisable to pass control cords through a spreader, in order to keep them from becoming tangled. Control cords should be inspected weekly, for wear and other defects.
On electric hoists that are pendant controlled, means for effecting an automatic return to the “off” position should be provided on the control, so that a constant pull on the control rope, or push on the control button, must be maintained in order to raise or lower the load. Push-button control circuits must be limited to 120 volts. A limit stop should be installed on the hoist motion, and at least two turns of rope should remain on the drum when the load block is on the floor.
Air Hoist
When a piston-type air hoist has been in operation for a long time, the lock-nut that holds the piston on its rod may become so loose that the rod will pull out of the piston, and let the load
cxlvii

drop. The piston can be secured to the rod with a castellated nut and cotter pin. Check that the piston is well secured to the rod whenever the air hoist is overhauled.
If an ordinary hook is used to hang the hoist from its support, the cylinder may unhook if the piston rod comes in contact with an obstruction when lowering. A clevis, or other device, should be used to prevent the hook from being detached from the hoist support.
Hand-Operated Chain Hoist
Chain hoists are suitable for many jobs where a block and tackle (fitted with fiber rope) might be used. Chain hoists are stronger, more dependable, and more durable than fiber rope tackle. There are three general types of chain hoists: spur-geared, differential, and screw-geared (or worm-drive). The spur-geared chain hoist is the most efficient, because it will pick up a load with the least effort on the part of a worker. The differential-type chain hoist is the least efficient.
Screw-geared, and differential, hoists are self locking, and will automatically hold a load in position. Since the spur-geared hoist is free running, an automatic load brake, similar to that on a crane, is provided to hold the load.
The chains must be made of high quality, welded steel, with a load safety factor of at least five. Chain hoists should have a larger capacity than regular work requires. Supports for hoists must be strong enough to carry loads imposed on them. People handling a chain hoist must follow safe lifting procedures, in order to avoid strains and other injuries.
cxlviii

The following safe job procedures will help minimize incidents which may adversely affect production and cause injuries.
REQUIRED OR RECOMMENDED PERSONAL PROTECTIVE EQUIPMENT:
HARD HAT, STEEL-TOED SHOES, SAFETY GLASSES, HEARING PROTECTION,
SEQUENCE OF BASIC JOB STEPS
1. Move hoist to object to be lifted.
2. Inspect slings, chains, and lifting devices.
GLOVES
POTENTIAL ACCIDENTS OR HAZARDS
1. A) Overexertion while pulling hoist.
B) Slip/trip/fall.
C) Struck against stationary objects. Caught on projections.
D) Foreign objects in eyes.
2. A) Contact with sharp wires or metal burrs.
B) Struck by dropped or swinging chain or sling.
cxlix
RECOMMENDED SAFE JOB PROCEDURES
1. A) Keep hoist rollers lubricated for ease of movement.
B) Face direction of travel. Keep walk areas free of extraneous materials. Clean up slick spots.
C) Face direction of travel. Avoid protruding objects.
D) Wear safety glasses or goggles. Practice good housekeeping - clean work areas regularly.
2. A) Wear gloves. Sand or file down sharp burrs. Replace bad ropes.
B) Hold firmly to parts. Do not allow chains to swing out of control.

SEQUENCE OF BASIC JOB STEPS
3. Lower hoist hook.
4. Make hook-up to material.
5. Raise load to desired height.
POTENTIAL ACCIDENTS OR HAZARDS
3. A) Struck by hook, control handle, or chain.
4. A) Struck by, or caught between, material or moving parts.
B) Contact with sharp wires or burrs.
5. A) Struck by, or caught on load being raised.
B) Caught between load and another object.
C) Caught between sling and load on hook.
D) Overexertion, if lifting with a manual hoist.
RECOMMENDED SAFE JOB PROCEDURES
3. A) Do not allow loose control handle to flop around. Tie bar should connect control ropes. Stay clear of hook being lowered.
4. A) See that material is stable. Keep hands and feet out of pinch points. Use hook or pole to place sling under material.
B) Wear gloves. Use hook or pole to push slings under load.
5. A) Position hoist directly over load, so that load will be raised straight and will not swing. Wear snug fitting clothing. Stand clear of load after hook-up.
B) Use push pole to maneuver lift.
C) After hook-up, remove hands before lifting. Use hook, tag line, or push pole to handle lift.
D) Do not overload hoist capacity. Keep working parts of hoist well maintained to make operation easier. Get help if needed.
cl

SEQUENCE OF BASIC JOB STEPS
6. Move load to desired location.
7. Lower load.
8. Unhook sling from hoist.
POTENTIAL ACCIDENTS OR HAZARDS
6. A) Struck by load slipping out of sling. Caught between load and floor, or other object.
B) Hitting other employees with load.
C) Slips, trips, or falls.
D) Overexertion.
7. A) Struck by load, if sling or hoist fails.
B) Caught between load and floor.
C) Caught on, or struck against load or sling.
8. A) Caught between sling and hook, or load.
RECOMMENDED SAFE JOB PROCEDURES
A) Have load well balanced in sling. Stay safe distance from load by using push pole, hook, or tag line to pull hoist to place.
B) Clear travel path of other personnel before moving. Warn all nearby persons of plan and hazards involved.
C) Face direction of travel. Keep walkways clear of slipping/tripping hazards.
D) Get assistance, if needed. Keep hoist rollers well maintained.
7. A) Slings and hoist should be checked before use. Do not overload sling or hoist capacity.
B) Do not position body directly beneath load.
C) Stand clear of load. Use push pole or tag line to maneuver load.
8. A) Remove hands from controls after adequate slack is dropped, in order to prevent accidental engagement of hoist controls.
cli

SEQUENCE OF BASIC JOB STEPS
9. Remove sling or chain from load.
POTENTIAL ACCIDENTS OR HAZARDS
B) Overexertion -removing sling from hook.
C) Struck against, or contact with sharp burrs or wires.
9. A) Caught between load and floor.
B) Overexertion -removing sling.
C) Caught on, or struck against load, sling, or other object.
D) Struck by load moving/caught between load and other object.
RECOMMENDED SAFE JOB PROCEDURES
B) Have adequate slack to make release easier.
C) Wear gloves. Remove burrs, and replace damaged or deteriorated ropes.
9. A) Use hook or push pole to remove sling from under material.
B) Load should be set on blocking to make removal easier.
C) Avoid undue haste, and avoid protruding objects.
D) See that load is well chocked to prevent movement. Material should not be stacked or stored too high.
clii

GENERAL INFORMATION
This module is part of an Instruction Guide that was developed to assist the sand, gravel, and crushed stone industry in conducting effective on-the-job training (OJT) of new employees, or employees reassigned to different jobs. The use of training materials, such as this module, is an important part of an effective, systematic, OJT program.
This Instruction Guide uses a generic Job Safety Analysis (JSA) of jobs common to the industry. The JSA format facilitates uniform basic training in safe job procedures, while requiring only a minimum of time and effort on the part of the trainer. This material is generic to the industry; therefore, each company using this guide will need to tailor the material somewhat to fit their particular requirements. In some cases, the material must be general in nature, and will not include specific details of procedures or equipment that must be taught by the trainer.
Recommendations for an overall OJT program are contained in the Mine Safety and Health Administration (MSHA) guide: “Structuring Effective On-The-Job Training Programs”
TRAINING RECOMMENDATIONS
On-the-job training is usually best done by the employee’s immediate supervisor. If the supervisor relies on another employee to do certain parts of the training, the supervisor should be present to monitor the training. OJT is conducted at the actual job site, where the work will be done.
The supervisor/trainer should use the training materials (this module, or other materials) while the training is being done, to help ensure that all job steps are covered, and that no important safety precautions are omitted. Effective OJT should begin with an explanation (lecture and/or discussion) of the safe job procedure. The explanation should be followed by a hands-on demonstration of the proper job procedure. A good demonstration is, perhaps, the most important part of OJT. The demonstration is followed by supervised practice, during which the supervisor/trainer coaches (corrects and encourages) the employee, and evaluates when the employee is ready to do the job without direct supervision.
The first step - explaining the job to the employee - can be done in different ways. The supervisor/trainer and the employee can sit down and go through the training materials together. It may be advantageous to provide the employee with a copy of the training modules that are applicable to his/her job. The fact that most of the training is conducted at the job site does not preclude the use of a classroom, or a quiet office, for the first part of the training. Any general theory, or knowledge training, as well as the initial explanation of the job procedure, may be best done in an office/classroom setting; especially when noise levels, or other conditions at the job site, make communication difficult. A complete series of job steps could be presented through the use of slides developed at the mining operation.
cliii

MODULE NUMBER 16OFINSTRUCTION GUIDE NUMBER 40
ON-THE-JOB TRAININGFOR THESAND, GRAVEL, AND CRUSHED STONE INDUSTRY
HANDLING MATERIAL WITH A SHOP OVERHEAD TRAVELING CRANE
This module describes the basic job steps, potential hazards and accidents, and recommended safe job procedures for handling materials with a shop overhead traveling crane.
An overhead crane may be operated either from a cab or from the floor. If a crane is operated from the floor, control devices may be either pendant, push-buttons, or pull-ropes. Control handles should be clearly identified by signs, shape, or position, so that an operator, while looking at the signal man (if needed), can tell by “feel” which motion is being controlled. Controls on floor-operated, and on cab-operated, cranes should be identified. If there are
cliv

several cranes on the same runway, or in the same building, all should have the controls in identical positions so that a substitute operator will not be confused. Safe means must be provided for the operator to access a cab-operated crane. In case of fire, the operator must be able to escape from the crane, regardless of its location on the runway.
The bridge-truck wheels and trolley wheels should have sweeps to push away a person’s feet or hands. An automatic alarm should sound continuously from the time the travel controller handle is first moved from the “off” position, until it is returned to the “off” position. Warning bells, or horns, and flashing lights (arranged to operate automatically when a crane is approaching) should be placed in aisles and walkways. An electronic device, which sounds a distinct alarm at a predetermined distance, should be used to warn operators, when two or more cranes are operating on the same runway.
Operations
When not in use, the crane should be parked with the load hook and slings raised high enough to clear the heads of persons working on the floor below. The operator should also place all controls in the “off” position, and lockout the crane. A light should be visible from the floor to indicate when the main switch is on. Controllers should be the spring return type; or the momentary contact, push-button type.
The operator should center the trolley over the load when starting to make a lift, and should slowly accelerate lifting motions, or brake lowering motions, in order to minimize stress on the crane. The operator should also periodically check that the crane is running square with the runway rails, by carefully running the crane up against the rail stops. Both sides should bump against the stops at the same time.
The following is a set of safety rules for operation of overhead cranes:
1. Only authorized operators are allowed to use any crane.
2. Remain in the crane cab when on duty.
3. Never go on top of the crane, or permit anyone else to do so, without first opening the main power disconnect switch and locking it out and tagging it.
4. Be sure hook is high enough to clear obstacles before “traveling” trolley or crane bridge.
5. Never permit the crane to bump into another crane.
6. Examine the crane at the start of every shift for loose or defective gears, keys, runways, railings, warning bells, signs, switches, sweep-brushes, cables, etc. Do not operate crane with any safety defects. Be sure that crane is kept clean and well lubricated.
clv

7. While hoisting equipment is in operation, operator should not perform any other work, and should not leave position at the controls until the load is safely landed or returned to ground level.
8. Do not carry a load above personnel. Sound alarm when necessary.
9. Do not allow personnel to ride on a load or on crane hooks.
10. If the power goes off, move the controller to the “off” position until the power is restored.
11. Check that the fire extinguisher on the crane is properly maintained.
12. Do not operate a crane if you are not physically fit. When ill, report to your foreman.
13. Do not drag the slings, chains, or load block. After the load is removed, do not move the crane until the hook is lowered and hook-on operator has hooked up chain or sling.
14. If asked to do something that seems unsafe, call foreman or repairman in charge for advice.
15. Before leaving cab, open the main switch. Make sure that the magnet, or hook, is empty and that the magnet-controller (if any) is off. Lock, or otherwise secure, equipment in order to prevent unauthorized use.
16. When parking an outside crane at the end of a shift, always set brake, or chain crane to the track. Lower booms to ground level, or secure them against displacement by wind or other outside forces.
17. Stop operation and open the power switch if the crane fails to respond correctly. Then notify the foreman. Attempting to get out of difficulty by repeated operation may make a condition worse.
18. Whenever a slack-line condition occurs, check the seating of the ropes on sheaves and drums before further operation.
19. Never pick up a load beyond the rated load capacity of the crane. In case of doubt, call the foreman.
20. Never move the load, or crane, unless you understand the floor signal.
21. When there are several ground persons, obey only the signals from the person in charge - except, obey an emergency stop signal given by anyone.
22. Do not allow the load to swing against the hook-on man or other floor-men. Make sure that all persons are clear of a load.
clvi

23. When raising or lowering a load, make sure that the load safely clears adjacent stockpiles or machinery.
24. Never leave a load suspended.
clvii

The following safe job procedures will help to minimize incidents which could cause injuries and adversely affect production.
REQUIRED OR RECOMMENDED PERSONAL PROTECTIVE EQUIPMENT:
HARD HAT, SAFETY SHOES, SAFETY GLASSES, GLOVES, HEARING PROTECTION
SEQUENCE OF BASIC JOB STEPS
1. Move hoist to material to be handled.
2. Check sling or chain, if used.
3. Attach sling or chain to load.
4. Lower hoist hook.
POTENTIAL ACCIDENTS OR HAZARDS
1. A) Struck by hoist hook or sling.
B) Slip, trip, or fall; struck against stationary object.
2. A) Struck against hook or sling. Contact with burrs, or sharp metal.
3. A) Struck against, or caught on material handled.
4. A) Struck by hoist hook.
clviii
RECOMMENDED SAFE JOB PROCEDURES
1. A) Carry hook high when moving hoist. Walk clear of hook movement, and sound warning to other workers.
B) Use designated walkways, and keep them clear of tripping hazards and spills. Avoid undue haste. Face in direction of travel.
2. A) Never handle metal objects with bare hands. Keep rope slings or chains in good condition. Replace bad ropes or chains.
3. A) Adjust movement to clearance. Material should be stored so that it is easily accessible. Keep slings in good repair.
4. A) Stand clear of hook being lowered. Keep other workers clear.

5. Attach hoist hook to sling.
6. Raise load.
7. Move load to desired point.
8. Lower load.
5. A) Caught between hoist hook and sling, or material.
B) Fall while hooking load. Overexertion.
6. A) Struck by load, if sling fails. Caught between load and floor, or other object.
7. A) Slip, trip, or fall.
B) Struck by load being moved. Caught between load and fixed object.
8. A) Struck against load and another object.
B) Caught between load and fixed object.
5. A) Get enough slack to make hook-up easier. Keep body parts out of pinch points.
B) Maintain good body balance. Do not over-reach. Have ample slack to make hook-up.
6. A) Load should not be raised until proper signal is given. Use lift sling of adequate size. Make secure hook-up. Hook sling such that load is balanced. Stand clear of load. Use push pole or tag line to maneuver load.
7. A) Keep walkways clear. Clean up any spills. Face direction of travel.
B) Face direction of travel. Use tag line or push pole to guide load. Sound warning, and be sure other workers are away from load. Obey stop signal from anyone.
8. A) Avoid undue haste. Adjust movement to available clearance.
B) Keep all workers clear of area where load is being deposited.
clix

9. Unhook load from hoist.
10. Move hoist clear of load.
11. Remove sling from load.
9. A) Caught between hook and sling, or load and sling.
B) Overexertion while removing sling.
10. A) Struck by hook.
11. A) Overexertion removing sling.
B) Struck by shifting load.
9. A) Wear gloves. Remove hand from controls when unhooking, in order to prevent accidental tightening or slack.
B) Have ample slack to unhook sling.
10. A) Keep all workers clear of hook movement. Give warning. Have good communication with coworkers in area.
11. A) Set load on blocks, so that sling or chain can be easily removed.
B) Secure load in place before removing sling.
clx

GENERAL INFORMATION
This module is part of an Instruction Guide that was developed to assist the sand, gravel, and crushed stone industry in conducting effective on-the-job training (OJT) of new employees, or employees reassigned to different jobs. The use of training materials, such as this module, is an important part of an effective, systematic, OJT program.
This Instruction Guide uses a generic Job Safety Analysis (JSA) of jobs common to the industry. The JSA format facilitates uniform basic training in safe job procedures, while requiring only a minimum of time and effort on the part of the trainer. This material is generic to the industry; therefore, each company using this guide will need to tailor the material somewhat to fit their particular requirements. In some cases, the material must be general in nature, and will not include specific details of procedures or equipment that must be taught by the trainer.
Recommendations for an overall OJT program are contained in the Mine Safety and Health Administration (MSHA) guide: “Structuring Effective On-The-Job Training Programs”
TRAINING RECOMMENDATIONS
On-the-job training is usually best done by the employee’s immediate supervisor. If the supervisor relies on another employee to do certain parts of the training, the supervisor should be present to monitor the training. OJT is conducted at the actual job site, where the work will be done.
The supervisor/trainer should use the training materials (this module, or other materials) while the training is being done, to help ensure that all job steps are covered, and that no important safety precautions are omitted. Effective OJT should begin with an explanation (lecture and/or discussion) of the safe job procedure. The explanation should be followed by a hands-on demonstration of the proper job procedure. A good demonstration is, perhaps, the most important part of OJT. The demonstration is followed by supervised practice, during which the supervisor/trainer coaches (corrects and encourages) the employee, and evaluates when the employee is ready to do the job without direct supervision.
The first step - explaining the job to the employee - can be done in different ways. The supervisor/trainer and the employee can sit down and go through the training materials together. It may be advantageous to provide the employee with a copy of the training modules that are applicable to his/her job. The fact that most of the training is conducted at the job site does not preclude the use of a classroom, or a quiet office, for the first part of the training. Any general theory, or knowledge training, as well as the initial explanation of the job procedure, may be best done in an office/classroom setting; especially when noise levels, or other conditions at the job site, make communication difficult. A complete series of job steps could be presented through the use of slides developed at the mining operation.
clxi
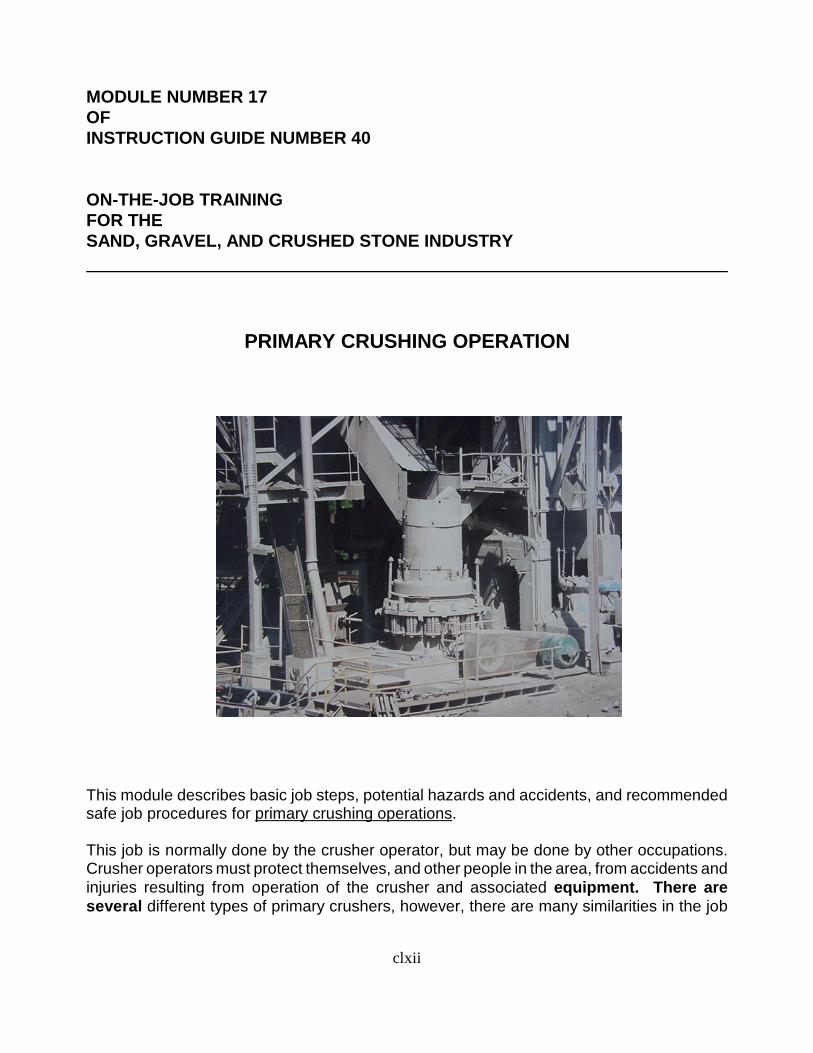
MODULE NUMBER 17OFINSTRUCTION GUIDE NUMBER 40
ON-THE-JOB TRAININGFOR THESAND, GRAVEL, AND CRUSHED STONE INDUSTRY
PRIMARY CRUSHING OPERATION
This module describes basic job steps, potential hazards and accidents, and recommended safe job procedures for primary crushing operations.
This job is normally done by the crusher operator, but may be done by other occupations. Crusher operators must protect themselves, and other people in the area, from accidents and injuries resulting from operation of the crusher and associated equipment. There are several different types of primary crushers, however, there are many similarities in the job
clxii

procedures followed by crusher operators.
Crushing is the first step in converting shot rock into usable products. Essentially, crushing is no more than taking large rocks and reducing them to small pieces. Crushing is sometimes continued until only fines remain.
At some operations, all the crushing is accomplished in one step, by a primary crusher. At other operations, crushing is done in two or three steps, with a primary crusher that is followed by a secondary crusher, and sometimes a tertiary crusher.
Raw material, of various sizes, is brought to the primary crusher by rear-dump haul units, or carried by a wheel front-end loader. Primary crushing reduces this run-of-mine rock to a more manageable size. The different types of primary crushers are: jaw crushers, gyratory crushers, impact crushers, and autogenous crushers.
JAW CRUSHER
The jaw crusher squeezes rock between two surfaces, one of which opens and closes like a jaw. Rock enters the jaw crusher from the top. Pieces of rock, that are larger than the opening at the bottom of the jaw, lodge between the two metal plates of the jaw. The opening and closing action of the movable jaw against the fixed jaw continues to reduce the size of lodged pieces of rock until the pieces are small enough to fall through the opening at the bottom of the jaw.
GYRATORY CRUSHER
A gyratory crusher breaks rock by squeezing the rock between an eccentrically gyrating spindle, which is covered by a wear resistant mantle, and the enclosing concave hopper. As run-of-mine rock enters the top of the gyratory crusher, it becomes wedged and squeezed between the mantle and hopper. Large pieces of ore are broken once, and then fall to a lower position (because they are now smaller) where they are broken again. This process continues until the pieces are small enough to fall through the narrow opening at the bottom of the crusher.
IMPACT CRUSHER
Impact crushers, which are also called hammer mills, break rock by impacting the rock with hammers that swing on a rotating shaft. The practical use of impact crushers is limited to soft materials, such as phosphate, gypsum, weathered shales, etc. Impact crushers cannot handle as large a top sized material as jaw, or gyratory, crushers can; however, impact crushers can make a finer sized product.
clxiii

AUTOGENOUS CRUSHER
In recent years, autogenous crushers have been adapted for crushing run-of-mine rock in primary crushing circuits. Consequently, autogenous mills have increased in importance as a means of crushing and grinding. In autogenous crushers, the rock to be crushed also provides the crushing force. Crushing is accomplished by the tumbling action of the rock. Flexible crushing circuits can be constructed so that hard ores, as well as soft ores, can be processed. Wet, sticky ores can be processed in autogenous mills, while the same ore would present difficulties for other types of crushers.
clxiv

The following safe job procedures will help to minimize incidents which could cause injuries and adversely affect production.
REQUIRED OR RECOMMENDED PERSONAL PROTECTIVE EQUIPMENT:
HARD HAT, SAFETY SHOES, SAFETY GLASSES, GLOVES, HEARING PROTECTION, RESPIRATOR, SAFETY BELT AND LINE.
POTENTIAL ACCIDENTS RECOMMENDED SAFE JOBSEQUENCE OF BASIC JOB OR HAZARDS PROCEDURES
STEPS
6. Start pumps. 1. A) Slips/trips/falls. 1. A) Practice good house-(Oil pump for keeping. Keep walkways crusher and/or clear of extraneous hydraulic materials. Clean up spills. pumps)
2. Check crusher. 2. A) Grease and oil 2. A) Visually inspect crusher for leakage. leakage, loose bolts and
nuts, and cracks in housing or supports.
3. Start crusher, 3. A) Person caught in 3. A) Make sure personnel are and then start equipment. clear. feed to crusher.
B) Belt breaking. B) Periodically check belts to ensure that they are in good condition.
4. Watch haul 4. A) Material flying out 4. A) Make sure door is closed at trucks or and hitting work station, or stand loaders dump personnel. behind screen guards. material. Make sure area is clear of
personnel.
clxv

SEQUENCE OF BASIC JOB
STEPS
5. Free large stone in feeder or crusher using pry bar, hammer and wedge, hydraulic hammer, grappling or crane hook, or dynamite.
POTENTIAL ACCIDENTS OR HAZARDS
B) Detonation of explosives.
RECOMMENDED SAFE JOB PROCEDURES
B) If dynamite or cap is observed in rock, do not try to remove it. Shut off crusher and feeder, and call supervisor.
5. A) Equipment starting. 5. A) Turn off, lock out, and tag
B) Falling rock from truck or feeder.
C) Fall into crusher.
D) Struck by slings and hooks, or caught between sling or hook and rock.
E) Pry bar slipping.
F) Eye injuries.
G) Wedge fly-back.
H) Sledge hammer glancing.
all switches before going into crusher or feeder.
B) Barricade truck dump.
C) Use safety belt and line.
D) Keep other personnel clear of slings and hooks. Attach slings and hooks securely to rock.
E) Beware of pry bar pinch points and hazards.
F) Wear safety glasses or goggles.
G) Use approved type wedge device only.
H) Use short-handled hammer in close places.
clxvi

SEQUENCE OF BASIC JOB
STEPS
6. Turn light on, or otherwise signal haul units or loaders to start dumping. (Light is usually turned on automatically.)
7. Turn off conveyor belts and crusher.
POTENTIAL ACCIDENTS RECOMMENDED SAFE JOB OR HAZARDS PROCEDURES
6. A) Excess material. 6. A) Make sure crusher is empty before another haul unit dumps material.
B) Crush, or injure, B) Make sure area is clear of personnel due to personnel. excess material.
7. A) Material left in 7. A) Make sure material clears crusher could jam. crusher and belts before
shutting down.
clxvii

GENERAL INFORMATION
This module is part of an Instruction Guide that was developed to assist the sand, gravel, and crushed stone industry in conducting effective on-the-job training (OJT) of new employees, or employees reassigned to different jobs. The use of training materials, such as this module, is an important part of an effective, systematic, OJT program.
This Instruction Guide uses a generic Job Safety Analysis (JSA) of jobs common to the industry. The JSA format facilitates uniform basic training in safe job procedures, while requiring only a minimum of time and effort on the part of the trainer. This material is generic to the industry; therefore, each company using this guide will need to tailor the material somewhat to fit their particular requirements. In some cases, the material must be general in nature, and will not include specific details of procedures or equipment that must be taught by the trainer.
Recommendations for an overall OJT program are contained in the Mine Safety and Health Administration (MSHA) guide: “Structuring Effective On-The-Job Training Programs”
TRAINING RECOMMENDATIONS
On-the-job training is usually best done by the employee’s immediate supervisor. If the supervisor relies on another employee to do certain parts of the training, the supervisor should be present to monitor the training. OJT is conducted at the actual job site, where the work will be done.
The supervisor/trainer should use the training materials (this module, or other materials) while the training is being done, to help ensure that all job steps are covered, and that no important safety precautions are omitted. Effective OJT should begin with an explanation (lecture and/or discussion) of the safe job procedure. The explanation should be followed by a hands-on demonstration of the proper job procedure. A good demonstration is, perhaps, the most important part of OJT. The demonstration is followed by supervised practice, during which the supervisor/trainer coaches (corrects and encourages) the employee, and evaluates when the employee is ready to do the job without direct supervision.
The first step - explaining the job to the employee - can be done in different ways. The supervisor/trainer and the employee can sit down and go through the training materials together. It may be advantageous to provide the employee with a copy of the training modules that are applicable to his/her job. The fact that most of the training is conducted at the job site does not preclude the use of a classroom, or a quiet office, for the first part of the training. Any general theory, or knowledge training, as well as the initial explanation of the job procedure, may be best done in an office/classroom setting; especially when noise levels, or other conditions at the job site, make communication difficult. A complete series of job steps could be presented through the use of slides developed at the mining operation.
clxviii

MODULE NUMBER 18OFINSTRUCTION GUIDE NUMBER 40
ON-THE-JOB TRAININGFOR THESAND, GRAVEL, AND CRUSHED STONE INDUSTRY
OPERATING DRILLING EQUIPMENT
This module discusses basic job steps, potential hazards and accidents, and recommended safe job procedures for operating drilling equipment.
Drilling produces the holes in which explosives are detonated. Correct hole layouts for low cost rock breakage cannot be planned without evaluating the characteristics of the deposit, the capabilities of drilling equipment, and applicable explosives.
Deposit hardness, strength, and rock structure are some of the characteristics that affect drilling. These characteristics are usually appraised by field tests before drilling begins.
Drilling layouts should be specifically designed for the explosives, and the blasting methods,
clxix

used at the job site. If available equipment limits the drilling capabilities, then the choice of explosives, and blasting methods, is also limited. Field tests will show which types of explosives, and which blasting methods, are best suited to the job. Explosives manufacturers can also provide data, and expert advice, about their products.
Placement of blasting holes should be determined before drilling begins. Each job is subject to many variables, which make it impracticable to state a rule about distance between blasting holes.
Many factors have to be considered while placing blasting holes. include:
1. The type, and amount, of burden imposed on each hole.
2. The location of dips, seams, and joints.
3. Methods, and costs, of drilling.
4. The diameter of, and the space between, holes.
5. The strength of explosives.
F) The proximity of dwellings, or other structures.
G) Compliance with environmental, and safety, regulations.
8. Other mine specific conditions.
Some of these factors
Remember that each blast requires strategy, planning, and site analysis. The appropriateness of a drilling layout is gauged by the extent to which the layout helps to reduce operating costs, and produce stable highwalls. Drilling and blasting operations should break rock into sizes that can be readily loaded, and fed into the crusher.
Inclined drilling is frequently used to obtain more consistent results in breakage and displacement. Larger inclinations yield better fragmentation, especially near the toe of the highwall. Better fragmentation lowers production costs by increasing efficiency in handling, crushing, and other phases of production.
Make sure that the proper type of equipment is used for the job. Equipment too large to maneuver, or too small to properly perform the work, may create additional hazards. Many types of drills are available. Drill manufacturers can provide data, and expert advice, on their products. Operators must be trained for the specific equipment.
Dust is a major health and safety concern for drill operators. Dust suppression during drilling yields benefits that include clean air for drill operators, longer maintenance intervals on the engine and the compressor air cleaners, and less accumulated dust on the drilling machine. Drill manufacturers are the best source for information on how to reduce dust on their
clxx

machines.
Make sure that access to the drilling area is safe. Make sure that roadways are stable, and are properly bermed. Check for loose rocks and unconsolidated material on highwalls above roadways. Correct all unsafe conditions prior to entering the work area.
Conduct an inspection of the work area. Check for loose or unconsolidated material on highwalls. Determine the condition of the floor that you are drilling on. Determine the “hazard zone,” which is at least 6 feet from the stable crest. Slips, faults, backbreak, overhang, cavities, and loose rock constitute an unstable crest. Once the hazard zone has been determined, place visual and/or physical barriers to warn persons of the hazards.
Consider adverse weather conditions. Heavy rains, snow, sleet, lightning, and wind can create poor visibility, slippery ground conditions and fall hazards, and electrocution hazards. Discontinue drilling activities when adverse conditions exist.
All equipment must be inspected before use. Safety defects must be corrected before the equipment is used.
Make sure the area is clear of obstacles and persons before moving equipment. Position the drilling equipment at a safe distance from the stable crest. Do not operate equipment within the hazard zone. When the drill is in the proper location, set the brakes and chock the wheel or lock the tracks, to prevent movement. Block the tracks, when angle drilling, to prevent possible movement during the drilling process. Lower the hydraulic jacks or outriggers, if provided, and level the unit.
clxxi

The following safe job procedures will help to minimize incidents which could cause injuries and adversely affect production.
REQUIRED OR RECOMMENDED PERSONAL PROTECTIVE EQUIPMENT:
HARD HAT, SAFETY SHOES, SAFETY GLASSES, GLOVES, HEARING PROTECTION, RESPIRATOR.
SEQUENCE OF POTENTIAL ACCIDENTS BASIC JOB STEPS OR HAZARDS
1. Check 1. A) Slips, trips, and falls. equipment.
B) Bruised or cut knuckles.
C) Cut or puncture from broken wires.
D) Struck by equipment.
E) Equipment damage or improper operation.
F) Fire.
RECOMMENDED SAFE JOB PROCEDURES
1. A) Keep area free of slipping and tripping hazards. Check for leakage of oil, grease, and water. Safety defects must be corrected before use.
B) Make sure all bolts and cables are tight.
C) Check all wire ropes, and replace those that are damaged or deteriorated.
D) Be sure all controls are in the ”off,” “brake set,” or “neutral” position, as appropriate.
E) Check hydraulic and compressor oil levels. Check hydraulic lines, air lines, and electrical cables. Check cooling system. Check gauges and warning lights. Check condition of drill bit. Report or repair equipment defects. Defects affecting safety must be corrected before equipment is used.
F) Check fire extinguisher.
clxxii

SEQUENCE OF BASIC JOB STEPS
2. Start engine (diesel), or energize machine (electrical).
3. Back up to wall.
4. Secure and level machine.
POTENTIAL ACCIDENTS OR HAZARDS
G) Ground failure under weight of equipment. Falling hazard.
2. A) Caught in, or struck by, moving parts.
B) Equipment damage.
3. A) Striking other personnel.
B) Drill overturning or falling off highwall.
4. A) Drill steel stalling or breaking.
B) Improper hole angle or diameter.
C) Machine overturning.
RECOMMENDED SAFE JOB PROCEDURES
G) Check drilling area for hazardous ground conditions. You must wear fall protection when you are exposed to falling hazard.
2. A) Be sure all persons are in the clear.
B) Switch on any auxiliary motors, such as the oil pump motor. Check engine operation and maintain proper adjustment. Check gauges for proper air pressure, oil pressure, voltage, etc.
3. A) Make sure area is clear of other personnel.
B) Make sure surface is firm and solid before starting.
4. A) Set propel brakes, or otherwise lock tracks to prevent movement during drilling.
B) Tracks may have to be blocked to ensure they will not move during drilling.
C) Lower hydraulic jacks or outriggers, if provided, and level machine.
clxxiii

SEQUENCE OF BASIC JOB STEPS
5. Begin drilling.
6. Unscrew drill pipe.
7. Take drill head back to top of pipe. Screw head on pipe, and repeat steps 5 and 6 above.
8. Shut down machine at end of shift.
POTENTIAL ACCIDENTS OR HAZARDS
5. A) Personnel caught in equipment. Struck by pull-down chains or cables.
B) Oil leaks from hoses.
C) Burns from being sprayed with hot hydraulic oil.
6. A) Hydraulic hose could break, and cause burns.
7. A) Head could fall and splinter a piece of metal.
8. A) Pipe lodged in hole because of ground movement.
RECOMMENDED SAFE JOB PROCEDURES
5. A) Examine work area and make sure it is clear of personnel.
B) Watch for wear on hoses and maintain hoses to prevent oil leakage.
C) Make sure cab door (where provided) is closed, to prevent getting sprayed with oil.
6. A) Check hoses for leakage and general condition.
7. A) Make sure drill head is properly secured on pipe. Watch out for other personnel in the area.
8. A) Drill pipe must be out of hole. Raise and clear jacks. Turn off all switches. Leave all controls in “off” or “neutral” position. Ensure all brakes have been applied. Inspect equipment and report any damage.
clxxiv

GENERAL INFORMATION
This module is part of an Instruction Guide that was developed to assist the sand, gravel, and crushed stone industry in conducting effective on-the-job training (OJT) of new employees, or employees reassigned to different jobs. The use of training materials, such as this module, is an important part of an effective, systematic, OJT program.
This Instruction Guide uses a generic Job Safety Analysis (JSA) of jobs common to the industry. The JSA format facilitates uniform basic training in safe job procedures, while requiring only a minimum of time and effort on the part of the trainer. This material is generic to the industry; therefore, each company using this guide will need to tailor the material somewhat to fit their particular requirements. In some cases, the material must be general in nature, and will not include specific details of procedures or equipment that must be taught by the trainer.
Recommendations for an overall OJT program are contained in the Mine Safety and Health Administration (MSHA) guide: “Structuring Effective On-The-Job Training Programs”
TRAINING RECOMMENDATIONS
On-the-job training is usually best done by the employee’s immediate supervisor. If the supervisor relies on another employee to do certain parts of the training, the supervisor should be present to monitor the training. OJT is conducted at the actual job site, where the work will be done.
The supervisor/trainer should use the training materials (this module, or other materials) while the training is being done, to help ensure that all job steps are covered, and that no important safety precautions are omitted. Effective OJT should begin with an explanation (lecture and/or discussion) of the safe job procedure. The explanation should be followed by a hands-on demonstration of the proper job procedure. A good demonstration is, perhaps, the most important part of OJT. The demonstration is followed by supervised practice, during which the supervisor/trainer coaches (corrects and encourages) the employee, and evaluates when the employee is ready to do the job without direct supervision.
The first step - explaining the job to the employee - can be done in different ways. The supervisor/trainer and the employee can sit down and go through the training materials together. It may be advantageous to provide the employee with a copy of the training modules that are applicable to his/her job. The fact that most of the training is conducted at the job site does not preclude the use of a classroom, or a quiet office, for the first part of the training. Any general theory, or knowledge training, as well as the initial explanation of the job procedure, may be best done in an office/classroom setting; especially when noise levels, or other conditions at the job site, make communication difficult. A complete series of job steps could be presented through the use of slides developed at the mining operation.
clxxv

MODULE NUMBER 19OFINSTRUCTION GUIDE NUMBER 40
ON-THE-JOB TRAININGFOR THESAND, GRAVEL, AND CRUSHED STONE INDUSTRY
TRANSPORTATION, USE, AND STORAGE OF EXPLOSIVES
This module describes basic job steps, potential hazards and accidents, and recommended safe job procedures for the transportation, use, and storage of explosives, blasting agents, primers, and detonators.
Loading and blasting is normally done by a blaster, but a blaster may be assisted during loading by a driller or a general laborer. No one should handle explosives or blasting agents unless they are under the direct supervision of an authorized person. Blasting operations must be under the direct control of authorized persons. In many states, an authorized person must hold state certification, such as a blaster’s certificate, or shot- firer’s papers.
Quarry blasting may involve the use of various types of explosives, blasting agents, primers, and detonators. Although there are specific procedures for the safe use of each type of
clxxvi

explosive and related products, the basic tasks can be categorized as storage, transportation, loading, and blasting.
STORAGE
Federal regulations require that detonators and explosives (other than blasting agents), be stored in magazines. The construction, location, inspection, and repair of a magazine is regulated by the Bureau of Alcohol, Tobacco, and Firearms. Appropriate regulations are found in 18CFR, as well as 30CFR.
Detonators provide the small, but powerful, explosion that initiates the blast. Detonating devices include blasting caps, detonating cord, and electrical detonators. Detonators must be stored in a separate magazine from explosives.
Magazines must be kept securely locked when unattended. Areas surrounding magazines, including blasting agent storage facilities, must be kept clear of trash, brush, and dry grass for a distance of not less than 25 feet.
Ammonium nitrate - fuel oil (ANFO) blasting agents must be physically separated from other explosives, safety fuse, or detonating cord that is stored in the same magazine; and, additionally, must be stored in such a manner that oil from the ANFO cannot contaminate the other materials.
Magazines must be posted with suitable danger signs, including “no smoking” signs. Signs must be located so that a bullet passing through any of the signs will not strike the magazines.
TRANSPORTATION
Explosives and detonating devices must be transported separately, or they must be separated by four inches of hardwood, or the equivalent, if they are transported in the same vehicle. Smoking, or carrying smoking materials, is prohibited.
Vehicles used to transport explosives, other than blasting agents, must have substantially constructed bodies with suitable sides and tailgates, and must not have any sparking metal exposed in the cargo space. Explosives must not be piled higher than the side or end enclosures.
Any vehicle containing explosives or detonators must be posted with proper warning signs. Other materials or supplies must not be hauled with the explosives or detonators. Only necessary persons may ride in vehicles containing explosives or detonators. Vehicles containing explosives or detonators must not be taken to a repair shop or garage for any purpose.
Because of potential danger, all explosive materials should be handled carefully. Never drop, or roughly handle, packages containing explosives. For example, when loading explosives into vehicles, never attempt to carry more explosives than can safely be handled, and never throw explosive materials into a vehicle. Once loaded, a vehicle must never be left
clxxvii

unattended.
When a vehicle containing explosives is parked, the brakes must be set, the engine must be shut off, and the wheels must be blocked securely against rolling.
clxxviii

The following safe job procedures will help to minimize incidents which could cause injuries and adversely affect production.
REQUIRED OR RECOMMENDED PERSONAL PROTECTIVE EQUIPMENT:
HARD HAT, SAFETY SHOES, SAFETY GLASSES, GLOVES, HEARING PROTECTION
SEQUENCE OF BASIC JOB STEPS
1. Pick up explosives.
2. Unload explosives.
3. Place blasting caps.
POTENTIAL ACCIDENTS OR HAZARDS
1. A) Unmarked truck.
B) Material falling from truck.
C) Sparking metal in truck.
D) Fire.
E) Blasting caps in contact with explosives.
2. A) Fire.
B) Impact.
3. A) Stray electric currents.
B) Lightning.
clxxix
RECOMMENDED SAFE JOB PROCEDURES
1. A) Place warning sign on truck.
B) Use tarp, or an enclosed truck.
C) Line bed of truck with plastic or wood, with no exposed nail heads.
D) Check fire extinguisher.
E) Place blasting caps in a separate wooden box.
A) Keep explosives on the ground, and away from sources of heat. Do not allow any smoking.
B) Lower bags to the ground. Do not throw bags. Remove loose rock from highwalls.
A) Place caps at least 90 feet away from electric pumps, radios, walkie talkie, etc. Keep caps shunted.
B) Listen to weather forecast. Clear area if a storm approaches.

SEQUENCE OF BASIC JOB STEPS
4. Load holes.
5. Preparing primer.
POTENTIAL ACCIDENTS
4.
5.
OR HAZARDS
C) Impact from falling materials.
D) Impact from vehicles.
E) Falling.
A) Drilling.
B) Sparking materials.
C) Improperly loading holes.
A) Not placing detonator securely in primer.
B) Detonation while lowering cap and primer into hole.
RECOMMENDED SAFE JOB PROCEDURES
C) Remove loose rock from highwalls.
D) Keep vehicles out of blasting area.
E) Keep away from highwalls. Avoid walking backwards.
A) Never drill and load at the same time. Complete drilling before loading holes. Never move drilling equipment, or any other equipment, across blasting area.
B) Use wood, or other non-sparking material, for a punch and for tamping poles.
C) Follow loading instructions of supervisor.
A) Put blasting cap through primer and out other side, and bring the cap in again from the other side. Make sure cap is enclosed in primer and cannot be pulled out.
B) Put some blasting agent into the hole first, so cap does not settle into dust at bottom of hole. Do not force blasting cap and primer into hole. Do not redrill around loaded hole.
clxxx

SEQUENCE OF BASIC JOB STEPS
6. Clear blasting area and prepare for blasting.
7. Tie series together with circuit board.
8. Testing circuit continuity.
9. Set off explosives.
J) Inspect blast area.
POTENTIAL ACCIDENTS OR HAZARDS
6. A) Full bags of explosives left on blasting site.
7. A) Failure to properly tie series.
B) Lost caps and explosives.
8. A) Inadequate wire.
B) Initiate from testing device.
9. A) People walking or driving into blasting area.
B) Employees struck by fly-rock.
10.A) Live explosives.
B) Falling rock.
RECOMMENDED SAFE JOB PROCEDURES
6. A) Clear blasting area of all material before blasting.
7. A) Wires should be tied together only at copper ends. Only blasters are to tie wires.
B) Keep accurate records.
8. A) Use 20 gauge copper wire. Use single wire. Do not reuse.
B) Use only device made for testing blasting circuits.
9. A) Clear area, post guards, and sound warning siren. Post and communicate blasting times.
B) Post guards at safe distances. Blasters must have adequate shelter. Use warning siren.
10.A) Supervisor should check for misfires, and handle appropriately.
B) Loose rock must be scaled.
clxxxi

GENERAL INFORMATION
This module is part of an Instruction Guide that was developed to assist the sand, gravel, and crushed stone industry in conducting effective on-the-job training (OJT) of new employees, or employees reassigned to different jobs. The use of training materials, such as this module, is an important part of an effective, systematic, OJT program.
This Instruction Guide uses a generic Job Safety Analysis (JSA) of jobs common to the industry. The JSA format facilitates uniform basic training in safe job procedures, while requiring only a minimum of time and effort on the part of the trainer. This material is generic to the industry; therefore, each company using this guide will need to tailor the material somewhat to fit their particular requirements. In some cases, the material must be general in nature, and will not include specific details of procedures or equipment that must be taught by the trainer.
Recommendations for an overall OJT program are contained in the Mine Safety and Health Administration (MSHA) guide: “Structuring Effective On-The-Job Training Programs”
TRAINING RECOMMENDATIONS
On-the-job training is usually best done by the employee’s immediate supervisor. If the supervisor relies on another employee to do certain parts of the training, the supervisor should be present to monitor the training. OJT is conducted at the actual job site, where the work will be done.
The supervisor/trainer should use the training materials (this module, or other materials) while the training is being done, to help ensure that all job steps are covered, and that no important safety precautions are omitted. Effective OJT should begin with an explanation (lecture and/or discussion) of the safe job procedure. The explanation should be followed by a hands-on demonstration of the proper job procedure. A good demonstration is, perhaps, the most important part of OJT. The demonstration is followed by supervised practice, during which the supervisor/trainer coaches (corrects and encourages) the employee, and evaluates when the employee is ready to do the job without direct supervision.
The first step - explaining the job to the employee - can be done in different ways. The supervisor/trainer and the employee can sit down and go through the training materials together. It may be advantageous to provide the employee with a copy of the training modules that are applicable to his/her job. The fact that most of the training is conducted at the job site does not preclude the use of a classroom, or a quiet office, for the first part of the training. Any general theory, or knowledge training, as well as the initial explanation of the job procedure, may be best done in an office/classroom setting; especially when noise levels, or other conditions at the job site, make communication difficult. A complete series of job steps could be presented through the use of slides developed at the mining operation.
clxxxii