Sage 300 ERP 2016 Sage Production Planning 2016 Table … Manual_PPv2016.pdf · Sage 300 ERP 2016...
79
1 | Page Sage 300 ERP 2016 Sage Production Planning 2016 Table of Contents Main Topics Page Things to Do Before and After Activation System Prerequisites 2 License Registration 3 – 5 Defining the Setup Tables Maintaining Distribution Networks 6 – 8 Maintaining Buyers and Planners 9 – 11 Maintaining Item Planning Information 12 – 18 Maintaining the Work Calendar 19 – 21 Running Periodic Maintenance Generating Manufacturing Lead Time 22 – 26 Generating Sales Forecasts 27 – 30 Transaction Processing Entering Sales Forecasts 31 – 36 Generating MPS/MRP Plans 37 – 43 Viewing Summary Planning Information 44 – 47 Viewing Planning Information by BOM 48 – 51 Viewing Detailed Planning Information 52 – 59 Viewing Available to Promise Inquiries 60 – 64 Generating Manufacturing Orders 65 – 69 Generating Purchase Requisitions 70 – 74 Other Transactions Scheduling MPS/MRP Planning Runs 75 – 79
Transcript of Sage 300 ERP 2016 Sage Production Planning 2016 Table … Manual_PPv2016.pdf · Sage 300 ERP 2016...
1 | P a g e
Sage 300 ERP 2016
Sage Production Planning 2016
Table of Contents
Main Topics Page Things to Do Before and After Activation System Prerequisites 2 License Registration 3 – 5 Defining the Setup Tables Maintaining Distribution Networks 6 – 8 Maintaining Buyers and Planners 9 – 11 Maintaining Item Planning Information 12 – 18 Maintaining the Work Calendar 19 – 21 Running Periodic Maintenance Generating Manufacturing Lead Time 22 – 26 Generating Sales Forecasts 27 – 30 Transaction Processing Entering Sales Forecasts 31 – 36 Generating MPS/MRP Plans 37 – 43 Viewing Summary Planning Information 44 – 47 Viewing Planning Information by BOM 48 – 51 Viewing Detailed Planning Information 52 – 59 Viewing Available to Promise Inquiries 60 – 64 Generating Manufacturing Orders 65 – 69 Generating Purchase Requisitions 70 – 74 Other Transactions Scheduling MPS/MRP Planning Runs 75 – 79
2 | P a g e
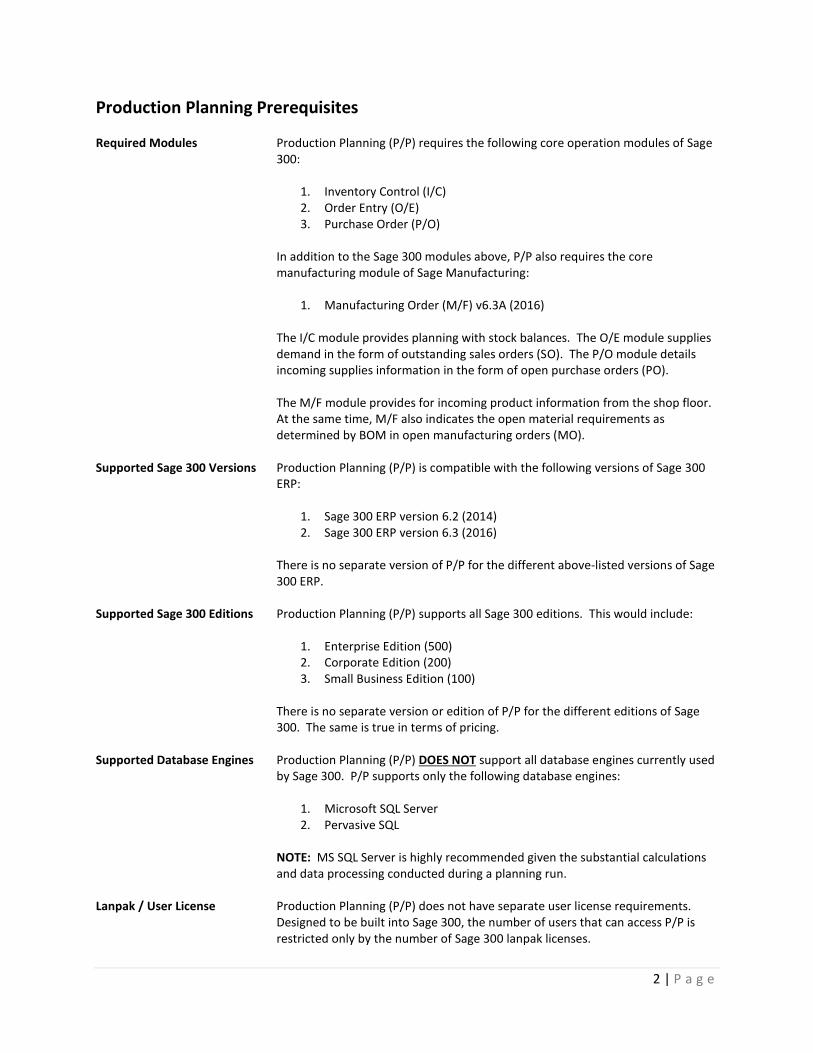
Production Planning Prerequisites Required Modules Production Planning (P/P) requires the following core operation modules of Sage
300:
1. Inventory Control (I/C) 2. Order Entry (O/E) 3. Purchase Order (P/O)
In addition to the Sage 300 modules above, P/P also requires the core manufacturing module of Sage Manufacturing:
1. Manufacturing Order (M/F) v6.3A (2016) The I/C module provides planning with stock balances. The O/E module supplies demand in the form of outstanding sales orders (SO). The P/O module details incoming supplies information in the form of open purchase orders (PO). The M/F module provides for incoming product information from the shop floor. At the same time, M/F also indicates the open material requirements as determined by BOM in open manufacturing orders (MO).
Supported Sage 300 Versions
Production Planning (P/P) is compatible with the following versions of Sage 300 ERP:
1. Sage 300 ERP version 6.2 (2014) 2. Sage 300 ERP version 6.3 (2016)
There is no separate version of P/P for the different above-listed versions of Sage 300 ERP.
Supported Sage 300 Editions
Production Planning (P/P) supports all Sage 300 editions. This would include:
1. Enterprise Edition (500) 2. Corporate Edition (200) 3. Small Business Edition (100)
There is no separate version or edition of P/P for the different editions of Sage 300. The same is true in terms of pricing.
Supported Database Engines Production Planning (P/P) DOES NOT support all database engines currently used by Sage 300. P/P supports only the following database engines:
1. Microsoft SQL Server 2. Pervasive SQL
NOTE: MS SQL Server is highly recommended given the substantial calculations and data processing conducted during a planning run.
Lanpak / User License
Production Planning (P/P) does not have separate user license requirements. Designed to be built into Sage 300, the number of users that can access P/P is restricted only by the number of Sage 300 lanpak licenses.
3 | P a g e
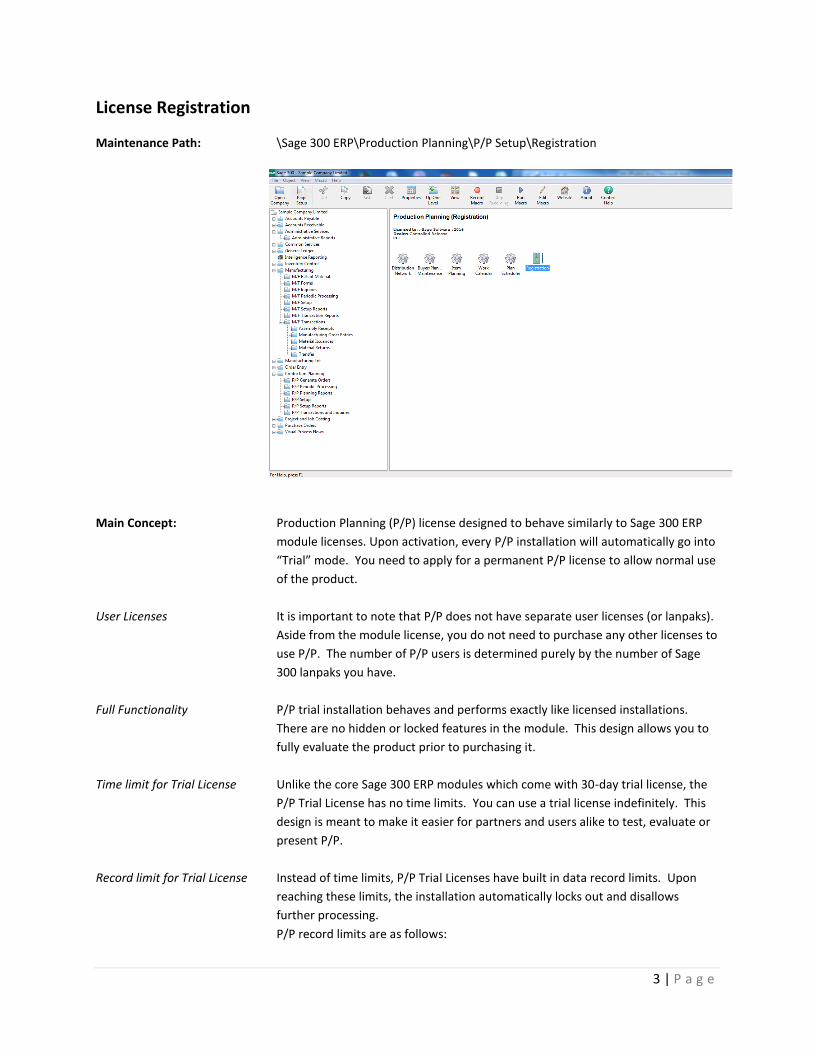
License Registration Maintenance Path: \Sage 300 ERP\Production Planning\P/P Setup\Registration
Main Concept: Production Planning (P/P) license designed to behave similarly to Sage 300 ERP
module licenses. Upon activation, every P/P installation will automatically go into
“Trial” mode. You need to apply for a permanent P/P license to allow normal use
of the product.
User Licenses It is important to note that P/P does not have separate user licenses (or lanpaks).
Aside from the module license, you do not need to purchase any other licenses to
use P/P. The number of P/P users is determined purely by the number of Sage
300 lanpaks you have.
Full Functionality
P/P trial installation behaves and performs exactly like licensed installations.
There are no hidden or locked features in the module. This design allows you to
fully evaluate the product prior to purchasing it.
Time limit for Trial License Unlike the core Sage 300 ERP modules which come with 30-day trial license, the
P/P Trial License has no time limits. You can use a trial license indefinitely. This
design is meant to make it easier for partners and users alike to test, evaluate or
present P/P.
Record limit for Trial License
Instead of time limits, P/P Trial Licenses have built in data record limits. Upon
reaching these limits, the installation automatically locks out and disallows
further processing.
P/P record limits are as follows:
4 | P a g e
1. Distribution Network table– 5 records 2. Item Planning table – 100 records 3. Sales Forecast Entry – 200 lines 4. Planning Run Records – 2,000 lines
To continue using this installation, you need only to restore a previous backup of
the sample database.
NFR License Currently, P/P does not have Not-For-Resale (NFR) licenses. We have designed all
our products to have built-in trial licenses with no time limits to avoid having to
generate and renew NFR licenses.
How to apply for a License All Sage 300 Manufacturing licenses are generated solely by Sage. Please contact
your Sage 300 partner to place this order. For direct customers (only for selected
regions), you can contact us via [email protected].
Field List:
Product - This read-only field displays the module name for P/P
Company - This field contains the officially registered company name of the end
user.
Serial No. - This field contains the generated serial number of Sage 300
Manufacturing for the end user.
Activation Code - This field contains the activation codes for this product license
as generated by Sage 300 Manufacturing.
License Type - This read-only field displays the type of license currently in force
for this installation. Upon activation, P/P installations go into “Trial” mode.
Upon registration of license, the license type will be changed to “Permanent”.
Valid From - This read-only field indicate the license effective date. This field
appears when the license type is in permanent.
Expire Date - This read-only field indicate when will the license expire. This field
appears if license type is in permanent.
Register - This action button will authenticate the P/P installation as valid and
official.
Close - This action button will close the P/P Registration window.
Registering P/P License:
To register the P/P license:
1. Open the Registration window by clicking on the Registration icon found under the P/P Setup.
2. Open the text file containing your Sage P/P license as provided by Sage or your Sage 300 ERP partner.
3. In the Company field, copy and paste the company name as indicated in
5 | P a g e
the license text file. Please be careful to copy the exact company name in terms of spacing, commas, periods as well as small/big letters.
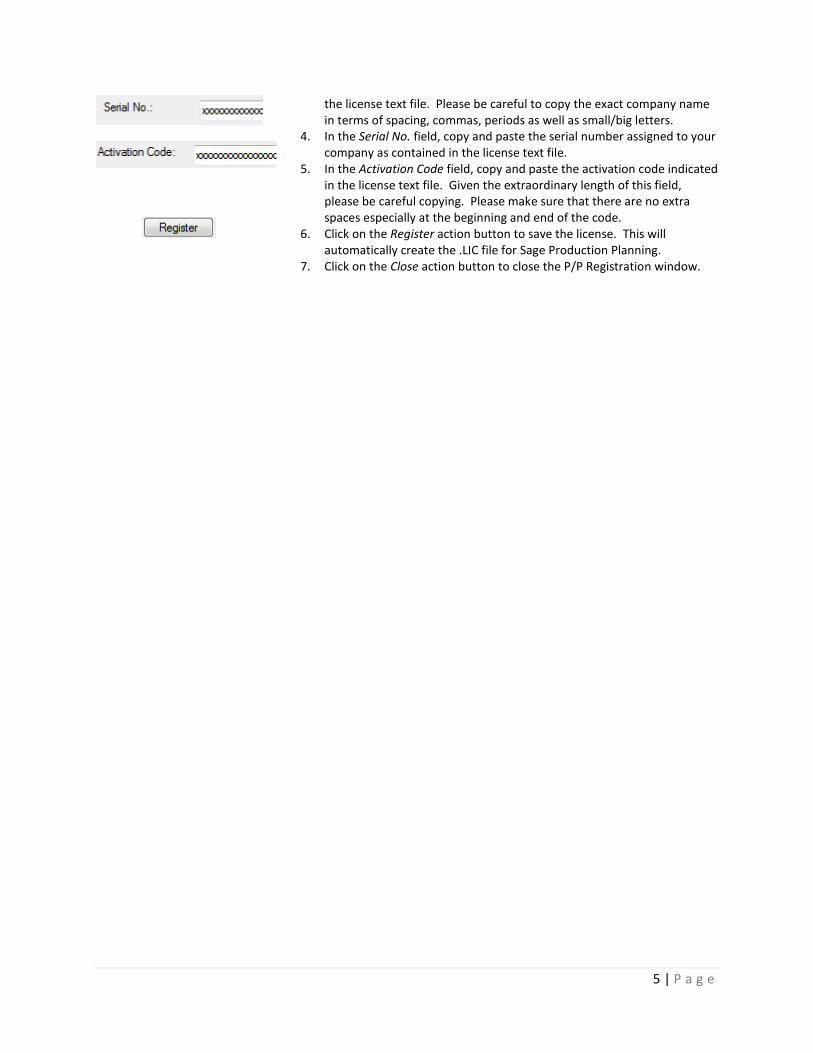
4. In the Serial No. field, copy and paste the serial number assigned to your company as contained in the license text file.
5. In the Activation Code field, copy and paste the activation code indicated in the license text file. Given the extraordinary length of this field, please be careful copying. Please make sure that there are no extra spaces especially at the beginning and end of the code.
6. Click on the Register action button to save the license. This will automatically create the .LIC file for Sage Production Planning.
7. Click on the Close action button to close the P/P Registration window.
6 | P a g e
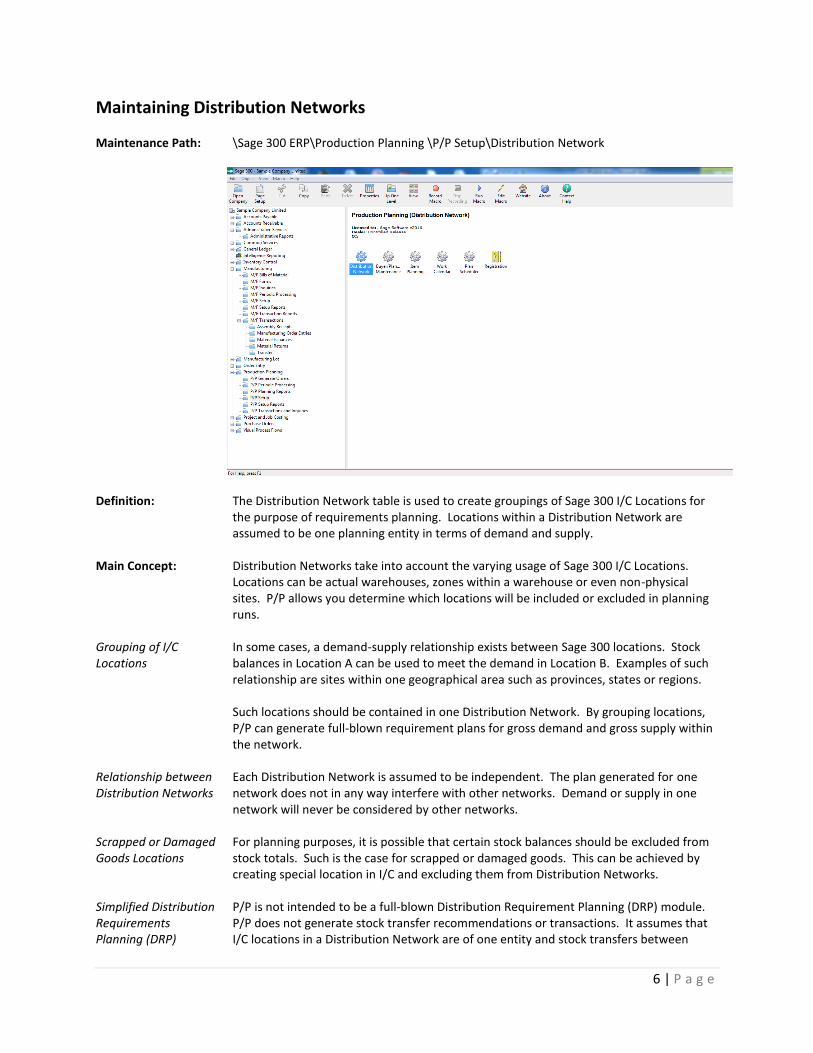
Maintaining Distribution Networks Maintenance Path: \Sage 300 ERP\Production Planning \P/P Setup\Distribution Network
Definition: The Distribution Network table is used to create groupings of Sage 300 I/C Locations for the purpose of requirements planning. Locations within a Distribution Network are assumed to be one planning entity in terms of demand and supply.
Main Concept:
Distribution Networks take into account the varying usage of Sage 300 I/C Locations. Locations can be actual warehouses, zones within a warehouse or even non-physical sites. P/P allows you determine which locations will be included or excluded in planning runs.
Grouping of I/C Locations
In some cases, a demand-supply relationship exists between Sage 300 locations. Stock balances in Location A can be used to meet the demand in Location B. Examples of such relationship are sites within one geographical area such as provinces, states or regions. Such locations should be contained in one Distribution Network. By grouping locations, P/P can generate full-blown requirement plans for gross demand and gross supply within the network.
Relationship between Distribution Networks
Each Distribution Network is assumed to be independent. The plan generated for one network does not in any way interfere with other networks. Demand or supply in one network will never be considered by other networks.
Scrapped or Damaged Goods Locations
For planning purposes, it is possible that certain stock balances should be excluded from stock totals. Such is the case for scrapped or damaged goods. This can be achieved by creating special location in I/C and excluding them from Distribution Networks.
Simplified Distribution Requirements Planning (DRP)
P/P is not intended to be a full-blown Distribution Requirement Planning (DRP) module. P/P does not generate stock transfer recommendations or transactions. It assumes that I/C locations in a Distribution Network are of one entity and stock transfers between
7 | P a g e
locations are negligible.
Maximum number of Distribution Networks
For licensed installations, there is no limit to the number of Distribution Networks you can define in P/P. Trial installations are limited to five (5) Distribution Networks.
Can an I/C Location be included in more than one Distribution Network?
It is possible for a location to be part of more than one Distribution Network. You can choose generate a plan for whole region containing several locations as well as generate solo plans for each location.
Field List:
Network Code - This user-defined field contains the unique code used to distinguish between different distribution networks. Description - This user-defined text field contains the description of the selected distribution network Inactive - This check box field indicates whether a Distribution Network record is active or inactive. Only active distribution networks may be used during production planning. Location - This field contains I/C location codes selected to be included in the Distribution Network. Locations are defined in the I/C Locations table. Each P/P Distribution Network can contain an unlimited number of I/C Locations. Description - This read only field contains the description of the selected I/C location as defined in the I/C Locations table. Add/Save - This action button will add or save the changes made to the P/P Distribution Network window. Delete - This action button will permanently remove the record from the P/P Distribution Network window. Close - This action button will close the P/P Distribution Network window.
Adding New Distribution Networks:
To create new P/P Distribution Networks:
1. Open the P/P Distribution Network table by clicking on the icon under the P/P Setup tab.
2. Click on the New icon to start with a blank data screen. 3. In the Network Code field, enter an alpha-numeric code to serve as the
Distribution Network code for the record. 4. In the Description field, type in a short description of the network to be created 5. In the details section, press the Insert button on your keyboard to call out a
details line. 6. In the Location field, select the I/C Location/s which will belong to this particular
network. 7. Click on the Add button to save changes made to the P/P Distribution Network
table. 8. Click on the Close button to close the P/P Distribution Network table.
Editing Distribution Networks:
To make changes to a P/P Distribution Network:
1. Open the P/P Distribution Network table by clicking on the icon under the P/P Setup tab.

8 | P a g e
2. In the Network Code field, use the search button to browse for the network record to be edited.
3. You can edit the description of the network record at any time. 4. You can insert or delete locations in the selected network record. 5. Upon completion, click on the Save button to record changes made to the
Distribution Network. 6. Click on the Close button to close the P/P Distribution Network table.
Deleting Distribution Networks:
You can only delete Distribution Networks which have no outstanding planning records. Please refer to Generating MPS/MRP Plans for more details on viewing and purging plans. To delete Distribution Networks:
1. Open the P/P Distribution Network table by clicking on the icon under the P/P Setup tab.
2. In the Network Code field, use the search button to browse for the network record to be deleted.
3. Click on the Delete button to permanently remove the network record. 4. Click on the Close button to close the P/P Distribution Network table.
9 | P a g e
Maintaining Buyers and Planners
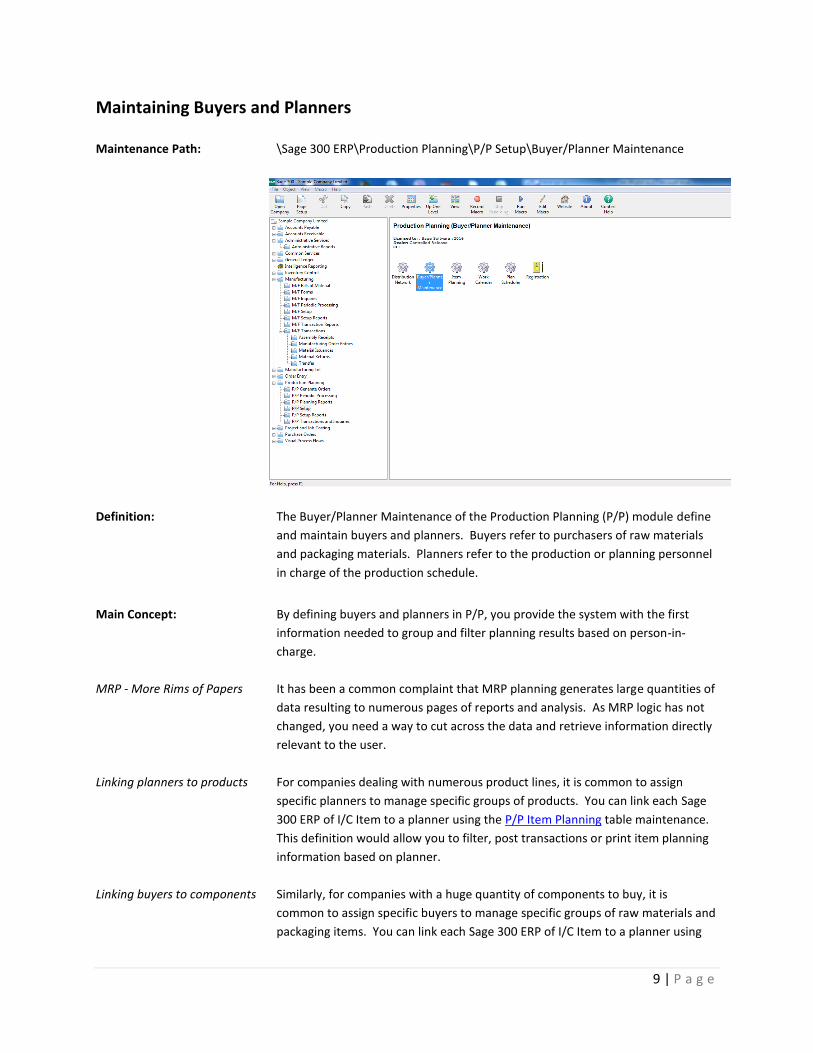
Maintenance Path: \Sage 300 ERP\Production Planning\P/P Setup\Buyer/Planner Maintenance
Definition: The Buyer/Planner Maintenance of the Production Planning (P/P) module define
and maintain buyers and planners. Buyers refer to purchasers of raw materials
and packaging materials. Planners refer to the production or planning personnel
in charge of the production schedule.
Main Concept:
By defining buyers and planners in P/P, you provide the system with the first
information needed to group and filter planning results based on person-in-
charge.
MRP - More Rims of Papers It has been a common complaint that MRP planning generates large quantities of
data resulting to numerous pages of reports and analysis. As MRP logic has not
changed, you need a way to cut across the data and retrieve information directly
relevant to the user.
Linking planners to products For companies dealing with numerous product lines, it is common to assign
specific planners to manage specific groups of products. You can link each Sage
300 ERP of I/C Item to a planner using the P/P Item Planning table maintenance.
This definition would allow you to filter, post transactions or print item planning
information based on planner.
Linking buyers to components Similarly, for companies with a huge quantity of components to buy, it is
common to assign specific buyers to manage specific groups of raw materials and
packaging items. You can link each Sage 300 ERP of I/C Item to a planner using
10 | P a g e
the P/P Item Planning table maintenance. This allows you to filter, post
transactions or print item planning information based on buyer.
Limits on buyers/planners There is no limit to the number of buyers or planners that you can define in P/P.
However, you can only link one buyer/planner record to one item record in the
P/P Item Planning table maintenance.
Using group codes vs. actual
person
In some cases, more than one buyer/planner may be in charge of a select group
of items. In such cases, it may be more effective to define item group instead of
individual buyer/planner records.
Item grouping could be based on buyer/planner teams or item properties. This
type of grouping prevents the need of changing item planning information every
time there is a change of personnel or item assignment.
Not defining buyers/planners You can choose not to define any buyers or planners in P/P. This is logical if
there is only one buyer and planner for the company. The only effect would be
that you cannot print out reports using buyer/planner as parameter.
Field List:
Buyer/Planner - This user-defined field contains the alphanumeric code used to
distinguish buyer/planner records.
Description - This user-defined text field contains the name or description for the
buyer or the planner.
Inactive - This check box indicates whether the selected buyer/planner record is
active or inactive. Only active records may be used during production planning.
Comments - This comment field provides for a narrative description of the
selected buyer or planner record.
Add/Save - This action button adds or saves all changes made to the
buyer/planner record.
Delete - This action button will permanently remove the selected record from the
Buyer/Planner table. Only records which are unused may be deleted.
Close - This action button closes the P/P Buyer/Planner Maintenance window.
Adding new Buyer and
Planners:
To add new buyer or planner records:
1. Open the Buyer/Planner Maintenance table by clicking on this icon from the P/P Setup tab.
2. Click on the New icon to call out a blank screen. 3. In the Buyer/Planner field, enter any alpha-numeric characters to serve
as the buyer or planner code. 4. In the Description field, enter a name or description for the buyer or
planner. 5. In the Comments field, you have the option to type in some comments
11 | P a g e
or remarks concerning the buyer or planner. 6. Click on the Add button to save the changes made to the P/P
Buyer/Planner table. 7. Click on the Close button to close the P/P Buyer/Planner Maintenance
table.
Editing Buyers or Planners:
To edit buyer or planner records:
1. Open the Buyer/Planner Maintenance table by clicking on this icon from the P/P Setup tab.
2. Using the Buyer/Planner search box, browse for the record to be edited. 3. You can edit the Description and Comments fields of the Buyer/Planner
Maintenance table. 4. Click on the Save button to save changes made to the buyer or planner
record. 5. Click on the Close button to close the P/P Buyer/Planner Maintenance
table. Deleting Buyers or Planners:
You can only delete buyers or planners which are not assigned to any items in
the P/P Item Planning table. To delete:
1. Open the Buyer/Planner Maintenance table by clicking on this icon from the P/P Setup tab.
2. Using the Buyer/Planner search box, browse for the record to be deleted.
3. Click on the Delete button to permanently remove the buyer or planner record.
4. Click on the Close button to close the P/P Buyer/Planner Maintenance table.
Related Topics: Maintaining Item Planning Information
12 | P a g e
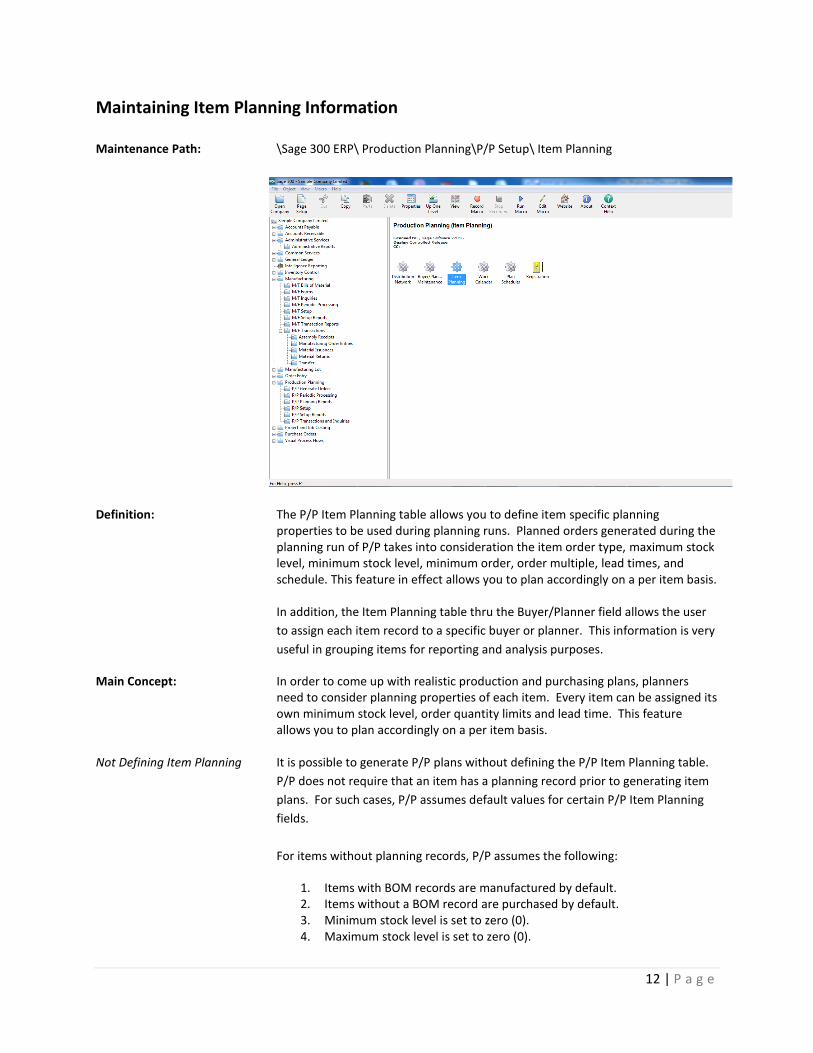
Maintaining Item Planning Information
Maintenance Path: \Sage 300 ERP\ Production Planning\P/P Setup\ Item Planning
Definition: The P/P Item Planning table allows you to define item specific planning properties to be used during planning runs. Planned orders generated during the planning run of P/P takes into consideration the item order type, maximum stock level, minimum stock level, minimum order, order multiple, lead times, and schedule. This feature in effect allows you to plan accordingly on a per item basis. In addition, the Item Planning table thru the Buyer/Planner field allows the user
to assign each item record to a specific buyer or planner. This information is very
useful in grouping items for reporting and analysis purposes.
Main Concept: In order to come up with realistic production and purchasing plans, planners need to consider planning properties of each item. Every item can be assigned its own minimum stock level, order quantity limits and lead time. This feature allows you to plan accordingly on a per item basis.
Not Defining Item Planning It is possible to generate P/P plans without defining the P/P Item Planning table.
P/P does not require that an item has a planning record prior to generating item
plans. For such cases, P/P assumes default values for certain P/P Item Planning
fields.
For items without planning records, P/P assumes the following:
1. Items with BOM records are manufactured by default. 2. Items without a BOM record are purchased by default. 3. Minimum stock level is set to zero (0). 4. Maximum stock level is set to zero (0).
13 | P a g e
5. Minimum order quantity and order multiple is assumed to be one (1). 6. Lead times are set to zero (0). 7. Shortages are to be resolved using planned orders.
Setting Schedule Setting a schedule in item planning only means that the item's properties set by
the user will be applied. If for example the user set the schedule as weekly, all the
item's properties like item order type, minimum stock level, maximum stock
level, minimum order, order multiple, and lead time will be taken into
consideration for each week only.
Setting Item Safety Stock level
(Minimum Stock)
Planners normally provide for a safety stock (minimum stock) to account for fluctuations in demand. This safety level applies to both products and raw materials.
Things to consider in setting
Minimum Stock
In setting safety stock levels, planners would have to consider the item’s historical demand size, demand fluctuation, item lead time as well as the item’s critical nature. Huge demand and erratic fluctuations will result to higher than normal safety levels. Unusually long lead times (e.g. imported by bulk) will also cause planners to increase minimum stock requirements. Lastly, if an item is critical to production operations, planners may want to ensure supply by adding to the safety levels.
Safety Stock versus Reorder Point
Safety stock levels are a lot lower than item reorder points. P/P provides for
stock quantities to be always above or equal to the safety level. In contrast,
reorder points merely trigger a replenishment of items with stock levels usually
falling way below this trigger point.
Setting limits to order quantity In replenishing stock levels, you can define a limit on the minimum order
quantities. For purchased items, vendors may require purchases to meet a
minimum quantity. For produced items, production batching can also set
minimum limits to production runs. In addition, economic order quantities (EOQ)
are also considered in determining the minimum quantity to order. EOQ refers
to the optimal order quantity considering fixed ordering costs as well as shipping
and handling costs.
Considering item packaging and handling
Packaging also needs to be considered when replenishing stock. It is only logical
that purchase plans consider how items are actually packed. You cannot order a
piece when the item is sold in dozens. The order multiple in P/P lets you define
the quantity by which order size is incremented.
Setting Default Buyers or Planners
By defining a default buyer or planner, you can easily group and filter items. This
prevents planners from having to look at too much data and allow them to focus
on items they actually manage. Please refer to P/P Buyers/Planners for more
details.
Lead Time for purchased items You cannot expect your vendors to be able to instantly ship materials you need.
14 | P a g e
By defining purchase lead times, P/P can backward calculate when items should
be ordered so that it would arrive on the desired date.
The purchase lead time should be calculated starting from the time of purchase
requisition to the time the material is ready for use. This should already consider
both internal and external operations such as delivery time, material receipt and
quality control.
Lead Time for manufactured items
For the case of manufactured items, you need to consider the time needed to
produce a batch of the product. Manufacturing lead time is composed of a
Manufacturing Setup Lead Time and the Manufacturing Run Lead Time. Both can
be manually defined or system generated.
Manufacturing Setup Lead Time
Setup lead time refers to the standard time required to prepare for a production
run. It is assumed for planning purposes that setup time is independent of
production quantity. It is also assumed that setup will only be required once per
production run. Manufacturing Setup Lead Time is expressed in terms of number
of days.
Manufacturing Run Lead Time
Run lead time refers to the standard time required to produce one unit of the
product. It is effectively the piece rate by which item is produced expressed in
terms of number of day per unit. This piece rate should already consider the
capacity of the work centers used to produce the product.
Manufacturing lead time is discussed further under P/P Lead Time Maintenance.
Relationship to I/C Reorder It is important to note that P/P is totally independent of the I/C Reorder table in
Sage 300 ERP. Settings defined in this table are not considered in any way by P/P
during Planning Run. You may, however, continue to use the I/C Reorder
functionality for reporting and analysis.
Field List:
Item Number - This field contains the selected item record as defined in I/C Item.
Network – This field displays the distribution network code. Each network is
independent and is based on the IC Locations of Sage 300 ERP.
Order Type - This dropdown field defines the default planning order type for the
item. Options include:
a. Manufactured – Selected item is manufactured or assembled by default. P/P Planning Run will create internal MO's to resolve shortages.
b. Purchased – Selected item is a purchased material. P/P Planning Run will create Sage 300 ERP P/O purchase requisitions to resolve shortages.
c. Subcontracted - Item is to be subcontracted. P/P Planning Run will create subcontract MO's to resolve shortages.
15 | P a g e
Create Order? - This dropdown field defines whether planned orders will be
created for the item during planning run. Options include:
a. Yes - P/P will create planned orders for the item based on demand
and item planning settings.
b. No - P/P will not create planned orders for the item and just calculate
net shortage for each item.
Schedule – This dropdown box contains schedule for plans depending on what
the user chose. User can choose from the following:
a) None – All item planning properties defined applies on a regular/daily basis. It means that every week, there is one demand calculation for the item.
b) Weekly – All item planning properties defined applies on a weekly basis. It means that every week, there is one demand calculation for the item.
c) Monthly – All item planning properties defined applies on a monthly basis. It means that every month there, is one demand calculation for the item.
d) Odd Week – All item planning properties defined applies on all weeks which are in even number counted for a year. It means that every odd week, there is one demand calculation for the item. (1
st week, 3
rd
week, 5th
week…etc.) e) Even Week – All item planning properties defined applies on all
weeks which are in even number counted for a year. It means that every even week, there is one demand calculation for the item. (2
nd
week, 4th
week, 6th
week…etc.)
Maximum Stock - This user-defined numeric field indicates the maximum stock
level of the selected item record. P/P uses this field to limit order quantity to a
predetermined maximum set by planners and will always maintain this level
during planning runs like minimum stock.
Minimum Stock - This user-defined numeric field indicates the safety stock
requirements of the selected item record. P/P uses this field as the benchmark
for the desired stock balance and will always maintain this ideal stock level during
planning runs. This field represents the safety stock levels predetermined by
planners necessary to offset demand spikes.
Minimum Order - This user-defined numeric field indicates the minimum order
level for the item. Planned orders to be generated by P/P cannot be less than
this quantity. This field represents optimal production batch sizes for internal
manufacturing or supplier batch size requirements for purchasing.
Order Multiple - This user-defined numeric field indicates the multiple by which
orders can be created. Planned orders to be generated by P/P will be according
to this multiplier. This field represents batch sizing determined by internal
planner or external suppliers.
16 | P a g e
Buyer/Planner - This search box contains the assigned buyer or planner for the
item. Buyer/Planner records are defined in the Buyer/Planner Maintenance.
This field is used mainly to group items by buyer or planner.
Order Lead Time - This user-defined numeric field indicates the standard
purchase lead time to acquire materials. Lead time is in units of Days. Planned
orders are backward calculated from the due date based on lead time.
Mfg. Setup Time - This user-defined numeric field indicates the standard setup
time needed to start production of a batch of items. Setup Lead Time is in unit of
Day per batch. Planned orders are backward calculated from the time of need
based partly on this setup lead time. Refer to the Lead Time Maintenance
periodic processing for more details on manufacturing lead time.
Mfg. Run Time - This user-defined numeric field indicates the standard run time
needed to product one unit of the item. Manufacturing Run Lead Time is in units
of Day per Unit. Planned orders are backward calculated from the time of need
based partly on this item run lead time. Refer to the Lead Time Maintenance
periodic processing for more details on manufacturing lead time.
Last Updated By - This read only field contains the user ID of the person who last
changed the item planning settings.
Last Updated Date - This read only field contains the date when the item
planning record was last updated.
Remarks - This comment field provides for narrative comments or remarks on the
planning settings for the selected item record.
Add/Save - This action button add/saves all changes made to the P/P Item
Planning window.
Delete – This action button permanently removes the item planning record from
the P/P Item Planning Table.
Close - This action button closes the P/P Item Planning window.
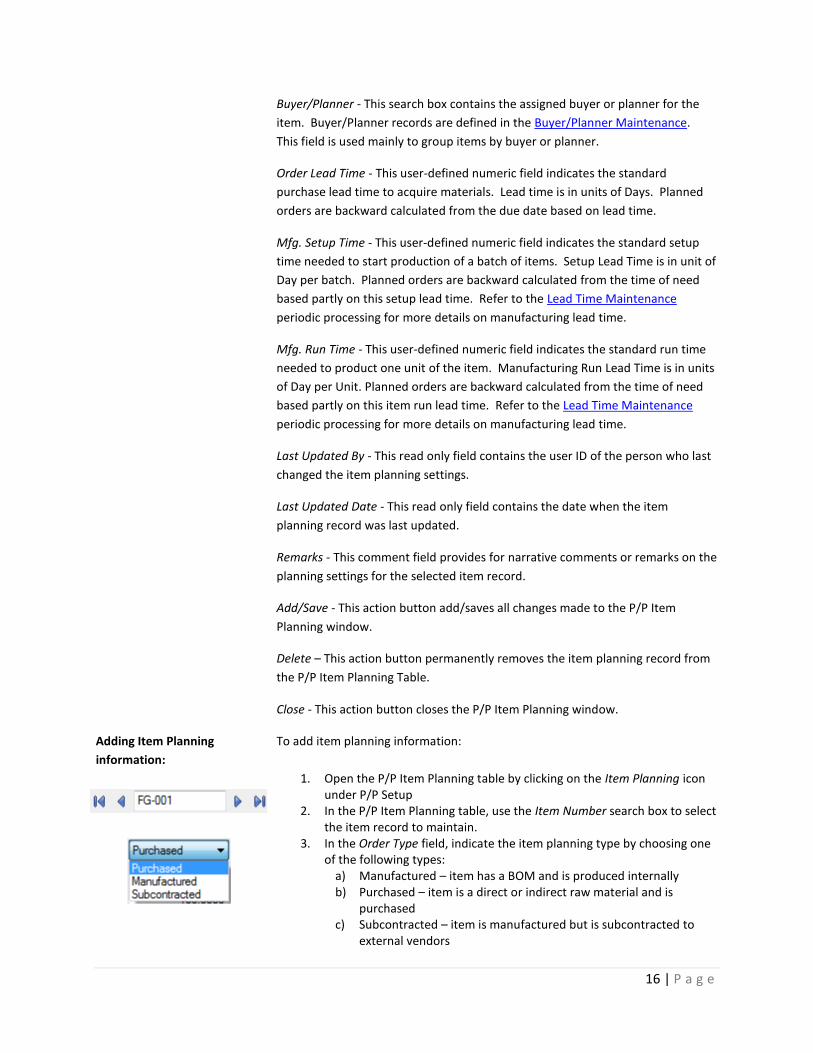
Adding Item Planning
information:
To add item planning information:
1. Open the P/P Item Planning table by clicking on the Item Planning icon under P/P Setup
2. In the P/P Item Planning table, use the Item Number search box to select the item record to maintain.
3. In the Order Type field, indicate the item planning type by choosing one of the following types:
a) Manufactured – item has a BOM and is produced internally b) Purchased – item is a direct or indirect raw material and is
purchased c) Subcontracted – item is manufactured but is subcontracted to
external vendors
17 | P a g e
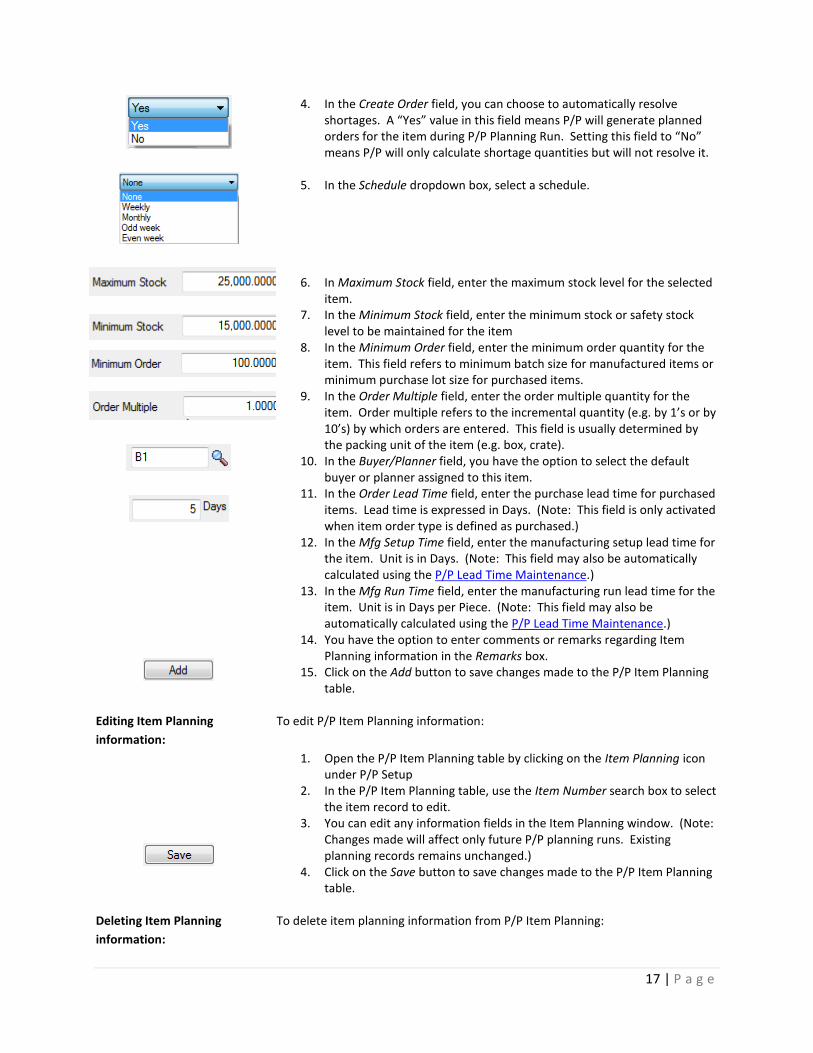
4. In the Create Order field, you can choose to automatically resolve shortages. A “Yes” value in this field means P/P will generate planned orders for the item during P/P Planning Run. Setting this field to “No” means P/P will only calculate shortage quantities but will not resolve it.
5. In the Schedule dropdown box, select a schedule.
6. In Maximum Stock field, enter the maximum stock level for the selected item.
7. In the Minimum Stock field, enter the minimum stock or safety stock level to be maintained for the item
8. In the Minimum Order field, enter the minimum order quantity for the item. This field refers to minimum batch size for manufactured items or minimum purchase lot size for purchased items.
9. In the Order Multiple field, enter the order multiple quantity for the item. Order multiple refers to the incremental quantity (e.g. by 1’s or by 10’s) by which orders are entered. This field is usually determined by the packing unit of the item (e.g. box, crate).
10. In the Buyer/Planner field, you have the option to select the default buyer or planner assigned to this item.
11. In the Order Lead Time field, enter the purchase lead time for purchased items. Lead time is expressed in Days. (Note: This field is only activated when item order type is defined as purchased.)
12. In the Mfg Setup Time field, enter the manufacturing setup lead time for the item. Unit is in Days. (Note: This field may also be automatically calculated using the P/P Lead Time Maintenance.)
13. In the Mfg Run Time field, enter the manufacturing run lead time for the item. Unit is in Days per Piece. (Note: This field may also be automatically calculated using the P/P Lead Time Maintenance.)
14. You have the option to enter comments or remarks regarding Item Planning information in the Remarks box.
15. Click on the Add button to save changes made to the P/P Item Planning table.
Editing Item Planning
information:
To edit P/P Item Planning information:
1. Open the P/P Item Planning table by clicking on the Item Planning icon under P/P Setup
2. In the P/P Item Planning table, use the Item Number search box to select the item record to edit.
3. You can edit any information fields in the Item Planning window. (Note: Changes made will affect only future P/P planning runs. Existing planning records remains unchanged.)
4. Click on the Save button to save changes made to the P/P Item Planning table.
Deleting Item Planning
information:
To delete item planning information from P/P Item Planning:
18 | P a g e
1. Open the P/P Item Planning table by clicking on the Item Planning icon under P/P Setup
2. In the P/P Item Planning table, use the Item Number search box to select the item record to delete.
3. Click on the Delete button to permanently remove the item planning information. (Note: Deleted records cannot be restored.)
Related Topics Lead Time Maintenance
19 | P a g e
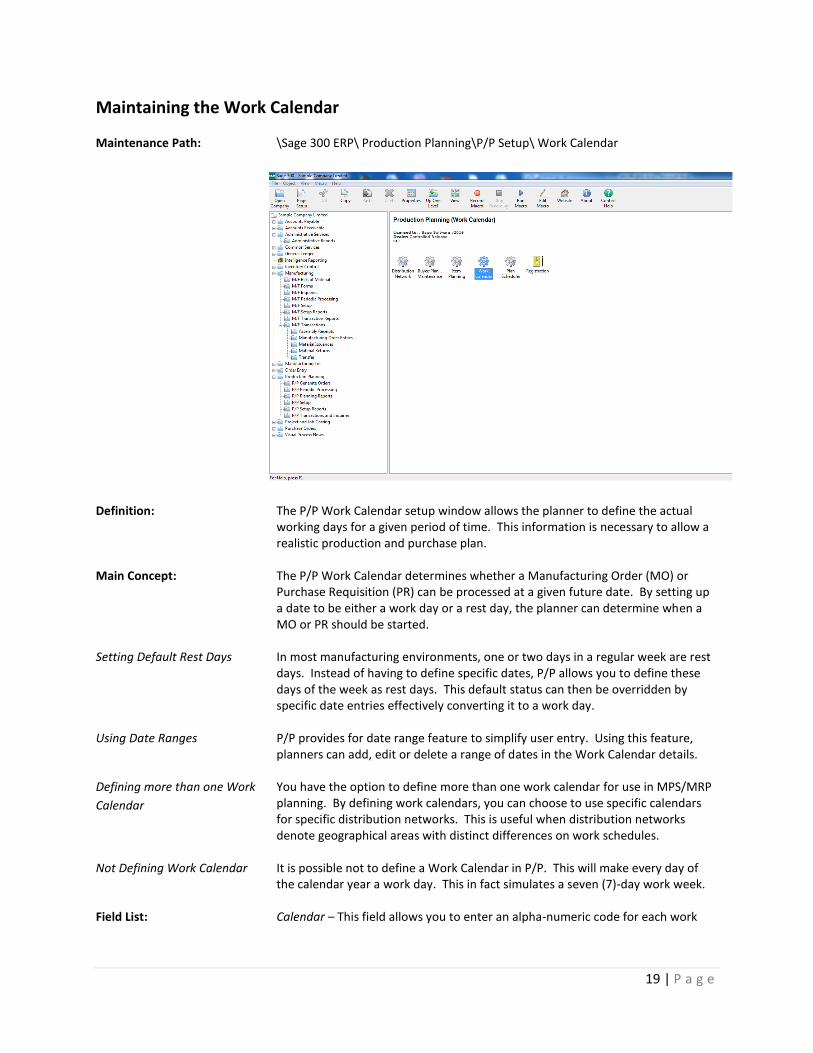
Maintaining the Work Calendar Maintenance Path: \Sage 300 ERP\ Production Planning\P/P Setup\ Work Calendar
Definition: The P/P Work Calendar setup window allows the planner to define the actual working days for a given period of time. This information is necessary to allow a realistic production and purchase plan.
Main Concept: The P/P Work Calendar determines whether a Manufacturing Order (MO) or Purchase Requisition (PR) can be processed at a given future date. By setting up a date to be either a work day or a rest day, the planner can determine when a MO or PR should be started.
Setting Default Rest Days In most manufacturing environments, one or two days in a regular week are rest days. Instead of having to define specific dates, P/P allows you to define these days of the week as rest days. This default status can then be overridden by specific date entries effectively converting it to a work day.
Using Date Ranges
P/P provides for date range feature to simplify user entry. Using this feature, planners can add, edit or delete a range of dates in the Work Calendar details.
Defining more than one Work
Calendar
You have the option to define more than one work calendar for use in MPS/MRP planning. By defining work calendars, you can choose to use specific calendars for specific distribution networks. This is useful when distribution networks denote geographical areas with distinct differences on work schedules.
Not Defining Work Calendar It is possible not to define a Work Calendar in P/P. This will make every day of the calendar year a work day. This in fact simulates a seven (7)-day work week.
Field List: Calendar – This field allows you to enter an alpha-numeric code for each work
20 | P a g e
calendar record to be created.
Description – This field allows you to enter a description or label for the work
calendar.
Default Rest Day -This check box allows the user to indicate which days of the
week are by default rest days (e.g. Saturday, Sunday). The use of default rest
days prevents the need to define specific calendar dates falling on these days.
Save - This action button saves all changes made to the Work Calendar window.
Delete - This action button deletes all the contents of the Work Calendar and
allows the user start from scratch.
Close - This action button closes the P/P Work Calendar window.
Date Details: Line Number - This column is a system generated line number.
Start-End Date - This date field indicates the selected date/s for which the user
would like to define a day status. This field can be made to reflect a single date
or a range of dates.
Status - This selection window allows the user to specify the day status. Options
include:
a. Work Day - Dates selected will be defined as normal working days. Such
days can be allotted for manufacturing and purchasing activities.
b. Holiday - Dates selected will be marked as non-working days. P/P plans
will not schedule any manufacturing or purchasing transactions during
these dates.
Day of the Week - This read only field indicates the day of the week to which the
selected date falls under (e.g. Monday, Tuesday, etc.). This depends on the
calendar year and cannot be changed.
Maintaining the Work
Calendar:
To maintain the Work Calendar:
1. Open the P/P Work Calendar window by clicking on the Work Calendar icon under the P/P Setup.
2. Enter an alpha-numeric code to serve as calendar code in the Calendar field.
3. Enter a descriptive text in the Description field to show purpose or usage of the Work Calendar being created.
4. Define the default rest days on a regular work week by clicking on the day type checkboxes
5. You have an option to input a start date for the date range to be defined.
6. You have an option to input an end date for the date range to be defined.
7. You have to indicate the status or type of the selected date range. a. Holiday – designated as a non-working day
21 | P a g e
b. Working Day – designated as a regular working day 8. Save the changes made to the Work Calendar by clicking on the Save
action button. 9. Click on the Close action button to close the P/P Work Calendar window.
Deleting the Work Calendar:
To delete the Work Calendar:
1. Open the P/P Work Calendar window by clicking on the Work Calendar icon under the P/P Setup.
2. Using the Calendar search button, browse and retrieve the calendar record to delete.
3. Click on the Delete action button to delete all entries made to the Work Calendar.
4. Click on the Close action button to close the P/P Work Calendar window.
22 | P a g e
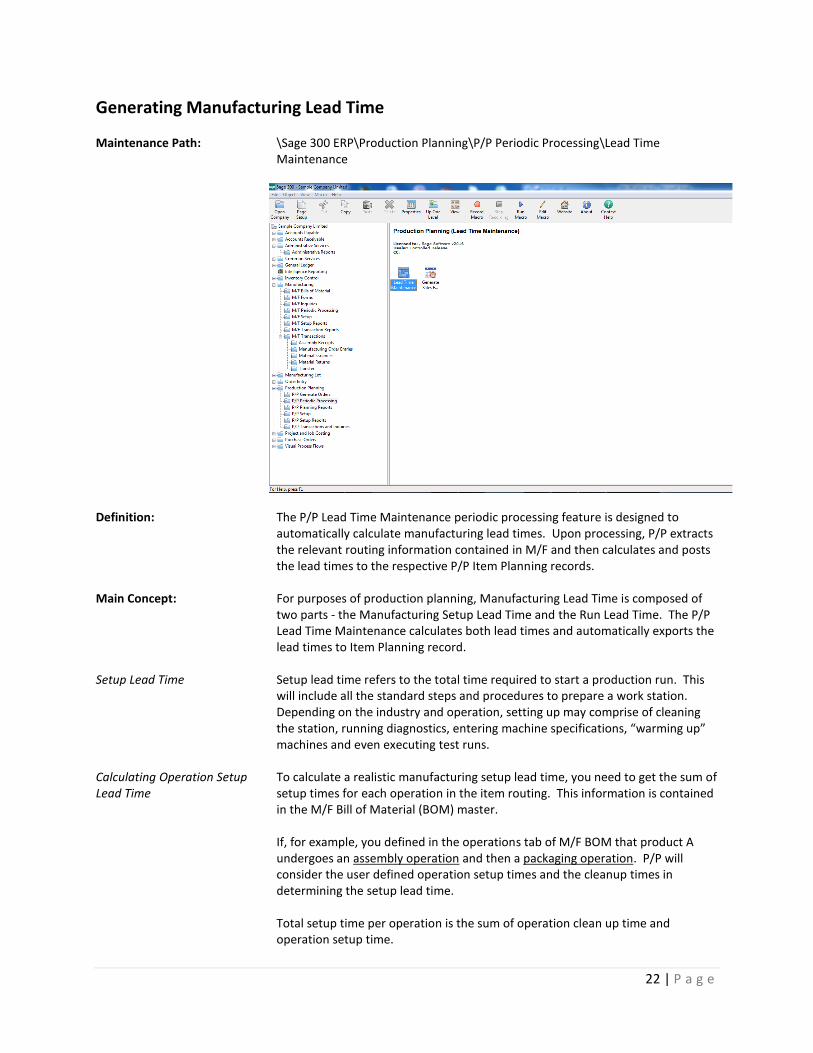
Generating Manufacturing Lead Time Maintenance Path: \Sage 300 ERP\Production Planning\P/P Periodic Processing\Lead Time
Maintenance
Definition: The P/P Lead Time Maintenance periodic processing feature is designed to automatically calculate manufacturing lead times. Upon processing, P/P extracts the relevant routing information contained in M/F and then calculates and posts the lead times to the respective P/P Item Planning records.
Main Concept:
For purposes of production planning, Manufacturing Lead Time is composed of two parts - the Manufacturing Setup Lead Time and the Run Lead Time. The P/P Lead Time Maintenance calculates both lead times and automatically exports the lead times to Item Planning record.
Setup Lead Time Setup lead time refers to the total time required to start a production run. This will include all the standard steps and procedures to prepare a work station. Depending on the industry and operation, setting up may comprise of cleaning the station, running diagnostics, entering machine specifications, “warming up” machines and even executing test runs.
Calculating Operation Setup Lead Time
To calculate a realistic manufacturing setup lead time, you need to get the sum of setup times for each operation in the item routing. This information is contained in the M/F Bill of Material (BOM) master. If, for example, you defined in the operations tab of M/F BOM that product A undergoes an assembly operation and then a packaging operation. P/P will consider the user defined operation setup times and the cleanup times in determining the setup lead time. Total setup time per operation is the sum of operation clean up time and operation setup time.
23 | P a g e
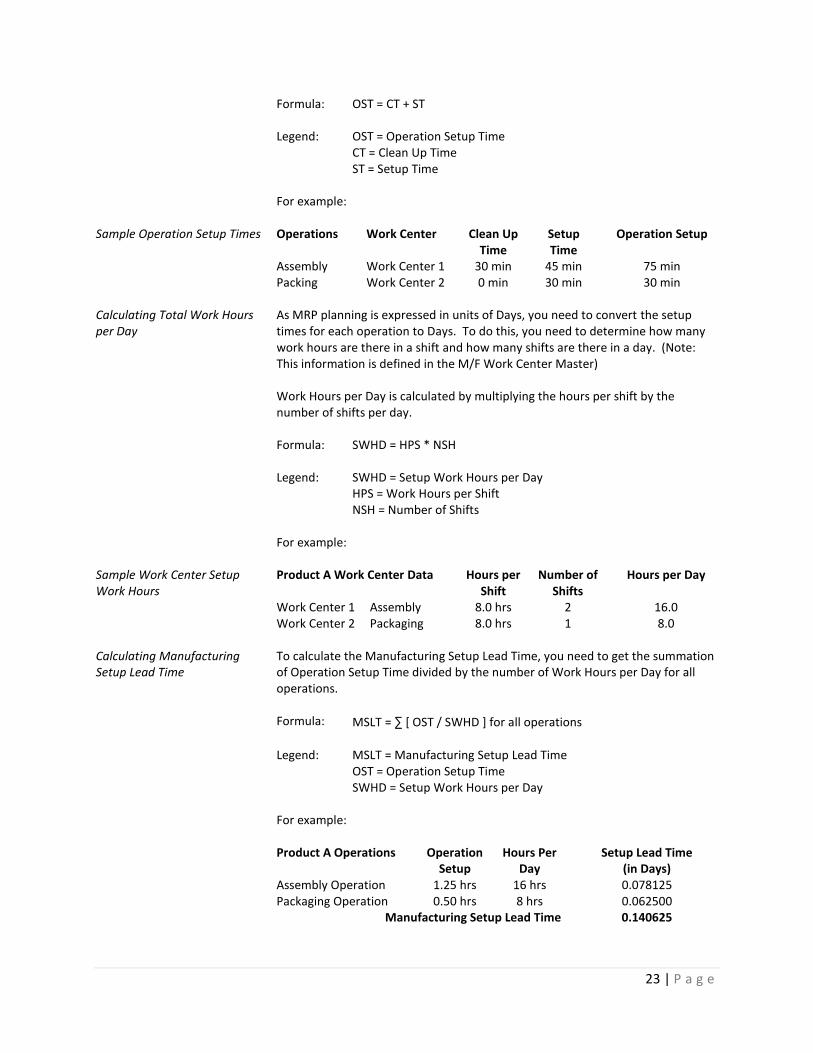
Formula: OST = CT + ST
Legend: OST = Operation Setup Time CT = Clean Up Time ST = Setup Time
For example:
Sample Operation Setup Times Operations Work Center Clean Up Time
Setup Time
Operation Setup
Assembly Work Center 1 30 min 45 min 75 min Packing Work Center 2 0 min 30 min 30 min
Calculating Total Work Hours per Day
As MRP planning is expressed in units of Days, you need to convert the setup times for each operation to Days. To do this, you need to determine how many work hours are there in a shift and how many shifts are there in a day. (Note: This information is defined in the M/F Work Center Master) Work Hours per Day is calculated by multiplying the hours per shift by the number of shifts per day. Formula: SWHD = HPS * NSH
Legend:
SWHD = Setup Work Hours per Day HPS = Work Hours per Shift NSH = Number of Shifts
For example:
Sample Work Center Setup Work Hours
Product A Work Center Data Hours per Shift
Number of Shifts
Hours per Day
Work Center 1 Assembly 8.0 hrs 2 16.0 Work Center 2 Packaging 8.0 hrs 1 8.0
Calculating Manufacturing Setup Lead Time
To calculate the Manufacturing Setup Lead Time, you need to get the summation of Operation Setup Time divided by the number of Work Hours per Day for all operations. Formula: MSLT = ∑ [ OST / SWHD ] for all operations
Legend: MSLT = Manufacturing Setup Lead Time
OST = Operation Setup Time SWHD = Setup Work Hours per Day
For example: Product A Operations Operation
Setup Hours Per
Day Setup Lead Time
(in Days) Assembly Operation 1.25 hrs 16 hrs 0.078125 Packaging Operation 0.50 hrs 8 hrs 0.062500
Manufacturing Setup Lead Time 0.140625
24 | P a g e
Run Lead Time Run Lead Time refers to the total time required to produce one unit of the product. Depending on the industry and operation, run time may be the machine piece rate (e.g. assembly) or the manual piece rate (e.g. packing).
Operation Run Time To get the operation run time, you need only convert to hours per unit the figure defined in the Run Time field of M/F Bill of Materials (BOM) Operations tab. For example:
Sample Operation Run Time Operations Work Center Piece Rate (in Minutes)
Piece Rate (in Hours)
Assembly Work Center 1 9 min/unit 0.150 hrs/unit Packaging Work Center 2 6 min/unit 0.100 hrs/unit
Run Time Work Hours per Day Similar to Manufacturing Setup Lead Time, you need to convert the Operation Run Time to units of Day. To do so, you will have to first calculate the total run time hours available in a normal day. This is calculated by multiplying the number of shifts for the Work Center by the number of hours per shift and by the number of work stations. Formula:
RWHD = NSH * HPS * NWS
Legend: RWHD = Run Work Hours per Day NSH = Number of Shifts HPS = Hours per Shift NWS = Number of Work Stations
Setup Work Hours vs. Run Work Hours
Number of work stations is considered for run lead time calculations because this reflects an increase in production capacity. Doubling the number work stations would cause capacity to double. In contrast, the number of work stations does not affect setup lead time. The assumption here is that you can setup the work stations simultaneously.
Sample Run Time Hours per Day calculation
Work Center Hours per Shift
Number of Shifts
Number of Stations
Hours per Day
Work Center 1 8 hrs 2 1 16.0 Work Center 2 8 hrs 1 3 24.0
Manufacturing Run Lead Time To calculate the effective Manufacturing Run Lead Time, you need to get the summation of Operation Run time divided by the Run Time Hours per Day for each operation in the BOM. Formula: MRLT = ∑ [ RRT / (RWHD) ] for all operations
Legend: RRT = Rated Run Time per unit
RWHD = Run Work Hours per Day
For example: Operations Run Time Hours per Day Run Lead Time
25 | P a g e
(Hours/Unit) (Hours/Day) (Days/Unit) Assembly 0.150 16.0 0.009375 Packaging 0.100 24.0 0.004167
Manufacturing Run Lead Time 0.013542
Total Manufacturing Lead Time
To calculate the effective total Manufacturing Lead Time, you should add the calculated Manufacturing Setup Lead Time to the product of Manufacturing Run Lead time and the order quantity. Formula: TMLT = MSLT + ( MRLT * OQ )
Legend: TMLT = Total Manufacturing Lead Time
MSLT = Manufacturing Setup Lead Time MRLT = Manufacturing Run Lead Time OQ = Order Quantity
The logic behind this is simple. Setup time, by definition, is independent of order quantity. It is assumed that the time it takes to setup a work station is the same regardless whether you intend to produce 10 units or 1,000 units. In contrast, run lead time is based primarily on the piece rate and run work hours. It is fairly obvious that it will take you a longer period of time to produce 1,000 units as against just 10 units. For example: To calculate the total manufacturing lead time to produce an order of 200 units of Product A: TMLT = 0.140625 Day + ( 0.013542 Day/unit * 200 units) = 2.849025 Days = 3 Days
Assumptions for Lead Time calculation
Several assumptions have been made in calculating the effective Manufacturing Lead Time. For purposes of P/P production planning, it is assumed that:
1. Each production run requires only one-time setup. 2. Work stations can be setup simultaneously. 3. All production runs are completed with no work stoppage and partial
runs. 4. Work station capacity is fully utilized for each production run.
All these assumptions are necessary to simplify lead time calculations.
Manual Entry of Lead Time You can choose to override the Manufacturing Setup and Run Lead Times. In the P/P Item Planning table, these fields are enabled and can be edited at any time. The design allows for planners to use their own formula in deriving manufacturing setup and run lead times.
Field List:
From-To Item Number - This item number parameter determines the scope of items whose manufacturing lead times are to be processed by P/P Lead Time Maintenance. Process - This button will execute the Lead Time Maintenance transaction. Manufacturing lead times will be automatically generated and posted to the P/P
26 | P a g e
Item Planning table. Close - This action button will close the P/P Lead Time Maintenance window.
Generating Manufacturing Lead Times:
To automatically generate manufacturing lead times:
1. Open the P/P Lead Time Maintenance window by clicking on the Lead Time Maintenance icon under P/P Periodic Processing.
2. In the Item Number from-to field, browse for the range of items whose manufacturing lead times are to be calculated and posted into the P/P Item Planning table.
3. Click on the Process button to execute the periodic processing transaction (Note: This routine will calculate both manufacturing setup and run lead times. This will overwrite the lead time entries in P/P Item Planning).
4. Click on the Close button to close the P/P Lead Time Maintenance window.
Related Topics: Item Planning Maintenance
M/F Work Center Master M/F Bill of Material
27 | P a g e
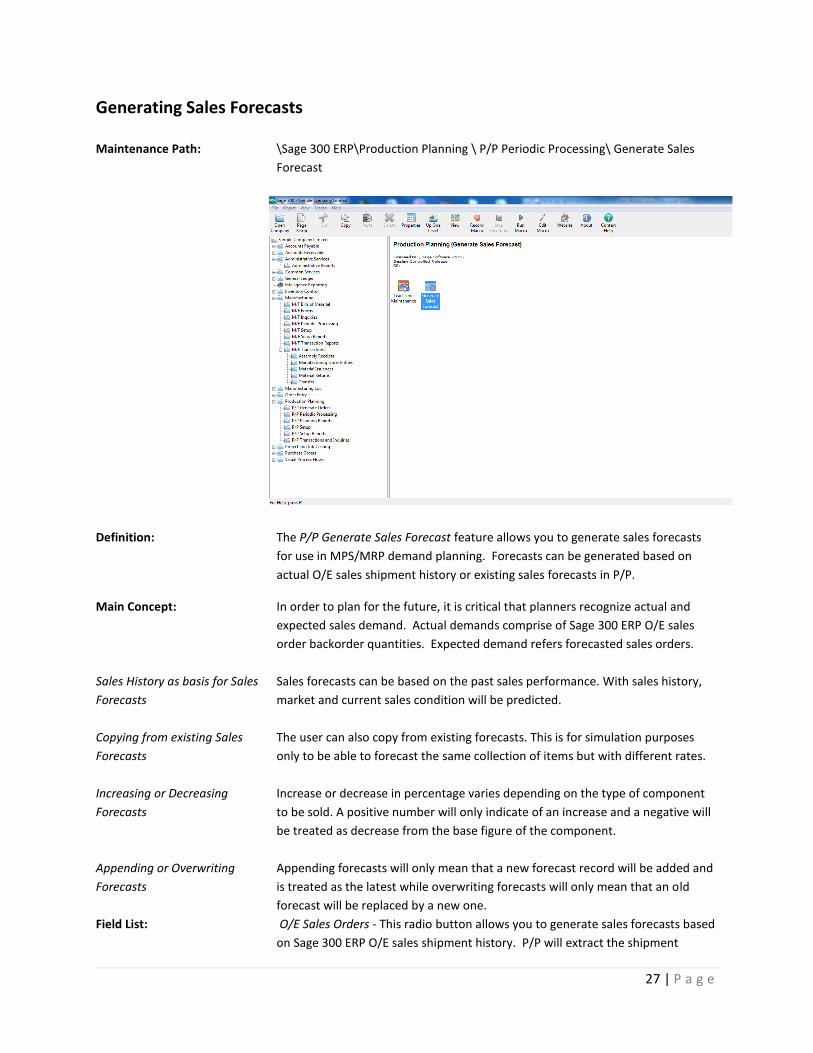
Generating Sales Forecasts
Maintenance Path: \Sage 300 ERP\Production Planning \ P/P Periodic Processing\ Generate Sales
Forecast
Definition: The P/P Generate Sales Forecast feature allows you to generate sales forecasts
for use in MPS/MRP demand planning. Forecasts can be generated based on
actual O/E sales shipment history or existing sales forecasts in P/P.
Main Concept:
In order to plan for the future, it is critical that planners recognize actual and
expected sales demand. Actual demands comprise of Sage 300 ERP O/E sales
order backorder quantities. Expected demand refers forecasted sales orders.
Sales History as basis for Sales
Forecasts
Sales forecasts can be based on the past sales performance. With sales history,
market and current sales condition will be predicted.
Copying from existing Sales
Forecasts
The user can also copy from existing forecasts. This is for simulation purposes
only to be able to forecast the same collection of items but with different rates.
Increasing or Decreasing
Forecasts
Increase or decrease in percentage varies depending on the type of component
to be sold. A positive number will only indicate of an increase and a negative will
be treated as decrease from the base figure of the component.
Appending or Overwriting
Forecasts
Appending forecasts will only mean that a new forecast record will be added and
is treated as the latest while overwriting forecasts will only mean that an old
forecast will be replaced by a new one.
Field List:
O/E Sales Orders - This radio button allows you to generate sales forecasts based
on Sage 300 ERP O/E sales shipment history. P/P will extract the shipment
28 | P a g e
history in O/E and use it as basis for forecast generation.
Forecast Codes – This radio button allows you to generate sales forecasts based
on an existing sales forecast batch in P/P. You can refer to P/P Sales Forecast
Entry for more details on manually entering forecasts.
From Forecast – This search box allows you to choose the source sales forecast
batch from which new sales forecast records will be generated. This field is only
enabled when Forecast Codes option is chosen.
To Forecast – This search box allows you to choose the target sales forecast batch
to use during sales forecast generation.
Salesperson From-To - This search box allows you to select a range of salesperson
to be considered during sales forecast generation. Salesperson refers to the
salesperson code allocated to sales orders entered in O/E Order Entry. This field
is enabled only when O/E Sales Orders option is selected.
Item No. From-To - This search box allows you to choose a range of Item codes to
be considered during sales forecast generation. Item codes can refer to forecasts
in P/P or sales item lines in O/E sales shipment history depending on the selected
forecast generation method.
Category From-To - This search box allows you to choose to choose a range of
item category codes to be considered during sales forecast generation. Item
category is based on the user maintenance in I/C Item table.
Location From-To - This search box allows you to choose a range of I/C locations
to be considered during sales forecast generation. When O/E Sales Orders option
is selected, location refers to SO locations as entered in O/E Sales Order Entry
and used in O/E Shipment Entry. When Forecast Codes option is selected, the
location field refers to sales forecast location as entered in P/P Sales Forecast
Entry.
Customer From-To - This search box allows you to choose a range of O/E
customers to be considered during sales forecast generation. This field is
enabled only when O/E Sales Orders option is selected.
Customer Group From-To - This search box allows you to choose a range of
customer groups to be considered during sales forecast generation. Customer
group is based on the A/R Customer master table. This field is enabled only when
O/E Sales Orders option is selected.
Year/Period From-To - This date range field allows you to select the year/period
based on O/E sales order date and use it as basis for forecast generation.
Forecast Year - This date field allows you to select the year to consider for sales
forecast generation.
29 | P a g e
Percent Inc/Dec – This numeric field allows you to enter a percent variance to add
or deduct to the base figure. A positive number indicates percent increase to the
total calculated quantity. Similarly, a negative number indicates a percent
decrease. A value of zero (0) indicates zero variance and forecast value equals
base value.
Insert Mode – This dropdown field lets you choose the method by which the
target forecast batch will be updated. Options include:
a. Append - This option will add the generated sales forecast lines to the
existing records in the target sales forecast batch.
b. Overwrite - This option will delete all lines in the target forecast batch
and then replace it with generate sales forecasts.
Generate – This action button will trigger the generation of sales forecast entries
based on the selected source mode.
Close – This action button will close the Generate Sales Forecast window.
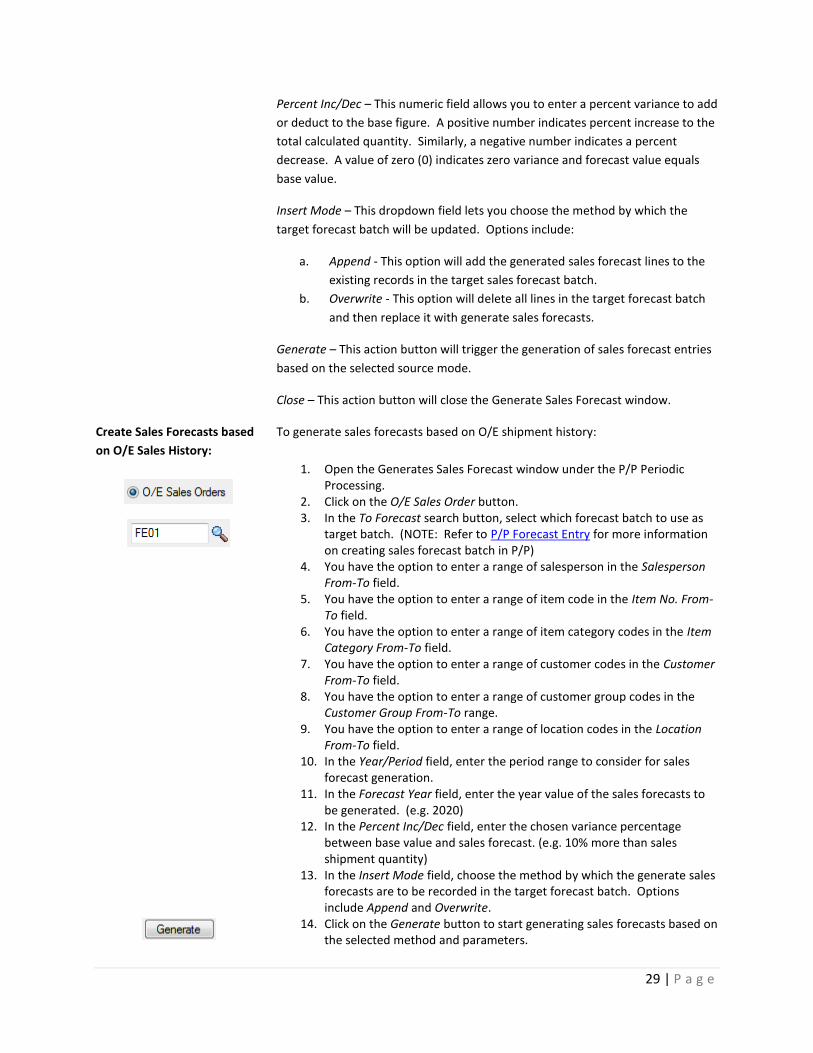
Create Sales Forecasts based
on O/E Sales History:
To generate sales forecasts based on O/E shipment history:
1. Open the Generates Sales Forecast window under the P/P Periodic Processing.
2. Click on the O/E Sales Order button. 3. In the To Forecast search button, select which forecast batch to use as
target batch. (NOTE: Refer to P/P Forecast Entry for more information on creating sales forecast batch in P/P)
4. You have the option to enter a range of salesperson in the Salesperson From-To field.
5. You have the option to enter a range of item code in the Item No. From-To field.
6. You have the option to enter a range of item category codes in the Item Category From-To field.
7. You have the option to enter a range of customer codes in the Customer From-To field.
8. You have the option to enter a range of customer group codes in the Customer Group From-To range.
9. You have the option to enter a range of location codes in the Location From-To field.
10. In the Year/Period field, enter the period range to consider for sales forecast generation.
11. In the Forecast Year field, enter the year value of the sales forecasts to be generated. (e.g. 2020)
12. In the Percent Inc/Dec field, enter the chosen variance percentage between base value and sales forecast. (e.g. 10% more than sales shipment quantity)
13. In the Insert Mode field, choose the method by which the generate sales forecasts are to be recorded in the target forecast batch. Options include Append and Overwrite.
14. Click on the Generate button to start generating sales forecasts based on the selected method and parameters.
30 | P a g e
15. Click on the Close button to close the Generate Sales Forecast button.
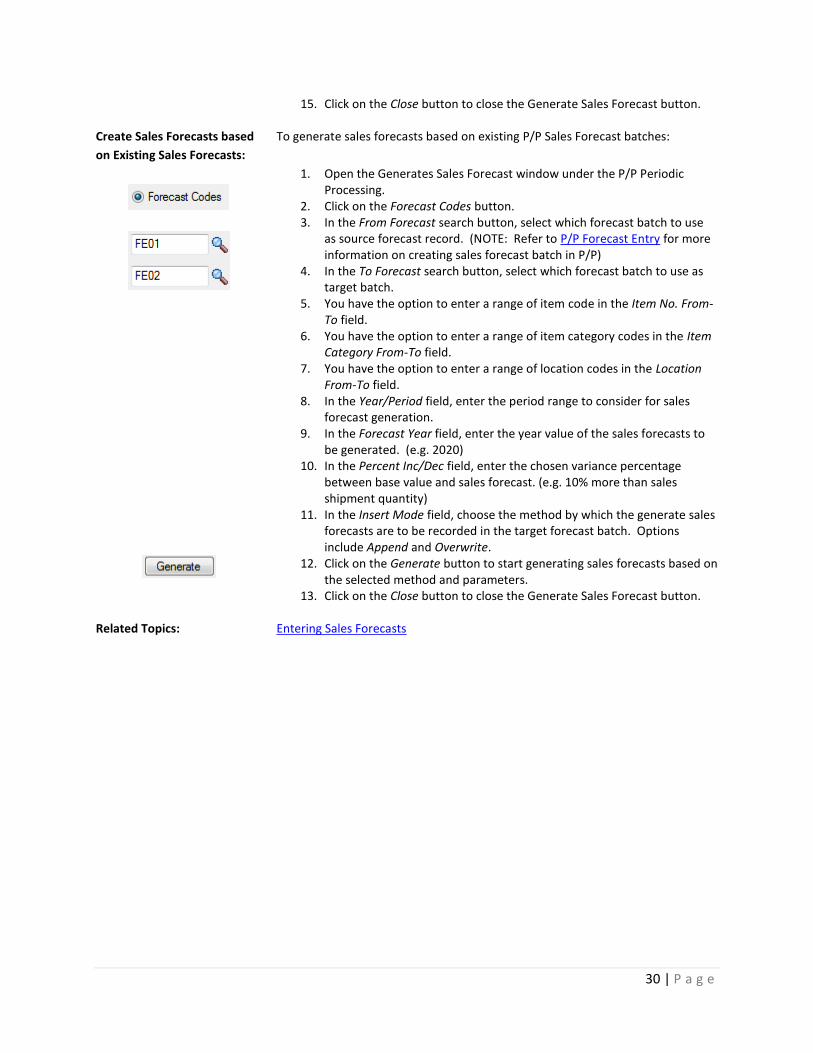
Create Sales Forecasts based
on Existing Sales Forecasts:
To generate sales forecasts based on existing P/P Sales Forecast batches:
1. Open the Generates Sales Forecast window under the P/P Periodic Processing.
2. Click on the Forecast Codes button. 3. In the From Forecast search button, select which forecast batch to use
as source forecast record. (NOTE: Refer to P/P Forecast Entry for more information on creating sales forecast batch in P/P)
4. In the To Forecast search button, select which forecast batch to use as target batch.
5. You have the option to enter a range of item code in the Item No. From-To field.
6. You have the option to enter a range of item category codes in the Item Category From-To field.
7. You have the option to enter a range of location codes in the Location From-To field.
8. In the Year/Period field, enter the period range to consider for sales forecast generation.
9. In the Forecast Year field, enter the year value of the sales forecasts to be generated. (e.g. 2020)
10. In the Percent Inc/Dec field, enter the chosen variance percentage between base value and sales forecast. (e.g. 10% more than sales shipment quantity)
11. In the Insert Mode field, choose the method by which the generate sales forecasts are to be recorded in the target forecast batch. Options include Append and Overwrite.
12. Click on the Generate button to start generating sales forecasts based on the selected method and parameters.
13. Click on the Close button to close the Generate Sales Forecast button.
Related Topics: Entering Sales Forecasts
31 | P a g e
Entering Sales Forecasts
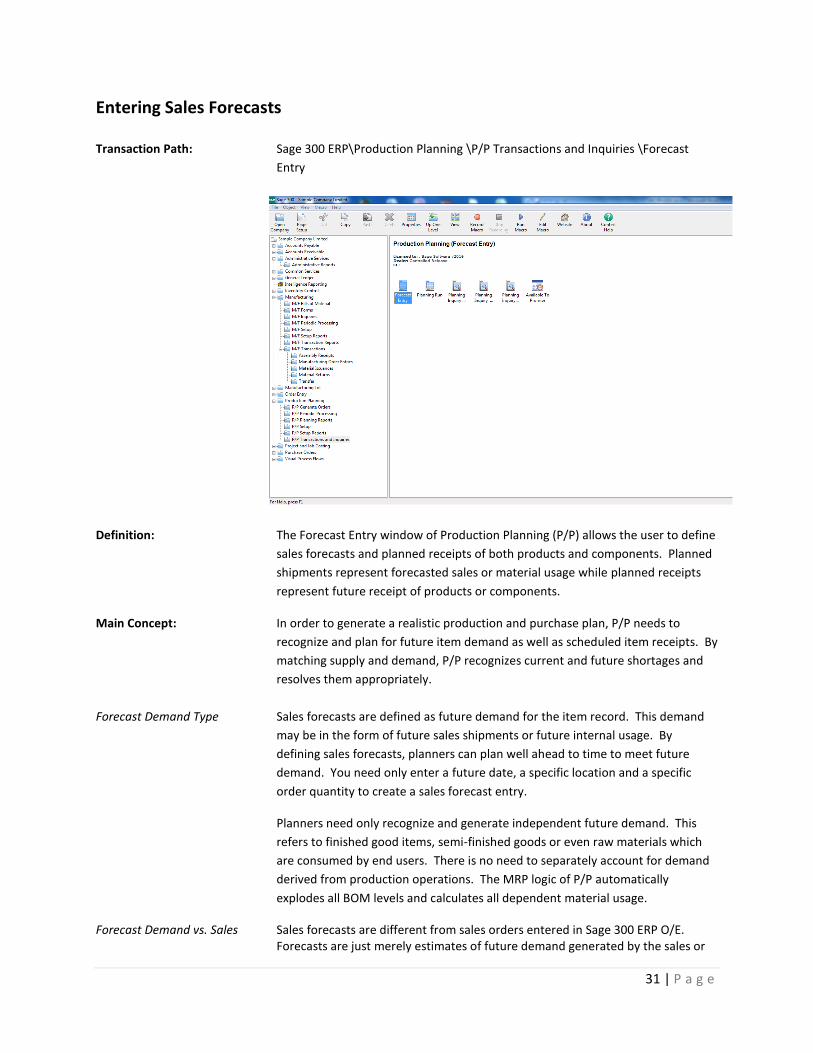
Transaction Path: Sage 300 ERP\Production Planning \P/P Transactions and Inquiries \Forecast
Entry
Definition: The Forecast Entry window of Production Planning (P/P) allows the user to define
sales forecasts and planned receipts of both products and components. Planned
shipments represent forecasted sales or material usage while planned receipts
represent future receipt of products or components.
Main Concept: In order to generate a realistic production and purchase plan, P/P needs to
recognize and plan for future item demand as well as scheduled item receipts. By
matching supply and demand, P/P recognizes current and future shortages and
resolves them appropriately.
Forecast Demand Type Sales forecasts are defined as future demand for the item record. This demand
may be in the form of future sales shipments or future internal usage. By
defining sales forecasts, planners can plan well ahead to time to meet future
demand. You need only enter a future date, a specific location and a specific
order quantity to create a sales forecast entry.
Planners need only recognize and generate independent future demand. This
refers to finished good items, semi-finished goods or even raw materials which
are consumed by end users. There is no need to separately account for demand
derived from production operations. The MRP logic of P/P automatically
explodes all BOM levels and calculates all dependent material usage.
Forecast Demand vs. Sales Sales forecasts are different from sales orders entered in Sage 300 ERP O/E. Forecasts are just merely estimates of future demand generated by the sales or
32 | P a g e
Orders (SO)
planning team. Sales Orders are considered actual firmed demand. Sales forecasts are consumed by actual sales orders based on the P/P forecast consumption logic.
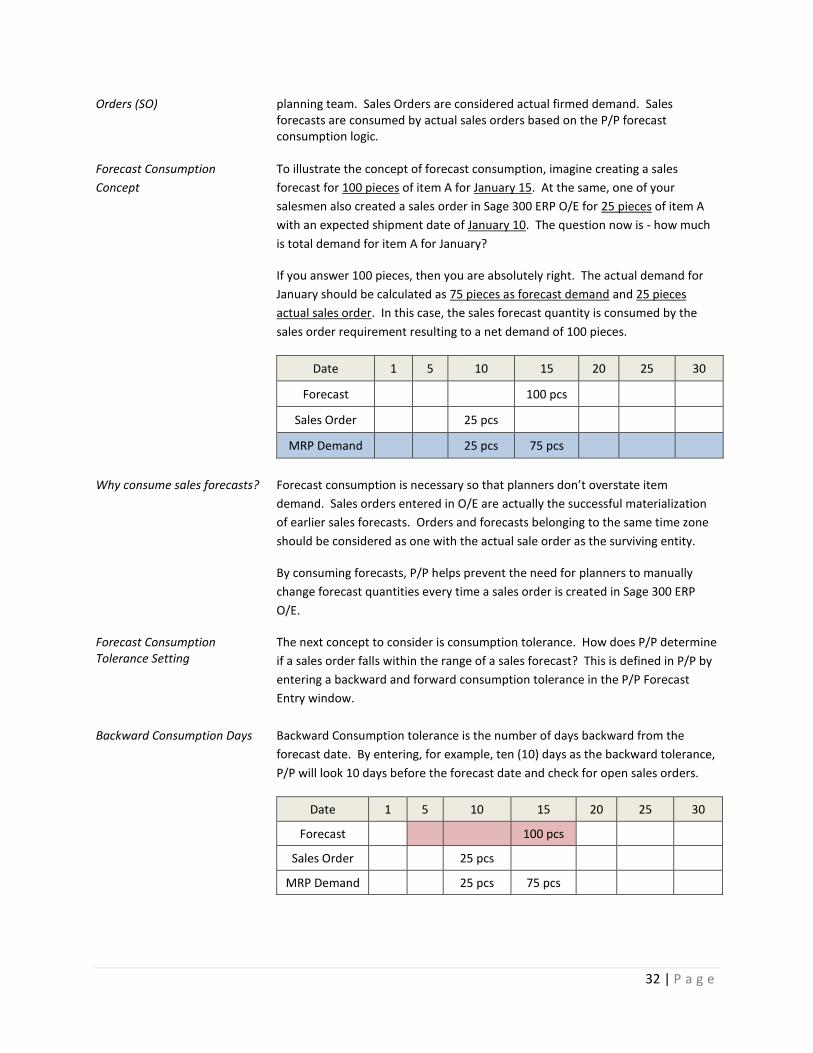
Forecast Consumption
Concept
To illustrate the concept of forecast consumption, imagine creating a sales
forecast for 100 pieces of item A for January 15. At the same, one of your
salesmen also created a sales order in Sage 300 ERP O/E for 25 pieces of item A
with an expected shipment date of January 10. The question now is - how much
is total demand for item A for January?
If you answer 100 pieces, then you are absolutely right. The actual demand for
January should be calculated as 75 pieces as forecast demand and 25 pieces
actual sales order. In this case, the sales forecast quantity is consumed by the
sales order requirement resulting to a net demand of 100 pieces.
Date 1 5 10 15 20 25 30
Forecast 100 pcs
Sales Order 25 pcs
MRP Demand 25 pcs 75 pcs
Why consume sales forecasts? Forecast consumption is necessary so that planners don’t overstate item
demand. Sales orders entered in O/E are actually the successful materialization
of earlier sales forecasts. Orders and forecasts belonging to the same time zone
should be considered as one with the actual sale order as the surviving entity.
By consuming forecasts, P/P helps prevent the need for planners to manually
change forecast quantities every time a sales order is created in Sage 300 ERP
O/E.
Forecast Consumption Tolerance Setting
The next concept to consider is consumption tolerance. How does P/P determine
if a sales order falls within the range of a sales forecast? This is defined in P/P by
entering a backward and forward consumption tolerance in the P/P Forecast
Entry window.
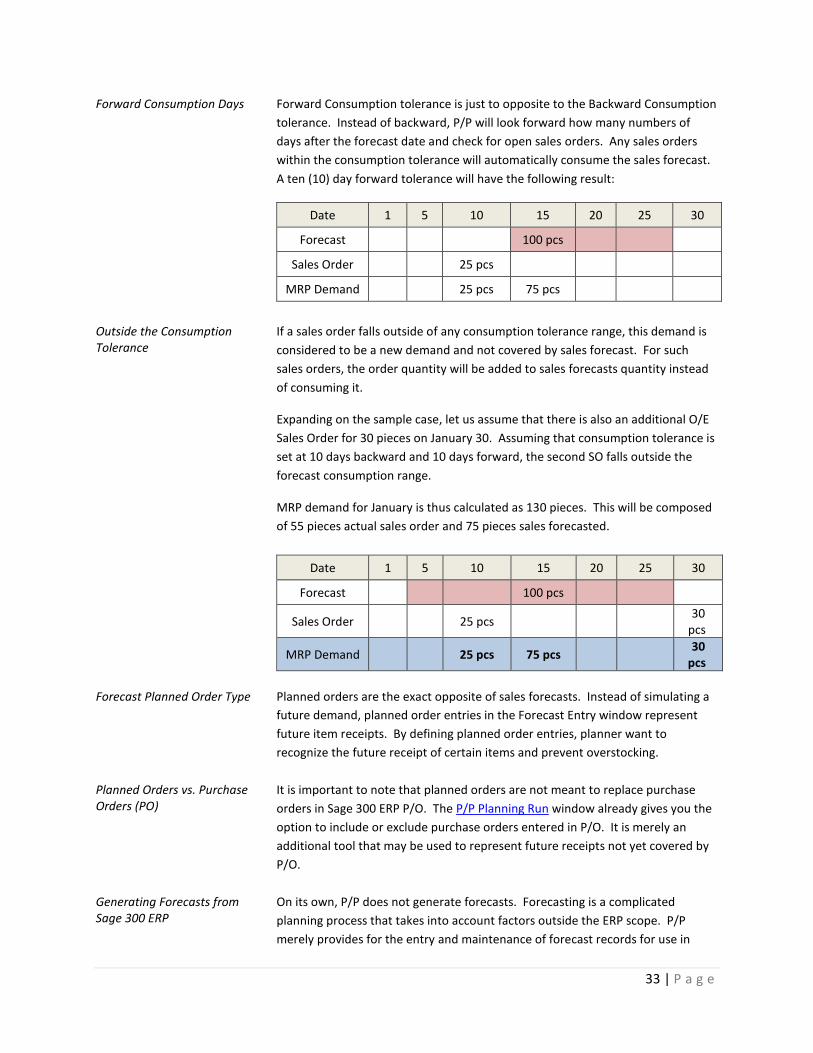
Backward Consumption Days Backward Consumption tolerance is the number of days backward from the
forecast date. By entering, for example, ten (10) days as the backward tolerance,
P/P will look 10 days before the forecast date and check for open sales orders.
Date 1 5 10 15 20 25 30
Forecast 100 pcs
Sales Order 25 pcs
MRP Demand 25 pcs 75 pcs
33 | P a g e
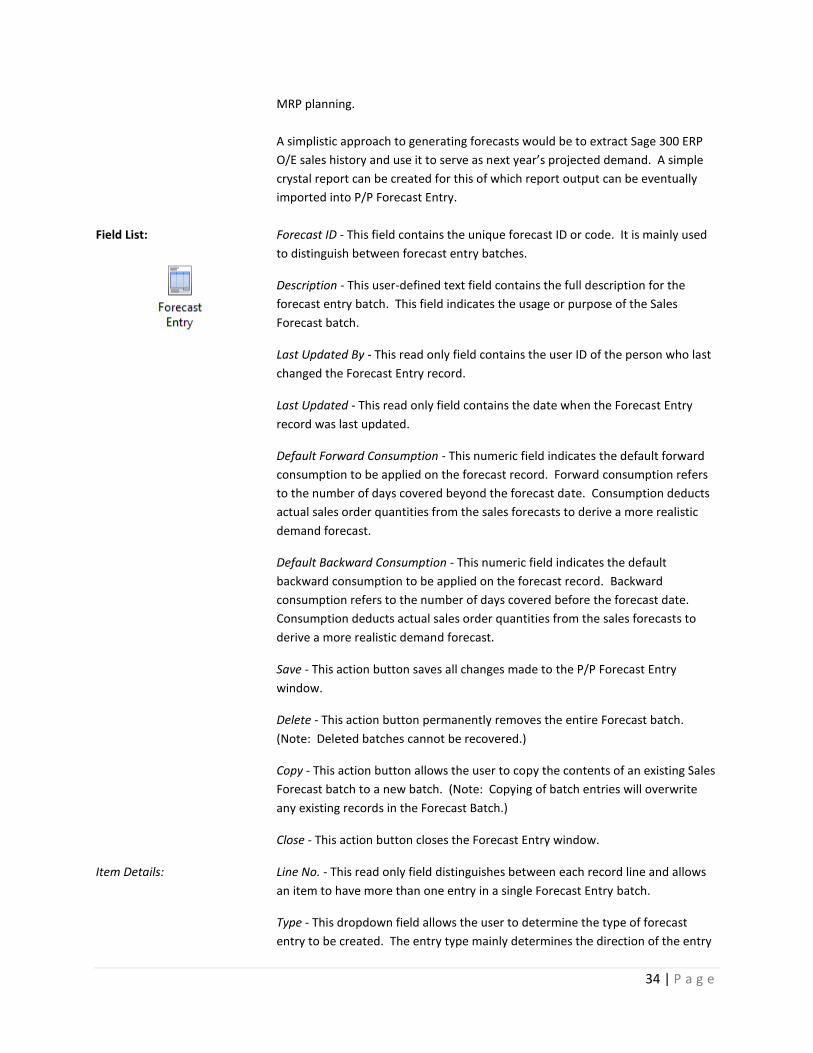
Forward Consumption Days Forward Consumption tolerance is just to opposite to the Backward Consumption
tolerance. Instead of backward, P/P will look forward how many numbers of
days after the forecast date and check for open sales orders. Any sales orders
within the consumption tolerance will automatically consume the sales forecast.
A ten (10) day forward tolerance will have the following result:
Date 1 5 10 15 20 25 30
Forecast 100 pcs
Sales Order 25 pcs
MRP Demand 25 pcs 75 pcs
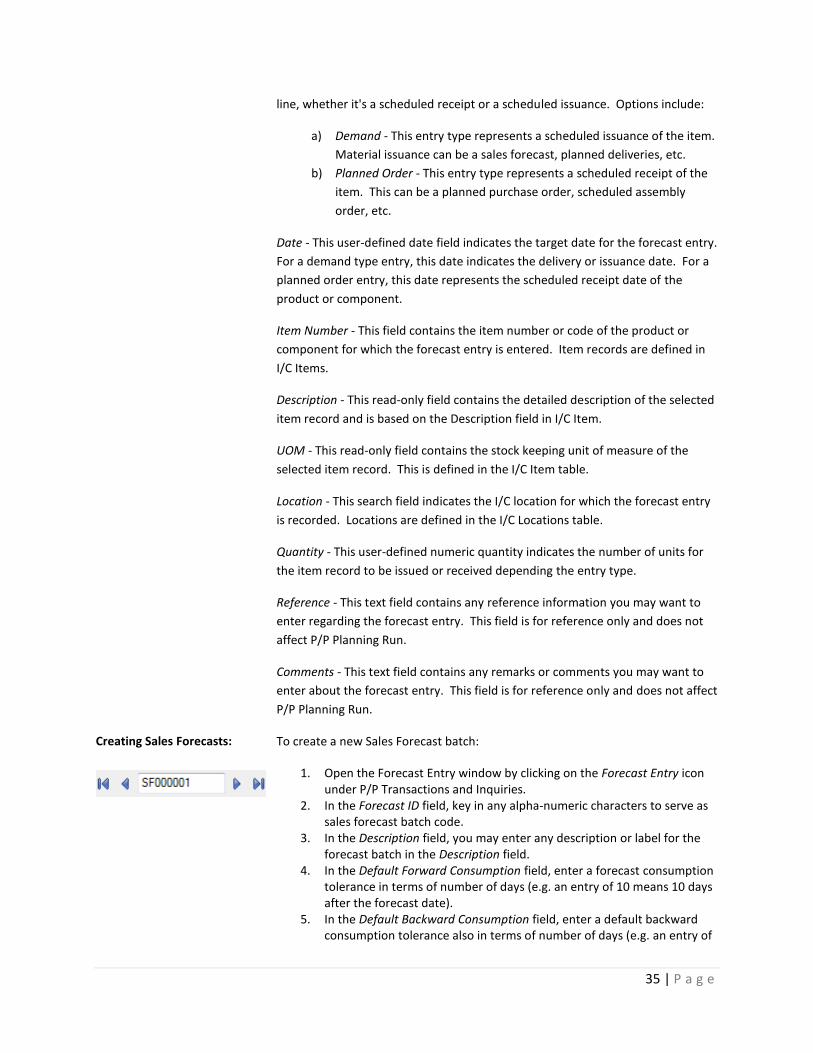
Outside the Consumption Tolerance
If a sales order falls outside of any consumption tolerance range, this demand is
considered to be a new demand and not covered by sales forecast. For such
sales orders, the order quantity will be added to sales forecasts quantity instead
of consuming it.
Expanding on the sample case, let us assume that there is also an additional O/E
Sales Order for 30 pieces on January 30. Assuming that consumption tolerance is
set at 10 days backward and 10 days forward, the second SO falls outside the
forecast consumption range.
MRP demand for January is thus calculated as 130 pieces. This will be composed
of 55 pieces actual sales order and 75 pieces sales forecasted.
Date 1 5 10 15 20 25 30
Forecast 100 pcs
Sales Order 25 pcs 30
pcs
MRP Demand 25 pcs 75 pcs 30
pcs
Forecast Planned Order Type Planned orders are the exact opposite of sales forecasts. Instead of simulating a
future demand, planned order entries in the Forecast Entry window represent
future item receipts. By defining planned order entries, planner want to
recognize the future receipt of certain items and prevent overstocking.
Planned Orders vs. Purchase Orders (PO)
It is important to note that planned orders are not meant to replace purchase
orders in Sage 300 ERP P/O. The P/P Planning Run window already gives you the
option to include or exclude purchase orders entered in P/O. It is merely an
additional tool that may be used to represent future receipts not yet covered by
P/O.
Generating Forecasts from Sage 300 ERP
On its own, P/P does not generate forecasts. Forecasting is a complicated
planning process that takes into account factors outside the ERP scope. P/P
merely provides for the entry and maintenance of forecast records for use in
34 | P a g e
MRP planning.
A simplistic approach to generating forecasts would be to extract Sage 300 ERP
O/E sales history and use it to serve as next year’s projected demand. A simple
crystal report can be created for this of which report output can be eventually
imported into P/P Forecast Entry.
Field List:
Forecast ID - This field contains the unique forecast ID or code. It is mainly used
to distinguish between forecast entry batches.
Description - This user-defined text field contains the full description for the
forecast entry batch. This field indicates the usage or purpose of the Sales
Forecast batch.
Last Updated By - This read only field contains the user ID of the person who last
changed the Forecast Entry record.
Last Updated - This read only field contains the date when the Forecast Entry
record was last updated.
Default Forward Consumption - This numeric field indicates the default forward
consumption to be applied on the forecast record. Forward consumption refers
to the number of days covered beyond the forecast date. Consumption deducts
actual sales order quantities from the sales forecasts to derive a more realistic
demand forecast.
Default Backward Consumption - This numeric field indicates the default
backward consumption to be applied on the forecast record. Backward
consumption refers to the number of days covered before the forecast date.
Consumption deducts actual sales order quantities from the sales forecasts to
derive a more realistic demand forecast.
Save - This action button saves all changes made to the P/P Forecast Entry
window.
Delete - This action button permanently removes the entire Forecast batch.
(Note: Deleted batches cannot be recovered.)
Copy - This action button allows the user to copy the contents of an existing Sales
Forecast batch to a new batch. (Note: Copying of batch entries will overwrite
any existing records in the Forecast Batch.)
Close - This action button closes the Forecast Entry window.
Item Details: Line No. - This read only field distinguishes between each record line and allows
an item to have more than one entry in a single Forecast Entry batch.
Type - This dropdown field allows the user to determine the type of forecast
entry to be created. The entry type mainly determines the direction of the entry
35 | P a g e
line, whether it's a scheduled receipt or a scheduled issuance. Options include:
a) Demand - This entry type represents a scheduled issuance of the item.
Material issuance can be a sales forecast, planned deliveries, etc.
b) Planned Order - This entry type represents a scheduled receipt of the
item. This can be a planned purchase order, scheduled assembly
order, etc.
Date - This user-defined date field indicates the target date for the forecast entry.
For a demand type entry, this date indicates the delivery or issuance date. For a
planned order entry, this date represents the scheduled receipt date of the
product or component.
Item Number - This field contains the item number or code of the product or
component for which the forecast entry is entered. Item records are defined in
I/C Items.
Description - This read-only field contains the detailed description of the selected
item record and is based on the Description field in I/C Item.
UOM - This read-only field contains the stock keeping unit of measure of the
selected item record. This is defined in the I/C Item table.
Location - This search field indicates the I/C location for which the forecast entry
is recorded. Locations are defined in the I/C Locations table.
Quantity - This user-defined numeric quantity indicates the number of units for
the item record to be issued or received depending the entry type.
Reference - This text field contains any reference information you may want to
enter regarding the forecast entry. This field is for reference only and does not
affect P/P Planning Run.
Comments - This text field contains any remarks or comments you may want to
enter about the forecast entry. This field is for reference only and does not affect
P/P Planning Run.
Creating Sales Forecasts:
To create a new Sales Forecast batch:
1. Open the Forecast Entry window by clicking on the Forecast Entry icon under P/P Transactions and Inquiries.
2. In the Forecast ID field, key in any alpha-numeric characters to serve as sales forecast batch code.
3. In the Description field, you may enter any description or label for the forecast batch in the Description field.
4. In the Default Forward Consumption field, enter a forecast consumption tolerance in terms of number of days (e.g. an entry of 10 means 10 days after the forecast date).
5. In the Default Backward Consumption field, enter a default backward consumption tolerance also in terms of number of days (e.g. an entry of
36 | P a g e
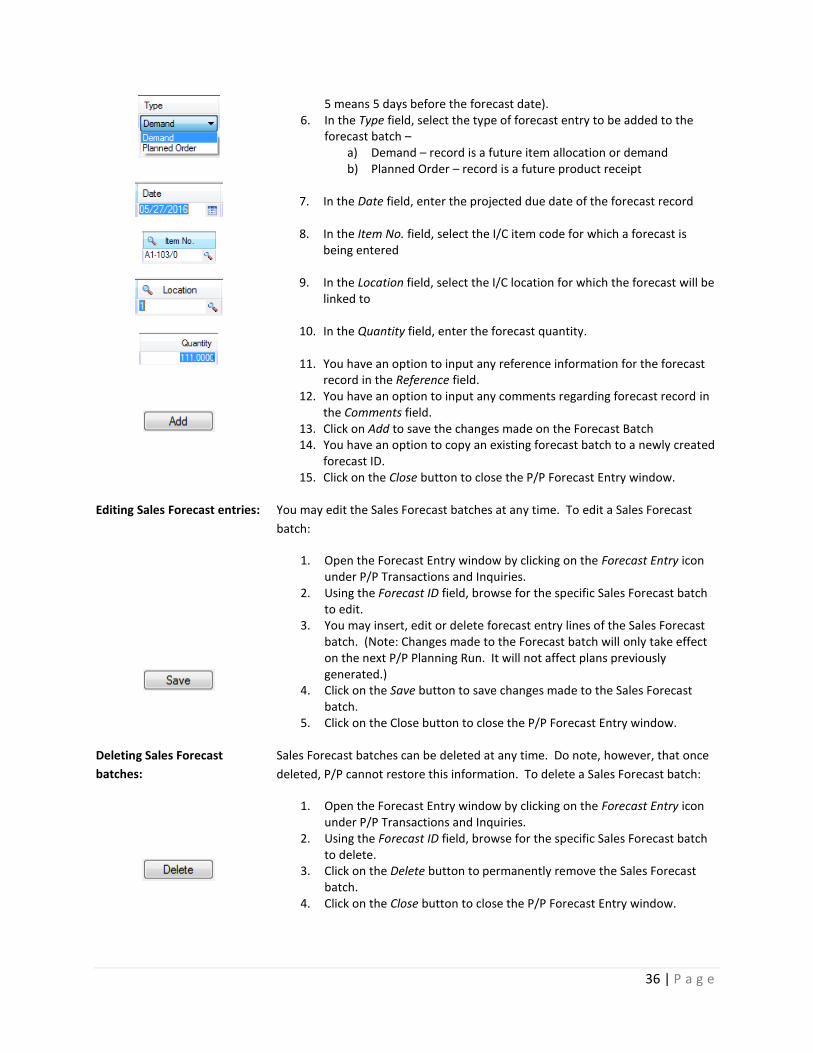
5 means 5 days before the forecast date). 6. In the Type field, select the type of forecast entry to be added to the
forecast batch – a) Demand – record is a future item allocation or demand b) Planned Order – record is a future product receipt
7. In the Date field, enter the projected due date of the forecast record
8. In the Item No. field, select the I/C item code for which a forecast is
being entered
9. In the Location field, select the I/C location for which the forecast will be linked to
10. In the Quantity field, enter the forecast quantity.
11. You have an option to input any reference information for the forecast record in the Reference field.
12. You have an option to input any comments regarding forecast record in the Comments field.
13. Click on Add to save the changes made on the Forecast Batch 14. You have an option to copy an existing forecast batch to a newly created
forecast ID. 15. Click on the Close button to close the P/P Forecast Entry window.
Editing Sales Forecast entries:
You may edit the Sales Forecast batches at any time. To edit a Sales Forecast
batch:
1. Open the Forecast Entry window by clicking on the Forecast Entry icon under P/P Transactions and Inquiries.
2. Using the Forecast ID field, browse for the specific Sales Forecast batch to edit.
3. You may insert, edit or delete forecast entry lines of the Sales Forecast batch. (Note: Changes made to the Forecast batch will only take effect on the next P/P Planning Run. It will not affect plans previously generated.)
4. Click on the Save button to save changes made to the Sales Forecast batch.
5. Click on the Close button to close the P/P Forecast Entry window.
Deleting Sales Forecast
batches:
Sales Forecast batches can be deleted at any time. Do note, however, that once
deleted, P/P cannot restore this information. To delete a Sales Forecast batch:
1. Open the Forecast Entry window by clicking on the Forecast Entry icon under P/P Transactions and Inquiries.
2. Using the Forecast ID field, browse for the specific Sales Forecast batch to delete.
3. Click on the Delete button to permanently remove the Sales Forecast batch.
4. Click on the Close button to close the P/P Forecast Entry window.
37 | P a g e
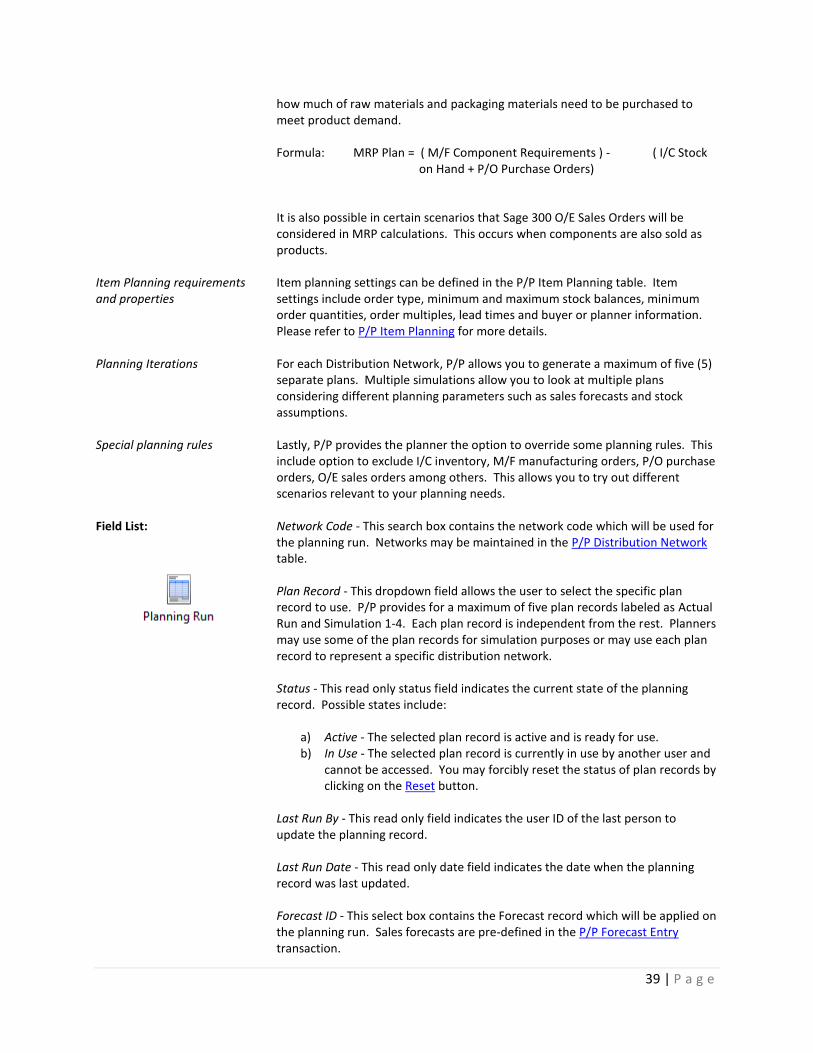
Generating MPS/MRP Plans Transaction Path: \Sage 300 ERP\Production Planning \P/P Transaction and Inquiries \Planning Run
Definition:
The Planning Run window of the Production Planning (P/P) module allows the planner to execute a combined Master Production Schedule (MPS) and Materials Requirement Plan (MPR). Based on MRP logic, P/P recommends you to manufacture or buy items to meet present and future demand.
Main Concept:
In essence, the P/P Planning Run captures the current state of inventory stock levels, on order balances and component allocations. This gives P/P a comprehensive view of current inventory levels as well as projected stock levels. Based on this, P/P generates recommendations taking into consideration demand, supply and pre-defined item planning properties.
Scope of Planning Run In terms of planning scope, P/P Planning Runs are generated on a per distribution network basis. Distribution Networks are defined in the P/P Distribution Network and it determines which locations will be included in the planning run.
Calculating Demand Item demand, in terms of production planning, is calculated as open sales orders plus open manufacturing component requirements and forecasted sales demand. Formula: P/P Demand = O/E Sales Orders + M/F MO Component + P/P Sales
Forecast
O/E Sales Orders as demand Open sales orders in SAGE 300 O/E with backorder quantities are considered firmed item requirements. This is true regardless of the sales order due dates whether it is already past due or if its future date. P/P Planning Run will consider any backorder quantity as P/P demand.
M/F Manufacturing Orders as In terms of manufacturing, P/P Planning Run will consider the component
38 | P a g e
demand requirements of both released and approved M/F Manufacturing Orders (MO). Requirement is based on the balance of unissued MO components as defined in the MO bill of material.
P/P Sales Forecasts as demand Another source of planning demand is sales forecast. Sales forecasts are anticipated future orders for the product. This is commonly provided by the Sales department and entered into Sage 300 via the P/P Forecast Entry routine.
Calculating Supply The opposite of demand is supply. P/P Planning Run calculates supply as the sum of current stock on hand, pending PO purchase receipts and pending MO manufacturing receipts.
Formula: P/P Supply = I/C Stock on hand + P/O Open Purchase Orders + M/F Open Manufacturing Orders
I/C Stock on hand as supply The most obvious source of supply is the current stock quantity held in affected
SAGE 300 I/C locations. The I/C stock on hand quantity is assumed, for purposes of planning, as available for consumption or usage. P/P Planning Run uses the quantity on hand quantity as shown in I/C Location Details.
P/O Purchase Orders as supply Another source of P/P supply is the outstanding on order quantities in SAGE 300 P/O. These outstanding PO quantities are firmed orders to suppliers to ship items based on order due dates. For purposes of planning, P/P considers all outstanding PO balances regardless of order due date.
M/F Manufacturing Orders as supply
For assembled products, outstanding MO manufacturing receipts is one more source of P/P supply. These MO balances are firmed orders to the production floor and the assembled products are eventually due for receipt. P/P Planning Run considers the balance of MO’s whose status is released or approved. It is important to note here that MO serves as both supply and demand. Unlike PO’s and SO’s, the component requirements of MO’s are a source of demand while the ordered product quantity of MO’s are actually a source of supply.
Generating MPS Schedule You can look at planning in terms of production planning and materials planning. The Master Production Schedule (MPS) mainly determines how much of assembled products need to be produced. In addition to quantity, MPS also determine when production runs should start based on manufacturing lead times. To determine planned order quantities, P/P considers demand in terms of outstanding SO balances and projected sales forecasts as well as supply in terms of stock on hand in I/C and outstanding MO receipts. Formula: MPS Plan = ( O/E Sales Orders + P/P Sales Forecast ) - ( I/C Stock
on Hand + M/F Open Orders)
It is also possible in certain scenarios that Sage 300 P/O Purchase Orders will be considered in MPS calculations. This occurs when products can be purchased as well as manufactured.
Generating MRP Plan On the other hand, Material Requirements Planning (MRP) mainly determines
39 | P a g e
how much of raw materials and packaging materials need to be purchased to meet product demand. Formula: MRP Plan = ( M/F Component Requirements ) - ( I/C Stock
on Hand + P/O Purchase Orders)
It is also possible in certain scenarios that Sage 300 O/E Sales Orders will be considered in MRP calculations. This occurs when components are also sold as products.
Item Planning requirements and properties
Item planning settings can be defined in the P/P Item Planning table. Item settings include order type, minimum and maximum stock balances, minimum order quantities, order multiples, lead times and buyer or planner information. Please refer to P/P Item Planning for more details.
Planning Iterations For each Distribution Network, P/P allows you to generate a maximum of five (5) separate plans. Multiple simulations allow you to look at multiple plans considering different planning parameters such as sales forecasts and stock assumptions.
Special planning rules Lastly, P/P provides the planner the option to override some planning rules. This include option to exclude I/C inventory, M/F manufacturing orders, P/O purchase orders, O/E sales orders among others. This allows you to try out different scenarios relevant to your planning needs.
Field List:
Network Code - This search box contains the network code which will be used for the planning run. Networks may be maintained in the P/P Distribution Network table. Plan Record - This dropdown field allows the user to select the specific plan record to use. P/P provides for a maximum of five plan records labeled as Actual Run and Simulation 1-4. Each plan record is independent from the rest. Planners may use some of the plan records for simulation purposes or may use each plan record to represent a specific distribution network. Status - This read only status field indicates the current state of the planning record. Possible states include:
a) Active - The selected plan record is active and is ready for use. b) In Use - The selected plan record is currently in use by another user and
cannot be accessed. You may forcibly reset the status of plan records by clicking on the Reset button.
Last Run By - This read only field indicates the user ID of the last person to update the planning record. Last Run Date - This read only date field indicates the date when the planning record was last updated. Forecast ID - This select box contains the Forecast record which will be applied on the planning run. Sales forecasts are pre-defined in the P/P Forecast Entry transaction.
40 | P a g e
Calendar - This select box contains the Calendar record that is defined in in P/P Work Calendar set up. Do not expedite PO records - This check box is an option to prevent an open Purchase Order to be moved its date in an earlier time to meet the demand like what is usually happening in a planning run. Limit planning run to Item Planning table - This checkbox is an option to generate a plan run only for items having item planning record defined in P/P Item Planning table. Include Stock - This checkbox option allows you to include Sage 300 I/C stock levels in the P/P planning run. If you choose to unclick this button and exclude I/C stock, all items in the planning run will be assumed to have zero inventory balances. Include PO - This checkbox option allows you to include Sage 300 P/O open Purchase Orders in the P/P planning run. Open PO’s contribute as quantities on order for the purchased items involved and serve as source of supply during materials planning. Include Kit - This checkbox option allows you to include Sage 300 I/C Kitting Items in the planning run. Only active I/C Kitting Items are considered during P/P Plan Run. I/C Kitting Items in O/E Order Entry add up to the on order quantities while its components add up to allocated quantities when part of the selected Kitting Number in O/E or part of the default kit for plan orders. Include PR - This check box option allows you to include Sage 300 P/O Purchase Requisition in the P/P planning run. Include MO - This checkbox option allows you to include Sage M/F Manufacturing Orders (MO) in the P/P planning run. P/P considers only MO’s which have been approved or released. Open MO’s contribute to both quantities on order for products as well as allocated quantities for components. Ignore Minimum - This checkbox option allows the user to ignore the minimum stock quantity defined in the P/P Item Planning table. In effect, there will be no minimum or safety stock levels for all items. Include SO - This checkbox option allows you to include Sage 300 O/E Sales Orders (SO) in the P/P planning run. Open SO’s contribute to the allocated quantities for products involved and serve as demand during production planning. Include Expired Forecast - This checkbox allows the user to include sales forecasts details dated earlier than the system date. By default, P/P excludes sales forecasts dated earlier than the planning run date. Ignore Calendar - This checkbox option allows the user to ignore the P/P Work Calendar table maintenance. This, in effect, makes each day a normal working day.

41 | P a g e
Forward Consumption - This numeric field indicates the actual forward consumption days to be applied during the planning run. Forward Consumption is the number of days after the forecast date which is considered covered by the sales forecast. Actual sales orders will consume the forecast in case the SO falls within the coverage. Default value is based on the forecast batch as defined in P/P Forecast Entry. Backward Consumption - This numeric field indicates the actual backward consumption days to be applied during the planning run. Backward Consumption is the number of days before the forecast date which is considered covered by the sales forecast. Actual sales orders will consume the forecast in case the SO falls within the coverage. Default value is based on the forecast batch as defined in P/P Forecast Entry. Remarks - This comment field contains your commentary regarding the planning run in question. Run / Rerun - This action button will execute the production planning run and generate both the Master Production Schedule (MPS) as well as the Material Requirements Plan (MRP). Delete - This action button will delete all the contents of the planning record. (Note: Deleted plans cannot be restored.) Copy - This action button will open the Copy transaction window which allows you to copy the contents of one planning record to another. Net Run - This action button is an option to generate a planning run aside from using Run/Re-run button. But this will take shorter because compared to Run/Re-run it only executes selected process from what Run/Re-run does. Reset - This action button will forcibly update the status of the P/P Planning Run from “In Use” to “Active”. This button should only be used to reset the status of P/P Planning Run after an unexpected system shutdown during a planning run (e.g. power failure). Close - This action button will close the P/P Planning Run transaction window.
Copy Plan fields: Source Record - This field contains the planning record which is to be copied to the target record. Target Record - This dropdown field indicates the planning record which is to be overwritten using the result of the source record. Post - This action button will copy the planning run results from the source record to the selected target record. Close- This action button will close the Copy transaction window.
Generating P/P Plan Records:
To generate a P/P production and materials plan:
1. Open the P/P Planning Run window by clicking on this icon in the P/P Transactions and Inquiries tab.
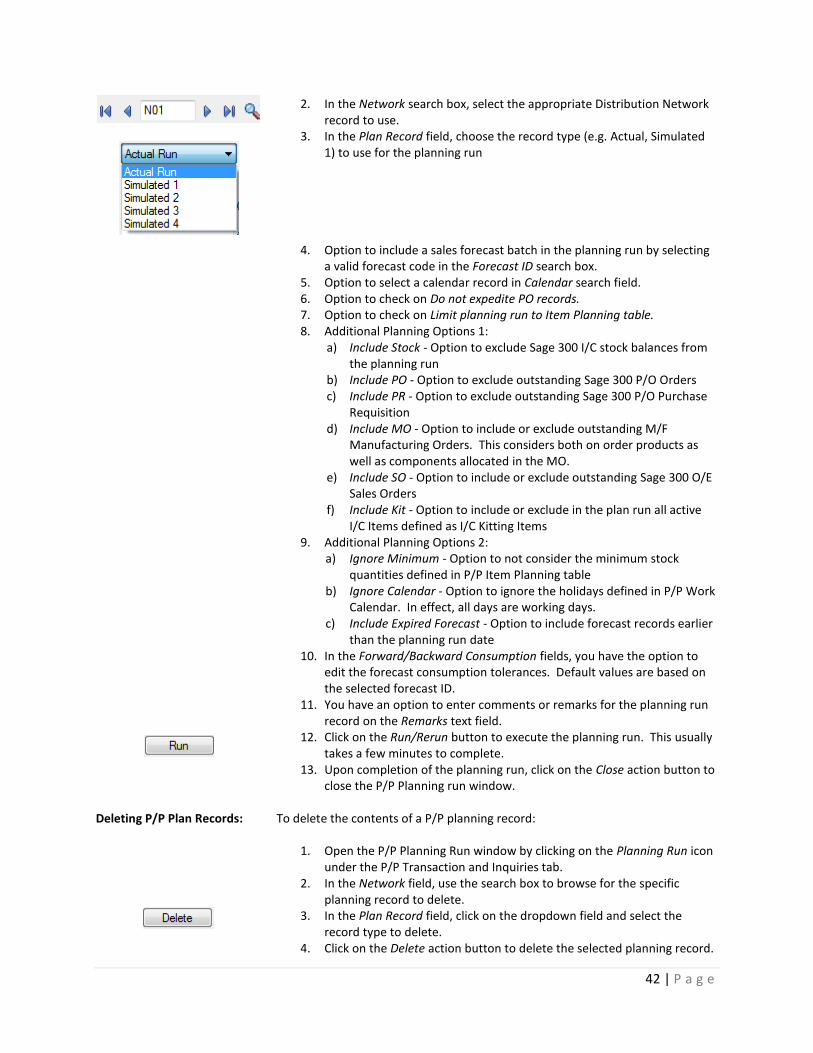
42 | P a g e
2. In the Network search box, select the appropriate Distribution Network record to use.
3. In the Plan Record field, choose the record type (e.g. Actual, Simulated 1) to use for the planning run
4. Option to include a sales forecast batch in the planning run by selecting a valid forecast code in the Forecast ID search box.
5. Option to select a calendar record in Calendar search field. 6. Option to check on Do not expedite PO records. 7. Option to check on Limit planning run to Item Planning table. 8. Additional Planning Options 1:
a) Include Stock - Option to exclude Sage 300 I/C stock balances from the planning run
b) Include PO - Option to exclude outstanding Sage 300 P/O Orders c) Include PR - Option to exclude outstanding Sage 300 P/O Purchase
Requisition d) Include MO - Option to include or exclude outstanding M/F
Manufacturing Orders. This considers both on order products as well as components allocated in the MO.
e) Include SO - Option to include or exclude outstanding Sage 300 O/E Sales Orders
f) Include Kit - Option to include or exclude in the plan run all active I/C Items defined as I/C Kitting Items
9. Additional Planning Options 2: a) Ignore Minimum - Option to not consider the minimum stock
quantities defined in P/P Item Planning table b) Ignore Calendar - Option to ignore the holidays defined in P/P Work
Calendar. In effect, all days are working days. c) Include Expired Forecast - Option to include forecast records earlier
than the planning run date 10. In the Forward/Backward Consumption fields, you have the option to
edit the forecast consumption tolerances. Default values are based on the selected forecast ID.
11. You have an option to enter comments or remarks for the planning run record on the Remarks text field.
12. Click on the Run/Rerun button to execute the planning run. This usually takes a few minutes to complete.
13. Upon completion of the planning run, click on the Close action button to close the P/P Planning run window.
Deleting P/P Plan Records:
To delete the contents of a P/P planning record:
1. Open the P/P Planning Run window by clicking on the Planning Run icon under the P/P Transaction and Inquiries tab.
2. In the Network field, use the search box to browse for the specific planning record to delete.
3. In the Plan Record field, click on the dropdown field and select the record type to delete.
4. Click on the Delete action button to delete the selected planning record.
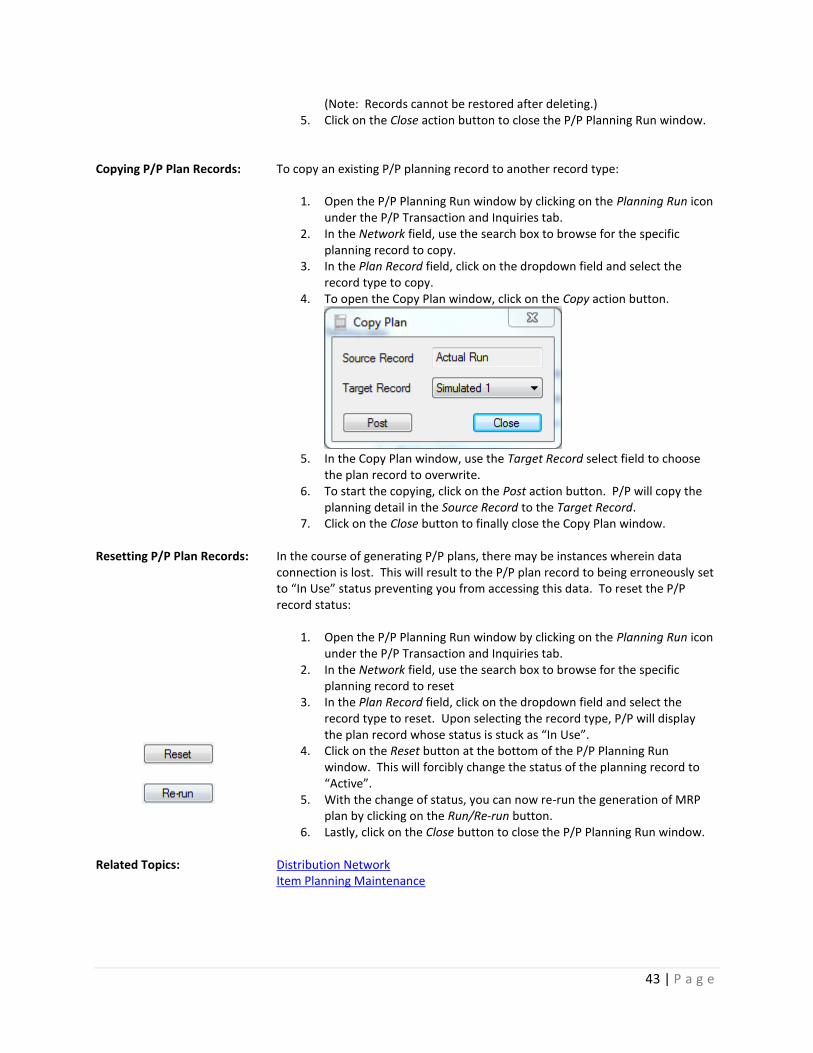
43 | P a g e
(Note: Records cannot be restored after deleting.) 5. Click on the Close action button to close the P/P Planning Run window.
Copying P/P Plan Records:
To copy an existing P/P planning record to another record type:
1. Open the P/P Planning Run window by clicking on the Planning Run icon under the P/P Transaction and Inquiries tab.
2. In the Network field, use the search box to browse for the specific planning record to copy.
3. In the Plan Record field, click on the dropdown field and select the record type to copy.
4. To open the Copy Plan window, click on the Copy action button.
5. In the Copy Plan window, use the Target Record select field to choose
the plan record to overwrite. 6. To start the copying, click on the Post action button. P/P will copy the
planning detail in the Source Record to the Target Record. 7. Click on the Close button to finally close the Copy Plan window.
Resetting P/P Plan Records:
In the course of generating P/P plans, there may be instances wherein data connection is lost. This will result to the P/P plan record to being erroneously set to “In Use” status preventing you from accessing this data. To reset the P/P record status:
1. Open the P/P Planning Run window by clicking on the Planning Run icon under the P/P Transaction and Inquiries tab.
2. In the Network field, use the search box to browse for the specific planning record to reset
3. In the Plan Record field, click on the dropdown field and select the record type to reset. Upon selecting the record type, P/P will display the plan record whose status is stuck as “In Use”.
4. Click on the Reset button at the bottom of the P/P Planning Run window. This will forcibly change the status of the planning record to “Active”.
5. With the change of status, you can now re-run the generation of MRP plan by clicking on the Run/Re-run button.
6. Lastly, click on the Close button to close the P/P Planning Run window.
Related Topics: Distribution Network Item Planning Maintenance
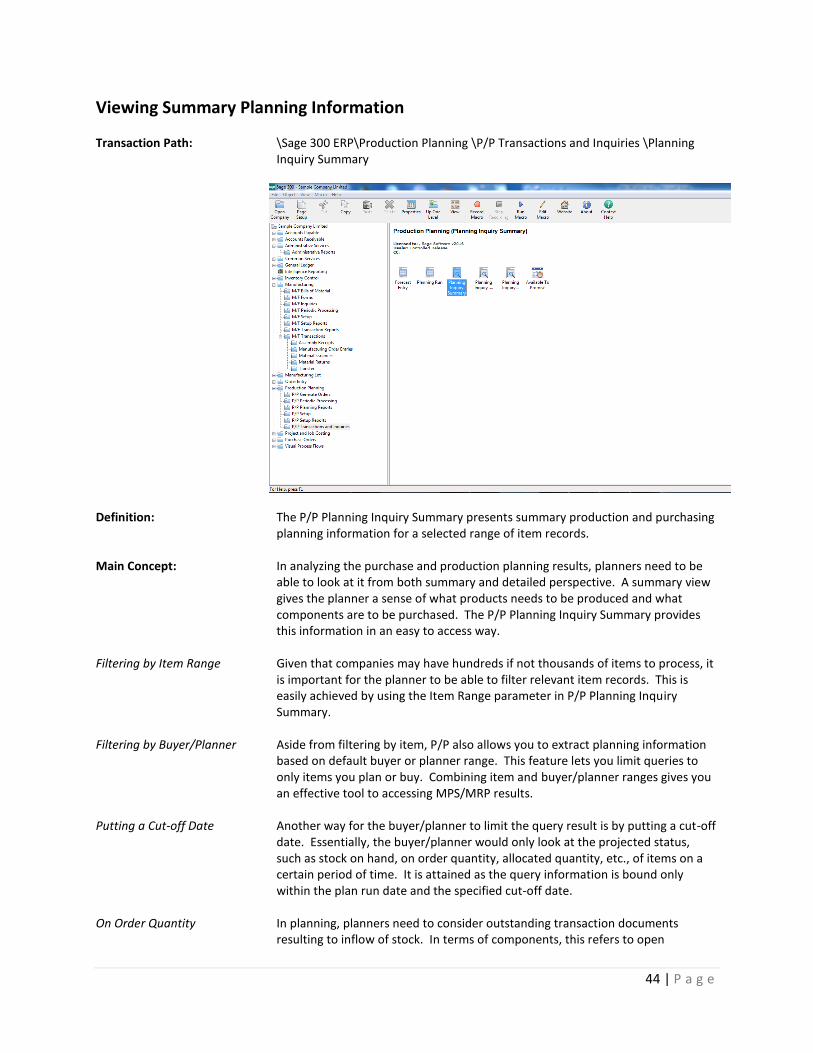
44 | P a g e
Viewing Summary Planning Information Transaction Path: \Sage 300 ERP\Production Planning \P/P Transactions and Inquiries \Planning
Inquiry Summary
Definition: The P/P Planning Inquiry Summary presents summary production and purchasing planning information for a selected range of item records.
Main Concept:
In analyzing the purchase and production planning results, planners need to be able to look at it from both summary and detailed perspective. A summary view gives the planner a sense of what products needs to be produced and what components are to be purchased. The P/P Planning Inquiry Summary provides this information in an easy to access way.
Filtering by Item Range Given that companies may have hundreds if not thousands of items to process, it is important for the planner to be able to filter relevant item records. This is easily achieved by using the Item Range parameter in P/P Planning Inquiry Summary.
Filtering by Buyer/Planner Aside from filtering by item, P/P also allows you to extract planning information based on default buyer or planner range. This feature lets you limit queries to only items you plan or buy. Combining item and buyer/planner ranges gives you an effective tool to accessing MPS/MRP results.
Putting a Cut-off Date Another way for the buyer/planner to limit the query result is by putting a cut-off date. Essentially, the buyer/planner would only look at the projected status, such as stock on hand, on order quantity, allocated quantity, etc., of items on a certain period of time. It is attained as the query information is bound only within the plan run date and the specified cut-off date.
On Order Quantity In planning, planners need to consider outstanding transaction documents resulting to inflow of stock. In terms of components, this refers to open
45 | P a g e
purchase orders (PO) of raw materials which are due on future dates. For products, this refers to open manufacturing orders (MO) which have outstanding balances. These two combined are referred to in P/P as “On Order Quantity”.
Allocated Quantity In terms of demand planning, planners need to consider existing transaction documents which result to outflow of stock. For products, such records refer to sales orders (SO) in Sage 300 O/E with outstanding balances. For components, this refers to open manufacturing orders (MO) with outstanding component requirement balances. These two combined are referred to in P/P as “Allocated Quantity”.
Projected Net Stock The Projected Net Stock is presented in this query. This field displays the net stock balance of each item considering current on hand stock in I/C, outstanding on order quantity in Sage 300 P/O and Sage M/F as well as open allocation quantities in Sage 300 O/E and Sage M/F. This is calculated as the sum of total quantity on hand plus quantity on order minus the allocated quantity. Formula: Projected Net Stock = On Hand Stock + On Order Qty - Allocated Qty
Forecasted Net Stock The Forecasted Net Stock is presented in this query. This refers to the net stock balances of each item considering planning transactions such as sales forecasts, forecasted receipts and recommended planned orders. This balance reflects the ideal stock balance based on MRP logic. Forecasted Net Stock is calculated as the sum of Projected Net Stock and total Forecasted Receipt minus total Forecasted Demand plus total Planned Orders. Formula: Forecasted Net Stock = Projected Net Stock + Forecasted Receipt -
Forecasted Demand + Planned Orders
Field List:
Network Code - This search box allows you to choose which distribution network to query. Networks are defined in the P/P Distribution Network maintenance. Planning runs are generated on a per distribution network basis via P/P Planning Run. Item Number From-To - This range field allows you to select a specific range of items to query. The main purpose of item ranges is to limit the number of item plan records to extract and view. Plan Record - This dropdown field allows you to choose which specific planning record of a selected network to query. P/P supports at most five separate planning records (e.g. Actual Run, Simulation 1) for each network code. Buyer/Planner - This search box allows you to select a specific buyer or planner record to serve as parameter for the query. Using this field, you can easily limit the scope of the query to a person, group of person or item group depending on the P/P Buyer/Planner maintenance. Cut-off Date - This field allows you to narrow down the item query information according to the date selected giving you only the status as of that date.
46 | P a g e
Show Only Items with Planned Orders - This checkbox gives you an option to view only those items that have been generated with planned orders. Item Plan - This action button is a shortcut key that opens the P/P Planning Inquiry Detailed window for the selected product or component. Export - This action button translates the information shown in the inquiry details into an excel file which opens up upon clicking the button. Close - This action button will close the P/P Planning Inquiry Summary query window.
Inquiry Details:
Item No. - This read only field contains the item code of the product or component for which P/P has generated a production or purchase plan. Description - This read only field contains the description of the selected product or component. This description is based on the Sage 300 I/C Item master maintenance. UOM - This read only field contains the stock unit of measure of the selected product or component. Stock UOM is defined in the Sage 300 I/C Item master maintenance. On Hand Stock - This read only field contains the total stock on hand in the selected network for the product or component. Stock balances are based on the Quantity on Hand field in Sage 300 I/C location for all locations within the distribution network. On Order Qty - This read only field contains the total quantity on order in the selected network for the product or component. On order quantities include both outstanding Sage 300 P/O Purchase Orders (PO) and open M/F Manufacturing Orders (MO) for all locations within the distribution network. Allocated Qty - This read only field contains the total quantity of item already allocated for the product or component in the selected network. Allocated refers to both backorders in Sage 300 O/E Sales Orders (SO) and outstanding component requirements in M/F Manufacturing Orders (MO) Projected Net Stock - This read only field contains the net stock balance for the product or component in the selected network. This figure refers to the projected stock balance when inventory stock and all outstanding orders (i.e. PO and MO) are considered. Forecasted Receipt - This read only field contains the total forecasted receipt quantity for the product or component in the selected network. Forecasted receipts are entered in P/P using the Forecast Entry transaction window. Forecasted Demand - This read only field contains the total effective sales forecasts for the product in the selected network. Sales forecasts are entered in the P/P using the Forecast Entry transaction window. Planned Order - This read only field contains the total planned orders generated
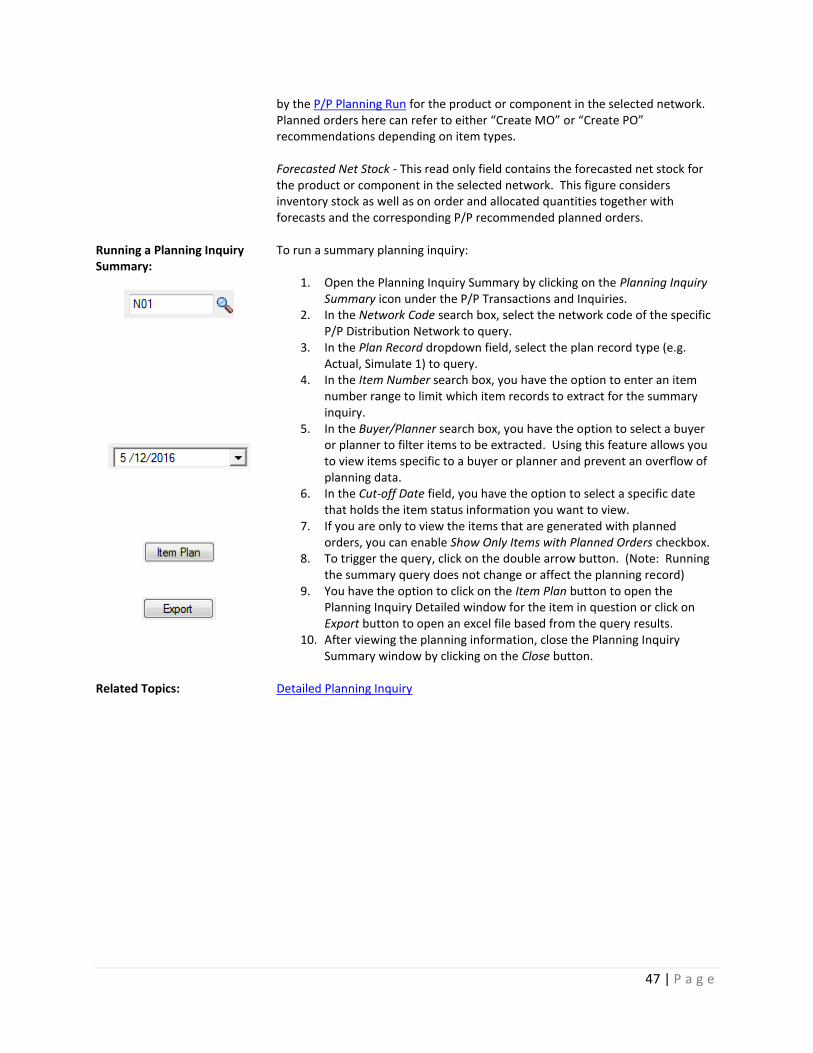
47 | P a g e
by the P/P Planning Run for the product or component in the selected network. Planned orders here can refer to either “Create MO” or “Create PO” recommendations depending on item types. Forecasted Net Stock - This read only field contains the forecasted net stock for the product or component in the selected network. This figure considers inventory stock as well as on order and allocated quantities together with forecasts and the corresponding P/P recommended planned orders.
Running a Planning Inquiry Summary:
To run a summary planning inquiry:
1. Open the Planning Inquiry Summary by clicking on the Planning Inquiry Summary icon under the P/P Transactions and Inquiries.
2. In the Network Code search box, select the network code of the specific P/P Distribution Network to query.
3. In the Plan Record dropdown field, select the plan record type (e.g. Actual, Simulate 1) to query.
4. In the Item Number search box, you have the option to enter an item number range to limit which item records to extract for the summary inquiry.
5. In the Buyer/Planner search box, you have the option to select a buyer or planner to filter items to be extracted. Using this feature allows you to view items specific to a buyer or planner and prevent an overflow of planning data.
6. In the Cut-off Date field, you have the option to select a specific date that holds the item status information you want to view.
7. If you are only to view the items that are generated with planned orders, you can enable Show Only Items with Planned Orders checkbox.
8. To trigger the query, click on the double arrow button. (Note: Running the summary query does not change or affect the planning record)
9. You have the option to click on the Item Plan button to open the Planning Inquiry Detailed window for the item in question or click on Export button to open an excel file based from the query results.
10. After viewing the planning information, close the Planning Inquiry Summary window by clicking on the Close button.
Related Topics: Detailed Planning Inquiry
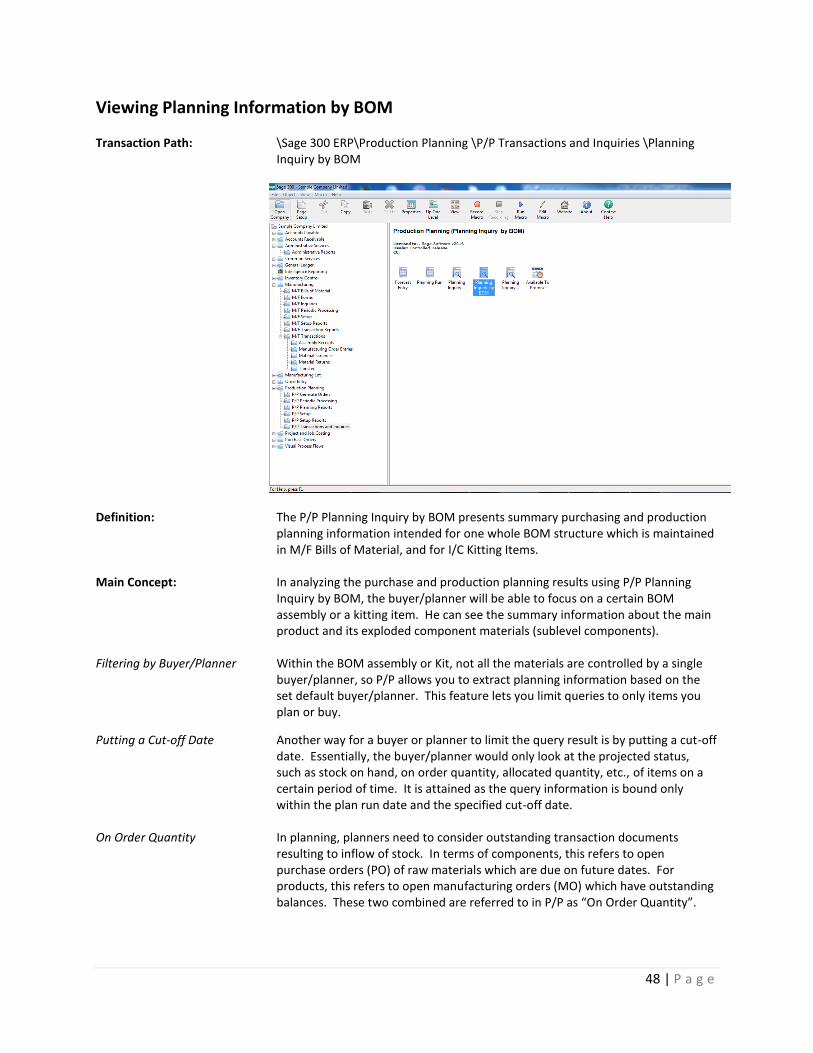
48 | P a g e
Viewing Planning Information by BOM Transaction Path: \Sage 300 ERP\Production Planning \P/P Transactions and Inquiries \Planning
Inquiry by BOM
Definition: The P/P Planning Inquiry by BOM presents summary purchasing and production planning information intended for one whole BOM structure which is maintained in M/F Bills of Material, and for I/C Kitting Items.
Main Concept: In analyzing the purchase and production planning results using P/P Planning Inquiry by BOM, the buyer/planner will be able to focus on a certain BOM assembly or a kitting item. He can see the summary information about the main product and its exploded component materials (sublevel components).
Filtering by Buyer/Planner Within the BOM assembly or Kit, not all the materials are controlled by a single buyer/planner, so P/P allows you to extract planning information based on the set default buyer/planner. This feature lets you limit queries to only items you plan or buy.
Putting a Cut-off Date Another way for a buyer or planner to limit the query result is by putting a cut-off date. Essentially, the buyer/planner would only look at the projected status, such as stock on hand, on order quantity, allocated quantity, etc., of items on a certain period of time. It is attained as the query information is bound only within the plan run date and the specified cut-off date.
On Order Quantity In planning, planners need to consider outstanding transaction documents resulting to inflow of stock. In terms of components, this refers to open purchase orders (PO) of raw materials which are due on future dates. For products, this refers to open manufacturing orders (MO) which have outstanding balances. These two combined are referred to in P/P as “On Order Quantity”.
49 | P a g e
Allocated Quantity In terms of demand planning, planners need to consider existing transaction documents which result to outflow of stock. For products, such records refer to sales orders (SO) in Sage 300 O/E with outstanding balances. For components, this refers to open manufacturing orders (MO) with outstanding component requirement balances. These two combined are referred to in P/P as “Allocated Quantity”.
Projected Net Stock The Projected Net Stock is presented in this query. This field displays the net stock balance of each item considering current on hand stock in I/C, outstanding on order quantity in Sage 300 P/O and Sage M/F as well as open allocation quantities in Sage 300 O/E and Sage M/F. This is calculated as the sum of total quantity on hand plus quantity on order minus the allocated quantity. Formula: Projected Net Stock = On Hand Stock + On Order Qty - Allocated Qty
Forecasted Net Stock The Forecasted Net Stock is presented in this query. This refers to the net stock
balances of each item considering planning transactions such as sales forecasts, forecasted receipts and recommended planned orders. This balance reflects the ideal stock balance based on MRP logic. Forecasted Net Stock is calculated as the sum of Projected Net Stock and total Forecasted Receipt minus total Forecasted Demand plus total Planned Orders. Formula: Forecasted Net Stock = Projected Net Stock + Forecasted Receipt -
Forecasted Demand + Planned Orders
Field List:
Network Code - This search box allows you to choose which distribution network to query. Networks are defined in the P/P Distribution Network maintenance. Planning runs are generated on a per distribution network basis via P/P Planning Run. Item Number - This search box allows you to select an item to query. The item selected should have a record maintained in M/F Bills of Material or in I/C Kitting Items which in then be validated by the system. Plan Record - This dropdown field allows you to choose which specific planning record of a selected network to query. P/P supports at most five separate planning records (e.g. Actual Run, Simulation 1) for each network code. Buyer/Planner - This search box allows you to select a specific buyer or planner record to serve as parameter for the query. Using this field, you can easily limit the scope of the query to a person, group of person or item group depending on the P/P Buyer/Planner maintenance. Cut-off Date - This field allows you to narrow down the item query information according to the date selected giving you only its status as of that date. Sort by tree - This checkbox gives you an option to sort items in the query details by M/F BOM tree or structure. The default sort method is by BOM level. Sort by BOM line number - This checkbox gives you an option to sort items in the
50 | P a g e
query details by item line number in its respective M/F BOM’s. Item Plan - This action button is a shortcut key to open the P/P Planning Inquiry Detailed window for the selected product or component. Export - This action button translates the information shown in the inquiry details into an excel file which opens up upon clicking the button. Close - This action button will close the P/P Planning Inquiry by BOM query window.
Inquiry Details:
Item No - This read only field contains the item code of the main BOM product item or the kitting item, and the sublevel components. Description - This read only field contains the description of the selected product or component. This description is based on the Sage 300 I/C Item master maintenance. BOM Level - This read only field shows the level of the item in the M/F BOM structure or I/C Kitting Item structure where it belongs to. Parent - This read only field shows the immediate parent item of the component in the detail line. UOM - This read only field contains the stock unit of measure of the selected product or component. Stock UOM is defined in the Sage 300 I/C Item master maintenance. On Hand Stock - This read only field contains the total stock on hand in the selected network for the product or component. Stock balances are based on the Quantity on Hand field in Sage 300 I/C location for all locations within the distribution network. On Order Qty - This read only field contains the total quantity on order in the selected network for the product or component. On order quantities include both outstanding Sage 300 P/O Purchase Orders (PO) and open M/F Manufacturing Orders (MO) for all locations within the distribution network. Allocated Qty - This read only field contains the total quantity of item already allocated for the product or component in the selected network. Allocated refers to both backorders in Sage 300 O/E Sales Orders (SO) and outstanding component requirements in M/F Manufacturing Orders (MO). Projected Net Stock - This read only field contains the net stock balance for the product or component in the selected network. This figure refers to the projected stock balance when inventory stock and all outstanding orders (i.e. PO and MO) are considered. Forecasted Receipt - This read only field contains the total forecasted receipt quantity for the product or component in the selected network. Forecasted receipts are entered in P/P using the Forecast Entry transaction window. Forecasted Demand - This read only field contains the total effective sales
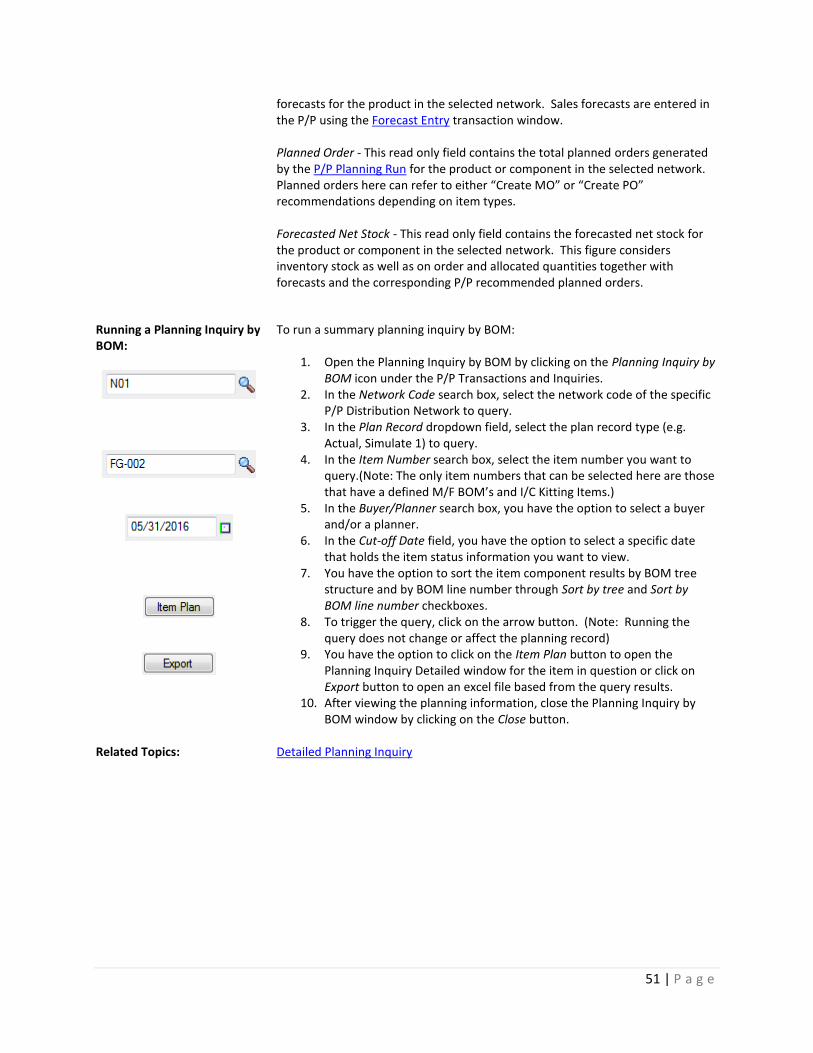
51 | P a g e
forecasts for the product in the selected network. Sales forecasts are entered in the P/P using the Forecast Entry transaction window. Planned Order - This read only field contains the total planned orders generated by the P/P Planning Run for the product or component in the selected network. Planned orders here can refer to either “Create MO” or “Create PO” recommendations depending on item types. Forecasted Net Stock - This read only field contains the forecasted net stock for the product or component in the selected network. This figure considers inventory stock as well as on order and allocated quantities together with forecasts and the corresponding P/P recommended planned orders.
Running a Planning Inquiry by BOM:
To run a summary planning inquiry by BOM:
1. Open the Planning Inquiry by BOM by clicking on the Planning Inquiry by BOM icon under the P/P Transactions and Inquiries.
2. In the Network Code search box, select the network code of the specific P/P Distribution Network to query.
3. In the Plan Record dropdown field, select the plan record type (e.g. Actual, Simulate 1) to query.
4. In the Item Number search box, select the item number you want to query.(Note: The only item numbers that can be selected here are those that have a defined M/F BOM’s and I/C Kitting Items.)
5. In the Buyer/Planner search box, you have the option to select a buyer and/or a planner.
6. In the Cut-off Date field, you have the option to select a specific date that holds the item status information you want to view.
7. You have the option to sort the item component results by BOM tree structure and by BOM line number through Sort by tree and Sort by BOM line number checkboxes.
8. To trigger the query, click on the arrow button. (Note: Running the query does not change or affect the planning record)
9. You have the option to click on the Item Plan button to open the Planning Inquiry Detailed window for the item in question or click on Export button to open an excel file based from the query results.
10. After viewing the planning information, close the Planning Inquiry by BOM window by clicking on the Close button.
Related Topics: Detailed Planning Inquiry
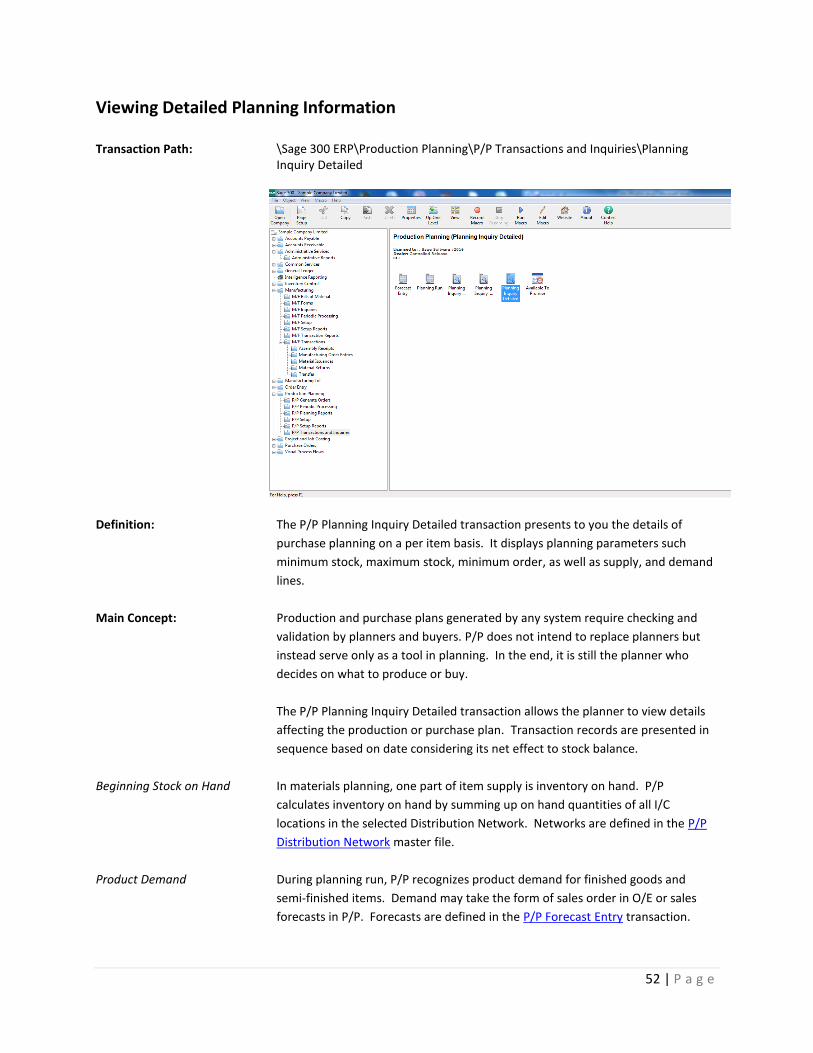
52 | P a g e
Viewing Detailed Planning Information
Transaction Path: \Sage 300 ERP\Production Planning\P/P Transactions and Inquiries\Planning Inquiry Detailed
Definition: The P/P Planning Inquiry Detailed transaction presents to you the details of
purchase planning on a per item basis. It displays planning parameters such
minimum stock, maximum stock, minimum order, as well as supply, and demand
lines.
Main Concept:
Production and purchase plans generated by any system require checking and
validation by planners and buyers. P/P does not intend to replace planners but
instead serve only as a tool in planning. In the end, it is still the planner who
decides on what to produce or buy.
The P/P Planning Inquiry Detailed transaction allows the planner to view details
affecting the production or purchase plan. Transaction records are presented in
sequence based on date considering its net effect to stock balance.
Beginning Stock on Hand In materials planning, one part of item supply is inventory on hand. P/P
calculates inventory on hand by summing up on hand quantities of all I/C
locations in the selected Distribution Network. Networks are defined in the P/P
Distribution Network master file.
Product Demand During planning run, P/P recognizes product demand for finished goods and
semi-finished items. Demand may take the form of sales order in O/E or sales
forecasts in P/P. Forecasts are defined in the P/P Forecast Entry transaction.
53 | P a g e
Component Demand Demand for components are based on the outstanding manufacturing orders
(MO) in M/F. Only MO’s with the status of “Approved” or “Released” are
considered during planning run. Demand quantity is based on the outstanding
component balances in the MO records. Due date is based on the MO due date.
Product/Component Supply In terms of supply, P/P recognizes upcoming product receipts from the shop floor
aside from the stock already on hand. This information is derived from
outstanding balances for approved or released MO’s in the M/F module.
For components, P/P also recognizes upcoming receipts from vendors. These
receipts come in the form of outstanding PO’s in Sage 300 ERP of P/O. It is also
possible for products to be purchased via PO instead of being manufactured.
Lastly, planners can also recognize expected miscellaneous receipts of products
or components. This information is inputted in P/P as part of forecasts via the
P/P Forecast Entry routine.
Manufacturing
Recommendation
When stock or on order quantities are not enough to meet demand, P/P
generates planned orders to resolve shortages. For items defined as having
“Manufactured” or “Subcontracted” as type in P/P Item Planning, P/P generates
planned orders for conversion to manufacturing orders in M/F. These records
are clearly marked as “Create MO” in the Action column.
Purchase Recommendation In the case of purchased items, P/P generates planned orders for conversion to
P/O Requisition. This only occurs when stock on hand or on order quantities are
insufficient to resolve shortages. Purchased items are defined in the P/P Item
Planning table in the Type field. These records are clearly marked as “Create PO”
in the Action column.
Planned Order Dates and Due
Dates
For P/P generated planned orders, document due dates are based on the
demand due dates such as sales orders in O/E and sales forecasts in P/P. For
components, due dates are based on MO due dates.
Order dates for the planned orders are calculated based on due dates and item
lead times. Lead times are added to the due dates to derive the order date.
Lead times are defined in the Order Lead Time and Manufacturing Lead Times
fields in the P/P Item Planning table.
Pre-plan Records When due dates of demand records or order dates of planned orders fall prior to
planning date, these detail lines are deemed to be outside of the planning scope.
Given that these records are already past due, no action can be taken by P/P to
resolve it on time. P/P, instead, moves the demand to the present and generates
the necessary planned orders to resolve shortage.
Expediting Orders Before recommending a new purchase or production planned order, P/P first
checks for outstanding MO’s or PO’s for future dates. If there are such records,
54 | P a g e
P/P recommends that these PO’s or MO’s be expedited instead.
Expediting simply means moving the due dates of existing orders to meet current
or earlier demand. In the Planning Inquiry Detailed window, P/P changes the due
dates of the expedited records to the recommended dates.
It is only when expedited orders are not enough to meet demand that
P/P will start generating planned orders.
Confirming Orders P/P allows planner to whether confirm or not the generated planned orders.
Changing the status of a Planned Order to Confirmed Order will prevent P/P from
changing it when re-running the plan.
Confirmed Order is similar to an actual document (e.g. PR, PO, MO). However,
this order is not yet considered as PR records.
Field List:
Item Number – This search box lets you choose which item record to query.
Items can be a finished good, semi-finished good, raw material or packaged
material. Item numbers are defined in I/C Item master.
Network Code - This search box allows you to choose which distribution network
to query. Networks are defined in the P/P Distribution Network maintenance.
Planning runs are generated on a per distribution network basis via P/P Planning
Run.
Plan Record - This dropdown field allows you to choose which specific planning
record of a selected network to query. P/P supports at most five separate
planning records (e.g. Actual Run, Simulation 1) for each network code.
Show Forecast Demand – This checkbox field allows you to include or exclude
sales forecasts and forecasted receipts from the query. Excluding forecasts
allows you to view net stock balances based only on actual orders (e.g. SO, PO
and MO).
Show Planned Orders – This checkbox field allows you to include or exclude
planned orders generated by P/P during planning run in the query. Excluding
planned orders shows you the project net stock balances if no purchase or
manufacturing orders are created.
Show Planning Message - This checkbox field allows you to include or exclude a
message for all detail lines whose actual quantity exceed the maximum stock
quantity defined for the item in query. Maximum Stock is defined in P/P Item
Planning table maintenance.
Stock on Hand – This read-only field indicates the stock on hand quantity for the
item record in the selected network during planning run. Stock balances are
based on the Quantity on Hand field in Sage 300 ERP of I/C location for all
55 | P a g e
locations within the distribution network.
Order Lead Time – This read-only field indicates the standard purchase lead time
to acquire items. Lead time is in units of Days and is independent of order
quantity. Planned orders are backward calculated from the due date based on
lead time. This information is obtained from the P/P Item Planning table
maintenance.
Maximum Stock – This read-only field indicates the maximum amount of stock
for the item. P/P uses this field as the benchmark for the desired capacity level
and will always maintain this ideal stock level during planning runs. This
information is obtained from the P/P Item Planning table maintenance.
Minimum Order - This field indicates the minimum order level for the item.
Planned orders to be generated by P/P cannot be less than this quantity. This
information is obtained from the P/P Item Planning table maintenance.
Minimum Stock - This field indicates the safety stock requirements of the
selected item record. P/P uses this field as the benchmark for the desired stock
balance and will always maintain this ideal stock level during planning runs. This
information is obtained from the P/P Item Planning table maintenance.
Order Multiple - This field indicates the multiple by which orders can be created.
This field represents batch sizing determined by internal planners or external
suppliers. This information is obtained from the P/P Item Planning table
maintenance.
Order Type – This field indicates the planning type for the selected product or
component. Items can be defined to be a manufactured product, a
subcontracted good or a purchased item. This information is obtained from the
P/P Item Planning table maintenance.
Buyer/Planner - This field contains the assigned buyer or planner for the item.
This field is used mainly to group items by buyer or planner. This information is
obtained from the P/P Item Planning table maintenance.
Mfg Setup Time - This field indicates the standard setup time needed to start
production of a batch of items. Setup Lead Time is in units of Day per batch. This
information is obtained from the P/P Item Planning table maintenance. Planned
orders are backward calculated from the time of need based partly on this setup
lead time. Please refer to the Lead Time Maintenance periodic processing for
more details on manufacturing lead time.
Mfg Run Time - This field indicates the standard run time needed to product one
unit of the product. Manufacturing Run Lead Time is calculated in units of Day
per Unit. This information is obtained from the P/P Item Planning table
maintenance. Generated planned orders are backward calculated from the time
56 | P a g e
of need based partly on this item run lead time. Please refer to the Lead Time
Maintenance periodic processing for more details on manufacturing lead time.
Schedule – This read-only field contains the plan schedule used for the selected
product or component (e.g. None, Weekly, Monthly). This information is
obtained from the P/P Item Planning table maintenance.
Close – This action button will close the P/P Planning Inquiry Detailed query
window.
Planned Order Details: Original Due Date – This column contains due date from the transaction record
(e.g PO, PR, SO). For demand lines such as sales orders or sales forecasts, this due
date refers to the date the items are required for consumption. For supply lines
such as purchase orders, this due date column represents the expected receipt
date.
Due Date – This column contains the calculated due date for detail line. For
expedite order, this date column refers to the suggested due date of P/P to meet
the current or earlier demand.
Doc Date – This column contains the actual or recommended document date for
detail lines. For demand and supply lines (e.g. PO, MO, SO), this date refers to
the order date of transaction document. For planned orders generated by P/P,
the document date serves as the suggested order date for the manufacturing
order or purchase requisition.
Type – This column indicates the type of transaction to which detail lines belong.
This field allows you to deduce the effect of the detail line in terms of supply and
demand. Types include:
a) Due on MO – This refers to supply detail lines in the form of pending MO order quantities. MO on order quantities are based on M/F Manufacturing Order having status of “Approved” and “Released”.
b) Due on Kit – This refers to supply detail lines in the form of pending sales order quantities. Sales order quantities are based on outstanding Sage 300 Order Entry records.
c) Due on PO – This refers to supply detail lines in the form of pending PO order quantities. PO on order quantities are based on outstanding 300 ERP P/O Purchase Order Entry records.
d) Forecast Receipt – This refers to supply detail lines in the form of projected miscellaneous receipts. Receipts are based on planned order entries in the P/P Forecast Entry transaction.
e) Usage Kit – This refers to demand detail lines for component requirement balances in the form of backorder sales order in Sage 300 O/E Order Entry and planned orders.
f) Planned Order – This refers to planning action detail lines in the form of either a purchase or manufacturing order. Planned orders are generated during P/P Planning Run to meet demand.
g) Usage MO – This refers to demand detail lines in the form of open
57 | P a g e
component requirements of manufacturing orders (MO). MO’s are based on M/F Manufacturing Order records having status of “Approved” and “Released”.
h) Usage SO – This refers to demand detail lines in the form of backorder sales orders in 300 ERP O/E Order Entry.
i) Usage Forecast – This refers to demand detail lines in the form of sales forecasts created for products in P/P Forecast Entry.
j) Confirmed Order – This refers to confirmed purchase or manufacturing order recommendations for planned order detail lines.
Document No – This column contains the document number of the transaction
record. This field is mainly to help the user to track the causal relationships
between item and pending or recommended transactions.
Quantity – This column contains the transaction quantity of the detail lines.
Depending on the type of the transaction, quantity can refer to PO order
quantity, SO backorders, MO order quantity, MO component requirement, sales
forecast quantity, or planned order quantity.
Actual Qty – This column displays the running total for the item record. Running
total includes the item stock on hand quantity and each planning detail line.
Demand detail lines (i.e. SO, Sales Forecasts, MO Component Usage) deducts
from the running total. Supply detail lines (i.e. PO, MO Order and Planned
Orders) add to the running total.
Net Qty – This column displays the running total of the item record compared
against the minimum stock quantity. This field is meant to compare the resulting
actual quantity versus the ideal stock level. It is calculated as the Actual Quantity
running total minus the item’s minimum stock quantity as defined in the P/P
Item Planning table.
Parent Item – This column identifies the immediate parent item which requires
the component detail line. Firmed MO’s have component usage requirements
and therefore a firmed parent-child relationship. For “Create MO” planned
orders generated in P/P, parent-child relationships are based on the default BOM
record in M/F as actual MO’s are not yet created. For example, if the raw
material is used in the 3rd
BOM level the column should show the 2nd
BOM level
product.
Top Item – This column displays the top most parent item. This relationship is
derived from either a firmed Manufacturing Order (MO) record or the default Bill
of Material (BOM). For example, if the raw material is used in the 3rd
BOM level
the column should show the 1st
level product.
Linked Doc – This column displays the immediate source or parent document for
the planned order detail line. It is meant to provide you with information on the
source of demand and justify the suggestion of creating MO’s or PO’s for the
58 | P a g e
product or component. Linked documents can take form of open sales orders
from 300 ERP O/E, sales forecasts from P/P Forecast Entry and MO component
requirements from M/F Manufacturing Order. Note that P/P does not put any
linked document reference for planned orders generated to meet minimum
stock requirements.
Customer/Vendor – This column displays the customer or vendor information for
the detail line. Customer information is based on the sales order customer
record in 300 ERP O/E Order Entry transactions. Vendor information is based on
the purchase order vendor record in 300 ERP P/O Purchase Order transactions.
Description – This column displays the description field of transaction documents
(e.g. Sales Forecast) linked to the detail line. It is meant to provide user some
reference information on the source document.
Action – This column contains either a planning remark or an action
recommendation generated by the P/P Planning Run for the selected detail line.
Action values include:
a) Pre-plan – This remark indicates that the detail line falls to a date earlier than the planning run date. As such, no logical action can be done to resolve this past due detail. Any planning action will have to be scheduled on the earliest possible time which is the planning run date.
b) Resolve Shortage – This remark indicates that the MO or PO record serves to meet a projected demand. No planning action is necessary.
c) Expedite Order – Due to an earlier item demand, planning recommends that you move the due dates of the MO or PO to the suggested due date.
d) Create MO – Based on MPS logic, planning recommends that you start a manufacturing order for the planned order quantity on the suggested order date.
e) Create PO – Based on MRP logic, planning recommends that you purchase the planned order quantity on the suggested order date.
Message – This column shows a message if the actual stock quantity exceeds the
maximum stock. Item’s maximum stock is defined in P/P Item Planning table
maintenance.
Confirm? – This column indicates whether the planned order is to be converted
to purchase order (PO) or manufacturing order (MO). You have the options of
changing each line to “Yes” or “No” by double clicking the field or using the space
bar key.
Running a Detailed Planning
Inquiry:
To run a detailed planning inquiry in P/P:
1. Open the Planning Inquiry Detailed window by clicking on the Planning Inquiry Detailed icon in P/P Transactions and Inquiries
2. In the Item Number search box, select the item record to access and
59 | P a g e
query by choosing the appropriate I/C item code 3. In the Network Code search box, select the P/P Distribution Network to
view by choosing the appropriate network code. 4. In the Plan Record dropdown box, select the planning record type (e.g.
Actual, Simulated 1) to query. 5. You have the option to include or exclude forecast data as defined in the
selected forecast code by clicking or unclicking the Show Forecast Demand check box.
6. You have the option to include or exclude planned orders generated during P/P Planning Run by clicking or unclicking the Show Planned Orders check box.
7. You have the option to include or exclude a message for planned orders that exceeds the maximum stock generated during P/P Planning Run by clicking or unclicking the Show Planning Message check box.
8. To run the planning inquiry, click on the Go button. (Note: Planning inquiries does not affect planning data)
9. Click on the Close button to close the Planning Inquiry Detailed window.
Related Topics: Summary Planning Inquiry
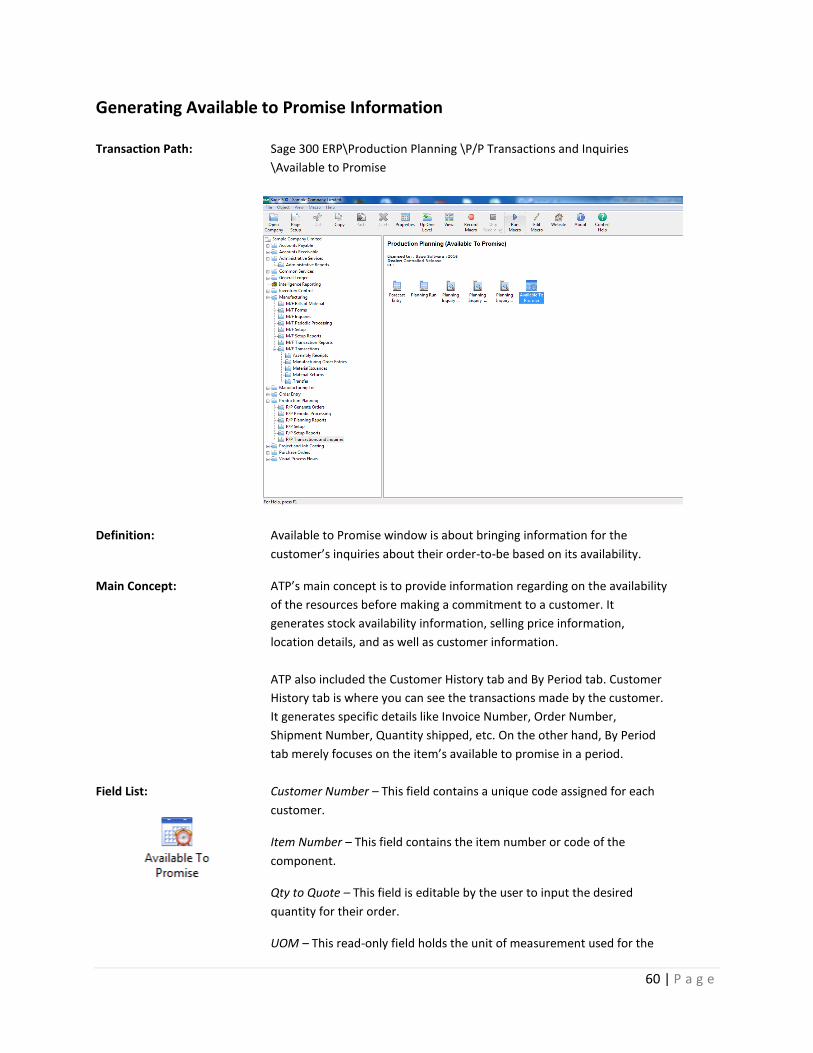
60 | P a g e
Generating Available to Promise Information
Transaction Path: Sage 300 ERP\Production Planning \P/P Transactions and Inquiries
\Available to Promise
Definition: Available to Promise window is about bringing information for the
customer’s inquiries about their order-to-be based on its availability.
Main Concept: ATP’s main concept is to provide information regarding on the availability
of the resources before making a commitment to a customer. It
generates stock availability information, selling price information,
location details, and as well as customer information.
ATP also included the Customer History tab and By Period tab. Customer
History tab is where you can see the transactions made by the customer.
It generates specific details like Invoice Number, Order Number,
Shipment Number, Quantity shipped, etc. On the other hand, By Period
tab merely focuses on the item’s available to promise in a period.
Field List:
Customer Number – This field contains a unique code assigned for each
customer.
Item Number – This field contains the item number or code of the
component.
Qty to Quote – This field is editable by the user to input the desired
quantity for their order.
UOM – This read-only field holds the unit of measurement used for the
61 | P a g e
component.
Network Code – This field contains Network defined in P/P Distribution
Network.
Last Receipt Date – This read-only field displays the date when the last
receipt was made.
Next Arrival Date – This read-only field contains the nearest date of the
arrival of the new stocks
Currency – This field is a read-only that contains the currency that will be
used as an exchange for the component.
Close – This action button will only close the window.
General Tab:
Stock Availability Section
Qty on Hand – This read-only field displays how many items the stocks hold. Qty on Demand – This read-only field displays the quantity that the customer demanded to have. Qty Available – This read only field displays the quantity difference of Qty on Hand and Qty on Demand. Qty on Order – This field contains the quantity for purchase orders as a supply ATP – This field is a read-only which displays the quantity of stocks that can be granted to the customers. The formula for this will be the sum of Qty Available and Qty on Order field.
Selling Price Information Section
Unit Price – This read-only field displays the price of the item. Extended Price – This read only field can be computed using Unit Price multiplied by the Qty to Quote field. Price List – This read-only field contains the information where the prices came from
Customer Information
Section
Balance – This field contains the quantity difference between the debt and credit amount of a customer’s account. Overdue 30 Days – This field contains the number of delayed days where a bill of payment was supposed to be made from the assigned date Credit Limit – This field displays the maximum amount credit of the customer Overdue 60 Days – This field contains the number of delayed days that reached more than 30 days where a bill of payment was supposed to be made from the assigned date
62 | P a g e
Remaining Credit – This field displays the remaining amount of the customer after doing a transaction Overdue > 90 Days – This field contains the number of delayed days that reached more than 60-90 days where a bill of payment was supposed to be made from the assigned date
Location Details Section: Location – This column displays the location code for each location detail. Description – This column contains the description of the location Qty on Hand – This read-only column displays how many items the stocks holds for each location. Qty on Demand – This read-only column displays the quantity that the customer demanded to have. Qty Available – This read-only column displays the quantity difference of Qty on Hand and Qty on Demand. Qty on Order – This field contains the quantity for purchase orders as a supply. ATP – This column is a read-only which displays the quantity of stocks that can be granted to the customers for each location posted. The formula for this will be the sum of Qty Available and Qty on Order field.
By Period Tab:
By Period – This dropdown field allows you to select the method of arranging detail section by period. Two methods are by weekly and by monthly. Cut Off Date – This field contains the date that will serve as an ending point of the query result. Show Forecast Demand – This field allows you to include or exclude
Demand type P/P Sales Forecast entries in the query and detail lines
calculations.
Show Planned Orders – This field allows you to include or exclude
planned orders generated by P/P during planning run in the query
section. When unchecked, planned orders are deducted from the
running total stock of each detail/by period line’s calculations.
From Date – This column displays starting dates depending on what is set in the By Weekly/By Monthly field. To Date – This column displays ending dates depending on what is set in the By Weekly/By Monthly field. Beginning – This column indicates the calculated running total stock balance at the beginning of the period
63 | P a g e
Sales Forecast – This column displays the item quantity in P/P Forecast Entry that falls on the date of the line period. If Forecast type is Demand, quantity is positive. If Forecast type is Planned Order, quantity reflects as a negative number. SO/MO/Kit Allocated - This column displays the item quantity in O/E Order Entry, whether backorder or outstanding component requirement, that falls on the date of the line period. It also reflects here the item component requirement quantity in MO. PO On Order – This column displays the item quantity in P/O Requisition Entry and P/O Purchase Order Entry quantity that falls on the date of the line period. Net On Hand – This column displays the current net stock on hand of the item on the said period. Net On Hand is calculated by the sum of the quantities in Beginning and PO On Order columns minus the sum of the quantities in Sales Forecast and SO/BOM/Kit Allocated columns. Planned Receipt – This column displays the quantity of Planned Orders based on Due Date depending on the date range per line. ATP – This column displays the sum of Net On Hand column and Planned receipt column. Planned Orders – This column also displays the quantity of Planned Orders but based on Order Date/Doc Date depending on the date range per line. Status – This column displays a message “Shortage” whenever the line period contains a shortage in stock as seen in Beginning column.
Customer Buying History
Tab:
History of Last – This drop-down menu has options for the user to choose in which they can see recently made transactions in a specific span of time. Options include: 30 days, 90 days, 180 days and 365 days. Date – This column contains the dates when a transaction has been made. Invoice No. – This column displays a unique reference number for each P/O Invoice Entry transaction Order No. – This column displays the unique O/E order number for reference purposes Shipment No. – This column displays the unique code for every O/E Shipment entry made for tracking Qty – This column displays the quantity shipped in O/E Shipment Entry. Unit Price – This column displays the amount of how much a unit would cost
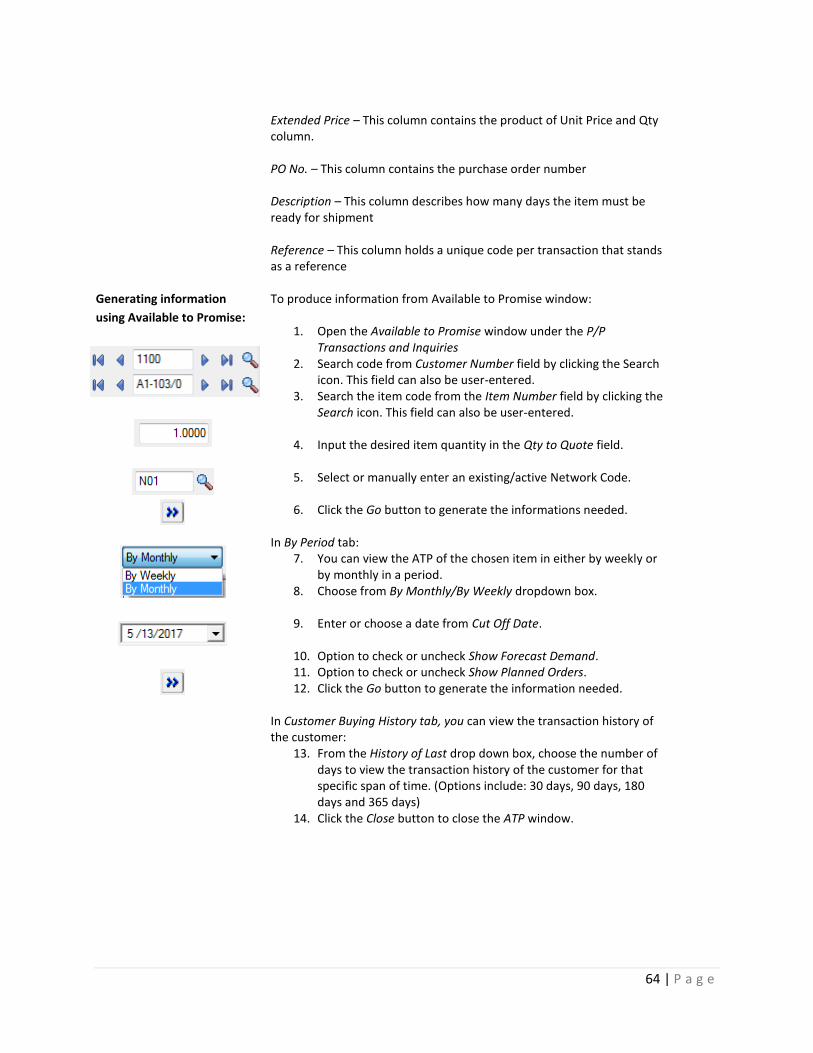
64 | P a g e
Extended Price – This column contains the product of Unit Price and Qty column. PO No. – This column contains the purchase order number Description – This column describes how many days the item must be ready for shipment Reference – This column holds a unique code per transaction that stands as a reference
Generating information
using Available to Promise:
To produce information from Available to Promise window:
1. Open the Available to Promise window under the P/P Transactions and Inquiries
2. Search code from Customer Number field by clicking the Search icon. This field can also be user-entered.
3. Search the item code from the Item Number field by clicking the Search icon. This field can also be user-entered.
4. Input the desired item quantity in the Qty to Quote field.
5. Select or manually enter an existing/active Network Code.
6. Click the Go button to generate the informations needed.
In By Period tab: 7. You can view the ATP of the chosen item in either by weekly or
by monthly in a period. 8. Choose from By Monthly/By Weekly dropdown box.
9. Enter or choose a date from Cut Off Date.
10. Option to check or uncheck Show Forecast Demand. 11. Option to check or uncheck Show Planned Orders. 12. Click the Go button to generate the information needed.
In Customer Buying History tab, you can view the transaction history of the customer:
13. From the History of Last drop down box, choose the number of days to view the transaction history of the customer for that specific span of time. (Options include: 30 days, 90 days, 180 days and 365 days)
14. Click the Close button to close the ATP window.
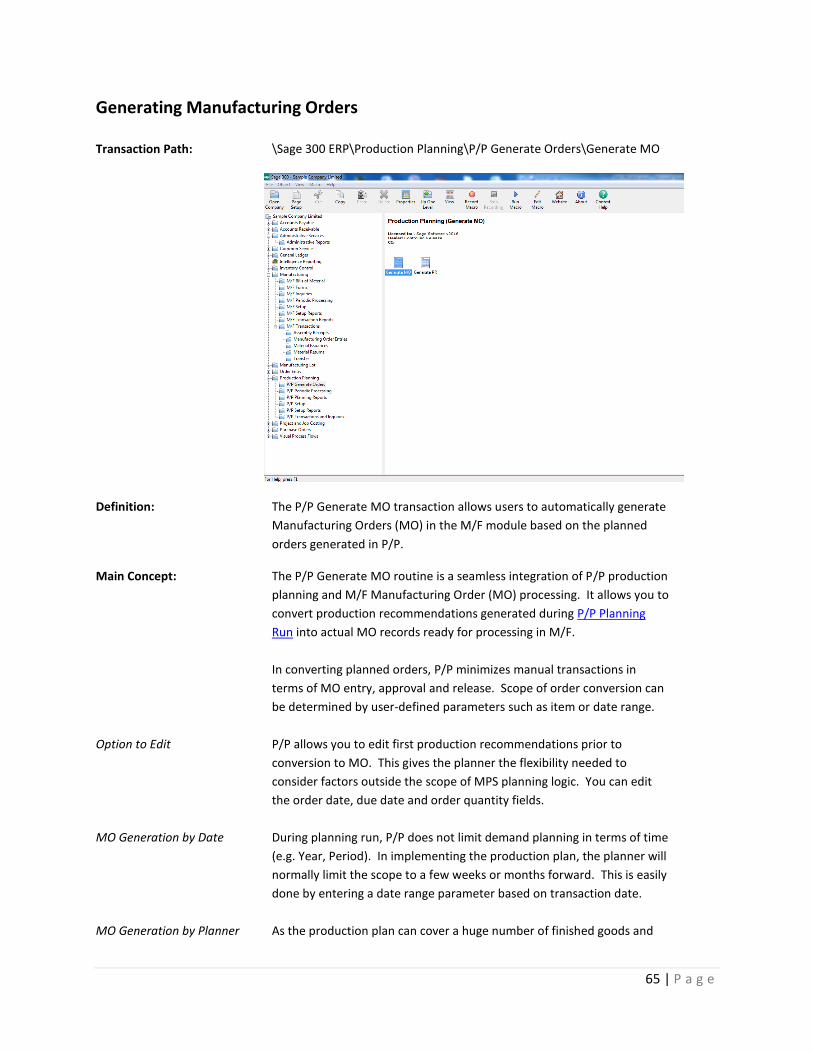
65 | P a g e
Generating Manufacturing Orders
Transaction Path: \Sage 300 ERP\Production Planning\P/P Generate Orders\Generate MO
Definition: The P/P Generate MO transaction allows users to automatically generate
Manufacturing Orders (MO) in the M/F module based on the planned
orders generated in P/P.
Main Concept:
The P/P Generate MO routine is a seamless integration of P/P production
planning and M/F Manufacturing Order (MO) processing. It allows you to
convert production recommendations generated during P/P Planning
Run into actual MO records ready for processing in M/F.
In converting planned orders, P/P minimizes manual transactions in
terms of MO entry, approval and release. Scope of order conversion can
be determined by user-defined parameters such as item or date range.
Option to Edit P/P allows you to edit first production recommendations prior to
conversion to MO. This gives the planner the flexibility needed to
consider factors outside the scope of MPS planning logic. You can edit
the order date, due date and order quantity fields.
MO Generation by Date During planning run, P/P does not limit demand planning in terms of time
(e.g. Year, Period). In implementing the production plan, the planner will
normally limit the scope to a few weeks or months forward. This is easily
done by entering a date range parameter based on transaction date.
MO Generation by Planner As the production plan can cover a huge number of finished goods and
66 | P a g e
semi-finished items, it is critical for the planner to be able to limit data to
relevant records. This is easily done by using the default item planner
information as contained in P/P Item Planning. Planners can then use
the Buyer/Planner range to limit records to only items they manage.
MO Generation by Type For manufacturers who also subcontract some production, P/P also
allows planners to extract production planning information by item type.
This is based on the item type definition in P/P Item Planning. In this
way, you can easily limit the scope of MO generation to either internal
MO’s, subcontract MO’s or both.
Default MO Status P/P Generate MO also allows you to set the default MO status for MO’s
to be generated. By default, MO status is set to “New” but can be
changed to “Approved” or “Released”. This feature simplifies the MO
generation process and prevents the need of planners to manually
change the status of MO’s after generation. You can also change the MO
status on the detail window for any planned order record.
Field List:
Network Code – This parameter allows the user to select which network
planning record to extract and convert to M/F Manufacturing Orders
(MO). Distribution networks are defined in the P/P Distribution Network
table.
Plan Record – This read only field shows the record type or the status of
the specific plan record. Default plan record is Actual Run.
Item Number Range – This parameter range allows the user to limit the
scope of records to be extracted in terms of planned orders’ item
number. Item numbers are defined in I/C Item master table.
Type – This dropdown field allows the user to limit the scope of records
to be extracted in terms of product type. This includes “All”, “Internal”,
and “Subcontracted”. Order types are assigned to items in the P/P Item
Planning master file.
From-To Date – This parameter range allows you to limit the scope of
records to be extracted in terms of the planned orders’ order date.
Order dates are calculated based on item lead times during P/P Planning
Run.
Area Code – This search box field contains the default production area to
be used for the MO’s to be generated. Area codes are defined in M/F
Production Area maintenance.
Buyer/Planner – This range allows you to limit the scope of records to be
extracted in terms of planner. Planners are assigned to items using the
P/P Item Planning master file.
67 | P a g e
Default MO Status – This dropdown field determines the default status
to be applied on the MO’s to be generated. MO status includes “New”,
“Approved” and “Released”.
Include Phantom BOM? – This check box allows you to include default
BOMs in type Phantom in the detail list.
Post – This action button will convert the selected planned order records
to M/F Manufacturing Orders (MO).
Create All – This action button will convert all the planned orders
contained in the P/P Generate MO window into actual M/F
Manufacturing Orders (MO).
Close – This action button will close the P/P Generate MO window.
Planned Order Details: Create MO? – This Yes/No column indicates which planned orders have
been selected to be converted to manufacturing orders (MO). You have
the option of changing all lines to “Yes” or “NO” by properly using the
Create All action button.
Order Date – This column contains the recommended order date for the
planned order as determined by the item manufacturing lead time. This
order date will be copied to the MO Order Date field. You have the
option to edit the order date prior to MO conversion.
Due Date – This is the calculated due date for the planned order as
determined by demand. MO to be generated will also use this due date
as the MO Due Date. This column can be edited by the user. You have
the option to edit the order due date prior to MO conversion.
Document No. – This column contains the planned order number as
generated by the P/P Planning Run. This field server as reference to
trace back the planned order to the original source of demand in P/P
Planning Inquiry Detailed.
Item No. – This column contains the item number of the product to be
manufactured as recommended by the planned order. Item numbers are
defined in I/C Item master.
Description – This column contains the item description of the product to
be manufactured as recommended by the planned order. Item
descriptions are defined in I/C Item master.
Linked Doc – This column contains the reference document associated
with the planned order. Document can be a sales order, a sales forecast,
a MO or a planned order.
Quantity – This column contains the recommended quantity to be
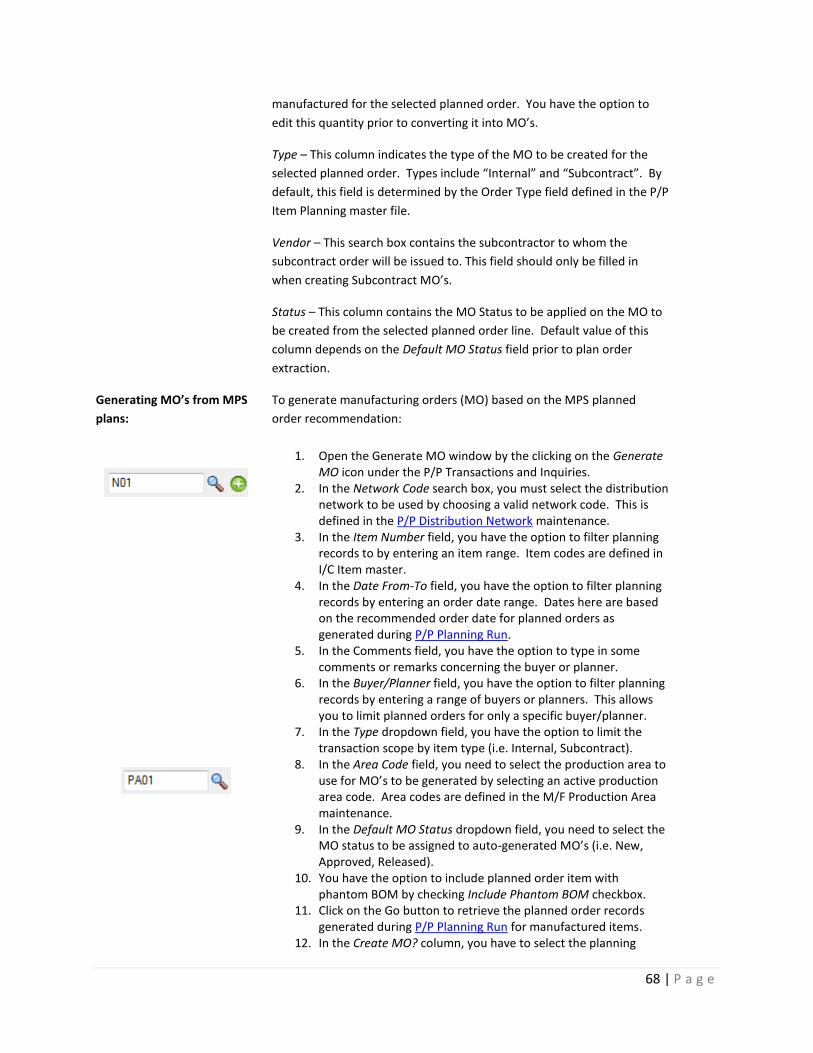
68 | P a g e
manufactured for the selected planned order. You have the option to
edit this quantity prior to converting it into MO’s.
Type – This column indicates the type of the MO to be created for the
selected planned order. Types include “Internal” and “Subcontract”. By
default, this field is determined by the Order Type field defined in the P/P
Item Planning master file.
Vendor – This search box contains the subcontractor to whom the
subcontract order will be issued to. This field should only be filled in
when creating Subcontract MO’s.
Status – This column contains the MO Status to be applied on the MO to
be created from the selected planned order line. Default value of this
column depends on the Default MO Status field prior to plan order
extraction.
Generating MO’s from MPS
plans:
To generate manufacturing orders (MO) based on the MPS planned
order recommendation:
1. Open the Generate MO window by the clicking on the Generate MO icon under the P/P Transactions and Inquiries.
2. In the Network Code search box, you must select the distribution network to be used by choosing a valid network code. This is defined in the P/P Distribution Network maintenance.
3. In the Item Number field, you have the option to filter planning records to by entering an item range. Item codes are defined in I/C Item master.
4. In the Date From-To field, you have the option to filter planning records by entering an order date range. Dates here are based on the recommended order date for planned orders as generated during P/P Planning Run.
5. In the Comments field, you have the option to type in some comments or remarks concerning the buyer or planner.
6. In the Buyer/Planner field, you have the option to filter planning records by entering a range of buyers or planners. This allows you to limit planned orders for only a specific buyer/planner.
7. In the Type dropdown field, you have the option to limit the transaction scope by item type (i.e. Internal, Subcontract).
8. In the Area Code field, you need to select the production area to use for MO’s to be generated by selecting an active production area code. Area codes are defined in the M/F Production Area maintenance.
9. In the Default MO Status dropdown field, you need to select the MO status to be assigned to auto-generated MO’s (i.e. New, Approved, Released).
10. You have the option to include planned order item with phantom BOM by checking Include Phantom BOM checkbox.
11. Click on the Go button to retrieve the planned order records generated during P/P Planning Run for manufactured items.
12. In the Create MO? column, you have to select the planning
69 | P a g e
records to be converted to actual MO’s by changing the value of this field from “No” to “Yes”.
13. You have the option to change the recommended order dates and due dates for the selected planned order record.
14. You have the option to change the recommended order quantities for the planned orders.
15. You have the option to change the order type for the planned orders. Type includes Internal and Subcontract type.
16. For subcontracted items, you can enter a vendor code for the subcontract order.
17. You have the option to change the status for the planned orders. You can choose New, Approved, or Released.
18. Using the Create All action button, you also have the option to convert all planned orders in the P/P Generate MO window to actual manufacturing orders.
19. Click on the Post button to convert selected planned orders into actual manufacturing orders.
20. Click on the Close button to eventually close the P/P Generate MO window.
Related Topics: Summary Planning Inquiry
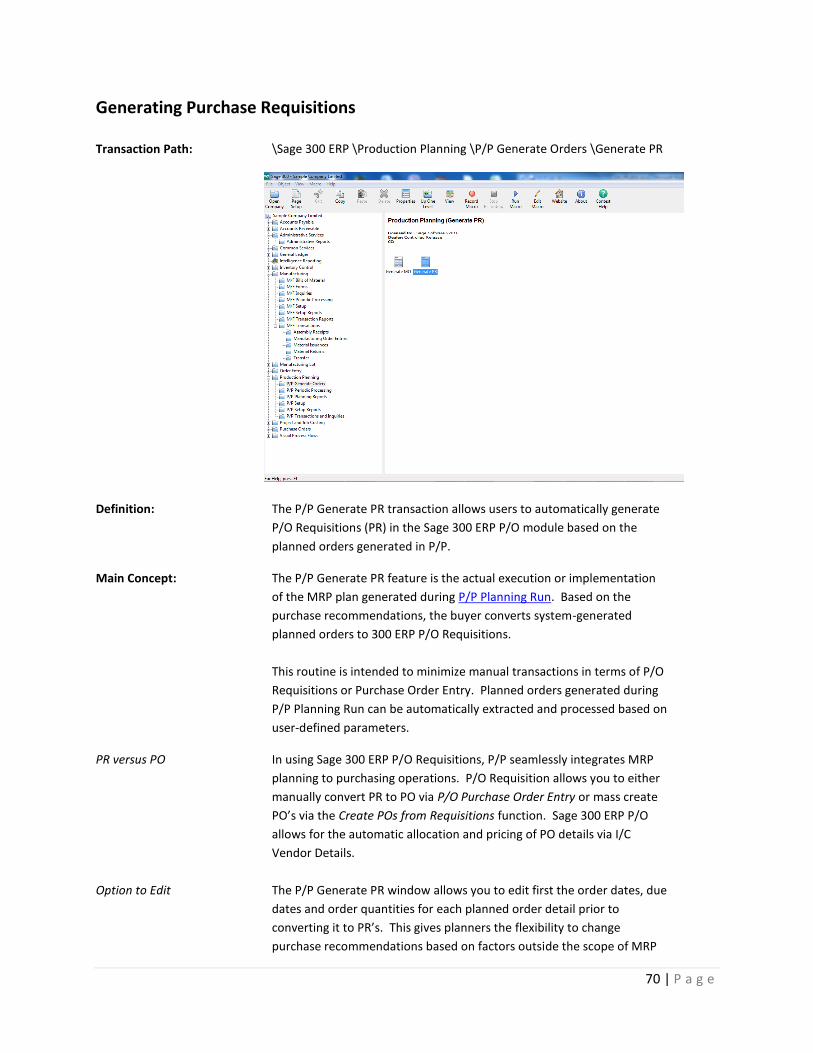
70 | P a g e
Generating Purchase Requisitions
Transaction Path: \Sage 300 ERP \Production Planning \P/P Generate Orders \Generate PR
Definition: The P/P Generate PR transaction allows users to automatically generate
P/O Requisitions (PR) in the Sage 300 ERP P/O module based on the
planned orders generated in P/P.
Main Concept: The P/P Generate PR feature is the actual execution or implementation
of the MRP plan generated during P/P Planning Run. Based on the
purchase recommendations, the buyer converts system-generated
planned orders to 300 ERP P/O Requisitions.
This routine is intended to minimize manual transactions in terms of P/O
Requisitions or Purchase Order Entry. Planned orders generated during
P/P Planning Run can be automatically extracted and processed based on
user-defined parameters.
PR versus PO In using Sage 300 ERP P/O Requisitions, P/P seamlessly integrates MRP
planning to purchasing operations. P/O Requisition allows you to either
manually convert PR to PO via P/O Purchase Order Entry or mass create
PO’s via the Create POs from Requisitions function. Sage 300 ERP P/O
allows for the automatic allocation and pricing of PO details via I/C
Vendor Details.
Option to Edit The P/P Generate PR window allows you to edit first the order dates, due
dates and order quantities for each planned order detail prior to
converting it to PR’s. This gives planners the flexibility to change
purchase recommendations based on factors outside the scope of MRP
71 | P a g e
logic.
Requisitions By Date During planning run, P/P does not set any time or period limit on item
demand and may generate plans for future years. P/P allows you to limit
the purchase plan to be implemented by filtering purchase
recommendations based on date range. This feature lets you generate
requisitions for the next month or several weeks instead of for every
period covered by the MRP plan.
Requisitions By Buyer With respect to buyer, P/P allows you to filter MRP purchase
recommendations based on the default buyer information. This feature
lets you limit data retrieval to only items you manage instead of all items
in the MRP plan. Combined with Item and Date ranges, P/P gives you the
most practical approach to executing purchase plans in Sage 300 ERP.
Generating Separate PR By default, P/P combines converted planning item details into a single
requisition document in Sage 300 ERPR of P/O. However, you have the
option to generate separate requisitions for every detail line converted
to PR. This facilitates PR processing for companies with strict PR
conversion to PO procedures.
Field List:
Network Code – This parameter allows the user to select which network
planning record to extract and convert to P/O Requisitions. Distribution
networks are defined in the P/P Distribution Network table.
Plan Record – This read only field shows the record type or the status of
the specific plan record. Default plan record is Actual Run.
Item Number Range – This parameter range allows the user to limit the
scope of records to be extracted in terms of planned orders’ item
number. Item numbers are defined in I/C Item master table.
Location – This search box contains the default I/C receiving location to
be used for the PR’s to be generated. Locations are defined in Sage 300
I/C Locations master.
Date From-To – This parameter range allows you to limit the scope of
records to be extracted in terms of the planned orders’ order date.
Order dates are calculated based on item lead times during P/P Planning
Run.
Buyer/Planner – This range allows you to limit the scope of records to be
extracted in terms of buyer/planner. Buyers/Planners are assigned to
items using the P/P Item Planning master file.
Order Number Field - This option button will let you copy the defined
linked document to the order number column field of generated PR.
72 | P a g e
Comment Field - This option button will let you copy the defined linked
document to the comment column field of generated PR.
Create Separate PR? – This checkbox option allows you to combine
planned orders into a single P/O Requisition document or generate a
separate P/O Requisition per planned order detail. By default, this
function is left unclicked.
Edit Due Date - This checkbox option allows the user to change or edit
the due date for the planned order as determined by the item demand.
Activating the field enables the date field.
Post – This action button will convert the selected planned orders to P/O
Requisition entries.
Create All – This action button will convert all the planned orders shown
in the P/P Generate PR window into actual P/O Requisition entries.
Close – This action button will close the P/P Generate PR window.
Planned Order Details: Create PR? – This Yes/No column indicates which planned orders have
been selected to be converted to P/O Requisitions. You can click on this
column on a per line basis or use the Create All button to convert all lines
to “Yes” or “No”.
Order Date – This column contain the recommended order date for the
planned order as determined by the item purchase lead time. By default,
this order date will be copied to the PR Order Date field. You have the
option to edit this field prior to posting.
Due Date – This is the calculated due date for the planned order as
determined by the item demand. P/O Requisitions to be generated will
also use this due date as the PR Due Date. You have the option to edit
this field prior to PR generation.
Document No. – This column contains the planned order number as
generated by the P/P Planning Run. You can use this unique number to
trace this recommendation to the source of the demand using P/P
Planning Inquiry Detailed.
Item No. – This column contains the item number of the item to be
purchased as recommended by the planned order.
Description – This column contains the item description of the item to be
purchased as recommended by the planned order.
Category – This column contains the category of the item to be
purchased as recommended by the planned order. This category of the
item is defined in I/C Items.
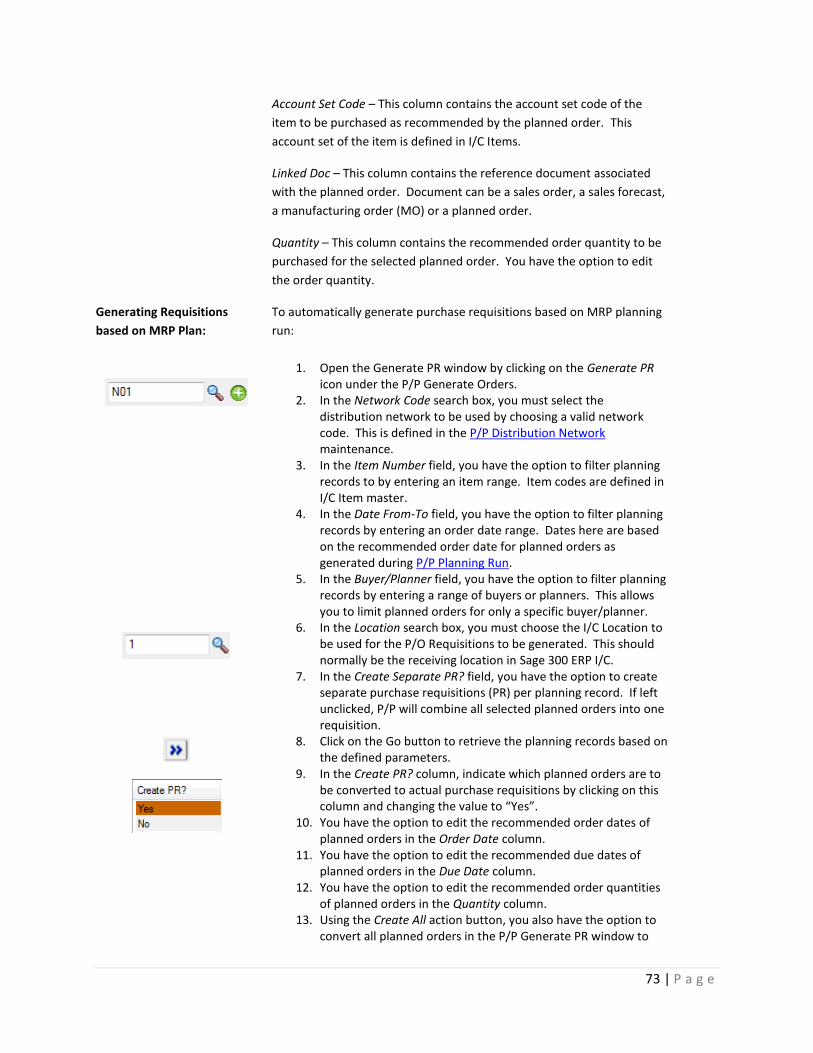
73 | P a g e
Account Set Code – This column contains the account set code of the
item to be purchased as recommended by the planned order. This
account set of the item is defined in I/C Items.
Linked Doc – This column contains the reference document associated
with the planned order. Document can be a sales order, a sales forecast,
a manufacturing order (MO) or a planned order.
Quantity – This column contains the recommended order quantity to be
purchased for the selected planned order. You have the option to edit
the order quantity.
Generating Requisitions
based on MRP Plan:
To automatically generate purchase requisitions based on MRP planning
run:
1. Open the Generate PR window by clicking on the Generate PR icon under the P/P Generate Orders.
2. In the Network Code search box, you must select the distribution network to be used by choosing a valid network code. This is defined in the P/P Distribution Network maintenance.
3. In the Item Number field, you have the option to filter planning records to by entering an item range. Item codes are defined in I/C Item master.
4. In the Date From-To field, you have the option to filter planning records by entering an order date range. Dates here are based on the recommended order date for planned orders as generated during P/P Planning Run.
5. In the Buyer/Planner field, you have the option to filter planning records by entering a range of buyers or planners. This allows you to limit planned orders for only a specific buyer/planner.
6. In the Location search box, you must choose the I/C Location to be used for the P/O Requisitions to be generated. This should normally be the receiving location in Sage 300 ERP I/C.
7. In the Create Separate PR? field, you have the option to create separate purchase requisitions (PR) per planning record. If left unclicked, P/P will combine all selected planned orders into one requisition.
8. Click on the Go button to retrieve the planning records based on the defined parameters.
9. In the Create PR? column, indicate which planned orders are to be converted to actual purchase requisitions by clicking on this column and changing the value to “Yes”.
10. You have the option to edit the recommended order dates of planned orders in the Order Date column.
11. You have the option to edit the recommended due dates of planned orders in the Due Date column.
12. You have the option to edit the recommended order quantities of planned orders in the Quantity column.
13. Using the Create All action button, you also have the option to convert all planned orders in the P/P Generate PR window to
74 | P a g e
actual P/O Requisitions. 14. To actually convert the planned orders to purchase requisitions,
click on the Post button to automatically generate Sage 300P/O Requisitions.
15. Click on the Close button to close the P/P Generate PR transaction window.
Related topics:
Summary Planning Inquiry
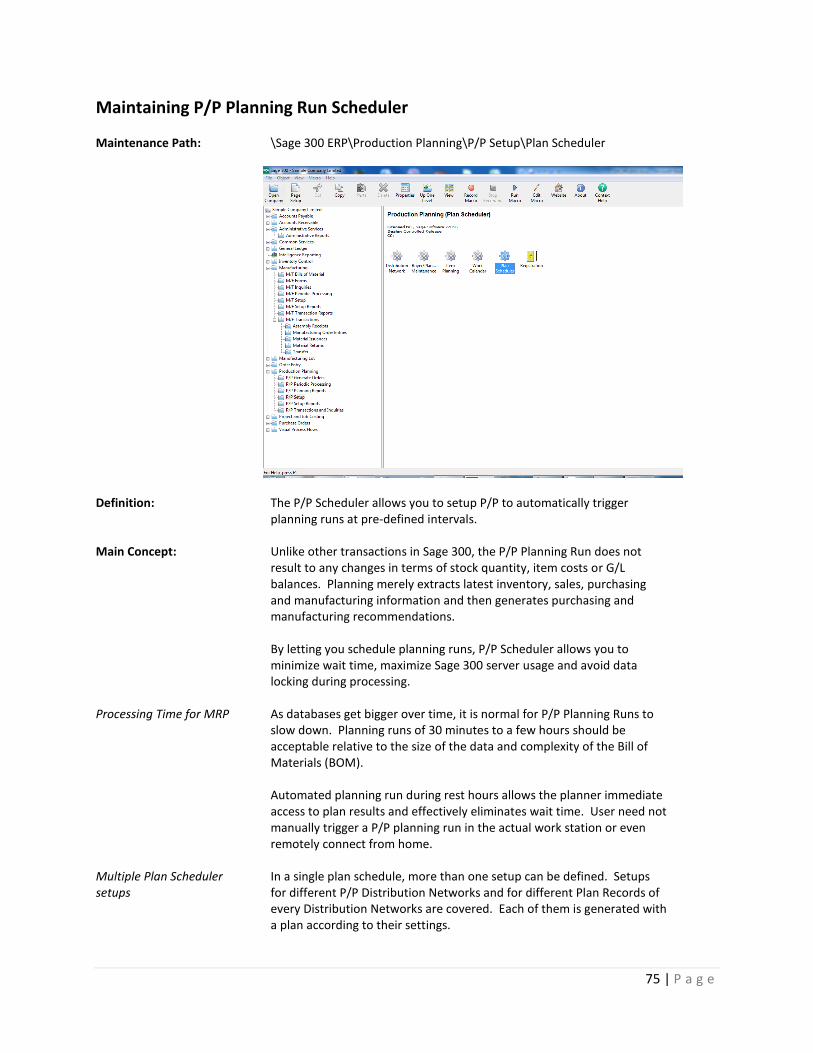
75 | P a g e
Maintaining P/P Planning Run Scheduler Maintenance Path: \Sage 300 ERP\Production Planning\P/P Setup\Plan Scheduler
Definition: The P/P Scheduler allows you to setup P/P to automatically trigger planning runs at pre-defined intervals.
Main Concept: Unlike other transactions in Sage 300, the P/P Planning Run does not result to any changes in terms of stock quantity, item costs or G/L balances. Planning merely extracts latest inventory, sales, purchasing and manufacturing information and then generates purchasing and manufacturing recommendations. By letting you schedule planning runs, P/P Scheduler allows you to minimize wait time, maximize Sage 300 server usage and avoid data locking during processing.
Processing Time for MRP As databases get bigger over time, it is normal for P/P Planning Runs to slow down. Planning runs of 30 minutes to a few hours should be acceptable relative to the size of the data and complexity of the Bill of Materials (BOM). Automated planning run during rest hours allows the planner immediate access to plan results and effectively eliminates wait time. User need not manually trigger a P/P planning run in the actual work station or even remotely connect from home.
Multiple Plan Scheduler setups
In a single plan schedule, more than one setup can be defined. Setups for different P/P Distribution Networks and for different Plan Records of every Distribution Networks are covered. Each of them is generated with a plan according to their settings.

76 | P a g e
Data Locking, Resource Usage Issues
It is unavoidable the P/P will require exclusive access to certain Sage 300 tables during planning run. P/P needs to obtain stock information from I/C, sales order information from O/C and purchase order information from P/O. Access to these Sage 300 resources are needed only at the start of the planning run and require only a relatively short processing time. However, conflict with Sage 300 users may still occur during planning. As server resources are limited, it can also affect processing speeds in Sage 300. By scheduling planning runs at rest hours, P/P can effectively eliminate any conflict with Sage 300 users. Running the plan at midnight or the equivalent rest period also allows the server to allocate more resources to the planning process and lead to faster completion times.
Planning Run Log As the planning run is fully automated, there is a need for P/P to keep a record or log of planning runs. The P/P Scheduler generates a text file containing start date-time and end date-time in PP63 folder under Sage Data folder. (e.g. \Data\PP63A\ScheduleLog)
Field List:
Inactive - This checkbox gives you an option to make the Plan Scheduler Settings, which is being referenced by the plan scheduler number in the navigation button/field, as not active. Company - This field should contain the Sage 300 database ID to be used for the automated P/P planning run. Database ID is defined by the system administrator in the Sage 300 Database Setup. Login ID - This field should contain the Sage 300 user ID the P/P Scheduler will use to log into Sage 300. Users are defined by the system administrator in the Users table under the Administrative Services tab. Password - This field should contain the Sage 300 user password to be applied to log into Sage 300. Passwords are defined by the system administrator in the Users table under the Administrative Services tab. Test - This action button allows you to test data connectivity based on Company, Login ID and Password settings. Network Code - This field should contain the network code which will be used for the automated P/P planning run. Networks are maintained in the P/P Distribution Network table. Forecast ID - This field should contain the Forecast batch record which will be applied on the automated P/P planning run. Sales forecasts are pre-defined in the P/P Forecast Entry transaction. Plan Record - This dropdown field allows the user to select the specific plan record to use on the automated P/P planning run. P/P provides for a maximum of five plan records labeled as Actual Run and Simulation 1-4. Planners may use some of the plan records for simulation purposes or may use each plan record to represent a specific distribution network.
77 | P a g e
Calendar - This select box contains the Calendar record that is defined in P/P Work Calendar set up. Do not expedite PO records. - This check box is an option to prevent an open Purchase Order to be moved its date in an earlier time to meet the demand like what is usually happening in a planning run. Limit planning run to Item Planning table - This checkbox is an option to generate a plan run only for items having item planning records defined in P/P Item Planning table. Include Stock - This checkbox option allows you to include Sage 300 I/C stock levels in the automated P/P planning run. If you choose to unclick this button and exclude I/C stock, all items in the planning run will be assumed to have zero inventory balances. Include PO - This checkbox option allows you to include Sage 300 P/O open Purchase Orders in the automated P/P planning run. Open PO’s contribute as quantities on order for the purchased items involved and serve as source of supply during materials planning. Include MO - This checkbox option allows you to include Sage M/F Manufacturing Orders (MO) in the automated P/P planning run. P/P considers only MO’s which have been approved or released. Open MO’s contribute to both quantities on order for products as well as allocated quantities for components. Ignore Minimum - This checkbox option allows the user to ignore the minimum stock quantity defined in the P/P Item Planning table during the automated P/P planning run. In effect, there will be no minimum or safety stock levels for all items. Ignore Calendar - This checkbox option allows the user to ignore the P/P Work Calendar table maintenance in the automated P/P planning run. This, in effect, makes each day a normal working day. Include PR - This check box option allows you to include Sage 300 P/O Purchase Requisition in the P/P planning run. Include SO - This checkbox option allows you to include Sage 300 O/E Sales Orders (SO) in the automated P/P planning run. Open SO’s contribute to the allocated quantities for products involved and serve as demand during production planning. Include Kit - This checkbox option allows you to include Sage 300 I/C Kitting Items in the planning run. Only active I/C Kitting Items are considered during P/P Plan Run. I/C Kitting Items in O/E Order Entry add up to the on order quantities while its components add up to allocated quantities when part of the selected Kitting Number in O/E or part of the default kit for plan orders. Include Expired Forecast - This checkbox allows the user to include sales
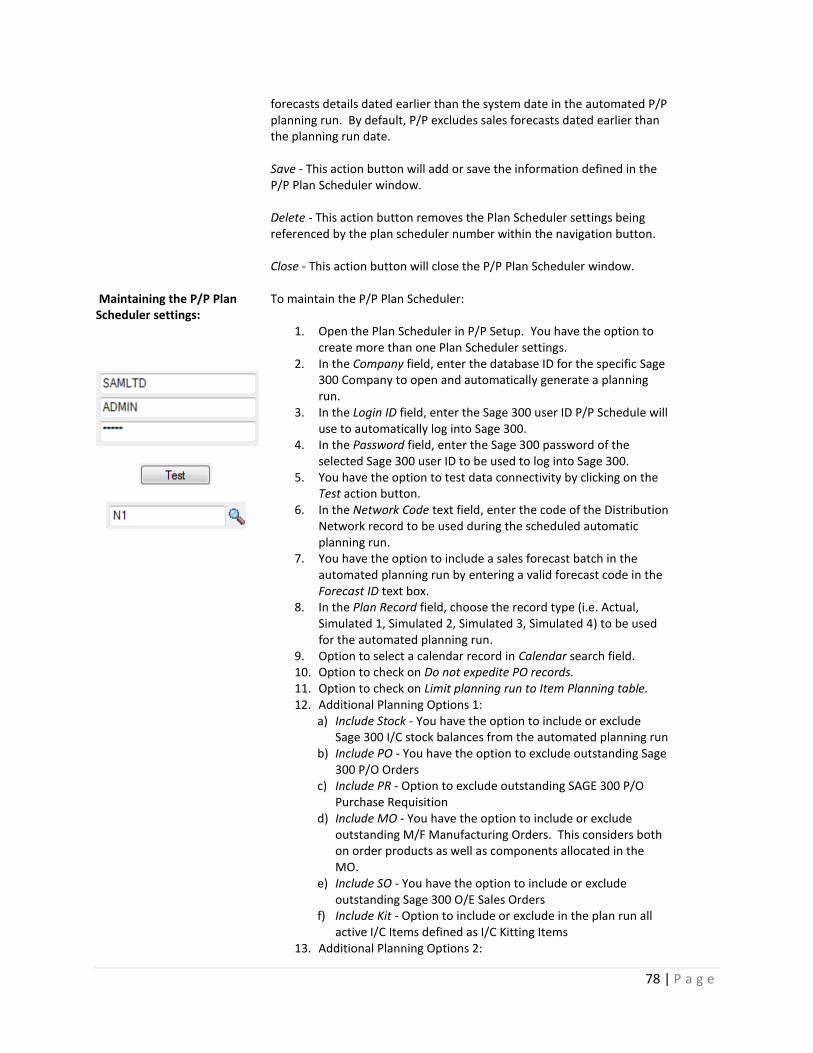
78 | P a g e
forecasts details dated earlier than the system date in the automated P/P planning run. By default, P/P excludes sales forecasts dated earlier than the planning run date. Save - This action button will add or save the information defined in the P/P Plan Scheduler window. Delete - This action button removes the Plan Scheduler settings being referenced by the plan scheduler number within the navigation button. Close - This action button will close the P/P Plan Scheduler window.
Maintaining the P/P Plan Scheduler settings:
To maintain the P/P Plan Scheduler:
1. Open the Plan Scheduler in P/P Setup. You have the option to create more than one Plan Scheduler settings.
2. In the Company field, enter the database ID for the specific Sage 300 Company to open and automatically generate a planning run.
3. In the Login ID field, enter the Sage 300 user ID P/P Schedule will use to automatically log into Sage 300.
4. In the Password field, enter the Sage 300 password of the selected Sage 300 user ID to be used to log into Sage 300.
5. You have the option to test data connectivity by clicking on the Test action button.
6. In the Network Code text field, enter the code of the Distribution Network record to be used during the scheduled automatic planning run.
7. You have the option to include a sales forecast batch in the automated planning run by entering a valid forecast code in the Forecast ID text box.
8. In the Plan Record field, choose the record type (i.e. Actual, Simulated 1, Simulated 2, Simulated 3, Simulated 4) to be used for the automated planning run.
9. Option to select a calendar record in Calendar search field. 10. Option to check on Do not expedite PO records. 11. Option to check on Limit planning run to Item Planning table. 12. Additional Planning Options 1:
a) Include Stock - You have the option to include or exclude Sage 300 I/C stock balances from the automated planning run
b) Include PO - You have the option to exclude outstanding Sage 300 P/O Orders
c) Include PR - Option to exclude outstanding SAGE 300 P/O Purchase Requisition
d) Include MO - You have the option to include or exclude outstanding M/F Manufacturing Orders. This considers both on order products as well as components allocated in the MO.
e) Include SO - You have the option to include or exclude outstanding Sage 300 O/E Sales Orders
f) Include Kit - Option to include or exclude in the plan run all active I/C Items defined as I/C Kitting Items
13. Additional Planning Options 2:
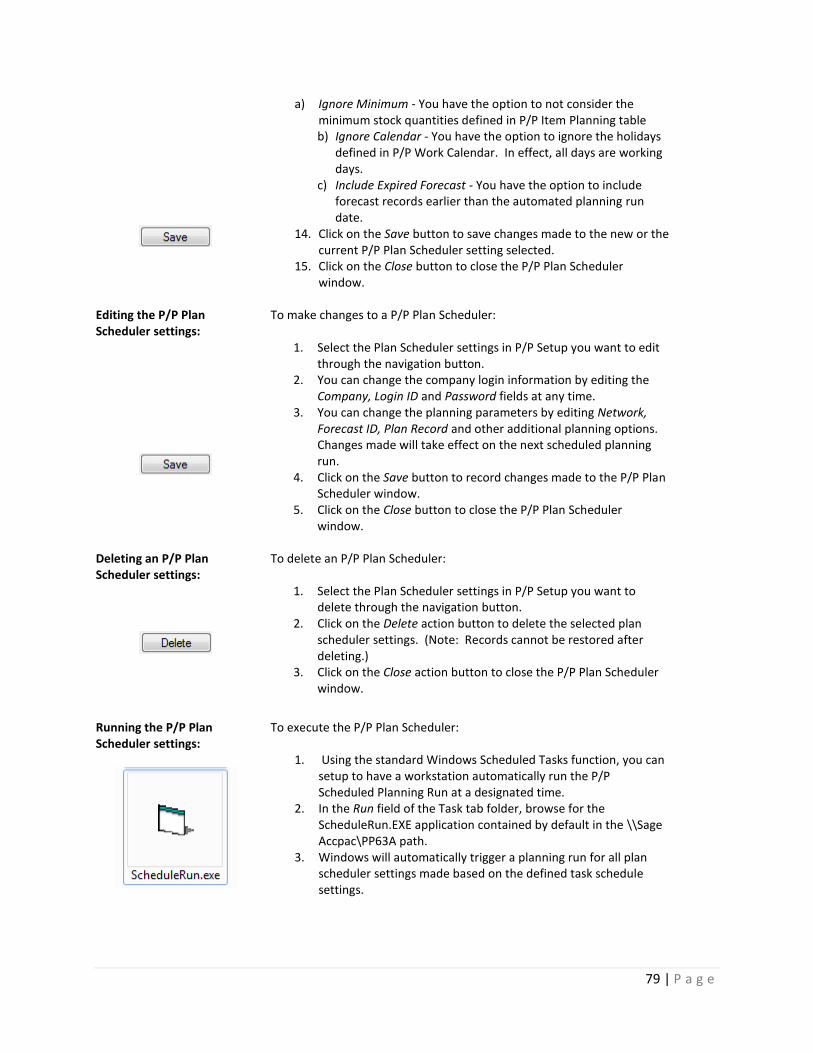
79 | P a g e
a) Ignore Minimum - You have the option to not consider the minimum stock quantities defined in P/P Item Planning table b) Ignore Calendar - You have the option to ignore the holidays
defined in P/P Work Calendar. In effect, all days are working days.
c) Include Expired Forecast - You have the option to include forecast records earlier than the automated planning run date.
14. Click on the Save button to save changes made to the new or the current P/P Plan Scheduler setting selected.
15. Click on the Close button to close the P/P Plan Scheduler window.
Editing the P/P Plan Scheduler settings:
To make changes to a P/P Plan Scheduler:
1. Select the Plan Scheduler settings in P/P Setup you want to edit through the navigation button.
2. You can change the company login information by editing the Company, Login ID and Password fields at any time.
3. You can change the planning parameters by editing Network, Forecast ID, Plan Record and other additional planning options. Changes made will take effect on the next scheduled planning run.
4. Click on the Save button to record changes made to the P/P Plan Scheduler window.
5. Click on the Close button to close the P/P Plan Scheduler window.
Deleting an P/P Plan Scheduler settings:
To delete an P/P Plan Scheduler:
1. Select the Plan Scheduler settings in P/P Setup you want to delete through the navigation button.
2. Click on the Delete action button to delete the selected plan scheduler settings. (Note: Records cannot be restored after deleting.)
3. Click on the Close action button to close the P/P Plan Scheduler window.
Running the P/P Plan Scheduler settings:
To execute the P/P Plan Scheduler:
1. Using the standard Windows Scheduled Tasks function, you can setup to have a workstation automatically run the P/P Scheduled Planning Run at a designated time.
2. In the Run field of the Task tab folder, browse for the ScheduleRun.EXE application contained by default in the \\Sage Accpac\PP63A path.
3. Windows will automatically trigger a planning run for all plan scheduler settings made based on the defined task schedule settings.