Safety and Survival/Crime Prevention these safety basics, you can also discuss wilderness survival....
20
Safety and Survival/Crime Prevention Introduction Safety of visitors—especially very young ones—is always a concern of park staff. Since many potential dangers are aggravated by ignorance, the safety and survival/crime prevention program is one way to make Junior Rangers aware of precautions they can take while in the park to ensure that their visits are safe and enjoyable ones. There are many safety topics Junior Rangers would benefit from, but the three that may be most important are fire safety, wild animal safety, and water safety. Since the majority of dangerous situations in state parks are related to these three topics, they are important topics to cover. Another safety issue Junior Rangers should be prepared for is what they should do if they get lost. A child who has learned ahead of time what to do when lost has a better chance of being found. (See the sample program for interpretive ideas.) Beyond these safety basics, you can also discuss wilderness survival. Kids find the techniques presented in a book such as Tom Brown's Guide to Wilderness Survival fascinating. They enjoy imagining how they would survive if cut off from civilization someday, and the information may be useful to them at some point in their lives. Finally, crime prevention is, unfortunately, a necessary topic to cover. Junior Rangers should know how to protect their belongings from being stolen, what to do if a crime occurs, and what to do if approached by strangers. 12-1
-
Upload
hoangthien -
Category
Documents
-
view
216 -
download
1
Transcript of Safety and Survival/Crime Prevention these safety basics, you can also discuss wilderness survival....

Safety and Survival/Crime Prevention
Introduction Safety of visitors—especially very young ones—is always a concern of park staff. Since many potential dangers are aggravated by ignorance, the safety and survival/crime prevention program is one way to make Junior Rangers aware of precautions they can take while in the park to ensure that their visits are safe and enjoyable ones. There are many safety topics Junior Rangers would benefit from, but the three that may be most important are fire safety, wild animal safety, and water safety. Since the majority of dangerous situations in state parks are related to these three topics, they are important topics to cover. Another safety issue Junior Rangers should be prepared for is what they should do if they get lost. A child who has learned ahead of time what to do when lost has a better chance of being found. (See the sample program for interpretive ideas.) Beyond these safety basics, you can also discuss wilderness survival. Kids find the techniques presented in a book such as Tom Brown's Guide to Wilderness Survival fascinating. They enjoy imagining how they would survive if cut off from civilization someday, and the information may be useful to them at some point in their lives. Finally, crime prevention is, unfortunately, a necessary topic to cover. Junior Rangers should know how to protect their belongings from being stolen, what to do if a crime occurs, and what to do if approached by strangers.
12-1

Junior Ranger Program Handbook: Safety and Survival/Crime Prevention
Preparing Junior Rangers ahead of time for potentially dangerous situations gives them the skills to be safe, prevent crime, and survive.
Interesting Facts About Safety and Survival
Children of all ages set over 35,000 fires annually. Approximately 8,000 of those fires are set in homes.
Twenty-five percent of all fires are started by playing with matches.
A five minute delay in reporting a crime endangers life and property. (It also gives a criminal a 2/3 better chance of escape.)
Over 90 percent of the lost children in state parks are found safe and unharmed within one hour.
Sample Programs: Safety and Survival/Crime Prevention General Program I. Introduction
Introduce yourself to the group. Introduce the Junior Ranger Program.
II. Focus/Objectives
The park is a fun place to be, but people can sometimes get into dangerous situations in the park. Today, we'll learn some of the things to be careful of, and ways to make sure your visit will be safe and enjoyable.
III. Inquiry/ Discussion
A. Hiking Safety 1. How many of you like to go hiking? 2. Whether you hike with your parents, with a group, or with friends, it's a
good idea to be prepared to hike safely.
12-2

Junior Ranger Program Handbook: Safety and Survival/Crime Prevention
3. What kind of shoes should you wear on a hike? Sturdy, comfortable shoes. (Model a good hiking shoe and sock.)
4. What kind of clothes should you wear? In warm weather, cotton (like a T-shirt) is a good choice because it cools the body. In cold or wet weather, however, avoid cotton. Because temperature or weather conditions may change while you're on a hike, it's a good idea to dress in layers. For example, if it's hot when you start out, you can wear a T-shirt with a windbreaker tied around your waist. If you get cold later, you can put the windbreaker on, and the layers will keep you warm.
5. Should you take anything with you on a hike? Yes, it's a good idea to carry a few things in a small day pack or belt pack. (Show and discuss a day pack containing: high energy food snacks, water/water purifier, first aid supplies, and garbage bags.)
6. Should you stay on the trails when you hike? Why? Yes. If you stay on the trail and avoid switchbacks or shortcuts, you will be less likely to get lost, to run into poison oak or other harmful plants, and to cause erosion. (Hike to an area where you can show the erosional effects of shortcutting on the trails.)
7. Is it all right to touch all the plants and animals you see on your hike? No. Some plants are dangerous and many animals will be afraid of you. They have defenses to protect themselves from their predators, and they might harm you.
8. Can anyone think of an example of a defense a plant or animal has to keep threatening people and animals away from it?
Examples: Rattlesnake/poisonous venom; stinging nettle/sharp bristles that irritate the skin; animals/claws and teeth that bite and tear.
9. Are there any insects we need to watch out for? Why? a. Mosquitoes: Female mosquitoes use mammals' blood to nourish their
young. They sometimes carry diseases. The enzyme the mosquito injects into your skin to keep your blood from clotting causes irritation. Protect yourself by using a good repellant, especially when hiking at dusk.
b. Wasps/bees: These insects sting as a defense. If a bee or a wasp lands on you, the best thing to do is to wait for it to fly away. It will usually only sting you if it feels threatened (for example, if you are swatting it away). If a wasp or a bee seems to be following you, change directions quickly several times. This usually throws them off.
c. Brown recluse or black widow spiders: These spiders are shy, and really like to avoid people as much as people want to avoid them. However, since they are poisonous, you should know how to identify them. The black widow is black with a characteristic red spot on its underside. A brown recluse is not so strikingly marked. You can tell a brown recluse by the violin-shaped markings on its back (show
12-3

Junior Ranger Program Handbook: Safety and Survival/Crime Prevention
photos). If you ever find a target-like marking on your body (rings of different shades), ask a doctor to check to see if you have been bitten by a brown recluse.
d. Ticks: Ticks, like mosquitoes, seek the blood of mammals. A tick will attach itself to your skin and fill itself with your blood, then drop off. Especially when hiking through areas where tall grass grows, it's a good idea to wear long pants and socks, and to check yourself for ticks during and after a hike. Some ticks are relatively harmless, but others carry Lyme disease. If you find a tick on your body, have a doctor or other expert remove it so that the head will come out. Have the tick analyzed to see if it carries Lyme disease.
10. Why should you avoid feeding or attracting wild animals? Wild animals aren't used to humans. Unlike domesticated pets, they are unlikely to be friendly toward you. Instead, they will feel threatened and defensive—in attack mode, in other words. Some wild animals may carry diseases like rabies or plague, which make them particularly dangerous to you. (Note: If you have mountain lions or bears in your park, see pages 12-16 to 12-18.)
11. Can you name some plants you should avoid? Poison oak, stinging nettle, thorny plants, etc. (Show Junior Rangers how to identify dangerous plants in your park by pointing them out or showing pictures).
B. Finding Your Way 1. If you were on a hike, and you didn't have a compass or a map, how would
you know what direction you were going? Demonstrate how to use the sun, landmarks, and the night sky for direction.
2. Find a map of the park. What is the symbol for mine, spring, or ranger station? Who can find one?1
3. There are five “D's” of map reading: a. Description (found in margins) b. Details (map symbols, legend) c. Direction d. Distances (scales at the bottom margin of the map) e. Designations (places and other map features)
4. Draw your own map of the park using the five “D's.” 5. Demonstrate basic compass use. 6. Can you use a compass without a map?
a. Yes, you can use a compass to find your direction (or “bearings”) from a location. If you're lost, you can use a compass to head back in the right direction, and to be sure you aren't walking in circles.
b. Show how to use a compass with a map. c. Show how to use a compass to tell time.
1 B. Kjellstrom’s book Be an Expert with Map and Compass contains some games you may want to try.
12-4

Junior Ranger Program Handbook: Safety and Survival/Crime Prevention
7. Take the group to an area and let them find their way back using only the compass. Determine a safe route to a destination.
C. Losing Your Way. 1. If you get lost, what should you do?
Try to stay calm, and stay in one place. Try “hugging” a tree; it may help you feel calmer. Stay by your tree. People will come to find you. Sometimes kids worry that their parents will get mad at them when they are found. Don't worry about that—your parents will be so happy to see you that they won't get mad. Listen for voices, and shout out every few minutes. It's a good idea to bring a whistle with you on hikes, because if you get lost, a whistle can be heard better and takes less energy than shouting.
D. Fire Safety 1. Where are you allowed to build a fire in the park?
a. Only in a designated area, and only with adult supervision. b. Demonstrate safe fire building and extinguishing.
2. Where should you go if there is a fire in the park? Discuss fire evacuation procedures.
3. What should you do if you're trapped by fire while in the park? Select an area clear of vegetation (road, ditch, waterway). Lie down, and cover any exposed skin with a jacket or blanket. Avoid canyons that can concentrate and channel fire.
4. What should you do if your clothing catches on fire? Stop, drop, and roll. If you see someone else's clothes on fire, tell them to drop and roll, and then try to extinguish the fire by covering the person with a blanket, depriving the fire of the oxygen it needs to burn.
E. Preventing Crime While on Vacation 1. What should you and your family do before leaving home for a vacation?
a. Arrange for friends or neighbors to pick up your newspapers, mail, and packages.
b. Notify a neighbor. c. Notify your police department (they provide vacation checks of
homes). d. Leave some shades up or curtains open so the house doesn't look
deserted. e. Arrange to keep your lawn maintained. f. Use timing devices for your lamps. g. Make sure all of your doors (basement, french, porch, balcony) can be
securely locked. h. Lock your garage door when you are away from home. i. Leave a radio on.
2. How do you report a crime? a. Tell an adult. b. Call 9-1-1 or park rangers immediately. c. Get a good description of suspects or vehicles. Roleplay calling 9-1-1 and giving appropriate information.
12-5

Junior Ranger Program Handbook: Safety and Survival/Crime Prevention
3. How can you prevent your bike from being stolen? a. Get a strong lock and use it every time you leave your bicycle
somewhere. Most bikes that get stolen weren't locked. b. Lock or chain your bicycle to something solid. c. Lock your bike through the frame and both wheels if you can.
4. How can you prevent your favorite things from being stolen? a. Don't leave your things on the seat of the car, or out in the open
campsite where someone could easily pick them up. b. Mark your things for identification and keep them safely locked up
when not in use. 5. How can you keep yourself safe?
a. Always try to play or walk with friends instead of alone. b. Don't take anything from a stranger, including candy, money, or car
rides. c. Tell an adult you trust if anyone makes you feel unsafe. d. Know where the nearest telephone is and how to telephone for help.2
IV. Application/ Conclusion
A. Ask the Junior Rangers what they learned today about safety. B. Announce next Junior Ranger program and other interpretive programs. C. Stamp logbooks.
2 These personal safety hints are from the “McGruff safety pledge.” For more information on McGruff activities contact: National Crime Prevention Council. www.ncpc.org.
12-6
Junior Ranger Program Handbook: Safety and Survival/Crime Prevention
Water Safety I. Introduction
Introduce yourself. Introduce the Junior Ranger Program.
II. Focus
Start off by explaining that since it’s summertime and the Junior Rangers will be cooling off in the water, there are some important rules for them to follow so that they can have fun at a beach or a pool without getting hurt.
III. Inquiry/Discussion
A. How many of you can swim? B. What are some important things to remember to be safe while you're
swimming? 1. Never swim alone. 2. Swim only in supervised areas. 3. Follow all posted rules. 4. Don't swim during electrical storms. 5. Don't dive into a place where you've never been before until you look it
over and make sure it is safe and deep enough for a dive. 6. Never fake calls for help.
C. When you're down on the beach, there are other important things to remember, such as checking with lifeguards to see if the conditions are safe. 1. How many of you have younger brothers and sisters? One important thing
to do is to keep an eye on them, even if there are lifeguards. 2. Can you think of any other things you might or might not want to do while
on the beach? a. Don't bring glass or breakable objects onto the beach. b. Don't throw sand. c. Obey the lifeguards. d. Don't swim near rocks, surfers, and rip tides.
D. When you are swimming in the ocean, you should know what to do if you get caught in a rip current. Rip currents are narrow, river-like currents. They take water that the waves have moved onto the beach back out past the surf. Rip currents are usually about 50 feet wide (about as wide as twelve kids laid end to end). You can spot a rip current by looking for the dirty brown water, choppy surface and the foam the currents carry back to sea. 1. Does anyone know what to do if you get caught in a rip current?
Don't panic. Swim parallel to shore, swimming across the current (rip currents are not very wide).
E. How many of you know how to do the survival float? Explain how to do the survival float, and explain that it can be used to stay afloat if they ever need to.
F. Does anyone know what to do if you get tangled in weeds or kelp while swimming?
12-7

Junior Ranger Program Handbook: Safety and Survival/Crime Prevention
Slow, gentle movements will free you, while thrashing around will only get you more tangled up.
G. What is a lifeguard? What does a lifeguard do? A lifeguard is always watching for people in danger. He or she gives first aid when needed, can give out information, and saves lives on the beach!
H. Keep an eye out for animals on the beach. If you see baby seals on the beach, don't disturb them. They generally rest on the beach when they are tired or cold. Their mothers are usually around, but let the lifeguard know the seal is there.
I. What should you do if you see someone in trouble in the water? 1. Tell a lifeguard right away. If no lifeguard is nearby, follow the REACH-
THROW-ROW-DON'T GO method. a. REACH: Extend anything to a person in the water and assist the
person to shore. The rescuer should hold onto a secure object and not enter the water. (Use a stick, branch, belt, rope, jacket, arm, leg, etc.)
b. THROW: Toss anything that floats to a person in the water. It should be thrown close enough to be grabbed by the person in the water, but try not to hit him/her in the head. The person can float until you can get a lifeguard to help get him/her out.
c. ROW: Propel a small boat, inner tube, log, etc. to a person in distress. Carefully bring the victim to safety.
d. DON'T GO: Unless you are a trained lifeguard. You should not swim to a person in distress without this training—you could become a victim also. Get a lifeguard or call 911 as soon as possible.
J. Activity: Sand animal contest. The Junior Rangers can make any kind of marine animal they like, either alone or in pairs. Give out an award for the most realistic creature!
IV. Conclusion
A. On the way back, ask the Junior Rangers to tell you what they learned today about water safety.
B. Announce the next Junior Ranger program. C. Stamp logbooks.
Activities Sun Compass Activity The birds and the bees use the sun as a compass. You can, too. All you need is an old-fashioned, non-digital watch. Go outside and point the hour hand of your watch at the sun. Imagine drawing a line from the center of your watch halfway between the 12 and the hour hand. This line will always point close to due south. You may encounter one slight complication, however. If it's summer and you're on daylight
12-8

Junior Ranger Program Handbook: Safety and Survival/Crime Prevention
saving time, you'll have to set your watch back an hour to make your calculations come out right.
South
Background Information: Safety and Survival/Crime Prevention Water Safety Safety in the water begins with learning how to swim. A learn-to-swim program is key to enjoying water recreation. By developing your swimming skills, you open up wonderful opportunities to learn a wide variety of aquatic sports and activities. Whenever possible, swim or play at a beach or pool that is protected by lifeguards. Most drownings occur at unguarded beaches where there are no lifeguards on duty. When swimming, if you ever feel like you're in danger of drowning, try to stay calm. If you panic, your body will stiffen and you will not be able to move or breathe easily. Many people who are afraid in water wave their arms wildly. If you do this, you may become tired and swallow water or faint. Staying calm helps you to breathe and stay afloat. Staying calm also gives you a chance to think of what to do to save yourself. You can float for hours as long as you are calm, keep your lungs filled with air, and tread water or use the survival float. Treading water and floating are the best ways to save energy. If you learn both of these, you can change from one to the other in the water while you wait for help to arrive. What to do if someone is in trouble in the water:
In an emergency—dial 9-1-1 If you see someone in trouble, get help from a lifeguard. If a lifeguard is not
available, have someone call 9-1-1.
12-9

Junior Ranger Program Handbook: Safety and Survival/Crime Prevention
Try to remain calm. Have someone spot the person in trouble or keep your eyes on the person. Give a clear explanation of your location and stay on the line with the dispatcher until you are told otherwise.
Throw the rip current victim something that floats and yell instructions on how to escape by having the victim swim out of the rip current, in a direction following the shoreline. When out of the current, direct them to swim toward shore.
Only professionally trained rescuers should attempt in-water rescues. Treading Water Treading water is a simple way to keep your head above the water while you stay afloat. When you know how to tread water, you can stay in the same place and use only a little energy. Your head stays above the water, so you can see all around you and can do these things if you need to: signal for help by moving your arm back and forth over your head; watch for help; and take off your clothes and shoes if they are weighing you down. The Survival Float Learning to float with very little effort will help you stay alive in the water for a long time in an emergency. To do the survival float:
1. Float upright in the water and take a deep breath.
3. Relax in this position until you need more air.
2. Lower your face into the water
(keeping your mouth closed) and bring your arms forward to rest at water level.
4. Using motion from your arms and legs
raise your head above the surface, treading water, and exhale. Take another breath and return to the relaxed position.
12-10

Junior Ranger Program Handbook: Safety and Survival/Crime Prevention
Cramps Cramps are painful tightening of muscles. If you swim too soon after eating, you can get stomach cramps. If you swim too long, you can get cramps in your arms or legs because they are tired. With either type of cramps, the pain and tightness will make swimming very hard. If you get cramps:
Relax as much as you can. Call for someone to help you. Change your swimming stroke or float to rest the arm or leg with the cramp. Stretch and rub the cramped muscle to relax the tightness.
Ocean Safety
Learn to swim before you go to the ocean—5,000 people drown every year. Show fins are easily pulled off in the surf—use only strap type fins. Non-swimmers should not use floats. Be aware of drop-offs in bays and lakes. Do not run in the water. Shuffle your feet when you walk to scare away stingrays.
If you do step on a stingray, soak your foot in hot water until the pain is gone, then have the wound cleaned by a doctor to prevent infection.
Jellyfish in Southern California usually cause only a slight rash with very mild pain that quickly goes away.
Inshore Holes and Cusps Large winter storms erode the beach and move a lot of sand off shore. The small, even waves of spring and summer create sand bars that slowly move toward the beach. Eventually these sand bars reach shore and their sand is added to the beach. They may add up to 50 feet of sand to a heavily eroded shore line. This process is not uniform and usually results in uneven bottom contours. The deep areas between the sandbar and shore are called “inshore holes.” They can be long trenches, a series of small depressions, or just a large hole 100 feet or more across with a rip current flowing out of it. Holes are easy to spot because they do not have waves breaking in on them, and therefore do not have much foam on the surface. When a broken wave moves over a hole it turns back into a swell that will break again when it gets past the hole. When the beach is building, it will have cusps, which are wide scallops in the shore line. They are usually more than 100 feet across. If you see cusps you know there are holes. Holes are usually easy to swim across, but sometimes the long shore current flowing down the beach will place you in a rip current. You have to swim parallel to shore with the long shore current until you are out of the rip.
12-11

Junior Ranger Program Handbook: Safety and Survival/Crime Prevention
Holes are very dangerous for non-swimmers, because they can suddenly find themselves in water over their heads. Undertow After waves come onto shore, they cause a current when they return to the ocean. This current is called undertow, because it happens under the next wave coming to shore, and it can have a very strong pull. Most beaches where undertows are common have signs that read, “Unsafe Swimming—Dangerous Undertow.” Higher waves cause stronger undertows. You should watch the waves so that you are not caught off guard. If you are knocked off your feet by a wave, you could be caught by an undertow. If you are caught, do not fight the undertow. Let the current carry you away from the beach. It will not carry you very far. When it weakens, do not try to swim back the same way. Swimming against the undertow is very hard—like trying to swim up a river. Instead, swim up or down the beach a little way, until you can swim back into shore. Rip Currents: Rivers in the Sea Rip currents are powerful, channeled currents of water flowing away from shore. They typically extend from the shoreline, through the surf zone, and past the line of breaking waves. Rip currents can occur at any beach with breaking waves. As waves travel from deep to shallow water, they eventually break near the shoreline. When waves break they generate currents that flow in both the offshore (away from the coast) and the alongshore directions. Currents flowing away from the beach are called rip currents. Rip currents can be found on many surf beaches every day. Under most tide and sea conditions the speeds are relatively slow. However, under certain wave, tide and beach profile conditions the speeds can quickly increase to become dangerous to anyone entering the surf. The strength and speed of a rip current will likely increase as wave height and wave period increase. They are most likely to be dangerous during high surf conditions. Rip currents most typically form at low spots or breaks in sandbars, and also near structures such as groins, jetties and piers. Rip currents can be very narrow or extend in widths to hundreds of yards. The seaward pull of rip currents varies: sometimes the rip current ends just beyond the line of breaking waves, but sometimes rip currents continue to push hundreds of yards offshore. Look for any of these clues to identify rip currents:
a channel of churning, choppy water
12-12

Junior Ranger Program Handbook: Safety and Survival/Crime Prevention
an area having a notable difference in water color a line of foam, seaweed, or debris moving steadily seaward a break in the incoming wave pattern
None, one, or more of the above clues may indicate the presence of rip currents. Rip currents are often not readily or easily identifiable to the average beachgoer. For your safety, be aware of this major surf zone hazard. Polarized sunglasses make it easier to see the rip current clues provided above. If you are caught in the seaward rush of a rip current, do not panic or attempt to swim directly to the shore against the strong current. Swim parallel to the shore until you are out of the rip current, then swim to shore angling away from the rip current.
Illustration courtesy of U.S. Lifeguard Association and National Oceanic and Atmospheric Administration Weather Service Even if you are unable to do this, the current usually dissipates just beyond the surf line. At this point, you may swim around the current and back to shore. Remember to swim at an angle away from the area to keep from getting caught up in the rip current again.
Never swim alone. Be cautious at all times, especially when swimming at unguarded beaches. If in
doubt, don’t go out! Whenever possible, swim at a lifeguard-protected beach. Obey all instructions and orders from lifeguards. If caught in a rip current, remain calm to conserve energy and think clearly. Don’t fight the current. Swim out of the current in a direction following the
shoreline. When out of the current, swim toward shore.
12-13

Junior Ranger Program Handbook: Safety and Survival/Crime Prevention
If you are unable to swim out of the rip current, float or calmly tread water. When out of the current, swim toward shore.
If you are still unable to reach shore, draw attention to yourself: face the shore, wave your arms, and yell for help.
If you see someone in trouble, get help from a lifeguard. If a lifeguard is not available, have someone call 9-1-1. Throw the rip current victim something that floats and yell instructions on how to escape. Do not go in the water after the person, unless you are a trained lifeguard. Remember, many people drown while trying to save someone else from a rip current.3 Ocean Waves Ocean waves are formed primarily when the wind blows over the surface of the water. The strength of the wind and the distance that the wind blows over open water is called fetch. Waves can be divided into several parts:
The crest is the highest point on a wave. The trough, or the valley between two waves, is the lowest point. Wavelength is the horizontal distance between the crests or troughs of two
consecutive waves. Wave height is the vertical distance between a wave's crest and trough. Wave period measures the size of the wave in time. A wave period can be
measured by picking a stationary point and counting the seconds it takes for two consecutive crests or troughs to pass it.
Waves breaking on the beach can be categorized into three basic types:
Surging Breakers: These waves happen on beaches where the slope of the beach is very steep. The wave is very powerful and dangerous as it suddenly rolls up onto the steep beach.
Plunging Breakers: This type of wave will curl over and form a “tube” until the
wave collapses. Expert surfers love to ride these waves, which can be found on beaches where the slope of the beach is moderately steep.
Spilling Breakers: Usually found on beaches with a gradual slope. These waves
gently roll, or spill, as they break over the front of the wave.
Rogue Wave: A common name given to a wave that is larger than the average wave height that has been observed. These can be unpredictable waves, which may occur even on days when most of the surf looks small and unspectacular. These large waves have been the cause of many drownings over the years and can catch those close to the shoreline by surprise, washing them into the cold, turbulent water. Most victims were climbing on rocks and cliffs, playing near or in the surf, or shore fishing.
3 This information on water safety is provided by the United States Lifesaving Association and NOAA Weather Service.
12-14
Junior Ranger Program Handbook: Safety and Survival/Crime Prevention
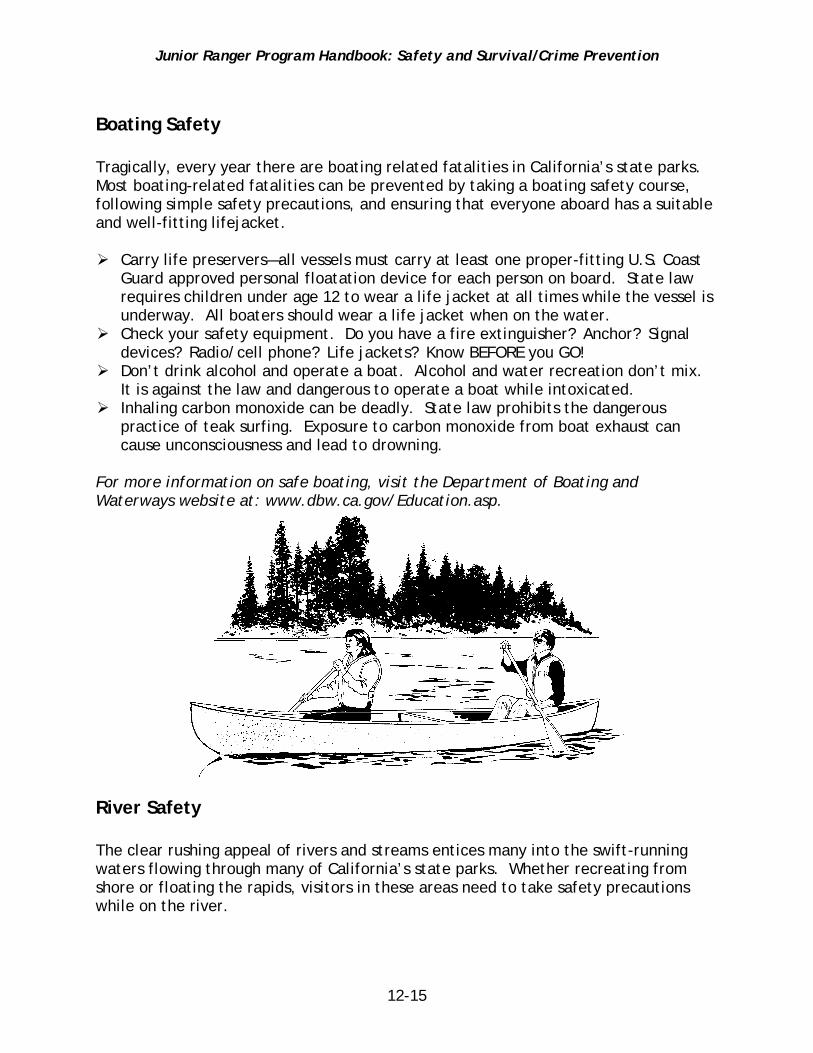
Boating Safety Tragically, every year there are boating related fatalities in California’s state parks. Most boating-related fatalities can be prevented by taking a boating safety course, following simple safety precautions, and ensuring that everyone aboard has a suitable and well-fitting lifejacket.
Carry life preservers—all vessels must carry at least one proper-fitting U.S. Coast Guard approved personal floatation device for each person on board. State law requires children under age 12 to wear a life jacket at all times while the vessel is underway. All boaters should wear a life jacket when on the water.
Check your safety equipment. Do you have a fire extinguisher? Anchor? Signal devices? Radio/cell phone? Life jackets? Know BEFORE you GO!
Don’t drink alcohol and operate a boat. Alcohol and water recreation don’t mix. It is against the law and dangerous to operate a boat while intoxicated.
Inhaling carbon monoxide can be deadly. State law prohibits the dangerous practice of teak surfing. Exposure to carbon monoxide from boat exhaust can cause unconsciousness and lead to drowning.
For more information on safe boating, visit the Department of Boating and Waterways website at: www.dbw.ca.gov/Education.asp.
River Safety The clear rushing appeal of rivers and streams entices many into the swift-running waters flowing through many of California’s state parks. Whether recreating from shore or floating the rapids, visitors in these areas need to take safety precautions while on the river.
12-15

Junior Ranger Program Handbook: Safety and Survival/Crime Prevention
Know the flow!—High flows on the rivers can be dangerous and may fluctuate daily. Do not overestimate your skill or underestimate the power of the river. Knowing what the flow is on the day of your trip is one way to determine if the river is boatable for your level of paddling experience.
Wear it!—Always wear a properly fitted personal flotation device (PFD) at all times when you are in or near the river.
Survival in cold water—Although it may be hot on shore, the shock from cold water in the river can deplete the strength of even the strongest swimmer and hypothermia can lead to unconsciousness. Wearing a PFD will help keep you afloat.
Wild Animal Safety Mountain Lions There's been very little research on how to avoid mountain lion attacks. But actual mountain lion attacks are being analyzed in the hope that some crucial questions can be answered: Did the victim do something to inadvertently provoke an attack? What should a person who is approached by a mountain lion do—or not do? The following suggestions are based on studies of mountain lion behavior and analysis of attacks by mountain lions, tigers and leopards.
When you walk or hike in mountain lion country, go in groups and make plenty of noise to reduce your chances of surprising a
lion. A sturdy walking stick is a good idea; it can be used to ward off a lion. Make sure children are close to you and
within your sight at all times. Talk with children about lions and teach them what to do if they meet one.
Do not approach a mountain lion, especially one that is feeding or with kittens. Most lions avoid a confrontation.
Give them a way to escape. Stay calm when you come upon a lion. Talk calmly yet firmly to it.
Move slowly. Stop. Back away slowly only if you can do so safely. Running may stimulate a
lion's instinct to chase and attack. Face the lion and stand upright. Do all you can to appear larger. Raise your arms. Open your jacket if you're
wearing one. Do not crouch down or bend over. While a person standing up may not seem the
right shape for a lion's prey, a person squatting or bending over resembles a four-legged prey animal.
If the lion behaves aggressively, throw stones, branches, or whatever you can get your hands on without crouching down or turning your back. Wave your arms slowly and speak firmly. What you want to do is convince the lion you are not prey and that you may in fact be a danger to it.
12-16
Junior Ranger Program Handbook: Safety and Survival/Crime Prevention
Fight back if a lion attacks you. Lions have been driven away by prey that fights back. People have fought back with rocks, sticks, caps or jackets, garden tools, and their bare hands successfully. Remain standing or try to get back up.
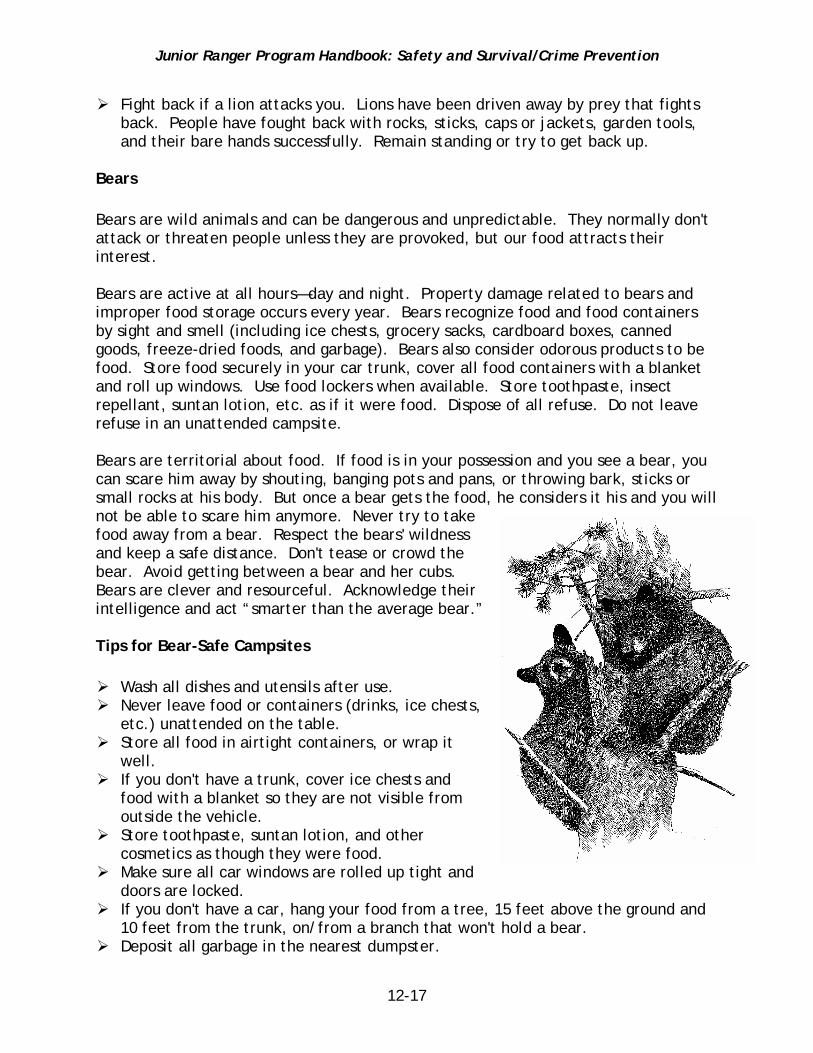
Bears Bears are wild animals and can be dangerous and unpredictable. They normally don't attack or threaten people unless they are provoked, but our food attracts their interest. Bears are active at all hours—day and night. Property damage related to bears and improper food storage occurs every year. Bears recognize food and food containers by sight and smell (including ice chests, grocery sacks, cardboard boxes, canned goods, freeze-dried foods, and garbage). Bears also consider odorous products to be food. Store food securely in your car trunk, cover all food containers with a blanket and roll up windows. Use food lockers when available. Store toothpaste, insect repellant, suntan lotion, etc. as if it were food. Dispose of all refuse. Do not leave refuse in an unattended campsite. Bears are territorial about food. If food is in your possession and you see a bear, you can scare him away by shouting, banging pots and pans, or throwing bark, sticks or small rocks at his body. But once a bear gets the food, he considers it his and you will not be able to scare him anymore. Never try to take food away from a bear. Respect the bears' wildness and keep a safe distance. Don't tease or crowd the bear. Avoid getting between a bear and her cubs. Bears are clever and resourceful. Acknowledge their intelligence and act “smarter than the average bear.” Tips for Bear-Safe Campsites
Wash all dishes and utensils after use. Never leave food or containers (drinks, ice chests,
etc.) unattended on the table. Store all food in airtight containers, or wrap it
well. If you don't have a trunk, cover ice chests and
food with a blanket so they are not visible from outside the vehicle.
Store toothpaste, suntan lotion, and other cosmetics as though they were food.
Make sure all car windows are rolled up tight and doors are locked.
If you don't have a car, hang your food from a tree, 15 feet above the ground and 10 feet from the trunk, on/from a branch that won't hold a bear.
Deposit all garbage in the nearest dumpster.
12-17

Junior Ranger Program Handbook: Safety and Survival/Crime Prevention
Do not store food in tents or wooden lockers. Remember, bears have a sense of smell hundreds of times more acute than that of
humans. Bears are especially attracted to sugar and fat, and they know how and where we like to store our food.
Suggested Resources: Safety and Survival/Crime Prevention Department of Boating and Waterways. www.dbw.ca.gov/Education.asp. Department of Homeland Security. U.S. Fire Administration. www.usfa.fema.gov. National Crime Prevention Council. www.ncpc.org. United States Lifesaving Association. www.usla.org.
12-18

INSERT WATER TAB HERE