Sacs Executive
66
Executive Executive RELEASE 5 USER’S MANUAL ENGINEERING DYNAMICS, INC. 2113 38TH STREET KENNER, LOUISIANA 70065 U.S.A. No part of this document may be reproduced in any form, in an electronic retrieval system or otherwise, without the prior written permission of the publisher. Copyright 1998 by ENGINEERING DYNAMICS, INC. Printed in U.S.A.
description
Reference Manual for SACS offshore modeling.
Transcript of Sacs Executive
Executive
ExecutiveRELEASE 5
USER’S MANUAL
ENGINEERING DYNAMICS, INC.
2113 38TH STREET
KENNER, LOUISIANA 70065
U.S.A.
No part of this document may bereproduced in any form, in anelectronic retrieval system orotherwise, without the prior
written permission of the publisher.
Copyright 1998 by
ENGINEERING DYNAMICS, INC.Printed in U.S.A.

Executive
Executive
i
TABLE OF CONTENTS
1.0 INTRODUCTION 1-1.......................................................................................................................1.1 GENERAL INFORMATION 1-1...............................................................................................1.2 PROGRAM OVERVIEW 1-1....................................................................................................
1.2.1 Program Features 1-1.........................................................................................................1.2.2 Program Requirements 1-1................................................................................................1.2.3 Security Key 1-1................................................................................................................
2.0 GETTING STARTED 2-1.................................................................................................................2.1 MAIN SCREEN 2-1....................................................................................................................
2.1.1 Menu Bar 2-1.....................................................................................................................2.1.2 Tool Bar 2-1.......................................................................................................................2.1.3 Status Bar 2-1....................................................................................................................2.1.4 Desktop Area 2-1...............................................................................................................2.1.5 File Explorer 2-2................................................................................................................2.1.6 Runfile Wizard 2-2............................................................................................................
2.1.6.1 Analysis Tabs 2-2.....................................................................................................2.1.6.2 Run file Wizard Tree 2-5.........................................................................................
2.1.7 Worksheet 2-6....................................................................................................................2.2 CONFIGURING THE SACS EXECUTIVE 2-6........................................................................
2.2.1 Editor 2-6...........................................................................................................................2.2.2 Browser 2-7.......................................................................................................................2.2.3 SACS System Data Directory 2-7.....................................................................................2.2.4 SACS Program Director y 2-7...........................................................................................2.2.5 SACS Program Format 2-7................................................................................................2.2.6 Key Server 2-7...................................................................................................................2.2.7 Section Library 2-7............................................................................................................2.2.8 Concatenate Output Files 2-7............................................................................................2.2.9 Load Worksheet file at start-up 2-8...................................................................................2.2.10 Show file names on worksheet 2-8..................................................................................
2.3 CONFIGURING THE SACS SYSTEM 2-8..............................................................................2.3.1 Units 2-8............................................................................................................................2.3.2 Element Sorting 2-8...........................................................................................................2.3.3 Joint Coordinates 2-8.........................................................................................................2.3.4 Convert Lower Case 2-8....................................................................................................2.3.5 Zoom Factor 2-9................................................................................................................2.3.6 Colors 2-9..........................................................................................................................2.3.7 Plot Configuration Setup 2-9.............................................................................................
2.4 USING PROJECTS 2-10..............................................................................................................2.5 FILE NAME CONVENTION OPTIONS 2-11............................................................................
2.5.1 Overview 2-11.....................................................................................................................2.5.2 Selecting File Name Convention 2-12.................................................................................2.5.3 Selecting File Identifier 2-12...............................................................................................2.5.4 Program and File Type Labels 2-12....................................................................................
2.6 LAUNCHING INTERACTIVE PROGRAMS 2-12....................................................................2.7 CREATING A RUN (EXECUTION) FILE 2-13.........................................................................2.8 EXECUTING AN ANALYSIS 2-13............................................................................................
Executive
ii
3.0 FILE FEATURES 3-1.......................................................................................................................3.1 NEW 3-1.....................................................................................................................................
3.1.1 Text File 3-1......................................................................................................................3.1.2 Worksheet 3-1....................................................................................................................3.1.3 Project 3-1..........................................................................................................................
3.2 OPEN 3-1....................................................................................................................................3.2.1 Text File 3-1......................................................................................................................3.2.2 Worksheet 3-1....................................................................................................................3.2.3 SACS Program Manual 3-1...............................................................................................
3.3 BROWSE 3-2..............................................................................................................................3.4 COPY 3-2....................................................................................................................................3.5 CONVERT 3-2............................................................................................................................3.6 DELETE 3-2...............................................................................................................................3.7 RUN 3-2......................................................................................................................................3.8 RUN MULTIPLE 3-3.................................................................................................................3.9 RUN SACS DEMO 3-3..............................................................................................................3.10 SET DIRECTORY 3-4..............................................................................................................3.11 MAKE DIRECTORY 3-4.........................................................................................................3.12 PRINT 3-4.................................................................................................................................
3.12.1 Text File 3-4....................................................................................................................3.12.2 Worksheet 3-5..................................................................................................................
3.13 PRINTER SETUP 3-5...............................................................................................................3.14 PRINTER FONT 3-5................................................................................................................3.15 EXIT 3-5...................................................................................................................................
4.0 SETTINGS FEATURES 4-1.............................................................................................................4.1 EXECUTIVE SETTINGS 4-1....................................................................................................4.2 PROJECT SETTINGS 4-1..........................................................................................................
4.2.1 Project Details 4-1.............................................................................................................4.2.1.1 Creating a New Project 4-1......................................................................................4.2.1.2 Selecting an Existing Project 4-2.............................................................................
4.2.2 Project Analysis Tasks 4-2................................................................................................4.2.2.1 Creating a New Analysis Task 4-2...........................................................................4.2.2.2 Selecting an Existing Analysis Task 4-2..................................................................
4.2.3 File Naming 4-2.................................................................................................................4.3 SACS SYSTEM CONFIGURATION 4-2..................................................................................4.4 SHOW CUE CARDS 4-2...........................................................................................................4.5 SHOW RELEASE 4 INTERFACE 4-3......................................................................................4.6 SAVE SETTINGS ON EXIT 4-4...............................................................................................
5.0 MODELING FEATURES 5-1...........................................................................................................5.1 PRECEDE 5-1.............................................................................................................................5.2 DATAGEN 5-1...........................................................................................................................
6.0 CHECK/REDESIGN FEATURES 6-1.............................................................................................6.1 POSTVUE 6-1.............................................................................................................................6.2 COLLAPSE VIEW 6-1...............................................................................................................
Executive
iii
6.3 INTERACTIVE FATIGUE 6-1..................................................................................................
7.0 UTILITIES FEATURES 7-1.............................................................................................................7.1 PREVUE 7-1...............................................................................................................................7.2 DISPLAY KEY 7-1....................................................................................................................7.3 EDIT KEY 7-2............................................................................................................................
8.0 HISTORY FEATURES 8-1...............................................................................................................
9.0 HELP FEATURES 9-1......................................................................................................................
A.0 INDEX A-1........................................................................................................................................

Executive
iv

Executive
SECTION 1INTRODUCTION

Executive
Executive
1-1
1.0 INTRODUCTION
1.1 GENERAL INFORMATIONThe SACS Executive program has been designed to provide the user with an easy to useand efficient front end utility for the SACS system. It controls and connects all elementsof the SACS system by providing access to all SACS interactive programs, utilities andsystem settings. The Executive also provides access to run file program module executionin addition to user defined program utilities.
1.2 PROGRAM OVERVIEW
1.2.1 Program FeaturesThe SACS Executive program may be used to control the entire SACS system. The usermay execute any SACS program or utility in addition to system utilities directly from theSACS Executive.
The following are some of the features available in the SACS Executive program:1. Ability to launch any SACS interactive graphics program.2. Create run or execution file for SACS run file program modules.3. Determines input files required for analysis execution and prompts for each input
file or can determine required file automatically.4. Ability to determine SACS output options automatically for run file executions.5. Includes extended power buttons for the most common tasks on the main screen.6. Provides command line help when the mouse passes over any power button.7. Allows access to all SACS system and Executive settings.8. Allows user specification of file editor and browser to be used by the Executive.9. Ability to execute any run file or executable file with out leaving the Executive.10. Complete on-line help facility.
1.2.2 Program RequirementsThe Executive requires a SACS configuration file (normally named “configg.sac”)defined by the environment variable “SACGCFG”. If a configuration file is not found orif the file does not exist, the program will exit with a “configuration file not found” errormessage.Note: The environmental variable "SACGCFG" must contain the full
pathname of the configuration file including the filename.
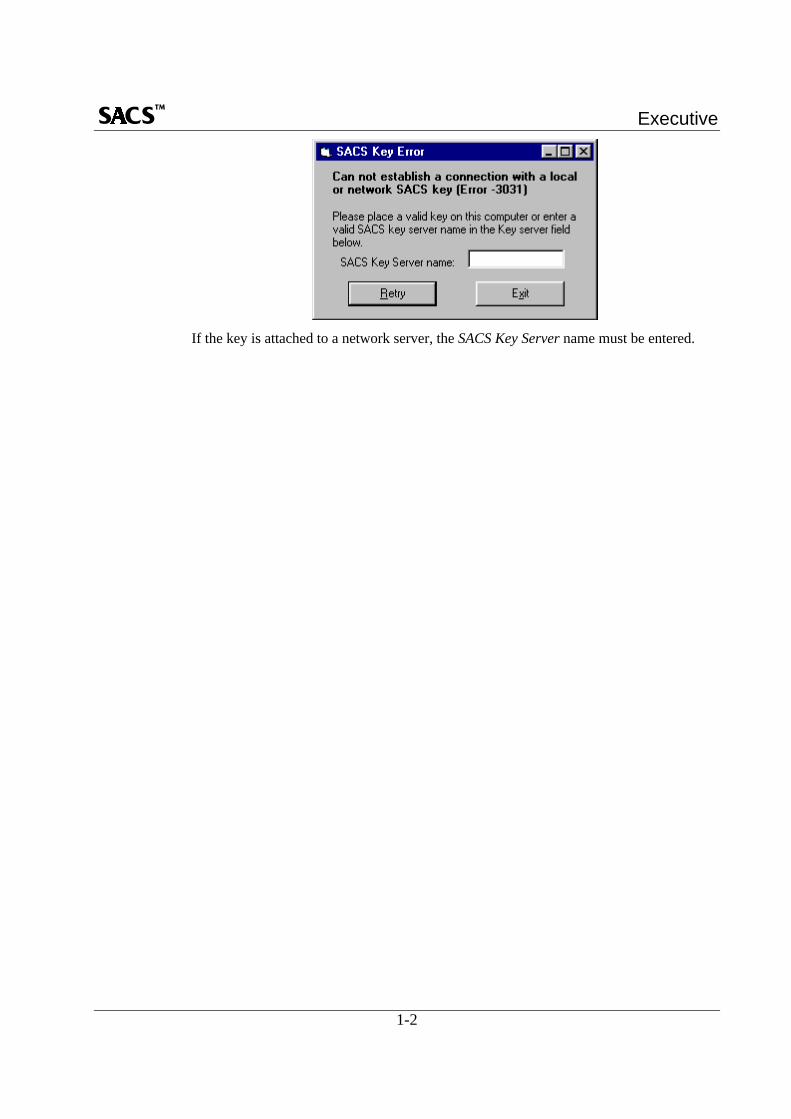
1.2.3 Security KeyThe Executive requires a SACS 5 hardware security key supplied by EngineeringDynamics, Inc. to run. The key must be attached either to the local machine or to anetwork server of which the machine is a client. If the Executive does not find thesecurity key, a key error will be reported.
Executive
1-2
If the key is attached to a network server, the SACS Key Server name must be entered.

Executive
SECTION 2GETTING STARTED

Executive
Executive
2-1
2.0 GETTING STARTEDThe SACS Executive is launched by selecting the SACS Executive icon from the Startmenu in Windows .
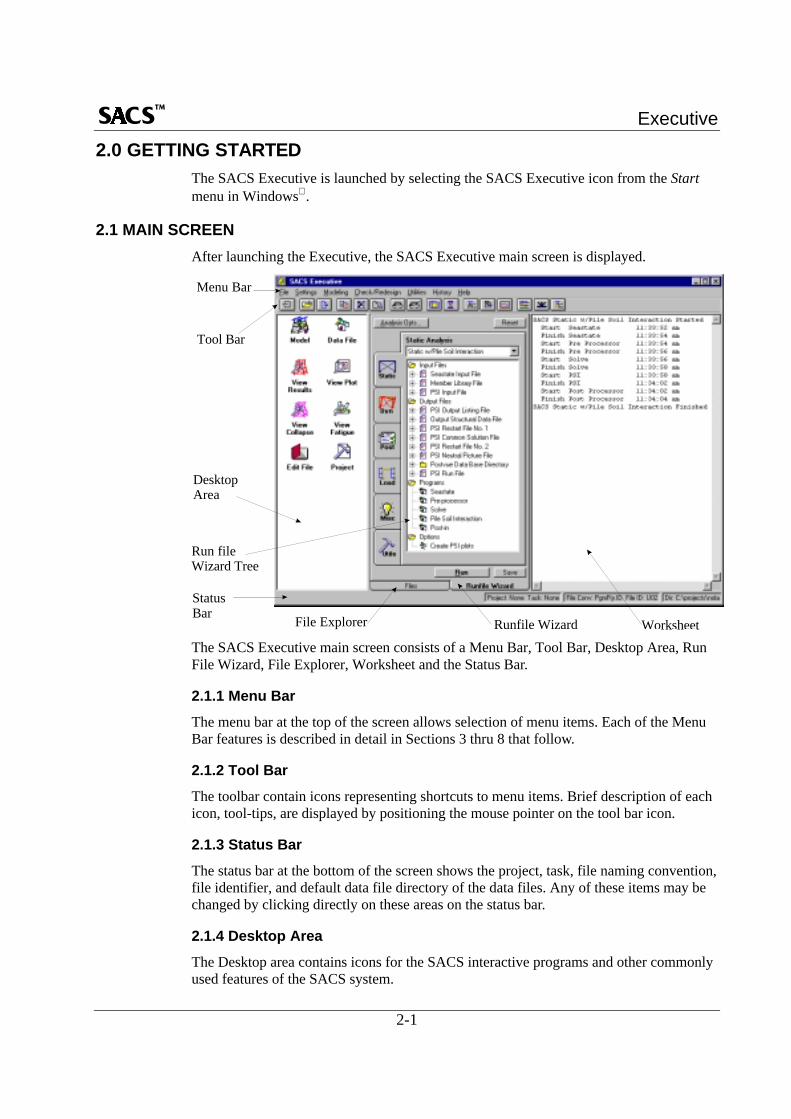
2.1 MAIN SCREENAfter launching the Executive, the SACS Executive main screen is displayed.
Menu Bar
Tool Bar
DesktopArea
File Explorer Runfile Wizard Worksheet
StatusBar
Run fileWizard Tree
The SACS Executive main screen consists of a Menu Bar, Tool Bar, Desktop Area, RunFile Wizard, File Explorer, Worksheet and the Status Bar.
2.1.1 Menu BarThe menu bar at the top of the screen allows selection of menu items. Each of the MenuBar features is described in detail in Sections 3 thru 8 that follow.
2.1.2 Tool BarThe toolbar contain icons representing shortcuts to menu items. Brief description of eachicon, tool-tips, are displayed by positioning the mouse pointer on the tool bar icon.
2.1.3 Status BarThe status bar at the bottom of the screen shows the project, task, file naming convention,file identifier, and default data file directory of the data files. Any of these items may bechanged by clicking directly on these areas on the status bar.
2.1.4 Desktop AreaThe Desktop area contains icons for the SACS interactive programs and other commonlyused features of the SACS system.
Executive
2-2
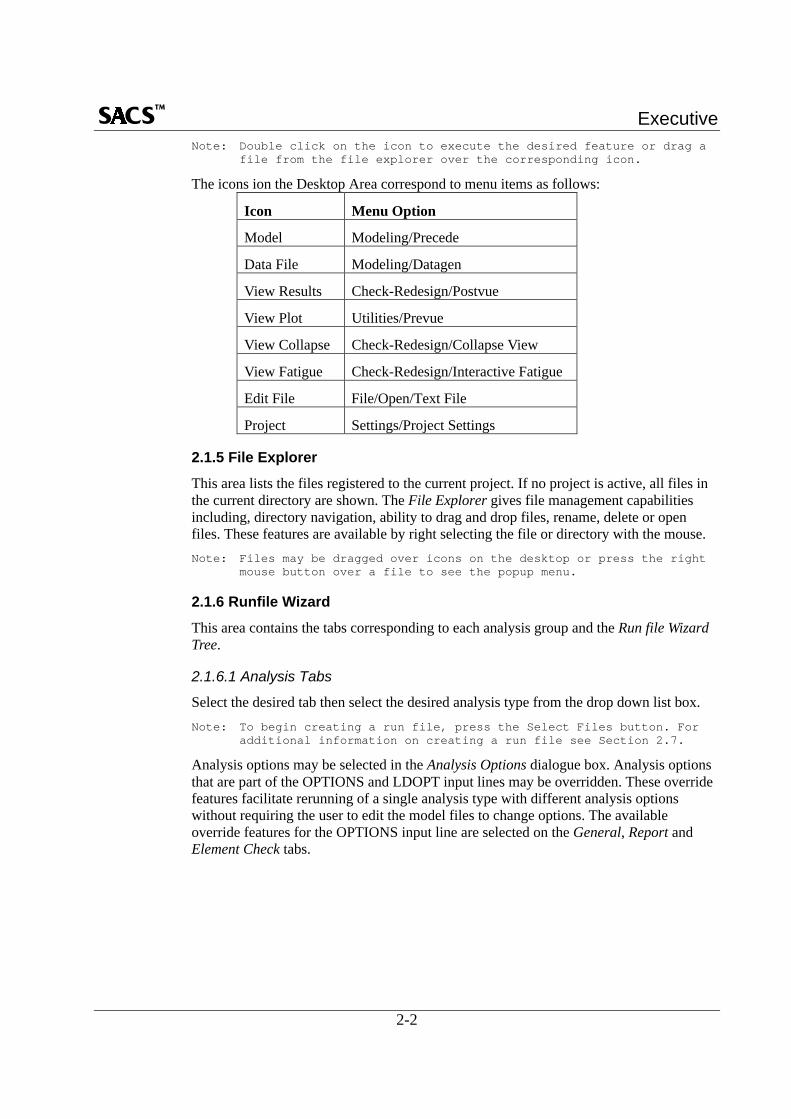
Note: Double click on the icon to execute the desired feature or drag afile from the file explorer over the corresponding icon.
The icons ion the Desktop Area correspond to menu items as follows:
Icon Menu Option
Model Modeling/Precede
Data File Modeling/Datagen
View Results Check-Redesign/Postvue
View Plot Utilities/Prevue
View Collapse Check-Redesign/Collapse View
View Fatigue Check-Redesign/Interactive Fatigue
Edit File File/Open/Text File
Project Settings/Project Settings
2.1.5 File ExplorerThis area lists the files registered to the current project. If no project is active, all files inthe current directory are shown. The File Explorer gives file management capabilitiesincluding, directory navigation, ability to drag and drop files, rename, delete or openfiles. These features are available by right selecting the file or directory with the mouse.Note: Files may be dragged over icons on the desktop or press the right
mouse button over a file to see the popup menu.
2.1.6 Runfile WizardThis area contains the tabs corresponding to each analysis group and the Run file WizardTree.
2.1.6.1 Analysis Tabs
Select the desired tab then select the desired analysis type from the drop down list box.Note: To begin creating a run file, press the Select Files button. For
additional information on creating a run file see Section 2.7.
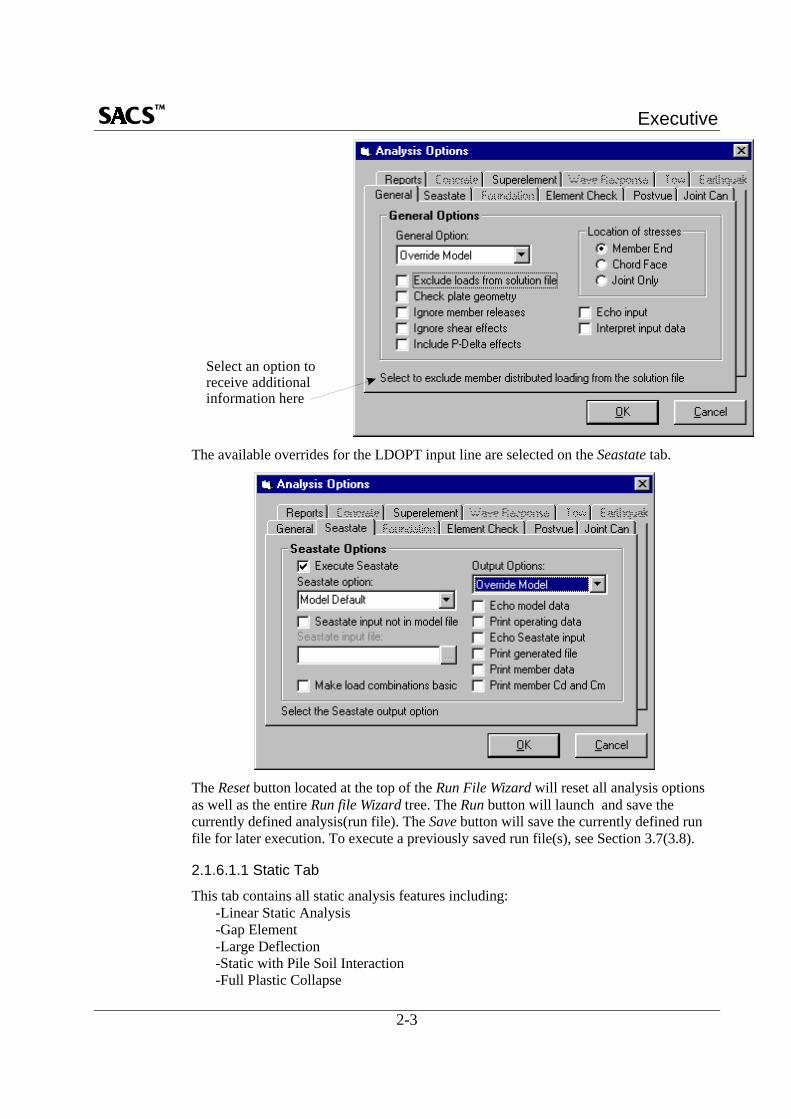
Analysis options may be selected in the Analysis Options dialogue box. Analysis optionsthat are part of the OPTIONS and LDOPT input lines may be overridden. These overridefeatures facilitate rerunning of a single analysis type with different analysis optionswithout requiring the user to edit the model files to change options. The availableoverride features for the OPTIONS input line are selected on the General, Report andElement Check tabs.
Executive
2-3
Select an option to receive additional information here
The available overrides for the LDOPT input line are selected on the Seastate tab.
The Reset button located at the top of the Run File Wizard will reset all analysis optionsas well as the entire Run file Wizard tree. The Run button will launch and save thecurrently defined analysis(run file). The Save button will save the currently defined runfile for later execution. To execute a previously saved run file(s), see Section 3.7(3.8).
2.1.6.1.1 Static Tab
This tab contains all static analysis features including:-Linear Static Analysis-Gap Element-Large Deflection-Static with Pile Soil Interaction-Full Plastic Collapse
Executive
2-4
-Plastic Collapse Restart
2.1.6.1.2 Dynamic Tab
This tab contains all dynamic analysis features including:-Dynamic Characteristics-Modal Restart-Earthquake-Forced Response-Engine Vibration-Ice Vibration-Wave Response-Probability
2.1.6.1.3 Post Processing Tab
This tab contains all post processing features including:-Element Stress/Code Check-Generate Postvue Database-Joint Can-Fatigue
2.1.6.1.4 Load Tab
This tab contains all the load generation features including:-Seastate Environmental Loads-Tow/Transportation-SACS to Wamit Converter-Wamit-Wamit to SACS Converter-Crane Superelement-SACS to Mora Converter-Mora-Mora to SACS Converter
2.1.6.1.5 Miscellaneous Tab
This tab contains miscellaneous features including:-Single Pile Analysis-Material Take-off-Flotation and Upending-Launch
2.1.6.1.6 Utilities Tab
This tab contains utility feature including:-Combine Solution File-Modify Solution File-Format Solution File-Unformat Formatted File-Create Superelement-Merge Superelement-Expand Superelement
Executive
2-5
-User Defined Superelement
2.1.6.2 Run file Wizard Tree
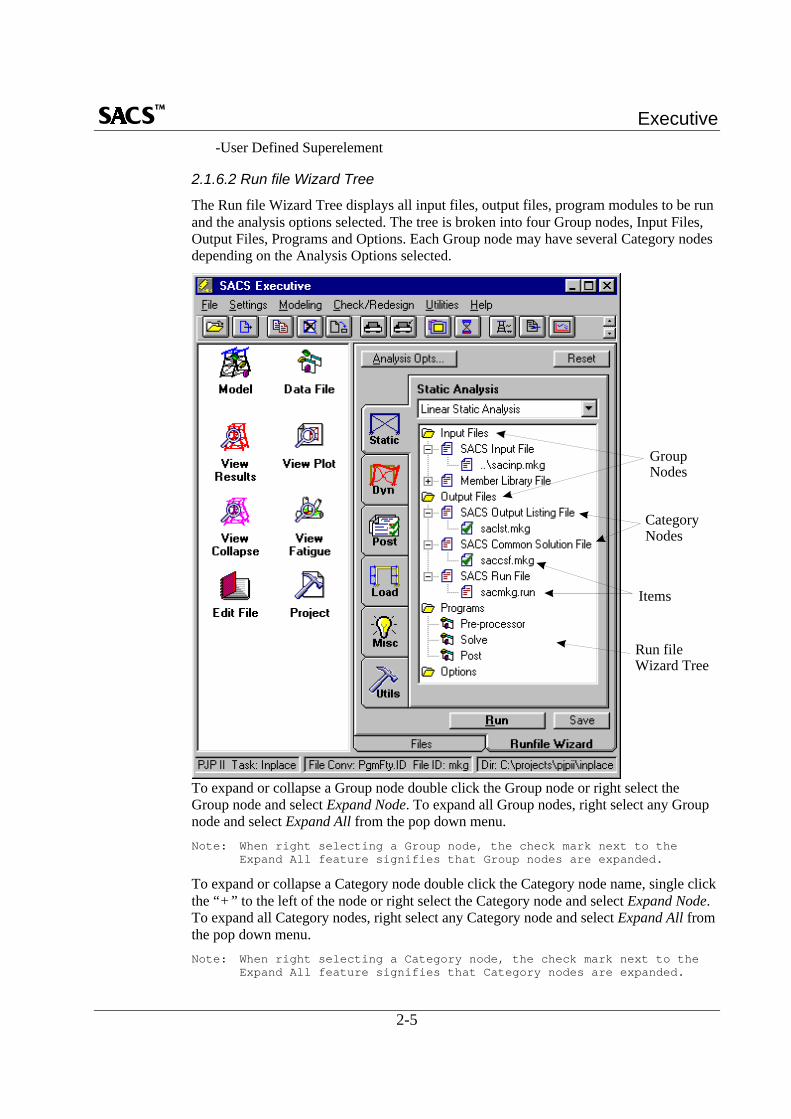
The Run file Wizard Tree displays all input files, output files, program modules to be runand the analysis options selected. The tree is broken into four Group nodes, Input Files,Output Files, Programs and Options. Each Group node may have several Category nodesdepending on the Analysis Options selected.
Run fileWizard Tree
GroupNodes
CategoryNodes
Items
To expand or collapse a Group node double click the Group node or right select theGroup node and select Expand Node. To expand all Group nodes, right select any Groupnode and select Expand All from the pop down menu.Note: When right selecting a Group node, the check mark next to the
Expand All feature signifies that Group nodes are expanded.
To expand or collapse a Category node double click the Category node name, single clickthe “+” to the left of the node or right select the Category node and select Expand Node.To expand all Category nodes, right select any Category node and select Expand All fromthe pop down menu.Note: When right selecting a Category node, the check mark next to the
Expand All feature signifies that Category nodes are expanded.
Executive
2-6
Expanded Category nodes will display the Item, which is often either an input or outputfile and also the relative path of the item.
Right selecting on any input file Item allows the user to rename, replace or open the inputfile Item with the associated program. Output files prior to executing the run file, onlyhave the rename, replace and the Keep File flag options. After executing the run file,where applicable, an Open… option becomes available.
By default, the Keep this File flag for output files is set on (checked). To remove the flag,right select the Item and select Keep this file (“X” placed next to the filename). All outputfiles with the Keep this File will be available after executing the run file.
2.1.7 WorksheetThe Worksheet provides work space where notes may be typed. All run file analysismessages are written to the worksheet area.Note: Hold the right mouse button down over the worksheet to get the
worksheet options menu.
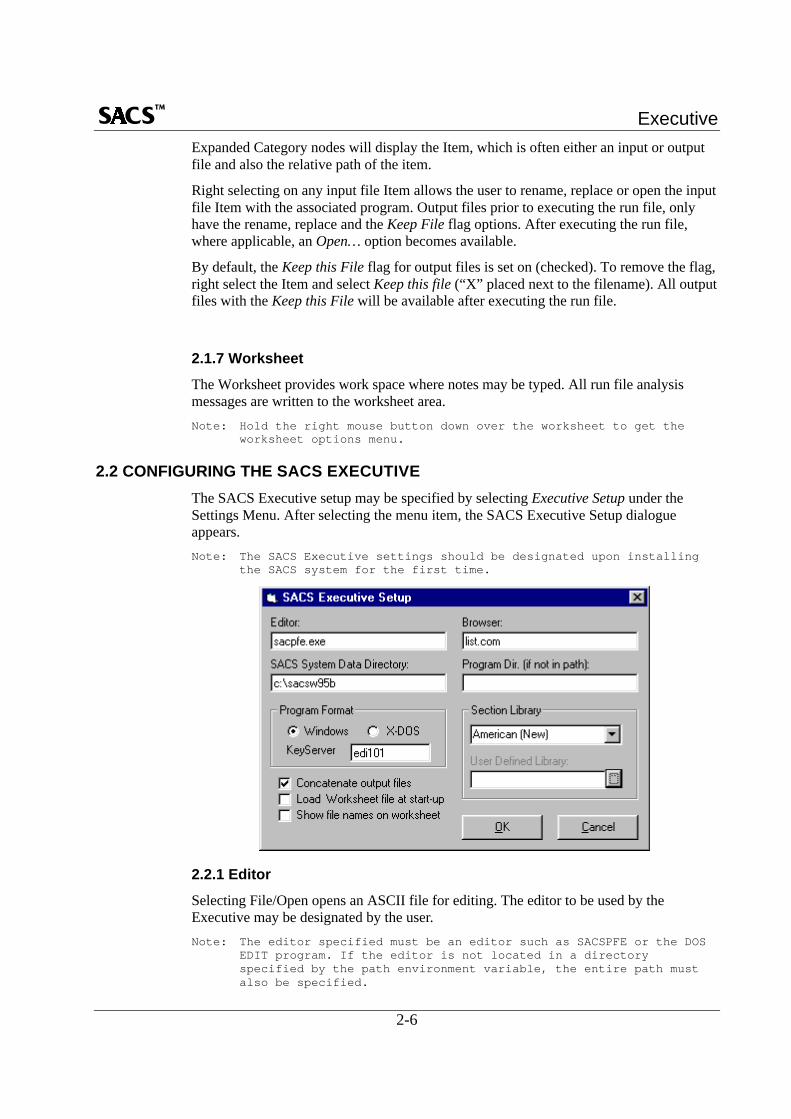
2.2 CONFIGURING THE SACS EXECUTIVEThe SACS Executive setup may be specified by selecting Executive Setup under theSettings Menu. After selecting the menu item, the SACS Executive Setup dialogueappears.Note: The SACS Executive settings should be designated upon installing
the SACS system for the first time.
2.2.1 EditorSelecting File/Open opens an ASCII file for editing. The editor to be used by theExecutive may be designated by the user.Note: The editor specified must be an editor such as SACSPFE or the DOS
EDIT program. If the editor is not located in a directoryspecified by the path environment variable, the entire path mustalso be specified.
Executive
2-7
2.2.2 BrowserSelecting File/Browse opens an ASCII file for viewing. The viewer to be used by theExecutive may be designated by the user.Note: The viewer specified is normally a program that will view ASCII
files only and not allow editing of the file such LIST program. Ifthe browser is not located in a directory specified by the pathenvironment variable, the entire path must also be specified.
2.2.3 SACS System Data DirectoryThe location of the SACS system program data files (ie. program help files, sectionlibrary files and program module data files) required by the SACS system is designated inthis field.Note: This directory is not to be confused with the directory containing
the SACS model and input files. This directory is a SACS systemdirectory, containing files required by the system.
2.2.4 SACS Program DirectoryThe directory containing the SACS system program execution modules is designated inthis field if the directory is not specified in the system path statement.Note: Typically path statements are specified in the Autoexec.bat
located in the root directory of the boot drive. This file shouldbe modified only by qualified personnel. Refer to thedocumentation that came with the system for complete details orcontact your System Administrator.
2.2.5 SACS Program FormatThe program version: Windows or XDOS is designated by selecting the appropriate radiobutton. The version is required to launch any interactive program within the Executive orto create an execution run file.
2.2.6 Key ServerThe name of the security key server is specified in the Key Server field.Note: The key server is only applicable for the Windows format of the
SACS programs.
2.2.7 Section LibraryThe default section library is designated from the Section Library combo box by selectingthe appropriate library from the combo box. If a user defined library is to be used, selectUser Defined from the combo box then enter the user defined library filename includingfull path in the User Defined Library field.Note: The SACS supplied section library selected, must be in the SACS
System Data Directory designated. User defined library files maybe located anywhere as long as the complete path is specified.
2.2.8 Concatenate Output FilesWhen creating a execution run file, the output listing generated by all of the programmodules executed will be put in the same file if this box is checked. Otherwise, eachprogram module executed will create a separate output listing file.
Executive
2-8
2.2.9 Load Worksheet file at start-upThe Load Worksheet file at start-up checkbox will open the last saved worksheet on thestartup of the Executive. With checkbox deselected, a blank worksheet will be loaded onstartup.
2.2.10 Show file names on worksheetThe Show file names on worksheet checkbox will display the names, as well as, the pathsof the input and output files used whenever a SACS analysis is executed.
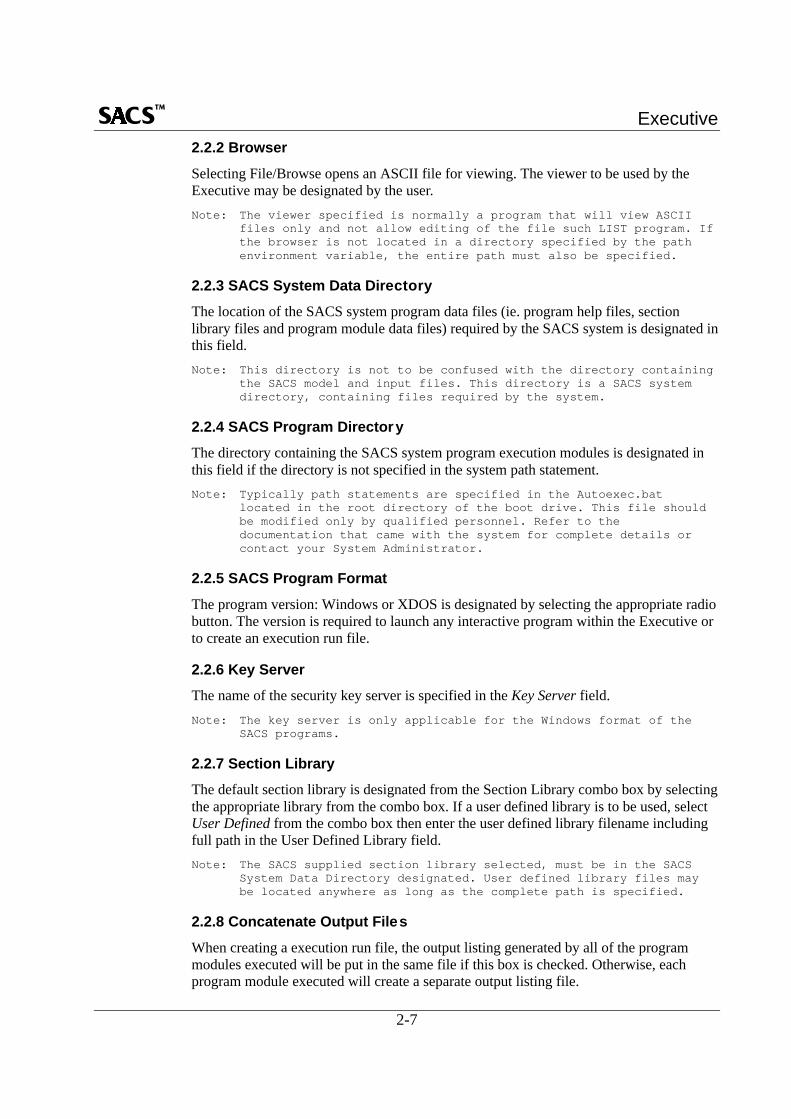
2.3 CONFIGURING THE SACS SYSTEMThe default SACS System settings may be specified by selecting SACS SystemConfiguration under the Settings menu. After selecting the menu item, the SACS SystemConfiguration dialogue is displayed.Note: The SACS System configuration should be designated upon installing
the SACS system prior to using the SACS system for the first time.
2.3.1 UnitsThe default system units are designated by selecting the appropriate radio button.
2.3.2 Element SortingThe desired element sorting technique to be used by Precede is stipulated by selecting theappropriate button.
2.3.3 Joint CoordinatesJoint coordinates can be stored in the SACS model file as decimal feet(meters) or asfeet(meters) and inches(centimeters). To store joint coordinates as feet(meters) only selectthe Joint coord in feet/meters only checkbox. This checkbox does not affect how jointcoordinates are input.
2.3.4 Convert Lower CaseSACS can differentiate between lower case and upper case characters. Unless specificallyrequired it is recommended to leave this checkbox selected(checked). When selected
Executive
2-9
checkbox will force all interactive programs to convert all lower case entries to uppercase. When deselected lower case entries when will viewed as different from their uppercase counterparts. For example, a load condition ID of abc will different from a loadcondition ID of ABC.
2.3.5 Zoom FactorThis value controls the magnification step that interactive programs will use when theZoom-in or Zoom-out features are invoked.
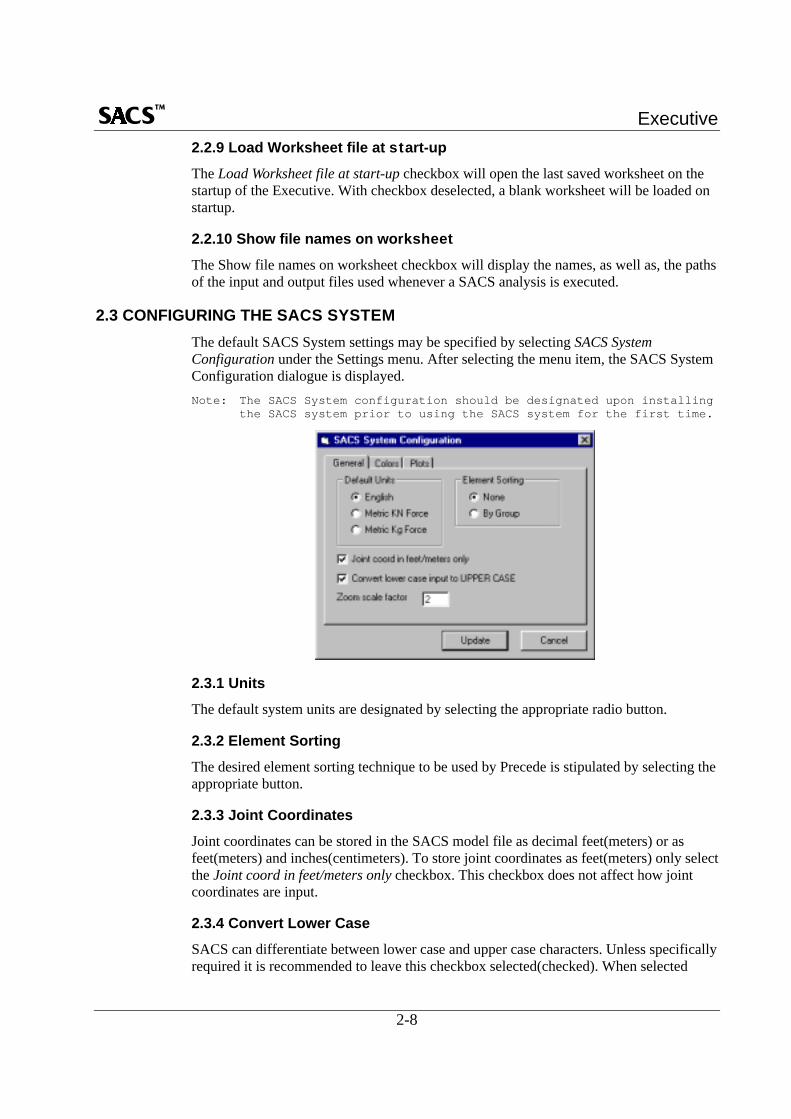
2.3.6 ColorsSelecting the Color tab displays the current color assignments. To change a colorassignment double click an item or select it from the combo box and select Palette. Thecolors designated are used by all interactive programs.
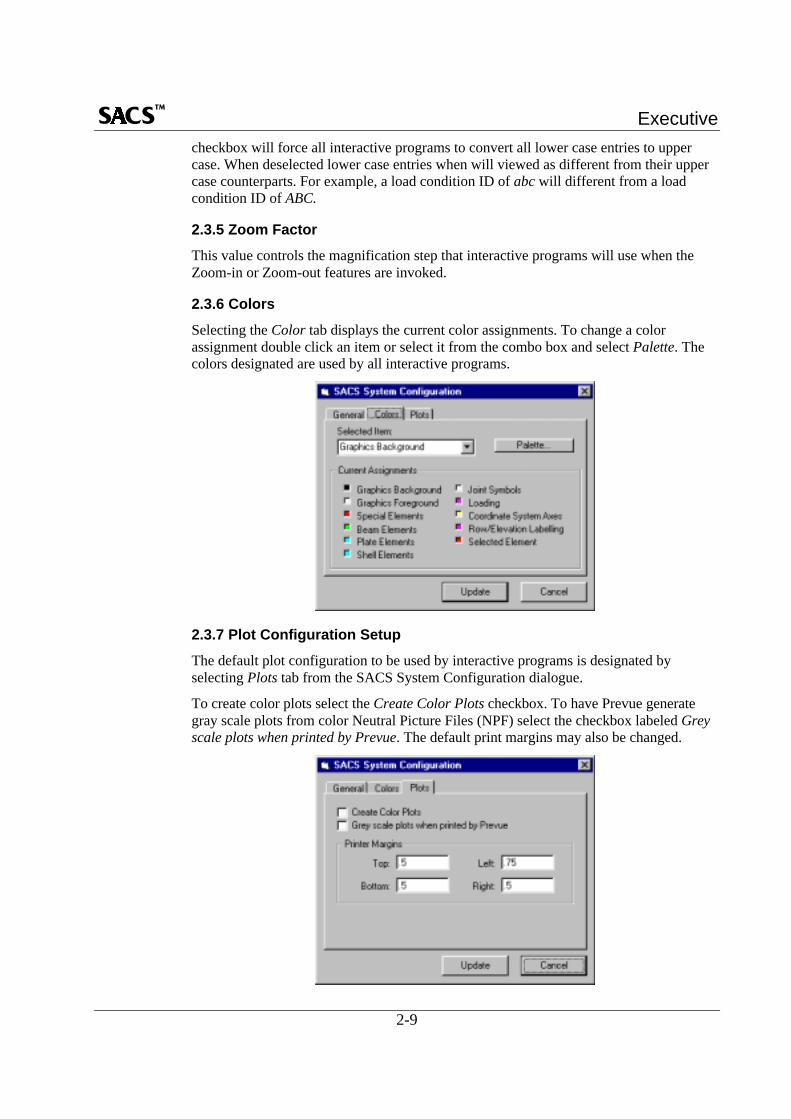
2.3.7 Plot Configuration SetupThe default plot configuration to be used by interactive programs is designated byselecting Plots tab from the SACS System Configuration dialogue.
To create color plots select the Create Color Plots checkbox. To have Prevue generategray scale plots from color Neutral Picture Files (NPF) select the checkbox labeled Greyscale plots when printed by Prevue. The default print margins may also be changed.

Executive
2-10
Note: Printer margins are specified in inches.
2.4 USING PROJECTSThe Executive allows the user to set up projects using the Projects dialogue. Each projectis defined by a name of up to eighteen characters. All project data, by default, is stored inthe project directory defined by the user.
A project may consist of various project tasks. For example, an analysis type such asinplace, lift or fatigue may be classified as a task. Each task has a default directorydefined as a sub-directory of the project directory where all task data is stored.
Files used for a project task are registered to the project file registry so that they may beaccessed automatically by the Executive. All registered files appear in the File Explorerarea which shows the filename, task to which it is assigned, the file description and thelast time modified.
Whenever a file is used to generate a run file or is created by an analysis execution, it isregistered to the project database for the current task. Files may be manually registeredby the user using the add button in the File Explorer section of the executive.
To register a file, click on the Add button. Select the filename and specify the program towhich the file applies, the file type, the task to which it applies and specify a description.If the file is to apply to all tasks within a project, select All Tasks as the project task.

Executive
2-11
Files may be removed from the project file registry or file details may be modified usingthe Remove or Modify buttons, respectively. See Section 4.2 for additional Project andAnalysis Task details.
2.5 FILE NAME CONVENTION OPTIONS
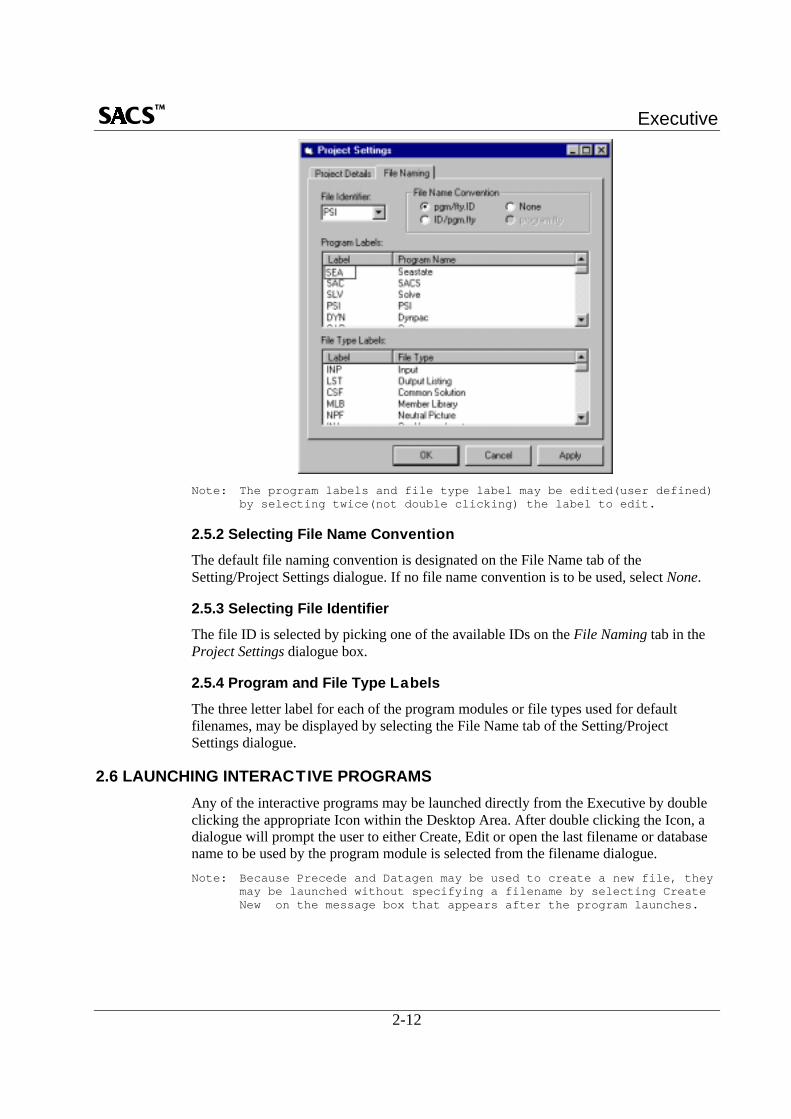
2.5.1 OverviewDefault file names created by SACS interactive program modules are determined by thefile naming convention designated on the File Name tab of the Setting/Project Settingsdialogue. In addition, the SACS Executive has the ability to determine the inputfilenames required automatically when creating an execution run file based on the defaultnaming convention selected.Note: The naming convention determines only the default filename.
Although it is recommended to use one on the SACS file namingconventions, files may have any name desired by the user.
The SACS system may be setup to use one of the two file naming conventions,PGMFTY.VER or VERPGM.FTY, or no naming convention. PGM represents the threeletter abbreviation of the program to which the file applies, FTY represents the three letterlabel of the file type and VER is the file identifier.
When using the naming convention designated as PGMFTY.VER, the first threecharacters of the default filename represent the applicable program module and the nextthree characters represent the file type. The file extension is set to the project versionidentifier. For example, the default file name for an output listing file created by PSI forfile identifier 001 is psilst.001, where psi is the three letter label for the PSI module, lstrepresents an output listing file type and 001 is the file identifier.
When using the naming convention designated as VERPGM.FTY, the first threecharacters of the default filename are the file identifier. The next three characters are thelabel of the applicable program module. The file extension is set to the file typeabbreviation. For example, the default file name for an output listing file created by PSIfor file identifier 001 is 001psi.lst, where psi is the three letter label for the PSI module,lst represents an output listing file type and 001 is the file identifier.Note: A list of all three letter program labels and file type labels are
displayed by selecting the File Name tab of the Setting/ProjectSettings dialogue.
Executive
2-12
Note: The program labels and file type label may be edited(user defined)by selecting twice(not double clicking) the label to edit.
2.5.2 Selecting File Name ConventionThe default file naming convention is designated on the File Name tab of theSetting/Project Settings dialogue. If no file name convention is to be used, select None.
2.5.3 Selecting File IdentifierThe file ID is selected by picking one of the available IDs on the File Naming tab in theProject Settings dialogue box.
2.5.4 Program and File Type LabelsThe three letter label for each of the program modules or file types used for defaultfilenames, may be displayed by selecting the File Name tab of the Setting/ProjectSettings dialogue.
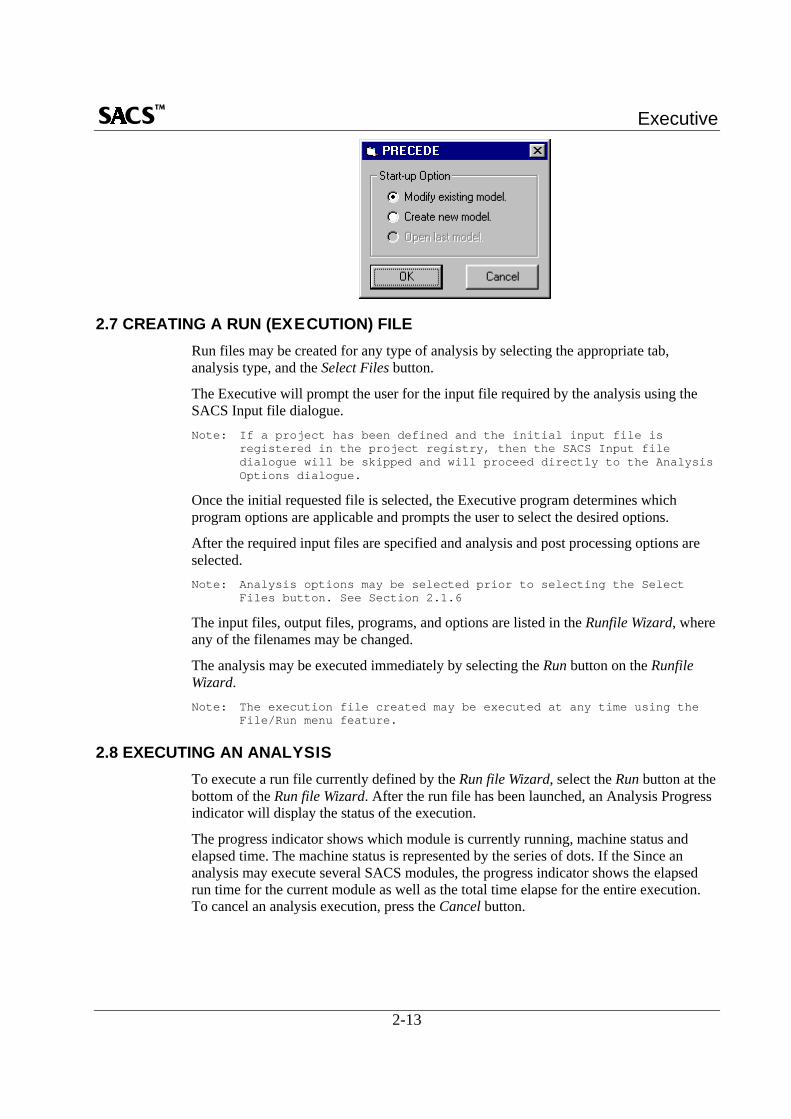
2.6 LAUNCHING INTERACTIVE PROGRAMSAny of the interactive programs may be launched directly from the Executive by doubleclicking the appropriate Icon within the Desktop Area. After double clicking the Icon, adialogue will prompt the user to either Create, Edit or open the last filename or databasename to be used by the program module is selected from the filename dialogue.Note: Because Precede and Datagen may be used to create a new file, they
may be launched without specifying a filename by selecting CreateNew on the message box that appears after the program launches.
Executive
2-13
2.7 CREATING A RUN (EXECUTION) FILERun files may be created for any type of analysis by selecting the appropriate tab,analysis type, and the Select Files button.
The Executive will prompt the user for the input file required by the analysis using theSACS Input file dialogue.Note: If a project has been defined and the initial input file is
registered in the project registry, then the SACS Input filedialogue will be skipped and will proceed directly to the AnalysisOptions dialogue.
Once the initial requested file is selected, the Executive program determines whichprogram options are applicable and prompts the user to select the desired options.
After the required input files are specified and analysis and post processing options areselected.Note: Analysis options may be selected prior to selecting the Select
Files button. See Section 2.1.6
The input files, output files, programs, and options are listed in the Runfile Wizard, whereany of the filenames may be changed.
The analysis may be executed immediately by selecting the Run button on the RunfileWizard.Note: The execution file created may be executed at any time using the
File/Run menu feature.
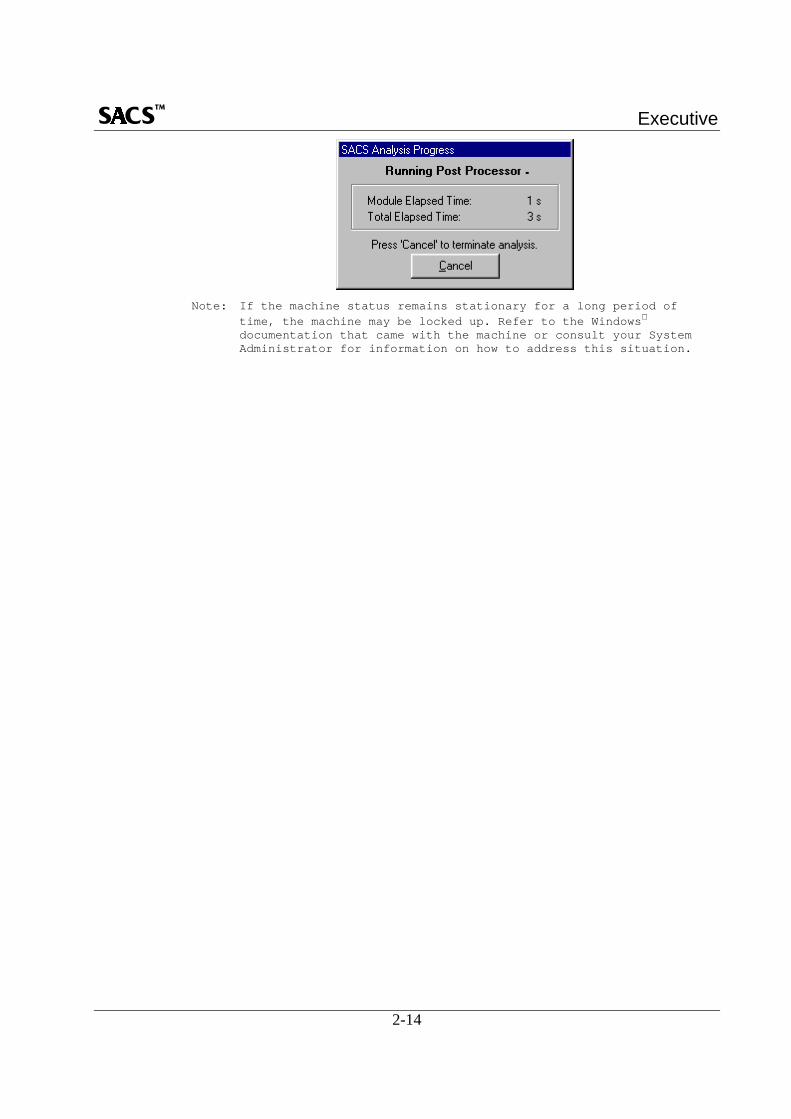
2.8 EXECUTING AN ANALYSISTo execute a run file currently defined by the Run file Wizard, select the Run button at thebottom of the Run file Wizard. After the run file has been launched, an Analysis Progressindicator will display the status of the execution.
The progress indicator shows which module is currently running, machine status andelapsed time. The machine status is represented by the series of dots. If the Since ananalysis may execute several SACS modules, the progress indicator shows the elapsedrun time for the current module as well as the total time elapse for the entire execution.To cancel an analysis execution, press the Cancel button.
Executive
2-14
Note: If the machine status remains stationary for a long period oftime, the machine may be locked up. Refer to the Windows
documentation that came with the machine or consult your SystemAdministrator for information on how to address this situation.
Executive
SECTION 3FILE FEATURES

Executive
Executive
3-1
3.0 FILE FEATURES
3.1 NEW
3.1.1 Text FileOpens a new text file for editing using the editor specified on the Executive Setupdialogue.
3.1.2 WorksheetOpens a new worksheet in the Worksheet Area, see Section 2.1.7. If the open worksheethas any unsaved changes, Executive will prompt to save or discard the changes.
The worksheet displays Module run start and stop times, Module run status, system errorsand key errors. The messages on the worksheet may be annotated by the user. All editcommands are available from the mouse and are accessible by positioning the mouseover the worksheet and right clicking the mouse. A quick menu will appear and menuitems can be selected using the left mouse button.
3.1.3 ProjectOpens a new project; refer to Section 4.2 for a description of the Project feature.
3.2 OPEN
3.2.1 Text FileOpens an existing file for editing using the editor whose execution command is specifiedon the Executive Setup dialogue.
3.2.2 WorksheetOpens an existing worksheet; if applicable, Executive will prompt to save or discardchanges.
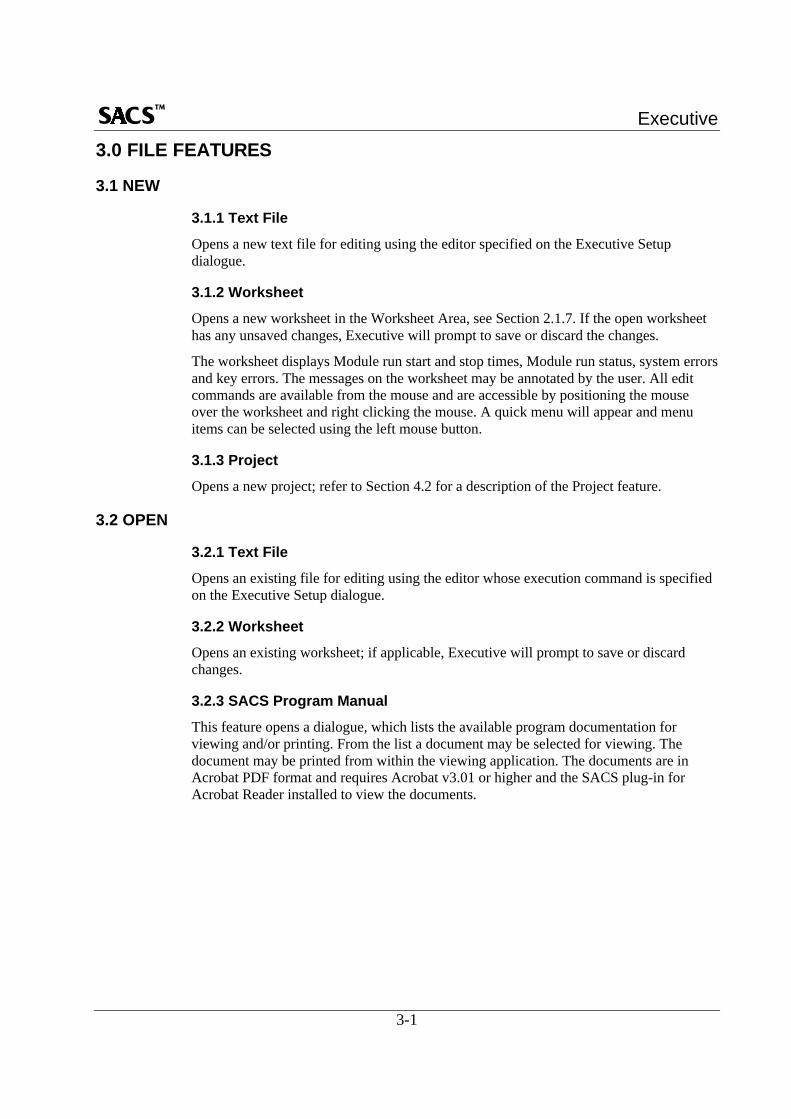
3.2.3 SACS Program ManualThis feature opens a dialogue, which lists the available program documentation forviewing and/or printing. From the list a document may be selected for viewing. Thedocument may be printed from within the viewing application. The documents are inAcrobat PDF format and requires Acrobat v3.01 or higher and the SACS plug-in forAcrobat Reader installed to view the documents.
Executive
3-2
3.3 BROWSEOpens an ASCII file for viewing (no editing) using the browser defined in the ExecutiveSettings dialogue, Section 4.1, utility included with the SACS system.
3.4 COPYThis feature will copy an existing file to a new filename. This feature is functionally thesame as the Edit/Copy/Paste feature of the Windows Explorer.
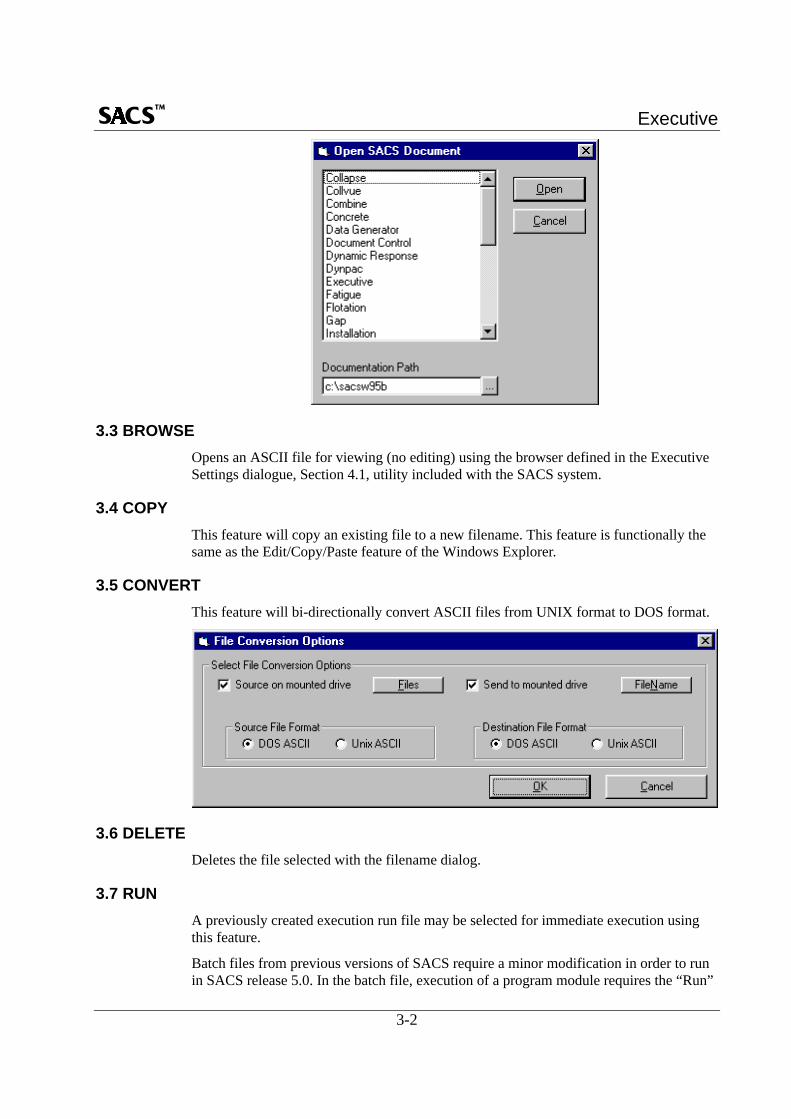
3.5 CONVERTThis feature will bi-directionally convert ASCII files from UNIX format to DOS format.
3.6 DELETEDeletes the file selected with the filename dialog.
3.7 RUNA previously created execution run file may be selected for immediate execution usingthis feature.
Batch files from previous versions of SACS require a minor modification in order to runin SACS release 5.0. In the batch file, execution of a program module requires the “Run”
Executive
3-3
keyword. For example, the execution of a program module in a batch file from a previousrelease would appear as:
SACWPRE < sacinp.gap >> gaplst.mkg
To convert this line for SACS release 5.0, change the line as follows:
run SACWPRE < sacinp.gap >> gaplst.mkg
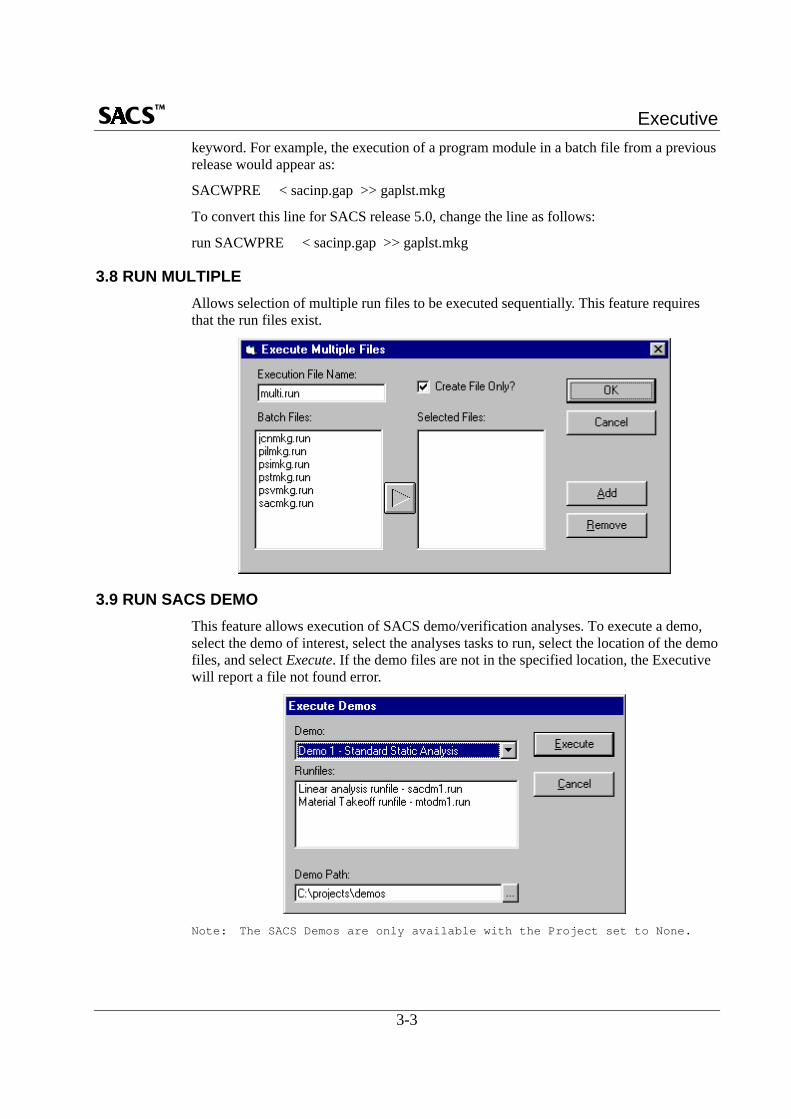
3.8 RUN MULTIPLEAllows selection of multiple run files to be executed sequentially. This feature requiresthat the run files exist.
3.9 RUN SACS DEMOThis feature allows execution of SACS demo/verification analyses. To execute a demo,select the demo of interest, select the analyses tasks to run, select the location of the demofiles, and select Execute. If the demo files are not in the specified location, the Executivewill report a file not found error.
Note: The SACS Demos are only available with the Project set to None.
Executive
3-4
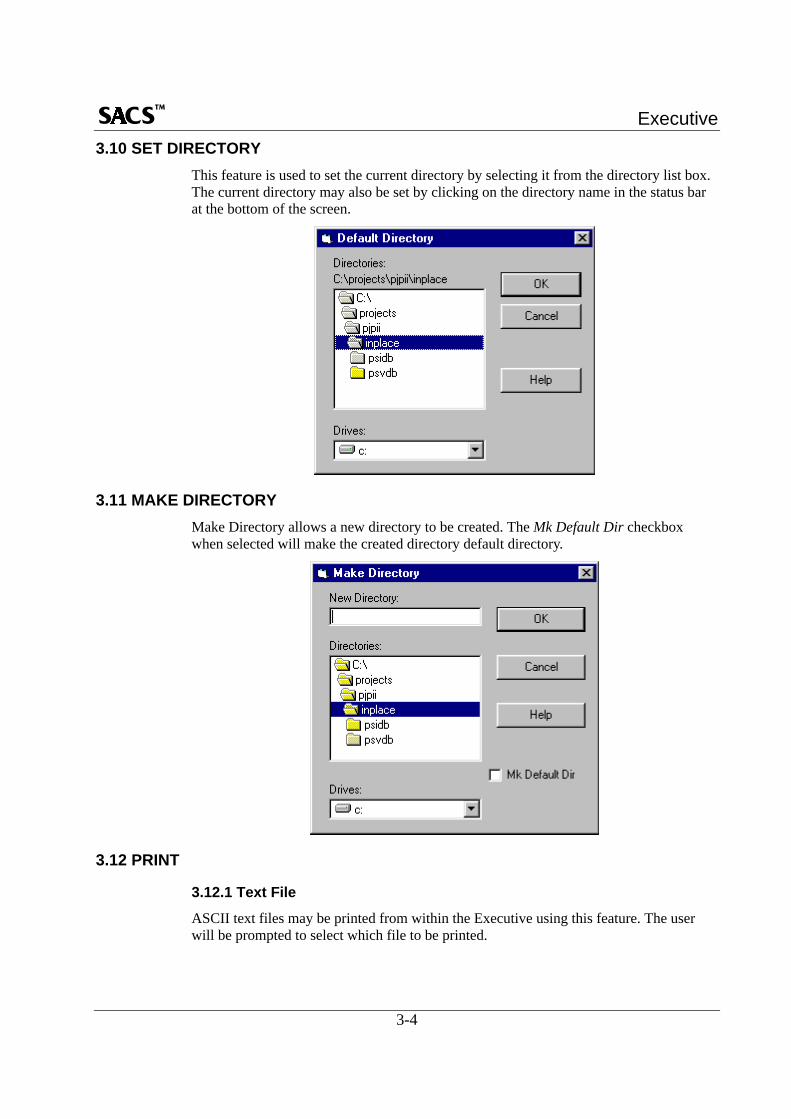
3.10 SET DIRECTORYThis feature is used to set the current directory by selecting it from the directory list box.The current directory may also be set by clicking on the directory name in the status barat the bottom of the screen.
3.11 MAKE DIRECTORYMake Directory allows a new directory to be created. The Mk Default Dir checkboxwhen selected will make the created directory default directory.
3.12 PRINT
3.12.1 Text FileASCII text files may be printed from within the Executive using this feature. The userwill be prompted to select which file to be printed.
Executive
3-5
3.12.2 WorksheetThis feature will print the contents of the open worksheet.
3.13 PRINTER SETUPThe Print Setup option controls the printing of ASCII files from within the Executive.The user is able to select which printer will used for printing. For completedocumentation of this feature refer to the documentation that came with your computer orask your system administrator.
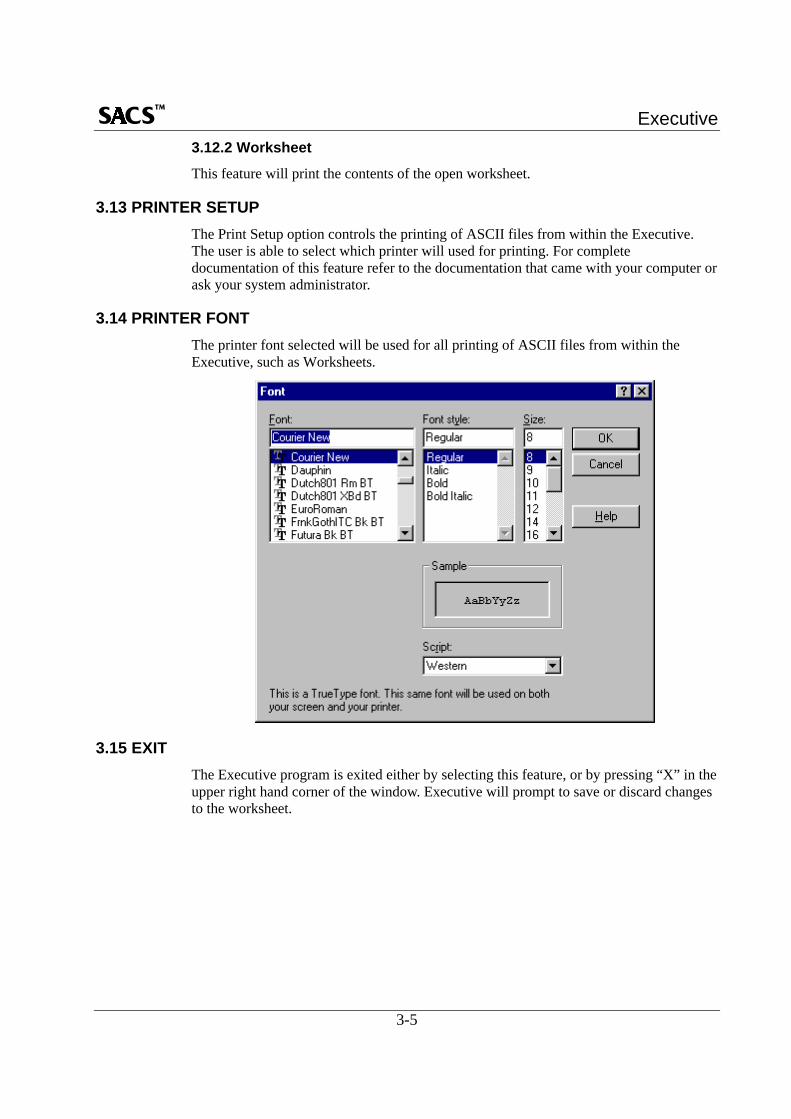
3.14 PRINTER FONTThe printer font selected will be used for all printing of ASCII files from within theExecutive, such as Worksheets.
3.15 EXITThe Executive program is exited either by selecting this feature, or by pressing “X” in theupper right hand corner of the window. Executive will prompt to save or discard changesto the worksheet.

Executive
3-6
Executive
SECTION 4SETTINGS FEATURES

Executive
Executive
4-1
4.0 SETTINGS FEATURES
4.1 EXECUTIVE SETTINGSThis opens the Executive Setup dialogue box which allows the user to change variousExecutive program settings. See Section 2.2 Configuring the SACS Executive for adetailed discussion of the setup parameters.
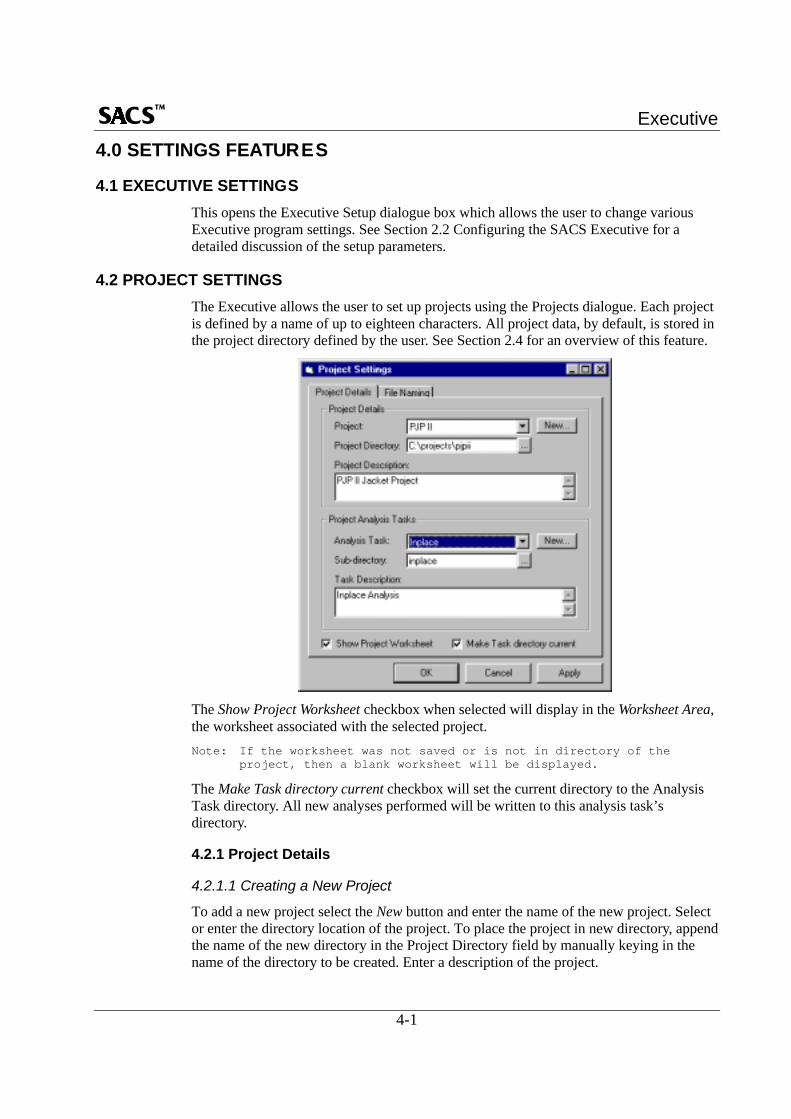
4.2 PROJECT SETTINGSThe Executive allows the user to set up projects using the Projects dialogue. Each projectis defined by a name of up to eighteen characters. All project data, by default, is stored inthe project directory defined by the user. See Section 2.4 for an overview of this feature.
The Show Project Worksheet checkbox when selected will display in the Worksheet Area,the worksheet associated with the selected project.Note: If the worksheet was not saved or is not in directory of the
project, then a blank worksheet will be displayed.
The Make Task directory current checkbox will set the current directory to the AnalysisTask directory. All new analyses performed will be written to this analysis task’sdirectory.
4.2.1 Project Details
4.2.1.1 Creating a New Project
To add a new project select the New button and enter the name of the new project. Selector enter the directory location of the project. To place the project in new directory, appendthe name of the new directory in the Project Directory field by manually keying in thename of the directory to be created. Enter a description of the project.
Executive
4-2
4.2.1.2 Selecting an Existing Project
All defined Projects are shown by selecting the drop down button of the Project combobox. Select one of the existing projects.
Projects may be copied from one machine to another by simply copying all associateddirectories and files then adding a new project specifying the appropriate projectdirectory. All tasks and task sub-directories will then be available to the new project.
4.2.2 Project Analysis Tasks
4.2.2.1 Creating a New Analysis Task
To add a new Project Analysis Task, select the New button and enter the name of the newanalysis task. Enter the subdirectory location and name of the analysis task. In thissubdirectory, the Executive will place all files that deal with this new analysis. By defaulta directory name that is entered in the Sub-directory field will be created under theproject directory. To place the analysis task subdirectory outside the Project directory,select/enter the complete path to the desired directory location.
4.2.2.2 Selecting an Existing Ana lysis Task
All defined analysis tasks for the current project are shown by selecting the drop downbutton of the Analysis Task combo box. Select one of the existing analysis tasks.
4.2.3 File NamingThe SACS file naming convention is defined on the File Naming tab. See Section 2.5 fora detailed discussion on the SACS file naming convention features. The file ID, and filenaming convention may be selected.
4.3 SACS SYSTEM CONFIGURATIONThis feature allows specification of the SACS System Configuration. See Section 2.3 fora detailed discussion on the system setup options.
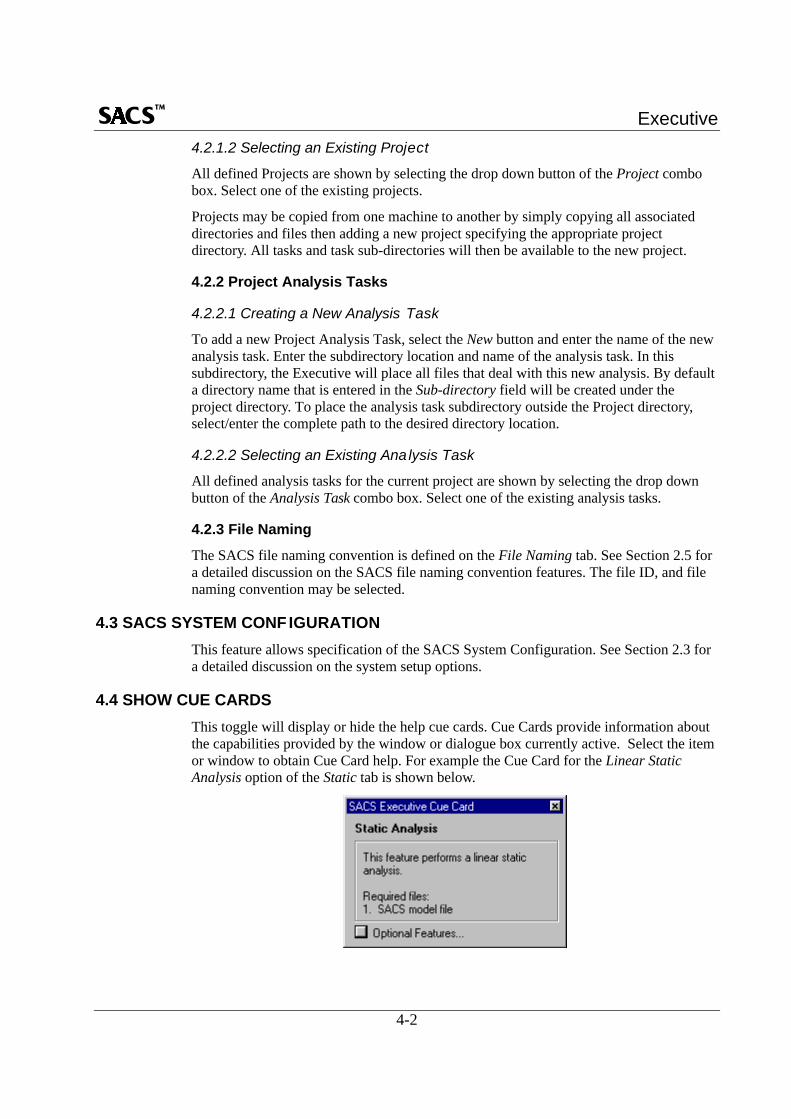
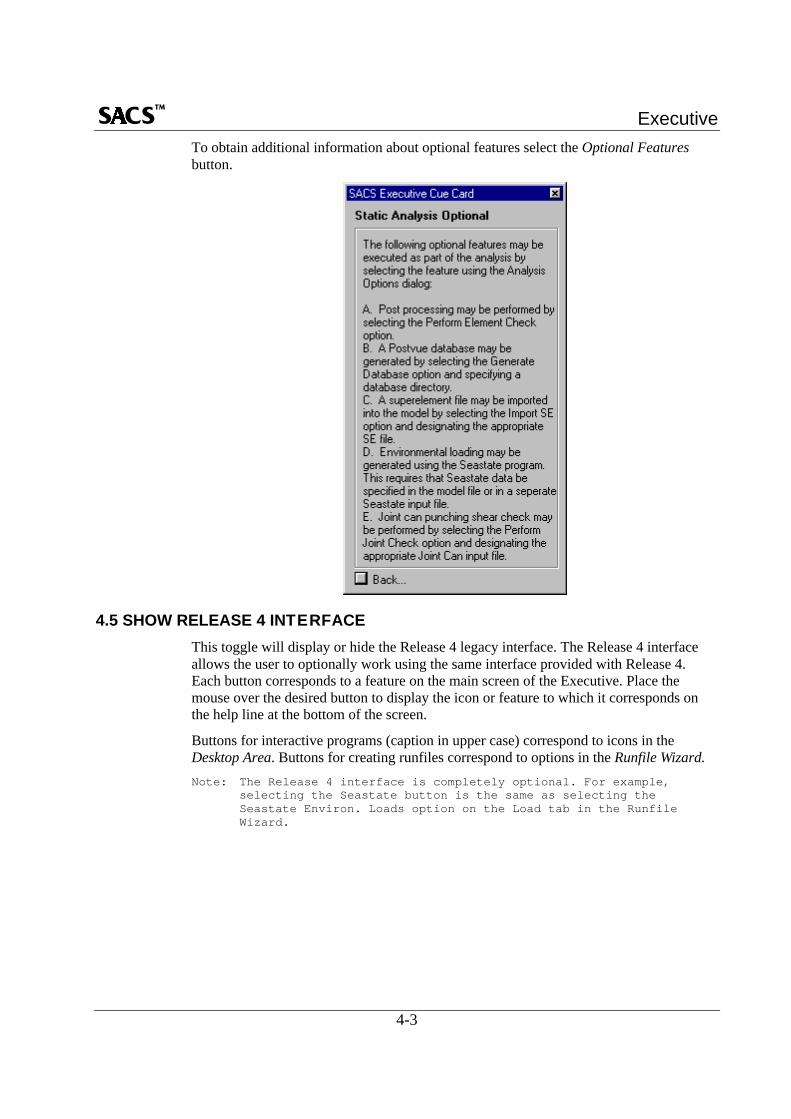
4.4 SHOW CUE CARDSThis toggle will display or hide the help cue cards. Cue Cards provide information aboutthe capabilities provided by the window or dialogue box currently active. Select the itemor window to obtain Cue Card help. For example the Cue Card for the Linear StaticAnalysis option of the Static tab is shown below.
Executive
4-3
To obtain additional information about optional features select the Optional Featuresbutton.
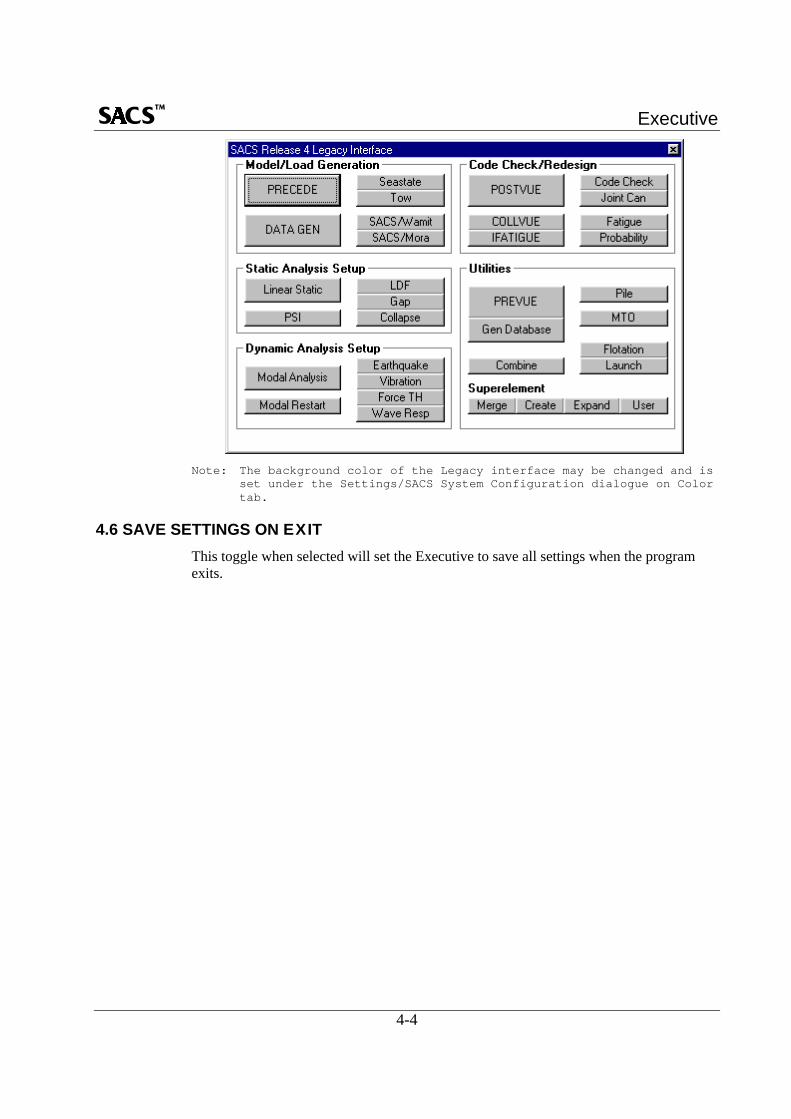
4.5 SHOW RELEASE 4 INTERFACEThis toggle will display or hide the Release 4 legacy interface. The Release 4 interfaceallows the user to optionally work using the same interface provided with Release 4.Each button corresponds to a feature on the main screen of the Executive. Place themouse over the desired button to display the icon or feature to which it corresponds onthe help line at the bottom of the screen.
Buttons for interactive programs (caption in upper case) correspond to icons in theDesktop Area. Buttons for creating runfiles correspond to options in the Runfile Wizard.Note: The Release 4 interface is completely optional. For example,
selecting the Seastate button is the same as selecting theSeastate Environ. Loads option on the Load tab in the RunfileWizard.
Executive
4-4
Note: The background color of the Legacy interface may be changed and isset under the Settings/SACS System Configuration dialogue on Colortab.
4.6 SAVE SETTINGS ON EXITThis toggle when selected will set the Executive to save all settings when the programexits.
Executive
SECTION 5MODELING FEATURES

Executive
Executive
5-1
5.0 MODELING FEATURESThe features under the Modeling menu allow for the creation of SACS model and loadingdata.
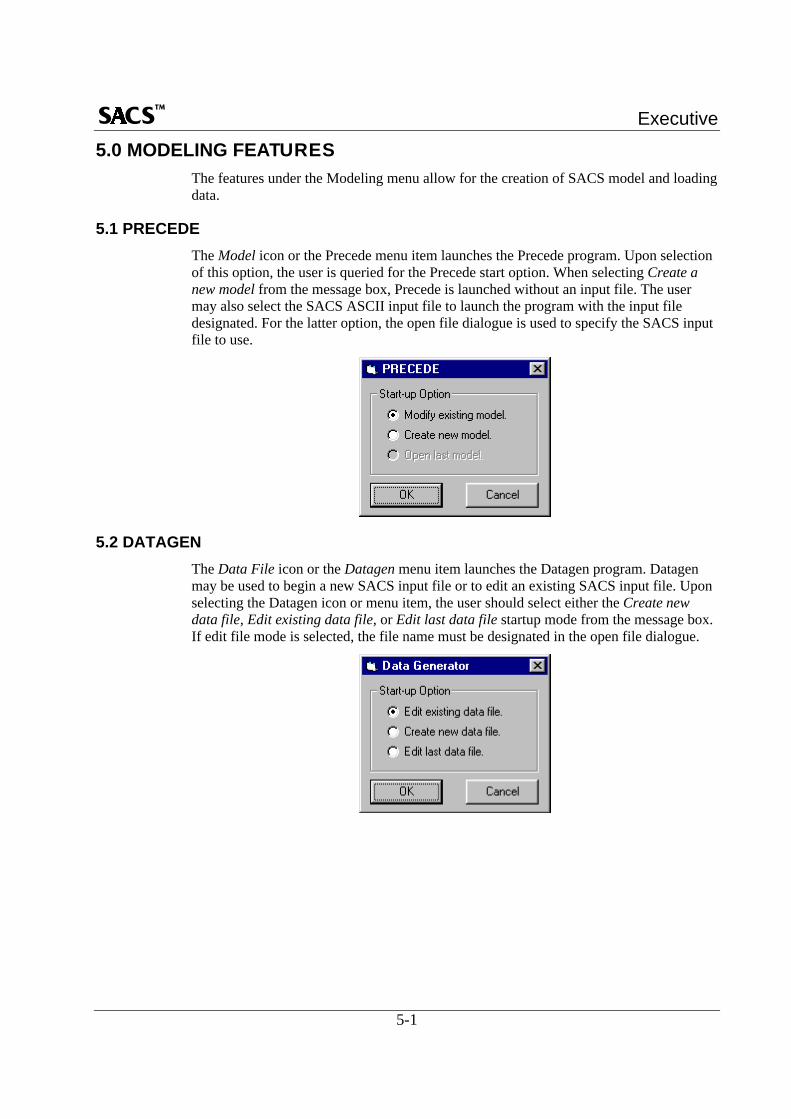
5.1 PRECEDEThe Model icon or the Precede menu item launches the Precede program. Upon selectionof this option, the user is queried for the Precede start option. When selecting Create anew model from the message box, Precede is launched without an input file. The usermay also select the SACS ASCII input file to launch the program with the input filedesignated. For the latter option, the open file dialogue is used to specify the SACS inputfile to use.
5.2 DATAGENThe Data File icon or the Datagen menu item launches the Datagen program. Datagenmay be used to begin a new SACS input file or to edit an existing SACS input file. Uponselecting the Datagen icon or menu item, the user should select either the Create newdata file, Edit existing data file, or Edit last data file startup mode from the message box.If edit file mode is selected, the file name must be designated in the open file dialogue.

Executive
5-2

Executive
SECTION 6CHECK/REDESIGN FEATURES

Executive
Executive
6-1
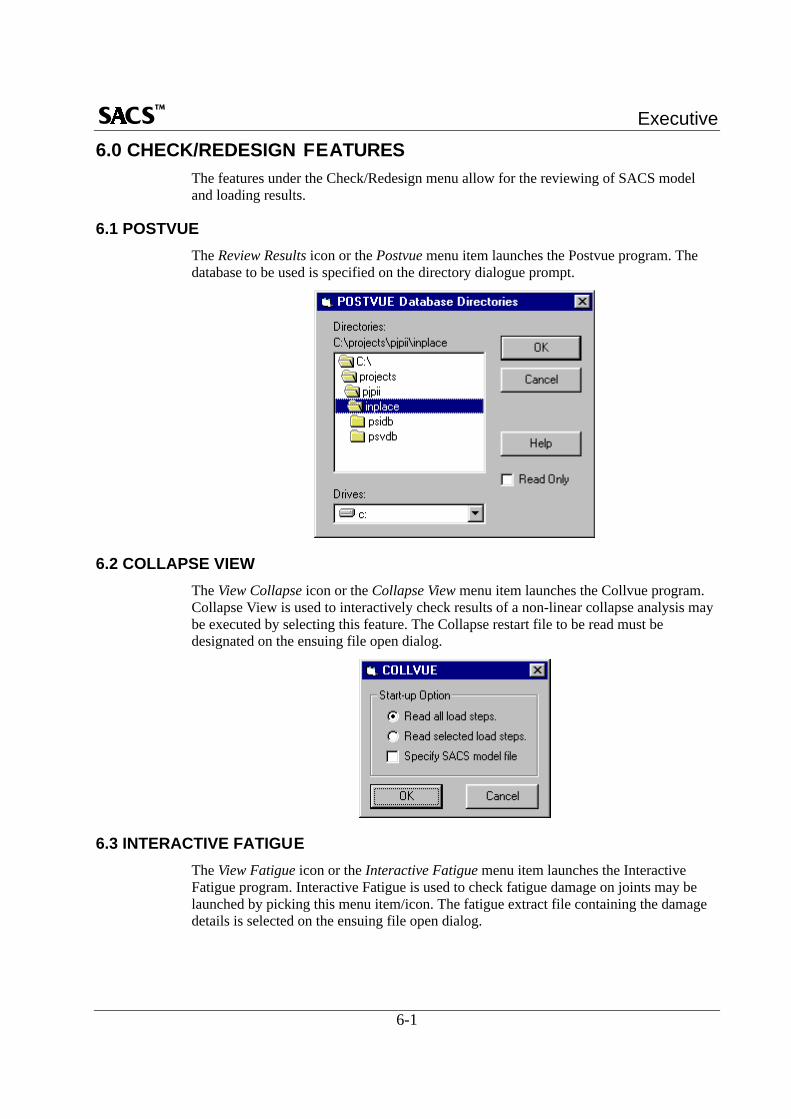
6.0 CHECK/REDESIGN FEATURESThe features under the Check/Redesign menu allow for the reviewing of SACS modeland loading results.
6.1 POSTVUEThe Review Results icon or the Postvue menu item launches the Postvue program. Thedatabase to be used is specified on the directory dialogue prompt.
6.2 COLLAPSE VIEWThe View Collapse icon or the Collapse View menu item launches the Collvue program.Collapse View is used to interactively check results of a non-linear collapse analysis maybe executed by selecting this feature. The Collapse restart file to be read must bedesignated on the ensuing file open dialog.
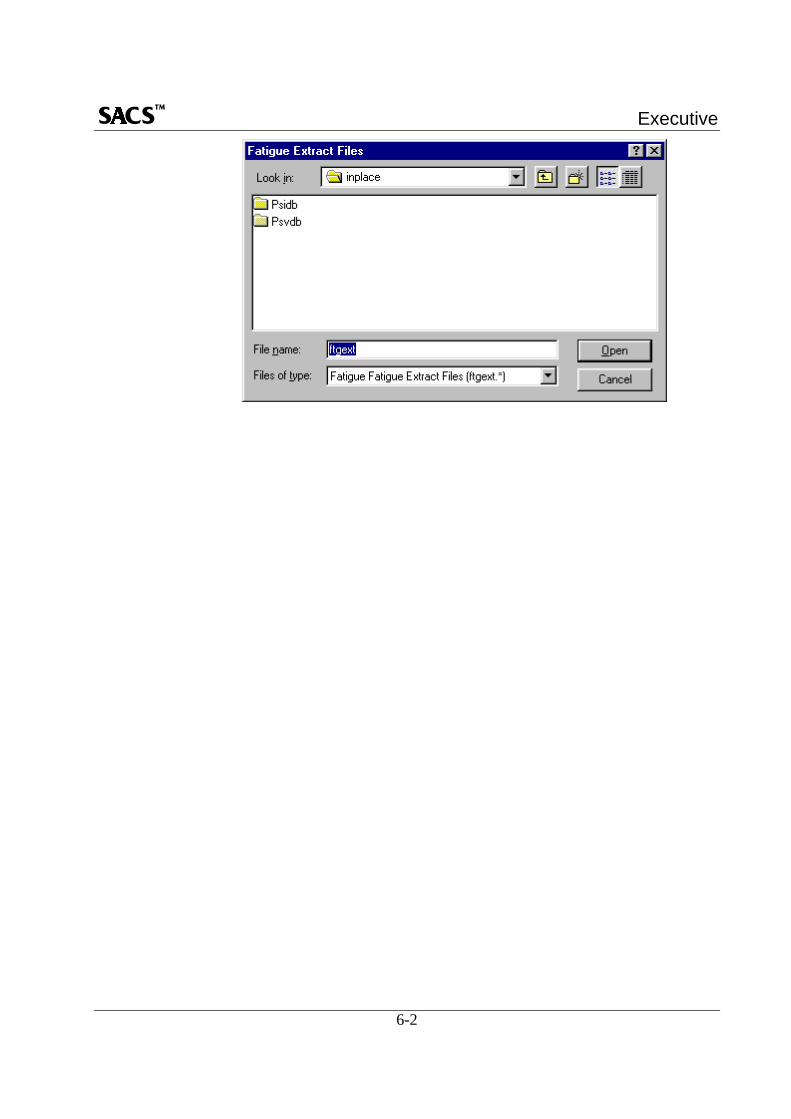
6.3 INTERACTIVE FATIGUEThe View Fatigue icon or the Interactive Fatigue menu item launches the InteractiveFatigue program. Interactive Fatigue is used to check fatigue damage on joints may belaunched by picking this menu item/icon. The fatigue extract file containing the damagedetails is selected on the ensuing file open dialog.
Executive
6-2

Executive
SECTION 7UTILITIES FEATURES

Executive
Executive
7-1
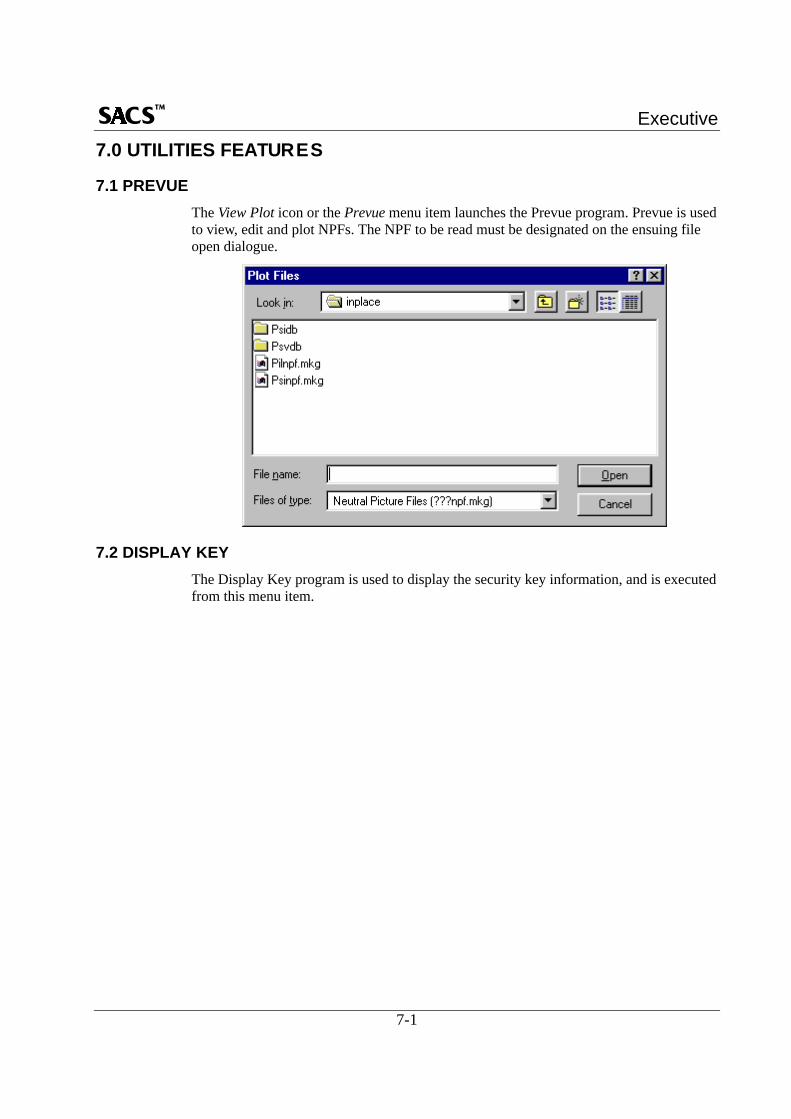
7.0 UTILITIES FEATURES
7.1 PREVUEThe View Plot icon or the Prevue menu item launches the Prevue program. Prevue is usedto view, edit and plot NPFs. The NPF to be read must be designated on the ensuing fileopen dialogue.
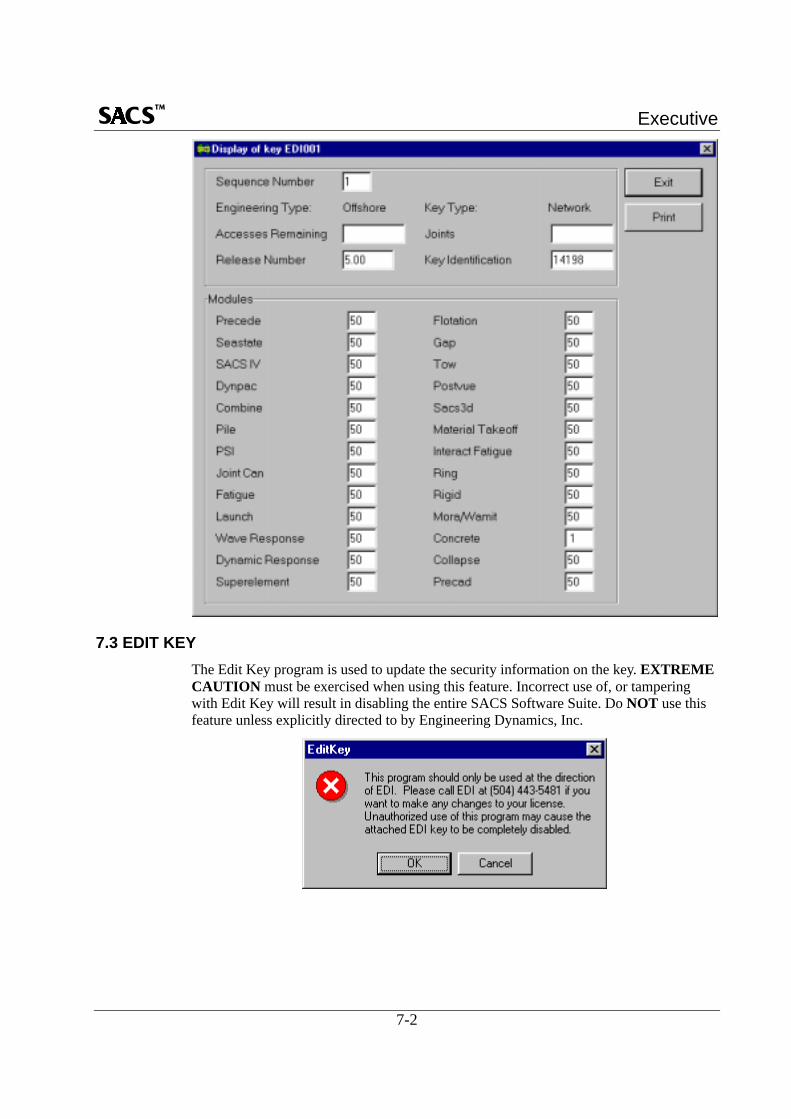
7.2 DISPLAY KEYThe Display Key program is used to display the security key information, and is executedfrom this menu item.
Executive
7-2
7.3 EDIT KEYThe Edit Key program is used to update the security information on the key. EXTREMECAUTION must be exercised when using this feature. Incorrect use of, or tamperingwith Edit Key will result in disabling the entire SACS Software Suite. Do NOT use thisfeature unless explicitly directed to by Engineering Dynamics, Inc.

Executive
7-3

Executive
7-4

Executive
SECTION 8HISTORY FEATURES

Executive

Executive
8-1
8.0 HISTORY FEATURESThe History Menu displays a history of all recent executions since the opening of theExecutive program. This feature allows the user a quick pick method.

Executive
8-2

Executive
SECTION 9HELP FEATURES

Executive
Executive
9-1
9.0 HELP FEATURESSelecting the Help menu activates the help file browse facility. The user may browsethrough the menu items or the list of keywords and terms that are provided. Theappropriate menu item is referenced for keywords and terms listed.
Cue card help is also available; refer to Section 4.4 for details.
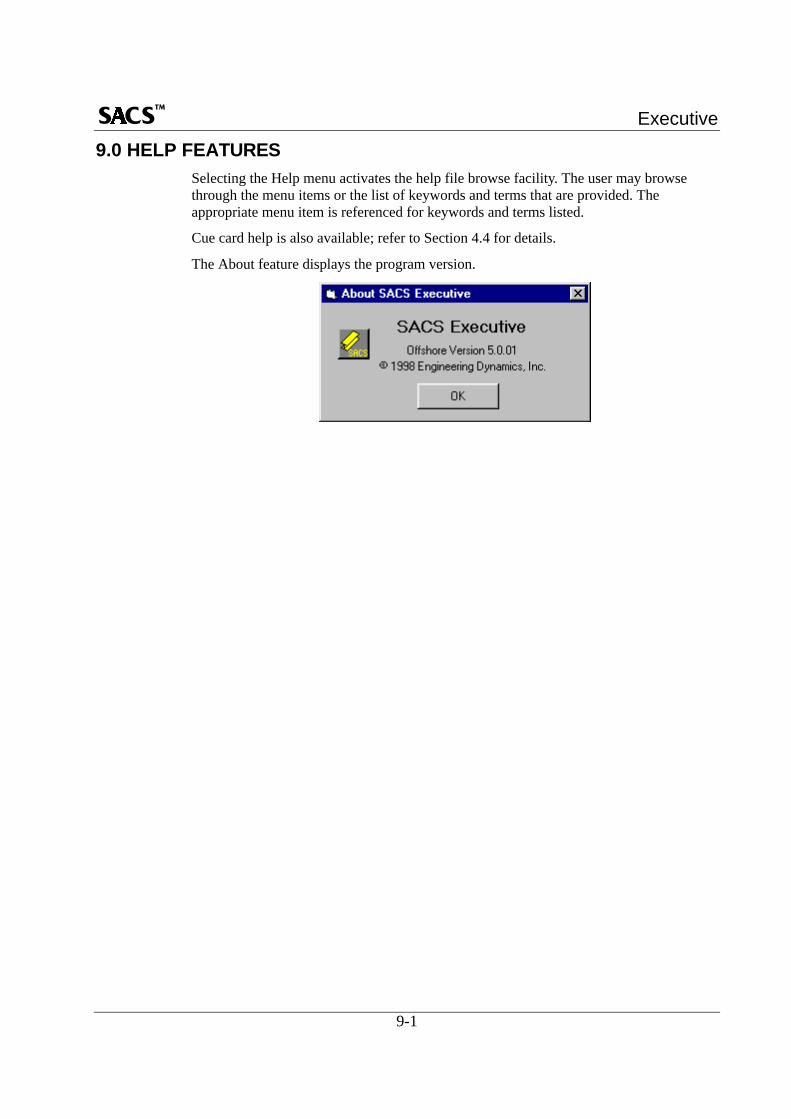
The About feature displays the program version.

Executive
9-2

Executive
SECTION A
INDEX

Executive
Executive
A-1
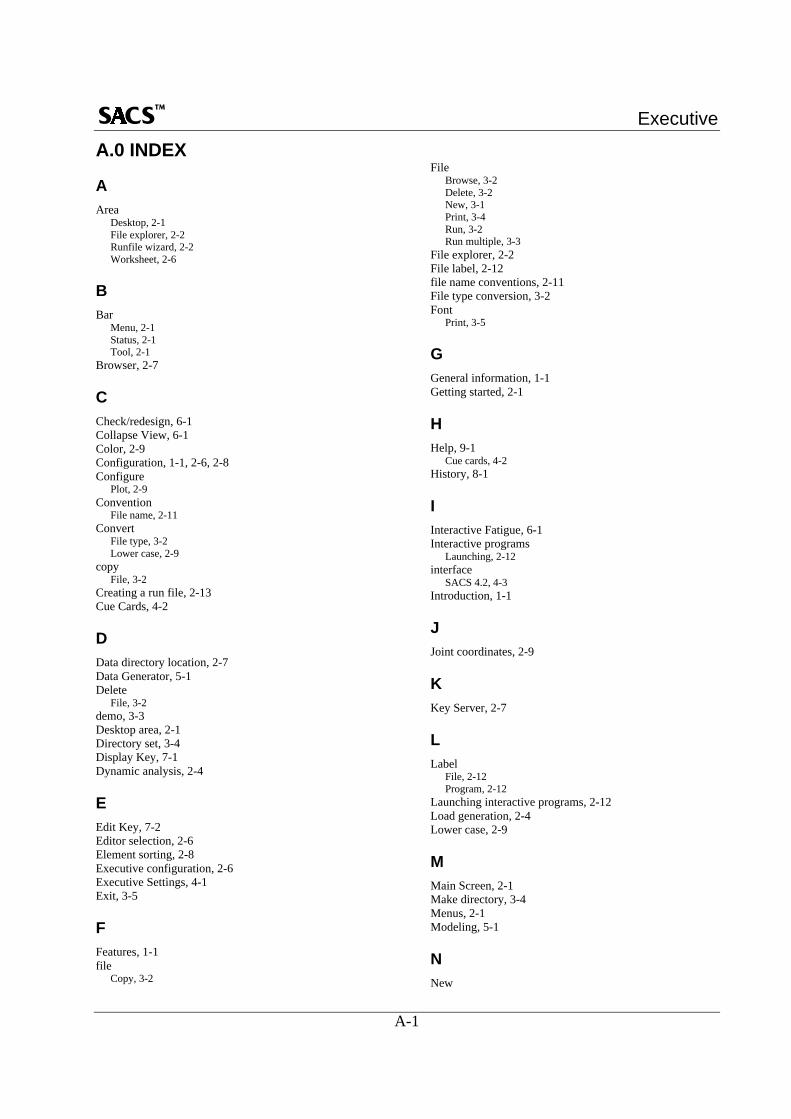
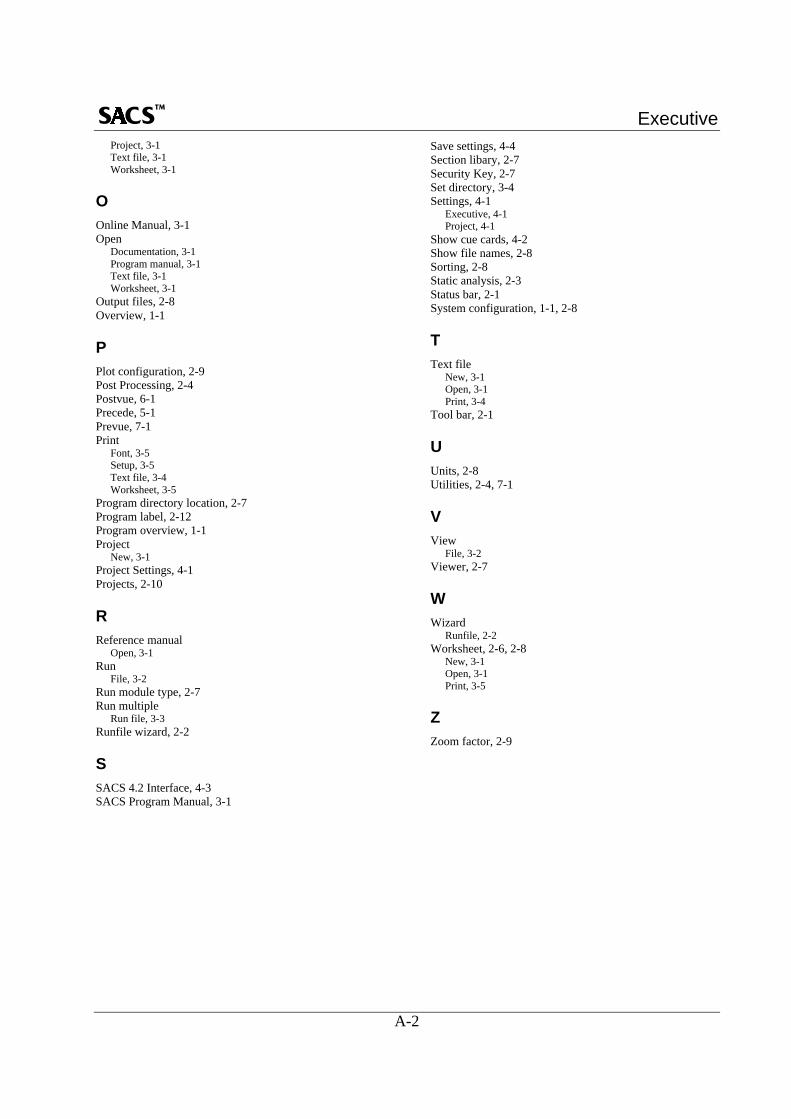
A.0 INDEX
AArea
Desktop, 2-1File explorer, 2-2Runfile wizard, 2-2Worksheet, 2-6
BBar
Menu, 2-1Status, 2-1Tool, 2-1
Browser, 2-7
CCheck/redesign, 6-1Collapse View, 6-1Color, 2-9Configuration, 1-1, 2-6, 2-8Configure
Plot, 2-9Convention
File name, 2-11Convert
File type, 3-2Lower case, 2-9
copyFile, 3-2
Creating a run file, 2-13Cue Cards, 4-2
DData directory location, 2-7Data Generator, 5-1Delete
File, 3-2demo, 3-3Desktop area, 2-1Directory set, 3-4Display Key, 7-1Dynamic analysis, 2-4
EEdit Key, 7-2Editor selection, 2-6Element sorting, 2-8Executive configuration, 2-6Executive Settings, 4-1Exit, 3-5
FFeatures, 1-1file
Copy, 3-2
FileBrowse, 3-2Delete, 3-2New, 3-1Print, 3-4Run, 3-2Run multiple, 3-3
File explorer, 2-2File label, 2-12file name conventions, 2-11File type conversion, 3-2Font
Print, 3-5
GGeneral information, 1-1Getting started, 2-1
HHelp, 9-1
Cue cards, 4-2History, 8-1
IInteractive Fatigue, 6-1Interactive programs
Launching, 2-12interface
SACS 4.2, 4-3Introduction, 1-1
JJoint coordinates, 2-9
KKey Server, 2-7
LLabel
File, 2-12Program, 2-12
Launching interactive programs, 2-12Load generation, 2-4Lower case, 2-9
MMain Screen, 2-1Make directory, 3-4Menus, 2-1Modeling, 5-1
NNew
Executive
A-2
Project, 3-1Text file, 3-1Worksheet, 3-1
OOnline Manual, 3-1Open
Documentation, 3-1Program manual, 3-1Text file, 3-1Worksheet, 3-1
Output files, 2-8Overview, 1-1
PPlot configuration, 2-9Post Processing, 2-4Postvue, 6-1Precede, 5-1Prevue, 7-1Print
Font, 3-5Setup, 3-5Text file, 3-4Worksheet, 3-5
Program directory location, 2-7Program label, 2-12Program overview, 1-1Project
New, 3-1Project Settings, 4-1Projects, 2-10
RReference manual
Open, 3-1Run
File, 3-2Run module type, 2-7Run multiple
Run file, 3-3Runfile wizard, 2-2
SSACS 4.2 Interface, 4-3SACS Program Manual, 3-1
Save settings, 4-4Section libary, 2-7Security Key, 2-7Set directory, 3-4Settings, 4-1
Executive, 4-1Project, 4-1
Show cue cards, 4-2Show file names, 2-8Sorting, 2-8Static analysis, 2-3Status bar, 2-1System configuration, 1-1, 2-8
TText file
New, 3-1Open, 3-1Print, 3-4
Tool bar, 2-1
UUnits, 2-8Utilities, 2-4, 7-1
VView
File, 3-2Viewer, 2-7
WWizard
Runfile, 2-2Worksheet, 2-6, 2-8
New, 3-1Open, 3-1Print, 3-5
ZZoom factor, 2-9