Roleplaying Game Supplement · 2017-09-10 · Tomb of Horrors is famous for grinding up characters...
115
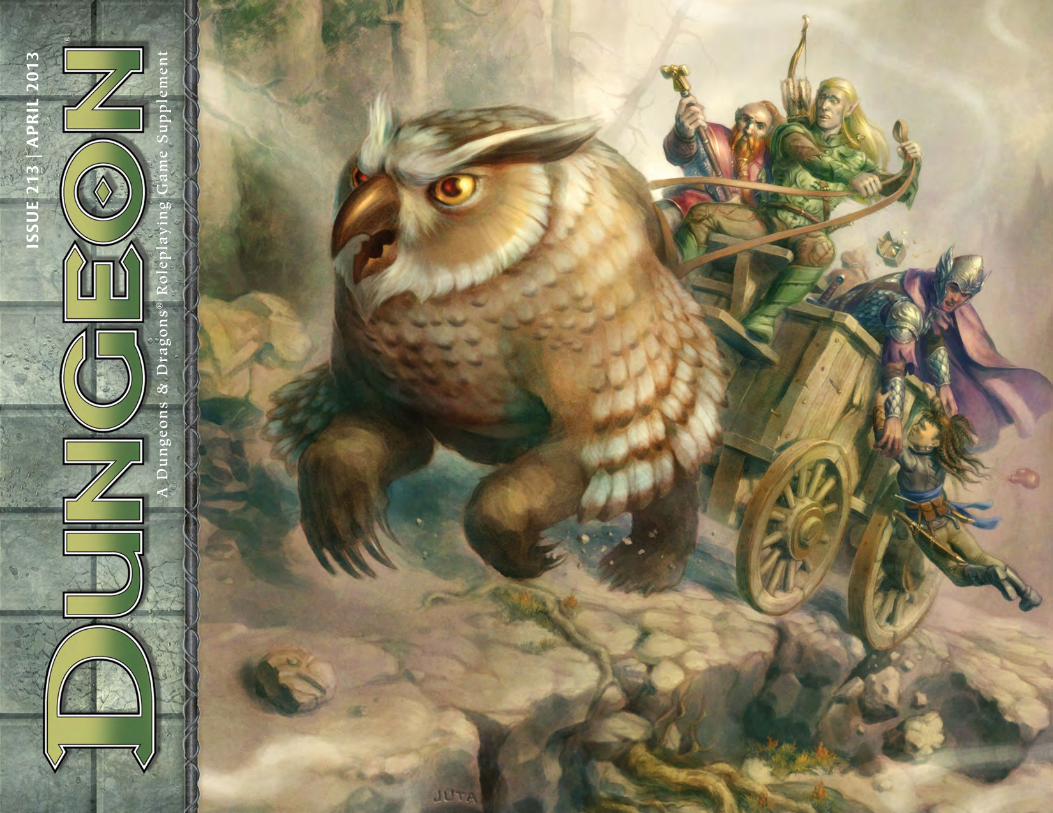
ISSUE 213 | APRIL 2013 A Dungeons & Dragons ® Roleplaying Game Supplement
Transcript of Roleplaying Game Supplement · 2017-09-10 · Tomb of Horrors is famous for grinding up characters...
Issu
e 21
3 |
AP
RIL
20
13
A D
un
geo
ns
& D
rago
ns®
Ro
lep
lay
ing
Ga
me
Su
pp
lem
ent
ABOUT THE COVER: Map? Check. Wagon? Check. Supplies? Check. Owlbear? Check. LET THE RACE BEGIN! Jason Juta depicts intrepid heroes racing over the mountain in true medieval fashion in this month’s feature illustration for “Owlbear Run.”
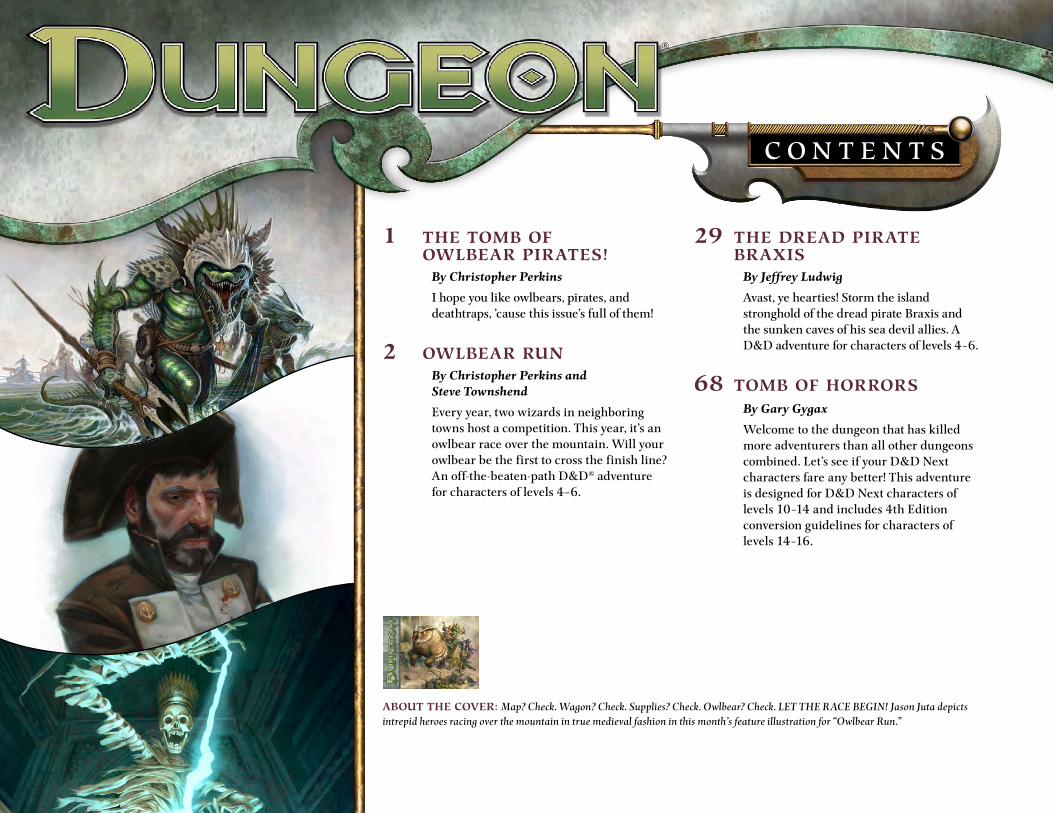
1 THE TOmB Of OwlBEAR PiRATEs!
By Christopher Perkins
I hope you like owlbears, pirates, and deathtraps, ’cause this issue’s full of them!
2 OwlBEAR RUnBy Christopher Perkins and Steve Townshend
Every year, two wizards in neighboring towns host a competition. This year, it’s an owlbear race over the mountain. Will your owlbear be the first to cross the finish line? An off-the-beaten-path D&D® adventure for characters of levels 4–6.
29 THE DREAD PiRATE BRAxis
By Jeffrey Ludwig
Avast, ye hearties! Storm the island stronghold of the dread pirate Braxis and the sunken caves of his sea devil allies. A D&D adventure for characters of levels 4–6.
68 TOmB Of HORRORsBy Gary Gygax
Welcome to the dungeon that has killed more adventurers than all other dungeons combined. Let’s see if your D&D Next characters fare any better! This adventure is designed for D&D Next characters of levels 10–14 and includes 4th Edition conversion guidelines for characters of levels 14–16.
C o n t e n t S
The Tomb of Owlbear Pirates!By Christopher Perkins
This issue was a lot of fun to cobble together, mostly because I’m a sucker for owlbears, pirates, and killer dungeons, and this month we have all three. Let me begin by saying that Chris Youngs (former Dungeon editor) thinks owlbears are dumb, which I find perplexing. I decided to prove how AWESOME they are by pitching an adventure about owlbears that riffed on The Cannonball Run, a spectacularly wasteful movie starring many of the biggest and/or weirdest names in Hollywood circa 1981. (I think it might be Youngs’ favorite film, even more than Conan the Barbarian, but don’t quote me on that.) I shared my “owlbear race” idea with Steve Townshend, one of our semi-regular ezine contributors, and asked him to write “Owlbear Run” for our April issue. I also gave him a bunch of maps I’d drawn over a weekend, and Steve took those maps and ran with them. If you think the adventure is great, praise Steve for his rollicking encounters. If you hate it, blame me for the dumb idea. “The Dread Pirate Braxis” is a different story. Jeff Ludwig submitted a proposal for the adventure last fall, unaware that we already had a pirate adven-ture called “Captain Slygo’s Treasure” slated for the November issue (Dungeon 208). However, I really liked Jeff ’s villain and the villain’s lair, so I asked him to tie the two adventures together. As a result, “The Dread Pirate Braxis” features a cameo by Captain Slygo, the goblin pirate, and can be run either as a standalone adventure or as a sequel to Timothy Ide’s adventure. We haven’t published a sequel in a long time, but the tradition dates back to the early days of Dungeon magazine. Might Captain Slygo return for a third outing? Only time will tell. . . .
Last but not least, we have something special for D&D® Insider subscribers this month: a faithful adap-tation of Gary Gygax’s Tomb of Horrors™ designed for use with the D&D Next playtest rules. This is the first time we’ve included exclusive D&D Next content in Dungeon, but we wanted to do something special for subscribers to celebrate Dungeons of Dread™ (our hard-cover compilation of the original S series adventures, which released last month). Tomb of Horrors is famous for grinding up characters and spitting them out (usu-ally naked, without their gear and loot). What better way to put D&D Next characters through the paces. We’ve also included conversion notes at the end of the adventure so that you can run the adventure using the 4th Edition rules. Finally, our submission window is open, and we’re accepting adventure proposals until the end of May. Imagine you’re in an elevator with the ezine produc-ers, and you have 30 seconds to tell us what’s cool about your adventure. What’s the thing that will get our attention or make us smile? Hint: it could be an iconic D&D monster depicted in a whole new light, a clever idea for a sequel, a memorable dungeon, or just about anything else. Let’s see what you got!
P.S. Can you believe that it’s taken 213 issues to get an owlbear featured on a Dungeon cover? Long overdue, if you ask me.
Senior Producer Christopher Perkins
Producers Greg Bilsland, steve Winter
Managing Editors Miranda Horner, Kim Mohan
Development and Editing Lead Jeremy Crawford
Developer Chris sims
Senior Creative Director Jon schindehette
Art Director Kate Irwin
Graphic Production Manager Angie Lokotz
Digital Studio Consultant Daniel Helmick
Contributing Authors Gary Gygax, Jeffrey Ludwig, Christopher Perkins, steve Townshend
Contributing Editors Michael G. Ryan, Ray Vallese
Contributing Artists Wayne england, Tony Foti, Tomás Giorello, Jason Juta, William O’Connor, David C. sutherland III, David A. Trampier, Kieran Yanner
Cartography Jason A. engle, David C. sutherland III
213Du ngeon Apr i l 2013
Dungeons & Dragons, Wizards of the Coast, D&D Insider, their respective logos, D&D, Dungeon, and Dragon are trademarks of Wizards of the Coast LLC in the USA and other countries. ©2013 Wizards of the Coast LLC.
This material is protected under the copyright laws of the United States of America. Any reproduction or unauthorized use of the material or artwork contained herein is prohibited without the express written permission of Wizards of the Coast LLC. This product is a work of fiction. Any similarity to actual people, organizations, places, or events is purely coincidental.
E D I T O R I A L
2A p r i l 2 013 | DU NGEON 213
TM & © 2013 Wizards of the Coast LLC. All rights reserved.
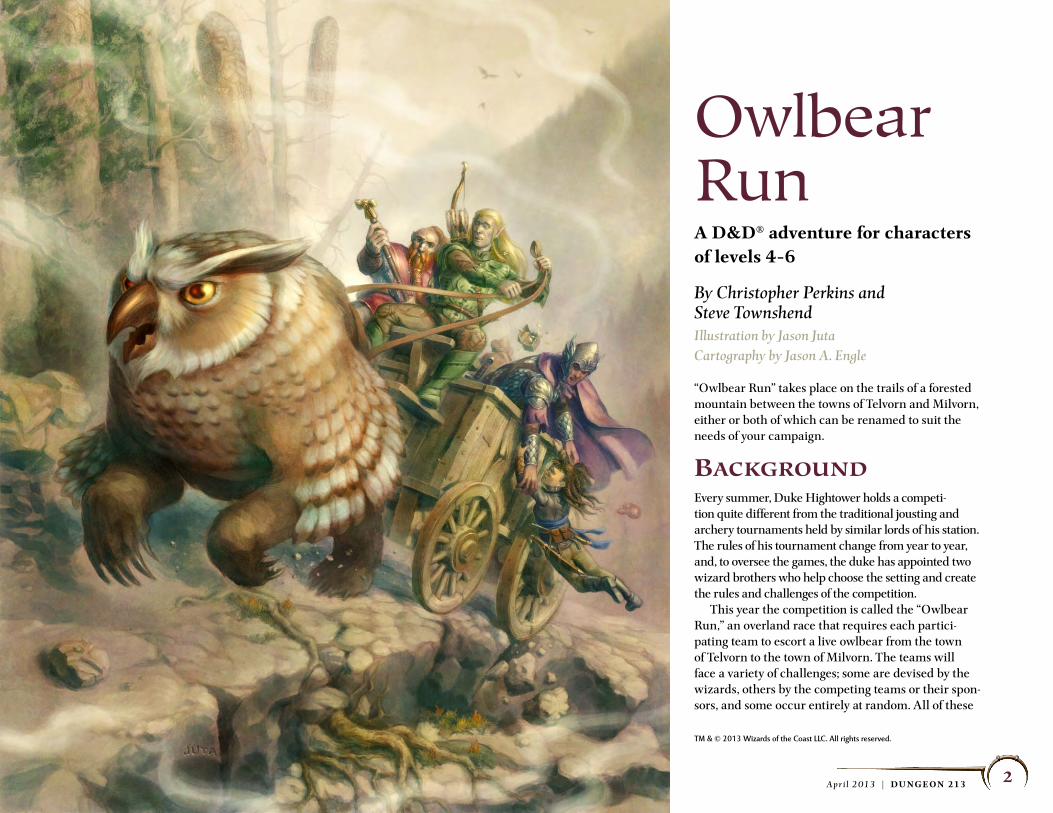
Owlbear RunA D&D® adventure for characters of levels 4–6
By Christopher Perkins and Steve TownshendIllustration by Jason JutaCartography by Jason A. Engle
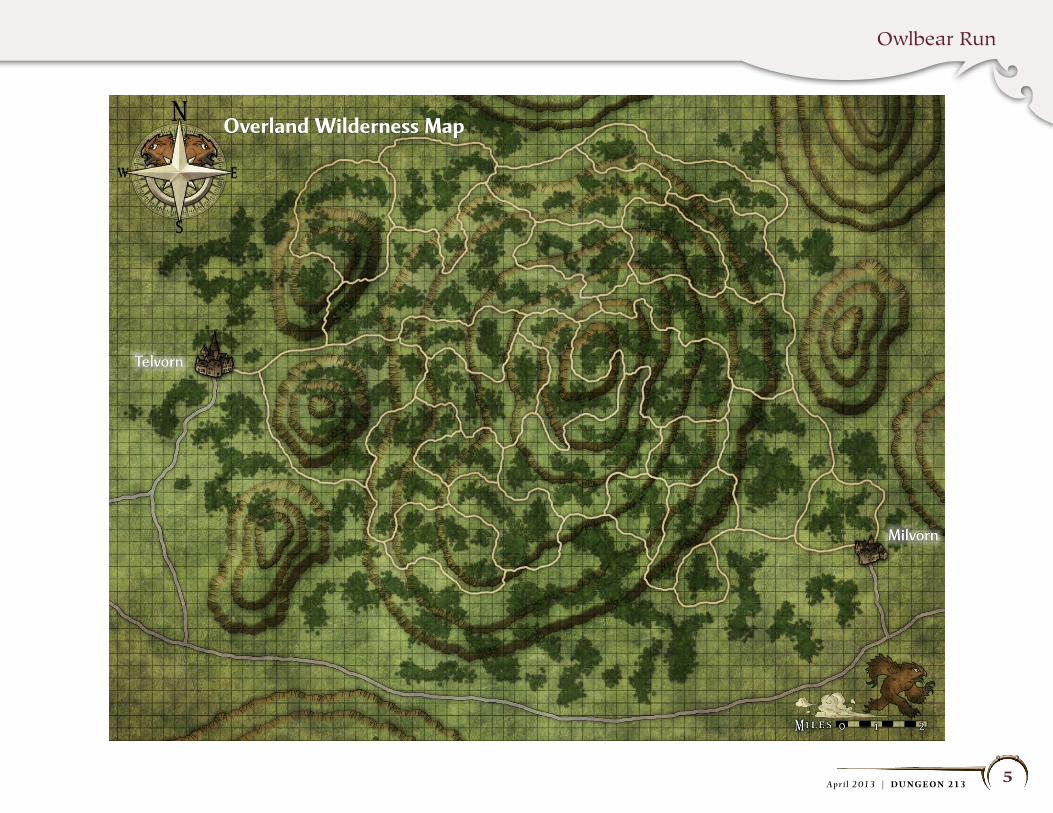
“Owlbear Run” takes place on the trails of a forested mountain between the towns of Telvorn and Milvorn, either or both of which can be renamed to suit the needs of your campaign.
BackgroundEvery summer, Duke Hightower holds a competi-tion quite different from the traditional jousting and archery tournaments held by similar lords of his station. The rules of his tournament change from year to year, and, to oversee the games, the duke has appointed two wizard brothers who help choose the setting and create the rules and challenges of the competition. This year the competition is called the “Owlbear Run,” an overland race that requires each partici-pating team to escort a live owlbear from the town of Telvorn to the town of Milvorn. The teams will face a variety of challenges; some are devised by the wizards, others by the competing teams or their spon-sors, and some occur entirely at random. All of these
Owlbear Run
3A p r i l 2 013 | DU NGEON 213
tests are in addition to the challenges inherent in motivating a temperamental owlbear. Fortune and fame await the first team to cross the finish line, and the local lords sponsoring the race are eager to enlist skilled champions for their causes.
adventure SynopSiSDuring their travels, the adventurers come to a cross-roads with a signpost advertising the competition. Assuming the characters decide to take the chal-lenge, they proceed to the town of Telvorn, where they submit their names as contestants. The wizards Dirk and Delzar explain the rules of the competition, and then the characters select their owlbear and vie for sponsorship among the local lords. The race is set on a wooded mountainside criss-crossed by old mining trails. The characters face a number of challenges (including encounters with other teams) on their way from Telvorn to Milvorn, all of which they must face accompanied by their owlbear. The key to the characters’ success lies in choosing the right sponsor or the right owlbear, learning how to motivate the owlbear they choose, and dealing with the other teams whose paths they cross.
running the adventure“Owlbear Run” is a nonstandard 4th Edition adven-ture. In the first part of the adventure, the characters roleplay and make choices that will influence the second part of the adventure, the race itself. Before you begin the adventure, be sure to familiarize your-self with the personalities and goals of the nonplayer character (NPC) team leaders, the NPC sponsors, and the owlbears. Read the sections “Running the Race” and “Dealing with Owlbears” carefully. The race portion of “Owlbear Run” is made up of random encounters. The adventure will run
differently depending on whom the adventurers choose for their sponsor, which owlbear they choose, which teams they cross paths with, the course the party plots through the woods, and the encounters you roll or selects.
encounter 1: the SignpostRoleplaying Encounter
The adventure begins as the adventurers make a mundane trip from one place to another. Along the way, the characters arrive at a crossroads where they learn of the Owlbear Run.
To start, read:During your journey, you come upon an old cottage near a crossroads. Several people gather outside the cottage as its owner, a wizened old farmer, hammers a sign into the earth at the junction. The sign reads:
GRAND TOURNEY: THE OWLBEAR RUN
DUKE HIGHTOWER SEEKS SKILLED CONTESTANTS FOR THIS YEAR’S COMPETITION.
REWARDS OF GOLD, GLORY, AND FAME! INQUIRE AT THE TELVORN TOWN MARKETPLACE, SOUTH.
“This is going to be a good one,” the old man says. “Last day to sign up!”
The farmer’s name is Griss. He farms a small plot of land by the crossroads where he posts and delivers news. The gathered figures are typically 5–6 common-ers—Griss’s neighbors—interested in the news (but see the “Meeting the Competition” sidebar). Griss knows the following information about the tournament.
F Every year, Duke Hightower holds a unique and outlandish competition to test the skills of the most resourceful adventurers in the land and to
bring commerce and wealth to the small towns of the region.
F Two wizard brothers named Dirk and Delzar design the tournament over the course of the year. Their contests can be devious and in some cases deadly to less skilled participants. Only the best of the best are encouraged to participate.
F Griss recalls five previous tournaments, includ-ing a magical obstacle course made of illusions, a subterranean race through a labyrinth of aban-doned mine shafts, a sea battle between five ships and a kraken, a jaunt into the Feywild to attain a gift from the archfey, and a competition where the contestants fought one another while the wizards polymorphed them into various creatures.
MeetinG the CoMpetitionInstead of 5–6 random commoners observing Griss’s sign, you might decide to introduce one of the com-peting teams here and let them size up the characters and reveal the details of the competition rather than having Griss do so (see “Competing Teams”). Intro-ducing one of the competing teams right away gives the adventurers a chance to develop early allies or rivals. Because the characters meet several NPCs when they reach Telvorn, introducing one team early lightens the next section and gives at least one other team a spotlight. The danger of introducing the competition early is that the characters might fight or kill that team, removing it from the race and increasing the char-acters’ odds of winning. Use this option at your discretion. If you choose to introduce a competing team at the crossroads, either choose one or roll ran-domly to determine which team is present.
Owlbear Run
4A p r i l 2 013 | DU NGEON 213
F Three teams have already signed up for the Owl-bear Run: Grembul’s Stormhammers, Liniel’s Fey Band, and Brandok’s Brute Squad. If the charac-ters ask, Griss can tell them what he knows about the leaders of each team (detailed in each “Leader” entry in “Competing Teams”).
F The nobles and ambassadors of the duke’s court enjoy betting against one another. In the end, the duke awards wealth, honor, and fame to the win-ning team.
When the characters have finished speaking to Griss or a competing team at the crossroads, proceed to Encounter 2: Telvorn.
Major Quest: Win the owlbear Run6th-Level Major Quest (250 XP/character)The characters earn this quest reward if they take first place in the Owlbear Run.
encounter 2: telvornRoleplaying Encounter
The characters arrive in the town of Telvorn to sign up for the Owlbear Run.
As the characters head for Telvorn, read:You take the road south to Telvorn, a small town nestled at the base of a low, sloping mountain thick with forest. Today the road to Telvorn is crowded with travelers, and the town’s outskirts are lined with the tents and striped pavilions of wayfarers from abroad. In the center of town, an inn, a general store, and a church form the perimeter of a bustling market square packed with merchant stalls where money and goods swiftly change hands and the festival attendees wear garlands of f lowers in their hair.
The characters can go straight to the market square or choose to explore the town first.
If they choose to explore the town, they might visit the church, the general store and stalls, the inn, the pavilions on the outskirts of town, or the owlbear pens. When the adventurers are ready to learn the details and rules of the contest or decide to sign up, they can proceed to the market square. Church: The church is dedicated to Avandra, god-dess of change, luck, trade, and travel. The characters can pay the high priestess, Galea, to cast any ritual they can afford. For a donation of 500 gold pieces (or items of equivalent value), the high priestess gives the characters Avandra’s blessing: Once during the race, a character can reroll any die result and gain a +5 modifier to the roll. General Store and Stalls: At the general store, the characters can purchase standard equipment from the Player’s Handbook®. Certain stalls of traveling merchants might offer special or magic items as you see fit. Inn: Representatives from each competing team in the Owlbear Run can be found at various times in the Grumpy Gryphon inn and tavern. Here the characters can meet the leaders of each team and form early alli-ances or rivalries. See the “Competing Teams” section. Pavilions on the Outskirts: This is where the sponsors can be found. Each sponsor has a stake in an owlbear and holds court under a pavilion in his or her own encampment. See “The Sponsors.” Owlbear Pens: The characters can view the vari-ous owlbears available for the competition in the owlbear pens, a converted horse stable reinforced for the captive owlbears. The individual owlbears are detailed in “The Owlbear Pens.”
When the characters go to the market square to sign up for the competition, read:
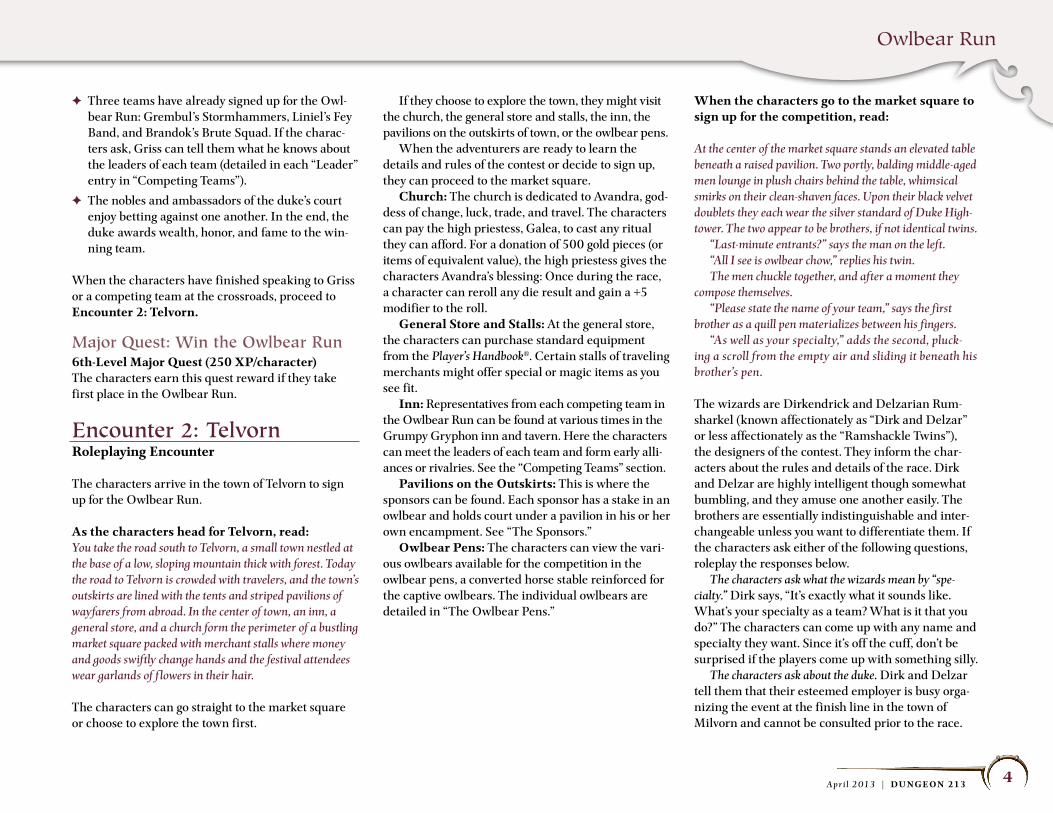
At the center of the market square stands an elevated table beneath a raised pavilion. Two portly, balding middle-aged men lounge in plush chairs behind the table, whimsical smirks on their clean-shaven faces. Upon their black velvet doublets they each wear the silver standard of Duke High-tower. The two appear to be brothers, if not identical twins. “Last-minute entrants?” says the man on the left. “All I see is owlbear chow,” replies his twin. The men chuckle together, and after a moment they compose themselves. “Please state the name of your team,” says the first brother as a quill pen materializes between his fingers. “As well as your specialty,” adds the second, pluck-ing a scroll from the empty air and sliding it beneath his brother’s pen.
The wizards are Dirkendrick and Delzarian Rum-sharkel (known affectionately as “Dirk and Delzar” or less affectionately as the “Ramshackle Twins”), the designers of the contest. They inform the char-acters about the rules and details of the race. Dirk and Delzar are highly intelligent though somewhat bumbling, and they amuse one another easily. The brothers are essentially indistinguishable and inter-changeable unless you want to differentiate them. If the characters ask either of the following questions, roleplay the responses below. The characters ask what the wizards mean by “spe-cialty.” Dirk says, “It’s exactly what it sounds like. What’s your specialty as a team? What is it that you do?” The characters can come up with any name and specialty they want. Since it’s off the cuff, don’t be surprised if the players come up with something silly. The characters ask about the duke. Dirk and Delzar tell them that their esteemed employer is busy orga-nizing the event at the finish line in the town of Milvorn and cannot be consulted prior to the race.
Owlbear Run
5A p r i l 2 013 | DU NGEON 213
Overland Wilderness Map
Telvorn
Milvorn

Owlbear Run
6A p r i l 2 013 | DU NGEON 213
The details of the contest are as follows:
F Each team must escort a live owlbear from Telvorn over the mountain to the finish line in Milvorn.
F The teams must run the race using the network of old mining trails on the mountain. No team can teleport, f ly over, or circumvent the mountain. Watchers and guards will be posted to ensure that no one cheats.
F The teams can use any means at their disposal to get ahead on the trails, short of killing another contestant. Murder is grounds for disqualification and a subsequent trial.
F The entry fee is 5,000 gold pieces per team.
F The team that wins the contest wins back its entry fee plus half the entry fees of all the other partici-pating teams (an additional 7,500 gp if all three NPC teams participate). The victors also receive bragging rights, fame, and an audience with Duke Hightower. The team that takes second place wins back its entry fee. The team that places third receives half its entry fee. There is no reward for the team that finishes last.
F Each owlbear is sponsored by a noble or diplomat from Duke Hightower’s court. Each team must choose a sponsor/owlbear. The teams can view the owlbear pens or interview nobles in any order. In the past, the sponsors have had the power to overtly impact the contest, so a good sponsor might be a key to victory.
F To gain a sponsor, a team should impress that indi-vidual and prove why the team should represent that sponsor.
F A sponsor pays the 5,000 gp entry fee for a team he or she supports.
F If the characters cannot gain or do not desire a sponsor, they can use the owlbear named Rolling Boulder, but they must pay their own entry fee.
F After each team has selected its owlbear and spon-sor, each team receives a map of the mountain trails to plot its intended course.
F Before the race begins, the teams can purchase any equipment they think they need, or they can visit any of the locations in town, gather informa-tion on the other teams, and so forth.
When the characters have made their owlbear and sponsor choices, plotted their route on the map, and made all their preparations, proceed to Encounter 3: The Race Begins.
the SponSorSFive nobles are in attendance, each with different motivations and goals. Prior to the race, the charac-ters can interview the nobles at the nobles’ pavilions on the outskirts of town and seek their sponsorship for the Owlbear Run. The characters can also ask around town to learn basic information about the sponsors (Streetwise DC 15). Each sponsor owns a stake in a specific owlbear. A sponsor pays the 5,000 gp entry fee for the team escorting his or her owlbear in the race. If the characters gain a sponsor, that sponsor gives them each a badge bearing his or her symbol. During the race, the characters will experience one random encounter in which a sponsor tries to inf luence the race. If this individual turns out to be their own sponsor (25% chance) and the characters display their sponsor’s badge, they can bypass the sponsor challenge (see “Encounter Types”). Play the sponsors according to the brief descrip-tions given here and your imagination. If you require statistics, use an appropriate statistics block of the sponsor’s race between levels 5 and 10 from any mon-ster supplement such as the Monster Manual®, Monster Vault™, or the online D&D Compendium.
If the characters need prompting, Sir Tomire sends a page to summon them to his pavilion in hopes they will escort his owlbear, Terrible Tharizdun, in the race. The characters can interview as many sponsors as they like, but they can gain sponsorship from only one of the nobles. The noble sponsors participating in the Owlbear Run are described below.
lady fazgahrd, Dwarf Diplomat (Good)Lady Fazgahrd serves her people as a diplomatic envoy to Duke Hightower. She is young for a dip-lomat, though she is as uncommonly wise as she is extraordinarily beautiful. Her hair is the color of pure gold, and her eyes perfect emerald. Owlbear: Lady Fazgahrd owns the owlbear called Lucky Lady, an allusion to the dwarves’ inborn knack for finding riches and veins of ore. Sponsorship: Lady Fazgahrd secretly distrusts the humans of Duke Hightower’s court with whom she deals on diplomatic terms. She sees through more of their ploys than they are aware. So, she pre-fers to sponsor a team with a non-evil dwarf who pays respect to her. Otherwise, the characters must impress her with their knowledge of dwarven culture, stonework, and customs. Doing this requires a DC 10 group Dungeoneering or History check in which at least half the characters succeed. Characters who speak Dwarven gain a +1 bonus to their rolls. If the characters do not gain sponsorship from Lady Fazgahrd, she sponsors Grembul’s Stormham-mers instead.
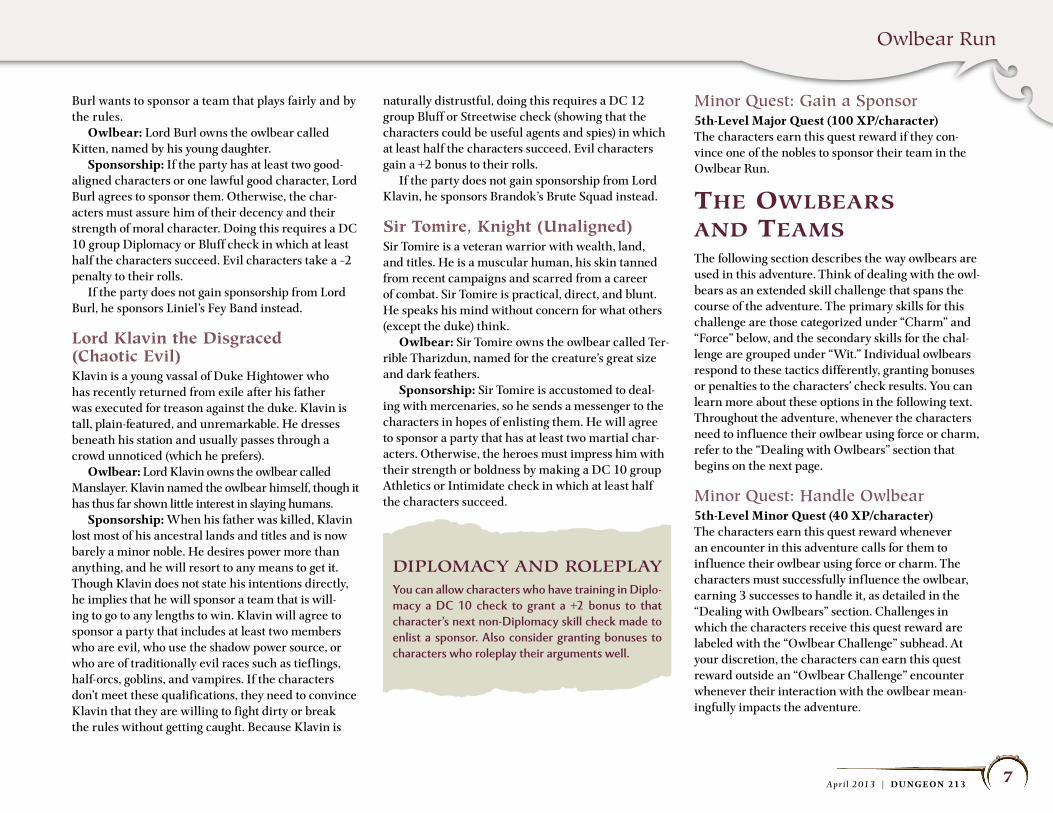
lord Burl, sheriff (lawful Good)Lord Burl is a thin human with slight features and graying golden hair. He is a kind, quiet lord, and he is merciful to the common people, who love him. As the lawful sheriff of Duke Hightower’s lands, Lord
Owlbear Run
7A p r i l 2 013 | DU NGEON 213
Burl wants to sponsor a team that plays fairly and by the rules. Owlbear: Lord Burl owns the owlbear called Kitten, named by his young daughter. Sponsorship: If the party has at least two good-aligned characters or one lawful good character, Lord Burl agrees to sponsor them. Otherwise, the char-acters must assure him of their decency and their strength of moral character. Doing this requires a DC 10 group Diplomacy or Bluff check in which at least half the characters succeed. Evil characters take a –2 penalty to their rolls. If the party does not gain sponsorship from Lord Burl, he sponsors Liniel’s Fey Band instead.
lord Klavin the Disgraced (Chaotic Evil)Klavin is a young vassal of Duke Hightower who has recently returned from exile after his father was executed for treason against the duke. Klavin is tall, plain-featured, and unremarkable. He dresses beneath his station and usually passes through a crowd unnoticed (which he prefers). Owlbear: Lord Klavin owns the owlbear called Manslayer. Klavin named the owlbear himself, though it has thus far shown little interest in slaying humans. Sponsorship: When his father was killed, Klavin lost most of his ancestral lands and titles and is now barely a minor noble. He desires power more than anything, and he will resort to any means to get it. Though Klavin does not state his intentions directly, he implies that he will sponsor a team that is will-ing to go to any lengths to win. Klavin will agree to sponsor a party that includes at least two members who are evil, who use the shadow power source, or who are of traditionally evil races such as tief lings, half-orcs, goblins, and vampires. If the characters don’t meet these qualifications, they need to convince Klavin that they are willing to fight dirty or break the rules without getting caught. Because Klavin is
naturally distrustful, doing this requires a DC 12 group Bluff or Streetwise check (showing that the characters could be useful agents and spies) in which at least half the characters succeed. Evil characters gain a +2 bonus to their rolls. If the party does not gain sponsorship from Lord Klavin, he sponsors Brandok’s Brute Squad instead.
sir Tomire, Knight (Unaligned)Sir Tomire is a veteran warrior with wealth, land, and titles. He is a muscular human, his skin tanned from recent campaigns and scarred from a career of combat. Sir Tomire is practical, direct, and blunt. He speaks his mind without concern for what others (except the duke) think. Owlbear: Sir Tomire owns the owlbear called Ter-rible Tharizdun, named for the creature’s great size and dark feathers. Sponsorship: Sir Tomire is accustomed to deal-ing with mercenaries, so he sends a messenger to the characters in hopes of enlisting them. He will agree to sponsor a party that has at least two martial char-acters. Otherwise, the heroes must impress him with their strength or boldness by making a DC 10 group Athletics or Intimidate check in which at least half the characters succeed.
Minor Quest: Gain a Sponsor5th-Level Major Quest (100 XP/character)The characters earn this quest reward if they con-vince one of the nobles to sponsor their team in the Owlbear Run.
the owlBearS and teamSThe following section describes the way owlbears are used in this adventure. Think of dealing with the owl-bears as an extended skill challenge that spans the course of the adventure. The primary skills for this challenge are those categorized under “Charm” and “Force” below, and the secondary skills for the chal-lenge are grouped under “Wit.” Individual owlbears respond to these tactics differently, granting bonuses or penalties to the characters’ check results. You can learn more about these options in the following text. Throughout the adventure, whenever the characters need to influence their owlbear using force or charm, refer to the “Dealing with Owlbears” section that begins on the next page.
Minor Quest: handle owlbear5th-Level Minor Quest (40 XP/character)The characters earn this quest reward whenever an encounter in this adventure calls for them to influence their owlbear using force or charm. The characters must successfully influence the owlbear, earning 3 successes to handle it, as detailed in the “Dealing with Owlbears” section. Challenges in which the characters receive this quest reward are labeled with the “Owlbear Challenge” subhead. At your discretion, the characters can earn this quest reward outside an “Owlbear Challenge” encounter whenever their interaction with the owlbear mean-ingfully impacts the adventure.
DiploMACy AnD RoleplAyYou can allow characters who have training in Diplo-macy a DC 10 check to grant a +2 bonus to that character’s next non-Diplomacy skill check made to enlist a sponsor. Also consider granting bonuses to characters who roleplay their arguments well.
Owlbear Run
8A p r i l 2 013 | DU NGEON 213
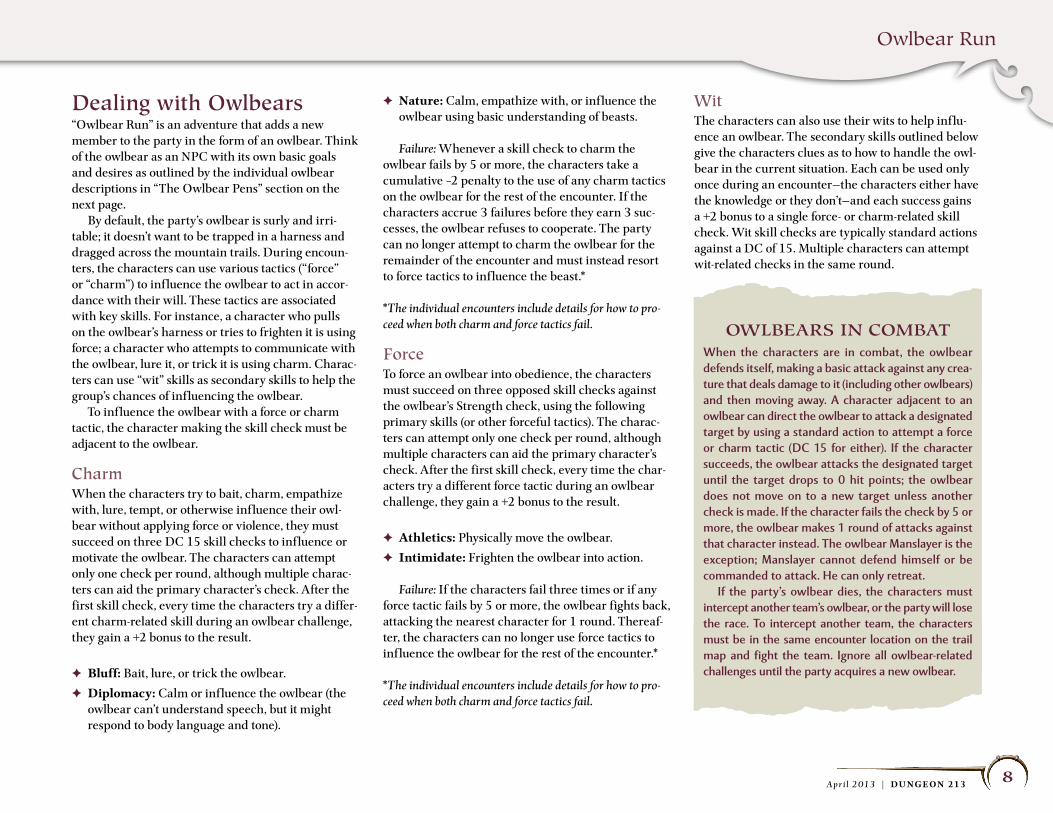
Dealing with owlbears“Owlbear Run” is an adventure that adds a new member to the party in the form of an owlbear. Think of the owlbear as an NPC with its own basic goals and desires as outlined by the individual owlbear descriptions in “The Owlbear Pens” section on the next page. By default, the party’s owlbear is surly and irri-table; it doesn’t want to be trapped in a harness and dragged across the mountain trails. During encoun-ters, the characters can use various tactics (“force” or “charm”) to influence the owlbear to act in accor-dance with their will. These tactics are associated with key skills. For instance, a character who pulls on the owlbear’s harness or tries to frighten it is using force; a character who attempts to communicate with the owlbear, lure it, or trick it is using charm. Charac-ters can use “wit” skills as secondary skills to help the group’s chances of influencing the owlbear. To influence the owlbear with a force or charm tactic, the character making the skill check must be adjacent to the owlbear.
CharmWhen the characters try to bait, charm, empathize with, lure, tempt, or otherwise influence their owl-bear without applying force or violence, they must succeed on three DC 15 skill checks to influence or motivate the owlbear. The characters can attempt only one check per round, although multiple charac-ters can aid the primary character’s check. After the first skill check, every time the characters try a differ-ent charm-related skill during an owlbear challenge, they gain a +2 bonus to the result.
F Bluff: Bait, lure, or trick the owlbear.
F Diplomacy: Calm or influence the owlbear (the owlbear can’t understand speech, but it might respond to body language and tone).
F Nature: Calm, empathize with, or influence the owlbear using basic understanding of beasts.
Failure: Whenever a skill check to charm the owlbear fails by 5 or more, the characters take a cumulative –2 penalty to the use of any charm tactics on the owlbear for the rest of the encounter. If the characters accrue 3 failures before they earn 3 suc-cesses, the owlbear refuses to cooperate. The party can no longer attempt to charm the owlbear for the remainder of the encounter and must instead resort to force tactics to influence the beast.*
*The individual encounters include details for how to pro-ceed when both charm and force tactics fail.
ForceTo force an owlbear into obedience, the characters must succeed on three opposed skill checks against the owlbear’s Strength check, using the following primary skills (or other forceful tactics). The charac-ters can attempt only one check per round, although multiple characters can aid the primary character’s check. After the first skill check, every time the char-acters try a different force tactic during an owlbear challenge, they gain a +2 bonus to the result.
F Athletics: Physically move the owlbear.
F Intimidate: Frighten the owlbear into action.
Failure: If the characters fail three times or if any force tactic fails by 5 or more, the owlbear fights back, attacking the nearest character for 1 round. Thereaf-ter, the characters can no longer use force tactics to influence the owlbear for the rest of the encounter.*
*The individual encounters include details for how to pro-ceed when both charm and force tactics fail.
WitThe characters can also use their wits to help influ-ence an owlbear. The secondary skills outlined below give the characters clues as to how to handle the owl-bear in the current situation. Each can be used only once during an encounter—the characters either have the knowledge or they don’t—and each success gains a +2 bonus to a single force- or charm-related skill check. Wit skill checks are typically standard actions against a DC of 15. Multiple characters can attempt wit-related checks in the same round.
oWlBeARS in CoMBAtWhen the characters are in combat, the owlbear defends itself, making a basic attack against any crea-ture that deals damage to it (including other owlbears) and then moving away. A character adjacent to an owlbear can direct the owlbear to attack a designated target by using a standard action to attempt a force or charm tactic (DC 15 for either). If the character succeeds, the owlbear attacks the designated target until the target drops to 0 hit points; the owlbear does not move on to a new target unless another check is made. If the character fails the check by 5 or more, the owlbear makes 1 round of attacks against that character instead. The owlbear Manslayer is the exception; Manslayer cannot defend himself or be commanded to attack. He can only retreat. If the party’s owlbear dies, the characters must intercept another team’s owlbear, or the party will lose the race. To intercept another team, the characters must be in the same encounter location on the trail map and fight the team. Ignore all owlbear-related challenges until the party acquires a new owlbear.
Owlbear Run
9A p r i l 2 013 | DU NGEON 213
F Arcana: Lore of owlbear behavior/physiology.
F Insight: Understand/predict the owlbear’s actions.
F Perception: Observe the nuances of the owlbear’s current physical/mental state.
Failure: There is no penalty for failure on a check involving a wit tactic.
Alternative tacticsThe characters might think of other skills they can use to influence the owlbear. For instance, a char-acter might try a History check to recall the story of a trained owlbear (wit) or a Heal check to tend an owlbear’s wound and gain its favor (charm). Reward creative thinking and allow the players to try any skill or strategy that seems feasible or makes sense within the story.
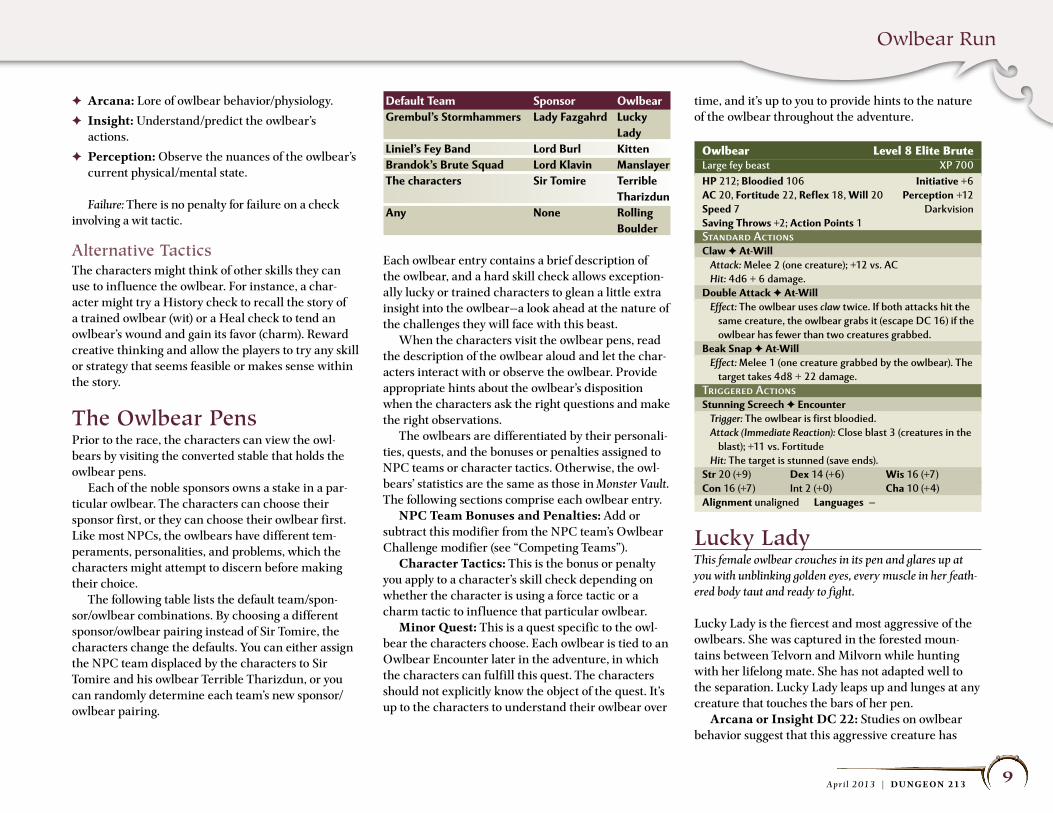
the owlbear pensPrior to the race, the characters can view the owl-bears by visiting the converted stable that holds the owlbear pens. Each of the noble sponsors owns a stake in a par-ticular owlbear. The characters can choose their sponsor first, or they can choose their owlbear first. Like most NPCs, the owlbears have different tem-peraments, personalities, and problems, which the characters might attempt to discern before making their choice. The following table lists the default team/spon-sor/owlbear combinations. By choosing a different sponsor/owlbear pairing instead of Sir Tomire, the characters change the defaults. You can either assign the NPC team displaced by the characters to Sir Tomire and his owlbear Terrible Tharizdun, or you can randomly determine each team’s new sponsor/owlbear pairing.
Default Team sponsor OwlbearGrembul’s stormhammers Lady Fazgahrd Lucky LadyLiniel’s Fey Band Lord Burl KittenBrandok’s Brute squad Lord Klavin ManslayerThe characters sir Tomire Terrible TharizdunAny None Rolling Boulder
Each owlbear entry contains a brief description of the owlbear, and a hard skill check allows exception-ally lucky or trained characters to glean a little extra insight into the owlbear—a look ahead at the nature of the challenges they will face with this beast. When the characters visit the owlbear pens, read the description of the owlbear aloud and let the char-acters interact with or observe the owlbear. Provide appropriate hints about the owlbear’s disposition when the characters ask the right questions and make the right observations. The owlbears are differentiated by their personali-ties, quests, and the bonuses or penalties assigned to NPC teams or character tactics. Otherwise, the owl-bears’ statistics are the same as those in Monster Vault. The following sections comprise each owlbear entry. NPC Team Bonuses and Penalties: Add or subtract this modifier from the NPC team’s Owlbear Challenge modifier (see “Competing Teams”). Character Tactics: This is the bonus or penalty you apply to a character’s skill check depending on whether the character is using a force tactic or a charm tactic to influence that particular owlbear. Minor Quest: This is a quest specific to the owl-bear the characters choose. Each owlbear is tied to an Owlbear Encounter later in the adventure, in which the characters can fulfill this quest. The characters should not explicitly know the object of the quest. It’s up to the characters to understand their owlbear over
time, and it’s up to you to provide hints to the nature of the owlbear throughout the adventure.
Owlbear Level 8 Elite BruteLarge fey beast XP 700HP 212; Bloodied 106 Initiative +6AC 20, Fortitude 22, Reflex 18, Will 20 Perception +12speed 7 Darkvisionsaving Throws +2; Action Points 1Standard ActionsClaw F At-Will
Attack: Melee 2 (one creature); +12 vs. ACHit: 4d6 + 6 damage.
Double Attack F At-WillEffect: The owlbear uses claw twice. If both attacks hit the
same creature, the owlbear grabs it (escape DC 16) if the owlbear has fewer than two creatures grabbed.
Beak snap F At-WillEffect: Melee 1 (one creature grabbed by the owlbear). The
target takes 4d8 + 22 damage.Triggered Actionsstunning screech F encounter
Trigger: The owlbear is first bloodied.Attack (Immediate Reaction): Close blast 3 (creatures in the
blast); +11 vs. FortitudeHit: The target is stunned (save ends).
str 20 (+9) Dex 14 (+6) Wis 16 (+7)Con 16 (+7) Int 2 (+0) Cha 10 (+4)Alignment unaligned Languages —
lucky ladyThis female owlbear crouches in its pen and glares up at you with unblinking golden eyes, every muscle in her feath-ered body taut and ready to fight.
Lucky Lady is the fiercest and most aggressive of the owlbears. She was captured in the forested moun-tains between Telvorn and Milvorn while hunting with her lifelong mate. She has not adapted well to the separation. Lucky Lady leaps up and lunges at any creature that touches the bars of her pen. Arcana or Insight DC 22: Studies on owlbear behavior suggest that this aggressive creature has
Owlbear Run
10A p r i l 2 013 | DU NGEON 213
recently suffered the loss of a mate, clan, or brood. Looking into its eyes, you can almost feel its pain.
NPC Team Bonuses and Penalties Stormhammers: –2 Fey Band: +1 Brute Squad: –3Character Tactics Force: –2 Charm: +1
Minor Quest: Reunite lucky lady with her Mate5th-Level Minor Quest (200 XP/character)The characters earn this quest reward if they suc-cessfully reunite Lucky Lady with her mate in the owlbear encounter “Lucky Lady Is Reunited.”
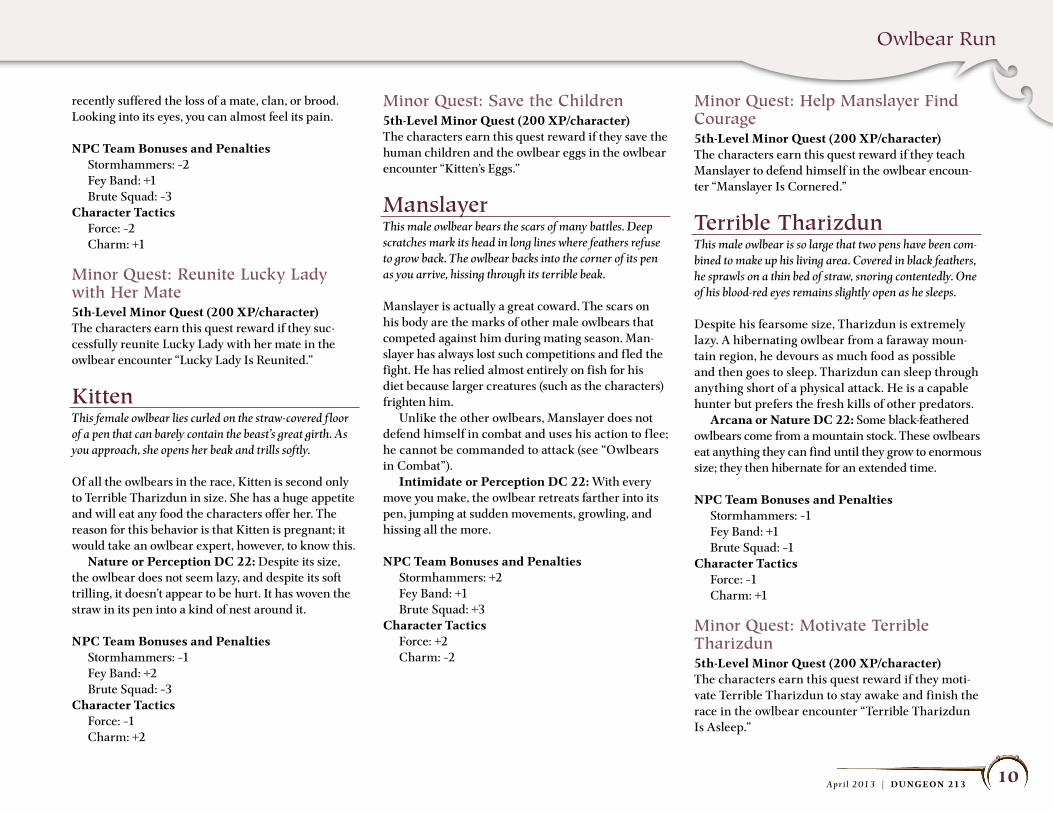
KittenThis female owlbear lies curled on the straw-covered f loor of a pen that can barely contain the beast’s great girth. As you approach, she opens her beak and trills softly.
Of all the owlbears in the race, Kitten is second only to Terrible Tharizdun in size. She has a huge appetite and will eat any food the characters offer her. The reason for this behavior is that Kitten is pregnant; it would take an owlbear expert, however, to know this. Nature or Perception DC 22: Despite its size, the owlbear does not seem lazy, and despite its soft trilling, it doesn’t appear to be hurt. It has woven the straw in its pen into a kind of nest around it.
NPC Team Bonuses and Penalties Stormhammers: –1 Fey Band: +2 Brute Squad: –3Character Tactics Force: –1 Charm: +2
Minor Quest: Save the Children5th-Level Minor Quest (200 XP/character)The characters earn this quest reward if they save the human children and the owlbear eggs in the owlbear encounter “Kitten’s Eggs.”
ManslayerThis male owlbear bears the scars of many battles. Deep scratches mark its head in long lines where feathers refuse to grow back. The owlbear backs into the corner of its pen as you arrive, hissing through its terrible beak.
Manslayer is actually a great coward. The scars on his body are the marks of other male owlbears that competed against him during mating season. Man-slayer has always lost such competitions and f led the fight. He has relied almost entirely on fish for his diet because larger creatures (such as the characters) frighten him. Unlike the other owlbears, Manslayer does not defend himself in combat and uses his action to f lee; he cannot be commanded to attack (see “Owlbears in Combat”). Intimidate or Perception DC 22: With every move you make, the owlbear retreats farther into its pen, jumping at sudden movements, growling, and hissing all the more.
NPC Team Bonuses and Penalties Stormhammers: +2 Fey Band: +1 Brute Squad: +3Character Tactics Force: +2 Charm: –2
Minor Quest: help Manslayer Find Courage5th-Level Minor Quest (200 XP/character)The characters earn this quest reward if they teach Manslayer to defend himself in the owlbear encoun-ter “Manslayer Is Cornered.”
terrible tharizdunThis male owlbear is so large that two pens have been com-bined to make up his living area. Covered in black feathers, he sprawls on a thin bed of straw, snoring contentedly. One of his blood-red eyes remains slightly open as he sleeps.
Despite his fearsome size, Tharizdun is extremely lazy. A hibernating owlbear from a faraway moun-tain region, he devours as much food as possible and then goes to sleep. Tharizdun can sleep through anything short of a physical attack. He is a capable hunter but prefers the fresh kills of other predators. Arcana or Nature DC 22: Some black-feathered owlbears come from a mountain stock. These owlbears eat anything they can find until they grow to enormous size; they then hibernate for an extended time.
NPC Team Bonuses and Penalties Stormhammers: –1 Fey Band: +1 Brute Squad: –1Character Tactics Force: –1 Charm: +1
Minor Quest: Motivate terrible tharizdun5th-Level Minor Quest (200 XP/character)The characters earn this quest reward if they moti-vate Terrible Tharizdun to stay awake and finish the race in the owlbear encounter “Terrible Tharizdun Is Asleep.”
Owlbear Run
11A p r i l 2 013 | DU NGEON 213
Rolling BoulderThis owlbear is covered with dun-colored feathers speckled with black dots. It stands upright in its pen, ripping meat from the haunch of an old horse. The owlbear glances in your direction as you approach but otherwise ignores you, focusing on its meal.
Rolling Boulder is largely indifferent to the char-acters. As long as it is fed, Rolling Boulder remains content, though this does not mean that it cooperates. Rolling Boulder does not have a hostile disposition but rather a contrary one. The owlbear does not understand what the humanoids want from it, but it enjoys eating the food they provide. In its owlbear mind, Rolling Boulder sees the humanoids that have captured it as its servants. Boulder is therefore stub-born, contrary, and difficult to motivate.
NPC Team Bonuses and Penalties Stormhammers: +0 Fey Band: +1 Brute Squad: +0Character Tactics Force: –1 Charm: –1
Minor Quest: DM’s ChoiceBecause Rolling Boulder is an option for characters who don’t choose a sponsor or fail to attain one, Roll-ing Boulder’s quest is up to you. Choose one of the owlbear quests detailed in this section and assign it to Rolling Boulder. You will decide whether Rolling Boulder’s apathy is due to him (or her) being sepa-rated from a mate, pregnant, cowardly, or lazy. You can make Rolling Boulder male or female, depending on the quest you decide to assign to it.
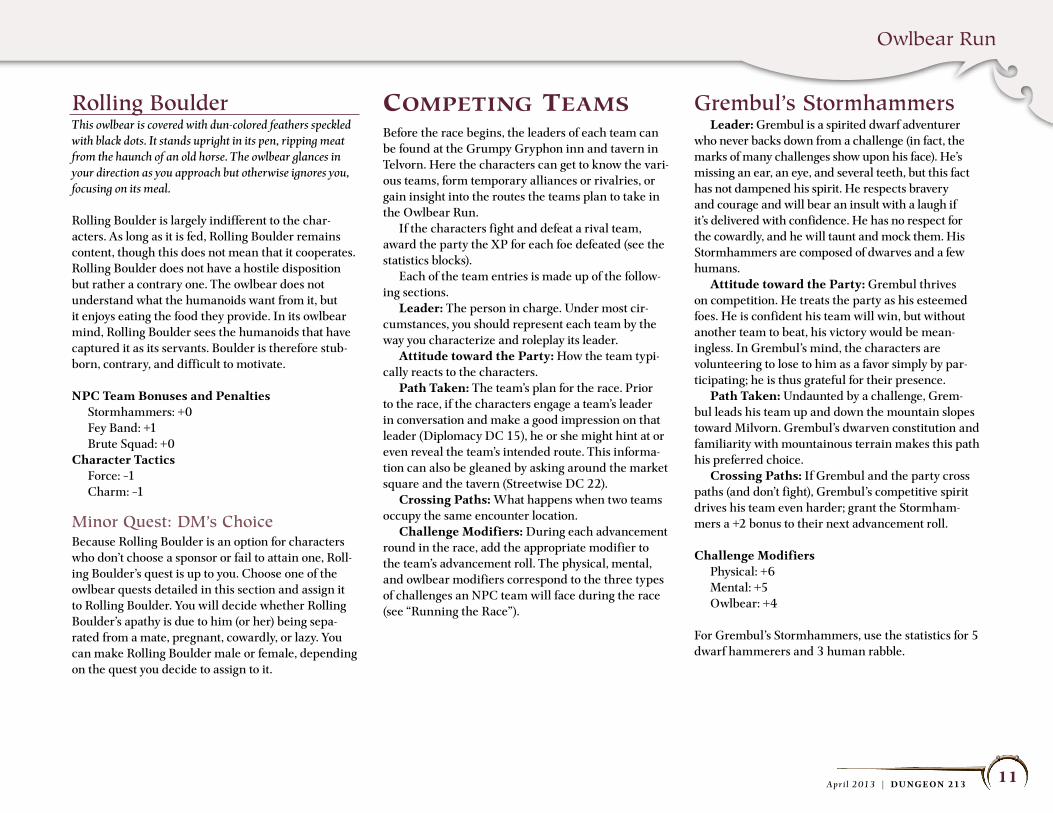
competing teamSBefore the race begins, the leaders of each team can be found at the Grumpy Gryphon inn and tavern in Telvorn. Here the characters can get to know the vari-ous teams, form temporary alliances or rivalries, or gain insight into the routes the teams plan to take in the Owlbear Run. If the characters fight and defeat a rival team, award the party the XP for each foe defeated (see the statistics blocks). Each of the team entries is made up of the follow-ing sections. Leader: The person in charge. Under most cir-cumstances, you should represent each team by the way you characterize and roleplay its leader. Attitude toward the Party: How the team typi-cally reacts to the characters. Path Taken: The team’s plan for the race. Prior to the race, if the characters engage a team’s leader in conversation and make a good impression on that leader (Diplomacy DC 15), he or she might hint at or even reveal the team’s intended route. This informa-tion can also be gleaned by asking around the market square and the tavern (Streetwise DC 22). Crossing Paths: What happens when two teams occupy the same encounter location. Challenge Modifiers: During each advancement round in the race, add the appropriate modifier to the team’s advancement roll. The physical, mental, and owlbear modifiers correspond to the three types of challenges an NPC team will face during the race (see “Running the Race”).
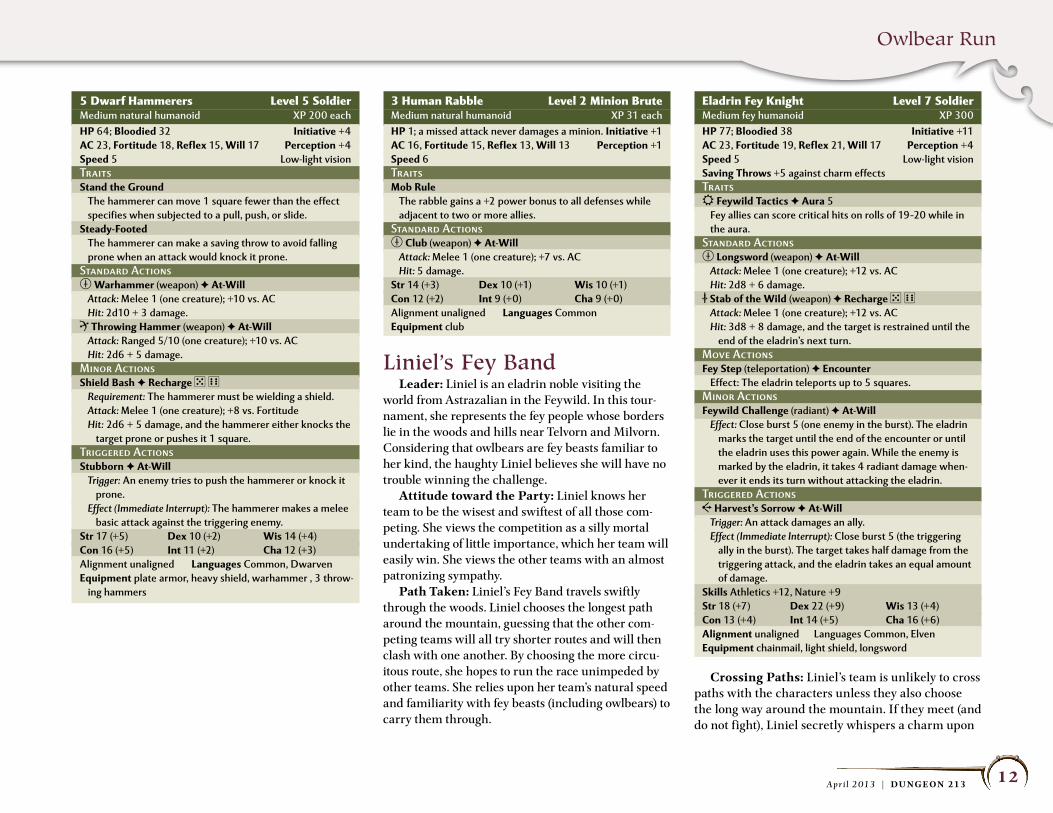
Grembul’s Stormhammers Leader: Grembul is a spirited dwarf adventurer who never backs down from a challenge (in fact, the marks of many challenges show upon his face). He’s missing an ear, an eye, and several teeth, but this fact has not dampened his spirit. He respects bravery and courage and will bear an insult with a laugh if it’s delivered with confidence. He has no respect for the cowardly, and he will taunt and mock them. His Stormhammers are composed of dwarves and a few humans. Attitude toward the Party: Grembul thrives on competition. He treats the party as his esteemed foes. He is confident his team will win, but without another team to beat, his victory would be mean-ingless. In Grembul’s mind, the characters are volunteering to lose to him as a favor simply by par-ticipating; he is thus grateful for their presence. Path Taken: Undaunted by a challenge, Grem-bul leads his team up and down the mountain slopes toward Milvorn. Grembul’s dwarven constitution and familiarity with mountainous terrain makes this path his preferred choice. Crossing Paths: If Grembul and the party cross paths (and don’t fight), Grembul’s competitive spirit drives his team even harder; grant the Stormham-mers a +2 bonus to their next advancement roll.
Challenge Modifiers Physical: +6 Mental: +5 Owlbear: +4
For Grembul’s Stormhammers, use the statistics for 5 dwarf hammerers and 3 human rabble.
Owlbear Run
12A p r i l 2 013 | DU NGEON 213
5 Dwarf Hammerers Level 5 SoldierMedium natural humanoid XP 200 eachHP 64; Bloodied 32 Initiative +4AC 23, Fortitude 18, Reflex 15, Will 17 Perception +4speed 5 Low-light visionTraitsstand the Ground
The hammerer can move 1 square fewer than the effect specifies when subjected to a pull, push, or slide.
steady-FootedThe hammerer can make a saving throw to avoid falling prone when an attack would knock it prone.
Standard Actionsm Warhammer (weapon) F At-Will
Attack: Melee 1 (one creature); +10 vs. ACHit: 2d10 + 3 damage.
R Throwing Hammer (weapon) F At-WillAttack: Ranged 5/10 (one creature); +10 vs. ACHit: 2d6 + 5 damage.
Minor Actionsshield Bash F Recharge 5 6
Requirement: The hammerer must be wielding a shield.Attack: Melee 1 (one creature); +8 vs. FortitudeHit: 2d6 + 5 damage, and the hammerer either knocks the
target prone or pushes it 1 square.Triggered Actionsstubborn F At-Will
Trigger: An enemy tries to push the hammerer or knock it prone.
Effect (Immediate Interrupt): The hammerer makes a melee basic attack against the triggering enemy.
str 17 (+5) Dex 10 (+2) Wis 14 (+4)Con 16 (+5) Int 11 (+2) Cha 12 (+3)Alignment unaligned Languages Common, Dwarvenequipment plate armor, heavy shield, warhammer , 3 throw-
ing hammers
3 Human Rabble Level 2 Minion BruteMedium natural humanoid XP 31 eachHP 1; a missed attack never damages a minion. Initiative +1AC 16, Fortitude 15, Reflex 13, Will 13 Perception +1speed 6TraitsMob Rule
The rabble gains a +2 power bonus to all defenses while adjacent to two or more allies.
Standard Actionsm Club (weapon) F At-Will
Attack: Melee 1 (one creature); +7 vs. ACHit: 5 damage.
str 14 (+3) Dex 10 (+1) Wis 10 (+1)Con 12 (+2) Int 9 (+0) Cha 9 (+0)Alignment unaligned Languages Commonequipment club
liniel’s Fey Band Leader: Liniel is an eladrin noble visiting the world from Astrazalian in the Feywild. In this tour-nament, she represents the fey people whose borders lie in the woods and hills near Telvorn and Milvorn. Considering that owlbears are fey beasts familiar to her kind, the haughty Liniel believes she will have no trouble winning the challenge. Attitude toward the Party: Liniel knows her team to be the wisest and swiftest of all those com-peting. She views the competition as a silly mortal undertaking of little importance, which her team will easily win. She views the other teams with an almost patronizing sympathy. Path Taken: Liniel’s Fey Band travels swiftly through the woods. Liniel chooses the longest path around the mountain, guessing that the other com-peting teams will all try shorter routes and will then clash with one another. By choosing the more circu-itous route, she hopes to run the race unimpeded by other teams. She relies upon her team’s natural speed and familiarity with fey beasts (including owlbears) to carry them through.
Crossing Paths: Liniel’s team is unlikely to cross paths with the characters unless they also choose the long way around the mountain. If they meet (and do not fight), Liniel secretly whispers a charm upon
Eladrin Fey Knight Level 7 SoldierMedium fey humanoid XP 300HP 77; Bloodied 38 Initiative +11AC 23, Fortitude 19, Reflex 21, Will 17 Perception +4speed 5 Low-light visionsaving Throws +5 against charm effectsTraitsO Feywild Tactics F Aura 5
Fey allies can score critical hits on rolls of 19–20 while in the aura.
Standard Actionsm Longsword (weapon) F At-Will
Attack: Melee 1 (one creature); +12 vs. ACHit: 2d8 + 6 damage.
M stab of the Wild (weapon) F Recharge 5 6Attack: Melee 1 (one creature); +12 vs. ACHit: 3d8 + 8 damage, and the target is restrained until the
end of the eladrin’s next turn.Move ActionsFey step (teleportation) F encounter
Effect: The eladrin teleports up to 5 squares.Minor ActionsFeywild Challenge (radiant) F At-Will
Effect: Close burst 5 (one enemy in the burst). The eladrin marks the target until the end of the encounter or until the eladrin uses this power again. While the enemy is marked by the eladrin, it takes 4 radiant damage when-ever it ends its turn without attacking the eladrin.
Triggered ActionsC Harvest’s sorrow F At-Will
Trigger: An attack damages an ally.Effect (Immediate Interrupt): Close burst 5 (the triggering
ally in the burst). The target takes half damage from the triggering attack, and the eladrin takes an equal amount of damage.
skills Athletics +12, Nature +9str 18 (+7) Dex 22 (+9) Wis 13 (+4)Con 13 (+4) Int 14 (+5) Cha 16 (+6)Alignment unaligned Languages Common, Elvenequipment chainmail, light shield, longsword
Owlbear Run
13A p r i l 2 013 | DU NGEON 213
the characters’ owlbear. The next time the charac-ters attempt to inf luence their owlbear, they take a –2 penalty to the first force- or charm-related check they make.
Challenge Modifiers Physical: +3 Mental: +6 Owlbear: +6
For Liniel’s Fey Band, use the statistics for 1 eladrin fey knight (Liniel) and 7 eladrin bow mages.
7 Eladrin Bow Mages Level 7 Minion ArtilleryMedium fey humanoid XP 75 eachHP 1; a missed attack never damages a minion. Initiative +7AC 21, Fortitude 18, Reflex 21, Will 19 Perception +10speed 6 Low-light visionStandard Actionsr Force Arrow (force) F At-Will
Attack: Ranged 20 (one creature); +14 vs. ACHit: 7 force damage, and the eladrin can push the target 1
square.Move ActionsFey step (teleportation) F encounter
Effect: The eladrin teleports up to 5 squares.str 12 (+4) Dex 18 (+7) Wis 14 (+5)Con 13 (+4) Int 14 (+5) Cha 11 (+3)Alignment unaligned Languages Common, Elven
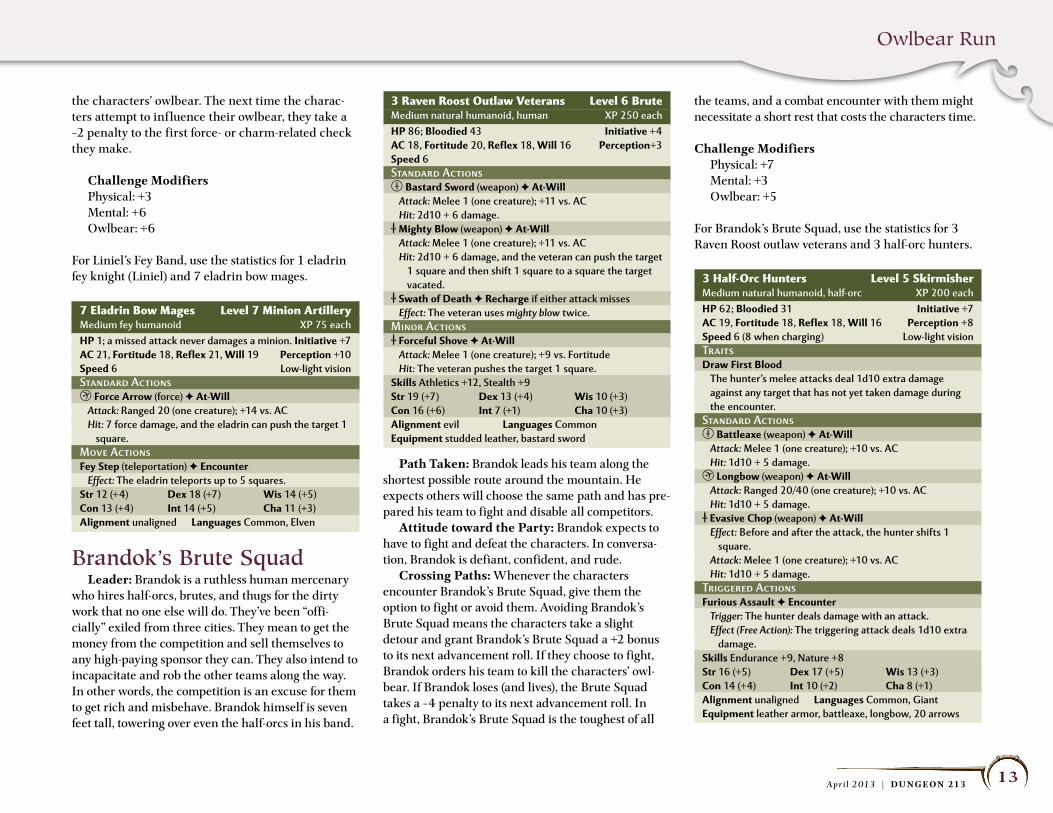
Brandok’s Brute Squad Leader: Brandok is a ruthless human mercenary who hires half-orcs, brutes, and thugs for the dirty work that no one else will do. They’ve been “offi-cially” exiled from three cities. They mean to get the money from the competition and sell themselves to any high-paying sponsor they can. They also intend to incapacitate and rob the other teams along the way. In other words, the competition is an excuse for them to get rich and misbehave. Brandok himself is seven feet tall, towering over even the half-orcs in his band.
Path Taken: Brandok leads his team along the shortest possible route around the mountain. He expects others will choose the same path and has pre-pared his team to fight and disable all competitors. Attitude toward the Party: Brandok expects to have to fight and defeat the characters. In conversa-tion, Brandok is defiant, confident, and rude. Crossing Paths: Whenever the characters encounter Brandok’s Brute Squad, give them the option to fight or avoid them. Avoiding Brandok’s Brute Squad means the characters take a slight detour and grant Brandok’s Brute Squad a +2 bonus to its next advancement roll. If they choose to fight, Brandok orders his team to kill the characters’ owl-bear. If Brandok loses (and lives), the Brute Squad takes a –4 penalty to its next advancement roll. In a fight, Brandok’s Brute Squad is the toughest of all
the teams, and a combat encounter with them might necessitate a short rest that costs the characters time.
Challenge Modifiers Physical: +7 Mental: +3 Owlbear: +5
For Brandok’s Brute Squad, use the statistics for 3 Raven Roost outlaw veterans and 3 half-orc hunters.
3 Half-Orc Hunters Level 5 SkirmisherMedium natural humanoid, half-orc XP 200 eachHP 62; Bloodied 31 Initiative +7AC 19, Fortitude 18, Reflex 18, Will 16 Perception +8speed 6 (8 when charging) Low-light visionTraitsDraw First Blood
The hunter’s melee attacks deal 1d10 extra damage against any target that has not yet taken damage during the encounter.
Standard Actionsm Battleaxe (weapon) F At-Will
Attack: Melee 1 (one creature); +10 vs. ACHit: 1d10 + 5 damage.
r Longbow (weapon) F At-WillAttack: Ranged 20/40 (one creature); +10 vs. ACHit: 1d10 + 5 damage.
M evasive Chop (weapon) F At-WillEffect: Before and after the attack, the hunter shifts 1
square.Attack: Melee 1 (one creature); +10 vs. ACHit: 1d10 + 5 damage.
Triggered ActionsFurious Assault F encounter
Trigger: The hunter deals damage with an attack.Effect (Free Action): The triggering attack deals 1d10 extra
damage.skills Endurance +9, Nature +8str 16 (+5) Dex 17 (+5) Wis 13 (+3)Con 14 (+4) Int 10 (+2) Cha 8 (+1)Alignment unaligned Languages Common, Giantequipment leather armor, battleaxe, longbow, 20 arrows
3 Raven Roost Outlaw Veterans Level 6 BruteMedium natural humanoid, human XP 250 eachHP 86; Bloodied 43 Initiative +4AC 18, Fortitude 20, Reflex 18, Will 16 Perception+3speed 6Standard Actionsm Bastard sword (weapon) F At-Will
Attack: Melee 1 (one creature); +11 vs. ACHit: 2d10 + 6 damage.
M Mighty Blow (weapon) F At-WillAttack: Melee 1 (one creature); +11 vs. ACHit: 2d10 + 6 damage, and the veteran can push the target
1 square and then shift 1 square to a square the target vacated.
M swath of Death F Recharge if either attack missesEffect: The veteran uses mighty blow twice.
Minor ActionsM Forceful shove F At-Will
Attack: Melee 1 (one creature); +9 vs. FortitudeHit: The veteran pushes the target 1 square.
skills Athletics +12, Stealth +9str 19 (+7) Dex 13 (+4) Wis 10 (+3)Con 16 (+6) Int 7 (+1) Cha 10 (+3)Alignment evil Languages Commonequipment studded leather, bastard sword
Owlbear Run
14A p r i l 2 013 | DU NGEON 213 14
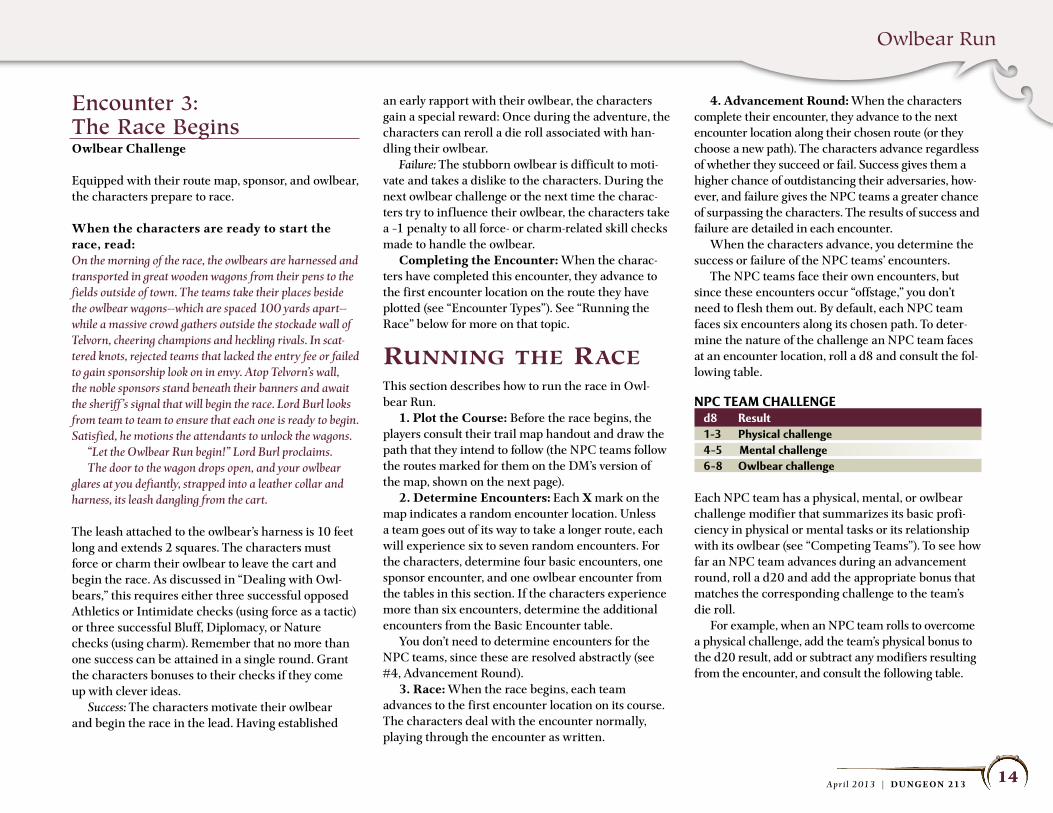
encounter 3: the Race BeginsOwlbear Challenge
Equipped with their route map, sponsor, and owlbear, the characters prepare to race.
When the characters are ready to start the race, read:On the morning of the race, the owlbears are harnessed and transported in great wooden wagons from their pens to the fields outside of town. The teams take their places beside the owlbear wagons—which are spaced 100 yards apart—while a massive crowd gathers outside the stockade wall of Telvorn, cheering champions and heckling rivals. In scat-tered knots, rejected teams that lacked the entry fee or failed to gain sponsorship look on in envy. Atop Telvorn’s wall, the noble sponsors stand beneath their banners and await the sheriff ’s signal that will begin the race. Lord Burl looks from team to team to ensure that each one is ready to begin. Satisfied, he motions the attendants to unlock the wagons. “Let the Owlbear Run begin!” Lord Burl proclaims. The door to the wagon drops open, and your owlbear glares at you defiantly, strapped into a leather collar and harness, its leash dangling from the cart.
The leash attached to the owlbear’s harness is 10 feet long and extends 2 squares. The characters must force or charm their owlbear to leave the cart and begin the race. As discussed in “Dealing with Owl-bears,” this requires either three successful opposed Athletics or Intimidate checks (using force as a tactic) or three successful Bluff, Diplomacy, or Nature checks (using charm). Remember that no more than one success can be attained in a single round. Grant the characters bonuses to their checks if they come up with clever ideas. Success: The characters motivate their owlbear and begin the race in the lead. Having established
an early rapport with their owlbear, the characters gain a special reward: Once during the adventure, the characters can reroll a die roll associated with han-dling their owlbear. Failure: The stubborn owlbear is difficult to moti-vate and takes a dislike to the characters. During the next owlbear challenge or the next time the charac-ters try to influence their owlbear, the characters take a –1 penalty to all force- or charm-related skill checks made to handle the owlbear. Completing the Encounter: When the charac-ters have completed this encounter, they advance to the first encounter location on the route they have plotted (see “Encounter Types”). See “Running the Race” below for more on that topic.
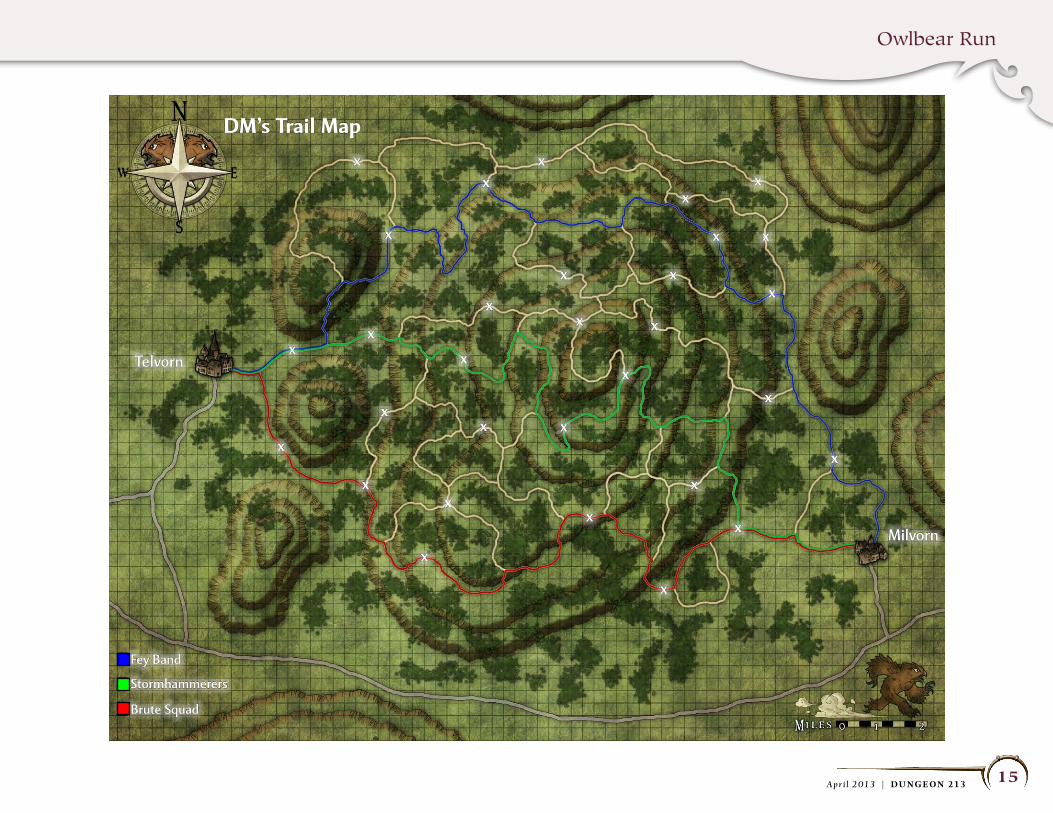
running the raceThis section describes how to run the race in Owl-bear Run. 1. Plot the Course: Before the race begins, the players consult their trail map handout and draw the path that they intend to follow (the NPC teams follow the routes marked for them on the DM’s version of the map, shown on the next page). 2. Determine Encounters: Each X mark on the map indicates a random encounter location. Unless a team goes out of its way to take a longer route, each will experience six to seven random encounters. For the characters, determine four basic encounters, one sponsor encounter, and one owlbear encounter from the tables in this section. If the characters experience more than six encounters, determine the additional encounters from the Basic Encounter table. You don’t need to determine encounters for the NPC teams, since these are resolved abstractly (see #4, Advancement Round). 3. Race: When the race begins, each team advances to the first encounter location on its course. The characters deal with the encounter normally, playing through the encounter as written.
4. Advancement Round: When the characters complete their encounter, they advance to the next encounter location along their chosen route (or they choose a new path). The characters advance regardless of whether they succeed or fail. Success gives them a higher chance of outdistancing their adversaries, how-ever, and failure gives the NPC teams a greater chance of surpassing the characters. The results of success and failure are detailed in each encounter. When the characters advance, you determine the success or failure of the NPC teams’ encounters. The NPC teams face their own encounters, but since these encounters occur “offstage,” you don’t need to f lesh them out. By default, each NPC team faces six encounters along its chosen path. To deter-mine the nature of the challenge an NPC team faces at an encounter location, roll a d8 and consult the fol-lowing table.
NPC TeAM CHALLeNGe d8 Result 1–3 Physical challenge 4–5 Mental challenge 6–8 Owlbear challenge
Each NPC team has a physical, mental, or owlbear challenge modifier that summarizes its basic profi-ciency in physical or mental tasks or its relationship with its owlbear (see “Competing Teams”). To see how far an NPC team advances during an advancement round, roll a d20 and add the appropriate bonus that matches the corresponding challenge to the team’s die roll. For example, when an NPC team rolls to overcome a physical challenge, add the team’s physical bonus to the d20 result, add or subtract any modifiers resulting from the encounter, and consult the following table.
Owlbear Run
15A p r i l 2 013 | DU NGEON 213
DM’s Trail Map
Telvorn
Fey Band
Stormhammerers
Brute Squad
Milvorn
x
xx
x
xx
x
x x
x
x
x x
x
x
x
x
x
x
x
x
x
x
x
x
x
x
x
x
x
x
Owlbear Run
16A p r i l 2 013 | DU NGEON 213
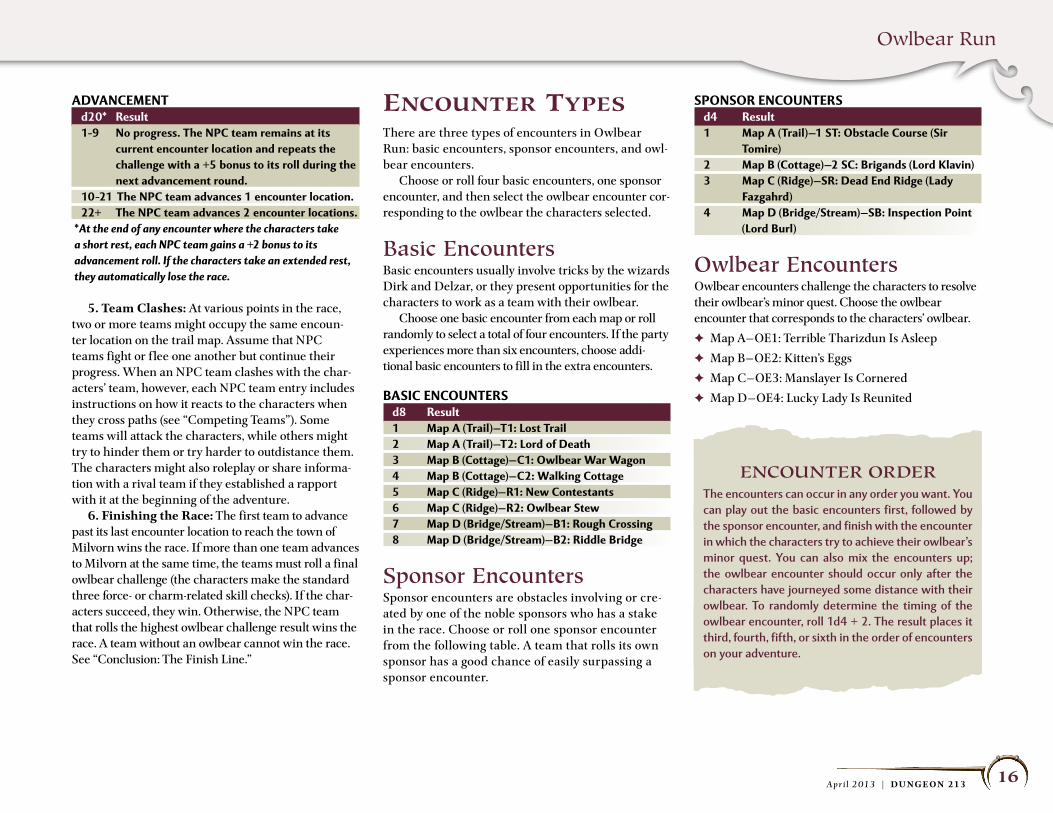
ADVANCeMeNT d20* Result 1–9 No progress. The NPC team remains at its
current encounter location and repeats the challenge with a +5 bonus to its roll during the next advancement round.
10–21 The NPC team advances 1 encounter location. 22+ The NPC team advances 2 encounter locations.*At the end of any encounter where the characters take a short rest, each NPC team gains a +2 bonus to its advancement roll. If the characters take an extended rest, they automatically lose the race.
5. Team Clashes: At various points in the race, two or more teams might occupy the same encoun-ter location on the trail map. Assume that NPC teams fight or f lee one another but continue their progress. When an NPC team clashes with the char-acters’ team, however, each NPC team entry includes instructions on how it reacts to the characters when they cross paths (see “Competing Teams”). Some teams will attack the characters, while others might try to hinder them or try harder to outdistance them. The characters might also roleplay or share informa-tion with a rival team if they established a rapport with it at the beginning of the adventure. 6. Finishing the Race: The first team to advance past its last encounter location to reach the town of Milvorn wins the race. If more than one team advances to Milvorn at the same time, the teams must roll a final owlbear challenge (the characters make the standard three force- or charm-related skill checks). If the char-acters succeed, they win. Otherwise, the NPC team that rolls the highest owlbear challenge result wins the race. A team without an owlbear cannot win the race. See “Conclusion: The Finish Line.”
encounter typeSThere are three types of encounters in Owlbear Run: basic encounters, sponsor encounters, and owl-bear encounters. Choose or roll four basic encounters, one sponsor encounter, and then select the owlbear encounter cor-responding to the owlbear the characters selected.
Basic encountersBasic encounters usually involve tricks by the wizards Dirk and Delzar, or they present opportunities for the characters to work as a team with their owlbear. Choose one basic encounter from each map or roll randomly to select a total of four encounters. If the party experiences more than six encounters, choose addi-tional basic encounters to fill in the extra encounters.
BAsIC eNCOuNTeRs d8 Result 1 Map A (Trail)—T1: Lost Trail 2 Map A (Trail)—T2: Lord of Death 3 Map B (Cottage)—C1: Owlbear War Wagon 4 Map B (Cottage)—C2: Walking Cottage 5 Map C (Ridge)—R1: New Contestants 6 Map C (Ridge)—R2: Owlbear stew 7 Map D (Bridge/stream)—B1: Rough Crossing 8 Map D (Bridge/stream)—B2: Riddle Bridge
Sponsor encountersSponsor encounters are obstacles involving or cre-ated by one of the noble sponsors who has a stake in the race. Choose or roll one sponsor encounter from the following table. A team that rolls its own sponsor has a good chance of easily surpassing a sponsor encounter.
sPONsOR eNCOuNTeRs d4 Result 1 Map A (Trail)—1 sT: Obstacle Course (sir
Tomire) 2 Map B (Cottage)—2 sC: Brigands (Lord Klavin) 3 Map C (Ridge)—sR: Dead end Ridge (Lady
Fazgahrd) 4 Map D (Bridge/stream)—sB: Inspection Point
(Lord Burl)
owlbear encountersOwlbear encounters challenge the characters to resolve their owlbear’s minor quest. Choose the owlbear encounter that corresponds to the characters’ owlbear.
F Map A—OE1: Terrible Tharizdun Is Asleep
F Map B—OE2: Kitten’s Eggs
F Map C—OE3: Manslayer Is Cornered
F Map D—OE4: Lucky Lady Is Reunited
enCounteR oRDeRThe encounters can occur in any order you want. You can play out the basic encounters first, followed by the sponsor encounter, and finish with the encounter in which the characters try to achieve their owlbear’s minor quest. You can also mix the encounters up; the owlbear encounter should occur only after the characters have journeyed some distance with their owlbear. To randomly determine the timing of the owlbear encounter, roll 1d4 + 2. The result places it third, fourth, fifth, or sixth in the order of encounters on your adventure.
Owlbear Run
17A p r i l 2 013 | DU NGEON 213
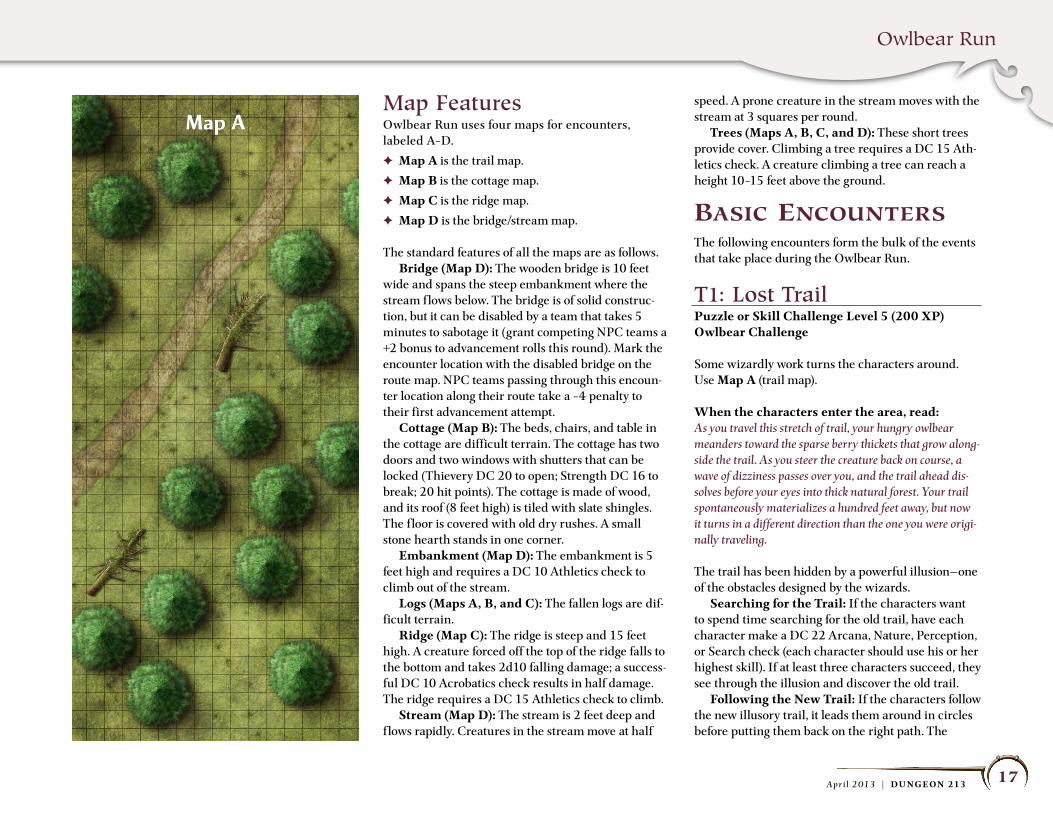
Map FeaturesOwlbear Run uses four maps for encounters, labeled A–D.
F Map A is the trail map.
F Map B is the cottage map.
F Map C is the ridge map.
F Map D is the bridge/stream map.
The standard features of all the maps are as follows. Bridge (Map D): The wooden bridge is 10 feet wide and spans the steep embankment where the stream flows below. The bridge is of solid construc-tion, but it can be disabled by a team that takes 5 minutes to sabotage it (grant competing NPC teams a +2 bonus to advancement rolls this round). Mark the encounter location with the disabled bridge on the route map. NPC teams passing through this encoun-ter location along their route take a –4 penalty to their first advancement attempt. Cottage (Map B): The beds, chairs, and table in the cottage are difficult terrain. The cottage has two doors and two windows with shutters that can be locked (Thievery DC 20 to open; Strength DC 16 to break; 20 hit points). The cottage is made of wood, and its roof (8 feet high) is tiled with slate shingles. The f loor is covered with old dry rushes. A small stone hearth stands in one corner. Embankment (Map D): The embankment is 5 feet high and requires a DC 10 Athletics check to climb out of the stream. Logs (Maps A, B, and C): The fallen logs are dif-ficult terrain. Ridge (Map C): The ridge is steep and 15 feet high. A creature forced off the top of the ridge falls to the bottom and takes 2d10 falling damage; a success-ful DC 10 Acrobatics check results in half damage. The ridge requires a DC 15 Athletics check to climb. Stream (Map D): The stream is 2 feet deep and f lows rapidly. Creatures in the stream move at half
speed. A prone creature in the stream moves with the stream at 3 squares per round. Trees (Maps A, B, C, and D): These short trees provide cover. Climbing a tree requires a DC 15 Ath-letics check. A creature climbing a tree can reach a height 10–15 feet above the ground.
BaSic encounterSThe following encounters form the bulk of the events that take place during the Owlbear Run.
t1: lost trailPuzzle or Skill Challenge Level 5 (200 XP)Owlbear Challenge
Some wizardly work turns the characters around. Use Map A (trail map).
When the characters enter the area, read:As you travel this stretch of trail, your hungry owlbear meanders toward the sparse berry thickets that grow along-side the trail. As you steer the creature back on course, a wave of dizziness passes over you, and the trail ahead dis-solves before your eyes into thick natural forest. Your trail spontaneously materializes a hundred feet away, but now it turns in a different direction than the one you were origi-nally traveling.
The trail has been hidden by a powerful illusion—one of the obstacles designed by the wizards. Searching for the Trail: If the characters want to spend time searching for the old trail, have each character make a DC 22 Arcana, Nature, Perception, or Search check (each character should use his or her highest skill). If at least three characters succeed, they see through the illusion and discover the old trail. Following the New Trail: If the characters follow the new illusory trail, it leads them around in circles before putting them back on the right path. The
Map A
Owlbear Run
18A p r i l 2 013 | DU NGEON 213
characters advance to the next encounter location, but each other team gains a +2 bonus to its advance-ment roll this round. Using the Owlbear: Any character who thinks to observe the party’s owlbear notices the owlbear doesn’t appear to see the illusion. It continues to eat the (now invisible) berries from bushes beside the original trail. If the characters try to take the owlbear onto the new trail away from the berries, the owlbear resists and the characters must use force or charm tactics to sway it (see “Dealing with Owlbears”). If the characters allow or encourage the owlbear to seek out the berries, the owlbear leads them past the illusion to the true path without losing any significant time in the race.
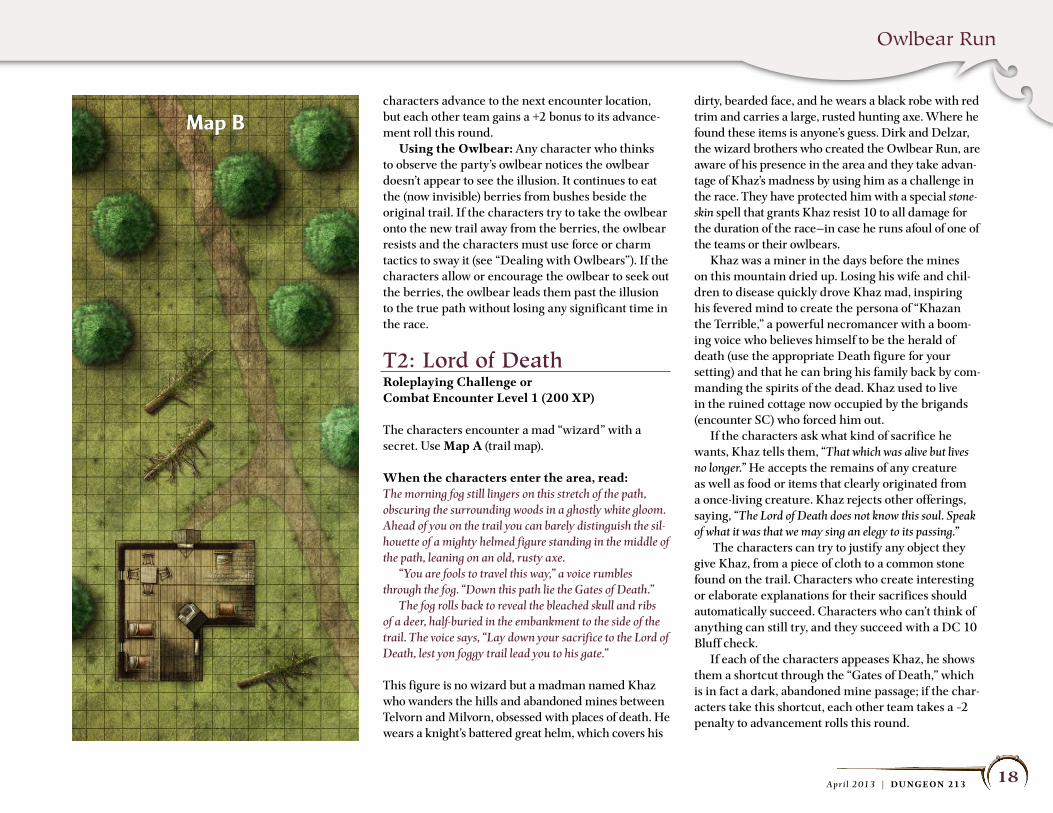
t2: lord of DeathRoleplaying Challenge or Combat Encounter Level 1 (200 XP)
The characters encounter a mad “wizard” with a secret. Use Map A (trail map).
When the characters enter the area, read:The morning fog still lingers on this stretch of the path, obscuring the surrounding woods in a ghostly white gloom. Ahead of you on the trail you can barely distinguish the sil-houette of a mighty helmed figure standing in the middle of the path, leaning on an old, rusty axe. “You are fools to travel this way,” a voice rumbles through the fog. “Down this path lie the Gates of Death.” The fog rolls back to reveal the bleached skull and ribs of a deer, half-buried in the embankment to the side of the trail. The voice says, “Lay down your sacrifice to the Lord of Death, lest yon foggy trail lead you to his gate.”
This figure is no wizard but a madman named Khaz who wanders the hills and abandoned mines between Telvorn and Milvorn, obsessed with places of death. He wears a knight’s battered great helm, which covers his
dirty, bearded face, and he wears a black robe with red trim and carries a large, rusted hunting axe. Where he found these items is anyone’s guess. Dirk and Delzar, the wizard brothers who created the Owlbear Run, are aware of his presence in the area and they take advan-tage of Khaz’s madness by using him as a challenge in the race. They have protected him with a special stone-skin spell that grants Khaz resist 10 to all damage for the duration of the race—in case he runs afoul of one of the teams or their owlbears. Khaz was a miner in the days before the mines on this mountain dried up. Losing his wife and chil-dren to disease quickly drove Khaz mad, inspiring his fevered mind to create the persona of “Khazan the Terrible,” a powerful necromancer with a boom-ing voice who believes himself to be the herald of death (use the appropriate Death figure for your setting) and that he can bring his family back by com-manding the spirits of the dead. Khaz used to live in the ruined cottage now occupied by the brigands (encounter SC) who forced him out. If the characters ask what kind of sacrifice he wants, Khaz tells them, “That which was alive but lives no longer.” He accepts the remains of any creature as well as food or items that clearly originated from a once-living creature. Khaz rejects other offerings, saying, “The Lord of Death does not know this soul. Speak of what it was that we may sing an elegy to its passing.” The characters can try to justify any object they give Khaz, from a piece of cloth to a common stone found on the trail. Characters who create interesting or elaborate explanations for their sacrifices should automatically succeed. Characters who can’t think of anything can still try, and they succeed with a DC 10 Bluff check. If each of the characters appeases Khaz, he shows them a shortcut through the “Gates of Death,” which is in fact a dark, abandoned mine passage; if the char-acters take this shortcut, each other team takes a –2 penalty to advancement rolls this round.
Map B
Owlbear Run
19A p r i l 2 013 | DU NGEON 213
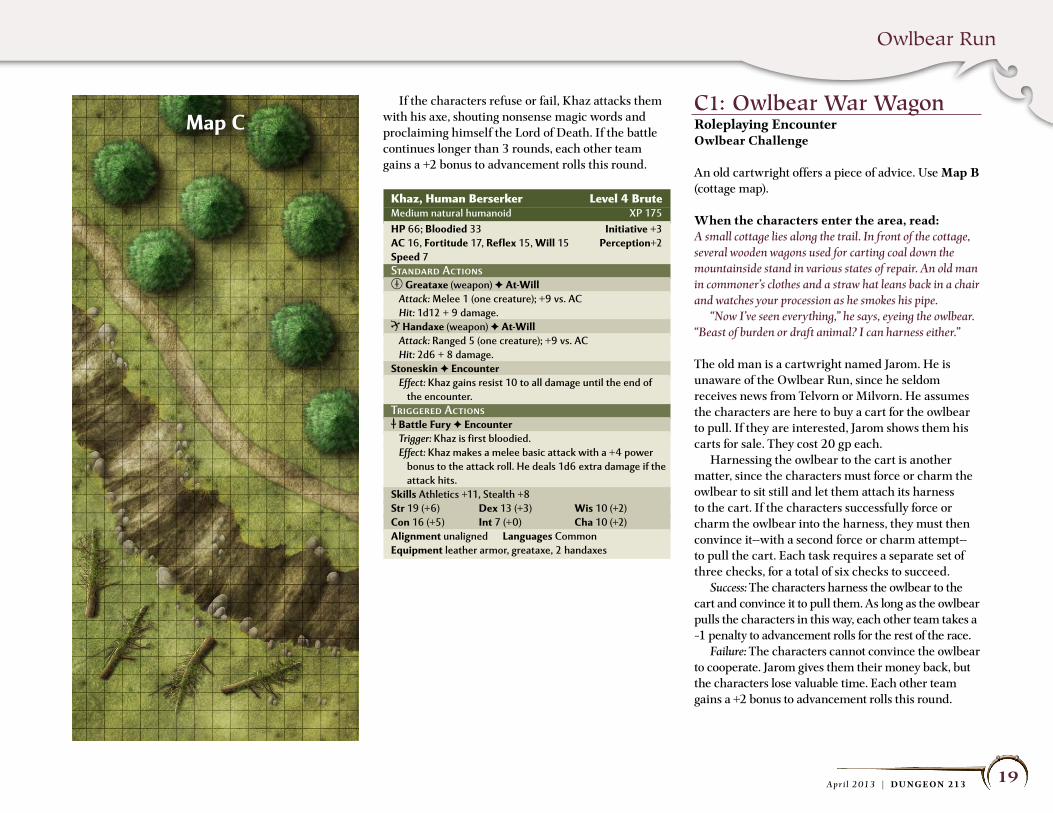
If the characters refuse or fail, Khaz attacks them with his axe, shouting nonsense magic words and proclaiming himself the Lord of Death. If the battle continues longer than 3 rounds, each other team gains a +2 bonus to advancement rolls this round.
Khaz, Human Berserker Level 4 BruteMedium natural humanoid XP 175HP 66; Bloodied 33 Initiative +3AC 16, Fortitude 17, Reflex 15, Will 15 Perception+2speed 7Standard Actionsm Greataxe (weapon) F At-Will
Attack: Melee 1 (one creature); +9 vs. ACHit: 1d12 + 9 damage.
R Handaxe (weapon) F At-WillAttack: Ranged 5 (one creature); +9 vs. ACHit: 2d6 + 8 damage.
stoneskin F encounterEffect: Khaz gains resist 10 to all damage until the end of
the encounter.Triggered ActionsM Battle Fury F encounter
Trigger: Khaz is first bloodied.Effect: Khaz makes a melee basic attack with a +4 power
bonus to the attack roll. He deals 1d6 extra damage if the attack hits.
skills Athletics +11, Stealth +8str 19 (+6) Dex 13 (+3) Wis 10 (+2)Con 16 (+5) Int 7 (+0) Cha 10 (+2)Alignment unaligned Languages Commonequipment leather armor, greataxe, 2 handaxes
C1: owlbear War WagonRoleplaying EncounterOwlbear Challenge
An old cartwright offers a piece of advice. Use Map B (cottage map).
When the characters enter the area, read:A small cottage lies along the trail. In front of the cottage, several wooden wagons used for carting coal down the mountainside stand in various states of repair. An old man in commoner’s clothes and a straw hat leans back in a chair and watches your procession as he smokes his pipe. “Now I’ve seen everything,” he says, eyeing the owlbear. “Beast of burden or draft animal? I can harness either.”
The old man is a cartwright named Jarom. He is unaware of the Owlbear Run, since he seldom receives news from Telvorn or Milvorn. He assumes the characters are here to buy a cart for the owlbear to pull. If they are interested, Jarom shows them his carts for sale. They cost 20 gp each. Harnessing the owlbear to the cart is another matter, since the characters must force or charm the owlbear to sit still and let them attach its harness to the cart. If the characters successfully force or charm the owlbear into the harness, they must then convince it—with a second force or charm attempt—to pull the cart. Each task requires a separate set of three checks, for a total of six checks to succeed. Success: The characters harness the owlbear to the cart and convince it to pull them. As long as the owlbear pulls the characters in this way, each other team takes a –1 penalty to advancement rolls for the rest of the race. Failure: The characters cannot convince the owlbear to cooperate. Jarom gives them their money back, but the characters lose valuable time. Each other team gains a +2 bonus to advancement rolls this round.
Map C
Owlbear Run
20A p r i l 2 013 | DU NGEON 213
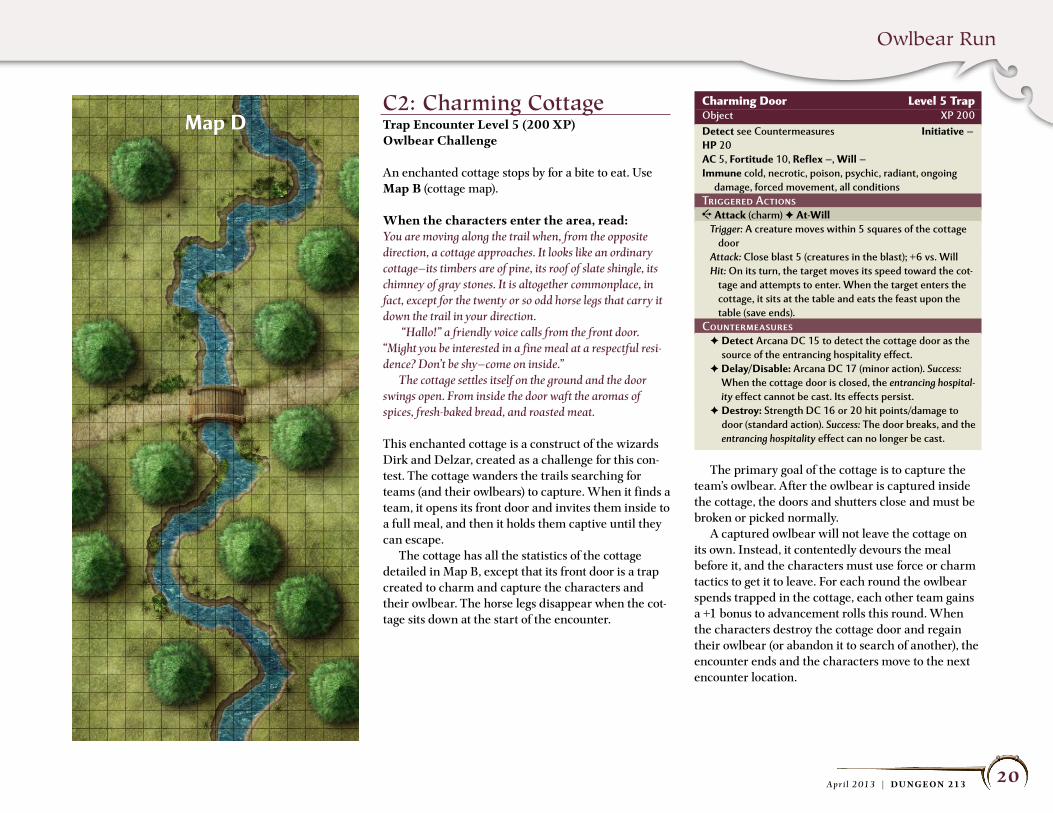
C2: Charming CottageTrap Encounter Level 5 (200 XP)Owlbear Challenge
An enchanted cottage stops by for a bite to eat. Use Map B (cottage map).
When the characters enter the area, read:You are moving along the trail when, from the opposite direction, a cottage approaches. It looks like an ordinary cottage—its timbers are of pine, its roof of slate shingle, its chimney of gray stones. It is altogether commonplace, in fact, except for the twenty or so odd horse legs that carry it down the trail in your direction. “Hallo!” a friendly voice calls from the front door. “Might you be interested in a fine meal at a respectful resi-dence? Don’t be shy—come on inside.” The cottage settles itself on the ground and the door swings open. From inside the door waft the aromas of spices, fresh-baked bread, and roasted meat.
This enchanted cottage is a construct of the wizards Dirk and Delzar, created as a challenge for this con-test. The cottage wanders the trails searching for teams (and their owlbears) to capture. When it finds a team, it opens its front door and invites them inside to a full meal, and then it holds them captive until they can escape. The cottage has all the statistics of the cottage detailed in Map B, except that its front door is a trap created to charm and capture the characters and their owlbear. The horse legs disappear when the cot-tage sits down at the start of the encounter.
Charming Door Level 5 TrapObject XP 200Detect see Countermeasures Initiative —HP 20AC 5, Fortitude 10, Reflex —, Will —Immune cold, necrotic, poison, psychic, radiant, ongoing
damage, forced movement, all conditionsTriggered ActionsC Attack (charm) F At-Will
Trigger: A creature moves within 5 squares of the cottage door
Attack: Close blast 5 (creatures in the blast); +6 vs. WillHit: On its turn, the target moves its speed toward the cot-
tage and attempts to enter. When the target enters the cottage, it sits at the table and eats the feast upon the table (save ends).
CountermeasuresF Detect Arcana DC 15 to detect the cottage door as the
source of the entrancing hospitality effect.F Delay/Disable: Arcana DC 17 (minor action). Success:
When the cottage door is closed, the entrancing hospital-ity effect cannot be cast. Its effects persist.
F Destroy: Strength DC 16 or 20 hit points/damage to door (standard action). Success: The door breaks, and the entrancing hospitality effect can no longer be cast.
The primary goal of the cottage is to capture the team’s owlbear. After the owlbear is captured inside the cottage, the doors and shutters close and must be broken or picked normally. A captured owlbear will not leave the cottage on its own. Instead, it contentedly devours the meal before it, and the characters must use force or charm tactics to get it to leave. For each round the owlbear spends trapped in the cottage, each other team gains a +1 bonus to advancement rolls this round. When the characters destroy the cottage door and regain their owlbear (or abandon it to search of another), the encounter ends and the characters move to the next encounter location.
Map D
Owlbear Run
21A p r i l 2 013 | DU NGEON 213
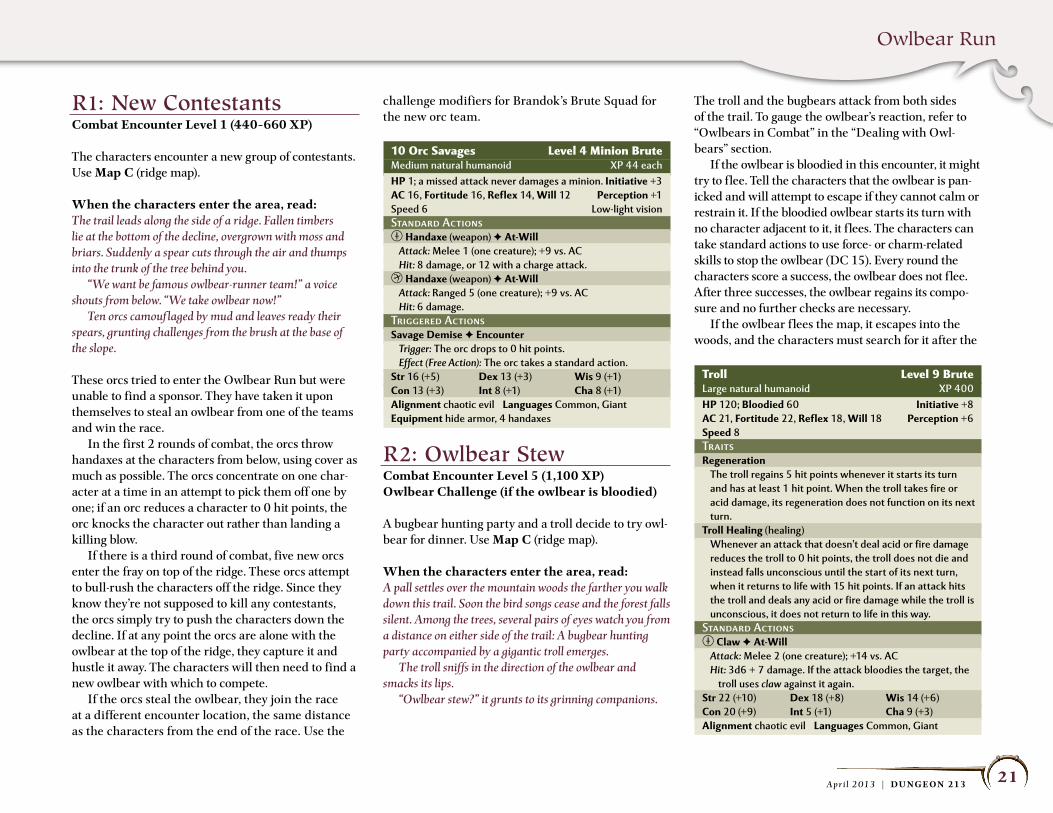
R1: new ContestantsCombat Encounter Level 1 (440–660 XP)
The characters encounter a new group of contestants. Use Map C (ridge map).
When the characters enter the area, read:The trail leads along the side of a ridge. Fallen timbers lie at the bottom of the decline, overgrown with moss and briars. Suddenly a spear cuts through the air and thumps into the trunk of the tree behind you. “We want be famous owlbear-runner team!” a voice shouts from below. “We take owlbear now!” Ten orcs camouf laged by mud and leaves ready their spears, grunting challenges from the brush at the base of the slope.
These orcs tried to enter the Owlbear Run but were unable to find a sponsor. They have taken it upon themselves to steal an owlbear from one of the teams and win the race. In the first 2 rounds of combat, the orcs throw handaxes at the characters from below, using cover as much as possible. The orcs concentrate on one char-acter at a time in an attempt to pick them off one by one; if an orc reduces a character to 0 hit points, the orc knocks the character out rather than landing a killing blow. If there is a third round of combat, five new orcs enter the fray on top of the ridge. These orcs attempt to bull-rush the characters off the ridge. Since they know they’re not supposed to kill any contestants, the orcs simply try to push the characters down the decline. If at any point the orcs are alone with the owlbear at the top of the ridge, they capture it and hustle it away. The characters will then need to find a new owlbear with which to compete. If the orcs steal the owlbear, they join the race at a different encounter location, the same distance as the characters from the end of the race. Use the
challenge modifiers for Brandok’s Brute Squad for the new orc team.
10 Orc Savages Level 4 Minion Brute Medium natural humanoid XP 44 eachHP 1; a missed attack never damages a minion. Initiative +3AC 16, Fortitude 16, Reflex 14, Will 12 Perception +1Speed 6 Low-light visionStandard Actionsm Handaxe (weapon) F At-Will
Attack: Melee 1 (one creature); +9 vs. ACHit: 8 damage, or 12 with a charge attack.
r Handaxe (weapon) F At-WillAttack: Ranged 5 (one creature); +9 vs. ACHit: 6 damage.
Triggered Actionssavage Demise F encounter
Trigger: The orc drops to 0 hit points.Effect (Free Action): The orc takes a standard action.
str 16 (+5) Dex 13 (+3) Wis 9 (+1)Con 13 (+3) Int 8 (+1) Cha 8 (+1)Alignment chaotic evil Languages Common, Giantequipment hide armor, 4 handaxes
R2: owlbear StewCombat Encounter Level 5 (1,100 XP)Owlbear Challenge (if the owlbear is bloodied)
A bugbear hunting party and a troll decide to try owl-bear for dinner. Use Map C (ridge map).
When the characters enter the area, read:A pall settles over the mountain woods the farther you walk down this trail. Soon the bird songs cease and the forest falls silent. Among the trees, several pairs of eyes watch you from a distance on either side of the trail: A bugbear hunting party accompanied by a gigantic troll emerges. The troll sniffs in the direction of the owlbear and smacks its lips. “Owlbear stew?” it grunts to its grinning companions.
The troll and the bugbears attack from both sides of the trail. To gauge the owlbear’s reaction, refer to “Owlbears in Combat” in the “Dealing with Owl-bears” section. If the owlbear is bloodied in this encounter, it might try to flee. Tell the characters that the owlbear is pan-icked and will attempt to escape if they cannot calm or restrain it. If the bloodied owlbear starts its turn with no character adjacent to it, it f lees. The characters can take standard actions to use force- or charm-related skills to stop the owlbear (DC 15). Every round the characters score a success, the owlbear does not flee. After three successes, the owlbear regains its compo-sure and no further checks are necessary. If the owlbear f lees the map, it escapes into the woods, and the characters must search for it after the
Troll Level 9 BruteLarge natural humanoid XP 400HP 120; Bloodied 60 Initiative +8AC 21, Fortitude 22, Reflex 18, Will 18 Perception +6speed 8TraitsRegeneration
The troll regains 5 hit points whenever it starts its turn and has at least 1 hit point. When the troll takes fire or acid damage, its regeneration does not function on its next turn.
Troll Healing (healing)Whenever an attack that doesn’t deal acid or fire damage reduces the troll to 0 hit points, the troll does not die and instead falls unconscious until the start of its next turn, when it returns to life with 15 hit points. If an attack hits the troll and deals any acid or fire damage while the troll is unconscious, it does not return to life in this way.
Standard Actionsm Claw F At-Will
Attack: Melee 2 (one creature); +14 vs. ACHit: 3d6 + 7 damage. If the attack bloodies the target, the
troll uses claw against it again.str 22 (+10) Dex 18 (+8) Wis 14 (+6)Con 20 (+9) Int 5 (+1) Cha 9 (+3)Alignment chaotic evil Languages Common, Giant
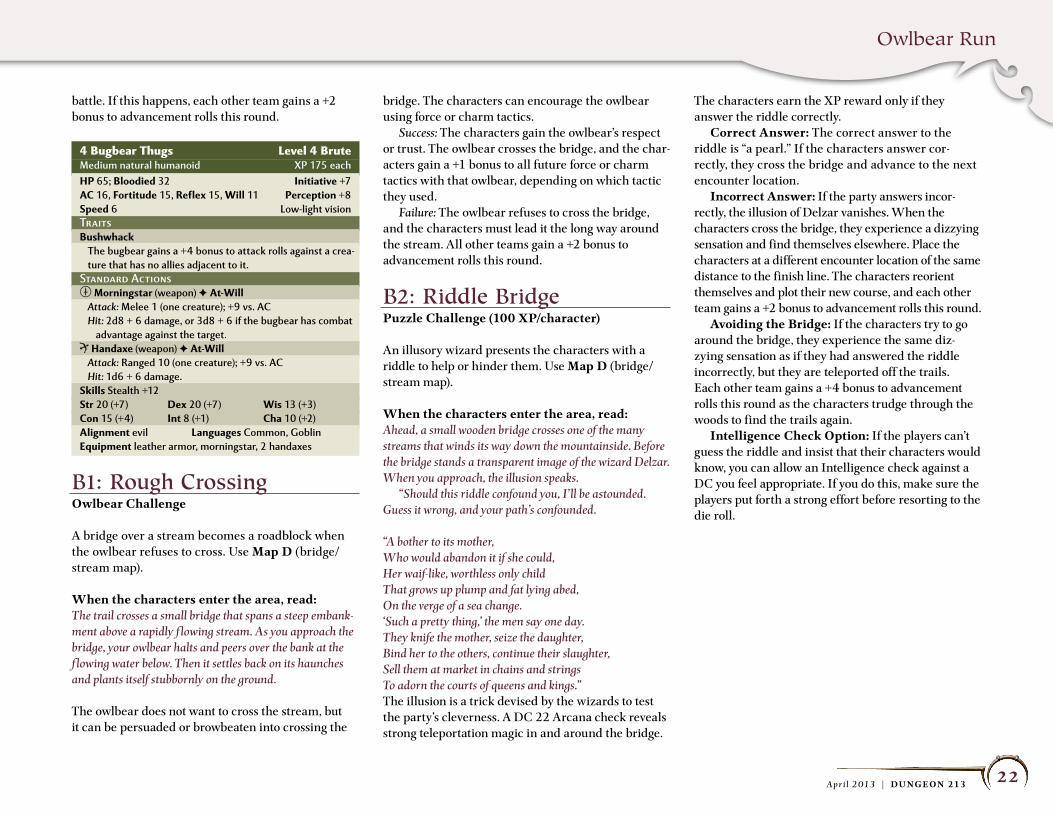
Owlbear Run
22A p r i l 2 013 | DU NGEON 213
battle. If this happens, each other team gains a +2 bonus to advancement rolls this round.
4 Bugbear Thugs Level 4 BruteMedium natural humanoid XP 175 eachHP 65; Bloodied 32 Initiative +7AC 16, Fortitude 15, Reflex 15, Will 11 Perception +8speed 6 Low-light visionTraitsBushwhack
The bugbear gains a +4 bonus to attack rolls against a crea-ture that has no allies adjacent to it.
Standard Actionsm Morningstar (weapon) F At-Will
Attack: Melee 1 (one creature); +9 vs. ACHit: 2d8 + 6 damage, or 3d8 + 6 if the bugbear has combat
advantage against the target.R Handaxe (weapon) F At-Will
Attack: Ranged 10 (one creature); +9 vs. ACHit: 1d6 + 6 damage.
skills Stealth +12str 20 (+7) Dex 20 (+7) Wis 13 (+3)Con 15 (+4) Int 8 (+1) Cha 10 (+2)Alignment evil Languages Common, Goblinequipment leather armor, morningstar, 2 handaxes
B1: Rough CrossingOwlbear Challenge
A bridge over a stream becomes a roadblock when the owlbear refuses to cross. Use Map D (bridge/stream map).
When the characters enter the area, read:The trail crosses a small bridge that spans a steep embank-ment above a rapidly f lowing stream. As you approach the bridge, your owlbear halts and peers over the bank at the f lowing water below. Then it settles back on its haunches and plants itself stubbornly on the ground.
The owlbear does not want to cross the stream, but it can be persuaded or browbeaten into crossing the
bridge. The characters can encourage the owlbear using force or charm tactics. Success: The characters gain the owlbear’s respect or trust. The owlbear crosses the bridge, and the char-acters gain a +1 bonus to all future force or charm tactics with that owlbear, depending on which tactic they used. Failure: The owlbear refuses to cross the bridge, and the characters must lead it the long way around the stream. All other teams gain a +2 bonus to advancement rolls this round.
B2: Riddle BridgePuzzle Challenge (100 XP/character)
An illusory wizard presents the characters with a riddle to help or hinder them. Use Map D (bridge/stream map).
When the characters enter the area, read:Ahead, a small wooden bridge crosses one of the many streams that winds its way down the mountainside. Before the bridge stands a transparent image of the wizard Delzar. When you approach, the illusion speaks. “Should this riddle confound you, I’ ll be astounded. Guess it wrong, and your path’s confounded.
“A bother to its mother,Who would abandon it if she could,Her waif-like, worthless only childThat grows up plump and fat lying abed,On the verge of a sea change.‘Such a pretty thing,’ the men say one day.They knife the mother, seize the daughter,Bind her to the others, continue their slaughter,Sell them at market in chains and stringsTo adorn the courts of queens and kings.”The illusion is a trick devised by the wizards to test the party’s cleverness. A DC 22 Arcana check reveals strong teleportation magic in and around the bridge.
The characters earn the XP reward only if they answer the riddle correctly. Correct Answer: The correct answer to the riddle is “a pearl.” If the characters answer cor-rectly, they cross the bridge and advance to the next encounter location. Incorrect Answer: If the party answers incor-rectly, the illusion of Delzar vanishes. When the characters cross the bridge, they experience a dizzying sensation and find themselves elsewhere. Place the characters at a different encounter location of the same distance to the finish line. The characters reorient themselves and plot their new course, and each other team gains a +2 bonus to advancement rolls this round. Avoiding the Bridge: If the characters try to go around the bridge, they experience the same diz-zying sensation as if they had answered the riddle incorrectly, but they are teleported off the trails. Each other team gains a +4 bonus to advancement rolls this round as the characters trudge through the woods to find the trails again. Intelligence Check Option: If the players can’t guess the riddle and insist that their characters would know, you can allow an Intelligence check against a DC you feel appropriate. If you do this, make sure the players put forth a strong effort before resorting to the die roll.
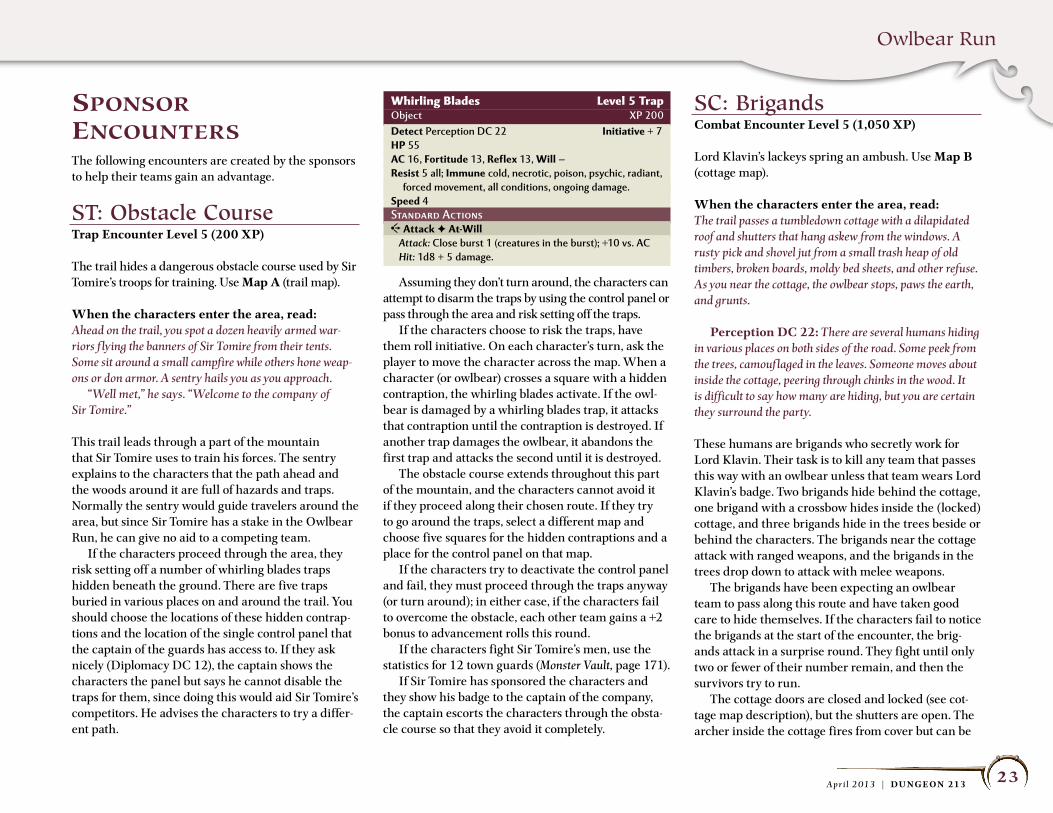
Owlbear Run
23A p r i l 2 013 | DU NGEON 213
SponSor encounterSThe following encounters are created by the sponsors to help their teams gain an advantage.
St: obstacle CourseTrap Encounter Level 5 (200 XP)
The trail hides a dangerous obstacle course used by Sir Tomire’s troops for training. Use Map A (trail map).
When the characters enter the area, read:Ahead on the trail, you spot a dozen heavily armed war-riors f lying the banners of Sir Tomire from their tents. Some sit around a small campfire while others hone weap-ons or don armor. A sentry hails you as you approach. “Well met,” he says. “Welcome to the company of Sir Tomire.”
This trail leads through a part of the mountain that Sir Tomire uses to train his forces. The sentry explains to the characters that the path ahead and the woods around it are full of hazards and traps. Normally the sentry would guide travelers around the area, but since Sir Tomire has a stake in the Owlbear Run, he can give no aid to a competing team. If the characters proceed through the area, they risk setting off a number of whirling blades traps hidden beneath the ground. There are five traps buried in various places on and around the trail. You should choose the locations of these hidden contrap-tions and the location of the single control panel that the captain of the guards has access to. If they ask nicely (Diplomacy DC 12), the captain shows the characters the panel but says he cannot disable the traps for them, since doing this would aid Sir Tomire’s competitors. He advises the characters to try a differ-ent path.
Assuming they don’t turn around, the characters can attempt to disarm the traps by using the control panel or pass through the area and risk setting off the traps. If the characters choose to risk the traps, have them roll initiative. On each character’s turn, ask the player to move the character across the map. When a character (or owlbear) crosses a square with a hidden contraption, the whirling blades activate. If the owl-bear is damaged by a whirling blades trap, it attacks that contraption until the contraption is destroyed. If another trap damages the owlbear, it abandons the first trap and attacks the second until it is destroyed. The obstacle course extends throughout this part of the mountain, and the characters cannot avoid it if they proceed along their chosen route. If they try to go around the traps, select a different map and choose five squares for the hidden contraptions and a place for the control panel on that map. If the characters try to deactivate the control panel and fail, they must proceed through the traps anyway (or turn around); in either case, if the characters fail to overcome the obstacle, each other team gains a +2 bonus to advancement rolls this round. If the characters fight Sir Tomire’s men, use the statistics for 12 town guards (Monster Vault, page 171). If Sir Tomire has sponsored the characters and they show his badge to the captain of the company, the captain escorts the characters through the obsta-cle course so that they avoid it completely.
SC: BrigandsCombat Encounter Level 5 (1,050 XP)
Lord Klavin’s lackeys spring an ambush. Use Map B (cottage map).
When the characters enter the area, read:The trail passes a tumbledown cottage with a dilapidated roof and shutters that hang askew from the windows. A rusty pick and shovel jut from a small trash heap of old timbers, broken boards, moldy bed sheets, and other refuse. As you near the cottage, the owlbear stops, paws the earth, and grunts.
Perception DC 22: There are several humans hiding in various places on both sides of the road. Some peek from the trees, camouf laged in the leaves. Someone moves about inside the cottage, peering through chinks in the wood. It is difficult to say how many are hiding, but you are certain they surround the party.
These humans are brigands who secretly work for Lord Klavin. Their task is to kill any team that passes this way with an owlbear unless that team wears Lord Klavin’s badge. Two brigands hide behind the cottage, one brigand with a crossbow hides inside the (locked) cottage, and three brigands hide in the trees beside or behind the characters. The brigands near the cottage attack with ranged weapons, and the brigands in the trees drop down to attack with melee weapons. The brigands have been expecting an owlbear team to pass along this route and have taken good care to hide themselves. If the characters fail to notice the brigands at the start of the encounter, the brig-ands attack in a surprise round. They fight until only two or fewer of their number remain, and then the survivors try to run. The cottage doors are closed and locked (see cot-tage map description), but the shutters are open. The archer inside the cottage fires from cover but can be
Whirling Blades Level 5 TrapObject XP 200Detect Perception DC 22 Initiative + 7HP 55AC 16, Fortitude 13, Reflex 13, Will —Resist 5 all; Immune cold, necrotic, poison, psychic, radiant,
forced movement, all conditions, ongoing damage.speed 4Standard ActionsC Attack F At-Will
Attack: Close burst 1 (creatures in the burst); +10 vs. ACHit: 1d8 + 5 damage.
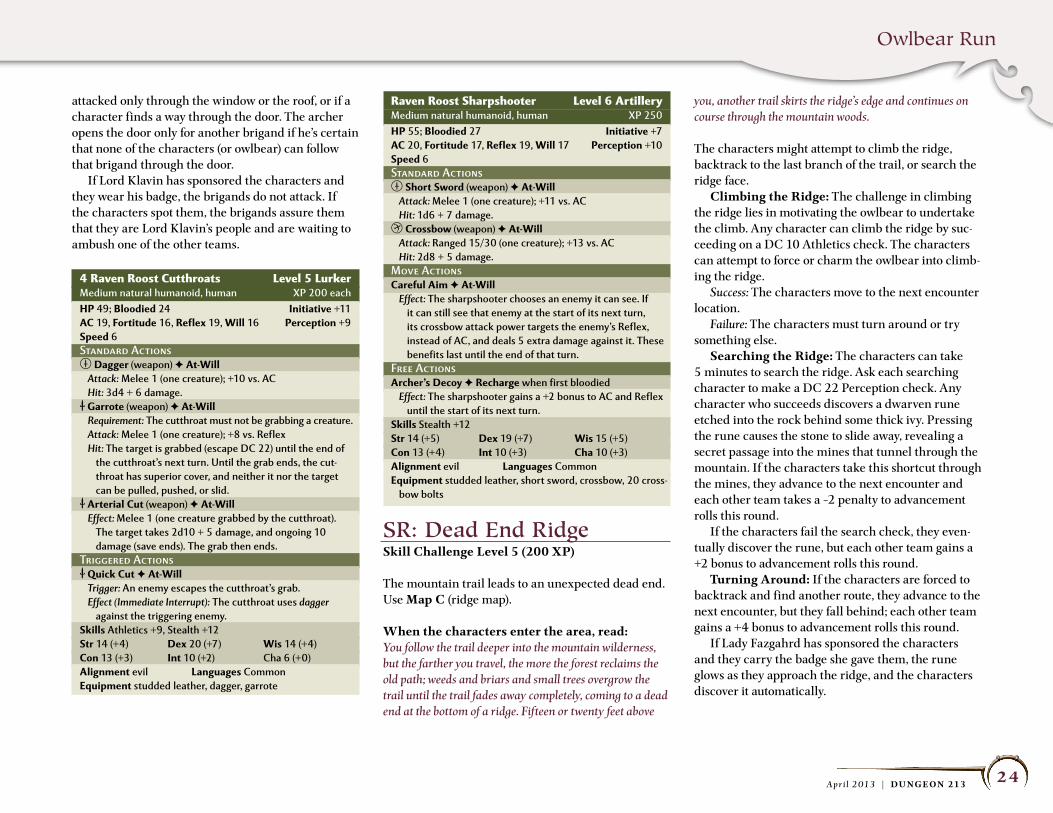
Owlbear Run
24A p r i l 2 013 | DU NGEON 213
attacked only through the window or the roof, or if a character finds a way through the door. The archer opens the door only for another brigand if he’s certain that none of the characters (or owlbear) can follow that brigand through the door. If Lord Klavin has sponsored the characters and they wear his badge, the brigands do not attack. If the characters spot them, the brigands assure them that they are Lord Klavin’s people and are waiting to ambush one of the other teams.
4 Raven Roost Cutthroats Level 5 LurkerMedium natural humanoid, human XP 200 eachHP 49; Bloodied 24 Initiative +11AC 19, Fortitude 16, Reflex 19, Will 16 Perception +9speed 6Standard Actionsm Dagger (weapon) F At-Will
Attack: Melee 1 (one creature); +10 vs. ACHit: 3d4 + 6 damage.
M Garrote (weapon) F At-WillRequirement: The cutthroat must not be grabbing a creature.Attack: Melee 1 (one creature); +8 vs. ReflexHit: The target is grabbed (escape DC 22) until the end of
the cutthroat’s next turn. Until the grab ends, the cut-throat has superior cover, and neither it nor the target can be pulled, pushed, or slid.
M Arterial Cut (weapon) F At-WillEffect: Melee 1 (one creature grabbed by the cutthroat).
The target takes 2d10 + 5 damage, and ongoing 10 damage (save ends). The grab then ends.
Triggered ActionsM Quick Cut F At-Will
Trigger: An enemy escapes the cutthroat’s grab.Effect (Immediate Interrupt): The cutthroat uses dagger
against the triggering enemy.skills Athletics +9, Stealth +12str 14 (+4) Dex 20 (+7) Wis 14 (+4)Con 13 (+3) Int 10 (+2) Cha 6 (+0)Alignment evil Languages Commonequipment studded leather, dagger, garrote
Raven Roost Sharpshooter Level 6 ArtilleryMedium natural humanoid, human XP 250HP 55; Bloodied 27 Initiative +7AC 20, Fortitude 17, Reflex 19, Will 17 Perception +10speed 6Standard Actionsm short sword (weapon) F At-Will
Attack: Melee 1 (one creature); +11 vs. ACHit: 1d6 + 7 damage.
r Crossbow (weapon) F At-WillAttack: Ranged 15/30 (one creature); +13 vs. ACHit: 2d8 + 5 damage.
Move ActionsCareful Aim F At-Will
Effect: The sharpshooter chooses an enemy it can see. If it can still see that enemy at the start of its next turn, its crossbow attack power targets the enemy’s Reflex, instead of AC, and deals 5 extra damage against it. These benefits last until the end of that turn.
Free ActionsArcher’s Decoy F Recharge when first bloodied
Effect: The sharpshooter gains a +2 bonus to AC and Reflex until the start of its next turn.
skills Stealth +12str 14 (+5) Dex 19 (+7) Wis 15 (+5)Con 13 (+4) Int 10 (+3) Cha 10 (+3)Alignment evil Languages Commonequipment studded leather, short sword, crossbow, 20 cross-
bow bolts
SR: Dead end RidgeSkill Challenge Level 5 (200 XP)
The mountain trail leads to an unexpected dead end. Use Map C (ridge map).
When the characters enter the area, read:You follow the trail deeper into the mountain wilderness, but the farther you travel, the more the forest reclaims the old path; weeds and briars and small trees overgrow the trail until the trail fades away completely, coming to a dead end at the bottom of a ridge. Fifteen or twenty feet above
you, another trail skirts the ridge’s edge and continues on course through the mountain woods.
The characters might attempt to climb the ridge, backtrack to the last branch of the trail, or search the ridge face. Climbing the Ridge: The challenge in climbing the ridge lies in motivating the owlbear to undertake the climb. Any character can climb the ridge by suc-ceeding on a DC 10 Athletics check. The characters can attempt to force or charm the owlbear into climb-ing the ridge. Success: The characters move to the next encounter location. Failure: The characters must turn around or try something else. Searching the Ridge: The characters can take 5 minutes to search the ridge. Ask each searching character to make a DC 22 Perception check. Any character who succeeds discovers a dwarven rune etched into the rock behind some thick ivy. Pressing the rune causes the stone to slide away, revealing a secret passage into the mines that tunnel through the mountain. If the characters take this shortcut through the mines, they advance to the next encounter and each other team takes a –2 penalty to advancement rolls this round. If the characters fail the search check, they even-tually discover the rune, but each other team gains a +2 bonus to advancement rolls this round. Turning Around: If the characters are forced to backtrack and find another route, they advance to the next encounter, but they fall behind; each other team gains a +4 bonus to advancement rolls this round. If Lady Fazgahrd has sponsored the characters and they carry the badge she gave them, the rune glows as they approach the ridge, and the characters discover it automatically.
Owlbear Run
25A p r i l 2 013 | DU NGEON 213
SB: inspection pointRoleplaying Challenge or Skill Challenge Level 5 (200 XP)
The sheriff ’s people hold an inspection point at a bridge. Use Map D (bridge/stream map).
When the characters approach the inspection point, read:On the bridge ahead stands a small band of armed humans wearing the colors of Lord Burl. A black-bearded man in chainmail and helm waves you forward. “Just a routine inspection,” he says. “Please cross the bridge in single file, and keep your weapons sheathed unless we ask you to unbind them.”
The sheriff ’s people are patrolling the mountain paths searching for evidence of the dangerous “black naga” drug smuggled through this region. They are conducting a legitimate (albeit time-consuming and thorough) investigation and have legal grounds to hold up any group trying to cross the bridge. If the characters let the sheriff ’s people complete their investigation, or if they turn around or take an alternate route, each other team gains a +3 bonus to advancement rolls this round. Talking through the Checkpoint: It’s difficult to convince the sheriff ’s people to disobey a direct order from their boss, but if the characters offer a compel-ling argument or a lie, each character can attempt a DC 10 Bluff or Diplomacy check to convince the sheriff ’s people to let them pass. The sheriff ’s crew will look to each of the characters to verify the story, so each character must succeed on this check or the sher-iff ’s crew continues to conduct its inspection. Fight: The characters can fight the sheriff ’s people. If any of the sheriff ’s people are slain in the fight, however, the characters lose any treasure they would be rewarded at the end of the race (see “Con-clusion: The Finish Line”). If the characters win the
fight or cross the bridge and leave the map, they pro-ceed unhindered. If the characters fight Lord Burl’s people, use the statistics for 6 town guards (Monster Vault, page 171). If Lord Burl has sponsored the characters and they openly display his badge, the sheriff ’s people let them pass to the next encounter location without conduct-ing their investigation. Each other team takes a –1 penalty to advancement rolls this round.
owlBear encounterSIn “Owlbear Run,” the characters experience one owlbear encounter associated with the owlbear they chose. Each owlbear entry includes a minor quest. This is the part of the adventure where the characters get to interact with their owlbear and help it resolve its quest. This event can come in the middle or at the end of the adventure but seldom appears at the begin-ning unless you want it to (see the “Encounter Order” sidebar at the beginning of the “Encounter Types” section).
oe1: terrible tharizdun is AsleepOwlbear Challenge
A stag’s carcass on the road lures the voracious, hibernating owlbear away from the trail. Use Map A (trail map).
When the characters start this encounter, read:As you move along the trail, Terrible Tharizdun sud-denly halts and raises his head. Just beyond the tree line, the bloody carcass of a stag lies sprawled on the forest f loor. Tharizdun coos and pulls against his harness to get at the feast.
If he is able, the hungry owlbear proceeds to the deer and begins to eat. The characters can prevent Terrible Tharizdun from stopping to eat the deer by using charm tactics at a –5 penalty, by baiting him with any part of the deer carcass, or by offering him all their rations (automatic success). The characters can also use force tactics to pull Terrible Tharizdun away from the carcass; the determined owlbear, however, gains a +2 bonus to his opposed rolls (see “Dealing with Owlbears”). If Terrible Tharizdun reaches the stag’s carcass, he will feast. Though he is hungry, Terrible Tharizdun takes his time eating the stag. (Nature DC 12: The carcass is fresh, and the characters can see recent wolf prints in the soft ground. The wolves that killed the stag were likely frightened by the characters’ approach.) If the characters wait for Tharizdun to finish, each other team gains a +2 bonus to advancement rolls this round. Once Terrible Tharizdun has finished, the owlbear wanders a few yards away and settles down to sleep; the characters can use force or charm tactics to prevent this. If the owlbear falls asleep, each other team gains an additional +2 bonus to advancement rolls (+4 total) this round. The characters might think of another solution to the problem. Remember that Terrible Tharizdun is strong and stubborn, and forcing or convincing him to move should be difficult (DC 22) and require more than one check. The root of the problem is the owl-bear’s hunger, however, and solutions that promise to sate the owlbear’s appetite should automatically suc-ceed (in other words, if he eats a character). Minor Quest Reward: If the characters get Ter-rible Tharizdun to continue the race without stopping to eat the stag or falling asleep, they earn the “Moti-vate Terrible Tharizdun” quest reward.
Owlbear Run
26A p r i l 2 013 | DU NGEON 213
oe2: Kitten’s eggsOwlbear Challenge
Kitten, the pregnant owlbear, needs a nest to lay her eggs. Use Map B (cottage map).
When the characters start this encounter, read:A small thatched cottage stands at a bend in the trail. The chopped wood stacked alongside the cottage and the smoke streaming from the chimney indicate that it is occupied. Through the open shutters come the voices of human chil-dren at play. Kitten coos, then growls, then coos again, pulling with all her strength toward the cottage.
The cottage is occupied by a human woman named Lora and her three small children. The children play with wooden toys on the f loor while the woman pre-pares a chicken at the table. The owlbear senses it is time to lay her eggs. She wants to lay them in this cottage, where they will be hidden from forest predators, but first she must drive the humans from their lair. If the characters study Kitten now, a DC 16 Arcana, Insight, Nature, or Per-ception check reveals that Kitten is pregnant, and the characters gain a +2 bonus to charm tactics used to influence Kitten for the rest of the encounter. Use the statistics for the human rabble minion in the “Competing Teams” section for the woman Lora, if necessary. Her children have the same AC and hit points as the rabble, but their attacks deal only 1 point of damage. Restraining Kitten: The characters can use force or charm tactics to restrain the owlbear. Success: The characters restrain the owlbear. Kitten moans and growls and lies down on the ground, refusing to move. Failure: Kitten bursts into the house and attacks the woman and children. (If the characters failed a force tactic by 5 or more, the owlbear might attack the characters instead.) Once the woman and her
children have f led the cottage or been slain, Kitten lays her eggs near the hearth. The Eggs: Regardless of whether Kitten breaks into the cottage, she lays her eggs here, sits on her makeshift nest, and refuses to budge. If the characters use force tactics to move her, the owlbear gains a +5 to her opposed rolls. Alternatively, the characters can use charm tactics to convince the owlbear to let them approach and handle her eggs. Success: The characters force Kitten to move from her nest or charm the owlbear into allowing them to handle her eggs. Kitten will not leave the eggs behind (she will fight to the death before leaving them), but if the characters take the eggs along, Kitten follows. Failure: Kitten takes extra time to make a nest from the materials she can find—thatch from the roof, wattle from the walls, rushes from the floor. She does not stir until she becomes hungry, and then she leaves the cot-tage to hunt. The race proceeds, but each other team gains a +3 bonus to advancement rolls this round. Minor Quest Reward: If the characters prevent Kitten from slaying the cottage occupants and they take her eggs along in the race, they earn the “Save the Children” quest reward.
oe3: Manslayer is CorneredCombat Encounter Level 5 (1,000 XP)Owlbear Challenge
Cornered against a ridge, the cowardly owlbear must face his fears. Use Map C (ridge map).
When the party starts this encounter, read:As you race through the woods, shaggy gray shapes keep pace with your party; a pack of hungry dire wolves has caught the scent of your owlbear. As your trail rounds the top of a ridge, the wolves spring their trap, cornering you against the edge of the steep decline. Terrified, the owlbear shrieks and struggles against his harness.
The dire wolves attack the owlbear; they attack only characters who stand in their way, attack, or hinder them. Manslayer cowers as the wolves attack, but it should be clear to the players that an owlbear could easily kill a dire wolf if it fought back. The characters can use force or charm tactics to motivate Manslayer to fight back. First Success: Manslayer stops cowering and stands up, though he remains intimidated by the wolves. Second Success: Manslayer assumes a threatening appearance, screeching and growling at the wolves. Third Success: Manslayer fights back against the wolves. Failure: If the characters fail, Manslayer leaps from the ridge in an attempt to escape and takes 2d10 falling damage. He then f lees the map at the first opportunity. If he is not killed by dire wolves and escapes the battle, the characters must search for him in the woods; each other team gains a +3 bonus to advancement rolls this round.
5 Dire Wolves Level 5 SkirmisherLarge natural beast (mount) XP 200 eachHP 67; Bloodied 33 Initiative +7AC 19, Fortitude 18, Reflex 17, Will 16 Perception+9speed 8 Low-light visionTraitsPack Harrier
The wolf has combat advantage against any enemy that is adjacent to two or more of the wolf’s allies.
Pack Hunter (mount)The wolf ’s rider has combat advantage against any enemy that is adjacent to one of the rider’s allies other than the wolf.
Standard Actionsm Bite F At-Will
Attack: Melee 1 (one creature); +10 vs. ACHit: 2d8 + 4 damage, or 3d8 + 4 against a prone target.
The target falls prone if the wolf has combat advantage against it.
str 19 (+6) Dex 16 (+5) Wis 14 (+4)Con 19 (+6) Int 5 (–1) Cha 11 (+2)Alignment unaligned Languages —
Owlbear Run
27A p r i l 2 013 | DU NGEON 213
If Manslayer survives the encounter, he finds his courage. For the remainder of the race, he defends him-self from attackers. He can also be convinced to fight the characters’ enemies (see “Owlbears in Combat”). Minor Quest Reward: If the characters get Man-slayer to fight the dire wolves, they earn the “Help Manslayer Find His Courage” quest reward.
oe4: lucky lady is ReunitedSkill Challenge Level 5 (200 XP)Owlbear Challenge
Lucky Lady encounters her mate, from which she has been separated since her capture. Use Map D (bridge/stream map).
When the characters start this encounter, read:As you near a bridge that spans a small stream, Lucky Lady’s tufted ears prick up and the owlbear rises on its haunches, owl eyes wide, focused on something beyond the bridge. Then you see it: a huge male owlbear on the edge of the forest, crashing through the bracken. When he spots your owlbear, it rises up on its haunches and screeches. Lucky Lady mirrors the male’s movement—she rises up and screeches back.
This male owlbear is Lucky Lady’s mate. When Lucky Lady and the male owlbear spot one another, Lucky Lady strains against her harness. The characters can try to restrain her using force or charm tactics, attempt to communicate or empathize with the male owlbear, scare him away, or watch and wait. (Feel free to improvise other solutions the characters devise.) An Arcana, Nature, or Perception check (DC 15) reveals that the male owlbear is alternately calling to his mate and issuing a challenge to the characters, whom it perceives to be a threat to his mate.
The characters can prove they are not a threat in one of the following ways.
F Communicate/Empathize (Nature DC 22): A character can calm the male owlbear by touching him and speaking to him gently.
F Calm Lucky Lady (charm or force tactics): The characters calm Lucky Lady. The male owlbear crosses the bridge. If the characters allow him to do so, the male owlbear approaches Lucky Lady, stops in front of her, and sniffs.
F Release Lucky Lady (DC 10 group Nature check in which at least half the characters succeed): If the characters release Lucky Lady, she meets her mate on the bridge. The male assesses the characters to see if they still pose a threat.
F Scare Away (DC 15 group Intimidate check in which at least half the characters succeed): The characters can spook the male owlbear by growling, beating their weapons, discharging spells, and so forth. If the characters fail, the male owlbear attacks.
Success: If the characters successfully convince the male owlbear that they are not a threat to his mate, the male owlbear calms. It nuzzles Lucky Lady and grunts at the characters before returning to the forest. If any check fails by 5 or more, the male owlbear attacks. Failure: If the characters fail to convince the male owlbear that they does not pose a threat to his mate, the male owlbear attacks (but Lucky Lady does not attack unless the characters have treated her cruelly). Each other team gains a +3 bonus to advancement rolls this round. Minor Quest Reward: If the characters success-fully convince the male owlbear they do not pose a threat to his mate and they allow the owlbears a moment together, they earn the “Reunite Lucky Lady with Her Mate” quest reward.
concluSion: the FiniSh lineAt the end of the race, the spoils go to the victor.
If the characters win the race, read:You have brought your owlbear through many trials, and now the town of Milvorn sprawls before you beneath the eastern slopes of the mountain. You pick up speed in your descent, barreling down the mountain like a mob of drunken gods. And gods you are, at least in Milvorn. The crowd cheers as you reach the town gate. Your triumphant owlbear echoes the cry, screeching victoriously over the applause as gold coins fall at your feet like enormous glittering raindrops.
If the characters lose the race, read:Despite your best efforts, due to an uncooperative owlbear, the wizards’ tricks, and the sponsors’ schemes, your crafty opponents have carried the day. You arrive in Milvorn to discover another team standing at the gates with its owl-bear, basking in the adoration of the crowd. As you consider what to do next, a messenger arrives with a summons from the duke and a proposition for lucra-tive employment. It seems that your greatness has not gone unnoticed after all.
If the characters finish the race first, they gain the quest reward, “Win the Owlbear Run.” If the char-acters paid 5,000 gp to participate in the race, they gain it back. The winner of the race gains 2,500 gp for each other team that participated in the race (7,500 gp total if all three NPC teams participated). In addition, the characters’ sponsor grants each character a magic item of the character’s level +2 (player’s choice). If the characters finish the race second, they gain back their entire entry fee. If they finish third, they gain back half their entry fee. If the characters had a sponsor who fronted their entry fee, they gain nothing.
www.ddo.com
Owlbear Run
28A p r i l 2 013 | DU NGEON 213
Regardless of how they placed, the characters gain an audience with Duke Hightower and establish a relationship with the sponsor they chose. Impressed by their performance, the duke or sponsor can give the characters a lead to future adventures. The Owlbear’s Fate: When the race is finished, the characters learn that the owlbears are to be released into the wild. Depending on the characters’ relationship with their owlbear, you might consider bringing it into the campaign as a recurring charac-ter or at higher levels as a companion character or a trained mount.
About the AuthorsChristopher Perkins is the D&D senior producer at Wiz-ards of the Coast and has been contributing to Dungeon magazine for two-thirds of his life. He liked The Cannonball Run when he was a kid, and is afraid to watch it as an adult for fear he might still like it.
Steve Townshend is an award-winning freelance D&D designer whose recent credits include Monster Vault: Threats to the Nentir Vale, Madness at Gardmore Abbey™, and Heroes of the Feywild™. The banderhobbs and Oublivae, Demon Queen of Desolation, are two of his favorite creations for D&D.
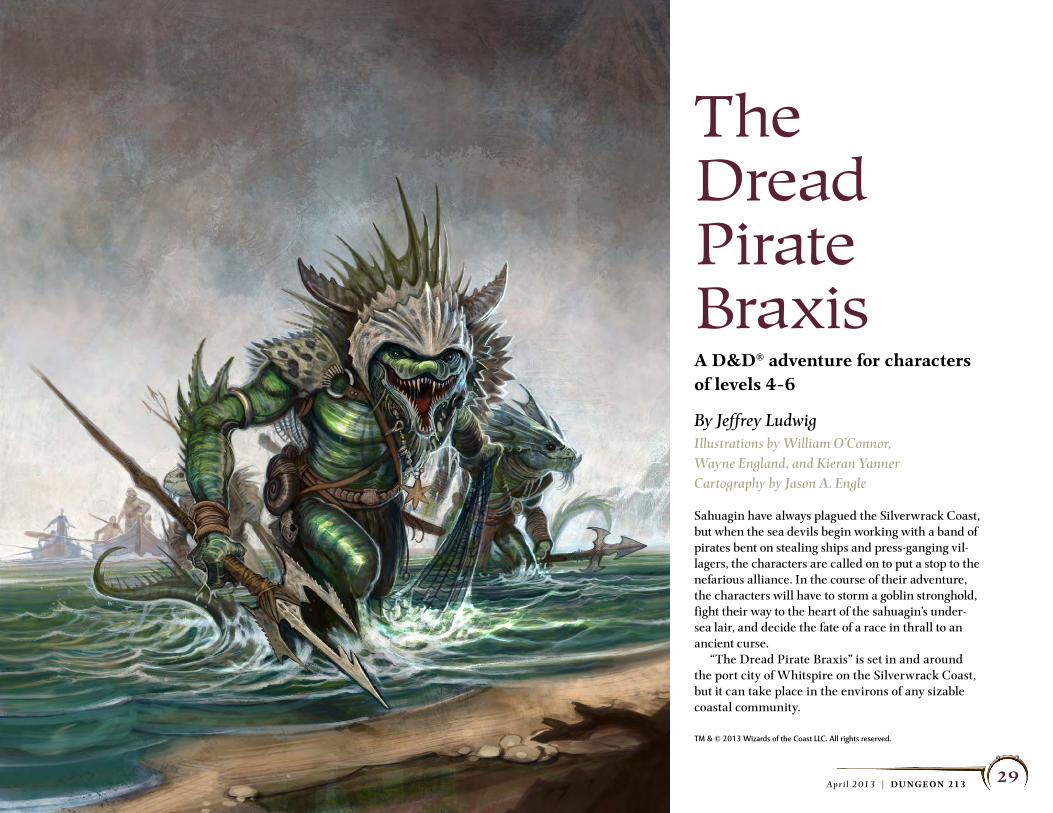
29A p r i l 2 013 | DU NGEON 213
TM & © 2013 Wizards of the Coast LLC. All rights reserved.
The Dread Pirate BraxisA D&D® adventure for characters of levels 4–6
By Jeffrey LudwigIllustrations by William O’Connor, Wayne England, and Kieran YannerCartography by Jason A. Engle
Sahuagin have always plagued the Silverwrack Coast, but when the sea devils begin working with a band of pirates bent on stealing ships and press-ganging vil-lagers, the characters are called on to put a stop to the nefarious alliance. In the course of their adventure, the characters will have to storm a goblin stronghold, fight their way to the heart of the sahuagin’s under-sea lair, and decide the fate of a race in thrall to an ancient curse. “The Dread Pirate Braxis” is set in and around the port city of Whitspire on the Silverwrack Coast, but it can take place in the environs of any sizable coastal community.

The Dread Pirate Braxis
30A p r i l 2 013 | DU NGEON 213
This adventure can be run as a sequel to “Captain Slygo’s Treasure” (Dungeon 208). The events in this adventure are assumed to take place about three months after the end of “Captain Slygo’s Treasure,” but the timeline can be adjusted to suit the needs of your campaign.
BackgroundCenturies ago, a race of tritons coexisted peace-ably with the land-dwelling races of the Silverwrack Coast. Over generations, they developed mutual trust and trade, with the tritons guiding coastal captains through the sea’s treacherous shoals and watching over the lives of castaway sailors, while the coastal settlements provided the tritons with valuable metal-work and appeased the tritons’ favored deity, Melora. One triton priestess named Zennara felt her race’s coexistence with the peoples of the Silverwrack Coast was a perversion of Melora’s will—that the goddess had intended the tritons to have sole dominion over the sea. Zennara whispered her heresies in the ear of a proud triton warrior named Krekzn, convincing him that he was destined to drive the ships and sail-ors from their waters and usher in a new golden age for his people. But when Krekzn announced his intention to break the age-old peace, the other leaders con-demned his plan. So Zennara fashioned a crown for Krekzn and bound it with dark magic of enchant-ment, ensuring the other tritons would follow his every command. With his newfound power, the self-styled Sea Prince began to terrorize the waters. In the months that followed, dozens of ships were lost to the Sea Prince’s raids, their crews slaughtered and buried beneath the waves. But Krekzn’s blood-lust, combined with his crown’s dark magic, began to wreak a terrible transformation on him and his people. The tritons began to manifest a demonic corruption and became driven by a bestial hunger. When Krekzn realized the curse he had brought
upon his people, he turned on the priestess who had counseled him and slew her in rage. This last act of savagery sealed the Sea Prince’s fate, and from that day forward Krekzn and his fellow tritons ceased to exist. They became sahuagin.
recent hiStoryThe sahuagin are a constant and deadly menace to the peoples of the Silverwrack Coast, spurred on by the now-aged Krekzn. Only the well-garrisoned port city of Whitspire has been immune to their threat—until recently. A few months ago, a seafaring scoundrel named Braxis sailed into the pirate cove of Shantytown, outrunning his latest misadventures. Braxis is a dop-pelganger who, unlike most of his kind, has never been content to simply steal the identities of others. He has always wanted to make a name for himself, although that has never stopped him from using his shapechanging abilities to his advantage. Upon his arrival in Shantytown, Braxis learned of the recent defeat of the hobgoblin pirate Granack at the hands of a band of adventurers (events that trans-pired in “Captain Slygo’s Treasure”). Taking advantage of the power vacuum left by Granack’s death, Braxis assumed the form of a hobgoblin and began recruiting from among the town’s goblin inhabitants. With a sizable crew at his command, Braxis set sail for Razorspine Island, the site of a long-abandoned stronghold that Braxis intended to use as a base of operations. Only after taking over the decrepit fortress did Braxis discover the reason for its abandonment—the nearby shoals are home to Krekzn and his sahuagin, who stage nightly raids on the stronghold. Braxis took advantage of the chaos during one such raid to adopt the guise of a sahuagin and follow the creatures back to their sea cave lair, hoping to find a weakness he could turn to his advantage. There he came face to face with the Sea Prince himself.
Recognizing the power of the crown Krekzn wore, the wily doppelganger stole it away as the prince slumbered on his throne. Krekzn awoke in a fury but could not move against the thief. Braxis discovered that the crown granted him the power to command the sahuagin, and so that night he hatched a plot for domination over the Silverwrack Coast. In the past few months, reports have filtered into Whitspire of attacks on passing ships by bands of goblin pirates and sahuagin raiders working in concert. Braxis’s plan is to amass a f leet capable of besieging Whitspire, and this has progressed so well that he has run into a new problem: He lacks enough hands to crew his vessels. In recent weeks, the sahua-gin have renewed their attacks on nearby fishing villages, capturing able-bodied townsfolk for the gob-lins to press into service manning their pirate f leet. Braxis is now near to achieving his aim. In a fort-night’s time, he plans to sail his f leet into Whitspire’s harbor and take the city by blood and fire. If Whitspire falls to Braxis’s might, the rest of the Silver-wrack Coast will surely follow.
SynopSiSThe adventure begins when the characters help fend off raiders attacking a local fishing village on the road to Whitspire. Once they arrive in Whitspire, the heroes learn about Braxis and are tasked with ending the threat that his alliance with the sahuagin presents to the city. The characters’ transport to Razorspine Island is provided by none other than an old acquaintance, the goblin pirate Slygo, who is willing to help them in exchange for their assistance in his newest quest for plunder. The bulk of the adventure’s action takes place on the island as the party storms Braxis’s stronghold, potentially liberating imprisoned vil-lagers along the way. The characters also encounter the ghost of the murdered triton priestess Zennara, who tells them of the tragedy she wrought ages ago,
The Dread Pirate Braxis
31A p r i l 2 013 | DU NGEON 213
begging them to find and destroy the Sea Prince’s Crown. Braxis, alerted to the characters’ presence, assumes the guise of a human sea captain named Smeadon in an attempt to gain the characters’ trust and lure them into the sea caves where the sahuagin dwell. After the characters have fought their way to the heart of the sahuagin’s lair, Braxis commands Krekzn and the other sahuagin to kill them. Assum-ing the characters defeat Braxis, they must then choose between destroying the Sea Prince’s Crown, returning it Krekzn, or claiming its power for them-selves to end the threat to the Silverwrack Coast.
Adventure hooksThe following hooks are a few possible ways the char-acters might get involved in the events at hand. Slayers of Granack: The heroes are renowned for defeating a hobgoblin pirate named Granack, and they are called upon to help the authorities of Whitspire. (Use this hook if you’re running this adventure as a sequel to “Captain Slygo’s Treasure” from Dungeon 208.) A Friend in Need: An nonplayer character friend of the party has gone missing, press-ganged by the goblins. The characters might already be aware of their friend’s capture when the adventure begins, or they might be expecting to meet their friend at West-erly End in Whitspire and learn of the kidnapping only when they chance to overhear a conversation in the inn’s taproom. Bounty: The Lord High Protector of Whitspire has put out a bounty along the Talon Coast: 5 gp for each pirate slain and 10 gp for each sahuagin. When the characters arrive in Whitspire to collect the bounty, Lord Odmund recognizes their capabilities and recruits them to put an end to the alliance.
treasureCharacters will likely gain at least a level in the course of this adventure, and they might gain close to two levels if they take on every available challenge. Other than the bounty offered by Lord Odmund, this adventure includes minimal treasure, which should not be figured into your treasure allocation. You should place about one-and-a-half level’s worth of treasure parcels according to the needs of the party or a little more if you have the party engage in the adventure’s optional skill challenges. Good areas for placing treasure include the smithy (16), Forak’s quarters (24), the mage’s quarters (25), the chapel (34), Braxis’s quarters (38), and the Sea Prince’s throne (42). The Sea Prince’s Crown is an artifact (and one the party may not keep), and so it should not figure into the treasure allotment.
Starting the adventureThe adventure begins with the characters on the road as they come upon one of the many fishing villages that dot the Silverwrack Coast.
event 1: the Village of piteRoleplaying Encounter
Pite is a small community of about 40 people. Other than the occasional trip to Whitspire to buy or barter for things they cannot make themselves, the fisher-folk of Pite have little contact with the world outside their village, so they regard the party’s arrival with wary curiosity.
When you’re ready to begin, read:Your travels have led you to the Silverwrack Coast. As you wander the seaside road, you can make out ahead of you a cluster of wooden shacks through the morning haze. A group of children plays in the mud of the road while a pair of women hangs fish from a crude drying rack nearby. An old man with a weathered face looks up from his work tar-ring fishing boats set up on wood blocks near the shore. The boat’s hulls glisten black with the freshly painted pitch, and the air smells of pine. At your approach, the women shoo the children inside and follow to stand in their door-ways. Beyond them a grizzled man stands in the middle of the road. Eyeing you from where he stands, he calls out, “Be welcome, travelers, if ’n you abide by Avandra’s peace. We’ve naught worth taking here; the raiders saw to that. Have they troubled you in your travels?”
The grizzled man’s name is Marken, and he is less interested in hearing about the characters’ troubles than in telling them about his own. Assuming they give him half a chance, Marken tells the heroes about the goblins and sahuagin (Marken refers to them as “sea devils”) that have been raiding the coast. His vil-lage was one of the first struck, and raiders dragged away several of his friends. If the characters inquire as to how Marken survived the raid, he claims to have been out on a fishing boat at the time, but a DC 14 Insight check reveals his lie. If challenged, he admits to having hid under a boat to avoid being taken. Marken doesn’t know anything about the cause of the raids, only that they have been happening all along the coast. He answers the characters’ ques-tions as best he can and is happy to talk for as long as they are. After the characters seem done with the conversation, or whenever you feel like moving the action forward, make a check against the charac-ters’ passive Perception scores (or call for rolls from any characters who stated they were keeping watch during the conversation).
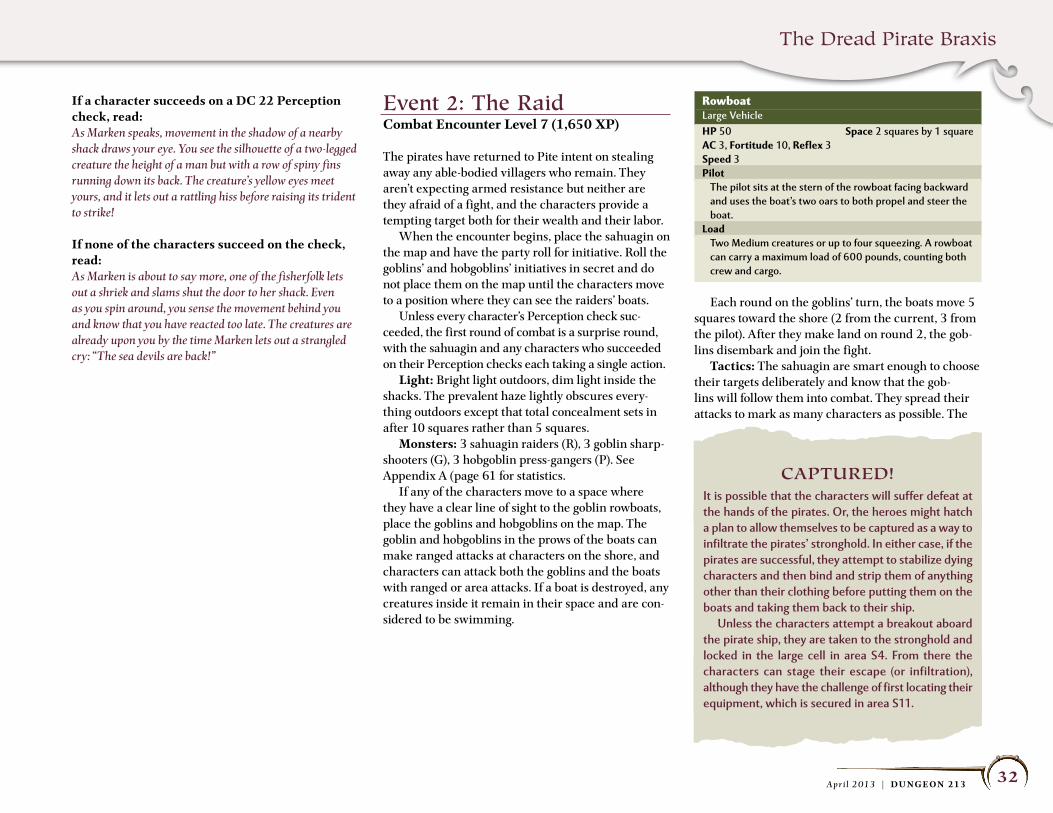
The Dread Pirate Braxis
32A p r i l 2 013 | DU NGEON 213
If a character succeeds on a DC 22 Perception check, read:As Marken speaks, movement in the shadow of a nearby shack draws your eye. You see the silhouette of a two-legged creature the height of a man but with a row of spiny fins running down its back. The creature’s yellow eyes meet yours, and it lets out a rattling hiss before raising its trident to strike!
If none of the characters succeed on the check, read:As Marken is about to say more, one of the fisherfolk lets out a shriek and slams shut the door to her shack. Even as you spin around, you sense the movement behind you and know that you have reacted too late. The creatures are already upon you by the time Marken lets out a strangled cry: “The sea devils are back!”
event 2: the RaidCombat Encounter Level 7 (1,650 XP)
The pirates have returned to Pite intent on stealing away any able-bodied villagers who remain. They aren’t expecting armed resistance but neither are they afraid of a fight, and the characters provide a tempting target both for their wealth and their labor. When the encounter begins, place the sahuagin on the map and have the party roll for initiative. Roll the goblins’ and hobgoblins’ initiatives in secret and do not place them on the map until the characters move to a position where they can see the raiders’ boats. Unless every character’s Perception check suc-ceeded, the first round of combat is a surprise round, with the sahuagin and any characters who succeeded on their Perception checks each taking a single action. Light: Bright light outdoors, dim light inside the shacks. The prevalent haze lightly obscures every-thing outdoors except that total concealment sets in after 10 squares rather than 5 squares. Monsters: 3 sahuagin raiders (R), 3 goblin sharp-shooters (G), 3 hobgoblin press-gangers (P). See Appendix A (page 61 for statistics. If any of the characters move to a space where they have a clear line of sight to the goblin rowboats, place the goblins and hobgoblins on the map. The goblin and hobgoblins in the prows of the boats can make ranged attacks at characters on the shore, and characters can attack both the goblins and the boats with ranged or area attacks. If a boat is destroyed, any creatures inside it remain in their space and are con-sidered to be swimming.
RowboatLarge VehicleHP 50 space 2 squares by 1 squareAC 3, Fortitude 10, Reflex 3speed 3Pilot
The pilot sits at the stern of the rowboat facing backward and uses the boat’s two oars to both propel and steer the boat.
LoadTwo Medium creatures or up to four squeezing. A rowboat can carry a maximum load of 600 pounds, counting both crew and cargo.
Each round on the goblins’ turn, the boats move 5 squares toward the shore (2 from the current, 3 from the pilot). After they make land on round 2, the gob-lins disembark and join the fight. Tactics: The sahuagin are smart enough to choose their targets deliberately and know that the gob-lins will follow them into combat. They spread their attacks to mark as many characters as possible. The
CAptuReD!It is possible that the characters will suffer defeat at the hands of the pirates. Or, the heroes might hatch a plan to allow themselves to be captured as a way to infiltrate the pirates’ stronghold. In either case, if the pirates are successful, they attempt to stabilize dying characters and then bind and strip them of anything other than their clothing before putting them on the boats and taking them back to their ship. Unless the characters attempt a breakout aboard the pirate ship, they are taken to the stronghold and locked in the large cell in area S4. From there the characters can stage their escape (or infiltration), although they have the challenge of first locating their equipment, which is secured in area S11.

The Dread Pirate Braxis
33A p r i l 2 013 | DU NGEON 213
hobgoblins use dazing strike to gain combat advan-tage against the characters and use pirate’s snarl to try to bunch them together before catching as many as possible in their spiked nets. The goblins focus on lightly armored foes, favoring enemies who have been marked by the sahuagin. If the goblins are faced with a foe too well armored for them to attack effectively, they use their actions to aid the hobgoblins’ or sahua-gin’s attacks instead.
WhAt’S in it FoR Me?After the attack on Pite, the danger the pirates and sahuagin pose to the people of the Silverwrack Coast should be evident to the characters. Some players might not feel motivated to follow the story arc, however. They could be asking, “What’s in it for me?” Not every character is driven by a desire to serve the greater good, and not every player will follow a story just because it’s there. If your players need a little extra encouragement, consider having Marken tell the characters about the bounty Odmund has placed on the raiders’ heads (see “Adventure Hooks”). This gives mercenary characters a reason to go see Odmund, which in turn gives them an opportu-nity to become more involved in the story. Keep in mind, however, that while bounty hunting might help to motivate some players, it could be a turn-off to others. Some players might find the idea of being paid killers distasteful, while others (particularly storytell-ers) might find it distracting if they feel pressured to engage in unnecessary combats for profit’s sake. For these reasons, you should consider carefully the personalities at your table before using the “Bounty” adventure hook. For some groups it will fit the bill, but if your players seem happy to engage in the story without it, it’s just as well to leave it out.
R
R R
G G GP P P
Party SetupMarken
The Village of Pite
1 square = 5 ft.
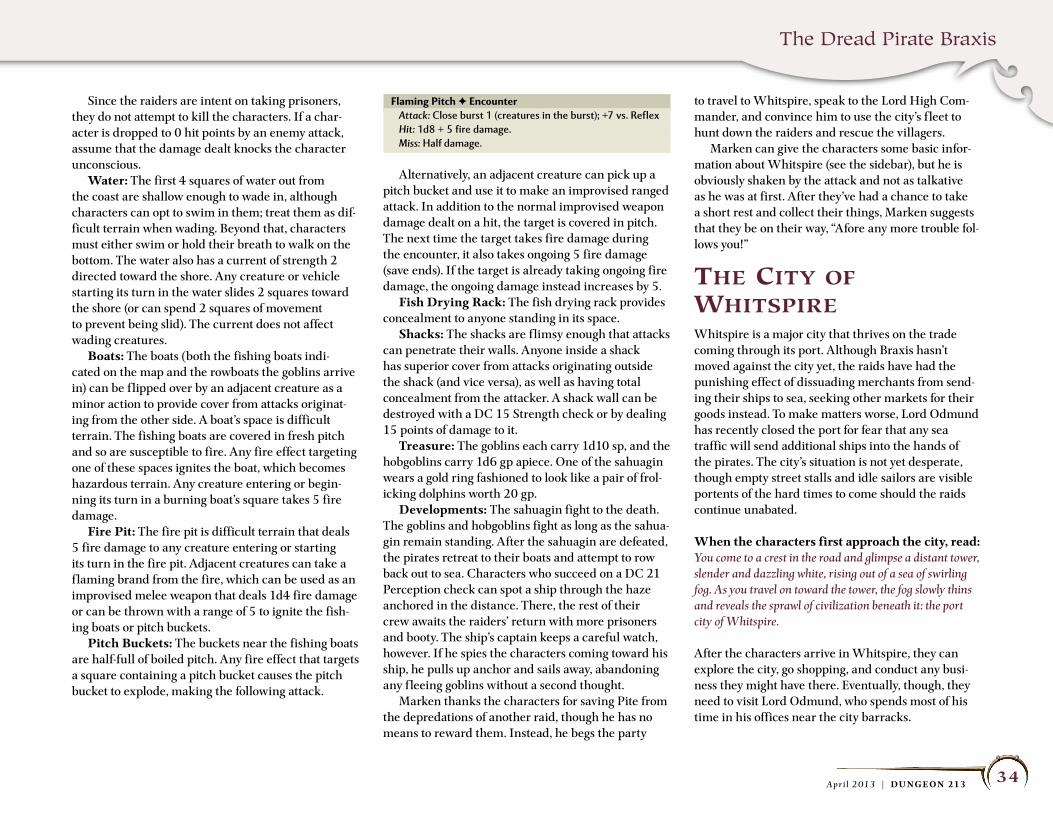
The Dread Pirate Braxis
34A p r i l 2 013 | DU NGEON 213
Since the raiders are intent on taking prisoners, they do not attempt to kill the characters. If a char-acter is dropped to 0 hit points by an enemy attack, assume that the damage dealt knocks the character unconscious. Water: The first 4 squares of water out from the coast are shallow enough to wade in, although characters can opt to swim in them; treat them as dif-ficult terrain when wading. Beyond that, characters must either swim or hold their breath to walk on the bottom. The water also has a current of strength 2 directed toward the shore. Any creature or vehicle starting its turn in the water slides 2 squares toward the shore (or can spend 2 squares of movement to prevent being slid). The current does not affect wading creatures. Boats: The boats (both the fishing boats indi-cated on the map and the rowboats the goblins arrive in) can be f lipped over by an adjacent creature as a minor action to provide cover from attacks originat-ing from the other side. A boat’s space is difficult terrain. The fishing boats are covered in fresh pitch and so are susceptible to fire. Any fire effect targeting one of these spaces ignites the boat, which becomes hazardous terrain. Any creature entering or begin-ning its turn in a burning boat’s square takes 5 fire damage. Fire Pit: The fire pit is difficult terrain that deals 5 fire damage to any creature entering or starting its turn in the fire pit. Adjacent creatures can take a f laming brand from the fire, which can be used as an improvised melee weapon that deals 1d4 fire damage or can be thrown with a range of 5 to ignite the fish-ing boats or pitch buckets. Pitch Buckets: The buckets near the fishing boats are half-full of boiled pitch. Any fire effect that targets a square containing a pitch bucket causes the pitch bucket to explode, making the following attack.
Flaming Pitch F encounterAttack: Close burst 1 (creatures in the burst); +7 vs. ReflexHit: 1d8 + 5 fire damage.Miss: Half damage.
Alternatively, an adjacent creature can pick up a pitch bucket and use it to make an improvised ranged attack. In addition to the normal improvised weapon damage dealt on a hit, the target is covered in pitch. The next time the target takes fire damage during the encounter, it also takes ongoing 5 fire damage (save ends). If the target is already taking ongoing fire damage, the ongoing damage instead increases by 5. Fish Drying Rack: The fish drying rack provides concealment to anyone standing in its space. Shacks: The shacks are f limsy enough that attacks can penetrate their walls. Anyone inside a shack has superior cover from attacks originating outside the shack (and vice versa), as well as having total concealment from the attacker. A shack wall can be destroyed with a DC 15 Strength check or by dealing 15 points of damage to it. Treasure: The goblins each carry 1d10 sp, and the hobgoblins carry 1d6 gp apiece. One of the sahuagin wears a gold ring fashioned to look like a pair of frol-icking dolphins worth 20 gp. Developments: The sahuagin fight to the death. The goblins and hobgoblins fight as long as the sahua-gin remain standing. After the sahuagin are defeated, the pirates retreat to their boats and attempt to row back out to sea. Characters who succeed on a DC 21 Perception check can spot a ship through the haze anchored in the distance. There, the rest of their crew awaits the raiders’ return with more prisoners and booty. The ship’s captain keeps a careful watch, however. If he spies the characters coming toward his ship, he pulls up anchor and sails away, abandoning any f leeing goblins without a second thought. Marken thanks the characters for saving Pite from the depredations of another raid, though he has no means to reward them. Instead, he begs the party
to travel to Whitspire, speak to the Lord High Com-mander, and convince him to use the city’s f leet to hunt down the raiders and rescue the villagers. Marken can give the characters some basic infor-mation about Whitspire (see the sidebar), but he is obviously shaken by the attack and not as talkative as he was at first. After they’ve had a chance to take a short rest and collect their things, Marken suggests that they be on their way, “Afore any more trouble fol-lows you!”
the city oF whitSpireWhitspire is a major city that thrives on the trade coming through its port. Although Braxis hasn’t moved against the city yet, the raids have had the punishing effect of dissuading merchants from send-ing their ships to sea, seeking other markets for their goods instead. To make matters worse, Lord Odmund has recently closed the port for fear that any sea traffic will send additional ships into the hands of the pirates. The city’s situation is not yet desperate, though empty street stalls and idle sailors are visible portents of the hard times to come should the raids continue unabated.
When the characters first approach the city, read:You come to a crest in the road and glimpse a distant tower, slender and dazzling white, rising out of a sea of swirling fog. As you travel on toward the tower, the fog slowly thins and reveals the sprawl of civilization beneath it: the port city of Whitspire.
After the characters arrive in Whitspire, they can explore the city, go shopping, and conduct any busi-ness they might have there. Eventually, though, they need to visit Lord Odmund, who spends most of his time in his offices near the city barracks.

The Dread Pirate Braxis
35A p r i l 2 013 | DU NGEON 213
When the party goes to meet Lord Odmund, read:As you enter his office, the Lord High Commander of Whit-spire stands with his back to you, gazing out a window with a commanding view of the city and its harbor. His steel-gray hair is pulled back in a tail that falls neatly between his square shoulders, and he holds his hands clasped tightly in the small of his back. With a barely audible sigh, Lord Odmund turns to face you. “Thank you for coming. I needn’t tell you that Whitspire currently faces a most peculiar threat, as I understand you’ve already had a run-in with the pirates who are raiding all along the coast and the sahuagin that fight with them. The danger is greater than perhaps you realize, however.”
Allow the players to interact conversationally with Lord Odmund. The following are some facts that he will make sure the characters know during this briefing. History of the Sahuagin: “The sahuagin have always been a menace, but before this time their attacks were merely mindless acts of slaughter perpetrated against hapless fisherfolk. Now, though, they seem to act with new purpose, and with their aid the pirates are capturing any ships that dare sail these waters. The Leader: “My agents inform me that the pirates are led by a hobgoblin named Braxis, who has his eye set on assaulting our fair city by sea. With the number of ships he has commandeered and the sahuagin as his allies, I dare say he might succeed. I’m keeping all ships at port and hiring every sell sword I can find to prepare for the attack, but it may not be enough. A Potential Plan: “Whitspire’s safety turns on find-ing a way to break whatever alliance Braxis has forged with the sahuagin. For that, I need someone capable and resourceful enough to infiltrate Braxis’s stronghold, dis-cover the nature of his bargain with the sea devils, and put an end to it . . . someone like you. And if Braxis’s head ends up on a pike, so much the better!”
If the adventurers agree to help, they receive the fol-lowing quest.
major Quest: End the sahuagin Threat4th-Level Major Quest (175 XP/character)The characters earn this quest reward if they stop the sahuagin attacks, most likely either by destroying the Sea Prince’s Crown or using it to command the sahua-gin to cease hostilities.
Regardless of whether the party succeeds at this quest, Lord Odmund will pay a sum of 500 gp for proof of Braxis’s death. (If you’re using the “Bounty” adventure hook, Odmund instead offers a 300 gp bonus on top of whatever bounty the characters end up collecting.) If the characters inquire about the possibility of bringing a larger force, Odmund disabuses them of this notion. With the pirates’ numbers and defenses unknown, he is unwilling to risk either his troops or ships in an assault on a fortified position, especially because every ship Whitspire loses to the pirates only swells Braxis’s f leet and hastens the day when the pirate can launch his assault on the city.
When the party is ready to proceed, read:Odmund takes a rolled-up chart out of his desk and hands it to you, along with a hastily scrawled note and a small purse that jingles. “This chart shows the waters around Razorspine Island, as well as the location of the pirate stronghold. The purse contains fifty gold pieces. Take them both down to the southernmost quay at moonrise and give them and this note to the captain of the ship making berth there. With any luck, he’ll agree to take you to the island.”
The note simply identifies the characters as agents of the Lord High Commander authorized to conduct business on his behalf.
WhitSpiReThe city of Whitspire is a bastion of civilization on the otherwise sparsely populated Silverwrack Coast. Its stone walls serve more to mark the boundaries of the wild than to fortify against invading armies, and its gates are open to all visitors. Wealth flows into the city through its port, and wares from far and wide are sold in its shops and street stalls. The city’s most prominent feature is the Spire, a tall, slender tower that sits atop a rocky bluff overlooking the port. The Spire serves as both lighthouse and watchtower and is crusted white with salt from centuries of sea spray. Population: 15,000 (50 percent human, 30 percent halfling, with prominent contingents of half-elves and half-orcs amongst the remaining mix). Government: Odmund Garrelson serves as Lord High Protector of Whitspire, giving him both civic and military authority in the city. In practice, Odmund leaves many of his civic duties in the capable hands of his halfling seneschal named Traven Attwater. Temples: Highstar Temple (Sehanine, Avandra, Melora) is run by the half-elf priest Father Jeromar and is favored by the city’s many merchants and travel-ers. The Chapel of Soul’s Berth (Melora, The Raven Queen) is run by an elf priestess named Tenebria and is frequented mostly by sailors and their families. Lodgings: Westerly End is the largest and finest inn in Whitspire and is run by the Litwicks, the city’s richest halfling family. Orm’s Public House is named for its owner, a half-orc who draws business by offer-ing the lowest rates in the city. The Drowned Man is technically a tavern, but its owner, the widower Seth, lets the sailors who drink there sleep in the common room if they can’t afford the public house. Merchants: Whitspire boasts dozens of well-appointed shops, but the best deals are in the stalls in the central plaza. Characters can purchase mundane items and common magic items of up to level 5.
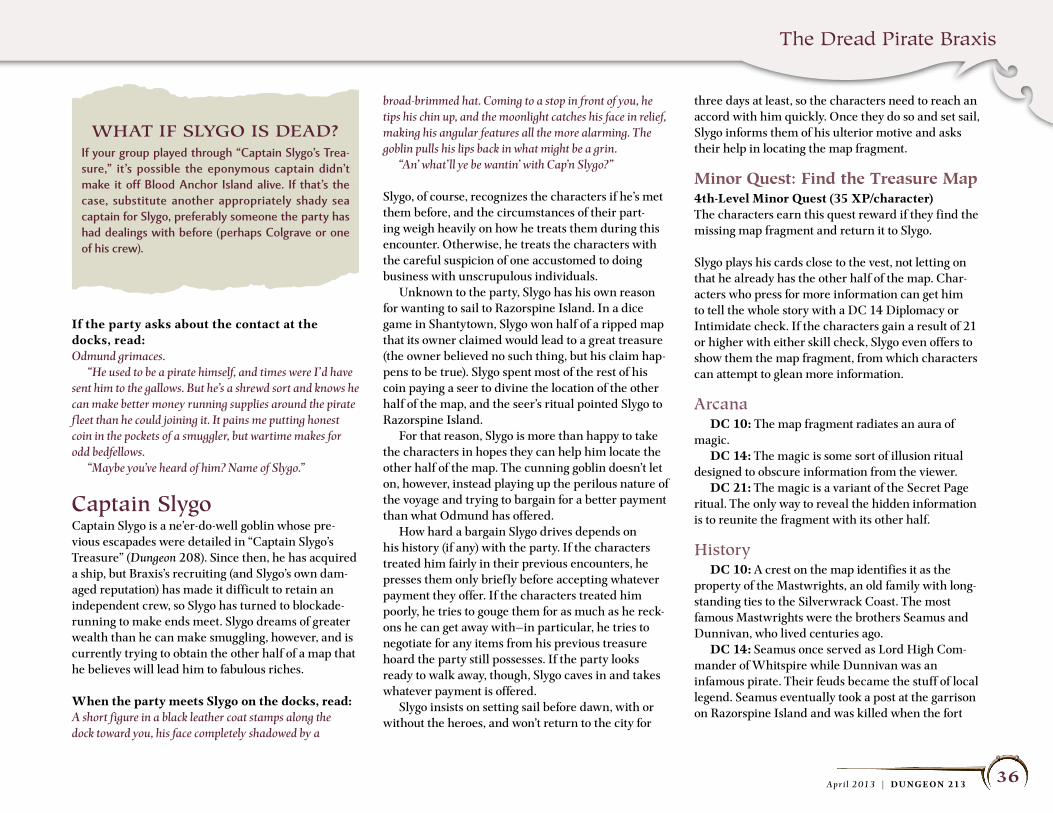
The Dread Pirate Braxis
36A p r i l 2 013 | DU NGEON 213
If the party asks about the contact at the docks, read:Odmund grimaces. “He used to be a pirate himself, and times were I’d have sent him to the gallows. But he’s a shrewd sort and knows he can make better money running supplies around the pirate f leet than he could joining it. It pains me putting honest coin in the pockets of a smuggler, but wartime makes for odd bedfellows. “Maybe you’ve heard of him? Name of Slygo.”
Captain SlygoCaptain Slygo is a ne’er-do-well goblin whose pre-vious escapades were detailed in “Captain Slygo’s Treasure” (Dungeon 208). Since then, he has acquired a ship, but Braxis’s recruiting (and Slygo’s own dam-aged reputation) has made it difficult to retain an independent crew, so Slygo has turned to blockade-running to make ends meet. Slygo dreams of greater wealth than he can make smuggling, however, and is currently trying to obtain the other half of a map that he believes will lead him to fabulous riches.
When the party meets Slygo on the docks, read:A short figure in a black leather coat stamps along the dock toward you, his face completely shadowed by a
broad-brimmed hat. Coming to a stop in front of you, he tips his chin up, and the moonlight catches his face in relief, making his angular features all the more alarming. The goblin pulls his lips back in what might be a grin. “An’ what’ ll ye be wantin’ with Cap’n Slygo?”
Slygo, of course, recognizes the characters if he’s met them before, and the circumstances of their part-ing weigh heavily on how he treats them during this encounter. Otherwise, he treats the characters with the careful suspicion of one accustomed to doing business with unscrupulous individuals. Unknown to the party, Slygo has his own reason for wanting to sail to Razorspine Island. In a dice game in Shantytown, Slygo won half of a ripped map that its owner claimed would lead to a great treasure (the owner believed no such thing, but his claim hap-pens to be true). Slygo spent most of the rest of his coin paying a seer to divine the location of the other half of the map, and the seer’s ritual pointed Slygo to Razorspine Island. For that reason, Slygo is more than happy to take the characters in hopes they can help him locate the other half of the map. The cunning goblin doesn’t let on, however, instead playing up the perilous nature of the voyage and trying to bargain for a better payment than what Odmund has offered. How hard a bargain Slygo drives depends on his history (if any) with the party. If the characters treated him fairly in their previous encounters, he presses them only briefly before accepting whatever payment they offer. If the characters treated him poorly, he tries to gouge them for as much as he reck-ons he can get away with—in particular, he tries to negotiate for any items from his previous treasure hoard the party still possesses. If the party looks ready to walk away, though, Slygo caves in and takes whatever payment is offered. Slygo insists on setting sail before dawn, with or without the heroes, and won’t return to the city for
three days at least, so the characters need to reach an accord with him quickly. Once they do so and set sail, Slygo informs them of his ulterior motive and asks their help in locating the map fragment.
minor Quest: find the Treasure map4th-Level Minor Quest (35 XP/character)The characters earn this quest reward if they find the missing map fragment and return it to Slygo.
Slygo plays his cards close to the vest, not letting on that he already has the other half of the map. Char-acters who press for more information can get him to tell the whole story with a DC 14 Diplomacy or Intimidate check. If the characters gain a result of 21 or higher with either skill check, Slygo even offers to show them the map fragment, from which characters can attempt to glean more information.
Arcana DC 10: The map fragment radiates an aura of magic. DC 14: The magic is some sort of illusion ritual designed to obscure information from the viewer. DC 21: The magic is a variant of the Secret Page ritual. The only way to reveal the hidden information is to reunite the fragment with its other half.
history DC 10: A crest on the map identifies it as the property of the Mastwrights, an old family with long-standing ties to the Silverwrack Coast. The most famous Mastwrights were the brothers Seamus and Dunnivan, who lived centuries ago. DC 14: Seamus once served as Lord High Com-mander of Whitspire while Dunnivan was an infamous pirate. Their feuds became the stuff of local legend. Seamus eventually took a post at the garrison on Razorspine Island and was killed when the fort
WhAt iF SlyGo iS DeAD?If your group played through “Captain Slygo’s Trea-sure,” it’s possible the eponymous captain didn’t make it off Blood Anchor Island alive. If that’s the case, substitute another appropriately shady sea captain for Slygo, preferably someone the party has had dealings with before (perhaps Colgrave or one of his crew).
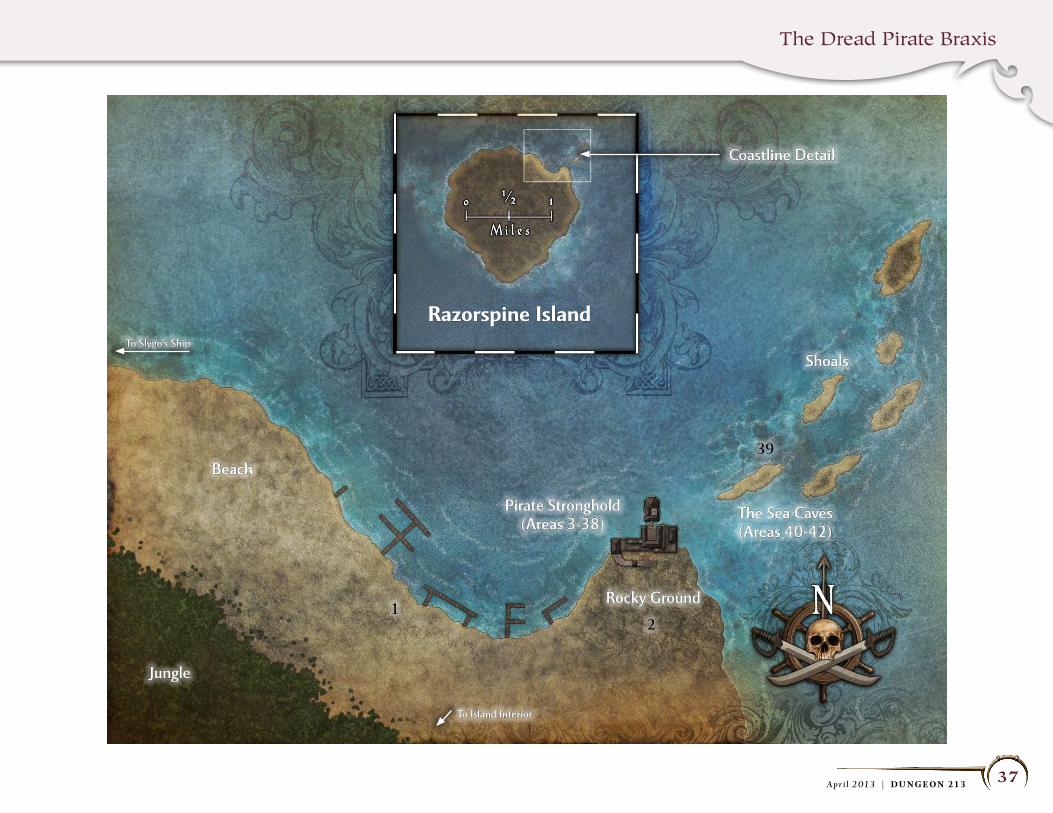
The Dread Pirate Braxis
37A p r i l 2 013 | DU NGEON 213
Razorspine Island
The Sea Caves(Areas 40-42)
Shoals
Coastline Detail
Rocky Ground
Beach
Jungle
Pirate Stronghold(Areas 3-38)
To Island Interior
To Slygo’s Ship
39
21
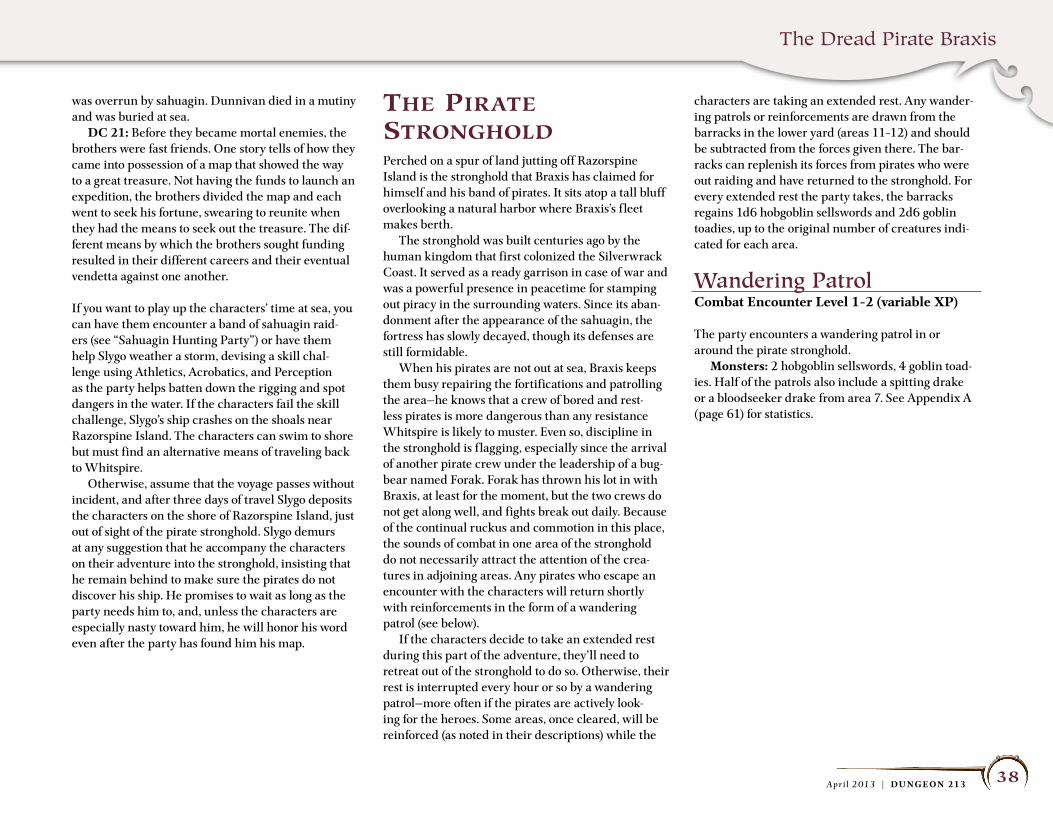
The Dread Pirate Braxis
38A p r i l 2 013 | DU NGEON 213
was overrun by sahuagin. Dunnivan died in a mutiny and was buried at sea. DC 21: Before they became mortal enemies, the brothers were fast friends. One story tells of how they came into possession of a map that showed the way to a great treasure. Not having the funds to launch an expedition, the brothers divided the map and each went to seek his fortune, swearing to reunite when they had the means to seek out the treasure. The dif-ferent means by which the brothers sought funding resulted in their different careers and their eventual vendetta against one another.
If you want to play up the characters’ time at sea, you can have them encounter a band of sahuagin raid-ers (see “Sahuagin Hunting Party”) or have them help Slygo weather a storm, devising a skill chal-lenge using Athletics, Acrobatics, and Perception as the party helps batten down the rigging and spot dangers in the water. If the characters fail the skill challenge, Slygo’s ship crashes on the shoals near Razorspine Island. The characters can swim to shore but must find an alternative means of traveling back to Whitspire. Otherwise, assume that the voyage passes without incident, and after three days of travel Slygo deposits the characters on the shore of Razorspine Island, just out of sight of the pirate stronghold. Slygo demurs at any suggestion that he accompany the characters on their adventure into the stronghold, insisting that he remain behind to make sure the pirates do not discover his ship. He promises to wait as long as the party needs him to, and, unless the characters are especially nasty toward him, he will honor his word even after the party has found him his map.
the pirate StrongholdPerched on a spur of land jutting off Razorspine Island is the stronghold that Braxis has claimed for himself and his band of pirates. It sits atop a tall bluff overlooking a natural harbor where Braxis’s f leet makes berth. The stronghold was built centuries ago by the human kingdom that first colonized the Silverwrack Coast. It served as a ready garrison in case of war and was a powerful presence in peacetime for stamping out piracy in the surrounding waters. Since its aban-donment after the appearance of the sahuagin, the fortress has slowly decayed, though its defenses are still formidable. When his pirates are not out at sea, Braxis keeps them busy repairing the fortifications and patrolling the area—he knows that a crew of bored and rest-less pirates is more dangerous than any resistance Whitspire is likely to muster. Even so, discipline in the stronghold is f lagging, especially since the arrival of another pirate crew under the leadership of a bug-bear named Forak. Forak has thrown his lot in with Braxis, at least for the moment, but the two crews do not get along well, and fights break out daily. Because of the continual ruckus and commotion in this place, the sounds of combat in one area of the stronghold do not necessarily attract the attention of the crea-tures in adjoining areas. Any pirates who escape an encounter with the characters will return shortly with reinforcements in the form of a wandering patrol (see below). If the characters decide to take an extended rest during this part of the adventure, they’ll need to retreat out of the stronghold to do so. Otherwise, their rest is interrupted every hour or so by a wandering patrol—more often if the pirates are actively look-ing for the heroes. Some areas, once cleared, will be reinforced (as noted in their descriptions) while the
characters are taking an extended rest. Any wander-ing patrols or reinforcements are drawn from the barracks in the lower yard (areas 11–12) and should be subtracted from the forces given there. The bar-racks can replenish its forces from pirates who were out raiding and have returned to the stronghold. For every extended rest the party takes, the barracks regains 1d6 hobgoblin sell swords and 2d6 goblin toadies, up to the original number of creatures indi-cated for each area.
Wandering patrolCombat Encounter Level 1–2 (variable XP)
The party encounters a wandering patrol in or around the pirate stronghold. Monsters: 2 hobgoblin sell swords, 4 goblin toad-ies. Half of the patrols also include a spitting drake or a bloodseeker drake from area 7. See Appendix A (page 61) for statistics.
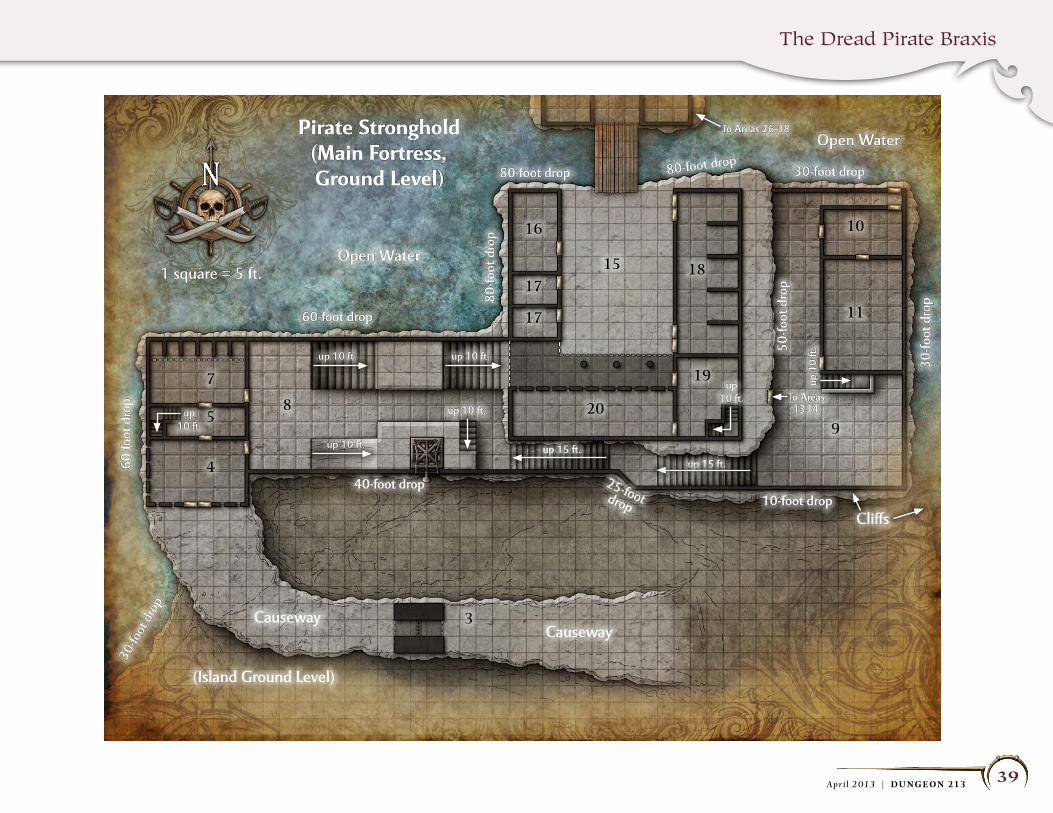
The Dread Pirate Braxis
39A p r i l 2 013 | DU NGEON 213
Pirate stronghold(Main Fortress, Ground Level)
Open Water
Open Water
1 square = 5 ft.
10-foot drop25-foot drop
80-foot drop
60-foot drop
30-foot drop80-foot drop
40-foot drop
up 10 ft.
up 10 ft.up 10 ft.
To Areas 13-14
To Areas 26-38
up 10 ft.
up 1
0 ft
.
up 10 ft.
up 10 ft.
up 15 ft.up 15 ft.
80-fo
ot d
rop
50-fo
ot d
rop
30-fo
ot d
rop
(Island Ground Level)
CausewayCauseway
Cliffs
60-fo
ot d
rop
30-fo
ot d
rop
17
17
18
11
19
209
10
8
7
5
4
3
16
15
The Dread Pirate Braxis
40A p r i l 2 013 | DU NGEON 213
encounter areaSMost of the encounters in the pirate stronghold take place in specific areas and are keyed to the maps. Unless otherwise noted, all walls are masonry and all doors are wooden. Climbing: Climbing any of the stronghold’s masonry walls requires a DC 20 Athletics check. Climbing any of the natural rock cliffs upon which the stronghold is situated requires a DC 15 Athlet-ics check. Characters falling off an exterior wall can make a saving throw to try to catch themselves on the cliff edge; failure indicates they fall all the way to the cliff ’s base, taking falling damage as appropriate. Some of the cliffs are situated over water. Characters falling into water take half normal falling damage.
outlying AreasApproaching from the island’s interior, the ground slopes down toward the sea and the harbor built there centuries ago, or it slopes up along the approach to the rocky promontory that overlooks the harbor and the stronghold that perches on its tip.
1. harborCombat Encounter Level 4 (973 XP), or Level 7 (1,622 XP) with reinforcements
This is where Braxis’s f leet makes berth. Braxis cur-rently commands twenty ships, but only about half of them are in harbor at any given time. The rest are out raiding the coast or patrolling the open waters. The pirates are constantly at work here, mending their ships and laying in provisions for their next raid. Light: Varies depending on the time of day. Monsters: 1 hobgoblin pirate captain, 1 hobgoblin press-ganger, 2 hobgoblin sell swords, 8 goblin toad-ies. See Appendix A (page 61 for statistics.
Read:Wooden docks jut out from the rocky beach here to the quays beyond. Nearly a dozen vessels lie at berth, most of them broad-bottomed merchant ships of various sizes, though you spot the sleek hull of a northern warship among them. One of the ships is being readied to set sail by a busy crew of goblin toadies under the watchful eye of an old hob-goblin, who occasionally barks orders to the others.
The pirates attack the characters on sight but will not pursue them beyond the docks. The pirate captain fights to the death. After he has been defeated, the remaining hobgoblins attempt to f lee or surrender once bloodied. A successful DC 14 Intimidate check convinces any surrendered hobgoblin to describe the stronghold’s basic layout and defenses, though the pirates here can offer only vague information about Braxis’s plans or whereabouts. Docks: The wooden docks are slick with sea spray. Anyone running or jumping on the docks must suc-ceed on a DC 14 Acrobatics check or fall prone at the end of their move. Ships: Ten merchant vessels and a warship called Golden Gull are currently berthed here. They are all seaworthy, and a ship can be sailed out of the harbor by a captain and at least four crew. Reinforcements: A patrol of two hobgoblin sell-swords and four goblin toadies is assigned to guard the harbor. They bring along a bloodseeker drake from area 7.
2. ApproachExploration Encounter
The adventurers are confronted by the stronghold’s defenses, both natural and constructed, as they approach. Light: Varies depending on the time of day.
Read:The ground beneath your feet slopes gradually upward as you approach the pirate stronghold, and the thick vegeta-tion of the island’s interior gives way to scrub. Ahead, a sheer cliff juts up near the island’s edge, and perched upon the rocky promontory is the ancient fortress, its battlements an extension of the cliff ’s forbidding face. A craggy stone causeway, rising like a ramp out of the island’s bedrock, provides the only access to the stronghold above, its mid-point straddled by a squat stone tower.
The cliff face ranges from 30 feet high at the base of the lower yard to 60 feet high at the base of the outer yard. The walls stand 20 feet tall all around the perimeter of the stronghold, forming an almost unbroken extension of the cliff at the outer yard, although there is enough of a lip at the base of the lower yard wall for a Medium creature to stand while squeezing. The causeway climbs gradually from ground level to 60 feet up at the entrance to area 4. Climbing the sides of the causeway requires a DC 15 Athletics check. Characters who try to scale the cliff or the cause-way are likely to be noticed by the guards in area 3, who pepper them with crossbow bolts while the char-acters attempt their climb.
outer yard and BuildingsA pair of fortifications—a gatehouse and a garrison—bar entry to the stronghold.
3. outer GatehouseCombat Encounter Level 3 (750 XP)
This stone tower is strategically located midway up the causeway leading to the stronghold’s main gate. The guards here mostly just harass their fellow pirates coming up from the harbor, and they aren’t
The Dread Pirate Braxis
41A p r i l 2 013 | DU NGEON 213
watching for an invading force from inland. They automatically notice characters who ascend the ramp or scale the nearby cliffs, however, unless the charac-ters have a means of evading detection. Light: Varies depending on the time of day. Monsters: 2 hobgoblin sell swords, 2 bugbear war-riors. See Appendix A (page 61) for statistics.
Read:A stone tower sits squarely astride the causeway, funneling traffic through its narrow arch. Two thuggish-looking bug-bears laze in the shade at the base of the tower. Perception DC 14: The teeth of a portcullis are just visible hanging from the underside of the tower’s arch. Perception DC 21: You notice movement behind a pair of arrow slits in the tower’s upper story.
The hobgoblin sell swords inside the tower fire their crossbows as soon as they see the characters approaching, gaining a surprise round to do so if the characters did not see them. The bugbears then wait to see what the characters do. If the characters hold back and attack from range, the bugbears rush for-ward to engage them. If the characters advance on the tower, the bugbears fall back through the arch-way, hoping to lure the characters through. As soon as one or more of the characters follow them through the archway, the hobgoblins drop the portcullis in order to split the party. The bugbears fight to the death. If the party storms the tower, the hobgoblins attempt to surrender when bloodied. Causeway: It is a 30-foot climb up the side of the causeway to the base of the gatehouse. Climbing the side of the causeway requires a DC 15 Athletics check. Portcullis: The portcullis is operated by a winch in the tower’s upper story. It requires a minor action to release the portcullis and two DC 10 Strength checks as standard actions to raise it fully (the arch-way stands 10 feet high; Medium characters can
squeeze through the opening once it has been raised halfway). Forcing open the portcullis requires a DC 28 Strength check. Arrow Slits: The arrow slits provide superior cover for creatures inside the tower against attacks originating outside the tower. Upper Level: The tower’s upper level is 10 feet above ground level, and its roof is 20 feet high. The only way into the tower’s upper level is through a trapdoor on the tower’s roof, which can be accessed by a rope ladder that the pirates keep coiled up on the roof and toss down the back side of the tower when they want to leave. Characters can climb the rope ladder at half speed without an Athletics check. Scal-ing the tower requires a DC 20 Athletics check.
4. outer GarrisonCombat Encounter Level 1 (325 XP), or Level 3 (799 XP) with reinforcements
This is the entrance to the stronghold proper. Several lackadaisical goblin toadies spend their hours here caring for the drakes in area 7 and playing with the goblins’ favorite new pet, a pseudodragon they found in the island’s jungle interior. Light: Bright (sunlight during the day, torches in brackets at night). Monsters: 6 goblin toadies, 1 bloodseeker drake, 1 pseudodragon. See Appendix A (page 61) for statistics.
Read:This spacious room is nearly empty except for some empty weapon racks lying derelict against the back wall and a small table that has been propped in the corner and used as a target for knife throwing. The f loor is littered with scraps of food and what look like rodent bones.
The goblins pay no mind to anything going on out-side the garrison and are easily caught unawares. If
the characters announce themselves, the goblins bar the doors and ready ranged attacks against the first person to come through. If the party defeats four or more of the raiders, the survivors attempt to f lee to the lower courtyard and return with reinforcements. Doors: The double doors are reinforced wood and can be barred from the inside (DC 20 Strength check to force open). Arrow Slits: Arrow slits on the western and southern walls provide superior cover for creatures inside the garrison against attacks originating out-side the garrison. The goblin toadies have no missile weapons, however, and so cannot make ranged attacks through the arrow slits. Reinforcements: A patrol of two hobgoblin sell-swords and four goblin toadies is assigned to guard the garrison. The hobgoblins keep the front doors barred and watch for approaching enemies, firing on the characters through the garrison’s arrow slits.
5. larderExploration Encounter
This room contains foodstuffs for both the goblins and their drakes. Light: Dim (sunlight filtering through the door-frame during the day) or none (at night).
Read:This room is pungent with the smell of rotting fruit. Sacks of foodstuffs crowd the east end of the room, many of them spoiling, by the looks of it. A large cutting board is littered with scraps of raw meat. A staircase runs up the west side of the room to the f loor above.
The stores here are a combination of provisions taken from ships the pirates have captured and food the goblins have gathered from the island’s interior. Char-acters who spend time rif ling through the supplies can salvage 15 days’ worth of rations from the lot.

The Dread Pirate Braxis
42A p r i l 2 013 | DU NGEON 213
6. Guards’ QuartersRoleplaying Encounter
The upper story of the garrison contains living quar-ters for the guards stationed here. Currently, a human boy named Ebran is kept prisoner here by the goblins. Light: Bright (sunlight during the day) or none (at night).
Read:These living chambers have been poorly cared for by their inhabitants. Smashed furniture lies scattered about the f loor, and torn straw mattresses have been pushed into the corners to make nests for rats and other vermin. The whole place reeks of filth. From one of the rooms comes a creaking footstep, and then a timid voice calls, “Hello?”
The goblins aren’t the only residents of the garrison—a human boy named Ebran lives here too. Ebran is from Pite and was taken along with several other vil-lagers in the goblins’ first raid on the village. Only 10 years of age, Ebran proved to be of little use as an oarsman, so the goblins decided to make him a ser-vant instead. Ebran stays hidden in the upper story of the gar-rison during any fighting, thinking the altercation is one of the usual ones between Braxis’s and Forak’s crews. Once he is assured that the characters mean him no harm, Ebran will readily tell them anything he knows. This might include the general layout of the stronghold, a rough estimation of the defending forces, and the existence of and quarrels between the two factions. Ebran makes sure to mention that more villagers are locked up in areas 13 and 14, and he asks the adventurers to rescue them. The characters gain the following quest.
minor Quest: Rescue the Villagers4th-Level Minor Quest (35 XP/character)The characters earn this quest reward if they free all the villagers in areas 13 and 14 and see them safely back to the ship.
Ebran does not know that Braxis is a shapechanger. If asked about Braxis, the boy tells the party that Braxis spends much of his time in the keep’s uppermost level planning the coming assault against Whitspire. He has overheard the goblins complain that the captain sometimes disappears inexplicably, only to reappear hours later just as mysteriously. If asked about Slygo’s map, Ebran tells the party that the only map he has seen at the stronghold was a tattered sea chart on the wall of area 24, where Ebran was once sent to deliver a message to Forak. Ebran isn’t brave enough to leave the stronghold by himself. If the characters aren’t ready to depart right away, he’s content to stay in the guards’ quarters while they continue to explore the stronghold, since most of the pirates pay him no mind.
7. KennelsCombat Encounter Level 5 (1,000 XP)
This small courtyard was built to house the garrison’s mastiffs. It is now home to the goblins’ barely tamed drakes, which they use for hunting game in the inland’s interior as well as for corraling runaway prisoners. Light: Varies depending on the time of day. Monsters: 4 bloodseeker drakes, 2 spitting drakes. See Appendix A (page 61) for statistics.
Read:The dirt f loor of this small courtyard is littered with bones gnawed clean of meat. Its back wall is partitioned into ken-nels strewn with brush and overhung by a low stone roof. Perception DC 14: A low growl sounds from one of the kennels, and the brush rustles in another.
The drakes here spend most of their time resting in the shade of their kennels, waiting for their next meal. Unless the characters succeed on a DC 18 Stealth check, the drakes notice them as soon as they enter the courtyard. The drakes are hostile to anyone who doesn’t smell like goblin. (Ebran, in area 6, has been living in the goblins’ squalor long enough that the drakes won’t attack him.) A character can attempt a DC 21 Nature check as a standard action to calm the drakes down. On a success, the drakes don’t attack the characters (or they break off the attack, if they’ve already engaged). Any attack against one of the drakes causes all the drakes to become hostile again, as does the arrival of any goblins in the area. After either of these two conditions is met, any further Nature checks to calm the beasts automatically fail.
8. outer yardExploration Encounter
This spacious courtyard provides access to both the upper and lower yards. Light: Varies depending on the time of day.
Read:A long courtyard f lanked by curtain walls leads farther into the stronghold. Broad stairs run along the northern wall, leading up to a fortified archway. Straight ahead, a large keep overlooks both yards. Along the southern wall, a stone ramp leads up to a broad platform on which is mounted a large wooden crane, its arm and hoist extend-ing just over the top of the curtain wall. Beyond the platform, at the far end of the courtyard, another stair-case hugs the keep’s southern wall, descending to a distant yard on the far side.
The crane here was used by the humans who built the fortress to hoist up goods and supplies that were too cumbersome to bring in through the guardhouse.
The Dread Pirate Braxis
43A p r i l 2 013 | DU NGEON 213
It broke down long ago, and the goblins haven’t both-ered to repair it. No goblins are in this area when the characters first arrive, though patrols come through frequently. You might have the characters meet a wandering patrol here as they return from exploring other areas of the stronghold, perhaps forcing them to battle their way up or down the adjoining stairs. Stairs: The northern stairs ascend 10 feet to the first landing and another 10 feet to the upper yard (area 15). Area 21 looks down over this staircase, and if Forak is aware of the party’s presence in the stronghold, he stations a pair of hobgoblin sell swords there to fire on anyone coming up (or f leeing down) the stairs. The southern stairs descend 15 feet to their landing and another 15 feet to the lower yard. All of the stairs are difficult terrain. Platform: The platform is made of wood raised on stone piers and stands 10 feet high. A ramp of solid masonry provides access to the west end of the plat-form and a wooden staircase access to the east end. The staircase is difficult terrain. Crane: The crane has fallen into disrepair but can be made serviceable with a little effort. Up to four characters can work for 15 minutes to repair it, after which each character must make a DC 14 Dun-geoneering or Thievery check. At least four successes are needed to repair the crane. Characters can keep working in 15-minute shifts until enough successes are accumulated. After the crane is repaired, a single operator can use a standard action to hoist up to 1,000 pounds of secured material 10 feet up or down along the outside of the curtain wall. Swinging a load over the wall and onto the platform is another stan-dard action. Alternatively, if the crane has no payload attached, the operator can make the following attack.
Standard ActionsCrane Arm F At-Will
Attack: Close burst 2 (creatures in the burst); +7 vs. ReflexHit: 1d8 + 5 damage, and the target falls prone.
lower yard and BarracksThis is where the bulk of the stronghold’s defenders have their living quarters.
9. lower yardCombat Encounter Level 3 (861 XP), or Level 6 (1,335 XP) with reinforcements
This yard contains the stronghold’s main barracks and serves as a recreation area for the pirates sta-tioned there. It also contains the entrance to the fort’s dungeon. Light: Varies depending on the time of day. Monsters: 2 hobgoblin sell swords, 1 hobgoblin press-ganger, 6 goblin toadies, 1 spitting drake. See Appendix A (page 61) for statistics.
Read:This large courtyard is dominated by a long building abut-ting the outer wall. A stone staircase on its near side leads up to the building’s second story. The courtyard is set up for combat training with wooden posts and straw targets showing the marks of regular use. The yard’s inside wall is formed by the bedrock of the keep above, and an iron door is set into the otherwise unworked stone.
The pirates here are training and roughhousing when the characters arrive but quickly turn their weapons on the characters. The spitting drake starts out of sight around the back of the kitchen, feeding on scraps tossed to it by the cook. After it hears the pirates engage the party, it joins the combat, making ranged attacks against the nearest target and then retreating behind the building for cover. Training Equipment: A wooden post grants cover to anyone standing in its square. A straw target offers concealment to anyone standing in its square. Doors: The iron door leading to the dungeon (areas 13–14) is locked (DC 21 Thievery check to
open, DC 23 Strength check to break). Both the bug-bear in area 14 and Forak have keys that open the door. The wooden door in the curtain wall behind the kitchen is unlocked and opens out onto a 30-foot drop to the water below. It is used for disposing of the stronghold’s waste. Developments: The sounds of combat here draw the attention of the pirates in the barracks. If the party attempts to take a short rest or otherwise lin-gers here after defeating the creatures, two hobgoblin sell swords and four goblin toadies come out of the barracks to find out what’s going on. The party has time to deal with these newcomers while the rest of the barrack’s forces arm themselves—but if the characters still hang around after defeating a second group, the remainder of the barracks’ forces starts to spill out at a rate of two hobgoblin sell swords and four goblin toadies per round until the characters either f lee or are defeated (or defeat the lot of them!). Reinforcements: A patrol of two hobgoblin sell-swords and four goblin toadies takes up watch in the yard in case the characters return. Unlike in other areas of the stronghold, these reinforcements appear as soon as the party leaves the area. So if the charac-ters go through the iron door into the dungeon, they will have another fight on their hands as soon as they come back out.
10. KitchenCombat Encounter Level 1 (262 XP)
This kitchen was designed to serve all the forces sta-tioned in the lower and outer yards, as well as those in the dungeon. Light: Bright (sunlight during the day, fireplace at night). Monsters: 1 bugbear warrior, 2 goblin toadies. See Appendix A (page 61) for statistics.
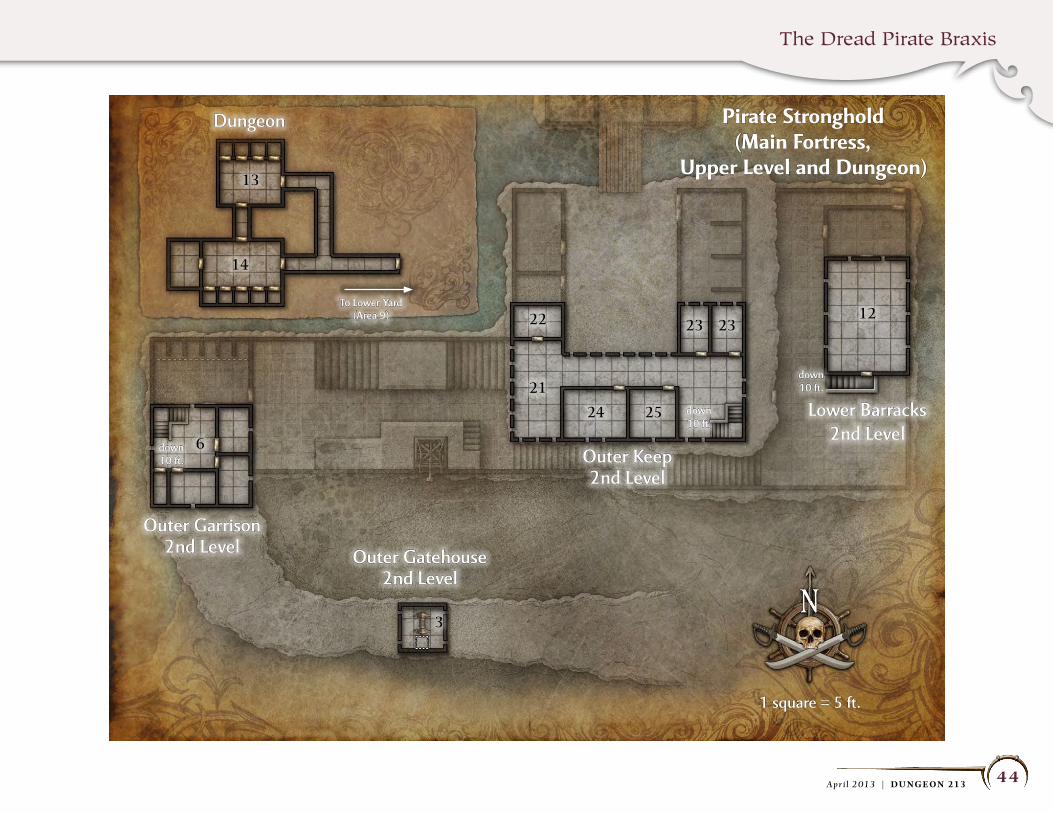
The Dread Pirate Braxis
44A p r i l 2 013 | DU NGEON 213
Pirate stronghold(Main Fortress,
upper Level and Dungeon)
1 square = 5 ft.
Dungeon
To Lower Yard(Area 9)
Outer Garrison2nd Level Outer Gatehouse
2nd Level
Outer Keep2nd Level
Lower Barracks2nd Level
down 10 ft.
down 10 ft.
down 10 ft.
2322
21
6
24 25
13
14
12
3
23
The Dread Pirate Braxis
45A p r i l 2 013 | DU NGEON 213
Read:This room glows with the heat given off by a great fireplace. Shelves on the walls are lined with glass and clay jugs, and the corners of the room are piled high with sacks of grain and barrels of meat. A large table in the center of the room is covered with chopped roots and fresh joints of meat. The air is sweet with the scent of onions and cloves.
The bugbear thug that Braxis hired as his cook is skillful enough to make food the doppelganger finds palatable (if not exactly to his taste). The cook will attack characters who enter the kitchen but will not pursue them outside the barracks. It attacks with a cleaver instead of a morningstar, but is otherwise a typical bugbear warrior. If a character moves near the fireplace, the bug-bear attempts to bull rush the character into the fire and trap its victim there. (The bugbear can effectively block the fireplace by standing in front of it, pre-venting a character in the fireplace from moving or shifting past the creature.) Fireplace: Any creature that enters the fireplace or starts its turn there takes 5 fire damage. Developments: As in area 9, combat in this area draws the attention of any remaining forces in the barracks. See area 9 for more details.
11. Barracks, Ground FloorCombat Encounter Level 1 (434 XP)
The ground floor of the barracks serves as a mess hall and doubles as sleeping quarters for the goblin toadies. Only fourteen are typically here at any given time, although the room can accommodate twice that number. Light: Bright (sunlight during the day, torches in brackets at night). Monsters: 14 goblin toadies. See Appendix A (page 61) for statistics.
Read:This large hall has long tables and benches running in two rows down its center. Crumbs of food and pieces of broken crockery litter the tables. Ragged bedding is strewn about the f loor, and the hall reeks with the stench of unwashed bodies.
Most of the goblins here are asleep or resting when the party enters. Only four are properly armed for battle. The others arm themselves and join combat in the second round but take a –2 penalty to AC unless they have a full 5 minutes to don armor first. If the characters haven’t already dealt with the bugbear cook in area 10, he and his two goblin assis-tants enter the battle at the beginning of the third round of combat (in which case, increase the XP value of this encounter accordingly). Tables: Small creatures can move freely under the tables, gaining cover by doing so. Combatants can hop onto the tables with a DC 10 Athletics check, gaining total cover against enemies under the table (and vice versa). A table can be f lipped as a minor action with a DC 14 Strength check, in which case any creature can stand behind it to gain cover against attacks origi-nating from the other side. Developments: Combat here draws the attention of the forces in area 12. If the party attempts to take a short rest or lingers here, hobgoblin sell swords begin to arrive from area 12 at a rate of two per round until all seven have arrived.
12. Barracks, upper FloorCombat Encounter Level 5 (1,225 XP)
The upper level of the barracks serves as quarters for the hobgoblin sell swords and is moderately cleaner than the f loor below. Only seven pirates are typi-cally here at any given time, although there are cots enough for twice that number. Light: Bright (sunlight during the day, torches in brackets at night). Monsters: 7 hobgoblin sell swords. See Appendix A (page 61) for statistics.
Read:This chamber is lined with rows of cots along either wall. Small trunks sit at the foot of each cot to hold personal belongings.
Most of the hobgoblins here are asleep or resting when the party enters. Only two are properly armed for battle. The others arm themselves and join combat in the second round but take a –2 penalty to AC unless they have a full 5 minutes to don armor first. Cots: The cots are difficult terrain. A cot can be f lipped up against the wall as a minor action, negat-ing the difficult terrain. Trunks: The trunks are unlocked and hold an assortment of clothes, light weapons, and other mun-dane belongings. Developments: Combat here draws the attention of the forces in area 11. If the party attempts to take a short rest or otherwise lingers here, goblin toad-ies begin to arrive from area 11 at a rate of four per round until all fourteen have arrived.
DungeonsThis is where the goblins keep troublesome prisoners or those who are too weak to work. Light: None (corridors).
The Dread Pirate Braxis
46A p r i l 2 013 | DU NGEON 213
Doors: The doors to the cells in both areas are made of iron grillwork and are all locked (DC 21 Thievery check to open, DC 23 Strength check to force). The bugbear jailer here and Forak both have keys that open the cells. The other doors in the dungeons are reinforced wood and are currently unlocked (although they can all be locked by the same key).
13. torture ChamberCombat Encounter Level 1 (200 XP)
Here the bugbear jailer and a couple of hobgoblins keep watch over those human prisoners who are not out at sea, chained to the galley of one of Braxis’s pirate ships. A wild ape that the pirates captured while hunting in the island’s interior is held here and kept hungry. The jailer in area 14 delights in threat-ening to feed difficult prisoners to his “pet.” Light: None. Monsters: 1 silverback ape. See Appendix A (page 61) for statistics.
Read:This forsaken room is festooned with chains and manacles, knotted ropes and iron pokers, as well as even grislier appa-ratuses. The stone f loor here is stained red, and several large bones lay strewn about, cracked open and cleaned of marrow. A row of cells lines one of the walls, and a bed of straw is heaped in the far corner.
The ape here attacks on sight, and the sound of combat draws the attention of the jailer, hobgoblins, and drake from area 14. The hobgoblins and the drake join the fight through the adjoining passage while the bugbear circles around through the hallway to cut off the party’s escape. The cells here are empty, except for a few bones and some moldering straw.
14. Guard ChamberCombat Encounter Level 2 (725 XP)
Here the bugbear jailer and a couple of hobgoblins keep watch over human prisoners who are not out at sea in one of Braxis’s pirate ships. Light: None. Monsters: 1 bugbear backstabber, 2 hobgoblin press-gangers, 1 bloodseeker drake. See Appendix A (page 61) for statistics.
Read:This cold, low-ceilinged chamber is barely warmed by the light of the torches on its walls. A row of cells runs the length of one wall, and a single large cell occupies another wall. In the dancing shadows of their iron grills, you can make out several huddled figures.
The hobgoblins and the drake leap to the attack while the bugbear opens the doors to area 13 so the ape can join the fray. The bugbear then circles around through the hallway to attack the characters from the side and cut off their escape. Treasure: The bugbear jailer has a key that opens the cells here as well as the iron door that leads to area 9. Prisoners: Ten prisoners that hail from various villages along the Silverwrack Coast are kept in the cells in area 14—one each in the small cells, and five in the large cell. (If you are using the “Friend in Need” adventure hook, you can substitute an acquain-tance of the party for one of the prisoners listed here.) The pirates always work the freshest prisoners and rotate out those who seem exhausted to give them a “rest” in the dungeons, so all the prisoners here have spent anywhere from several days to a few weeks doing hard labor at sea and are severely weakened. Some barely have the strength to walk, and none of them are in any condition to fight (not that any are trained warriors, anyhow).
The prisoners shout to the characters for aid as soon as they see them, and they beg to be rescued from the stronghold. They ask to be escorted back to the party’s ship, and it should be obvious to the char-acters that the prisoners’ chances of survival without such an escort are slim. The prisoners are desperate for their freedom, however, and they know the gob-lins do not treat runaways kindly, so they will leave rather than linger if the characters insist on pushing deeper into the stronghold. In such an event, use your discretion in determining how many, if any, of the prisoners make it safely back to the ship. The prisoners’ names are as follows:
F Bran Carterson, a 14-year-old male human black-smith’s apprentice
F Melkn Darrow, a 16-year-old male human fisher
F Evann Browning, a 22-year-old male human tanner
F Atha Meeran, a 23-year-old female human fisher
F Tip Longrod, a 31-year-old male half ling fisher
F Grethen Oxbrow, a 32-year-old female half-orc laborer for hire
F Else Tallow, a 36-year old female human candlemaker
F Ebbar Keelwright, a 41-year-old male human shipwright
F Falk “Pappy” Darrow, a 51-year-old male human fisherman (and Melkn’s grandfather)
F Lark Saltspray, a 57-year-old male half-elf mer-chant sailor
The prisoners will happily share what they know with the party, although their knowledge of the strong-hold is limited, having spent most of their time either aboard ship or in the dungeon. Lark Saltspray, how-ever, can attest to the uneasy nature of the pirates’ alliance with the sahuagin, since he has seen them work together on raids. The sahuagin seem not to
The Dread Pirate Braxis
47A p r i l 2 013 | DU NGEON 213
take orders from the pirates, and on some occasions they have appeared downright hostile toward them, though the hostility has never escalated to violence. It’s a mystery to Lark what keeps the two forces work-ing together.
upper yard and BuildingsThis is the heart of the stronghold, where visitors were commonly received and lodged upon their arrival.
15. upper yardCombat Encounter Level 5 (1,236 XP)
When the characters first make their way to the upper yard, they run into what looks like a routine patrol. What at first seems like a minor skirmish, though, quickly escalates as pirates from the adjoin-ing areas join the encounter. Light: Varies depending on the time of day. Monsters: 2 hobgoblin sell swords, 4 goblin toad-ies (plus 2 hobgoblin sell swords and 2 goblin toadies from area 30, and 1 hobgoblin beast master and 1 rage drake from area 18). See Appendix A (page 61) for statistics.
Read:A broad f lagstone courtyard extends to the north, f lanked by low buildings to both the east and west. The yard’s south-ern end is overhung by the second story of a small keep, the overhang supported by a row of columns. The northern end of the courtyard opens out onto a precipice that looks to drop all the way to the waters below. Beyond the precipice rises another spur of rock on which a large gatehouse is situated, its drawbridge spanning the divide.
When the characters first enter the courtyard, they’re just in time to see a patrol of two hobgoblin sell swords and four goblin toadies coming toward them across
the bridge. Unless the characters are hiding, the patrol spots them as well and immediately attacks. The goblins rush forward to engage the party, while the hobgoblins stay close to the northern end of the courtyard to prevent the characters from rushing the drawbridge. (They’re smart enough, however, to stand at least 1 square away from the precipice to avoid being easily knocked off the edge.) By the beginning of the second round of combat, the pirates in area 30 notice what’s going on and enter the initiative order. The hobgoblins there fire down on the characters while the goblin toadies use their standard actions to attempt to raise the draw-bridge (see area 30 for details on the drawbridge mechanism). Meanwhile, the beast master in area 18 also hears the fracas and mounts his rage drake. The two roll initiative at the beginning of the third round of combat and burst out of the stables to attack any char-acters still in the courtyard. It’s quite possible that the party will get split up in this encounter, with some characters making it over the drawbridge while others are stranded in the courtyard. Although this encounter is meant to challenge the characters’ tactics and resourceful-ness, it shouldn’t be a death trap. Characters stuck in the upper yard who can’t take the heat have the possibility of retreating to previously cleared areas of the stronghold. Characters trapped in the inner yard without enough backup to storm the gatehouse can hide out in the kitchens until help arrives or can potentially lure the defenders in area 30 out to deal with them one at a time. Don’t be afraid to give the characters a run for their money, but don’t back them into a corner, either. That said, some parties, through luck or resource-fulness, might have an easier time dealing with the forces presented here. If that’s the case, have another patrol come up from the outer yard in the middle of the encounter, or have a circling ambush drake
descend on characters who take refuge in the inner yard, just to keep things interesting. Precipice: The precipice drops 80 feet into the ocean below. Creatures that fall into the water take half normal falling damage. Reinforcements: None (but see reinforcements for area 30). Also, after this encounter, the pirates keep the drawbridge up at all times. The charac-ters will either need to figure out another way to get across to the inner gatehouse or else wait until the pirates lower the bridge for some reason (possibly for another patrol or for one of the meals Braxis orders up from the cook in area 10).
16. SmithyExploration Encounter
This smithy once served the needs of the entire for-tress. None of the pirates are skilled smiths, however, so the forge now sits cold. Light: Dim (sunlight filtering through the door-frame during the day) or none (at night).
Read:This building is home to a neglected forge, its bed laid with a cold blanket of ancient ashes. A hammer and tongs lie on the f loor near the anvil, and an assortment of unshaped irons are propped up in the corner.
The forge is still serviceable and contains suffi-cient materials for a skilled smith to do crafting and repairs. Bran Carterson, one of the prisoners from area 14, has some skill as a smith, and after an extended rest he can be persuaded to work the forge if need be, provided the area is kept clear of monsters.
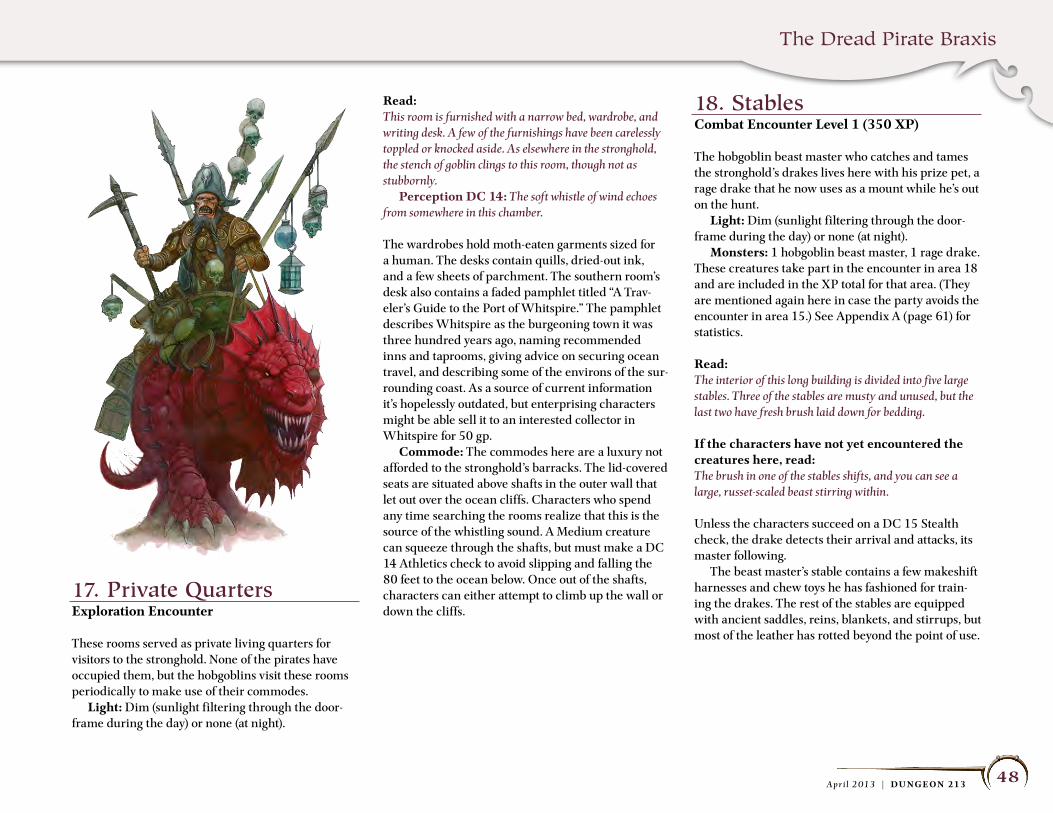
The Dread Pirate Braxis
48A p r i l 2 013 | DU NGEON 213
17. private QuartersExploration Encounter
These rooms served as private living quarters for visitors to the stronghold. None of the pirates have occupied them, but the hobgoblins visit these rooms periodically to make use of their commodes. Light: Dim (sunlight filtering through the door-frame during the day) or none (at night).
Read:This room is furnished with a narrow bed, wardrobe, and writing desk. A few of the furnishings have been carelessly toppled or knocked aside. As elsewhere in the stronghold, the stench of goblin clings to this room, though not as stubbornly. Perception DC 14: The soft whistle of wind echoes from somewhere in this chamber.
The wardrobes hold moth-eaten garments sized for a human. The desks contain quills, dried-out ink, and a few sheets of parchment. The southern room’s desk also contains a faded pamphlet titled “A Trav-eler’s Guide to the Port of Whitspire.” The pamphlet describes Whitspire as the burgeoning town it was three hundred years ago, naming recommended inns and taprooms, giving advice on securing ocean travel, and describing some of the environs of the sur-rounding coast. As a source of current information it’s hopelessly outdated, but enterprising characters might be able sell it to an interested collector in Whitspire for 50 gp. Commode: The commodes here are a luxury not afforded to the stronghold’s barracks. The lid-covered seats are situated above shafts in the outer wall that let out over the ocean cliffs. Characters who spend any time searching the rooms realize that this is the source of the whistling sound. A Medium creature can squeeze through the shafts, but must make a DC 14 Athletics check to avoid slipping and falling the 80 feet to the ocean below. Once out of the shafts, characters can either attempt to climb up the wall or down the cliffs.
18. StablesCombat Encounter Level 1 (350 XP)
The hobgoblin beast master who catches and tames the stronghold’s drakes lives here with his prize pet, a rage drake that he now uses as a mount while he’s out on the hunt. Light: Dim (sunlight filtering through the door-frame during the day) or none (at night). Monsters: 1 hobgoblin beast master, 1 rage drake. These creatures take part in the encounter in area 18 and are included in the XP total for that area. (They are mentioned again here in case the party avoids the encounter in area 15.) See Appendix A (page 61) for statistics.
Read:The interior of this long building is divided into five large stables. Three of the stables are musty and unused, but the last two have fresh brush laid down for bedding.
If the characters have not yet encountered the creatures here, read:The brush in one of the stables shifts, and you can see a large, russet-scaled beast stirring within.
Unless the characters succeed on a DC 15 Stealth check, the drake detects their arrival and attacks, its master following. The beast master’s stable contains a few makeshift harnesses and chew toys he has fashioned for train-ing the drakes. The rest of the stables are equipped with ancient saddles, reins, blankets, and stirrups, but most of the leather has rotted beyond the point of use.
The Dread Pirate Braxis
49A p r i l 2 013 | DU NGEON 213
outer KeepThis centrally situated keep has commanding views of three of the yards as well as the approach from the island’s interior.
19. Common RoomCombat Encounter Level 4 (875 XP)
The outer keep has been occupied by Forak and his crew. Braxis conspires to keep as many of Forak’s crew out at sea or on island patrols as possible to fore-stall any possible coup, so only a few pirates are here when the characters arrive. The hobgoblin sell swords are resting in area 20, and Forak and the warcaster are in their chambers upstairs when the party enters area 15; unless Forak has been previously alerted to the party’s presence in the stronghold, none of these individuals participate in the encounter described in that area. The pirates in area 20, however, arm them-selves while Forak and the warcaster descend to area 19, waiting to see what move the party makes next. Light: Bright (sunlight during the day, torches in brackets at night). Monsters: Forak (bugbear warrior), 1 hobgoblin warcaster (plus 3 hobgoblin sell swords from area 20). See Appendix A (page 61) for statistics.
Read:This room is furnished with a pair of small tables and sev-eral chairs. Several bone dice lie scattered on the tabletops amid chipped cups and tankards, and an open barrel in the corner gives off the scent of sour ale. A stone staircase in the room’s back corner leads to the f loor above.
If the characters enter area 19 after encountering the patrol in the upper yard, they find Forak and the warcaster here while the hobgoblin sell swords wait in area 20 with crossbows at the ready. Forak charges the first character he sees, and the warcaster
uses force lure and force pulse to keep characters from swarming into the room, pushing them back outside where the sell swords can fire on them from behind the arrow slits. If the party does make headway into the room, one or more of the pirates swap their cross-bows for swords and move into area 19 to help even the odds. If the characters continue to the inner yard after the fight in area 15 without exploring this area, Forak and the other creatures here follow after them if pos-sible, laying an ambush in the inner yard while the party explores the surrounding buildings. Forak fights as a bugbear warrior but has the fol-lowing additional power.
Minor ActionsC Captain’s Bravado F encounter
Effect: Close burst 5 (Forak and allies in the burst). The target gains 10 temporary hit points.
Treasure: Forak has a key that opens the iron door in area 9 and the cells in areas 13 and 14. Developments: Forak is a fierce opponent, but he values his life (certainly more than he values the lives of his crew), and he attempts to f lee if reduced to 20 hit points. Failing that, he surrenders. If the party accepts his surrender, Forak has no scruples about running away or turning on the characters as soon as he thinks he can get away with it (a DC 14 Insight check reveals his deceitful intent). Once beaten, Forak readily answers any question the party asks of him, though he doesn’t volunteer information. He tells the truth about anything he knows but is prone to fabrication when asked ques-tions he doesn’t know the answer to, especially if the characters are threatening him. Forak can confirm the locations of both the prisoners (area 14) and the map fragment (area 24; he doesn’t know that it is of any value), and can also tell the characters that they’re likely to find Braxis somewhere in the inner keep. Forak is quick to add that Braxis isn’t always
there (he doesn’t want the characters to think he’s lied to them if they don’t find Braxis in the keep) and corroborates Ebran’s information that Braxis is prone to disappearing for hours at a time. Forak does not know about the crown or about Braxis’s shapechanging abilities. If asked about the alliance, Forak expresses his distaste for the sahuagin and informs the party that Braxis has some kind of understanding with the sea devils’ leader, whom he refers to variously as both Krekzn and the Sea Prince. Forak doesn’t know how Braxis forged the alliance or what the Sea Prince’s motive is in aiding Braxis, but it’s Forak’s belief that Braxis’s disappearances are due to his meeting Krekzn in secret somewhere to plot their attacks.
20. BarracksCombat Encounter Level 1 (525 XP)
This is where Forak’s crew takes their rest when Braxis doesn’t have them on active duty. Only three pirates are here right now, but there are beds enough for ten. Light: Bright (sunlight during the day, torches in brackets at night). Monsters: 3 hobgoblin sell swords. These crea-tures take part in the encounter in area 19 and are included in the XP total for that area. (They are mentioned again here in case the party avoids the encounter in area 19.) See Appendix A (page 61) for statistics.
Read:This long chamber has a row of cots running the length of its north wall, each with a small trunk at its foot. Arrow slits above the heads of the cots look out onto the court-yard beyond.
If the characters avoid the encounter in area 19, they find the pirates here resting. The pirates grab
The Dread Pirate Braxis
50A p r i l 2 013 | DU NGEON 213
weapons and leap to the attack but take a –2 penalty to AC unless they have a full 5 minutes to don armor first. They shout for Forak, who arrives along with the warcaster from area 19 at the beginning of the third round of combat. Arrow Slits: The arrow slits provide superior cover for creatures inside the keep against attacks originating outside the keep. Cots: The cots are difficult terrain. A cot can be f lipped up against the wall as a minor action, negat-ing the difficult terrain and blocking any arrow slit behind it. Trunks: The trunks are unlocked and hold an assortment of clothes, light weapons, and other mun-dane belongings.
21. upper GarrisonExploration Encounter
This garrison is empty when the characters arrive unless Forak has been warned of the party’s approach, in which case he stations the pirates from area 20 here to attack the characters as they traverse the staircase below. Light: Bright (sunlight during the day, torches in brackets at night).
Read:Arrow slits in this room’s western wall give a commanding view of the stairway up from the outer yard, while those on the south wall look out on the approach from the island’s interior.
22. ArmoryExploration Encounter
This room contains spare weapons and armor for the stronghold’s defenders. Light: None.
Read:The walls of this closet are hung with racks of swords and spears. Standing in its center are suits of rusted chainmail and moldering leather armor. Arrows and quarrels are laid in here by the hundreds.
23. officers’ QuartersExploration Encounter
These rooms served as living quarters for the strong-hold’s petty officers. They have gone largely unused by the pirates. Light: Bright (sunlight during the day) or none (at night).
Read:This room is furnished with a desk and wardrobe. A sword and a small steel shield embossed with a crest hang on the interior wall. History DC 10: The crest on the shield is a sigil of the fallen human kingdom that first settled the Silver-wrack Coast. Perception DC 10: Scrape marks on the f loor show where a large piece of furniture was dragged out of here—likely a bed.
Forak stole the beds out of these chambers to make himself more comfortable in area 24.
24. Forak’s QuartersCombat Encounter Level 1 (200 XP)
This spacious room served as the quarters of the outer keep’s main officer. Forak has taken it for himself and can be found here if the party makes it through areas 15 and 19 without alerting the keep’s defenders to their presence. Light: Bright (sunlight during the day, torches in brackets at night).
Monsters: Forak (bugbear warrior). Forak takes part in the encounter in area 19 and is included in the XP total for that area. (He is mentioned again here in case the party avoids the encounter in area 19.) See Appendix A (page 61) for statistics.
Read:This spacious chamber is furnished with a desk, wardrobe, and table, as well as three narrow beds that have been shoved together in one corner of the room. The pieces of a broken armchair lie tossed in another corner. Windows on the south wall look out on the island’s interior. Hanging on the opposite wall is a framed sea chart depicting a region of the Silverwrack Coast. Perception DC 10: The chart appears to be torn along one edge.
If Forak is here, he attacks immediately, calling for help as he does so. The warcaster from area 25 enters combat the next round, and the pirates from area 20 arrive the round after that. Wardrobe: The wardrobe holds moth-eaten gar-ments sized for a human as well as three bottles of good wine that might sell for 10 gp apiece. Desk: The desk contains quills, dried-out ink, and a few sheets of parchment. Table: The table holds a pewter goblet and a pewter dish with a few crumbs of food on it as well as a half-drunk bottle of wine that is quite delicious. A few empty bottles litter the f loor nearby. Chart: The framed chart is the map fragment Slygo is searching for. Characters can examine the chart using Arcana and History as described in the section on Slygo’s quest.

The Dread Pirate Braxis
51A p r i l 2 013 | DU NGEON 213
25. Mage’s QuartersCombat Encounter Level 1 (150 XP) and Trap/Hazard (300 XP)
This room served as the quarters of the stronghold’s resident wizard. The hobgoblin warcaster has taken it over and can be found here if the characters make it through areas 15 and 19 without alerting the keep’s defenders to their presence. Light: Bright (sunlight during the day, torches in brackets at night). Monsters: 1 hobgoblin warcaster. The warcaster takes part in the encounter in area 19 and is included in the XP total for that area. (It is mentioned again here in case the party avoids the encounter in area 19.) See Appendix A (page 61) for statistics. Trap/Hazard: 1 glyph of warding.
Read:This room is furnished not only with a bed and wardrobe but with a large desk piled with books and scrolls and a small table covered with alchemical apparatus. Windows on the southern wall provide ample light to read by.
If the warcaster is here, it attacks immediately, call-ing for help as it does so. Forak from area 24 enters combat the next round, and the pirates from area 20 arrive the round after that. Wardrobe: The wardrobe holds moth-eaten robes sized for a human, as well as an assortment of finely carved wooden staves. Characters who search carefully (DC 14 Perception check) find that the wardrobe has a false bottom concealing a hidden compartment, which is trapped with a glyph of warding.
The compartment contains a spellbook with the fol-lowing spells and rituals: fountain of f lame (wizard 1), sleep (wizard 1), instant friends (wizard 2), shield (wizard 2), fireball (wizard 5), Tasha’s forcible
conscription (wizard 5), Secret Page (ritual 1), Silence (ritual 1), and Arcane Lock (ritual 4). Desk: Many of the desk’s writings are, in fact, mundane. The wizard of the stronghold also served as its clerk, and characters who search the tomes and scrolls find years’ worth of ships’ logs, soldier rosters, supply orders, and lists of inventory. A few of the writ-ings are of a more esoteric nature. Table: This table holds all the necessary equip-ment to craft alchemical items.
inner yard and BuildingsThese buildings are on a separate, smaller out-cropping of rock from the rest of the stronghold. A drawbridge provides the only access to these areas.
26. inner yardExploration Encounter
This small courtyard provides access to the inner gatehouse and the inner keep as well as its adjoin-ing kitchens. Light: Varies depending on the time of day.
Monsters: 1 juvenile bloodseeker drake. See Appendix A (page 61) for statistics.
Read:This small courtyard is overshadowed by the gatehouse on its southern side and the even taller keep along its north side. A lower building runs alongside the yard’s western well, connecting the keep to the gatehouse.
This yard is bare and uninhabited, except for a juve-nile bloodseeker drake that lurks here, feeding off scraps from the kitchen and trying to avoid the adult drakes that the patrols sometimes take with them on their rounds of the stronghold. The juvenile drake tries to avoid the party and does not attack unless provoked. It hasn’t bonded with the goblins the way the adult drakes have, how-ever, and can be persuaded to trust the characters. Any character can attempt a DC 21 Nature check as a standard action to gain the drake’s trust. Suc-cess means the drake will follow the character as a companion creature for as long as the party treats it well. A character who fails the Nature check cannot attempt to gain the drake’s trust again, but other char-acters can. If a character attempts the check and fails by 5 or more, the drake turns hostile, preventing any other characters from attempting to gain its trust.
27. KitchenExploration Encounter
This kitchen is meant to service the inner and outer keeps. Forak’s cook met an untimely end in a recent raid, and so the rest of his crew now take turns pre-paring meals for the outer keep. Braxis won’t deign to eat the crew’s idea of food and orders all his meals from the cook in area 10. Light: Dim (sunlight filtering through the door-frame during the day) or none (at night).
Glyph of Warding (Fire) Level 7 TrapObject XP 300Detect Perception DC 27, Arcana DC 23 Initiative —Immune attacksTriggered ActionsC Attack (fire) F At-Will
Trigger: A creature opens the secret compartment.Attack (Immediate Reaction): Close burst 3 (creatures in the
burst); +10 vs. ReflexHit: 3d6 + 4 fire damage, and ongoing 5 fire damage (save
ends).Effect: The trap is disabled.
CountermeasuresF Disable: Thievery DC 23. Success: An adjacent charac-
ter can disable the trap. Failure (18 or less): The trap is triggered.
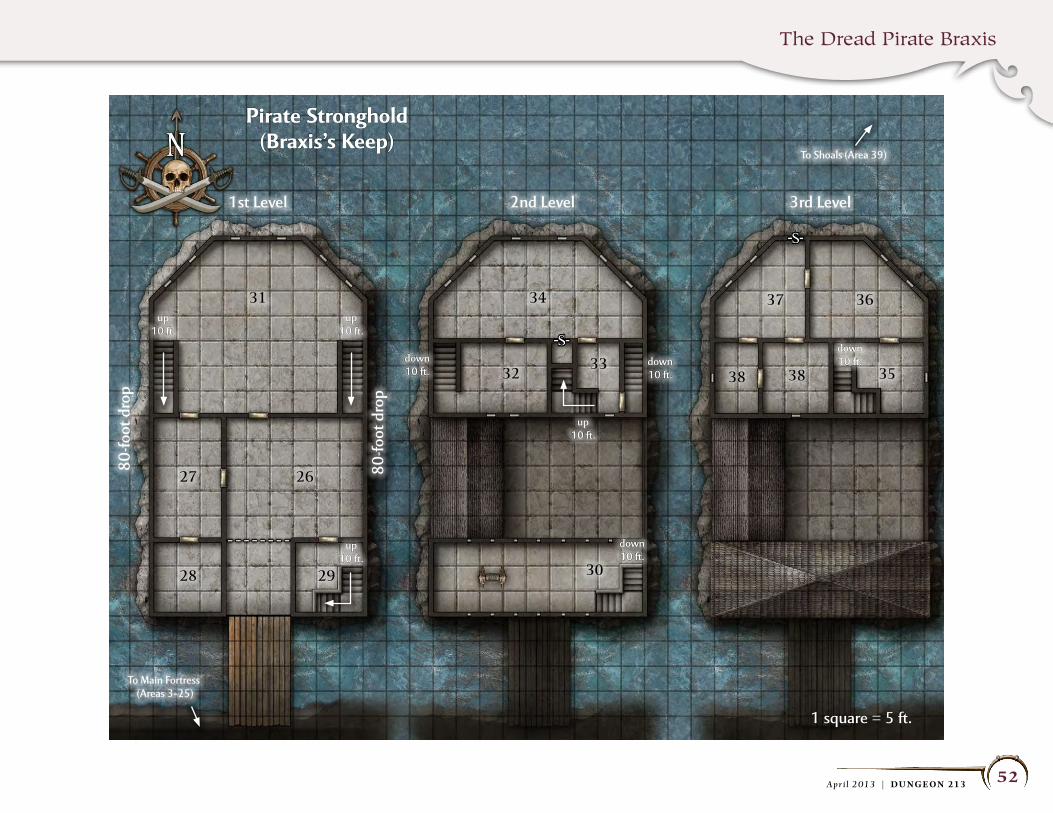
The Dread Pirate Braxis
52A p r i l 2 013 | DU NGEON 213
Pirate stronghold(Braxis’s Keep)
1 square = 5 ft.
up 10 ft.
up 10 ft.
up 10 ft.
up 10 ft.
down10 ft.
down10 ft.
down10 ft.
down10 ft.
up 15 ft.
2nd Level 3rd Level1st Level
To Shoals (Area 39)
To Main Fortress (Areas 3–25)
80-fo
ot d
rop
80-fo
ot d
rop
38 38 35
27
28 29 30
31
26
34
3233
37 36

The Dread Pirate Braxis
53A p r i l 2 013 | DU NGEON 213
Read:This building has multiple fire pits along its back wall with turnspits and cauldrons arranged above them. Most of the pits are cold, but one glows with the dull warmth of banked embers. Broad workbenches sport deep gouges from the knives and cleavers that lie about.
This area sees only intermittent use. The party can easily take short rests here, but every few hours some-one from the outer keep arrives to stoke the fire or ladle out a few bowls of pottage from the cauldron that sits over the fire. Any character who tries to eat the pottage must make a DC 10 Endurance check to keep it down. On a failed check, the character takes 5 poison damage.
28. larderExploration Encounter
Forak’s crew keeps this larder fairly well stocked, though the best supplies make their way down to area 10 unless Forak happens to grab them for himself. Light: None.
Read:This room contains sacks of roots and grain, barrels of ripe fruit and salted meat, and several casks of what smells like cider.
The stores here are a combination of provisions taken from ships the pirates have captured and food the goblins have gathered from the island’s interior. Char-acters who spend time rif ling through the supplies can gather 15 days’ worth of rations from the lot.
29. inner Gatehouse, Ground FloorExploration Encounter
This area serves as a general storeroom and allows access to the gatehouse’s upper story. Light: Dim (sunlight filtering through the door-frame during the day) or none (at night).
Read:Coils of rope and stacks of cut wood cover the f loor of this storeroom. Shovels, pickaxes, and ladders lean up against the walls. A stone staircase curls up the back wall to the f loor above.
30. inner Gatehouse, upper FloorCombat Encounter Level 1 (412 XP), or Level 3 (762 XP) with reinforcements
This guardroom overlooks both the upper and inner yards and has a winch for operating the drawbridge below. Light: Bright (sunlight during the day, torches in brackets at night). Monsters: 2 hobgoblin sell swords, 2 goblin toad-ies. These creatures take part in the encounter in area 15 and are included in the XP total for that area. (They are mentioned again here in case the party avoids the encounter in area 15.) See Appendix A (page 61) for statistics.
Read:This narrow chamber has rows of arrow slits running the length of both walls, allowing a commanding view of the courtyards below. A large winch is set into the f loor toward the far end of the room, its chain running out through a loop in one of the walls.
The hobgoblins here fire on any enemies on the bridge or in either of the courtyards, and the goblin toadies engage in melee at the top of the stairs in an attempt to keep enemies bottlenecked while the hob-goblins pick them off with ranged attacks. Arrow Slits: The arrow slits provide superior cover for creatures inside the gatehouse against attacks originating outside the gatehouse. Winch: The winch here operates the drawbridge below. It can be released as a minor action or raised with four standard actions (each standard action requires a DC 10 Strength check and raises the far end of the bridge 5 feet up and pulls it 5 feet away from the edge of area 15). Reinforcements: Two hobgoblin sell swords.
inner KeepThree stories high and defended by the inner gate-house, this keep is the stronghold’s bastion, allowing its commander to maintain a watch on both the harbor and the ocean for miles around.
31. Great hallCombat Encounter Level 4 (950 XP)
This hall was where the commander of the strong-hold would entertain his guests and officers, and it is where Braxis routinely receives reports from his crew. Currently, a hobgoblin captain from one of the raid-ing parties is waiting here to deliver his report. Light: Bright (sunlight during the day, torches in brackets at night). Monsters: 1 hobgoblin pirate captain, 2 hobgoblin sell swords, 2 bugbear warriors. See Appendix A (page 61) for statistics.
The Dread Pirate Braxis
54A p r i l 2 013 | DU NGEON 213
Read:This spacious hall is simply furnished with three great tables that form a horseshoe opening out toward the hall’s entrance. Stuffed drakes’ heads of various sizes and color-ation are mounted on the walls in fearsome poses. Along both sides of the room, staircases ascend to the f loor above.
Unless alerted to the party’s presence, the pirates here are lounging lazily around the tables, wait-ing for Braxis to come meet them. They leap into action when they see the characters, though, and the captain lets out a shout to warn Braxis before engag-ing the characters. He and the bugbear fight to the death, but the other two hobgoblins will try to f lee out of the keep once they are bloodied if their cap-tain has already been defeated. Tables: Combatants can hop onto the tables with a DC 10 Athletics check. A table can be f lipped as a minor action with a DC 14 Strength check, in which case any creature can stand behind it to gain cover from attacks originating from the other side.
32. AntechamberExploration Encounter
This simply adorned room leads into the chapel. Light: Bright (sunlight during the day) or none (at night).
Read:This sparsely furnished chamber sports a fanciful statue of a human with fishlike scales and fins on his legs and feet. A door to the north leads further into the keep. History or Nature DC 10: The statue depicts a triton, a creature that figures in local folklore, though there have been no reports in living memory of such creatures actually being sighted. Perception DC 14: You hear the sound of a woman weeping from somewhere on the other side of the door.
Perception DC 21: Between her sobs, you hear the woman imploring the goddess Melora for forgiveness and then crying out a name: “Krekzn.”
33. private AntechamberExploration Encounter
This simply adorned room leads into the chapel and up to Braxis’s apartments. Light: Bright (sunlight during the day, torches in brackets at night).
Read:This sparsely furnished chamber contains a small stone basin set on a pedestal at waist height, its rim decorated with carvings of sea creatures. A staircase leads up to the next f loor. Perception DC 14: You hear the sound of a woman weeping from somewhere on the other side of the door to the north. Perception DC 21: Between her sobs, you hear the woman imploring the goddess Melora for forgiveness and then crying out a name: “Krekzn.”
Doors: Both doors here are reinforced wood, and Braxis keeps them locked at all times (DC 21 Thiev-ery to open, DC 16 Strength to force). Only Braxis has the key to these doors. Basin: The basin was intended for hand washing and perfunctory ablutions before entering the chapel, although it stands dry now. It still retains the power of its initial consecration, allowing the truly devout to find a peaceful clarity of mind by performing the ritual cleansing. Any clean water can be used to pre-pare the basin. Arcana DC 10: The basin radiates an aura of divine magic. Religion DC 10: The character understands the basic function of the basin and senses the potential benefit of performing the ablutions.
Religion DC 21: The character performs the appropriate ablutions with a deep and focused rev-erence, gaining access to the following power. Any number of individuals can benefit from the basin, but each individual can gain the power only once per day.
Clarity of Mind UtilityYour unhurried equanimity allows you to perceive your mis-take and immediately act to correct it.DailyFree Action PersonalTrigger: You make an attack roll, a skill check, or an
ability check.effect: Roll twice and take the highest result. You then
lose this power.
34. Chapel of MeloraRoleplaying Encounter
The keep’s chapel is haunted by the ghost of the slain triton priestess, who begs the adventurers to undo the evil she has wrought. Light: Bright (sunlight during the day) or none (at night).
Read:This room is a chapel with benches fashioned of polished driftwood arranged around the central altar. The altar features a benevolent depiction of Melora as the bringer of the sea’s bounty, but the carving has been defaced by deep gashes in the wood. Hovering near the altar is a ghostly apparition—a woman with legs covered in scales and fins and long hair that seems to f loat and stir in some invisible current. Her face is a mask of pain and sorrow, and three puncture wounds pierce her breast near the heart. Upon seeing you, the apparition ceases her sobbing and speaks with a voice that seems to come from some distant place. “Greetings, strangers. I am Zennara, once a priestess of Melora, now cursed for my sins. Though I be consigned to wretchedness, my people, bound to slavery by my own evil

The Dread Pirate Braxis
55A p r i l 2 013 | DU NGEON 213
actions, may yet be freed. If you would save these waters from the threat of the vile Sea Prince who urges his sahua-gin followers to butchery, then listen well to my tale.”
If the characters stay to listen, Zennara recounts the story presented in the adventure’s “Background” sec-tion. Her knowledge of events ends with her death. She does not know that Braxis now possesses the crown, and she presents Krekzn as the principal threat to the Silverwrack Coast. She then beseeches the party to seek out Krekzn and destroy his crown, which will break his hold over the sahuagin and, she hopes, allow them to find some measure of peace.
major Quest: Destroy the Crown4th-Level Major Quest (175 XP/character)The characters earn this quest reward if they destroy the Sea Prince’s Crown.
If the characters accept Zennara’s quest, she tells them where to find the entrance to the sea caves and tells them to destroy the crown by “casting it into the maw of eternal hunger.” If the characters press for a further explanation, Zennara tells them that the sahuagin have turned aside from Melora’s grace and now worship a demonic shark named Sekolah whose insatiable bloodlust matches Krekzn’s own. The sahuagin priests claim that everything ever created will eventually be consumed by Sekolah’s hunger. Zennara then encourages the characters to seek Melora’s blessing for their undertaking.
If a character prays at the altar, read:The stillness of the chapel is suddenly filled with the soft murmur of surf on a distant shore. You feel a beneficent presence descend upon you.
Any character praying at the altar can choose one of the following benefits: gain an action point; regain the use of an expended daily power; or regain three
healing surges. Each character can receive this ben-efit only once during the course of the adventure. Doors: The door to area 33 is made of reinforced wood and is locked (DC 21 Thievery check to open, DC 16 Strength check to break). Braxis has the key to this door. The secret door requires a DC 21 Percep-tion check to find and leads to a small reliquary that contains incense, censers, and other well-preserved ritualistic items.
35. Waiting RoomExploration Encounter
This simply adorned room leads into the war room of the stronghold’s commander. Light: Bright (sunlight during the day, oil lamps at night).
Read:This simply appointed chamber is furnished with a bench and a small side table. Set upon the table is an empty vase made of green glass. A single window looks out to sea.
36. War RoomRoleplaying Encounter
This is where Braxis spends most of his time, plotting his attack against Whitspire. He is here when the party arrives, but, warned by the sounds of combat in area 31, he has changed himself to resemble the human captain of one of the ships his crew captured. (The original captain is since deceased, slain when trying to escape the island.) Although Braxis wears the Sea Prince’s Crown at all times, he can conceal it and the demonic corruption it causes because of his change shape ability. Light: Bright (sunlight during the day, oil lamps at night).
Monsters: Braxis (disguised as Captain Smeadon). See Appendix A (page 61) for statistics.
Read:This grandly appointed office is dominated by a large table on which is spread a chart depicting Whitspire and the sur-rounding coastline. Dozens of small wooden blocks, crudely carved to resemble ships, are arranged in formation on the chart. Swords, helmets, shields, and several other charts showing various islands hang on the walls. The room’s win-dows look out on the open ocean. A grunt draws your attention to a figure slouched in the corner. A middle-aged man dressed in the tattered uniform of a ship’s captain, his face bruised and haggard, pushes
The Dread Pirate Braxis
56A p r i l 2 013 | DU NGEON 213
himself to his feet. He rubs his jaw gingerly and looks from you to a door standing ajar on the western wall. “If yer lookin’ for that blasted ’obgoblin, ye just missed ’im,” he grunts.
The man introduces himself as Captain Jaime Smeadon. He explains that he is captain of the Golden Gull, a warship captured by the pirates. He claims he was brought to this room for interrogation, saying Braxis was demanding information regarding Whitspire’s harbor and defenses and beating him for not telling him what he wanted to know. He says that when they heard the combat in area 31, Braxis gave him a final blow to the gut and then ran through the door into area 37. Braxis’s depiction of Smeadon is accurate, and anyone making a DC 14 Streetwise check can verify as much (if the characters visited area 1, they might also have seen the Golden Gull at berth there). A result of 21 or better on a Streetwise check means the char-acter recalls some trivial details he or she has heard about Smeadon, which if used to try to verify his iden-tity provide a +2 bonus to any Insight checks made to discover the impersonation. Assuming the characters believe Smeadon’s ver-sion of events, he announces his intention to join the party and hunt down Braxis. He arms himself with a sword and shield from the wall or gladly accepts any magic equipment the characters offer him. He then exhorts the party to search the remainder of the area to discover where Braxis might have gone. Smeadon’s hope is that the characters discover the secret door in area 37 and surmises that Braxis must have escaped that way. If they don’t find it on their own, Smeadon helpfully “discovers” it and—if they still don’t connect the dots—suggests that Braxis might have used it to escape. (He doesn’t point out the trap, though, and if the characters insist that he go through first, Smeadon makes a show of nearly getting his leg trapped.) Upon reaching the rowboat, Smeadon once again waits for the characters to discover the sea
caves, if necessary helping them to reach the conclu-sion that Braxis went there. If at any point the characters decide to turn back, whether to take an extended rest or to explore more of the stronghold, Smeadon urges them to pursue Braxis before he has a chance to escape or rally a counterstrike. Ultimately, however, Smeadon will follow the characters’ lead, biding his time for a chance to lure them into the sea caves. Smeadon fights alongside the party as a com-panion character, trying to make a convincing show without putting himself too much in harm’s way. He does not hesitate to fight the other pirates in the stronghold and will make a show of viciously finish-ing them off if he feels it will aid his deception. If the party sees through the deception, Braxis assumes the form of a hobgoblin, hurls a few insults at the party, and then bolts for the secret passage in area 37. He takes the rowboat and f lees to the sea caves, where he waits for the party in area 41 in the guise of a sahuagin guard.
37. Sitting RoomExploration Encounter and Trap/Hazard Level 1 (200 XP)
This room contains a secret exit from the stronghold that Braxis uses to slip out unnoticed on his periodic visits to the sea caves. Light: Bright (sunlight during the day, oil lamps at night). Trap/Hazard: 1 foot crusher trap.
Read:This room is furnished with a couch, two armchairs, and a small table. A stack of books and a bottle of wine sit on the table, and a decorative shield stands propped alongside it. Faded tapestries depicting nautical scenes adorn the walls. The windows here afford a breathtaking view of the harbor and the island beyond.
The wine is the same fine vintage found in Forak’s quarters. The books are all tales of the sea, the kind old mariners are fond of telling. Braxis took the shield off the wall in area 36 and keeps it in here to prop open the secret door (he’s never found the latch to deactivate the door’s trap). Doors: The secret door here is a 3-foot-square panel in the wall at f loor level behind one of the tap-estries that slides up into the wall (DC 14 Perception check to find). It leads to a ladder of iron rungs set into the keep’s exterior, allowing one to climb down to the cliff below. There the rungs continue down the cliff side to the water where a rowboat is moored under a small overhang in the cliff. The door is trapped to prevent unwanted entrance to the keep. The trap is equally as effective at prevent-ing hapless adventurers from using it as an exit. A pressure plate in the f loor causes the secret door to slam closed on any creature that tries to move through it in either direction.
Foot Crusher Level 5 TrapObject XP 200Detect Perception DC 22 Initiative —Immune attacksTriggered Actionsm slam F At-Will
Trigger: A creature enters the open door.Attack (Immediate Interrupt): Melee 1 (the triggering crea-
ture); +8 vs. ReflexHit: 1d10 + 8 damage, and the target is restrained (save
ends).Aftereffect: The target is slowed (save ends).Effect: The door closes, ending the creature’s movement,
and the trap resets.Countermeasures
F Bypass: Thievery DC 15 (standard action). Success: An adjacent character can allow one creature to pass through the door without triggering the trap.
F Disable: Thievery DC 22 (standard action). Success: An adjacent character can disable the trap.
The Dread Pirate Braxis
57A p r i l 2 013 | DU NGEON 213
38. Braxis’s QuartersExploration Encounter
These rooms once housed the stronghold’s com-mander and his family. Braxis now inhabits them. Light: Bright (sunlight during the day, oil lamps at night).
Read:This chamber is appointed with a wardrobe, a writing desk, and a large, comfortable-looking bed. The walls are plas-tered and painted with murals of ships sailing along the Silverwrack Coast.
The wardrobe holds an assortment of men’s, women’s, and children’s clothes, all of them musty with age. The writing desk holds quills, bottles of dried ink, and a few sheets of parchment. Braxis, thanks to his shapechanging ability, has little need of clothes or other common personal effects. The desk in the larger room contains a note-book in which Braxis records his activities (he finds that keeping a journal helps him maintain a stronger sense of identity). The journal is written in neat script in the Common tongue. The most recent entries read as follows:
F The venture in Farrel’s Way ended poorly. Have put into Shantytown. Mean to lie low here while things settle down.
F The pirates here have been working for some brute named Granack, who’s gotten himself killed by a group of adventurers. Now they’re mostly just out of work. Could be an opportunity.
F I’ve hired a new crew and am setting sail tomorrow for Razorspine Island, where there’s apparently an old fort sitting empty. From there we should be able to hit mul-tiple shipping lanes.
F Turns out the shoals here are infested with sea devils. They attacked us the night after we arrived and again
the following night. After the second attack, I followed them back to their lair, a cave in the shoals. Their leader was wearing a crown that seems to have some enchant-ment about it. I relieved him of the trinket, and now the sea devils serve me instead of him! More opportunity!
F New plan. With sea devils’ help, my crew is capturing ships and crew to work their galleys. I have ten ships already. Once I have enough, we’ll sail for the coast and put Whitspire to the sword! With the sea devils at my call, who can stand against me? The Silverwrack Coast belongs to Braxis now.
the Sea CavesThe sahuagin make their home in a network of caves that run through the shoals off Razorspine Island. The areas presented here assume that the adventurers make their way directly to the lair of the Sea Prince, but the caves are extensive and hold many more sahua-gin than detailed here. If you want to extend this part of the adventure, you can have the characters engage in a skill challenge using Dungeoneering, Nature, and Perception to find their way through the caves. Each failure means the characters encounter a sahuagin hunting party somewhere deep in the caves. The encounter areas here have the following common features. Ceilings: The cavern ceilings are roughly 15 feet high. Coral Growths: These nodules of coral are dif-ficult terrain, and any creature pushed, pulled, or slid into coral growth takes 3 damage per square. Water Pools: What look like isolated pools on the cavern f loor are actually connected sections of the cave that have f looded with water. The shaded areas on the map show the submerged tunnels connecting the pools. Krakenweed: What looks like harmless sea kelp is, in fact, a much more dangerous species known as krakenweed. The sahuagin introduced it to these caves to help catch any intruders who escape their
patrols. The krakenweed does not attack the sahuagin thanks to an unguent they wear. The substance is pre-pared by the priest in area C2 from the f lesh of an eel that lives in beds of krakenweed.
Krakenweed Level 5 HazardTerrain XP 200 Detect Nature DC 22HP 15 per squareAC 16, Fortitude 15, Reflex 17, Will —Immune poison, psychic, forced movement, all conditions,
ongoing damage; Resist 5 force, 5 thunder; Vulnerable 5 fire
Triggered Actionsm Kraken’s Grasp (poison) F At-Will
Trigger: A creature enters a square within 2 squares of the krakenweed.
Attack (Opportunity Action): Melee 2 (the triggering crea-ture); +8 vs. Reflex
Hit: The target is grabbed (escape DC 15) and pulled 2 squares. Until the grab ends, the target takes ongoing 5 poison damage.
The sahuagin guards here are fond of using their tridents to herd intruders into range of the kraken-weed’s grasp. All guards in the sea caves can use the following attack power.
Standard ActionsM Herding strike (weapon) F At-Will
Attack: Melee 1 (one creature); +11 vs. ACHit: 7 damage, and the target is pushed 1 square.
Sahuagin hunting partyCombat Encounter Level 2 (500–675 XP)
The characters encounter a band of sahuagin out hunting for food. Monsters: 2 sahuagin raiders, 2 sahuagin guards. See Appendix A (page 61) for statistics.
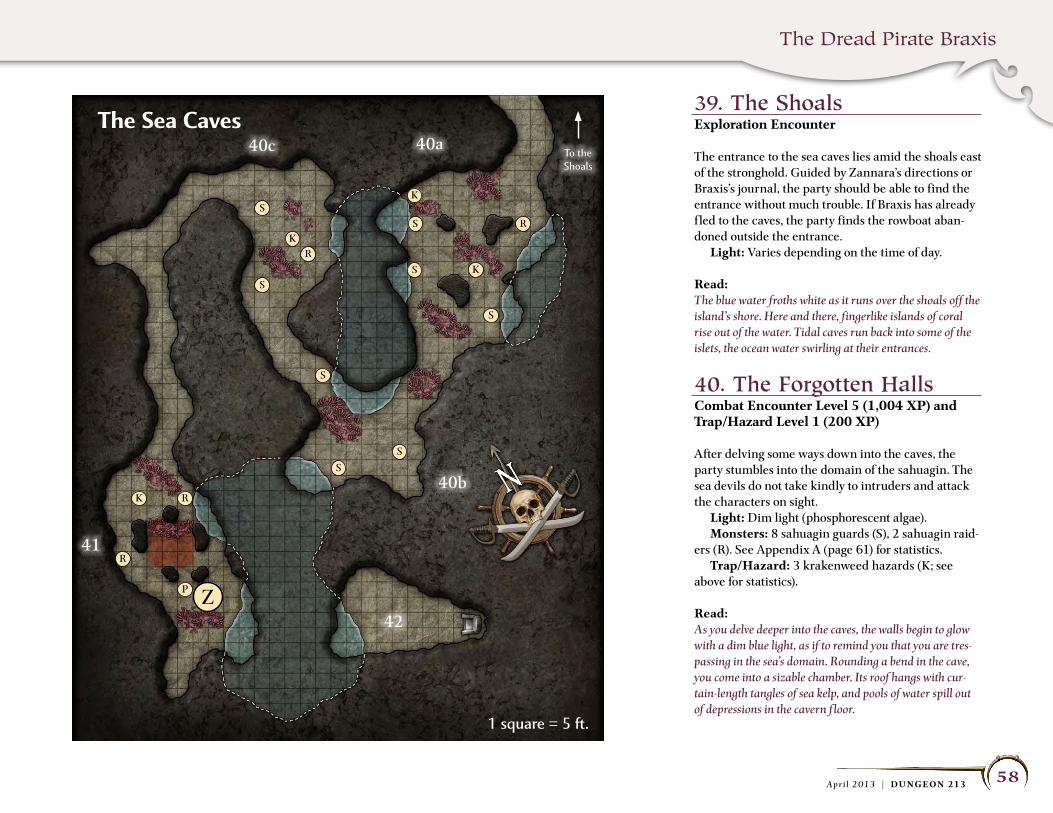
The Dread Pirate Braxis
58A p r i l 2 013 | DU NGEON 213
39. the ShoalsExploration Encounter
The entrance to the sea caves lies amid the shoals east of the stronghold. Guided by Zannara’s directions or Braxis’s journal, the party should be able to find the entrance without much trouble. If Braxis has already f led to the caves, the party finds the rowboat aban-doned outside the entrance. Light: Varies depending on the time of day.
Read:The blue water froths white as it runs over the shoals off the island’s shore. Here and there, fingerlike islands of coral rise out of the water. Tidal caves run back into some of the islets, the ocean water swirling at their entrances.
40. the Forgotten hallsCombat Encounter Level 5 (1,004 XP) and Trap/Hazard Level 1 (200 XP)
After delving some ways down into the caves, the party stumbles into the domain of the sahuagin. The sea devils do not take kindly to intruders and attack the characters on sight. Light: Dim light (phosphorescent algae). Monsters: 8 sahuagin guards (S), 2 sahuagin raid-ers (R). See Appendix A (page 61) for statistics. Trap/Hazard: 3 krakenweed hazards (K; see above for statistics).
Read:As you delve deeper into the caves, the walls begin to glow with a dim blue light, as if to remind you that you are tres-passing in the sea’s domain. Rounding a bend in the cave, you come into a sizable chamber. Its roof hangs with cur-tain-length tangles of sea kelp, and pools of water spill out of depressions in the cavern f loor.
40c
41
42
40b
40a
K
S
S
S
SS
S
S
S
K
K
K
P
R
R
R
R
Z
The sea CavesTo the Shoals
1 square = 5 ft.
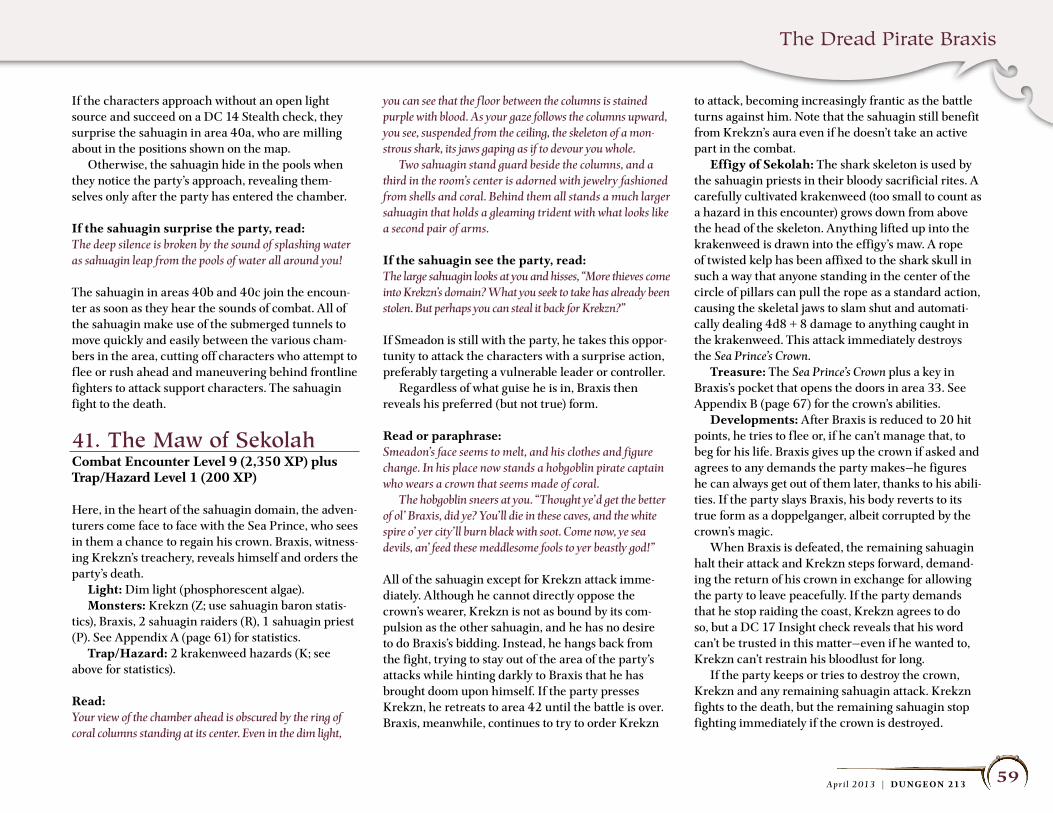
The Dread Pirate Braxis
59A p r i l 2 013 | DU NGEON 213
If the characters approach without an open light source and succeed on a DC 14 Stealth check, they surprise the sahuagin in area 40a, who are milling about in the positions shown on the map. Otherwise, the sahuagin hide in the pools when they notice the party’s approach, revealing them-selves only after the party has entered the chamber.
If the sahuagin surprise the party, read:The deep silence is broken by the sound of splashing water as sahuagin leap from the pools of water all around you!
The sahuagin in areas 40b and 40c join the encoun-ter as soon as they hear the sounds of combat. All of the sahuagin make use of the submerged tunnels to move quickly and easily between the various cham-bers in the area, cutting off characters who attempt to f lee or rush ahead and maneuvering behind frontline fighters to attack support characters. The sahuagin fight to the death.
41. the Maw of SekolahCombat Encounter Level 9 (2,350 XP) plus Trap/Hazard Level 1 (200 XP)
Here, in the heart of the sahuagin domain, the adven-turers come face to face with the Sea Prince, who sees in them a chance to regain his crown. Braxis, witness-ing Krekzn’s treachery, reveals himself and orders the party’s death. Light: Dim light (phosphorescent algae). Monsters: Krekzn (Z; use sahuagin baron statis-tics), Braxis, 2 sahuagin raiders (R), 1 sahuagin priest (P). See Appendix A (page 61) for statistics. Trap/Hazard: 2 krakenweed hazards (K; see above for statistics).
Read:Your view of the chamber ahead is obscured by the ring of coral columns standing at its center. Even in the dim light,
you can see that the f loor between the columns is stained purple with blood. As your gaze follows the columns upward, you see, suspended from the ceiling, the skeleton of a mon-strous shark, its jaws gaping as if to devour you whole. Two sahuagin stand guard beside the columns, and a third in the room’s center is adorned with jewelry fashioned from shells and coral. Behind them all stands a much larger sahuagin that holds a gleaming trident with what looks like a second pair of arms.
If the sahuagin see the party, read:The large sahuagin looks at you and hisses, “More thieves come into Krekzn’s domain? What you seek to take has already been stolen. But perhaps you can steal it back for Krekzn?”
If Smeadon is still with the party, he takes this oppor-tunity to attack the characters with a surprise action, preferably targeting a vulnerable leader or controller. Regardless of what guise he is in, Braxis then reveals his preferred (but not true) form.
Read or paraphrase:Smeadon’s face seems to melt, and his clothes and figure change. In his place now stands a hobgoblin pirate captain who wears a crown that seems made of coral. The hobgoblin sneers at you. “Thought ye’d get the better of ol’ Braxis, did ye? You’ll die in these caves, and the white spire o’ yer city’ll burn black with soot. Come now, ye sea devils, an’ feed these meddlesome fools to yer beastly god!”
All of the sahuagin except for Krekzn attack imme-diately. Although he cannot directly oppose the crown’s wearer, Krekzn is not as bound by its com-pulsion as the other sahuagin, and he has no desire to do Braxis’s bidding. Instead, he hangs back from the fight, trying to stay out of the area of the party’s attacks while hinting darkly to Braxis that he has brought doom upon himself. If the party presses Krekzn, he retreats to area 42 until the battle is over. Braxis, meanwhile, continues to try to order Krekzn
to attack, becoming increasingly frantic as the battle turns against him. Note that the sahuagin still benefit from Krekzn’s aura even if he doesn’t take an active part in the combat. Effigy of Sekolah: The shark skeleton is used by the sahuagin priests in their bloody sacrificial rites. A carefully cultivated krakenweed (too small to count as a hazard in this encounter) grows down from above the head of the skeleton. Anything lifted up into the krakenweed is drawn into the effigy’s maw. A rope of twisted kelp has been affixed to the shark skull in such a way that anyone standing in the center of the circle of pillars can pull the rope as a standard action, causing the skeletal jaws to slam shut and automati-cally dealing 4d8 + 8 damage to anything caught in the krakenweed. This attack immediately destroys the Sea Prince’s Crown. Treasure: The Sea Prince’s Crown plus a key in Braxis’s pocket that opens the doors in area 33. See Appendix B (page 67) for the crown’s abilities. Developments: After Braxis is reduced to 20 hit points, he tries to f lee or, if he can’t manage that, to beg for his life. Braxis gives up the crown if asked and agrees to any demands the party makes—he figures he can always get out of them later, thanks to his abili-ties. If the party slays Braxis, his body reverts to its true form as a doppelganger, albeit corrupted by the crown’s magic. When Braxis is defeated, the remaining sahuagin halt their attack and Krekzn steps forward, demand-ing the return of his crown in exchange for allowing the party to leave peacefully. If the party demands that he stop raiding the coast, Krekzn agrees to do so, but a DC 17 Insight check reveals that his word can’t be trusted in this matter—even if he wanted to, Krekzn can’t restrain his bloodlust for long. If the party keeps or tries to destroy the crown, Krekzn and any remaining sahuagin attack. Krekzn fights to the death, but the remaining sahuagin stop fighting immediately if the crown is destroyed.
The Dread Pirate Braxis
60A p r i l 2 013 | DU NGEON 213
If one of the characters puts on the crown, the sahuagin treat the characters as allies, and Krekzn is powerless to stop them from leaving.
42. the Sea prince’s throneExploration Encounter
This throne is the seat from which Krekzn rules his fallen kingdom. The chamber is littered with grisly trophies taken from his defeated foes along with the odd piece of tribute brought to him by his twisted subjects. Light: Dim light (phosphorescent algae).
Read:This chamber is small and damp, and the air here is stale. The weight of the entire ocean seems to press in around you. At the back of the chamber sits a large throne carved out of the coral, presiding over a great nothingness.
concluding the adventureIf the characters return the crown to Krekzn, he allows them to leave without incident, but the raids on the villages continue unabated and the party does not receive the XP award for Lord Odmund’s quest. (The characters can, however, still collect the bounty on Braxis’s head.) If the characters keep the crown, they can use its power to stop the sahuagin from attacking the vil-lages, completing Odmund’s quest. The party then has the evil magic of the crown itself to deal with, however, and if Krekzn is still alive, he will surely plot a way to get it back. If the party destroys the crown, its curse is broken and all the sahuagin (except Krekzn) are restored to their original forms as tritons. Eternally grateful to the adventurers, the tritons see them safely back to
Whitspire before seeking a new home for themselves far out to sea. With Braxis defeated, Whitspire is safe. The port reopens, and the characters are the toast of the town. As for Slygo, if the party gives him the other map frag-ment, he eagerly begins deciphering the clues that appear when the two halves are united. There’s plenty more treasure to be found on the Silverwrack Coast, and Slygo will surely need help acquiring it . . . if the characters are up for another adventure, that is!
About the AuthorJeffrey Ludwig lives, works, and games in the fog-enshrouded port city of San Francisco. He wishes luck and courage to the brave souls who venture into the Sea Prince’s domain, particularly if their DM has read his previous contri-bution to D&D Insider, “Less Death, More Danger!”
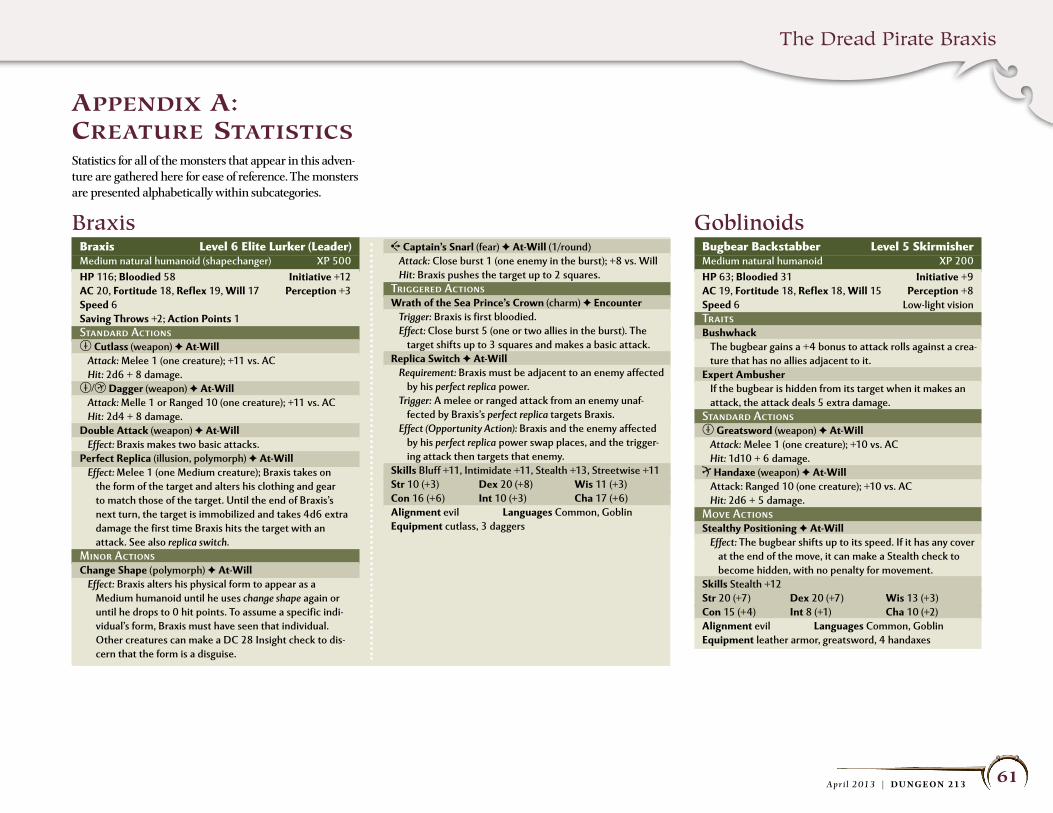
The Dread Pirate Braxis
61A p r i l 2 013 | DU NGEON 213
appendix a: creature StatiSticSStatistics for all of the monsters that appear in this adven-ture are gathered here for ease of reference. The monsters are presented alphabetically within subcategories.
GoblinoidsBugbear Backstabber Level 5 SkirmisherMedium natural humanoid XP 200HP 63; Bloodied 31 Initiative +9AC 19, Fortitude 18, Reflex 18, Will 15 Perception +8speed 6 Low-light visionTraitsBushwhack
The bugbear gains a +4 bonus to attack rolls against a crea-ture that has no allies adjacent to it.
expert AmbusherIf the bugbear is hidden from its target when it makes an attack, the attack deals 5 extra damage.
Standard Actionsm Greatsword (weapon) F At-Will
Attack: Melee 1 (one creature); +10 vs. ACHit: 1d10 + 6 damage.
R Handaxe (weapon) F At-WillAttack: Ranged 10 (one creature); +10 vs. ACHit: 2d6 + 5 damage.
Move Actionsstealthy Positioning F At-Will
Effect: The bugbear shifts up to its speed. If it has any cover at the end of the move, it can make a Stealth check to become hidden, with no penalty for movement.
skills Stealth +12str 20 (+7) Dex 20 (+7) Wis 13 (+3)Con 15 (+4) Int 8 (+1) Cha 10 (+2)Alignment evil Languages Common, Goblinequipment leather armor, greatsword, 4 handaxes
BraxisBraxis Level 6 Elite Lurker (Leader) Medium natural humanoid (shapechanger) XP 500HP 116; Bloodied 58 Initiative +12AC 20, Fortitude 18, Reflex 19, Will 17 Perception +3speed 6saving Throws +2; Action Points 1Standard Actionsm Cutlass (weapon) F At-Will
Attack: Melee 1 (one creature); +11 vs. ACHit: 2d6 + 8 damage.
m/r Dagger (weapon) F At-WillAttack: Melle 1 or Ranged 10 (one creature); +11 vs. ACHit: 2d4 + 8 damage.
Double Attack (weapon) F At-WillEffect: Braxis makes two basic attacks.
Perfect Replica (illusion, polymorph) F At-WillEffect: Melee 1 (one Medium creature); Braxis takes on
the form of the target and alters his clothing and gear to match those of the target. Until the end of Braxis’s next turn, the target is immobilized and takes 4d6 extra damage the first time Braxis hits the target with an attack. See also replica switch.
Minor ActionsChange shape (polymorph) F At-Will
Effect: Braxis alters his physical form to appear as a Medium humanoid until he uses change shape again or until he drops to 0 hit points. To assume a specific indi-vidual’s form, Braxis must have seen that individual. Other creatures can make a DC 28 Insight check to dis-cern that the form is a disguise.
C Captain’s snarl (fear) F At-Will (1/round)Attack: Close burst 1 (one enemy in the burst); +8 vs. WillHit: Braxis pushes the target up to 2 squares.
Triggered ActionsWrath of the sea Prince’s Crown (charm) F encounter
Trigger: Braxis is first bloodied.Effect: Close burst 5 (one or two allies in the burst). The
target shifts up to 3 squares and makes a basic attack.Replica switch F At-Will
Requirement: Braxis must be adjacent to an enemy affected by his perfect replica power.
Trigger: A melee or ranged attack from an enemy unaf-fected by Braxis’s perfect replica targets Braxis.
Effect (Opportunity Action): Braxis and the enemy affected by his perfect replica power swap places, and the trigger-ing attack then targets that enemy.
skills Bluff +11, Intimidate +11, Stealth +13, Streetwise +11str 10 (+3) Dex 20 (+8) Wis 11 (+3)Con 16 (+6) Int 10 (+3) Cha 17 (+6)Alignment evil Languages Common, Goblinequipment cutlass, 3 daggers
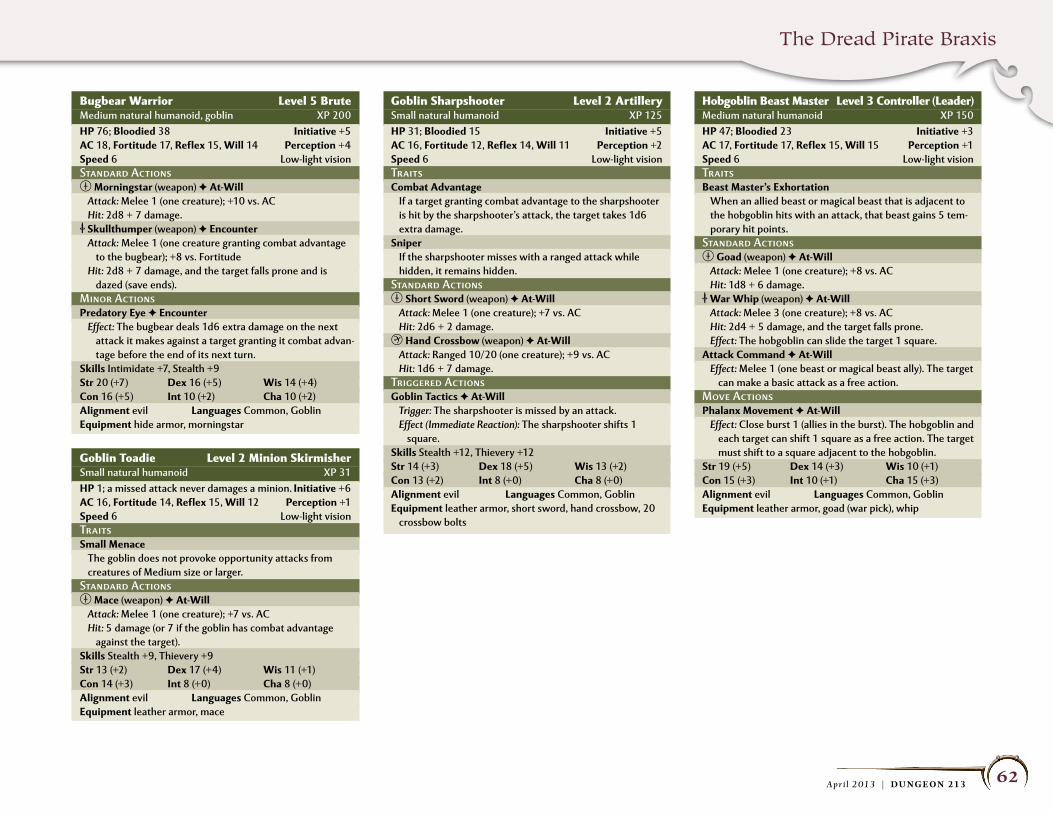
The Dread Pirate Braxis
62A p r i l 2 013 | DU NGEON 213
Bugbear Warrior Level 5 BruteMedium natural humanoid, goblin XP 200HP 76; Bloodied 38 Initiative +5AC 18, Fortitude 17, Reflex 15, Will 14 Perception +4speed 6 Low-light visionStandard Actionsm Morningstar (weapon) F At-Will
Attack: Melee 1 (one creature); +10 vs. ACHit: 2d8 + 7 damage.
M skullthumper (weapon) F encounterAttack: Melee 1 (one creature granting combat advantage
to the bugbear); +8 vs. FortitudeHit: 2d8 + 7 damage, and the target falls prone and is
dazed (save ends).Minor ActionsPredatory eye F encounter
Effect: The bugbear deals 1d6 extra damage on the next attack it makes against a target granting it combat advan-tage before the end of its next turn.
skills Intimidate +7, Stealth +9str 20 (+7) Dex 16 (+5) Wis 14 (+4)Con 16 (+5) Int 10 (+2) Cha 10 (+2)Alignment evil Languages Common, Goblinequipment hide armor, morningstar
Goblin Toadie Level 2 Minion SkirmisherSmall natural humanoid XP 31HP 1; a missed attack never damages a minion. Initiative +6AC 16, Fortitude 14, Reflex 15, Will 12 Perception +1speed 6 Low-light visionTraitssmall Menace
The goblin does not provoke opportunity attacks from creatures of Medium size or larger.
Standard Actionsm Mace (weapon) F At-Will
Attack: Melee 1 (one creature); +7 vs. ACHit: 5 damage (or 7 if the goblin has combat advantage
against the target).skills Stealth +9, Thievery +9str 13 (+2) Dex 17 (+4) Wis 11 (+1)Con 14 (+3) Int 8 (+0) Cha 8 (+0)Alignment evil Languages Common, Goblinequipment leather armor, mace
Goblin Sharpshooter Level 2 ArtillerySmall natural humanoid XP 125HP 31; Bloodied 15 Initiative +5AC 16, Fortitude 12, Reflex 14, Will 11 Perception +2speed 6 Low-light visionTraitsCombat Advantage
If a target granting combat advantage to the sharpshooter is hit by the sharpshooter’s attack, the target takes 1d6 extra damage.
sniperIf the sharpshooter misses with a ranged attack while hidden, it remains hidden.
Standard Actionsm short sword (weapon) F At-Will
Attack: Melee 1 (one creature); +7 vs. ACHit: 2d6 + 2 damage.
r Hand Crossbow (weapon) F At-WillAttack: Ranged 10/20 (one creature); +9 vs. ACHit: 1d6 + 7 damage.
Triggered ActionsGoblin Tactics F At-Will
Trigger: The sharpshooter is missed by an attack.Effect (Immediate Reaction): The sharpshooter shifts 1
square.skills Stealth +12, Thievery +12str 14 (+3) Dex 18 (+5) Wis 13 (+2)Con 13 (+2) Int 8 (+0) Cha 8 (+0)Alignment evil Languages Common, Goblinequipment leather armor, short sword, hand crossbow, 20
crossbow bolts
Hobgoblin Beast Master Level 3 Controller (Leader)Medium natural humanoid XP 150HP 47; Bloodied 23 Initiative +3AC 17, Fortitude 17, Reflex 15, Will 15 Perception +1speed 6 Low-light visionTraitsBeast Master’s exhortation
When an allied beast or magical beast that is adjacent to the hobgoblin hits with an attack, that beast gains 5 tem-porary hit points.
Standard Actionsm Goad (weapon) F At-Will
Attack: Melee 1 (one creature); +8 vs. ACHit: 1d8 + 6 damage.
M War Whip (weapon) F At-WillAttack: Melee 3 (one creature); +8 vs. ACHit: 2d4 + 5 damage, and the target falls prone.Effect: The hobgoblin can slide the target 1 square.
Attack Command F At-WillEffect: Melee 1 (one beast or magical beast ally). The target
can make a basic attack as a free action.Move ActionsPhalanx Movement F At-Will
Effect: Close burst 1 (allies in the burst). The hobgoblin and each target can shift 1 square as a free action. The target must shift to a square adjacent to the hobgoblin.
str 19 (+5) Dex 14 (+3) Wis 10 (+1)Con 15 (+3) Int 10 (+1) Cha 15 (+3)Alignment evil Languages Common, Goblinequipment leather armor, goad (war pick), whip
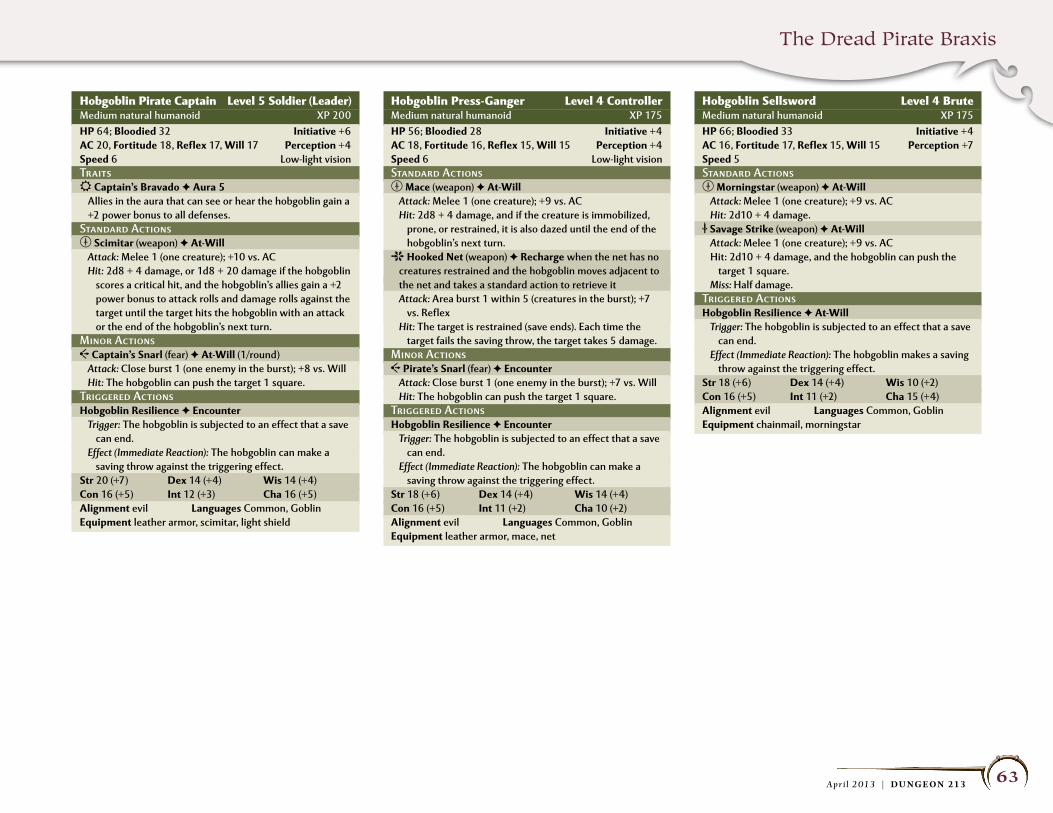
The Dread Pirate Braxis
63A p r i l 2 013 | DU NGEON 213
Hobgoblin Pirate Captain Level 5 Soldier (Leader)Medium natural humanoid XP 200HP 64; Bloodied 32 Initiative +6AC 20, Fortitude 18, Reflex 17, Will 17 Perception +4speed 6 Low-light visionTraitsO Captain’s Bravado F Aura 5
Allies in the aura that can see or hear the hobgoblin gain a +2 power bonus to all defenses.
Standard Actionsm scimitar (weapon) F At-Will
Attack: Melee 1 (one creature); +10 vs. ACHit: 2d8 + 4 damage, or 1d8 + 20 damage if the hobgoblin
scores a critical hit, and the hobgoblin’s allies gain a +2 power bonus to attack rolls and damage rolls against the target until the target hits the hobgoblin with an attack or the end of the hobgoblin’s next turn.
Minor ActionsC Captain’s snarl (fear) F At-Will (1/round)
Attack: Close burst 1 (one enemy in the burst); +8 vs. WillHit: The hobgoblin can push the target 1 square.
Triggered ActionsHobgoblin Resilience F encounter
Trigger: The hobgoblin is subjected to an effect that a save can end.
Effect (Immediate Reaction): The hobgoblin can make a saving throw against the triggering effect.
str 20 (+7) Dex 14 (+4) Wis 14 (+4)Con 16 (+5) Int 12 (+3) Cha 16 (+5)Alignment evil Languages Common, Goblinequipment leather armor, scimitar, light shield
Hobgoblin Press-Ganger Level 4 ControllerMedium natural humanoid XP 175HP 56; Bloodied 28 Initiative +4AC 18, Fortitude 16, Reflex 15, Will 15 Perception +4speed 6 Low-light visionStandard Actionsm Mace (weapon) F At-Will
Attack: Melee 1 (one creature); +9 vs. ACHit: 2d8 + 4 damage, and if the creature is immobilized,
prone, or restrained, it is also dazed until the end of the hobgoblin’s next turn.
A Hooked Net (weapon) F Recharge when the net has no creatures restrained and the hobgoblin moves adjacent to
the net and takes a standard action to retrieve itAttack: Area burst 1 within 5 (creatures in the burst); +7
vs. ReflexHit: The target is restrained (save ends). Each time the
target fails the saving throw, the target takes 5 damage.Minor ActionsC Pirate’s snarl (fear) F encounter
Attack: Close burst 1 (one enemy in the burst); +7 vs. WillHit: The hobgoblin can push the target 1 square.
Triggered ActionsHobgoblin Resilience F encounter
Trigger: The hobgoblin is subjected to an effect that a save can end.
Effect (Immediate Reaction): The hobgoblin can make a saving throw against the triggering effect.
str 18 (+6) Dex 14 (+4) Wis 14 (+4)Con 16 (+5) Int 11 (+2) Cha 10 (+2)Alignment evil Languages Common, Goblinequipment leather armor, mace, net
Hobgoblin Sell sword Level 4 BruteMedium natural humanoid XP 175HP 66; Bloodied 33 Initiative +4AC 16, Fortitude 17, Reflex 15, Will 15 Perception +7speed 5Standard Actionsm Morningstar (weapon) F At-Will
Attack: Melee 1 (one creature); +9 vs. ACHit: 2d10 + 4 damage.
M savage strike (weapon) F At-WillAttack: Melee 1 (one creature); +9 vs. ACHit: 2d10 + 4 damage, and the hobgoblin can push the
target 1 square.Miss: Half damage.
Triggered ActionsHobgoblin Resilience F At-Will
Trigger: The hobgoblin is subjected to an effect that a save can end.
Effect (Immediate Reaction): The hobgoblin makes a saving throw against the triggering effect.
str 18 (+6) Dex 14 (+4) Wis 10 (+2)Con 16 (+5) Int 11 (+2) Cha 15 (+4)Alignment evil Languages Common, Goblinequipment chainmail, morningstar
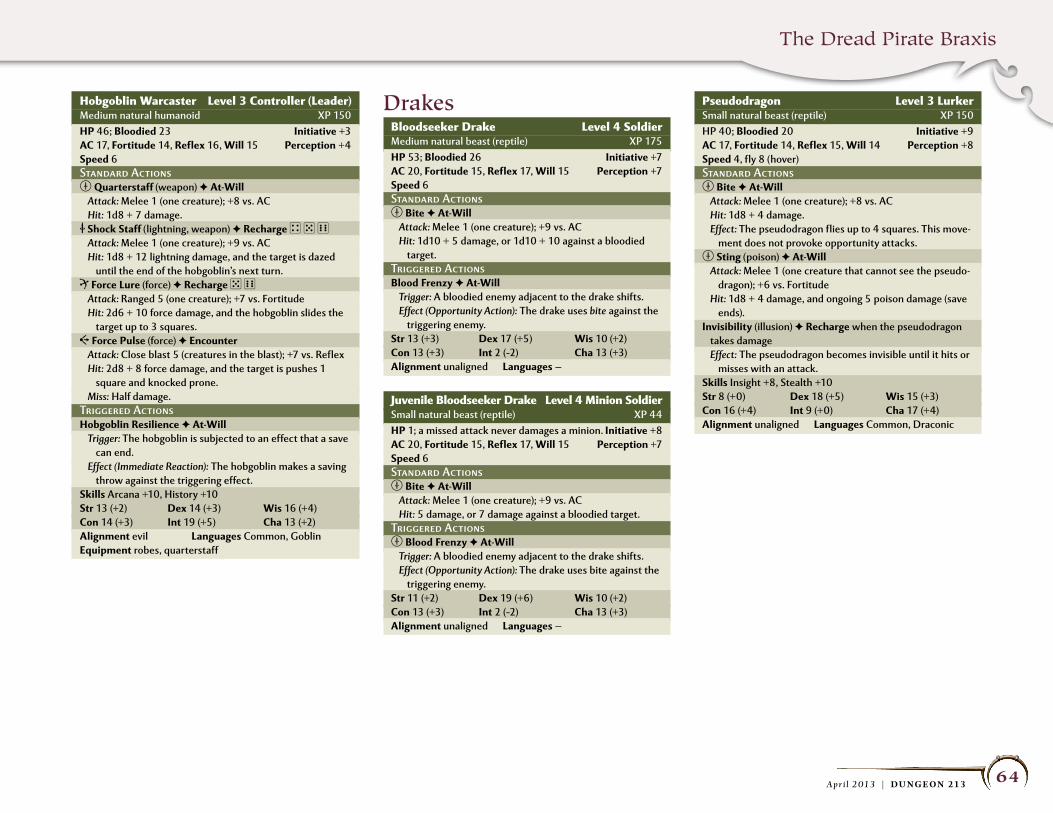
The Dread Pirate Braxis
64A p r i l 2 013 | DU NGEON 213
Hobgoblin Warcaster Level 3 Controller (Leader)Medium natural humanoid XP 150HP 46; Bloodied 23 Initiative +3AC 17, Fortitude 14, Reflex 16, Will 15 Perception +4speed 6Standard Actionsm Quarterstaff (weapon) F At-Will
Attack: Melee 1 (one creature); +8 vs. ACHit: 1d8 + 7 damage.
M shock staff (lightning, weapon) F Recharge 4 5 6Attack: Melee 1 (one creature); +9 vs. ACHit: 1d8 + 12 lightning damage, and the target is dazed
until the end of the hobgoblin’s next turn.R Force Lure (force) F Recharge 5 6
Attack: Ranged 5 (one creature); +7 vs. FortitudeHit: 2d6 + 10 force damage, and the hobgoblin slides the
target up to 3 squares.C Force Pulse (force) F encounter
Attack: Close blast 5 (creatures in the blast); +7 vs. ReflexHit: 2d8 + 8 force damage, and the target is pushes 1
square and knocked prone.Miss: Half damage.
Triggered ActionsHobgoblin Resilience F At-Will
Trigger: The hobgoblin is subjected to an effect that a save can end.
Effect (Immediate Reaction): The hobgoblin makes a saving throw against the triggering effect.
skills Arcana +10, History +10str 13 (+2) Dex 14 (+3) Wis 16 (+4)Con 14 (+3) Int 19 (+5) Cha 13 (+2)Alignment evil Languages Common, Goblinequipment robes, quarterstaff
DrakesBloodseeker Drake Level 4 SoldierMedium natural beast (reptile) XP 175HP 53; Bloodied 26 Initiative +7AC 20, Fortitude 15, Reflex 17, Will 15 Perception +7speed 6Standard Actionsm Bite F At-Will
Attack: Melee 1 (one creature); +9 vs. ACHit: 1d10 + 5 damage, or 1d10 + 10 against a bloodied
target.Triggered ActionsBlood Frenzy F At-Will
Trigger: A bloodied enemy adjacent to the drake shifts.Effect (Opportunity Action): The drake uses bite against the
triggering enemy.str 13 (+3) Dex 17 (+5) Wis 10 (+2)Con 13 (+3) Int 2 (–2) Cha 13 (+3)Alignment unaligned Languages —
Juvenile Bloodseeker Drake Level 4 Minion SoldierSmall natural beast (reptile) XP 44HP 1; a missed attack never damages a minion. Initiative +8AC 20, Fortitude 15, Reflex 17, Will 15 Perception +7speed 6 Standard Actionsm Bite F At-Will
Attack: Melee 1 (one creature); +9 vs. ACHit: 5 damage, or 7 damage against a bloodied target.
Triggered Actionsm Blood Frenzy F At-Will
Trigger: A bloodied enemy adjacent to the drake shifts.Effect (Opportunity Action): The drake uses bite against the
triggering enemy.str 11 (+2) Dex 19 (+6) Wis 10 (+2)Con 13 (+3) Int 2 (–2) Cha 13 (+3)Alignment unaligned Languages —
Pseudodragon Level 3 LurkerSmall natural beast (reptile) XP 150HP 40; Bloodied 20 Initiative +9AC 17, Fortitude 14, Reflex 15, Will 14 Perception +8speed 4, fly 8 (hover)Standard Actionsm Bite F At-Will
Attack: Melee 1 (one creature); +8 vs. ACHit: 1d8 + 4 damage.Effect: The pseudodragon flies up to 4 squares. This move-
ment does not provoke opportunity attacks.m sting (poison) F At-Will
Attack: Melee 1 (one creature that cannot see the pseudo-dragon); +6 vs. Fortitude
Hit: 1d8 + 4 damage, and ongoing 5 poison damage (save ends).
Invisibility (illusion) F Recharge when the pseudodragon takes damageEffect: The pseudodragon becomes invisible until it hits or
misses with an attack.skills Insight +8, Stealth +10str 8 (+0) Dex 18 (+5) Wis 15 (+3)Con 16 (+4) Int 9 (+0) Cha 17 (+4)Alignment unaligned Languages Common, Draconic
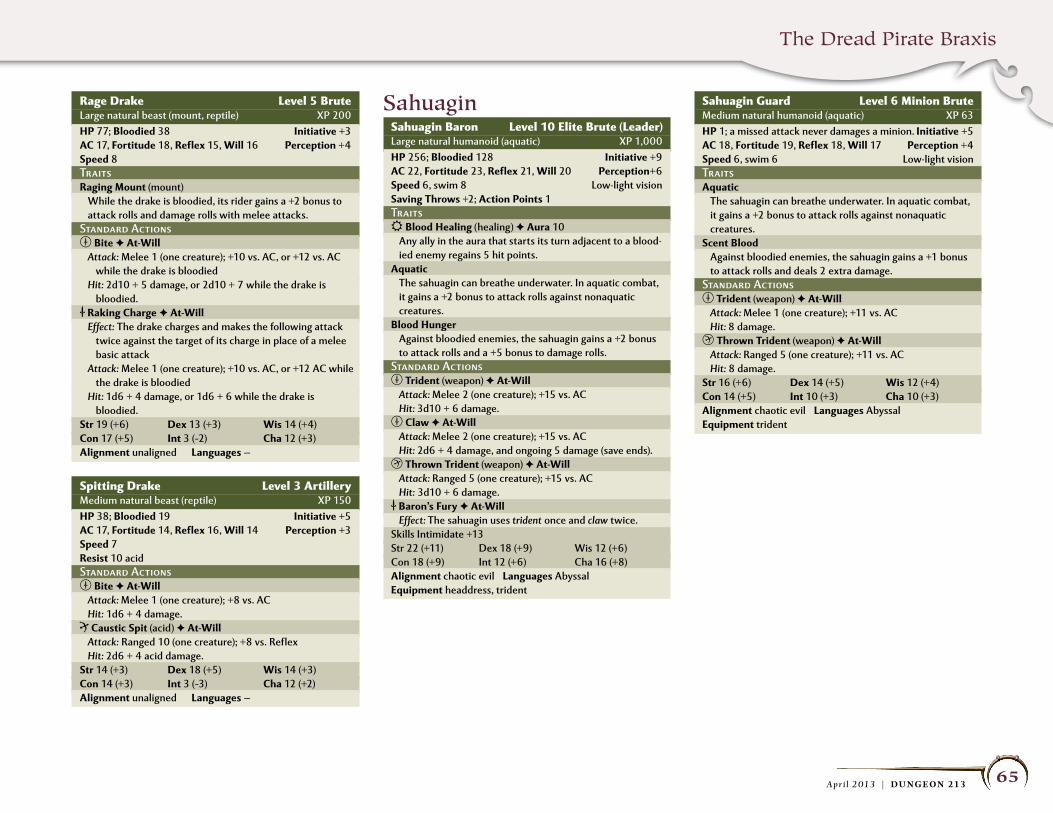
The Dread Pirate Braxis
65A p r i l 2 013 | DU NGEON 213
Rage Drake Level 5 BruteLarge natural beast (mount, reptile) XP 200HP 77; Bloodied 38 Initiative +3AC 17, Fortitude 18, Reflex 15, Will 16 Perception +4speed 8TraitsRaging Mount (mount)
While the drake is bloodied, its rider gains a +2 bonus to attack rolls and damage rolls with melee attacks.
Standard Actionsm Bite F At-Will
Attack: Melee 1 (one creature); +10 vs. AC, or +12 vs. AC while the drake is bloodied
Hit: 2d10 + 5 damage, or 2d10 + 7 while the drake is bloodied.
M Raking Charge F At-WillEffect: The drake charges and makes the following attack
twice against the target of its charge in place of a melee basic attack
Attack: Melee 1 (one creature); +10 vs. AC, or +12 AC while the drake is bloodied
Hit: 1d6 + 4 damage, or 1d6 + 6 while the drake is bloodied.
str 19 (+6) Dex 13 (+3) Wis 14 (+4)Con 17 (+5) Int 3 (–2) Cha 12 (+3)Alignment unaligned Languages —
Spitting Drake Level 3 ArtilleryMedium natural beast (reptile) XP 150HP 38; Bloodied 19 Initiative +5AC 17, Fortitude 14, Reflex 16, Will 14 Perception +3speed 7Resist 10 acidStandard Actionsm Bite F At-Will
Attack: Melee 1 (one creature); +8 vs. ACHit: 1d6 + 4 damage.
R Caustic spit (acid) F At-WillAttack: Ranged 10 (one creature); +8 vs. ReflexHit: 2d6 + 4 acid damage.
str 14 (+3) Dex 18 (+5) Wis 14 (+3)Con 14 (+3) Int 3 (–3) Cha 12 (+2)Alignment unaligned Languages —
SahuaginSahuagin Baron Level 10 Elite Brute (Leader)Large natural humanoid (aquatic) XP 1,000HP 256; Bloodied 128 Initiative +9AC 22, Fortitude 23, Reflex 21, Will 20 Perception+6speed 6, swim 8 Low-light visionsaving Throws +2; Action Points 1TraitsO Blood Healing (healing) F Aura 10
Any ally in the aura that starts its turn adjacent to a blood-ied enemy regains 5 hit points.
AquaticThe sahuagin can breathe underwater. In aquatic combat, it gains a +2 bonus to attack rolls against nonaquatic creatures.
Blood HungerAgainst bloodied enemies, the sahuagin gains a +2 bonus to attack rolls and a +5 bonus to damage rolls.
Standard Actionsm Trident (weapon) F At-Will
Attack: Melee 2 (one creature); +15 vs. ACHit: 3d10 + 6 damage.
m Claw F At-WillAttack: Melee 2 (one creature); +15 vs. ACHit: 2d6 + 4 damage, and ongoing 5 damage (save ends).
r Thrown Trident (weapon) F At-WillAttack: Ranged 5 (one creature); +15 vs. ACHit: 3d10 + 6 damage.
M Baron’s Fury F At-WillEffect: The sahuagin uses trident once and claw twice.
Skills Intimidate +13Str 22 (+11) Dex 18 (+9) Wis 12 (+6)Con 18 (+9) Int 12 (+6) Cha 16 (+8)Alignment chaotic evil Languages Abyssalequipment headdress, trident
Sahuagin Guard Level 6 Minion BruteMedium natural humanoid (aquatic) XP 63HP 1; a missed attack never damages a minion. Initiative +5AC 18, Fortitude 19, Reflex 18, Will 17 Perception +4speed 6, swim 6 Low-light visionTraitsAquatic
The sahuagin can breathe underwater. In aquatic combat, it gains a +2 bonus to attack rolls against nonaquatic creatures.
scent BloodAgainst bloodied enemies, the sahuagin gains a +1 bonus to attack rolls and deals 2 extra damage.
Standard Actionsm Trident (weapon) F At-Will
Attack: Melee 1 (one creature); +11 vs. ACHit: 8 damage.
r Thrown Trident (weapon) F At-WillAttack: Ranged 5 (one creature); +11 vs. ACHit: 8 damage.
str 16 (+6) Dex 14 (+5) Wis 12 (+4)Con 14 (+5) Int 10 (+3) Cha 10 (+3)Alignment chaotic evil Languages Abyssalequipment trident
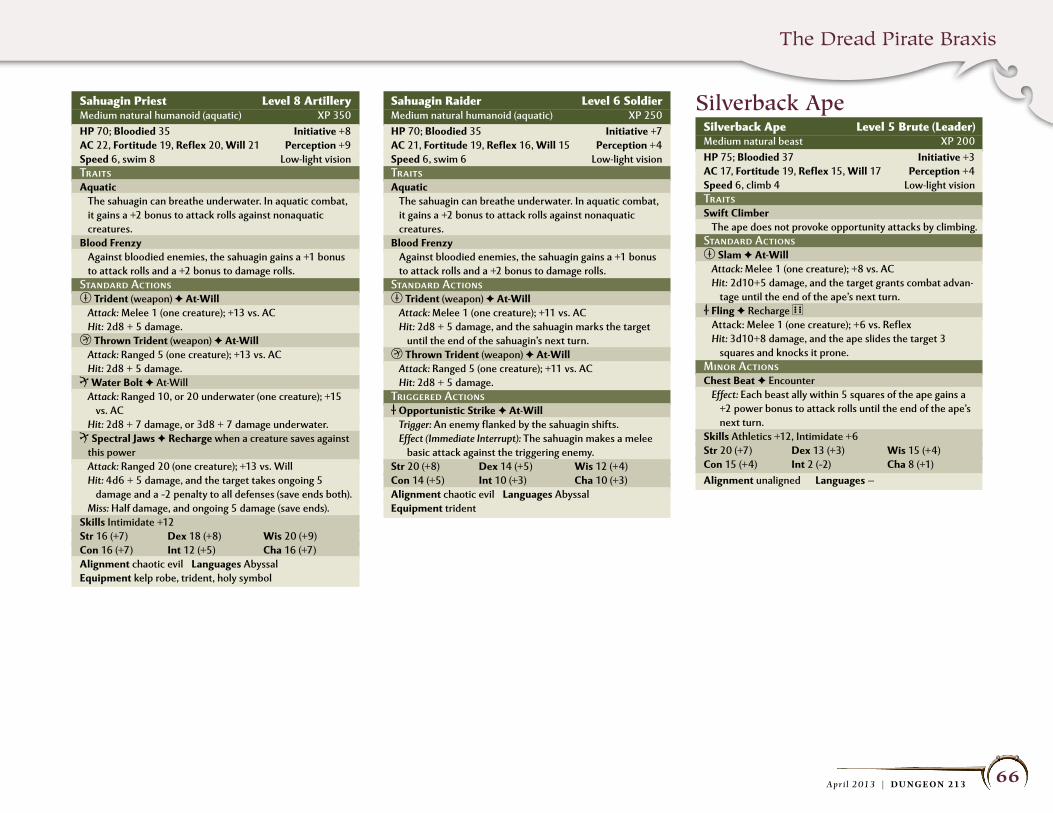
The Dread Pirate Braxis
66A p r i l 2 013 | DU NGEON 213
Sahuagin Priest Level 8 ArtilleryMedium natural humanoid (aquatic) XP 350HP 70; Bloodied 35 Initiative +8AC 22, Fortitude 19, Reflex 20, Will 21 Perception +9speed 6, swim 8 Low-light visionTraitsAquatic
The sahuagin can breathe underwater. In aquatic combat, it gains a +2 bonus to attack rolls against nonaquatic creatures.
Blood FrenzyAgainst bloodied enemies, the sahuagin gains a +1 bonus to attack rolls and a +2 bonus to damage rolls.
Standard Actionsm Trident (weapon) F At-Will
Attack: Melee 1 (one creature); +13 vs. ACHit: 2d8 + 5 damage.
r Thrown Trident (weapon) F At-WillAttack: Ranged 5 (one creature); +13 vs. ACHit: 2d8 + 5 damage.
R Water Bolt F At-WillAttack: Ranged 10, or 20 underwater (one creature); +15
vs. ACHit: 2d8 + 7 damage, or 3d8 + 7 damage underwater.
R spectral Jaws F Recharge when a creature saves against this powerAttack: Ranged 20 (one creature); +13 vs. WillHit: 4d6 + 5 damage, and the target takes ongoing 5
damage and a –2 penalty to all defenses (save ends both).Miss: Half damage, and ongoing 5 damage (save ends).
skills Intimidate +12str 16 (+7) Dex 18 (+8) Wis 20 (+9)Con 16 (+7) Int 12 (+5) Cha 16 (+7)Alignment chaotic evil Languages Abyssalequipment kelp robe, trident, holy symbol
Silverback ApeSilverback Ape Level 5 Brute (Leader)Medium natural beast XP 200HP 75; Bloodied 37 Initiative +3AC 17, Fortitude 19, Reflex 15, Will 17 Perception +4speed 6, climb 4 Low-light visionTraitsswift Climber
The ape does not provoke opportunity attacks by climbing.Standard Actionsm slam F At-Will
Attack: Melee 1 (one creature); +8 vs. ACHit: 2d10+5 damage, and the target grants combat advan-
tage until the end of the ape’s next turn.M Fling F Recharge 6
Attack: Melee 1 (one creature); +6 vs. ReflexHit: 3d10+8 damage, and the ape slides the target 3
squares and knocks it prone.Minor ActionsChest Beat F Encounter
Effect: Each beast ally within 5 squares of the ape gains a +2 power bonus to attack rolls until the end of the ape’s next turn.
skills Athletics +12, Intimidate +6str 20 (+7) Dex 13 (+3) Wis 15 (+4)Con 15 (+4) Int 2 (–2) Cha 8 (+1)Alignment unaligned Languages —
Sahuagin Raider Level 6 SoldierMedium natural humanoid (aquatic) XP 250HP 70; Bloodied 35 Initiative +7AC 21, Fortitude 19, Reflex 16, Will 15 Perception +4speed 6, swim 6 Low-light visionTraitsAquatic
The sahuagin can breathe underwater. In aquatic combat, it gains a +2 bonus to attack rolls against nonaquatic creatures.
Blood FrenzyAgainst bloodied enemies, the sahuagin gains a +1 bonus to attack rolls and a +2 bonus to damage rolls.
Standard Actionsm Trident (weapon) F At-Will
Attack: Melee 1 (one creature); +11 vs. ACHit: 2d8 + 5 damage, and the sahuagin marks the target
until the end of the sahuagin’s next turn.r Thrown Trident (weapon) F At-Will
Attack: Ranged 5 (one creature); +11 vs. ACHit: 2d8 + 5 damage.
Triggered ActionsM Opportunistic strike F At-Will
Trigger: An enemy flanked by the sahuagin shifts.Effect (Immediate Interrupt): The sahuagin makes a melee
basic attack against the triggering enemy.str 20 (+8) Dex 14 (+5) Wis 12 (+4)Con 14 (+5) Int 10 (+3) Cha 10 (+3)Alignment chaotic evil Languages Abyssalequipment trident
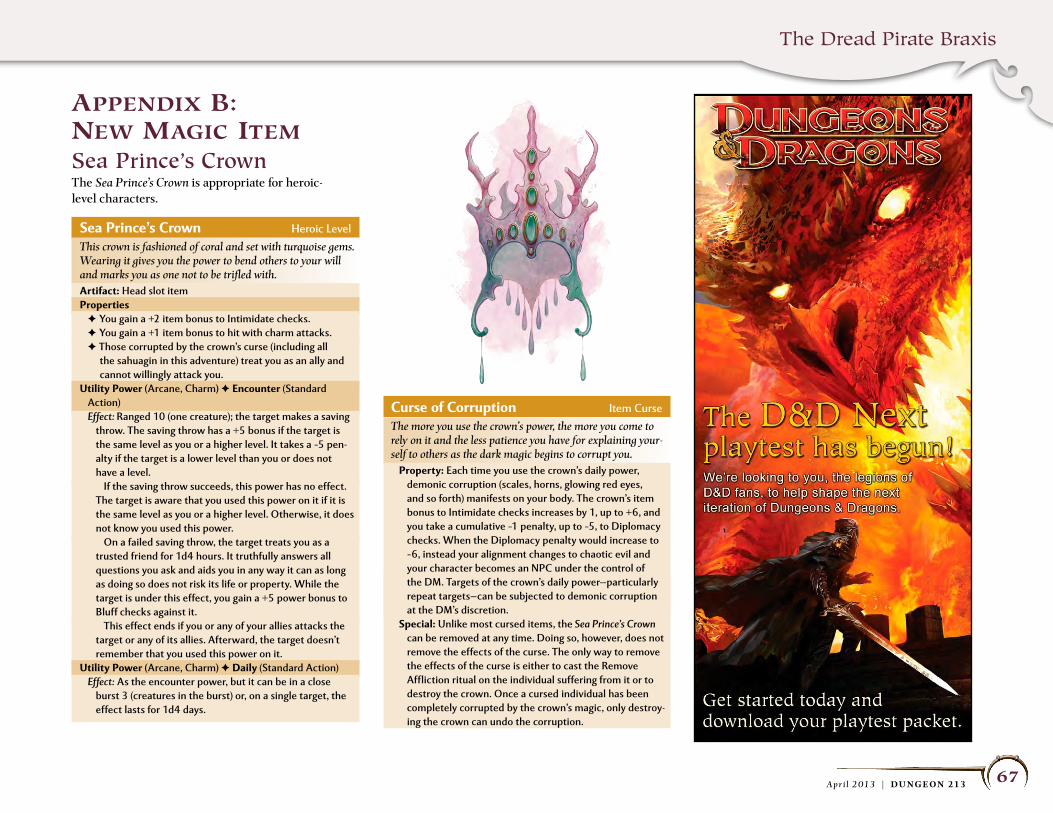
The Dread Pirate Braxis
67A p r i l 2 013 | DU NGEON 213
appendix B: new magic item
Sea prince’s CrownThe Sea Prince’s Crown is appropriate for heroic- level characters.
sea Prince’s Crown Heroic LevelThis crown is fashioned of coral and set with turquoise gems. Wearing it gives you the power to bend others to your will and marks you as one not to be trifled with.Artifact: Head slot itemProperties
F You gain a +2 item bonus to Intimidate checks.F You gain a +1 item bonus to hit with charm attacks.F Those corrupted by the crown’s curse (including all
the sahuagin in this adventure) treat you as an ally and cannot willingly attack you.
utility Power (Arcane, Charm) F encounter (Standard Action)Effect: Ranged 10 (one creature); the target makes a saving
throw. The saving throw has a +5 bonus if the target is the same level as you or a higher level. It takes a –5 pen-alty if the target is a lower level than you or does not have a level.
If the saving throw succeeds, this power has no effect. The target is aware that you used this power on it if it is the same level as you or a higher level. Otherwise, it does not know you used this power.
On a failed saving throw, the target treats you as a trusted friend for 1d4 hours. It truthfully answers all questions you ask and aids you in any way it can as long as doing so does not risk its life or property. While the target is under this effect, you gain a +5 power bonus to Bluff checks against it.
This effect ends if you or any of your allies attacks the target or any of its allies. Afterward, the target doesn’t remember that you used this power on it.
utility Power (Arcane, Charm) F Daily (Standard Action)Effect: As the encounter power, but it can be in a close
burst 3 (creatures in the burst) or, on a single target, the effect lasts for 1d4 days.
Curse of Corruption Item CurseThe more you use the crown’s power, the more you come to rely on it and the less patience you have for explaining your-self to others as the dark magic begins to corrupt you.
Property: Each time you use the crown’s daily power, demonic corruption (scales, horns, glowing red eyes, and so forth) manifests on your body. The crown’s item bonus to Intimidate checks increases by 1, up to +6, and you take a cumulative –1 penalty, up to –5, to Diplomacy checks. When the Diplomacy penalty would increase to –6, instead your alignment changes to chaotic evil and your character becomes an NPC under the control of the DM. Targets of the crown’s daily power—particularly repeat targets—can be subjected to demonic corruption at the DM’s discretion.
special: Unlike most cursed items, the Sea Prince’s Crown can be removed at any time. Doing so, however, does not remove the effects of the curse. The only way to remove the effects of the curse is either to cast the Remove Affliction ritual on the individual suffering from it or to destroy the crown. Once a cursed individual has been completely corrupted by the crown’s magic, only destroy-ing the crown can undo the corruption.
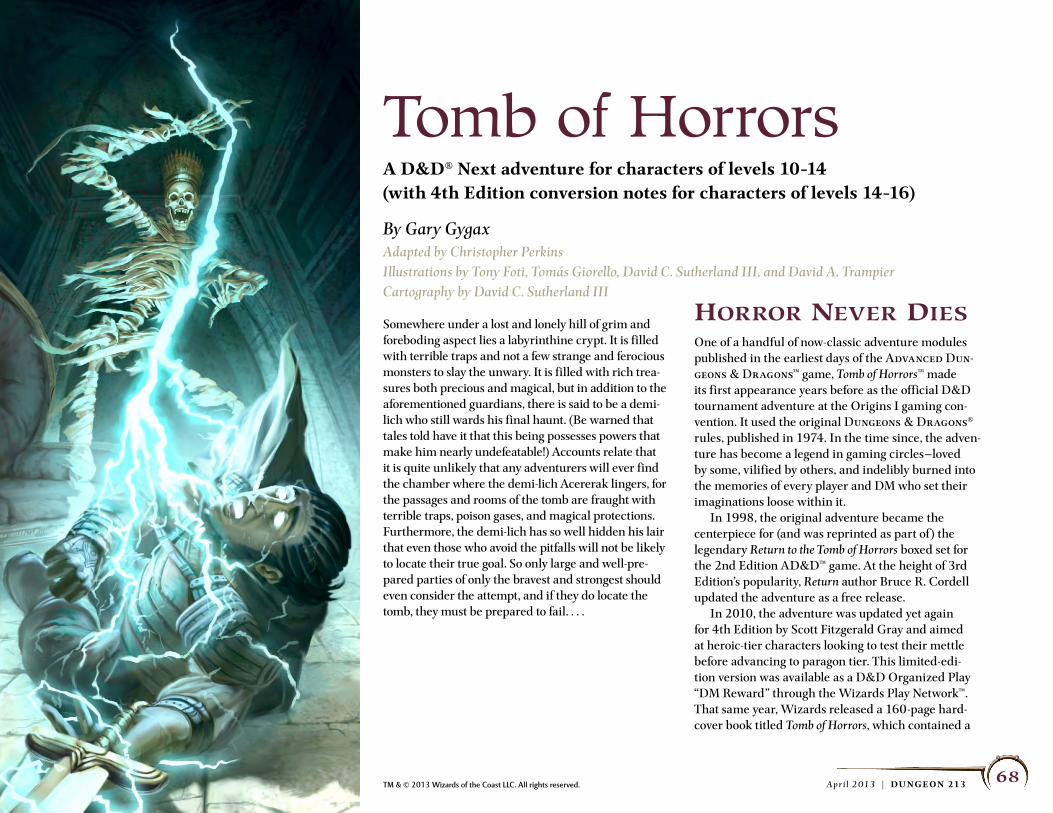
68A p r i l 2 013 | DU NGEON 213TM & © 2013 Wizards of the Coast LLC. All rights reserved.
Tomb of HorrorsA D&D® Next adventure for characters of levels 10–14 (with 4th Edition conversion notes for characters of levels 14–16)
By Gary GygaxAdapted by Christopher PerkinsIllustrations by Tony Foti, Tomás Giorello, David C. Sutherland III, and David A. TrampierCartography by David C. Sutherland III
Somewhere under a lost and lonely hill of grim and foreboding aspect lies a labyrinthine crypt. It is filled with terrible traps and not a few strange and ferocious monsters to slay the unwary. It is filled with rich trea-sures both precious and magical, but in addition to the aforementioned guardians, there is said to be a demi-lich who still wards his final haunt. (Be warned that tales told have it that this being possesses powers that make him nearly undefeatable!) Accounts relate that it is quite unlikely that any adventurers will ever find the chamber where the demi-lich Acererak lingers, for the passages and rooms of the tomb are fraught with terrible traps, poison gases, and magical protections. Furthermore, the demi-lich has so well hidden his lair that even those who avoid the pitfalls will not be likely to locate their true goal. So only large and well-pre-pared parties of only the bravest and strongest should even consider the attempt, and if they do locate the tomb, they must be prepared to fail. . . .
horror never dieSOne of a handful of now-classic adventure modules published in the earliest days of the Advanced Dun-geons & Dragons™ game, Tomb of Horrors™ made its first appearance years before as the official D&D tournament adventure at the Origins I gaming con-vention. It used the original Dungeons & Dragons® rules, published in 1974. In the time since, the adven-ture has become a legend in gaming circles—loved by some, vilified by others, and indelibly burned into the memories of every player and DM who set their imaginations loose within it. In 1998, the original adventure became the centerpiece for (and was reprinted as part of ) the legendary Return to the Tomb of Horrors boxed set for the 2nd Edition AD&D™ game. At the height of 3rd Edition’s popularity, Return author Bruce R. Cordell updated the adventure as a free release. In 2010, the adventure was updated yet again for 4th Edition by Scott Fitzgerald Gray and aimed at heroic-tier characters looking to test their mettle before advancing to paragon tier. This limited-edi-tion version was available as a D&D Organized Play “DM Reward” through the Wizards Play Network™. That same year, Wizards released a 160-page hard-cover book titled Tomb of Horrors, which contained a
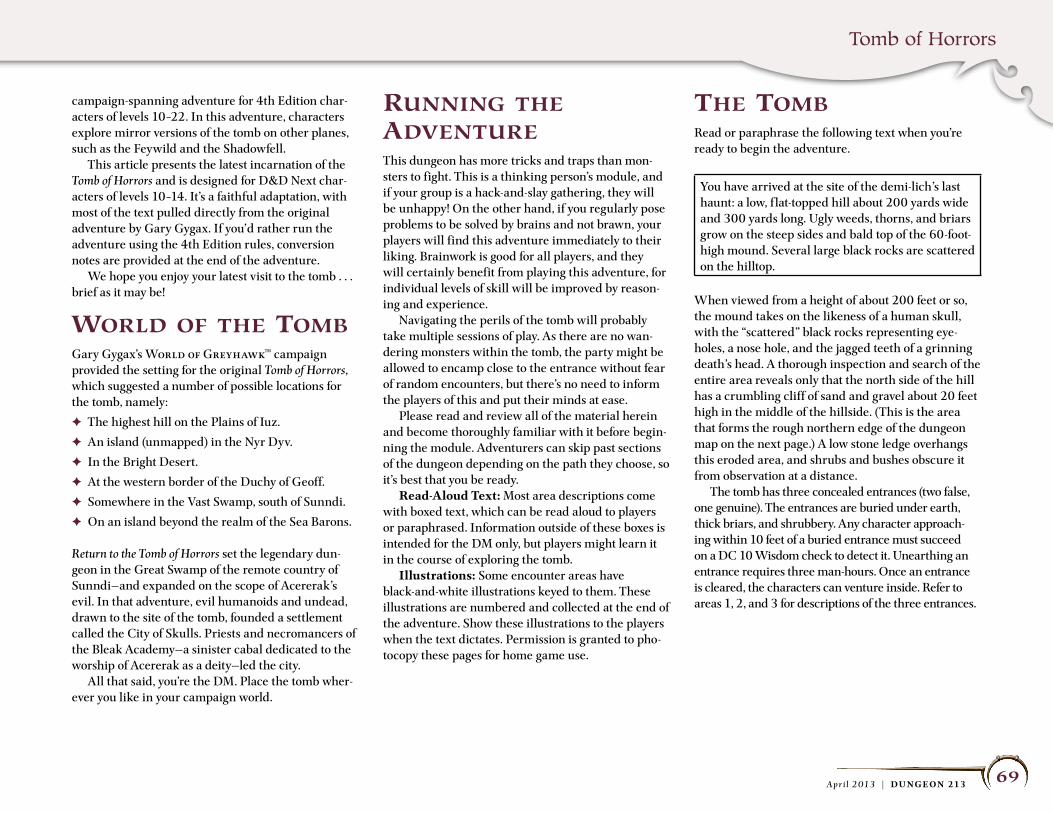
Tomb of Horrors
69A p r i l 2 013 | DU NGEON 213
campaign-spanning adventure for 4th Edition char-acters of levels 10–22. In this adventure, characters explore mirror versions of the tomb on other planes, such as the Feywild and the Shadowfell. This article presents the latest incarnation of the Tomb of Horrors and is designed for D&D Next char-acters of levels 10–14. It’s a faithful adaptation, with most of the text pulled directly from the original adventure by Gary Gygax. If you’d rather run the adventure using the 4th Edition rules, conversion notes are provided at the end of the adventure. We hope you enjoy your latest visit to the tomb . . . brief as it may be!
world oF the tomBGary Gygax’s World of Greyhawk™ campaign provided the setting for the original Tomb of Horrors, which suggested a number of possible locations for the tomb, namely:
F The highest hill on the Plains of Iuz.
F An island (unmapped) in the Nyr Dyv.
F In the Bright Desert.
F At the western border of the Duchy of Geoff.
F Somewhere in the Vast Swamp, south of Sunndi.
F On an island beyond the realm of the Sea Barons.
Return to the Tomb of Horrors set the legendary dun-geon in the Great Swamp of the remote country of Sunndi—and expanded on the scope of Acererak’s evil. In that adventure, evil humanoids and undead, drawn to the site of the tomb, founded a settlement called the City of Skulls. Priests and necromancers of the Bleak Academy—a sinister cabal dedicated to the worship of Acererak as a deity—led the city. All that said, you’re the DM. Place the tomb wher-ever you like in your campaign world.
running the adventureThis dungeon has more tricks and traps than mon-sters to fight. This is a thinking person’s module, and if your group is a hack-and-slay gathering, they will be unhappy! On the other hand, if you regularly pose problems to be solved by brains and not brawn, your players will find this adventure immediately to their liking. Brainwork is good for all players, and they will certainly benefit from playing this adventure, for individual levels of skill will be improved by reason-ing and experience. Navigating the perils of the tomb will probably take multiple sessions of play. As there are no wan-dering monsters within the tomb, the party might be allowed to encamp close to the entrance without fear of random encounters, but there’s no need to inform the players of this and put their minds at ease. Please read and review all of the material herein and become thoroughly familiar with it before begin-ning the module. Adventurers can skip past sections of the dungeon depending on the path they choose, so it’s best that you be ready. Read-Aloud Text: Most area descriptions come with boxed text, which can be read aloud to players or paraphrased. Information outside of these boxes is intended for the DM only, but players might learn it in the course of exploring the tomb. Illustrations: Some encounter areas have black-and-white illustrations keyed to them. These illustrations are numbered and collected at the end of the adventure. Show these illustrations to the players when the text dictates. Permission is granted to pho-tocopy these pages for home game use.
the tomBRead or paraphrase the following text when you’re ready to begin the adventure.
You have arrived at the site of the demi-lich’s last haunt: a low, f lat-topped hill about 200 yards wide and 300 yards long. Ugly weeds, thorns, and briars grow on the steep sides and bald top of the 60-foot-high mound. Several large black rocks are scattered on the hilltop.
When viewed from a height of about 200 feet or so, the mound takes on the likeness of a human skull, with the “scattered” black rocks representing eye-holes, a nose hole, and the jagged teeth of a grinning death’s head. A thorough inspection and search of the entire area reveals only that the north side of the hill has a crumbling cliff of sand and gravel about 20 feet high in the middle of the hillside. (This is the area that forms the rough northern edge of the dungeon map on the next page.) A low stone ledge overhangs this eroded area, and shrubs and bushes obscure it from observation at a distance. The tomb has three concealed entrances (two false, one genuine). The entrances are buried under earth, thick briars, and shrubbery. Any character approach-ing within 10 feet of a buried entrance must succeed on a DC 10 Wisdom check to detect it. Unearthing an entrance requires three man-hours. Once an entrance is cleared, the characters can venture inside. Refer to areas 1, 2, and 3 for descriptions of the three entrances.
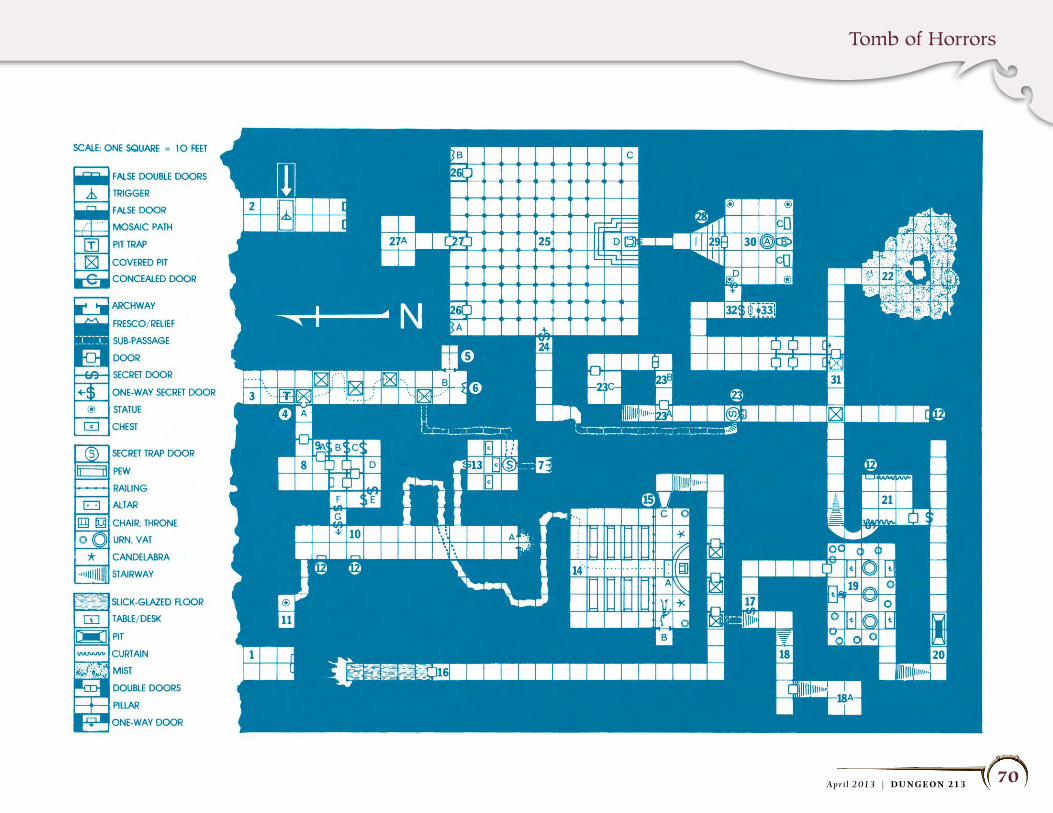
Tomb of Horrors
70A p r i l 2 013 | DU NGEON 213
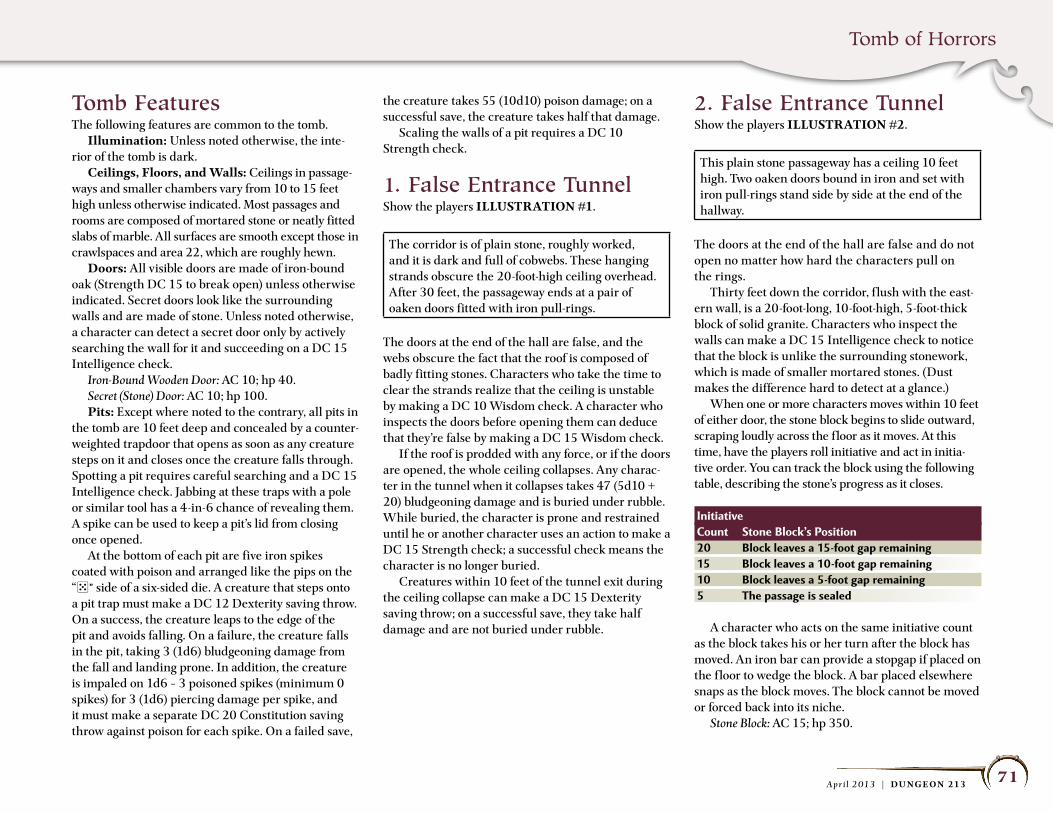
Tomb of Horrors
71A p r i l 2 013 | DU NGEON 213
tomb FeaturesThe following features are common to the tomb. Illumination: Unless noted otherwise, the inte-rior of the tomb is dark. Ceilings, Floors, and Walls: Ceilings in passage-ways and smaller chambers vary from 10 to 15 feet high unless otherwise indicated. Most passages and rooms are composed of mortared stone or neatly fitted slabs of marble. All surfaces are smooth except those in crawlspaces and area 22, which are roughly hewn. Doors: All visible doors are made of iron-bound oak (Strength DC 15 to break open) unless otherwise indicated. Secret doors look like the surrounding walls and are made of stone. Unless noted otherwise, a character can detect a secret door only by actively searching the wall for it and succeeding on a DC 15 Intelligence check. Iron-Bound Wooden Door: AC 10; hp 40. Secret (Stone) Door: AC 10; hp 100. Pits: Except where noted to the contrary, all pits in the tomb are 10 feet deep and concealed by a counter-weighted trapdoor that opens as soon as any creature steps on it and closes once the creature falls through. Spotting a pit requires careful searching and a DC 15 Intelligence check. Jabbing at these traps with a pole or similar tool has a 4-in-6 chance of revealing them. A spike can be used to keep a pit’s lid from closing once opened. At the bottom of each pit are five iron spikes coated with poison and arranged like the pips on the “5” side of a six-sided die. A creature that steps onto a pit trap must make a DC 12 Dexterity saving throw. On a success, the creature leaps to the edge of the pit and avoids falling. On a failure, the creature falls in the pit, taking 3 (1d6) bludgeoning damage from the fall and landing prone. In addition, the creature is impaled on 1d6 – 3 poisoned spikes (minimum 0 spikes) for 3 (1d6) piercing damage per spike, and it must make a separate DC 20 Constitution saving throw against poison for each spike. On a failed save,
the creature takes 55 (10d10) poison damage; on a successful save, the creature takes half that damage. Scaling the walls of a pit requires a DC 10 Strength check.
1. False entrance tunnelShow the players ILLUSTRATION #1.
The corridor is of plain stone, roughly worked, and it is dark and full of cobwebs. These hanging strands obscure the 20-foot-high ceiling overhead. After 30 feet, the passageway ends at a pair of oaken doors fitted with iron pull-rings.
The doors at the end of the hall are false, and the webs obscure the fact that the roof is composed of badly fitting stones. Characters who take the time to clear the strands realize that the ceiling is unstable by making a DC 10 Wisdom check. A character who inspects the doors before opening them can deduce that they’re false by making a DC 15 Wisdom check. If the roof is prodded with any force, or if the doors are opened, the whole ceiling collapses. Any charac-ter in the tunnel when it collapses takes 47 (5d10 + 20) bludgeoning damage and is buried under rubble. While buried, the character is prone and restrained until he or another character uses an action to make a DC 15 Strength check; a successful check means the character is no longer buried. Creatures within 10 feet of the tunnel exit during the ceiling collapse can make a DC 15 Dexterity saving throw; on a successful save, they take half damage and are not buried under rubble.
2. False entrance tunnelShow the players ILLUSTRATION #2.
This plain stone passageway has a ceiling 10 feet high. Two oaken doors bound in iron and set with iron pull-rings stand side by side at the end of the hallway.
The doors at the end of the hall are false and do not open no matter how hard the characters pull on the rings. Thirty feet down the corridor, f lush with the east-ern wall, is a 20-foot-long, 10-foot-high, 5-foot-thick block of solid granite. Characters who inspect the walls can make a DC 15 Intelligence check to notice that the block is unlike the surrounding stonework, which is made of smaller mortared stones. (Dust makes the difference hard to detect at a glance.) When one or more characters moves within 10 feet of either door, the stone block begins to slide outward, scraping loudly across the floor as it moves. At this time, have the players roll initiative and act in initia-tive order. You can track the block using the following table, describing the stone’s progress as it closes.
InitiativeCount stone Block’s Position20 Block leaves a 15-foot gap remaining15 Block leaves a 10-foot gap remaining10 Block leaves a 5-foot gap remaining5 The passage is sealed
A character who acts on the same initiative count as the block takes his or her turn after the block has moved. An iron bar can provide a stopgap if placed on the f loor to wedge the block. A bar placed elsewhere snaps as the block moves. The block cannot be moved or forced back into its niche. Stone Block: AC 15; hp 350.
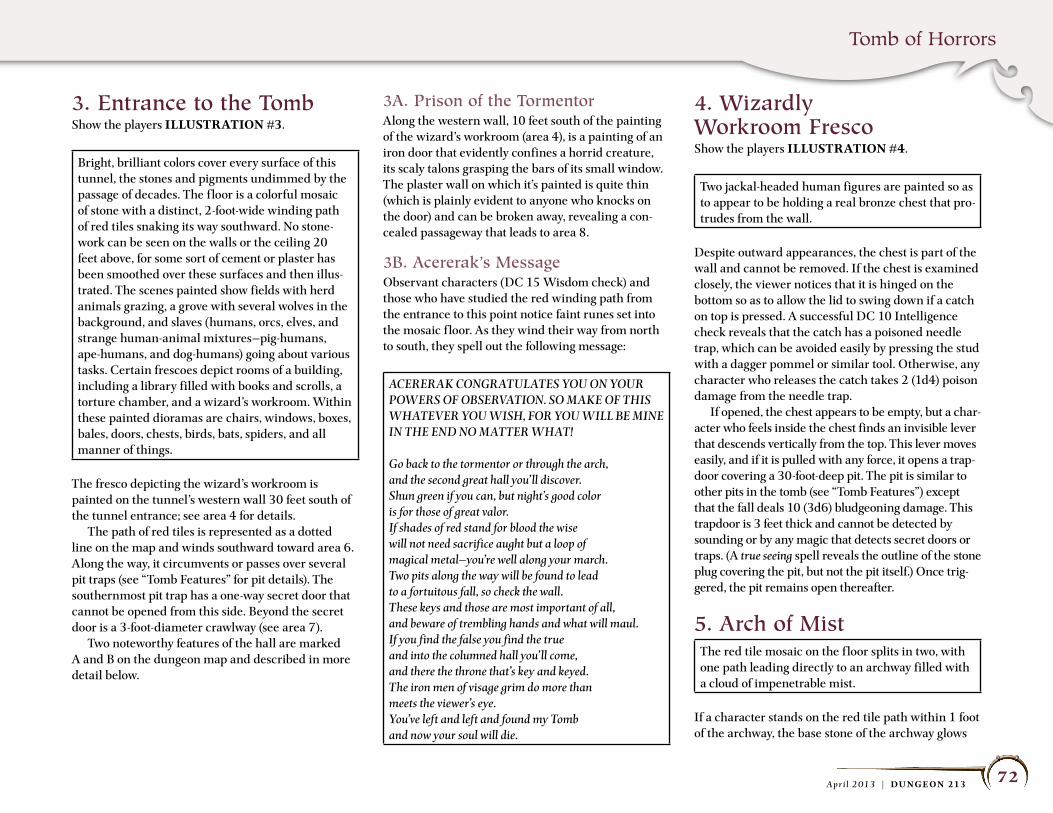
Tomb of Horrors
72A p r i l 2 013 | DU NGEON 213
3. entrance to the tombShow the players ILLUSTRATION #3.
Bright, brilliant colors cover every surface of this tunnel, the stones and pigments undimmed by the passage of decades. The f loor is a colorful mosaic of stone with a distinct, 2-foot-wide winding path of red tiles snaking its way southward. No stone-work can be seen on the walls or the ceiling 20 feet above, for some sort of cement or plaster has been smoothed over these surfaces and then illus-trated. The scenes painted show fields with herd animals grazing, a grove with several wolves in the background, and slaves (humans, orcs, elves, and strange human-animal mixtures—pig-humans, ape-humans, and dog-humans) going about various tasks. Certain frescoes depict rooms of a building, including a library filled with books and scrolls, a torture chamber, and a wizard’s workroom. Within these painted dioramas are chairs, windows, boxes, bales, doors, chests, birds, bats, spiders, and all manner of things.
The fresco depicting the wizard’s workroom is painted on the tunnel’s western wall 30 feet south of the tunnel entrance; see area 4 for details. The path of red tiles is represented as a dotted line on the map and winds southward toward area 6. Along the way, it circumvents or passes over several pit traps (see “Tomb Features” for pit details). The southernmost pit trap has a one-way secret door that cannot be opened from this side. Beyond the secret door is a 3-foot-diameter crawlway (see area 7). Two noteworthy features of the hall are marked A and B on the dungeon map and described in more detail below.
3A. prison of the tormentorAlong the western wall, 10 feet south of the painting of the wizard’s workroom (area 4), is a painting of an iron door that evidently confines a horrid creature, its scaly talons grasping the bars of its small window. The plaster wall on which it’s painted is quite thin (which is plainly evident to anyone who knocks on the door) and can be broken away, revealing a con-cealed passageway that leads to area 8.
3B. Acererak’s MessageObservant characters (DC 15 Wisdom check) and those who have studied the red winding path from the entrance to this point notice faint runes set into the mosaic f loor. As they wind their way from north to south, they spell out the following message:
ACERERAK CONGRATULATES YOU ON YOUR POWERS OF OBSERVATION. SO MAKE OF THIS WHATEVER YOU WISH, FOR YOU WILL BE MINE IN THE END NO MATTER WHAT!
Go back to the tormentor or through the arch,and the second great hall you’ll discover.Shun green if you can, but night’s good coloris for those of great valor.If shades of red stand for blood the wisewill not need sacrifice aught but a loop ofmagical metal—you’re well along your march.Two pits along the way will be found to leadto a fortuitous fall, so check the wall.These keys and those are most important of all,and beware of trembling hands and what will maul.If you find the false you find the trueand into the columned hall you’ll come,and there the throne that’s key and keyed.The iron men of visage grim do more thanmeets the viewer’s eye.You’ve left and left and found my Tomband now your soul will die.
4. Wizardly Workroom FrescoShow the players ILLUSTRATION #4.
Two jackal-headed human figures are painted so as to appear to be holding a real bronze chest that pro-trudes from the wall.
Despite outward appearances, the chest is part of the wall and cannot be removed. If the chest is examined closely, the viewer notices that it is hinged on the bottom so as to allow the lid to swing down if a catch on top is pressed. A successful DC 10 Intelligence check reveals that the catch has a poisoned needle trap, which can be avoided easily by pressing the stud with a dagger pommel or similar tool. Otherwise, any character who releases the catch takes 2 (1d4) poison damage from the needle trap. If opened, the chest appears to be empty, but a char-acter who feels inside the chest finds an invisible lever that descends vertically from the top. This lever moves easily, and if it is pulled with any force, it opens a trap-door covering a 30-foot-deep pit. The pit is similar to other pits in the tomb (see “Tomb Features”) except that the fall deals 10 (3d6) bludgeoning damage. This trapdoor is 3 feet thick and cannot be detected by sounding or by any magic that detects secret doors or traps. (A true seeing spell reveals the outline of the stone plug covering the pit, but not the pit itself.) Once trig-gered, the pit remains open thereafter.
5. Arch of MistThe red tile mosaic on the f loor splits in two, with one path leading directly to an archway filled with a cloud of impenetrable mist.
If a character stands on the red tile path within 1 foot of the archway, the base stone of the archway glows
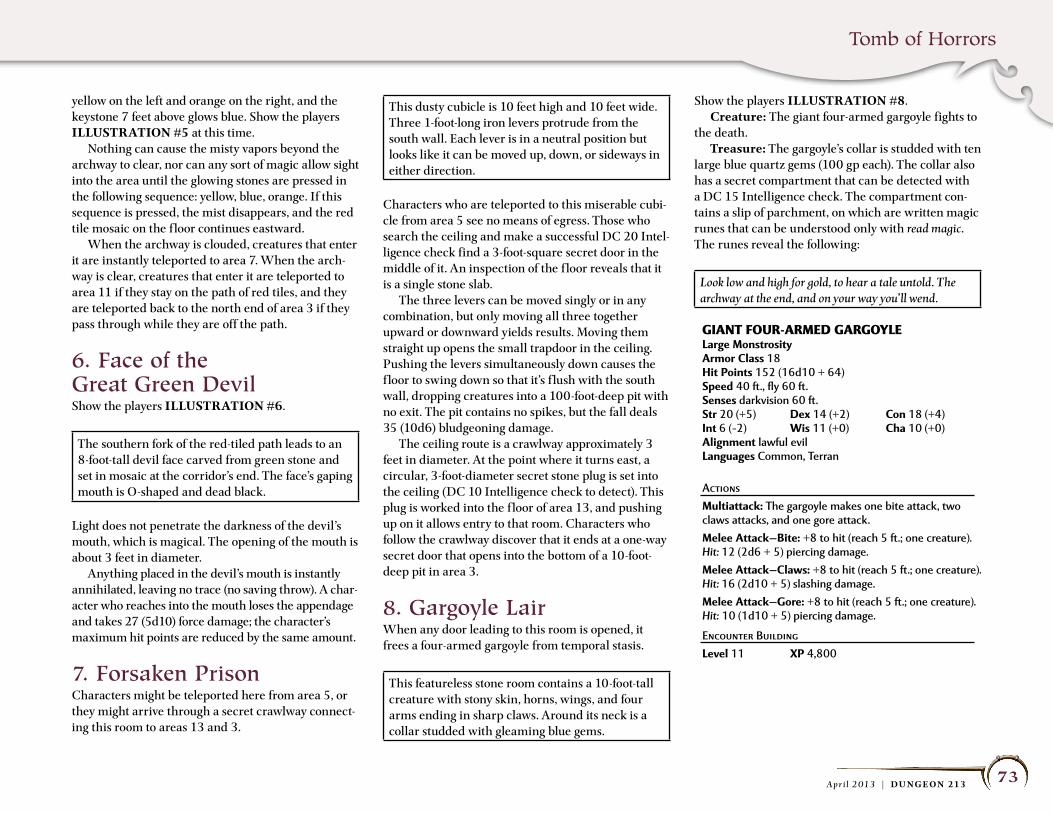
Tomb of Horrors
73A p r i l 2 013 | DU NGEON 213
yellow on the left and orange on the right, and the keystone 7 feet above glows blue. Show the players ILLUSTRATION #5 at this time. Nothing can cause the misty vapors beyond the archway to clear, nor can any sort of magic allow sight into the area until the glowing stones are pressed in the following sequence: yellow, blue, orange. If this sequence is pressed, the mist disappears, and the red tile mosaic on the f loor continues eastward. When the archway is clouded, creatures that enter it are instantly teleported to area 7. When the arch-way is clear, creatures that enter it are teleported to area 11 if they stay on the path of red tiles, and they are teleported back to the north end of area 3 if they pass through while they are off the path.
6. Face of the Great Green DevilShow the players ILLUSTRATION #6.
The southern fork of the red-tiled path leads to an 8-foot-tall devil face carved from green stone and set in mosaic at the corridor’s end. The face’s gaping mouth is O-shaped and dead black.
Light does not penetrate the darkness of the devil’s mouth, which is magical. The opening of the mouth is about 3 feet in diameter. Anything placed in the devil’s mouth is instantly annihilated, leaving no trace (no saving throw). A char-acter who reaches into the mouth loses the appendage and takes 27 (5d10) force damage; the character’s maximum hit points are reduced by the same amount.
7. Forsaken prisonCharacters might be teleported here from area 5, or they might arrive through a secret crawlway connect-ing this room to areas 13 and 3.
This dusty cubicle is 10 feet high and 10 feet wide. Three 1-foot-long iron levers protrude from the south wall. Each lever is in a neutral position but looks like it can be moved up, down, or sideways in either direction.
Characters who are teleported to this miserable cubi-cle from area 5 see no means of egress. Those who search the ceiling and make a successful DC 20 Intel-ligence check find a 3-foot-square secret door in the middle of it. An inspection of the f loor reveals that it is a single stone slab. The three levers can be moved singly or in any combination, but only moving all three together upward or downward yields results. Moving them straight up opens the small trapdoor in the ceiling. Pushing the levers simultaneously down causes the f loor to swing down so that it’s f lush with the south wall, dropping creatures into a 100-foot-deep pit with no exit. The pit contains no spikes, but the fall deals 35 (10d6) bludgeoning damage. The ceiling route is a crawlway approximately 3 feet in diameter. At the point where it turns east, a circular, 3-foot-diameter secret stone plug is set into the ceiling (DC 10 Intelligence check to detect). This plug is worked into the f loor of area 13, and pushing up on it allows entry to that room. Characters who follow the crawlway discover that it ends at a one-way secret door that opens into the bottom of a 10-foot-deep pit in area 3.
8. Gargoyle lairWhen any door leading to this room is opened, it frees a four-armed gargoyle from temporal stasis.
This featureless stone room contains a 10-foot-tall creature with stony skin, horns, wings, and four arms ending in sharp claws. Around its neck is a collar studded with gleaming blue gems.
Show the players ILLUSTRATION #8. Creature: The giant four-armed gargoyle fights to the death. Treasure: The gargoyle’s collar is studded with ten large blue quartz gems (100 gp each). The collar also has a secret compartment that can be detected with a DC 15 Intelligence check. The compartment con-tains a slip of parchment, on which are written magic runes that can be understood only with read magic. The runes reveal the following:
Look low and high for gold, to hear a tale untold. The archway at the end, and on your way you’ll wend.
GiAnT FOuR-ARMED GARGOyLELarge MonstrosityArmor Class 18Hit Points 152 (16d10 + 64)speed 40 ft., fly 60 ft.senses darkvision 60 ft. str 20 (+5) Dex 14 (+2) Con 18 (+4)Int 6 (–2) Wis 11 (+0) Cha 10 (+0)Alignment lawful evilLanguages Common, Terran
ActionsMultiattack: The gargoyle makes one bite attack, two claws attacks, and one gore attack.Melee Attack—Bite: +8 to hit (reach 5 ft.; one creature). Hit: 12 (2d6 + 5) piercing damage.Melee Attack—Claws: +8 to hit (reach 5 ft.; one creature). Hit: 16 (2d10 + 5) slashing damage.Melee Attack—Gore: +8 to hit (reach 5 ft.; one creature). Hit: 10 (1d10 + 5) piercing damage.
Encounter BuildingLevel 11 XP 4,800
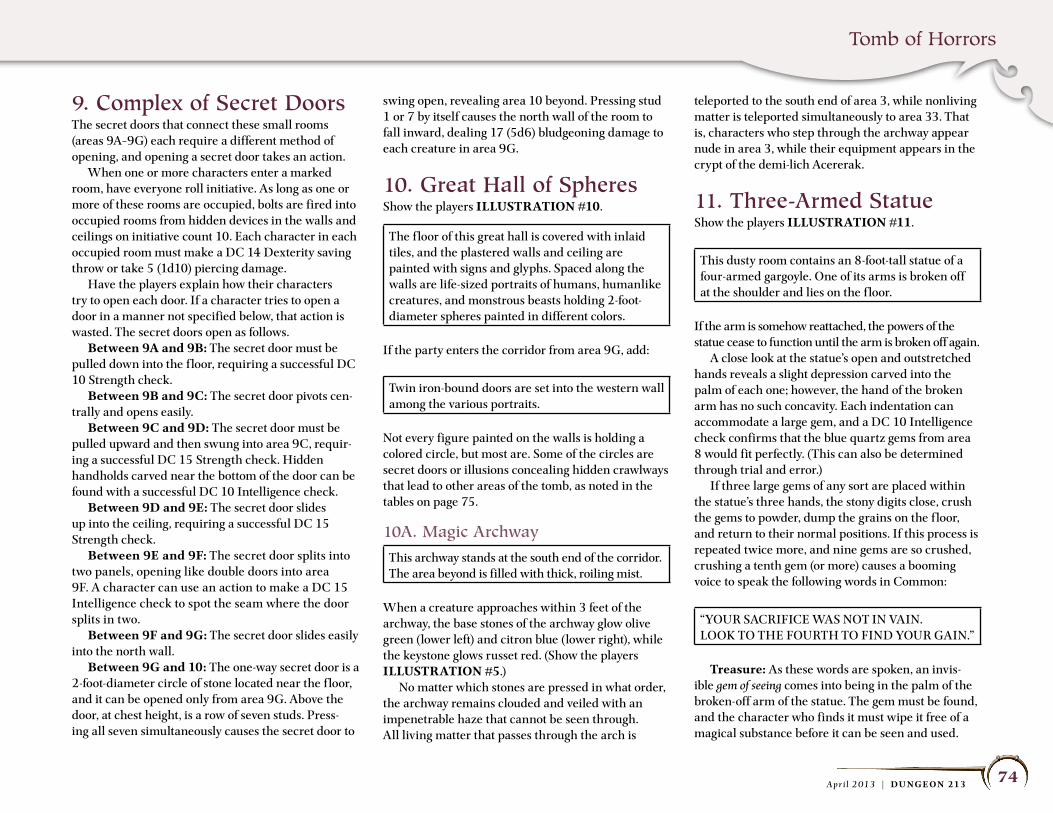
Tomb of Horrors
74A p r i l 2 013 | DU NGEON 213
9. Complex of Secret DoorsThe secret doors that connect these small rooms (areas 9A–9G) each require a different method of opening, and opening a secret door takes an action. When one or more characters enter a marked room, have everyone roll initiative. As long as one or more of these rooms are occupied, bolts are fired into occupied rooms from hidden devices in the walls and ceilings on initiative count 10. Each character in each occupied room must make a DC 14 Dexterity saving throw or take 5 (1d10) piercing damage. Have the players explain how their characters try to open each door. If a character tries to open a door in a manner not specified below, that action is wasted. The secret doors open as follows. Between 9A and 9B: The secret door must be pulled down into the f loor, requiring a successful DC 10 Strength check. Between 9B and 9C: The secret door pivots cen-trally and opens easily. Between 9C and 9D: The secret door must be pulled upward and then swung into area 9C, requir-ing a successful DC 15 Strength check. Hidden handholds carved near the bottom of the door can be found with a successful DC 10 Intelligence check. Between 9D and 9E: The secret door slides up into the ceiling, requiring a successful DC 15 Strength check. Between 9E and 9F: The secret door splits into two panels, opening like double doors into area 9F. A character can use an action to make a DC 15 Intelligence check to spot the seam where the door splits in two. Between 9F and 9G: The secret door slides easily into the north wall. Between 9G and 10: The one-way secret door is a 2-foot-diameter circle of stone located near the f loor, and it can be opened only from area 9G. Above the door, at chest height, is a row of seven studs. Press-ing all seven simultaneously causes the secret door to
swing open, revealing area 10 beyond. Pressing stud 1 or 7 by itself causes the north wall of the room to fall inward, dealing 17 (5d6) bludgeoning damage to each creature in area 9G.
10. Great hall of SpheresShow the players ILLUSTRATION #10.
The f loor of this great hall is covered with inlaid tiles, and the plastered walls and ceiling are painted with signs and glyphs. Spaced along the walls are life-sized portraits of humans, humanlike creatures, and monstrous beasts holding 2-foot-diameter spheres painted in different colors.
If the party enters the corridor from area 9G, add:
Twin iron-bound doors are set into the western wall among the various portraits.
Not every figure painted on the walls is holding a colored circle, but most are. Some of the circles are secret doors or illusions concealing hidden crawlways that lead to other areas of the tomb, as noted in the tables on page 75.
10A. Magic Archway
This archway stands at the south end of the corridor. The area beyond is filled with thick, roiling mist.
When a creature approaches within 3 feet of the archway, the base stones of the archway glow olive green (lower left) and citron blue (lower right), while the keystone glows russet red. (Show the players ILLUSTRATION #5.) No matter which stones are pressed in what order, the archway remains clouded and veiled with an impenetrable haze that cannot be seen through. All living matter that passes through the arch is
teleported to the south end of area 3, while nonliving matter is teleported simultaneously to area 33. That is, characters who step through the archway appear nude in area 3, while their equipment appears in the crypt of the demi-lich Acererak.
11. three-Armed StatueShow the players ILLUSTRATION #11.
This dusty room contains an 8-foot-tall statue of a four-armed gargoyle. One of its arms is broken off at the shoulder and lies on the f loor.
If the arm is somehow reattached, the powers of the statue cease to function until the arm is broken off again. A close look at the statue’s open and outstretched hands reveals a slight depression carved into the palm of each one; however, the hand of the broken arm has no such concavity. Each indentation can accommodate a large gem, and a DC 10 Intelligence check confirms that the blue quartz gems from area 8 would fit perfectly. (This can also be determined through trial and error.) If three large gems of any sort are placed within the statue’s three hands, the stony digits close, crush the gems to powder, dump the grains on the f loor, and return to their normal positions. If this process is repeated twice more, and nine gems are so crushed, crushing a tenth gem (or more) causes a booming voice to speak the following words in Common:
“YOUR SACRIFICE WAS NOT IN VAIN.LOOK TO THE FOURTH TO FIND YOUR GAIN.”
Treasure: As these words are spoken, an invis-ible gem of seeing comes into being in the palm of the broken-off arm of the statue. The gem must be found, and the character who finds it must wipe it free of a magical substance before it can be seen and used.

Tomb of Horrors
75A p r i l 2 013 | DU NGEON 213
The gem is an oval diamond about 1 inch in diam-eter and one-quarter inch thick. It has two f lat and polished sides, very clear. It operates only twelve times and then shatters.
12. trapped False DoorThe tomb has several doors marked 12. Each is an iron-bound oak door with iron hinges and a single iron pull-ring at waist height. A character who inspects the door and succeeds on a DC 20 Intelli-gence check realizes that it is false. However, its trap is too well hidden to be detected as long as the door remains closed. Opening the door triggers a spear trap. Show the players ILLUSTRATION #12 when this occurs. When the spear shoots out, determine at random, if need be, which character is the target. If the char-acters take precautions and avoid standing directly in front of the door, they automatically dodge the trap. Otherwise, the target must succeed on a DC 14 Dex-terity saving throw or take 10 (3d6) piercing damage. The trap reloads when the door is closed, such that reopening it releases another spear.
13. Chamber of ChestsThe 5-foot-wide, rough-hewn tunnel that leads from area 10 comes to an apparent dead end, although a careful search might reveal a secret door (see “Tomb Features” for more information on secret doors). This 5-foot-wide, 5-foot-tall secret door is 10 feet above the f loor of room 13, and opening it causes a stone at the mouth of the crawlway to tilt. The lead character must succeed on a DC 12 Dexterity saving throw to avoid falling into the room, taking 3 (1d6) bludgeon-ing damage and landing prone. When the characters first peer into the room, show the players ILLUSTRATION #13A.
Beyond the secret door is a dusty chamber contain-ing three large chests. The first is made of gold, the second made of silver, and the third made of oak bound with thick bronze bands. Each is about 4 feet long, 2 feet wide, and 3 feet high.
A secret stone plug in the f loor can be lifted, reveal-ing a 3-foot-wide crawlway that passes underneath this room and leads to areas 3 and 7. The three chests are affixed firmly to the f loor. Each container is described below, and when a chest is opened, show the players the appropriate illustration. Gold Chest (show ILLUSTRATION #13B when opened): The chest isn’t made of solid gold but
AReA 10: WesT WALL FeATuRes (FROM NORTH TO sOuTH)Painted Figure Circle Color Circle Height secret (if any)Priest Gold 8 feet Circle is an illusion concealing a crawlway to area 11Wolf-headed woman Orange 4 feet —False door* — — Opening the door triggers a trap (see area 12)Basilisk Purple 2 feet —False door* — — Opening the door triggers a trap (see area 12)Minotaur Bronze 4 feet —Prancing jester Gray 6 feet —sphinx Bright blue 2 feet —Ferocious ape White 8 feet —Human skeleton — — —Winged devil Turquoise 6 feet —Giant snake scarlet 4 feet —Minstrel Pale green 2 feet —*The false doors are not paintings, but actual doors set into the wall.
AReA 10: eAsT WALL FeATuRes (FROM NORTH TO sOuTH)Painted Figure Circle Color Circle Height secret (if any)Crocodile-headed man Pale blue 6 feet —Black dragon silver 2 feet Circle is a one-way secret door from area 9G*Frightened man Green — —Bird-headed man Yellow 4 feet —Yuan-ti Pink 8 feet —Hydra Black 2 feet Circle is an illusion concealing a crawlway to area 14Headless woman Pale violet 6 feet —smiling man Red 4 feet Circle is an illusion concealing a crawlway to area 13Gorgon Amber 2 feet —Faceless robed wizard — — —Tiger-headed priestess Indigo 8 feet —*The one-way secret door requires a DC 15 Intelligence check to detect and cannot be opened from this side.
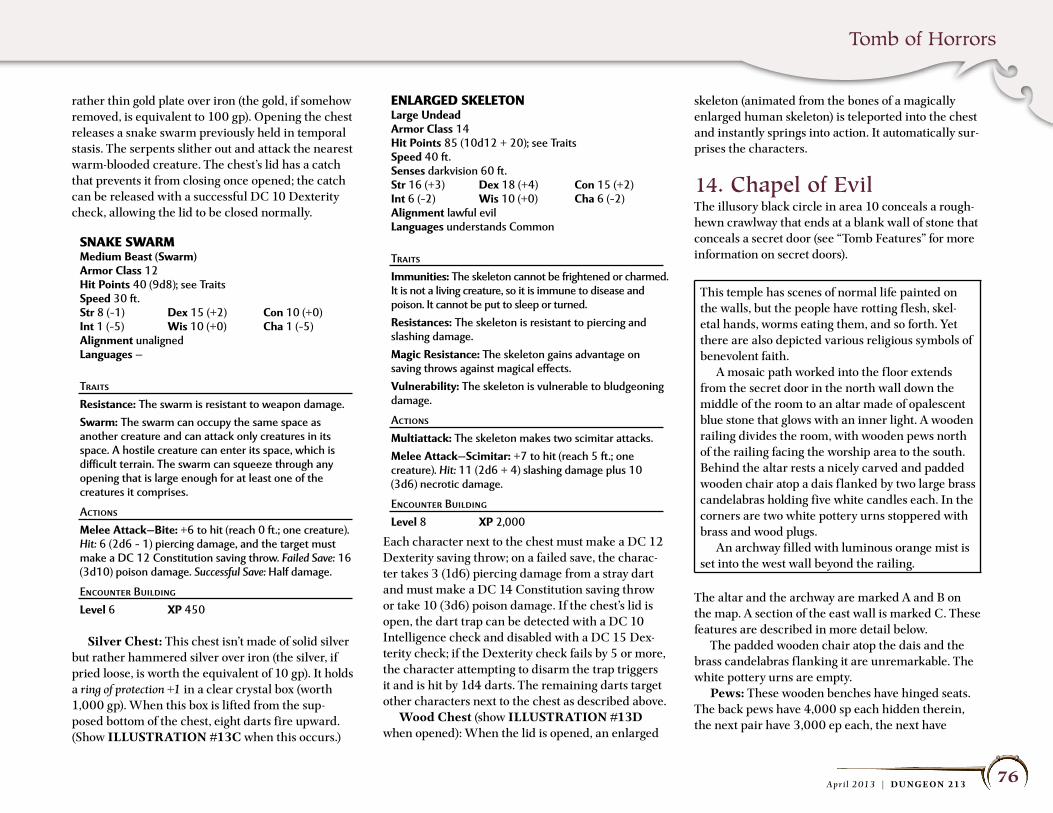
Tomb of Horrors
76A p r i l 2 013 | DU NGEON 213
rather thin gold plate over iron (the gold, if somehow removed, is equivalent to 100 gp). Opening the chest releases a snake swarm previously held in temporal stasis. The serpents slither out and attack the nearest warm-blooded creature. The chest’s lid has a catch that prevents it from closing once opened; the catch can be released with a successful DC 10 Dexterity check, allowing the lid to be closed normally.
SnAKE SWARMMedium Beast (swarm)Armor Class 12Hit Points 40 (9d8); see Traitsspeed 30 ft.str 8 (–1) Dex 15 (+2) Con 10 (+0)Int 1 (–5) Wis 10 (+0) Cha 1 (–5)Alignment unalignedLanguages —
TraitsResistance: The swarm is resistant to weapon damage.swarm: The swarm can occupy the same space as another creature and can attack only creatures in its space. A hostile creature can enter its space, which is difficult terrain. The swarm can squeeze through any opening that is large enough for at least one of the creatures it comprises.
ActionsMelee Attack—Bite: +6 to hit (reach 0 ft.; one creature). Hit: 6 (2d6 – 1) piercing damage, and the target must make a DC 12 Constitution saving throw. Failed Save: 16 (3d10) poison damage. Successful Save: Half damage.
Encounter BuildingLevel 6 XP 450
Silver Chest: This chest isn’t made of solid silver but rather hammered silver over iron (the silver, if pried loose, is worth the equivalent of 10 gp). It holds a ring of protection +1 in a clear crystal box (worth 1,000 gp). When this box is lifted from the sup-posed bottom of the chest, eight darts fire upward. (Show ILLUSTRATION #13C when this occurs.)
Each character next to the chest must make a DC 12 Dexterity saving throw; on a failed save, the charac-ter takes 3 (1d6) piercing damage from a stray dart and must make a DC 14 Constitution saving throw or take 10 (3d6) poison damage. If the chest’s lid is open, the dart trap can be detected with a DC 10 Intelligence check and disabled with a DC 15 Dex-terity check; if the Dexterity check fails by 5 or more, the character attempting to disarm the trap triggers it and is hit by 1d4 darts. The remaining darts target other characters next to the chest as described above. Wood Chest (show ILLUSTRATION #13D when opened): When the lid is opened, an enlarged
skeleton (animated from the bones of a magically enlarged human skeleton) is teleported into the chest and instantly springs into action. It automatically sur-prises the characters.
14. Chapel of evilThe illusory black circle in area 10 conceals a rough-hewn crawlway that ends at a blank wall of stone that conceals a secret door (see “Tomb Features” for more information on secret doors).
This temple has scenes of normal life painted on the walls, but the people have rotting f lesh, skel-etal hands, worms eating them, and so forth. Yet there are also depicted various religious symbols of benevolent faith. A mosaic path worked into the f loor extends from the secret door in the north wall down the middle of the room to an altar made of opalescent blue stone that glows with an inner light. A wooden railing divides the room, with wooden pews north of the railing facing the worship area to the south. Behind the altar rests a nicely carved and padded wooden chair atop a dais f lanked by two large brass candelabras holding five white candles each. In the corners are two white pottery urns stoppered with brass and wood plugs. An archway filled with luminous orange mist is set into the west wall beyond the railing.
The altar and the archway are marked A and B on the map. A section of the east wall is marked C. These features are described in more detail below. The padded wooden chair atop the dais and the brass candelabras f lanking it are unremarkable. The white pottery urns are empty. Pews: These wooden benches have hinged seats. The back pews have 4,000 sp each hidden therein, the next pair have 3,000 ep each, the next have
EnLARGED SKELETOnLarge undeadArmor Class 14Hit Points 85 (10d12 + 20); see Traitsspeed 40 ft.senses darkvision 60 ft.str 16 (+3) Dex 18 (+4) Con 15 (+2)Int 6 (–2) Wis 10 (+0) Cha 6 (–2)Alignment lawful evilLanguages understands Common
TraitsImmunities: The skeleton cannot be frightened or charmed. It is not a living creature, so it is immune to disease and poison. It cannot be put to sleep or turned.Resistances: The skeleton is resistant to piercing and slashing damage. Magic Resistance: The skeleton gains advantage on saving throws against magical effects.Vulnerability: The skeleton is vulnerable to bludgeoning damage.
ActionsMultiattack: The skeleton makes two scimitar attacks.Melee Attack—scimitar: +7 to hit (reach 5 ft.; one creature). Hit: 11 (2d6 + 4) slashing damage plus 10 (3d6) necrotic damage.
Encounter BuildingLevel 8 XP 2,000
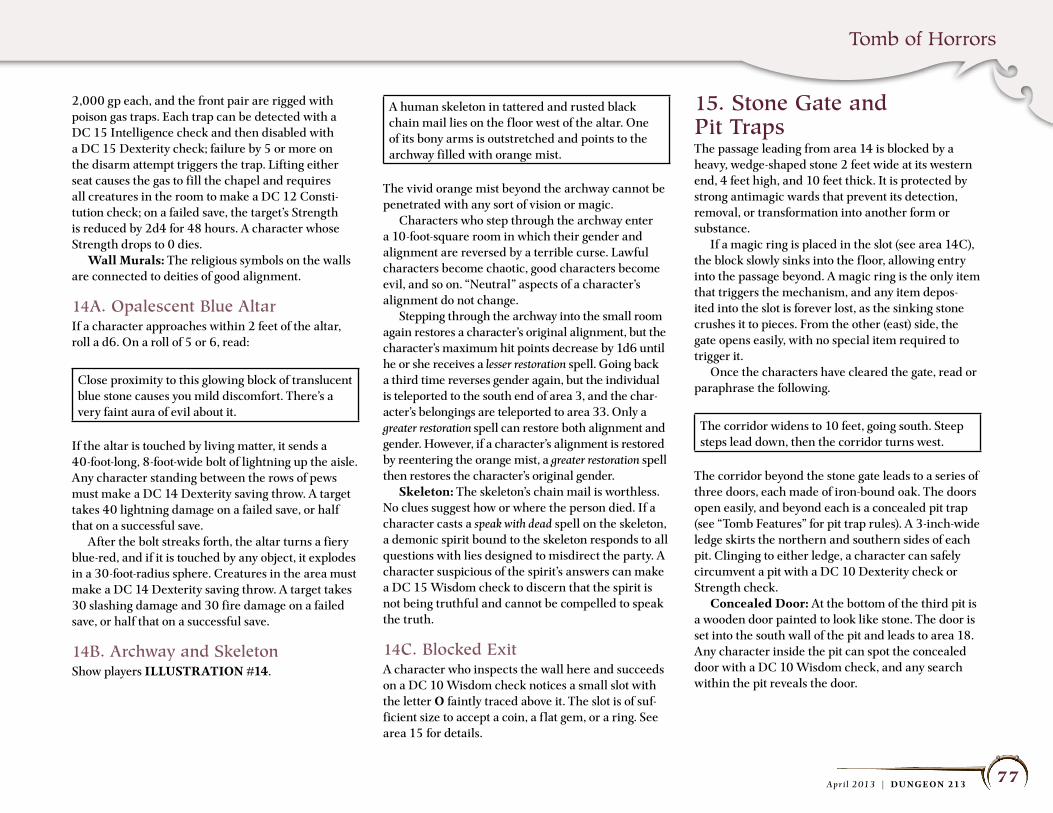
Tomb of Horrors
77A p r i l 2 013 | DU NGEON 213
2,000 gp each, and the front pair are rigged with poison gas traps. Each trap can be detected with a DC 15 Intelligence check and then disabled with a DC 15 Dexterity check; failure by 5 or more on the disarm attempt triggers the trap. Lifting either seat causes the gas to fill the chapel and requires all creatures in the room to make a DC 12 Consti-tution check; on a failed save, the target’s Strength is reduced by 2d4 for 48 hours. A character whose Strength drops to 0 dies. Wall Murals: The religious symbols on the walls are connected to deities of good alignment.
14A. opalescent Blue AltarIf a character approaches within 2 feet of the altar, roll a d6. On a roll of 5 or 6, read:
Close proximity to this glowing block of translucent blue stone causes you mild discomfort. There’s a very faint aura of evil about it.
If the altar is touched by living matter, it sends a 40-foot-long, 8-foot-wide bolt of lightning up the aisle. Any character standing between the rows of pews must make a DC 14 Dexterity saving throw. A target takes 40 lightning damage on a failed save, or half that on a successful save. After the bolt streaks forth, the altar turns a fiery blue-red, and if it is touched by any object, it explodes in a 30-foot-radius sphere. Creatures in the area must make a DC 14 Dexterity saving throw. A target takes 30 slashing damage and 30 fire damage on a failed save, or half that on a successful save.
14B. Archway and SkeletonShow players ILLUSTRATION #14.
A human skeleton in tattered and rusted black chain mail lies on the f loor west of the altar. One of its bony arms is outstretched and points to the archway filled with orange mist.
The vivid orange mist beyond the archway cannot be penetrated with any sort of vision or magic. Characters who step through the archway enter a 10-foot-square room in which their gender and alignment are reversed by a terrible curse. Lawful characters become chaotic, good characters become evil, and so on. “Neutral” aspects of a character’s alignment do not change. Stepping through the archway into the small room again restores a character’s original alignment, but the character’s maximum hit points decrease by 1d6 until he or she receives a lesser restoration spell. Going back a third time reverses gender again, but the individual is teleported to the south end of area 3, and the char-acter’s belongings are teleported to area 33. Only a greater restoration spell can restore both alignment and gender. However, if a character’s alignment is restored by reentering the orange mist, a greater restoration spell then restores the character’s original gender. Skeleton: The skeleton’s chain mail is worthless. No clues suggest how or where the person died. If a character casts a speak with dead spell on the skeleton, a demonic spirit bound to the skeleton responds to all questions with lies designed to misdirect the party. A character suspicious of the spirit’s answers can make a DC 15 Wisdom check to discern that the spirit is not being truthful and cannot be compelled to speak the truth.
14C. Blocked exitA character who inspects the wall here and succeeds on a DC 10 Wisdom check notices a small slot with the letter O faintly traced above it. The slot is of suf-ficient size to accept a coin, a f lat gem, or a ring. See area 15 for details.
15. Stone Gate and pit trapsThe passage leading from area 14 is blocked by a heavy, wedge-shaped stone 2 feet wide at its western end, 4 feet high, and 10 feet thick. It is protected by strong antimagic wards that prevent its detection, removal, or transformation into another form or substance. If a magic ring is placed in the slot (see area 14C), the block slowly sinks into the f loor, allowing entry into the passage beyond. A magic ring is the only item that triggers the mechanism, and any item depos-ited into the slot is forever lost, as the sinking stone crushes it to pieces. From the other (east) side, the gate opens easily, with no special item required to trigger it. Once the characters have cleared the gate, read or paraphrase the following.
The corridor widens to 10 feet, going south. Steep steps lead down, then the corridor turns west.
The corridor beyond the stone gate leads to a series of three doors, each made of iron-bound oak. The doors open easily, and beyond each is a concealed pit trap (see “Tomb Features” for pit trap rules). A 3-inch-wide ledge skirts the northern and southern sides of each pit. Clinging to either ledge, a character can safely circumvent a pit with a DC 10 Dexterity check or Strength check. Concealed Door: At the bottom of the third pit is a wooden door painted to look like stone. The door is set into the south wall of the pit and leads to area 18. Any character inside the pit can spot the concealed door with a DC 10 Wisdom check, and any search within the pit reveals the door.
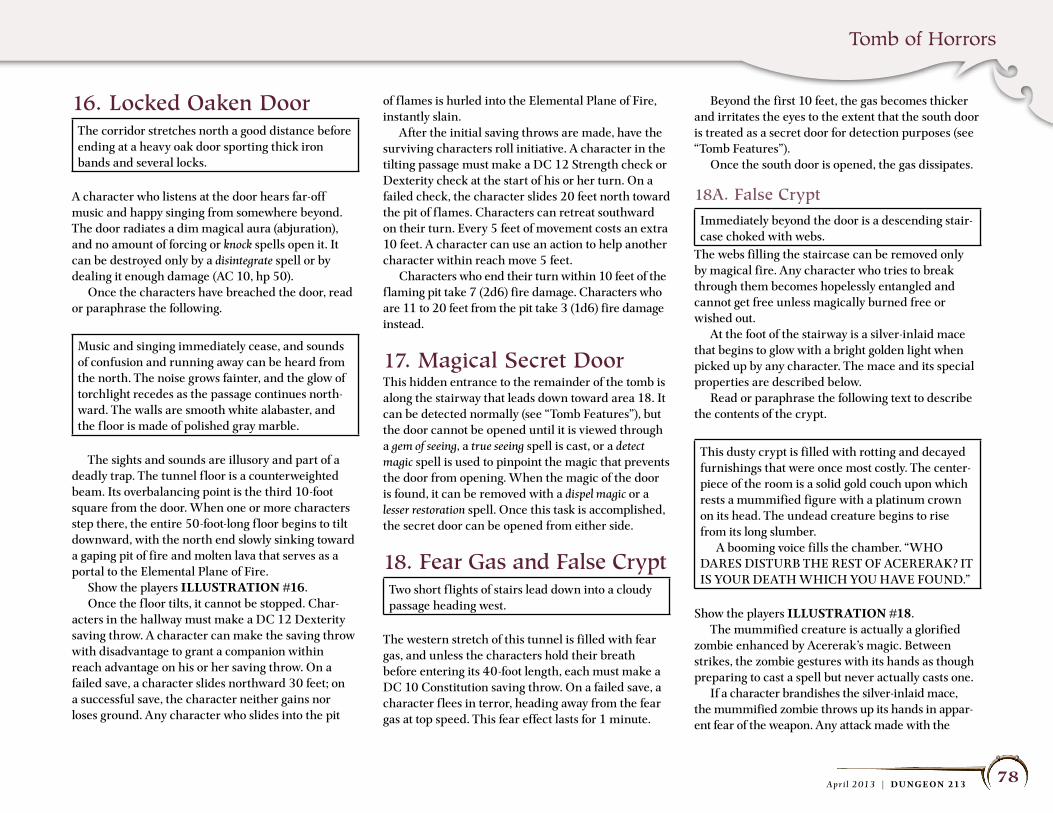
Tomb of Horrors
78A p r i l 2 013 | DU NGEON 213
16. locked oaken DoorThe corridor stretches north a good distance before ending at a heavy oak door sporting thick iron bands and several locks.
A character who listens at the door hears far-off music and happy singing from somewhere beyond. The door radiates a dim magical aura (abjuration), and no amount of forcing or knock spells open it. It can be destroyed only by a disintegrate spell or by dealing it enough damage (AC 10, hp 50). Once the characters have breached the door, read or paraphrase the following.
Music and singing immediately cease, and sounds of confusion and running away can be heard from the north. The noise grows fainter, and the glow of torchlight recedes as the passage continues north-ward. The walls are smooth white alabaster, and the f loor is made of polished gray marble.
The sights and sounds are illusory and part of a deadly trap. The tunnel f loor is a counterweighted beam. Its overbalancing point is the third 10-foot square from the door. When one or more characters step there, the entire 50-foot-long f loor begins to tilt downward, with the north end slowly sinking toward a gaping pit of fire and molten lava that serves as a portal to the Elemental Plane of Fire. Show the players ILLUSTRATION #16. Once the f loor tilts, it cannot be stopped. Char-acters in the hallway must make a DC 12 Dexterity saving throw. A character can make the saving throw with disadvantage to grant a companion within reach advantage on his or her saving throw. On a failed save, a character slides northward 30 feet; on a successful save, the character neither gains nor loses ground. Any character who slides into the pit
of f lames is hurled into the Elemental Plane of Fire, instantly slain. After the initial saving throws are made, have the surviving characters roll initiative. A character in the tilting passage must make a DC 12 Strength check or Dexterity check at the start of his or her turn. On a failed check, the character slides 20 feet north toward the pit of f lames. Characters can retreat southward on their turn. Every 5 feet of movement costs an extra 10 feet. A character can use an action to help another character within reach move 5 feet. Characters who end their turn within 10 feet of the flaming pit take 7 (2d6) fire damage. Characters who are 11 to 20 feet from the pit take 3 (1d6) fire damage instead.
17. Magical Secret DoorThis hidden entrance to the remainder of the tomb is along the stairway that leads down toward area 18. It can be detected normally (see “Tomb Features”), but the door cannot be opened until it is viewed through a gem of seeing, a true seeing spell is cast, or a detect magic spell is used to pinpoint the magic that prevents the door from opening. When the magic of the door is found, it can be removed with a dispel magic or a lesser restoration spell. Once this task is accomplished, the secret door can be opened from either side.
18. Fear Gas and False CryptTwo short f lights of stairs lead down into a cloudy passage heading west.
The western stretch of this tunnel is filled with fear gas, and unless the characters hold their breath before entering its 40-foot length, each must make a DC 10 Constitution saving throw. On a failed save, a character f lees in terror, heading away from the fear gas at top speed. This fear effect lasts for 1 minute.
Beyond the first 10 feet, the gas becomes thicker and irritates the eyes to the extent that the south door is treated as a secret door for detection purposes (see “Tomb Features”). Once the south door is opened, the gas dissipates.
18A. False Crypt
Immediately beyond the door is a descending stair-case choked with webs.
The webs filling the staircase can be removed only by magical fire. Any character who tries to break through them becomes hopelessly entangled and cannot get free unless magically burned free or wished out. At the foot of the stairway is a silver-inlaid mace that begins to glow with a bright golden light when picked up by any character. The mace and its special properties are described below. Read or paraphrase the following text to describe the contents of the crypt.
This dusty crypt is filled with rotting and decayed furnishings that were once most costly. The center-piece of the room is a solid gold couch upon which rests a mummified figure with a platinum crown on its head. The undead creature begins to rise from its long slumber. A booming voice fills the chamber. “WHO DARES DISTURB THE REST OF ACERERAK? IT IS YOUR DEATH WHICH YOU HAVE FOUND.”
Show the players ILLUSTRATION #18. The mummified creature is actually a glorified zombie enhanced by Acererak’s magic. Between strikes, the zombie gestures with its hands as though preparing to cast a spell but never actually casts one. If a character brandishes the silver-inlaid mace, the mummified zombie throws up its hands in appar-ent fear of the weapon. Any attack made with the
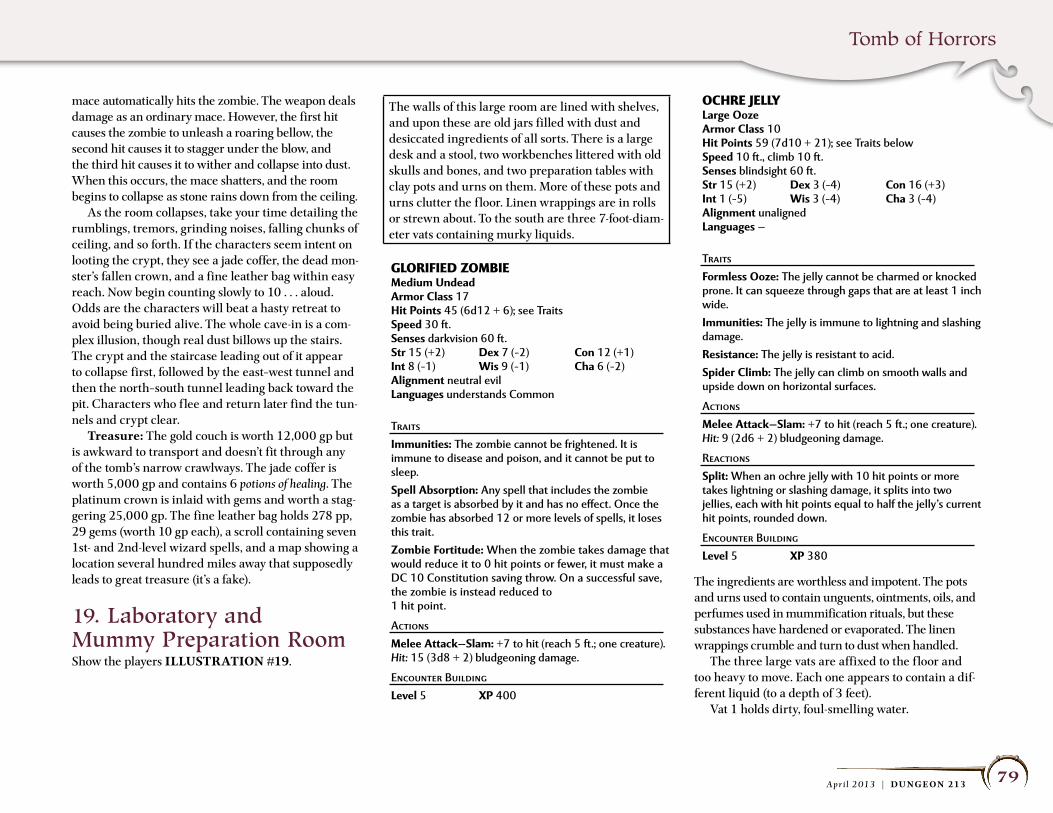
Tomb of Horrors
79A p r i l 2 013 | DU NGEON 213
mace automatically hits the zombie. The weapon deals damage as an ordinary mace. However, the first hit causes the zombie to unleash a roaring bellow, the second hit causes it to stagger under the blow, and the third hit causes it to wither and collapse into dust. When this occurs, the mace shatters, and the room begins to collapse as stone rains down from the ceiling. As the room collapses, take your time detailing the rumblings, tremors, grinding noises, falling chunks of ceiling, and so forth. If the characters seem intent on looting the crypt, they see a jade coffer, the dead mon-ster’s fallen crown, and a fine leather bag within easy reach. Now begin counting slowly to 10 . . . aloud. Odds are the characters will beat a hasty retreat to avoid being buried alive. The whole cave-in is a com-plex illusion, though real dust billows up the stairs. The crypt and the staircase leading out of it appear to collapse first, followed by the east–west tunnel and then the north–south tunnel leading back toward the pit. Characters who f lee and return later find the tun-nels and crypt clear. Treasure: The gold couch is worth 12,000 gp but is awkward to transport and doesn’t fit through any of the tomb’s narrow crawlways. The jade coffer is worth 5,000 gp and contains 6 potions of healing. The platinum crown is inlaid with gems and worth a stag-gering 25,000 gp. The fine leather bag holds 278 pp, 29 gems (worth 10 gp each), a scroll containing seven 1st- and 2nd-level wizard spells, and a map showing a location several hundred miles away that supposedly leads to great treasure (it’s a fake).
19. laboratory and Mummy preparation RoomShow the players ILLUSTRATION #19.
The walls of this large room are lined with shelves, and upon these are old jars filled with dust and desiccated ingredients of all sorts. There is a large desk and a stool, two workbenches littered with old skulls and bones, and two preparation tables with clay pots and urns on them. More of these pots and urns clutter the f loor. Linen wrappings are in rolls or strewn about. To the south are three 7-foot-diam-eter vats containing murky liquids.
The ingredients are worthless and impotent. The pots and urns used to contain unguents, ointments, oils, and perfumes used in mummification rituals, but these substances have hardened or evaporated. The linen wrappings crumble and turn to dust when handled. The three large vats are affixed to the f loor and too heavy to move. Each one appears to contain a dif-ferent liquid (to a depth of 3 feet). Vat 1 holds dirty, foul-smelling water.
GLORiFiED ZOMBiEMedium undeadArmor Class 17Hit Points 45 (6d12 + 6); see Traitsspeed 30 ft.senses darkvision 60 ft.str 15 (+2) Dex 7 (–2) Con 12 (+1)Int 8 (–1) Wis 9 (–1) Cha 6 (–2)Alignment neutral evilLanguages understands Common
TraitsImmunities: The zombie cannot be frightened. It is immune to disease and poison, and it cannot be put to sleep.spell Absorption: Any spell that includes the zombie as a target is absorbed by it and has no effect. Once the zombie has absorbed 12 or more levels of spells, it loses this trait.Zombie Fortitude: When the zombie takes damage that would reduce it to 0 hit points or fewer, it must make a DC 10 Constitution saving throw. On a successful save, the zombie is instead reduced to 1 hit point.
ActionsMelee Attack—slam: +7 to hit (reach 5 ft.; one creature). Hit: 15 (3d8 + 2) bludgeoning damage.
Encounter BuildingLevel 5 XP 400
OCHRE JELLyLarge OozeArmor Class 10Hit Points 59 (7d10 + 21); see Traits belowspeed 10 ft., climb 10 ft.senses blindsight 60 ft.str 15 (+2) Dex 3 (–4) Con 16 (+3)Int 1 (–5) Wis 3 (–4) Cha 3 (–4)Alignment unalignedLanguages —
TraitsFormless Ooze: The jelly cannot be charmed or knocked prone. It can squeeze through gaps that are at least 1 inch wide.Immunities: The jelly is immune to lightning and slashing damage.Resistance: The jelly is resistant to acid.spider Climb: The jelly can climb on smooth walls and upside down on horizontal surfaces.
ActionsMelee Attack—slam: +7 to hit (reach 5 ft.; one creature). Hit: 9 (2d6 + 2) bludgeoning damage.
Reactionssplit: When an ochre jelly with 10 hit points or more takes lightning or slashing damage, it splits into two jellies, each with hit points equal to half the jelly’s current hit points, rounded down.
Encounter BuildingLevel 5 XP 380
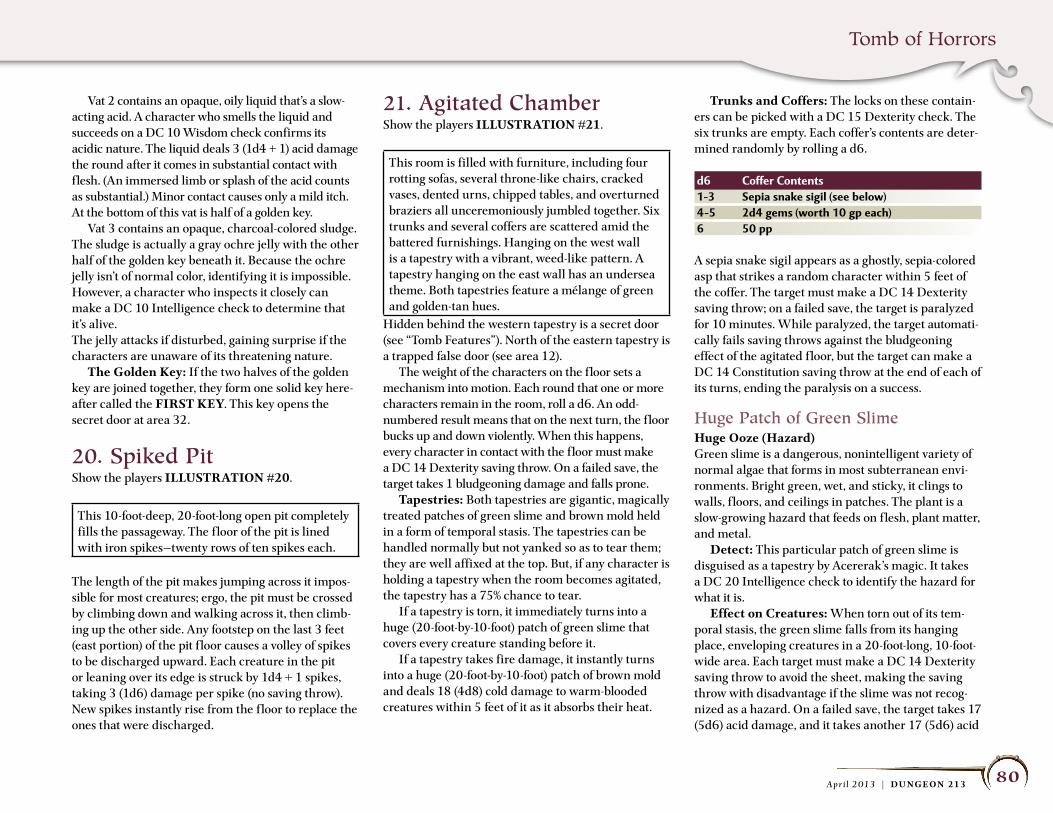
Tomb of Horrors
80A p r i l 2 013 | DU NGEON 213
Vat 2 contains an opaque, oily liquid that’s a slow-acting acid. A character who smells the liquid and succeeds on a DC 10 Wisdom check confirms its acidic nature. The liquid deals 3 (1d4 + 1) acid damage the round after it comes in substantial contact with flesh. (An immersed limb or splash of the acid counts as substantial.) Minor contact causes only a mild itch. At the bottom of this vat is half of a golden key. Vat 3 contains an opaque, charcoal-colored sludge. The sludge is actually a gray ochre jelly with the other half of the golden key beneath it. Because the ochre jelly isn’t of normal color, identifying it is impossible. However, a character who inspects it closely can make a DC 10 Intelligence check to determine that it’s alive. The jelly attacks if disturbed, gaining surprise if the characters are unaware of its threatening nature. The Golden Key: If the two halves of the golden key are joined together, they form one solid key here-after called the FIRST KEY. This key opens the secret door at area 32.
20. Spiked pitShow the players ILLUSTRATION #20.
This 10-foot-deep, 20-foot-long open pit completely fills the passageway. The f loor of the pit is lined with iron spikes—twenty rows of ten spikes each.
The length of the pit makes jumping across it impos-sible for most creatures; ergo, the pit must be crossed by climbing down and walking across it, then climb-ing up the other side. Any footstep on the last 3 feet (east portion) of the pit f loor causes a volley of spikes to be discharged upward. Each creature in the pit or leaning over its edge is struck by 1d4 + 1 spikes, taking 3 (1d6) damage per spike (no saving throw). New spikes instantly rise from the f loor to replace the ones that were discharged.
21. Agitated ChamberShow the players ILLUSTRATION #21.
This room is filled with furniture, including four rotting sofas, several throne-like chairs, cracked vases, dented urns, chipped tables, and overturned braziers all unceremoniously jumbled together. Six trunks and several coffers are scattered amid the battered furnishings. Hanging on the west wall is a tapestry with a vibrant, weed-like pattern. A tapestry hanging on the east wall has an undersea theme. Both tapestries feature a mélange of green and golden-tan hues.
Hidden behind the western tapestry is a secret door (see “Tomb Features”). North of the eastern tapestry is a trapped false door (see area 12). The weight of the characters on the floor sets a mechanism into motion. Each round that one or more characters remain in the room, roll a d6. An odd-numbered result means that on the next turn, the floor bucks up and down violently. When this happens, every character in contact with the floor must make a DC 14 Dexterity saving throw. On a failed save, the target takes 1 bludgeoning damage and falls prone. Tapestries: Both tapestries are gigantic, magically treated patches of green slime and brown mold held in a form of temporal stasis. The tapestries can be handled normally but not yanked so as to tear them; they are well affixed at the top. But, if any character is holding a tapestry when the room becomes agitated, the tapestry has a 75% chance to tear. If a tapestry is torn, it immediately turns into a huge (20-foot-by-10-foot) patch of green slime that covers every creature standing before it. If a tapestry takes fire damage, it instantly turns into a huge (20-foot-by-10-foot) patch of brown mold and deals 18 (4d8) cold damage to warm-blooded creatures within 5 feet of it as it absorbs their heat.
Trunks and Coffers: The locks on these contain-ers can be picked with a DC 15 Dexterity check. The six trunks are empty. Each coffer’s contents are deter-mined randomly by rolling a d6.
d6 Coffer Contents1–3 sepia snake sigil (see below)4–5 2d4 gems (worth 10 gp each)6 50 pp
A sepia snake sigil appears as a ghostly, sepia-colored asp that strikes a random character within 5 feet of the coffer. The target must make a DC 14 Dexterity saving throw; on a failed save, the target is paralyzed for 10 minutes. While paralyzed, the target automati-cally fails saving throws against the bludgeoning effect of the agitated f loor, but the target can make a DC 14 Constitution saving throw at the end of each of its turns, ending the paralysis on a success.
huge patch of Green SlimeHuge Ooze (Hazard)Green slime is a dangerous, nonintelligent variety of normal algae that forms in most subterranean envi-ronments. Bright green, wet, and sticky, it clings to walls, f loors, and ceilings in patches. The plant is a slow-growing hazard that feeds on f lesh, plant matter, and metal. Detect: This particular patch of green slime is disguised as a tapestry by Acererak’s magic. It takes a DC 20 Intelligence check to identify the hazard for what it is. Effect on Creatures: When torn out of its tem-poral stasis, the green slime falls from its hanging place, enveloping creatures in a 20-foot-long, 10-foot-wide area. Each target must make a DC 14 Dexterity saving throw to avoid the sheet, making the saving throw with disadvantage if the slime was not recog-nized as a hazard. On a failed save, the target takes 17 (5d6) acid damage, and it takes another 17 (5d6) acid
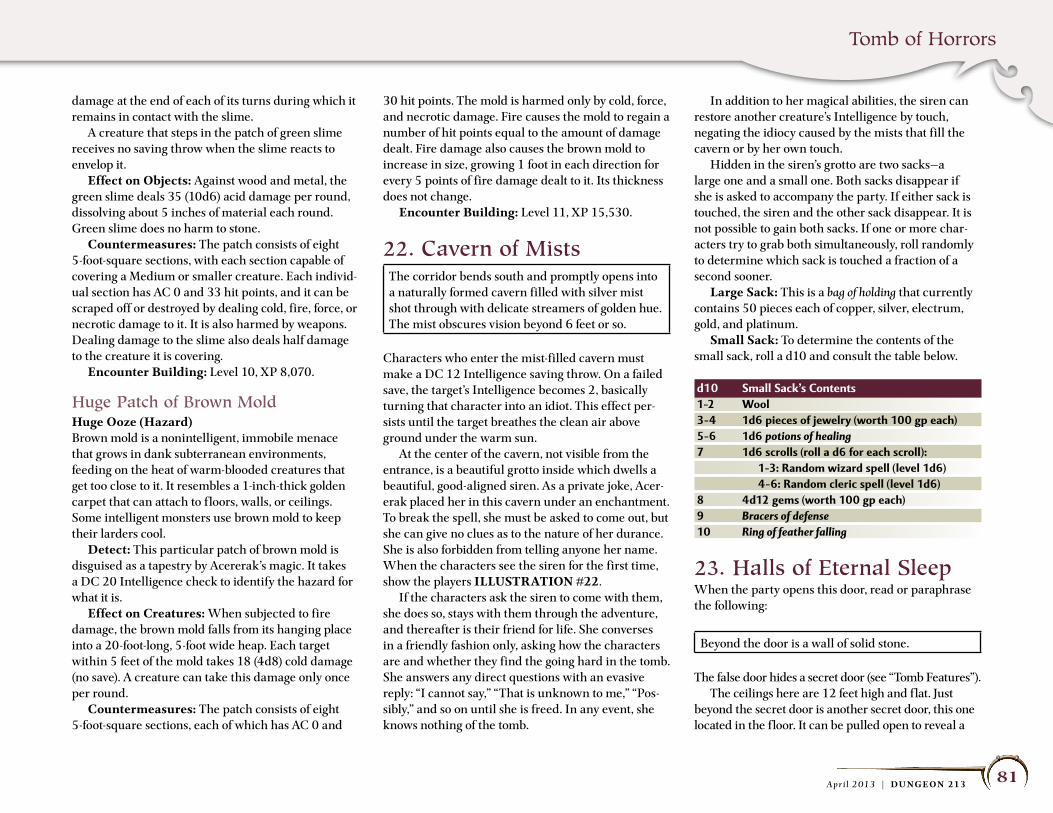
Tomb of Horrors
81A p r i l 2 013 | DU NGEON 213
damage at the end of each of its turns during which it remains in contact with the slime. A creature that steps in the patch of green slime receives no saving throw when the slime reacts to envelop it. Effect on Objects: Against wood and metal, the green slime deals 35 (10d6) acid damage per round, dissolving about 5 inches of material each round. Green slime does no harm to stone. Countermeasures: The patch consists of eight 5-foot-square sections, with each section capable of covering a Medium or smaller creature. Each individ-ual section has AC 0 and 33 hit points, and it can be scraped off or destroyed by dealing cold, fire, force, or necrotic damage to it. It is also harmed by weapons. Dealing damage to the slime also deals half damage to the creature it is covering. Encounter Building: Level 10, XP 8,070.
huge patch of Brown MoldHuge Ooze (Hazard)Brown mold is a nonintelligent, immobile menace that grows in dank subterranean environments, feeding on the heat of warm-blooded creatures that get too close to it. It resembles a 1-inch-thick golden carpet that can attach to f loors, walls, or ceilings. Some intelligent monsters use brown mold to keep their larders cool. Detect: This particular patch of brown mold is disguised as a tapestry by Acererak’s magic. It takes a DC 20 Intelligence check to identify the hazard for what it is. Effect on Creatures: When subjected to fire damage, the brown mold falls from its hanging place into a 20-foot-long, 5-foot wide heap. Each target within 5 feet of the mold takes 18 (4d8) cold damage (no save). A creature can take this damage only once per round. Countermeasures: The patch consists of eight 5-foot-square sections, each of which has AC 0 and
30 hit points. The mold is harmed only by cold, force, and necrotic damage. Fire causes the mold to regain a number of hit points equal to the amount of damage dealt. Fire damage also causes the brown mold to increase in size, growing 1 foot in each direction for every 5 points of fire damage dealt to it. Its thickness does not change. Encounter Building: Level 11, XP 15,530.
22. Cavern of MistsThe corridor bends south and promptly opens into a naturally formed cavern filled with silver mist shot through with delicate streamers of golden hue. The mist obscures vision beyond 6 feet or so.
Characters who enter the mist-filled cavern must make a DC 12 Intelligence saving throw. On a failed save, the target’s Intelligence becomes 2, basically turning that character into an idiot. This effect per-sists until the target breathes the clean air above ground under the warm sun. At the center of the cavern, not visible from the entrance, is a beautiful grotto inside which dwells a beautiful, good-aligned siren. As a private joke, Acer-erak placed her in this cavern under an enchantment. To break the spell, she must be asked to come out, but she can give no clues as to the nature of her durance. She is also forbidden from telling anyone her name. When the characters see the siren for the first time, show the players ILLUSTRATION #22. If the characters ask the siren to come with them, she does so, stays with them through the adventure, and thereafter is their friend for life. She converses in a friendly fashion only, asking how the characters are and whether they find the going hard in the tomb. She answers any direct questions with an evasive reply: “I cannot say,” “That is unknown to me,” “Pos-sibly,” and so on until she is freed. In any event, she knows nothing of the tomb.
In addition to her magical abilities, the siren can restore another creature’s Intelligence by touch, negating the idiocy caused by the mists that fill the cavern or by her own touch. Hidden in the siren’s grotto are two sacks—a large one and a small one. Both sacks disappear if she is asked to accompany the party. If either sack is touched, the siren and the other sack disappear. It is not possible to gain both sacks. If one or more char-acters try to grab both simultaneously, roll randomly to determine which sack is touched a fraction of a second sooner. Large Sack: This is a bag of holding that currently contains 50 pieces each of copper, silver, electrum, gold, and platinum. Small Sack: To determine the contents of the small sack, roll a d10 and consult the table below.
d10 small sack’s Contents1–2 Wool3–4 1d6 pieces of jewelry (worth 100 gp each)5–6 1d6 potions of healing7 1d6 scrolls (roll a d6 for each scroll): 1–3: Random wizard spell (level 1d6) 4–6: Random cleric spell (level 1d6)8 4d12 gems (worth 100 gp each)9 Bracers of defense10 Ring of feather falling
23. halls of eternal SleepWhen the party opens this door, read or paraphrase the following:
Beyond the door is a wall of solid stone.
The false door hides a secret door (see “Tomb Features”). The ceilings here are 12 feet high and flat. Just beyond the secret door is another secret door, this one located in the floor. It can be pulled open to reveal a
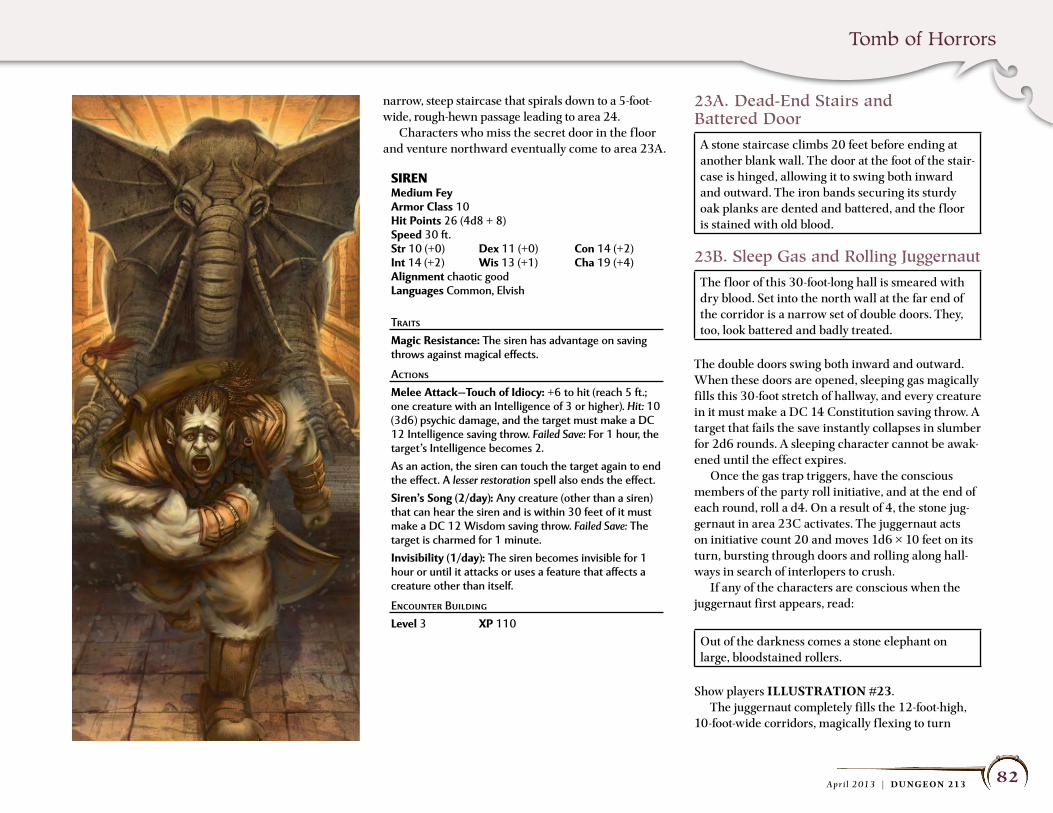
Tomb of Horrors
82A p r i l 2 013 | DU NGEON 213
narrow, steep staircase that spirals down to a 5-foot-wide, rough-hewn passage leading to area 24. Characters who miss the secret door in the f loor and venture northward eventually come to area 23A.
SiREnMedium FeyArmor Class 10Hit Points 26 (4d8 + 8)speed 30 ft.str 10 (+0) Dex 11 (+0) Con 14 (+2)Int 14 (+2) Wis 13 (+1) Cha 19 (+4)Alignment chaotic goodLanguages Common, Elvish
TraitsMagic Resistance: The siren has advantage on saving throws against magical effects.
ActionsMelee Attack—Touch of Idiocy: +6 to hit (reach 5 ft.; one creature with an Intelligence of 3 or higher). Hit: 10 (3d6) psychic damage, and the target must make a DC 12 Intelligence saving throw. Failed Save: For 1 hour, the target’s Intelligence becomes 2.As an action, the siren can touch the target again to end the effect. A lesser restoration spell also ends the effect.siren’s song (2/day): Any creature (other than a siren) that can hear the siren and is within 30 feet of it must make a DC 12 Wisdom saving throw. Failed Save: The target is charmed for 1 minute.Invisibility (1/day): The siren becomes invisible for 1 hour or until it attacks or uses a feature that affects a creature other than itself.
Encounter BuildingLevel 3 XP 110
23A. Dead-end Stairs and Battered Door
A stone staircase climbs 20 feet before ending at another blank wall. The door at the foot of the stair-case is hinged, allowing it to swing both inward and outward. The iron bands securing its sturdy oak planks are dented and battered, and the f loor is stained with old blood.
23B. Sleep Gas and Rolling Juggernaut
The f loor of this 30-foot-long hall is smeared with dry blood. Set into the north wall at the far end of the corridor is a narrow set of double doors. They, too, look battered and badly treated.
The double doors swing both inward and outward. When these doors are opened, sleeping gas magically fills this 30-foot stretch of hallway, and every creature in it must make a DC 14 Constitution saving throw. A target that fails the save instantly collapses in slumber for 2d6 rounds. A sleeping character cannot be awak-ened until the effect expires. Once the gas trap triggers, have the conscious members of the party roll initiative, and at the end of each round, roll a d4. On a result of 4, the stone jug-gernaut in area 23C activates. The juggernaut acts on initiative count 20 and moves 1d6 × 10 feet on its turn, bursting through doors and rolling along hall-ways in search of interlopers to crush. If any of the characters are conscious when the juggernaut first appears, read:
Out of the darkness comes a stone elephant on large, bloodstained rollers.
Show players ILLUSTRATION #23. The juggernaut completely fills the 12-foot-high, 10-foot-wide corridors, magically f lexing to turn
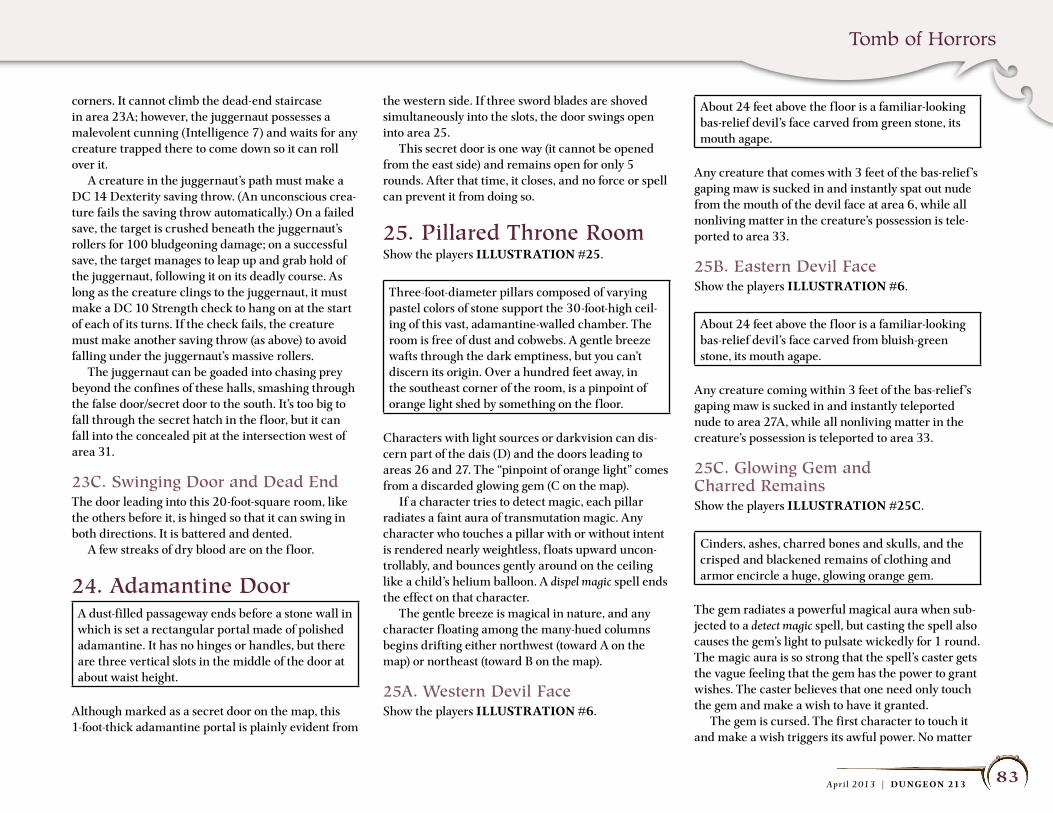
Tomb of Horrors
83A p r i l 2 013 | DU NGEON 213
corners. It cannot climb the dead-end staircase in area 23A; however, the juggernaut possesses a malevolent cunning (Intelligence 7) and waits for any creature trapped there to come down so it can roll over it. A creature in the juggernaut’s path must make a DC 14 Dexterity saving throw. (An unconscious crea-ture fails the saving throw automatically.) On a failed save, the target is crushed beneath the juggernaut’s rollers for 100 bludgeoning damage; on a successful save, the target manages to leap up and grab hold of the juggernaut, following it on its deadly course. As long as the creature clings to the juggernaut, it must make a DC 10 Strength check to hang on at the start of each of its turns. If the check fails, the creature must make another saving throw (as above) to avoid falling under the juggernaut’s massive rollers. The juggernaut can be goaded into chasing prey beyond the confines of these halls, smashing through the false door/secret door to the south. It’s too big to fall through the secret hatch in the f loor, but it can fall into the concealed pit at the intersection west of area 31.
23C. Swinging Door and Dead endThe door leading into this 20-foot-square room, like the others before it, is hinged so that it can swing in both directions. It is battered and dented. A few streaks of dry blood are on the f loor.
24. Adamantine DoorA dust-filled passageway ends before a stone wall in which is set a rectangular portal made of polished adamantine. It has no hinges or handles, but there are three vertical slots in the middle of the door at about waist height.
Although marked as a secret door on the map, this 1-foot-thick adamantine portal is plainly evident from
the western side. If three sword blades are shoved simultaneously into the slots, the door swings open into area 25. This secret door is one way (it cannot be opened from the east side) and remains open for only 5 rounds. After that time, it closes, and no force or spell can prevent it from doing so.
25. pillared throne RoomShow the players ILLUSTRATION #25.
Three-foot-diameter pillars composed of varying pastel colors of stone support the 30-foot-high ceil-ing of this vast, adamantine-walled chamber. The room is free of dust and cobwebs. A gentle breeze wafts through the dark emptiness, but you can’t discern its origin. Over a hundred feet away, in the southeast corner of the room, is a pinpoint of orange light shed by something on the f loor.
Characters with light sources or darkvision can dis-cern part of the dais (D) and the doors leading to areas 26 and 27. The “pinpoint of orange light” comes from a discarded glowing gem (C on the map). If a character tries to detect magic, each pillar radiates a faint aura of transmutation magic. Any character who touches a pillar with or without intent is rendered nearly weightless, f loats upward uncon-trollably, and bounces gently around on the ceiling like a child’s helium balloon. A dispel magic spell ends the effect on that character. The gentle breeze is magical in nature, and any character f loating among the many-hued columns begins drifting either northwest (toward A on the map) or northeast (toward B on the map).
25A. Western Devil FaceShow the players ILLUSTRATION #6.
About 24 feet above the f loor is a familiar-looking bas-relief devil’s face carved from green stone, its mouth agape.
Any creature that comes with 3 feet of the bas-relief ’s gaping maw is sucked in and instantly spat out nude from the mouth of the devil face at area 6, while all nonliving matter in the creature’s possession is tele-ported to area 33.
25B. eastern Devil FaceShow the players ILLUSTRATION #6.
About 24 feet above the f loor is a familiar-looking bas-relief devil’s face carved from bluish-green stone, its mouth agape.
Any creature coming within 3 feet of the bas-relief ’s gaping maw is sucked in and instantly teleported nude to area 27A, while all nonliving matter in the creature’s possession is teleported to area 33.
25C. Glowing Gem and Charred RemainsShow the players ILLUSTRATION #25C.
Cinders, ashes, charred bones and skulls, and the crisped and blackened remains of clothing and armor encircle a huge, glowing orange gem.
The gem radiates a powerful magical aura when sub-jected to a detect magic spell, but casting the spell also causes the gem’s light to pulsate wickedly for 1 round. The magic aura is so strong that the spell’s caster gets the vague feeling that the gem has the power to grant wishes. The caster believes that one need only touch the gem and make a wish to have it granted. The gem is cursed. The first character to touch it and make a wish triggers its awful power. No matter
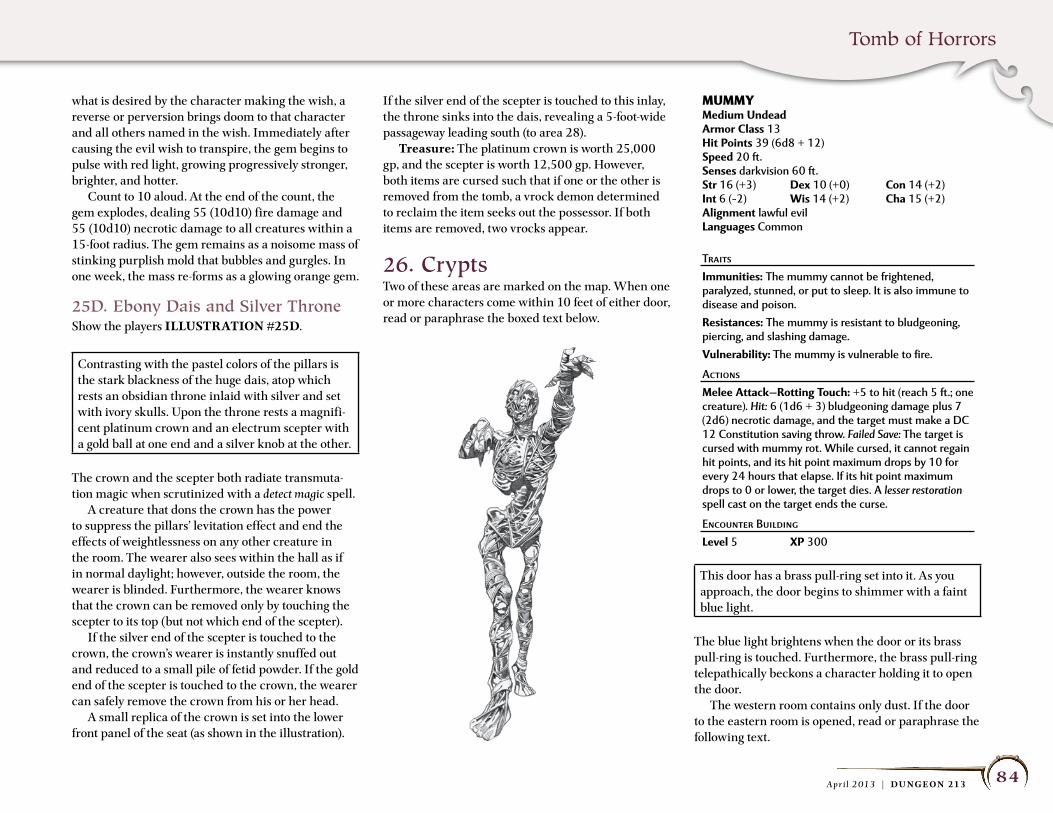
Tomb of Horrors
84A p r i l 2 013 | DU NGEON 213
what is desired by the character making the wish, a reverse or perversion brings doom to that character and all others named in the wish. Immediately after causing the evil wish to transpire, the gem begins to pulse with red light, growing progressively stronger, brighter, and hotter. Count to 10 aloud. At the end of the count, the gem explodes, dealing 55 (10d10) fire damage and 55 (10d10) necrotic damage to all creatures within a 15-foot radius. The gem remains as a noisome mass of stinking purplish mold that bubbles and gurgles. In one week, the mass re-forms as a glowing orange gem.
25D. ebony Dais and Silver throneShow the players ILLUSTRATION #25D.
Contrasting with the pastel colors of the pillars is the stark blackness of the huge dais, atop which rests an obsidian throne inlaid with silver and set with ivory skulls. Upon the throne rests a magnifi-cent platinum crown and an electrum scepter with a gold ball at one end and a silver knob at the other.
The crown and the scepter both radiate transmuta-tion magic when scrutinized with a detect magic spell. A creature that dons the crown has the power to suppress the pillars’ levitation effect and end the effects of weightlessness on any other creature in the room. The wearer also sees within the hall as if in normal daylight; however, outside the room, the wearer is blinded. Furthermore, the wearer knows that the crown can be removed only by touching the scepter to its top (but not which end of the scepter). If the silver end of the scepter is touched to the crown, the crown’s wearer is instantly snuffed out and reduced to a small pile of fetid powder. If the gold end of the scepter is touched to the crown, the wearer can safely remove the crown from his or her head. A small replica of the crown is set into the lower front panel of the seat (as shown in the illustration).
If the silver end of the scepter is touched to this inlay, the throne sinks into the dais, revealing a 5-foot-wide passageway leading south (to area 28). Treasure: The platinum crown is worth 25,000 gp, and the scepter is worth 12,500 gp. However, both items are cursed such that if one or the other is removed from the tomb, a vrock demon determined to reclaim the item seeks out the possessor. If both items are removed, two vrocks appear.
26. CryptsTwo of these areas are marked on the map. When one or more characters come within 10 feet of either door, read or paraphrase the boxed text below.
This door has a brass pull-ring set into it. As you approach, the door begins to shimmer with a faint blue light.
The blue light brightens when the door or its brass pull-ring is touched. Furthermore, the brass pull-ring telepathically beckons a character holding it to open the door. The western room contains only dust. If the door to the eastern room is opened, read or paraphrase the following text.
MuMMyMedium undeadArmor Class 13Hit Points 39 (6d8 + 12)speed 20 ft.senses darkvision 60 ft.str 16 (+3) Dex 10 (+0) Con 14 (+2)Int 6 (–2) Wis 14 (+2) Cha 15 (+2)Alignment lawful evilLanguages Common
TraitsImmunities: The mummy cannot be frightened, paralyzed, stunned, or put to sleep. It is also immune to disease and poison.Resistances: The mummy is resistant to bludgeoning, piercing, and slashing damage.Vulnerability: The mummy is vulnerable to fire.
ActionsMelee Attack—Rotting Touch: +5 to hit (reach 5 ft.; one creature). Hit: 6 (1d6 + 3) bludgeoning damage plus 7 (2d6) necrotic damage, and the target must make a DC 12 Constitution saving throw. Failed Save: The target is cursed with mummy rot. While cursed, it cannot regain hit points, and its hit point maximum drops by 10 for every 24 hours that elapse. If its hit point maximum drops to 0 or lower, the target dies. A lesser restoration spell cast on the target ends the curse.
Encounter BuildingLevel 5 XP 300
Tomb of Horrors
85A p r i l 2 013 | DU NGEON 213
Beyond the door is a 10-foot-square room contain-ing a low stone table, upon which rests a wooden sarcophagus. Various broken and looted chests, urns, and coffers are scattered about.
Inside the sarcophagus are the mummified remains of a female human, its wrappings tattered. An ame-thyst gem is visible in the mummy’s right eye socket, and the mummy wears a gold ring on the third digit of its left hand. Creature: If the gem is removed, the mummy ani-mates and attacks. Treasure: The amethyst is worth 5,000 gp, and the gold ring is a ring of fire resistance (which negates the mummy’s vulnerability to fire while the creature wears the ring).
27. Animated ArmamentsWhen one or more characters come within 10 feet of the door leading to this small room, read or para-phrase the following text.
This door has a brass pull-ring set into it. As you approach, the door begins to shimmer with a faint purple light.
The faint purple light turns a bright, coruscating purple with tinges of sickly green when the door or its brass pull-ring is touched. As with the doors leading to area 26, the brass pull-ring telepathically beckons a character holding it to open the door. If the glowing door is opened, show the players ILLUSTRATION #27, and read or paraphrase the following text.
Beyond the door lies a 10-foot-square chamber with a small, featureless door set into the middle of the north wall. The walls here are hung with pairs of swords crossed behind shields. There are three sets to the west, three to the east, and two more f lanking the door to the north—eight sets in all.
The door set into the north wall slides neatly into a cavity in the adjoining east wall, but opening it requires an action. Unless it is wedged open, the door closes on its own after 1 round. Beyond the door lies area 27A. A detect magic spell cast in the room reveals no magical auras. Acererak has cast wards upon the area to prevent the spell from detecting the magical con-structs that guard the chamber. Eight sets of armaments hang on the walls. Each time a living creature enters this small room through the south door, one set (consisting of two swords and one shield) f lies off the wall to attack the interloper. If the set is destroyed, another set animates to take its place until all eight sets are animated and destroyed.
If multiple living creatures enter the room, one set of armaments animates for each intruder. However, there’s an added danger to having more than one set animated at a given time: each animated set after the first grants a cumulative +1 bonus to AC, attack rolls, and damage rolls to all animated sets in the room (maximum bonus of +7). For example, if four sets are animated at once, they each gain a +3 bonus to AC, attack rolls, and damage rolls. The animated armaments return to their original hanging positions as soon as no living creatures are in the room.
AnimAted ArmAment SetMedium ConstructArmor Class 15Hit Points 33 (6d8 + 6)Speed 0 ft., fly 30 ft.Senses blindsight 30 ft.Str 15 (+2) Dex 16 (+3) Con 12 (+1)Int 2 (–4) Wis 10 (+0) Cha 1 (–5)Alignment unalignedLanguages —
TraitsArmament Attrition: A set includes one shield and two swords. The first time the set is reduced to 22 hit points, the shield is destroyed and the set’s AC decreases by 2. The first time the set is reduced to 11 hit points, one of its swords is destroyed and the set loses its multiattack action. When the set drops to 0 hit points, its remaining sword is destroyed.Immunities: The set cannot be charmed, frightened, knocked prone, paralyzed, petrified, stunned, or put to sleep. It is also immune to disease and poison as well as necrotic, psychic, radiant, and thunder damage.
ActionsMultiattack: The set makes two long sword attacks (see also the Armament Attrition trait).Melee Attack—Long Sword: +5 to hit (reach 5 ft.; one creature). Hit: 6 (1d8 + 2) slashing damage.
Encounter BuildingLevel 4 XP 180
Tomb of Horrors
86A p r i l 2 013 | DU NGEON 213
27A. Chamber of hopelessnessShow the players ILLUSTRATION #27A.
This bleak chamber is littered with skeletons, rot-ting equipment, and treasure. A small fountain set into the eastern wall spills water into a stone basin. Words are scrawled in glowing letters along the north wall. Written in Common, they read:
YOU WHO DARED TO VIOLATE MY TOMB NOW PAY THE PRICE. STAY HERE AND DIE SLOWLY OF STARVATION, OR OPEN AND ENTER THE DOOR TO YOUR SOUTH WHERE CERTAIN BUT QUICK DEATH AWAITS. WHICHEVER YOU CHOOSE, KNOW THAT I, ACERERAK THE ETERNAL, WATCH AND SCOFF AT YOUR PUNY EFFORTS AND ENJOY YOUR DEATH THROES.
Characters who are teleported here from area 25B are in for a rude surprise if they open the door to the south (see area 27). All of the sets of armaments hanging on the walls of area 27 animate and attack at once (each gaining a +7 bonus to AC, attack rolls, and damage rolls). They return to their hanging positions if the characters withdraw to this chamber. The water spilling from the fountain drains away through side holes, so there’s always plenty to drink. It is impossible to f lood the room, for hundreds of small drain holes are in the f loor and along the base of the walls. Treasure: Characters searching the skeletons and rotting equipment find 300 sp, 200 ep, 150 gp, 75 pp, and 2d10 gems (worth 10 gp each) scattered about. There are also crushed gems and broken magic items littered here and there—the work of insane victims and attacking swords. Only two magic items survive: a f lail +1 and a potion of diminution.
28. Wondrous FoyerShow the players ILLUSTRATION #28.
The narrow passage widens to a landing and steps that funnel out to the south as they ascend. The six steps are made of onyx, pink marble, lapis, black marble, serpentine (golden), and malachite, and upon the fourth step is a bronze key. The walls of the foyer are composed of untarnished and gleam-ing copper panels set between rare woods inlaid with ivory. The 30-foot-high ceiling is silver, formed so as to reflect and multiply light within the place. The steps end before a pair of tall mithral doors joined together by a cup-shaped concavity with a keyhole in the middle of it. The doors have no vis-ible handles, hinges, or other fixtures.
See area 29 for more information on the mithral doors. Each step leading up to the doors is 1½ feet tall. The bronze key lying on the fourth step has a curse placed upon it, such that any creature that touches it must make a DC 14 Wisdom saving throw. Creatures that fail the save not only are compelled to relinquish the key but also will not allow it within 2 feet of them under any circumstances. A lesser restoration spell cast on the aff licted creature ends the effect, which is oth-erwise permanent. The Bronze Key: The key, hereafter referred to as the SECOND KEY, fits into the keyhole but does not unlock the mithral doors. See area 29 for details.
29. Mithral DoorsTogether, the doors are 9 feet wide and 27 feet tall. They are composed of 3-foot-thick solid mithral impregnated with powerful magic that makes them impervious to spells. If the doors are attacked with weapons, they do not budge; however, scratches or nicks cause the doors to gush blood from their “wounds”—the blood
of all who have perished in the tomb. The blood cas-cades down the steps and fills the foyer to the top of the first step (1½ feet deep) in 6 rounds, and each round thereafter it rises higher by one step (1½ feet). In 20 rounds, the blood completely fills the foyer to the 30-foot-high ceiling. A greater restoration or heal spell applied to the doors stops the f low of blood. Certain other spells have unusual effects if cast on the blood or the doors, as described below.
F A cone of cold cast on the doors stops the f low of blood for 3 rounds.
F Fire of any sort, magical or otherwise, turns the blood to a poisonous gas. Creatures in the foyer that are not immune to poison are killed instantly, and those in the 5-foot-wide passageway leading to area 25 must make a DC 14 Constitution saving throw. A failed save results in death.
F A disintegrate spell destroys all blood present but doesn’t stop the f low of blood.
F A polymorph spell causes the blood that is present to coalesce into a giant bloodred ochre jelly that attacks at once. Use the ochre jelly statistics in area 19, but increase its size to Huge, increase its hit points to 142 (15d12 + 45), and allow it to make up to three slam attacks as a single action. If the ochre jelly or one of its smaller, split-off versions is killed, it turns back into blood that further fills the foyer. The giant ochre jelly is a level 7 creature worth 2,000 XP if slain.
F A raise dead or resurrection spell destroys all the blood, stanches the f low of blood from the doors, and causes an apparition to appear at the top of the steps. The apparition restores all spent Hit Dice to every character present and casts a bless spell on the party that lasts for 24 hours.
Opening the Doors: Where the two valves meet is a hemispherical concavity with a central hole.
Tomb of Horrors
87A p r i l 2 013 | DU NGEON 213
The latter appears to be a keyhole for the SECOND KEY, but if the bronze key is inserted, any character touching the key takes 5 (1d10) lightning damage. Inserting the FIRST KEY (see area 19) into the lock deals 11 (2d10) lightning damage. Neither key opens the doors. The real key is the electrum scepter in area 25D. If the scepter’s gold ball is inserted into the depres-sion, the mithral valves swing silently open into area 30. On the other hand, if the scepter’s silver knob is touched to the hemispherical concavity, the character holding the scepter is teleported away and “spat” out of the mouth of the devil face in area 6, completely nude, and any nonliving materials formerly in the character’s possession are teleported to area 33. The crown and scepter are teleported back to the throne in area 25D.
30. False treasure RoomShow the players ILLUSTRATION #30.
This imposing room has a silvered ceiling that reflects light in order to brighten its contents. The walls are of ivory with gold inlay. The f loor is made of polished (but common) agate. In each corner stands a 9-foot-tall, black iron statue of fearsome visage. The northeast statue stands with a saw-toothed greatsword raised to strike; the northwest statue clutches a huge, spike-ended mace. The southwest statue brandishes a polearm, and the southeast statue readies a spiked morningstar. Against the south wall rests a granite sarcopha-gus f lanked by two heavy iron chests. The name ACERERAK is spelled in glyphs on the sarcopha-gus lid. Resting at the foot of the sarcophagus is a bronze urn with gold filigree. A thin stream of smoke issues from a tiny vent in its brass stopper.
The room is lined with lead and has antimagic prop-erties, suppressing all magic item properties and spell effects. Only detect magic spells work normally. The bronze urn, the granite sarcophagus, and the iron chests are marked on the map as A, B, and C, respectively. Each is described below. The statues are imbued with false magical auras to fool adventurers, but they are merely harmless hunks of metal. Behind one of the statues is a secret door, marked D on the map and described below.
30A. Bronze urnThis gold-filigreed container is big and awkward, and its brass stopper is sealed shut with gold fill. This gold must be pried out to open the urn. If the stopper is removed, an efreeti appears in a plume of smoke. If the urn has been battered, knocked about, shaken, overturned, and so on, the efreeti is furious and
attacks. Otherwise, it performs three services for the party and then returns to the Elemental Plane of Fire.
EFREETiLarge elemental (Fire)Armor Class 15Hit Points 150 (12d10 + 84); see Traits belowspeed 40 ft., fly 60 ft.senses darkvision 60 ft.str 22 (+6) Dex 11 (+0) Con 24 (+7)Int 16 (+3) Wis 15 (+2) Cha 16 (+3)Alignment lawful evilLanguages Common, Ignan
TraitsFiery Demise: When the efreeti dies, it disappears in a flash of fire and a puff of smoke, leaving behind embers and any gear it was carrying or wearing.Immunities: The efreeti is immune to fire.Telepathy: The efreeti can communicate telepathically with any creature within 100 feet that speaks or understands a language.
ActionsMultiattack: The efreeti makes two scimitar attacks.Melee Attack—scimitar: +9 to hit (reach 10 ft.; one creature). Hit: 13 (2d6 + 6) slashing damage and 10 (3d6) fire damage.smoke Form (Recharge 6): The efreeti polymorphs into a 10-foot-diameter cloud of smoke. In this form, it cannot take actions and cannot be harmed, but it can pass through the smallest gaps. The efreeti can take an action to end the effect.spellcasting: The efreeti casts one of the following spells: at will—detect magic, produce flame; 1/day—enlarge, invisibility, polymorph. Once per month, it can cast wish, but never for its own gain or benefit. The efreeti uses Intelligence as its magic ability, and the saving throw DC to resist its spells is 13.
Encounter BuildingLevel 10 XP 3,900
Tomb of Horrors
88A p r i l 2 013 | DU NGEON 213
30B. Granite SarcophagusThe outer shell of the sarcophagus is adorned with Acererak’s name in platinum inlay. The platinum can be pried out and is worth 100 pp. The back of the sarcophagus (facing the south wall) is staved in and shattered. Through the hole can be seen bits of a wooden inner shell, a few bones, destroyed jewelry (copper fittings with the precious gems pried out and absent), torn bits of robes and wrappings, dust, and a broken staff of the magi (evident from the runes upon it). The staff cannot be restored by any means, and a shattered skull rolls out if the contents are disturbed. The impression is that the demi-lich has long been destroyed, and only his magical traps have survived. Of course, this is exactly what Acererak wants tomb robbers to think. The bones in the sarcophagus are not his, and the sacking of this tomb is staged.
30C. iron ChestsEach of these massive iron boxes is set into the stone and has triple locks set with poison needle traps. No skill check is required to detect the traps, and a trapped lock can be disabled and safely opened at the same time with a successful DC 15 Dexterity check. A character failing the check is pricked by the needle and must make a DC 12 Constitution saving throw. On a failed save, the character dies. If the save suc-ceeds, the character takes 26 (4d12) poison damage. Neither chest can be moved, and both show marks of prying, battering, and so forth. Treasure: The eastern chest holds 10,000 gems, but they are merely polished quartz (1 gp each). The western chest contains 10,000 cp magi-cally disguised to appear as platinum until they are removed to a distance of 13 miles from the tomb, when their true nature becomes evident. (A true seeing spell or a gem of seeing reveals the illusion.)
30D. Secret DoorThe northwest statue has an iron pull-ring hidden inside it, tucked behind its iron shell. The pull-ring opens a secret, 2-foot-diameter circular stone plug in the wall nearby. Detecting the pull-ring and the nearby secret door requires a careful search of the area and a DC 15 Intelligence check. The pull-ring is rigged to a thick wire that wraps over a pulley, disappears into the f loor under the statue, and connects to the stone plug. If the ring is pulled, the stone plug swings outward and upward, revealing a chute that leads 10 feet down the corridor to the west. (The chute levels out before reaching the secret door at area 32.)
31. phantom pitSeveral features are not readily apparent to charac-ters traversing this east–west stretch of corridor, in particular the two one-way doors to the north and a nearby pit. These features do not exist in the same reality as the east–west corridor. One-Way Doors: A character has no trouble spot-ting these one-way doors from the north, where they can be opened and stepped through. A character stepping through a one-way door appears in the hall-way to the south as though having phased through a solid stone wall. No spell and no amount of searching can reveal the doors’ presence from the south side. Pit Trap: Opening either one-way door causes this concealed pit to come into phase at the location indi-cated on the map. The pit trap remains a real danger in that location for 24 hours, after which it phases back out of reality. Other than its tendency to appear and disappear, the 10-foot-deep spiked pit is identical to most other pits in the tomb (see “Tomb Features”).
32. Secret DoorThis hidden portal cannot be detected by any magi-cal or mundane means. However, careful inspection
of the wall reveals a tiny, metal-lined keyhole at chest height. Any attempt to force entry is fruitless. If the FIRST KEY (see area 19) is inserted into the keyhole, the secret door (a 5-foot-wide, 8-foot-tall, 3-foot-thick slab of stone-sheathed adamantine) sinks into the f loor.
33. Vault of AcererakThe secret door slowly sinks into the f loor, reveal-ing a dark, dusty vault 10 feet wide and 20 feet deep with a peaked ceiling 25 feet above. The vault is empty.
Close inspection reveals a keyhole in the middle of a 2-foot-square, shallow depression in the center of the f loor. If the FIRST KEY (see area 19) is inserted into the keyhole, it explodes and is destroyed, dealing 35 (10d6) force damage to its holder. If the SECOND KEY (see area 28) is inserted into the keyhole, nothing occurs until the key is turned three times to the right in succession. Immediately after this is done, Acererak’s true vault rises up from below the f loor. When this happens, read or para-phrase the text below.
Everything around you begins to tremble as the f loor in the southern 15 feet of the crypt begins to peak and rise up toward the ceiling. As it does, a sealed vault below this one begins to rise out of the f loor, pushing steadily upward with a loud grinding noise.
Any character in the southern 15 feet of the vault must make a DC 10 Dexterity saving throw to quickly leap down toward the north. On a failed save, the character is crushed against the peaked ceiling over-head, squashed to jelly, and killed. The crypt rising from the f loor is a sealed mithral vault. The mithral door set into the north face of the vault has an inset pull-ring. A hard pull causes the
Tomb of Horrors
89A p r i l 2 013 | DU NGEON 213
thick door to swing open, releasing a blast of foul but harmless air.
the Mithral VaultShow the players ILLUSTRATION #33 once Acer-erak’s mithral vault is opened.
The f loor of the mithral vault is strewn with treasure. Situated at the back of the vault under an arcane wall mural is a ghostly white block of engraved stone with a jeweled skull and a heap of powdered bone atop it.
The arcane wall mural is a complex series of glyphs that safeguard the crypt against scrying magic and other forms of divination. Scattered upon the f loor is the treasure. Treasure: The items lying on the f loor of the vault include the following.
F All items belonging to characters that were tele-ported here.
F 97 gems worth 10 gp each, and 3 large gems of considerable value (a peridot worth 10,000 gp, an emerald worth 50,000 gp, and a black opal worth 100,000 gp). The large gems can be used as mis-sile weapons against Acererak; when shot with a sling, a gem deals 1 force damage per 10,000 gp value to the demi-lich on a hit (but the gem is shat-tered on impact whether it hits or misses).
F 12 potions and 6 scrolls (determined randomly).
F 1 ring, 1 rod, 1 staff, and 3 wondrous items of your choice.
F A vorpal greatsword.
F A cursed mace that behaves in every respect like a mace of disruption until it scores a critical hit, whereupon it also disintegrates its wielder (no saving throw).
F A cursed spear +3. It functions normally as a melee weapon, but if thrown, the spear turns in midair and attacks the wielder instead.
If the treasure on the f loor is disturbed, read or para-phrase the following text:
The dust atop the white block stirs and rises into the air, assuming a vaguely humanoid shape.
Creature: If the shape is ignored, it dissipates in 3 rounds; it can only advance and threaten, not harm. If the shape is attacked, it ignores all damage and instead gains 1 hit point for every point of damage dealt. It appears to stagger and waver with each attack, but this is a ploy by Acererak to fool tomb rob-bers into thinking their efforts are having the desired effect. If it gains 50 hit points or more in this manner, the dusty apparition (under Acererak’s control) attacks immediately.
APPARiTiOnMedium undeadArmor Class 11Hit Points 54 (12d8); see Traits belowspeed 40 ft., fly 40 ft.senses darkvision 60 ft.str 3 (–4) Dex 13 (+1) Con 10 (+0)Int 6 (–2) Wis 12 (+1) Cha 14 (+2)Alignment neutralLanguages —
Traitsethereal: The apparition is ethereal.Immunities: The apparition cannot be paralyzed, petrified, put to sleep, stunned, turned, rebuked, or knocked prone. It is immune to disease and poison.
ActionsMelee Attack—Corrupting Touch: +9 to hit (reach 5 ft.; one creature). Hit: 20 (4d8 + 2) necrotic damage.Horrifying Visage: Each creature within 50 feet of the apparition that can see it must make a DC 10 Wisdom saving throw. Failed Save: The creature ages 4d10 years and is frightened for 1 minute. As an action, the frightened creature can make a DC 10 Wisdom check to no longer be frightened, but only a greater restoration spell can undo the unnatural aging. Successful Save: The creature is immune to the apparition’s horrifying visage for the next 24 hours. This immunity also applies once the frightened effect ends.Possession (Recharge 6): The apparition chooses a living creature within 5 feet of it. The chosen creature must make a DC 10 Charisma saving throw. Failed Save: The apparition vanishes into the target. For the next 24 hours, the apparition controls the target’s actions. Successful Save: The target is not possessed and is immune to the apparition’s possession for the next 24 hours. The apparition can leave its host at any time (no action required), ending the possession. A turn undead effect or a greater restoration spell that targets the possessed creature automatically drives out the apparition. Whether the ghost leaves voluntarily or by force, it reappears in a space within 5 feet of its former host.
Encounter BuildingLevel 7 XP 1,760
Tomb of Horrors
90A p r i l 2 013 | DU NGEON 213
Acererak the Demi-lichShow the players ILLUSTRATION #33A. Ages past, a human wizard/cleric of surpassing evil took the steps necessary to preserve his life force beyond the centuries he had already lived, and this creature became the lich Acererak. Over the scores of years that followed, the lich dwelled with hordes of ghastly servants in the gloomy stone halls of the very hill where the tomb resides. Eventually even the undead life force of Acererak began to wane, so for the next eight decades, the lich’s servants labored to create the Tomb of Horrors. Then Acererak destroyed all of his slaves and servitors, magically hid the entrance to his halls, and went to his final haunt, while his soul roamed strange planes unknown to even the wisest of sages. Joining the halves of the FIRST KEY calls his soul back to the Material Plane, and use of the SECOND KEY alerts the now demi-lich that he must prepare to do battle to survive yet more centuries. All that remains of Acererak are the dust of his bones and a skull with two 50,000 gp rubies set into its eye sockets. The skull also has six pointed (marquis cut) diamonds set as teeth in its jaw (each diamond is worth 5,000 gp). If any character is foolish enough to touch or strike the skull, a terrible thing occurs.
The skull rises into the air, its ruby eyes f lickering with malevolence, its diamond teeth agleam with ancient hunger for the souls of the damned.
The skull is all that remains of Acererak’s body, but it’s all the demi-lich needs to show the heroes the folly of their endeavors. It tries to trap the soul of the character who touched it in one of its gems. If the character resists by making a successful saving throw, the demi-lich tries again on its next turn. Once it suc-ceeds in trapping the offender’s soul, it sinks down, sated for the time being. If struck or touched again, it rises again and tries to capture another soul. Once it
has trapped two souls, it pronounces a vile curse on the surviving interlopers. A gem that contains a trapped soul glows with a faint inner light. When viewed with a true seeing spell or a gem of seeing, the inner light assumes the tiny form of the creature trapped within. Although the demi-lich has the power to devour the souls it has captured, it prefers not to. It would rather savor the undying torment of the souls than snuff them out quickly.
AcererAk the Demi-lichTiny UndeadArmor Class 20Hit Points 50 (20d4)Speed 0 ft., fly 30 ft.Senses darkvision 120 ft.; see also the True Seeing traitStr 1 (–5) Dex 10 (+0) Con 10 (+0)Int 24 (+7) Wis 17 (+3) Cha 21 (+5)Alignment neutral evilLanguages — (see Telepathy trait)
TraitsDestruction: When the demi-lich is reduced to 0 hit points or fewer, it is destroyed and turns to powder, leaving behind eight gems. Roll a d6 for each gem that contains a trapped soul; on a roll of 1–5, the soul within the gem is devoured by Acererak, and nothing short of divine intervention can restore it. On a roll of 6, the soul remains trapped in the gem and can be released by crushing the gem. However, a material body must be ready within 10 feet to receive it, or the soul is released into the afterlife.Immunities: The demi-lich cannot be charmed, frightened, paralyzed, petrified, stunned, or put to sleep. It is immune to disease and poison, as well as acid, cold, fire, lightning, and psychic damage. Inside its own tomb, the demi-lich cannot be turned.Resistances: The demi-lich is resistant to force, thunder, and weapon damage.Telepathy: The demi-lich can communicate telepathically with any creature within 100 feet that speaks or understands a language. Its telepathy extends to the Ethereal Plane.
True Seeing: The demi-lich can see invisible creatures and the true forms of creatures that have changed their shape. It always succeeds on saving throws against illusions, and it can see into the Ethereal Plane.
ActionsTrap the Soul: The demi-lich chooses one living creature within 30 feet of it that it can see. The target must be on the Material Plane or the Ethereal Plane, and it must make a DC 14 Charisma saving throw. Failed Save: The soul of the target is trapped inside one of the demi-lich’s gems. Meanwhile, the target’s body collapses in a mass of corruption that completely molders and vanishes by the start of the demi-lich’s next turn. The demi-lich can capture the souls of up to eight creatures in its gems. If the demi-lich traps a ninth soul, one randomly determined soul already trapped in a gem is devoured to make room, and nothing short of divine intervention can restore it.Vile Curse (1/day): The demi-lich pronounces a horrible curse, targeting all hostile creatures within 30 feet of it that it can see. Each target has disadvantage on attack rolls and saving throws until the effect is lifted by a greater restoration spell. In addition, the target must make a DC 14 Wisdom saving throw. Failed Save: The target is teleported 100–600 miles away to a random, safe location. Treasure from the tomb carried by the target is not teleported with it.
Encounter BuildingLevel 14 XP 11,530
Tomb of Horrors
91A p r i l 2 013 | DU NGEON 213
concluding the adventureDestruction of the demi-lich marks the end of the adventure. Characters who survive the ordeal can leave the tomb with a king’s ransom—not to mention bragging rights, for they have prevailed where count-less others have not! This ends the expedition to the Tomb of Horrors. We hope you and your players have found it exciting, challenging, and rewarding.
4th edition converSionAs noted at the beginning of this adventure, a 4th Edition conversion of the original Tomb of Horrors is already f loating out there in the ether. However, it was printed in limited quantities and given away as a DM Reward to Organized Play participants, and about the only place you’ll find a copy these days is on eBay. Moreover, it was designed for 9th-level charac-ters and provided a more balanced play experience. If you’re looking for something closer in concept to the original, you can run this D&D Next adap-tation as a 4th Edition adventure for characters of levels 14–16 by following these straightforward con-version rules.
Ability Checks vs. Skill ChecksD&D Next uses ability checks instead of skill checks as its primary form of task resolution. For example, to spot a secret door, one makes an Intelligence check or a Wisdom check, not a Perception check. In addition, the character might have a feat, a class feature, a racial trait, or another ability that applies a bonus to the check.
Whenever the adventure calls for an ability check, you can substitute the appropriate skill and set the skill check DC based on the party’s level, as given in the table on page 126 of the Rules Compendium™. Most skill check DCs in the Tomb of Horrors should be moderate or hard.
Saving throwsIn D&D Next, a saving throw is an instantaneous response to a harmful or debilitating effect, such as a lightning bolt or a fall into a pit. A saving throw is keyed to one of the six ability scores. In 4th Edition, this sort of effect is resolved by making an attack roll against one of four defenses (AC, Fortitude, Ref lex, or Will). Whenever the adventure calls for a saving throw, have the “attacker” (a monster, a pit trap, or whatever) instead make an attack roll. The attack modifier is 5 + the attacker’s level against AC, or 3 + its level against Fortitude, Reflex, or Will. (For the sake of simplic-ity, you can assume that a trap is the same level as the player characters, or you can use the rules under “Traps” below.) If the attack hits, resolve the outcome as though the target had failed its saving throw. If the attack misses, resolve the outcome as though the target had succeeded on its saving throw.
trapsTraps causing instant death (what in the old days we referred to as “save or die” effects) are frowned upon in 4th Edition. That said, if you want an authentic Tomb of Horrors experience, you can keep the “save or die” effects by requiring characters to make skill checks instead of saving throws and keeping the out-come of failure the same. It will shock them, but that’s sort of the point! Since 4th Edition characters have more hit points than their D&D Next counterparts, damage-deal-ing traps need a boost. You can select a trap of the
appropriate level and use it as a guide or replace-ment. If that isn’t good enough for you, whenever a trap targets a 4th Edition character with an attack or an effect, it deals damage equal to the trap’s level + 8 if the attack is something the trap can do at will. If the trap can make the attack only once, it deals 1½ times that damage. If the trap’s effect can easily affect two targets, the damage is three-quarters normal. If the trap’s effect can affect three or more targets, its damage should be about half normal. You can convert the raw number into a die expression if you want. For example, you might decide that a false door rigged with a spear trap (see area 12 for details) is a level 15 trap. Such a trap has an attack bonus of +20 (5 + the trap’s level) vs. AC, and since the trap is unlikely to be triggered more than once, it should probably deal about 35 damage on a hit, or 6d6 + 14. Elite Traps: Elite traps typically deal twice the given damage in a given round, sometimes over mul-tiple attacks. Moreover, skill check DCs to detect and disarm such traps are normally increased by 4. Awarding XP for Traps: A trap is worth as much XP as a monster of its level. See the Rules Compendium for more information on XP awards.
Damage typesThere’s no such thing as “untyped damage” in D&D Next, where all damage has a type. As was true in 3rd Edition, weapons deal bludgeoning, piercing, or slash-ing damage. However, you can treat these as “untyped damage” when running this adventure for 4th Edi-tion characters. Falling Damage: When running this adventure for 4th Edition characters, use normal 4th Edition falling damage.
treasure SwapsUse the Rules Compendium (pages 298–302) to deter-mine treasure appropriate to the party’s level, and
Tomb of Horrors
92A p r i l 2 013 | DU NGEON 213
then assign the treasure to the following areas of the tomb, replacing the treasures already there.
Location Treasure 13 standard 18A standard 22 standard × 2 26 standard 27A standard 30 standard 33 standard × 2
Other treasures can be left as is. In some cases, the treasure found in these areas has a narrative tie to the adventure or is needed for some other purpose in the tomb. Examples include the gemstone collar in area 8 and the crown and the scepter in area 25D.
Monster SwapsUse the following 4th Edition monsters in place of the ones in this adventure. Sources are provided for easy reference; however, statistics for these monsters are also available in the online D&D Compendium™. Giant Four-Armed Gargoyle (area 8): Use the gargoyle mauler from the Tomb of Horrors hardcover super-adventure (page 112). Enlarged Skeleton and Snake Swarm (area 13): Use the skeletal tomb guardian and the snake swarm in Monster Vault™ (pages 257 and 301, respectively). Glorified Zombie (area 18): Use the mummy tomb guardian from Monster Vault (page 213). Ochre Jelly (area 19): Use the blood demon from Demonomicon™ (page 105). For the giant bloodred ochre jelly that might appear in area 29, use 2d4 blood demons instead. Siren (area 22): Use the frost witch harpy from Monster Vault: Threats to the Nentir Vale™ (page 56), and assume she looks like a comely human woman. Mummy (area 26): Use the royal mummy from Monster Vault (page 214).
Sets of Armaments (area 27): Use the statistics shown on this page. As described in the encounter, the sets gain bonuses to AC, attack rolls, and damage rolls based on how many are activated. Efreeti (area 30): Use the efreet fireblade from Monster Vault (page 103). If it proves too challenging for a paragon-level party, have it vanish to the Ele-mental Chaos when first bloodied. Apparition and Acererak the Demi-lich (area 33): Use the eldritch phantom and Acererak construct from the Tomb of Horrors hardcover super-adventure (pages 74 and 77, respectively).
About the AuthorsGary Gygax is best remembered throughout the gaming industry as the grandfather of modern RPGs and the cocre-ator of the Dungeons & Dragons roleplaying game. He passed away in 2008.
Christopher Perkins is the D&D Senior Producer at Wiz-ards of the Coast, a longtime Dungeon contributor, and a rabid fan of Gary’s work.
AFteRWoRDI’m proud to say that this is a faithful adaptation of Gary Gygax’s module—and just as lethal. Most of my work as the developer amounted to replacing 1st Edi-tion mechanics with their D&D Next counterparts, sprinkling a little bit of extra flavor text here and there, and gently reorganizing text to make informa-tion easier to find. I also added read-aloud text to the adventure, although most of the words in those boxes were culled from the original manuscript and simply made more prominent. Turning the map sideways was a fun Photoshop exercise that afforded me the chance to make the smallest of tweaks in one or two places where the map and text were at odds. I knew I was taking a risk, since that’s rather like putting lip gloss on the Mona Lisa. I hope the purists among you aren’t too horrified.
—Chris Perkins
Set of Armaments Level 11 SkirmisherMedium natural animate XP 600HP 108; Bloodied 54 Initiative +10AC 23, Fortitude 22, Reflex 23, Will 21 Perception +5speed 0, fly 6 (hover) Blindsight 5Immune dazed, disease, dominated, fear, necrotic, poison,
psychic, radiant, sleep, stunnedTraitsArmament Attrition
A set of armaments includes a light shield and two swords. When the set is first bloodied, the shield is destroyed and the set’s AC decreases by 1. When the set is reduced to 27 hit points or fewer for the first time, one sword is destroyed and the set can no longer use double attack. When the set drops to 0 hit points, the other sword is destroyed.
Hovering ThreatThe set cannot be knocked prone.
Standard Actionsm Longsword (weapon) F At-Will
Attack: Melee 1 (one creature); +16 vs. ACHit: 2d8 + 10 damage.
M Double Attack F At-WillEffect: The set uses longsword twice.
Move ActionsManeuver F At-Will
Effect: The set shifts up to half its speed.str 15 (+7) Dex 16 (+8) Wis 10 (+5)Con 12 (+6) Int 1 (+0) Cha 1 (+0)Alignment unaligned Languages —
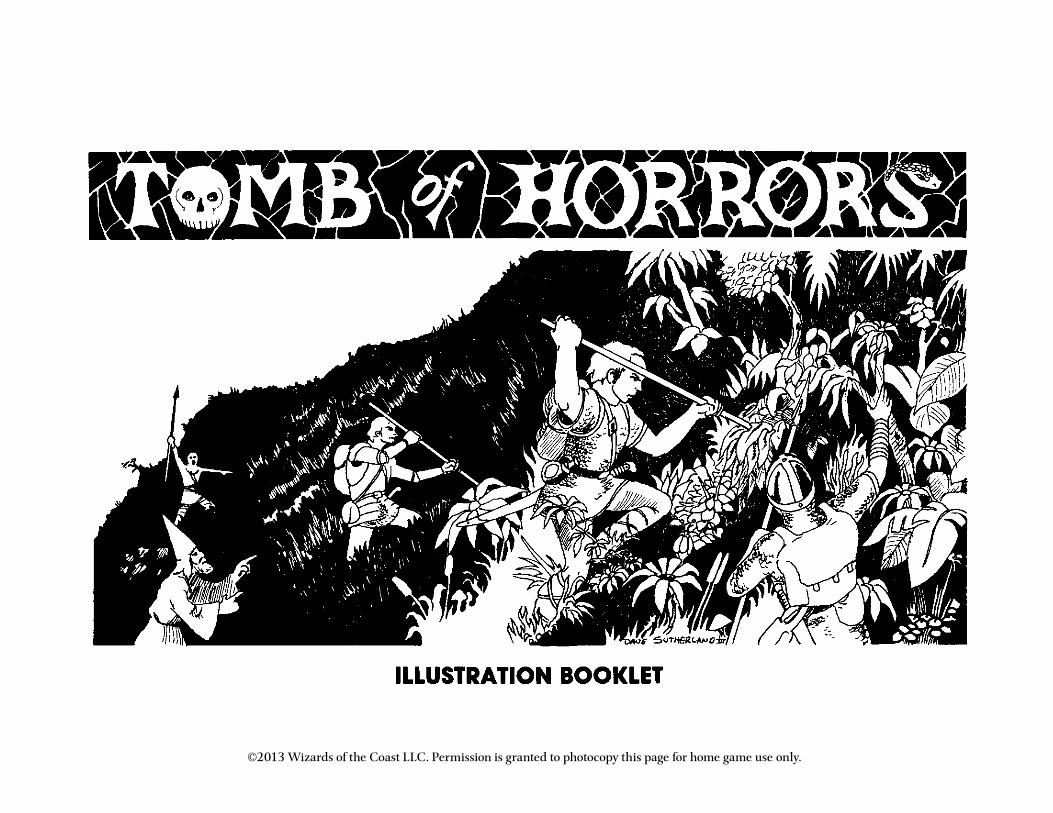
©2013 Wizards of the Coast LLC. Permission is granted to photocopy this page for home game use only.
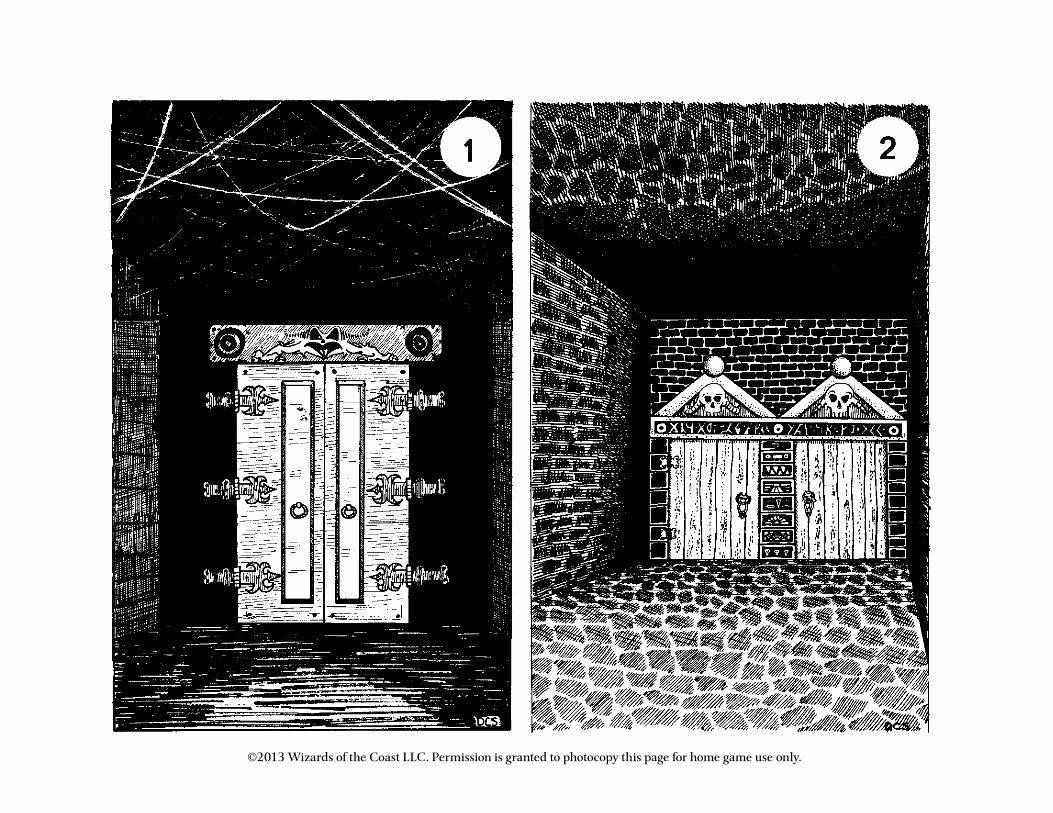
©2013 Wizards of the Coast LLC. Permission is granted to photocopy this page for home game use only.
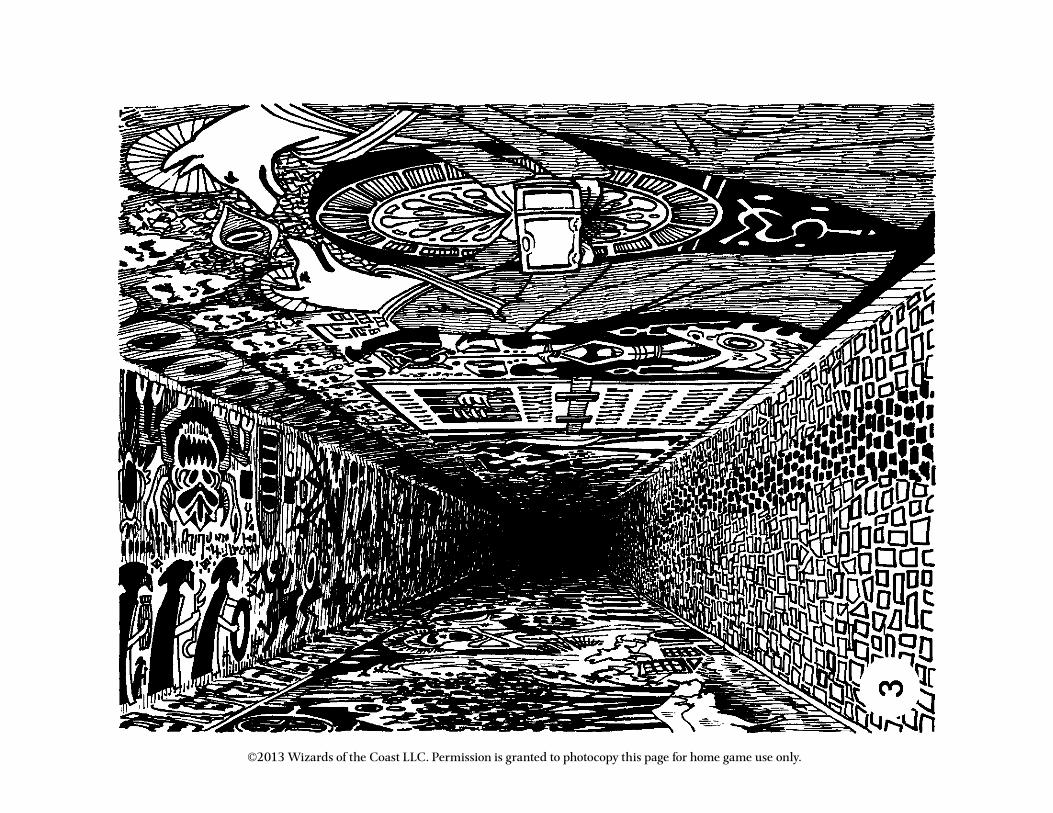
©2013 Wizards of the Coast LLC. Permission is granted to photocopy this page for home game use only.
©2013 Wizards of the Coast LLC. Permission is granted to photocopy this page for home game use only.
©2013 Wizards of the Coast LLC. Permission is granted to photocopy this page for home game use only.
©2013 Wizards of the Coast LLC. Permission is granted to photocopy this page for home game use only.
©2013 Wizards of the Coast LLC. Permission is granted to photocopy this page for home game use only.
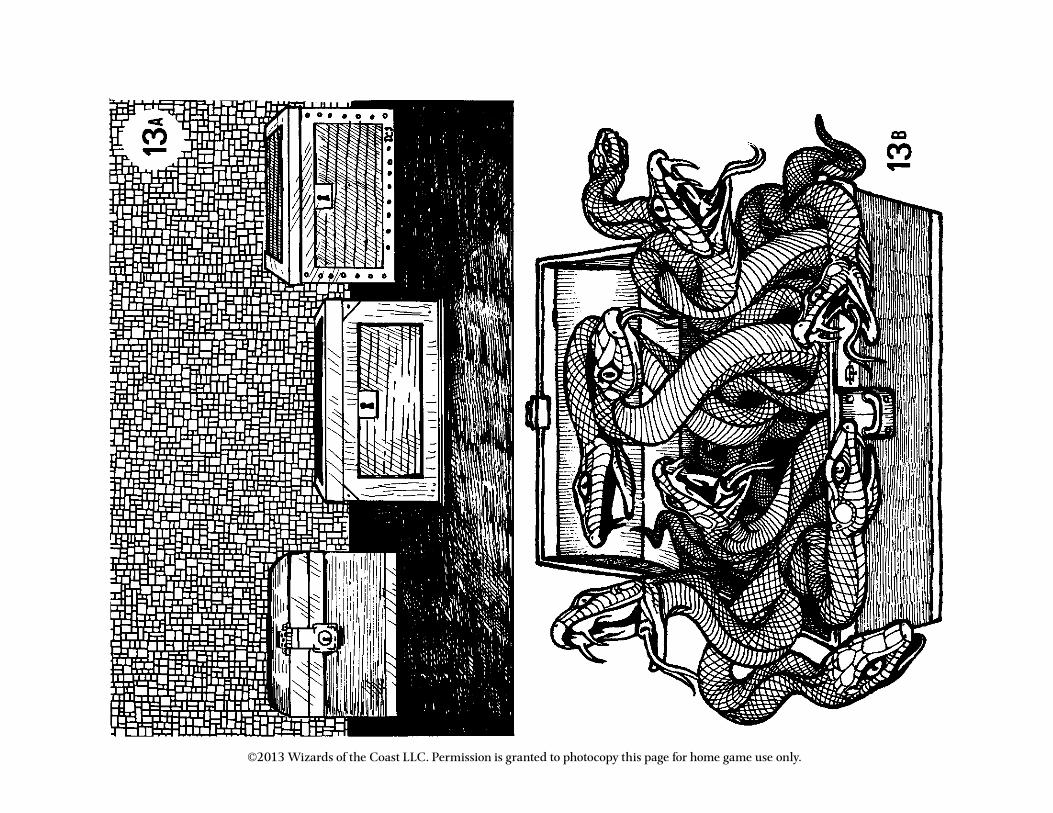
©2013 Wizards of the Coast LLC. Permission is granted to photocopy this page for home game use only.
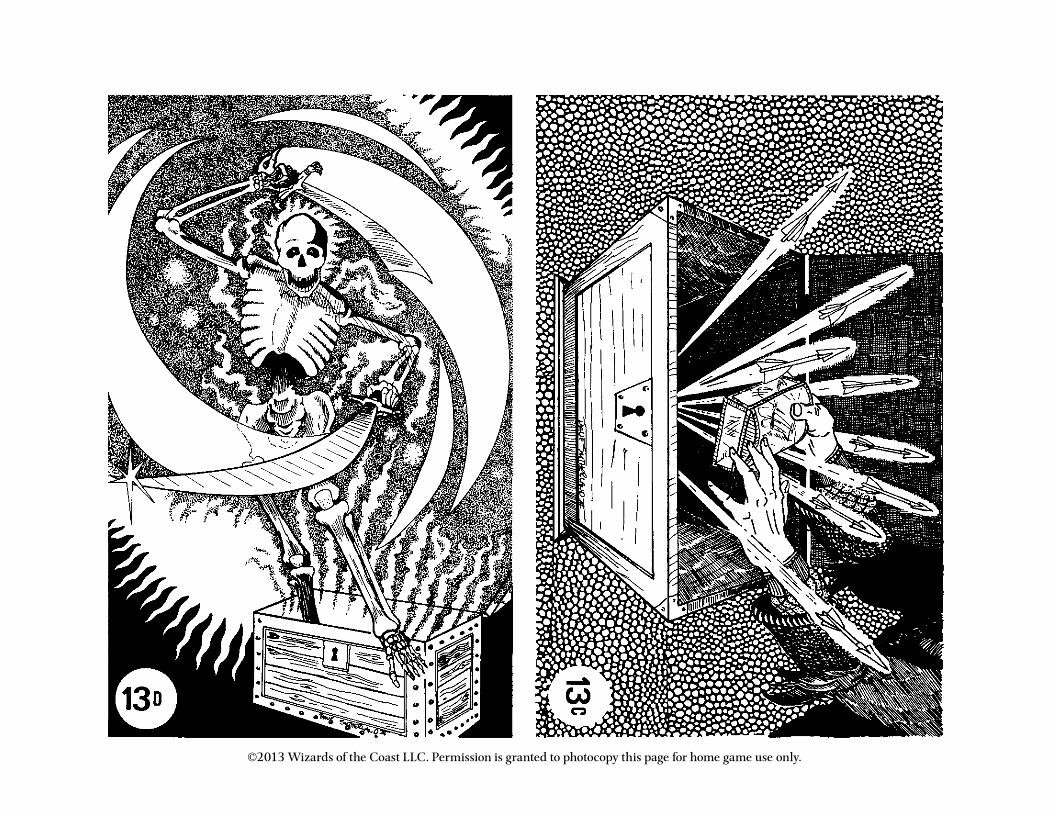
©2013 Wizards of the Coast LLC. Permission is granted to photocopy this page for home game use only.
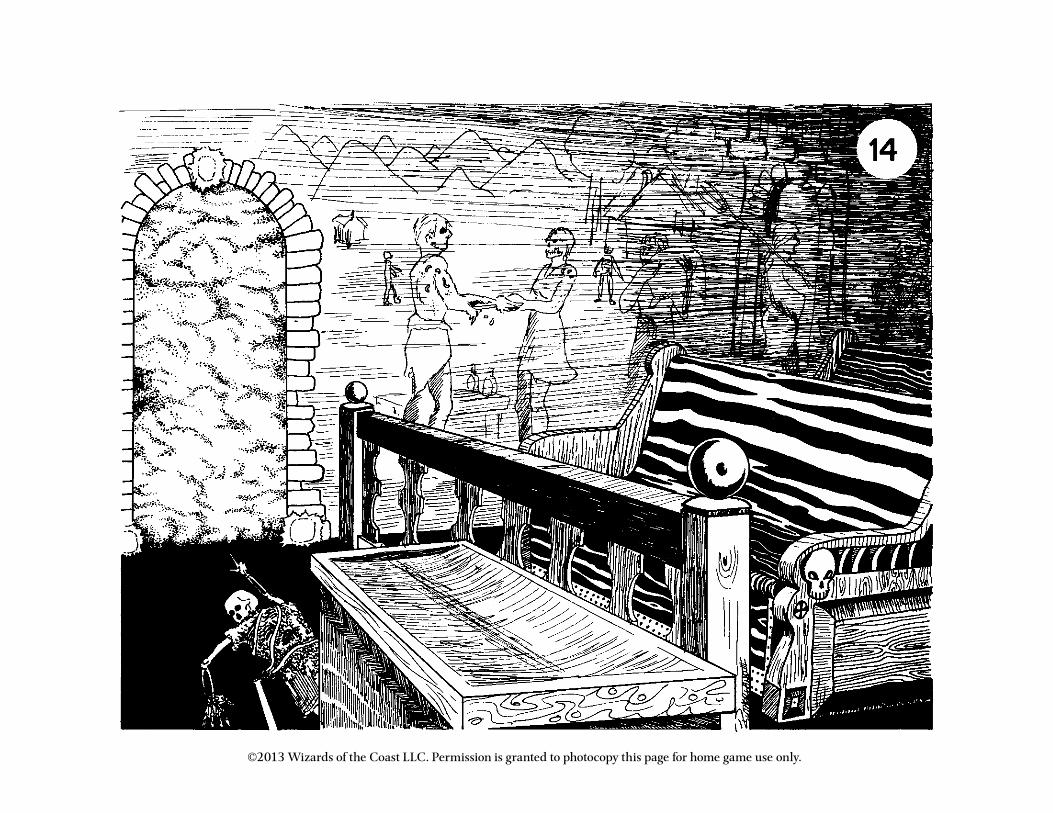
©2013 Wizards of the Coast LLC. Permission is granted to photocopy this page for home game use only.
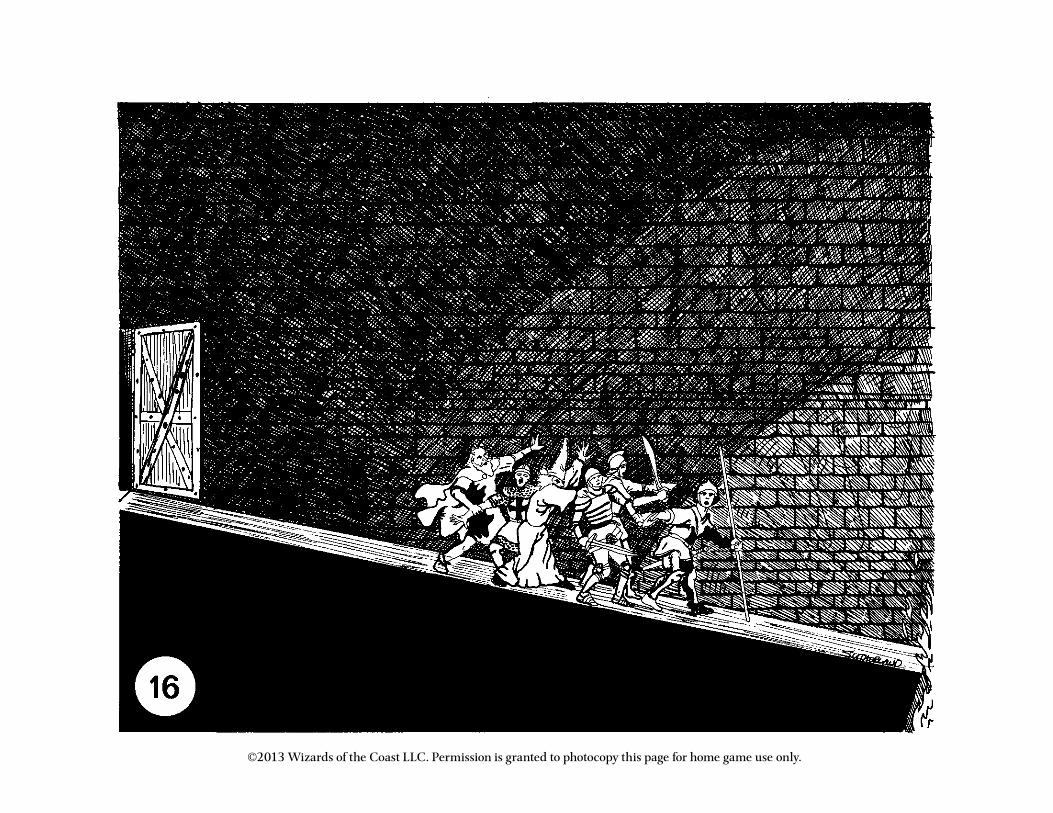
©2013 Wizards of the Coast LLC. Permission is granted to photocopy this page for home game use only.
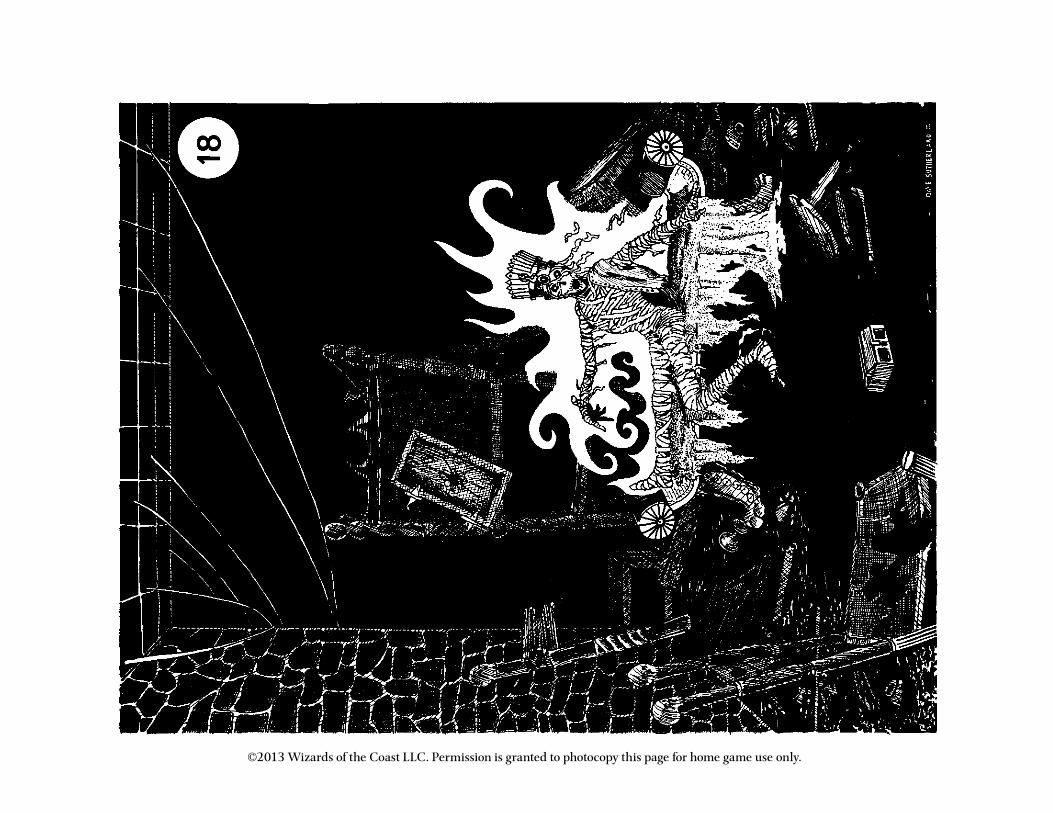
©2013 Wizards of the Coast LLC. Permission is granted to photocopy this page for home game use only.
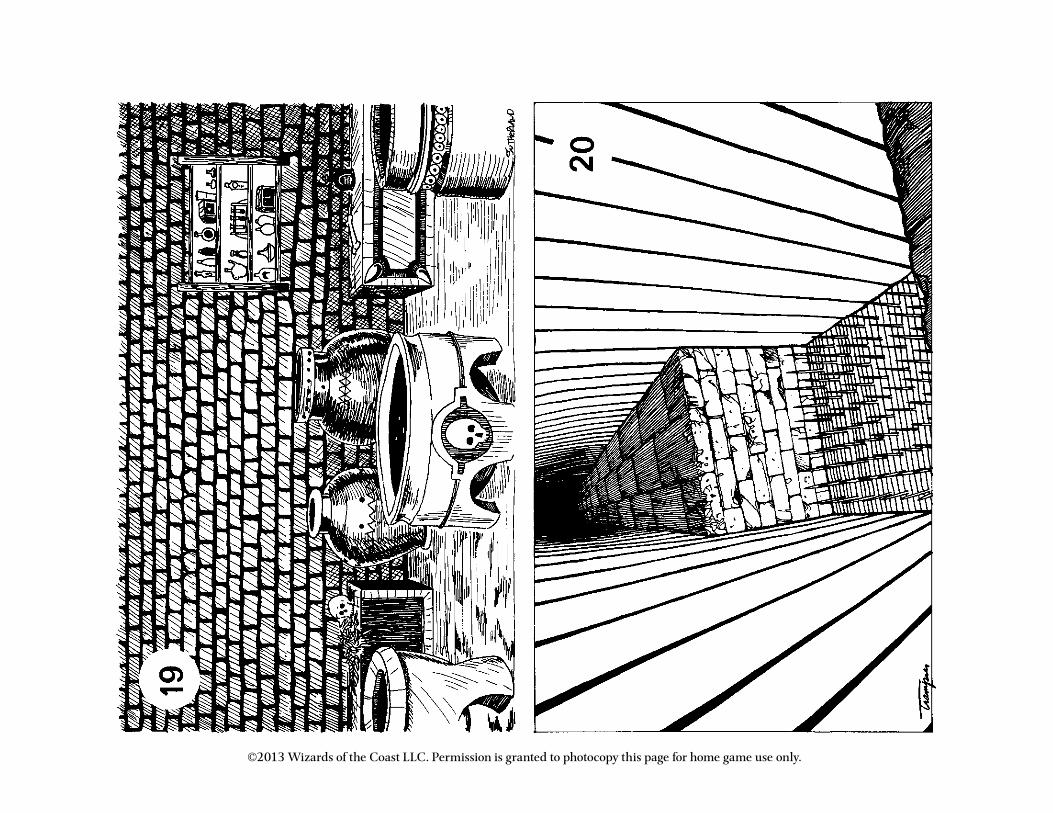
©2013 Wizards of the Coast LLC. Permission is granted to photocopy this page for home game use only.
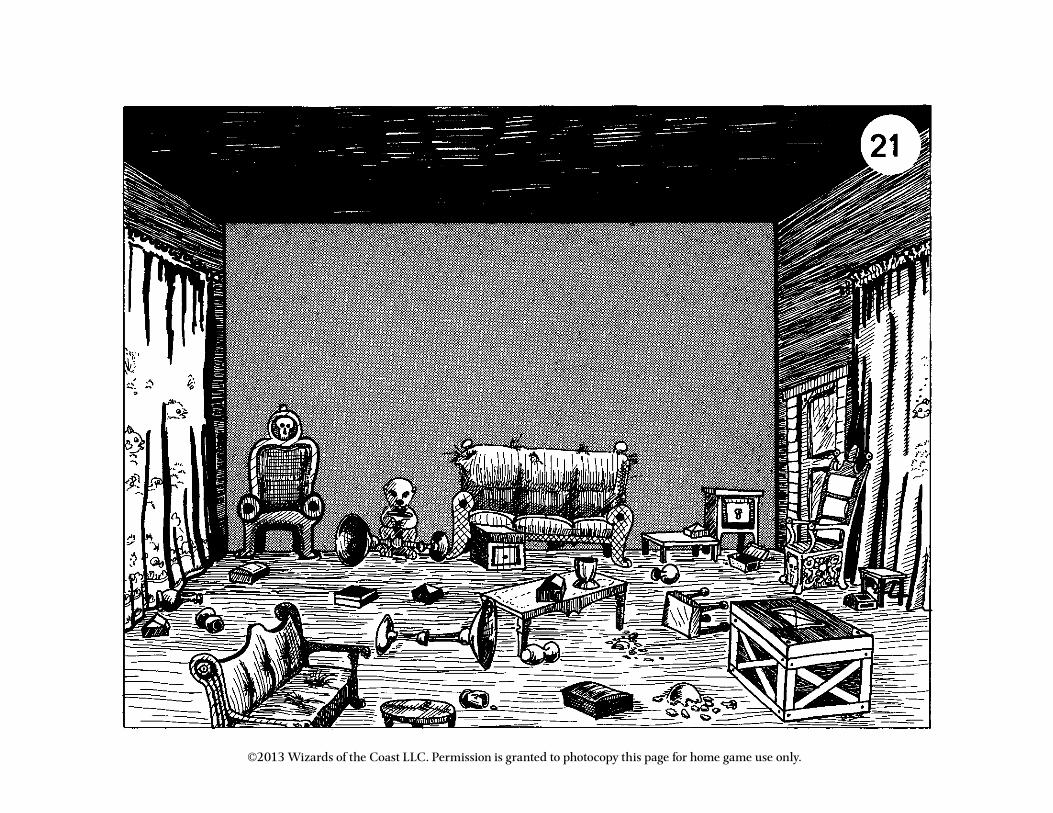
©2013 Wizards of the Coast LLC. Permission is granted to photocopy this page for home game use only.

©2013 Wizards of the Coast LLC. Permission is granted to photocopy this page for home game use only.
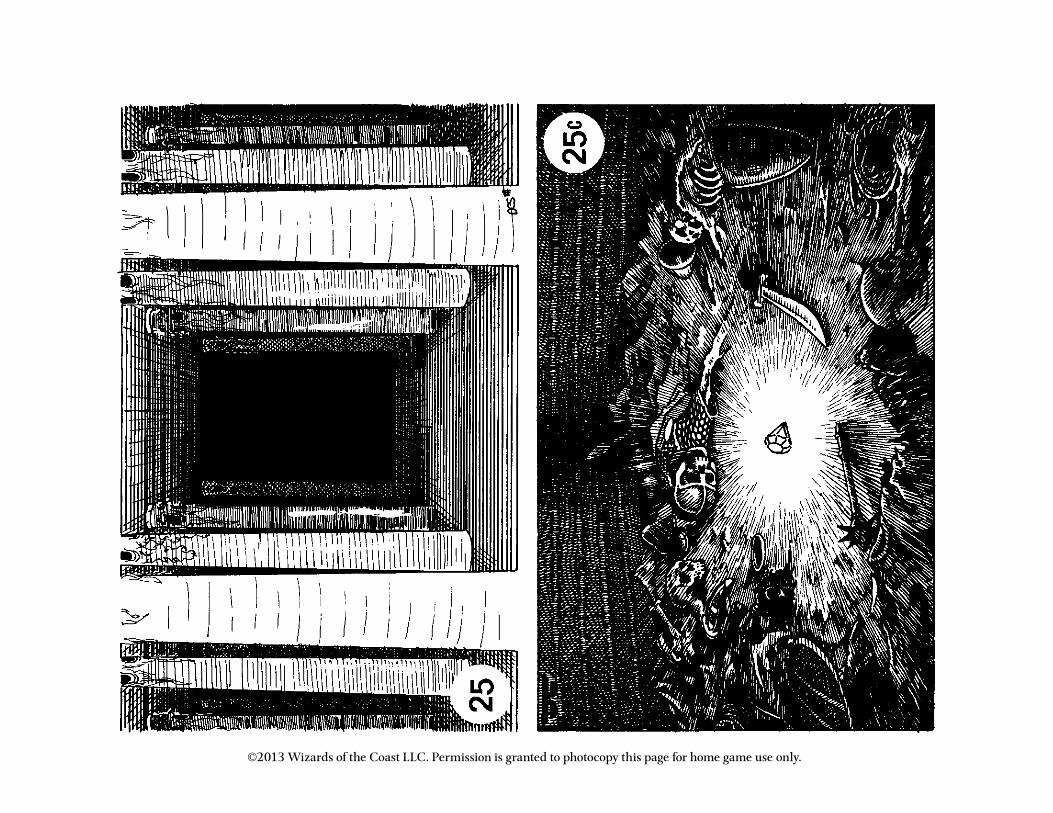
©2013 Wizards of the Coast LLC. Permission is granted to photocopy this page for home game use only.
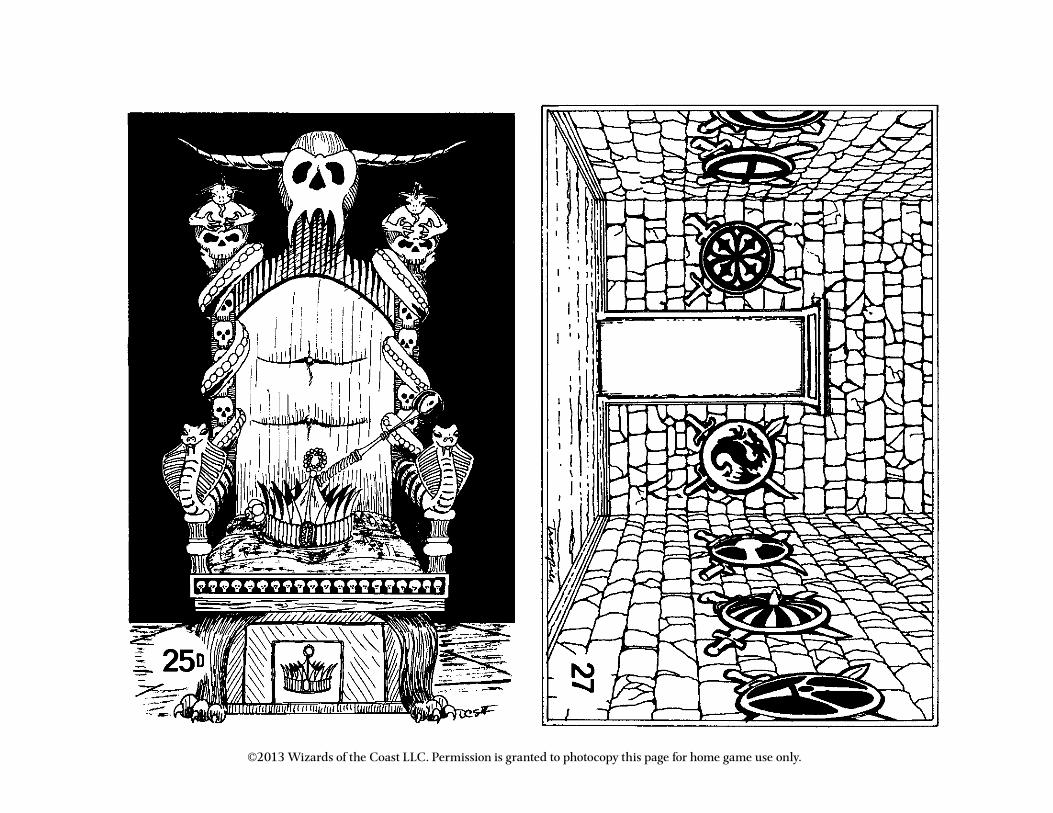
©2013 Wizards of the Coast LLC. Permission is granted to photocopy this page for home game use only.
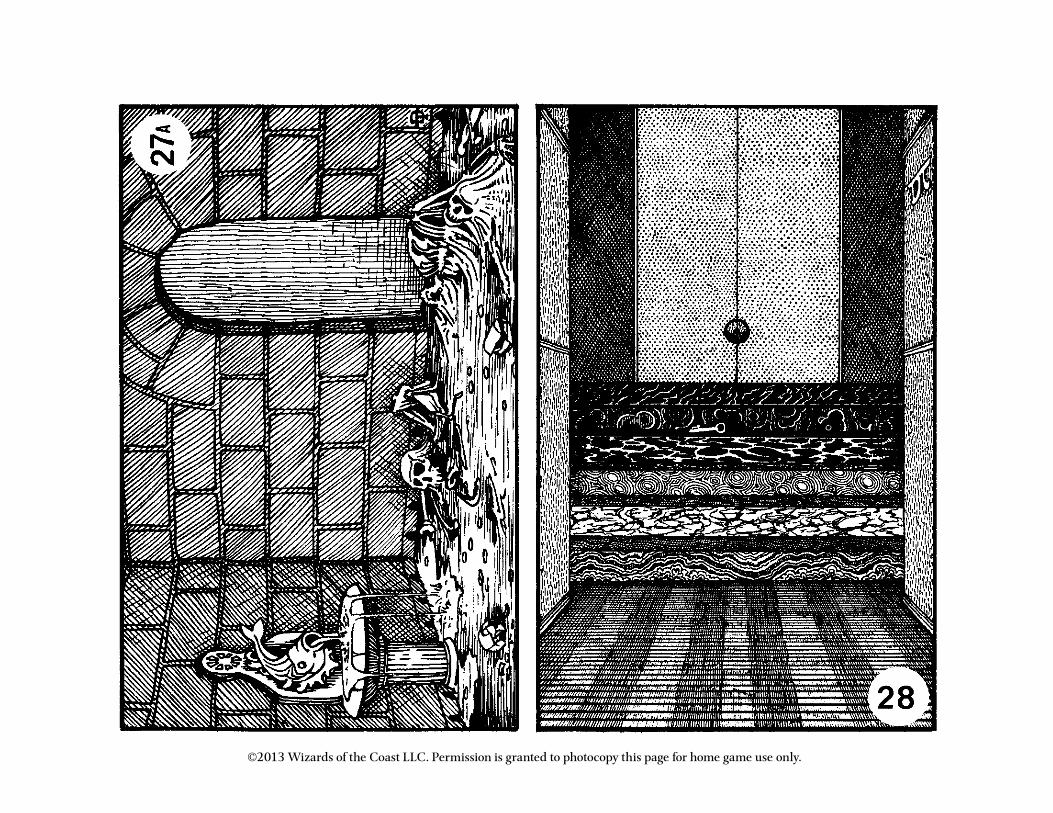
©2013 Wizards of the Coast LLC. Permission is granted to photocopy this page for home game use only.
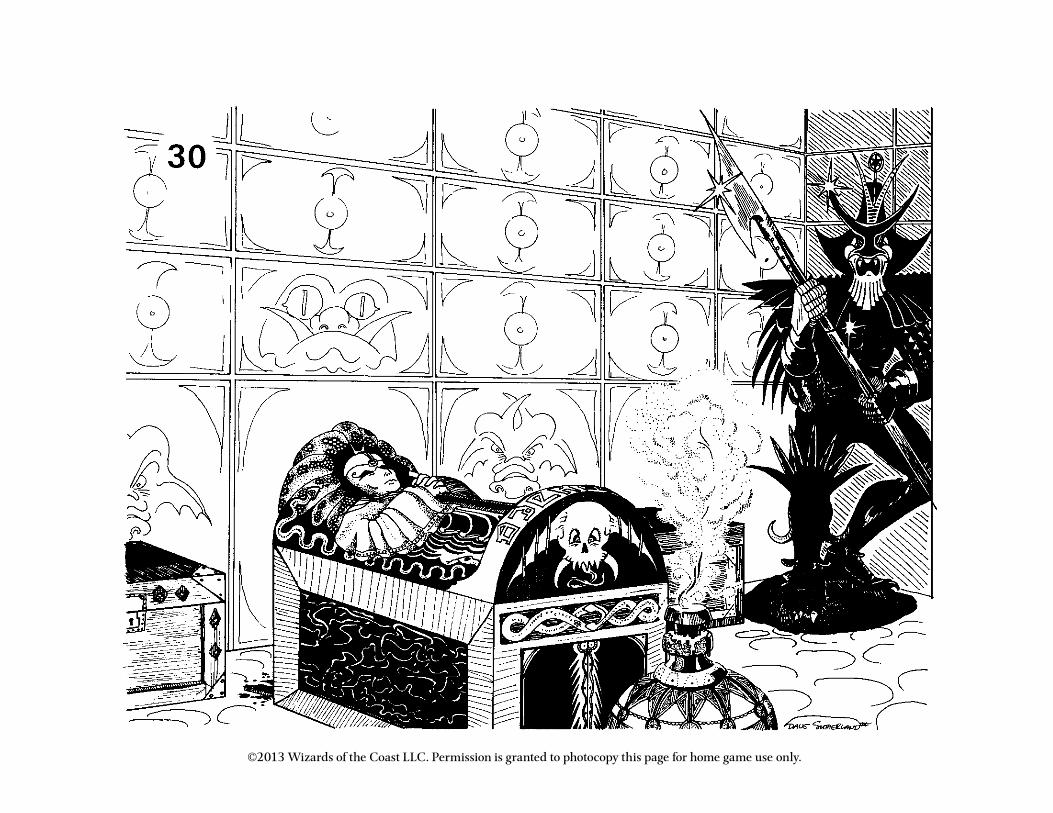
©2013 Wizards of the Coast LLC. Permission is granted to photocopy this page for home game use only.
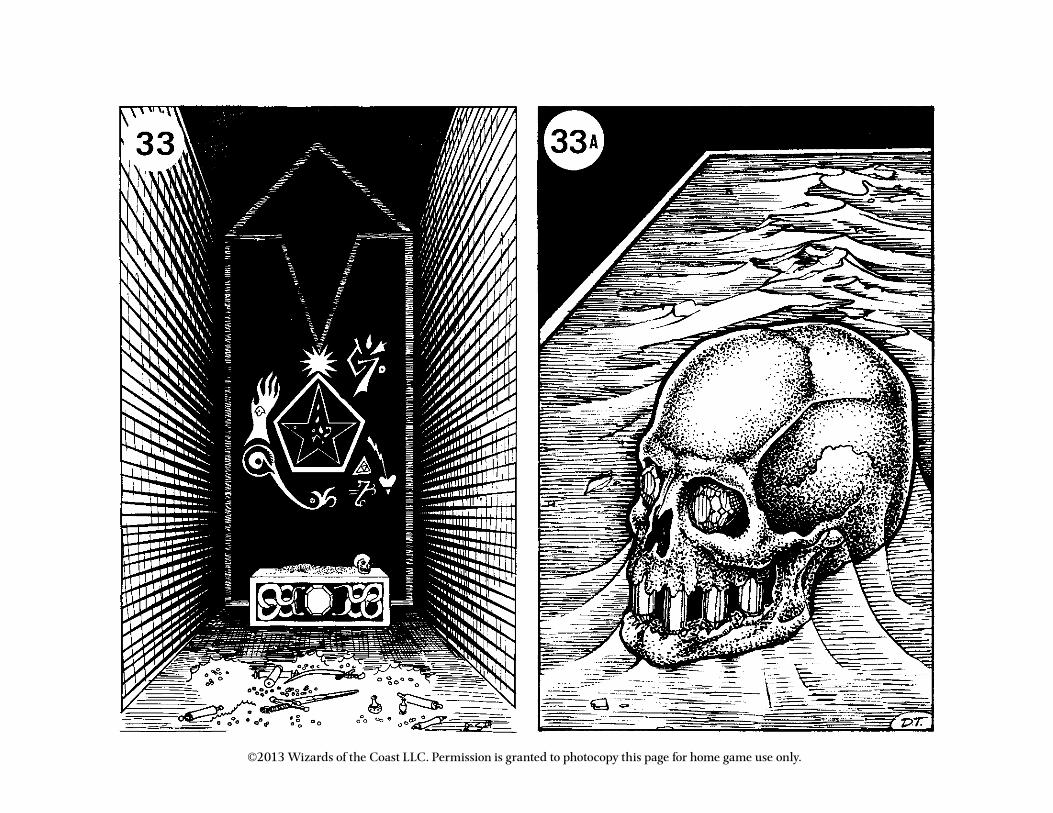
©2013 Wizards of the Coast LLC. Permission is granted to photocopy this page for home game use only.
C O M I N G N E X T M O N T H
DARK lAnTERnBy Craig Campbell
An agent of the King’s Dark Lanterns has stolen a cache of gold from the Brelish exchequer. Hunt him down, retrieve the gold, and thwart whatever else the rogue agent is plotting. A D&D® Eberron® adventure for characters of levels 6–8.
nO REsT fOR THE wiCKEDBy Robert J. Schwalb
The archmage Addiv Ragemry built his dungeon to save lives, but something has gone horribly awry. A D&D adventure for characters of levels 7–9 featuring the classic dungeon from the Dungeon! Fantasy Board Game.
THE ElDER ElEmEnTAl EyEBy Peter Sleijpen and Chris Sims
As the village of Easting weathers an outbreak of the abyssal plague, you must track down the mad villains responsible for spreading it. Only then will you discover there’s more going on that meets the eye. This D&D adventure for characters of levels 1–3 was originally created for the D&D Encounters™ in-store play program.