RioHD-LED-3 user guide - · PDF fileImage size Image adjustment Menu Menu overview ... HDMI...
12
RioHD-LED-3T
Transcript of RioHD-LED-3 user guide - · PDF fileImage size Image adjustment Menu Menu overview ... HDMI...

RioHD-LED-3T

Table of contents Warranty and support information
Your RioHD-LED-3T projector is warrantied to be free of defects in material and workmanship for a period of 45 days from the date of receipt. Should your projector develop an issue requiring it to be repaired within this time frame, we will repair or exchange any defective unit at no cost to you.
FAVI Entertainment will pay round trip shipping for warranty claims within the USA. (Excludes: HI, AK, APO, USA Territories, and international orders.
After 45 days have passed, your projector will then be covered under our parts warranty, which is valid up to one year from the date of receipt. We will bill you a flat rate for repair and shipping costs before accepting the unit back for repair. You will not be billed for the cost of replacement parts.
The above warranties will be considered null and void in theevent of damage caused by misuse, neglect, improper handling,or improper installation.
FAQ’s, and other support information can be found at
http://www.favientertainment.com/help.asp
Introduction
Safety instructions
Projector overviewMain unit overviewRemote control overviewTop panel layoutInput panel layoutStarting up your projector for the first timePowering down your projectorFocus adjustmentKeystone adjustment
InstallationInstallation methodsImage sizeImage adjustment
MenuMenu overviewPicture menuSound menuSyetem menuPIP menuPC menuGeometry menu
MaintenanceCleaning the lensCleaning the projector’s casingFuse changing
Troubleshooting
Specifications
Accessories
Warranty and support information
1
2
334556677
891010
1111111212131414
15151516
17
19
20
21
Air filter maintenance 16

Accessories Introduction
● 30,000 hour lamp life
● Composite, S-video, Component, VGA, and dual HDMI ports allow multiple devices to be connected to the projector simultaneously.
● Simple input selection: Change inputs with the press of a button.
● Full support for 4:3 and 16:9 aspect ratios.
● Digital zoom support.
Designed to provide high performance at an economic price, the RioHD-LED-3 is well suited for both business and home theater use.
Thank you for purchasing the FAVI RioHD-LED-3T. The RioHD-LED-3T uses a long lasting, high power LED lamp to deliver a bright, vibrant image. This projector comes with such features as:
Your projector should come with the following accessories:
Remote controlPower cordA/V cableVGA cableThis user guide
If any of the above accessories are missing, please contact the distributer that you purchased the projector from.

Safety instructions
LCD
LCD native resolution
Supported resolutions
Video inputs
Audio inputs
HDMI x2, VGA, Component, S-Video, Composite
480i, 480p, 720p, 1080i, 1080p
VGA resolutions from 640x480 to 1920x1080
800x600
5” TFT
HDMI audio, Stereo line input jacks
LED lamp life
LED lamp power
30,000 hours
Projected imagesize 60 - 200 inches
Power consumption 120 watts
100 to 240 VAC 50/60 HzOperating voltage
32°F - 104° F
0°F - 120° F
Operating temperarture
Storage temperature
Operating temperarture 10% - 90%
Size
Weight
12 x 10 x 4/7 8 /3 4 /1 2
7 LBS/1 2
Specifications
● Do not operate the projector in an environment where the temperature is above 104° F. Doing so could damage your projector and void your warranty.
● Do not expose this projector to liquids or extreme humidity. If the projector’s casing becomes dirty, use a damp soft cloth to clean it. Please unplug the projector before cleaning it.
● This projector should be placed on a stable surface or mounted securely prior to being operated. Improper placement or mounting may cause damage to the unit.
● While the projector is operating, do not look directly into the lens.
● This projector needs adequate ventilation in order to operate properly. Inadequate ventilation will cause the projector to overheat and shut down. Excessive overheating could damage the projector’s internal optics.
● If you do not plan to use the projector for an extened period of time, or if an electrical storm develops, please unplug the projector. An electrical surge could damage your projector.
● Do not expose this projector to direct sunlight.
100 watts

Troubleshooting
1: Lens2: IR receiver3: Height adjustment foot4: Air filter removal tab5: Input panel6: Main power switch7: Fuse retainer8: Keystone control9: Ventilation output10: Speaker11: Ceiling mount attachment points12: Ventilation slot
6 7
8
1 2 3 4
5
109
11 12
Projector overview
Main unit overview:The following diagrams point out the features of your projector:
Problem: Solution:
● To rule out connection issues, try shutting down your computer, and
connecting the projector as your only display. Your computer should detect
the projector. If you see your OS startup screen, but not your desktop, your resolution or refresh rate may be set to an incompatible mode.
● If you’re using a laptop, some laptops have a ‘Projector mode’ that
must be enabled before they will output to your projector.
Other laptops have a key combination (usually FN+F5) that needs to be pressed in order to
activate their external VGA port. If you’re not sure how your laptop
outputs to an external display, please contact the manufacturer of your
laptop.
I can’t display my computer’s desktop in
VGA mode.
The projector is shutting down by
itself.
● The projector may have inadequate ventilation.
● The room temperature may be too high.

If you have any issues with using your RioHD-LED-3T, before contacting us please refer to the following troubleshooting guide:
1 2 3
4 5 6
7 8 0
-/ -- 0
UP MIX
OK
HDMI1VGASVAV
ATV DTV
Picture
Display
Menu
Return
REVEALINDEX
SUBPage SIZE
PreviewH.F lip V.Flip
ON/OFFMUTE
PIP
M ------
------
------
------
------
------
- - ---------
------- ------ - --------- -
- ------ ------ - ---- -
------ - ----
-----------
-------
HDMI2
Aspect ratio selection
Power button
Input selection cluster
Horizontal image flip
Vertical image flip
Menu navigation and selection
Access the main menu
Image preset selection
On screen display
Activate Picture in Picture
mode
--
Mute button
Remote control overview:
This remote control is also used on other projector models,
some with different sets of features.
This diagram points out which buttons
control the functions of your projector.
Projector overview
Projector will not power on.
● Check the power cord and power outlet.● Check the fuse and replace if necessary.
I have a video source connected, but the projector
shows “NO SYNC”.
● Check to make sure the projector is set to the correct mode. If using HDMI, check to make sure the projector is set to display from the correct HDMI port.
● Check your video source, and video cables.
Troubleshooting
Small text is hard to read in VGA
mode.
● Set your desktop resolution to 1280x960 or lower for displaying in 4:3 mode. Set it to 1280x768 or lower if displaying in 16:9 mode.
● Increase the size of the text being displayed.
Problem: Solution:
The remote control does not work.
● Check the batteries.
● Try aiming at the IR sensor on the front of the projector.
(The left and right arrow buttons also control the volume)

Top panel layout:All of your projector’s functions and menu settings can be accessed using the buttons on the top cover. Some of these buttons have more then one function.
1
2 3 4 5
6
1: Indicator LED2: Power button3: Main Menu button
4: Source Menu button5: Navigation arrow buttons / Volume adjustment6: When the Source menu is open, this button selects the highlighted source.
L out , R out
Y/Pb/PrVideo
L in , R inVGA INSvideo
HDMI 1HDMI 2
Component video input
Composite video inputLine audio output
VGA inputS-Video input
HDMI inputs
Input panel layout:
Line audio input
Your projector supports all the inputs listed below:
Projector overviewMaintenanceFuse changing:Your projector comes with a replacable fuse that is designed toprotect the unit in the event of a power surge.
To replace the fuse, remove the fuse retainer by inserting a smallslotted screwdriver in the area shown in the diagram below, and gentlyprying the fuse retainer out.
Air filter maintenance:Your projector has a removable air filter located on the front of the unitthat should be cleaned at least once a month, or more often in a dusty environment. Gently push down on the tab shown in the diagram below, and slide out the filter.
Rinse out the filter with water and allow it to air dry beforereplacing it.
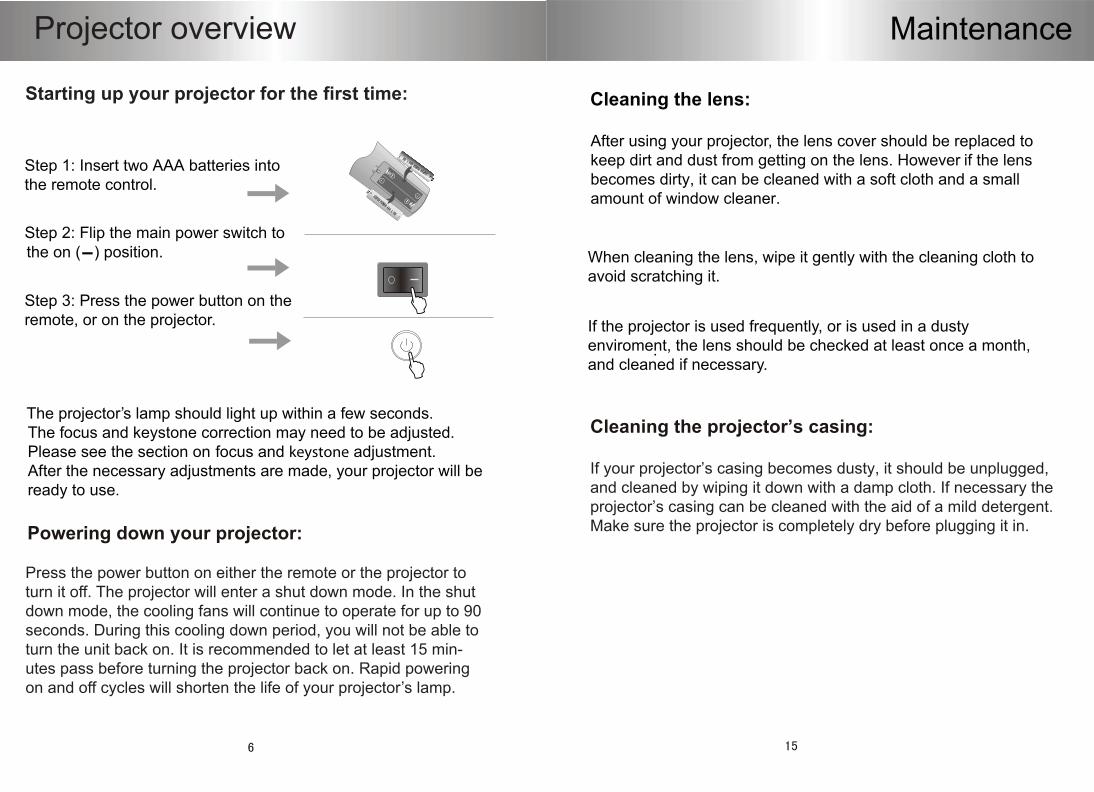
Powering down your projector:
Step 1: Insert two AAA batteries intothe remote control.
-Step 2: Flip the main power switch to the on ( ) position.
Step 3: Press the power button on the remote, or on the projector.
The projector’s lamp should light up within a few seconds.The focus and keystone correction may need to be adjusted. Please see the section on focus and keystone adjustment. After the necessary adjustments are made, your projector will be ready to use.
Starting up your projector for the first time:
Press the power button on either the remote or the projector to turn it off. The projector will enter a shut down mode. In the shut down mode, the cooling fans will continue to operate for up to 90 seconds. During this cooling down period, you will not be able to turn the unit back on. It is recommended to let at least 15 min-utes pass before turning the projector back on. Rapid powering on and off cycles will shorten the life of your projector’s lamp.
Projector overview
Cleaning the lens:
After using your projector, the lens cover should be replaced tokeep dirt and dust from getting on the lens. However if the lensbecomes dirty, it can be cleaned with a soft cloth and a smallamount of window cleaner.
When cleaning the lens, wipe it gently with the cleaning cloth to avoid scratching it.
If the projector is used frequently, or is used in a dustyenviroment, the lens should be checked at least once a month, and cleaned if necessary.
.
Maintenance
Cleaning the projector’s casing:
If your projector’s casing becomes dusty, it should be unplugged,and cleaned by wiping it down with a damp cloth. If necessary the projector’s casing can be cleaned with the aid of a mild detergent. Make sure the projector is completely dry before plugging it in.
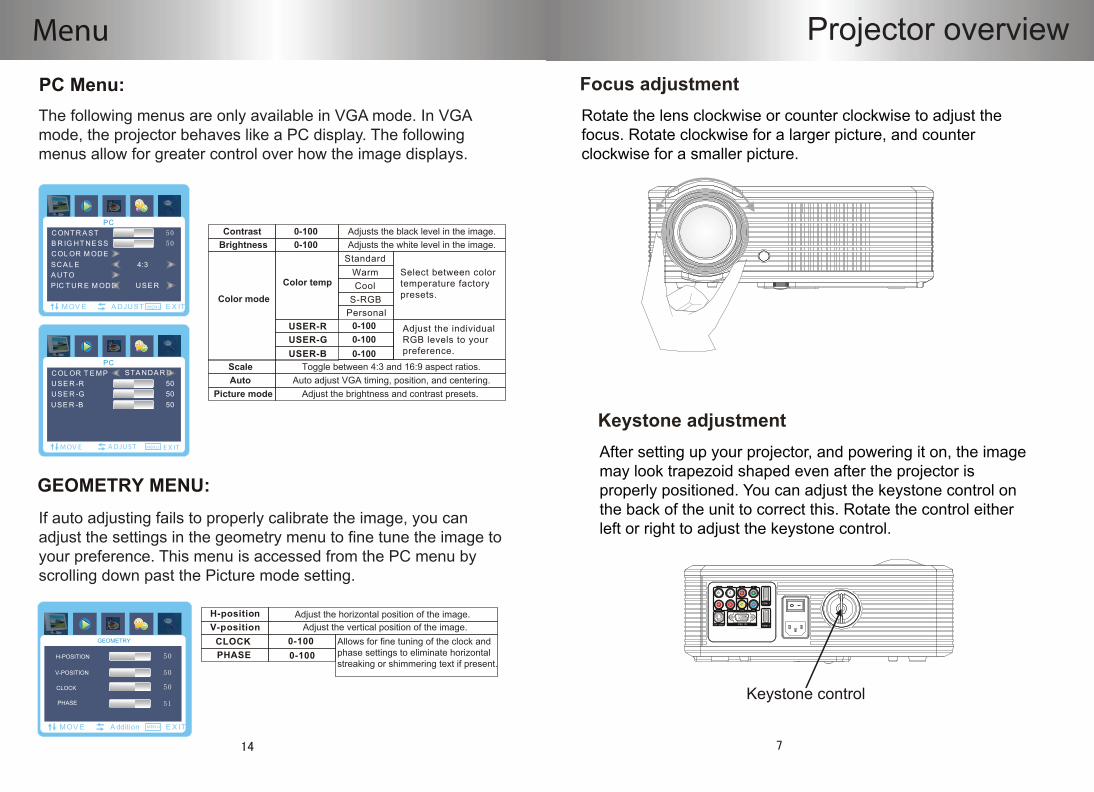
Keystone control
Focus adjustmentRotate the lens clockwise or counter clockwise to adjust the focus. Rotate clockwise for a larger picture, and counter clockwise for a smaller picture.
Keystone adjustmentAfter setting up your projector, and powering it on, the image may look trapezoid shaped even after the projector is properly positioned. You can adjust the keystone control on the back of the unit to correct this. Rotate the control either left or right to adjust the keystone control.
PC Menu:
CONT R A STB R IG HT NE SSCOL OR M ODESCA L EA UT OPIC T UR E M ODE USE R
PC
4:3
MOV E A DJUST E X ITMEN U
COL OR T E MPUSE R -RUSE R -GUSE R -B
5050
50
PCSTA NDA R D
GEOMETRY MENU:
MOV E A ddition E X ITMEN U
GEOMETRY
H-POSITION
V-POSITION
CLOCK
PHASE
Menu
M OV E A DJU S T M EN U E X IT
Projector overview
Color temp
Color mode
Brightness 0-100 Adjusts the white level in the image.Contrast 0-100 Adjusts the black level in the image.
StandardWarmCool
S-RGBPersonal
Select between color temperature factory presets.
0-1000-1000-100
USER-RUSER-GUSER-B
Adjust the individual RGB levels to your preference.
Scale Toggle between 4:3 and 16:9 aspect ratios.Auto Auto adjust VGA timing, position, and centering.
Picture mode Adjust the brightness and contrast presets.
The following menus are only available in VGA mode. In VGA mode, the projector behaves like a PC display. The following menus allow for greater control over how the image displays.
Adjust the horizontal position of the image.Adjust the vertical position of the image.
Allows for fine tuning of the clock and phase settings to eliminate horizontal streaking or shimmering text if present.
If auto adjusting fails to properly calibrate the image, you can adjust the settings in the geometry menu to fine tune the image to your preference. This menu is accessed from the PC menu by scrolling down past the Picture mode setting.
H-positionV-position
CLOCKPHASE
0-1000-100
Installation
SpeakerL Screen
SpeakerR
A/V source
Door
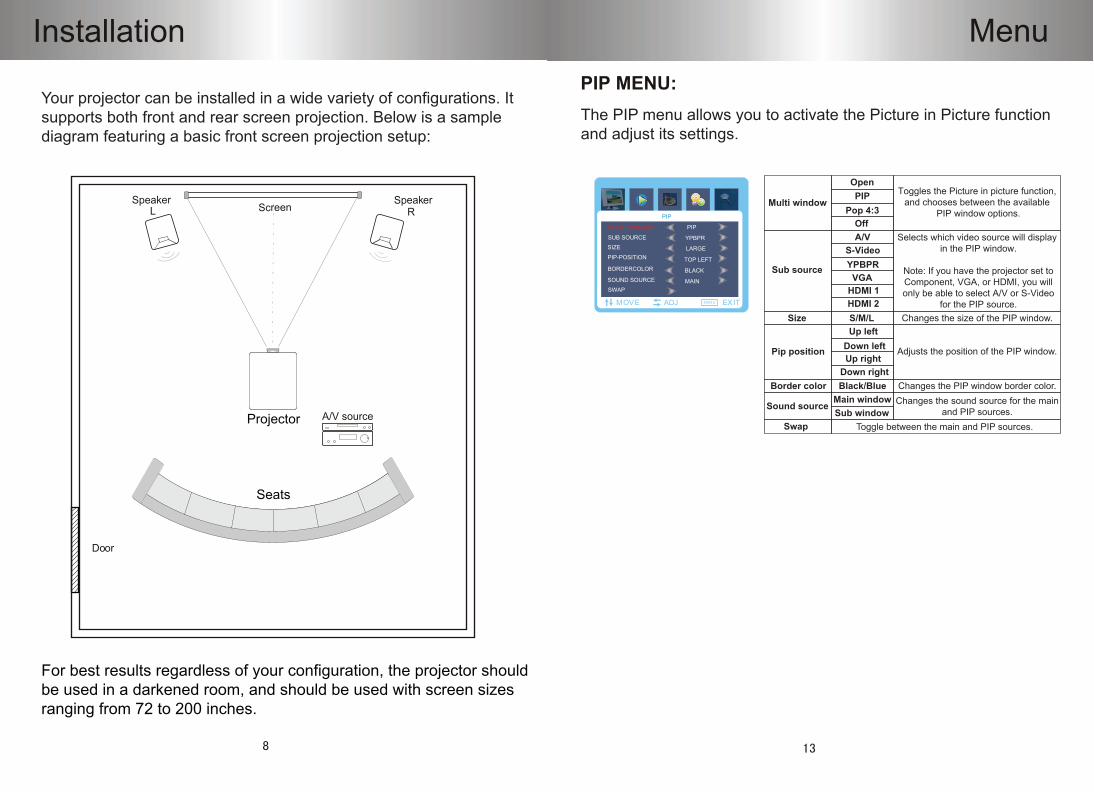
For best results regardless of your configuration, the projector shouldbe used in a darkened room, and should be used with screen sizes ranging from 72 to 200 inches.
Projector
Seats
PIP MENU:
MOVE ADJ EXITMEN U
MULITI WINDOW
SUB SOURCE
SIZE
PIP-POSITION
BORDERCOLOR
SOUND SOURCE
SWAP
PIP
PIP
LARGE
TOP LEFT
BLACK
MAIN
YPBPR
Menu
Toggles the Picture in picture function, and chooses between the available
PIP window options.
OpenPIP
Pop 4:3Off
Multi window
Selects which video source will display in the PIP window.
Note: If you have the projector set toComponent, VGA, or HDMI, you willonly be able to select A/V or S-Video
for the PIP source.
A/VS-VideoYPBPR
VGASub source
HDMI 1HDMI 2
Size S/M/L Changes the size of the PIP window.Up left
Down leftUp right
Down right
Pip position
Border color Black/Blue Changes the PIP window border color.
Adjusts the position of the PIP window.
Sound sourceMain window Changes the sound source for the main
and PIP sources.Sub windowSwap Toggle between the main and PIP sources.
The PIP menu allows you to activate the Picture in Picture function and adjust its settings.
Your projector can be installed in a wide variety of configurations. It supports both front and rear screen projection. Below is a sample diagram featuring a basic front screen projection setup:

Installation
Front projectionceiling mount
Front projectiontable mount
Rear projectionceiling mount
Rear projection
Screen Projector
Screen Screen
Screen
Projector
Projector
Projector
Installation methods
table mount
There are several ways to install your projector, depending on yourneeds. This projector can be set on a table or mounted to theceiling. It supports both front and rear screen projection. Below are some examples of how this projector can be set up.
FAVI recommends that a professional installer be contacted to install a ceiling mount for your projector. If installing a ceiling mount yourself, please follow the instructions that came with your mount. This projector must be installed in an area where nothing can interfere with the ventilation slots.
SOUND MENU:
S OU N D S OU R C E
OF F
S OU N D
M OV E A ddition E X ITM EN U
B A SS
T R E B L E
B A L A NCE
AVC
SOUND MODE USER
NORMAL
SYSTEM MENU:
M OV E A ddition E X ITM EN U
OFF
SYSTEM
OSD-LANGUAGE
OSD-HPOSITION
OSD-VPOSITION
FLIP HORIZONTAL
FLIP VERTICAL
MEM-RECALL
OFF
AVC
SoundSource
UserMusicMovieSound mode
NormalLine
Sound Box
Menu
9
Adjusts the low frequency response.Adjusts the high frequency response.
Adjusts the speaker balance.
Standard Adjusts the treble and bass levels toone of three factory presets.
The user setting allows you to adjust the levels of treble and bass.
Line and speaker output
Auto Voice Control.Automatically adjusts the volume level
to reduce voice distortion.
On
OffSpeaker only output
Line only output
0-1000-1000-100
BassTreble
Balance
Here you can adjust the audio options to your preference.
Adjusts the menu’s horizontal position.Adjusts the menu’s vertical position.
LanguageH-PositionV-PositionENGLISH
Adjusts the language for the menu screens.0-1000-100
Restores all settings to their factory defaults.
Off-OnOff-On
Toggles the Horizontal image flip option.Toggles the Vertical image flip option.
Flip horizontalFlip verticalMem-Recall
Here you can adjust how the menu system displays on your projector.

Image size:
4:3 mode 16:9 mode
Image sizes are measured diagonally and are approximate.
Distance from screen
Projected image size
Distance from screen
Projected image size
72 inches
82 inches
92 inches
100 inches
120 inches
150 inches
200 inches
72 inches
82 inches
92 inches
100 inches
120 inches
150 inches
200 inches
103 inches
117 inches
131 inches
143 inches
171 inches
214 inches
286 inches
111 inches
126 inches
142 inches
154 inches
185 inches
231 inches
308 inches
The projector is angled too far to the right.
The projector is angled too far to the left
The projector is set up correctly.
The projector’s keystone control needs to be adjusted.
For best image results, the projector should be directly facing the screen. Adjustments to the focus and keystone controls will help
to improve the picture. Please see the diagram below for examples of correct and incorrect setup:
Image adjustment:
Menu overview:
3D NRNOR MA L
PIC T UR E
MIDMOV E A DJ E X ITMEN U
CONTRAST
BRIGHTNESS
HUE
SATURATION
SHARPNESS
COLOR TONE
Menu
Press the MENU button on either the remote or the
projector to bring up the main menu.
In the main menu, use the up and down navigation arrow
buttons (▲/▼) to highlight the menu option that you want to adjust. Use the left and right
arrow buttons (◄/►) to adjust the highlighted option.
Installation
3D NRNORMAL
PICTURE
MIDMOVE ADJ EXITMEN U
CONTRAST
BRIGHTNESS
HUE
SATURATION
SHARPNESS
COLOR TONE
Picture Menu:The Picture menu allows you adjust the image to your liking. The available options are outlined below:
3D noise reduction.Reduces ‘noise’ in the picture.
Color tone presets.Adds more warmth or coolness to
the image
Adjusts the black level in the image.Adjusts the white level in the image.
Adjusts the tint of the image.Adjusts the amount of color saturation.
Adjusts the image sharpness.Standard
CoolWarm
0-1000-1000-1000-1000-100
HighMidLowOff
ContrastBrightness
Hue
Sharpness
Color tone
3D NR
Saturation
To exit from a sub menu, press the Menu button. Press it again to exit the main menu screen.