“REVANT – RESPONSIVE WORDPRESS...
137
1 “REVANT – RESPONSIVE WORDPRESS THEME DOCUMENTATION” Created: October 20 /2014 Version: 1.0.7 WordPress Theme Developed by: Kopatheme.com Email: [email protected] After activating the theme please ensure that all required settings mentioned herein are also configured properly. Preview the theme on a browser to confirm that the changes to the settings have taken effect. The look and feel of the theme will not appear perfectly unless the required settings have been configured properly, as the details mentioned on this documentation.
Transcript of “REVANT – RESPONSIVE WORDPRESS...

1
“REVANT – RESPONSIVE WORDPRESS THEME
DOCUMENTATION” Created: October 20 /2014
Version: 1.0.7
WordPress Theme Developed by: Kopatheme.com
Email: [email protected]
After activating the theme please ensure that all required settings mentioned herein are also
configured properly. Preview the theme on a browser to confirm that the changes to the
settings have taken effect. The look and feel of the theme will not appear perfectly unless
the required settings have been configured properly, as the details mentioned on this
documentation.

2
Table of Contents
A. Theme Installation …………………………………………………………………………………………. 4
B. Demo Content ………………………………………………………………………………………………... 7
C. Updating The Theme ………………………………………………………………………………………. 9
D. Theme Options Customization …………………………………………………………………………. 9
1. Theme Options……………………………………………………………………………………….…….….9
2. Sidebar Manager……………………………………………………………………………………………..13
3. Layout Manager………………………………………………………………………………………………15
4. Backup………………………………………………………………………………………………………… 18
E. Custom Widgets ………………………………………………………………………………………………20
1. Kopa Advertisement……………………………………………………………………………….………..21
2. Kopa Author………………………………………………………………………………………………….22
3. Kopa Gallery Carousel………………………………………………………………………………………23
4. Kopa Video Carousel………………………………………………………………………………………..26
5. Kopa Post Single………………………………………………………………………………………….….29
6. Kopa Post Carousel……………………………………………………………………………..……….….31
7. Kopa Post List Carousel………………………………………………………………………..……….….34
8. Kopa Post Carousel Sync……………………………………………………………………….…………..37
9. Kopa Video Grid……………………………………………………………………………………….…….40
10. Kopa Post List…………………………………………………………………………………………….….42
11. Kopa Quote………………………………………………………………………………………………..….55
12. Kopa Social…………………………………………………………………………………………………...57
13. Kopa Video Playlist………………………………………………………………………………………....58
14. Kopa Video Filter……………………………………………………………………………….……...……61
15. Kopa Contact……………………………………………………………………………………………..…..64
16. Kopa Newsletter…………………………………………………………………………………….…..……65
17. Kopa Tweet………………………………………………………………………………………….…………68
F. Custom Shortcode Generator ……………………………………………………………………..……..74
G. Translation ………………………………………………………………………………………………………86
H. Create Categories and Posts ……………………………………………………………………………….87
1. Create Category…………………………………………………………………………………….………….87
2. Create Posts………………………………………………………………………………………….…………91
3. Create Custom Menu……………………………………………………………………………….…………93
I. Appendix ……………………………………………………………………………………………………...…102

3
Create Frontpage 1 + Frontpage 2……………………………………………………………………..…102
Create Frontpage 3…………………………………………………………………………………….…...108
Create Gallery Page………………………………………………………………………………………....115
Create Video Page………………………………………………………………………………………...…118
Create Blog Page………………………………………………………………………………………..……121
Create Single Post………………………………………………………………………………………...…123
Create Shop Page……………………………………………………………………………………….……125
Create Single Product Page……………………………………………………………………………...…126
J. Video Tutorial ………………………………………………………………………………………………....126
K. How to setup the demo site ……………………………………………………………………………….127
L. Integrate bbPress plugin to create forum ………………………………………………………...…132
M. Sources and Credits …………………………………………………………………………………….……136

4
A. Theme Installation
Note: As a pre-requisite you will need a copy of WordPress version 4.0 installed and running on your server.
After you have successfully installed WordPress on your server, you are now ready to install Revant theme.
The process of installation is very easy. Here are the simple steps to upload and install Revant theme:
Step 1: Download the Revant theme files from your download page with name file "Revant-1.0.7-
downloaded-package.zip". The downloaded file consists of not only theme file but also demo data,
document, etc.
Step 2: Unzip the file "Revant-1.0.7-downloaded-package.zip". Once the file has been unzipped
you will notice a file named Revant. This is the theme file.
Step 3: Login to the WordPress control panel of your website.

5
Step 4: From your Dashboard, go to Appearance Themes.
Click "Add New" in either way.
Click “Upload Theme”

6
Step 5: Click Choose File to find the file Revant.zip on your computer and click Install Now.
Step 6: Finally, click Activate to activate it.
After activation, preview this theme you will see the theme looks quite empty, because we have not yet
configured the theme.

7
B. Demo Content
Demo content includes demo posts, pages, comments, categories, tags and so on. It is necessary in helping you
to learn how the theme works; you can use them to setup a demo page. To import demo content, you can follow
these steps:
Go to Tools Import and select the WordPress option. If you are prompted to install the WordPress
Importer plugin you should do this.

8
Click the Choose File button and locate the demo-data.xml file that is inside the folder and double
click the file to select it and then click the Upload file and import button.
A new screen will appear, check the Download and import file attachments option and
click Submit.

9
C. Updating the Theme
Once a new update becomes available for the theme, you will notice an update notification in the admin panel.
To apply the update the theme needs to be downloaded once again and then reinstalled following the steps 1 -
8 mentioned in section above.
D. Theme Options Customization
1. Theme Options
Go to Appearance Theme Options. You will find all the options that the Revant theme offers right
here. Here they are:
General Setting
Custom Logo: You can upload main logo in header and adjust margin.
Custom Small logo in navigation: You can upload Small logo in navigation (display in Frontpage 2
layout’s left navigation).
Custom Favicon: You can upload your site's favicon that display in tab bar of browsers.

10
Apple Icons: You can upload your Apple icons (57x57), Images will be cut with multi-size for iPhone
(Retina), iPad (Retina).
Config Header: You can show or hide "Date, Cart, Top menu, Extra menu, Socials, Search bar". You
also add information for header in Header Information.
1. Top menu 3. Headline 5. Cart 7. Socials 9. Main Menu
2. Logo 4. Tagline entered from setting General 6. Date 8. Search Bar 10. Extra Menu

11
In frontpage 2 layout, you can enter "Title in navigation, Link for title, and footer description in navigation”
Headline: You can enter headline title, choose categories, tags, format to show, custom timestamp,
and number of post to show in frontend. If you want to hide headline then enter number of post equal
to zero.
Footer: You can enter the content you want to display in your footer.
Custom system: You can choose show/ hide breadcrumb, Custom excerpt length for blog, Custom
excerpt length for front page and Custom thumbnail for each post.
12
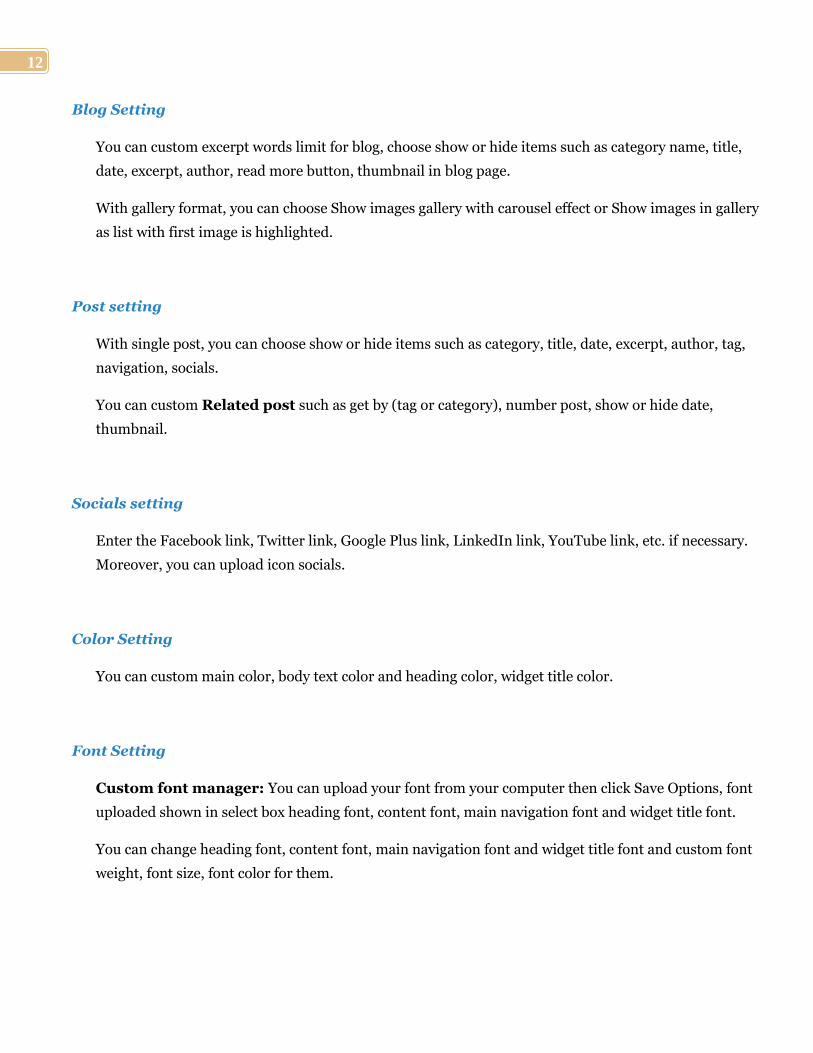
Blog Setting
You can custom excerpt words limit for blog, choose show or hide items such as category name, title,
date, excerpt, author, read more button, thumbnail in blog page.
With gallery format, you can choose Show images gallery with carousel effect or Show images in gallery
as list with first image is highlighted.
Post setting
With single post, you can choose show or hide items such as category, title, date, excerpt, author, tag,
navigation, socials.
You can custom Related post such as get by (tag or category), number post, show or hide date,
thumbnail.
Socials setting
Enter the Facebook link, Twitter link, Google Plus link, LinkedIn link, YouTube link, etc. if necessary.
Moreover, you can upload icon socials.
Color Setting
You can custom main color, body text color and heading color, widget title color.
Font Setting
Custom font manager: You can upload your font from your computer then click Save Options, font
uploaded shown in select box heading font, content font, main navigation font and widget title font.
You can change heading font, content font, main navigation font and widget title font and custom font
weight, font size, font color for them.

13
Custom CSS
You can add additional CSS to your code. This CSS code is saved in Database and it isn't lost when we
update new theme.
2. Sidebar Manager
Sidebar manager is an advanced feature of the Kopatheme framework which allows you to create sidebars
for each page you want, rename Sidebars as wanted, so it is easy for you to remember and control position
of Widgets in Appearance Widget
To create a new sidebar, follow these steps:
Step 1: Click Appearance Theme option Sidebar Manager
Step 2: Enter sidebar name, click Add sidebar button.
Step 3: You can enter description for created sidebars.
To rename default/ existing sidebar, follow the steps:
Step 1: Click Appearance Theme option Sidebar Manager
Step 2: Click on sidebar name you want to rename
Step 3: Click on sidebar name, description you want to rename.
To delete default/ existing sidebar, follow the steps:
Step 1: Click Appearance Theme option Sidebar Manager
Step 1: Click on sidebar name you want to delete
Step 2: Click Delete on the below of the sidebar name you want to delete.
Finally, Click Save Options button to save.

14
1. Enter new sidebar name 3. Rename sidebar name 5. Click if you want to delete sidebar
2. Click to add new sidebar 4. Enter or edit description for sidebar
Note: Advanced Setting described on this page includes advanced options are used for professional
developers.

15
3. Layout Manager
We can customize layout of all pages in the website with Layout Manager. In Layout Manager, you can see
the illustration for layouts which that page can apply. The illustration shows you the widget areas of the
layout. Basing on the illustration, you can feel easy to select the sidebar for widget areas.
Sidebars of Kopatheme framework are dynamic, so you can create a sidebar, delete or edit the flexibly in
Sidebar Manager.
The way to set up the pages layout is summarized as 3 following steps:
Step 1: Select layout you like for the page.
Step 2: Choose sidebar for each widget area.
Step 3: Come to Appearance Widgets page to drag-drop widgets into each sidebar.

16
Setup Front Page
Firstly, Click Settings Reading. Select the page which you intend to show as your front page from
Home page display.
Then, go to Appearance Theme Option Layout Manager Front Page with Frontpage 1
set as default page. If you want to change layout of front page, you Click Select layout to select Front
page 2 or Front page 3.
17
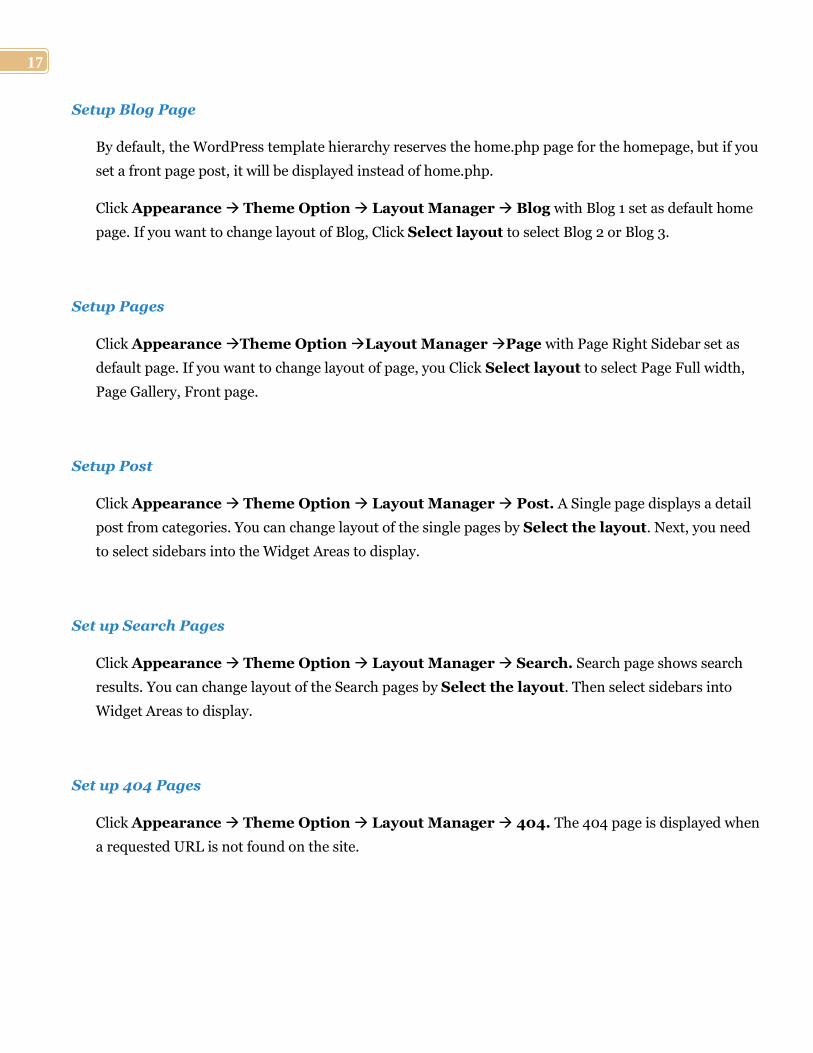
Setup Blog Page
By default, the WordPress template hierarchy reserves the home.php page for the homepage, but if you
set a front page post, it will be displayed instead of home.php.
Click Appearance Theme Option Layout Manager Blog with Blog 1 set as default home
page. If you want to change layout of Blog, Click Select layout to select Blog 2 or Blog 3.
Setup Pages
Click Appearance Theme Option Layout Manager Page with Page Right Sidebar set as
default page. If you want to change layout of page, you Click Select layout to select Page Full width,
Page Gallery, Front page.
Setup Post
Click Appearance Theme Option Layout Manager Post. A Single page displays a detail
post from categories. You can change layout of the single pages by Select the layout. Next, you need
to select sidebars into the Widget Areas to display.
Set up Search Pages
Click Appearance Theme Option Layout Manager Search. Search page shows search
results. You can change layout of the Search pages by Select the layout. Then select sidebars into
Widget Areas to display.
Set up 404 Pages
Click Appearance Theme Option Layout Manager 404. The 404 page is displayed when
a requested URL is not found on the site.

18
4. Backup
When you want to remove completely the customizing and configuration to start over without customizing
each option, Backup allows you to return to the initial state of the theme. Note: this feature only allows the
theme to return the default in theme options, layout manager, and sidebar manager.
To implement the backup Appearance Theme Options Backup tab.
Restore Default Settings
Select one of the following options:
All Setting: Come back the default for 3 tabs: Theme Options, Sidebar Manager, Layout Manager
Theme Options: Come back the default for Theme Options
Sidebars & Layouts: Come back the default for 2 tabs: Sidebar Manager and Layout manager
Click Restore Defaults to finish the backup.
Import/ Export Setting
Besides Restore function, you also can import/export setting; you can export and import settings if your
host has problem forcing to reinstall the website.
Export Setting: Kopa Framework will create a file with .json format to backup all configurations of
theme options includes Layout manager, Sidebar manager, General settings. This file can be used to

19
restore your settings if someday your web has problem forcing to reinstall, or you can easily setup
another website with the same settings.
Go to Appearance Theme Options Backup Tab Import/Export tab to perform the
backup, you can select one of following options:
All Setting (This will contain all of the option listed below): It will make the backup for all setting
(contain Theme Option, Sidebars & Layout).
Theme Options: It will make the backup for Theme Options tab
Sidebars & Layouts: It will make the backup for 2 tabs: Sidebar Manager & Layout manager
Click Download Export File button to export .json file.
Import Setting: If you have settings in a backup file on your computer, the Kopa Framework can
import those into this site.

20
E. Custom Widget
WordPress Widgets add content and features to your Sidebars. Examples are the default widgets that come
preloaded with a clean installation of WordPress, such as post categories, tag clouds, navigation, search, etc.
Beside these default widgets, a lot of other widgets are created by our developers to display content on the
website. Available Widgets lists all the current widgets that are installed with your copy of theme. To use a
widget, simply drag and drop it onto the Sidebar and refresh the appropriate page to display its content.

21
1. Kopa Advertisement
Display an image like the banner on the frontend. This widget supports 3 image sizes (290 x 338px, 255 x
48px or 728 x 90px). Drag and Drop Kopa Advertisement widget into the sidebar you want to display.
Add Image URL (This is very important, go to Media Library and click Add New to upload an
image you will use in Advertisement widget, after that, click on that image, look at the right of the
image, you will see Image URL, copy URL and paste on Image URL of Kopa Advertisement widget).
Add Image Title (show when hover on the image).
Image Link (may have).
You can check on checkbox to add image link and open link in new tab when clicking on the image.
Finally, you can select the size for your image.
Click Save button to save.

22
2. Kopa Author
Display user's avatar. Drag and Drop the widget into the sidebar you want to display.
Add Title of the widget.
Select Roles You can select the single role or multi roles, if you do not select any role, all roles are
selected by default.
Custom Number of authors to show (We order the default quantity is 50, You can change it, If the
number of authors you want to add is much more the number authors to show per page, widget will display
Next - Previous button to see all authors).
Custom Number to show per page (The default is 10, you can change it).
Click Save button to save.

23
3. Kopa Gallery Carousel
Display list posts with the gallery format by carousel effect. Drag and Drop the widget into the sidebar you
want to display and configure it.
Add Title of the widget.
Select Categories (You can select single category or multi categories, if you do not select any category,
your website will show all posts with gallery format in all categories.
Select Tag (You can select single tag or multi tag, if you do not select any tag your website will show all
posts with gallery format.)
Select Relation = AND - Display posts which both belong to categories and have selected tags.
Select Order by to arrange the displaying order of posts according to Post id, Date, Title, Random or
Number of comment.
Select Ordering to customize Order by from larger to smaller for Post id, Date, Number of comment,
using alphabet to arrange by Title.
Custom Number of posts (The default is 7, you can change it.)
Custom Number of post per page (the default is 4, you can change it).
Custom Slider speed in milliseconds, the smaller the number is, the faster the speed is.
Check on checkbox if you want carousel to run at auto play mode.
Timestamp: Allow your website to show recent posts from the nearest day.
Click Save button to save.

24

25
It will be displayed on the frontend as bellow:
26
4. Kopa Video Carousel
Display list posts with the video format by carousel effect. Drag and Drop the widget into the sidebar you
want to display and configure it.
Enter Title of the widget.
Select Categories (You can select single category or multi categories, if you do not select any category,
your website will show all posts with video format in all categories.
Select Tag (You can select single tag or multi tag, if you do not select any tag your website will show all
posts with video format).
Select Relation = AND - Display posts which both belong to categories and have selected tags.
Select Order by to arrange the displaying order of posts according to Post id, Date, Title, Random or
Number of comment.
Select Ordering to customize Order by from larger to smaller for Post id, Date, Number of comment,
using alphabet to arrange by Title.
Custom Number of posts (The default is 7, you can change it).
Custom Number of post per page (the default is 4, you can change it).
Custom Slider speed in milliseconds, the smaller the number is, the faster the speed is.
Check on checkbox if you want carousel to run at auto play mode.
Timestamp: Allow your website to show recent posts from the nearest day.
Select Layout: You can select Small thumbnail (used in frontpage 3) and Big thumbnail (Used in
Video Page).
Click Save button to save.

27

28
You can see 2 following images on the frontend:
With layout: Small thumbnail
With layout: Big thumbnail

29
5. Kopa Post Single
Display single post with thumbnail, title and postdate. Drag and Drop the widget into the sidebar you want
to display and configure it.
Enter Title of the widget.
Select Categories (You can select single category or multi categories, if you do not select any category,
your website will show posts in all categories).
Select Tag (You can select single tag or multi tag, if you do not select any tag your website will show all
posts).
Select Relation (AND/OR) to combine 2 options filter categories/tag (AND - Display posts which
both belong to categories and have selected tags, OR - Display posts which either belong to categories or
have selected tags).
Select Order by to arrange the displaying order of posts according to Post id, Date, Title, Random or
Number of comment.
Select Ordering to customize Order by from larger to smaller for Post id, Date, Number of comment,
using alphabet to arrange by Title.
Timestamp: Allow your website to show recent posts from the nearest day.
Check on checkboxes if you want to hide post title and postdate.
Click Save button to save.

30

31
6. Kopa Post Carousel
Display list posts with carousel effect. Drag and Drop the widget into the sidebar you want to display and
configure it.
Add Title of the widget.
Select Categories (You can select single category or multi categories, if you do not select any category,
your website will show posts in all categories.
Select Tag (You can select single tag or multi tag, if you do not select any tag your website will show all
posts).
Select Relation (AND/OR) to combine 2 options filter categories/tag (AND - Display posts which
both belong to categories and have selected tags, OR - Display posts which either belong to categories or
have selected tags).
Select Order by to arrange the displaying order of posts according to Post id, Date, Title, Random or
Number of comment.
Select Ordering to customize Order by from larger to smaller for Post id, Date, Number of comment,
using alphabet to arrange by Title.
Custom Number of posts (the default is 5, you can change it).
Custom Number of post per page (the default is 3, You can change it, when the number of posts per
page is smaller than the number of posts, the widget will display Next-Previous button so that you can
see all posts).
Choose Layout: There are 2 layouts for you to select: Three items per page and One item per
page. Select layout options you want to display on the dropdown (see following illustrations.)
Custom Slider speed in milliseconds the smaller the number is, the faster the speed is.
Check on checkboxes Slider auto play if you want carousel to run at auto play mode.
Timestamp: Allow your website to show recent posts from the nearest day.
Check on checkboxes to hide the title and the category if you do not want to display the title and the
category on the frontend.
Click Save button to save.

32

33
It will be displayed on the frontend as bellow:
Three items per page
One item per page

34
7. Kopa Post List Carousel
Display the list post on gallery page with carousel top posts carousel and the following is 3 top posts. Drag
and Drop the widget into the sidebar you want to display and configure it:
Add Title of the widget (not display on the front end).
Select Categories (You can select single category or multi categories, if you do not select any category,
your website will show posts in all categories.
Select Tag (You can select single tag or multi tag, if you do not select any tag your website will show all
posts).
Select Relation (AND/OR) to combine 2 options filter categories/tag(AND - Display posts which both
belong to categories and have tags selected, OR - Display posts which either belong to categories or have
tags selected).
Select Order by to arrange the displaying order of posts according to Post id, Date, Title, Random or
Number of comment.
Select Ordering to customize Order by from larger to smaller for Post id, Date, Number of comment,
using alphabet to arrange by Title.
Custom Number of posts (the default is 6, you can change it).
Timestamp: Allow your website to show recent posts from the nearest day.
Click Save button to save.

35

36
It will be displayed on the frontend as bellow:

37
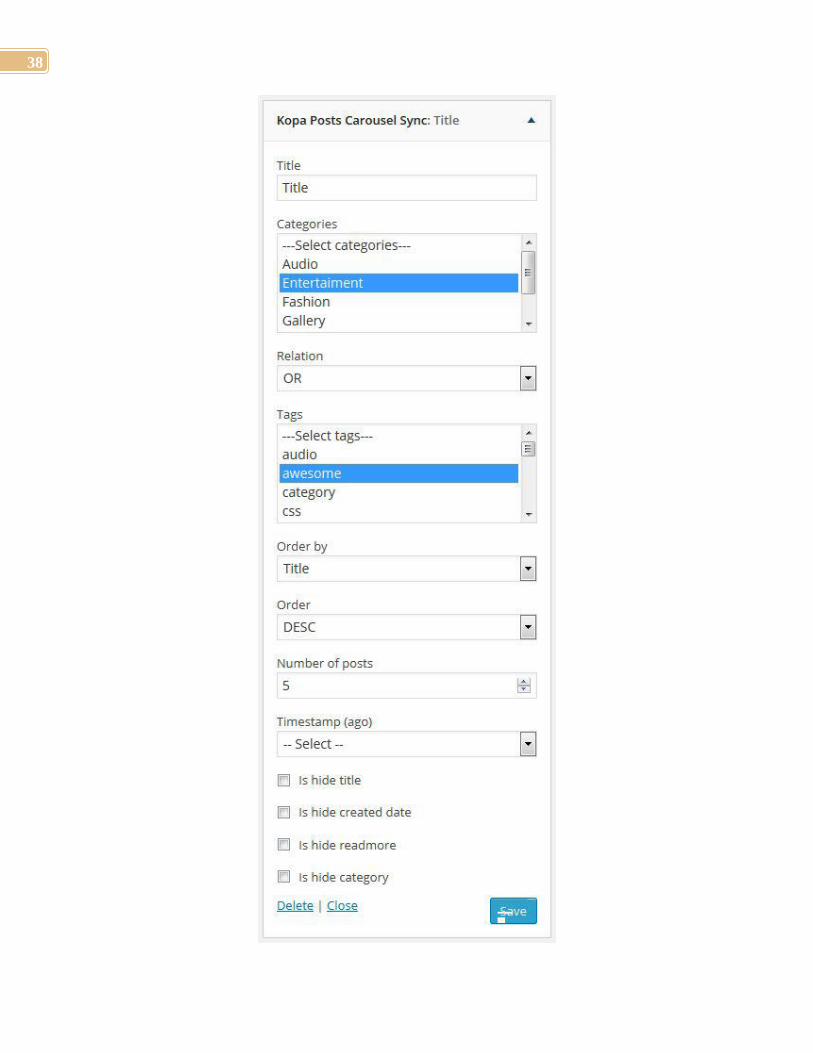
8. Kopa Post Carousel Sync
Display post list with carousel effect (You can see illustrations). Drag and Drop the widget into the sidebar
you want to display and configure it.
Add Title of the widget (not display on the front-end).
Select Categories (You can select single category or multi categories, if you do not select any category,
your website will show posts in all categories.
Select Tag (You can select single tag or multi tag, if you do not select any tag your website will show all
posts).
Select Relation (AND/OR) to combine 2 options filter categories/tag(AND - Display posts which both
belong to categories and have tags selected, OR - Display posts which either belong to categories or have
tags selected).
Select Order by to arrange the displaying order of posts according to Post id, Date, Title, Random or
Number of comment.
Select Order (DESC/ASC) to customize Order by from larger to smaller with Post id, Date, Number
of comment, using alphabet if arrange by the title.
Custom Number of posts (the default is 5, you can change it).
Timestamp: Allow your website to show recent posts from the nearest day.
Check on checkbox to hide the title, created date, readmore, category if you do not want to
display them on the front-end.
Click Save button to save.
38

39
It will be displayed on the frontend as bellow:
40
9. Kopa Video Grid
Display posts with video Grid format (see the following illustration on frontend).Drag and Drop the widget
into the sidebar you want to display and configure it.
Enter Title widget.
Select Categories (You can select single category or multi categories, if you do not select any category,
your website will show posts with the video format in all categories).
Select Tag (You can select single tag or multi tag, if you do not select any tag your website will show all
video posts).
Select Relation = AND - Display posts which both belong to categories and have tags selected.
Select Order by to arrange the displaying order of posts according to Post id, Date, Title, Random or
Number of comment.
Select Order (DESC/ASC) to customize Order by from larger to smaller with Post id, Date, Number
of comment, using alphabet if arrange by the title.
Custom Number of posts (the default is 7, you can change it).
Timestamp: Allow your website to show recent posts from the nearest day.
Check on checkbox to hide author if you do not want to display on the front-end.
Click Save button to save.

41

42
It will be displayed as on Homepage 1 and Homepage 2 as bellow:
10. Kopa Post List
You can create posts with different styles. Drag and Drop the widget into the sidebar you want to display
and configure it.
Add Title of the widget.
Select Categories (You can select single category or multi categories, if you do not select any category,
your website will show posts in all categories.
Select Tag (You can select single tag or multi tag, if you do not select any tag your website will show all
posts).
Select Relation (AND/OR) to combine 2 options filter categories/tag (AND - Display posts which
both belong to categories and have tags selected, OR - Display posts which either belong to categories or
have tags selected).
Select Order by to arrange the displaying order of posts according to Post id, Date, Title, Random or
Number of comment.
Select Ordering to customize Order by from larger to smaller for Post id, Date, Number of comment,
using alphabet to arrange by Title.

43
Custom Number of posts (the default is 5, you can change it).
Custom Excerpt words limit (the default quantity is 55 words, you can change it, you will customize
the number for each layout.
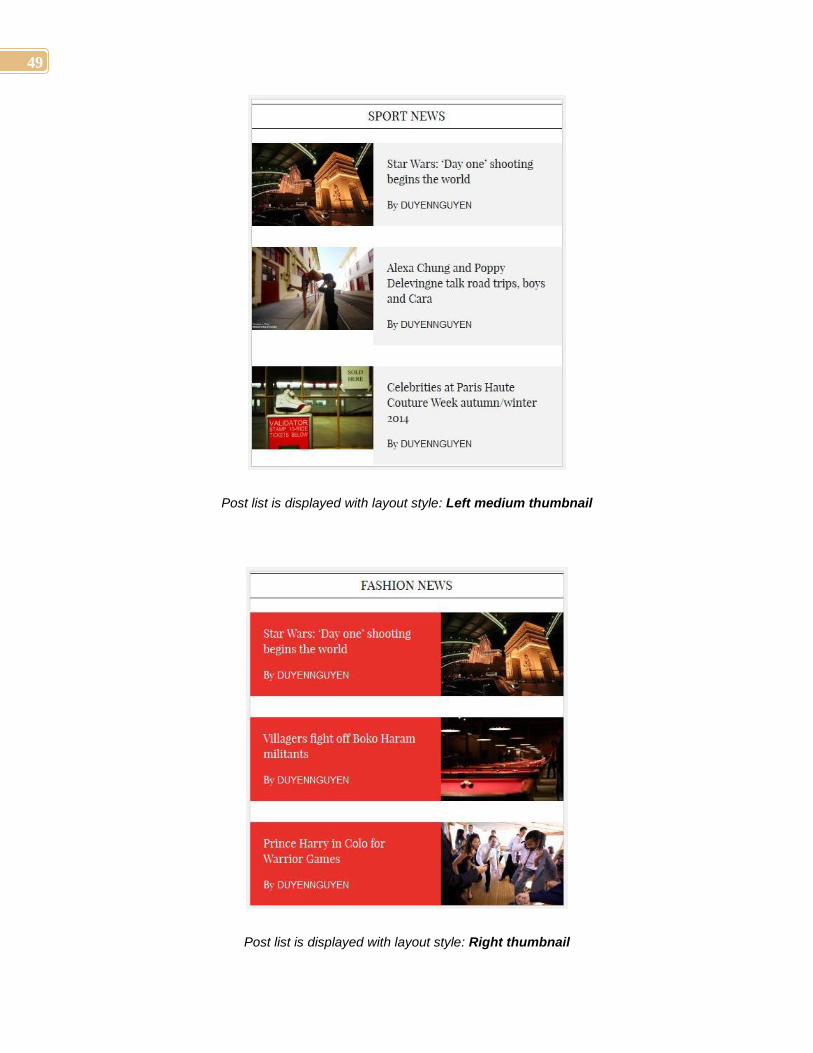
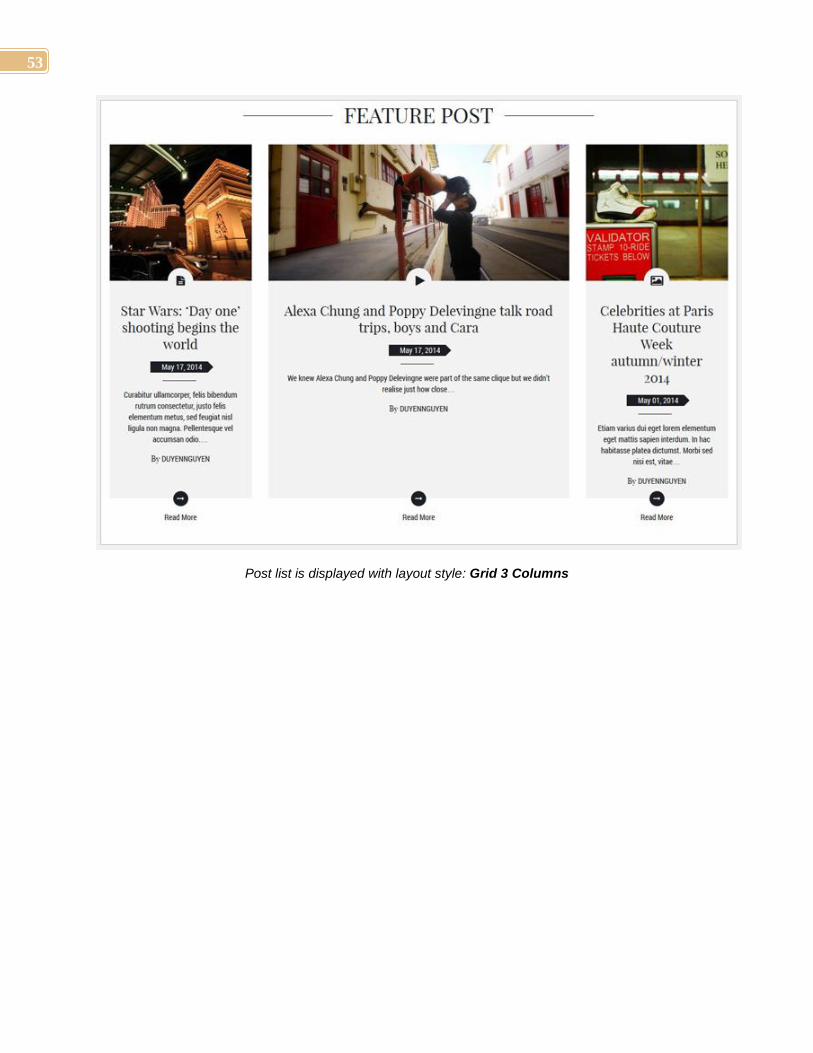
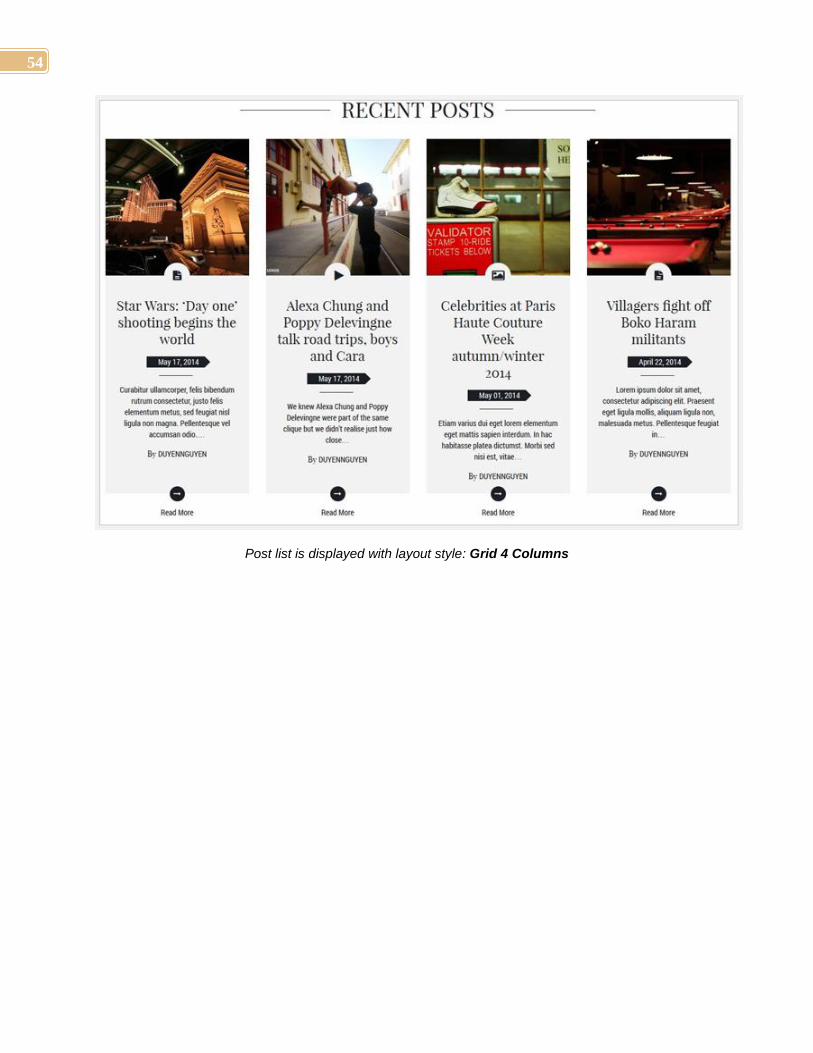
Choose Layout: There are 14 layouts to select. Select layout options you want to display on the
dropdown (see following illustrations).
Timestamp: Allow your website to show recent posts from the nearest day.
Check on checkboxes to hide Excerpt, created date, author and readmore if you do not want to
display them on the front-end.
Click Save button to save.
It will be displayed on the frontend as bellow:
Post list is displayed with layout style: Icon Post Format

44
Post list is displayed with layout style: Thumbnail for first

45
Post list is displayed with layout style: Left small Thumbnail
Post list is displayed with layout style: No thumbnail with comments number

46
Post list is displayed with layout style: Grid 1 Column small thumbnail

47
Post list is displayed with layout style: Grid 1 Column thumbnail for first

48
Post list is displayed with layout style: Grid 1 Column big thumbnail
49
Post list is displayed with layout style: Left medium thumbnail
Post list is displayed with layout style: Right thumbnail

50
Post list is displayed with layout style: Grid 1 column medium thumbnail

51
Post list is displayed with layout style: No thumbnail

52
Post list is displayed with layout style: Grid 2 Columns
53
Post list is displayed with layout style: Grid 3 Columns
54
Post list is displayed with layout style: Grid 4 Columns
55
11. Kopa Quote
Display a quote. With the widget, only display the quote, so you have to select the category in which there is
the post including the quote. Drag and drop Kopa Quote widget into sidebar you want to display and
configure it.
Enter title of the widget.
Select Categories (select the category in which there is the post including the quote).
Select Relation (AND/OR) to combine 2 options filter categories/tag (AND - Display posts which
both belong to categories and have tags selected, OR - Display posts which either belong to categories or
have tags selected).
Select Order by to arrange the displaying order of posts according to Post id, Date, Title, Random or
Number of comment.
Select Ordering to customize Order by from larger to smaller for Post id, Date, Number of comment,
using alphabet to arrange by Title.
Timestamp: Allow your website to show recent posts from the nearest day.
Click Save button to save.

56

57
12. Kopa Social
The widget can show relating social links such as Facebook link, Twitter link, Instagram link, Google Plus
link, Feed link, YouTube link. Drag and Drop the widget into the sidebar you want to display and configure
it.
Enter Title of the widget.
Select Position to display the widget, if you select sidebar position the widget will be displayed
description, if you select footer position the widget will be displayed on the footer.
Enter description if your select position = footer.
Check on checkboxes if you want to add socials such as Facebook, Twitter, etc. (Note: if you want socials
icons have links, go to Theme Options Social Setting and add social links).
Click Save button to save.

58
13. Kopa Video Playlist
The widget shows a list of videos including the newest video. You can click to view and there are other
videos being displayed in the carousel, when clicking this video, go to the detail video to view. We use this
widget in the video page. Drag and Drop the widget into the sidebar you want to display and configure it:
Add Title of the widget.
Select Categories (You can select single category or multi categories, if you do not select any category,
your website will show posts with the video format in all categories.
Select Tag (You can select single tag or multi tag, if you do not select any tag your website will show all
video posts).
Select Relation = AND - Display posts which both belong to categories and have tags selected.
Select Order by to arrange the displaying order of posts according to Post id, Date, Title, Random or
Number of comment.
Select Ordering to customize Order by from larger to smaller for Post id, Date, Number of comment,
using alphabet to arrange by Title.
Custom Number of posts (the default is 7, you can change it).
Timestamp: Allow your website to show recent posts from the nearest day.
Check on checkbox to hide author if you do not want to show authors on the front-end.
Click Save button to save.

59

60
It will be displayed on the frontend as bellow:

61
14. Kopa Video Filter
The widget shows lists of video posts according to categories. We use this widget in the video page, you can
see demo to be more clearly. Drag and Drop the widget into the sidebar you want to display and configure
it:
Add Title of the widget.
Select Categories (You can select single category or multi categories, if you do not select any category,
your website will show posts with the video format in all categories.
Select Tag (You can select single tag or multi tag, if you do not select any tag your website will show all
video posts).
Select Relation = AND - Display posts which both belong to categories and have tags selected.
Select Order by to arrange the displaying order of posts according to Post id, Date, Title, Random or
Number of comment.
Select Ordering to customize Order by from larger to smaller for Post id, Date, Number of comment,
using alphabet to arrange by Title.
Custom Number of posts (the default is 7, you can change it).
Timestamp: Allow your website to show recent posts from the nearest day.
Click Save button to save.

62

63
It will be displayed on the frontend as bellow:

64
15. Kopa Contact
The widget allows showing contacting information such as your email, phone number, and address on the
footer. Drag and Drop the widget into the sidebar you want to display and configure it.
Enter Title widget
Enter number phone
Enter email address
Enter description, it can be your company's address or a passage to introduce your company.
Click Save button to save.

65
16. Kopa Newsletter
It displays email subscriptions form. Dragging and dropping this widget into sidebar that you want to
display.
Enter the title, Feedburner ID, description then click Save. It displays same as below:
Note: The steps to setup email subscription newsletter.

66
Assuming you already have setup Google feedburner feed account, login to My Feeds at Google
Feedburner site. Click on the feed you want to setup email subscription for. Click on Publicize tab and
then click on Email subscriptions link under services as shown below:
Then click on Activate button to activate the email subscriptions for your feed.
Next click on Subscription management as shown below:

67
Look for subscription link code which you can put on your website. Here is how the subscription link code looks like:
<a href="http: //feedburner.google.com/fb/a/mailverify?uri=infoheap&loc=en_US">Subscribe to
InfoHeap by Email</a>
This is how the page looks like on feedburner site when a user clicks on it:
Please note that you can also use the embeddable subscription form code instead of subscription link
code. It will put the email subscription form with email address text box on your site itself.
Next go to communication preference and enter from email and confirmation email subject and body as
desired.
Then go to email branding settings and enter Email subject/title, logo URL, etc.
Next go to delivery options and set a schedule email delivery time.

68
Note that feedburner sends email once a day and the frequency is not configurable. You can only pick
the time. It looks at all the recent posts and if there is no new post since it sent last subscription email,
then it does not send any email.
And last, dragging and dropping Kopa Newsletter widget to sidebar which you want to display.
17. Kopa Tweet
It displays list tweets from twitter.com.Drag and Drop the widget into the sidebar you want to display and
configure it.
Add Title widget
Add Twitter ID
Add Twitter API key
Add Twitter API secret
Add Twitter Access token
Add Twitter Access token secret
Custom Number of item
Click Save button to save.

69
Note: Create Generate API Key, API Token, and Access Key for Twitter OAuth
Login site https: //apps.twitter.com/
To make things straight, you have to create a Twitter application to generate Twitter API Keys, Access
Token and secret keys and so on.
Creating a Twitter Application

70

71
To use Twitter counter widget and other Twitter related widgets, you need OAuth access keys. To get
Twitter Access keys, you need to create Twitter Application which is mandatory to access Twitter.
1. Go to https: //dev.twitter.com/apps/new and log in, if necessary
2. Enter your Application Name, Description and your website address. You can leave the callback
URL bpty.
3. Accept the TOS, and solve the CAPTCHA.
4. Submit the form by clicking the Create your Twitter Application
5. Copy the consumer key (API key) and consumer secret from the screen into your application.

72
Create Your Access Token for Oauth

73
After creating your Twitter Application, you have to give the access to your Twitter Account to use this
Application. To do this, click the Create my Access Token.
Get the API Key, API Secret, Access token, Access Token Secret
In order to access the Twitter, that is to get recent tweets and twitter followers count, you need the four
keys such like API Key, API Secret, Access token, Access Token Secret.

74
F. Custom Shortcode Generator
It would be impossible to remember the syntax of every shortcodes available options associated with it. Our
shortcodes generator is an easy way for you to place a shortcode in theme to display the content. Within
the "Page" or "Post", you can see the Visual Shortcode. Just click on the shortcode you need then it will be
added to the content.
Shortcodes avaiable with this theme
This theme comes with following shortcodes to display the content:
1. Column shortcode
Click to Column symbol, add title and content for Column:
1/1 [row] [col col=12]TEXT[/col] [/row]
1/2-1/2 [row] [col col=6]TEXT[/col] [col col=6]TEXT[/col] [/row]
1/3-1/3-1/3 [row] [col col=4]TEXT[/col] [col col=4]TEXT[/col] [col col=4]TEXT[/col] [/row]
1/3-2/3 [row] [col col=4]TEXT[/col] [col col=8]TEXT[/col] [/row]

75
1/4-1/2-1/4 [row] [col col=3]TEXT[/col] [col col=6]TEXT[/col] [col col=3]TEXT[/col] [/row]
1/4-1/4-1/4-1/4 [row] [col col=3]TEXT[/col] [col col=3]TEXT[/col] [col col=3]TEXT[/col] [col
col=3]TEXT[/col] [/row]
1/4-3/4 [row] [col col=3]TEXT[/col] [col col=9]TEXT[/col] [/row]
1/6-4/6-1/6 [row] [col col=2]TEXT[/col] [col col=8]TEXT[/col] [col col=2]TEXT[/col] [/row]
1/6-1/6-1/6-1/2 [row] [col col=2]TEXT[/col] [col col=2]TEXT[/col] [col col=2]TEXT[/col] [col
col=6]TEXT[/col] [/row]
1/6-1/6-1/6-1/6-1/6-1/6 [row] [col col=2]TEXT[/col] [col col=2]TEXT[/col] [col col=2]TEXT[/col] [col
col=2]TEXT[/col] [col col=2]TEXT[/col] [col col=2]TEXT[/col] [/row]
2/3-1/3 [row] [col col=8]TEXT[/col] [col col=4]TEXT[/col] [/row]
5/6-1/6 [row] [col col=10]TEXT[/col] [col col=2]TEXT[/col] [/row]

76
It will be displayed on the frontend as bellow:

77

78
2. Accordion
Click to Accordion symbol, add title and content for Accordion:
[accordions] [accordion title="First"]Content 1[/accordion] [accordion title="Second"]Content
2[/accordion] [accordion title="Third"]Content 3[/accordion] [/accordions]
3. Tab
Click to Tab symbol, displays code below:
[tabs] [tab title="Tab 1"]Content Tab1[/tab] [tab title="Tab 2"]Content Tab2[/tab] [tab title="Tab
3"]Content Tab3[/tab] [/tabs]
Enter Tab title and Tab content for tab, the image will illustrate for above shortcode:

79
4. Alert box shortcode
Click on Alert symbol, It displays code blow:
[alert type="e.g. warning, link, success, info" notice="Notice this: "][/alert]
Select an option (Warning or Link or Success or Info), Enter content for style of alert, it is illustrated by the
image below:
Example: [alert type="warning" notice="Warning! Better check yourself, you're not looking too
good."][/alert]
5. Soundcloud
Click on Soundcloud symbol, It displayss code blow:
[soundcloud]https: //soundcloud-url[/soundcloud]
You just have to replace default url by your soundcloud URL.

80
6. Button
Click to Button symbol, it displays code below
[kopa_button size="small" color="red-1" link="http: //kopatheme.net" target="_self"][/kopa_button]
select a size like small, large, select a color like red-1, red-2, yellow-1, yellow-2, blue-1, blue-2, green-1,
green-2, green-3, purple-1, purple-2, brown-1, brown-2, gray-1, gray-2, black, and add button name
Example: [kopa_button size="small" color="red-1" link="http: //kopatheme.net"
target="_self"]Submit[/kopa_button]
Button will be displayed on the frontend as bellow:
7. Contact form
Click to contact form symbol, itdisplays code below:
[contact_form caption="Contact Us" description=""][/contact_form]
With the shortcode, you can create the form contact for contact page.

81
8. Contact form
Click to contact form symbol, it displays code below:
[contact_info] [email]Email[/email] [address]Address[/address] [phone]Phone number [/phone]
[fax]Fax number[/fax] [/contact_info]
You can create contacting information including the email, address, phone number, fax number with our
styles by this shortcode, you only need to displace the default information by your information.
9. Dropcaps
Click to dropcaps symbol, It displayss code below
[dropcaps style = "normal | circle | square"][/dropcaps]
Select style and add your content in] [in shortcode, the first symbol will be automatically used for dropcap
Example: [dropcaps style = "normal"]Content[/dropcaps]
Dropcaps will be displayed on the frontend as bellow:

82
10. Google maps
Click google map symbol, It displays code below:
[google_map][/google_map]
Shortcode allows you to embed a map in your website. Adding [google_map]paste iframe code in
here[/google_map]
To get iframe code go to url- http: //maps.google.com/ to locate your position.
1. Click to open Share and Embed code 2. Copy shortcode
11. Vimeo shortcode
Click Vimeo symbol, displays the code below. You just have to replace default URL by your vimeo URL
[vimeo width="730" height="411"]http: //vimeo.com/123456789[/vimeo]
83
12. Youtube shortcode
Click youtube symbol, display the code below. You just have to replace default URL by your youtube URL
[youtube width="730" height="411"]http: //www.youtube.com/watch?v=ABCDEFGH[/youtube]
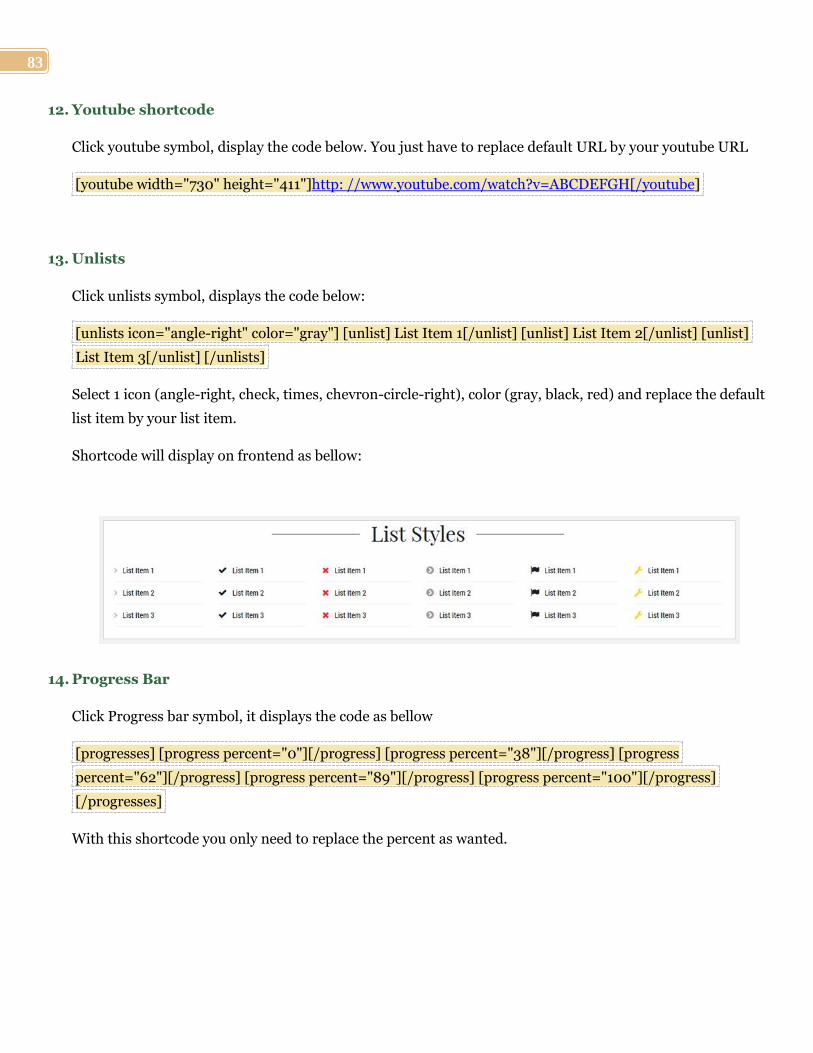
13. Unlists
Click unlists symbol, displays the code below:
[unlists icon="angle-right" color="gray"] [unlist] List Item 1[/unlist] [unlist] List Item 2[/unlist] [unlist]
List Item 3[/unlist] [/unlists]
Select 1 icon (angle-right, check, times, chevron-circle-right), color (gray, black, red) and replace the default
list item by your list item.
Shortcode will display on frontend as bellow:
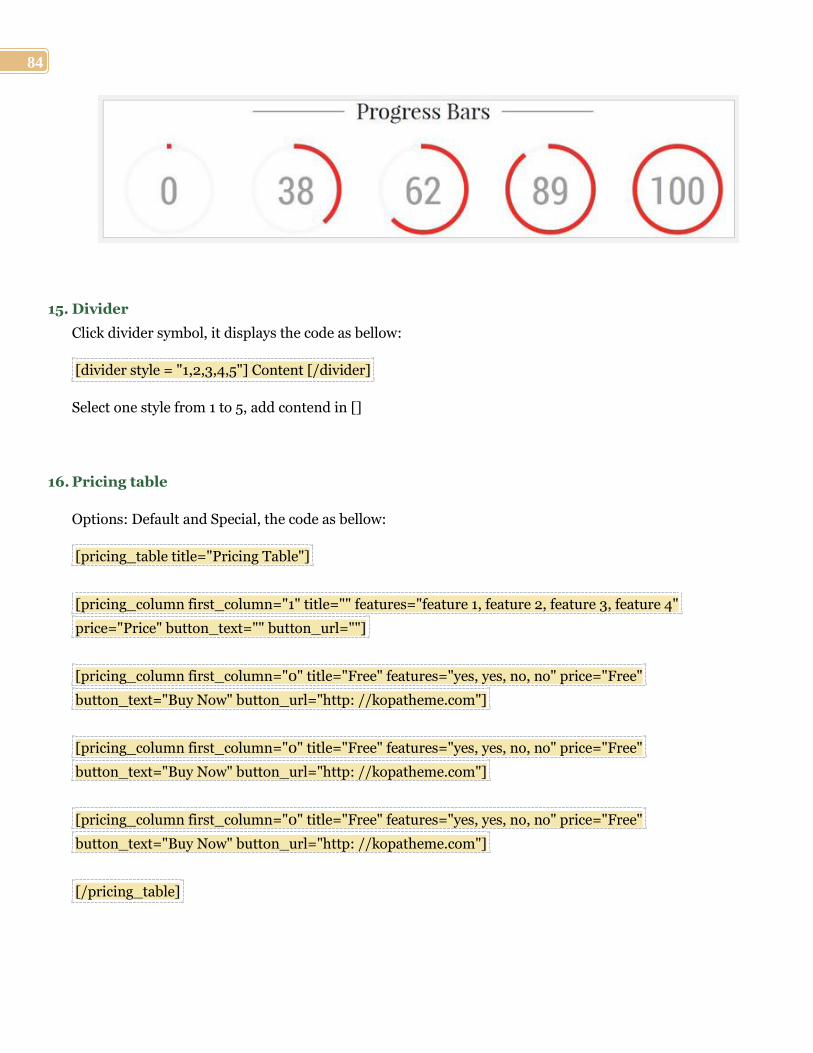
14. Progress Bar
Click Progress bar symbol, it displays the code as bellow
[progresses] [progress percent="0"][/progress] [progress percent="38"][/progress] [progress
percent="62"][/progress] [progress percent="89"][/progress] [progress percent="100"][/progress]
[/progresses]
With this shortcode you only need to replace the percent as wanted.
84
15. Divider
Click divider symbol, it displays the code as bellow:
[divider style = "1,2,3,4,5"] Content [/divider]
Select one style from 1 to 5, add contend in []
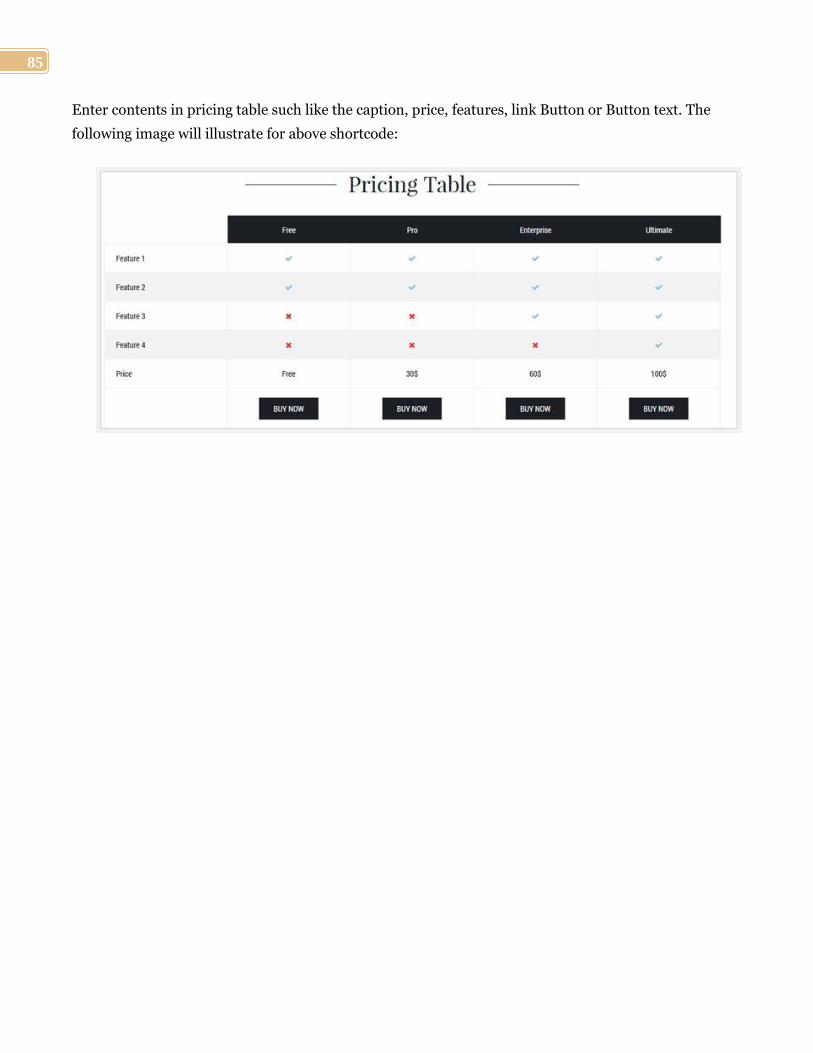
16. Pricing table
Options: Default and Special, the code as bellow:
[pricing_table title="Pricing Table"]
[pricing_column first_column="1" title="" features="feature 1, feature 2, feature 3, feature 4"
price="Price" button_text="" button_url=""]
[pricing_column first_column="0" title="Free" features="yes, yes, no, no" price="Free"
button_text="Buy Now" button_url="http: //kopatheme.com"]
[pricing_column first_column="0" title="Free" features="yes, yes, no, no" price="Free"
button_text="Buy Now" button_url="http: //kopatheme.com"]
[pricing_column first_column="0" title="Free" features="yes, yes, no, no" price="Free"
button_text="Buy Now" button_url="http: //kopatheme.com"]
[/pricing_table]
85
Enter contents in pricing table such like the caption, price, features, link Button or Button text. The
following image will illustrate for above shortcode:

86
G. Translation
If you are familiar with WordPress and the many plugins and Themes available for it, you've probably come
across some strangely named files like .mo, .po, and .pot. This discussion is aimed at explaining how to take a
.po file that is included with this Theme and translate it into your native language.
Summarized Instructions:
1. Download and install the translation poEdit program.
2. Open the Revant/languages/en_US.pot file with poEdit. Translate the file to your languages with
Poedit. For more information, click here.
3. Define your language inside wordpress/wp-config.php file. Open wp-config.php file in any text editor
and look for the following code:
define ('WPLANG', '');
Enter a parameter for WPLANG . This is generally in a format like language_country . For
example, en_US , or de_DE . So, this line will change to:
define ('WPLANG', 'de_DE');
For more information.Click here

87
H. Create Categories and Posts
As you can imagine, most of the site content will be posts and images associated with such posts. Categories
allow for a broad grouping of such post topics. Now we will start creating categories and publish a few posts.
1. Create Category
Go to Posts Categories
Enter new Category name.
Scroll down and click on "Add Category". A newly created category will appear. You can then repeat
the steps to create more categories.

88

89
With our KOPATheme Framework, you can customize the layout for each category. Follow the procedures
listed below:
2. Click in Category name or Edit hyperlink to edit category

90
3. Scroll down to the bottom of the page, like shown in the image. Check the check box to enable
customization for this category. If this is unchecked, this category will use the default settings for all
categories that has been set in the Layout Manager.
4. Now, you can select layout and sidebar for this category
91
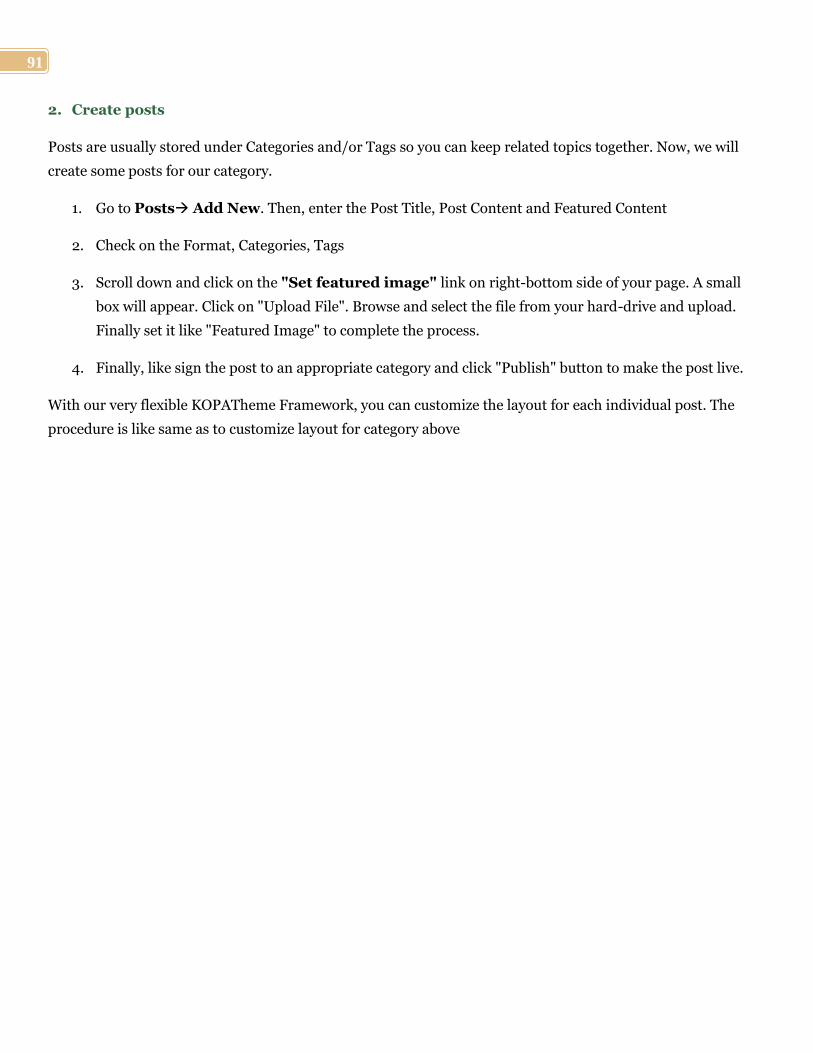
2. Create posts
Posts are usually stored under Categories and/or Tags so you can keep related topics together. Now, we will
create some posts for our category.
1. Go to Posts Add New. Then, enter the Post Title, Post Content and Featured Content
2. Check on the Format, Categories, Tags
3. Scroll down and click on the "Set featured image" link on right-bottom side of your page. A small
box will appear. Click on "Upload File". Browse and select the file from your hard-drive and upload.
Finally set it like "Featured Image" to complete the process.
4. Finally, like sign the post to an appropriate category and click "Publish" button to make the post live.
With our very flexible KOPATheme Framework, you can customize the layout for each individual post. The
procedure is like same as to customize layout for category above

92
1.Open Screen Option 4.Choose a format 7.Set featured image for post
2. Enter title post 5.Choose an existing category or Create a new one 8.Click on box if you want custom separate layout for post
3. Write content for the post 6.Create a new tag for post or Assign an existing tag 9. Click to publish post.
93
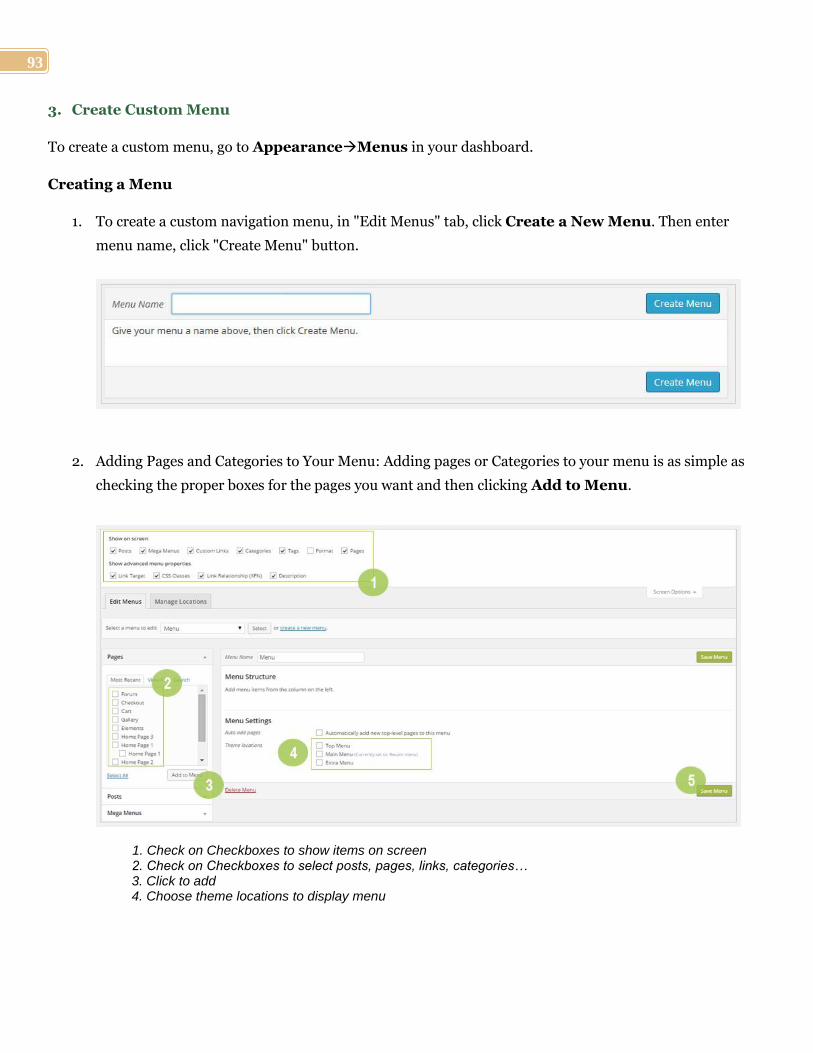
3. Create Custom Menu
To create a custom menu, go to AppearanceMenus in your dashboard.
Creating a Menu
1. To create a custom navigation menu, in "Edit Menus" tab, click Create a New Menu. Then enter
menu name, click "Create Menu" button.
2. Adding Pages and Categories to Your Menu: Adding pages or Categories to your menu is as simple as
checking the proper boxes for the pages you want and then clicking Add to Menu.
1. Check on Checkboxes to show items on screen 2. Check on Checkboxes to select posts, pages, links, categories… 3. Click to add 4. Choose theme locations to display menu

94
3. Creating a custom menu allows you to do the following things:
Change the order of pages in your menu, or delete them.
Create nested sub-menus of links, also referred to like "drop-down" menus
Create links to category pages allowing you to collect together posts like on that category
Add custom links to other sites
4. Note: When we click on any menu, we can customize this menu
Enter the Navigation Label to display in the menu.
Enter the title attribute which display when you hover on the Label
Manage Menus Location
This theme supports 3 menus location (Top Menu, Main Menu and Extra Menu). In "Manage Locations"
tab, you have to select menus to display for each location
Be sure to click Save Menu each time you make changes to your custom menu.

95
Create Mega Menu
Step 1: Go to Mega Menus All mega menu: click Add New to create a mega menu
Step 2: Go to Appearance Theme Options Sidebar Manager tab: create 3 sidebars for Mega
Menu
Go to Mega Menu Edit Mega Menu created in step 1 and configure it as bellow:
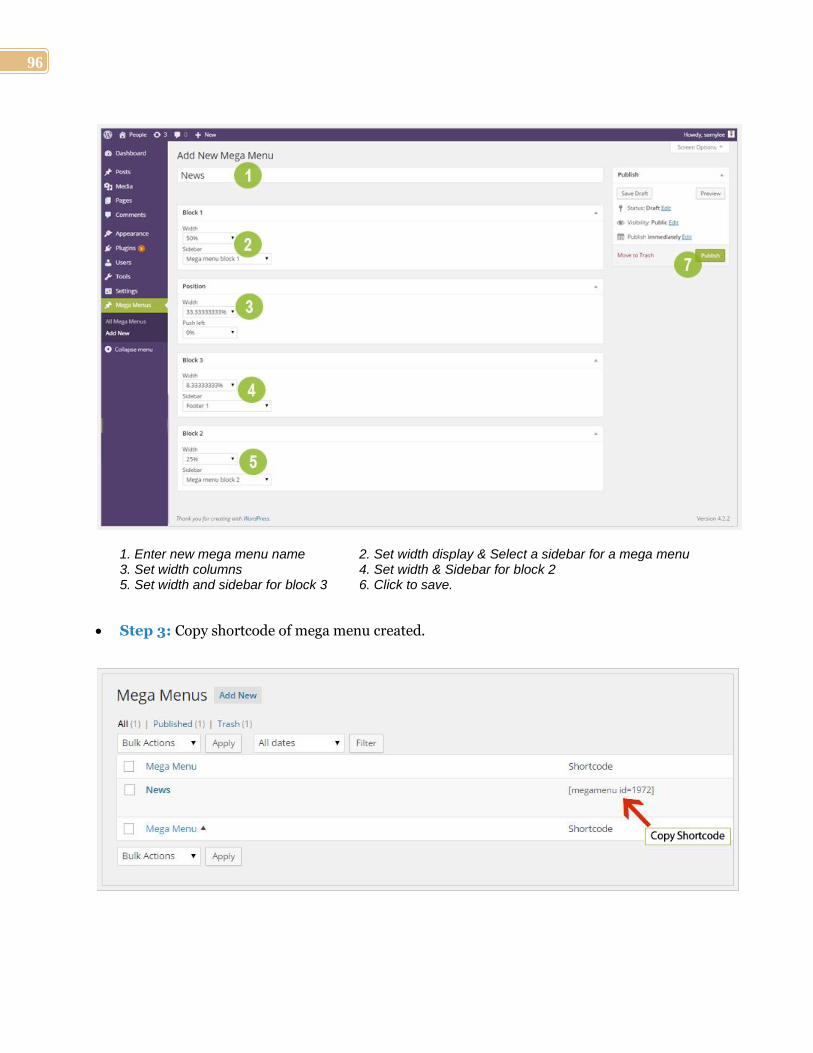
96
1. Enter new mega menu name 2. Set width display & Select a sidebar for a mega menu 3. Set width columns 4. Set width & Sidebar for block 2 5. Set width and sidebar for block 3 6. Click to save.
Step 3: Copy shortcode of mega menu created.

97
Step 4: Go to Appearance Menus: Click Select Main menu, then click edit menu item (menu
item created), paste the shortcode on description. Click Save Menu to save.
1. Check in checkboxes to display them in edit item menu 2. Paste shortcode here 3. Click to save.
98
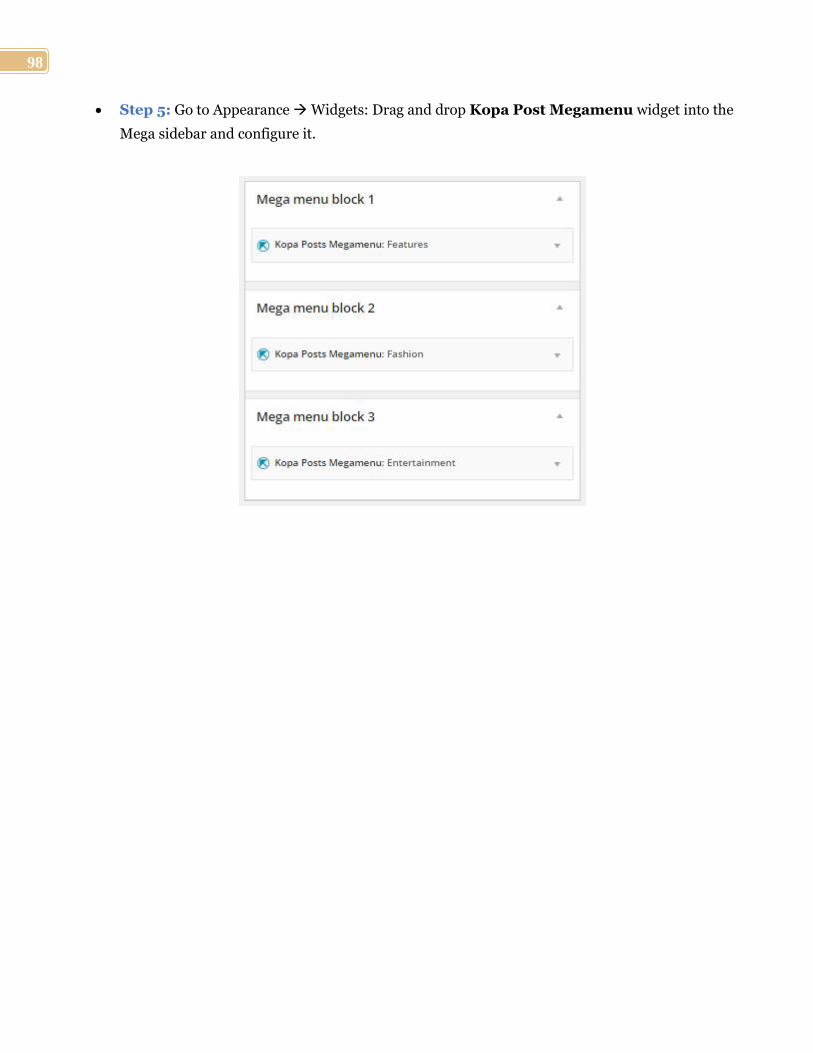
Step 5: Go to Appearance Widgets: Drag and drop Kopa Post Megamenu widget into the
Mega sidebar and configure it.
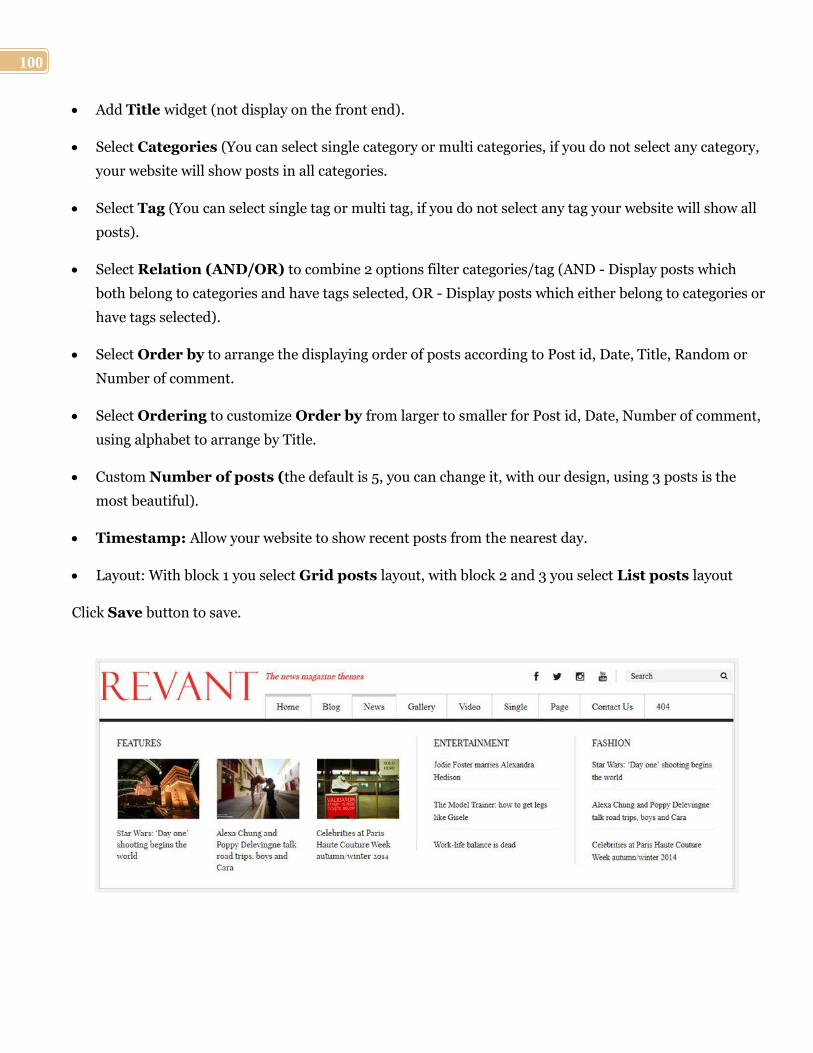
99
100
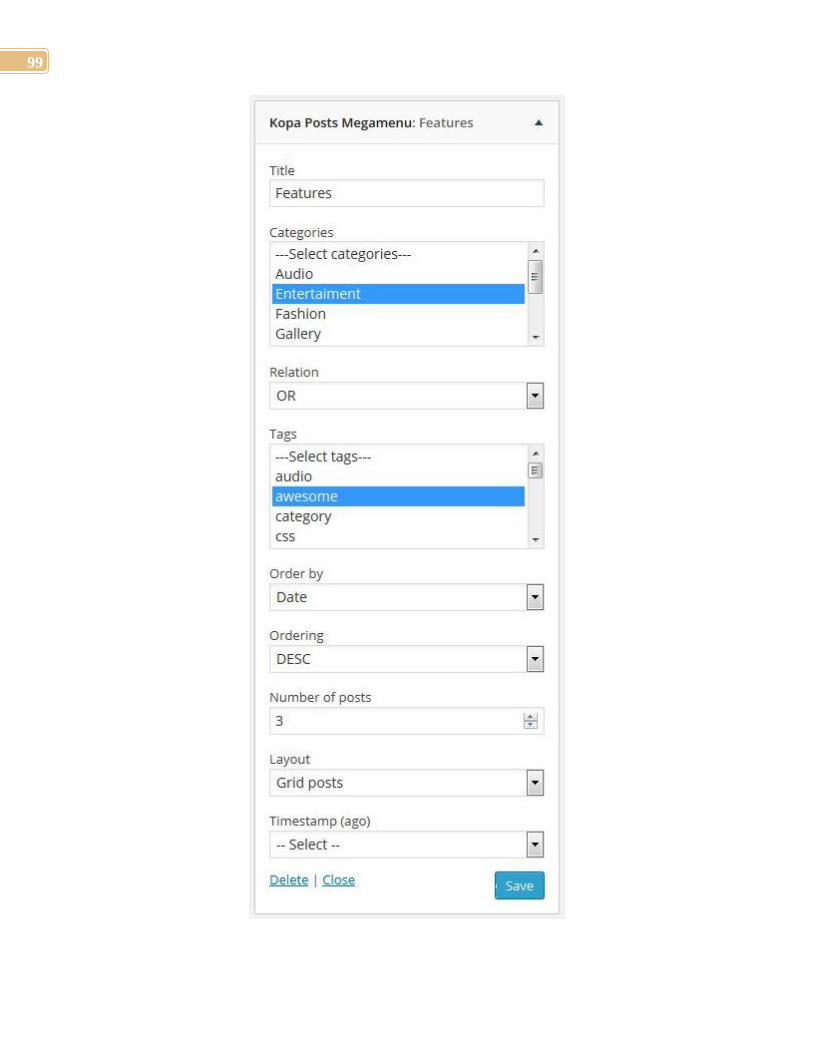
Add Title widget (not display on the front end).
Select Categories (You can select single category or multi categories, if you do not select any category,
your website will show posts in all categories.
Select Tag (You can select single tag or multi tag, if you do not select any tag your website will show all
posts).
Select Relation (AND/OR) to combine 2 options filter categories/tag (AND - Display posts which
both belong to categories and have tags selected, OR - Display posts which either belong to categories or
have tags selected).
Select Order by to arrange the displaying order of posts according to Post id, Date, Title, Random or
Number of comment.
Select Ordering to customize Order by from larger to smaller for Post id, Date, Number of comment,
using alphabet to arrange by Title.
Custom Number of posts (the default is 5, you can change it, with our design, using 3 posts is the
most beautiful).
Timestamp: Allow your website to show recent posts from the nearest day.
Layout: With block 1 you select Grid posts layout, with block 2 and 3 you select List posts layout
Click Save button to save.

101
Edit Menu
To Edit Menus tab, select a menu to edit then click Select button to select.
You can the order of menus by dragging the menu and drop it into position you want, or you can change
navigation Label, Title Attribute, CSS class, link relationship, theme location...
Click Save button to save.
1. Click to select menu 2. You can change or add items if you want 3. You can change theme location 4. Click to save changes

102
I. Appendix
Creating Frontpage 1 or Frontpage 2
1. Go to Appearance Theme Options Layout Manager Front Page: Select the layout for
your page: Front Page 1 or Frontpage 2
Basically, layout frontpage 1 and layout frontpage 2 are similar about widget areas and widgets, but
layout frontpage 2 has left navigation.
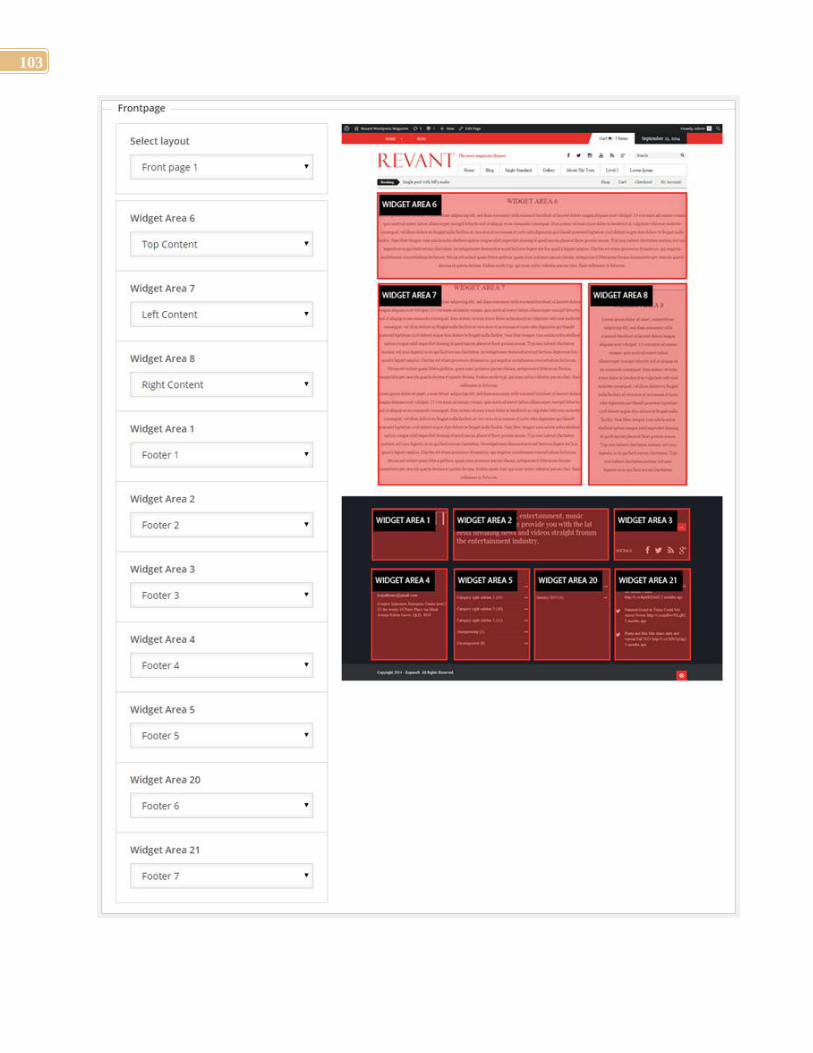
103

104
Widget area 1 Select Footer 1 sidebar
Widget area 2 Select Footer 2 sidebar
Widget area 3 Select Footer 3 sidebar
Widget area 4 Select Footer 4 sidebar
Widget area 5 Select Footer 5 sidebar
Widget area 6 Select Top Content sidebar
Widget area 7 Select Left Content sidebar
Widget area 8 Select Right Content sidebar
2. Go to Appearance Menus and make sure you already have a Main Menu Tab created and set as
default. Now check the new page you created from the Pages box and move the page name all the way to
the Top and Save Menu.
3. Now go to Widgets.

105
106

107
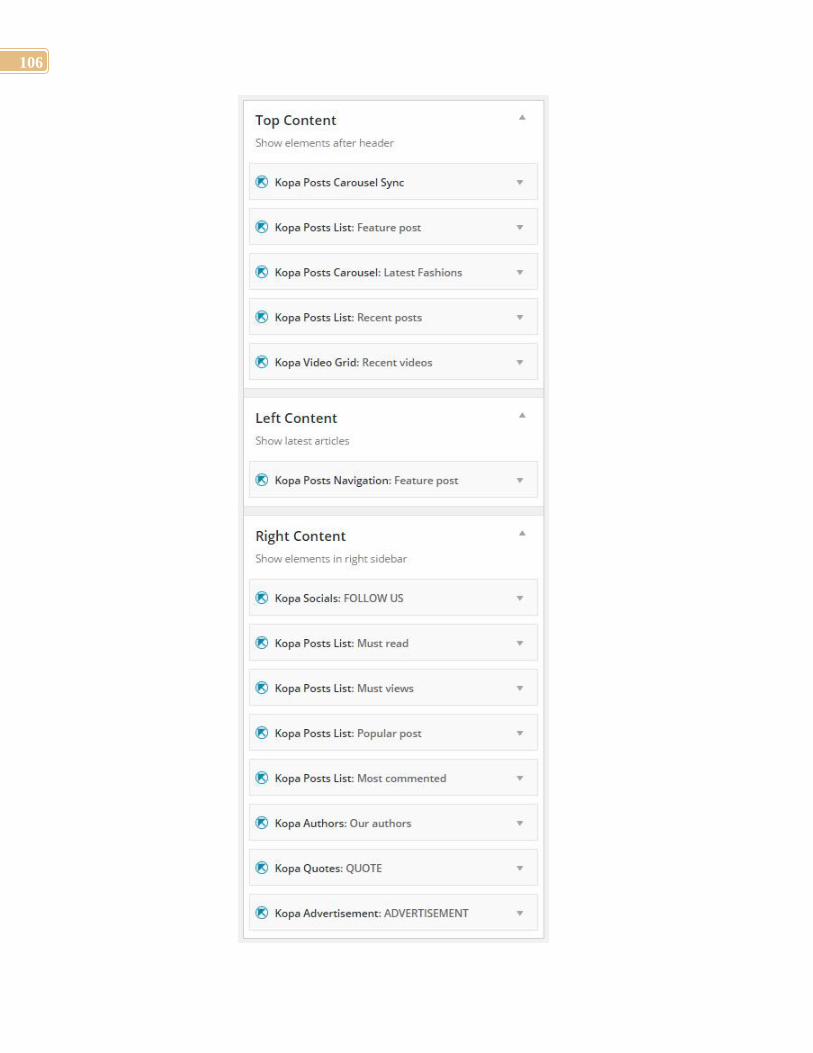
Top Content sidebar
Drag Kopa Posts Carousel Sync widget to Top Content sidebar
Drag Kopa Post List widget to Top Content sidebar then select layout style "Grid 3 columns",
number of posts = 3
Drag Kopa Post Carousel widget to Top Content sidebar then select layout style "One item
per page"
Drag Kopa Post List widget to Top Content sidebar then select layout style "Grid 4 coloumns"
Drag Kopa Video Grid widget to Top Content sidebar
Left Content sidebar
Drag Kopa Post List widget to Left Content sidebar then select layout style "Grid 2 columns"
Right Content sidebar
Drag Kopa Socials widget to Right Content sidebar with position = sidebar
Drag Kopa Post List widget to Right Content sidebar then select layout style "Icon post
format"
Drag Kopa Post List widget to Right Content sidebar then select layout style "Thumbnail for
first"
Drag Kopa Post List widget to Right Content sidebar then select layout style "Left small
thumbnail"
Drag Kopa Post List widget to Right Content sidebar then select layout style "No thumbnail
with comment number"
Drag Kopa Author widget to Right Content sidebar
Drag Kopa Quote widget to Right Content sidebar
Drag Kopa Advertisement widget to Right Content sidebar
Footer 1 sidebar
Drag Kopa Advertisement widget to Footer 1 sidebar with image upload is logo image

108
Footer 2 sidebar
Drag Text widget to Footer 2 sidebar
Footer 3 sidebar
Drag Kopa Newsletter widget to Footer 3 sidebar
Drag Kopa Socials widget to Footer 3 sidebar with position = footer
Footer 4 sidebar
Drag Kopa Contact widget to Footer 4 sidebar
Footer 5 sidebar
Drag Categories widget to Footer 5 sidebar
Footer 6 sidebar
Drag Archives widget to Footer 6 sidebar
Footer 7 sidebar
Drag Kopa Tweet widget to Footer 7 sidebar
To customize the widget, you can see above Custom widget
Create Frontpage 3
1. Go to Appearance Theme Options Layout Manager Front Page: Select the layout for
your page: Front Page 3
Go to Appearance Theme Options Sidebar Manager to create sidebars for the layout. You
can name the sidebar as bellow.

109
Widget area 9 Select Main Content area 9 sidebar
Widget area 10 Select Main Content area 10 sidebar
Widget area 11 Select Main Content area 11 sidebar
Widget area 12 Select Main Content area 12 sidebar
Widget area 13 Select Main Content area 13 sidebar

110
Widget area 14 Select Main Content area 14 sidebar
Widget area 8 Select Right Content sidebar
Widget area 15 Select Main Content area 15 sidebar
Widget area 1 Select the footer 1 sidebar
Widget area 2 Select the footer 2 sidebar
Widget area 3 Select the footer 3 sidebar
Widget area 4 Select the footer 4 sidebar
Widget area 5 Select the footer 5 sidebar
Widget area 20 Select the footer 6 sidebar
Widget area 21 Select the footer 7 sidebar
Go to Appearance Menus and make sure you already have a Main Menu Tab created and set
as default. Now check the new page you created from the Pages box and move the page name all the
way to the Top and Save Menu.
Now go to Widgets.

111

112

113
Footer 1 sidebar
Drag Kopa Advertisement widget to the footer 1 sidebar with image upload is logo image
Footer 2 sidebar
Drag Text widget to the footer 2 sidebar
Footer 3 sidebar
Drag Kopa Newsletter widget to the footer 3 sidebar
Drag Kopa Socials widget to the footer 3 sidebar with position = the footer
Footer 4 sidebar
Drag Kopa Contact widget to the footer 4 sidebar
Footer 5 sidebar
Drag Categories widget to the footer 5 sidebar
Footer 6 sidebar
Drag Archives widget to the footer 6 sidebar
Footer 7 sidebar
Drag Kopa Tweet widget to the footer 7 sidebar
Main Content area 9 sidebar
Drag Kopa Posts Carousel widget to Main Content area 9 sidebar with One item per
page layout
Main Content area 10 sidebar
Drag Kopa Post List widget to Main Content area 10 sidebar with Grid 1 column small
thumbnail layout
Drag Kopa Post List widget to Main Content area 10 sidebar with Grid 1 column
thumbnail for first layout
Main Content area 11 sidebar
114
Drag Kopa Post List widget to Main Content area 11 sidebar with Grid 1 column big
thumbnail layout
Main Content area 12 sidebar
Drag Kopa Post List widget to Main Content area 12 sidebar with Right thumbnail layout
Drag Kopa Post List widget to Main Content area 12 sidebar with Left medium
thumbnail layout
Main Content area 13 sidebar
Drag Kopa Post List widget to Main Content area 13 sidebar with No thumbnail layout
Drag Kopa Post List widget to Main Content area 13 sidebar with Grid 1 column medium
thumbnail layout
Main Content area 14 sidebar
Drag Kopa Video Carousel widget to Main Content area 14 sidebar with Small
thumbnail layout
Drag Kopa Gallery Carousel widget to Main Content area 14 sidebar
Main Content area 15 sidebar
Drag Kopa Post Single widget to Main Content area 15 sidebar
Main Content area 16 sidebar
Drag Kopa Post Carousel widget to Main Content area 16 sidebar with Three items per
page layout
To configure for the widget, you can see above Custom widget
115
Creating Gallery Page
1. Create a page (example: name page is Gallery)
2. Scroll down Custom Layout, check on box to enable custom layout for the page.
3. In selectbox Select layout, select Page right sidebar layout. With widget areas in the footer and
widget area 8 right sidebar, you can use sidebars used in the customized frontpage, or create new
sidebars by going to Sidebar manager and create a new sidebar, then go to Gallery page, select
sidebar for widgets area. With widget area 7, create a new sidebar for it, for example Gallery sidebar.

116

117
Widget area 7 Select Gallery sidebar
Widget area 8 Select Right Content sidebar
Widget area 1 Select the footer 1 sidebar
Widget area 2 Select the footer 2 sidebar
Widget area 3 Select the footer 3 sidebar
Widget area 4 Select the footer 4 sidebar
Widget area 5 Select the footer 5 sidebar
Widget area 20 Select the footer 6 sidebar
Widget area 21 Select the footer 7 sidebar
4. Go to Appearance Menus: Select 1 menu (for example: Main-Menu), check Select Gallery page to
add the menu. Click Save button to save
5. Now go to Widgets.
Drag Kopa Video PlayList widget to Video sidebar
Drag Kopa Video Carousel widget to Video sidebar with Big thumbnail layout
Drag Kopa Video Filter widget to Video sidebar
To configure the widget, you can see above Custom widget part.

118
Creating Video Page
1. Create a page (example: name page is Video)
2. Scroll down Custom Layout, check on box to enable custom layout for the page.
3. In selectbox, select layout, Select Video page layout. with widget areas in the footer and widget area
8 - right sidebar You can use sidebars used in the frontpage , or create new sidebars, you can go
to Sidebar manager and create new sidebars, then go to Video page, select the sidebar for the widget
area. With widget area 7, you create 1 sidebar for example Video sidebar.

119
Widget area 7 Select Video sidebar
Widget area 8 Select Right Content sidebar

120
Widget area 1 Select the footer 1 sidebar
Widget area 2 Select the footer 2 sidebar
Widget area 3 Select the footer 3 sidebar
Widget area 4 Select the footer 4 sidebar
Widget area 5 Select the footer 5 sidebar
Widget area 20 Select the footer 6 sidebar
Widget area 21 Select the footer 7 sidebar
4. Go to Appearance Menus: Select 1 menu (for example: Main-Menu), check Select Video page to
add the menu. Click Save button to save
5. Now go to Widgets.
Drag Kopa Video PlayList widget to Video sidebar
Drag Kopa Video Carousel widget to Video sidebar with Big thumbnail layout
Drag Kopa Video Filter widget to Video sidebar
To configure the widget, you can see above Custom widget part.

121
Creating Blog Page
1. Go to Appearance Layout Manager Blog: We have 6 options for you to select, Select 1 layout,
and select the sidebar for the widget. With widget areas in the footer, you can use sidebars used in the
frontpage, or create other sidebars by going to Sidebar manager and create a new sidebar, then go to
Layout Manager Blog, select the sidebar for the widget area. Finally, click Save options.

122

123
Widget Area 7 Select Blog sidebar
Widget Area 1 Select the footer 1 sidebar
Widget Area 2 Select the footer 2 sidebar
Widget Area 3 Select the footer 3 sidebar
Widget Area 4 Select the footer 4 sidebar
Widget Area 5 Select the footer 5 sidebar
Widget Area 6 Select the footer 6 sidebar
Widget Area 7 Select the footer 7 sidebar
2. Go to Settings Reading Choosing Posts Page is a added page (Blog).
3. Go to Appearance Menus and make sure you already have a Main Menu Tab created and set as
default. Now check the blog page from the pages box and move the page name all the way to the main-
menu and Save Menu.
Finally, Preview your blog page in frontend.
With 6 options of Blog layout, you can use them to customize for archives such as category, tag, author
... by clicking edit, scroll down Custom layout -> check on checkbox, select the layout, and select
sidebars for widget areas. Click Update button to save
Creating Single Post
1. Go to Appearance Layout Manager Post: We have 3 options for you to select, Select 1 layout,
select the sidebar for the widget. With widget areas in the footer, you can use sidebars used in the
frontpage, or create other sidebars by going to Sidebar manager and create a new sidebar, then go to
Layout Manager Post, select the sidebar for the widget area. Finally, click Save options.

124
Widget Area 8 Select Right Content sidebar
Widget Area 1 Select the footer 1 sidebar
Widget Area 2 Select the footer 2 sidebar

125
Widget Area 3 Select the footer 3 sidebar
Widget Area 4 Select the footer 4 sidebar
Widget Area 5 Select the footer 5 sidebar
Widget Area 6 Select the footer 6 sidebar
Widget Area 7 Select the footer 7 sidebar
2. Go to Posts Add New Post (Single post) give title to the post, enter the content, set featured
image.
Then click Publish.
You can see How to use each widget above. Finally, Preview your Post in frontend.
Creating Shop Page
1. Go to Appearance Layout Manager Shop
Widget Area 8 Select Right Content sidebar
Widget Area 1 Select the footer 1 sidebar
Widget Area 2 Select the footer 2 sidebar
Widget Area 3 Select the footer 3 sidebar
Widget Area 4 Select the footer 4 sidebar
Widget Area 5 Select the footer 5 sidebar
Widget Area 6 Select the footer 6 sidebar
Widget Area 7 Select the footer 7 sidebar
Then click Publish.

126
2. Go to Appearance Menus and make sure you already have a Main Menu Tab created and set as
default. Now check the post which you created from the Page box and move the Page name all the way
to the main-menu and Save Menu.
You can see How to use each widget above. Finally, Preview your page in frontend.
Creating Single Product Page
1. Go to Appearance Layout Manager Single Product
Widget Area 8 Select Right Content sidebar
Widget Area 1 Select the footer 1 sidebar
Widget Area 2 Select the footer 2 sidebar
Widget Area 3 Select the footer 3 sidebar
Widget Area 4 Select the footer 4 sidebar
Widget Area 5 Select the footer 5 sidebar
Widget Area 6 Select the footer 6 sidebar
Widget Area 7 Select the footer 7 sidebar
Then click Publish.
2. Go to Appearance Menus and make sure you already have a Main Menu Tab created and set as
default. Now check the post which you created from the Page box and move the Page name all the way
to the main-menu and Save Menu.
You can see How to use each widget above. Finally, Preview your page in frontend.
J. Video Tutorial - Will be updated

127
K. How to setup the demo site
In order to set up the site like our demo, you can follow these steps:
Step 1: Install Revant theme: following part A – Theme Installation
Step 2: Import demo data: following part B – Demo Content
Step 3: Create menus: following part H -3- Create Custom Menu
Step 4: Choose a page to become front page and posts page. Go to Settings Reading. Select the
page which you intend to show as your front page and posts page from Front page display.

128
Step 5: Import demo backup all setting file.
We offer you a demo backup all setting file with the name kopatheme.net -demo-revant-backup-
all-settings.json. When you import this file, it will automatically import all setting includes Layout
manager, Sidebar manager, General settings like we set up in demo site. You can following the
instructions below:
Step 5.1: Go to Appearance Theme Options Backup Tab Import/Export
Step 5.2: Click the Choose file button and locate the kopatheme.net -demo-revant-backup-
all-settings.json file that is inside the the folder and double click the file to select it and then click
the Import button.

129
Step 6: Import demo widgets file
We offer you a demo widget file with name kopatheme.net-demo-revant-widgets.wie. When you
import this file, it will automatically drag and drop all widgets to default sidebar like we use in demo
site.
To import this file .wie you'd like install Widget Importer & Exporter plugin. You have to do
following things:
Step 6.1: Install and active Widget Importer & Exporter plugin
o Go
to Dashboard Plugin Add New Search by "Widget Importer & Exporter" keyword
o Click "Install Now" to install plugin

130
o Click "Active Plugin" to active plugin
Step 6.2: Go to Tools Widget Importer & Exporter: browse demo widget file to import

131
After successfully import, all widgets be dragged into default sidebar and your task is to configure
parameters such as title, category, tag, title, excerpt length, number of post, etc. in the widgets because
your element can unlike ours.
Note: It is possible that when importing the demo widgets will be encountered some errors as the site
does not display data in some areas, you can go to Appearance Widgets to choose the categories /
tags for the widgets, then click the Save button to save.
132
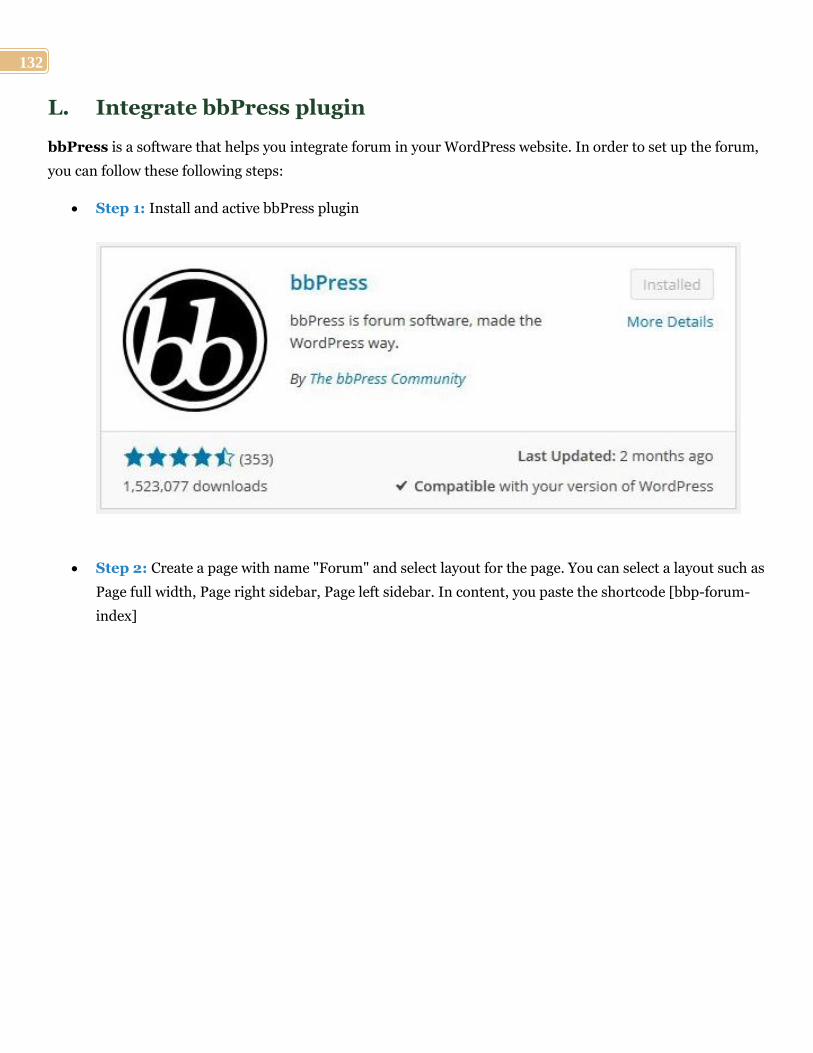
L. Integrate bbPress plugin
bbPress is a software that helps you integrate forum in your WordPress website. In order to set up the forum,
you can follow these following steps:
Step 1: Install and active bbPress plugin
Step 2: Create a page with name "Forum" and select layout for the page. You can select a layout such as
Page full width, Page right sidebar, Page left sidebar. In content, you paste the shortcode [bbp-forum-
index]

133
1. Enter forum name 2. Enter forum content 3.Check on Custom Layout 4. Select Forum layout 5. Create a sidebar in Sidebar Manager and select in in widget area 8 6. Click Publish or Update.
134
Step 3: Go to Appearance Menus: Select a menu such as Main menu, Top menu or Extra menu and
add forums page to the menu will be displayed in frontend
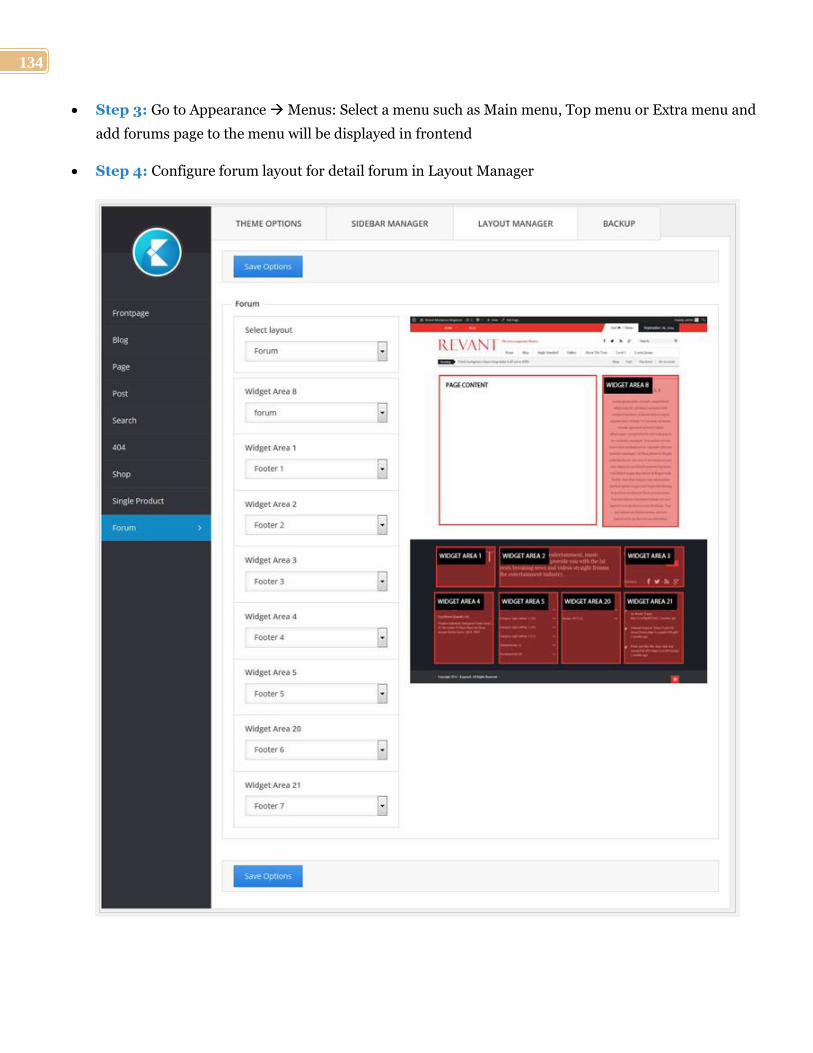
Step 4: Configure forum layout for detail forum in Layout Manager

135
Step 5: Go to Appearance Widgets: You can drag and drop widgets necessary into the sidebar you
created for widget area 8 of forum layout

136
M. Sources and Credits
I've used the following images, icons or other files like listed.
jquery-1.10.2.min.js
Bootstrap v3.0.3
FitVids 1.0.3
hoverIntent r7
imagesLoaded PACKAGED v3.1.4
jquery-flickr-plugin
easyPieChart
jQuery Form Plugin
jquery.matchHeight.js v0.5.2
jQuery Navgoco Menus Plugin v0.1.5
jQuery News Ticker free
jQuery Validation Plugin 1.9.0
Masonry PACKAGED v3.1.2
Modernizr 2.7.1
jQuery OwlCarousel v1.27
jQuery Superfish Menu Plugin by Joel Birch
Theia Sticky Sidebar v1.2.0 by Liviu Cristian Mirea Ghiban
Font Awesome 4.1.0

137
******************************************************************************************
Thank you so much for purchasing this Theme. If you have any question relating to themes please don't
hesitate to ask your question at: kopatheme.com/forum
KOPATHEME
Email: [email protected]
Designed and developed by: kopatheme.com