Retail Term Deposits Origination User Guide
94
Retail Term Deposits Origination User Guide Oracle FLEXCUBE Universal Banking Release 14.4.0.2.0 Part No. F36581-01 November 2020
Transcript of Retail Term Deposits Origination User Guide
Retail Term Deposits Origination User Guide
Oracle FLEXCUBE Universal Banking
Release 14.4.0.2.0
Part No. F36581-01
November 2020

Retail Term Deposits Origination User Guide
Oracle Financial Services Software Limited
Oracle Park
Off Western Express Highway
Gurgaon (East)
Mumbai, Maharashtra 400 063
India
Worldwide Inquiries:
Phone: +91 22 6718 3000
Fax: +91 22 6718 3001
https://www.oracle.com/industries/financial-services/index.html
Copyright © 2007, 2020, Oracle and/or its affiliates. All rights reserved.
Oracle and Java are registered trademarks of Oracle and/or its affiliates. Other names may be trademarks
of their respective owners.
U.S. GOVERNMENT END USERS: Oracle programs, including any operating system, integrated software,
any programs installed on the hardware, and/or documentation, delivered to U.S. Government end users
are “commercial computer software” pursuant to the applicable Federal Acquisition Regulation and agency-
specific supplemental regulations. As such, use, duplication, disclosure, modification, and adaptation of the
programs, including any operating system, integrated software, any programs installed on the hardware,
and/or documentation, shall be subject to license terms and license restrictions applicable to the programs.
No other rights are granted to the U.S. Government.
This software or hardware is developed for general use in a variety of information management applications.
It is not developed or intended for use in any inherently dangerous applications, including applications that
may create a risk of personal injury. If you use this software or hardware in dangerous applications, then
you shall be responsible to take all appropriate failsafe, backup, redundancy, and other measures to ensure
its safe use. Oracle Corporation and its affiliates disclaim any liability for any damages caused by use of
this software or hardware in dangerous applications.
This software and related documentation are provided under a license agreement containing restrictions
on use and disclosure and are protected by intellectual property laws. Except as expressly permitted in
your license agreement or allowed by law, you may not use, copy, reproduce, translate, broadcast, modify,
license, transmit, distribute, exhibit, perform, publish or display any part, in any form, or by any means.
Reverse engineering, disassembly, or de-compilation of this software, unless required by law for
interoperability, is prohibited. The information contained herein is subject to change without notice and is
not warranted to be error-free. If you find any errors, please report them to us in writing.
This software or hardware and documentation may provide access to or information on content, products
and services from third parties. Oracle Corporation and its affiliates are not responsible for and expressly
disclaim all warranties of any kind with respect to third-party content, products, and services. Oracle
Corporation and its affiliates will not be responsible for any loss, costs, or damages incurred due to your
access to or use of third-party content, products, or services.

Contents
1 Preface .................................................................................................................................................. 1
1.1 Introduction .................................................................................................................................... 1
1.2 Audience ....................................................................................................................................... 1
1.3 Document Accessibility ................................................................................................................. 1
1.4 Acronyms and Abbreviations ........................................................................................................ 1
1.5 List of Topics ................................................................................................................................. 2
1.6 Related Documents ....................................................................................................................... 2
1.7 Symbols ......................................................................................................................................... 3
2 Term Deposit Origination Process ........................................................................................................ 4
2.1 Introduction .................................................................................................................................... 4
2.2 Reference Workflow for Term Deposit Account Origination ......................................................... 5
3 Term Deposit Origination ...................................................................................................................... 6
3.1 Application Entry Stage ................................................................................................................. 7
3.1.1 Account Details Data Segment ............................................................................................. 7
3.1.2 Customer Information Data Segment.................................................................................. 14
3.1.3 Account Service Preferences .............................................................................................. 20
3.1.4 Nominee Details Data Segment .......................................................................................... 23
3.1.5 Mandate Details Data Segment .......................................................................................... 30
3.1.6 Summary ............................................................................................................................. 33
3.1.7 Action Tabs ......................................................................................................................... 39
3.2 Application Enrichment Stage ..................................................................................................... 46
3.2.1 Account Details Data Segment ........................................................................................... 46
3.2.2 Interest Details Data Segment ............................................................................................ 50
3.2.3 Summary ............................................................................................................................. 52
3.3 Account Funding Stage ............................................................................................................... 58
3.3.1 Account Details Data Segment ........................................................................................... 58
3.3.2 Initial Funding Details .......................................................................................................... 62
3.3.3 Summary ............................................................................................................................. 66
3.4 Supervisor Approval Stage ......................................................................................................... 72
3.4.1 Application Information Data Segment ............................................................................... 72
3.4.2 Summary ............................................................................................................................. 75
3.5 Account Creation ......................................................................................................................... 81
3.5.1 Account Details Data Segment ........................................................................................... 81
3.5.2 Account Create Details Data Segment ............................................................................... 82

3.5.3 Summary ............................................................................................................................. 84
4 Functional Activity Codes Glossary .................................................................................................... 90
Retail Term Deposits Origination User Guide
1
Copyright @ 2007, 2020
All Rights Reserved
1 Preface
1.1 Introduction
Welcome to the Retail Term Deposits Origination user guide for Oracle FLEXCUBE Universal
Banking – Retail Process Management (RPM). This document provides an overview of the Term
Deposit Origination process and takes you through the various steps involved in handling all the
necessary activities in the life cycle of a Term Deposit Origination.
1.2 Audience
This user manual is intended for the Relationship Managers (RMs) and Sales Officers in-charge of
sourcing the Term Deposit products from prospect and customer of the bank. The user manual is
also intended for the other bank personas such as Bank Operations Manager, Account Opening
Officers or Branch Managers who may handle the specific stages of the lifecycle of the Term
Deposit Origination process based on the bank’s internal operation and policies.
1.3 Document Accessibility
For information about Oracle's commitment to accessibility, visit the Oracle Accessibility Program
website at http://www.oracle.com/pls/topic/lookup?ctx=acc&id=docacc.
1.4 Acronyms and Abbreviations
The list of the acronyms and abbreviations that you are likely to find in the manual are as follows:
Table 1: Acronyms Table
Abbreviation Description
RPM Retail Process Management
DS Data Segment
System Retail Process Management Module
TD Term Deposit
Retail Term Deposits Origination User Guide
2
Copyright @ 2007, 2020
All Rights Reserved
1.5 List of Topics
This user manual is organized as follows:
Table 2: List of Topics
Topics Description
Term Deposit
Origination Process
This topic provides a snapshot of the features of the entire module.
Term Deposit
Origination
This topic provides detailed information on the defined stages
through which the Term Deposit application has to flow before it is
ready to be sent to the Host for Account Creation.
Functional Activity
Codes - Glossary
Functional Activity Codes - Glossary has the alphabetical list of
Term Deposits Account stages with functional activity codes and
page references for quick navigation.
1.6 Related Documents
The related documents are as follows:
1. Retail Process Management Operations User Manual
2. Retail Process Management Savings Account Origination User Manual
3. Retail Process Management Current Account Origination User Manual
4. Retail Process Management Retail Term Deposits Origination User Manual
5. Retail Process Management Retail Loans Origination User Manual
6. Retail Process Management Alerts and Dashboard User Manual
7. Common Core User Manual
Retail Term Deposits Origination User Guide
3
Copyright @ 2007, 2020
All Rights Reserved
1.7 Symbols
This user manual may refer to all or some of the following icons:
Table 3: Symbols
Icons Function
Exit
Add row
Delete row
Option list
Represents Results
Retail Term Deposits Origination User Guide
4
Copyright @ 2007, 2020
All Rights Reserved
2 Term Deposit Origination Process
This chapter includes the following sections:
2.1 Introduction
2.2 Reference Workflow for Term Deposit Account Origination
2.1 Introduction
Oracle FLEXCUBE Universal Banking - Retail Process Management (RPM) is the middle office
banking solution with a comprehensive coverage of Retail Banking Origination processes for
Savings Account, Current Account, Term Deposit and Loans comprising of Home Loan, Personal
Loan, Education Loan and Vehicle Loan. It is a Host-Agnostic solution and comes pre-integrated
with Oracle FLEXCUBE Universal Banking solution.
It enables banks to deliver improved user experience for various bank personas such as Sales
Officers, Relationship Manager, Account Opening Officers, Branch Supervisor/Managers, Loan
Officers, and Credit Officers and so on; handling defined functions in the lifecycle of the various
product origination.
The convenience of configuring appropriate stages and the respective data segments within each
of these stages, which can be business driven, is hosted and architectured by our new platform
solution. The random access navigation between data segments within a given stage with
appropriate validations, helps enable the business user to capture apt information anytime during
the account open process before the Term Deposit Account is created in the Host. The new
workflow also supports capturing of relevant documents, stage wise, and generation of advices and
notifications dynamically.
This user guide explains the reference workflow for the Term Deposit Account Origination process
and further details the data that needs to be captured in the data segment linked to the specific
stages.
This process initiates with the receipt of Term Deposit opening form and related documents from a
customer for opening of a Term Deposit. The bank verifies the details and documents submitted for
opening of Term Deposit to ensure completeness and initiates the Term Deposit Origination
process by selecting the desired TD Product from the Product Catalogue.
Retail Term Deposits Origination User Guide
5
Copyright @ 2007, 2020
All Rights Reserved
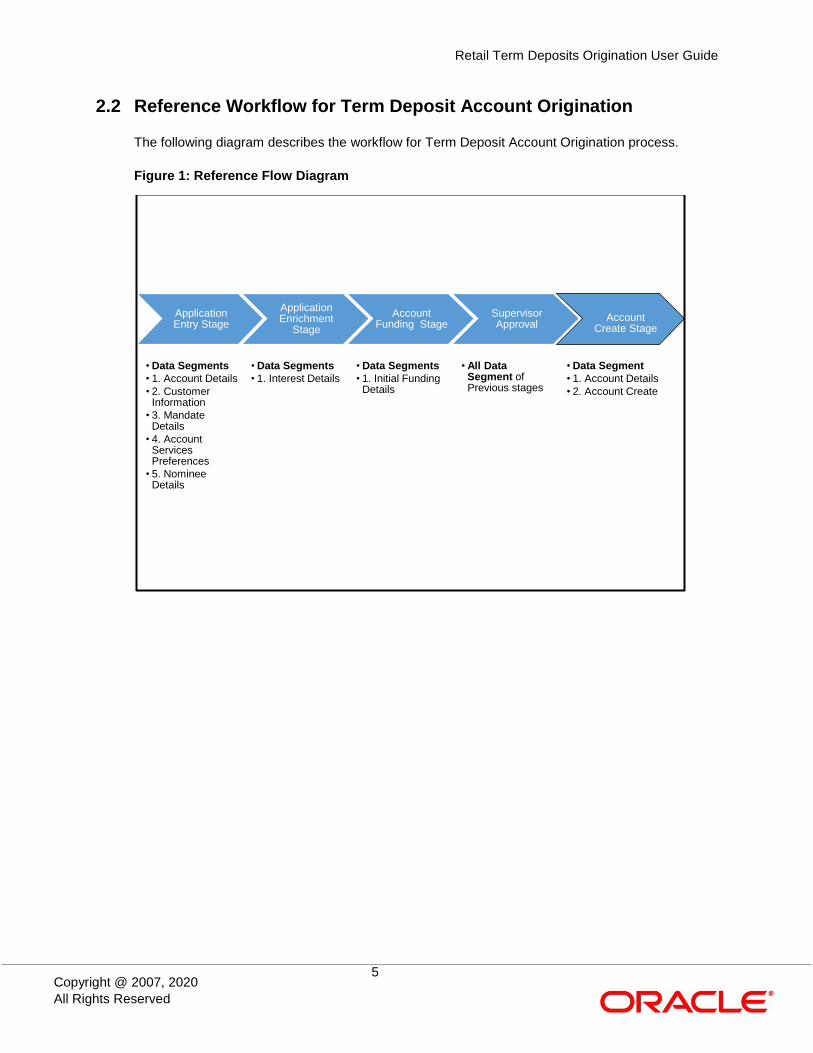
2.2 Reference Workflow for Term Deposit Account Origination
The following diagram describes the workflow for Term Deposit Account Origination process.
Figure 1: Reference Flow Diagram
Application Entry Stage
• Data Segments
• 1. Account Details
• 2. Customer Information
• 3. Mandate Details
• 4. Account Services Preferences
• 5. Nominee Details
Application Enrichment
Stage
• Data Segments
• 1. Interest Details
Account Funding Stage
• Data Segments
• 1. Initial Funding Details
Supervisor Approval
• All Data Segment of Previous stages
Account Create Stage
• Data Segment
• 1. Account Details
• 2. Account Create

Retail Term Deposits Origination User Guide
6
Copyright @ 2007, 2020
All Rights Reserved
3 Term Deposit Origination
As detailed in the Retail Process Management Operations user manual, all the Product
Originations are initiated in the Application Initiation stage from the Product Catalogue. The Cart
Operation in Product Catalogue allows to originate single or multiple Product initiation. Once the
Term Deposit Account product origination process is initiated either as a single product origination or
as part of the multiple product selection, Process Orchestrator generates the Term Deposit Account
Process Reference Number on submit of the Application Initiation stage. Process Orchestrator also
updates the record in the Free Task process for the Application Entry stage also referred as Task
from orchestrator perspective.
The Term Deposit Account Origination process flow comprises of the below stages and the detailed
information of the same is available in the below sections:
3.1 Application Entry Stage
3.2 Application Enrichment Stage
3.3 Account Funding Stage
3.4 Supervisor Approval Stage
3.5 Account Creation
Retail Term Deposits Origination User Guide
7
Copyright @ 2007, 2020
All Rights Reserved
3.1 Application Entry Stage
Process Orchestrator updates the record in the Free Task process for the Application Entry stage
also referred as Task from orchestrator perspective. User can Acquire and Edit or Acquire the task
from the Action column and the header respectively as per requirement.
After successful submission of Application Entry stage, a request for the initial funding transaction
is sent to Teller Module, if Fund By option is selected as Cash. The status of the Teller Transaction
is then validated in the Initial Funding Details data segment of Account Funding stage.
The Application Entry stage comprises of the below mentioned data segments:
3.1.1 Account Details Data Segment
3.1.2 Customer Information Data Segment
3.1.3 Account Service Preferences
3.1.4 Nominee Details Data Segment
3.1.5 Mandate Details Data Segment
3.1.6 Summary
3.1.7 Action Tabs
Please refer the below section for more details on these data segments.
3.1.1 Account Details Data Segment
The Account Details data segment displays the account details.
Pre-requisites
Specify User Id and Password, and login to Home screen.

Retail Term Deposits Origination User Guide
8
Copyright @ 2007, 2020
All Rights Reserved
1. From Home screen, click Tasks. Under Tasks, click Free Tasks.
The Free Tasks screen is displayed.
Figure 2: Free Tasks
2. Click Acquire and Edit for the application for which Application Entry stage has to be acted
upon. It will ensure that the task is acquired to your user ID, and will launch the Application
Entry stage with the Account Details data segment screen.
The Account Details screen is displayed.
Figure 3: Account Details

Retail Term Deposits Origination User Guide
9
Copyright @ 2007, 2020
All Rights Reserved
It will ensure that the task is acquired to your user ID and will launch the Application Entry
stage.
3. Provide the details in the relevant data fields. Mandatory data fields are indicated accordingly.
For more information on fields, refer to Table 4: Account Details - Field Description.
Table 4: Account Details - Field Description
Field Description
Account Type Displays the account type based on the product selected in
the product catalogue.
This field is mandatory.
Business Product Name Displays the business product name based on the product
selected in the product catalogue.
Product Image Displays the business product image.
Product Description Displays a short description of the business product.
Account Branch By default, displays the logged-in user’s home branch.
System allows to select the branch from the branch list of
values.
Account Currency Select the currency from the drop-down list, if required.
Available options in the drop-down list are based on the
currency allowed for the selected business product. By
default, base currency of user logged-in branch is
displayed.
This field is mandatory.
Term Deposit Amount Select the currency and the specify loan amount. Select the
currency from the drop-down list.
This field is mandatory.
Term Deposit Tenure Select the loan tenure in year, months and days.
This field is mandatory.
Retail Term Deposits Origination User Guide
10
Copyright @ 2007, 2020
All Rights Reserved
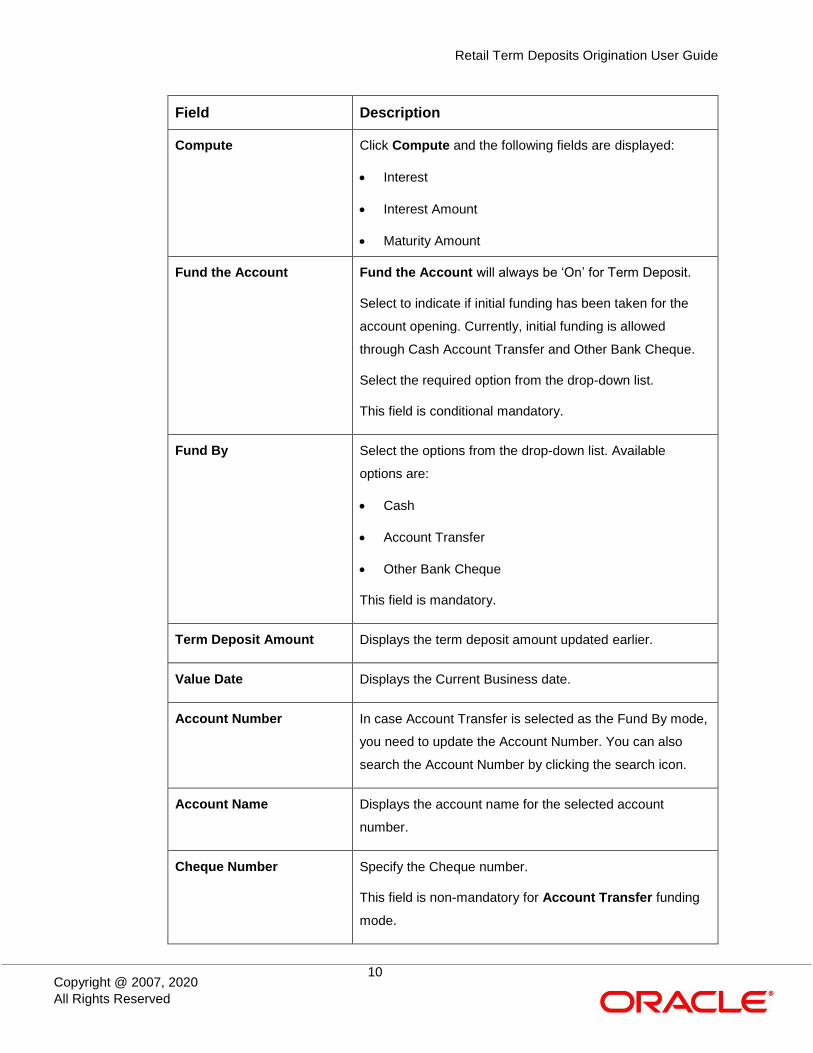
Field Description
Compute Click Compute and the following fields are displayed:
Interest
Interest Amount
Maturity Amount
Fund the Account Fund the Account will always be ‘On’ for Term Deposit.
Select to indicate if initial funding has been taken for the
account opening. Currently, initial funding is allowed
through Cash Account Transfer and Other Bank Cheque.
Select the required option from the drop-down list.
This field is conditional mandatory.
Fund By Select the options from the drop-down list. Available
options are:
Cash
Account Transfer
Other Bank Cheque
This field is mandatory.
Term Deposit Amount Displays the term deposit amount updated earlier.
Value Date Displays the Current Business date.
Account Number In case Account Transfer is selected as the Fund By mode,
you need to update the Account Number. You can also
search the Account Number by clicking the search icon.
Account Name Displays the account name for the selected account
number.
Cheque Number Specify the Cheque number.
This field is non-mandatory for Account Transfer funding
mode.
Retail Term Deposits Origination User Guide
11
Copyright @ 2007, 2020
All Rights Reserved
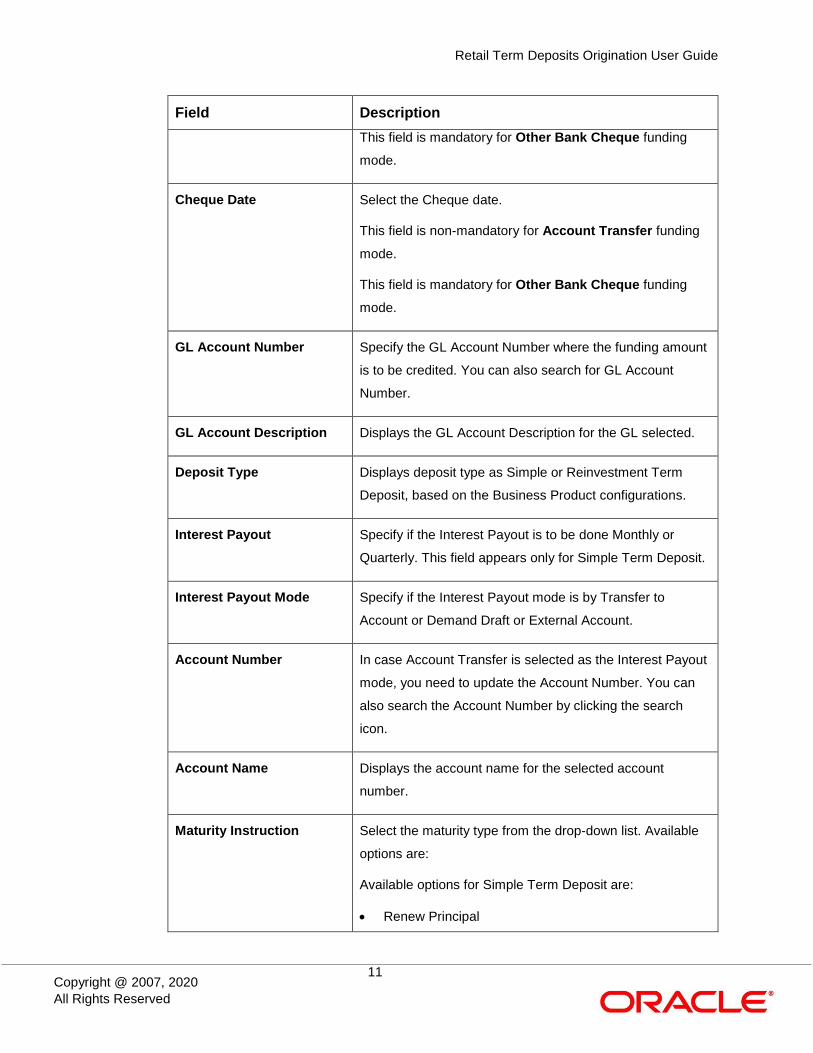
Field Description
This field is mandatory for Other Bank Cheque funding
mode.
Cheque Date Select the Cheque date.
This field is non-mandatory for Account Transfer funding
mode.
This field is mandatory for Other Bank Cheque funding
mode.
GL Account Number Specify the GL Account Number where the funding amount
is to be credited. You can also search for GL Account
Number.
GL Account Description Displays the GL Account Description for the GL selected.
Deposit Type Displays deposit type as Simple or Reinvestment Term
Deposit, based on the Business Product configurations.
Interest Payout Specify if the Interest Payout is to be done Monthly or
Quarterly. This field appears only for Simple Term Deposit.
Interest Payout Mode Specify if the Interest Payout mode is by Transfer to
Account or Demand Draft or External Account.
Account Number In case Account Transfer is selected as the Interest Payout
mode, you need to update the Account Number. You can
also search the Account Number by clicking the search
icon.
Account Name Displays the account name for the selected account
number.
Maturity Instruction Select the maturity type from the drop-down list. Available
options are:
Available options for Simple Term Deposit are:
Renew Principal
Retail Term Deposits Origination User Guide
12
Copyright @ 2007, 2020
All Rights Reserved
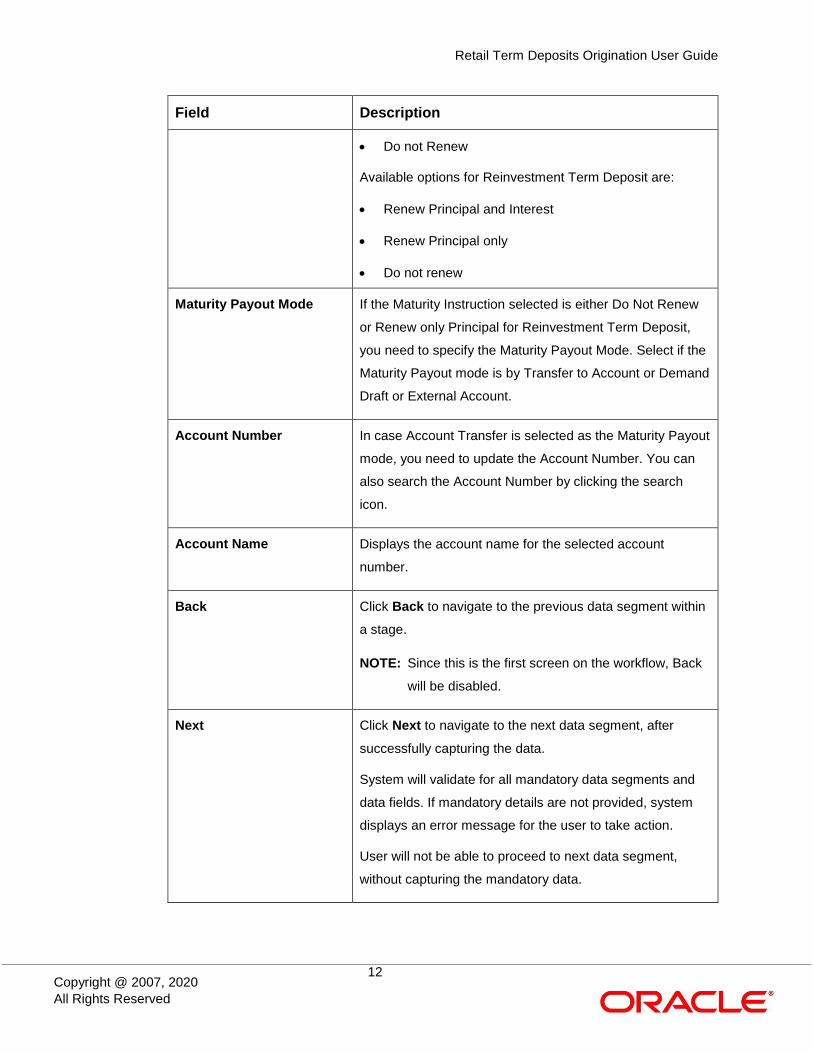
Field Description
Do not Renew
Available options for Reinvestment Term Deposit are:
Renew Principal and Interest
Renew Principal only
Do not renew
Maturity Payout Mode If the Maturity Instruction selected is either Do Not Renew
or Renew only Principal for Reinvestment Term Deposit,
you need to specify the Maturity Payout Mode. Select if the
Maturity Payout mode is by Transfer to Account or Demand
Draft or External Account.
Account Number In case Account Transfer is selected as the Maturity Payout
mode, you need to update the Account Number. You can
also search the Account Number by clicking the search
icon.
Account Name Displays the account name for the selected account
number.
Back Click Back to navigate to the previous data segment within
a stage.
NOTE: Since this is the first screen on the workflow, Back
will be disabled.
Next Click Next to navigate to the next data segment, after
successfully capturing the data.
System will validate for all mandatory data segments and
data fields. If mandatory details are not provided, system
displays an error message for the user to take action.
User will not be able to proceed to next data segment,
without capturing the mandatory data.

Retail Term Deposits Origination User Guide
13
Copyright @ 2007, 2020
All Rights Reserved
Field Description
Save & Close Click Save & Close to save the data captured. Save &
Close will be enabled only if, all the mandatory fields are
captured. This task will be available in the My Task list for
the user to continue later.
Cancel Click Cancel to close the application without saving.
Retail Term Deposits Origination User Guide
14
Copyright @ 2007, 2020
All Rights Reserved
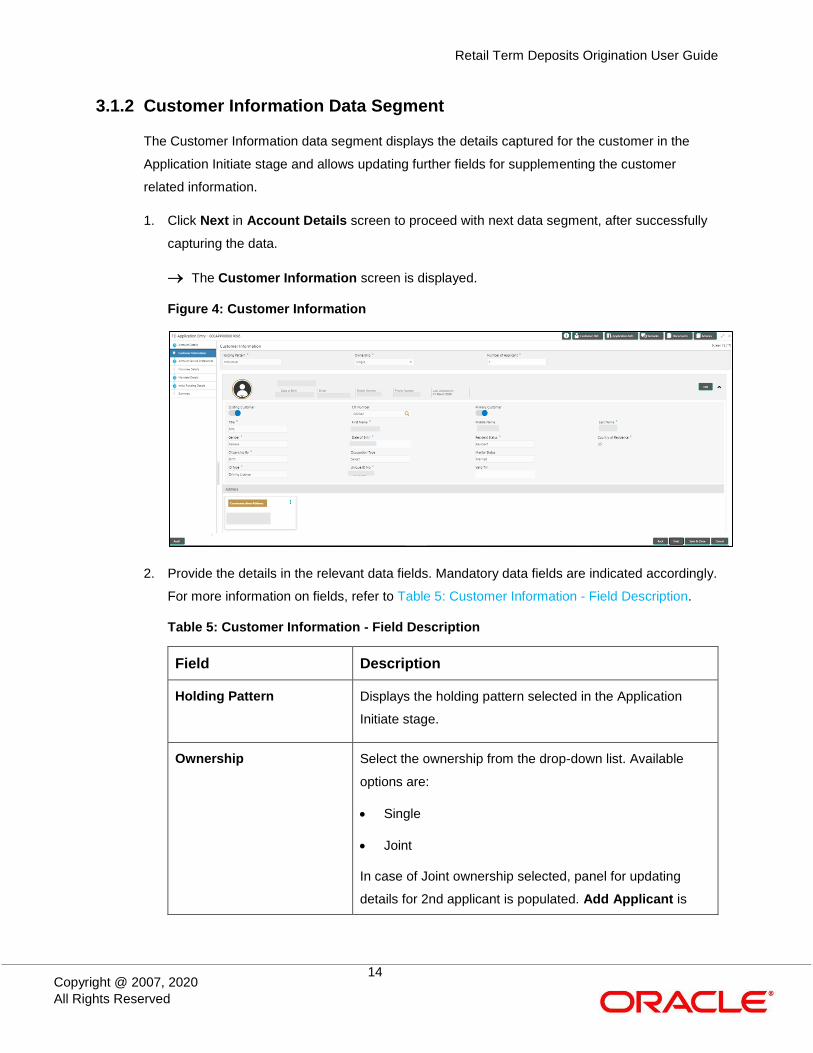
3.1.2 Customer Information Data Segment
The Customer Information data segment displays the details captured for the customer in the
Application Initiate stage and allows updating further fields for supplementing the customer
related information.
1. Click Next in Account Details screen to proceed with next data segment, after successfully
capturing the data.
The Customer Information screen is displayed.
Figure 4: Customer Information
2. Provide the details in the relevant data fields. Mandatory data fields are indicated accordingly.
For more information on fields, refer to Table 5: Customer Information - Field Description.
Table 5: Customer Information - Field Description
Field Description
Holding Pattern Displays the holding pattern selected in the Application
Initiate stage.
Ownership Select the ownership from the drop-down list. Available
options are:
Single
Joint
In case of Joint ownership selected, panel for updating
details for 2nd applicant is populated. Add Applicant is
Retail Term Deposits Origination User Guide
15
Copyright @ 2007, 2020
All Rights Reserved
Field Description
also enabled to allow adding additional applicants to the
account.
By default, system displays the ownership selected in the
Application Initiate stage.
This field is mandatory.
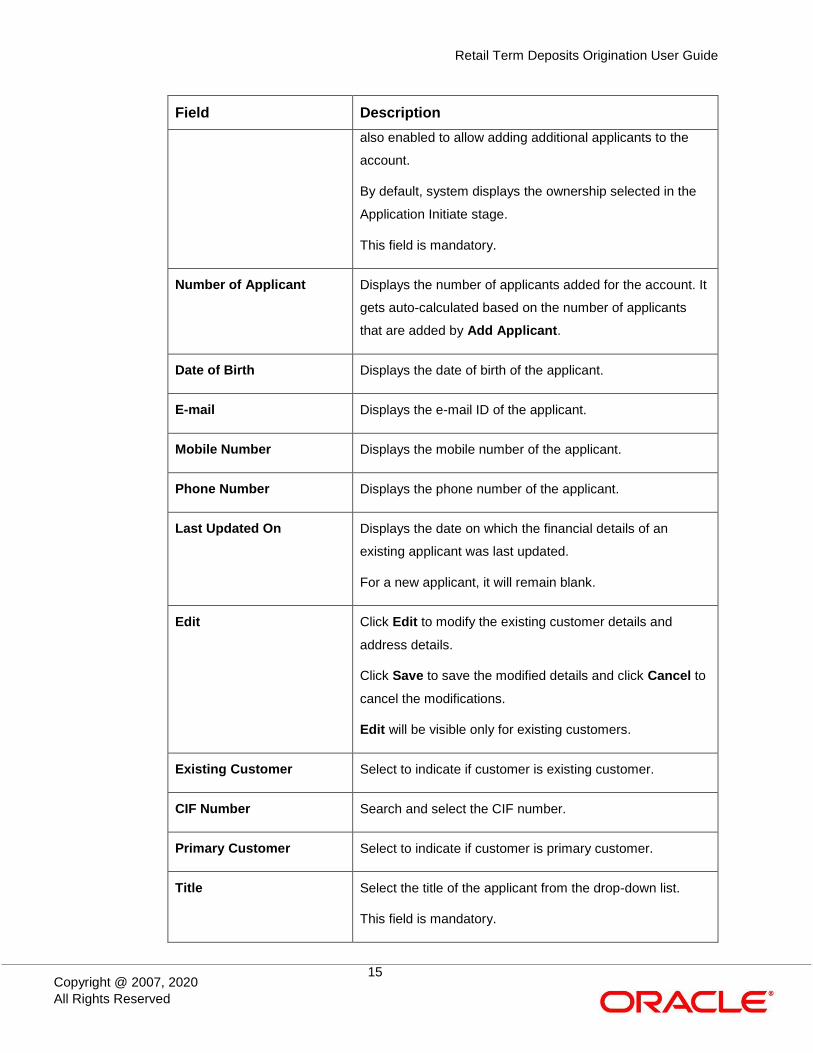
Number of Applicant Displays the number of applicants added for the account. It
gets auto-calculated based on the number of applicants
that are added by Add Applicant.
Date of Birth Displays the date of birth of the applicant.
E-mail Displays the e-mail ID of the applicant.
Mobile Number Displays the mobile number of the applicant.
Phone Number Displays the phone number of the applicant.
Last Updated On Displays the date on which the financial details of an
existing applicant was last updated.
For a new applicant, it will remain blank.
Edit Click Edit to modify the existing customer details and
address details.
Click Save to save the modified details and click Cancel to
cancel the modifications.
Edit will be visible only for existing customers.
Existing Customer Select to indicate if customer is existing customer.
CIF Number Search and select the CIF number.
Primary Customer Select to indicate if customer is primary customer.
Title Select the title of the applicant from the drop-down list.
This field is mandatory.
Retail Term Deposits Origination User Guide
16
Copyright @ 2007, 2020
All Rights Reserved
Field Description
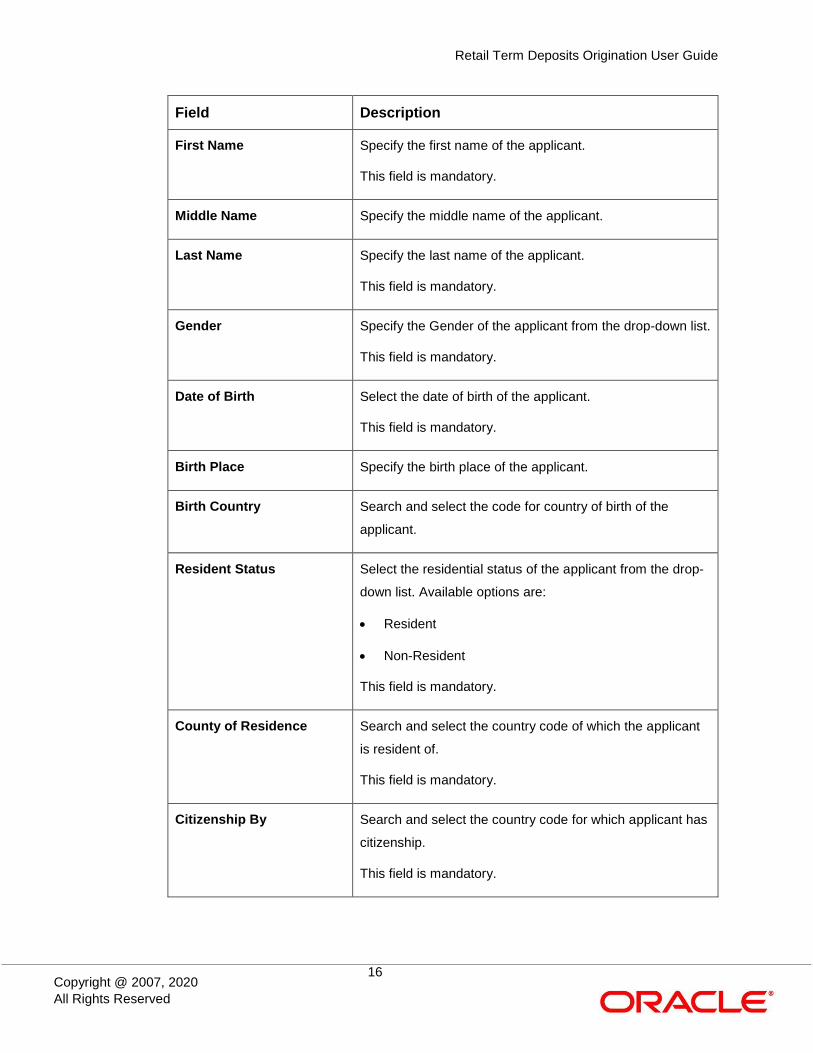
First Name Specify the first name of the applicant.
This field is mandatory.
Middle Name Specify the middle name of the applicant.
Last Name Specify the last name of the applicant.
This field is mandatory.
Gender Specify the Gender of the applicant from the drop-down list.
This field is mandatory.
Date of Birth Select the date of birth of the applicant.
This field is mandatory.
Birth Place Specify the birth place of the applicant.
Birth Country Search and select the code for country of birth of the
applicant.
Resident Status Select the residential status of the applicant from the drop-
down list. Available options are:
Resident
Non-Resident
This field is mandatory.
County of Residence Search and select the country code of which the applicant
is resident of.
This field is mandatory.
Citizenship By Search and select the country code for which applicant has
citizenship.
This field is mandatory.

Retail Term Deposits Origination User Guide
17
Copyright @ 2007, 2020
All Rights Reserved
Field Description
Occupation Type Select the occupation type of the applicant from the drop-
down list.
This field is mandatory.
Marital Status Select the marital status of the customer from the drop-
down list. Available options are:
Married
Unmarried
Legally Separated
Widow
This field is mandatory.
ID Type Select the identification document type for the applicant
from the drop-down list.
This field is mandatory.
Unique ID No. Specify the number of the identification document provided.
This field is mandatory.
Valid Till Select the valid till date of the identification document
provided.
Address Displays the address details.
Click on the top right side of the Address Tile.
View – Click View to view the address details of an existing
customer.
Edit - Click Edit to update the address details of an
existing customer.
Delete – Click Delete to delete the address of an existing
customer.
To add multiple addresses of the applicant, click icon on
the Address to add additional addresses.

Retail Term Deposits Origination User Guide
18
Copyright @ 2007, 2020
All Rights Reserved
Field Description
Address Type Select the address type for the applicant from the drop-
down list.
Permanent Address
Residential Address
Communication Address
Office Address
This field is mandatory. Capturing Communication
Address is mandatory.
Building Specify the house or office number, floor and building
details.
This field is mandatory.
Street Specify the street.
This field is mandatory.
Locality Specify the locality name of the address.
City Specify the city.
This field is mandatory.
State Specify the state.
This field is mandatory.
Country Specify the country code.
This field is mandatory.
Zip Code Specify the zip code of the address.
This field is mandatory.
E-mail Specify the e-mail address of the applicant.
This field is mandatory.

Retail Term Deposits Origination User Guide
19
Copyright @ 2007, 2020
All Rights Reserved
Field Description
Mobile Specify the ISD code and the mobile number of the
applicant.
This field is mandatory.
Phone Specify the ISD code and the phone number of the
applicant.
Back Click Back to navigate to the previous data segment within
a stage.
Next Click Next to navigate to the next data segment, after
successfully capturing the data.
System will validate for all mandatory data segments and
data fields. If mandatory details are not provided, system
displays an error message for the user to take action.
User will not be able to proceed to next data segment,
without capturing the mandatory data.
Save & Close Click Save & Close to save the data captured. Save &
Close will be enabled only if, all the mandatory fields are
captured. This task will be available in the My Task list for
the user to continue later.
Cancel Click Cancel to close the application without saving.
Retail Term Deposits Origination User Guide
20
Copyright @ 2007, 2020
All Rights Reserved
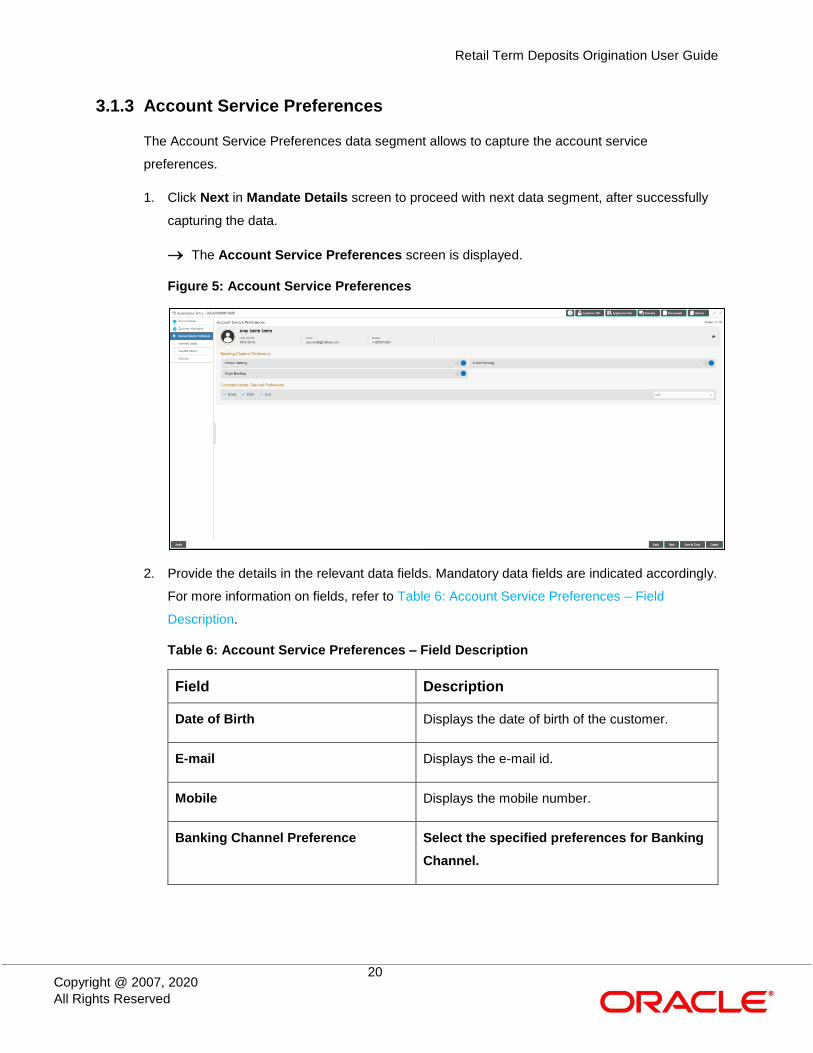
3.1.3 Account Service Preferences
The Account Service Preferences data segment allows to capture the account service
preferences.
1. Click Next in Mandate Details screen to proceed with next data segment, after successfully
capturing the data.
The Account Service Preferences screen is displayed.
Figure 5: Account Service Preferences
2. Provide the details in the relevant data fields. Mandatory data fields are indicated accordingly.
For more information on fields, refer to Table 6: Account Service Preferences – Field
Description.
Table 6: Account Service Preferences – Field Description
Field Description
Date of Birth Displays the date of birth of the customer.
E-mail Displays the e-mail id.
Mobile Displays the mobile number.
Banking Channel Preference Select the specified preferences for Banking
Channel.
Retail Term Deposits Origination User Guide
21
Copyright @ 2007, 2020
All Rights Reserved
Field Description
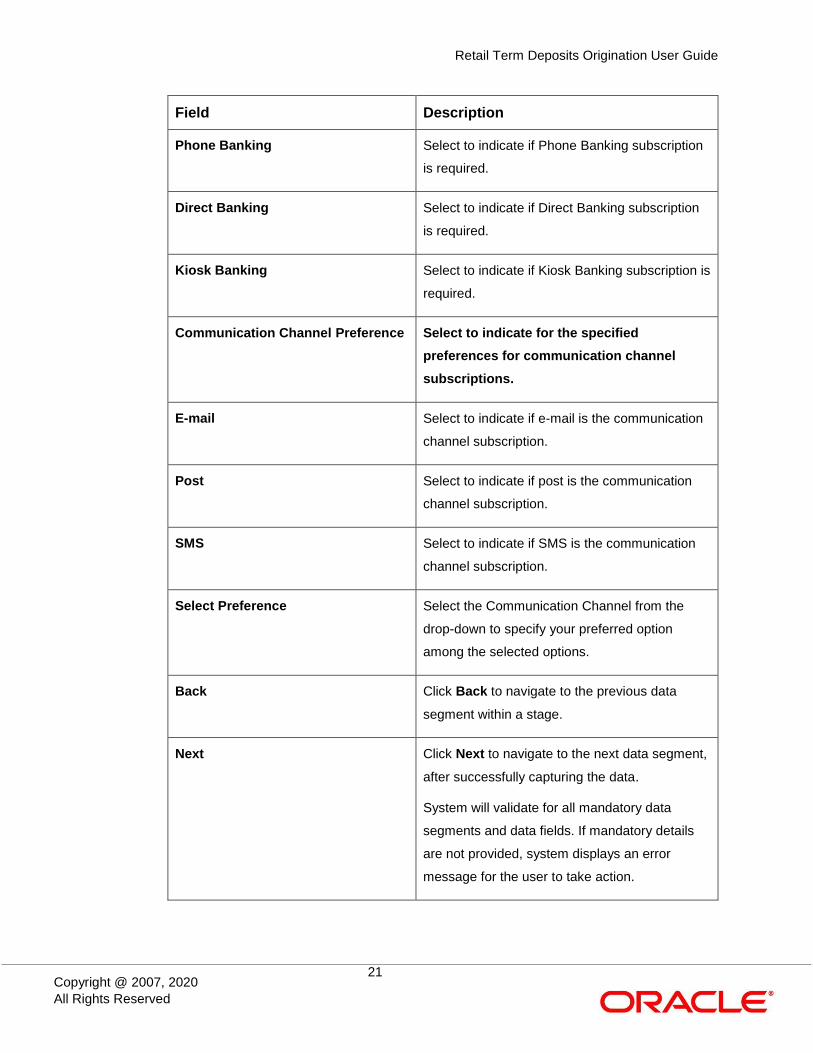
Phone Banking Select to indicate if Phone Banking subscription
is required.
Direct Banking Select to indicate if Direct Banking subscription
is required.
Kiosk Banking Select to indicate if Kiosk Banking subscription is
required.
Communication Channel Preference Select to indicate for the specified
preferences for communication channel
subscriptions.
E-mail Select to indicate if e-mail is the communication
channel subscription.
Post Select to indicate if post is the communication
channel subscription.
SMS Select to indicate if SMS is the communication
channel subscription.
Select Preference Select the Communication Channel from the
drop-down to specify your preferred option
among the selected options.
Back Click Back to navigate to the previous data
segment within a stage.
Next Click Next to navigate to the next data segment,
after successfully capturing the data.
System will validate for all mandatory data
segments and data fields. If mandatory details
are not provided, system displays an error
message for the user to take action.
Retail Term Deposits Origination User Guide
22
Copyright @ 2007, 2020
All Rights Reserved
Field Description
User will not be able to proceed to next data
segment, without capturing the mandatory data.
Save & Close Click Save & Close to save the data captured.
Save & Close will be enabled only if, all the
mandatory fields are captured. This task will be
available in the My Task list for the user to
continue later.
Cancel Click Cancel to close the application without
saving.

Retail Term Deposits Origination User Guide
23
Copyright @ 2007, 2020
All Rights Reserved
3.1.4 Nominee Details Data Segment
The Nominee Details data segment allows capturing details of the nominee for the account. This
is a non-mandatory data segment. It allows capturing multiple nominees also for the account, if
required. Nominee can also be minor, in which case, it is mandatory to provide details of the
guardian.
1. Click Next in Account Service Preferences screen to proceed with next data segment, after
successfully capturing the data.
The Nominee Details screen is displayed.
Figure 6: Nominee Details
2. Provide the details in the relevant data fields. Mandatory data fields are indicated accordingly.
For more information on fields, refer to Table 7: Nominee Details - Field Description.
Table 7: Nominee Details - Field Description
Field Description
Title Select the title of the nominee.
This field is mandatory.
First Name Specify the first name of the nominee.
This field is mandatory.
Retail Term Deposits Origination User Guide
24
Copyright @ 2007, 2020
All Rights Reserved
Field Description
Middle Name Specify the middle name of the nominee.
Last Name Specify the last name of the nominee.
This field is mandatory.
Relationship Type Select the relationship type of the nominee with
the applicant.
This field is mandatory.
Date of Birth Select the date of birth of the nominee.
This field is mandatory.
Minor Select to indicate if nominee is minor.
Guardian Guardian is enabled if Minor is selected. Click
Guardian to update guardian details.
This field is conditional mandatory.
Percentage Specify the percentage to be considered for
distribution of the account balance in case of
uneventful death of the applicant.
Address Click Address to load the address screen for
updating the address of the nominee.
Building Specify the House/Office Number, Floor and
Building details.
This field is mandatory.
Street Specify the street.
This field is mandatory.
Locality Specify the landmark of the address, if available.
Retail Term Deposits Origination User Guide
25
Copyright @ 2007, 2020
All Rights Reserved
Field Description
City Specify the city.
This field is mandatory.
State Specify the state.
This field is mandatory.
Country Specify the Country Code.
This field is mandatory.
Zip Code Specify the Pin code/Zip code of the address.
This field is mandatory.
Contact Details Specify the contact details.
E-mail Specify the e-mail address of the Nominee.
This field is mandatory.
Mobile Specify the Mobile Number of the Nominee.
This field is mandatory.
Phone No Specify the Phone No. of the Nominee.
Save & Close Click Save to save the nominee details and
come back to the Nominee Details screen.
This field is mandatory.
Back Click Back to navigate to the previous data
segment within a stage.
Retail Term Deposits Origination User Guide
26
Copyright @ 2007, 2020
All Rights Reserved
Field Description
Next Click Next to navigate to the next data segment,
after successfully capturing the data.
System will validate for all mandatory data
segments and data fields. If mandatory details
are not provided, system displays an error
message for the user to take action.
User will not be able to proceed to next data
segment, without capturing the mandatory data.
Save & Close Click Save & Close to save the data captured.
Save & Close will be enabled only if, all the
mandatory fields are captured. This task will be
available in the My Task list for the user to
continue later.
Cancel Click Cancel to close the application without
saving.
Retail Term Deposits Origination User Guide
27
Copyright @ 2007, 2020
All Rights Reserved
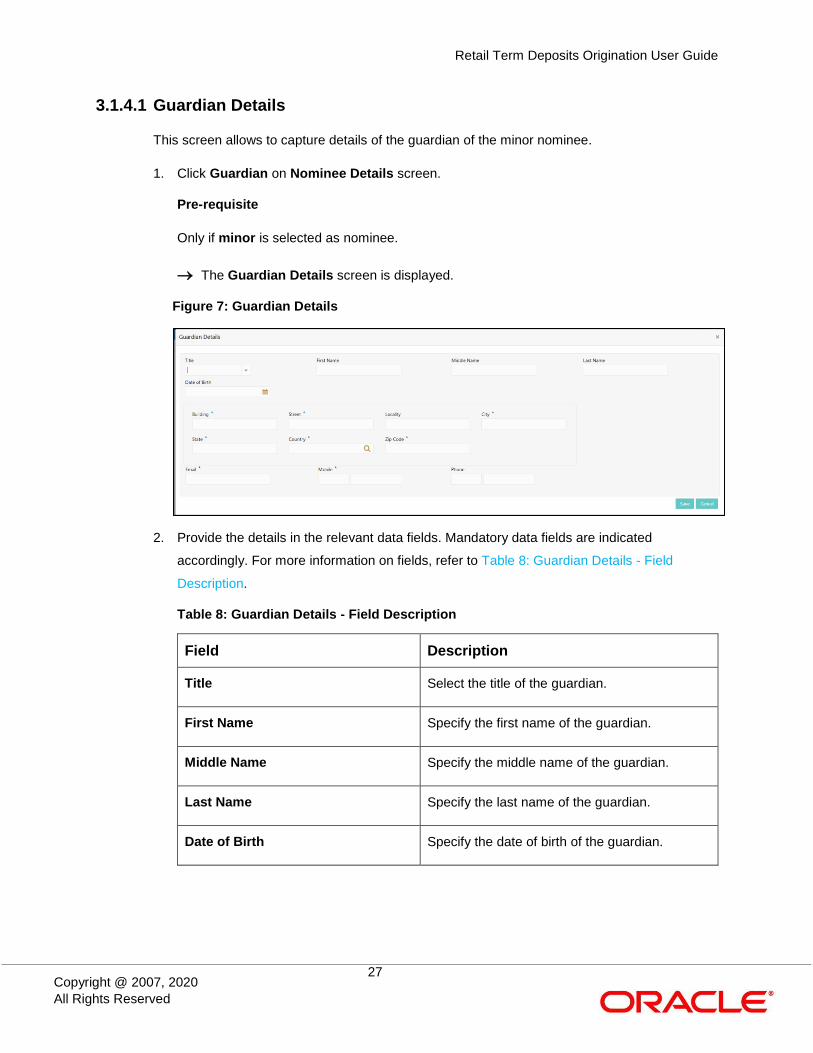
3.1.4.1 Guardian Details
This screen allows to capture details of the guardian of the minor nominee.
1. Click Guardian on Nominee Details screen.
Pre-requisite
Only if minor is selected as nominee.
The Guardian Details screen is displayed.
Figure 7: Guardian Details
2. Provide the details in the relevant data fields. Mandatory data fields are indicated
accordingly. For more information on fields, refer to Table 8: Guardian Details - Field
Description.
Table 8: Guardian Details - Field Description
Field Description
Title Select the title of the guardian.
First Name Specify the first name of the guardian.
Middle Name Specify the middle name of the guardian.
Last Name Specify the last name of the guardian.
Date of Birth Specify the date of birth of the guardian.

Retail Term Deposits Origination User Guide
28
Copyright @ 2007, 2020
All Rights Reserved
Field Description
Building Specify the house/office Number, floor and
building details.
This field is mandatory.
Street Specify the street.
This field is mandatory.
Locality Specify the locality.
City Specify the city.
This field is mandatory.
State Specify the state.
This field is mandatory.
Country Specify the country code.
This field is mandatory.
Zip Code Specify the pin code or zip code of the address.
This field is mandatory.
E-mail Specify the e-mail address of the guardian.
This field is mandatory.
Mobile Specify the ISD code and the mobile number of
the guardian.
This field is mandatory.
Phone No. Specify the ISD code and the phone number of
the guardian.
Save Click Save to save the guardian details.
Retail Term Deposits Origination User Guide
29
Copyright @ 2007, 2020
All Rights Reserved
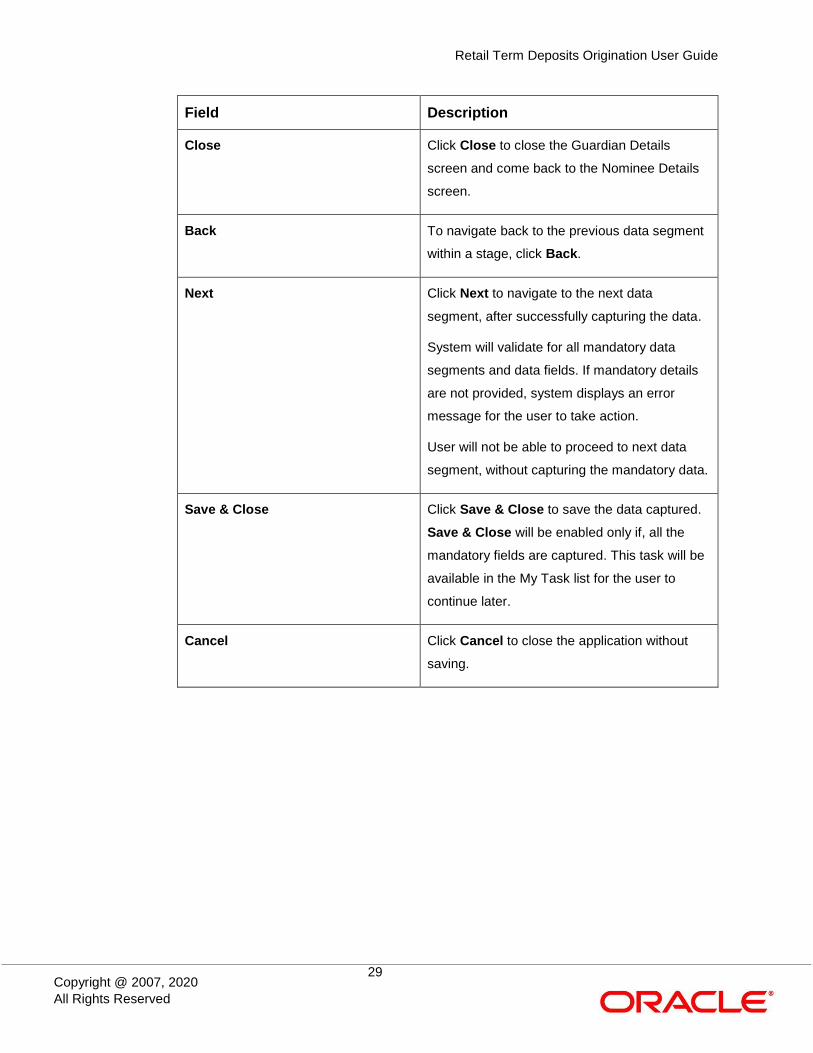
Field Description
Close Click Close to close the Guardian Details
screen and come back to the Nominee Details
screen.
Back To navigate back to the previous data segment
within a stage, click Back.
Next Click Next to navigate to the next data
segment, after successfully capturing the data.
System will validate for all mandatory data
segments and data fields. If mandatory details
are not provided, system displays an error
message for the user to take action.
User will not be able to proceed to next data
segment, without capturing the mandatory data.
Save & Close Click Save & Close to save the data captured.
Save & Close will be enabled only if, all the
mandatory fields are captured. This task will be
available in the My Task list for the user to
continue later.
Cancel Click Cancel to close the application without
saving.

Retail Term Deposits Origination User Guide
30
Copyright @ 2007, 2020
All Rights Reserved
3.1.5 Mandate Details Data Segment
The Mandate Details data segment allows to capture the mode of operation for the account.
1. Click Next in Customer Information screen to proceed with next data segment, after
successfully capturing the data.
The Mandate Details screen is displayed.
Figure 8: Mandate Details
2. Provide the details in the relevant data fields. Mandatory data fields are indicated accordingly.
For more information on fields, refer to Table 9: Mandate Details - Field Description.
Table 9: Mandate Details - Field Description
Field Description
Mode of Operation Select the mode of operation relevant for the
account from the drop-down list. Available options
are:
Single
Jointly
Anyone
Survivor
Either or Survivor
Former or Survivor
Retail Term Deposits Origination User Guide
31
Copyright @ 2007, 2020
All Rights Reserved
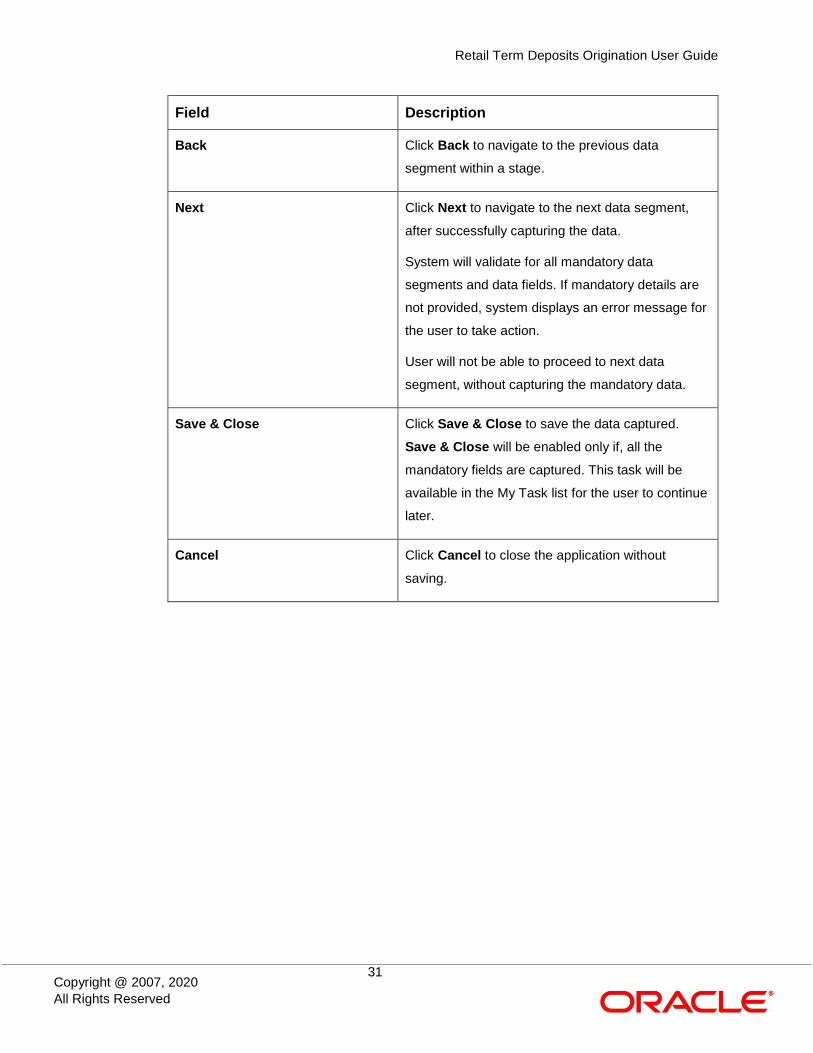
Field Description
Back Click Back to navigate to the previous data
segment within a stage.
Next Click Next to navigate to the next data segment,
after successfully capturing the data.
System will validate for all mandatory data
segments and data fields. If mandatory details are
not provided, system displays an error message for
the user to take action.
User will not be able to proceed to next data
segment, without capturing the mandatory data.
Save & Close Click Save & Close to save the data captured.
Save & Close will be enabled only if, all the
mandatory fields are captured. This task will be
available in the My Task list for the user to continue
later.
Cancel Click Cancel to close the application without
saving.

Retail Term Deposits Origination User Guide
32
Copyright @ 2007, 2020
All Rights Reserved
1.1 If Mode of Operation is selected as “As per Mandate”.
The Mandate Details screen is displayed with additional fields.
Figure 9: Mandate Details

Retail Term Deposits Origination User Guide
33
Copyright @ 2007, 2020
All Rights Reserved
3.1.6 Summary
The Summary displays the tiles for all the data segments in the Application Entry stage. The tiles
displays the important details captured in the specified data segment.
1. Click Next in Nominee Details screen to proceed with next data segment, after successfully
capturing the data.
The Summary screen is displayed.
Figure 10: Summary
Each of these summary tiles are clickable and the user will have the option to view all the
details captured under the given data segment. For more information on summary tiles, refer
to Table 10: Summary - Field Description.
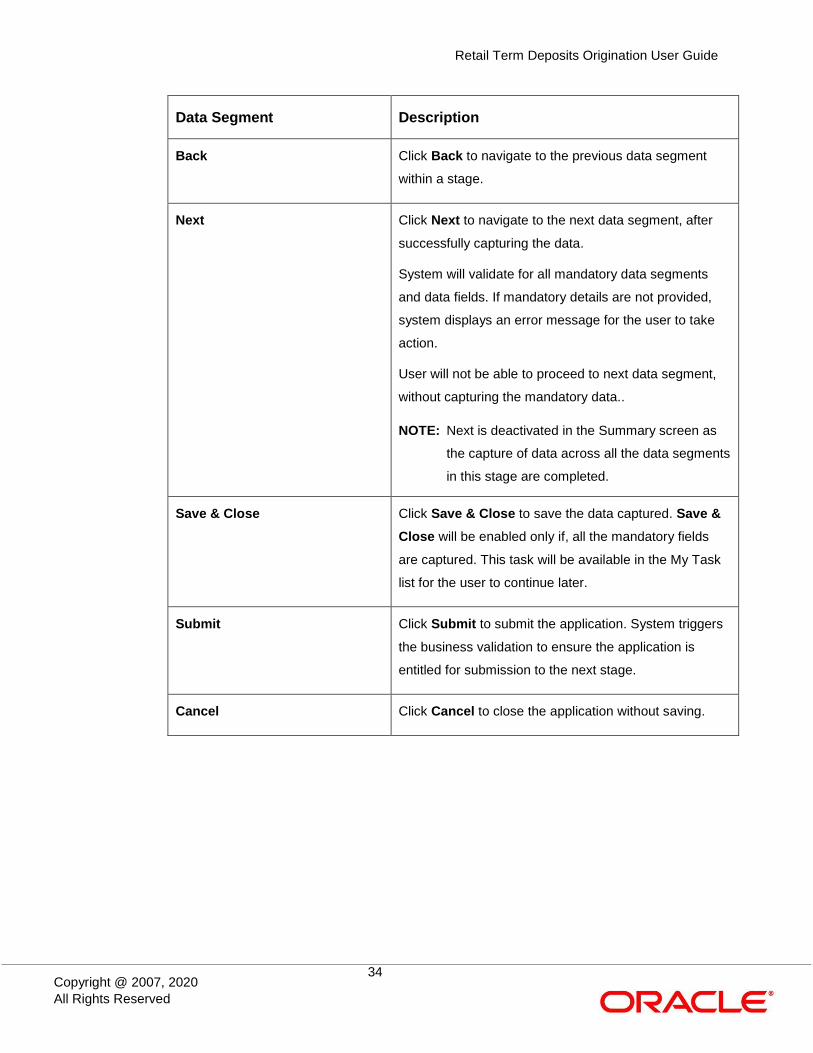
Table 10: Summary - Field Description
Data Segment Description
Account Details Displays the account details
Customer Information Displays the customer information details.
Mandate Details Displays the mandate details.
Account Service Preferences Displays the account service preferences details.
Nominee Details Displays the nominee details.
Retail Term Deposits Origination User Guide
34
Copyright @ 2007, 2020
All Rights Reserved
Data Segment Description
Back Click Back to navigate to the previous data segment
within a stage.
Next Click Next to navigate to the next data segment, after
successfully capturing the data.
System will validate for all mandatory data segments
and data fields. If mandatory details are not provided,
system displays an error message for the user to take
action.
User will not be able to proceed to next data segment,
without capturing the mandatory data..
NOTE: Next is deactivated in the Summary screen as
the capture of data across all the data segments
in this stage are completed.
Save & Close Click Save & Close to save the data captured. Save &
Close will be enabled only if, all the mandatory fields
are captured. This task will be available in the My Task
list for the user to continue later.
Submit Click Submit to submit the application. System triggers
the business validation to ensure the application is
entitled for submission to the next stage.
Cancel Click Cancel to close the application without saving.

Retail Term Deposits Origination User Guide
35
Copyright @ 2007, 2020
All Rights Reserved
2. Click Submit to reach the OUTCOME, where the overrides, checklist and documents for this
stage can be validated or verified.
The Overrides screen is displayed.
Figure 11: Overrides
Overrides are basically warnings that are raised during the business validations. User has to
accept the overrides to proceed further. Alternatively, user can go back and correct the data
to ensure overrides do not arise. Few example of overrides are as following:
Nominee Details are not updated.

Retail Term Deposits Origination User Guide
36
Copyright @ 2007, 2020
All Rights Reserved
3. Click Proceed Next.
The Checklist screen is displayed.
Figure 12: Checklist
Checklist configured in the business process for the business product is displayed here.
Checklist are the check points that the user has to accept having confirmed.
4. Select the checkbox to accept the checklist.

Retail Term Deposits Origination User Guide
37
Copyright @ 2007, 2020
All Rights Reserved
5. Click Save & Proceed.
The Outcome screen is displayed.
Figure 13: Outcome
6. Select Proceed outcome from the Select an Outcome drop-down list. Available options are:
Proceed
Terminate
Outcomes configured in the conductor workflow for the business process is available in the
dropdown list.
7. Enter the remarks in Remarks.
Retail Term Deposits Origination User Guide
38
Copyright @ 2007, 2020
All Rights Reserved
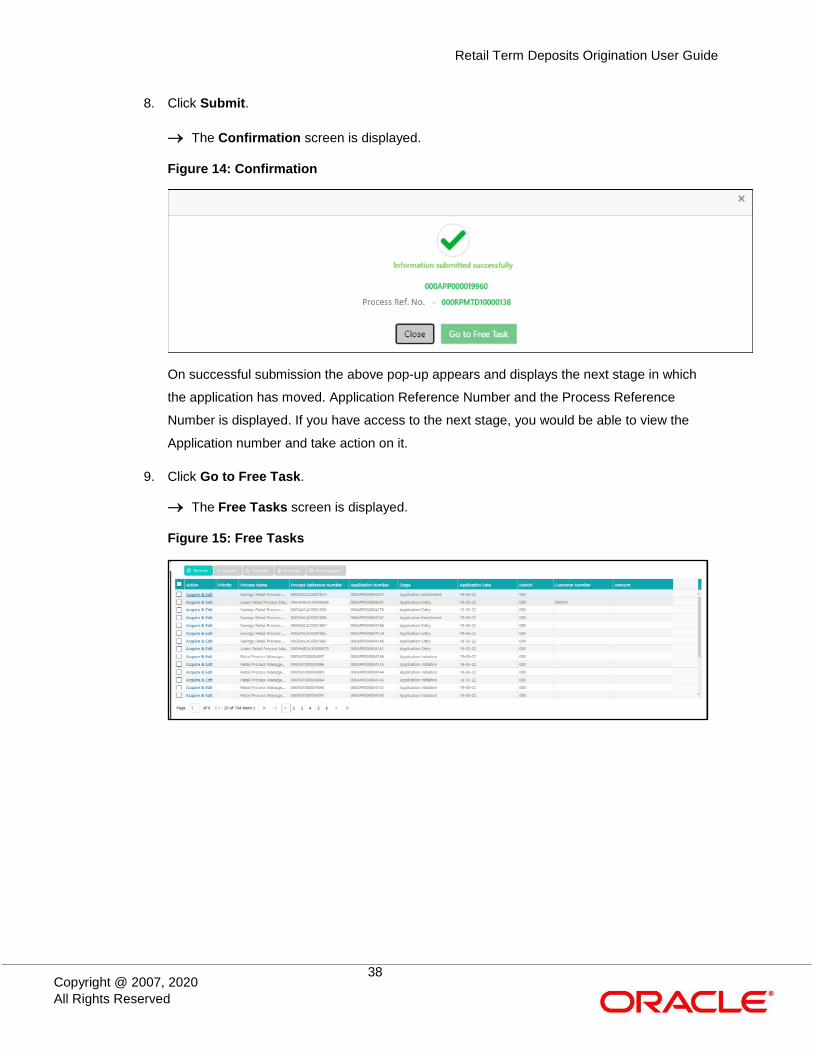
8. Click Submit.
The Confirmation screen is displayed.
Figure 14: Confirmation
On successful submission the above pop-up appears and displays the next stage in which
the application has moved. Application Reference Number and the Process Reference
Number is displayed. If you have access to the next stage, you would be able to view the
Application number and take action on it.
9. Click Go to Free Task.
The Free Tasks screen is displayed.
Figure 15: Free Tasks
Retail Term Deposits Origination User Guide
39
Copyright @ 2007, 2020
All Rights Reserved
3.1.7 Action Tabs
This section includes the following subsections:
3.1.7.1 Icon
3.1.7.2 Customer 360
3.1.7.3 Application Info
3.1.7.4 Remarks
3.1.7.5 Documents
3.1.7.6 Advices
The functions available in the various tabs can be accessed during any point in the Application
Entry Stage. Details about the tabs are as follows:
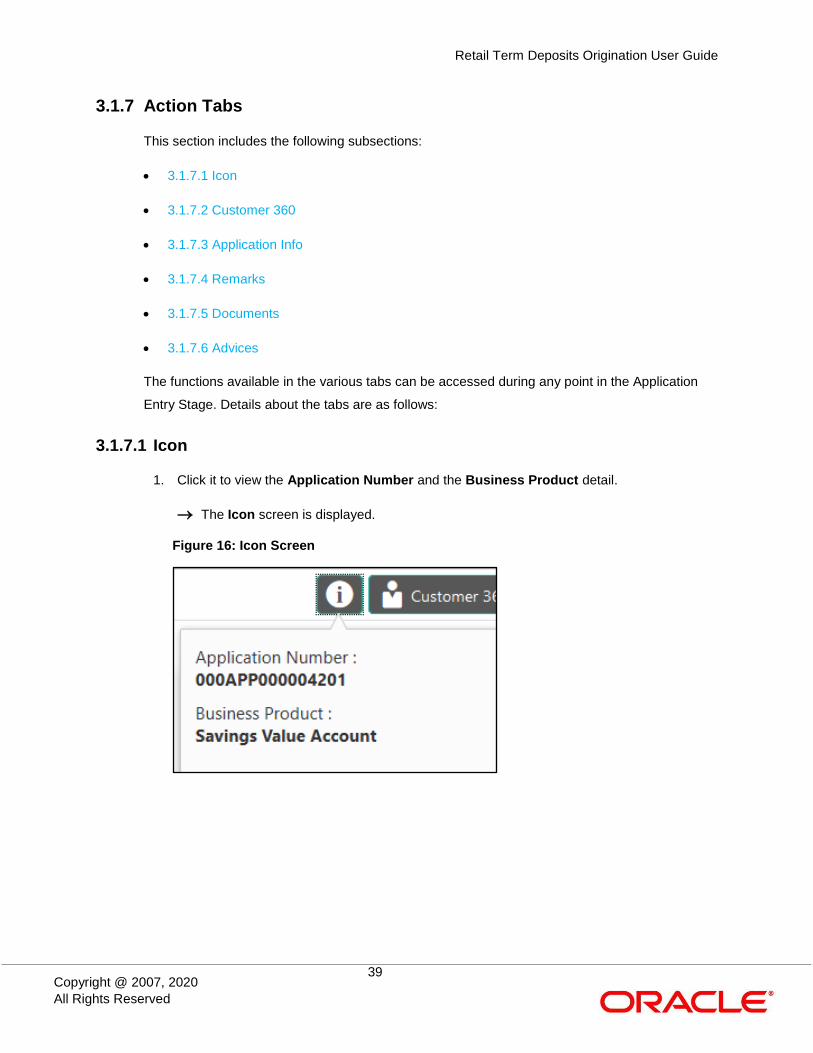
3.1.7.1 Icon
1. Click it to view the Application Number and the Business Product detail.
The Icon screen is displayed.
Figure 16: Icon Screen

Retail Term Deposits Origination User Guide
40
Copyright @ 2007, 2020
All Rights Reserved
3.1.7.2 Customer 360
1. Click Customer 360 to select the Customer ID of existing customer, and then view the Mini
Customer 360.
The Customer 360 screen is displayed.
Figure 17: Customer 360
The screen shows the list of Customer IDs in case of Joint Accounts. Select the specific
Customer ID to view their Mini Customer 360. The CIF Numbers are populated in the Customer
360 screen only post the CIF number has been keyed in the Customer Information data
segment.

Retail Term Deposits Origination User Guide
41
Copyright @ 2007, 2020
All Rights Reserved
3.1.7.3 Application Info
1. Click Application Info to view the application information.
The Application Information screen is displayed.
Figure 18: Application Information
The Application Information screen displays separate cards for various products initiated as
part of the application.
2. For more information on fields, refer to Table 11: Application Information – Field
Description.
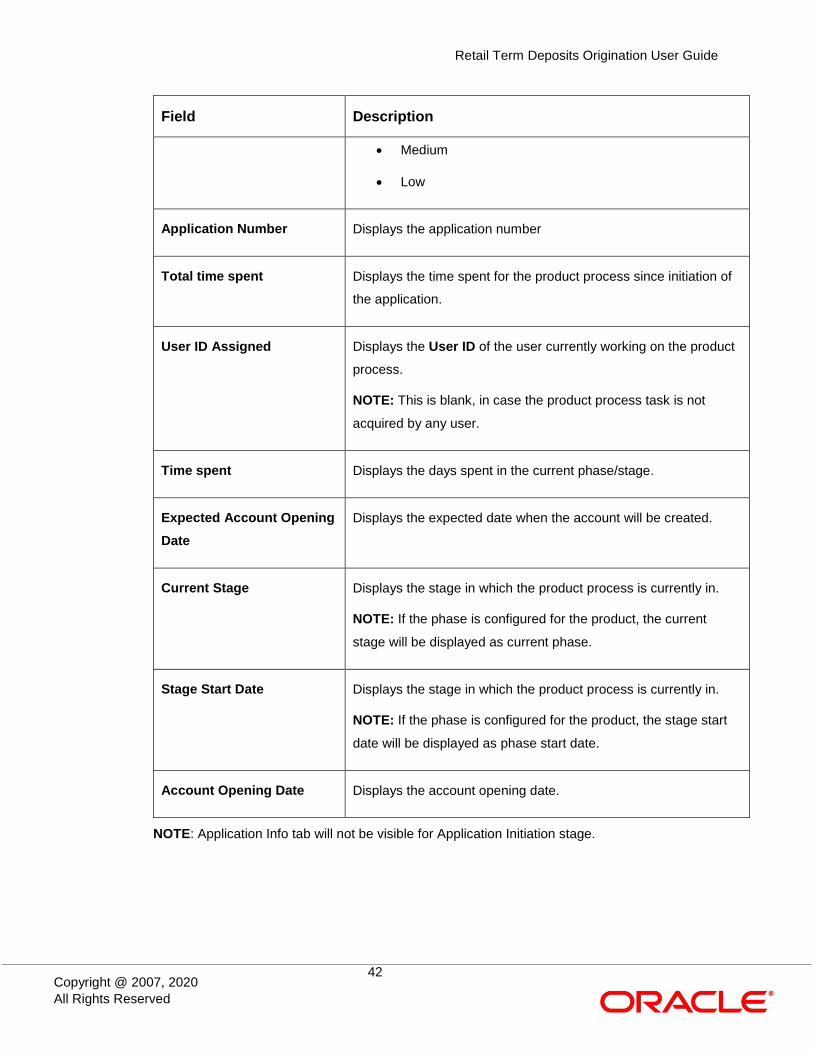
Table 11: Application Information – Field Description
Field Description
Application Date Displays the application date.
Phone Displays the phone number.
E-mail Displays the E-mail ID.
Source By Displays the name of the user who has sourced the application.
Channel Displays the channel name.
Priority Displays the priority of the application.
High
Retail Term Deposits Origination User Guide
42
Copyright @ 2007, 2020
All Rights Reserved
Field Description
Medium
Low
Application Number Displays the application number
Total time spent Displays the time spent for the product process since initiation of
the application.
User ID Assigned Displays the User ID of the user currently working on the product
process.
NOTE: This is blank, in case the product process task is not
acquired by any user.
Time spent Displays the days spent in the current phase/stage.
Expected Account Opening
Date
Displays the expected date when the account will be created.
Current Stage Displays the stage in which the product process is currently in.
NOTE: If the phase is configured for the product, the current
stage will be displayed as current phase.
Stage Start Date Displays the stage in which the product process is currently in.
NOTE: If the phase is configured for the product, the stage start
date will be displayed as phase start date.
Account Opening Date Displays the account opening date.
NOTE: Application Info tab will not be visible for Application Initiation stage.

Retail Term Deposits Origination User Guide
43
Copyright @ 2007, 2020
All Rights Reserved
3.1.7.4 Remarks
1. Click Remarks to update any remarks that you want to post for the application that you are
working on.
The Remarks screen is displayed.
Figure 19: Remarks
Remarks posted are updated with your User ID, Date, and are available for view in the next
stages for the users working on that application.
Retail Term Deposits Origination User Guide
44
Copyright @ 2007, 2020
All Rights Reserved
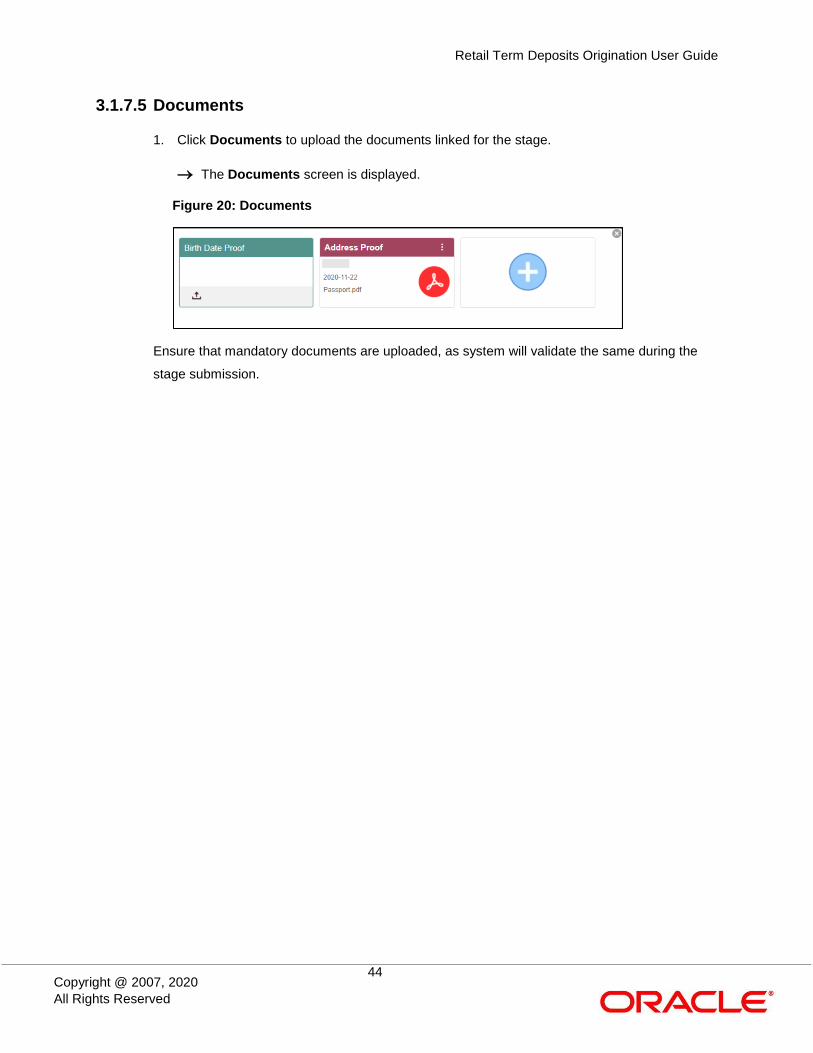
3.1.7.5 Documents
1. Click Documents to upload the documents linked for the stage.
The Documents screen is displayed.
Figure 20: Documents
Ensure that mandatory documents are uploaded, as system will validate the same during the
stage submission.

Retail Term Deposits Origination User Guide
45
Copyright @ 2007, 2020
All Rights Reserved
3.1.7.6 Advices
1. Click Advices to view the advice linked for the stage.
The Advices screen is displayed.
Figure 21: Advices
System will generate the advice on submission of the stage. For Application Entry stage of
Term Deposit product, no advice is configured.
Retail Term Deposits Origination User Guide
46
Copyright @ 2007, 2020
All Rights Reserved
3.2 Application Enrichment Stage
Users having functional access to the Application Enrichment stage will be able to view the record
in the Free Task process.
The Application Enrichment stage comprises of the below mentioned data segments:
3.2.1 Account Details Data Segment
3.2.2 Interest Details Data Segment
3.2.3 Summary
Please refer the below section for more details on these data segments.
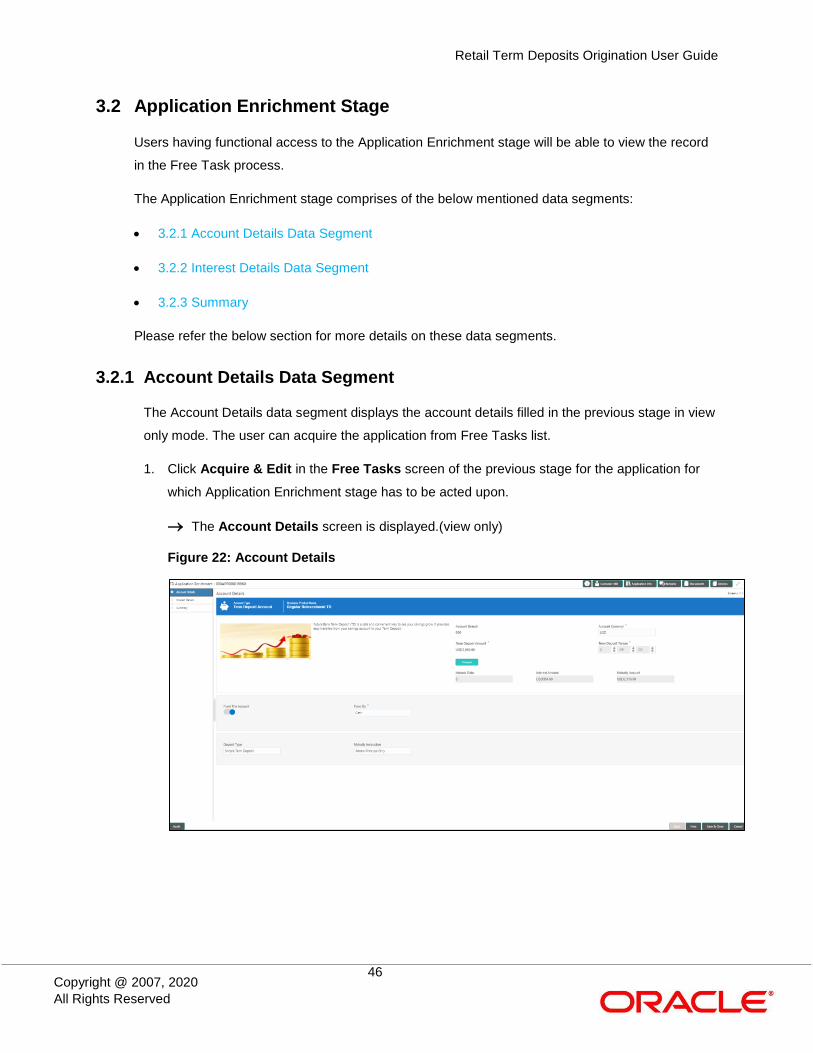
3.2.1 Account Details Data Segment
The Account Details data segment displays the account details filled in the previous stage in view
only mode. The user can acquire the application from Free Tasks list.
1. Click Acquire & Edit in the Free Tasks screen of the previous stage for the application for
which Application Enrichment stage has to be acted upon.
The Account Details screen is displayed.(view only)
Figure 22: Account Details

Retail Term Deposits Origination User Guide
47
Copyright @ 2007, 2020
All Rights Reserved
For more information on fields, refer to Table 12: Account Details - Field Description.
Table 12: Account Details - Field Description
Field Description
Account Type Displays the account type based on the product selected in
the product catalogue.
This field is mandatory.
Business Product Name Displays the business product name based on the product
selected in the product catalogue.
Product Image Displays the business product image.
Product Description Displays a short description of the business product.
Account Branch By default, displays the logged-in user’s home branch.
Account Currency Displays the account currency.
Term Deposit Amount Displays the Term Deposit amount.
Term Deposit Tenure Displays the term deposit tenure.
Compute Click Compute and the following fields are displayed:
Interest
Interest Amount
Maturity Amount
Fund the Account Displays if initial funding has been taken for the account
opening. Currently, initial funding is allowed through Cash
Account Transfer and Other Bank Cheque.
Fund the Account will always be ‘On’ for Term Deposit.
Fund By Displays the Fund By. Available options are:
Cash
Account Transfer

Retail Term Deposits Origination User Guide
48
Copyright @ 2007, 2020
All Rights Reserved
Field Description
Other Bank Cheque
Term Deposit Amount Displays the term deposit amount updated earlier.
Value Date Displays the Current Business date.
Account Number Displays the account number.
Account Name Displays the account name for the selected account
number.
Cheque Number Displays the cheque number.
Cheque Date Displays the Cheque date.
GL Account Number Displays the GL Account Number where the funding
amount is to be credited.
GL Account Description Displays the GL Account Description for the GL selected.
Deposit Type Displays deposit type as Simple or Reinvestment Term
Deposit, based on the Business Product configurations.
Interest Payout Displays the Interest Payout.
Interest Payout Mode Displays the Interest Payout mode.
Account Number Displays the account number.
Account Name Displays the account name for the selected account
number.
Maturity Instruction Displays the maturity amount.
Maturity Payout Mode Displays the maturity payout mode.
Account Number Displays the account number.

Retail Term Deposits Origination User Guide
49
Copyright @ 2007, 2020
All Rights Reserved
Field Description
Account Name Displays the account name for the selected account
number.
Back Click Back to navigate to the previous data segment within
a stage.
NOTE: Since this is the first screen on the workflow, Back
will be disabled.
Next Click Next to navigate to the next data segment, after
successfully capturing the data.
System will validate for all mandatory data segments and
data fields. If mandatory details are not provided, system
displays an error message for the user to take action.
User will not be able to proceed to next data segment,
without capturing the mandatory data.
Save & Close Click Save & Close to save the data captured. Save &
Close will be enabled only if, all the mandatory fields are
captured. This task will be available in the My Task list for
the user to continue later.
Cancel Click Cancel to close the application without saving.

Retail Term Deposits Origination User Guide
50
Copyright @ 2007, 2020
All Rights Reserved
3.2.2 Interest Details Data Segment
The Interest Details data segment displays the interest applicable for the account.
1. Click Next in Account Details screen to proceed with next data segment, after successfully
capturing the data.
The Interest Details screen is displayed.
Figure 23: Interest Details
2. Provide the details in the relevant data fields. Mandatory data fields are indicated accordingly.
For more information on fields, refer to Table 13: Interest Details - Field Description.
Table 13: Interest Details - Field Description
Field Description
Interest Type Specify the interest type.
Interest Rate Specify the interest rate applicable for the
account.
Margin In % Select the margin in percentage.
Currently, system does not allow to specify the
margin for the interest rate for Term Deposit
account.
This field is mandatory.

Retail Term Deposits Origination User Guide
51
Copyright @ 2007, 2020
All Rights Reserved
Field Description
Effective Rate Displays the final rate calculated based on the
Interest Rate and the Margin specified.
Since Margin is not allowed currently, the Final
Rate will be equal to the Interest Rate.
Back Click Back to navigate to the previous data
segment within a stage.
Next Click Next to navigate to the next data segment,
after successfully capturing the data.
System will validate for all mandatory data
segments and data fields. If mandatory details
are not provided, system displays an error
message for the user to take action.
User will not be able to proceed to next data
segment, without capturing the mandatory data.
Save & Close Click Save & Close to save the data captured.
Save & Close will be enabled only if, all the
mandatory fields are captured. This task will be
available in the My Task list for the user to
continue later.
Cancel Click Cancel to close the application without
saving.

Retail Term Deposits Origination User Guide
52
Copyright @ 2007, 2020
All Rights Reserved
3.2.3 Summary
The Summary displays the tiles for all the data segments in the Application Enrichment stage.
The tiles displays the important details captured in the specified data segment.
1. Click Next in Interest Details screen to proceed with next data segment, after successfully
capturing the data.
The Summary screen is displayed.
Figure 24: Summary
Each of these summary tiles are clickable and the user will have the option to view all the
details captured under the given data segment. For more information on summary tiles, refer
to Table 14: Summary - Field Description.
Table 14: Summary - Field Description
Data Segment Description
Account Details Displays the account details.
Interest Details Displays the interest details
Back Click Back to navigate to the previous data segment
within a stage.
Next Click Next to navigate to the next data segment, after
successfully capturing the data.

Retail Term Deposits Origination User Guide
53
Copyright @ 2007, 2020
All Rights Reserved
Data Segment Description
System will validate for all mandatory data segments
and data fields. If mandatory details are not provided,
system displays an error message for the user to take
action.
User will not be able to proceed to next data segment,
without capturing the mandatory data.
NOTE: Next is deactivated in the Summary screen as
the capture of data across all the data segments
in this stage are completed.
Save & Close Click Save & Close to save the data captured. Save &
Close will be enabled only if, all the mandatory fields
are captured. This task will be available in the My Task
list for the user to continue later.
Submit Click Cancel to close the application without saving.
Cancel Click Cancel to terminate the application and the status
of the application. Such applications cannot be revived
later by the user.

Retail Term Deposits Origination User Guide
54
Copyright @ 2007, 2020
All Rights Reserved
2. Click Submit to reach the OUTCOME, where the overrides, checklist and documents for this
stage can be validated or verified.
The Overrides screen is displayed.
Figure 25: Overrides
Overrides are basically warnings that are raised during the business validations. User has to
accept the overrides to proceed further. Alternatively, user can go back and correct the data
to ensure overrides do not arise.

Retail Term Deposits Origination User Guide
55
Copyright @ 2007, 2020
All Rights Reserved
3. Click Proceed Next.
The Checklist screen is displayed.
Figure 26: Checklist
Checklist configured in the business process for the business product is displayed here.
Checklist are the check points that the user has to accept having confirmed.
4. Select the checkbox to accept the checklist.

Retail Term Deposits Origination User Guide
56
Copyright @ 2007, 2020
All Rights Reserved
5. Click Save & Proceed.
The Outcome screen is displayed.
Figure 27: Outcome
6. Select Proceed outcome from the drop-down list. Available options are:
Proceed
Return to Application Entry
Terminate
Outcomes configured in the conductor workflow for the business process is available in the
drop-down list.
7. Enter the remarks in Remarks.

Retail Term Deposits Origination User Guide
57
Copyright @ 2007, 2020
All Rights Reserved
8. Click Submit.
The Confirmation screen is displayed.
Figure 28: Confirmation
On successful submission the above pop-up appears and displays the next stage in which
the application has moved. Application Reference Number and the Process Reference
Number is also displayed. Click on ‘Close’ to close the pop-up screen. Alternatively click on
‘Go to Free Task’ to launch the Free Task menu. If you have access to the next stage, you
would be able to view the Application number and take action on it.
9. Click Go to Free Task.
The Free Tasks screen is displayed.
Figure 29: Free Tasks
Retail Term Deposits Origination User Guide
58
Copyright @ 2007, 2020
All Rights Reserved
3.3 Account Funding Stage
Users having functional access to the Account Funding stage will be able to view the record in the
Free Task process.
The Account Funding Stage comprises of the below mentioned data segments:
3.3.1 Account Details Data Segment
3.3.2 Initial Funding Details Data Segment
3.3.3 Summary
Please refer the below section for more details on these data segments.
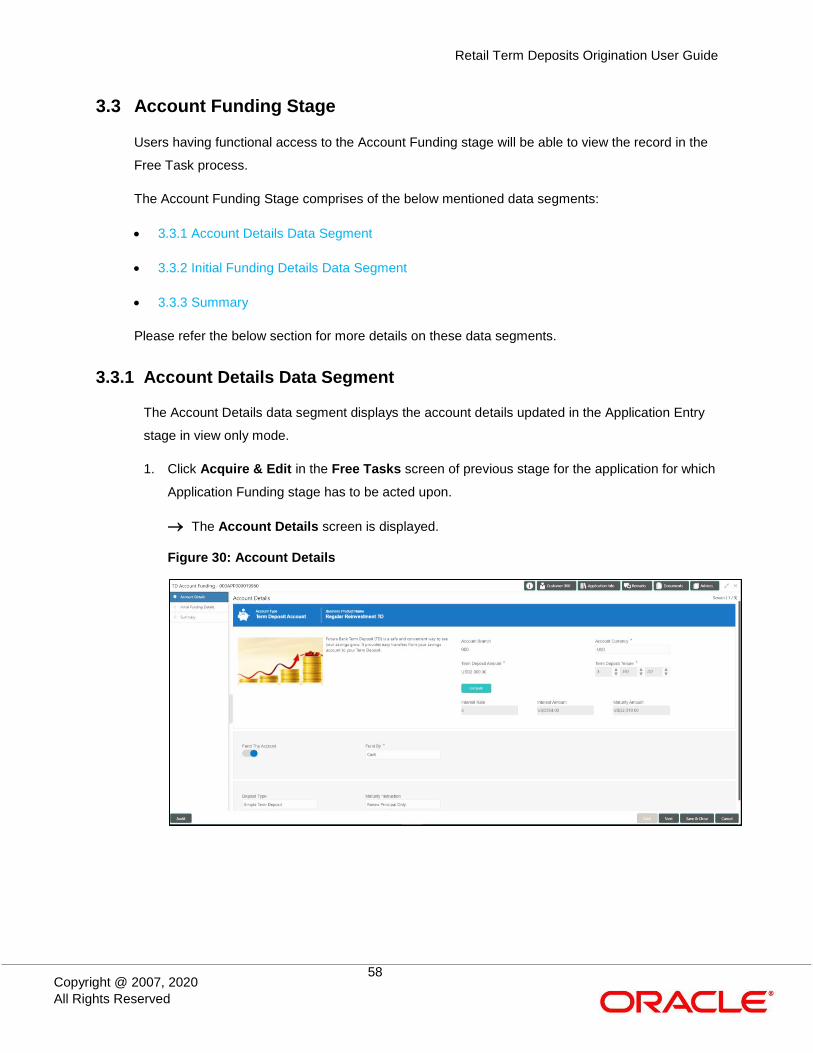
3.3.1 Account Details Data Segment
The Account Details data segment displays the account details updated in the Application Entry
stage in view only mode.
1. Click Acquire & Edit in the Free Tasks screen of previous stage for the application for which
Application Funding stage has to be acted upon.
The Account Details screen is displayed.
Figure 30: Account Details
Retail Term Deposits Origination User Guide
59
Copyright @ 2007, 2020
All Rights Reserved
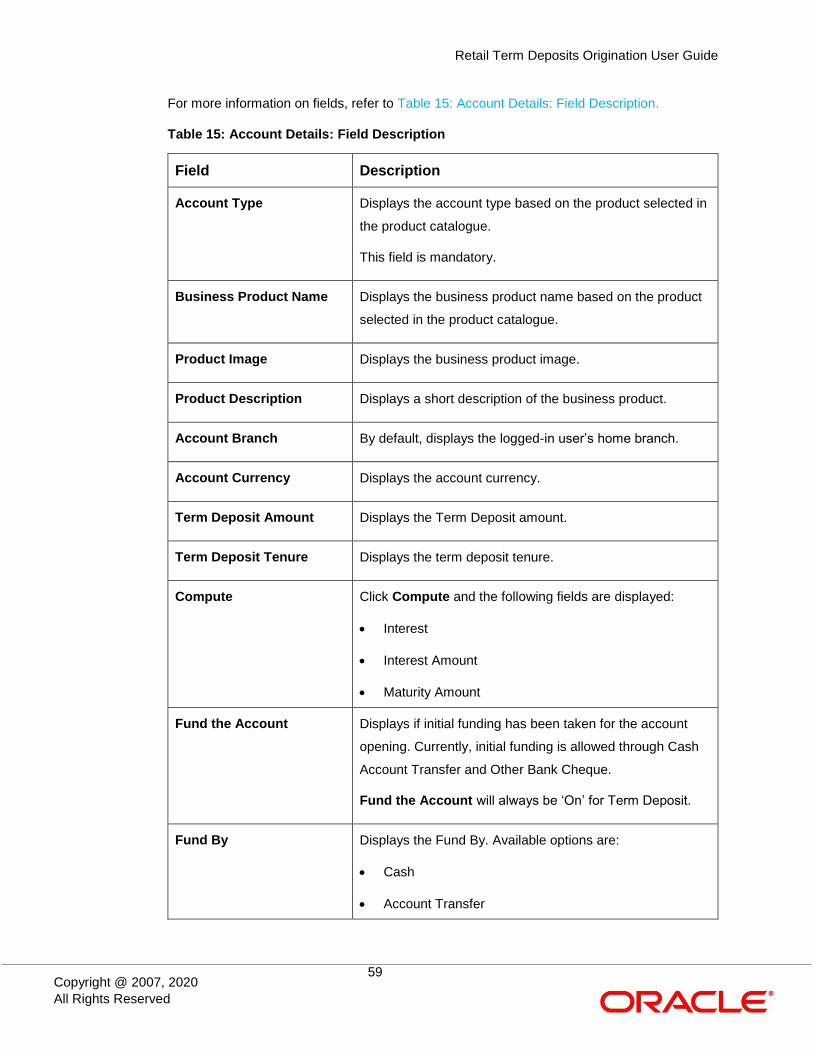
For more information on fields, refer to Table 15: Account Details: Field Description.
Table 15: Account Details: Field Description
Field Description
Account Type Displays the account type based on the product selected in
the product catalogue.
This field is mandatory.
Business Product Name Displays the business product name based on the product
selected in the product catalogue.
Product Image Displays the business product image.
Product Description Displays a short description of the business product.
Account Branch By default, displays the logged-in user’s home branch.
Account Currency Displays the account currency.
Term Deposit Amount Displays the Term Deposit amount.
Term Deposit Tenure Displays the term deposit tenure.
Compute Click Compute and the following fields are displayed:
Interest
Interest Amount
Maturity Amount
Fund the Account Displays if initial funding has been taken for the account
opening. Currently, initial funding is allowed through Cash
Account Transfer and Other Bank Cheque.
Fund the Account will always be ‘On’ for Term Deposit.
Fund By Displays the Fund By. Available options are:
Cash
Account Transfer
Retail Term Deposits Origination User Guide
60
Copyright @ 2007, 2020
All Rights Reserved
Field Description
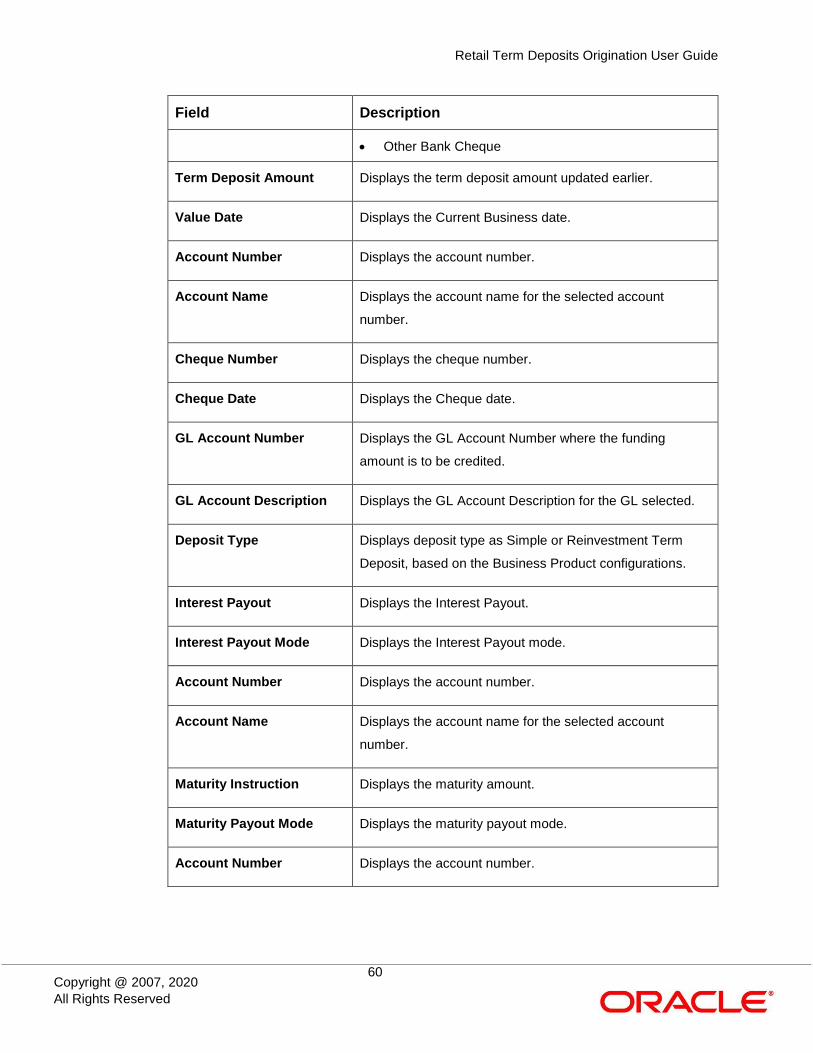
Other Bank Cheque
Term Deposit Amount Displays the term deposit amount updated earlier.
Value Date Displays the Current Business date.
Account Number Displays the account number.
Account Name Displays the account name for the selected account
number.
Cheque Number Displays the cheque number.
Cheque Date Displays the Cheque date.
GL Account Number Displays the GL Account Number where the funding
amount is to be credited.
GL Account Description Displays the GL Account Description for the GL selected.
Deposit Type Displays deposit type as Simple or Reinvestment Term
Deposit, based on the Business Product configurations.
Interest Payout Displays the Interest Payout.
Interest Payout Mode Displays the Interest Payout mode.
Account Number Displays the account number.
Account Name Displays the account name for the selected account
number.
Maturity Instruction Displays the maturity amount.
Maturity Payout Mode Displays the maturity payout mode.
Account Number Displays the account number.

Retail Term Deposits Origination User Guide
61
Copyright @ 2007, 2020
All Rights Reserved
Field Description
Account Name Displays the account name for the selected account
number.
Back Click Back to navigate to the previous data segment within
a stage.
NOTE: Since this is the first screen on the workflow, Back
will be disabled.
Next Click Next to navigate to the next data segment, after
successfully capturing the data.
System will validate for all mandatory data segments and
data fields. If mandatory details are not provided, system
displays an error message for the user to take action.
User will not be able to proceed to next data segment,
without capturing the mandatory data.
Save & Close Click Save & Close to save the data captured. Save &
Close will be enabled only if, all the mandatory fields are
captured. This task will be available in the My Task list for
the user to continue later.
Cancel Click Cancel to close the application without saving.

Retail Term Deposits Origination User Guide
62
Copyright @ 2007, 2020
All Rights Reserved
3.3.2 Initial Funding Details
The Initial Funding Details data segment displays the Initial Funding details captured in the
Application Entry stage. The Transaction Reference Number and the Transaction Status is either
auto-populated or has to be manually captured based on the configuration. Automatic option is
supported only for the Initial Funding with ‘Cash’ mode. Manual process is supported for Account
Transfer, Other Bank Cheque and Cash mode of initial funding.
For more details on the Modes and the Manual/Automatic Process configuration, please refer to
the Configurations Guide. Teller transaction reference number and its status for the initial funding
transaction triggered off as part of the Application Entry stage.
1. Click Next in Interest Details screen to proceed with next data segment, after successfully
capturing the data.
The Initial Funding Details screen is displayed.
Figure 31: Initial Funding Details

Retail Term Deposits Origination User Guide
63
Copyright @ 2007, 2020
All Rights Reserved
2. Provide the details in the relevant data fields. Mandatory data fields are indicated accordingly.
For more information on fields, refer to Table 16: Initial Funding Details - Field Description.
Table 16: Initial Funding Details - Field Description
Field Description
Fund the Account Displays the Fund the Account selected in the
Account Details Data Segment in Application
Entry stage.
Fund By Displays the Fund by option selected in the
Account Details Data Segment in Application
Entry stage.
Amount Displays the amount of the initial funding
updated in the Account Details data segment in
Application Entry stage.
Value Date Displays the value date of the initial funding
updated in the Account Details data segment in
Application Entry stage.
Account Number Displays the Account Number. This field appears
only if Account Transfer is selected as the
funding by mode.
Account Name Displays the Account Name. This field appears
only if Account Transfer is selected as the
funding by mode.
Cheque Number Displays the Cheque Number. This field appears
only if Account Transfer or Other Bank Cheque
is selected as the funding by mode. For Account
Transfer the cheque number is displayed only if
captured during the funding details capture in
Account Details data segment.
Cheque Date Displays the Cheque Date. This field appears
only if Account Transfer or Other Bank Cheque
Retail Term Deposits Origination User Guide
64
Copyright @ 2007, 2020
All Rights Reserved
Field Description
is selected as the funding by mode. For Account
Transfer the cheque number is displayed only if
captured during the funding details capture in
Account Details data segment.
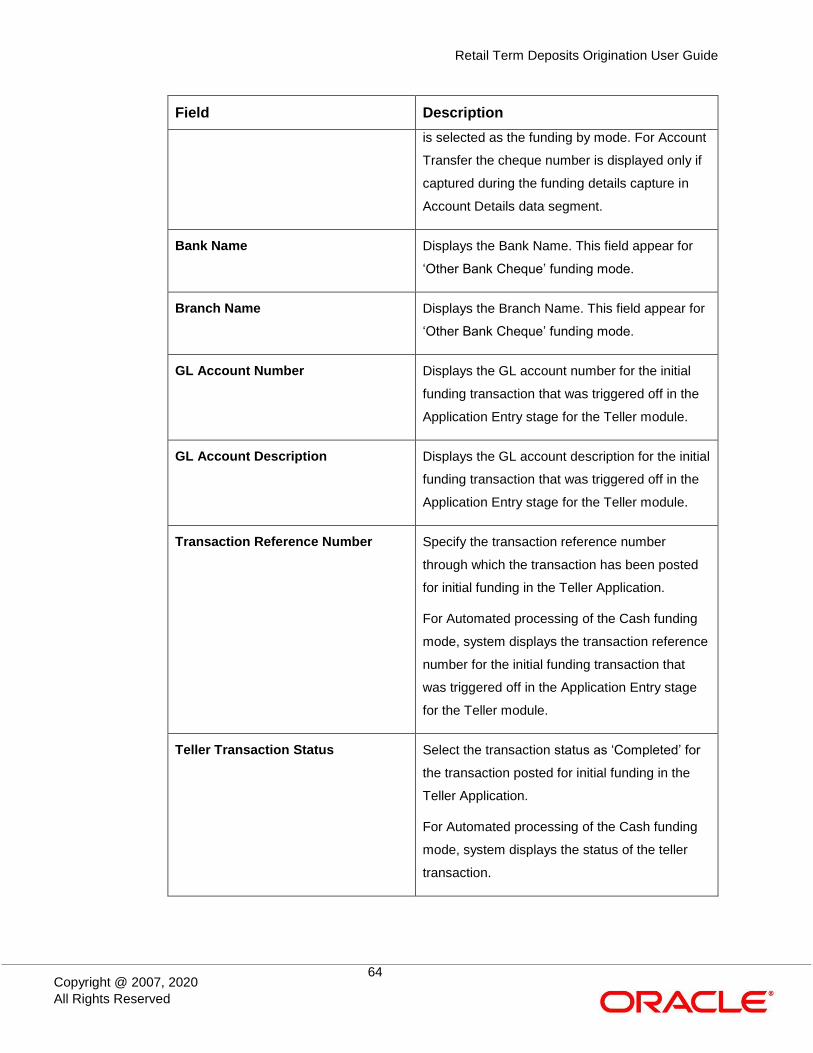
Bank Name Displays the Bank Name. This field appear for
‘Other Bank Cheque’ funding mode.
Branch Name Displays the Branch Name. This field appear for
‘Other Bank Cheque’ funding mode.
GL Account Number Displays the GL account number for the initial
funding transaction that was triggered off in the
Application Entry stage for the Teller module.
GL Account Description Displays the GL account description for the initial
funding transaction that was triggered off in the
Application Entry stage for the Teller module.
Transaction Reference Number Specify the transaction reference number
through which the transaction has been posted
for initial funding in the Teller Application.
For Automated processing of the Cash funding
mode, system displays the transaction reference
number for the initial funding transaction that
was triggered off in the Application Entry stage
for the Teller module.
Teller Transaction Status Select the transaction status as ‘Completed’ for
the transaction posted for initial funding in the
Teller Application.
For Automated processing of the Cash funding
mode, system displays the status of the teller
transaction.
Retail Term Deposits Origination User Guide
65
Copyright @ 2007, 2020
All Rights Reserved
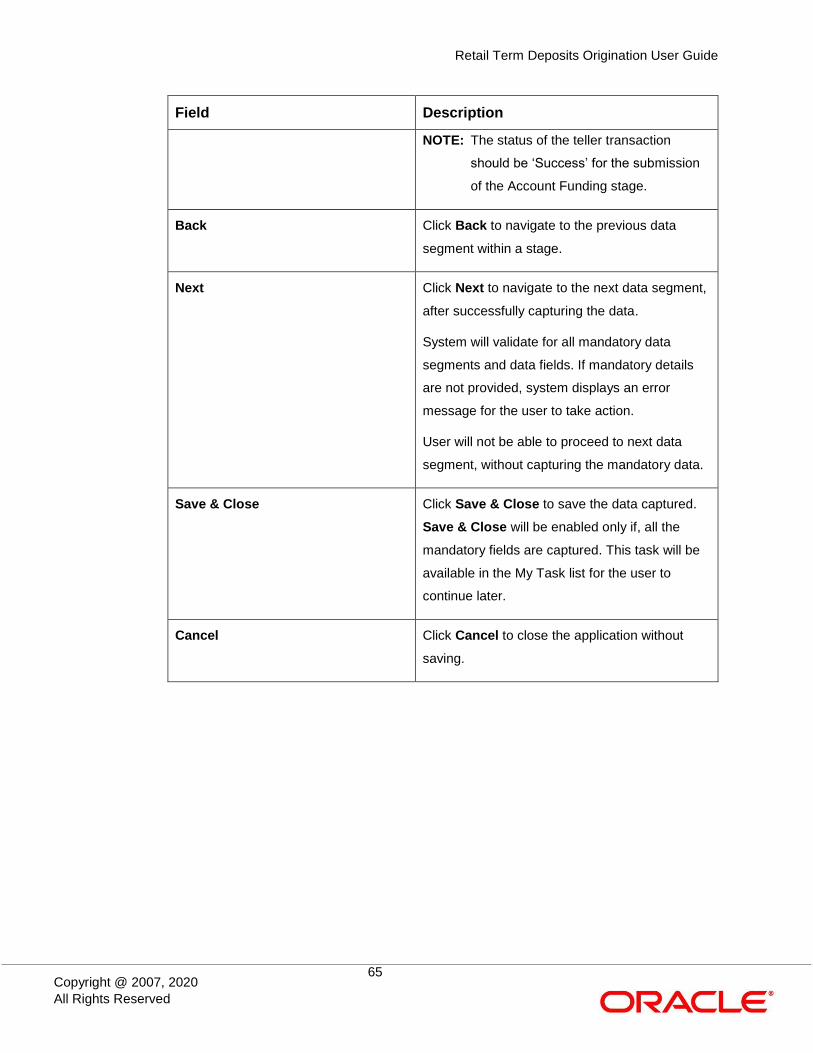
Field Description
NOTE: The status of the teller transaction
should be ‘Success’ for the submission
of the Account Funding stage.
Back Click Back to navigate to the previous data
segment within a stage.
Next Click Next to navigate to the next data segment,
after successfully capturing the data.
System will validate for all mandatory data
segments and data fields. If mandatory details
are not provided, system displays an error
message for the user to take action.
User will not be able to proceed to next data
segment, without capturing the mandatory data.
Save & Close Click Save & Close to save the data captured.
Save & Close will be enabled only if, all the
mandatory fields are captured. This task will be
available in the My Task list for the user to
continue later.
Cancel Click Cancel to close the application without
saving.
Retail Term Deposits Origination User Guide
66
Copyright @ 2007, 2020
All Rights Reserved
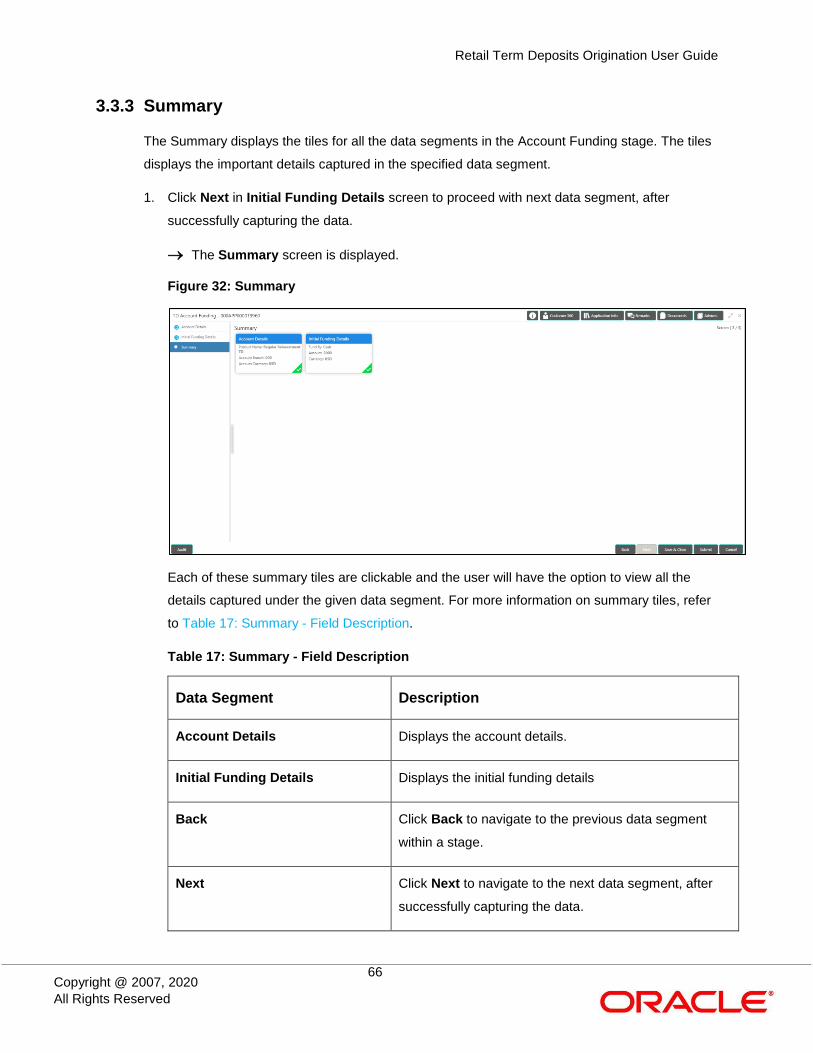
3.3.3 Summary
The Summary displays the tiles for all the data segments in the Account Funding stage. The tiles
displays the important details captured in the specified data segment.
1. Click Next in Initial Funding Details screen to proceed with next data segment, after
successfully capturing the data.
The Summary screen is displayed.
Figure 32: Summary
Each of these summary tiles are clickable and the user will have the option to view all the
details captured under the given data segment. For more information on summary tiles, refer
to Table 17: Summary - Field Description.
Table 17: Summary - Field Description
Data Segment Description
Account Details Displays the account details.
Initial Funding Details Displays the initial funding details
Back Click Back to navigate to the previous data segment
within a stage.
Next Click Next to navigate to the next data segment, after
successfully capturing the data.
Retail Term Deposits Origination User Guide
67
Copyright @ 2007, 2020
All Rights Reserved
Data Segment Description
System will validate for all mandatory data segments
and data fields. If mandatory details are not provided,
system displays an error message for the user to take
action.
User will not be able to proceed to next data segment,
without capturing the mandatory data.
NOTE: Next is deactivated in the Summary screen as
the capture of data across all the data segments
in this stage are completed.
Save & Close Click Save & Close to save the data captured. Save &
Close will be enabled only if, all the mandatory fields
are captured. This task will be available in the My Task
list for the user to continue later.
Submit Click Submit to submit the application. System triggers
the business validation to ensure the application is
entitled for submission to the next stage.
Cancel Click Cancel to close the application without saving.

Retail Term Deposits Origination User Guide
68
Copyright @ 2007, 2020
All Rights Reserved
2. Click Submit to reach the OUTCOME, where the overrides, checklist and documents for this
stage can be validated or verified.
The Overrides screen is displayed.
Figure 33: Overrides
Overrides are basically warnings that are raised during the business validations. User has to
accept the overrides to proceed further. Alternatively, user can go back and correct the data
to make ensure overrides do not arise.
Retail Term Deposits Origination User Guide
69
Copyright @ 2007, 2020
All Rights Reserved
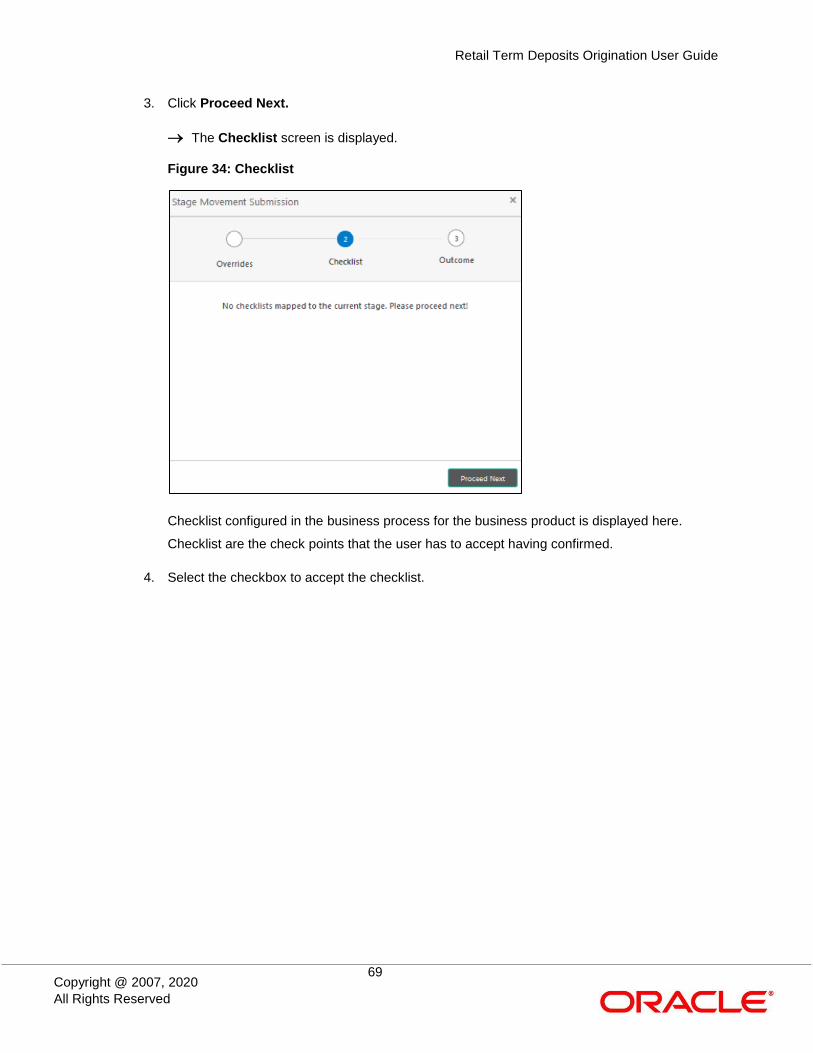
3. Click Proceed Next.
The Checklist screen is displayed.
Figure 34: Checklist
Checklist configured in the business process for the business product is displayed here.
Checklist are the check points that the user has to accept having confirmed.
4. Select the checkbox to accept the checklist.
Retail Term Deposits Origination User Guide
70
Copyright @ 2007, 2020
All Rights Reserved
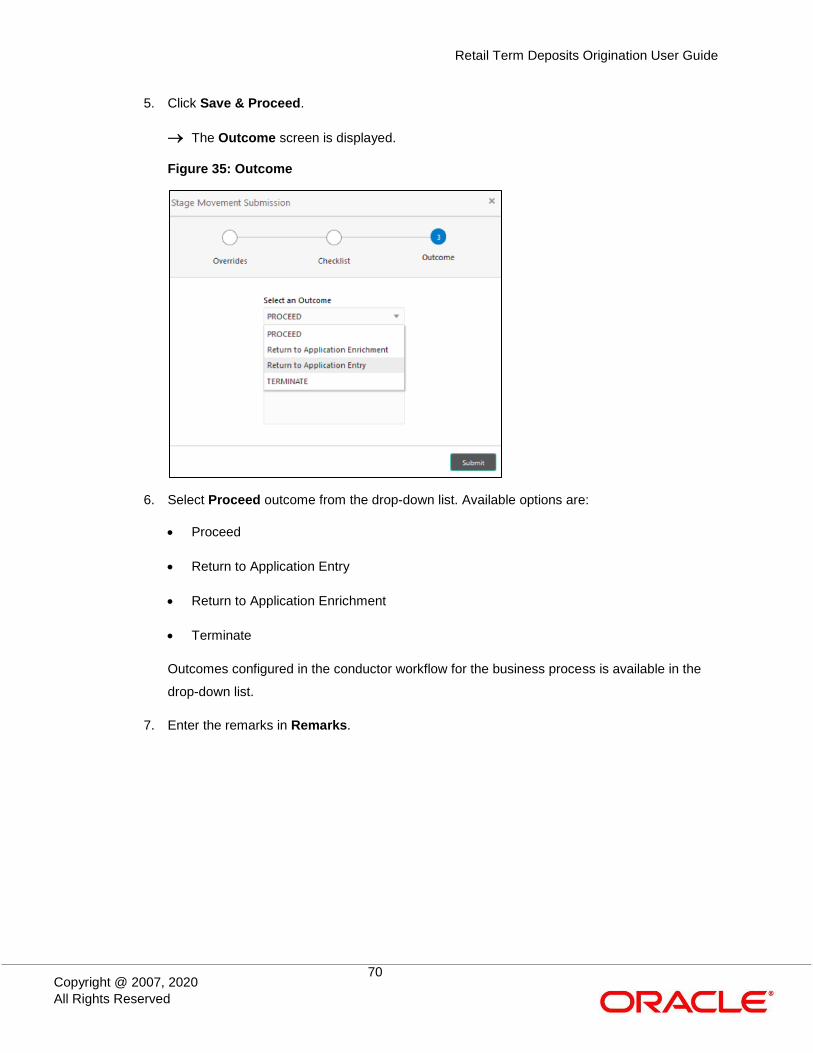
5. Click Save & Proceed.
The Outcome screen is displayed.
Figure 35: Outcome
6. Select Proceed outcome from the drop-down list. Available options are:
Proceed
Return to Application Entry
Return to Application Enrichment
Terminate
Outcomes configured in the conductor workflow for the business process is available in the
drop-down list.
7. Enter the remarks in Remarks.

Retail Term Deposits Origination User Guide
71
Copyright @ 2007, 2020
All Rights Reserved
8. Click Submit.
The Confirmation screen is displayed.
Figure 36: Confirmation
On successful submission the above pop-up appears and displays the next stage in which
the application has moved. Application Reference Number and the Process Reference
Number is also displayed. Click on ‘Close’ to close the pop-up screen.
9. Click Go to Free Task.
The Free Tasks screen is displayed.
Figure 37: Free Tasks
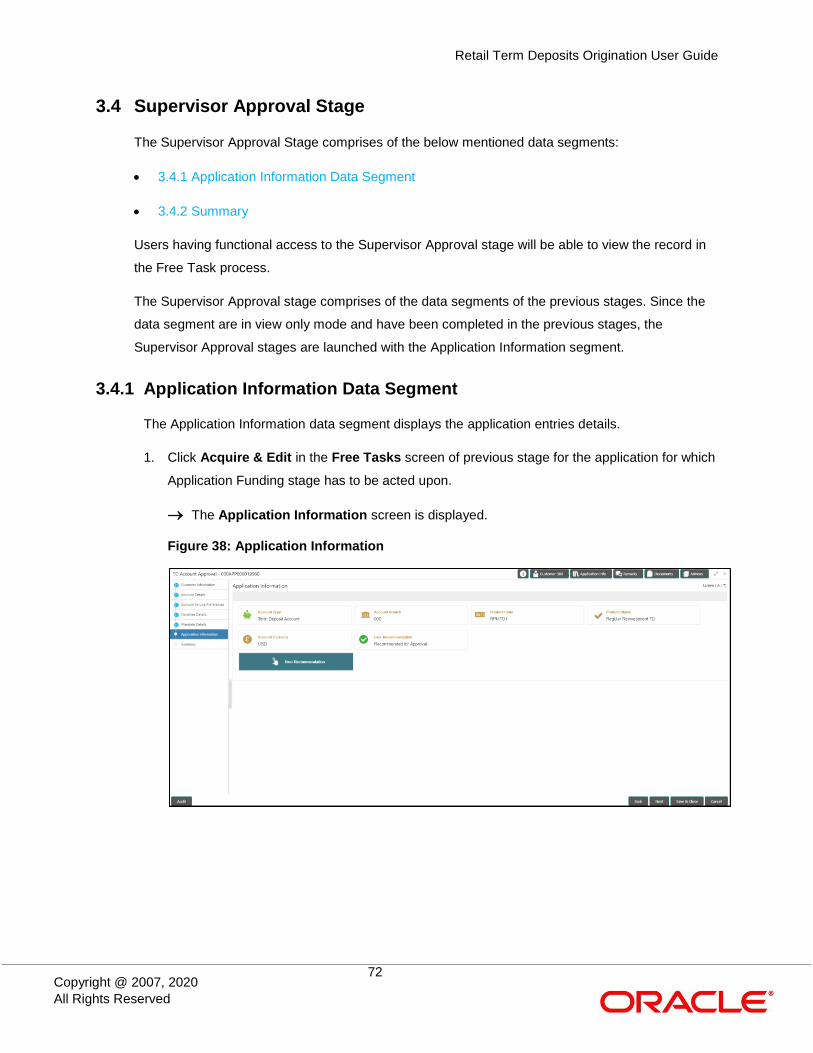
Retail Term Deposits Origination User Guide
72
Copyright @ 2007, 2020
All Rights Reserved
3.4 Supervisor Approval Stage
The Supervisor Approval Stage comprises of the below mentioned data segments:
3.4.1 Application Information Data Segment
3.4.2 Summary
Users having functional access to the Supervisor Approval stage will be able to view the record in
the Free Task process.
The Supervisor Approval stage comprises of the data segments of the previous stages. Since the
data segment are in view only mode and have been completed in the previous stages, the
Supervisor Approval stages are launched with the Application Information segment.
3.4.1 Application Information Data Segment
The Application Information data segment displays the application entries details.
1. Click Acquire & Edit in the Free Tasks screen of previous stage for the application for which
Application Funding stage has to be acted upon.
The Application Information screen is displayed.
Figure 38: Application Information

Retail Term Deposits Origination User Guide
73
Copyright @ 2007, 2020
All Rights Reserved
2. Provide the details in the relevant data fields. Mandatory data fields are indicated accordingly.
For more information on fields, refer to Table 18: Application Information – Field Description.
Table 18: Application Information – Field Description
Field Description
Account Type Displays the account type.
Account Branch Displays the account branch.
Product Code Displays the product code.
Product Name Displays the product name.
Account Currency Displays the account currency.
User Recommendation Select the user recommendation. Available
options are:
Recommended for Approval
Recommended for Reject
Back Click Back to navigate to the previous data
segment within a stage.
Next Click Next to navigate to the next data segment,
after successfully capturing the data.
System will validate for all mandatory data
segments and data fields. If mandatory details
are not provided, system displays an error
message for the user to take action.
User will not be able to proceed to next data
segment, without capturing the mandatory data.
Save & Close Click Save & Close to save the data captured.
Save & Close will be enabled only if, all the
mandatory fields are captured. This task will be
available in the My Task list for the user to
continue later.
Retail Term Deposits Origination User Guide
74
Copyright @ 2007, 2020
All Rights Reserved
Field Description
Cancel Click Cancel to close the application without
saving.

Retail Term Deposits Origination User Guide
75
Copyright @ 2007, 2020
All Rights Reserved
3.4.2 Summary
The Summary displays the tiles for all the data segments of the Term Deposit Origination
Process. The tiles displays the important details captured in the specified data segment. It further
allows to click on the specific tile to view the data segment and the details captured. You can
additionally click on the data segment from the train on the left hand side to view the details of the
data segment.
1. Click Next in Application Information screen to proceed with next data segment, after
successfully capturing the data.
The Summary screen is displayed.
Figure 39: Summary
Each of these summary tiles are clickable and the user will have the option to view all the
details captured under the given data segment. For more information on summary tiles, refer
to Table 19: Summary – Field Description.
Table 19: Summary – Field Description
Data Segment Description
Customer Information Displays the customer information details.
Account Details Displays the account details.
Account Service Preferences Displays the account service preferences details.
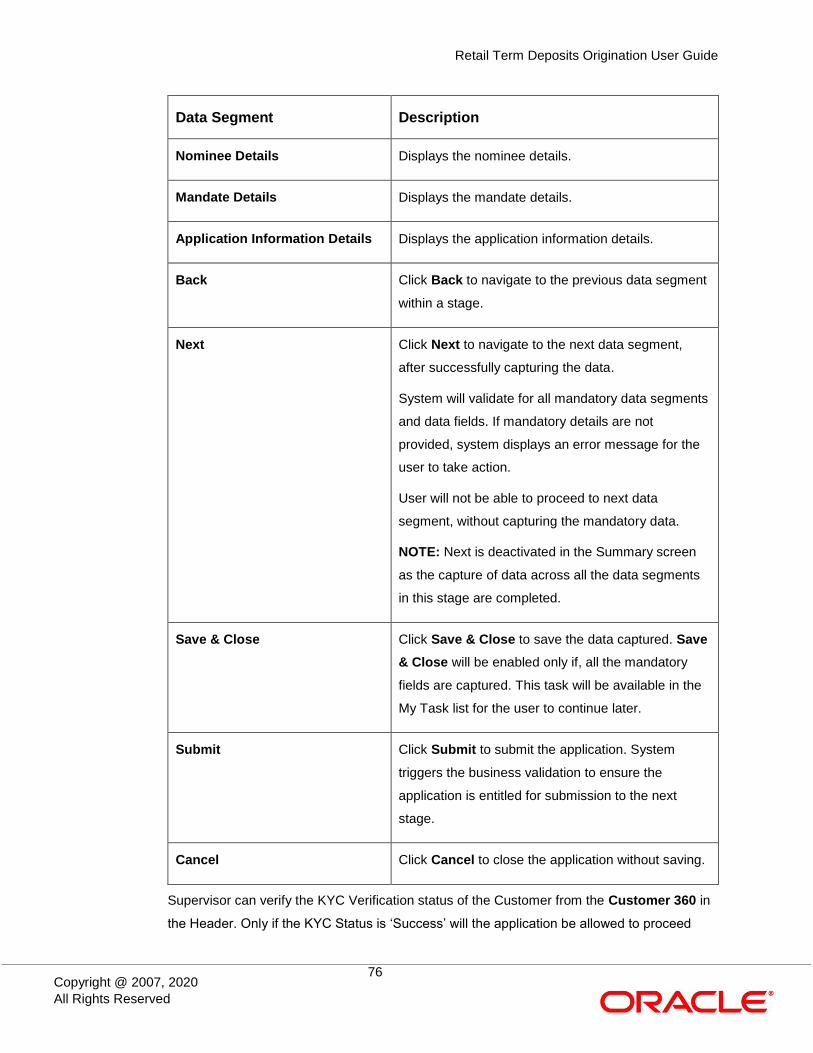
Retail Term Deposits Origination User Guide
76
Copyright @ 2007, 2020
All Rights Reserved
Data Segment Description
Nominee Details Displays the nominee details.
Mandate Details Displays the mandate details.
Application Information Details Displays the application information details.
Back Click Back to navigate to the previous data segment
within a stage.
Next Click Next to navigate to the next data segment,
after successfully capturing the data.
System will validate for all mandatory data segments
and data fields. If mandatory details are not
provided, system displays an error message for the
user to take action.
User will not be able to proceed to next data
segment, without capturing the mandatory data.
NOTE: Next is deactivated in the Summary screen
as the capture of data across all the data segments
in this stage are completed.
Save & Close Click Save & Close to save the data captured. Save
& Close will be enabled only if, all the mandatory
fields are captured. This task will be available in the
My Task list for the user to continue later.
Submit Click Submit to submit the application. System
triggers the business validation to ensure the
application is entitled for submission to the next
stage.
Cancel Click Cancel to close the application without saving.
Supervisor can verify the KYC Verification status of the Customer from the Customer 360 in
the Header. Only if the KYC Status is ‘Success’ will the application be allowed to proceed
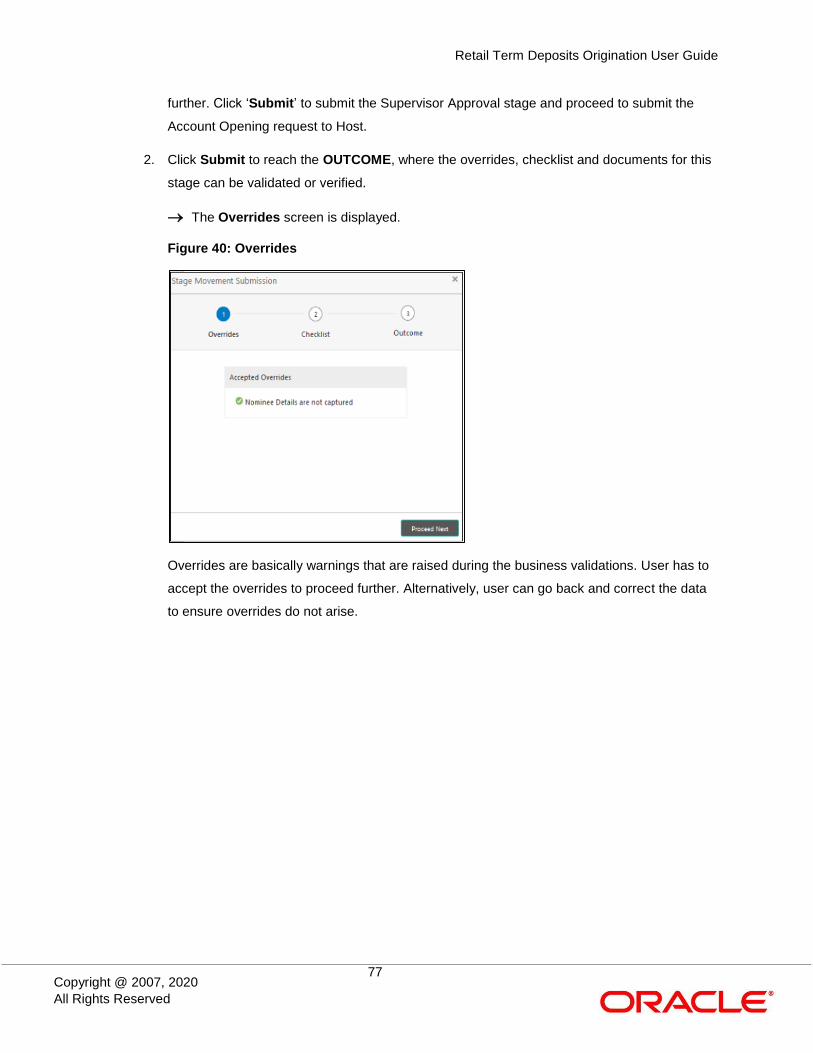
Retail Term Deposits Origination User Guide
77
Copyright @ 2007, 2020
All Rights Reserved
further. Click ‘Submit’ to submit the Supervisor Approval stage and proceed to submit the
Account Opening request to Host.
2. Click Submit to reach the OUTCOME, where the overrides, checklist and documents for this
stage can be validated or verified.
The Overrides screen is displayed.
Figure 40: Overrides
Overrides are basically warnings that are raised during the business validations. User has to
accept the overrides to proceed further. Alternatively, user can go back and correct the data
to ensure overrides do not arise.
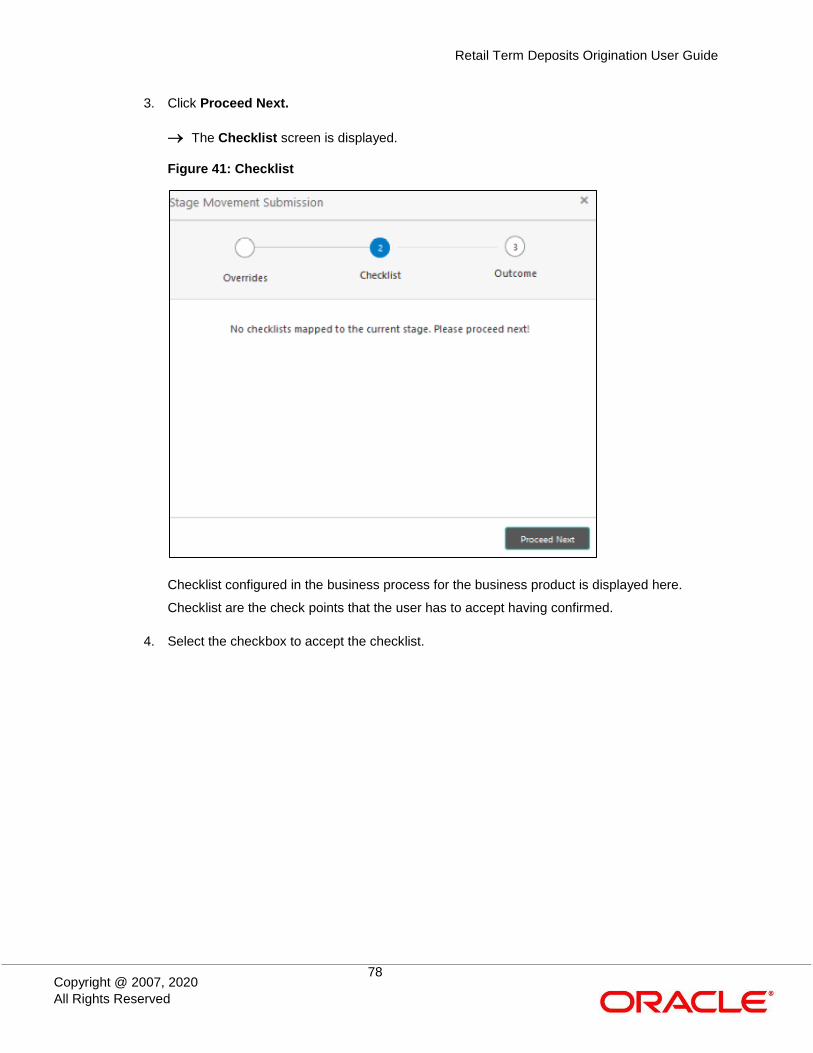
Retail Term Deposits Origination User Guide
78
Copyright @ 2007, 2020
All Rights Reserved
3. Click Proceed Next.
The Checklist screen is displayed.
Figure 41: Checklist
Checklist configured in the business process for the business product is displayed here.
Checklist are the check points that the user has to accept having confirmed.
4. Select the checkbox to accept the checklist.

Retail Term Deposits Origination User Guide
79
Copyright @ 2007, 2020
All Rights Reserved
5. Click Save & Proceed.
The Outcome screen is displayed.
Figure 42: Outcome
6. Select Proceed outcome from the drop-down list. Available options are:
Proceed
Return to Initial Funding
Return to Application Enrichment
Return to Account Entry
Terminate
Outcomes configured in the conductor workflow for the business process is available in the
drop-down list.
7. Enter the remarks in Remarks.

Retail Term Deposits Origination User Guide
80
Copyright @ 2007, 2020
All Rights Reserved
8. Click Submit.
The Confirmation screen is displayed.
Figure 43: Confirmation
On successful submission the above pop-up appears and displays the next stage in which
the application has moved. Application Reference Number and the Process Reference
Number is also displayed. Click on ‘Close’ to close the pop-up screen. Alternatively click on
‘Go to Free Task’ to launch the Free Task menu. If you have access to the next stage, you
would be able to view the Application number and take action on it.
9. Click Go to Free Task.
The Free Tasks screen is displayed.
Figure 44: Free Tasks
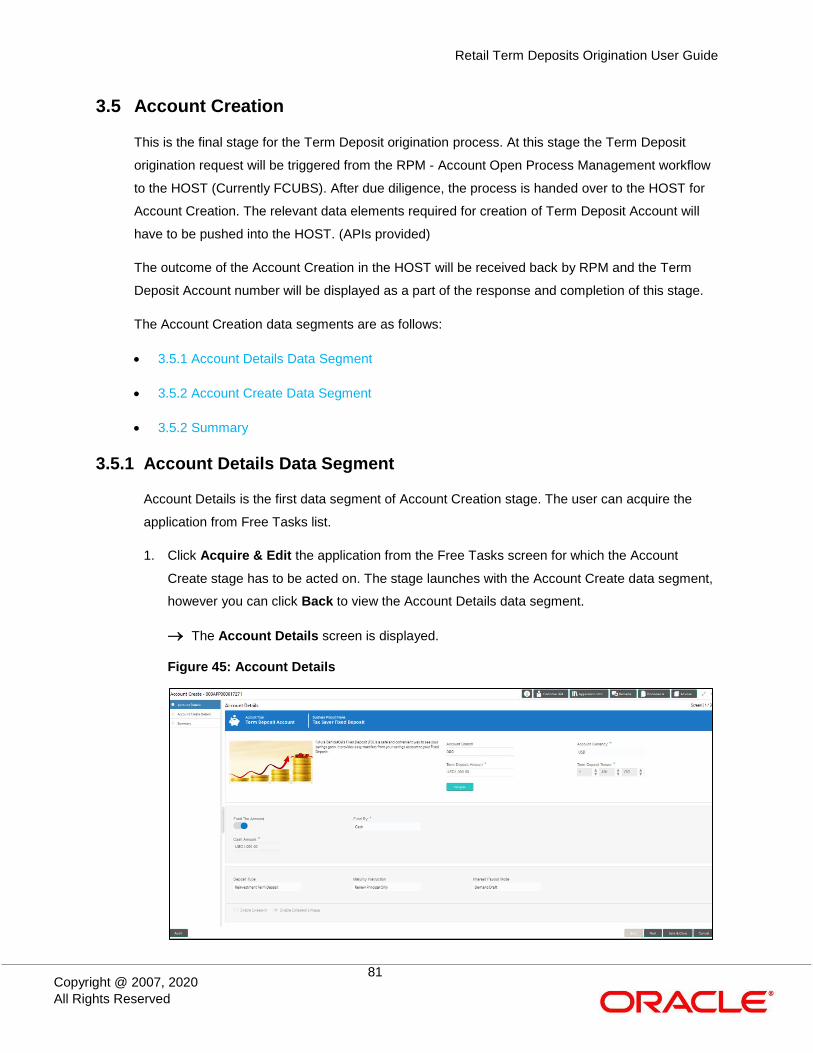
Retail Term Deposits Origination User Guide
81
Copyright @ 2007, 2020
All Rights Reserved
3.5 Account Creation
This is the final stage for the Term Deposit origination process. At this stage the Term Deposit
origination request will be triggered from the RPM - Account Open Process Management workflow
to the HOST (Currently FCUBS). After due diligence, the process is handed over to the HOST for
Account Creation. The relevant data elements required for creation of Term Deposit Account will
have to be pushed into the HOST. (APIs provided)
The outcome of the Account Creation in the HOST will be received back by RPM and the Term
Deposit Account number will be displayed as a part of the response and completion of this stage.
The Account Creation data segments are as follows:
3.5.1 Account Details Data Segment
3.5.2 Account Create Data Segment
3.5.2 Summary
3.5.1 Account Details Data Segment
Account Details is the first data segment of Account Creation stage. The user can acquire the
application from Free Tasks list.
1. Click Acquire & Edit the application from the Free Tasks screen for which the Account
Create stage has to be acted on. The stage launches with the Account Create data segment,
however you can click Back to view the Account Details data segment.
The Account Details screen is displayed.
Figure 45: Account Details
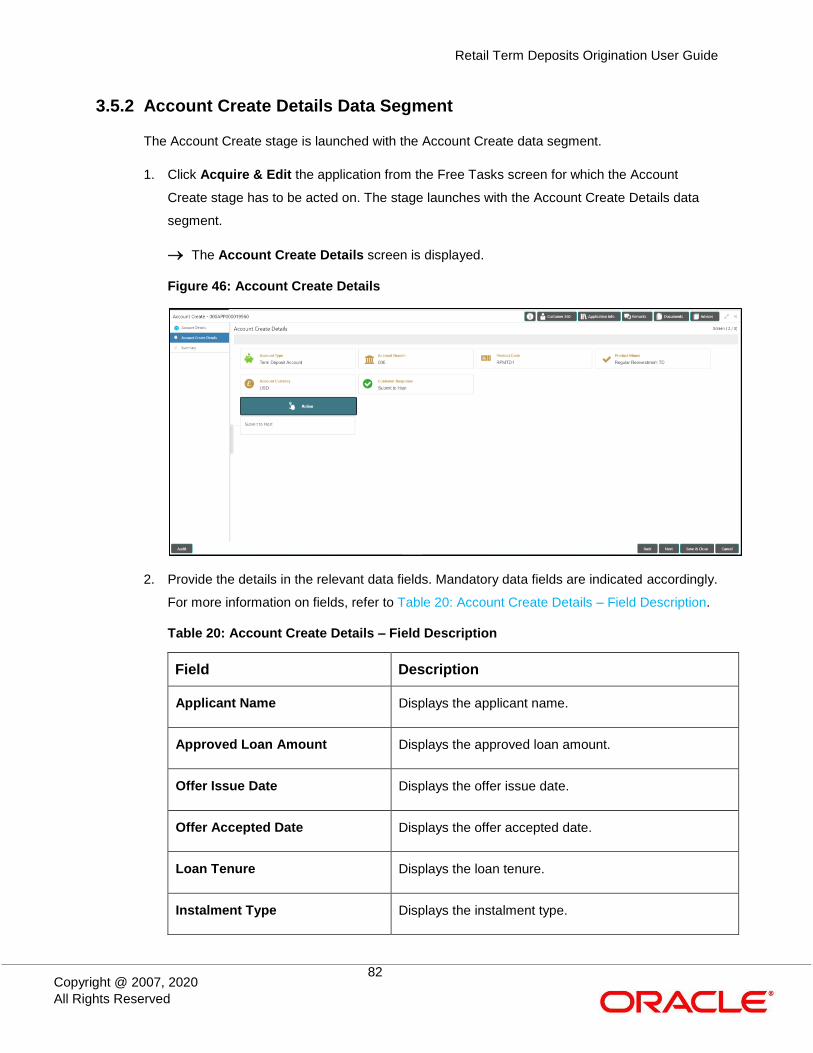
Retail Term Deposits Origination User Guide
82
Copyright @ 2007, 2020
All Rights Reserved
3.5.2 Account Create Details Data Segment
The Account Create stage is launched with the Account Create data segment.
1. Click Acquire & Edit the application from the Free Tasks screen for which the Account
Create stage has to be acted on. The stage launches with the Account Create Details data
segment.
The Account Create Details screen is displayed.
Figure 46: Account Create Details
2. Provide the details in the relevant data fields. Mandatory data fields are indicated accordingly.
For more information on fields, refer to Table 20: Account Create Details – Field Description.
Table 20: Account Create Details – Field Description
Field Description
Applicant Name Displays the applicant name.
Approved Loan Amount Displays the approved loan amount.
Offer Issue Date Displays the offer issue date.
Offer Accepted Date Displays the offer accepted date.
Loan Tenure Displays the loan tenure.
Instalment Type Displays the instalment type.

Retail Term Deposits Origination User Guide
83
Copyright @ 2007, 2020
All Rights Reserved
Field Description
Instalment Frequency Displays the instalment frequency.
Rate of Interest Displays the rate of interest.
Principal Displays the principal amount.
Interest Displays the interest amount.
Instalment Amount Displays the instalment amount.
Charges Displays the charges.
Disbursement Account Displays the disbursement account.
Repayment Account Displays the repayment account.
Back Click Back to navigate to the previous data segment
within a stage.
Next Click Next to navigate to the next data segment, after
successfully capturing the data.
System will validate for all mandatory data segments
and data fields. If mandatory details are not provided,
system displays an error message for the user to take
action.
User will not be able to proceed to next data segment,
without capturing the mandatory data.
Save & Close Click Save & Close to save the data captured. Save &
Close will be enabled only if, all the mandatory fields
are captured. This task will be available in the My Task
list for the user to continue later.
Cancel Click Cancel to close the application without saving..
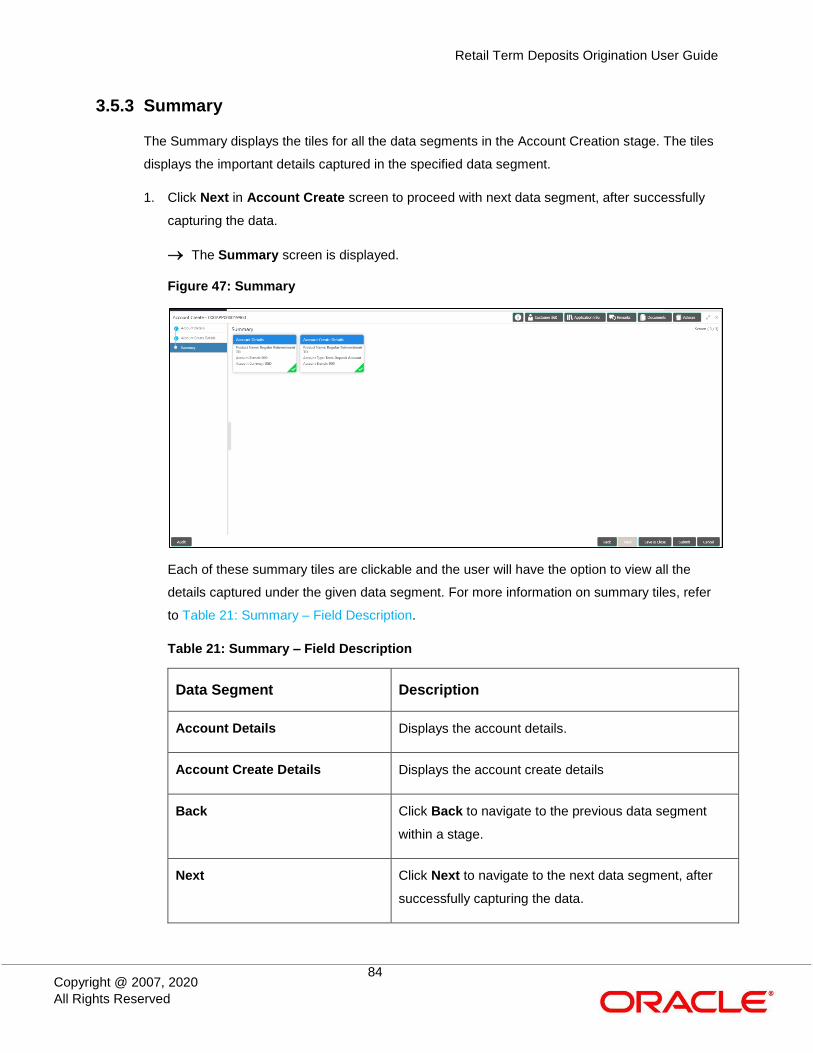
Retail Term Deposits Origination User Guide
84
Copyright @ 2007, 2020
All Rights Reserved
3.5.3 Summary
The Summary displays the tiles for all the data segments in the Account Creation stage. The tiles
displays the important details captured in the specified data segment.
1. Click Next in Account Create screen to proceed with next data segment, after successfully
capturing the data.
The Summary screen is displayed.
Figure 47: Summary
Each of these summary tiles are clickable and the user will have the option to view all the
details captured under the given data segment. For more information on summary tiles, refer
to Table 21: Summary – Field Description.
Table 21: Summary – Field Description
Data Segment Description
Account Details Displays the account details.
Account Create Details Displays the account create details
Back Click Back to navigate to the previous data segment
within a stage.
Next Click Next to navigate to the next data segment, after
successfully capturing the data.

Retail Term Deposits Origination User Guide
85
Copyright @ 2007, 2020
All Rights Reserved
Data Segment Description
System will validate for all mandatory data segments
and data fields. If mandatory details are not provided,
system displays an error message for the user to take
action.
User will not be able to proceed to next data segment,
without capturing the mandatory data.
NOTE: Next is deactivated in the Summary screen as
the capture of data across all the data segments
in this stage are completed.
Save & Close Click Save & Close to save the data captured. Save &
Close will be enabled only if, all the mandatory fields
are captured. This task will be available in the My Task
list for the user to continue later.
Submit Click Submit to submit the application. System triggers
the business validation to ensure the application is
entitled for submission to the next stage.
Cancel Click Cancel to close the application without saving.

Retail Term Deposits Origination User Guide
86
Copyright @ 2007, 2020
All Rights Reserved
2. Click Submit to reach the OUTCOME, where the overrides, checklist and documents for this
stage can be validated or verified.
The Overrides screen is displayed.
Figure 48: Overrides
Overrides are basically warnings that are raised during the business validations. User has to
accept the overrides to proceed further. Alternatively, user can go back and correct the data
to ensure overrides do not arise.

Retail Term Deposits Origination User Guide
87
Copyright @ 2007, 2020
All Rights Reserved
3. Click Proceed Next.
The Checklist screen is displayed.
Figure 49: Checklist
Checklist configured in the business process for the business product is displayed here.
Checklist are the check points that the user has to accept having confirmed.
4. Select the checkbox to accept the checklist.

Retail Term Deposits Origination User Guide
88
Copyright @ 2007, 2020
All Rights Reserved
5. Click Save & Proceed.
The Outcome screen is displayed.
Figure 50: Outcome
6. Select Proceed outcome from the drop-down list. Available options are:
Proceed
Return to Initial Funding
Return to Application Enrichment
Return to Application Entry
Terminate
Outcomes configured in the conductor workflow for the business process is available in the
drop-down list.
7. Enter the remarks in Remarks.

Retail Term Deposits Origination User Guide
89
Copyright @ 2007, 2020
All Rights Reserved
8. Click Submit.
The Confirmation screen is displayed.
Figure 51: Confirmation
Reject Application will terminate the application and no further action will be allowed on this
reference number.
After the Host creates the Term Deposit Account successfully, the response is sent back to the
RPM with the Term Deposit Account Number.
The details of all the applications which have logically completed all their stage movements,
(Rejected / Account Created) will be made available in Completed tasks for query purpose only.

Retail Term Deposits Origination User Guide
90
Copyright @ 2007, 2020
All Rights Reserved
4 Functional Activity Codes Glossary
1. Account Funding Stage (pg. 58) - RPM_FA_TDORG_ACCRT
2. Account Funding Stage (pg. 58) - RPM_FA_TDORG_FUND
3. Application Enrichment Stage (pg. 46) - RPM_FA_TDORG_ENRCH
4. Application Entry Stage (pg. 7) - RPM_FA_TDORG_APPEN
5. Supervisor Approval Stage (pg. 72) - RPM_FA_TDORG_APPRV