Residential Construction Technology 2201 Curriculum Guide · Residential Construction Technology 1...
185
Residential Construction Technology 2201 Curriculum Guide (draft) September 2009 Government of Newfoundland and Labrador Department of Education
Transcript of Residential Construction Technology 2201 Curriculum Guide · Residential Construction Technology 1...
ResidentialConstructionTechnology2201
Curriculum Guide (draft)September 2009
Government of Newfoundland and Labrador
Department of Education

Residential Construction Technology i
Table of Contents
Table of Contents
Acknowledgments ............................................................................................................... iii
Section I: Program Overview and Rationale ................................................................ 1Background ...................................................................................................................................................1Purpose of Curriculum Guide ...................................................................................................................2Context for Teaching and Learning ..........................................................................................................2Literacy Through Technology Education ................................................................................................3Effective Assessment and Evaluation Practices ......................................................................................5
Section II: Program Design and Components ............................................................. 7Program Components .................................................................................................................................7
Outcomes Structure ................................................................................................................................7Essential Graduation Learnings .................................................................................................................8General Curriculum Outcomes..................................................................................................................9Key Stage Curriculum Outcomes ..............................................................................................................9
Section III: Specifi c Curriculum Outcomes ............................................................... 13Overview .....................................................................................................................................................13The 4-column layout ..................................................................................................................................15
Unit 1 - Skilled Trades and Apprenticeship ........................................................17Overview .................................................................................................................................................17
Purpose ...........................................................................................................................17Profi le ..............................................................................................................................17Implementation...............................................................................................................17
Evaluation ...............................................................................................................................................18Suggested Timeline ...............................................................................................................................18Outcomes and Strategies ......................................................................................................................19
Topic 1: Skilled Trades and the Apprenticship Program ...........................................................20Topic 2: The Design Process .........................................................................................................38
Unit 2: Courses Common to all Trades .........................................................................43Overview .................................................................................................................................................43
Purpose ...........................................................................................................................43Profi le ..............................................................................................................................43Implementation...............................................................................................................43
Evaluation ...............................................................................................................................................44

Residential Construction Technologyii
Table of Contents
Suggested Timeline ...............................................................................................................................44Outcomes and Strategies ......................................................................................................................45
Topic 1: Blueprint Reading and Interpretation ................................................................46Topic 2: Occupational Health and Safety (OH&S) .........................................................70Topic 3: Fabrication Safety ..............................................................................................82
Unit 3: Practical Residential Construction ...................................................................99Overview .................................................................................................................................................99
Purpose ...........................................................................................................................99Profi le ..............................................................................................................................99Implementation.............................................................................................................100
Evaluation ............................................................................................................................................ 100Suggested Timeline ............................................................................................................................ 100Outcomes and Strategies ................................................................................................................... 101
Topic 1: Window and Door Framing ............................................................................102Topic 2: Window Installation with external trim ...........................................................110Topic 3: Door Installation with external trim ................................................................118Topic 4: Exterior Cladding (wood) with VBL ................................................................126Topic 5: Exterior Cladding (vinyl) with VBL .................................................................132Topic 6: Roof Coverings ................................................................................................140Topic 7: Stair Construction ...........................................................................................146Topic 8: Project Management ........................................................................................152Topic 9: Flooring ...........................................................................................................156Topic 10: Heating and Ventilation (Ductwork) .............................................................164Topic 11: “Smart House” Wiring ..................................................................................176

Residential Construction Technology iii
Acknowledgements
AcknowledgmentsThe Department of Education for Newfoundland and Labrador gratefully acknowledges the contribution of the following mem-bers of the provincial Skilled Trades and Technology Working Group, in the completion of this guide:
Randy AshProgram Development Offi cer Division of Institutional and Industrial Education Department of Education
John Barron Program Development Specialist Division of Program Development Department of Education
Tony HillierProgram Development Specialist Division of Program Development Department of Education
Bob JohnsonTest Development ConsultantDivision of Evaluation, Testing and Certifi cationDepartment of Education
Craig White Program Development Specialist Division of Program Development Department of Education
Ron Smith Program Development SpecialistEastern School Distict
Gonzo Bennett TeacherMount Pearl Senior High School, Mount Pearl
Rod Lundrigan Teacher O’Donel High School, Mount Pearl
Edward ReddickTeacherHoly Heart High School, St. John’s

Residential Construction Technology iii
Acknowledgements

Residential Construction Technology 1
Section I: Program Overview and Rationale
Section 1
Program Overview and Rationale
Background Residential Construction Technology 2201 is based conceptu-ally, philosophically and practically on the Foundation document for Atlantic Canada Technology Education Curriculum (2001). The teacher is directed to the foundation document for specifi c information that forms the basis for this and other technol-ogy education curricula in the province of Newfoundland and Labrador.
This two-term course is a continuation of the material covered in Skilled Trades 1201, and presents advanced topics new to the curriculum. This course is the second of three that are designed specifi cally to address the skilled trades, and continues with the instruction model and structure introduced in the Skilled Trades 1201 teaching guide.
The philosophy behind the Futures in Skilled Trades and Tech-nology program is to instill in students knowledge of the career paths they may choose in this growth area. All of the courses in this series deal with the topics of apprenticeship, career opportu-nities and the basic skills of the trades areas encompassed. This is done through real world work experiences in the fabrication lab such that a signifi cant amount of the instruction in this course and its predecessor involve hands-on activities.
The activities in Residential Construction Technology 2201, take on a more advanced aspect than those found in Skilled Trades 1201, and continue with the theme of house construc-tion. Along with the proposed energy and power course in level III, these courses will form the basis of the certifi cate in skilled trades.

Residential Construction Technology2
Section I: Program Overview and Rationale
Purpose of Curriculum Guide
The purpose of this curriculum guide is to provide teachers with a clear delineation of student expectations in the course. The guide includes the specifi c curriculum outcomes, suggested teaching and learning strategies, suggested assessment and evalu-ation strategies and support resources.
As stated in the Foundation document for Atlantic Canada Tech-nology Education Curriculum (2001), the technology education curriculum in Atlantic Canada adheres to certain principles that guide decisions shaping the continuous improvement of teach-ing and learning including the design and implementation of the curriculum. These include:
• Technology education values and embraces the strategic links between applied learning and integrated learning.
• Technology education values and embraces meaningful con-nections among diverse areas of study.
• Technology education incorporates each individual’s prior knowledge, skills, and attitudes in the design of authentic learning experiences.
• Technology education curriculum in Atlantic Canada ad-heres to strategies that emphasize the unifying concepts of related disciplines, particularly science.
• Technology education values an environment with the learner as its pivotal force.
• Continuous inquiry is essential to technology education.
• The success of technology education initiatives is a function of informed implementation and improvement practices.
• Technology education implies strategic and distinct pre-serv-ice and in-service demands on teacher education.
Context forLearning
Residential Construction Technology 3
Section I: Program Overview and Rationale
LiteracyThroughTechnology Education
Residential Construction Technology 2201 encourages student collaboration in solving technical problems and refl ects true industry practice through the use of a problem-based learning approach. Continuous inquiry, improvement and learning are fundamental to this approach and the fabrication lab environ-ment provides authentic activities where students drive the learning.
As noted in the Foundation document for Atlantic Canada Tech-nology Education Curriculum (2001), in order to acquire tech-nological “literacy”, students must be given the opportunity to actively participate in the solution of technical problems. In sup-port of this, it is recommended that delivery of Residential Con-struction Technology 2201, be focused on the shop/lab setting with intermittent classroom instruction as required. The course is designed for 80% lab and 20% class delivery. This is consis-tent with the 80% fi eld work experience and 20% classroom instruction requirements for apprentices to become eligible for journeyperson certifi cation. This mode of instructional delivery provides students with opportunities to:
• identify, assess, and make decisions about their use of tech-nological resources;
• assess their technological literacy/capability in the context of specifi c situations;
• develop personal action plans to acquire specifi c technical skills and capabilities;
• safely use a wide variety of technological systems, tools, and other resources;
• identify and address technological issues and situations important to them;
• design, develop, and articulate technological solutions to a wide range of problems;
• articulate ideas and take intellectual risks;
• refl ect on and evaluate their learning;
• refl ect on, evaluate, and express ideas and opinions on the relationship between technology and education and the role of technology education; and
• assess technology as a force for change in a variety of work places, jobs, occupations, and careers.

Residential Construction Technology4
Section I: Program Overview and Rationale
The structure of eleven distinct modules of hands-on activities creates a centre-based instructional model that allows students to drive learning while the teacher’s role becomes that of facilitator. Students themselves can take that role on in the form of project management and not only aid in their own learning but that of their classmates as well.
In the Foundation document for Atlantic Canada Technology Education Curriculum (2001), it is suggested that in a learning community characterized by mutual trust, acceptance, and re-spect, student diversity is both recognized and valued. Educators should ensure that classroom practices and resources positively and accurately refl ect diverse perspectives and reject prejudical attitudes and discriminatory behaviours. It is also suggested in the document that if curriculum is to contribute to the achieve-ment of equity and equality in education, it must:
• refl ect students’ abilities, needs, interests, and learning styles;
• expect that all students will be successful regardless of gender, racial and ethno cultural background, socio-economic status, lifestyle, or ability; and
• enable students to value individual variation among members of their classroom community.
Residential Construction Technology 2201 considers a wide range of learners and learning styles through a problem-based learning approach that encourages experiential learning. This student-centered learning model emphasizes a group approach to problem-solving that requires students to take ownership of their own learning. As suggested in the Foundation document for Atlantic Canada Technology Education Curriculum (2001), taking ownership and responsibility for their own learning is a signifi -cant element in the growth of a student’s technological capabil-ity.

Residential Construction Technology 5
Section I: Program Overview and Rationale
Effective Assessmentand Evaluation Practices
The Atlantic Foundation document on Technology Education, recommends that, in planning assessments, teachers should use a broad range of strategies in an appropriate balance to give students multiple opportunities to demonstrate their knowledge, skills and attitudes. The document identifi es many types of as-sessment strategies including:
• formal and informal observations;
• work samples;
• anecdotal records;
• conferences;
• teacher-made and other tests;
• portfolios;
• learning journals;
• questioning;
• performance assessment;
• peer- and self-assessment;
• available information; and
• using a high level of professional judgment in making decisions based upon information.
Similarly, the document suggests that evaluation involves teach-ers and others in analyzing and refl ecting upon information about student learning gathered in a variety of ways. The process requires:
• developing clear criteria and guidelines for assigning marks or grades to student work;
• synthesizing information from multiple sources;
• weighing and balancing all available information; and
• using a high level of professional judgment in making decisions based upon information.
Assessment and evaluation in Residential Construction Tech-nology 2201 must consider both the problem-based learning approach used and the required General Curriculum Outcomes (GCOs) outlined in the Foundation document for Atlantic Can-ada Technology Education Curriculum (2001). The assessment strategies recommended in Section III of this guide refl ect these requirements.

Residential Construction Technology6
Section I: Program Overview and Rationale

Residential Construction Technology 7
Section II: Program Design and Components
Section II
Program Design and Components
Program Components
Residential Construction Technology 2201 is the second of three Futures in Skilled Trades and Technology courses that in-troduce students to a wide variety of trades, technologies and problem-solving strategies that refl ect industry practice. This course is preceded by Skilled Trades 1201. Although not pre-requisite, this course also prepares students for further study in related courses such as Energy and Power 3201.
The course curriculum is structured to address outcomes as sug-gested in the Foundation document for Atlantic Canada Tech-nology Education Curriculum (2001). These include Essential Graduation Learnings (EGLs), General Curriculum Outcomes (GCOs), Key Stage Curriculum Outcomes (KSCOs) and Spe-cifi c Curriculum Outcomes (SCOs).
EGLs are statements describing the knowledge, skills and atti-tudes expected of all students who graduate from high school.
GCOs are statements that identify what students are expected to know and be able to do upon completion of study in a cur-riculum area.
KSCOs provide additional detail for each of the GCOs and provide a means to quickly assess progress in a subject area at the end of a level of schooling. SCOs identify what students are expected to know and be able to do at a particular grade level.
Outcomes Structure

Residential Construction Technology8
Section II: Program Design and Components
Essential Graduation Learnings
The EGLs specifi ed in the Atlantic Foundation document on Technology Education include:
Aesthetic ExpressionGraduates will be able to respond with critical awareness to vari-ous forms of the arts and be able to express themselves through art.
CitizenshipGraduates will be able to assess social, cultural, economic, and environmental interdependence in a local and global context.
CommunicationGraduates will be able to use listening, viewing, speaking read-ing, and writing modes of language(s) and mathematical and scientifi c concepts and symbols, to think, learn and communi-cate effectively.
Personal DevelopmentGraduates will be able to continue to learn and to pursue an ac-tive, healthy lifestyle.
Problem SolvingGraduates will be able to use strategies and processes needed to solve a wide variety of problems, including those requiring language, and mathematical and scientifi c concepts.
Technological CompetenceGraduates will be able to use a variety of technologies, demon-strate an understanding of technological applications, and apply appropriate technologies for solving problems.
Spiritual and Moral DevelopmentGraduates will be able to demonstrate understanding and ap-preciation for the place of belief systems in shaping the develop-ment of moral values and ethical content.

Residential Construction Technology 9
Section II: Program Design and Components
General Curriculum Outcomes
The GCOs for technology education as defi ned in the Atlantic Foundation document on Technology Education include:
GCO 1: Technological Problem SolvingStudents will be expected to design, develop, evaluate and articu-late technological solutions.
GCO 2: Technological SystemsStudents will be expected to evaluate and manage technological systems.
GCO 3: History and Evolution of TechnologyStudents will be expected to demonstrate an understanding of the history and evolution of technology, and of its social and cultural implications.
GCO 4: Technology and CareersStudents will be expected to demonstrate an understanding of current and evolving careers and of the infl uence of technology on the nature of work.
GCO 5: Technological ResponsibilityStudents will be expected to demonstrate an understanding of the consequences of their technological choices.
The KSCOs for Residential Construction Tecnology 2201 are based on the fi ve previously noted GCO’s and indicate what is expected of students at the end of Level III. By the end of Level III, students will be expected to:
[1.401] articulate problems that may be solved through technological means:
• assess diverse needs and opportunities; and
• construct detailed design briefs that include design criteria and a work schedule.
Key Stage Curriculum OutcomesGCO 1: Technological Problem Solving

Residential Construction Technology10
Section II: Program Design and Components
[1.402] conduct design studies to identify a technological solu-tion to a problem:
• investigate related solutions;
• document a range of options to solve this problem;
• determine and justify the best option;
• determine resource requirements and availability; and
• develop detailed action plans, including technical drawings and sequences of action.
[1.403] develop (prototype, fabricate, make) technological solu-tions to problems:
• match resources and technical processes for specifi c tasks;
• construct and test models and prototypes as needed;
• construct the solution with adherence to the design criteria; and
• document activities, decisions, and milestones.
[1.404] critically evaluate technological solutions and report their fi ndings:
• develop detailed evaluations of both their own and others’ technological solutions, with reference to independently developed criteria;
• employ a continuous assessment methodology with the purpose of continuous improvement of the design; and
• document and report their changes, the rationale for change, and conclusions.
[1.405] communicate ideas and information about technological solutions through appropriate technical means:
• accurately present technical information by using a representative sample of analog and digital tools, including, for example, two- and three-dimensional, computer-assisted drafting and modelling tools; and
• create accurately scaled models and prototypes.

Residential Construction Technology 11
Section II: Program Design and Components
GCO 3: History and Evolution of Technology
[2.401] operate, monitor, and adjust technological systems of increasing complexity
[2.402] manage technological systems of increasing complexity
[2.403] modify programming logic and control systems to opti-mize the behaviour of systems
[2.404] deconstruct complex technological systems into their simpler systems and components
[2.405] troubleshoot and maintain systems
[3.401] evaluate technological systems in the context of conver-gence where one system has multiple functions, or divergence where multiple systems have the same function
[3.402] evaluate the symbiotic roles of technology and science in modern society
[3.403] analyse the symbiotic relationship between technology and education, including factors that infl uence standards for technological literacy and capability, and ways that the commu-nity responds
[3.404] critically evaluate the effects of accelerating rates of tech-nological change on self and society
[3.405] account for effects of cultural diversity on technological solutions:
• critically examine the effects of cultural diversity on market forces and technological products, and vice versa; and
• incorporate knowledge of cultural diversity into development of technological solutions.
GCO 2: Technological Systems

Residential Construction Technology12
Section II: Program Design and Components
GCO 5: Technological Responsibility
[4.401] assess and evaluate employability profi les for a variety of workplaces and careers, and determine the level of technological literacy and capability they would need to achieve for job entry
[4.402] employ design and invention as tools to create entrepre-neurial activity
[4.403] envision their short- and longer-term future and develop a plan for acquiring the technological literacy/capability required to achieve their vision
[5.401] demonstrate responsible leadership in employing legal and ethical rules and principles
[5.402] demonstrate responsible leadership in employing health and safety rules and standards
[5.403] demonstrate responsible leadership in taking proper measures to manage current and future technological risk
GCO 4: Technology and Careers

Residential Construction Technology 13
Section III: Specifi c Curriculum Outcomes
Section III
Specifi c Curriculum Outcomes
Overview The Specifi c Curriculum Outcomes (SCOs) for the Residential Construction Technology Curriculum Guide are derived from Stage 4 (Grade 10-12) of the Key Stage Curriculum Outcomes (KSCOs) outlined in the Foundation document for Atlantic Canada Technology Education Curriculum (2001). The SCOs are organized into three units delivered over two terms:
Unit 1: Skilled Trades and Apprenticeship
Unit 2: Courses Common to all Trades
Unit 3: Practical Residential Construction
The fi rst two units contain most of the classroom-based activi-ties and form the basis of instruction for the remaining unit. This material is important and should be covered before moving into the fi nal unit.
The third unit includes most of the hands-on activities and is designed with a modular approach to instruction. Students will work in groups of two on each of the construction “centres” which will be placed around the fabrication lab. Each of the hands-on activities contains some front matter which can ei-ther be done before or after the activity. In this way the teacher becomes facilitator, or in construction terms “contractor.”
Each unit consists of several topics that address the General Curriculum Outcomes (GCOs) detailed in the Foundation doc-ument for Atlantic Canada Technology Education Curriculum (2001). Units are sequenced to progressively challenge students.
Residential Construction Technology14
Section III: Specifi c Curriculum Outcomes
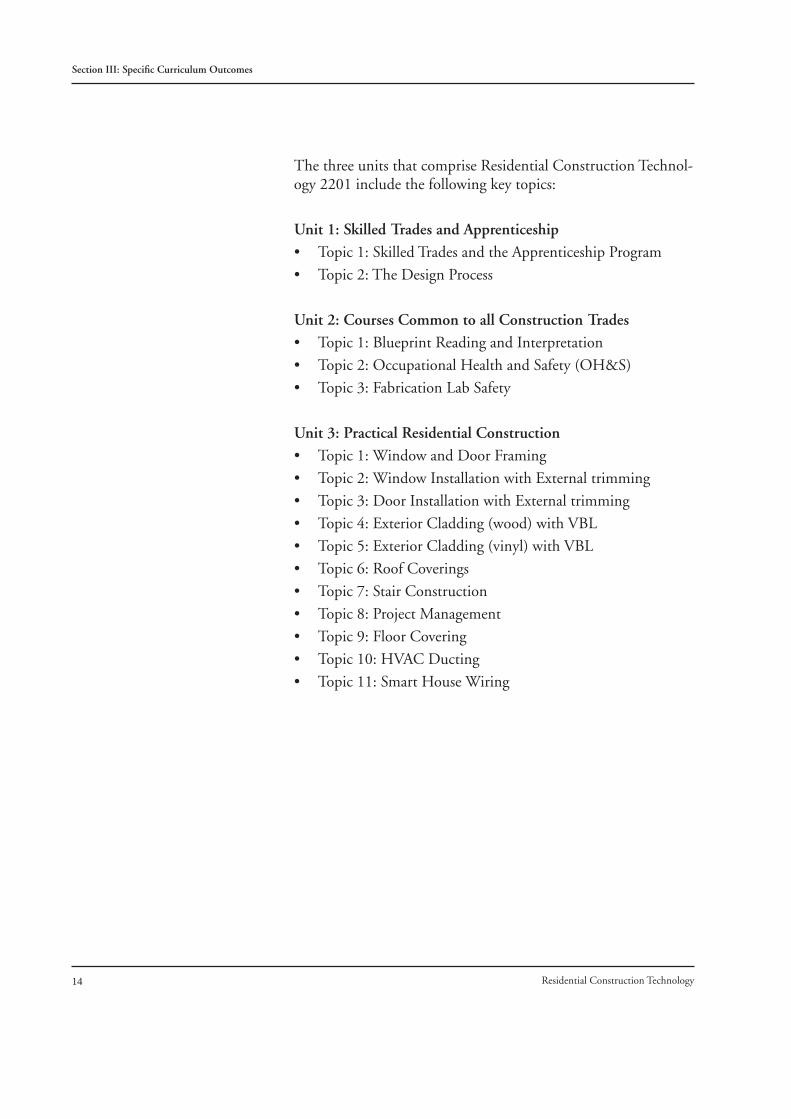
The three units that comprise Residential Construction Technol-ogy 2201 include the following key topics:
Unit 1: Skilled Trades and Apprenticeship• Topic 1: Skilled Trades and the Apprenticeship Program
• Topic 2: The Design Process
Unit 2: Courses Common to all Construction Trades• Topic 1: Blueprint Reading and Interpretation
• Topic 2: Occupational Health and Safety (OH&S)
• Topic 3: Fabrication Lab Safety
Unit 3: Practical Residential Construction• Topic 1: Window and Door Framing
• Topic 2: Window Installation with External trimming
• Topic 3: Door Installation with External trimming
• Topic 4: Exterior Cladding (wood) with VBL
• Topic 5: Exterior Cladding (vinyl) with VBL
• Topic 6: Roof Coverings
• Topic 7: Stair Construction
• Topic 8: Project Management
• Topic 9: Floor Covering
• Topic 10: HVAC Ducting
• Topic 11: Smart House Wiring

Residential Construction Technology 15
Section III: Specifi c Curriculum Outcomes
The 4-column layout in the curriculum guide spans across twopages and presents the necessary information to the teacher todeliver a particular course topic to the student. The 4-columnlayout consists of: • First Column - One or more SCO’s from the course, that
contains a listing of the KSCOs to which it directly relates (the relative KSCOs are included in brackets). The KSCO would be those for the subject area the course fi ts.
• Second Column - Suggested teaching and learning strate-gies are recommendations for implementing the curriculum. This section could include organization and preparation and sample student projects and activities sections.
• Third Column - Suggested assessment and evaluation strate-gies are recommendations for determining student achieve-ment. Suggestions are provided to assist the teacher with the evaluation and assessment of student activity. This column provides additional information that may be of help to the teacher in lesson planning.
• Fourth Column - References to teacher and student texts and other resources are included here.
The teacher is encouraged to expand and elaborate upon the information presented in columns II, III and IV, as the infor-mation provided in those columns is meant to be suggestions. Other teaching resources, which accompany this curriculum guide, provide additional material and resource support to the teacher. The concepts, strategies, and resources identifi ed in the curriculum guide are elaborated on in these resource.
The 4-columnLayout

Residential Construction Technology16
Section III: Specifi c Curriculum Outcomes

Residential Construction Technology 17
Unit 1 - Skilled Trades and Apprenticeship
Unit 1
Skilled Trades and Apprenticeship
Overview PurposeThe purpose of this unit is to make students aware of the post-secondary options in the skilled trades. An in-depth look at the apprenticeship model and those trades which are covered in this course is matched with a discussion of the design process and its implications in residential construction. This unit consists of two topics:
• Topic 1: Skilled Trades and the Apprenticeship Program
• Topic 2: The Design Process
Profi leResidential Construction Technology 2201 has no pre-requi-sites, but it is expected that students will take one of the two fi rst year Futures in Skilled Trades and Technology Program cours-es. The material in this unit is a partial review of that covered in Skilled Trades 1201, but is intended to introduce the model to students who have never seen it before. Suggested extension activities are provided for students who have completed Skilled Trades 1201.
ImplementationUnit 1 contains information that puts the students’ learning into a post-secondary context. Students should have an aware-ness of their opportunities as they are engaged in the practical activities based on real work experiences, and this unit prepares this foundation.

Residential Construction Technology18
Unit 1 - Skilled Trades and Apprenticeship
Evaluation
Suggested Timeline
Unit 1 represents approximately 5% of the course material.
The timeline indicated below is a guideline for the teacher.
Topic 1: Skilled Trades and the Apprenticeship Program (5 classes)
• SCOs 1.11-1.19
Topic 2: The Design Process (2 classes)
• SCOs 1.21-1.23

Residential Construction Technology 19
Unit 1 - Skilled Trades and Apprenticeship
Outcomes and Strategies

Residential Construction Technology20
Unit 1 - Skilled Trades and Apprenticeship
Suggested Teaching and Learning StrategiesSpecifi c Curriculum Outcomes
Students will be expected to
The purpose of this outcome is to develop understanding of the apprenticeship program and how to become an apprentice. It also distinguishes between certifi cation for provincially desig-nated trades and Red Seal, or inter-provincial, trades.
As preparation, you will need to become familiar with the ap-prenticeship program. Apprenticeship policy is the jurisdiction of the provincial Department of Education, Industrial Training division. Their apprenticeship and certifi cation website is the primary reference in the resources. The specifi cs of apprentice-ship programs are the mandate of the Provincial Apprentice-ship and Certifi cation Board. Visit http://www.ed.gov.nl.ca/app/pacb.htm for details of the mandate and specifi c duties of the board. The full policy manual is available in pdf format at http://www.ed.gov.nl.ca/app/doc_pub/pdf/ policymanual.pdf.
The Interprovincial Standards Red Seal programs website (http://www.red-seal.ca/Site/trades/analist_e.htm) provides the full list of trades. The site will also be useful for the next topic.
Points to emphasize: • describe what constitutes an apprenticeship;• programs available in Canada and in Newfoundland and
Labrador in particular;• relationship between apprentice and journeyperson;• designated trades versus Red Seal trades; and• the ertifi cation process.
Student Activity
Describe each of the following:• apprenticeship;• the apprentice;• how to become an apprentice;• the journeyperson;• provincial designated occupations/ trades; • certifi cation (examination) in a designated trade;
1.1.1 describe the apprenticeship program [4.401]
Topic 1: Skilled Trades and the Apprenticeship Program

Residential Construction Technology 21
Unit 1 Skilled Trades and Apprenticeship
ResourcesSuggested Assessment and Evaluation Strategies
Presentation
• It is strongly recommended that students participate in a pre-sentation provided by a program development offi cer with the Department of Education, Industrial Training division. This presentation will cover all aspects of the apprenticeship program in Newfoundland and Labrador and reference ap-prenticeship programs in other provinces
Report
• Students could prepare a brief overview of Newfoundland and Labrador’s apprenticeship system. This activity could follow the presentation by Industrial Training so that mate-rial and information can be re-enforced and evaluation can take place.
Research
• Students could do a research paper which should include:• distinguishing between Red Seal trades and provincially
designated programs;• noting the advantages and disadvantages of each designa-
tion; and• describing the three routes of entry into an apprenticeship
program. Those routes include direct entry, apprenticeship/pre-employment, and trade qualifi er.
• Contacts at Division of Industrial Training the Department of Education - http://www.ed.gov.nl.ca/edu/dir/dept/ii.htm
• Industrial training website http://www.ed.gov.nl.ca/app/
• Apprenticeship form, ap-plications, plans of training, etc., - http://www.ed.gov.nl.ca/app/forms/forms.htm
• Trade Secrets “Alberta Ap-prenticeship and Industry Training”- http://www.tradesecrets.gov.ab.ca/
• Chart of apprenticeship training programs across Canada -http://www.ellis-chart.ca/Welcome.html

Residential Construction Technology22
Unit 1 - Skilled Trades and Apprenticeship
Suggested Teaching and Learning StrategiesSpecifi c Curriculum Outcomes
Students will be expected to
• Red Seal trade; and• Certifi cation (examination) in Red Seal trades.
Student Activity:
Answer the following questions:• What is the duration of apprenticeship?• Who administers the apprenticeship program?• Who are the partners to the apprenticeship agreement?• What are the roles of each partner?• What is the course component?• What is the workplace component?• What is the purpose of a logbook (record of occupational
progress)• How do the pay rates for apprentices compare to that of
journeypersons?
The purpose of this outcome is for students to be aware of the full scope of the skilled and Red Seal trades in the province of Newfoundland and Labrador.
Points to emphasize: • the scope of the skilled and Red Seal trades;• the difference in terms of training and certifi cation;• how each applies to inter-provincial employability; and• institutions capable of providing training.
The student could, using the links provided by the teacher, perform the following tasks:• examine and list the types of trades that might be present on
a construction site;• make a list of the Newfoundland and Labrador designated
trades, complete with a one sentence description of each trade;
• identify each of the designated trades as either a 7200, 5400, or a 2400 hour program; and
• make a list of the Red Seal trades, complete with a one sen-tence description of each trade
1.1.1 describe the apprenticeship program [4.401]
1.1.2 identify the Newfoundland and Labrador designated trades and the Red Seal trades [4.401]
Topic 1: Skilled Trades and the Apprenticeship Program

Residential Construction Technology 23
Unit 1 Skilled Trades and Apprenticeship
ResourcesSuggested Assessment and Evaluation Strategies
•
Chart
• Students could prepare a chart of 10 Real Seal trades that they would consider as an occupation. The chart would include trade names, length of program, provinces where the programs are offered and certifi cation requirements.
• Apprenticeship form, ap-plications, plans of training, etc., - http://www.ed.gov.nl.ca/app/forms/forms.htm
• Chart of apprenticeship training programs across Canada - http://www.ellis-chart.ca/Welcome.html

Residential Construction Technology24
Unit 1 - Skilled Trades and Apprenticeship
Suggested Teaching and Learning StrategiesSpecifi c Curriculum Outcomes
Students will be expected to
Apprenticeship programs in Atlantic Canada make use of a set of common core courses. These courses are not part of the tech-nical requirement of the trade, but address peripheral knowl-edge and skills that are related to the trade. As an example, writing skills are assessed because of their ubiquitous use in the communication of information.
Points to emphasize:
• course work dealing with writing and mathematical skills;• quality service as a part of doing business;• unions and their function in the skilled trade workplace;• methods of searching for and obtaining employment in the
skilled trades; and• entrepreneurship as an alternative to being employed by
others.
For the student:
• review several of the provincially designated trades identifi ed in the last topic, identify the common core courses that are taught concurrently with the trade;
• create a table that details the types of knowledge gained in the common core courses; and
• use the information generated in the table, relating the type of knowledge to its use in each of the skilled trades.
1.1.3 identify the common core courses in the skilled trades programs in Atlantic Canada [4.401] [4.403]
Topic 1: Skilled Trades and the Apprenticeship Program

Residential Construction Technology 25
Unit 1 Skilled Trades and Apprenticeship
ResourcesSuggested Assessment and Evaluation Strategies
Research/Presentation
• Students could perform research on the related programs that are included in all trades. A list of such courses, including their relative length, should be a part of this research. A short presentation to the class would be appropriate here.
• Apprenticeship Plans of Training - http://www.ed.gov.nl.ca/app/forms/forms.htm

Residential Construction Technology26
Unit 1 - Skilled Trades and Apprenticeship
Suggested Teaching and Learning StrategiesSpecifi c Curriculum Outcomes
Students will be expected to
Within all apprenticeship programs are a series of core common courses. The general outcomes for all these courses are listed be-low. Students should have an awareness of what they entail.
Customer service - students will:
• defi ne quality customer service;• explain the importance of quality service;• defi ne the relationship between service and sales;• explain the importance of and demonstrate a positive atti-
tude; and• recognize and demonstrate handling of customer complaints.
Workplace correspondence - students will be able to:
• explain the importance of well-developed writing skills in business and in career development;
• explain the purpose of the various types of business corre-spondence;
• examine the principles of effective business writing;• examine the standard formats for letters and memos;• write effective letters and memos;• examine the fundamentals of informal reports and the report
writing procedure; and • produce an informal report.
Quality assurance / quality control - students will be able to:
• develop the skills and knowledge required to apply quality assurance/quality control procedures; and
• develop an awareness of quality management principles and processes.
Introduction to computers - students will have a basic under-standing of:
• computer systems and their operation; and• popular software packages, their applications and future
trends in computer applications.
1.1.4 recognize the necessity of the content within the common core courses in the skilled trades programs [4.403]
Topic 1: Skilled Trades and the Apprenticeship Program
(cont’d p. 28)

Residential Construction Technology 27
Unit 1 Skilled Trades and Apprenticeship
ResourcesSuggested Assessment and Evaluation Strategies
Research
• Students could research and explore what is meant by “qual-ity service” and write a paragraph that defi nes and described this construct in their own words.
Chart
• Students could create a table that lists fi ve poor and fi ve ac-ceptable personal behaviours that infl uence quality service.
Research
• Students could research and defi ne the terms caveat emptor and caveat venditor. What signifi cance do these terms have in the skilled trades world?
Research
• Students could review the skilled trades and identify exam-ples of workplace correspondence that the tradesperson needs to respond to and create.
Paper and pencil
• Students could be asked to write a report on their experi-ences in the classroom to this point, highlighting how things could be improved as well as those things which have gone well. This report should be written in a methodology that properly refl ects a real piece of workplace correspondence
Paper and pencil
• Students could write a paragraph and propose what it might mean to use substandard or cut rate materials in a project. In this paragraph they should identify:
• Structural implications• Impact on business and reputation• Quality of the job• Safety considerations on the work site
Research
• Students could review and suggest the potential cost of poor quality workmanship in terms of future costs, i.e.: insurance claims, legal liabilities.
• United States Small Business Administration—quality of service - http://www.sba.gov/managing/marketing/customer.html
• Government Standards for Quality Service—Gov’t of Ireland - http://www. taoiseach.gov.ie/index.asp?docID=800
• Microsoft Customer Service Education Modules —Mi-crosoft standards - http://www.microsoft.com/small-business/resources/toolkit/module.aspx?mid=93)
• Wagner & Smith, page 729-735.
• ISO 9001 standardization. Discusses the ISO 9001 pro-tocols for quality assurance, standards of quality, product conformity, product quality - http://praxiom.com/iso-9001.htm
• Writing Professional Busi-ness Letters and Memos - http://owl.english.purdue.edu/handouts/pw/#sub7
• Importance of Writing in the Workplace -http://www.writingcommission.org/prod_downloads/writing-com/writingticket-to-work.pdf

Residential Construction Technology28
Unit 1 - Skilled Trades and Apprenticeship
Suggested Teaching and Learning StrategiesSpecifi c Curriculum Outcomes
Students will be expected to
Job search techniques - students will:
• identify and examine employment trends and opportunities;• identify sources that can lead to employment;• discuss the importance of fi tting qualifi cations to job re-
quirements;• successfully complete a variety of application forms• establish the aim/purpose of a resume;• explore characteristics of effective resumes, types of resumes,
and principles of resume format;• explore characteristics of and write an effective cover letter;• explore, and participate in a role play of a typical job inter-
view;• explore other employment related correspondence;• explore the job market to identify employability skills ex-
pected by employer; and• compare a self-analysis to general employer expectations.
Entrepreneurial awareness - students will:• identify the advantages and disadvantages of self-employ-
ment vs. regular employment;• differentiate between an entrepreneur and a business owner;• evaluate personal ideas about being in business;• identify characteristics common to entrepreneurs;• relate their own personal characteristics to entrepreneurs;• evaluate their present ideas about business people;• distinguish between an opportunity and an idea;• list the existing traditional and innovative business ventures
in the region and explain the general parameters around which business ventures should fi t;
• summarize the role of such agencies as Regional Economic Development Boards, Atlantic Canada’s Opportunities Agency, Women’s Enterprise Bureau, etc., and list other agencies where assistance - fi nancial and otherwise - is avail-able to those interested in starting a business venture;
• identify potential business opportunities within the region;• explain the entrepreneurial process; and• describe the purpose and ingredients of a business plan.
1.1.4 recognize the necessity of the content within the common core courses in the skilled trades programs. [4.403]
Topic 1: Skilled Trades and the Apprenticeship Program

Residential Construction Technology 29
Unit 1 Skilled Trades and Apprenticeship
ResourcesSuggested Assessment and Evaluation Strategies
Research
• Students could search the local papers for advertisements for skilled trades positions and create a collage that highlights the variety of positions available.
Interview
• Students could perform a mock interview, with the instruc-tor grading the interview based upon accepted interview criteria.
Paper and Pencil
• Students could complete a variety of application forms, to be found online at various hiring websites.
Research
• Students could contact their local RED board and discuss the entrepreneurship process, including:
• Qualities of an entrepreneur• Starting a business• The business plan• Funding agencies
• Students could research, or fi nd and interview a famous/suc-cessful local entrepreneur. Determine:
• How they established their business• Failures and successes• Their mentors
• Careers for Life (Interview section)
• Career Development 2201 Curriculum material
• Searching for a job. Ser-vices Canada.-(http://www.jobsetc.ca/) In particular-career exploration, training options, Workers rights and benefi ts.
• Seneca College - Entre-preneurship test, info on starting your own business, qualities needed to become an entrepreneur - http://ilearn.senecac.on.ca/careers/entrepreneur/entrepreneur-ism.html)
• Regional Economic Devel-opment Boards—economic initiatives, funding poten-tials—http://www.intrd.gov.nl.ca/intrd/economicboards.htm
• Atlantic Canada Opportuni-ties Agency (ACOA) fund-ing, business info (http://www.acoa.ca/)
• ACOA - Sample Business Plan at http://www.acoa.ca/e/business/tools.shtml

Residential Construction Technology30
Unit 1 - Skilled Trades and Apprenticeship
Suggested Teaching and Learning StrategiesSpecifi c Curriculum Outcomes
Students will be expected to
The purpose of this outcome is to develop a “big picture” view of three selected trades: • carpentry; • residential electrician; and• sheet metal worker.
Each trade has a plan of training. Each plan of training has a section that lists the courses and another that gives the contents of each course. For each course, the purpose is usually written as course aims, usually not more that four statements, containing the gist of what will be covered.
Points to emphasize:• each trade has a specifi c training plan;• training plans involve technical, academic, and practical
knowledge and skills; and• each course offered has a specifi c focus.
Student activity:
For the skilled trades, carpentry, residential electrician, and sheet metal worker, students could complete the following:
• make a list of the technical courses for each trade, organized by year; and
• write the purpose of each course, usually included in the course as course aims.
1.1.5 identify the technical courses for each of the selected trades, and identify the purpose of each course [4.401] [4.403]
Topic 1: Skilled Trades and the Apprenticeship Program

Residential Construction Technology 31
Unit 1 Skilled Trades and Apprenticeship
ResourcesSuggested Assessment and Evaluation Strategies
Research:
• Students could perform research on the carpentry, construc-tion electrician, and sheet metal trades. Students will review each plan of training as provided by the Newfoundland and Labrador Department of Education and note the main ob-jectives of each program.
Presentation:
• Students could participate in a presentation with a trade expert who will discuss the advantages and disadvantages of being employed in an industry trade specifi cally referencing the carpentry, construction electrician and sheet metal trades.
• Apprenticeship form, ap-plications, plans of training, etc., - http://www.ed.gov.nl.ca/app/forms/forms.htm
• National occupational analysis - http://www.red-seal.ca/Site/trades/analist_e.htm
• Trades and occupation - http://www.tradesecrets.gov.ab.ca/index.html
Residential Construction Technology32
Unit 1 - Skilled Trades and Apprenticeship
Suggested Teaching and Learning StrategiesSpecifi c Curriculum Outcomes
Students will be expected to
The apprenticeship program has signifi cant work experience requirements. Information in the plans of training identifi es these requirements for most, but not all, of the trades. A bit of creative investigation may be required. Inviting a tradesperson to class to discuss the apprenticeship program may be an op-tion. Most programs have a block of in-school time followed by a block of work experience, followed by an in-school block. De-pending on the apprenticeship program, the pattern is repeated over a period of 2 to 5 years.
Points to emphasize:
• each skilled trade has selected skills that an apprentice should experience; and
• these are elaborated as part of a training plan.
Student Activities:
For the apprenticeship programs carpentry, residential electrician, and sheet metal worker, students could complete the following:
• draw a block diagram of each program showing the in-school and work experience blocks; and
• where information exists, make a list of the work experi-ences in each work experience block for each apprenticeship program.
• students could examine a selection of the training plans for the apprenticeships for selected trades
1.1.6 identify and list the work experiences required for apprenticeship in the selected trades [4.401][4.403]
Topic 1: Skilled Trades and the Apprenticeship Program

Residential Construction Technology 33
Unit 1 Skilled Trades and Apprenticeship
ResourcesSuggested Assessment and Evaluation Strategies
Research
• Students may research a trade/occupation of their choice and report on the major skills and abilities required in the perfor-mance of trade duties.
Presentation
• Students may be placed in small groups to write up a list of tools required by a specifi c trade. The trades may be assigned by the teacher with verbal reports given back to the class in a group setting.
• National occupational analysis - http://www.red-seal.ca/Site/trades/analist_e.htm

Residential Construction Technology34
Unit 1 - Skilled Trades and Apprenticeship
Suggested Teaching and Learning StrategiesSpecifi c Curriculum Outcomes
Students will be expected to
The purpose of this outcome is to enable students to develop a sense of what it is like to work in a particular trade. As in the previous outcome, inviting trades people to class may be an option. You may wish to invite a person in the latter stages of apprenticeship as well as a journeyperson.
Finding labour market information on the trades should not be a daunting task. There are many sites available online for such information. The manner that such searches take place is just as important as the information garnered from such a search. Students need to become familiar with the variety of sources that labour market information can come from and their respec-tive validities.
There are several things that the teacher needs to consider in order to keep these searches from becoming too large:
1. References should be provided to begin the research;2. Criteria should be provided for the research and report; and3. An example should be presented, such as an overview of one
trade, or working through the process of conducting the exercise for one trade.
For the Student
For the skilled trades, carpentry, residential electrician, and sheet metal worker, students could complete the following:
• research and describe working conditions for each trade; and
• research and describe employment prospects for each trade.
An important thing to keep in mind is the source of the infor-mation. Government sources would be the best, and much of this information is available on the web.
1.1.7 research and report job conditions and employment prospects for the selected trades[4.401] [4.403]
Topic 1: Skilled Trades and the Apprenticeship Program

Residential Construction Technology 35
Unit 1 Skilled Trades and Apprenticeship
ResourcesSuggested Assessment and Evaluation Strategies
Field Trip
• Students may participate in a fi eld trip to an industrial set-ting or construction work site. Students will observe trades persons in the performance of their duties.
Report
• Students will prepare a report on a fi eld trip outlining the skills and duties being performed by the observed trades’ persons.
Research
• Students may perform research in the physical requirements for working within an assigned trade or occupation.
Presentation
• Students could present on the source they used to fi nd their labour market research, and the methodology they followed to garner the information.
• Service Canada - http://www.jobsetc.ca/content_pieces.jsp?lang=en&category_id=410
• NOC Website - http://www23.hrdc-drhc.gc.ca/2001/e/generic/wel-come.shtml
• Youth Ventures - http://www.youthventuresnl.com/success.php
• LMI Works - http://lmi-works.nl.ca

Residential Construction Technology36
Unit 1 - Skilled Trades and Apprenticeship
Suggested Teaching and Learning StrategiesSpecifi c Curriculum Outcomes
Students will be expected to
This SCO sets up one of the critical tools used in apprentice-ship programs—the work log. Technology education courses normally employ portfolios that students use to document their work. The work log has a similar function. It is used by ap-prentices to document their activities and certifi cations. It is reviewed by their supervisor, typically a journeyperson, and is used to certify the apprentice for each stage of the process and for journeyperson status.
As an emulation of that practice, students will maintain a work log for activities in the remainder of the course
Points to emphasize:
• a work log is a means of assessing the preparedness of an individual to complete tasks;
• it is a tandard method of documenting and signing off when skills are acquired;
• a work log is the standard tool in the apprenticeship program;
• it is used to document jobs done, time on task, and has to be signed off by a journeyperson in the respective skilled trade; and
• the work log will be a standard tool that the student will use in an ongoing fashion to document their work.
Student Activity:
Using the work log template provided by the instructor (or one you have developed) and your work from the previous outcome, complete your fi rst work log entry.
1.1.8 maintain a work log (portfolio) for personal and professional assessment. [1.405
Topic 1: Skilled Trades and the Apprenticeship Program

Residential Construction Technology 37
Unit 1 Skilled Trades and Apprenticeship
ResourcesSuggested Assessment and Evaluation Strategies
Work Log Book
• Students will review a work log book as issued by the New-foundland and Labrador Department of Education. Stu-dents will complete a log book for the Residential Construc-tion Technology 2211 course getting the associated skills signed off by the instructor. This log book will be submitted upon course completion for evaluation.
Research
• Students could research the variety of occupations that in-volve the use of some sort of log in their training. References to Career Development could be made at this point.
Research/Presentation
• Students could research different types of work logs that are used in different occupations with the aim of develop-ing their own work log. This log would still need to meet the criteria set down by the teacher but would be able to be personalized.
• How to create a work log - http://www.ehow.com/how_2105493_create-work-log.html
• Department of Educa-tion Website - http://www.ed.gov.nl.ca/app/registra-tion/logbook.html

Residential Construction Technology38
Unit 1 - Skilled Trades and Apprenticeship
Suggested Teaching and Learning StrategiesSpecifi c Curriculum Outcomes
Students will be expected to
The design process is a construct to describe the method that technologists use to problem solve. It can be likened to the sci-entifi c method and a problem solving process.
The discussion could focus on:
• needs identifi cation;• defi ning the problem;• generating options;• selecting the best option;• developing the solution;• prototyping and testing; and • evaluation and redesign.
These are a standard set of steps used to desribe the process. The students, in groups, could take this material and adapt it to the construction site.
The relevance can be expanded to the Occupational Health and Safety area which uses an adapted methodology for its SAFE Work model.
An example that can be used to create discussion is how the fabrication labs themselves are laid out for the module imple-mentation. The need was identifi ed for more real activity in a smaller space, which defi ned the problem as possibly limiting the hands-on activities for students. One option that could have been generated is a larger lab, but given the restrictions of time and money the best option was to adapt the activies. The modu-lar instruction method is the developed solution, it was tested and continues to be tested in pilot schools, which will evaluate it and refi ne it over time.
1.2.1 identify the steps in the design process and predict how the design process can be applied to a job site situation [1.401, 1.402, 1.403]
Topic 2: The Design Process

Residential Construction Technology 39
Unit 1 Skilled Trades and Apprenticeship
ResourcesSuggested Assessment and Evaluation Strategies
Problem Solving
• Students could create a solution based on the design process, to a simple, basic problem.
Assessment activity
• Students could complete a selected-response assessment based on a presentation/class discussion of the design process.
Practical Activity
• Students could identify in their school some problem that could be addressed within a Skilled Trades course. They could then apply the design process to the problem in an ef-fort to develop a workable solution. This process will involve using teams, discussion in classes, interviewing stakeholders and reporting. It could also be done in concert with groups from other Skilled Trades and Technology Program courses
• Design and Fabrication 1202 Curriculum Guide
• Design and Fabrication 2202 Curriculum Guide
• Technology Student.com - http://www.technology-student.com/designpro/despro1.htm
• Engineering Design Pro-cess - http://ocw.mit.edu/OcwWeb/Civil-and-Envi-ronmental-Engineering/1-012Spring2002/Projects/detail/design_process.htm

Residential Construction Technology40
Unit 1 - Skilled Trades and Apprenticeship
Suggested Teaching and Learning StrategiesSpecifi c Curriculum Outcomes
Students will be expected to
This outcome identifi es a key area of employability skills. Work-ing as a team is an integral part of the trades experience. The student model for this will involve relying on a work-mate for assistance in completing the assigned task. Skilled trades persons constantly rely on the assistance of a team mate, and few trades work in isolation. Even those trades requiring only a single worker often will have an apprentice worker to aid in the task. This may lead to a discussion of how the apprentice aids in the work while learning and the partnership that evolves from this.
The extrapolation in this case is clear when looking at the modular approach. The roofers need the trusses developed in Skilled Trades 1201, the smart house wirers need the partitions put together by the carpentry unit and so on. This is directly transferable to the skilled trades. Each of the trades areas relies on another trade to be able to complete their jobs. Carpenters rely on masons for brickwork; electricians and plumbers rely on carpenters for the structure the wire and pipe must run through; etc.
This section is the precursor to the project management topic in Unit 3. Students could identify ways they can monitor their work and manage the movement of materials and person-nel within the fabrication lab. A discussion of work plans, log books, scheduling, module timetables and time on task can be begun here. This is an opportunity to stress the importance of working well to complete tasks on time, as there will be a set job time for each module. Working to a deadline is another important area within employability skills.
1.2.2 demonstrate recognition of the importance of a team approach in skilled trades job experiences [4.401]
1.2.3 develop strategies for managing individual and team activities [4.401][5.401][5.402][5.403]
Topic 2: The Design Process

Residential Construction Technology 41
Unit 1 Skilled Trades and Apprenticeship
ResourcesSuggested Assessment and Evaluation Strategies
Group Work
• Students, during the project management role-play (3.8.1), will assess the performance of other students as team mem-bers and as individuals throughout the course.
Report
• Students could complete a“best-practices” list based on presentations concerning work plans, log books, scheduling, module timetables, and time on task.
Role Play
• As part of the project management role-play (3.8.1), students may present to the instructor a list of possible ways to im-prove the effi ciency of the environment.
• Team Work Essentials - http://www.time-man-agement-guide.com/team-building.html
• Overview of Project Man-agement - http://manage-menthelp.org/plan_dec/project/project.htm
• Team work rubric - http://www.teach-nology.com/web_tools/rubrics/teamwork
• Team work in the classroom - http://www.ndt-ed.org/TeachingResources/Class-roomTips/Teamwork.htm
Residential Construction Technology42
Unit 1 - Skilled Trades and Apprenticeship

Residential Construction Technology 43
Unit 2 - Courses Common to all Trades
Unit 2
Courses Common to all Trades
Overview PurposeThe purpose of this unit is to present to students the breadth and scope of learning that takes place in the apprenticeship program. Aspects of these courses are directly applicable to the skilled trades, while others have a more general focus and are important for all workers.
Profi leThe unit is organized into three topics. • Topic 1: Blueprint Reading and Interpretation
This topic specifi cally deals with those skills that skilled trades-people in residential construction have to acquire in order to be able to function in the work environment. • Topic 2: Occupational Health and Safety (OH&S)
This is a short course in OH&S, providing a sense of the re-sponsibilities for employers and employees in the workplace. • Topic 3: Fabrication Lab Safety
This material is common throughout the Futures in Skilled Trades and Technology program, and is a good follow-up to the Occupational Health and Safety section.
ImplementationThe course material in this unit is intended to be completed before the students enter the fabrication lab environment. Most of the material deals specifi cally with individual responsibility, proper behaviour, and lab safety.

Residential Construction Technology44
Unit 2 - Courses Common to all Trades
Evaluation
Timeline
This material constitutes approximately 20% of the course as a whole. There are a series of quizzes available from Occupational Health and Safety dealing with the material covered in Topic 2.
The timeline indicated below is a guideline for the teacher.
Topic 1: Blueprint Reading and Interpretation (10 classes) • SCOs 2.1.1-2.1.11
Topic 2: Occupational Health and Safety (5 classes) • SCOs 2.2.1-2.2.4
Topic 3: Fabrication Lab Safety (10 classes) • SCOs 2.3.1-2.3.8

Residential Construction Technology 45
Unit 2 - Courses Common to all Trades
Outcomes and Strategies

Residential Construction Technology46
Unit 2 - Courses Common to all Trades
Suggested Teaching and Learning StrategiesSpecifi c Curriculum Outcomes
Students will be expected to
The purpose of this outcome is for students to understand the basic building block of communication in the trades. Sketching is a basic communications skill essential for all the construction trades. Workers use the skill to develop drawings of parts of a project to ensure construction accuracy and to communicate ideas to others. As in all forms of communication, there is a core alphabet. For technical drawings, this begins with the standard forms of lines.
Sketching is a quick form of drawing. Except for the lack of drawing tools (mechanical or CAD), it is the same process as any other form of technical drawing, that is, the same types of drawings are created, both pictorial and orthographic. It is absolutely critical that sketching take place without the use of mechanical drawing aids. This means no rulers and no measur-ing devices. Only one aid is permissible—the use of grid paper to help keep lines straight and for aligning parts of the drawing.
Points to emphasize:• the alphabet of lines and the function of each type of line.• proper sketching techniques for creating each line using a
pencil and grid paper (grid needs to be very light).• while learning to sketch properly can be time consuming
initially, it is one of the most signifi cant skills that crosses all trades.
• technical sketching is a critical communications tool for all the trades, and for all technical industries and professions.
Student Activity
Complete two sets of drawings by sketching a few dozen of each line type, with the purpose of creating straight lines of the cor-rect weight and stroke length:• construction line;• visible object lines;• hidden object lines; • centre lines; • extension lines; and• dimension lines.
2.1.1 correctly use the alphabet of lines [1.401][2.401]
Topic 1: Blueprint Reading and Interpretation
(cont’d p. 48)
Residential Construction Technology 47
Unit 2 - Courses Common to all Trades
ResourcesSuggested Assessment and Evaluation Strategies
Portfolio
• Students could create a design/drawing portfolio. This portfolio will contain all of the projects, drawings, fl oorplans and designs that students will create over the next few weeks. This portfolio should be kept in a classroom location and assessed regularly.
• Students could be given a description of the various line types and their particular application in a technical draw-ing. They should then practice the various line types and use them in context. Students could then be given a sample drawing and asked to put into practice their knowledge of the alphabet of lines. This will then be added to their draw-ing portfolio.
Work Log
• Students could itemize the information they have learned in this section in their work log book.
• Tutorial on the alphabet of lines - http://www.scribd.com/doc/18057967/Alpha-bet-of-Lines
• Basic Drafting Skills -http://www.ioes.org/media/docu-ments/1729110.pdf
• Skilled Trades 1201 - Teach-er’s Resource Guide
• Powerpoint for instruc-tion - http://www.lenape.k12.pa.us/blueprint/Assign-ments/Powerpoint/Jr/Alpha-bet Of Lines.ppt
• Basic Blueprint reading and sketching

Residential Construction Technology48
Unit 2 - Courses Common to all Trades
Suggested Teaching and Learning StrategiesSpecifi c Curriculum Outcomes
Students will be expected to
For the fi rst set, a horizontal/vertical grid paper should be used to help align the sketch lines.
For the second set, unlined plain paper with the grid placed beneath should be used to help align the lines.
Compete another two sets by sketching a series of shapes:• box;• triangle; and• circle.
•
The purpose of this outcome is to develop understanding of the standard method of representing three dimensional objects as drawings where more than one face of the object is visible in the same drawing. While there are a number of types of pictorial drawings, the two most commonly used are cabinet, which is an older style, and isometric, which is a more modern and more frequently used style.
Many students have diffi culty visualizing in three dimensions. A common approach is to use 3-D physical models to illustrate the relationships between the actual object and the drawing. A series of drawings are provided in the teachers’ resource guide. Each drawing is based on a single 3-D shape. The sheet con-tains orthographic, isometric, cabinet projection, and a pattern for constructing the object from paper. For this outcome, they will need to use the isometric, cabinet, and possibly the pattern drawings. The CDLI communications technology course site includes short video clip demonstrations of how to create each type of drawing.
In preparation you could create physical models of 3-D shapes, naming all of the faces on each model (1, 2, 3, etc). These can
2.1.1 correctly use the alphabet of lines [1.401][2.401]
2.1.2 read and interpret pictorial drawings [1.401][1.402] [1.403][2.401][2.402]
Topic 1: Blueprint Reading and Interpretation
(cont’d p. 50)

Residential Construction Technology 49
Unit 2 - Courses Common to all Trades
ResourcesSuggested Assessment and Evaluation Strategies
Portfolio
• Students could create a pictorial drawing from a series of common objects. They could work from models they are given. They could then select various drawings to add to their drawing portfolio.
Practical Activity
• Students could take a series of pictorial drawings used for as-sembly of common items (instructions) and determine what information is on them, and what was needed.
• Read and Interpret plans - http://www.hsc.csu.edu.au/construction/optional/compulsory/bcg1003a/bc-g1003a/bcg1003aedit1csu.html
• Reading technical drawings document -www.fl doe.org/workforce/dwdframe/0910/art/rtf/0623110100.rtf

Residential Construction Technology50
Unit 2 - Courses Common to all Trades
Suggested Teaching and Learning StrategiesSpecifi c Curriculum Outcomes
Students will be expected to
be made from wood, polyfoam or folded paper. For folded pa-per use the patterns and be sure to add tabs for gluing. You may also print the cabinet projection and isometric drawing for each object, and demonstrate the relationship between the named faces of the objects and the corresponding parts of the isometric drawings and cabinet projections.
You may wish to create a larger set of different, but simple, additional objects and drawings for use with students. The simpler shapes used here help students understand the relation-ships between the parts of the object and how they are shown in different types of drawings. These forms appear in all mechani-cal drawings including building plans.
Points to emphasize: • Pictorial drawings are the primary method of representing
technical information in a 3-D format.• Cabinet projections combine a fl at, front-on view of an
object with an extruded depth at an angle of 30, 45, or 60 degrees. The depth is drawn at half the actual size.
• Isometric drawings are approximations of perspective draw-ings but simplifi ed so that the three major axes of a box are drawn vertical and at 30 degrees from horizontal to the left and right. This makes them easy to do with mechanical drafting tools. All faces of an isometric drawing are drawn using actual measurements (or using the same scale).
• Starting with the basic box shape, all objects can be drawn in an isometric layout. Special techniques exist for drawing circular and irregular shapes.
• The basic box has six faces. It is a convention (standard practice) to draw it with the longest face to the left.
Student Activity:
Using models and drawings supplied by the teacher:• match parts of a cabinet projection to named faces on
models; and• match parts of isometric drawings to named faces on
models.
2.1.2 read and interpret pictorial drawings [1.401][1.402] [1.403][2.401][2.402]
Topic 1: Blueprint Reading and Interpretation

Residential Construction Technology 51
Unit 2 - Courses Common to all Trades
ResourcesSuggested Assessment and Evaluation Strategies
Practical Activity
• Students could create a series of pictorial drawings and post them in a grouping within the fabrication lab. Then other students could view them and attempt to determine what is being depicted and what information they can garner from the drawing.
Work Log
• Students could itemize the information they have learned in this section in their work log book.
• Introduction to Pictorial Drawings - http://www.saskschools.ca/curr_content/Drafting10/Unit5/intro.htm
• Text - Basic Blueprint read-ing and sketching

Residential Construction Technology52
Unit 2 - Courses Common to all Trades
Suggested Teaching and Learning StrategiesSpecifi c Curriculum Outcomes
Students will be expected to
The purpose of this outcome is to develop understanding of the method of drawing that represents one face of the object at a time in a drawing. You will need to use the orthographic views from the drawings for this outcome.
Six possible faces, or views, are available to represent a cube. In practice only three—labelled front view, right side view and top view—are typically used. You will need to properly label the views before using the drawings, or do so with the students. One approach is to: • show the 3-D models and review the isometric drawings for
them; • present the orthographic projections for each model and
name the three standard views in the drawings;• identify each named face from the model and related it to
the corresponding view in the orthographic drawing; and• relate the orthographic projections to the corresponding
isometrics by identifying which face of the isometric corre-sponds to which view of the orthographic.
Points to emphasize:• Each view of an orthographic is simply what the object
looks like from that side. While there are six views (six faces), it is normal to only show three views.
• The location of views is a convention. It is an agreed upon way to do things that makes it easier for others to interpret a drawing based on the location of the views.
• The labels for the views are also a convention and apply to the location, not to the actual object. Front, right side and top views are the normal.
• The front view may in fact show the side of the object.• The location of the views corresponds to the faces of the ob-
ject in the isometric drawing. Measurements on the isomet-ric correspond to measurements on the orthographic views.
• Orthographic views are used in all technical drawings, in-cluding building plans.
2.1.3 read and interpret orthographic projections [1.401][1.402][1.403] [2.401][2.402]
Topic 1: Blueprint Reading and Interpretation

Residential Construction Technology 53
Unit 2 - Courses Common to all Trades
ResourcesSuggested Assessment and Evaluation Strategies
Drawing Exercise
• Given a set of 3-D models and/or isometric drawings and a set of orthographic projections, students could match or-thogonal views to the corresponding faces on the 3-D objects and/or isometric drawings. This can be undertaken in a quiz structure or in a drawing exercise.
Presentation
• Students could research the meaning and use of orthographic projections and present it to the class as a whole either as a formal presentation or as a poster to be displayed.
Work Log
• Students could itemize the information they have learned in this section in their work log book.
• Text - Basic Blueprint read-ing and sketching
• Working with Orthographic Projections - http://vec-tor.tutsplus.com/tutorials/illustration/working-with-orthographic-projections-and-basic-isometrics/
• Defi ning orthographic projection - http://www.reference.com/browse/or-thographic%20projection
• Introduction to orthograph-ic projection - http://www.scribd.com/doc/17770898/Orthographic-Projection
Residential Construction Technology54
Unit 2 - Courses Common to all Trades
Suggested Teaching and Learning StrategiesSpecifi c Curriculum Outcomes
Students will be expected to
The purpose of this outcome is to help students understand the use of measurement and scale in drawings.
Drawings may be larger than, equal to, or smaller than the actual objects they represent. Very few objects are of a size that is convenient to represent actual size in a drawing. Most are smaller than or larger than the drawing. Buildings fall into the latter category.
To accurately represent larger objects in a drawing, a scale must be used. One unit of measure in the drawing represents a larger unit of measure in the real object. In the imperial system, a typical scale for a house plan is 1/4 inch on the drawing repre-sents 1 foot in the real world. For a metric drawing, a scale can be 10:1, 20:1 or 50:1. Drawings also use dimensions to indi-cate actual size.
Points to emphasize: • Most drawings use a scale.• While the scale can have any ratio, there are standard ratios
used for most drawings, especially for buildings (e.g., 1/4 inch to the foot, 20:1, 50:1, etc.)
• Scale ensures that drawings are an accurate representation of the object.
• While dimensions are placed on most drawings, sometimes it is easier to just measure the drawing and convert to the actual size using the scale.
Student Activity:
Given a partially dimensioned drawing with a background grid, answer the following questions:• What is the total length and width of the building?• What is the size of each of the smaller offi ces?• What is the size of each window, and what is the distance
from the centre of each window to the outside edge of the left side of the building?
2.1.4 correctly interpret drawing units and scale [1.401][1.402] [1.403][2.401][2.402]
Topic 1: Blueprint Reading and Interpretation

Residential Construction Technology 55
Unit 2 - Courses Common to all Trades
ResourcesSuggested Assessment and Evaluation Strategies
Problem Solving/Portfolio
• Students could be given a scale drawing of the fabrication laboratory on grid paper with partial dimensions. Students could then be expected to determine the size of the smaller contained rooms, the total length and width of the lab, and the size and location of windows and door. This could then be added to their drawing portfolio.
Drawing/Portfolio
• As a take home activity students could be asked to draw a scale drawing of their living quarters. This could then be added to their drawing portfolio.
Work Log
• Students could itemize the information they have learned in this section in their work log book.
• Text - Basic Blueprint read-ing and sketching
• Scale Drawings - http://www.mathsteacher.com.au/year8/ch06_ratios/06_scale/draw.htm
• Scale Drawings lesson plans - www.cimt.plymouth.ac.uk/projects/mepres/book7/y7s19lp.pdf
• Drawing Units and Scale - http://www.fortlewis.edu/academics/school_arts_sci-ences/physics_engineering/Engr 103 Webpage/help - misc docs/Drawing Units.doc

Residential Construction Technology56
Unit 2 - Courses Common to all Trades
Suggested Teaching and Learning StrategiesSpecifi c Curriculum Outcomes
Students will be expected to
The purpose of this outcome is to provide introductory experi-ences for students with the range of fl oor plans and structural blueprints used in the construction trades.
Using a complete set of house plans, emphasize the following: • demonstrate the relationship between the drawings of a
house plan and orthographic projections. A fl oor plan is a top view of a building that has been cut horizontally ap-proximately midway up the wall;
• demonstrate a foundation drawing and how it represents the actual foundation;
• demonstrate a fl oor plan drawing and how it represents the actual house structure and layout;
• demonstrate elevation drawings and how they represent the facade of the house;
• demonstrate a section drawing and how it represents the structure of the building; and
• demonstrate a detail drawing and how it represents the con-struction details of a small component of the building.
Student Activity
Given a set of house plans:• read a foundation plan and determine building size and the
location of doors, windows and support columns;• read a fl oor plan and determine the size of each room and
location and size of windows and doors and other features;• read an elevation drawing and identify the relationship of
grade to the foundation and the type of siding and roofi ng; and
• read a section drawing and determine the actual compo-nents that make up the foundation, walls, fl oors and roof, and the heights of structural components.
2.1.5 read and interpret fl oor plans or blueprints[1.401][1.402] [1.403][2.401][2.402]
Topic 1: Blueprint Reading and Interpretation

Residential Construction Technology 57
Unit 2 - Courses Common to all Trades
ResourcesSuggested Assessment and Evaluation Strategies
Problem Solving/Portfolio
• Students could read a foundation plan and determine build-ing size and the location of doors, windows and support columns.
• Students could read a fl oor plan and determine the size of each room and location and size of windows and doors and other features.
• Students could read an elevation drawing and identify the relationship of grade to the foundation and the type of siding and roofi ng.
• Students could read a section drawing and determine the ac-tual components that make up the foundation, walls, fl oors and roof, and the heights of structural components.
Work Log
• Students could itemize the information they have learned in this section in their work log book.
• Text - Basic Blueprint read-ing and sketching - House Plan Example Pack
• How to read a fl oor plan - http://www.ehow.com/how_2107912_read-fl oor-plan.html
• Understanding Blueprints - http://www.thehousede-signers.com/understand-ing_blueprints.asp
• House plan and elevation view examples - http://www.familyhomeplans.com/

Residential Construction Technology58
Unit 2 - Courses Common to all Trades
Suggested Teaching and Learning StrategiesSpecifi c Curriculum Outcomes
Students will be expected to
This purpose of this outcome is to enable students to compre-hend information contained in a blueprint. The term elevation view refers to the 2-dimensional representation of the face detail of the object in question (e.g., house, shed). This will provide a method of determining the appearance and position of various elements of the structure.
This is one of the stages of residential construction planning. Floor plans provide general horizontal placement, but elevation views will help determine vertical placement and overall appear-ance. Other details include:
• fi nish material; and• roof.
This is an area where aesthetics plays an important role. How a house will look in the land it is to be placed can be determined from an elevation view. Other factors about how visually appeal-ing a house will be are discussed in the student activity. It isn’t enough that a house be well built but that it has some extrinsic value for the eye as well.
Student Activity:
Students could determine the exact placement of doors and windows from an elevation view. A commentary of the general aesthetics could also occur at this point. Elevation view has the further purpose of insuring that the placement of doors and windows, siding and roofi ng material will be visually appealing.
2.1.6 read and interpret elevation view in blueprint reading [1.401][1.402][1.403] [2.401][2.402]
Topic 1: Blueprint Reading and Interpretation

Residential Construction Technology 59
Unit 2 - Courses Common to all Trades
ResourcesSuggested Assessment and Evaluation Strategies
Problem Solving
• Students could be given an elevation view and asked to de-termine the exact placement of doors and windows from an elevation view.
• Text - Basic Blueprint read-ing and sketching - House Plan Example Pack
• House plan and elevation view examples - http://www.familyhomeplans.com/

Residential Construction Technology60
Unit 2 - Courses Common to all Trades
Suggested Teaching and Learning StrategiesSpecifi c Curriculum Outcomes
Students will be expected to
The purpose of this outcome is to provide an introduction to the basic electrical symbols used on fl oor plans. Carpentry and Building Construction pg. 778 is a prime example.
• Show examples of the electrical device (wire, switch, recep-tacle, ...) and sketch the symbol for that device.
• Demonstrate the electrical drawing and how the symbols represent locations of devices.
• Demonstrate the method for showing circuits, the devices on the circuit and the location of electrical appliances.
• Demonstrate the method for showing the location of the service entrance and distribution panel.
Things to consider when teaching this section:• The drawing has a reduced symbol set.• Review the complete symbol set in the text references and
identify those used most frequently.• The use of dashed lines on drawings indicate wire runs.
Refer to the Mullen et al . drawings for examples.• Electrical drawings are used by carpenters to build the struc-
tures needed to hold the electrical devices. They are used by electricians to plan circuits and wiring runs, and to place electrical boxes and wires for the electrical rough-ins.
Student Activity:
Given an electrical drawing , examine it and make a list of the:• locations and number of 120 volt receptacles;• locations and number of lights; and• locations and number of switches and the devices they con-
trol, distinguishing single and three-way switches.
2.1.7 read and interpret electrical drawings [1.401][1.402] [1.403][2.401][2.402]
Topic 1: Blueprint Reading and Interpretation

Residential Construction Technology 61
Unit 2 - Courses Common to all Trades
ResourcesSuggested Assessment and Evaluation Strategies
Practical activity
• Given an electrical drawing, students could examine it and make a list of the:
• locations and number of 120 volt receptacles;• locations and number of lights;• locations and number of switches and the devices they
control; and• single and three-way switches.
This drawing should be placed in their project portfolio.
• Carpentry and Building Con-struction, Section 38.2, and pg. 923 and pg. 778.
• Text - Basic Blueprint read-ing and sketching - House Plan Example Pack
• What is an elevation view? - http://www.hsc.csu.edu.au/construction/optional/compulsory/bcg1003a/bc-g1003a/bcg1003aedit1csu.html

Residential Construction Technology62
Unit 2 - Courses Common to all Trades
Suggested Teaching and Learning StrategiesSpecifi c Curriculum Outcomes
Students will be expected to
The purpose of this outcome is to have students develop a bet-ter understanding of electrical devices, their symbols and how they represent systems on a plan.
Provide each student with a copy of a fl oorplan.
Create and provide a specifi cation (list) of the electrical devices and where they need to be located.
• Receptacles need to be spaced about every 3.7 m (12 feet)
• All lights need to be controlled by a switch. It is customary to connect each switch to the device it controls on the plan using a dashed line.
• In rooms where there is no overhead light, it is customary to control one or more receptacles with a switch. In each case, half of the receptacle is live and the other half is switched.
• A 220 volt receptacles would have an independent circuit.
• A maximum of 12 devices may be on a branch circuit.
Another consideration is the placement of the smart house de-vices. Although covered in a later topic, this is a place that these devices can be introduced.
Such devices include:
• thermostats;
• network drops;
• audio/visual wiring drops; and
• security panels.
For the Student
Given a fl oorplan:
Plan the electrical layout by sketching the devices in the cor-rect location on the plan. Show which switches control which devices.
2.1.8 sketch electrical systems on fl oor plans [1.405][2.402]
Topic 1: Blueprint Reading and Interpretation

Residential Construction Technology 63
Unit 2 - Courses Common to all Trades
ResourcesSuggested Assessment and Evaluation Strategies
Project Portfolio
• Given a blank fl oor plan, students could be expected to do a basic electrical plan for that particular plan including:
• receptacle;
• switche;
• light;
• cable;
• phone;
• smoke detector;
• thermostat;
• security panel; and
• audio/visual wire drop.
• •

Residential Construction Technology64
Unit 2 - Courses Common to all Trades
Suggested Teaching and Learning StrategiesSpecifi c Curriculum Outcomes
Students will be expected to
The purpose of this outcome is to help students understand that 3-D sheet metal objects are made from fl at sheets of metal, cut to a pattern, folded, and joined by tabs or other mechanism.
There are several standard techniques for layout, of which the two which we will be using are:
• Parallel line development, which is a technique used for objects that have parallel sides. Cylinders are included in this category.
• Radial line development, which is a technique used to create sheet metal patterns for objects that have sides that meet at a point. This includes cones, pyramids and frustums (truncated cones).
For any of the techniques, sketching the layout on paper is a cost-effective means of solving layout problems. Testing layouts by sketching them on paper and then cutting and folding them is frequently done.
Approaches include:
• Demonstrate the 3-D object/fl at drawing relationship with actual models and the sheet metal drawings of those objects.
• A live demo can be quickly done by having the drawing on heavy paper or poster board which you then cut out, fold and assemble. Multiple copies of the same object can be prepared in advance, with each copy taken to a different stage in the process.
• Demonstrate the relationship between the object, the drawing and an isometric drawing.
• Using models that are cut, demonstrate the use of section drawings to show how a structure is built up from fl at material.
• Demonstrate drawings for parallel line layouts and radial line layouts.
2.1.9 read and interpret sheet metal drawings [1.401] [1.402][1.403][2.401] [2.402]
Topic 1: Blueprint Reading and Interpretation
(cont’d p. 66)

Residential Construction Technology 65
Unit 2 - Courses Common to all Trades
ResourcesSuggested Assessment and Evaluation Strategies
Practical Activity
• Students could be expected to identify the two standard techniques for sheet metal layout. They could be expected to do a layout on heavy paper, cut it out, and fold it to represent the object to be constructed. Emphasis could be placed on the importance of constructing models to save on cost and to correct errors.

Residential Construction Technology66
Unit 2 - Courses Common to all Trades
Suggested Teaching and Learning StrategiesSpecifi c Curriculum Outcomes
Students will be expected to
Points to emphasize:
• Any parallel line layout can be done for any rectangular object.
• A radial line layout can be done for any object that has sides that meet at a point, for example a cone or pyramid. For radial line layouts, the distance along the curved edge of the sheet metal is the circumference of the cone or pyramid that it is derived from.
• Numbered lines are used in the drawing to aid in transferring locations from the orthographics to the pattern drawing. The appendix drawings also use the numbering on the isometric drawing to illustrate the relationship.
• Making the patterns in paper, aids in understanding.
For the Student
• Read a parallel line layout for a rectangular box and relate it to an isometric drawing of the box.
• Create the box in heavy paper or posterboard.
• Read a radial line layout for a cone and relate it to the isometric drawing of the cone.
• Create the cone in heavy paper or posterboard.
2.1.9 read and interpret sheet metal drawings [1.401] [1.402][1.403][2.401] [2.402]
Topic 1: Blueprint Reading and Interpretation
Residential Construction Technology 67
Unit 2 - Courses Common to all Trades
ResourcesSuggested Assessment and Evaluation Strategies

Residential Construction Technology68
Unit 2 - Courses Common to all Trades
Suggested Teaching and Learning StrategiesSpecifi c Curriculum Outcomes
Students will be expected to
The purpose of this outcome is to familiarize students with various technical information supplied on bluepring drawings. Some of the information provided includes:
• dimensions;
• placement of doors and windows;
• interior and exterior wall location;
• load bearing walls; and
• electrical and plumbing elements.
Activity
Students will interpret information present on a detail and as-sembly drawing.
This outcome is an introduction to this concept that will be covered as the course progresses. The theoretical aspect will be enhanced by the skill-building to follow. The fi rst step, covered in the activities below, is knowledge-building.
Points to emphasize:
• Resources are scarce and shared.
• Wasteful cutting/usage limits the access of others.
• Good resource usage is a keystone to an effective and cost effi cient skilled trades site.
• “Measure twice, cut once” policy.
Tools used to obtain accuracy when laying out on material:
• Ruler, scribe, protractor, templates, etc.
You will need to provide project plans and materials lists for the activity.
Activity
Given a drawing and a list of available materials, develop a plan for the most economical use of the materials.
2.1.10 fi nd technical information on detail and assembly drawings. [1.403] [1.405]
2.1.11 use accuracy and precision when processing materials. [1.404][1.405]
Topic 1: Blueprint Reading and Interpretation

Residential Construction Technology 69
Unit 2 - Courses Common to all Trades
ResourcesSuggested Assessment and Evaluation Strategies
Project Portfolio
• Given a technical drawing students could be expected to determine:
• dimensions;
• placement of doors and windows;
• interior and exterior wall location;
• load bearing walls; and
• electrical and plumbing elements.
Paper and Pencil
• Given a drawing and a list of available materials, students could be expected to develop a plan for the most economical use of the materials.
• Given a work plan, students could be expected to develop a bill of materials and then do a cost assessment activity based on their developed bill of materials.

Residential Construction Technology70
Unit 2 - Courses Common to all Trades
Suggested Teaching and Learning StrategiesSpecifi c Curriculum Outcomes
Students will be expected to
The purpose of this outcome is to make students aware of their rights and responsibilities as employees. The fi rst step is awareness, with all the stakeholders having the same level of responsibility to know the regulations. A suggested method of instructing this section is to use case studies. A role play would also be an appropriate strategy in this case. This outcome is best used as an introduction to the next outcome and the two done in tandem.
Introduce the SAFE work program
Spot the hazard
Assess the risk
Find a better way
Everyday
Activity
Set up a situation where an unsafe work practice is being under-taken. Students could work through the Occupational Health and Safety (OH&S) process considering the situation.
Students could discuss the roles of the various stakeholders as you work through the process. Pay specifi c attention to:
• the worker;
• the OH&S committee;
• the employer; and
• commission offi cers.
Address some of the following terms in the role play:
• stop work; and
• risk.
2.2.1 demonstrate knowledge of the Occupational Health and Safety Act. [5.402]
Topic 2: Occupational Health and Safety (OH&S)

Residential Construction Technology 71
Unit 2 - Courses Common to all Trades
ResourcesSuggested Assessment and Evaluation Strategies
Role Play
• Teachers should set up a situation where an unsafe work practice is being undertaken. Students could then work through the OH&S process.
Role Play/Simulation
• Students could form their own OH&S committee within the class. Teachers could take on the roll of the employer, while students take on various roles within the business. Site visits, stop work orders, safe work inspections, and risk assessments could form the basis of this role play.
Log Book
• Students could record their learning with regards to the SAFE work program. They could break down the learning into individual goals
• •

Residential Construction Technology72
Unit 2 - Courses Common to all Trades
Suggested Teaching and Learning StrategiesSpecifi c Curriculum Outcomes
Students will be expected to
This outcome deals with what is essentially the heart of the Oc-cupational Health and Safety Act. Workers in Canada have the following rights:
• The right to know.
• The right to participate and assist.
• The right to refuse.
Students should understand that as workers they have a right to know what potential hazards are present at a jobsite and the ways to prevent injury so that they may enjoy a safe working environment. They also have the right to participate and assist in the identifi cation and resolution of workplace safety issues. The right to refuse is defi ned in the act as:
Workers may refuse work that they believe is dangerous to their health or safety, or the health or safety of fellow workers;
a.) until action has been taken by the employer to the worker’s satisfaction;
b.) until the OH&S committee or worker health and safety representative has investigated the matter and advised the worker to return-to-work; or
c.) until an offi cer has investigated the matter and has advised the worker to return to work.
Employers have clear responsibilities with respect to safety in the workplace. This is the second important aspect of the Oc-cupational Health and Safety process. Employers specifi cally are responsible to:
1) provide and maintain a workplace and the necessary equipment, systems, and tools that are safe and without risk to the health of their workers; and
2) provide the information, instruction, training, supervision, and facilities that are necessary to ensure the health, safety and welfare of their workers.
2.2.2 identify the rights and responsibilities of the various stakeholders including the right to refuse. [5.402]
Topic 2: Occupational Health and Safety (OH&S)
(cont’d p. 74)

Residential Construction Technology 73
Unit 2 - Courses Common to all Trades
ResourcesSuggested Assessment and Evaluation Strategies
Practical Activity
• Students should be advocates for their own safety within the skilled trades and technology program. Even though the Oc-cupational Health and Safety activity in the last section is a role play, students should be aware of their work site and en-sure that it remains safe for themselves and their classmates. Presentations to the class, the instructor and other classes could be an effi cient method.
Presentation
• Students could create a presentation for their peer group. The theme of the presentation could be, “Everything a young worker should know about Occupational Health and Safety.” These materials and the content are found on the internet or a variety of sources available from OH&S.
Paper and Pencil
• Students could encompass this material within their personal code of conduct contract in section 2.3.1. Emphasis on the responsibilities of workers should be paramount in this con-tract.
• •

Residential Construction Technology74
Unit 2 - Courses Common to all Trades
Suggested Teaching and Learning StrategiesSpecifi c Curriculum Outcomes
Students will be expected to
The fi nal aspect of the Occupational Health and Safety process is workers’ responsibilities. Students should be aware that with rights comes responsibilities. Workers are responsible to:
1) protect their own health and safety and that of others workers at or near the workplace;
2) to cooperate with their employers and with other workers in the workplace to protect:
a. their own health and safety;
b. the health and safety of other workers engaged in the work of the employer; and
c. the health and safety of other workers or persons not engaged in the work place of the employer but present at or near the workplace;
3) use devices and equipment provided for their protection in accordance with the instructions for use and training provided, with respect to the devices and equipment.;
4) consult and cooperate with the OH&S committee (if there is one at the workplace) or the worker responsible for health and safety at the workplace; and
5) cooperate with the person at the workplace who is exercising a duty imposed by the Act or Regulations.
It is important to note that younger and/or new workers expe-rience higher rates of injuries than do other workers and that knowledge of OH&S reduces that likelyhood.
Activity
This previous outcome suggests a role play and mock situation that introduces students to the OH&S topic in general. An extension of this will include the specifi c rights and responsi-bilities of employers and workers, and ensure students have an appropriate understanding of this topic.
2.2.2 identify the rights and responsibilities of the various stakeholders including the right to refuse. [5.402]
Topic 2: Occupational Health and Safety (OH&S)
Residential Construction Technology 75
Unit 2 - Courses Common to all Trades
ResourcesSuggested Assessment and Evaluation Strategies
• Role Play
• All students should rotate through the role of the worker in the Occupational Health and Safety role play. Once in that position students could represent themselves as workers, highlighting their rights and responsibilities in the role.
Pencil and Paper
• Students could outline in their own words what they see as their rights and responsibilities as workers. A comparison could then be undertaken with the Occupational Health and Safety Act and materials to reinforce the understanding of this topic.
•
• •

Residential Construction Technology76
Unit 2 - Courses Common to all Trades
Suggested Teaching and Learning StrategiesSpecifi c Curriculum Outcomes
Students will be expected to
This outcome should have students explore the Occupational Health and Safety committee and the worker health and safety representative.
The following are excerpts from the Safe Work Newfoundland and Labrador website:
“An occupational health and safety committee is an advisory group made up of representatives from management and work-ers. The committee provides a forum for communication be-tween the employer and the worker to address health and safety concerns in the workplace. In an effort to reduce workplace ac-cidents and injuries, committees identify and evaluate concerns, make recommendations for corrective action and promote health and safety in the workplace. Committees are a legislated requirement of the Occupational Health and Safety Act and Regulations. In brief, the requirements for an occupational health and safety committee are as follows:
• A workplace having 10 or more workers is required to have a committee.
• A fi rm that has more than one workplace (i.e. retail company with stores across the province, school board with schools across a district etc.) must have a separate committee for each location if the number of workers at each location is 10 or more.
• The committee may consist of two to 12 members.
• At least half the members shall be elected by workers.
• The other half shall be appointed by the employer.
• The committee is to have two co-chairs one representing management and the other representing the workers.
• A list of committee members shall be posted in a conspicu ous place at the workplace.
• Committee meetings shall be held every three months and during work hours as part of the job.
• Minutes of meetings are to be posted in the workplace and a copy is to be forwarded to the Commission.
2.2.3 explain the process for the reporting of risks, workplace issues and accidents. [5.402]
Topic 2: Occupational Health and Safety (OH&S)
(cont’d p. 78)

Residential Construction Technology 77
Unit 2 - Courses Common to all Trades
ResourcesSuggested Assessment and Evaluation Strategies
• Role Play
• The Occupational Health and Safety Committee, that could have been set up earlier in this section, could now be expand-ed to establish methods and processes for reporting issues, risks and accidents.
Log Book
• Students could report on these processes in their log, specifi ying what they have learned.
WHSCC Website
www.whscc.nf.ca
SAFE Work Newfoundland and Labrador
http://209.128.14.165/ohsc-whsr.html
•

Residential Construction Technology78
Unit 2 - Courses Common to all Trades
Suggested Teaching and Learning StrategiesSpecifi c Curriculum Outcomes
Students will be expected to
• The committee shall participate in workplace inspections.
• Committee members are to be trained as per legislative requirements.”
“A worker health and safety representative is required in work-places where less than 10 workers are employed. A fi rm that has more than one workplace (e.g., retail company with stores across the province, school board with schools across a district etc.), must have a separate worker health and safety representa-tive for each location if the number of workers at each location is less than 10. The employer must ensure that a worker, not connected with management, is designated as the worker health and safety representative. The worker health and safety repre-sentative must be elected by other workers or appointed by the labour union if applicable. The name of this individual is to be posted in a prominent area in the workplace.
The main role of the worker health and safety representative is to monitor the health, safety and welfare of workers employed at the workplace. The worker health and safety representative is a liaison between the employer and the workers when it comes to addressing health and safety concerns at the workplace. Worker health and safety representatives identify and evaluate concerns, make recommendations for corrective actions and promote health and safety in the workplace. They also partici-pate in workplace inspections. Worker health and safety repre-sentatives are to be trained as per legislative requirements.”
Activity
Student could form their own mock OH&S committee. All of the considerations for its formation should be brought into considetation and addressed in writing for the instructor.
This activity could be undertaken with the previous two out-comes, and become an integral part of the resolution of the incident.
2.2.3 explain the process for the reporting of risks, workplace issues and accidents. [5.402]
Topic 2: Occupational Health and Safety (OH&S)

Residential Construction Technology 79
Unit 2 - Courses Common to all Trades
ResourcesSuggested Assessment and Evaluation Strategies
• Paper and Pencil/Report
• Students could create a report justifying the use of OH&S committees in the workplace. Within this report, the forma-tion of their own committee would be the focus, and the roles it has taken in the fabrication lab.
WHSCC Website
www.whscc.nf.ca
SAFE Work Newfoundland and Labrador
http://209.128.14.165/ohsc-whsr.html
•

Residential Construction Technology80
Unit 2 - Courses Common to all Trades
Suggested Teaching and Learning StrategiesSpecifi c Curriculum Outcomes
Students will be expected to
OH&S inspections division consists of offi cers, industrial hygienists, engineers and radiation specialists. For the purposes of this outcome, we will focus on the group as a whole with specical consideration for commision offi cers. Although all these members of the inspection branch are not usually involved with residential construction sites, they are involved in some way with other skilled trades and will be included for completeness.
The inspections division is responsible for:
• investigating workplace accidents and incidents;
• conducting compliance inspections and detailed
audits of workplaces;
• hygiene assessments of various physical, chemical,
biological and ergonomic agents in the workplace in
order to protect worker health;
• evaluating and inspecting radiation control measures
in workplaces; and
• enforcing Occupational Health and Safety Legislation.
The main tools of the commission offi cer are investigations, compliance inspections and workplace audits. All of these deal with accidents and incidents before, during and after their oc-curance.
Activity
Students could expand the discussion of what the duties of a commission offi cer are to what powers they have concerning OH&S and the workplace. All of the activities in this section can be tied to the role play initiated in 2.2.1.
2.2.4 explain the duties of OH&S Commission Offi cers. [5.402]
Topic 2: Occupational Health and Safety (OH&S)

Residential Construction Technology 81
Unit 2 - Courses Common to all Trades
ResourcesSuggested Assessment and Evaluation Strategies
• Presentation
• An OH&S offi cer should be brought into class for a pre-sentation. Students should be given a response form for the presentation, and list the duties and responsibilities for the inspector in question.
Role Play
• Students could expand their role play to include the Occupational Health and Safety offi cer. This rotating role could become part of the committee being used throughout the course.
•
• •

Residential Construction Technology82
Unit 2 - Courses Common to all Trades
Suggested Teaching and Learning StrategiesSpecifi c Curriculum Outcomes
Students will be expected to
Occupational Heath and Safety rules clearly state that em-ployees and employers have rights and responsibilities. It is the responsibility of employers to provide a safe work environment, and the responsibility of employees to maintain that environ-ment. Establishing a personal code of conduct will allow stu-dents to take ownership of their OH&S rights and responsibili-ties, and will also serve to establish the baseline for safety within the lab.
This outcome also involves the project management topic within Unit 3. One of the duties of the project manager in that section is to ensure that all students are working in a safe manner. It is important that this does not become a case of one student “telling” on another, but rather the students working together to keep the fabrication lab safe. It is suggested that if an unsafe practice is identifi ed that the fi rst step would be to talk to the worker in question, the second step would be to make an in-formal report, and the third step would be to put a “stop work” order on the module in question. This could easily become a whole class learning experience, addressing aspects of the fab-rication lab safety section, the Occupational Health and Safety section and the project management section.
Activity
Students will create a contract concerning their behaviour in the fabrication lab. This contract will provide details of appropriate behaviour and consequences.
At this stage a parental permission form, signed and returned, would be advisable.
2.3.1 develop personal rules of conduct based on standard practice and revise at the end of this topic section. [5.401, 5.402, 5.403]
Topic 3 - Fabrication Lab Safety

Residential Construction Technology 83
Unit 2 - Courses Common to all Trades
ResourcesSuggested Assessment and Evaluation Strategies
Although in most assessments the activities are suggested, in the case of the safety sections most are prescribed. Wording for these specifi c activities will be indicative.
• Practical Activity
• Students are expected to create a contract concerning their behaviour in the fabrication lab. This contract will provide details of appropriate behaviour and consequences. In the de-velopment of the contract, students should include the prior learning from the previous section on Occupational Health and Safety.
• At this stage a parental permission form, signed and re-turned, would be advisable.
• •
Residential Construction Technology84
Unit 2 - Courses Common to all Trades
Suggested Teaching and Learning StrategiesSpecifi c Curriculum Outcomes
Students will be expected to
Safety rules within the fabrication lab should be clearly and prominently displayed. One of the fi rst activities for students in this course or any of the other skilled trades and technology courses should be to design and implement a safety information program within the lab site. This will enable students to become aware of the common hazards in the fabrication lab, while tak-ing personal responsibility for identifi cation and awareness for others using the space.
This outcome ties in directly with the preceding topic on OH&S and specifi cally the SAFE work program. The fi rst step in that program is:
Spot the hazard.
All students should walk through their fabrication space and identify the hazards.
Activity
Each group of students can be given a piece of equipment or situation that they can then address with rules, messaging, clear zones and fl oor plans. This is something that can be done in every course on a yearly basis, and it can also form the basis of a design project with the inclusion of OH&S and safe work principles.
A second activity could be to allow students to audit the fab-rication lab themselves for hazards. Each group would do an assessment of the space and then compare notes with the other groups.
2.3.2 identify common hazards within the construction work site (Fabrication Room). [5.402, 5.403]
Topic 3 - Fabrication Lab Safety

Residential Construction Technology 85
Unit 2 - Courses Common to all Trades
ResourcesSuggested Assessment and Evaluation Strategies
Practical Activity
• Each group of students could be given a piece of equipment or situation that they can then address with rules, messaging, clear zones and fl oor plans. This is something that can be done in every course on a yearly basis, and it can also form the basis of a design project with the inclusion of OH&S and safe work principles.
Group Activity
• Students could audit the fabrication lab themselves for hazards. Each group could do an assessment of the space and then compare notes with the other groups.
• •

Residential Construction Technology86
Unit 2 - Courses Common to all Trades
Suggested Teaching and Learning StrategiesSpecifi c Curriculum Outcomes
Students will be expected to
Working with a wide variety of tools is at the heart of the skilled trades. For power tools in particular, ensuring students are properly certifi ed to use them is essential. Normal practice is to use a combination of written and performance testing for each student for each tool. It is a good idea to maintain a chart of who is qualifi ed for what tools. You may wish to provide class wide instruction on tools, followed by individual testing. It is to be expected that not all students will qualify for all tools. It is also expected that students who qualify for different tools may wish to trade tasks.
Points to emphasize
• Safety is not just a set of rules. Safety is a way of life. It is a set of ideas, attitudes, behaviours and practices that are essential to the workplace. Safe practice does not eliminate risk, but it reduces risk. Safe practice is risk management.
• Safe use of tools is primarily using them in the prescribed manner, with the proper adjustments and usage procedures. It is also avoidance of clearly understood unsafe practices. In particular shortcuts and quick workarounds often increase risk.
• Only students who are qualifi ed will be allowed to use a particular tool. It is not necessary for all students to use all tools. It is perfectly acceptable for a group to divide the tasks so that each member can qualify for a different group of tools.
• Tool qualifi cation can occur on an as-needed basis.
• Tool qualifi cation has no margin of error. Only 100% on written/verbal/performance tests are acceptable for qualifi cation.
• Each tool is different but all tools have commonalities. Point out the commonalities with other tools when demonstrating a tool’s function, adjustments and operating procedures.
2.3.3 demonstrate safe practice for use of standard hand, portable power, and stationary power tools, for carpentry, sheet metal, and electrical work. [5.402]
Topic 3 - Fabrication Lab Safety
(cont’d p. 100)
Residential Construction Technology 87
Unit 2 - Courses Common to all Trades
ResourcesSuggested Assessment and Evaluation Strategies
Pencil and Paper
• Students are expected to complete a written safety test (pass-ing grade is 100%) and complete a practical safety demon-stration for each of the hand, portable power, and stationary power tools to be used in the fabrication laboratory. These tests are available in the teacher’s resource guide.
Log Book
• Students could report in their work log book each tool they are qualifi ed to use, and the date and time of the qualifi ca-tion.

Residential Construction Technology88
Unit 2 - Courses Common to all Trades
Suggested Teaching and Learning StrategiesSpecifi c Curriculum Outcomes
Students will be expected to
It may be useful to take one class and do an overview demonstration of all tools. Include:
• function of the tool:
• parts of the tool:
• adjustments that can be made and the correct procedure for completing them;
• safe usage of the tool for performing the common tasks; and
• procedures to follow in instances where the tool is not functioning or functioning outside the specs.
Activity
Students should
• complete the safety program for each tool that requires it, and that is intended for use;
• state and describe the safe operating procedure for using a tool at 100% accuracy;
• demonstrate safe use of a tool with 100% accuracy;
• record certifi cation for tool in the work log and have the teacher initial it;
• use tools as needed, in accordance with accepted safe practices; and
• create an appropriate entry in the work log.
2.3.3 demonstrate safe practice for use of standard hand, portable power, and stationary power tools, for carpentry, sheet metal, and electrical work. [5.402]
Topic 3 - Fabrication Lab Safety

Residential Construction Technology 89
Unit 2 - Courses Common to all Trades
ResourcesSuggested Assessment and Evaluation Strategies

Residential Construction Technology90
Unit 2 - Courses Common to all Trades
Suggested Teaching and Learning StrategiesSpecifi c Curriculum Outcomes
Students will be expected to
The purpose of this outcome is to formalize the normal safety procedures established in classrooms and laboratories. Teachers should outline the various contingencies and the proper safe re-sponse by students. These should include but are not limited to:
• fi re extinguishers;
• eye wash station;
• fi re exits;
• emergnecy shut-off; and
• fi rst aid kit.
Activity
Students could participate in a mock emergency within the fabrication lab. This simulation should involve injury, fi re, elec-trical situations and chemical spills.
WHMIS is an acronym for Workplace Hazardous Materials Information System. It involves a series of national regulations concerning the communication of information about the use and storage of hazardous material in the workplace. Science 1206 and the locally developed Workplace Safety 3220 both present a short course in WHMIS. In this course we will touch on the basics of the system and what has to be looked for in the fabrication lab.
Activity
Students should review the details of WHMIS, specifi cally:
• supplier label;
• workplace label;
• material safety data sheets (MSDS); and
• employee education.
2.3.4 demonstrate safe practices within the fabrication area, and proper procedure for handling shop emergencies. [5.402, 5.403]
2.3.5 understand the importance of WHMIS and demonstrate knowledge of its key features. [5.402, 5.403]
Topic 3 - Fabrication Lab Safety

Residential Construction Technology 91
Unit 2 - Courses Common to all Trades
ResourcesSuggested Assessment and Evaluation Strategies
Practical Activity
• Students could participate in a mock emergency within the fabrication lab. This simulation should involve injury, fi re, electrical situations and chemical spills.
Paper and Pencil
• Students could review the details of WHMIS, specifi cally:• supplier label;• workplace label;• material safety data sheets (MSDS); and• employee education.
This should be done in a written quiz or report

Residential Construction Technology92
Unit 2 - Courses Common to all Trades
Suggested Teaching and Learning StrategiesSpecifi c Curriculum Outcomes
Students will be expected to
The material safety data sheets are provided with all hazardous materials defi ned as those having the potential to cause a physi-cal or health hazard.
The different classes of such material are:
• Class A - compressed gas;
• Class B - fl ammable and combustible material;
• Class C - oxidizing material;
• Class D - poisonous and infectious material;
• Class E - corrosive material; and
• Class F - dangerously reactive material.
Activity
Students can choose a common hazardous material in the fabri-cation lab and research the relevant material safety data sheet. A report to the instructor should be prepared on this material, its use and storage in the fabrication lab.
2.3.6 recognize the need to consult Material Safety Data Sheets (MSDS) when dealing with chemicals on the jobsite. [5.402]
Topic 3 - Fabrication Lab Safety

Residential Construction Technology 93
Unit 2 - Courses Common to all Trades
ResourcesSuggested Assessment and Evaluation Strategies
Research/Paper and Pencil
• Students could choose a common hazardous material in the Fabrication Lab and research the relevant Material Safety Data Sheet. A report to the instructor should be prepared on this material, its use and storage in the Fabrication Lab.
Log Book
• Students could record in their work logs the completion of the section on WHMIS.
Residential Construction Technology94
Unit 2 - Courses Common to all Trades
Suggested Teaching and Learning StrategiesSpecifi c Curriculum Outcomes
Students will be expected to
This outcome will present ladder and small scaffold safety and proper use. Several of the fabrication sections to follow will involve the ability to safely use a ladder or baker’s scafolding.
The main point within this section is to insure that the ladder being used is in good condition and is the right ladder for the job being done. We will discuss ladder safety by considering the following headings:• proper selection;• inspection;• proper set-up; and• proper climbing and use.
Every type of ladder requires a different series of considerations within these headings. For the purposes of this course, we will consider only simple extension ladders and step ladders.
Scaffolding has a different set of considerations, involving:• questions to be asked before set-up;• inspection;• proper set-up; and• safety considerations.
A short course in this material is available in the teachers’ re-source guide which will accompany the curriculum guide. All students involved in ladder use MUST take this course.
The Occupational Health and Safety Act states that anyone work-ing over a height of 3.05 metres must wear a fall protection device. This information should be imparted to students, but it is understood that NO student will be operating at, or greater than, that height.
Simple fall protection devices include:• safety belt;• safety harness; and• life lines (1134 kg test).
2.3.7 demonstrate safe practice for the use of ladders and small scaffolding, to include fall protection devices and standards. [5.402]
Topic 3 - Fabrication Lab Safety

Residential Construction Technology 95
Unit 2 - Courses Common to all Trades
ResourcesSuggested Assessment and Evaluation Strategies
Practical Activity
• All students or teachers involved in the use of ladders or scaf-folding will be expected to complete the safety course found in the teacher resource guide.
• Students must complete this course and demonstrate knowl-edge of the material (at 100% accuracy) before they are permitted to use ladders or scaffolds.
Log Book
• Once the course is completed, students could report the suc-cesful completion in their log books.
• •

Residential Construction Technology96
Unit 2 - Courses Common to all Trades
Suggested Teaching and Learning StrategiesSpecifi c Curriculum Outcomes
Students will be expected to
Within the modular approach to instruction is an assumption that there will be time to do demonstrations of each of the activities students are expected to undertake. Some of this will occur as the individual modules start, but a quick overview of the activities should be undertaken before any of the modules begin. The purpose of this outcome is to create an opportunity to go over these activities as a whole before the module rotation begins. The module activities are listed below and in more detail in Unit 3.
Topic 1: Window and Door Framing
Topic 2: Window Installation with External Trimming
Topic 3: Door Installation with External Trimming
Topic 4: Exterior Cladding (wood) with VBL
Topic 5: Exterior Cladding (vinyl) with VBL
Topic 6: Roof Coverings
Topic 7: Stair Construction
Topic 8: Project Management
Topic 9: Floor Covering
Topic 10: HVAC Ducting
Topic 11: Smart House Wiring
This could be presented a second time as the modules reach their half-way rotation as a refresher for students.
Activity
Students could be expected to make a report on the demon-strations and should be encouraged to make copious notes. In small groups they could present their own demonstrations of how each module should be completed, or as part of their own module learning make a short presentation to the next group that is to rotate into their place.
2.3.8 observe demonstrations for each of the construction activities in Unit 3.[5.402]
Topic 3 - Fabrication Lab Safety

Residential Construction Technology 97
Unit 2 - Courses Common to all Trades
ResourcesSuggested Assessment and Evaluation Strategies
Presentation
• Students could be expected to make a report on the demon-strations and should be encouraged to make copious notes. In small groups they could present their own demonstrations of how each module should be completed, or as part of their own module learning make a short presentation to the next group that is to rotate into their place.
• •

Residential Construction Technology98
Unit 2 - Courses Common to all Trades

Residential Construction Technology 99
Unit 3 - Practical Residential Construction
Unit 3
Practical Residential Construction
Overview PurposeThe purpose of this unit is to provide students an opportunity to experience residential construction. The activities are all structured with practical components that offer students hands-on learning. Each of the topics below are single instructional modules. The topics are not sequential, they are meant to be taught in a modular method:
• Topic 1: Window and Door Framing
• Topic 2: Window Installation with External Trimming
• Topic 3: Door Installation with External Trimming
• Topic 4: Exterior Cladding (wood) with VBL
• Topic 5: Exterior Cladding (vinyl) with VBL
• Topic 6: Roof Coverings
• Topic 7: Stair Construction
• Topic 8: Project Management
• Topic 9: Floor Covering
• Topic 10: HVAC Ducting
• Topic 11: Smart House Wiring
Profi leThe activities in this unit are an extension of the Skilled Trades 1211 course. Residential Construction Technology 2211 will focus mostly on carpentry skills that are used in the fabrication of new houses. It is the intent of this unit to provide students a better understanding of the residential construction process and to develop skills that may lead students into a career path in the skilled trades.

Residential Construction Technology100
Unit 3 - Practical Residential Construction
Implementation
Evaluation
Timeline
Unit 3 contains most of the hands-on activities within the Residential Construction Technology 2211course. A total of 77 hours of instruction will occur in this unit.
Unit 3 consists of 22 hours of instruction, 44 hours of hands-on activities and 11 hours of refl ection and breakdown. As such, it represents over 70% of the entire course and its evaluation should refl ect this.
The timeline indicated below is a guideline for the teacher. It is based on a seven class rotation for each topic.
Topic 1: Window and Door Framing
• SCOs 3.1.1 – 3.1.7
Topic 2: Window Installation with External Trimming
• SCOs 3.2.1 – 3.2.8
Topic 3: Door Installation with External Trimming
• SCOs 3.3.1 – 3.3.8
Topic 4: Exterior Cladding (wood) with VBL
• SCOs 3.4.1 – 3.4.7
Topic 5: Exterior Cladding (vinyl) with VBL
• SCOs 3.5.1 – 3.5.7
Topic 6: Roof Coverings
• SCOS 3.6.1 – 3.6.6
Topic 7: Stair Construction
• SCOs 3.7.1 – 3.7.6
Topic 8: Project Management
• SCOs 3.8.1 – 3.8.5
Topic 9: Floor Covering
• SCOs 3.9.1 – 3.9.7
Topic 10: HVAC Ducting
• SCOs 3.10.1 – 3.10.8
Topic 11: Smart House Wiring
• SCOs 3.11.1 – 3.11.5

Residential Construction Technology 101
Unit 3 - Practical Residential Construction
Outcomes and Strategies

Residential Construction Technology 102
Unit 3 - Practical Residential Construction
Suggested Teaching and Learning StrategiesSpecifi c Curriculum Outcomes
Students will be expected to
This outcome forms the introduction to this material and will form the basis of the instruction to follow.
Terms:
trimmer stud – inside framing stud supporting the header
cripple stud – short studs underneath window openings
header – load bearing support on top of window or door
rough sill – bottom of window opening, held up by cripple studs
Tools:
hammer;
compound mitre saw;
hand saw;
framing square;
measuring tape; and
level.
Activities:
Given a diagram of a window and door framing situation, label the different parts and list and explain the tools used in their installation.
3.1.1 Demonstrate knowledge of terms and tools used in the industry for window and door frame preparation.[1.405]
Residential Construction Technology 103
Unit 3 - Practical Residential Construction
ResourcesSuggested Assessment and Evaluation Strategies
Paper and Pencil - Diagram
• Students should be given a diagram and will be expected to label the appropriate parts of a wall for window and door installation.
Presentation
• Students could generate a list of tools necessary to complete the rough stud opening (RSO) for a given window or door and their appropriate use. There will be emphasis placed on safe use of tools and proper terminology related to window and door installation. This list and the appropriate use of tools will be demonstrated to the instructor.
• Modern Carpentry Chapter 9, Pages 205-231

Residential Construction Technology 104
Unit 3 - Practical Residential Construction
Suggested Teaching and Learning StrategiesSpecifi c Curriculum Outcomes
Students will be expected to
Topic 1: Window and Door Framing
3.1.2 Locate appropriate sections of the National Building Code that deal specifi cally with window and door installation.[1.405]
The purpose of this outcome is to familiarize and enable stu-dents to use the National Building Code standards associated with window and door installation. The national building code states the codes and requirements for all residential construc-tion.
Working in teams of two students will research, using the Na-tional Building Code, the proper lintel size for a predetermined window and door. This will be provided to students in the form of an elevation drawing. Students should be made aware of the importance of installation specifi cations that meet the manufac-tures installation specifi cations (for warranty purposes) and fi re safety regulations.
There should be particular emphasis placed on:
• safety requirements;
• minimum window size for windows for egress;
• direction of swing of doors and windows; and
• terminology associated with window and door installation;
• RSO - rough stud opening
• RHS - right hand swing, etc.
Activities:
Provide students with a set of residential plans and have them determine minimum size and location of windows and doors as specifi ed in the National Building Code.

Residential Construction Technology 105
Unit 3 - Practical Residential Construction
ResourcesSuggested Assessment and Evaluation Strategies
National Building CodeResearch
• Using the proper sections of the national building code students could research the code as it relates to the size and location for framing exterior doors and windows.
• Things to consider:• exterior door sizing (800-900 mm; • the proper direction of swing for an exterior
door; and • the proper use of the various terms used in
exterior door installation.
Paper and Pencil - Diagrams
• Students could apply this knowledge to a set of fl oor plans by deciding on the proper location, size and swing of exterior doors.

Residential Construction Technology 106
Unit 3 - Practical Residential Construction
Suggested Teaching and Learning StrategiesSpecifi c Curriculum Outcomes
Students will be expected to
The purpose of this outcome is to familiarize students with the various framing components required in window and door installation.
Activity
Perform the following:
• label a diagram of a window;
• label a diagram of a door; and
• label a diagram of a wall frame.
The purpose of this outcome is to determine correct RSO to allow for proper window and door installation.
Points to emphasize are:
• installation of insulation;
• binding of doors and windows;
• allowance for seasonal shifting; and
• installation of interior trim.
Activity
Given a window or door of a specifi c size, determine the rough size opening.
Topic 1: Window and Door Framing
3.1.3 Identify the parts of a window and door frame and nominal lumber sizes for each component.[1.402][1.405]
3.1.4 Differentiate between rough-in and door or window unit to be installed[1.402][1.405]

Residential Construction Technology 107
Unit 3 - Practical Residential Construction
ResourcesSuggested Assessment and Evaluation Strategies
• Modern Carpentry Chapter 9, Pages 209
• Modern Carpentry Chapter 9, Pages 329 & 338
Paper and pencil - Quiz
• Given a diagram of a window or door frame students could correctly label the various parts. Things to emphasize are nomi-nal lumber sizes, and spacing and loads to be carried.
Paper and Pencil - Diagrams
• Students could be supplied with a variety of door and window sizes which they will then be expected to determine the proper RSO for the installation of those various doors and windows.
• They should follow the proper RSO guideline below:
• window: 12.5 mm (½”) clearance on each side and 19 mm (¾”) on top for plumbing and leveling; and
• door: 63 mm (2 ½”) larger than door and jambs.
•

Residential Construction Technology 108
Unit 3 - Practical Residential Construction
Suggested Teaching and Learning StrategiesSpecifi c Curriculum Outcomes
Students will be expected to
The purpose of the outcome is to have students develop a plan for window and door installation. This will involve a rough sketch which will include:
• proper RSO;
• Identifi cation of key framing components;
• dimensioning;
• location of installation; and
• proper nominal sizes of lumber to be used.
Using proper building techniques and tools to layout and as-semble a wall to accommodate the installation of a 800 mm (32”) door.
Activity
Students will be required to:
• select proper and quality material;
• layout accurate stud spacing and RSO; and
• assemble wall frame to accommodate door
Using proper building techniques and tools to layout and as-semble a wall to accommodate the installation of a 533mm (21”) X 787mm (31”) window.
• • Activity• Students will be required to:• • select proper and quality material;• • layout accurate stud spacing and RSO; and• • assemble wall frame to accommodate window.
3.1.5 Create a work plan for the installation of a window and door using the National Building Code. [1.402][1.405] [4.402][4.403]
3.1.6 Assemble the framing for a 800 mm (32”) door opening. [1.401][1.402] [1.403][1.404][1.405] [2.401][2.402][5.402]
3.1.7 Assemble the framing for a 533 mm (21”) window opening. [1.401][1.402][1.403][1.404][1.405] [2.401][2.402][5.402]
Topic 1: Window and Door Framing

Residential Construction Technology 109
Unit 3 - Practical Residential Construction
ResourcesSuggested Assessment and Evaluation Strategies
• Modern Carpentry Chapter 9, Pages 206
•
Modern Carpentry Chapter 9
Paper and Pencil - Assignment
• Students could develop a rough sketch on grid paper that gives the proper RSO and labels for window and door instal-lation. Diagrams should be similar to page 206. The work plan must be approved by the instructor before fabrication can be started. A bill of materials for successful completion of the fabrication stage must be included with the sketch.
Practical activity
• Students could select, measure, cut and assemble the mate-rial needed to frame a RSO for the installation of a door of a specifi ed size. Emphasis must be placed on accuracy of measurements, safe use of equipment during cutting and as-sembly, and pride and quality of workmanship.
Practical activity
• Students could select, measure, cut and assemble the mate-rial needed to frame a RSO for the installation of a window of a specifi ed size. Emphasis must be placed on accuracy of measurements, safe use of equipment during cutting and as-sembly, and pride and quality of workmanship.
Log Book
• Students could record the successful completion of these activities in their log books.

Residential Construction Technology 110
Unit 3 - Practical Residential Construction
Suggested Teaching and Learning StrategiesSpecifi c Curriculum Outcomes
Students will be expected to
• This outcome will help students identify common types of windows and associated trim products. • • Window material – wood, vinyl and steel.• • Some of the common window types include:• • casement;• • slider;• • double hung;• • bay; and• • hopper.• • Some of the common trim products include:• • fi nger jointed pine;• • medium density fi ber board (MDF);• • vinyl; and • • natural wood products (e.g., wood, cedar, etc.).• • Activity• • Identify the different types of windows and discuss the ad-vantages and disadvantages of each.• • Identify the different types of trim products and discuss the advantages and disadvantages of each.
3.2.1 Identify common types of windows, hardware and trim products. [1.405]
Topic 2: Window Installation with External Trimming

Residential Construction Technology 111
Unit 3 - Practical Residential Construction
ResourcesSuggested Assessment and Evaluation Strategies
Carpentry and Building Con-struction, Unit 6, p551-565.
Pencil and Paper
• Students could complete worksheets on various types of win-dow materials based on notes/handouts in class.
Group Activity
• In small groups or pairings:• students could identify the different types of trim products
and discuss the advantages and disadvantages of each; and • students could identify the different advantages disadvan-
tages of the various window types.
Presentation
• In small groups or pairings, students could prepare a presentation on some of the various types of trim products and window types. Within the pre-sentation advantages and disadvantages of each will be the main focus.

Residential Construction Technology 112
Unit 3 - Practical Residential Construction
Suggested Teaching and Learning StrategiesSpecifi c Curriculum Outcomes
Students will be expected to
3.2.2 Demonstrate knowledge of terms and tools used in the industry for window installation.[1.405]
3.2.3 Interpret appropriate sections of the National Building Code that deal specifi cally with window installation.[1.402][1.405]
• •
Topic 2: Window Installation with External Trimming
The purpose of this outcome is to familiarize students with the tools associated with the installation of windows.
Activity:
Given a list of tools students will articulate the use of that tool as it relates specifi cally to window and door installation.
The purpose of this outcome is to familiarize and enable students to use the national building code standards associated with window installation. The National Building Code states the codes and requirements for all residential construction. Students should be made aware of the importance of instal-lation specifi cations that meet the manufactures installation specifi cations (for warranty purposes) and fi re safety regula-tions.
There should be particular emphasis placed on:• safety requirements;• minimum window size for windows for egress;• direction of swing of windows; and• Terminology associated with window installation (e.g., RSO, RHS, etc.).
Activity:
Provide students with a set of residential plans and have them determine minimum size and location of windows as specifi ed in the National Building Code.

Residential Construction Technology 113
Unit 3 - Practical Residential Construction
ResourcesSuggested Assessment and Evaluation Strategies
National Building CodeResearch/Demonstration
• Students could research the tools associated with the installa-tion of windows and provide a demonstration of the tool or description of its use to the instructor.
Paper and Pencil - Diagrams
• Using the national building code as a guide, students could take a set of residential construction plans and determine the location and type of windows specifi ed by the code.
Discussion
• Students may discuss, with the instructor, using industry–specifi c terms, such as RSO and RHS, their choices.

Residential Construction Technology 114
Unit 3 - Practical Residential Construction
Suggested Teaching and Learning StrategiesSpecifi c Curriculum Outcomes
Students will be expected to
This outcome examines the different types of windows available for installation in residential construction. It is designed to be a precursor to 3.2.5, as an understanding of the types of windows is needed before an order can be fi lled out.
Students could research the window types either from the sup-plied texts or from vendor internet sites. Common windows types are:
• sliding;
• swinging; and
• fi xed.
Within these types a variety of designs and method of operation are available. Some examples are listed below:
• double hung;
• horizontal sliding;
• casement;
• awning; and
• hopper.
The purpose of this outcome is to provide students with a practical opportunity to complete an order form that would normally be required in residential construction.
Activity:
Students could interpret a set of house plans and complete a window requisition form as used by a local window supplier. This activity should also involve calculating the costs of those windows.
3.2.4 Identify the key components and characteristics of a window with respect to window design.[1.405]
3.2.5 Complete an order form for windows from a set of fl oor plans.[1.405]
Topic 2: Window Installation with External Trimming

Residential Construction Technology 115
Unit 3 - Practical Residential Construction
ResourcesSuggested Assessment and Evaluation Strategies
Window Order Form
Blueprints
Paper and Pencil - Checklist
• Students could complete a checklist and diagram of all the component parts of a window. With this diagram, a brief description of the designed function of each part could be included.
Group Work
• In small groups or pairings, students could discuss the im-plications of different types of windows and when each type would be most appropriately installed. They should take into account the esthetics as well as the functionality of the window design in their discussion.
Paper and Pencil
• Students could estimate the cost and then complete an order form for a set of specifi c windows based on a set of house plans.

Residential Construction Technology 116
Unit 3 - Practical Residential Construction
Suggested Teaching and Learning StrategiesSpecifi c Curriculum Outcomes
Students will be expected to
The purpose of this outcome is to provide students the oppor-tunity to properly install a window to manufacturer’s specifi ca-tions.
Activity:• Check the size of rough opening in relationship to the size of the window.• Install proper moisture barriers (e.g., tyvek, building paper etc.).• Install window using appropriate tools and building practices (e.g., shims, fasteners, etc.).• Check window for functionality, level and plumb.
The purpose of the outcome is to provide an opportunity for students to properly insulate a previously installed window.
Activity:Students will insulate around the window using fi berglass insu-lation.
The purpose of this outcome is to provide students with the opportunity to discover the relationship between siding systems and window installation. This will be accomplished through the proper installation of a J-trim to mate the brick mold to the siding.
Activity: Students will measure, cut, and install a J-trim using the proper techniques in order to fi nish the window installation.
3.2.6 Install a vinyl window according to manufacturer’s specifi cation. [1.402][1.405] [4.402][4.403]
3.2.7 Insulate around the window frame using fi berglass pink insulation. [1.401][1.402][1.403] [1.404][1.405][2.401][2.402] [5.402]
3.2.8 Attach appropriate trim material to complete window to siding interface. [1.401][1.402][1.403] [1.404][1.405] [2.401][2.402] [5.402]
Topic 2: Window Installation with External Trimming
Residential Construction Technology 117
Unit 3 - Practical Residential Construction
ResourcesSuggested Assessment and Evaluation Strategies
Carpentry and Building Construction, Unit 6, p561.
Paper and Pencil
• Students will complete a handout outlining the steps re-quired for the successful installation of a window according to the manufacturer’s instructions.
Practical activity
• Students could install and insulate a window following the correct steps. The instructor will inspect and grade as per a checklist/rubric. (see teacher resource guide)
Discussion
• Students could discuss the importance of proper insulation around windows and doors.
Practical activity
• Students could determine the type of window and install the appropriate trim for that window. This can vary from J-trim for wooden windows to the built-in channel in a vinyl win-dow.
Log Book
• Students could record the successful completion of these activities in their log book.
Residential Construction Technology 118
Unit 3 - Practical Residential Construction
Suggested Teaching and Learning StrategiesSpecifi c Curriculum Outcomes
Students will be expected to
This outcome will help students identify common types of doors, hardware, and associated trim products.
Some of the common exterior door types include:
• patio doors;
• steel french;
• steel slab (with/without sidelights); and
• solid wood (oak/mahogany).
Some of the common hardware products include:
• deadbolts; and
• door handles.
Some of the common trim products include:
• fi nger jointed pine;
• medium density fi ber board (MDF);
• vinyl; and
• natural wood products (e.g., wood, cedar etc.).
Activity
Identify the different types of doors and discuss the advantages and disadvantages of each.
Identify the different types of hardware and discuss the advan-tages and disadvantages of each.
Identify the different types of trim products and discuss the advantages and disadvantages of each.
3.3.1 Identify common types of exterior doors, hardware and trim products.[1.405]
Topic 3: Door Installation with External Trimming

Residential Construction Technology 119
Unit 3 - Practical Residential Construction
ResourcesSuggested Assessment and Evaluation Strategies
Modern Carpentry Chapter 12Paper and Pencil - Assignment
• Students could be given a list encompassing exterior door types, hardware and trim products. They should compare various types and do an evaluation of which type best fi ts various applications. They can create a table which lists the various types of products and then do a side by side compari-son. Things to consider in the comparison would be cost, durability, aesthetics and practicality.

Residential Construction Technology 120
Unit 3 - Practical Residential Construction
Suggested Teaching and Learning StrategiesSpecifi c Curriculum Outcomes
Students will be expected to
Topic 3: Door Installation with External Trimming
The purpose of this outcome is to familiarize students with the tools associated with the installation of doors.
Activity:
Given a list of tools students will articulate the use of that tool as it relates specifi cally to door installation.
The purpose of this outcome is to familiarize and enable stu-dents to use the National Building Code standards associated with door installation. The National Building Code states the codes and requirements for all residential construction.
Students should be made aware of the importance of installation specifi cations that meet the manufactures installation specifi ca-tions (for warranty purposes) and fi re safety regulations.
There should be particular emphasis placed on:
• safety requirements;
• minimum door size for doors for egress;
• direction of swing of doors; and
• terminology associated with door installation (e.g., RSO, RHS, etc.).
Activities:
Provide students with a set of residential plans and have them determine minimum size and location of doors as specifi ed in the National Building Code.
3.3.2 Demonstrate knowledge of terms and tools used in the industry for door installation.[1.405]
3.3.3 Interpret appropriate sections of the National Building Code that deal specifi cally with exterior door installation. [1.402][1.405]

Residential Construction Technology 121
Unit 3 - Practical Residential Construction
ResourcesSuggested Assessment and Evaluation Strategies
Discussion/Interview
• Students should be supplied with a list of tools used to complete the installation of an exterior door. They could determine the proper use for the tool and discuss, with the instructor, its safe and proper use in the installation.
Research/Pencil and Paper
• Using the proper sections of the National Building Code, students could research the code as it relates to the size and location of exterior doors.
• Things to consider would be: • door sizing (800-900 mm); • the proper direction of swing for an exterior door; and • the proper use of the various terminology used in exterior
door installation.
• Students should apply this knowledge to a set of fl oor plans by deciding on the proper location, size, and swing of exte-rior doors.
• Modern Carpentry Chapter 12

Residential Construction Technology 122
Unit 3 - Practical Residential Construction
Suggested Teaching and Learning StrategiesSpecifi c Curriculum Outcomes
Students will be expected to
This outcome deals with the different types of doors available for installation in construction. It is designed to be a precursor to 3.3.5, as an understanding of the types of doors is needed before an order can be fi lled out.
Students could research the door types either from the supplied texts or from vendor internet sites. Common exterior door materials are:
• solid wood;• fi berglass;• steel; and• glass.
Within these materials, different styles are available
• sliding;• swinging; and• double doors.
The purpose of this outcome is to provide students with practi-cal opportunity to complete an order form that would normally be required in industry.
Students will be required to interpret a set of house plans and complete an exterior door requisition form as used by a local door supplier.
3.3.4 identify the key components and characteristics of an exterior door with respect to door design.[1.405]
3.3.5 complete an order form for exterior doors from a set fl oorplan. [1.402][1.405] [4.402][4.403]
Topic 3: Door Installation with External Trimming
Residential Construction Technology 123
Unit 3 - Practical Residential Construction
ResourcesSuggested Assessment and Evaluation Strategies
Interview/Paper and Pencil
• Students should be given a list of various door materials and door types. They could do a comparison of the different ma-terials and types, and do a side by side comparison listing the strengths and weaknesses of the various materials and types. They will then be expected to make an educated decision on which door material and type fi ts a sample application. This should be done in an interview style conversation with the instructor.
Paper and Pencil
• Students could complete a quiz at this point that incorporates aspects of the last few SCOs dealing with types and styles of windows and doors. This quiz should test the knowledge and application of knowledge the students could have gained.
Paper and Pencil
• Using the knowledge gained in 3.3.4 students could com-plete an appropriate order form for exterior door purchase. They will be expected to specify the material and door type necessary, the door size and the door swing. They will garner this information from a provided set of fl oor plans and the knowledge gained throughout this unit.
• Modern Carpentry Chapter 12
Residential Construction Technology 124
Unit 3 - Practical Residential Construction
Suggested Teaching and Learning StrategiesSpecifi c Curriculum Outcomes
Students will be expected to
The purpose of this outcome is to provide students the op-portunity to properly install an exterior door to manufacturer’s specifi cations.
Activity:• Check the size of rough opening in relationship to the size of the door.• Install proper moisture barriers (e.g., tyvek, building paper etc.).• Install door using appropriate tools and building practices (e.g., shims, fasteners, etc.).• Check doors for functionality, level and plumb.
The purpose of the outcome is to provide an opportunity for students to properly insulate a previously installed exterior door.
Activity:Students will insulate around the door using fi berglass pink insulation.
The purpose of this outcome is to provide students with the opportunity to discover the relationship between siding system and exterior door installation. This will be through the proper installation of a J-trim to mate the brick mold to the siding.
Activity:
Students will measure, cut and install a J-trim using the proper techniques in order to fi nish the door installation.
3.3.6 install a complete exterior door system according to manufacturer’s specifi cation. [1.401][1.402][1.403] [1.404][1.405][2.401][2.402][5.402]
3.3.7 insulate around the exterior door frame using fi berglass pink insulation. [1.401][1.402][1.403][1.404][1.405] [2.401][2.402][5.402]
3.3.8 attach appropriate trim material to complete exterior door to siding interface. [1.401][1.402][1.403][1.404][1.405] [2.401][2.402][5.402]
Topic 3: Door Installation with External Trimming

Residential Construction Technology 125
Unit 3 - Practical Residential Construction
ResourcesSuggested Assessment and Evaluation Strategies
Practical Activity
• Students will be expected to safely use the appropriate tools to install an exterior door. They will use proper plumbing procedures to ensure that the door is installed in a proper manner. The door will be checked for functionality, levelness and plumb.
Log Book
• Upon successful completion of these activities, students could record their experiences in their log book.
Discussion/Group Work
• Students could discuss in small groups the importance of insulation in door installations.
Practical Activity
• Students will use appropriate safety equipments and proce-dures to install fi berglass insulation around the previously installed exterior door. They will be expected to use proper handling procedures for fi breglass insulation and proper safety precautions for clean up after the installation is com-plete.
Practical Activity
• Students will use the proper tools and procedures to meas-ure, cut, and install J-trim to accept siding to fi nish the door installation. The J-trim will be installed to industry standards and using industry approved techniques. In real life situations caulking would be used here, but to assist with ease of disassembly we will not use caulking at this juncture. Students will be reminded of the importance of caulking the J-trim to ensure a proper water tight seal around the door.
• Modern Carpentry Chapter 12

Residential Construction Technology 126
Unit 3 - Practical Residential Construction
Suggested Teaching and Learning StrategiesSpecifi c Curriculum Outcomes
Students will be expected to
The purpose of this outcome is to help students identify com-mon types of exterior wood cladding.
Some forms you may explore are:• cedar (shakes, vertical, and horizontal);• spruce clapboard; or• fi bre cement board.
Activity:
Identify the different types of siding and discuss the advantages and disadvantages of each.
The purpose for this outcome is to allow students an opportu-nity to comprehend the difference a vapour barrier liner makes with respect to heating, cooling and moisture control.
Some forms of VBL you may examine are:• Tyvek;• plastic of varying thickness; or• foil.
Some methods of installation you may consider are:• acoustical sealant;• staples; and• high adhesive tape (e.g., tuck, etc.)
Activity:
Installation of Tyvek using the hammer stapler and taping sys-tem.
3.4.1 Identify common types of exterior wood cladding.[1.405]
3.4.2 Recognize the need for a vapour barrier liner in working with external wood cladding. [1.401] [1.402][1.404][1.405]
Topic 4: Exterior Cladding (wood) with VBL

Residential Construction Technology 127
Unit 3 - Practical Residential Construction
ResourcesSuggested Assessment and Evaluation Strategies
Presentation
• Students could study different types of siding and will be expected to do a comparison of the advantages and disad-vantages of each. They will look at factors such as durability, weather ability, aesthetic appeal and practicality. This infor-mation can be provided in the form of a table or in a Power-point presentation.
Research/Presentation
• Students could research the benefi ts of adding a vapour barri-er when building a structure. There are different types, each with their own particular benefi ts.
Presentation
• Students could explore various ways of installing vapour bar-rier and also various sealant materials to be used to fi nish the installation. Students can do a display board exhibiting the various types and their properties.
Practical Activity
• Students could install a vapour barrier on the prepared section for wood cladding.
Modern Carpentry Chapter 12
Residential Construction Technology 128
Unit 3 - Practical Residential Construction
Suggested Teaching and Learning StrategiesSpecifi c Curriculum Outcomes
Students will be expected to
The purpose of this outcome is to familiarize and enable stu-dents to use the national building code standards associated with wood cladding installation. The National Building Code states the codes and requirements for all residential construc-tion. Students should be made aware of the importance of installation specifi cations that meet the manufactures installation specifi ca-tions (for warranty purposes) and fi re safety regulations.
There should be particular emphasis placed on:• proper installation; and• moisture and rot control.
Activity:
Students will install wood cladding following national building standards.
The purpose of this outcome is to familiarize students with the tools associated with the installation of wood cladding. Some tools used are:• compound mitre saw;• hammer;• caulking gun;• drill (for pre-drilling);• level; and• spacing jig.
Activity:Given a list of tools students will articulate the use of these tools as they relate specifi cally to wood cladding installation, as well as the appropriate technique used to ensure the proper installa-tion of the cladding.
3.4.3 Interpret appropriate sections of the National Building Code that deal specifi cally with wood cladding installation.[1.402] [1.405]
3.4.4 Demonstrate knowledge of terms and tools used in the industry for installation of wood cladding. [1.405]
Topic 4: Exterior Cladding (wood) with VBL

Residential Construction Technology 129
Unit 3 - Practical Residential Construction
ResourcesSuggested Assessment and Evaluation Strategies
Research
• Students could investigate the National Building Code to ex-amine the proper methods of installing wood cladding. The specifi cations for proper installation for fi re safety regulations and for moisture control need to be met.
Research/Presentation
• Students could investigate the various tools used in the in-stallation of wood cladding. They will look at the safety fea-tures necessary when using the various tools. They will give a brief description of these tools as they relate to the specifi c aspect of wood cladding installation.
Modern Carpentry Chapter 12

Residential Construction Technology 130
Unit 3 - Practical Residential Construction
Suggested Teaching and Learning StrategiesSpecifi c Curriculum Outcomes
Students will be expected to
This outcome will allow students the opportunity to identify some of the following elements of wood cladding:
• moisture resistance;
• pest resistance;
• checking or splitting;
• cupping or warping; and
• ability to hold paint or stain (rough or planed side out).
The purpose of this outcome is to provide students with a practical opportunity to complete an order form that would normally be required in industry.
Students will be required to interpret a set of house plans and complete an exterior sheathing formula in order to ensure the proper amount of cladding is ordered.
The following formulas may be helpful to go over with stu-dents:
• for 25mm x 300mm the estimating factor is the area x 1.17;
• for 25mm x 250mm the estimating factor is the area x 1.210;
• for 25mm x 200mm the estimating factor is the area x 1.28;
• for 25mm x 150mm the estimating factor is the area x 1.33; and
• for 25mm x 100mm the estimating factor is the area x 1.60.
Within this outcome, students should install wood cladding and the vapour barrier liner in a method to emulate residential construction situations.
3.4.5 Identify the key components and characteristics of wood cladding products with respect to residential construction.[1.405]
3.4.6 Complete an order form for wood cladding from a set elevation view. [1.402][1.405] [4.402] [4.403]
3.4.7 Install Vapour Barrier Liner and wood cladding using proper techniques. [1.401][1.402][1.403] [1.404][1.405][2.401] [2.402][5.402]
Topic 4: Exterior Cladding (wood) with VBL

Residential Construction Technology 131
Unit 3 - Practical Residential Construction
ResourcesSuggested Assessment and Evaluation Strategies
Research
• The installation of wood cladding has its own set of specifi c concerns. Some of these are moisture resistance, cupping, warping, etc. Students should investigate the concerns that surround the installation of wood cladding. They can fi nd the issues that are present and then explore ways to solve the problem.
Paper and Pencil
• Given a set of elevation plans, students could calculate the amount of wood cladding needed to fi nish the exterior of the house. They will be presented with the formulas and asked to use the formulas to determine the amount of siding needed. They will then complete an order form and order the necessary material.
Log Book
• Students could record the successful completion of this activ-ity in their log book.
Practical Activity• Students should be given the necessary material to go
through the practical application of wood cladding. They will prepare their walls for the installation of the proper va-pour barrier. They will install their vapour barrier and then proceed to preparing their walls for the installation of the wood cladding. After the walls have been prepared they will prepare a sketch to enable them to plan the installation of the wood cladding. They will then install the wood cladding. They will follow proper installation procedures and complete the installation using industry standards and techniques.
• Modern Carpentry Chapter 12

Residential Construction Technology 132
Unit 3 - Practical Residential Construction
Suggested Teaching and Learning StrategiesSpecifi c Curriculum Outcomes
Students will be expected to
The purpose of this outcome is to determine the different types of exterior vinyl siding used in residential construction.
Types to look at are:
• vertical vinyl siding;
• horizontal vinyl siding; and
• solid core (next generation).
The purpose of this outcome is to determine the purpose that a vapour barrier has when used in combination with vinyl siding. Points to emphasize are:
Different types of vapour barrier:
• Tyvek, building paper, and vapour barrier sheathing; and
• use of fl ashing around windows and doors.
Students can look at the different types and then make an informed decision as to which type best suits different applica-tions. Students will present the advantages and disadvantages of each material.
3.5.1 identify common types of exterior vinyl cladding. [1.405]
3.5.2 recognize the need for a vapour barrier liner in working with external vinyl cladding.[1.402] [1.405]
Topic 5: Exterior Cladding (vinyl) with VBL
Residential Construction Technology 133
Unit 3 - Practical Residential Construction
ResourcesSuggested Assessment and Evaluation Strategies
Presentation
• Students could study different types of siding and will be expected to do a comparison of the advantages and disad-vantages of each. They will look at factors such as durability, weather ability, aesthetic appeal and practicality. This infor-mation can be provided in the form of a table or a Power-point presentation.
Research/Presentation
• Students could research the benefi ts of adding a vapour barrier when building a structure. There are different types, each with their own particular benefi ts.
Presentation
• Students could explore various ways of installing a vapour barrier and also various sealant materials to be used to fi nish the installation. Students can do a display board exhibiting the various types and their properties.

Residential Construction Technology 134
Unit 3 - Practical Residential Construction
Suggested Teaching and Learning StrategiesSpecifi c Curriculum Outcomes
Students will be expected to
The purpose of this outcome is to familiarize students with the tools associated with the installation of vinyl cladding.
Some common terms are:
• end caps;
• J-trim; and
• starter strip.
Common tools used in the installation of vinyl cladding are:
• steel tape;
• folding rule;
• hand saw;
• hack saw;
• chalk line;
• hammer;
• zip tool;
• aviation snips; and
• steel awl.
Given a list of tools students will articulate the use of that tool as it relates specifi cally to vinyl cladding installation.
.
3.5.3 demonstrate knowledge of terms and tools used in the industry for installation of vinyl cladding.[1.405]
Topic 5: Exterior Cladding (vinyl) with VBL

Residential Construction Technology 135
Unit 3 - Practical Residential Construction
ResourcesSuggested Assessment and Evaluation Strategies
Research/Presentation
• Students could investigate the various tools used in the installation of vinyl cladding. They will look at the safety features necessary when using the various tools. They will give a brief description of the tool as it relates to the specifi c aspect of vinyl cladding installation.

Residential Construction Technology 136
Unit 3 - Practical Residential Construction
Suggested Teaching and Learning StrategiesSpecifi c Curriculum Outcomes
Students will be expected to
The purpose of this outcome is to familiarize and enable stu-dents to use the national building code standards associated with vinyl cladding installation. The National Building Code states the codes and requirements for all residential construc-tion.
Working in teams of two students will use the National Building Code to research the proper installation requirements for vinyl cladding on a residence. This will include the proper use of vapour barrier, the use of proper sheathing material, and the proper requirements for installation.
Activities:
Provide students with a set of residential plans and have them determine the amount of siding and vapour barrier needed to complete the house, based on manufacturers’ installation recom-mendations. This would also include calculating the amount of end cap, J-trim and starter strip needed.
This outcome will familiarize students with the unique features of vinyl siding and the way it reacts to different climatic condi-tions. This would include making allowances for expansion and contraction due to temperature changes, and proper nailing procedures to allow for the above.
Other factors would include albedo, fading due to sun exposure, issues with painting, maintenance and cracking.
3.5.4 interpret appropriate sections of the National Building Code that deal specifi cally with vinyl cladding installation.[1.402] [1.405]
3.5.5 identify the key components and characteristics of vinyl cladding products with respect to residential construction.[1.405]
Topic 5: Exterior Cladding (vinyl) with VBL

Residential Construction Technology 137
Unit 3 - Practical Residential Construction
ResourcesSuggested Assessment and Evaluation Strategies
Research
• Students could investigate the National Building Code to ex-amine the proper methods of installing vinyl cladding. The specifi cations for proper installation for fi re safety regulations and for moisture control need to be met.
Research
• The installation of vinyl cladding has its own set of specifi c concerns. Students could investigate the concerns that sur-round the installation of vinyl cladding. They can fi nd the issues that are present and then explore ways to solve the problems.

Residential Construction Technology 138
Unit 3 - Practical Residential Construction
Suggested Teaching and Learning StrategiesSpecifi c Curriculum Outcomes
Students will be expected to
The purpose of this outcome is to provide students with a practical opportunity to complete an order form that would normally be required in industry.
Students will be required to interpret a set of house plans and complete a vinyl cladding requisition form as used by a local vinyl siding supplier. This would include:
• starter strip;
• J-trim;
• corner caps; and
• vinyl cladding.
The purpose of this outcome is to provide students the oppor-tunity to properly install vinyl cladding and vapour barrier to manufacturers’ specifi cations.
Students will be expected to:
• properly cut and install vapor barrier, including proper use of tuck tape on all joins;
• properly measure and cut vinyl cladding where necessary; and
• properly install vinyl cladding, including starter strip, J-trim, corner caps, and vinyl cladding.
3.5.6 complete an order form for vinyl cladding from a set elevation view. [1.402][1.405] [4.402][4.403]
3.5.7 install vapour barrier liner and vinyl cladding using proper techniques. [1.401][1.402][1.403][1.404][1.405] [2.401][2.402][5.402]
Topic 5: Exterior Cladding (vinyl) with VBL

Residential Construction Technology 139
Unit 3 - Practical Residential Construction
ResourcesSuggested Assessment and Evaluation Strategies
Paper and Pencil
• Given a set of elevation plans students could calculate the amount of vinyl cladding needed to fi nish the exterior of the house. They will be presented with the formulas and asked to use the formulas to determine the amount of siding needed. They will then complete an order form and order the necessary material.
Practical Activity
• Students could be given the necessary material to go through the practical application of vinyl cladding. They will prepare their walls for the installation of the proper vapour barrier. They will install their vapor barrier and then proceed to pre-paring their walls for the installation of the vinyl cladding. After the walls have been prepared they will prepare a sketch to plan the installation of their wood cladding. They will then install their wood cladding. They will follow proper installation procedures and complete the installation using industry standards and techniques.
Work Log Book
• Upon successful completion of this activity, students could record the experiences in their work log book.

Residential Construction Technology 140
Unit 3 - Practical Residential Construction
Suggested Teaching and Learning StrategiesSpecifi c Curriculum Outcomes
Students will be expected to
Students must be familiar with roofi ng terminology and tools that are used in the trade.
Some common terms are:
• coverage;
• exposure;
• ice guard;
• head lap;
• side lap;
• square; and
• shingle cap.
Common tools used for roofi ng are:
• roofi ng hammer;
• hook knife;
• roofi ng cement applicator;
• chaulk line;
• measuring tape; and
• hammer staple gun.
Given a list of tools and terms students will have to use resourc-es available to defi ne or explain their use.
3.6.1 demonstrate knowledge of terms and tools used in the industry for roof covering.[1.405]
Topic 6: Roof Coverings

Residential Construction Technology 141
Unit 3 - Practical Residential Construction
ResourcesSuggested Assessment and Evaluation Strategies
Paper and Pencil
• Students could be given pictures of various tools used in the installation of roof coverings. Students could identify the various tools and describe how they are used in installation procedures. A simple list can be generated. For example:
• roofi ng hammer;
• hook knife;
• roofi ng cement applicator;
• chaulk line;
• measuring tape; and
• hammer staple gun.
• Students could be given key terms used in the installation of roof coverings and could then provide descriptions. For example:
• coverage;
• exposure;
• ice guard;
• head lap;
• side lap;
• square; and
• shingle cap.
Modern Carpentry Chapter 11

Residential Construction Technology 142
Unit 3 - Practical Residential Construction
Suggested Teaching and Learning StrategiesSpecifi c Curriculum Outcomes
Students will be expected to
There are various materials used for roof coverings in the con-struction industry. Materials such as, slate, clay tile, asphalt shingles, wood shingles, metal shingles and composite materials have pros and cons associated with them.
There are also coverings that are specifi cally associated with steep roofs and those should be covered specifi cally.
Students could:
• provide a description of the advantages and disadvantages of each type;
• provide a cost analysis; and
• identify which covering is used the most in our province and explain why.
The purpose of this outcome is to familiarize and enable stu-dents to use the National Building Code standards associated with roof installation. The National Building Code states the codes and requirements for all residential construction.
Students should be made aware of the importance of installation specifi cations that meet the manufacturers’ installation specifi ca-tions (for warranty purposes).
There should be particular emphasis placed on:
• safety requirements;
• proper installation techniques; and
• waterproof membranes.
3.6.2 identify different roof covering systems for steep roofs [1.405]
3.6.3 interpret appropriate sections of the National Building Code that deal specifi cally with roof covering installation.[1.402] [1.405]
Topic 6: Roof Coverings
Residential Construction Technology 143
Unit 3 - Practical Residential Construction
ResourcesSuggested Assessment and Evaluation Strategies
Paper and Pencil
• Students could be given diagrams illustrating low slope and regular pitched roofs. Students could defi ne the differences in both applications and explain the advantages and disad-vantages.
• Students could be given the names of various types of roof-ing membranes and asked to describe their composition and required use.
Research/Paper and Pencil
• Students could be given information on various roofi ng ap-plications and could research applications in the National Building Code.

Residential Construction Technology 144
Unit 3 - Practical Residential Construction
Suggested Teaching and Learning StrategiesSpecifi c Curriculum Outcomes
Students will be expected to
Having the ability to properly calculate the right amount of ma-terials needed for a job is a very important skill for trades people to develop. Too much material, or not enough, could affect the cost (or profi t) of a job.
Activity:
Given a diagram of a house’s roof, students will calculate the amount of materials needed to fi nish a roofi ng job.
Key terms:
• bundle; and
• square.
The purpose of the outcome is to have students develop a plan for the installation of asphalt shingles on a mock up roof. The area will be 1.44 square meters (16 square feet).
Students must calculate all materials and outline proper installa-tion methods of shingles.
Practical experience working with proper material and tools will provide students with excellent learning opportunities.
In this module students will use their workplan to properly shingle a section of roof.
3.6.4 calculate the number of shingles required to cover a set roof area. [1.402][1.405]
3.6.5 create a workplan for the installation of covering for a 600mm (2’) by 2400mm (8’) section of roof. [1.402][1.405] [4.402][4.403]
3.6.6 install membrane, iceguard and shingles on a 600 mm (2’) by 2400mm (8’) section of roof. [1.401][1.402][1.403] [1.404][1.405][2.401][2.402] [5.402]
Topic 6: Roof Coverings
Residential Construction Technology 145
Unit 3 - Practical Residential Construction
ResourcesSuggested Assessment and Evaluation Strategies
Paper and Pencil
• Students could be given a roofi ng plan and required to calculate
• the number of bundles; and• the number of squares required to shingle a roof.
Pencil and Paper/Calculation
• Students could be given a roofi ng plan and required to de-velop an installation plan. The plan could outline
• determination of roof application; • calculation of the required roofi ng materials; and • description of installation procedures.
Practical Activity
• Students could be provided with adequate materials to apply shingles and membranes to a simulated roof. Students could install shingles as outlined in their roofi ng plan.
Log Book
• Students could record the successful completion of this activity in their log book.

Residential Construction Technology 146
Unit 3 - Practical Residential Construction
Suggested Teaching and Learning StrategiesSpecifi c Curriculum Outcomes
Students will be expected to
Students should be familiar with the tools and terms used in stair construction. This is consistent with all the other practical work in this section.
Common terms used in the construction of stairs are:
• rise;
• run;
• stringer;
• tread;
• riser;
• nosing; and
• cleat.
Common tools used in the construction of a stairway:
• button gauges;
• framing square;
• hand saw;
• hammer;
• nail set;
• level;
• jig saw; and
• t-bevel.
3.7.1 demonstrate knowledge of terms and tools used in the industry for stair construction.[1.405]
Topic 7: Stair Construction

Residential Construction Technology 147
Unit 3 - Practical Residential Construction
ResourcesSuggested Assessment and Evaluation Strategies
Research/Paper and Pencil
• Using available resources students should defi ne the follow ing terms:
• rise;
• run;
• stringer;
• tread;
• riser;
• nosing; and
• cleat.
• With the use of the Internet students should fi nd an image and describe the usage of the tool listed below
• button gauges;
• framing square;
• hand saw;
• hammer;
• nail set;
• level;
• jig saw; and
• t-bevel.

Residential Construction Technology 148
Unit 3 - Practical Residential Construction
Suggested Teaching and Learning StrategiesSpecifi c Curriculum Outcomes
Students will be expected to
The purpose of this outcome is to familiarize and enable stu-dents to use the National Building Code standards associated with stair installation. Students should be made aware of the importance of installation specifi cations that meet the manufac-turers’ installation specifi cations (for warranty purposes.)
There should be particular emphasis placed on:
• safety requirements;
• proper installation techniques;
• appropriate rise versus run; and
• width of treads.
This section is intended to allow students, given a stair installa-tion situation, to identify what exactly is needed in the way of materials.
• stringer;
• tread;
• riser; and
• cleat.
Refer to the text for nominal lumber sizes in different instances.
3.7.2 interpret appropriate sections of the National Building Code that deal specifi cally with stair assembly.[1.402][1.405]
3.7.3 identify the parts of a stair assembly and nominal lumber sizes for each component. [1.405]
Topic 7: Stair Construction

Residential Construction Technology 149
Unit 3 - Practical Residential Construction
ResourcesSuggested Assessment and Evaluation Strategies
Research/Paper and Pencil
• Students could consult the National Building Code to iden-tify code restrictions on the building of a set of stairs.
The following questions can be used as a guideline for this area
• What safety requirements must be met for the installation of a set of stairs?
• What is the proper technique for installation of a set of stair?
• What is the maximum and minimum code for rise and run standards?
• When are handrails required? • What is the standard width of treads?
Paper and Pencil
• Given a diagram students could identify the following components of a stair assembly and list the nominal size of lumber associated with each component:
• stringer;
• tread;
• riser; and
• cleat.

Residential Construction Technology 150
Unit 3 - Practical Residential Construction
Suggested Teaching and Learning StrategiesSpecifi c Curriculum Outcomes
Students will be expected to
Rise over run is the intended slope of the stairway. The National Building Code establishes norms and safety requirements for this aspect.
Rise = slope
Run
Slope = 7/9, 175mm (7”) rise for a 225mm (9”) run.
These should be kept as minimums. Going to a larger slope may cause safety issues, but going to a smaller should be acceptable.
This purpose of the outcome is to have students develop a plan for the installation of a stairway. The suggested size for this stairway is 600 mm(24”) wide with three treads (approximately 650mm (26”)).
Students must calculate all materials and outline proper installa-tion methods of stairways.
Practical experience working with proper material and tools will provide students with excellent learning opportunities.
In this module students will use their workplan to properly install a three tread stairway.
3.7.4 calculate a proper rise over run ratio given a set stairway height and design a template for its installation.[1.402][1.405]
3.7.5 create a workplan for the installation of a set of straight stairs based on a template. [1.402][1.405] [4.402][4.403]
3.7.6 create and assemble a complete stair assembly. [1.401][1.402] [1.403][1.404][1.405][1.401] [2.402][5.402]
Topic 7: Stair Construction

Residential Construction Technology 151
Unit 3 - Practical Residential Construction
ResourcesSuggested Assessment and Evaluation Strategies
Paper and Pencil
• Given a fl oor plan students could calculate a stairway that meets National Building Code standards.
Design Activity
• Students could design a template for the above plan with the appropriate rise over run calculations.
Paper and Pencil/Application
• Students could develop a plan for the installation of a set of stairs. Given a predetermined height and location, students would calculate all materials and outline proper installation method.
Practical Activity
* Using the stair module setup and workplan, students could fabricate and install their set of stairs.
Log Book
• Upon successful completion of this activity, students could record the experiences in their log book.
Residential Construction Technology 152
Unit 3 - Practical Residential Construction
Suggested Teaching and Learning StrategiesSpecifi c Curriculum Outcomes
Students will be expected to
The project manager is an integral part of the residential con-struction team. In one sense they are the contractor in another they are the foreperson. Their role is one of organization and as the name suggests, management. The project manager makes sure that all of the parts to successfully complete a project are in place. Everything from materials, workforce, to permits and inspections will be under their supervision.
Points to emphasize:
• cost estimates;
• construction order checklists;
• materials scheduling;
• workplan monitoring; and
• Occupational Health and Safety.
The intention of this topic is to put students in a semi-supervi-sory role, to ensure that:
• the modules are running well:
o students are working,
o areas are cleaned at the end of class,
o tools are returned to their proper storage location;
• suffi cient equipment and materials are available;
• workplans are submitted and being followed;
• OH&S rules are being complied with; and
• workers are present and engaged.
In this outcome, students will present an overview of all the contruction activities that are happening in the fabrication lab to the instructor. This will require interviewing the various groups, observation of activities, production of a job site (fab-rication lab) map indicating location of student groups, and a written report for the instructor.
3.8.1 investigate the role of a project manager as it pertains to residential construction.[1.405]
3.8.2 list with details all of the projects that are ongoing in the class at that particular time. [1.402] [1.405][4.402][4.403]
Topic 8: Project Management

Residential Construction Technology 153
Unit 3 - Practical Residential Construction
ResourcesSuggested Assessment and Evaluation Strategies
Role Play
• This can be a role-playing assignment. Students assigned this unit will take on the role of project managers and perform daily inspections and reports. They will act in the capacity of OH&S offi cers, work supervisors, materials ordering and worker evaluations.
• Students will present their fi ndings to the instructor in the form of a compiled report that covers the following areas:
• cost estimates;• material ordering;• OH&S reports;• worker evaluations based on performance;• equipment inventories; and• regular inspection forms of workplace.
Interview/Paper and Pencil
• As part of their regular reporting process, students should report on the various activities taking place in the fabrica-tion lab. At intervals, an interview of groups at the different modules will be necessary to determine relative activity.

Residential Construction Technology 154
Unit 3 - Practical Residential Construction
Suggested Teaching and Learning StrategiesSpecifi c Curriculum Outcomes
Students will be expected to
Given a sample fl oor plan, students will calculate the necessary materials needed to complete it. Once the materials are calculated, they will then determine the price of completion from a set price list.
This plan could be the technical drawing for any of the mod-ules in this course, and in fact should be alternated between the modules in each rotation. Included in these calculations should be the concept of arrival times of materials, and just-in-time material purchase.
In this section, the student project manager could organize the ordering forms for materials, ensuring they are dispensed, completed and returned. The order forms will be checked periodically by the project managers for obvious errors and fi led properly. A master order list will be compiled from the forms indicating delivery times, inventory and running costs.
This section also deals with the retention of workplans and follow-up of the various checks and balances.
This outcome has the project managers acting in the role of the Occupational Health and Safety committee. This role is well described in the OH&S topic in unit 2 topic 2. Students will inspect the fabrication lab environment for safety concerns and report such concerns to the instructor in the form of appropri-ate documentation. They will also follow up on these reports to ensure that the concerns have been addressed and the general lab safety improved.
3.8.3 investigate and calculate necessary materials required for a sample fl oor plan. [1.402][1.405] [4.402][4.403]
3.8.4 organize and use the appropriate documentation relevant to residential construction. [1.402] [1.405][4.402][4.403]
3.8.5 monitor the shop environment to ensure required safety practices are being carried out. [1.402] [1.405][4.402][4.403] [5.402]
Topic 8: Project Management

Residential Construction Technology 155
Unit 3 - Practical Residential Construction
ResourcesSuggested Assessment and Evaluation Strategies
Paper and Pencil
• Given a set of fl oor plans from a particular module, stu-dents could calculate the amount of materials necessary to complete the project. Once this is complete students could investigate costs of materials and determine the total costs for the materials.
Paper and Pencil
• The order forms have to be fi led in each individual groups’ work portfolio. It will be used as part of the evaluation. The project managers could be responsible for collating the mate-rial, as well as checking that theoretical material is completed before the student groups move out to the jobsite.
Presentation/Paper and Pencil
• The students could be responsible for an actual OH&S re-port, which should include keeping fi re exits clear, checking fi re extinguishers, and safe operation of machinery and tools. This could then be presented to the OH&S committee set up for the course in a previous section.
Log Book
• Students could record the successful completion of this activity in their log book.

Residential Construction Technology 156
Unit 3 - Practical Residential Construction
Suggested Teaching and Learning StrategiesSpecifi c Curriculum Outcomes
Students will be expected to
Students should be familiar with the tools and techniques used in fl oor installation. This is consistent with all the other practi-cal work in this section.
Common tools used:
• chaulk lines;
• staples guns;
• trowels;
• drill;
• saw;
• knee kicker;
• hardwood nailer;
• glue iron;
• compressor; and
• nail guns.
Techniques used in the installation of fl oor covering are:
• work from a centre;
• symmetrical layout;
• square line from dominant wall;
• nailing strips;
• fl ooring orientation;
• join awareness (e.g., none in high traffi c areas, hiding).
3.9.1 identify and describe the tools and techniques used in the industry for fl oor covering installation.[1.405]
Topic 9: Floor Covering

Residential Construction Technology 157
Unit 3 - Practical Residential Construction
ResourcesSuggested Assessment and Evaluation Strategies
Paper and Pencil
• Students could be given a list of tools used in the installa-tion of various fl oor coverings. They would then give a brief description of the tools purpose and the proper use of the tool for that particular application. Emphasis will be placed on the safe and proper usage of the tool.
Demonstration/Paper and Pencil
• Students could examine the various techniques used in the application of various fl oor coverings. Different fl oor cover-ings use different techniques. Students could then learn the different techniques and apply those techniques during the application phase later in the unit. Demonstrations of these tools for classmates is an effective method of enhancing this activity.
• Modern Carpentry Chapter 16

Residential Construction Technology 158
Unit 3 - Practical Residential Construction
Suggested Teaching and Learning StrategiesSpecifi c Curriculum Outcomes
Students will be expected to
Students should be familiar with various common types of residential fl oor coverings. This section will include a discussion of challenges with regards to each type of fl oor covering installa-tion.
Although a signifi cant number of fl oor covering types are listed here, only vinyl and laminate (or hardwood) fl ooring will be considered in the practical sections of this topic.
Common types of residential fl oor coverings are:
• cork;
• ceramic tile;
• hardwood;
• vinyl;
• linoleum;
• carpet; and
• laminate.
Activity:
Students could be engaged in a discussion of the advantages and disadvantages of each fl oor covering type. A common method would be the creation of a grid with each type listed and a series of headings to outline the various advantages and disadvantages.
3.9.2 identify and describe the common types of residential fl oor coverings.[1.405]
Topic 9: Floor Covering

Residential Construction Technology 159
Unit 3 - Practical Residential Construction
ResourcesSuggested Assessment and Evaluation Strategies
Paper and Pencil
• Students could be given a list of the various types of fl oor coverings available on the market. They will be provided with a grid listing the different types of fl oor coverings and they will be expected to discuss the advantages and disadvan-tages of each. Given a scenario, students could be asked to decide which fl oor covering best suits the particular applica-tion.
• Modern Carpentry Chapter 16

Residential Construction Technology 160
Unit 3 - Practical Residential Construction
Suggested Teaching and Learning StrategiesSpecifi c Curriculum Outcomes
Students will be expected to
The purpose of this outcome is to familiarize and enable stu-dents to use the National Building Code standards associated with stair installation. Students should be made aware of the importance of installation specifi cations that meet the manufac-tures installation specifi cations (for warranty purposes.)
There should be particular emphasis placed on:
• safety requirements;
• proper installation techniques;
• fi re rating; and
• sound considerations.
The intention of this section is to have students use their gen-eral math skills. Although math levels within this course will be varied, practical math skills will be an integral part of the in-struction. Rise over run, length times width, Pythagoras theo-rem (3-4-5 rule) and fractions are important concepts within the skilled trades.
The required calculation in this case is length x width equals area.
L x W = A
Estimation of materials and allowing for wastage are also impor-tant concepts, which are covered in the carpentry text.
3.9.3 interpret appropriate sections of the National Building Code that deal specifi cally with fl ooring installation. [1.402][1.405]
3.9.4 estimate material requirements for the installation of various fl ooring materials.[1.402][1.405]
Topic 9: Floor Covering

Residential Construction Technology 161
Unit 3 - Practical Residential Construction
ResourcesSuggested Assessment and Evaluation Strategies
Research/Presentation
• Students could examine the appropriate sections of the Na-tional Building Code as it relates to the installation of various fl oor coverings. They will be responsible for presenting to the instructor a synopsis of the different codes with respect to different fl oor coverings. Safety requirements, fi re ratings, sound proofi ng and proper installation techniques, must be included.
Paper and Pencil
• Given a sample fl oor plan, students could estimate the amount of fl oor covering material needed to fi nish that particular area. They will be expected to do the mathemati-cal processes necessary to calculate the amount of fl ooring required and then create a bill of materials for the ordering process.
• Modern Carpentry Chapter 16

Residential Construction Technology 162
Unit 3 - Practical Residential Construction
Suggested Teaching and Learning StrategiesSpecifi c Curriculum Outcomes
Students will be expected to
The purpose of this outcome is to provide students with a practical opportunity to complete an order form that would normally be required in industry.
Students will be required to interpret a set of house plans and complete a fl oor covering requisition form as used by a local fl ooring supplier. This would include:
• underlay;
• fasteners; and
• fl oor covering.
Practical experience working with proper material and tools will provide students with excellent learning opportunities.
In this module, students will use their order form and fl oor plans to properly install fl oor covering.
As stated before, the suggested fl oor coverings used in this sec-tion would primarily focus on laminate and vinyl. Hardwood can be substituted for laminate. The only consideration in this instance is cost and reusability.
A 1200 mm (4) ’x 1200 mm (4’) section of fl ooring would be appropriate in this sense, although any section of the fabrication lab would work well for this installation, keeping in mind that it has to be limited by walls and/or cabinets to make the activity realistic.
3.9.5 complete an order form for various fl ooring materials based on a set of fl oorplans.[1.402] [1.405][4.402][4.403]
3.9.6 install various forms of fl ooring using proper fl ooring installation techniques. [1.401][1.402][1.403] [1.404][1.405][1.401][2.402] [5.402]
Topic 9: Floor Covering

Residential Construction Technology 163
Unit 3 - Practical Residential Construction
ResourcesSuggested Assessment and Evaluation Strategies
Pencil and Paper
• Given a set of fl oor plans to interpret, students could deter-mine the appropriate fl oor covering for the various rooms based on the activity taking place in that room. For exam-ple, carpet would not be considered a good fl oor covering for a kitchen or a foyer. Students will be given an order form to complete the ordering for the appropriate fl oor covering. They will be expected to determine the amount of material needed and then complete the order form.
Practical Activity
• Students could take a given fl oor plan and then assemble the fl ooring for that area. They will be expected to create a work plan, select their materials and appropriate tools, properly layout their work area, and then install the appropriate fl ooring using safe work practices and safe work techniques. Teachers will evaluate this installation based on work prepa-ration, quality and work ethic.
Log Book
• Upon successful completion of this activity, students could record the experiences in their log book.
• Modern Carpentry Chapter 16

Residential Construction Technology 164
Unit 3 - Practical Residential Construction
Suggested Teaching and Learning StrategiesSpecifi c Curriculum Outcomes
Students will be expected to
Common terms used in ductwork fabrication and installation:
• ductwork;
• trunk line;
• CFM;
• boot; and
• register.
Common tools include:
• shear, brake and roll;
• aviation snips;
• tin snips;
• rivet gun;
• deamer;
• layout tools;
• t-square;
• compass;
• scriber;
• steel rule;
• punch; and
• dividers.
Students should also identify the special precautions that need to be taken when working with sheet metal. Personal protective equipment, including but not limited to gloves, long sleeved shirts and safety glasses should be worn at all times.
3.10.1 identify and describe the tools and terms used in the industry for HVAC duct installation.[1.405]
Topic 10: HVAC Ducting

Residential Construction Technology 165
Unit 3 - Practical Residential Construction
ResourcesSuggested Assessment and Evaluation Strategies
Paper and Pencil
• With the use of the Internet or other resources students could defi ne the following terms:
• ductwork;• trunk line;• CFM;• boot; and• register.
Report/Paper and Pencil
• Students could use the internet to fi nd images to identify and describe the following tools:
• shear, brake and roll;• aviation snips;• tin Snips;• rivet gun;• seamer;• layout tools;• t-square;• compass;• scriber;• steel rule;• punch; and• dividers.

Residential Construction Technology 166
Unit 3 - Practical Residential Construction
Suggested Teaching and Learning StrategiesSpecifi c Curriculum Outcomes
Students will be expected to
In this topic, the emphasis for instruction and activity is the ductwork aspect of HVAC. To put the ducting into context, the following material on HVAC is included.
HVAC stands for heating, ventilation, and air conditioning. For the purposes of this course, attention will be focused on ventila-tion ducting. In the industry many aspects of ventilation duct-ing are manufactured and brought to a job site. Some pieces, though, are fabricated on site.
Houses are becoming more air-tight as energy considerations become paramount. Ventilation ducting is used to carry fresh air from outside a residence into various rooms within. It also re-moves stale, dust-laden, or moist air from the room. The theory is that air is removed from rooms that create odour or moist laden air, such as a bathroom or kitchen and then returned to other areas in the residence such as bedrooms and living rooms as fresh air.
The system that attaches to the duct can be of several different types:
• air exchanger;
• heat-recovery air exchanger;
• furnace;
• central air conditioning unit;
• dehumidifi er; and
• range hood.
3.10.2 describe the purpose and operation of an HVAC system.[1.405]
Topic 10: HVAC Ducting

Residential Construction Technology 167
Unit 3 - Practical Residential Construction
ResourcesSuggested Assessment and Evaluation Strategies
Paper and Pencil/Research
• Using the Internet students will research and answer the following questions:
• What does HVAC stand for?• Where would you use a HVAC system?• What are the advantages of a properly installed HVAC
system?• How important is heat recovery in a HVAC system?
Discussion/Group Work
• Students could research and discuss the different applications of each of the following HVAC units:
• air exchanger;
• heat-recovery air exchanger;
• furnace;
• central air conditioning unit;
• dehumidifi er; and
• range hood.

Residential Construction Technology 168
Unit 3 - Practical Residential Construction
Suggested Teaching and Learning StrategiesSpecifi c Curriculum Outcomes
Students will be expected to
Students should understand the basic principles of heat transfer and their corollaries. Some areas of investigation could be:
• conduction – heat travels through solid objects;
• convection – heat travels through a medium, with the physical concepts of heat rises and cold sinks; or
• radiation - heat traveling through visible and non-visible light.
The investigation should take the form of how these principles may be applied to heating a home and the converse of cooling a home. From a cooling perspective, the following principles apply:
• refl ection; and
• convection.
Activity:
A simple investigation could include why we change the direc-tion a ceiling fan in the summer and the winter.
3.10.3 describe the basic principals of heating and cooling air.[1.405]
Topic 10: HVAC Ducting

Residential Construction Technology 169
Unit 3 - Practical Residential Construction
ResourcesSuggested Assessment and Evaluation Strategies
Paper and Pencil
• Students will research the following terms associated with heating and cooling:
• conduction;• convection;• radiation;• refl ection; and• convection.

Residential Construction Technology 170
Unit 3 - Practical Residential Construction
Suggested Teaching and Learning StrategiesSpecifi c Curriculum Outcomes
Students will be expected to
The primary consideration in this area is cubic feet per minute (CFM) and air recirculation rates. CFMs and air recirculation rates deal with the ability of a device to process/replace the air in a room a certain number of times per hour.
A common use of this material is in the selection of a bathroom fan. A bathroom fan exhausts air from a small room over a certain time, and the CFM rating indicates how fast and often it will do this. The smaller the CFM, the more likely that the room will not be exhausted properly.
Activity:
All fabrication labs have ambient air cleaners and dust collec-tors. Students could make the connection between how power-ful a air cleaning device is and its rated CFMs.
The purpose of this outcome is to familiarize and enable stu-dents to use the National Building Code standards associated with ductwork installation. Students should be made aware of the importance of installation specifi cations that meet the manufactures installation specifi cations (for warranty purposes).
There should be particular emphasis placed on:
• safety requirements;
• proper installation techniques;
• air replacement rates; and
• supply and return duct exterior placement.
3.10.4 describe air patterns and their impact on a typical HVAC system.[1.405]
3.10.5 interpret appropriate sections of the National Building Code that deal specifi cally with ductwork installation. [1.402] [1.405]
Topic 10: HVAC Ducting

Residential Construction Technology 171
Unit 3 - Practical Residential Construction
ResourcesSuggested Assessment and Evaluation Strategies
Paper and Pencil
• Students should understand the concept of CFM or litres per second (L/s). A simple written defi nition and explanation submitted to the teacher should suffi ce.
• Students could research and report on the ambient air clean-ers that are used in the skilled trades program.
• Students could also demonstrate and explain the operation procedure of how the ambient air cleaners work.
• Students could measure the size of the fabrication area and calculate how long it would take the ambient air cleaners to circulate clean air.
Paper and Pencil/Report
• Students could write a brief report on the importance of proper ventilation in residential home construction.
• Students could research the National Building Code stan-dards to determine code regulations concerning ductwork installation in residential houses.
• Students should outline safety requirements, proper instal-lation techniques, gauge of sheet metal, and placement of supply and return ducting.

Residential Construction Technology 172
Unit 3 - Practical Residential Construction
Suggested Teaching and Learning StrategiesSpecifi c Curriculum Outcomes
Students will be expected to
The four basic duct systems are:
• single zone;
• variable air volume (VAV);
• multi-zone; and
• double-duct (dual).
Single zone systems have the ducting connected directly to the air system, and when the system in engaged all ducts are in use. There is no control set to allow for only parts of the system to be engaged independently.
Variable air volume systems involve the ability to control the speed of air fl ow within the system, and can be used in conjunc-tion with other systems.
Multi-zone systems have controls that allow for certain parts of the system to be engaged independently.
Double duct systems involve a cooling and heating system that are separated and always running. A fan discharges air in a blow-thru arrangement that can either be directed through the cooling coil or the heating coil. A damper-type of system, controlled by the zone’s thermostat, mixes the correct amount of cool air and hot air to maintain the proper supply air tempera-ture called for by the zone.
Y’s versus T’s – the use of a Y splitter is more effi cient than a T shape, in that the air will travel past the opening of a T, and not the more even split of air pressure in a Y.
3.10.6 describe the four basic duct systems and their design principals.[1.402] [1.405]
Topic 10: HVAC Ducting

Residential Construction Technology 173
Unit 3 - Practical Residential Construction
ResourcesSuggested Assessment and Evaluation Strategies
Paper and Pencil/Research
• Students could research and report on the four basic duct systems:
• single-zone;• variable air volume (VAV);• multi-zone; and• double-duct (dual).
Presentation
• Students could create a slideshow that illustrate the different duct systems, illustrating the advantages and disadvantages of each.

Residential Construction Technology 174
Unit 3 - Practical Residential Construction
Suggested Teaching and Learning StrategiesSpecifi c Curriculum Outcomes
Students will be expected to
This aspect of fabrication will involve the shear, brake and roll. The 300mm (12”) length of the duct will allow for the entire piece of sheet metal to be manipulated on the shear, brake and roll (SBR). It is suggested that the duct be 100mm (4”) x 200mm (8”) in size, to simulate an actual install.
Students should ensure that the SBR is free of debris, unob-structed for planned use and in a safe location away from other project areas. The metal should be manipulated in such a way as to minimize waste and potential for injury. It is very important to ensure that personal protective equipment is used by students at all times when utilizing this mechanical device as sheet metal has signifi cant injury potential.
This aspect of fabrication will involve the shear, brake and roll. The 300mm (12”) length of the duct will allow for the entire piece of sheet metal to be manipulated on the shear, brake and roll. It is suggested that the duct be 100mm (4”) in diameter, to simulate an actual install.
Students should insure that the SBR is free of debris, unob-structed for planned use and in a safe location away from other project areas. The metal should be manipulated in such a way as to minimize waste and potential for injury. It is very important to ensure that personal protective equipment is used by students at all times when utilizing this mechanical device as sheet metal has signifi cant injury potential.
For this outcome, students will need a standard fl oor register, register boot and stack boot for adapting between the cylindrical and rectangular piece of ducting. The installation for this sec-tion will take place on the fl oor fabrication site, and will involve the installation of the ducts.
3.10.7 fabricate a 300mm (12”) length rectangular sheet metal duct. [1.401[1.402][1.403] [1.404][1.405][1.401] [2.402][5.402]
3.10.8 fabricate a 300mm (12”) length cylindrical sheet metal duct. [1.401] [1.402][1.403][1.404] [1.405][1.401][2.402] [5.402]
3.10.9 install fabricated duct with register in an existing fl oor system. [1.401][1.402][1.403] [1.404][1.405][1.401] [2.402] [5.402]
Topic 10: HVAC Ducting
Residential Construction Technology 175
Unit 3 - Practical Residential Construction
ResourcesSuggested Assessment and Evaluation Strategies
Practical Activity
• Students will fabricate a 300 mm long rectangular duct.
• Students could demonstrate this fabrication fi rst by making a template using bristol board . Accuracy in dimensions should be stressed.
Practical Activity
• Students will fabricate a 300 mm length cyclindrical sheet metal duct.
• Students could demonstrate this fabrication fi rst by making a template using bristol board . Accuracy in dimensions should be stressed.
Log Book
• Students could record the successful completion of this activ-ity in their log book.
Practical Activity
• Students will demonstrate proper installation technique in installing a register boot and stack boot for a standard fl oor register.

Residential Construction Technology 176
Unit 3 - Practical Residential Construction
Suggested Teaching and Learning StrategiesSpecifi c Curriculum Outcomes
Students will be expected to
Structured wiring is combining all of the communications wir-ing in your home and treating it as one wiring system. With multiple TV’s , phones, computers, sound systems and other digital devices, structured wiring gives access to all of this tech-nology anywhere in that home.
Structured wiring has three main components: service centre; cables; and outlets. A single cable run is required for setting up the access points within the house. The smart home structured wiring cables contain all the wiring necessary for Internet access, cable or digital cable TV, speaker wiring, intercoms, telephones and security systems.
There are many websites dealing with this topic where more information can be obtained.
A smart home is defi ned by the structured wiring and the availability of centralized control. It is an emerging technol-ogy, featuring remote contol over the phone, H/VAC, lighting, Internet and audio-visual components, by a panel, laptop or in some cases, a cell phone.
Installations will encompass different aspects of control systems and could involve all parts of the home environment.
Another dimension of smart home installations is assistive technology. Students should investigate what smart home technologies can do to enrich the lives of individuals with disabilities, and how the systems have evolved to incorporate these considerations.
3.11.1 describe the purpose of “smart house” wiring. [1.402][1.405]
3.11.2 investigate what constitutes a smart home.[1.402][1.405]
Topic 11: Smart House Wiring

Residential Construction Technology 177
Unit 3 - Practical Residential Construction
ResourcesSuggested Assessment and Evaluation Strategies
Paper and Pencil
• Based on a handout, and in conjunction with online research, students could complete a worksheet that describes the pur pose of a “smart home” and what a “smart home” constitutes.

Residential Construction Technology 178
Unit 3 - Practical Residential Construction
Suggested Teaching and Learning StrategiesSpecifi c Curriculum Outcomes
Students will be expected to
The purpose of this outcome is to familiarize and enable stu-dents to use the national building code standards associated with wiring installation. The National Building Code states the codes and requirements for all residential construction. Students should be made aware of the importance of installation specifi cations that meet the manufacturers installation specifi ca-tions (for warranty purposes.) There is no specifi c section on smart house wiring, but rather those dealing with other wiring requirements.
There should be particular emphasis placed on:• safety requirements;• proper installation techniques; and• future requirements.
Students should create a diagram of the control run path throughout a one-story structure, keeping in mind the most cost-effective route, and one which will encompass all the rooms necessary. From this diagram a workplan will be developed that will include a list of necessary equipment and materials.
This outcome deals with the practical hands-on aspect of this topic. Students will be expected to run the cabling, make the terminations and install various devices included within the smart home concept.
It is assumed that the cabling used in this situation will be the proper structured cabling, and not the individual component wiring. Each of the terminations will be specifi c to the device in question.
3.11.3 interpret appropriate sections of the National Building Code that deal specifi cally with “smart home” wiring installation.[1.402] [1.405]
3.11.4 create a workplan for the installation of a standard set of control wires. [1.402][1.405] [4.402][4.403]
3.11.5 install:
• a programmable thermostat;
• security devices,;
• audio/video cabling;
• network cabling;
• coaxial cable;
• communications devices; and
• a panel.
[1.401][1.402][1.403] [1.404][1.405][1.401] [2.402][5.402]
Topic 11: Smart House Wiring

Residential Construction Technology 179
Unit 3 - Practical Residential Construction
ResourcesSuggested Assessment and Evaluation Strategies
Research and Reporting
• Within the National Building Code there is no specifi c sec-tion dealing with smart home wiring. Students could investi-gate the National Building Code to itemize the sections and material dealing with wiring requirements. This then could be extrapolated to become a National Building Code appen-dix specifi c to smart home wiring. The report should include the assumed safety requirements, installation techniques and future requirements sections found in the associated wiring sections.
Paper and Pencil
• Students could create a work plan that will outline the installation of a trunk cable for a one-story home. This will include considerations for security, home theatre, communi-cation, and environmental issues. This plan will show where the main panel will be located and where the terminations will occur for the various devices available.
Practical Activity
• Students could run cabling, make terminations and install various devices included within the smart home concept.
Log Book
• Students could record the successful completion of this activity in their log book.

Residential Construction Technology180
Unit 3 - Practical Residential Construction