ESXi Installable and vCenter Server Setup Guide - ESXi 4.0 Installable

Replacing Default vCenter Server 5.0and ESXi Certificates
vCenter Server 5.0ESXi 5.0
This document supports the version of each product listed andsupports all subsequent versions until the document is replacedby a new edition. To check for more recent editions of thisdocument, see http://www.vmware.com/support/pubs.
EN-000979-00

Replacing Default vCenter Server 5.0 and ESXi Certificates
2 VMware, Inc.
You can find the most up-to-date technical documentation on the VMware Web site at:
http://www.vmware.com/support/
The VMware Web site also provides the latest product updates.
If you have comments about this documentation, submit your feedback to:
Copyright © 2009–2012 VMware, Inc. All rights reserved. This product is protected by U.S. and international copyright andintellectual property laws. VMware products are covered by one or more patents listed at http://www.vmware.com/go/patents.
VMware is a registered trademark or trademark of VMware, Inc. in the United States and/or other jurisdictions. All other marksand names mentioned herein may be trademarks of their respective companies.
VMware, Inc.3401 Hillview Ave.Palo Alto, CA 94304www.vmware.com

Contents
1 About vCenter Server Certificates 5
vCenter and ESXi SSL Certificate Requirements 5
2 Replacing Default SSL Certificates on ESXi 7
ESXi Certificates: Before You Begin 7Edit the OpenSSL Configuration File 8Create and Submit Certificate-Signing Requests 9Copy SSL Certificate Files to ESXi 10Generate New Certificates for ESXi 10
3 Replacing Default vCenter Certificates 13
vCenter Certificates: Before You Begin 13Edit the OpenSSL Configuration File 14Create and Submit Certificate-Signing Requests 15Create the PFX File 16Load Replacement Certificates into Memory 16Update the vCenter Server Database Password 17Restart vCenter Server Services 18Verify the vCenter Server Certificate 18
4 Replace VMware vSphere Update Manager Certificates 19
5 Replace vCenter Server Appliance Certificates 21
6 Replacing vCenter Server Heartbeat Certificates 23
7 Troubleshooting vCenter Server Certificates 25
New vCenter Server Certificate Does Not Appear to Load 25vCenter Server Cannot Connect to Managed Hosts 25vCenter Server Cannot Connect to the Database 26Cannot Configure vSphere HA When Using Custom SSL Certificates 26Unexpected Behavior Occurs When You Change the rui.pfx Password 26
Index 29
VMware, Inc. 3

Replacing Default vCenter Server 5.0 and ESXi Certificates
4 VMware, Inc.
About vCenter Server Certificates 1vSphere encrypts session information using standard digital certificates. Using the default certificates thatvSphere creates might not comply with the security policy of your organization. If you require a certificatefrom a trusted certificate authority, you can replace the default certificate.
Certificate checking is enabled by default and SSL certificates are used to encrypt network traffic. However,ESXi uses automatically generated certificates that are created as part of the installation process and stored onthe server system. These certificates are unique and make it possible to begin using the server, but they are notverifiable and are not signed by a trusted, well-known certificate authority (CA). These default certificates arevulnerable to possible man-in-the-middle attacks.
To receive the full benefit of certificate checking, especially if you intend to use encrypted remote connectionsexternally, install new certificates that are signed by a valid internal certificate authority or public keyinfrastructure (PKI) service. Alternatively, purchase a certificate from a trusted security authority.
For more information about encryption and securing your vSphere environment, see the vSphere Securitydocumentation.
vCenter and ESXi SSL Certificate RequirementsVMware products use standard X.509 version 3 (X.509v3) certificates to encrypt session information sent overSecure Socket Layer (SSL) protocol connections between components.
For example, communications between a vCenter Server system and each ESXi host that it manages areencrypted, and some features, such as vSphere Fault Tolerance, require the certificate verification provided bySSL. The client verifies the authenticity of the certificate presented during the SSL handshake phase, beforeencryption, which protects against "man-in-the-middle" attacks.
When you replace default vCenter and ESXi certificates, the certificates you obtain for your servers must besigned and conform to the Privacy Enhanced Mail (PEM) key format. PEM is a key format that stores data ina Base-64 encoded Distinguished Encoding Rules (DER) format.
The key used to sign certificates must be a standard RSA key with an encryption length that ranges from 512to 4096 bits. The recommended length is 2048 bits.
Certificates signed by a commercial certificate authority, such as Entrust or Verisign, are pre-trusted on theWindows operating system. However, if you replace a certificate with one signed by your own local root CA,or if you plan to continue using a default certificate, you must pre-trust the certificate by importing it into thelocal certificate store for each vSphere Client instance.
You must pre-trust all certificates that are signed by your own local root CA, unless you pre-trust the parentcertificate, the root CA’s own certificate. You must also pre-trust any valid default certificates that you willcontinue to use on vCenter Server.
VMware, Inc. 5

Replacing Default vCenter Server 5.0 and ESXi Certificates
6 VMware, Inc.
Replacing Default SSL Certificates onESXi 2
Replace default certificates with those signed by an internal certificate authority or public key infrastructure(PKI) service. Alternatively, purchase a certificate from a trusted commercial security authority.
NOTE Use commercially signed certificates for systems that are exposed to the Internet.
When you replace default server certificates in a production environment, deploy new certificates in stages,rather than all at the same time. Make sure that you understand the process as it applies to your environmentbefore you replace certificates.
This chapter includes the following topics:
n “ESXi Certificates: Before You Begin,” on page 7
n “Edit the OpenSSL Configuration File,” on page 8
n “Create and Submit Certificate-Signing Requests,” on page 9
n “Copy SSL Certificate Files to ESXi,” on page 10
n “Generate New Certificates for ESXi,” on page 10
ESXi Certificates: Before You BeginEnsure that your environment has the required software installed before you begin replacing default ESXicertificates.
n Microsoft CA (2000 or higher), with Web Server template
n Microsoft Visual C++ 2008 Redistributable Package (x86) installed on the system where you will generatethe certificate-signing request
n OpenSSL 0.98r or higher installed on the system where you will generate the certificate-signing request
n Putty or other SSH client
n WinSCP or other SFTP/SCP client
n vCenter Server 5.0
n ESXi 5.0
VMware, Inc. 7

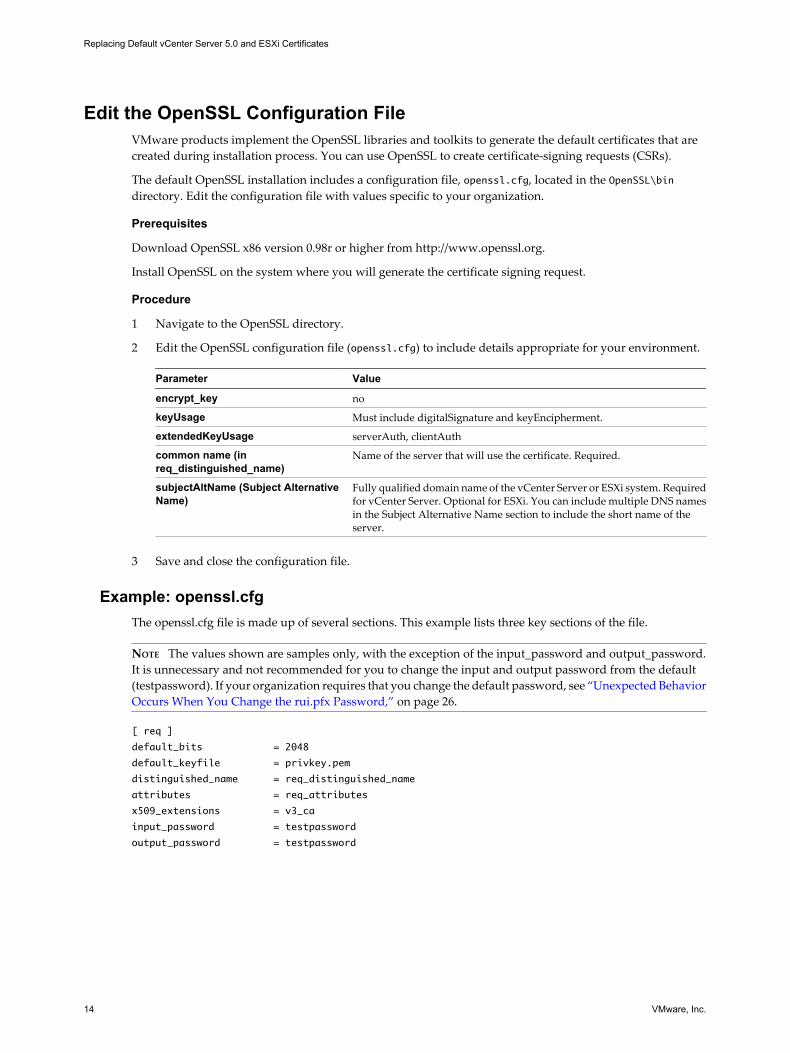
Edit the OpenSSL Configuration FileVMware products implement the OpenSSL libraries and toolkits to generate the default certificates that arecreated during installation process. You can use OpenSSL to create certificate-signing requests (CSRs).
The default OpenSSL installation includes a configuration file, openssl.cfg, located in the OpenSSL\bindirectory. Edit the configuration file with values specific to your organization.
Prerequisites
Download OpenSSL x86 version 0.98r or higher from http://www.openssl.org.
Install OpenSSL on the system where you will generate the certificate signing request.
Procedure
1 Navigate to the OpenSSL directory.
2 Edit the OpenSSL configuration file (openssl.cfg) to include details appropriate for your environment.
Parameter Value
encrypt_key no
keyUsage Must include digitalSignature and keyEncipherment.
extendedKeyUsage serverAuth, clientAuth
common name (inreq_distinguished_name)
Name of the server that will use the certificate. Required.
subjectAltName (Subject AlternativeName)
Fully qualified domain name of the vCenter Server or ESXi system. Requiredfor vCenter Server. Optional for ESXi. You can include multiple DNS namesin the Subject Alternative Name section to include the short name of theserver.
3 Save and close the configuration file.
Example: openssl.cfgThe openssl.cfg file is made up of several sections. This example lists three key sections of the file.
NOTE The values shown are samples only, with the exception of the input_password and output_password.It is unnecessary and not recommended for you to change the input and output password from the default(testpassword). If your organization requires that you change the default password, see “Unexpected BehaviorOccurs When You Change the rui.pfx Password,” on page 26.
[ req ]
default_bits = 2048
default_keyfile = privkey.pem
distinguished_name = req_distinguished_name
attributes = req_attributes
x509_extensions = v3_ca
input_password = testpassword
output_password = testpassword
Replacing Default vCenter Server 5.0 and ESXi Certificates
8 VMware, Inc.

encrypt_key = no
prompt = no
string_mask = nombstr
req_extensions = v3_req
[ v3_req ]
basicConstraints = CA:FALSE
keyUsage = digitalSignature, keyEncipherment
extendedKeyUsage = serverAuth, clientAuth
subjectAltName = DNS:vc.homedns.org, DNS:vc50.homedns.org, DNS:vc50
[ req_distinguished_name ]
countryName = US
stateOrProvinceName = California
localityName = Palo Alto
0.organizationName = VMware Inc
organizationalUnitName = IT
commonName = vc.homedns.org
emailAddress = [email protected]
Create and Submit Certificate-Signing RequestsYou must generate a certificate-signing request (CSR) for each system that requires a replacement certificate.You submit the certificate-signing request to your certificate authority to obtain a base-64 encoded certificate.
See the OpenSSL documentation at http://www.openssl.org for information about OpenSSL commands andoptions.
Prerequisites
OpenSSL x86 version 0.98r or higher is installed on the system where you will create the request.
The OpenSSL configuration file (openssl.cfg) has been edited to suit your environment as described in “Editthe OpenSSL Configuration File,” on page 14.
Procedure
1 Generate the certificate signing request by running the following command on the system where youinstalled OpenSSL.
openssl req -new -nodes -out rui.csr -config openssl.cfg
2 Open the rui.csr file with a text editor and copy the contents of the file (including the beginning and endingtags).
3 Use the contents of the rui.csr file to create a certificate request to submit to your certificate authority.
If you are using Microsoft CA (2003 or higher), perform the following steps to create the request.
a Browse to your Microsoft Certificate Authority web site (typically https://servername/certsrv/) andselect Request a Certificate.
b Select Advanced Certificate Request and select Submit a certificate request using a base-64-encodedCMC or PKCS #10 file.
c Paste the contents of the rui.csr file into to the text box or browse to the rui.csr file.
d Select the Web Server Certificate template and click Submit.
The Web Server template should include Subject Alternative Names (required for vCenter Server,optional for ESXi). You might have to modify the template to include this parameter.
Chapter 2 Replacing Default SSL Certificates on ESXi
VMware, Inc. 9

4 Download the base-64 encoded certificate to the system where you generated the certificate-signingrequest.
5 If necessary, rename the certificate files to rui.crt and rui.key.
Copy SSL Certificate Files to ESXiCopy the new certificate files onto the host to replace default SSL certificates.
Prerequisites
Acquire or generate the following files:
n X.509 certificate file with RSA public key in PEM format, named rui.crt
n RSA private key in PEM format, named rui.key
On the target host, verify that you have performed the following tasks before you copy new certificates ontothe host.
n Back up existing default certificates.
n Enable SSH on the target host.
n Ensure that lockdown mode is not enabled.
n Put the target host in maintenance mode.
Procedure
1 Use WinSCP or other SFTP/SCP client to connect to the target host and change to the following directory.
/etc/vmware/ssl
2 Back up the existing default certificate files (rui.crt and rui.key) if you have not already done so.
3 Delete the existing default certificate files (rui.crt and rui.key).
4 Copy the newly generated certificate files (rui.crt and rui.key) to the target host SSLdirectory /etc/vmware/ssl.
You must use Text Mode or ASCII Mode to transfer the files.
5 Log in to the target host Direct Console User Interface (DCUI) as root.
6 Select Troubleshooting Options, then select Restart Management Agents (F11).
7 After the management agents are restarted, log out of the Direct Console User Interface and take the hostout of maintenance mode.
8 Verify that the thumbprint of the certificate matches the thumbprint displayed in the DCUI.
If the thumbprints do not match, the certificate did not load. Ensure that the certificate file is free of straycharacters.
Newly generated SSL certificates are loaded onto the ESXi host and default certificates have been replaced.
Generate New Certificates for ESXiYou typically generate new certificates only if you change the host name or accidentally delete the certificate.Under certain circumstances, you might be required to force the host to generate new certificates.
Procedure
1 Log in to the ESXi Shell and acquire root privileges.
Replacing Default vCenter Server 5.0 and ESXi Certificates
10 VMware, Inc.

2 In the directory /etc/vmware/ssl, back up any existing certificates by renaming them using the followingcommands.
mv rui.crt orig.rui.crt
mv rui.key orig.rui.key
NOTE If you are regenerating certificates because you have deleted them, this step is unnecessary.
3 Run the command /sbin/generate-certificates to generate new certificates.
4 Restart the host after you install the new certificate.
Alternatively, you can put the host into maintenance mode, install the new certificate, and then use theDirect Console User Interface (DCUI) to restart the management agents.
5 Confirm that the host successfully generated new certificates by using the following command andcomparing the time stamps of the new certificate files with orig.rui.crt and orig.rui.key.
ls -la
Chapter 2 Replacing Default SSL Certificates on ESXi
VMware, Inc. 11

Replacing Default vCenter Server 5.0 and ESXi Certificates
12 VMware, Inc.

Replacing Default vCenter Certificates 3VMware recommends that you replace default certificates with those signed by an internal certificate authorityor public key infrastructure (PKI) service. Alternatively, purchase a certificate from a trusted commercialsecurity authority.
NOTE Use commercially signed certificates for systems that are exposed to the Internet.
When you replace default server certificates in a production environment, deploy new certificates in stages,rather than all at the same time. Make sure that you understand the process as it applies to your environmentbefore you replace certificates.
This chapter includes the following topics:
n “vCenter Certificates: Before You Begin,” on page 13
n “Edit the OpenSSL Configuration File,” on page 14
n “Create and Submit Certificate-Signing Requests,” on page 15
n “Create the PFX File,” on page 16
n “Load Replacement Certificates into Memory,” on page 16
n “Update the vCenter Server Database Password,” on page 17
n “Restart vCenter Server Services,” on page 18
n “Verify the vCenter Server Certificate,” on page 18
vCenter Certificates: Before You BeginEnsure that your environment has the required software installed before you begin replacing default vCentercertificates.
n Microsoft CA (2003 or higher), with Web Server template that includes Subject Alternative Name
n Microsoft Visual C++ 2008 Redistributable Package (x86) installed on the system where you will generatethe certificate-signing request
n OpenSSL 0.98r or higher installed on the system where you will generate the certificate-signing request
n vCenter Server 5.0
VMware, Inc. 13
Edit the OpenSSL Configuration FileVMware products implement the OpenSSL libraries and toolkits to generate the default certificates that arecreated during installation process. You can use OpenSSL to create certificate-signing requests (CSRs).
The default OpenSSL installation includes a configuration file, openssl.cfg, located in the OpenSSL\bindirectory. Edit the configuration file with values specific to your organization.
Prerequisites
Download OpenSSL x86 version 0.98r or higher from http://www.openssl.org.
Install OpenSSL on the system where you will generate the certificate signing request.
Procedure
1 Navigate to the OpenSSL directory.
2 Edit the OpenSSL configuration file (openssl.cfg) to include details appropriate for your environment.
Parameter Value
encrypt_key no
keyUsage Must include digitalSignature and keyEncipherment.
extendedKeyUsage serverAuth, clientAuth
common name (inreq_distinguished_name)
Name of the server that will use the certificate. Required.
subjectAltName (Subject AlternativeName)
Fully qualified domain name of the vCenter Server or ESXi system. Requiredfor vCenter Server. Optional for ESXi. You can include multiple DNS namesin the Subject Alternative Name section to include the short name of theserver.
3 Save and close the configuration file.
Example: openssl.cfgThe openssl.cfg file is made up of several sections. This example lists three key sections of the file.
NOTE The values shown are samples only, with the exception of the input_password and output_password.It is unnecessary and not recommended for you to change the input and output password from the default(testpassword). If your organization requires that you change the default password, see “Unexpected BehaviorOccurs When You Change the rui.pfx Password,” on page 26.
[ req ]
default_bits = 2048
default_keyfile = privkey.pem
distinguished_name = req_distinguished_name
attributes = req_attributes
x509_extensions = v3_ca
input_password = testpassword
output_password = testpassword
Replacing Default vCenter Server 5.0 and ESXi Certificates
14 VMware, Inc.

encrypt_key = no
prompt = no
string_mask = nombstr
req_extensions = v3_req
[ v3_req ]
basicConstraints = CA:FALSE
keyUsage = digitalSignature, keyEncipherment
extendedKeyUsage = serverAuth, clientAuth
subjectAltName = DNS:vc.homedns.org, DNS:vc50.homedns.org, DNS:vc50
[ req_distinguished_name ]
countryName = US
stateOrProvinceName = California
localityName = Palo Alto
0.organizationName = VMware Inc
organizationalUnitName = IT
commonName = vc.homedns.org
emailAddress = [email protected]
Create and Submit Certificate-Signing RequestsYou must generate a certificate-signing request (CSR) for each system that requires a replacement certificate.You submit the certificate-signing request to your certificate authority to obtain a base-64 encoded certificate.
See the OpenSSL documentation at http://www.openssl.org for information about OpenSSL commands andoptions.
Prerequisites
OpenSSL x86 version 0.98r or higher is installed on the system where you will create the request.
The OpenSSL configuration file (openssl.cfg) has been edited to suit your environment as described in “Editthe OpenSSL Configuration File,” on page 14.
Procedure
1 Generate the certificate signing request by running the following command on the system where youinstalled OpenSSL.
openssl req -new -nodes -out rui.csr -config openssl.cfg
2 Open the rui.csr file with a text editor and copy the contents of the file (including the beginning and endingtags).
3 Use the contents of the rui.csr file to create a certificate request to submit to your certificate authority.
If you are using Microsoft CA (2003 or higher), perform the following steps to create the request.
a Browse to your Microsoft Certificate Authority web site (typically https://servername/certsrv/) andselect Request a Certificate.
b Select Advanced Certificate Request and select Submit a certificate request using a base-64-encodedCMC or PKCS #10 file.
c Paste the contents of the rui.csr file into to the text box or browse to the rui.csr file.
d Select the Web Server Certificate template and click Submit.
The Web Server template should include Subject Alternative Names (required for vCenter Server,optional for ESXi). You might have to modify the template to include this parameter.
Chapter 3 Replacing Default vCenter Certificates
VMware, Inc. 15

4 Download the base-64 encoded certificate to the system where you generated the certificate-signingrequest.
5 If necessary, rename the certificate files to rui.crt and rui.key.
Create the PFX FileThe rui.pfx file is a concatenation of the system’s certificate (rui.crt) and private key (rui.key), exported in thePFX format. The file is copied to the subdirectory on the vCenter Server system.
Personal Information Exchange Format (PFX) enables transfer of certificates and their private keys from onecomputer to another or to removable media. The Microsoft Windows CryptoAPI uses the PFX format, alsoknown as PKCS #12.
Prerequisites
Edit the OpenSSL configuration file (openssl.cfg) to suit your environment as described in “Edit the OpenSSLConfiguration File,” on page 14.
Procedure
1 On the system where you generated the certificate-signing request, run the following command to exportthe certificate and key file together to PFX format.
openssl pkcs12 -export -in rui.crt -inkey rui.key -name rui -passout pass:testpassword -out
rui.pfx
IMPORTANT You must use the password testpassword. If your organization requires that you change thedefault password, see “Unexpected Behavior Occurs When You Change the rui.pfx Password,” onpage 26.
2 Test the validity of the PFX file by running the following command..
openssl pkcs12 -in rui.pfx -info
3 Enter the password testpassword.
You might be prompted to enter the password more than once.
4 Verify that a base64-encoded string or characters are displayed with information about the PFX file.
If the PFX file is not valid, you cannot proceed with the certificate replacement process. A valid PFX fileis required.
What to do next
n On the system where you generated the certificate-signing request, back up the existing default certificates.
n In a safe location, back up the newly created certificate files.
Load Replacement Certificates into MemoryAfter you generate
Prerequisites
Verify that you have administrator privileges on the target vCenter Server system.
Back up the three existing certificate files: rui.crt, rui.key, and rui.pfx.
Acquire or generate the following files:
n X.509 certificate file with RSA public key in PEM format, named rui.crt
n RSA private key in PEM format, named rui.key
Replacing Default vCenter Server 5.0 and ESXi Certificates
16 VMware, Inc.
n PKCS12 bundle of the same certificate and key, named rui.pfx
NOTE You do not need to update the keystore files sms.keystore and sms.truststore. SMS populates thesefiles.
Procedure
1 Use a browser to connect to the vCenter Server system and view the existing certificate.
The method to view the certificate varies depending on the browser you are using. See your browser'sdocumentation for more information.
2 Take a screenshot or otherwise record the details of the existing certificate.
After you load the new certificates into memory, you can use the screenshot to verify that the certificatewas successfully replaced by comparing the old certificate to the new certificate.
3 Copy the newly created certificate files (rui.crt, rui.key, and rui.pfx) to the appropriate directories on thetarget vCenter Server system, overwriting the existing certificates.
For vCenter Server 5.0 and later, you must also copy the certificate files to the vSphere Web Client directory(if the vSphere Web Client server runs on the same system as vCenter Server) and to the Inventory Servicedirectory.
n For Windows 2008, the locations are typically:
n C:\Program Data\VMware\VMware VirtualCenter\SSL
n C:\Program Files\VMware\Infrastructure\Inventory Service\SSL
n C:\Program Files\VMware\Infrastructure\vSphere Web Client\DMServer\config\ssl
n For Windows 2003, the locations are typically:
n C:\Documents and Settings\All Users\Application Data\VMware\VMware VirtualCenter\SSL
n C:\Documents and Settings\All Users\Application Data\VMware\Infrastructure\Inventory
Service\SSL
n C:\Documents and Settings\All Users\VMware\Infrastructure\vSphere Web
Client\DMServer\config\ssl
4 Using a browser on the vCenter Server system, connect tohttp://localhost/mob/?moid=vpxd-securitymanager&vmodl=1
5 Enter the administrator name and password for the vCenter Server system.
The Managed Object Type: vpxSecurityManager Web page appears.
6 Under Methods, click reloadSslCertificate.
7 Click Invoke Method.
The following message appears: Method Invocation Result: void.
Update the vCenter Server Database PasswordAfter you replace default vCenter Server certificates, you must update the database password for the system.This allows all web services to access the database.
Prerequisites
Install replacement vCenter Server certificates.
Chapter 3 Replacing Default vCenter Certificates
VMware, Inc. 17

Procedure
1 On the vCenter Server system, open a terminal window with Administrator privileges.
2 Change to the vCenter Server installation directory.
For example, C:\Program Files\VMware\Infrastructure\VirtualCenter Server.
3 Enter the command vpxd -p and enter the existing database password when prompted.
This command updates the encrypted database password, which allows all web services to access thedatabase.
Restart vCenter Server ServicesAfter you replace vCenter Server certificates, you must restart the vCenter Server service.
Procedure
1 Stop the vCenter Server service (VMware VirtualCenter Server).
2 Start the vCenter Server service.
Restarting vCenter Server also restarts VMware vCenter Management Webservices, the Inventory Service,the vSphere Web Client, and Profile Driven Storage Services.
Linked Mode and other features will not function if you do not restart this service. Because the certificatethumbprint is published as Linked Mode shared information, it might take some time to replicate to theother vCenter Server instances in the Linked Mode group.
All vCenter Server services (such as the Inventory Service and the vSphere Web Client service) have restartedand the new certificates should be loaded.
Verify the vCenter Server CertificateAfter you install vCenter Server certificates, verify that all services are functional and you are able to accessthe components of your environment without errors.
Procedure
1 Refresh the page in the browser window and verify that the new certificate is installed by comparing it tothe old certificate you recorded in “Load Replacement Certificates into Memory,” on page 16.
2 Log in to a vSphere Client connected to the vCenter Server system and ensure that you do not receive anycertificate-related warnings.
3 Verify that all the Host Status tabs are functional.
4 Verify that the vCenter Service Status is green.
If your installation was unsuccessful (for example, the new certificate does not appear to load, vCenter Servercannot connect to managed hosts, or vCenter Server cannot connect to the database), see the Chapter 7,“Troubleshooting vCenter Server Certificates,” on page 25.
Replacing Default vCenter Server 5.0 and ESXi Certificates
18 VMware, Inc.
Replace VMware vSphere UpdateManager Certificates 4
You can replace vSphere Update Manager certificates.
Prerequisites
Obtain the certificate files rui.crt, rui.key, and rui.pfx as described in the following procedures:n “Edit the OpenSSL Configuration File,” on page 14
n “Create and Submit Certificate-Signing Requests,” on page 15
n “Create the PFX File,” on page 16
Verify that you have administrator privileges on the Update Manager system.
Procedure
1 Back up the existing Update Manager certificates.
2 Copy the newly created certificate files (rui.crt, rui.key, and rui.pfx) to the Update Manager SSL directoryon the system where Update Manager is installed.
Typically, the directory is C:\Program Files\VMware\Infrastructure\Update Manager\SSL.
3 Stop the VMware vSphere Update Manager service.
4 Change to the Update Manager installation directory.
Typically, the directory is C:\Program Files\VMware\Infrastructure\Update Manager\.
5 Run the file VMwareUpdateManagerUtility.exe.
6 In the Options pane, click SSL Certificate.
7 In the Configuration pane, select Followed and verified the steps and click Apply.
8 After the operation completes, start the VMware vSphere Update Manager service.
What to do next
Verify that you can access Update Manager without receiving certificate-related warnings.
VMware, Inc. 19

Replacing Default vCenter Server 5.0 and ESXi Certificates
20 VMware, Inc.
Replace vCenter Server ApplianceCertificates 5
You can replace vCenter Server Appliance certificates.
Prerequisites
Obtain certificate files rui.crt, rui.key, and rui.pfx as described in the following procedures:n “Edit the OpenSSL Configuration File,” on page 14
n “Create and Submit Certificate-Signing Requests,” on page 15
n “Create the PFX File,” on page 16
Procedure
1 Log in to the vCenter Server Appliance using SSH or the console.
2 Change to the directory /etc/vmware-vpx/ssl and back up the existing certificates by running thefollowing commands.
mkdir backup
mv rui* backup
3 Copy or upload the certificate files from your certificate authority (rui.crt, rui.key, and rui.pfx) to thefollowing directory on the vCenter Server Appliance system.
/etc/vmware-vpx/ssl
4 Restart the vpxd service by running the following command.
/etc/init.d/vmware-vpxd restart
5 Upload the PEM file to the directory /etc/ssl/certs and run the following command.
c_rehash /etc/ssl/certs
VMware, Inc. 21
Replacing Default vCenter Server 5.0 and ESXi Certificates
22 VMware, Inc.

Replacing vCenter Server HeartbeatCertificates 6
You can replace default vCenter Server Heartbeat certificates.
Prerequisites
Install OpenSSL on the system where you will replace the certificate.
Obtain certificate files rui.crt, rui.key, and rui.pfx as described in the following procedures:
n “Edit the OpenSSL Configuration File,” on page 14
n “Create and Submit Certificate-Signing Requests,” on page 15
n “Create the PFX File,” on page 16
Procedure
1 Download the SSLImport.jar utility from the VMware Knowledge Base article Replacing SSL Certificatesfor vCenter Server Heartbeat 6.x (KB 2013041).
2 On the system where you will replace the Heartbeat certificate, copy the certificate (rui.crt), private key(rui.key), and the SSLImport.jar file to the JRE bin directory, which is typically in the following location.
C:\Program Files\VMware\VMware vCenter Server Heartbeat\R2\jre\bin
3 Convert the private key (rui.key) and the certificate (rui.crt) from PEM format to DER format usingOpenSSL.
a To convert the private key, run the following command.
openssl pkcs8 -topk8 -nocrypt -in rui.key -inform PEM -out key.der -outform DER
b To convert the certificate, run the following command.
openssl x509 -in rui.crt -inform PEM -out cert.der -outform DER
4 Use the following command to run the SSLImport utility.
java -jar SSLImport.jar key.der cert.der
A new keystore is created (NFKeyStore.jks) and the keystore alias (keyAlias) is displayed with the keystorepassword (keyPassword).
5 Set the new password for the keystore file (NFKeyStore.jks).
keytool -keyclone -alias "keyAlias" -dest "nfhb_private_certificate" -keypass keyPassword -new
new password -keystore NFKeyStore.jks -storepass keyPassword keytool -storepasswd -new new
password -keystore NFKeyStore.jks -storepass keyPassword keytool -delete -alias keyAlias -
keystore NFKeyStore.jks -storepass new password
VMware, Inc. 23

6 Run the following command to stop the Heartbeat web service.
net stop nfwebsvc
7 Back up the Heartbeat SSL directory, which is typically in the following location.
C:\Program Files\VMware\VMware vCenter Server Heartbeat\tomcat\ssl
8 Move the new NFKeyStore.jks file, key.der, and cert.der into the Heartbeat SSL directory.
C:\Program Files\VMware\VMware vCenter Server Heartbeat\SSL
9 Open the following file with a text editor.
C:\Program Files\VMware\VMware vCenter Server Heartbeat\tomcat\apache-
tomcat-6.0.32\conf\server.xml
10 Locate the following section and enter the new keystore password as the value of the keystorePassparameter.
<Connector port="9561" protocol="HTTP/1.1" SSLEnabled="true"
...
keystoreFile="../sslNFKeyStore.jks"
keystorePass="new password"
keyAlias="nfhb_private_certificate"/>
11 Run the following command to start the Heartbeat web service.
net start nfwebsvc
Replacing Default vCenter Server 5.0 and ESXi Certificates
24 VMware, Inc.

Troubleshooting vCenter ServerCertificates 7
These topics describe some of the issues you might encounter when you work with vCenter and ESXicertificates.
This chapter includes the following topics:
n “New vCenter Server Certificate Does Not Appear to Load,” on page 25
n “vCenter Server Cannot Connect to Managed Hosts,” on page 25
n “vCenter Server Cannot Connect to the Database,” on page 26
n “Cannot Configure vSphere HA When Using Custom SSL Certificates,” on page 26
n “Unexpected Behavior Occurs When You Change the rui.pfx Password,” on page 26
New vCenter Server Certificate Does Not Appear to LoadAfter you replace default vCenter Server certificates, the new certificates might not appear to load.
Problem
When you install new vCenter Server certificates, you might not see the new certificate.
Cause
Existing open connections to vCenter Server are not forcibly closed and might still use the old certificate.
Solution
To force all connections to use the new certificate, use one of the following methods.
n Restart the network stack or network interfaces on the server.
n Restart the vCenter Server service.
vCenter Server Cannot Connect to Managed HostsAfter you replace default vCenter Server certificates and restart the system, vCenter Server might not be ableto connect to managed hosts.
Problem
vCenter Server cannot connect to managed hosts after server certificates are replaced and the system isrestarted.
Solution
Log into the host as the root user and reconnect the host to vCenter Server.
VMware, Inc. 25

vCenter Server Cannot Connect to the DatabaseAfter you replace default vCenter Server certificates, you might be unable to connect to the vCenter Serverdatabase.
Problem
vCenter Server is unable to connect to the vCenter Server database after you replace default vCenter Servercertificates, and management web services do not start.
Cause
The database password must be updated in its encrypted form.
Solution
Update the database password by running the following command: vpxd -P pwd.
Cannot Configure vSphere HA When Using Custom SSL CertificatesAfter you install custom SSL certificates, attempts to enable vSphere High Availability (HA) fail.
Problem
When you attempt to enable vSphere HA on a host with custom SSL certificates installed, the following errormessage appears: vSphere HA cannot be configured on this host because its SSL thumbprint has notbeen verified.
Cause
When you add a host to vCenter Server, and vCenter Server already trusts the host's SSL certificate,VPX_HOST.EXPECTED_SSL_THUMBPRINT is not populated in the vCenter Server database. vSphere HA obtains thehost's SSL thumbprint from this field in the database. Without the thumbprint, you cannot enable vSphere HA.
Solution
1 In the vSphere Client, disconnect the host that has custom SSL certificates installed.
2 Reconnect the host to vCenter Server.
3 Accept the host's SSL certificate.
4 Enable vSphere HA on the host.
Unexpected Behavior Occurs When You Change the rui.pfx PasswordThe default password for the PFX file rui.pfx is testpassword. If you change this password, you must alsochange the default keystorePass parameter in the Tomcat configuration file.
Problem
Unexpected behavior might occur if the rui.pfx password does not match the keystorePass parameter. Forexample, you receive the error message Unable to connect to the remote server when you attempt to enablethe vCenter Server Service Status plug-in or Tomcat is not listening on TCP port 8443 as expected.
Cause
The default password for PFX files is testpassword. It is not necessary or recommended to change thispassword. However, if your organization requires that you change the default password, you must updatethe corresponding Tomcat the configuration file.
Replacing Default vCenter Server 5.0 and ESXi Certificates
26 VMware, Inc.
Solution
1 Stop all vCenter Server services.
2 Browse to the Tomcat configuration files and open server.xml in a text editor.
The default location is Program Files\VMware\Infrastructure\tomcat\conf\server.xml.
3 Locate the line containing the following text: Connector port="8443"
4 Update the keystorePass parameter to match the rui.pfx certificate password.
You cannot leave this parameter empty. The default is testpassword.
5 Restart all vCenter Server services.
Chapter 7 Troubleshooting vCenter Server Certificates
VMware, Inc. 27

Replacing Default vCenter Server 5.0 and ESXi Certificates
28 VMware, Inc.

Index
Ccertificate authority
commercial 5self-signed 5
certificate signing request (CSR)generating 9, 15submitting 9, 15
certificatesESXi 7, 10generating new 10replacing 7, 16, 21replacing Update Manager 19replacing vCenter Server Heartbeat 23requirements 5troubleshooting 26vCenter 13vCenter Server 13vCenter Server Appliance 21verifying 18
certificates and PFX files 26
Ddatabase password, updating 17default vCenter Server certificates 5
EESXi, certificates 7, 10
Ggenerating certificates 10
Ppassword, database 17PFX file 16
Rreplacing certificates, loading 16rui.pfx 26
Ssecurity, vCenter Server certificates 5self-signed certificates 5services, restarting 18SSL certificates
copying 10ESXi 7
troubleshooting in vSphere HA 26vCenter Server 13
Ttroubleshooting, certificates 26
VvCenter, certificates 13vCenter Server
certificate requirements 5certificates 13restarting 18troubleshooting certificates 26verifying certificates 18
vCenter Server Appliance, replacingcertificates 21
vCenter Server certificates 25vCenter Server Heartbeat, certificates 23vSphere HA, troubleshooting SSL certificates 26vSphere Update Manager, certificates 19
VMware, Inc. 29

Replacing Default vCenter Server 5.0 and ESXi Certificates
30 VMware, Inc.