
“Remainders” by Kurt Hertzogkurthertzog.com/articles/remaindersrev2red.pdf · With such an...
17
© 2011 Kurt Hertzog 1 “Remainders” by Kurt Hertzog The origin of the name There is an old line among authors. It goes something like “see you in the remainders bin”. The remainders bin is where the book stores put things that don’t sell. Kind of the cast offs that need to be marked way down in order to get them gone. Not much use. Same thing in just about any manufacturing process. There is a certain amount of material wasted in the process. Usually it gets scrapped since it is often too small or just plain unusable. Imagine if your business is laser cut kits. (see figures 1 & 2) You need to create all of the various pieces in each of the correct species to create your kits. What about the leftover material with all of the cutouts. Up until now, you just scrapped them since there is little use for a mix match of different pen barrels with a bunch of holes laser cut out. Here is a method to create something useful from the “Remainders”. Figure 1 - The laser cut kit market has dramatically expanded since it’s creation by Kallanshaan Woods back in 2001. Figure 2 - There are a huge variety of kits available now constructed from an assortment of woods and plastics in order to create “pictures”.
Transcript of “Remainders” by Kurt Hertzogkurthertzog.com/articles/remaindersrev2red.pdf · With such an...

© 2011 Kurt Hertzog
1
“Remainders” by Kurt Hertzog The origin of the name There is an old line among authors. It goes something like “see you in the remainders bin”. The remainders bin is where the book stores put things that don’t sell. Kind of the cast offs that need to be marked way down in order to get them gone. Not much use. Same thing in just about any manufacturing process. There is a certain amount of material wasted in the process. Usually it gets scrapped since it is often too small or just plain unusable. Imagine if your business is laser cut kits. (see figures 1 & 2) You need to create all of the various pieces in each of the correct species to create your kits. What about the leftover material with all of the cutouts. Up until now, you just scrapped them since there is little use for a mix match of different pen barrels with a bunch of holes laser cut out. Here is a method to create something useful from the “Remainders”.
Figure 1 - The laser cut kit market has dramatically expanded since it’s creation by Kallanshaan Woods back in 2001.
Figure 2 - There are a huge variety of kits available now constructed from an assortment of woods and plastics in order to create “pictures”.

© 2011 Kurt Hertzog
2
The process I use the cutout blanks left over from the Kallenshaan Woods laser cut kits. Ken Nelsen sells the scraps at the various trade shows. (see figure 3) Usually they are just in a pile for the shopper to pick through and buy at a bargain price. With such an assortment of different cut out patterns and all of the different species, you can make quite a project out of creating pen blanks from the scrap materials. There are many different ways of using these blanks but here is a simple straight forward method that I currently use.
After I have selected the blank, I want to fill the empty spaces with some contrasting color and material. In order to economize on the filler material and to make a convenient support mechanism, I use the brass pen tube inside the blank. As usual, I always scuff my brass tubes to insure a good adhesive bond surface. (see figure 4) You are at a cross roads at this point. You can glue the tube in place and fill the cutout areas or you can use the tube as a support to be removed and glued in later. By protecting the tube with either masking tape or waxed paper, you can fill the holes in the cutout with the tube in place for support and easily remove it later to perform the gluing process. (see figure 5).
Figure 3 - The need for many different colors of wood creates a large number of scrap pieces after many inserts have been harvested from them.

© 2011 Kurt Hertzog
3
Filler materials? What to fill the holes with? Decisions, decisions, decisions. You can use just about anything. My method is to use epoxy glue that is highly filled with wood chips, wood dust, acrylic paint, metal dust, powders, or whatever will be a nice contrast and is readily available. The folks at Kallenshaan Woods will even sell you the various colored sawdust to use as filler material. (see figure 6)
Figure 4 - The remainders are perfectly cut but have nonsensical patters since the harvesting is for maximum material utilization.
Figure 5 - Each of these remainder pieces can have a new life if you are willing to do a bit of self directed work to fill the cut outs.
Figure 6 - Kallanshaan Woods has not only found a market for their scraps but also for the sawdust from cutting the various colored dyed woods.

© 2011 Kurt Hertzog
4
Drat! More decisions to be made. You can fill the empty space with your filler of choice (see figure 7) and then use Ca glue to solidify your filler (see figure 8) or mix your filler with epoxy. (see figure 9) While I use both methods, I have found that mixing the epoxy into a thick slurry with my filler material makes it easier to fill the holes. (see figure 10) I find it much easier to fill the holes with this thick paste like material and not have to worry about the grains of filler staying in place while I drip Ca glue into place. (see figure 11)
Figure 8 - One technique for solidifying the inlayed material is to drip cyanoacrylate glue into the opening to fuse it together.
Figure 7 - By providing a backing in the cutout area, filler materials can be put into the opening to create a unique style pen blank.

© 2011 Kurt Hertzog
5
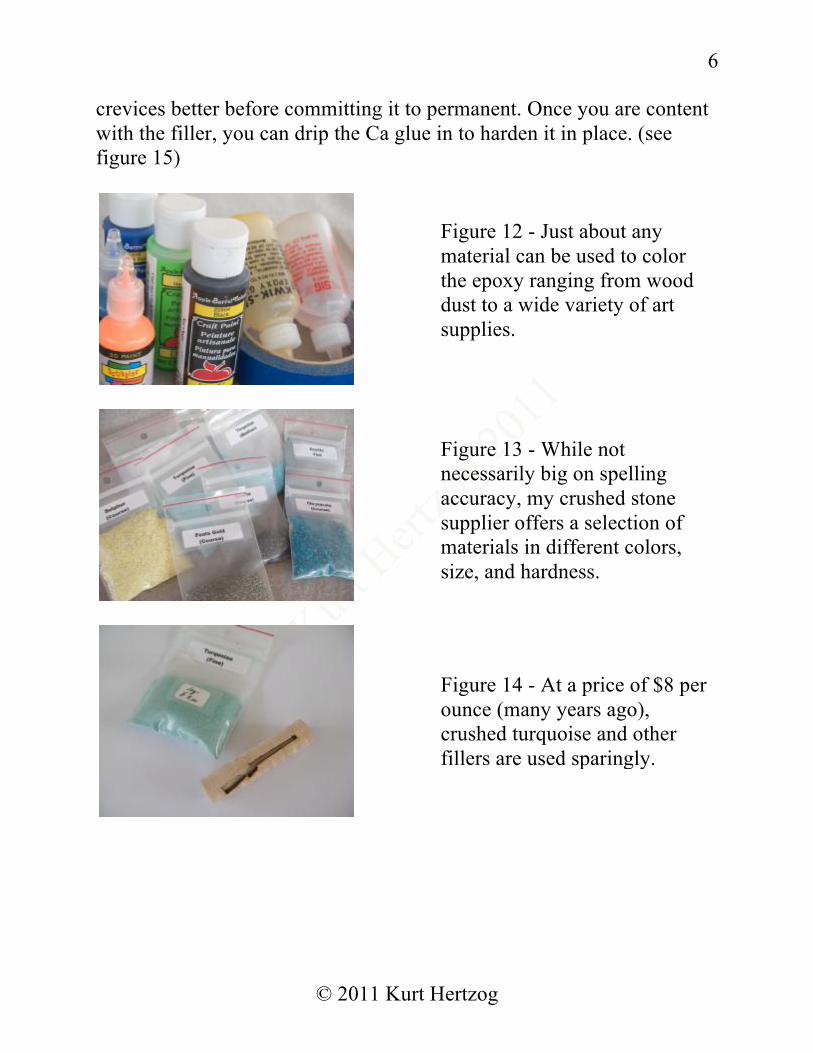
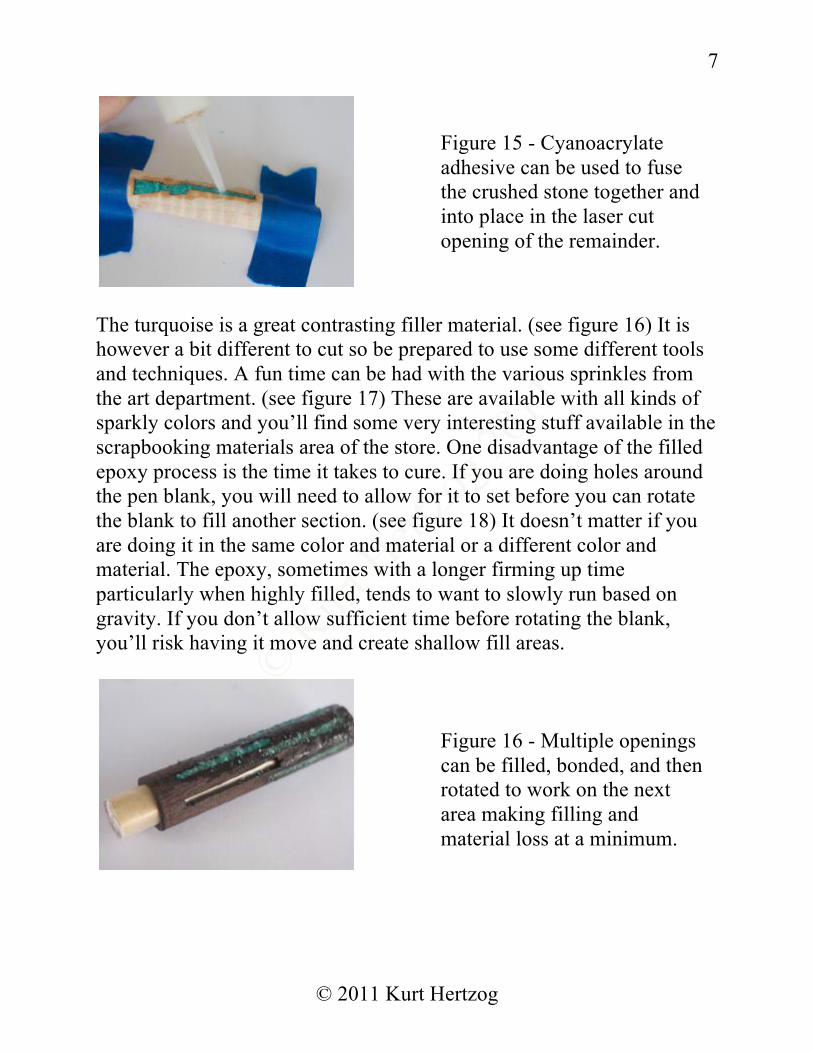
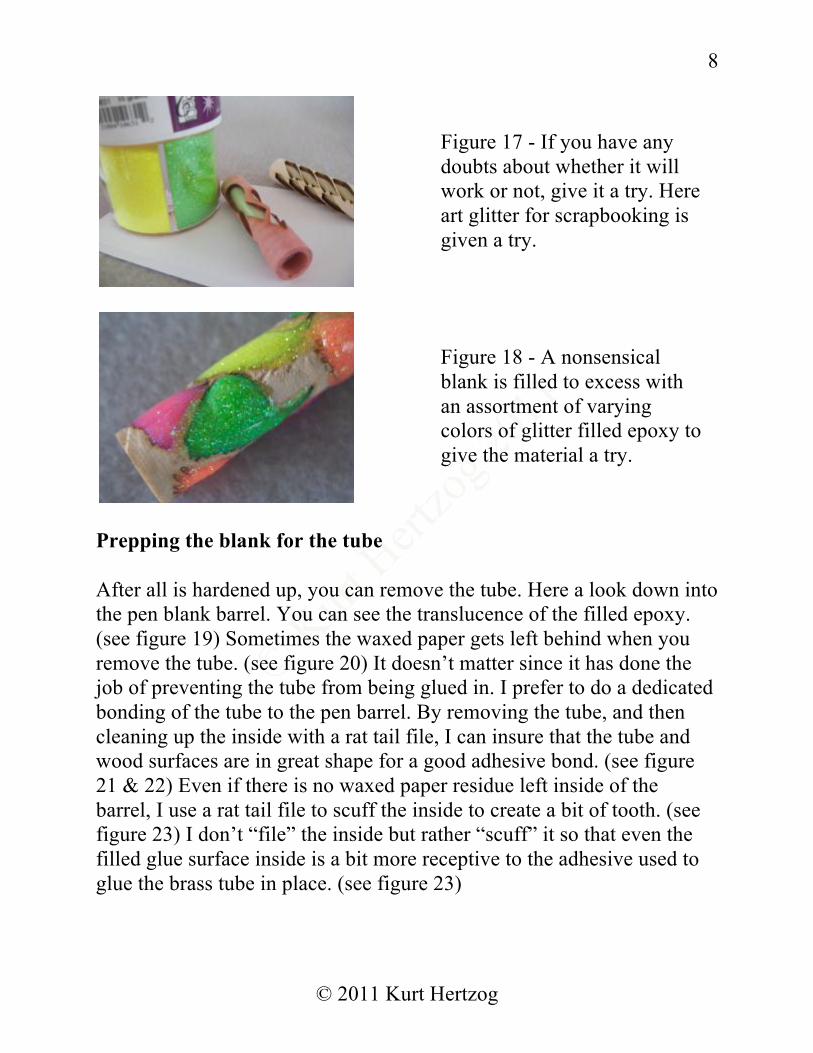
While brass filings from the key cutting machine and any array of other “mechanical” fillers will give you a nice palette, I often venture into paints. A trip through the craft store will give you a huge choice of colors and textures to experiment with. (see figure 12) Of course, there is the old faithful such as crushed turquoise and other colorful stone materials available to use as filler as well. (see figure 13) The crushed stone tends to work better with the fill it as a powder and then solidify in place.(see figure 14) This allows you to pack the powder into the
Figure 9 - Another option is to use whatever filler you wish and mix it with your favorite epoxy adhesive.
Figure 10 - The final color and ultimate density can be controlled by the quantity of filler used in the mixed epoxy.
Figure 11 - The filled epoxy can be put into the opening with care taken to insure good perimeter wetting and adequate material to allow for any shrinkage.
© 2011 Kurt Hertzog
6
crevices better before committing it to permanent. Once you are content with the filler, you can drip the Ca glue in to harden it in place. (see figure 15)
Figure 12 - Just about any material can be used to color the epoxy ranging from wood dust to a wide variety of art supplies.
Figure 13 - While not necessarily big on spelling accuracy, my crushed stone supplier offers a selection of materials in different colors, size, and hardness.
Figure 14 - At a price of $8 per ounce (many years ago), crushed turquoise and other fillers are used sparingly.
© 2011 Kurt Hertzog
7
The turquoise is a great contrasting filler material. (see figure 16) It is however a bit different to cut so be prepared to use some different tools and techniques. A fun time can be had with the various sprinkles from the art department. (see figure 17) These are available with all kinds of sparkly colors and you’ll find some very interesting stuff available in the scrapbooking materials area of the store. One disadvantage of the filled epoxy process is the time it takes to cure. If you are doing holes around the pen blank, you will need to allow for it to set before you can rotate the blank to fill another section. (see figure 18) It doesn’t matter if you are doing it in the same color and material or a different color and material. The epoxy, sometimes with a longer firming up time particularly when highly filled, tends to want to slowly run based on gravity. If you don’t allow sufficient time before rotating the blank, you’ll risk having it move and create shallow fill areas.
Figure 15 - Cyanoacrylate adhesive can be used to fuse the crushed stone together and into place in the laser cut opening of the remainder.
Figure 16 - Multiple openings can be filled, bonded, and then rotated to work on the next area making filling and material loss at a minimum.
© 2011 Kurt Hertzog
8
Prepping the blank for the tube After all is hardened up, you can remove the tube. Here a look down into the pen blank barrel. You can see the translucence of the filled epoxy. (see figure 19) Sometimes the waxed paper gets left behind when you remove the tube. (see figure 20) It doesn’t matter since it has done the job of preventing the tube from being glued in. I prefer to do a dedicated bonding of the tube to the pen barrel. By removing the tube, and then cleaning up the inside with a rat tail file, I can insure that the tube and wood surfaces are in great shape for a good adhesive bond. (see figure 21 & 22) Even if there is no waxed paper residue left inside of the barrel, I use a rat tail file to scuff the inside to create a bit of tooth. (see figure 23) I don’t “file” the inside but rather “scuff” it so that even the filled glue surface inside is a bit more receptive to the adhesive used to glue the brass tube in place. (see figure 23)
Figure 17 - If you have any doubts about whether it will work or not, give it a try. Here art glitter for scrapbooking is given a try.
Figure 18 - A nonsensical blank is filled to excess with an assortment of varying colors of glitter filled epoxy to give the material a try.

© 2011 Kurt Hertzog
9
Figure 19 - The filled areas of the blank have an eerie translucence after the epoxy cures and the backing core is removed.
Figure 20 - On occasion, the waxed paper wrapped around the tube to prevent bonding to the tube gets stuck to the inside of the tube.
Figure 21 - Any waxed paper or tape used to provide a dam for filling can be easily removed to allow for a good gluing surface for the brass tube.
Figure 22 - Depending on the species of wood used, each of the fillers has a completely different look.
© 2011 Kurt Hertzog
10
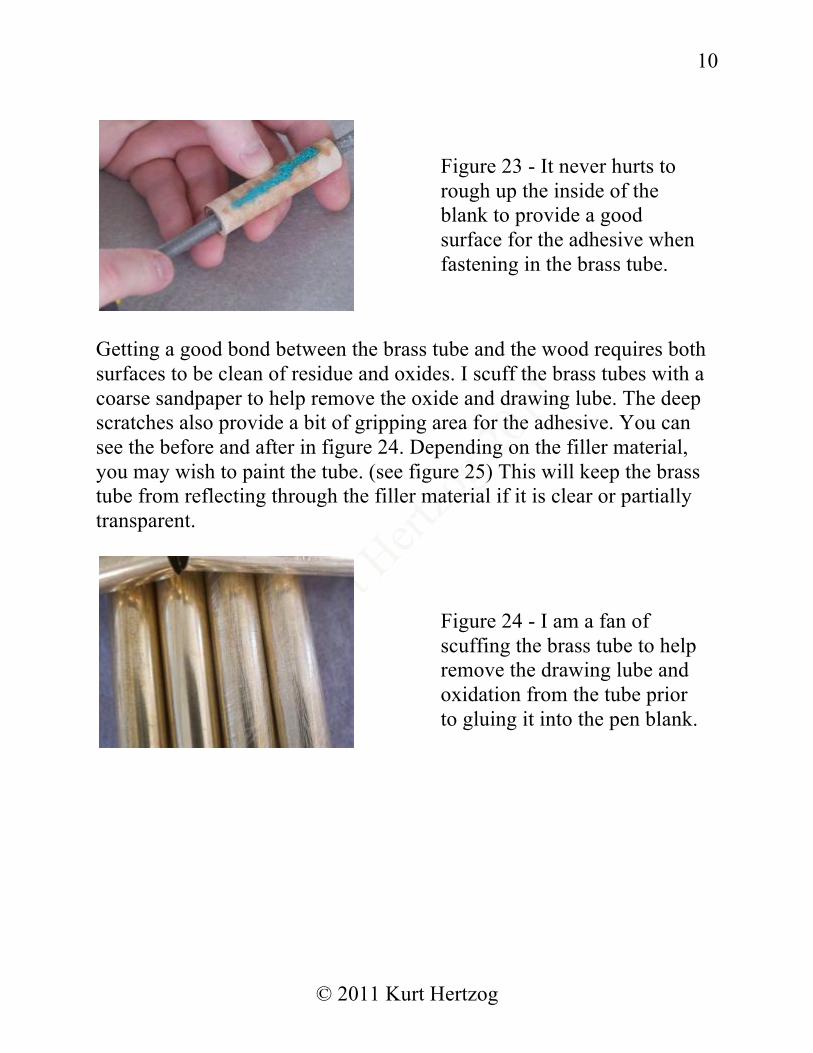
Getting a good bond between the brass tube and the wood requires both surfaces to be clean of residue and oxides. I scuff the brass tubes with a coarse sandpaper to help remove the oxide and drawing lube. The deep scratches also provide a bit of gripping area for the adhesive. You can see the before and after in figure 24. Depending on the filler material, you may wish to paint the tube. (see figure 25) This will keep the brass tube from reflecting through the filler material if it is clear or partially transparent.
Figure 23 - It never hurts to rough up the inside of the blank to provide a good surface for the adhesive when fastening in the brass tube.
Figure 24 - I am a fan of scuffing the brass tube to help remove the drawing lube and oxidation from the tube prior to gluing it into the pen blank.

© 2011 Kurt Hertzog
11
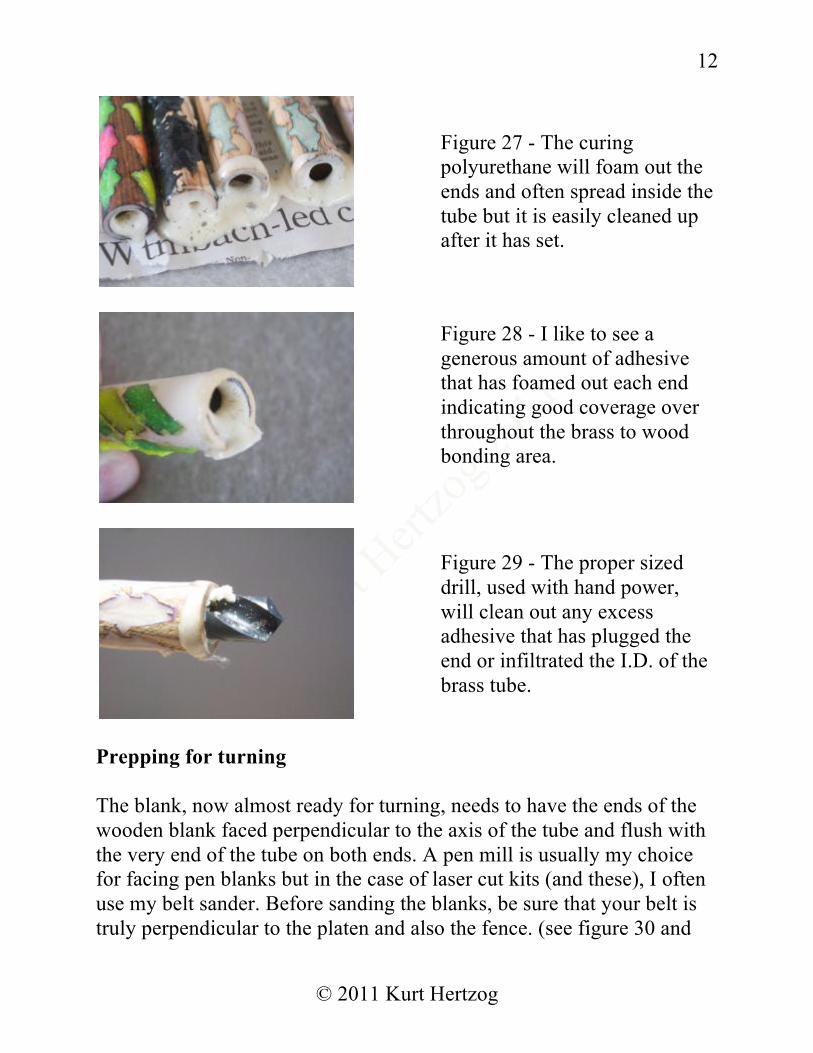
Gluing in the tube There is no easier way to start a heated discussion among penturners than to ask what is the best glue for bonding in tubes. The short answer is “it doesn’t matter”. Any of them will work if used properly. While I use three different ones (Ca, epoxy, and polyurethane), I favor polyurethane where ever possible. (see figure 26) I like the foaming, gap filling character of the adhesive. (see figure 27) The fact that it cures but still remains a bit compliant allows the wood to move without being stressed by the unmoving brass. (see figure 28) Many don’t like the foaming of the curing polyurethane because it tends to get everywhere and often foams into the inside of the tube. I clean it out easily with the proper sized drill by hand. (see figure 29)
Figure 25 - There are occasions when painting the brass tube black, white, or another color will help prevent seeing it through the inlayed material.
Figure 26 - I use polyurethane glues to bond in my brass tubes after scuffing the tube, spreading the glue on the tube, and wetting the inside of the blank with water.
© 2011 Kurt Hertzog
12
Prepping for turning The blank, now almost ready for turning, needs to have the ends of the wooden blank faced perpendicular to the axis of the tube and flush with the very end of the tube on both ends. A pen mill is usually my choice for facing pen blanks but in the case of laser cut kits (and these), I often use my belt sander. Before sanding the blanks, be sure that your belt is truly perpendicular to the platen and also the fence. (see figure 30 and
Figure 27 - The curing polyurethane will foam out the ends and often spread inside the tube but it is easily cleaned up after it has set.
Figure 28 - I like to see a generous amount of adhesive that has foamed out each end indicating good coverage over throughout the brass to wood bonding area.
Figure 29 - The proper sized drill, used with hand power, will clean out any excess adhesive that has plugged the end or infiltrated the I.D. of the brass tube.

© 2011 Kurt Hertzog
13
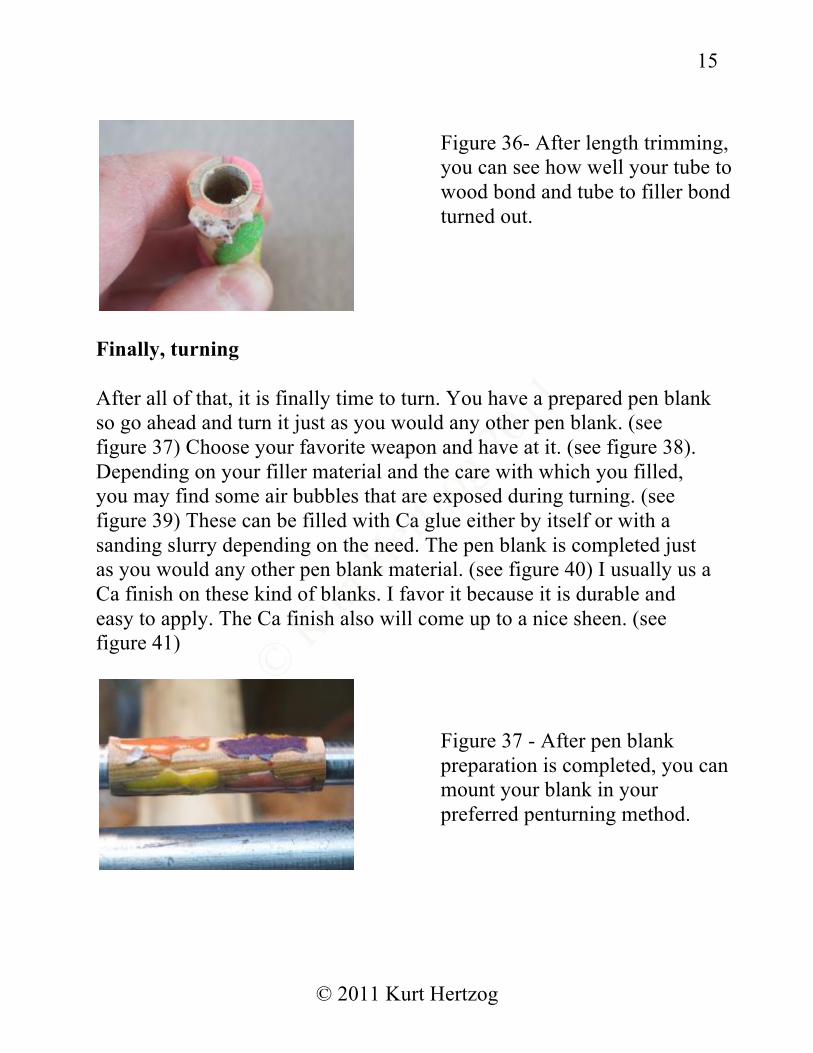
31). There are many available jigs for sanding the blanks on a belt sander. I have a homemade one that pilots on the inner diameter of the tube and was carefully made so the pilot shaft is perpendicular to the platen and fence. Notice the painters tape that is used to compensate for various diameter tubes. (see figure 32) Sanding the “remainders” pen blanks is done just like the laser cut kits. The blank is slowly presented to the belt sander and checked often to sand only up to the edge of the brass inside. (see figure 33) Once sanded on both ends up flush to the brass, the blanks are ready for turning (see figure 34) You can certainly use a pen mill to face the blanks if you wish. It will work as well as sanding. (see figure 35 & 36) It will work on the remainders blanks but will often fracture the regular laser cut kit blanks.
Figure 30 - To use a sander to square the blank and trim to the brass tube edge, the belt platen needs to be square to the sander table.
Figure 31 - The sander belt platen also needs to be square to the fence on the belt sander table.

© 2011 Kurt Hertzog
14
Figure 32 - My home built sanding jig allows me to sand the end of the blank flush to the tube on my belt sander in order to reduce stress on laser cut blanks, including remainders.
Figure 33 - The pen blank, piloting on the I.D. of the brass tube, can be sanded accurately and perpendicular to the brass tube.
Figure 34 - Since the pen assembly sizes on the length dimension of the brass tube, it is important that the blank be trimmed only until the wood is just flush with the brass tube.
Figure 35 - The non-fragile pen blanks can be trimmed using the traditional rotating pen mill piloting on the I.D. and trimmed only until flush with the brass.
© 2011 Kurt Hertzog
15
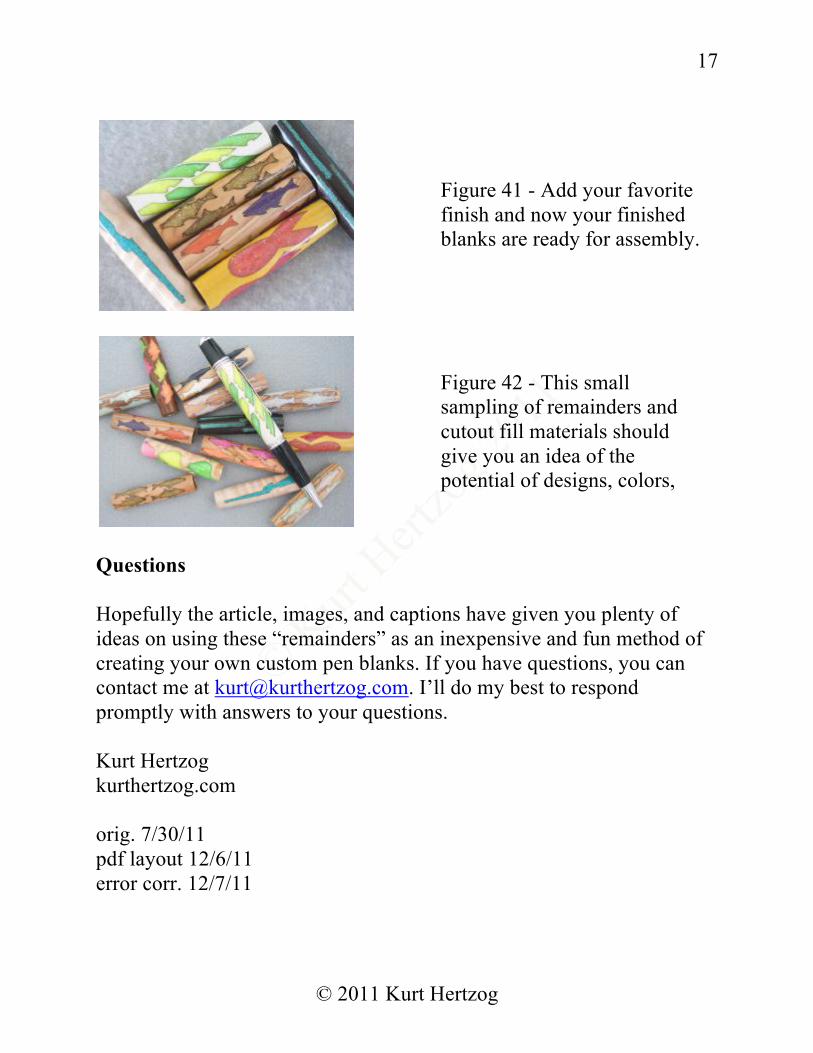
Finally, turning After all of that, it is finally time to turn. You have a prepared pen blank so go ahead and turn it just as you would any other pen blank. (see figure 37) Choose your favorite weapon and have at it. (see figure 38). Depending on your filler material and the care with which you filled, you may find some air bubbles that are exposed during turning. (see figure 39) These can be filled with Ca glue either by itself or with a sanding slurry depending on the need. The pen blank is completed just as you would any other pen blank material. (see figure 40) I usually us a Ca finish on these kind of blanks. I favor it because it is durable and easy to apply. The Ca finish also will come up to a nice sheen. (see figure 41)
Figure 36- After length trimming, you can see how well your tube to wood bond and tube to filler bond turned out.
Figure 37 - After pen blank preparation is completed, you can mount your blank in your preferred penturning method.

© 2011 Kurt Hertzog
16
Finito After turning and finishing, you can assemble your masterpiece. Depending on which remainder you selected, you’ll assemble to the appropriate kit. I find that doing a bunch of the barrels and having them ready for assembly is advantageous. It lets me quickly complete the pen desired without committing to the expense of a large quantity of completed pens. (see figure 42).
Figure 38 - The pen blank can now be turned using your preferred tools and method with any changes as needed based on your inlayed material choice.
Figure 39 - Turning and sanding can proceed as usual. Any small voids or air holes can be filled with Ca.
Figure 40 - There are a host of different species of woods available as remainders so the choices of base and fill materials will give you plenty of possibilities to explore.
© 2011 Kurt Hertzog
17
Questions Hopefully the article, images, and captions have given you plenty of ideas on using these “remainders” as an inexpensive and fun method of creating your own custom pen blanks. If you have questions, you can contact me at [email protected]. I’ll do my best to respond promptly with answers to your questions. Kurt Hertzog kurthertzog.com orig. 7/30/11 pdf layout 12/6/11 error corr. 12/7/11
Figure 41 - Add your favorite finish and now your finished blanks are ready for assembly.
Figure 42 - This small sampling of remainders and cutout fill materials should give you an idea of the potential of designs, colors, and materials that you can explore.