Release Note CLIQ Connect PC 0 - ABLOY Australia · 4.7 Activate CLIQ Connect that’s gone into...
19
ASSA ABLOY CLIQ Connect PC Application User Manual
Transcript of Release Note CLIQ Connect PC 0 - ABLOY Australia · 4.7 Activate CLIQ Connect that’s gone into...

ASSA ABLOY
CLIQ Connect PC Application User Manual

Table of Contents
1 INTRODUCTION ............................................................................................ 3
2 VERSIONS ..................................................................................................... 3
2.1 CLIQ Web Manager/Remote ......................................................................... 3 2.2 Key Firmware............................................................................................. 3 2.3 Microsoft Windows ...................................................................................... 3
3 INSTALLATION .............................................................................................. 4
4 USING CLIQ CONNECT PC APP ...................................................................... 8
4.1 Starting CLIQ Connect ................................................................................ 8 4.2 Configure Windows to always show the CLIQ Connect icon in the task bar ......... 9
4.2.1 Win 8 .................................................................................................. 9 4.2.2 Win 10 ...............................................................................................10
4.3 Configuring CLIQ Connect ...........................................................................12 4.4 Login to CLIQ Web Manager using CLIQ Connect ...........................................15 4.5 Updating a C-key (not applicable for CLIQ Go customers) ...............................17 4.6 Updating a user key ...................................................................................17 4.7 Activate CLIQ Connect that’s gone into sleep mode........................................18 4.8 Using CLIQ Connect’s token entry feature when enrolling for C-key certificate
(not applicable for CLIQ Go customers) ................................................................18 4.9 Automatic software Update .........................................................................18 4.10 Viewing the application logs and CLIQ Connect version ..................................19 4.11 Stop CLIQ Connect from automatically start with Windows .............................19
5 KNOWN ISSUES AND LIMITATIONS ............................................................ 19

1 Introduction
This document contains the user manual for CLIQ Connect PC Application.
The purpose of this document is to present how CLIQ Connect PC Application works, is
installed, configured and troubleshot.
CLIQ Connect PC Application (CCPA) is a software that replaces Java when logging in to
CLIQ Web Manager. CCPA installs on the PC like a normal software and will appear in the
Taskbar in Windows.
Note, if you want to use the Lockchart in CLIQ Web Manager then you will still need Java
installed on the PC. Note, the Lockchart will no longer be available from CLIQ Web
Manager version 7.
2 Versions
This user manual covers CLIQ Connect PC Application version 1.2 and 1.3 which is
compatible with the following components:
2.1 CLIQ Web Manager/Remote
The CLIQ Web Manager 6.0 release or later.
2.2 Key Firmware
The Key firmware 12.3 or later (for direct programming functionality)
2.3 Microsoft Windows
Windows Vista
Windows 7
Windows 8.1

3 Installation
First download the application by going to:
https://cliqconnect.assaabloy.com/
Save the zip file on your PC. Extract the zip file.
Now run the CLIQ_Connect.exe file. Note, the version (such as 1.3) will also be a part of
the file name for the .exe file.
The installation will start.
Select your preferred language and click OK.
You might be asked to provide local admin details on your PC in order to install CLIQ
Connect. Provide the required details (contact your IT department for help if required).
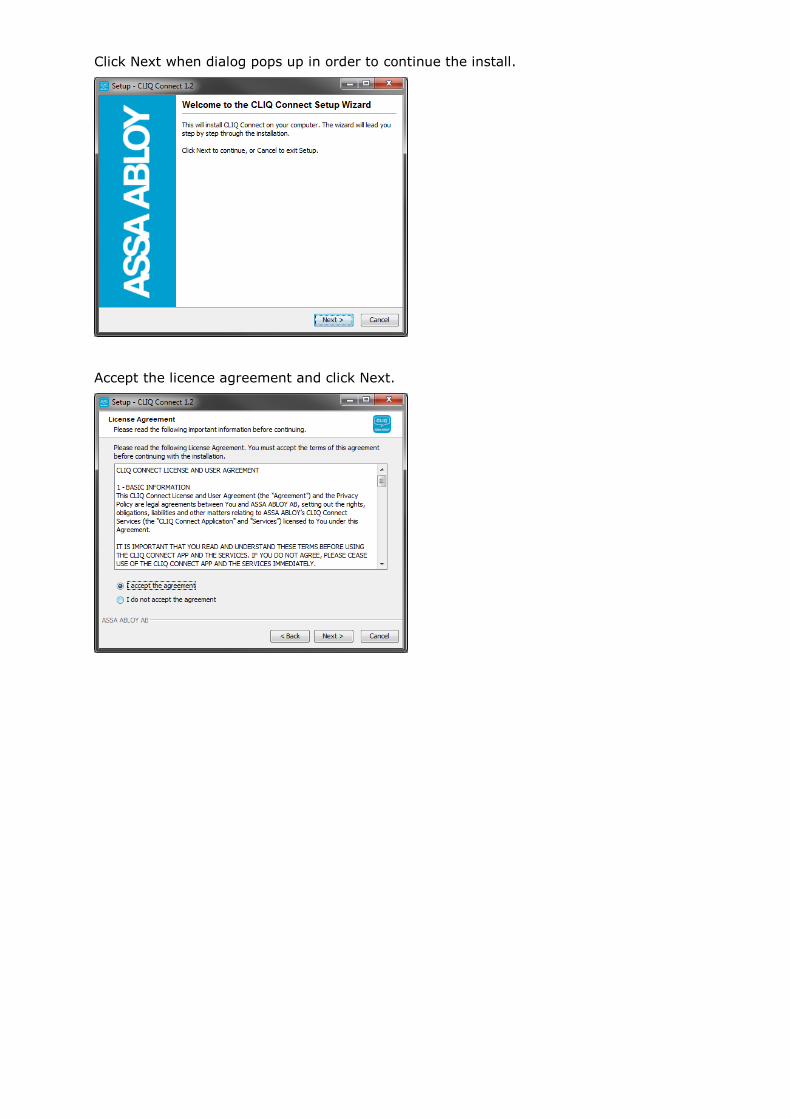
Click Next when dialog pops up in order to continue the install.
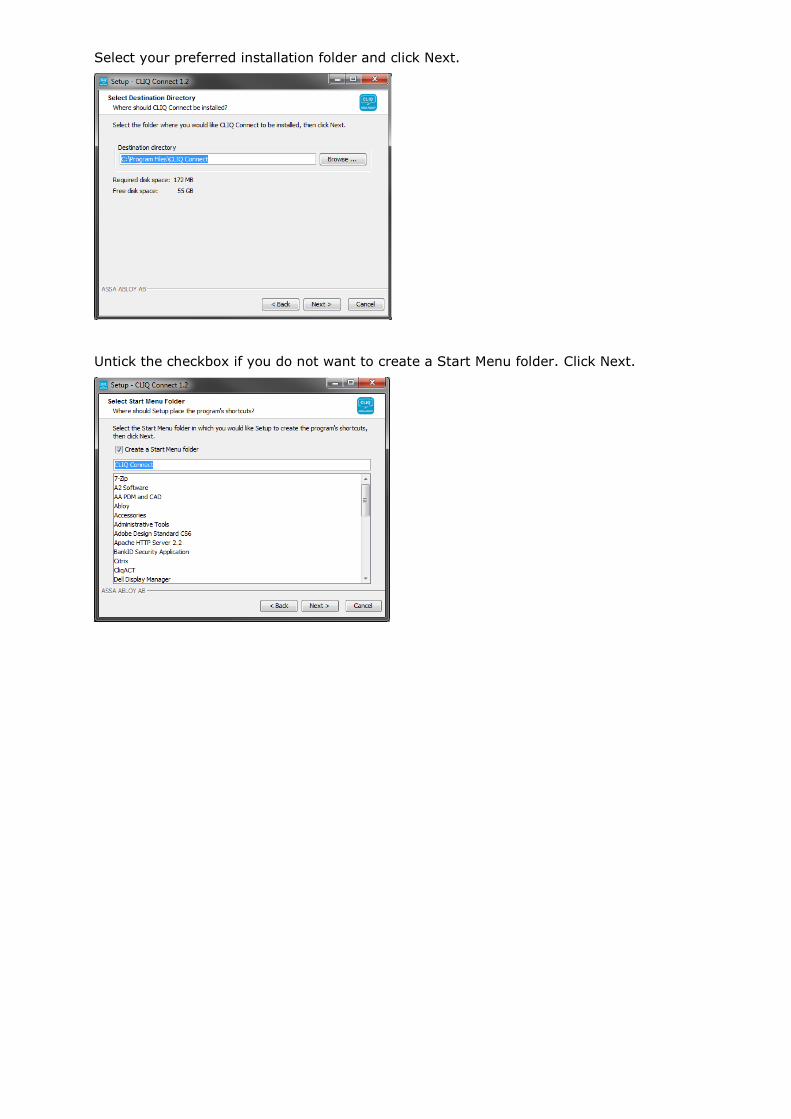
Accept the licence agreement and click Next.
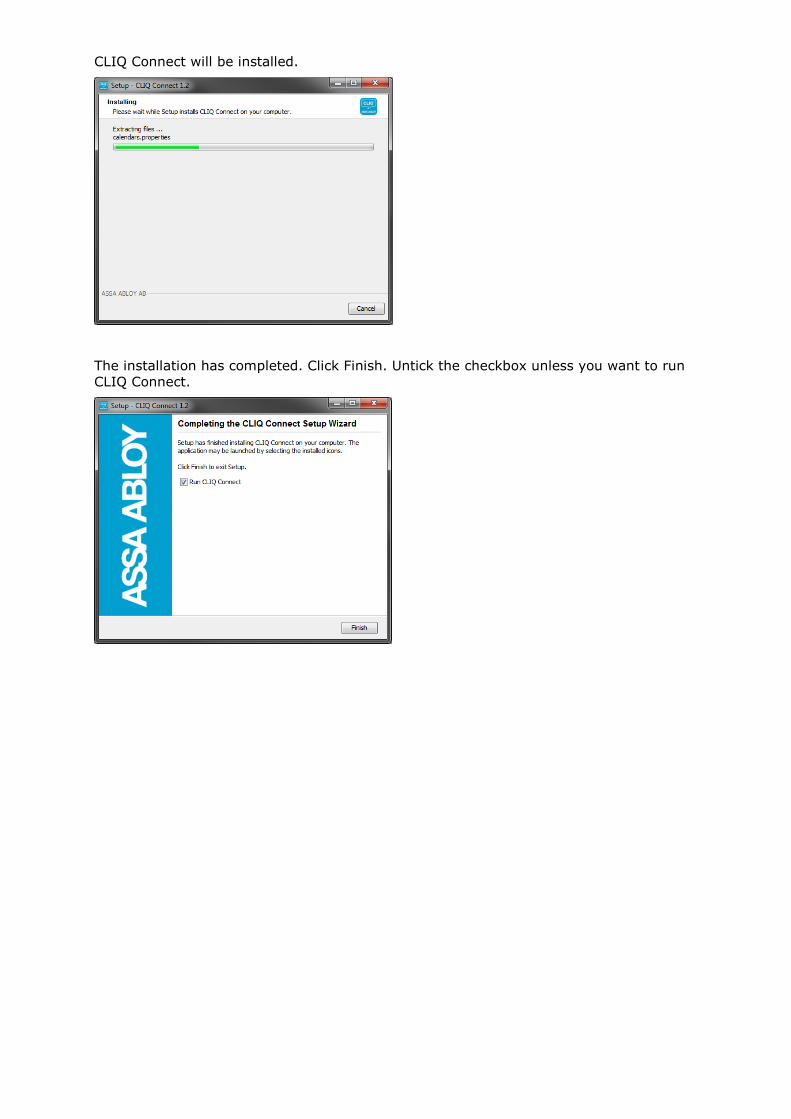
Select your preferred installation folder and click Next.
Untick the checkbox if you do not want to create a Start Menu folder. Click Next.
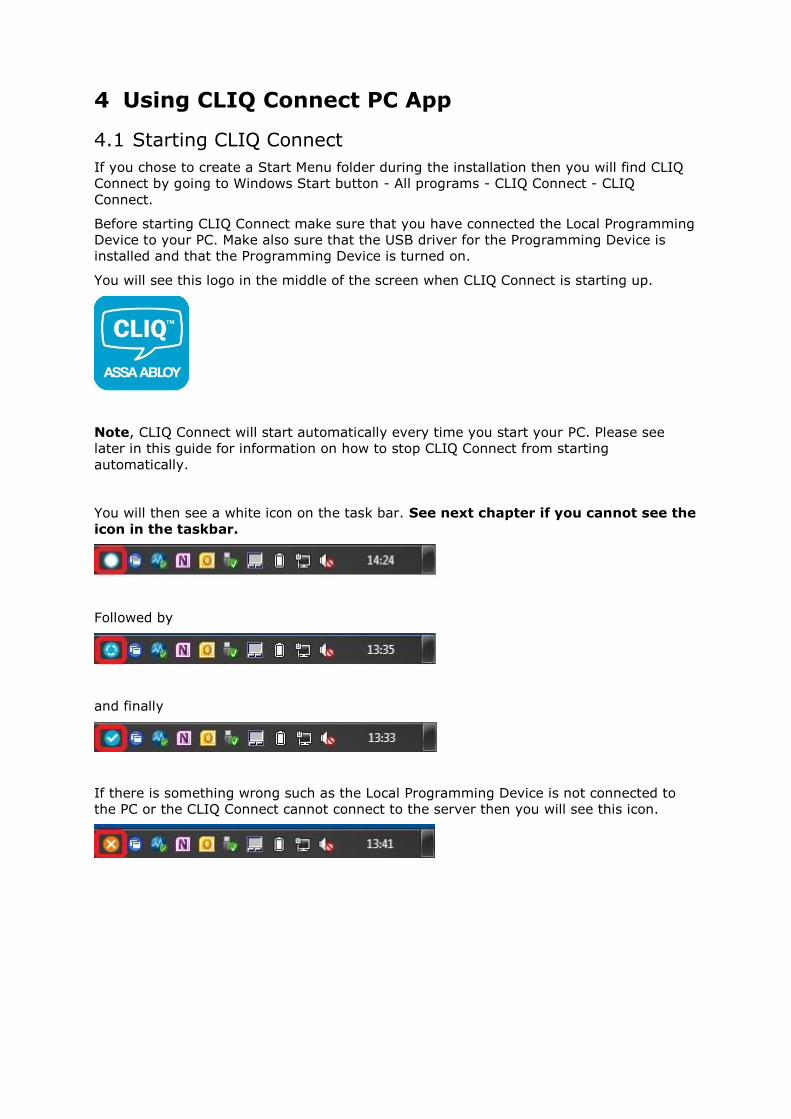
CLIQ Connect will be installed.
The installation has completed. Click Finish. Untick the checkbox unless you want to run
CLIQ Connect.
4 Using CLIQ Connect PC App
4.1 Starting CLIQ Connect
If you chose to create a Start Menu folder during the installation then you will find CLIQ
Connect by going to Windows Start button - All programs - CLIQ Connect - CLIQ
Connect.
Before starting CLIQ Connect make sure that you have connected the Local Programming
Device to your PC. Make also sure that the USB driver for the Programming Device is
installed and that the Programming Device is turned on.
You will see this logo in the middle of the screen when CLIQ Connect is starting up.
Note, CLIQ Connect will start automatically every time you start your PC. Please see
later in this guide for information on how to stop CLIQ Connect from starting
automatically.
You will then see a white icon on the task bar. See next chapter if you cannot see the
icon in the taskbar.
Followed by
and finally
If there is something wrong such as the Local Programming Device is not connected to
the PC or the CLIQ Connect cannot connect to the server then you will see this icon.
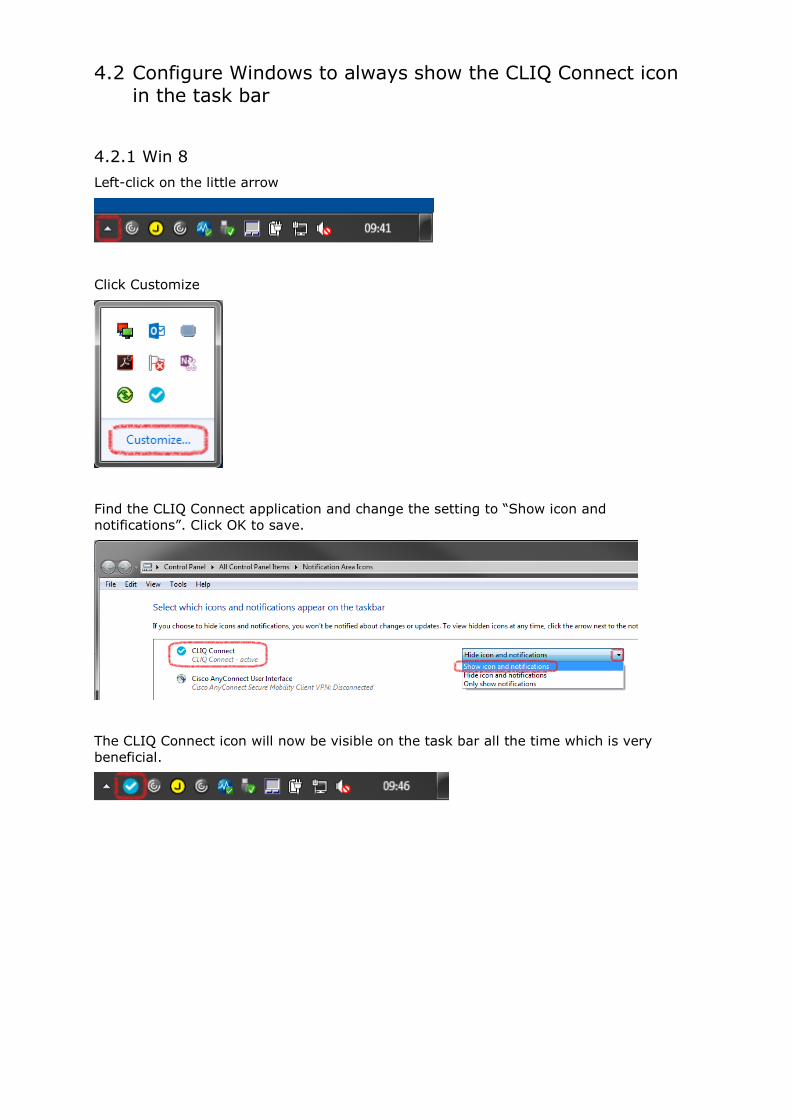
4.2 Configure Windows to always show the CLIQ Connect icon in the task bar
4.2.1 Win 8
Left-click on the little arrow
Click Customize
Find the CLIQ Connect application and change the setting to “Show icon and
notifications”. Click OK to save.
The CLIQ Connect icon will now be visible on the task bar all the time which is very
beneficial.
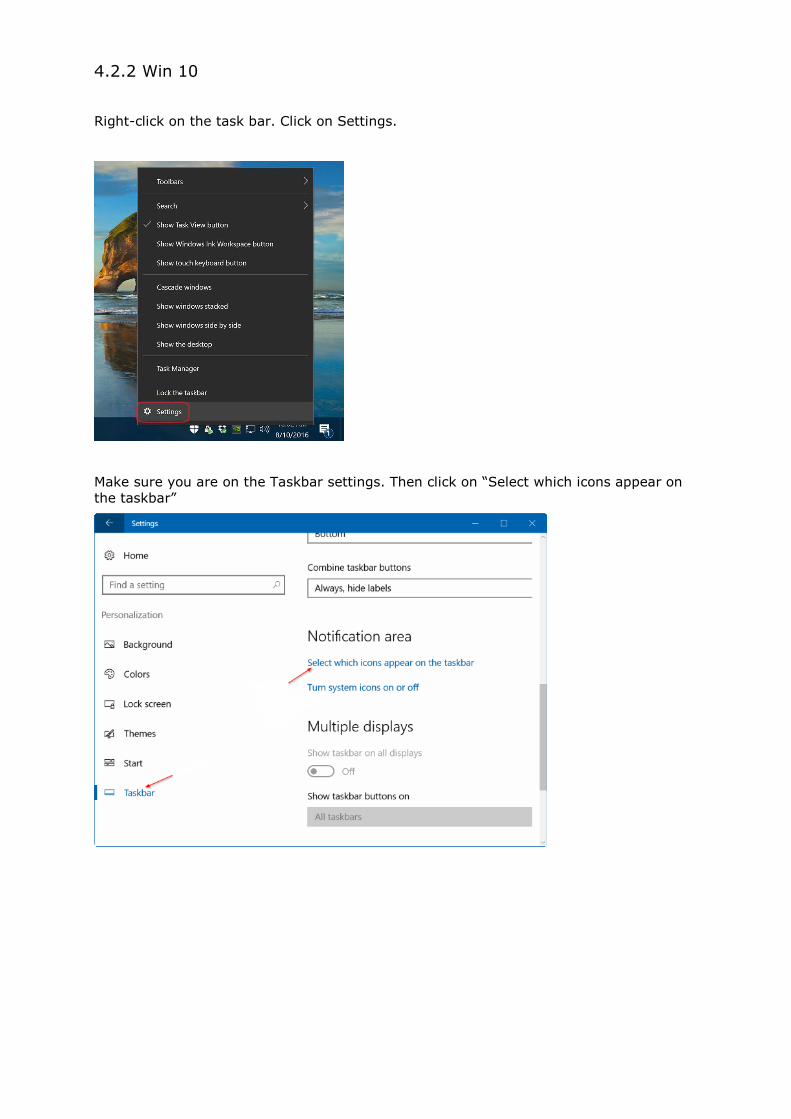
4.2.2 Win 10
Right-click on the task bar. Click on Settings.
Make sure you are on the Taskbar settings. Then click on “Select which icons appear on
the taskbar”

Find CLIQ Connect and change the value to On.
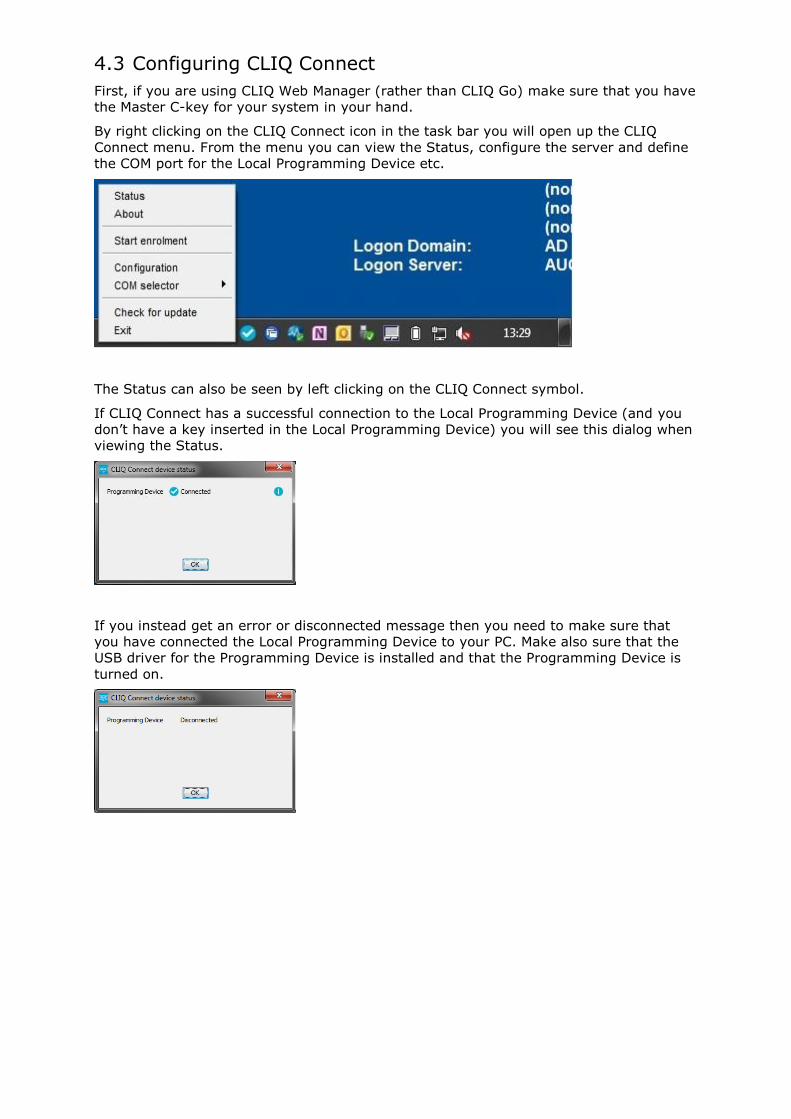
4.3 Configuring CLIQ Connect
First, if you are using CLIQ Web Manager (rather than CLIQ Go) make sure that you have
the Master C-key for your system in your hand.
By right clicking on the CLIQ Connect icon in the task bar you will open up the CLIQ
Connect menu. From the menu you can view the Status, configure the server and define
the COM port for the Local Programming Device etc.
The Status can also be seen by left clicking on the CLIQ Connect symbol.
If CLIQ Connect has a successful connection to the Local Programming Device (and you
don’t have a key inserted in the Local Programming Device) you will see this dialog when
viewing the Status.
If you instead get an error or disconnected message then you need to make sure that
you have connected the Local Programming Device to your PC. Make also sure that the
USB driver for the Programming Device is installed and that the Programming Device is
turned on.
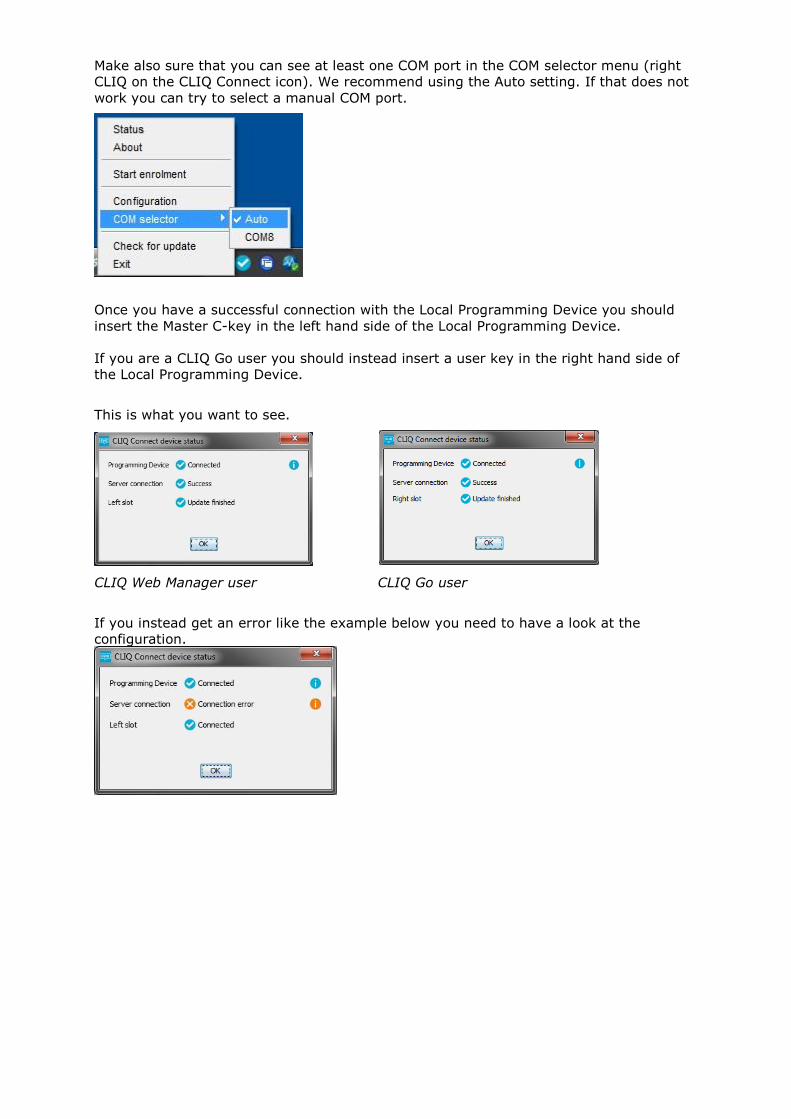
Make also sure that you can see at least one COM port in the COM selector menu (right
CLIQ on the CLIQ Connect icon). We recommend using the Auto setting. If that does not
work you can try to select a manual COM port.
Once you have a successful connection with the Local Programming Device you should
insert the Master C-key in the left hand side of the Local Programming Device.
If you are a CLIQ Go user you should instead insert a user key in the right hand side of
the Local Programming Device.
This is what you want to see.
CLIQ Web Manager user CLIQ Go user
If you instead get an error like the example below you need to have a look at the
configuration.
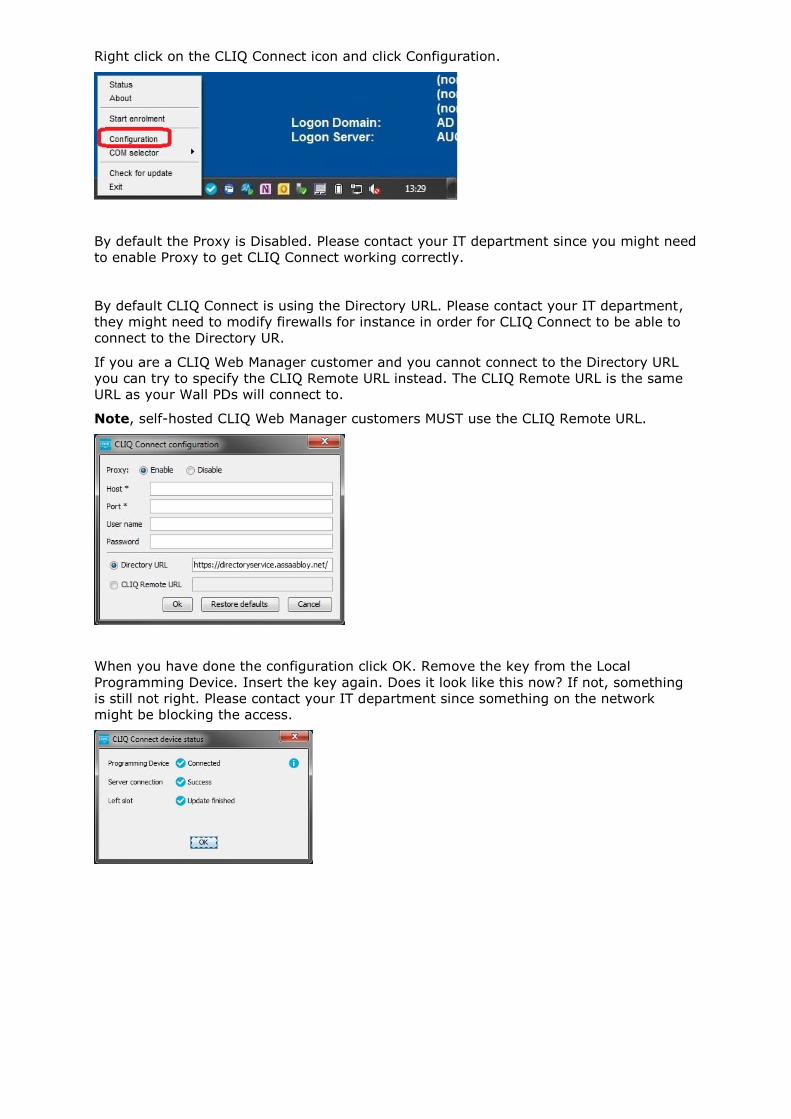
Right click on the CLIQ Connect icon and click Configuration.
By default the Proxy is Disabled. Please contact your IT department since you might need
to enable Proxy to get CLIQ Connect working correctly.
By default CLIQ Connect is using the Directory URL. Please contact your IT department,
they might need to modify firewalls for instance in order for CLIQ Connect to be able to
connect to the Directory UR.
If you are a CLIQ Web Manager customer and you cannot connect to the Directory URL
you can try to specify the CLIQ Remote URL instead. The CLIQ Remote URL is the same
URL as your Wall PDs will connect to.
Note, self-hosted CLIQ Web Manager customers MUST use the CLIQ Remote URL.
When you have done the configuration click OK. Remove the key from the Local
Programming Device. Insert the key again. Does it look like this now? If not, something
is still not right. Please contact your IT department since something on the network
might be blocking the access.
4.4 Login to CLIQ Web Manager using CLIQ Connect
When you login to CLIQ Web Manager version 6 or later the default option is to use CLIQ
Connect login method. Note, from CLIQ Web Manager version 7 it will only be possible to
login via CLIQ Connect. Logging in via Java will not be possible anymore.
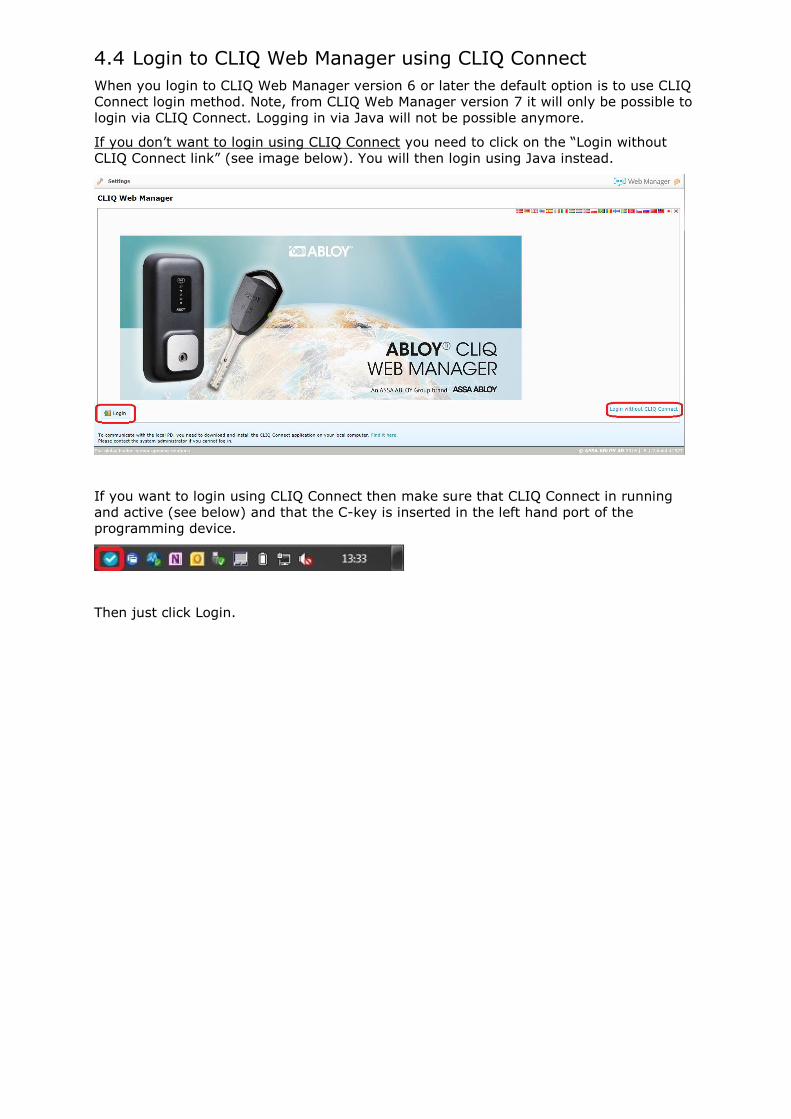
If you don’t want to login using CLIQ Connect you need to click on the “Login without
CLIQ Connect link” (see image below). You will then login using Java instead.
If you want to login using CLIQ Connect then make sure that CLIQ Connect in running
and active (see below) and that the C-key is inserted in the left hand port of the
programming device.
Then just click Login.

Type the PIN code and click OK.
A pop up window will appear in the lower right hand corner on the screen. Click OK.
You will now be logged in to CLIQ Web Manager.

4.5 Updating a C-key (not applicable for CLIQ Go customers)
The user can update/program CLIQ C-keys using the left hand key port of Local
Programming Device.
The icon on the task bar will look like this when a key is being updated/CLIQ Connect
looking for updates.
Once the update is finished it will look like this.
In the Status menu it will look this after a successful update.
4.6 Updating a user key
The user can update/program CLIQ user keys using the right hand key port of Local
Programming Device.
The icon on the task bar will look like this when a key is being updated/CLIQ Connect
looking for updates.
Once the update is finished it will look like this.
In the Status menu it will look this after a successful update.
4.7 Activate CLIQ Connect that’s gone into sleep mode
CLIQ Connect will go into sleep mode and the Local Programming Device will turn off
after a few minutes of inactivity. You can tell that CLIQ Connect is in sleep mode by
looking at the icon. It will be grey.
Left click on the CLIQ Connect icon to wake it up.
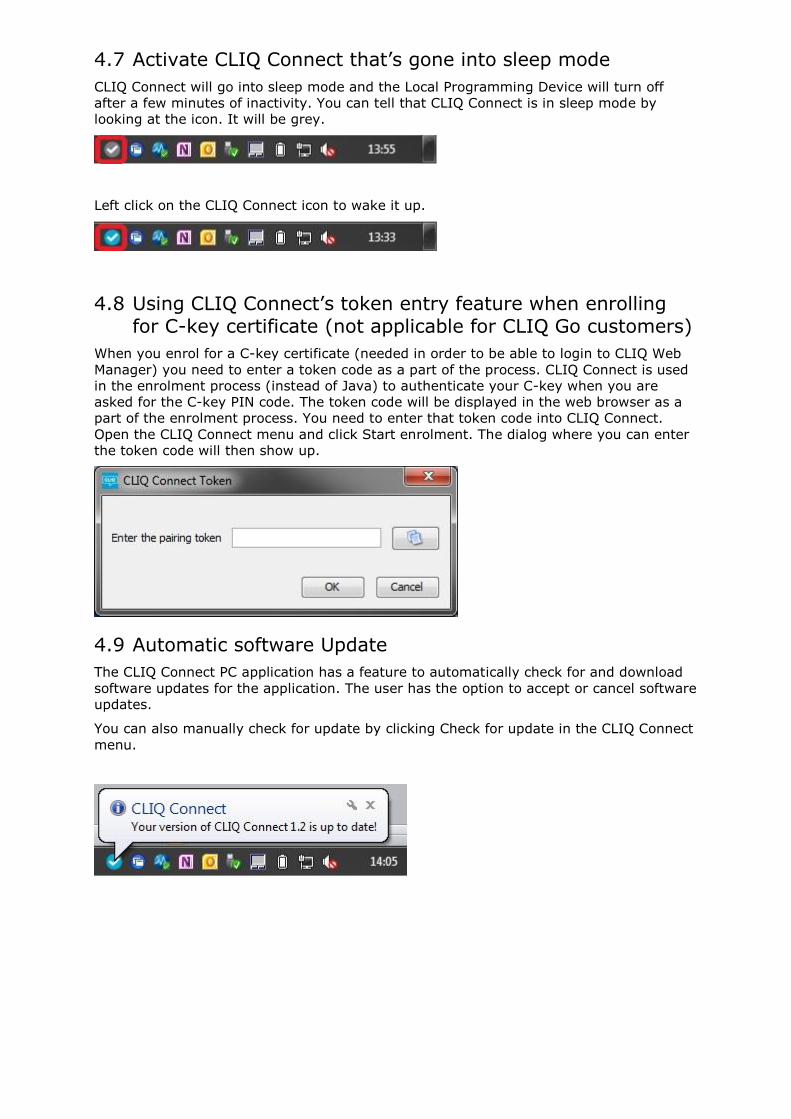
4.8 Using CLIQ Connect’s token entry feature when enrolling for C-key certificate (not applicable for CLIQ Go customers)
When you enrol for a C-key certificate (needed in order to be able to login to CLIQ Web
Manager) you need to enter a token code as a part of the process. CLIQ Connect is used
in the enrolment process (instead of Java) to authenticate your C-key when you are
asked for the C-key PIN code. The token code will be displayed in the web browser as a
part of the enrolment process. You need to enter that token code into CLIQ Connect.
Open the CLIQ Connect menu and click Start enrolment. The dialog where you can enter
the token code will then show up.
4.9 Automatic software Update
The CLIQ Connect PC application has a feature to automatically check for and download
software updates for the application. The user has the option to accept or cancel software
updates.
You can also manually check for update by clicking Check for update in the CLIQ Connect
menu.

4.10 Viewing the application logs and CLIQ Connect version
To help debugging any issues with the Local Programming Device or the server
connection there is a way to see the application logs.
From the CLIQ Connect menu click About. Then click Application logs. That will open the
folder where the application logs are being saved.
You can also see the CLIQ Connect version in use from the About dialog.
4.11 Stop CLIQ Connect from automatically start with Windows
By default CLIQ Connect starts automatically with the PC.
If want to disable that feature go to the Windows registry editor. Go to
Computer\HKEY_CURRENT_USER\Software\Microsoft\Windows\CurrentVersion\Run
Remove the key called CLIQ Connect.
5 Known Issues and Limitations
Some virus protection tools might warn about a harmful application while
upgrading the CLIQ Connect PC Application. This issue is under investigation.