Register Social Service Applications Job Aid
13
Register Social Service Applications Job Aid – Updated 8/18/2015 Page 1 Register Social Service Applications Job Aid Processing Steps for Social Service Applications The following outlines the general steps Social Service staff take when registering and maintaining Social Service cases. The Social Service application is a Social Services authorization for medical coverage. As an administrative function, there are no actual applications associated with these cases. Fields marked with a red star (*) are mandatory. Step 1: Begin Application Registration 1. From Left Navigation, select Application Registration – Register an Application. The Register Application-Application page displays. This Job Aid is designed to help you understand how to register Social Service applications in IES. Table of Contents Processing steps for Social Service Applications…………………………………….Page 1 Social Services Case Maintenance…………Page 11
Transcript of Register Social Service Applications Job Aid

Register Social Service Applications Job Aid – Updated 8/18/2015 Page 1
Register Social Service Applications Job Aid
Processing Steps for Social Service Applications
The following outlines the general steps Social Service staff take when registering and maintaining Social Service cases. The Social Service application is a Social Services authorization for medical coverage. As an administrative function, there are no actual applications associated with these cases.
Fields marked with a red star (*) are mandatory.
Step 1: Begin Application Registration
1. From Left Navigation, select Application Registration – Register an Application.
The Register Application-Application page displays.
This Job Aid is designed to
help you understand how to
register Social Service
applications in IES.
Table of Contents
Processing steps for Social Service
Applications…………………………………….Page 1
Social Services Case Maintenance…………Page 11

Register Social Service Applications Job Aid – Updated 8/18/2015 Page 2
Register Social Service Applications Job Aid
2. Complete the page.
Policy Tip: Enter only required fields:
Date Received: Should reflect the case open date and be a state business/work day.
Written Language/Spoken Language: If the written and/or spoken language is not known, leave as English and update when information is available.
Source: Select Phone-in.
Primary Applicant: enter the name of the child/youth for which HFS Social Services is being authorized.
3. Click [NEXT]. The Register Application- Address page displays.
IES Tip: Access IES Wizards, helpful step-by-step instruction on completing each
page in IES, by clicking the Help icon in the top right-hand corner of
each page in IES. Page-level help can also be found by clicking the icon next
to the page title.
Step 2: Record Child’s Address

Register Social Service Applications Job Aid – Updated 8/18/2015 Page 3
Register Social Service Applications Job Aid
4. Enter the Child/youth’s physical address. Click [Add].
5. Review the address in the Address Summary section.
6. If the address is correct, click [Next]. The Register Application – Type page displays.
IES Tip: The address entered on this page is used to mail the child’s medical card.
Helpful Wizards
Begin Application Registration
Record an Approved Representative
Record an Address
Step 3: Select the Type of Application being Registered
7. On the Register Application- Type page, if the worker is a DHS or HFS Social Services
user, the question, Is this a DHS or HFS Social Services application?, defaults to ‘Yes’.
All other fields are marked, ‘No’.
8. Click [Next]. The Register Application – Individual Summary page displays.
Policy Tip: The individual entered on this page is the child. These cases are single individual cases only. In the case of siblings, open a separate case for each.
YES
Register Social Service Applications Job Aid – Updated 8/18/2015 Page 4
Register Social Service Applications Job Aid
9. Click [Next]. The File Clearance – Results page displays.
Helpful Wizards
9. Review information for accuracy, click [Next].
10. Enter child/youth’s date of birth and SSN.
11. Click [Next].

Register Social Service Applications Job Aid – Updated 8/18/2015 Page 5
Register Social Service Applications Job Aid
Policy Tip: If the child’s SSN is not available, leave the field blank.
Step 5: Determine if the Child Already has an Individual # in IES
12. Individuals display with similar names and dates of birth that are already known to IES, along
with a percentage match.
13. Determine if the child is already included in the Master Client Index (MCI) and been
assigned an Individual #.
14. If there is no match, answer YES to the question at the bottom right of the page, “Do you
wish to establish as a new individual
15. Click [Next]. The Register Individual – Summary page displays.
Register Social Service Applications Job Aid – Updated 8/18/2015 Page 6
Register Social Service Applications Job Aid
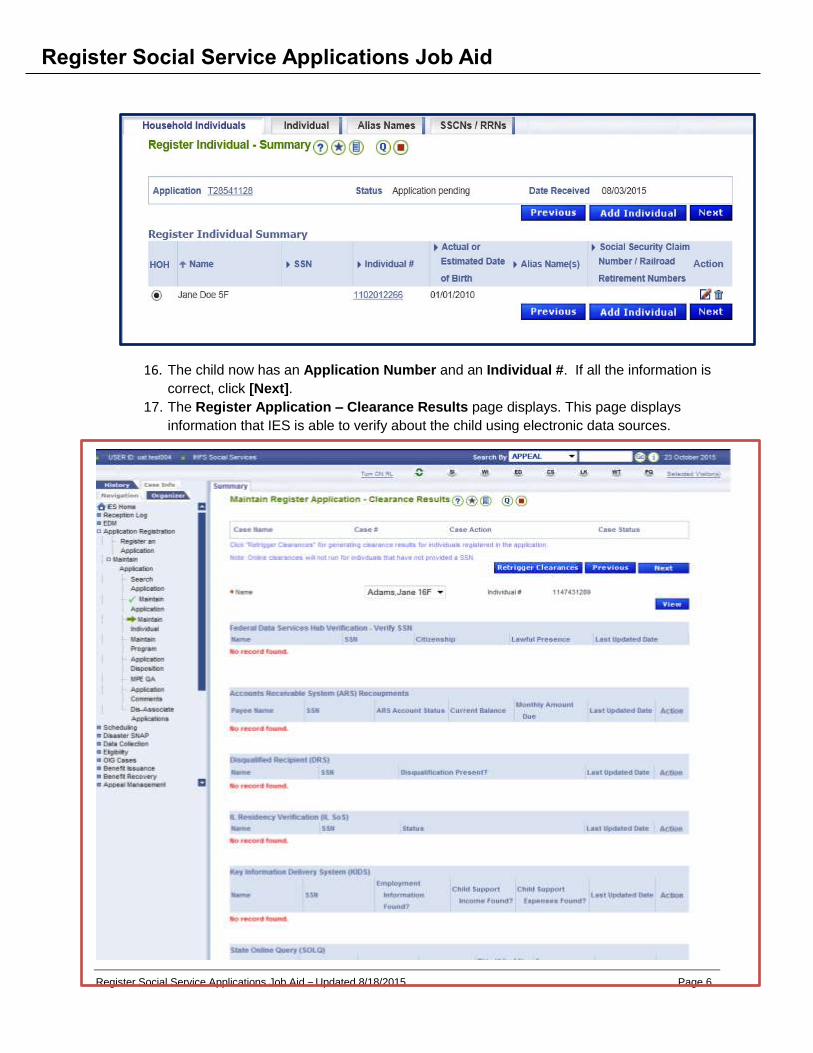
16. The child now has an Application Number and an Individual #. If all the information is
correct, click [Next].
17. The Register Application – Clearance Results page displays. This page displays
information that IES is able to verify about the child using electronic data sources.
Register Social Service Applications Job Aid – Updated 8/18/2015 Page 7
Register Social Service Applications Job Aid
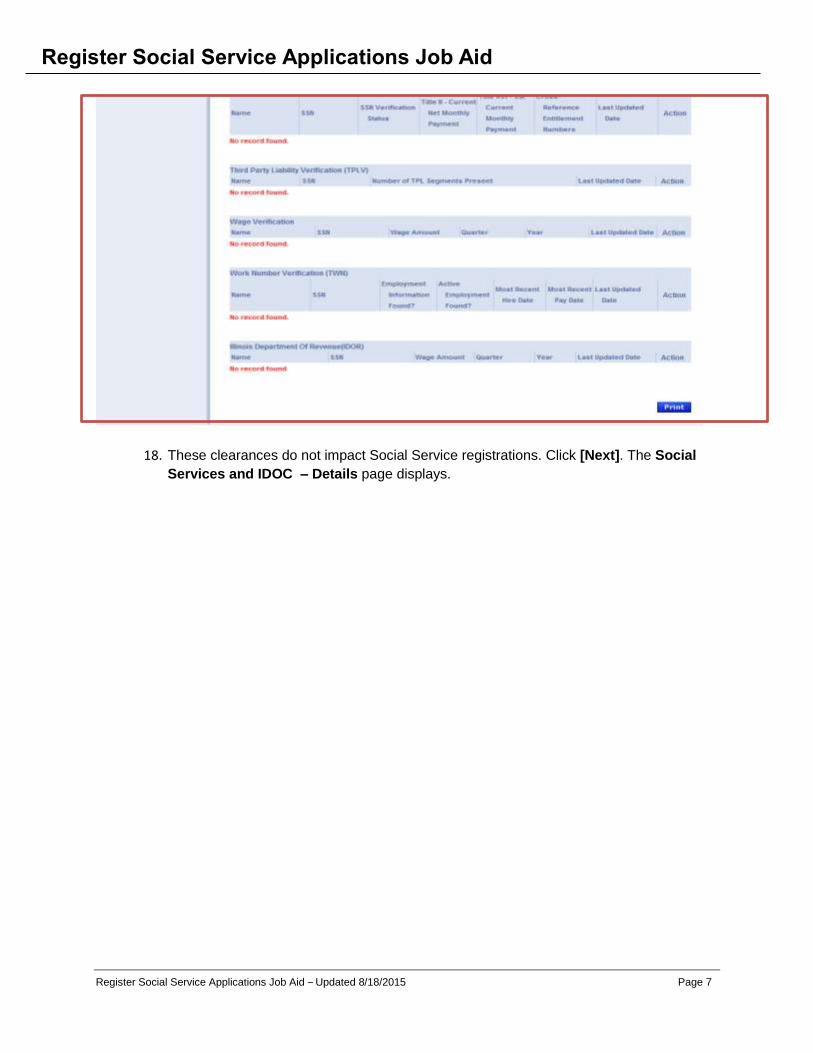
18. These clearances do not impact Social Service registrations. Click [Next]. The Social
Services and IDOC – Details page displays.

Register Social Service Applications Job Aid – Updated 8/18/2015 Page 8
Register Social Service Applications Job Aid
Step 6: Complete the Social Services and IDOC – Details page
This is the first Social Services specific page queued for the Social Services cases. This page
collects information on existing or temporary RIN, eligibility and entry dates and Facility/Provider
information.
19. Check the drop down value for the first question and if needed, change it to read HFS Social
Services.
20. Eligibility Begin Date- enter the date Social Services Eligibility begins
21. Eligibility End Date – enter one of the following dates:
90th day (including the begin date) for the Initial Authorization
30th day (including the begin date) for an Extension
3rd day (including the begin date) for an MCO case
22. Enter the provider # in the Facility/Provider # field. The Address Book is not available for
providers. Enter the number accurately.
23. Date Entered Facility: Enter the date the services (or inpatient hospitalization) begins
24. Enter the provider name in the Facility/Provider name field.
Click [Add]

Register Social Service Applications Job Aid – Updated 8/18/2015 Page 9
Register Social Service Applications Job Aid
Check the accuracy of Provider Number and Facility Name
IES Tip: To edit information that was entered click the Edit Icon for the individual
whose information needs to be updated. Then click [Update]. The information
displays at the bottom of the page.
25. Click [Next]. The Register Application – Summary page displays.

Register Social Service Applications Job Aid – Updated 8/18/2015 Page 10
Register Social Service Applications Job Aid
Step 7: Complete the Registration Application – Summary
This is the final page in application registration. Click [Assign] to activate the [Submit] button.
Then click [Submit]. Make sure not to click [Submit and go to Data Collection]!
Registration Application – Summary > End of Application Registration Process
Congratulations! Application Registration is Complete!
The child has been enrolled in Medicaid. Logout of IES or return to Left Navigation and click
Register an Application to enroll another child.

Register Social Service Applications Job Aid – Updated 8/18/2015 Page 11
Register Social Service Applications Job Aid
Case Maintenance
Case maintenance on these cases is done through Application Registration, under Maintain Application.
1. Select search application, enter the case name, application number, SSN or other searchable information and click [Search]
2. Select the case from the search results by clicking on the pencil icon. This will pull up all information on the child/youth.

Register Social Service Applications Job Aid – Updated 8/18/2015 Page 12
Register Social Service Applications Job Aid
3. Click through screens and make the necessary updates
4. To make changes to child/youths demographic information, click the pencil icon.
5. Click [Next] to go on to the Social Services and IDOC Details screen. Extensions are authorized
here.
6. On all changes, be sure to click [next] until you get to the Maintain Application Summary screen.
7. Click [Assign] and [Submit].

Register Social Service Applications Job Aid – Updated 8/18/2015 Page 13
Register Social Service Applications Job Aid