Red Stripe Version Garden Path - Pat Sloan's Blog
4
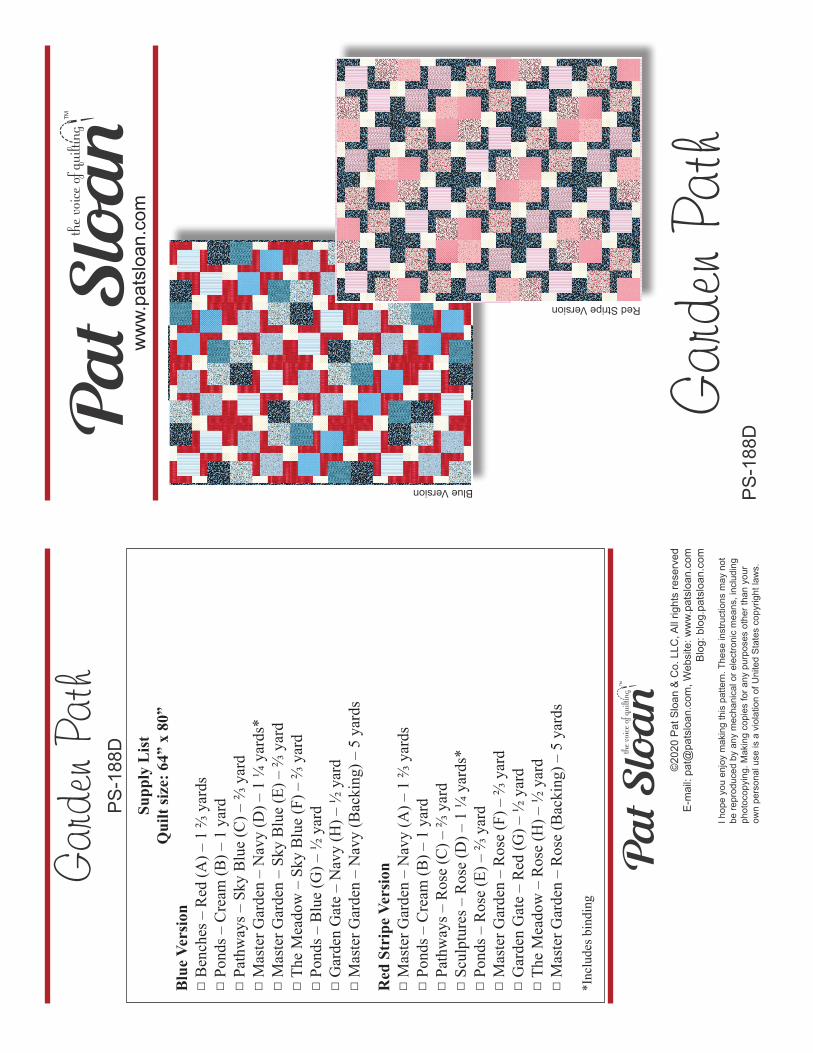
Garden Path Garden Path PS-188D www.patsloan.com PS-188D I hope you enjoy making this pattern. These instructions may not be reproduced by any mechanical or electronic means, including photocopying. Making copies for any purposes other than your own personal use is a violation of United States copyright laws. ©2020 Pat Sloan & Co. LLC, All rights reserved E-mail: [email protected], Website: www.patsloan.com Blog: blog.patsloan.com Blue Version Red Stripe Version Supply List Quilt size: 64” x 80” Blue Version □ Benches – Red (A) – 1 ⅔ yards □ Ponds – Cream (B) – 1 yard □ Pathways – Sky Blue (C) – ⅔ yard □ Master Garden – Navy (D) – 1 ¼ yards* □ Master Garden – Sky Blue (E) – ⅔ yard □ The Meadow – Sky Blue (F) – ⅔ yard □ Ponds – Blue (G) – ½ yard □ Garden Gate – Navy (H) – ½ yard □ Master Garden – Navy (Backing) – 5 yards Red Stripe Version □ Master Garden – Navy (A) – 1 ⅔ yards □ Ponds – Cream (B) – 1 yard □ Pathways – Rose (C) – ⅔ yard □ Sculptures – Rose (D) – 1 ¼ yards* □ Ponds – Rose (E) – ⅔ yard □ Master Garden – Rose (F) – ⅔ yard □ Garden Gate – Red (G) – ½ yard □ The Meadow – Rose (H) – ½ yard □ Master Garden – Rose (Backing) – 5 yards *Includes binding
Transcript of Red Stripe Version Garden Path - Pat Sloan's Blog
Gard
en P
ath
Gard
en P
ath
PS-1
88D
ww
w.pa
tslo
an.c
om
PS-1
88D
I hop
e yo
u en
joy
mak
ing
this
pat
tern
. The
se in
stru
ctio
ns m
ay n
ot
be re
prod
uced
by
any
mec
hani
cal o
r ele
ctro
nic
mea
ns, i
nclu
ding
ph
otoc
opyi
ng. M
akin
g co
pies
for a
ny p
urpo
ses
othe
r tha
n yo
ur
own
pers
onal
use
is a
vio
latio
n of
Uni
ted
Stat
es c
opyr
ight
law
s.
©20
20 P
at S
loan
& C
o. L
LC, A
ll rig
hts
rese
rved
E-m
ail:
pat@
pats
loan
.com
, Web
site
: ww
w.pa
tslo
an.c
omBl
og: b
log.
pats
loan
.com
Blue Version
Red Stripe Version
Supp
ly L
ist
Qui
lt si
ze: 6
4” x
80”
Blu
e Ve
rsio
n□
Ben
ches
– R
ed (A
) – 1
⅔ y
ards
□
Pond
s – C
ream
(B) –
1 y
ard
□
Path
way
s – S
ky B
lue
(C) –
⅔ y
ard
□ M
aste
r Gar
den
– N
avy
(D) –
1 ¼
yar
ds*
□ M
aste
r Gar
den
– Sk
y B
lue
(E) –
⅔ y
ard
□ Th
e M
eado
w –
Sky
Blu
e (F
) – ⅔
yar
d□
Pond
s – B
lue
(G) –
½ y
ard
□ G
arde
n G
ate
– N
avy
(H) –
½ y
ard
□ M
aste
r Gar
den
– N
avy
(Bac
king
) – 5
yar
ds
Red
Str
ipe
Vers
ion
□ M
aste
r Gar
den
– N
avy
(A) –
1 ⅔
yar
ds□
Pond
s – C
ream
(B) –
1 y
ard
□ Pa
thw
ays –
Ros
e (C
) – ⅔
yar
d□
Scul
ptur
es –
Ros
e (D
) – 1
¼ y
ards
*□
Pond
s – R
ose
(E) –
⅔ y
ard
□ M
aste
r Gar
den
– R
ose
(F) –
⅔ y
ard
□ G
arde
n G
ate
– R
ed (G
) – ½
yar
d□
The
Mea
dow
– R
ose
(H) –
½ y
ard
□ M
aste
r Gar
den
– R
ose
(Bac
king
) – 5
yar
ds
*Inc
lude
s bin
ding
Garden PathQuilt Design by Pat Sloan
©2020 Pat Sloan & Co www.PatSloan.com2
InspirationOne of my favorite things to do is a Garden tour. I have been all around the world and have visited many different gardens along the way. How each garden is set up is so wonderful and truly inspiring if you love flowers. It’s also very fun to be at a park and find a hidden gem of a garden, it’s magical. I can’t wait to see your Garden Path quilt. Be sure to share at my Facebook community ‘Quilt Along with Pat Sloan’ and watch my YouTube channel with daily videos.
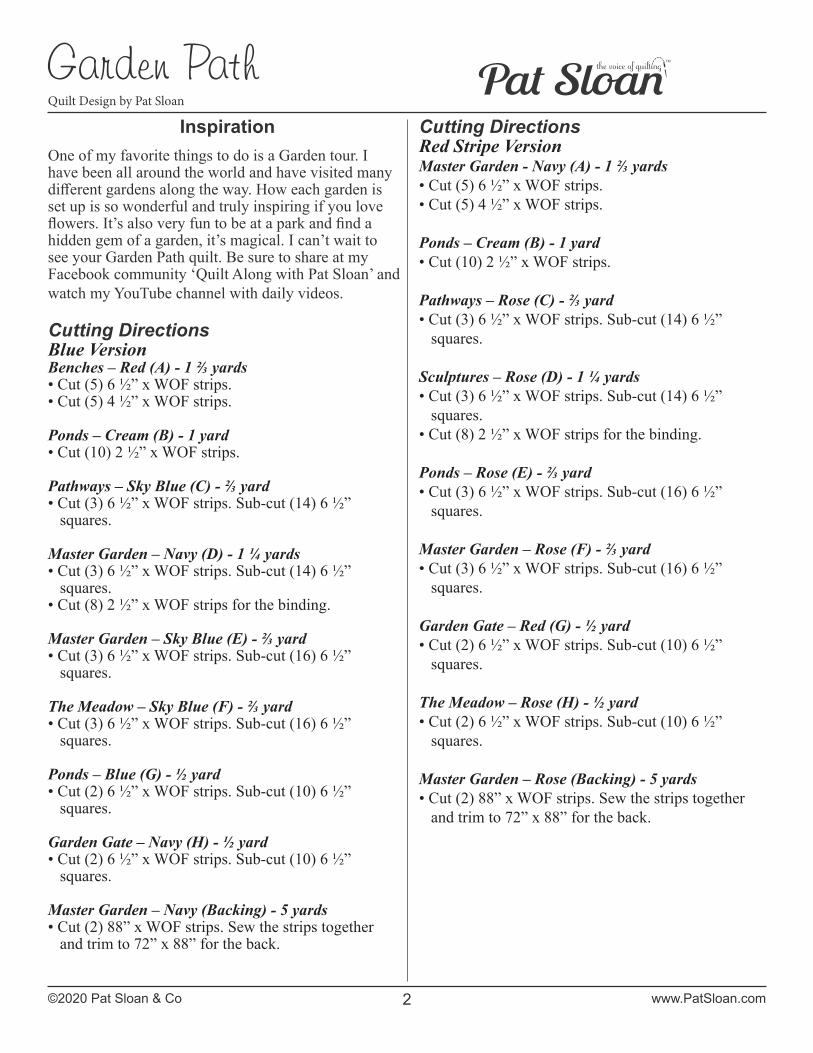
Cutting DirectionsRed Stripe VersionMaster Garden - Navy (A) - 1 ⅔ yards• Cut (5) 6 ½” x WOF strips.• Cut (5) 4 ½” x WOF strips.
Ponds – Cream (B) - 1 yard• Cut (10) 2 ½” x WOF strips.
Pathways – Rose (C) - ⅔ yard• Cut (3) 6 ½” x WOF strips. Sub-cut (14) 6 ½” squares.
Sculptures – Rose (D) - 1 ¼ yards• Cut (3) 6 ½” x WOF strips. Sub-cut (14) 6 ½” squares.• Cut (8) 2 ½” x WOF strips for the binding.
Ponds – Rose (E) - ⅔ yard• Cut (3) 6 ½” x WOF strips. Sub-cut (16) 6 ½” squares.
Master Garden – Rose (F) - ⅔ yard• Cut (3) 6 ½” x WOF strips. Sub-cut (16) 6 ½” squares.
Garden Gate – Red (G) - ½ yard• Cut (2) 6 ½” x WOF strips. Sub-cut (10) 6 ½” squares.
The Meadow – Rose (H) - ½ yard• Cut (2) 6 ½” x WOF strips. Sub-cut (10) 6 ½” squares.
Master Garden – Rose (Backing) - 5 yards• Cut (2) 88” x WOF strips. Sew the strips together and trim to 72” x 88” for the back.
Cutting DirectionsBlue VersionBenches – Red (A) - 1 ⅔ yards• Cut (5) 6 ½” x WOF strips.• Cut (5) 4 ½” x WOF strips.
Ponds – Cream (B) - 1 yard• Cut (10) 2 ½” x WOF strips.
Pathways – Sky Blue (C) - ⅔ yard• Cut (3) 6 ½” x WOF strips. Sub-cut (14) 6 ½” squares.
Master Garden – Navy (D) - 1 ¼ yards• Cut (3) 6 ½” x WOF strips. Sub-cut (14) 6 ½” squares.• Cut (8) 2 ½” x WOF strips for the binding.
Master Garden – Sky Blue (E) - ⅔ yard• Cut (3) 6 ½” x WOF strips. Sub-cut (16) 6 ½” squares.
The Meadow – Sky Blue (F) - ⅔ yard• Cut (3) 6 ½” x WOF strips. Sub-cut (16) 6 ½” squares.
Ponds – Blue (G) - ½ yard• Cut (2) 6 ½” x WOF strips. Sub-cut (10) 6 ½” squares.
Garden Gate – Navy (H) - ½ yard• Cut (2) 6 ½” x WOF strips. Sub-cut (10) 6 ½” squares.
Master Garden – Navy (Backing) - 5 yards• Cut (2) 88” x WOF strips. Sew the strips together and trim to 72” x 88” for the back.

Garden PathQuilt Design by Pat Sloan
©2020 Pat Sloan & Co www.PatSloan.com3
1.
2.
3.
4.
Fig. 1 Fig. 2
Fig. 3
Block Assembly Directions
5.
6.
7.
8.
(The arrows in figures represent the fabric print direction. Pay attention to the fabric and unit orientations while assembling the various components.)
A B
Strip Set 1make 5
A B
Unit 1cut 80
A B
Strip Set 2make 5
A B
Unit 2cut 80
C
Unit 2
Unit 1
Unit 3make 14
Unit 4make 14
D
Unit 2
Unit 1
Unit 5make 16
E
Unit 2
Unit 1
Unit 6make 16
F
Unit 2
Unit 1
Unit 7make 10
G
Unit 2
Unit 1
Sew (1) 4 ½” x WOF Fabric A strip to the left side of (1) 2 ½” x WOF Fabric B strip lengthwise to make (1) Strip Set 1 (Fig. 1). Repeat to make (5) Strip Set 1’s total.
Cut the (5) Strip Set 1’s into (80) 2 ½” x 6 ½” Unit 1 strips (Fig. 2).
Fig. 4
Fig. 5
Sew (1) 6 ½” x WOF Fabric A strip to the left side of (1) 2 ½” x WOF Fabric B strip lengthwise to make (1) Strip Set 2 (Fig. 3). Repeat to make (5) Strip Set 2’s total.
Cut the (5) Strip Set 2’s into (80) 2 ½” x 8 ½” Unit 2 strips (Fig. 4).
Sew (1) Unit 1 strip to the left side of (1) 6 ½” Fabric C square. Sew (1) Unit 2 strip to the top of the newly sewn strip to make (1) Unit 3 square (Fig. 5). Repeat to make (14) Unit 3 strips total.
Repeat Step 5 and refer to Figures 6-10 for component identification and location to make (14) Unit 4 squares, (16) Unit 5 squares, (16) Unit 6 squares, (10) Unit 7 squares and (10) Unit 8 squares.
Fig. 6 Fig. 7
Fig. 8 Fig. 9 Fig. 10
Fig. 11
Fig. 12 Fig. 13
Sew (1) Unit 3 square to the left side of (1) Unit 4 square to make the top row. Sew (1) Unit 4 square to the left side of (1) Unit 3 square to make the bottom row. Sew the (2) rows together lengthwise to make (1) Block One square (Fig. 11). Repeat to make (7) Block One squares total.
Unit 8make 10
H
Unit 2
Unit 1
Unit 3
Unit 3
Uni
t 4
Unit 4
Block Onemake 7
Repeat Step 7 and refer to Figures 12-13 for component identification, location and orientation to make (8) Block Two squares and (5) Block Three squares.
Unit 5
Unit 5
Uni
t 6
Unit 6
Block Twomake 8
Unit 7
Unit 7
Uni
t 8
Unit 8
Block Threemake 5

Garden PathQuilt Design by Pat Sloan
©2020 Pat Sloan & Co www.PatSloan.com4
14.
15.
Quilt Top Assembly Directions
***Please visit my website www.PatSloan.com and sign up for my newsletter, read my blog, join me at my on-line quilt bee, at my Facebook sew along, and at Instagram.
12.
13.
1 1
1
1
3
3
3
3
2
2
12
2
12
12
3 2
2
9.
10.
11.
(Follow Figure 14 while assembling the quilt top.)Sew together (1) Block One square, (1) Block Two square, (1) Block Three square and (1) Block One square, in that order from left to right, to make Row One.
Sew together (1) Block Two square, (1) Block One square, (1) Block Two square and (1) Block Three square, in that order from left to right, to make Row Two.
Sew together (1) Block Three square, (1) Block Two square, (1) Block One square and (1) Block Two square, in that order from left to right, to make Row Three.
Sew together (1) Block One square, (1) Block Three square, (1) Block Two square and (1) Block One square, in that order from left to right, to make Row Four.
Sew together (1) Block Two square, (1) Block One square, (1) Block Three square and (1) Block Two square, in that order from left to right, to make Row Five.
Sew the (5) pieced rows together, in numerical order, to make the quilt top.
Quilt and bind.
Quilt Layout
Fig. 14