
Red Hat Linux v5.x iSCSI Configuration v1.11
27
Red Hat Linux™ v5.x Software iSCSI Initiator Configuration and tuning Guide Abstract This document covers installing and configuring the Redhat Enterprise Linux v5.x software iSCSI initiator. It also covers configuring MPIO with RHEL v5.2 or greater V1.11
-
Upload
carlos-molina -
Category
Documents
-
view
61 -
download
2
Transcript of Red Hat Linux v5.x iSCSI Configuration v1.11
Red Hat Linux™ v5.x Software iSCSI Initiator Configuration and tuning Guide
Abstract
This document covers installing and configuring the Redhat Enterprise Linux v5.x software iSCSI initiator. It also covers configuring MPIO with RHEL v5.2 or greater
V1.11

Copyright © 2010 Dell EqualLogic, Inc.
September 2010
EqualLogic is a registered trademark of Dell, Inc.
All trademarks and registered trademarks mentioned herein are the property of their respective owners. Possession, use, or copying of the documentation or the software described in this publication is authorized only under the license agreement specified herein.
Dell, Inc. will not be held liable for technical or editorial errors or omissions contained herein. The information in this document is subject to change. Your performance can vary.
Dell, Inc. 300 Innovative Way Suite 301 Nashua, NH 03063 Tel: 603.579.9762 Fax: 603.579.6910 Support: 877.887.7337

Revision Information The following table describes the release history of this document. Technical Report Revision Date Change 1.0 1.01 1.02 1.03 1.04 1.05 1.06 1.07 1.08 1.09 1.10 1.11
11/2007 11/2007 10/2008 11/2008 07/2009 9/2009 10/2009 12/2009 04/2010 8/2010 8/2010 9/2010
Initial Release Updated path locations Clarified minimum release version Changed how to create interface files and warning about SElinux Updated configuring interfaces files with RH 5.3+ Text clean up Corrected blacklist and install methodology, Added performance tuning section Added Manual mounting instructions, text cleanup Added MPIO failover issue info RH BugZ: 570681 Corrected SELinux requirements Added: Known issues section Remove QUEUE_IF_NO_PATH (see RH KB in Known issue section) Corrected: logout all targets parameter Port retry needs to be set to FAIL Added kernel network settings
Table of Contents Revision Information ..................................................................................................................... 3
Installation Instructions: ................................................................................................................ 7
Discovering Targets: ...................................................................................................................... 8
Logging in: ..................................................................................................................................... 8
• Log into all targets ............................................................................................................. 8
• Log into an individual target. ............................................................................................ 8
Logging out: .................................................................................................................................. 8
• Logging off an individual target. ........................................................................................ 8
• Logging out all targets. ..................................................................................................... 8
Checking Session Status: ................................................................................................................ 9
Mapping EQL volume name to /dev/sd(X) device name ............................................................... 10
Using CHAP authentication: ......................................................................................................... 11
Configuring Mulitpath Connections: ............................................................................................ 12
Persistent Device naming: ........................................................................................................... 14
Setting the default values for all Equallogic devices: .................................................................... 15
Mounting iSCSI Filesystems at Boot: ............................................................................................ 18
Flowcontrol ................................................................................................................................. 19
Enabling Jumbo Frames: .............................................................................................................. 20
Performance tuning options: ....................................................................................................... 21
• #/etc/iscsi/iscsid.conf ...................................................................................................... 21
• #/etc/mulitpath.conf ....................................................................................................... 21
• Linux Kernel Settings ........................................................................................................ 22
• Linux Read Ahead Value ................................................................................................... 23
• Changing IO sizes ............................................................................................................. 24
• Changing Linux I/O scheduler ........................................................................................... 24
Known issues: .............................................................................................................................. 25
• Linux ARP behavior: ......................................................................................................... 25
• Linux Netfilter: ................................................................................................................. 25
• MPIO Failover slow: ......................................................................................................... 25
• Remove queue_if_no_path: ............................................................................................. 26

Minimum RHEL version info: .................................................................................................... 27
SELinux .................................................................................................................................... 27


Installation Instructions:
The initiator is comprised of kernel modules that come with the appropriate Red Hat Enterprise Linux installation. To use and manage the initiator, you need to install the iSCSI utilities.
For RHEL v5.x you can install the iSCSI initiator through the Add/Remove Programs or at the command line. #up2date iscsi-initiator-utils Newer versions of RHEL v5 use the ‘yum’ utility instead #yum install iscsi-initiator-utils Once installed, run: # service iscsi start To verify that the iSCSI service will be started at boot time, the chkconfig command can be used as follows: # chkconfig –-list iscsi iscsi 0:off 1:off 2:off 3:off 4:off 5:off 6:off By default, the newly added iscsi initiator is not enabled at boot, which is the reason for each of the run levels listed to have the service set to off. To enable this at boot, again use the chkconfig command as follows: # chkconfig –-add iscsi # chkconfig iscsi on The above two commands first checks to be sure there are the necessary scripts to start and stop the service, and then it sets this service to be enabled for the appropriate runlevels. Then check to be sure the changes took effect: # chkconfig --list iscsi iscsi 0:off 1:off 2:on 3:on 4:on 5:on 6:off You also need to do the same for the Multipath daemon. # chkconfig --list multipathd iscsi 0:off 1:off 2:on 3:on 4:on 5:on 6:off
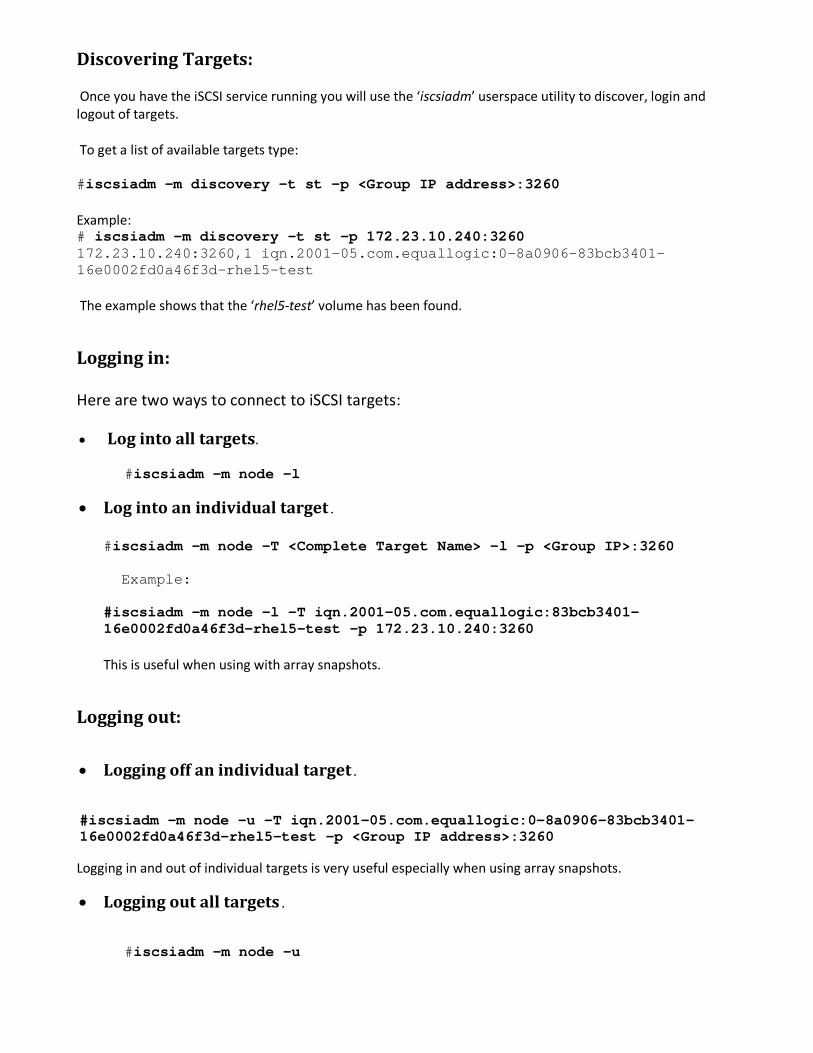
Discovering Targets: Once you have the iSCSI service running you will use the ‘iscsiadm’ userspace utility to discover, login and logout of targets. To get a list of available targets type: #iscsiadm –m discovery –t st –p <Group IP address>:3260 Example: # iscsiadm -m discovery -t st -p 172.23.10.240:3260 172.23.10.240:3260,1 iqn.2001-05.com.equallogic:0-8a0906-83bcb3401-16e0002fd0a46f3d-rhel5-test The example shows that the ‘rhel5-test’ volume has been found.
Logging in: Here are two ways to connect to iSCSI targets: • Log into all targets.
#iscsiadm –m node –l
• Log into an individual target. #iscsiadm –m node –T <Complete Target Name> –l –p <Group IP>:3260 Example: #iscsiadm –m node –l –T iqn.2001-05.com.equallogic:83bcb3401-16e0002fd0a46f3d-rhel5-test –p 172.23.10.240:3260 This is useful when using with array snapshots.
Logging out:
• Logging off an individual target.
#iscsiadm –m node –u –T iqn.2001-05.com.equallogic:0-8a0906-83bcb3401-16e0002fd0a46f3d-rhel5-test –p <Group IP address>:3260
Logging in and out of individual targets is very useful especially when using array snapshots.
• Logging out all targets.
#iscsiadm –m node –u
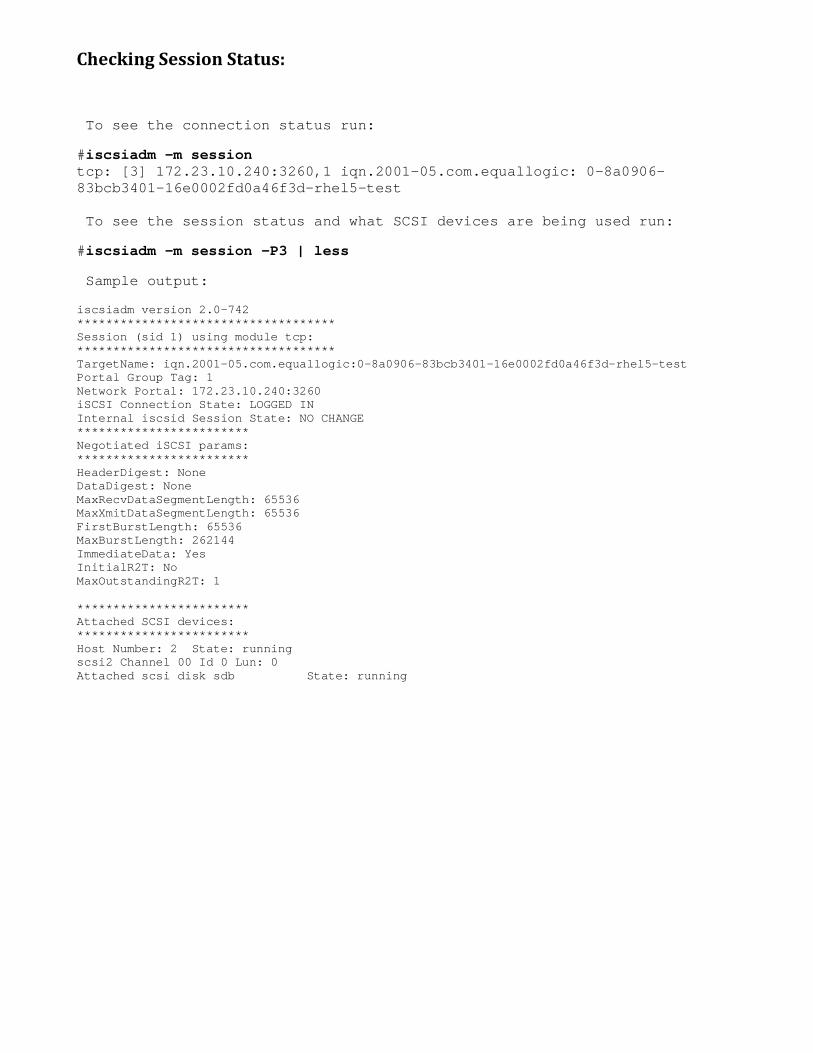
Checking Session Status:
To see the connection status run:
#iscsiadm –m session tcp: [3] 172.23.10.240:3260,1 iqn.2001-05.com.equallogic: 0-8a0906-83bcb3401-16e0002fd0a46f3d-rhel5-test To see the session status and what SCSI devices are being used run:
#iscsiadm -m session –P3 | less
Sample output:
iscsiadm version 2.0-742 ************************************ Session (sid 1) using module tcp: ************************************ TargetName: iqn.2001-05.com.equallogic:0-8a0906-83bcb3401-16e0002fd0a46f3d-rhel5-test Portal Group Tag: 1 Network Portal: 172.23.10.240:3260 iSCSI Connection State: LOGGED IN Internal iscsid Session State: NO CHANGE ************************ Negotiated iSCSI params: ************************ HeaderDigest: None DataDigest: None MaxRecvDataSegmentLength: 65536 MaxXmitDataSegmentLength: 65536 FirstBurstLength: 65536 MaxBurstLength: 262144 ImmediateData: Yes InitialR2T: No MaxOutstandingR2T: 1 ************************ Attached SCSI devices: ************************ Host Number: 2 State: running scsi2 Channel 00 Id 0 Lun: 0 Attached scsi disk sdb State: running
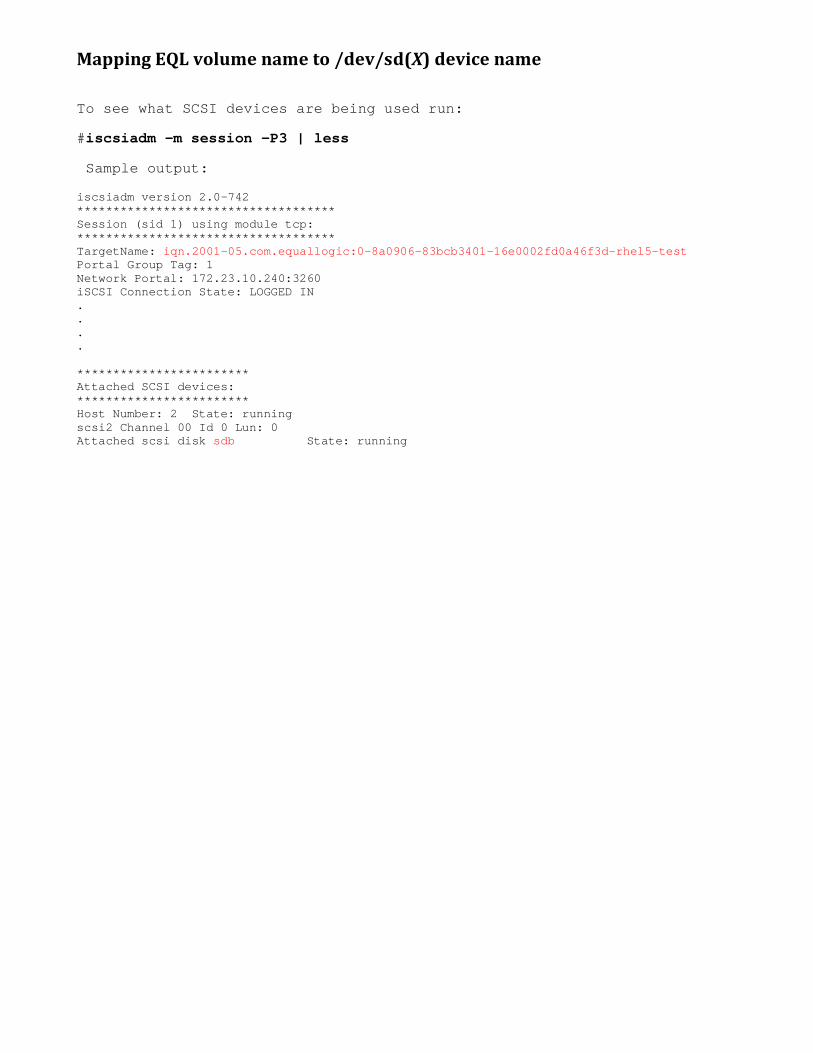
Mapping EQL volume name to /dev/sd(X) device name
To see what SCSI devices are being used run:
#iscsiadm -m session –P3 | less
Sample output:
iscsiadm version 2.0-742 ************************************ Session (sid 1) using module tcp: ************************************ TargetName: iqn.2001-05.com.equallogic:0-8a0906-83bcb3401-16e0002fd0a46f3d-rhel5-test Portal Group Tag: 1 Network Portal: 172.23.10.240:3260 iSCSI Connection State: LOGGED IN . . . . ************************ Attached SCSI devices: ************************ Host Number: 2 State: running scsi2 Channel 00 Id 0 Lun: 0 Attached scsi disk sdb State: running
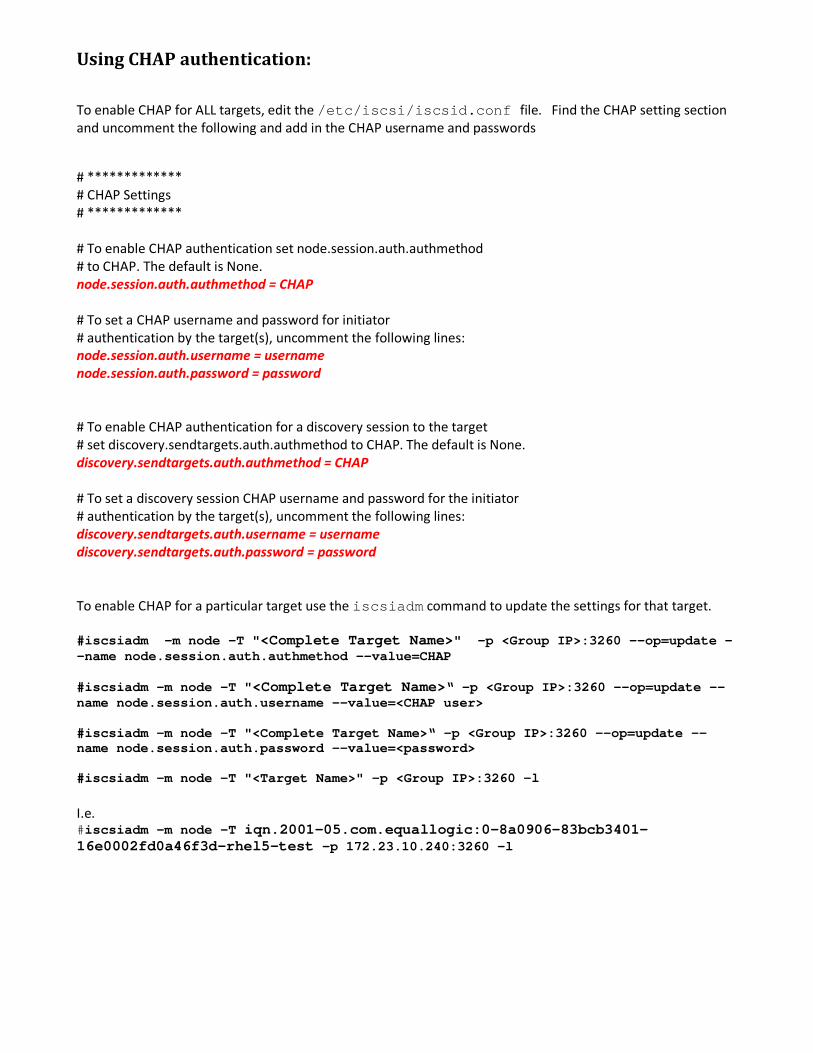
Using CHAP authentication:
To enable CHAP for ALL targets, edit the /etc/iscsi/iscsid.conf file. Find the CHAP setting section and uncomment the following and add in the CHAP username and passwords
# ************* # CHAP Settings # ************* # To enable CHAP authentication set node.session.auth.authmethod # to CHAP. The default is None. node.session.auth.authmethod = CHAP # To set a CHAP username and password for initiator # authentication by the target(s), uncomment the following lines: node.session.auth.username = username node.session.auth.password = password # To enable CHAP authentication for a discovery session to the target # set discovery.sendtargets.auth.authmethod to CHAP. The default is None. discovery.sendtargets.auth.authmethod = CHAP # To set a discovery session CHAP username and password for the initiator # authentication by the target(s), uncomment the following lines: discovery.sendtargets.auth.username = username discovery.sendtargets.auth.password = password To enable CHAP for a particular target use the iscsiadm command to update the settings for that target. #iscsiadm -m node -T "<Complete Target Name>" -p <Group IP>:3260 --op=update --name node.session.auth.authmethod --value=CHAP #iscsiadm -m node -T "<Complete Target Name>“ -p <Group IP>:3260 --op=update --name node.session.auth.username --value=<CHAP user> #iscsiadm -m node -T "<Complete Target Name>“ -p <Group IP>:3260 --op=update --name node.session.auth.password --value=<password> #iscsiadm -m node –T "<Target Name>" -p <Group IP>:3260 -l I.e. #iscsiadm -m node –T iqn.2001-05.com.equallogic:0-8a0906-83bcb3401-16e0002fd0a46f3d-rhel5-test –p 172.23.10.240:3260 –l

Configuring Mulitpath Connections:
To create the multiple logins needed for Linux dev-mapper to work you need to create an ‘interface’ file for each GbE interface you wish to use to connect to the array.
Use the following commands to create the interface files for MPIO.
(Select the appropriate Ethernet interfaces you’re using.)
#iscsiadm -m iface -I eth0 -o new New interface eth0 added Repeat for the other interface, i.e. eth1 #iscsiadm –m iface –I eth1 –o new New interface eth1 added Now update the interface name for each port: #iscsiadm –m iface –I eth0 - -op=update –n iface.net_ifacename –v eth0 eth0 updated #iscsiadm –m iface –I eth1 - -op=update –n iface.net_ifacename –v eth1 eth1 updated Here’s an example of what the /var/lib/iscsi/ifaces/eth0 looks like: iface.iscsi_ifacename = eth0 iface.net_ifacename = eth0 iface.hwaddress = default iface.transport_name = tcp If you have already discovered your volumes, you now need to re-discover the target(s).
#iscsiadm –m discovery –t st –p <Group IP Addr>:3260 172.23.10.240:3260,1 iqn.2001-05.com.equallogic: 0-8a0906-83bcb3401-16e0002fd0a46f3d-rhel5-test 172.23.10.240:3260,1 iqn.2001-05.com.equallogic: 0-8a0906-83bcb3401-16e0002fd0a46f3d-rhel5-test You should see the volume info for each interface you specified. In this example, two interfaces were defined so we see the volume listed twice.

You now need to log into the volume.
#iscsiadm –m node –l –T iqn.2001-05.com.equallogic:0-8a0906-8951f2302-815273634274741f-rhel5-test –p 172.23.10.240:3260
#iscsiadm –m session tcp: [3] 172.23.10.240:3260,1 iqn.2001-05.com.equallogic: 0-8a0906-83bcb3401-16e0002fd0a46f3d-rhel5-test tcp: [4] 172.23.10.240:3260,1 iqn.2001-05.com.equallogic: 0-8a0906-83bcb3401-16e0002fd0a46f3d-rhel5-test This shows that both adapters have connected to the array.
Verify that the multipathing is correctly configured.
#multipath –v2 #multipath –ll rhel5-test (36090a02830f251891f74744263735281) dm-1 EQLOGIC,100E-00 [size=100G][features=0][hwhandler=0][rw] \_ round-robin 0 [prio=0][active] \_ 9:0:0:0 sdd 8:48 [active][ready] \_ 8:0:0:0 sde 8:64 [active][ready] svr-vol (36090a01840b31c74e173a4873200a02f) dm-0 EQLOGIC,100E-00 [size=10G][features=0][hwhandler=0][rw] \_ round-robin 0 [prio=0][enabled] \_ 6:0:0:0 sdb 8:16 [active][ready] \_ 7:0:0:0 sdc 8:32 [active][ready] In this example you see that there are two paths to each volume. They are set one on top of the other. If they are separated, then MPIO is not working correctly. Try restarting the multipath service and check again. If not, review your multipath configuration file for any errors.
#service multipathd restart
What you do NOT want to see in the #multipath –ll output is:
[features=1 queue_if_no_path] it should be [features=0] as shown above. Otherwise you will likely run into the issue described below. When a link fails, ALL I/O will be paused.
http://www.redhat.com/docs/en-US/Red_Hat_Enterprise_Linux/5.5/html/DM_Multipath/queueifnopath_issues.html
Also RH 5.5 has a regression bug with MPIO failover.
https://bugzilla.redhat.com/show_bug.cgi?id=570681
Other resources for configuring MPIO can be found at:
http://www.redhat.com/docs/en-US/Red_Hat_Enterprise_Linux/5/html/DM_Multipath/mpio_configfile.html
http://kbase.redhat.com/faq/docs/DOC-3353
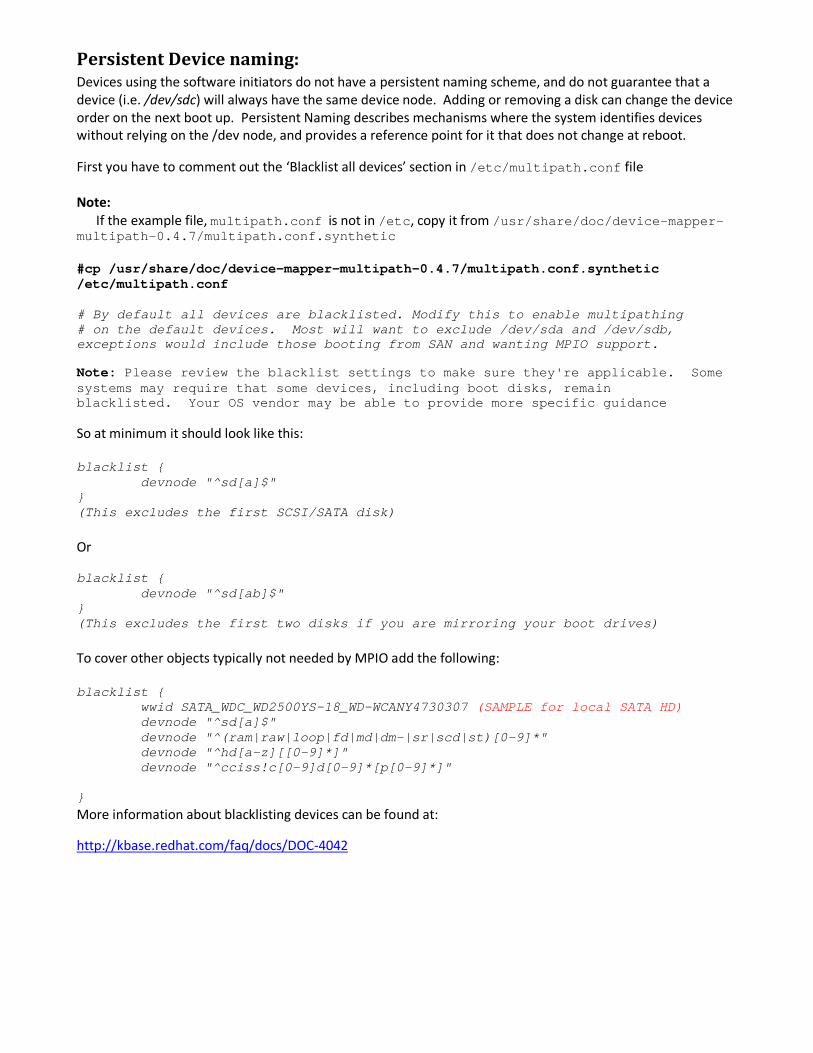
Persistent Device naming: Devices using the software initiators do not have a persistent naming scheme, and do not guarantee that a device (i.e. /dev/sdc) will always have the same device node. Adding or removing a disk can change the device order on the next boot up. Persistent Naming describes mechanisms where the system identifies devices without relying on the /dev node, and provides a reference point for it that does not change at reboot.
First you have to comment out the ‘Blacklist all devices’ section in /etc/multipath.conf file Note: If the example file, multipath.conf is not in /etc, copy it from /usr/share/doc/device-mapper-multipath-0.4.7/multipath.conf.synthetic #cp /usr/share/doc/device-mapper-multipath-0.4.7/multipath.conf.synthetic /etc/multipath.conf # By default all devices are blacklisted. Modify this to enable multipathing # on the default devices. Most will want to exclude /dev/sda and /dev/sdb, exceptions would include those booting from SAN and wanting MPIO support.
Note: Please review the blacklist settings to make sure they're applicable. Some systems may require that some devices, including boot disks, remain blacklisted. Your OS vendor may be able to provide more specific guidance
So at minimum it should look like this: blacklist { devnode "^sd[a]$" } (This excludes the first SCSI/SATA disk) Or blacklist { devnode "^sd[ab]$" } (This excludes the first two disks if you are mirroring your boot drives) To cover other objects typically not needed by MPIO add the following: blacklist { wwid SATA_WDC_WD2500YS-18_WD-WCANY4730307 (SAMPLE for local SATA HD) devnode "^sd[a]$" devnode "^(ram|raw|loop|fd|md|dm-|sr|scd|st)[0-9]*" devnode "^hd[a-z][[0-9]*]" devnode "^cciss!c[0-9]d[0-9]*[p[0-9]*]" } More information about blacklisting devices can be found at:
http://kbase.redhat.com/faq/docs/DOC-4042
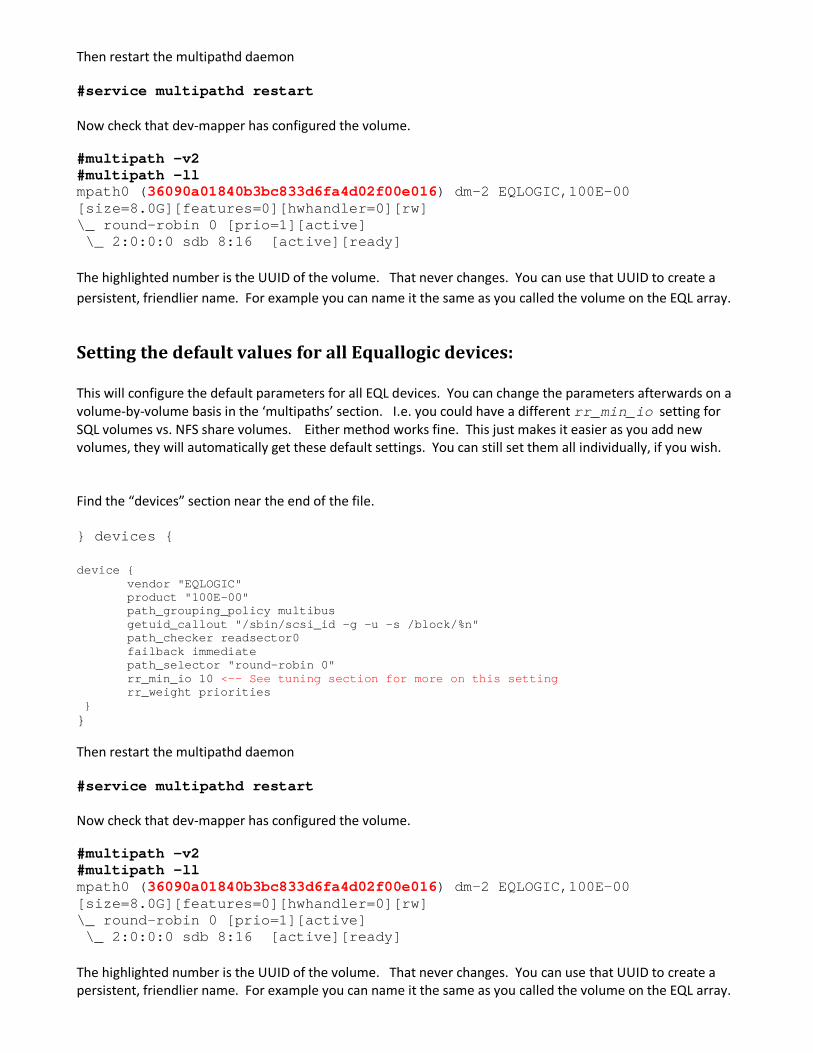
Then restart the multipathd daemon #service multipathd restart Now check that dev-mapper has configured the volume. #multipath –v2 #multipath -ll mpath0 (36090a01840b3bc833d6fa4d02f00e016) dm-2 EQLOGIC,100E-00 [size=8.0G][features=0][hwhandler=0][rw] \_ round-robin 0 [prio=1][active] \_ 2:0:0:0 sdb 8:16 [active][ready] The highlighted number is the UUID of the volume. That never changes. You can use that UUID to create a persistent, friendlier name. For example you can name it the same as you called the volume on the EQL array.
Setting the default values for all Equallogic devices: This will configure the default parameters for all EQL devices. You can change the parameters afterwards on a volume-by-volume basis in the ‘multipaths’ section. I.e. you could have a different rr_min_io setting for SQL volumes vs. NFS share volumes. Either method works fine. This just makes it easier as you add new volumes, they will automatically get these default settings. You can still set them all individually, if you wish. Find the “devices” section near the end of the file.
} devices {
device { vendor "EQLOGIC" product "100E-00" path_grouping_policy multibus getuid_callout "/sbin/scsi_id -g -u -s /block/%n" path_checker readsector0 failback immediate path_selector "round-robin 0" rr_min_io 10 <-- See tuning section for more on this setting rr_weight priorities } } Then restart the multipathd daemon #service multipathd restart Now check that dev-mapper has configured the volume. #multipath –v2 #multipath -ll mpath0 (36090a01840b3bc833d6fa4d02f00e016) dm-2 EQLOGIC,100E-00 [size=8.0G][features=0][hwhandler=0][rw] \_ round-robin 0 [prio=1][active] \_ 2:0:0:0 sdb 8:16 [active][ready] The highlighted number is the UUID of the volume. That never changes. You can use that UUID to create a persistent, friendlier name. For example you can name it the same as you called the volume on the EQL array.
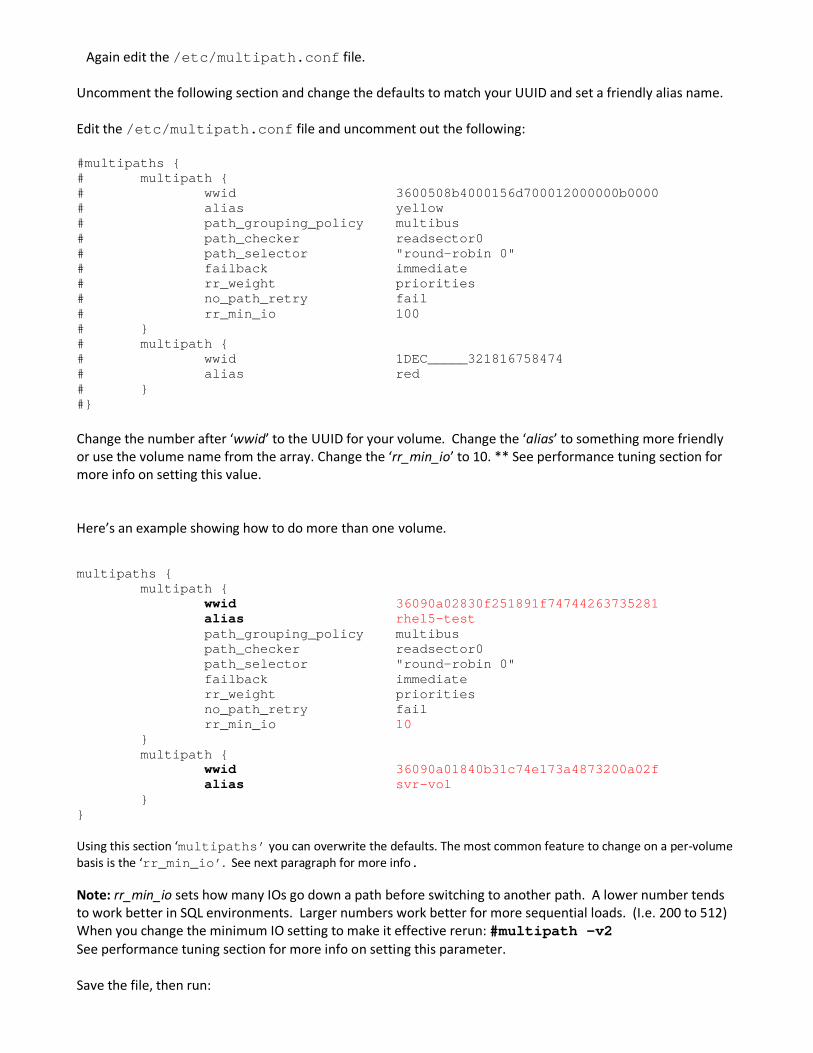
Again edit the /etc/multipath.conf file. Uncomment the following section and change the defaults to match your UUID and set a friendly alias name. Edit the /etc/multipath.conf file and uncomment out the following: #multipaths { # multipath { # wwid 3600508b4000156d700012000000b0000 # alias yellow # path_grouping_policy multibus # path_checker readsector0 # path_selector "round-robin 0" # failback immediate # rr_weight priorities # no_path_retry fail # rr_min_io 100 # } # multipath { # wwid 1DEC_____321816758474 # alias red # } #} Change the number after ‘wwid’ to the UUID for your volume. Change the ‘alias’ to something more friendly or use the volume name from the array. Change the ‘rr_min_io’ to 10. ** See performance tuning section for more info on setting this value. Here’s an example showing how to do more than one volume.
multipaths { multipath { wwid 36090a02830f251891f74744263735281 alias rhel5-test path_grouping_policy multibus path_checker readsector0 path_selector "round-robin 0" failback immediate rr_weight priorities no_path_retry fail rr_min_io 10 } multipath { wwid 36090a01840b31c74e173a4873200a02f alias svr-vol } } Using this section ‘multipaths’ you can overwrite the defaults. The most common feature to change on a per-volume basis is the ‘rr_min_io’. See next paragraph for more info. Note: rr_min_io sets how many IOs go down a path before switching to another path. A lower number tends to work better in SQL environments. Larger numbers work better for more sequential loads. (I.e. 200 to 512) When you change the minimum IO setting to make it effective rerun: #multipath –v2 See performance tuning section for more info on setting this parameter. Save the file, then run:
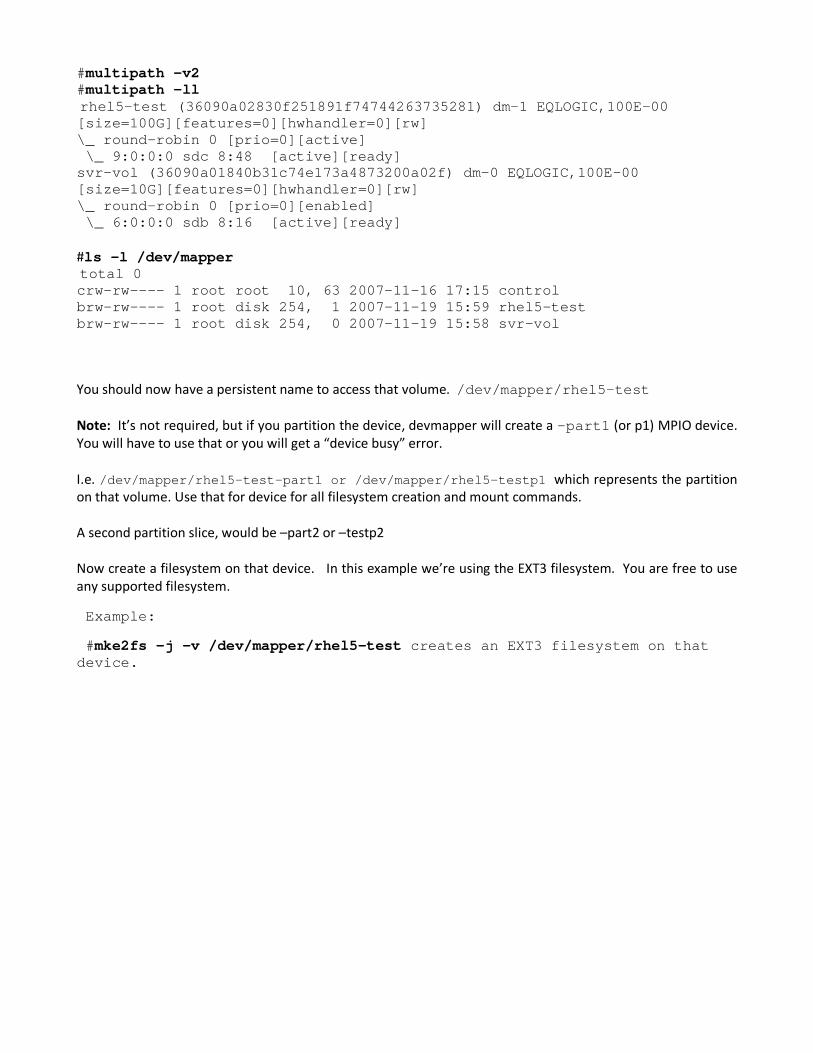
#multipath –v2 #multipath –ll rhel5-test (36090a02830f251891f74744263735281) dm-1 EQLOGIC,100E-00 [size=100G][features=0][hwhandler=0][rw] \_ round-robin 0 [prio=0][active] \_ 9:0:0:0 sdc 8:48 [active][ready] svr-vol (36090a01840b31c74e173a4873200a02f) dm-0 EQLOGIC,100E-00 [size=10G][features=0][hwhandler=0][rw] \_ round-robin 0 [prio=0][enabled] \_ 6:0:0:0 sdb 8:16 [active][ready] #ls -l /dev/mapper total 0 crw-rw---- 1 root root 10, 63 2007-11-16 17:15 control brw-rw---- 1 root disk 254, 1 2007-11-19 15:59 rhel5-test brw-rw---- 1 root disk 254, 0 2007-11-19 15:58 svr-vol
You should now have a persistent name to access that volume. /dev/mapper/rhel5-test Note: It’s not required, but if you partition the device, devmapper will create a –part1 (or p1) MPIO device. You will have to use that or you will get a “device busy” error. I.e. /dev/mapper/rhel5-test-part1 or /dev/mapper/rhel5-testp1 which represents the partition on that volume. Use that for device for all filesystem creation and mount commands. A second partition slice, would be –part2 or –testp2 Now create a filesystem on that device. In this example we’re using the EXT3 filesystem. You are free to use any supported filesystem.
Example:
#mke2fs –j –v /dev/mapper/rhel5-test creates an EXT3 filesystem on that device.
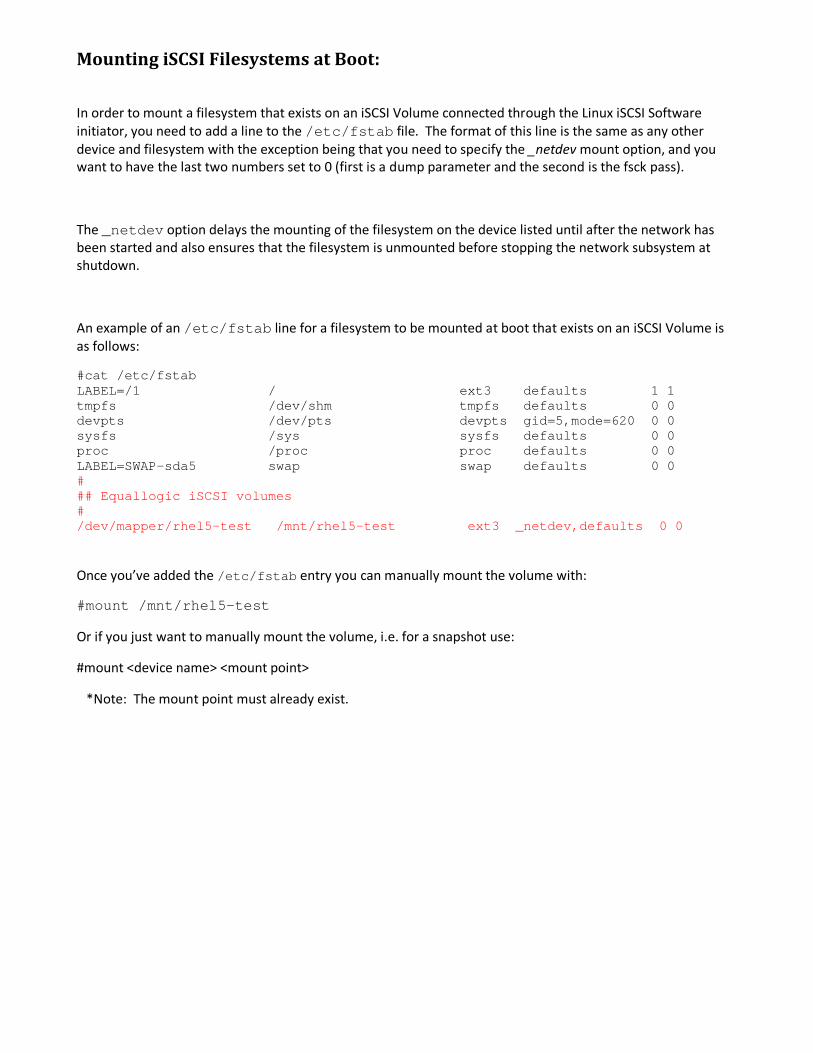
Mounting iSCSI Filesystems at Boot:
In order to mount a filesystem that exists on an iSCSI Volume connected through the Linux iSCSI Software initiator, you need to add a line to the /etc/fstab file. The format of this line is the same as any other device and filesystem with the exception being that you need to specify the _netdev mount option, and you want to have the last two numbers set to 0 (first is a dump parameter and the second is the fsck pass).
The _netdev option delays the mounting of the filesystem on the device listed until after the network has been started and also ensures that the filesystem is unmounted before stopping the network subsystem at shutdown.
An example of an /etc/fstab line for a filesystem to be mounted at boot that exists on an iSCSI Volume is as follows:
#cat /etc/fstab LABEL=/1 / ext3 defaults 1 1 tmpfs /dev/shm tmpfs defaults 0 0 devpts /dev/pts devpts gid=5,mode=620 0 0 sysfs /sys sysfs defaults 0 0 proc /proc proc defaults 0 0 LABEL=SWAP-sda5 swap swap defaults 0 0 # ## Equallogic iSCSI volumes # /dev/mapper/rhel5-test /mnt/rhel5-test ext3 _netdev,defaults 0 0 Once you’ve added the /etc/fstab entry you can manually mount the volume with:
#mount /mnt/rhel5-test
Or if you just want to manually mount the volume, i.e. for a snapshot use:
#mount <device name> <mount point>
*Note: The mount point must already exist.
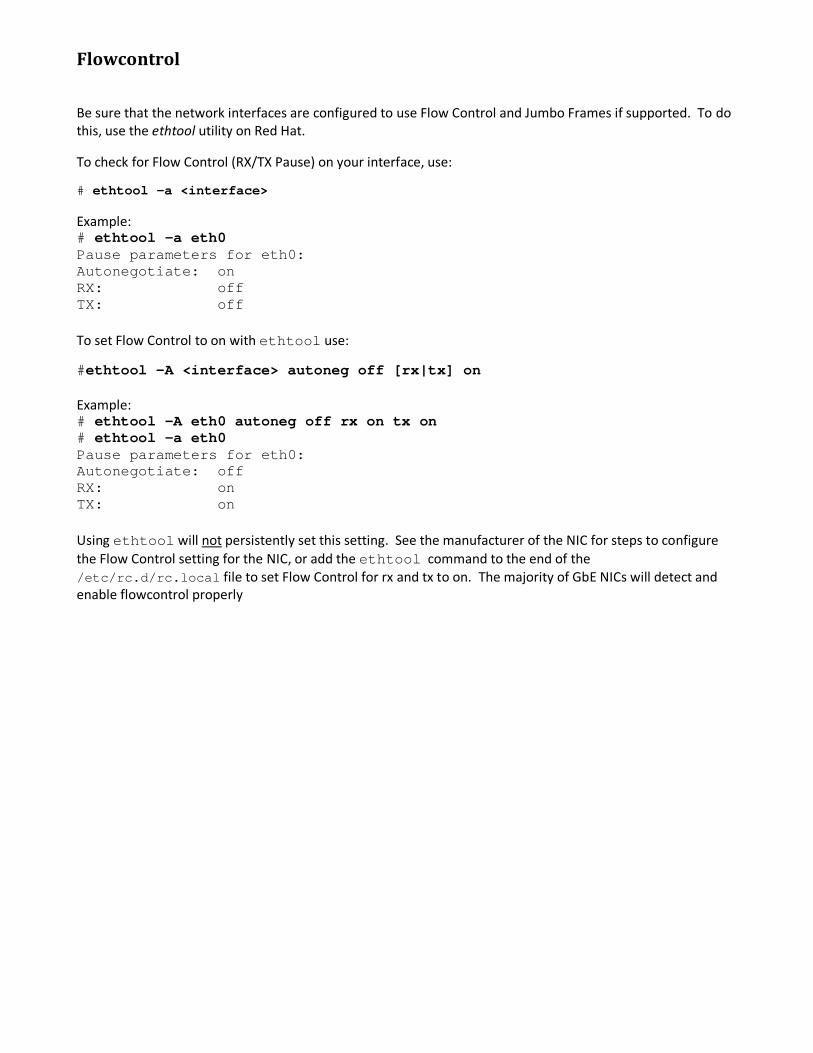
Flowcontrol
Be sure that the network interfaces are configured to use Flow Control and Jumbo Frames if supported. To do this, use the ethtool utility on Red Hat.
To check for Flow Control (RX/TX Pause) on your interface, use:
# ethtool –a <interface>
Example: # ethtool -a eth0 Pause parameters for eth0: Autonegotiate: on RX: off TX: off To set Flow Control to on with ethtool use:
#ethtool –A <interface> autoneg off [rx|tx] on Example: # ethtool –A eth0 autoneg off rx on tx on # ethtool -a eth0 Pause parameters for eth0: Autonegotiate: off RX: on TX: on Using ethtool will not persistently set this setting. See the manufacturer of the NIC for steps to configure the Flow Control setting for the NIC, or add the ethtool command to the end of the /etc/rc.d/rc.local file to set Flow Control for rx and tx to on. The majority of GbE NICs will detect and enable flowcontrol properly
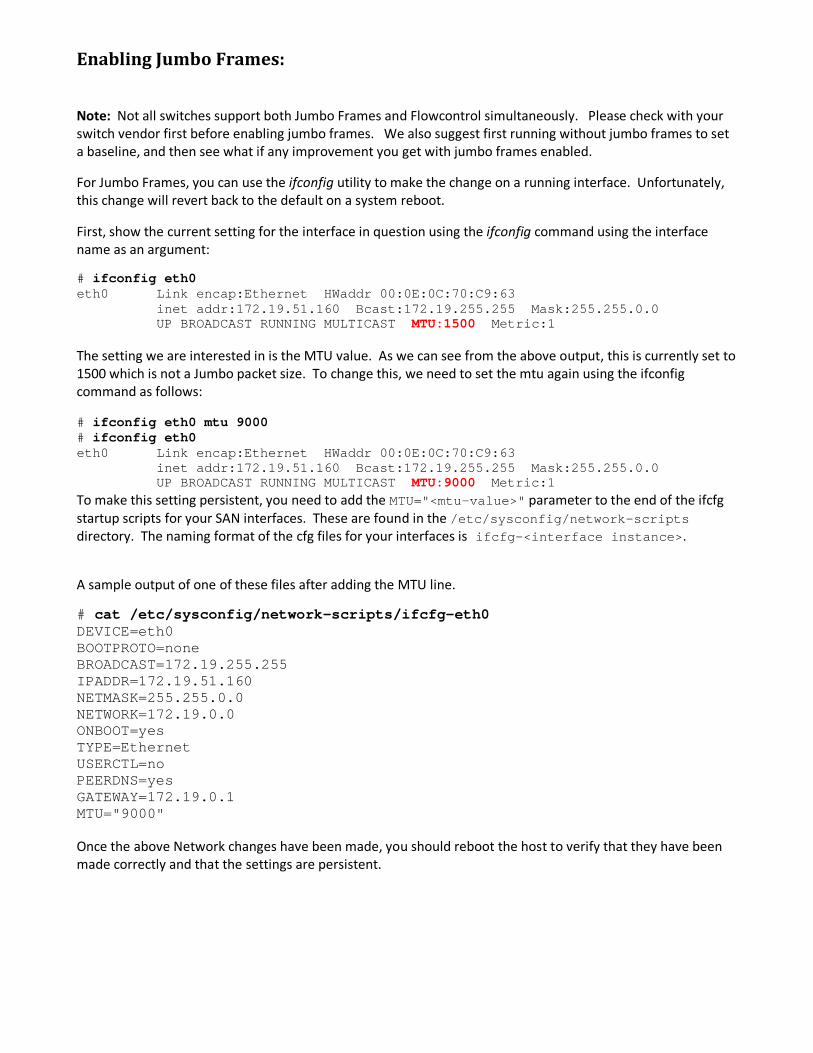
Enabling Jumbo Frames:
Note: Not all switches support both Jumbo Frames and Flowcontrol simultaneously. Please check with your switch vendor first before enabling jumbo frames. We also suggest first running without jumbo frames to set a baseline, and then see what if any improvement you get with jumbo frames enabled.
For Jumbo Frames, you can use the ifconfig utility to make the change on a running interface. Unfortunately, this change will revert back to the default on a system reboot.
First, show the current setting for the interface in question using the ifconfig command using the interface name as an argument:
# ifconfig eth0 eth0 Link encap:Ethernet HWaddr 00:0E:0C:70:C9:63 inet addr:172.19.51.160 Bcast:172.19.255.255 Mask:255.255.0.0 UP BROADCAST RUNNING MULTICAST MTU:1500 Metric:1 The setting we are interested in is the MTU value. As we can see from the above output, this is currently set to 1500 which is not a Jumbo packet size. To change this, we need to set the mtu again using the ifconfig command as follows: # ifconfig eth0 mtu 9000 # ifconfig eth0 eth0 Link encap:Ethernet HWaddr 00:0E:0C:70:C9:63 inet addr:172.19.51.160 Bcast:172.19.255.255 Mask:255.255.0.0 UP BROADCAST RUNNING MULTICAST MTU:9000 Metric:1 To make this setting persistent, you need to add the MTU="<mtu-value>" parameter to the end of the ifcfg startup scripts for your SAN interfaces. These are found in the /etc/sysconfig/network-scripts directory. The naming format of the cfg files for your interfaces is ifcfg-<interface instance>.
A sample output of one of these files after adding the MTU line.
# cat /etc/sysconfig/network-scripts/ifcfg-eth0 DEVICE=eth0 BOOTPROTO=none BROADCAST=172.19.255.255 IPADDR=172.19.51.160 NETMASK=255.255.0.0 NETWORK=172.19.0.0 ONBOOT=yes TYPE=Ethernet USERCTL=no PEERDNS=yes GATEWAY=172.19.0.1 MTU="9000" Once the above Network changes have been made, you should reboot the host to verify that they have been made correctly and that the settings are persistent.
Performance tuning options:
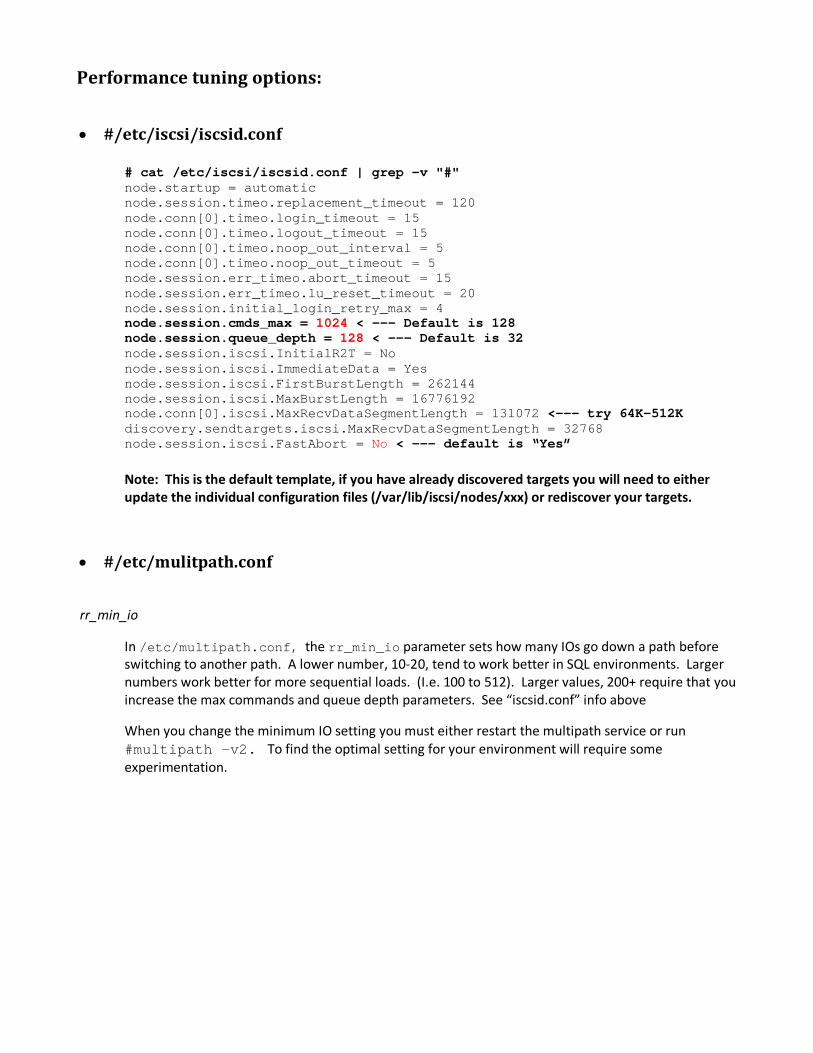
• #/etc/iscsi/iscsid.conf
# cat /etc/iscsi/iscsid.conf | grep -v "#" node.startup = automatic node.session.timeo.replacement_timeout = 120 node.conn[0].timeo.login_timeout = 15 node.conn[0].timeo.logout_timeout = 15 node.conn[0].timeo.noop_out_interval = 5 node.conn[0].timeo.noop_out_timeout = 5 node.session.err_timeo.abort_timeout = 15 node.session.err_timeo.lu_reset_timeout = 20 node.session.initial_login_retry_max = 4 node.session.cmds_max = 1024 < --- Default is 128 node.session.queue_depth = 128 < --- Default is 32 node.session.iscsi.InitialR2T = No node.session.iscsi.ImmediateData = Yes node.session.iscsi.FirstBurstLength = 262144 node.session.iscsi.MaxBurstLength = 16776192 node.conn[0].iscsi.MaxRecvDataSegmentLength = 131072 <--- try 64K-512K discovery.sendtargets.iscsi.MaxRecvDataSegmentLength = 32768 node.session.iscsi.FastAbort = No < --- default is “Yes”
Note: This is the default template, if you have already discovered targets you will need to either update the individual configuration files (/var/lib/iscsi/nodes/xxx) or rediscover your targets.
• #/etc/mulitpath.conf
rr_min_io
In /etc/multipath.conf, the rr_min_io parameter sets how many IOs go down a path before switching to another path. A lower number, 10-20, tend to work better in SQL environments. Larger numbers work better for more sequential loads. (I.e. 100 to 512). Larger values, 200+ require that you increase the max commands and queue depth parameters. See “iscsid.conf” info above
When you change the minimum IO setting you must either restart the multipath service or run #multipath –v2. To find the optimal setting for your environment will require some experimentation.
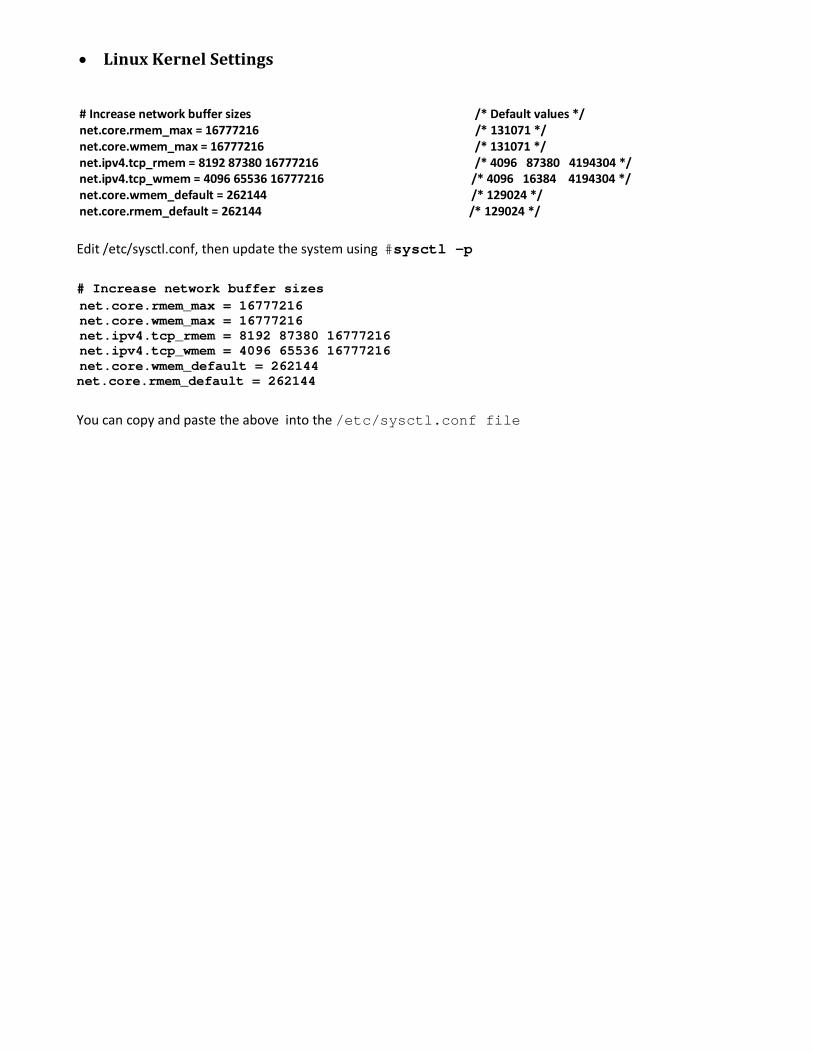
• Linux Kernel Settings
# Increase network buffer sizes /* Default values */ net.core.rmem_max = 16777216 /* 131071 */ net.core.wmem_max = 16777216 /* 131071 */ net.ipv4.tcp_rmem = 8192 87380 16777216 /* 4096 87380 4194304 */ net.ipv4.tcp_wmem = 4096 65536 16777216 /* 4096 16384 4194304 */ net.core.wmem_default = 262144 /* 129024 */ net.core.rmem_default = 262144 /* 129024 */ Edit /etc/sysctl.conf, then update the system using #sysctl –p # Increase network buffer sizes net.core.rmem_max = 16777216 net.core.wmem_max = 16777216 net.ipv4.tcp_rmem = 8192 87380 16777216 net.ipv4.tcp_wmem = 4096 65536 16777216 net.core.wmem_default = 262144 net.core.rmem_default = 262144 You can copy and paste the above into the /etc/sysctl.conf file

• Linux Read Ahead Value
By default Linux requests the next 256 sectors when doing a read. In a very sequential environment, increasing this value can improve read performance.
You can set the read-ahead on an sd device by using the "blockdev" command. This tells the SCSI layer to read X sectors ahead. This is only valuable with sequential I/O-type applications, and can cause performance problems with high random I/O. Under sequential I/O. the performance gain was observed to be in the 10%-20% range. Syntax: blockdev –setra X <device name> i.e. #blockdev –setra 4096 /dev/sda or /dev/mapper/mpath1 (Note: 4096 is just an example value. You will have to do testing to determine the optimal value for your system). The OS will read-ahead X pages, and throughput will be higher. To make the blockdev change effective every time you boot, add the following to /etc/rc.d/rc.local . /sbin/blockdev –setra 4096 <device name> /sbin/blockdev –setra 4096 <device name> etc… You can also put a setting in /etc/sysctl.conf which will set the read-ahead on boot: /sys/bus/scsi/drivers/sd/[DEVICEID]/block/queue/read_ahead_kb Note: You can also use the persistent device names vs. the /dev/sd? device names. This information came from this external web site, and has not been rigorously verified by EqualLogic: http://www.3ware.com/kb/article.aspx?id=11050
To check the existing read ahead setting use:
#blockdev –getra <device name>
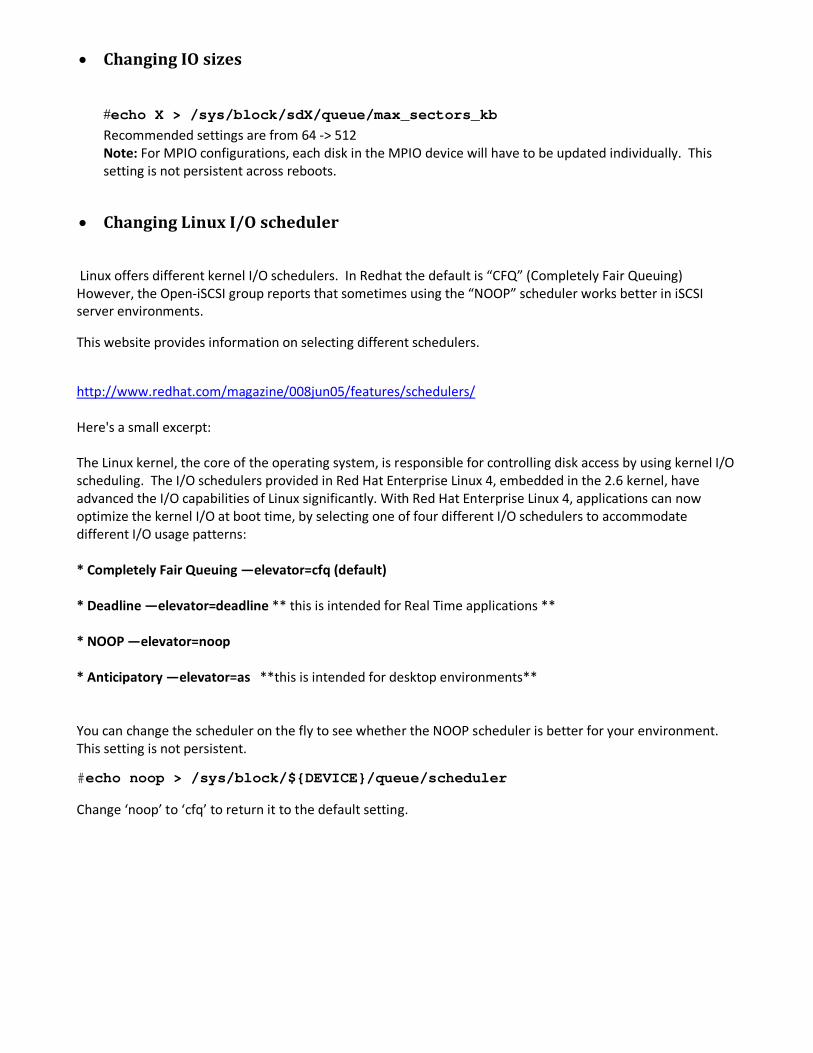
• Changing IO sizes
#echo X > /sys/block/sdX/queue/max_sectors_kb Recommended settings are from 64 -> 512 Note: For MPIO configurations, each disk in the MPIO device will have to be updated individually. This setting is not persistent across reboots.
• Changing Linux I/O scheduler
Linux offers different kernel I/O schedulers. In Redhat the default is “CFQ” (Completely Fair Queuing) However, the Open-iSCSI group reports that sometimes using the “NOOP” scheduler works better in iSCSI server environments.
This website provides information on selecting different schedulers.
http://www.redhat.com/magazine/008jun05/features/schedulers/ Here's a small excerpt: The Linux kernel, the core of the operating system, is responsible for controlling disk access by using kernel I/O scheduling. The I/O schedulers provided in Red Hat Enterprise Linux 4, embedded in the 2.6 kernel, have advanced the I/O capabilities of Linux significantly. With Red Hat Enterprise Linux 4, applications can now optimize the kernel I/O at boot time, by selecting one of four different I/O schedulers to accommodate different I/O usage patterns: * Completely Fair Queuing —elevator=cfq (default) * Deadline —elevator=deadline ** this is intended for Real Time applications ** * NOOP —elevator=noop * Anticipatory —elevator=as **this is intended for desktop environments** You can change the scheduler on the fly to see whether the NOOP scheduler is better for your environment. This setting is not persistent.
#echo noop > /sys/block/${DEVICE}/queue/scheduler
Change ‘noop’ to ‘cfq’ to return it to the default setting.
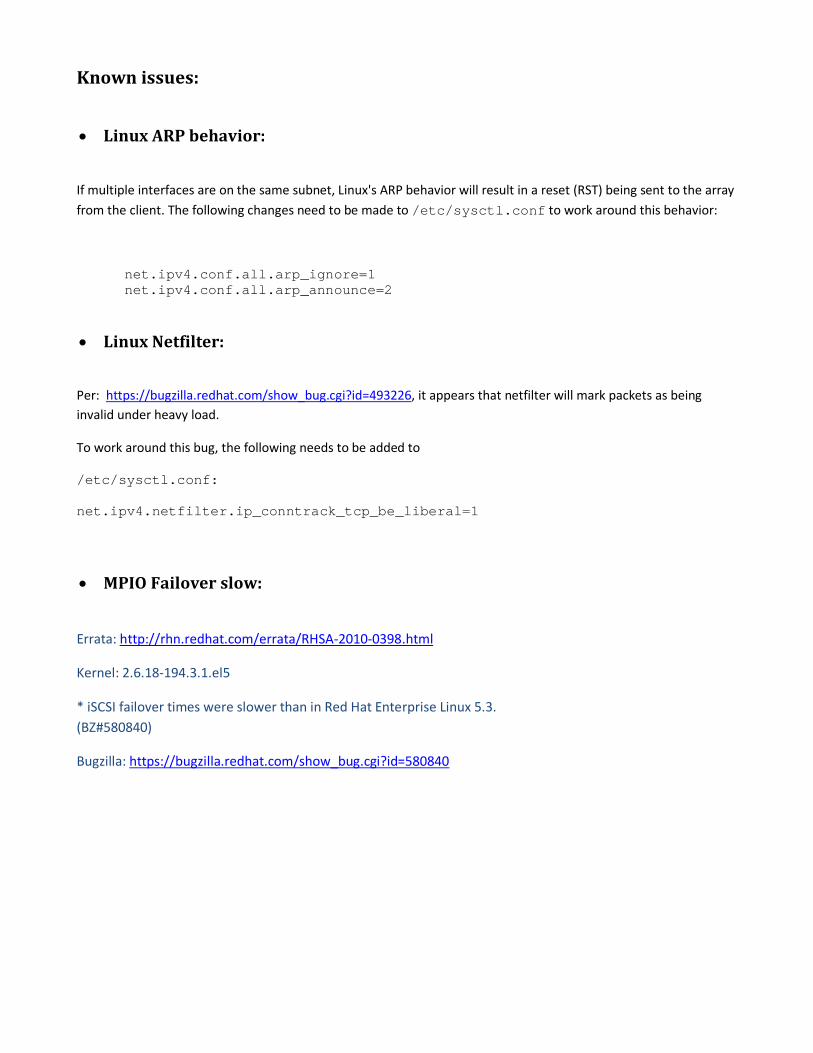
Known issues:
• Linux ARP behavior:
If multiple interfaces are on the same subnet, Linux's ARP behavior will result in a reset (RST) being sent to the array from the client. The following changes need to be made to /etc/sysctl.conf to work around this behavior:
net.ipv4.conf.all.arp_ignore=1 net.ipv4.conf.all.arp_announce=2
• Linux Netfilter:
Per: https://bugzilla.redhat.com/show_bug.cgi?id=493226, it appears that netfilter will mark packets as being invalid under heavy load.
To work around this bug, the following needs to be added to
/etc/sysctl.conf:
net.ipv4.netfilter.ip_conntrack_tcp_be_liberal=1
• MPIO Failover slow:
Errata: http://rhn.redhat.com/errata/RHSA-2010-0398.html
Kernel: 2.6.18-194.3.1.el5
* iSCSI failover times were slower than in Red Hat Enterprise Linux 5.3. (BZ#580840)
Bugzilla: https://bugzilla.redhat.com/show_bug.cgi?id=580840
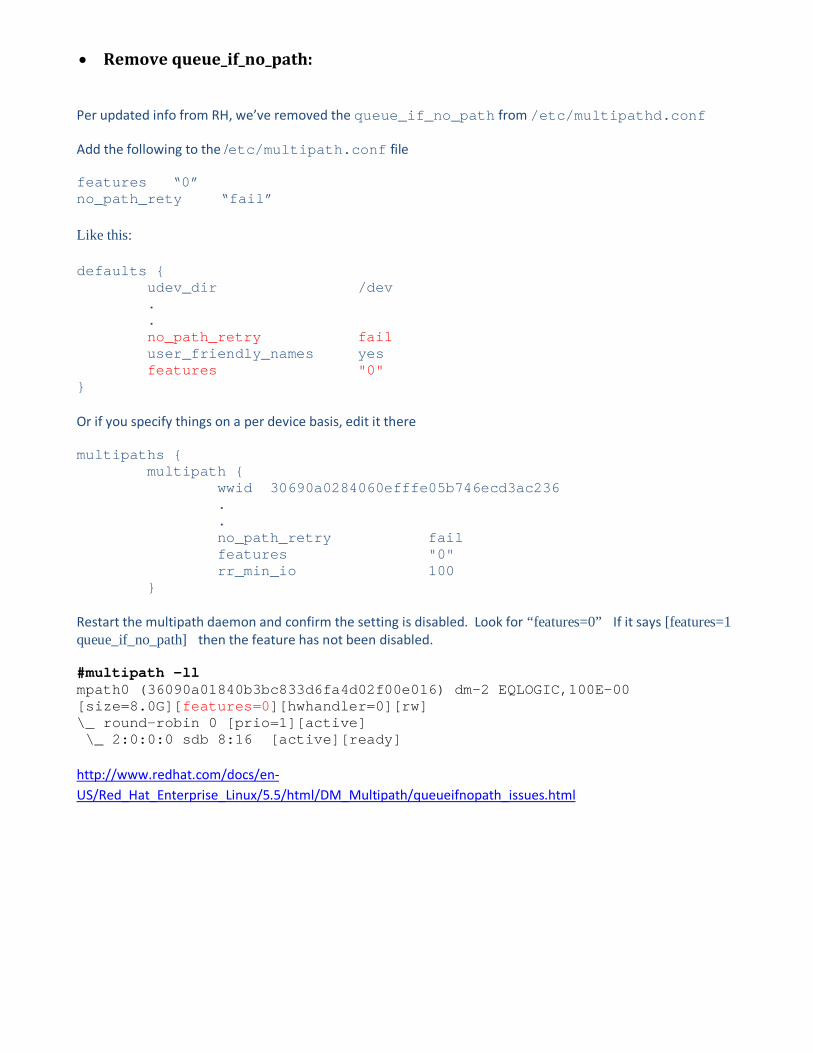
• Remove queue_if_no_path:
Per updated info from RH, we’ve removed the queue_if_no_path from /etc/multipathd.conf
Add the following to the /etc/multipath.conf file
features “0” no_path_rety “fail” Like this: defaults { udev_dir /dev . . no_path_retry fail user_friendly_names yes features "0" } Or if you specify things on a per device basis, edit it there multipaths { multipath { wwid 30690a0284060efffe05b746ecd3ac236 . . no_path_retry fail features "0" rr_min_io 100 } Restart the multipath daemon and confirm the setting is disabled. Look for “features=0” If it says [features=1 queue_if_no_path] then the feature has not been disabled. #multipath -ll mpath0 (36090a01840b3bc833d6fa4d02f00e016) dm-2 EQLOGIC,100E-00 [size=8.0G][features=0][hwhandler=0][rw] \_ round-robin 0 [prio=1][active] \_ 2:0:0:0 sdb 8:16 [active][ready] http://www.redhat.com/docs/en-US/Red_Hat_Enterprise_Linux/5.5/html/DM_Multipath/queueifnopath_issues.html
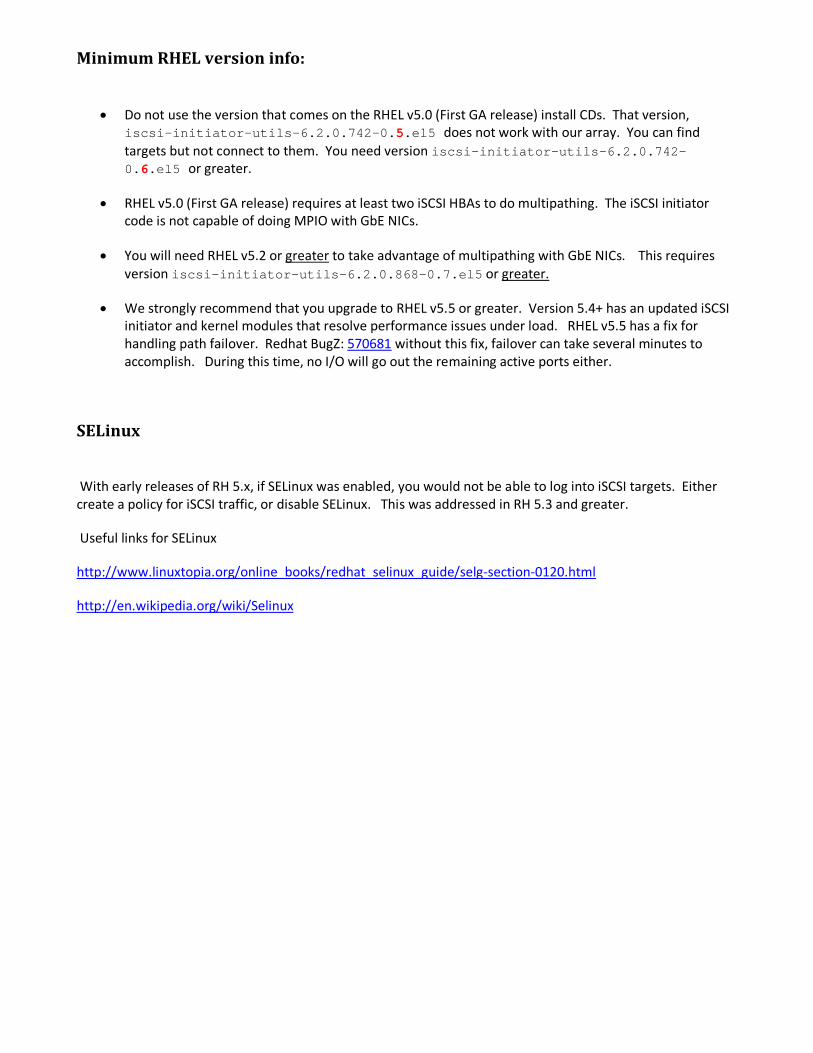
Minimum RHEL version info:
• Do not use the version that comes on the RHEL v5.0 (First GA release) install CDs. That version, iscsi-initiator-utils-6.2.0.742-0.5.el5 does not work with our array. You can find targets but not connect to them. You need version iscsi-initiator-utils-6.2.0.742-0.6.el5 or greater.
• RHEL v5.0 (First GA release) requires at least two iSCSI HBAs to do multipathing. The iSCSI initiator code is not capable of doing MPIO with GbE NICs.
• You will need RHEL v5.2 or greater to take advantage of multipathing with GbE NICs. This requires version iscsi-initiator-utils-6.2.0.868-0.7.el5 or greater.
• We strongly recommend that you upgrade to RHEL v5.5 or greater. Version 5.4+ has an updated iSCSI initiator and kernel modules that resolve performance issues under load. RHEL v5.5 has a fix for handling path failover. Redhat BugZ: 570681 without this fix, failover can take several minutes to accomplish. During this time, no I/O will go out the remaining active ports either.
SELinux
With early releases of RH 5.x, if SELinux was enabled, you would not be able to log into iSCSI targets. Either create a policy for iSCSI traffic, or disable SELinux. This was addressed in RH 5.3 and greater.
Useful links for SELinux
http://www.linuxtopia.org/online_books/redhat_selinux_guide/selg-section-0120.html
http://en.wikipedia.org/wiki/Selinux