Red Hat JBoss Developer Studio 10.3 Installation Guide · Information for users installing Red Hat...
24
Misha Husnain Ali Supriya Bharadwaj Red Hat Developer Group Documentation Team Red Hat JBoss Developer Studio 10.3 Installation Guide Installing Red Hat JBoss Developer Studio
Transcript of Red Hat JBoss Developer Studio 10.3 Installation Guide · Information for users installing Red Hat...
Misha Husnain Ali Supriya BharadwajRed Hat Developer Group DocumentationTeam
Red Hat JBoss Developer Studio10.3Installation Guide
Installing Red Hat JBoss Developer Studio

Red Hat JBoss Developer Studio 10.3 Installation Guide
Installing Red Hat JBoss Developer Studio
Misha Husnain [email protected]
Supriya [email protected]
Legal Notice
Copyright © 2017 Red Hat, Inc.
The text of and illustrations in this document are licensed by Red Hat under a Creative CommonsAttribution–Share Alike 3.0 Unported license ("CC-BY-SA"). An explanation of CC-BY-SA isavailable athttp://creativecommons.org/licenses/by-sa/3.0/. In accordance with CC-BY-SA, if you distribute this document or an adaptation of it, you mustprovide the URL for the original version.
Red Hat, as the licensor of this document, waives the right to enforce, and agrees not to assert,Section 4d of CC-BY-SA to the fullest extent permitted by applicable law.
Red Hat, Red Hat Enterprise Linux, the Shadowman logo, JBoss, OpenShift, Fedora, the Infinitylogo, and RHCE are trademarks of Red Hat, Inc., registered in the United States and othercountries.
Linux ® is the registered trademark of Linus Torvalds in the United States and other countries.
Java ® is a registered trademark of Oracle and/or its affiliates.
XFS ® is a trademark of Silicon Graphics International Corp. or its subsidiaries in the United Statesand/or other countries.
MySQL ® is a registered trademark of MySQL AB in the United States, the European Union andother countries.
Node.js ® is an official trademark of Joyent. Red Hat Software Collections is not formally related toor endorsed by the official Joyent Node.js open source or commercial project.
The OpenStack ® Word Mark and OpenStack logo are either registered trademarks/service marksor trademarks/service marks of the OpenStack Foundation, in the United States and other countriesand are used with the OpenStack Foundation's permission. We are not affiliated with, endorsed orsponsored by the OpenStack Foundation, or the OpenStack community.
All other trademarks are the property of their respective owners.
AbstractInformation for users installing Red Hat JBoss Developer Studio. This guide describes allprerequisites for a successful installation of the product followed by a number of installationmethods, including how to use your existing installation of Eclipse.
. . . . . . . . . . . . . . . . . . . . . . . . . . . . . . . . . . . . . . . . . . . . . . . . . . . . . . . . . . . . . . . . . . . . . . . . . . . . . . . . . . . . . . . . . . . . . . . . . . . . . . . . . . . . . . . . . . . . . . . . . . . . . . . . . . . . . . . . . . . . . . . . . . . . . . . . . . . . . . . . . . . . . . . . . . . . . . . . . . . . . . . . . . . . . . . . . . . . . . . . . . . . . . . . . . . . . . . . . . . . . . . . . . . . . . . . . . . . . . . . . . . . . . . . . . . . . . . . . . . . . . . . . . . . . . . . . . . . . . . .
. . . . . . . . . . . . . . . . . . . . . . . . . . . . . . . . . . . . . . . . . . . . . . . . . . . . . . . . . . . . . . . . . . . . . . . . . . . . . . . . . . . . . . . . . . . . . . . . . . . . . . . . . . . . . . . . . . . . . . . . . . . . . . . . . . . . . . . . . . . . . . . . . . . . . . . . . . . . . . . . . . . . . . . . . . . . . . . . . . . . . . . . . . . . . . . . . . . . . . . . . . . . . . . . . . . . . . . . . . . . . . . . . . . . . . . . . . . . . . . . . . . . . . . . . . . . . . . . . . . . . . . . . . . . . . . . . . . . . . . .
. . . . . . . . . . . . . . . . . . . . . . . . . . . . . . . . . . . . . . . . . . . . . . . . . . . . . . . . . . . . . . . . . . . . . . . . . . . . . . . . . . . . . . . . . . . . . . . . . . . . . . . . . . . . . . . . . . . . . . . . . . . . . . . . . . . . . . . . . . . . . . . . . . . . . . . . . . . . . . . . . . . . . . . . . . . . . . . . . . . . . . . . . . . . . . . . . . . . . . . . . . . . . . . . . . . . . . . . . . . . . . . . . . . . . . . . . . . . . . . . . . . . . . . . . . . . . . . . . . . . . . . . . . . . . . . . . . . . . . . .
. . . . . . . . . . . . . . . . . . . . . . . . . . . . . . . . . . . . . . . . . . . . . . . . . . . . . . . . . . . . . . . . . . . . . . . . . . . . . . . . . . . . . . . . . . . . . . . . . . . . . . . . . . . . . . . . . . . . . . . . . . . . . . . . . . . . . . . . . . . . . . . . . . . . . . . . . . . . . . . . . . . . . . . . . . . . . . . . . . . . . . . . . . . . . . . . . . . . . . . . . . . . . . . . . . . . . . . . . . . . . . . . . . . . . . . . . . . . . . . . . . . . . . . . . . . . . . . . . . . . . . . . . . . . . . . . . . . . . . . .
. . . . . . . . . . . . . . . . . . . . . . . . . . . . . . . . . . . . . . . . . . . . . . . . . . . . . . . . . . . . . . . . . . . . . . . . . . . . . . . . . . . . . . . . . . . . . . . . . . . . . . . . . . . . . . . . . . . . . . . . . . . . . . . . . . . . . . . . . . . . . . . . . . . . . . . . . . . . . . . . . . . . . . . . . . . . . . . . . . . . . . . . . . . . . . . . . . . . . . . . . . . . . . . . . . . . . . . . . . . . . . . . . . . . . . . . . . . . . . . . . . . . . . . . . . . . . . . . . . . . . . . . . . . . . . . . . . . . . . . .
. . . . . . . . . . . . . . . . . . . . . . . . . . . . . . . . . . . . . . . . . . . . . . . . . . . . . . . . . . . . . . . . . . . . . . . . . . . . . . . . . . . . . . . . . . . . . . . . . . . . . . . . . . . . . . . . . . . . . . . . . . . . . . . . . . . . . . . . . . . . . . . . . . . . . . . . . . . . . . . . . . . . . . . . . . . . . . . . . . . . . . . . . . . . . . . . . . . . . . . . . . . . . . . . . . . . . . . . . . . . . . . . . . . . . . . . . . . . . . . . . . . . . . . . . . . . . . . . . . . . . . . . . . . . . . . . . . . . . . . .
. . . . . . . . . . . . . . . . . . . . . . . . . . . . . . . . . . . . . . . . . . . . . . . . . . . . . . . . . . . . . . . . . . . . . . . . . . . . . . . . . . . . . . . . . . . . . . . . . . . . . . . . . . . . . . . . . . . . . . . . . . . . . . . . . . . . . . . . . . . . . . . . . . . . . . . . . . . . . . . . . . . . . . . . . . . . . . . . . . . . . . . . . . . . . . . . . . . . . . . . . . . . . . . . . . . . . . . . . . . . . . . . . . . . . . . . . . . . . . . . . . . . . . . . . . . . . . . . . . . . . . . . . . . . . . . . . . . . . . . .
. . . . . . . . . . . . . . . . . . . . . . . . . . . . . . . . . . . . . . . . . . . . . . . . . . . . . . . . . . . . . . . . . . . . . . . . . . . . . . . . . . . . . . . . . . . . . . . . . . . . . . . . . . . . . . . . . . . . . . . . . . . . . . . . . . . . . . . . . . . . . . . . . . . . . . . . . . . . . . . . . . . . . . . . . . . . . . . . . . . . . . . . . . . . . . . . . . . . . . . . . . . . . . . . . . . . . . . . . . . . . . . . . . . . . . . . . . . . . . . . . . . . . . . . . . . . . . . . . . . . . . . . . . . . . . . . . . . . . . . .
. . . . . . . . . . . . . . . . . . . . . . . . . . . . . . . . . . . . . . . . . . . . . . . . . . . . . . . . . . . . . . . . . . . . . . . . . . . . . . . . . . . . . . . . . . . . . . . . . . . . . . . . . . . . . . . . . . . . . . . . . . . . . . . . . . . . . . . . . . . . . . . . . . . . . . . . . . . . . . . . . . . . . . . . . . . . . . . . . . . . . . . . . . . . . . . . . . . . . . . . . . . . . . . . . . . . . . . . . . . . . . . . . . . . . . . . . . . . . . . . . . . . . . . . . . . . . . . . . . . . . . . . . . . . . . . . . . . . . . . .
. . . . . . . . . . . . . . . . . . . . . . . . . . . . . . . . . . . . . . . . . . . . . . . . . . . . . . . . . . . . . . . . . . . . . . . . . . . . . . . . . . . . . . . . . . . . . . . . . . . . . . . . . . . . . . . . . . . . . . . . . . . . . . . . . . . . . . . . . . . . . . . . . . . . . . . . . . . . . . . . . . . . . . . . . . . . . . . . . . . . . . . . . . . . . . . . . . . . . . . . . . . . . . . . . . . . . . . . . . . . . . . . . . . . . . . . . . . . . . . . . . . . . . . . . . . . . . . . . . . . . . . . . . . . . . . . . . . . . . . .
Table of Contents
CHAPTER 1. INTRODUCING JBOSS DEVELOPER STUDIO INSTALLATION OPTIONS
CHAPTER 2. UNDERSTANDING JBOSS DEVELOPER STUDIO INSTALLATION PREREQUISITES2.1. HARDWARE AND SOFTWARE REQUIREMENTS2.2. INSTALLING OPENJDK 8
CHAPTER 3. INSTALLING JBOSS DEVELOPER STUDIO IN ECLIPSE3.1. INSTALLING JBOSS DEVELOPER STUDIO IN ECLIPSE WHEN ONLINE3.2. INSTALLING JBOSS DEVELOPER STUDIO IN ECLIPSE WHEN OFFLINE
CHAPTER 4. INSTALLING JBOSS DEVELOPER STUDIO USING THE INSTALLER4.1. INSTALLING JBOSS DEVELOPER STUDIO STAND-ALONE4.2. INSTALLING JBOSS DEVELOPER STUDIO AND RED HAT JBOSS EAP
CHAPTER 5. INSTALLING JBOSS DEVELOPER STUDIO THROUGH RED HAT DEVELOPMENT SUITE
CHAPTER 6. INSTALLING JBOSS DEVELOPER STUDIO USING RPM
CHAPTER 7. PERFORMING ADVANCED INSTALLATION TASKS7.1. INSTALLING JBOSS DEVELOPER STUDIO USING A SCRIPT7.2. BUILDING THE JBOSS DEVELOPER STUDIO STAND-ALONE INSTALLER FROM SOURCE
CHAPTER 8. UNINSTALLING JBOSS DEVELOPER STUDIO8.1. UNINSTALLING JBOSS DEVELOPER STUDIO INSTALLED USING THE INSTALLER8.2. UNINSTALLING JBOSS DEVELOPER STUDIO INSTALLED IN ECLIPSE8.3. UNINSTALLING JBOSS DEVELOPER STUDIO INSTALLED USING RPM
CHAPTER 9. UPGRADING JBOSS DEVELOPER STUDIO9.1. UPGRADING MAJOR VERSIONS OF JBOSS DEVELOPER STUDIO9.2. UPDATING MINOR VERSIONS OF JBOSS DEVELOPER STUDIO
CHAPTER 10. REPORTING ISSUES FROM WITHIN JBOSS DEVELOPER STUDIO
3
444
666
888
10
11
121212
14141517
181818
20
Table of Contents
1

Red Hat JBoss Developer Studio 10.3 Installation Guide
2
CHAPTER 1. INTRODUCING JBOSS DEVELOPER STUDIOINSTALLATION OPTIONS
JBoss Developer Studio can be installed in a variety of ways. Depending on your circumstance, useone of the following installation methods:
Chapter 3, Installing JBoss Developer Studio in Eclipse
Section 3.1, “Installing JBoss Developer Studio in Eclipse when Online”
Section 3.2, “Installing JBoss Developer Studio in Eclipse when Offline”
Chapter 4, Installing JBoss Developer Studio Using the Installer
Section 4.1, “Installing JBoss Developer Studio Stand-alone”
Section 4.2, “Installing JBoss Developer Studio and Red Hat JBoss EAP”
Chapter 5, Installing JBoss Developer Studio through Red Hat Development Suite
Chapter 6, Installing JBoss Developer Studio Using RPM
Chapter 7, Performing Advanced Installation Tasks
Section 7.1, “Installing JBoss Developer Studio Using a Script”
Section 7.2, “Building the JBoss Developer Studio Stand-alone Installer from Source”
CHAPTER 1. INTRODUCING JBOSS DEVELOPER STUDIO INSTALLATION OPTIONS
3
CHAPTER 2. UNDERSTANDINGJBOSS DEVELOPER STUDIO INSTALLATIONPREREQUISITES
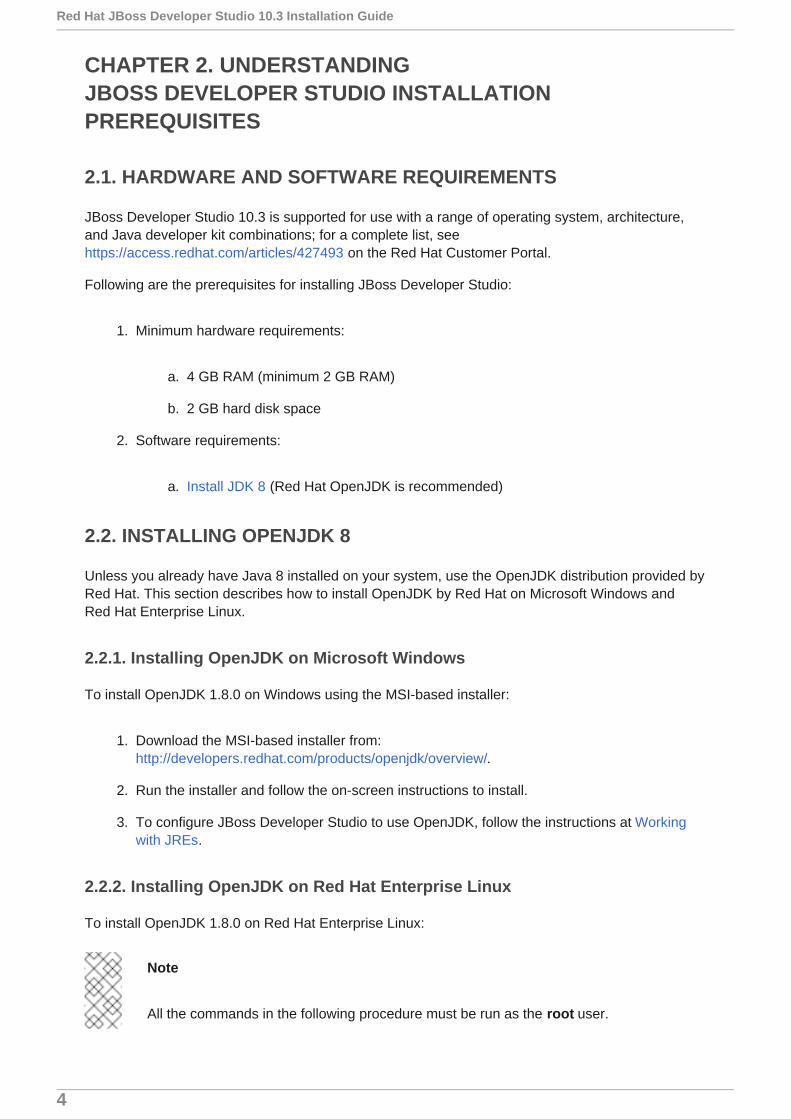
2.1. HARDWARE AND SOFTWARE REQUIREMENTS
JBoss Developer Studio 10.3 is supported for use with a range of operating system, architecture,and Java developer kit combinations; for a complete list, seehttps://access.redhat.com/articles/427493 on the Red Hat Customer Portal.
Following are the prerequisites for installing JBoss Developer Studio:
1. Minimum hardware requirements:
a. 4 GB RAM (minimum 2 GB RAM)
b. 2 GB hard disk space
2. Software requirements:
a. Install JDK 8 (Red Hat OpenJDK is recommended)
2.2. INSTALLING OPENJDK 8
Unless you already have Java 8 installed on your system, use the OpenJDK distribution provided byRed Hat. This section describes how to install OpenJDK by Red Hat on Microsoft Windows andRed Hat Enterprise Linux.
2.2.1. Installing OpenJDK on Microsoft Windows
To install OpenJDK 1.8.0 on Windows using the MSI-based installer:
1. Download the MSI-based installer from:http://developers.redhat.com/products/openjdk/overview/.
2. Run the installer and follow the on-screen instructions to install.
3. To configure JBoss Developer Studio to use OpenJDK, follow the instructions at Workingwith JREs.
2.2.2. Installing OpenJDK on Red Hat Enterprise Linux
To install OpenJDK 1.8.0 on Red Hat Enterprise Linux:
Note
All the commands in the following procedure must be run as the root user.
Red Hat JBoss Developer Studio 10.3 Installation Guide
4
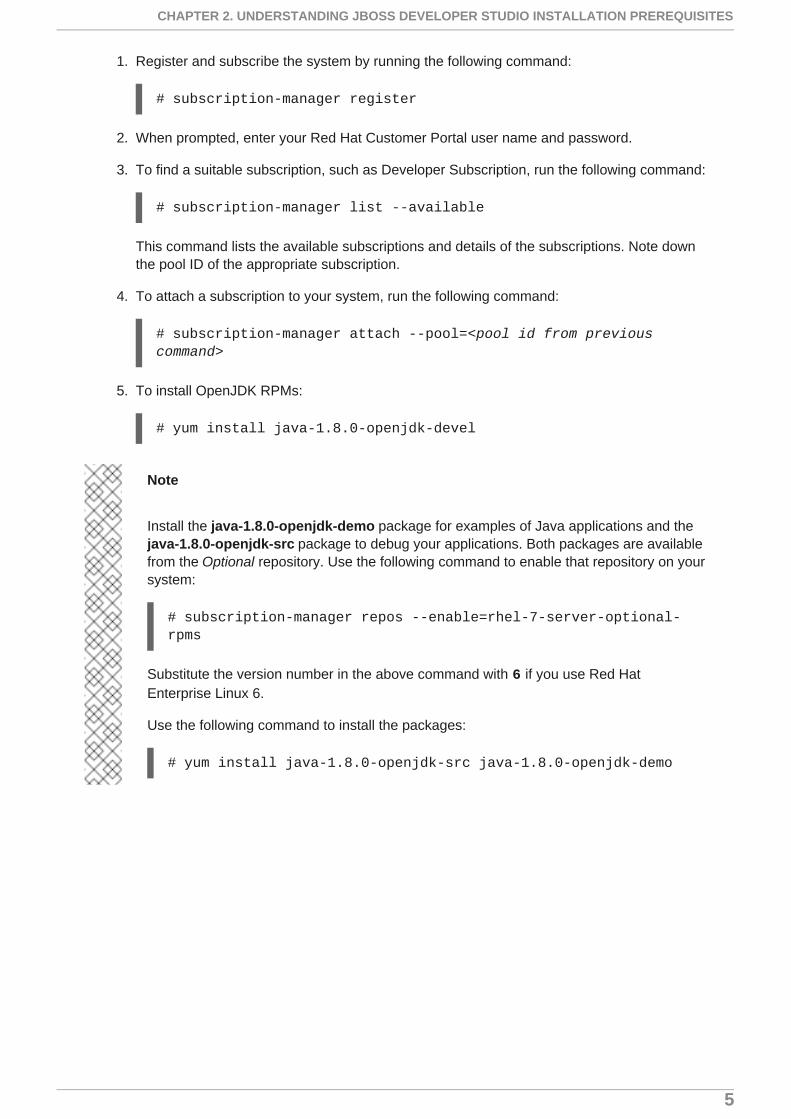
1. Register and subscribe the system by running the following command:
# subscription-manager register
2. When prompted, enter your Red Hat Customer Portal user name and password.
3. To find a suitable subscription, such as Developer Subscription, run the following command:
# subscription-manager list --available
This command lists the available subscriptions and details of the subscriptions. Note downthe pool ID of the appropriate subscription.
4. To attach a subscription to your system, run the following command:
# subscription-manager attach --pool=<pool id from previous command>
5. To install OpenJDK RPMs:
# yum install java-1.8.0-openjdk-devel
Note
Install the java-1.8.0-openjdk-demo package for examples of Java applications and thejava-1.8.0-openjdk-src package to debug your applications. Both packages are availablefrom the Optional repository. Use the following command to enable that repository on yoursystem:
# subscription-manager repos --enable=rhel-7-server-optional-rpms
Substitute the version number in the above command with 6 if you use Red HatEnterprise Linux 6.
Use the following command to install the packages:
# yum install java-1.8.0-openjdk-src java-1.8.0-openjdk-demo
CHAPTER 2. UNDERSTANDING JBOSS DEVELOPER STUDIO INSTALLATION PREREQUISITES
5

CHAPTER 3. INSTALLING JBOSS DEVELOPER STUDIO INECLIPSE
JBoss Developer Studio for Eclipse packages the JBoss Developer Studio plug-ins for your existingEclipse instance. You can either install JBoss Developer Studio from the Eclipse Marketplace whenyou are online or use the Update Site Zip to install it when you are offline.
3.1. INSTALLING JBOSS DEVELOPER STUDIO IN ECLIPSE WHENONLINE
JBoss Developer Studio is available to install from Eclipse Marketplace when you are online.
To install JBoss Developer Studio BYOE from Eclipse Marketplace:
1. Start Eclipse Neon.
2. Click Help → Eclipse Marketplace, locate Red Hat JBoss Developer Studio 10.3 GA,and click Install.
3. Follow the on-screen instructions to complete the installation process.
During the installation process, if you receive warnings about installing unsigned content, review thedetails of the content and if satisfied, click OK to continue with the installation.
Once installation is complete, you are prompted to restart Eclipse. Click Yes to restart immediatelyand No if you need to save any unsaved changes to open projects. Note that IDE changes do nottake effect until Eclipse is restarted.
3.2. INSTALLING JBOSS DEVELOPER STUDIO IN ECLIPSE WHENOFFLINE
You need the Update Site Zip to install JBoss Developer Studio in Eclipse in the offline mode.Alternatively, you can also use an installer downloaded on your system instead of the Update Site Zip to install JBoss Developer Studio in Eclipse when Offline.
Important
You must first be online to download the .zip file before proceeding to installJBoss Developer Studio in Eclipse in the offline mode.
To install JBoss Developer Studio in Eclipse in offline mode:
1. Download the Red Hat JBoss Developer Studio 10.3 Update Site Zip fromhttps://devstudio.redhat.com/10.0/stable/updates/.
2. Start Eclipse Neon.
3. Click Help → Install New Software.
4. In the Work with field, enter the path of the Update Site Zip file. Alternatively, click Add andclick Archive to locate the file.
Red Hat JBoss Developer Studio 10.3 Installation Guide
6
5. From the table of components, select Red Hat JBoss Developer Studio 10 - Bring YourOwn Eclipse and click Next.
6. Follow the on-screen instructions to complete the installation process.
During the installation process, you may receive warnings about installing unsigned content. If this isthe case, review the details of the content and if satisfied, click OK to continue with the installation.
Once the installation is complete, you are prompted to restart Eclipse. Click Yes to restartimmediately and No to save any unsaved changes to open projects. Note that the IDE changes donot take effect until Eclipse is restarted.
CHAPTER 3. INSTALLING JBOSS DEVELOPER STUDIO IN ECLIPSE
7
CHAPTER 4. INSTALLING JBOSS DEVELOPER STUDIOUSING THE INSTALLER
JBoss Developer Studio stand-alone packages the JBoss Developer Studio plug-ins with Eclipseand dependent third-party plug-ins in an installer for all operating systems.
4.1. INSTALLING JBOSS DEVELOPER STUDIO STAND-ALONE
The installer provided to install JBoss Developer Studio stand-alone is available from a variety ofsources, including the Red Hat Customer Portal.
To install JBoss Developer Studio stand-alone:
1. Download Red Hat JBoss Developer Studio 10.3 Stand-alone Installer fromJBoss Developer Studio Software Downloads.
2. Start the installer:
$ cd /path/to/.jar$ java -jar devstudio-10.3.0.GA-installer-standalone.jar
Alternatively, you can start the installer by double-clicking the .jar file. On OS X systems,hold control and click the .jar file, click Open, review the .jar file details and if satisfied,click Open.
3. Follow the on-screen instructions to complete the installation process.
4.2. INSTALLING JBOSS DEVELOPER STUDIO AND RED HATJBOSS EAP
A single installer is provided for both JBoss Developer Studio stand-alone and Red Hat JBossEnterprise Application Platform (JBoss EAP). A specific JBoss EAP version is packaged in theinstaller. For details of the JBoss EAP version, see https://access.redhat.com/articles/427493. Thisinstaller is available from a variety of sources, including the Red Hat Customer Portal.
To install JBoss Developer Studio stand-alone and JBoss EAP:
1. Download Red Hat JBoss Developer Studio 10.3 Installer with EAP fromJBoss Developer Studio Software Downloads.
2. Start the installer:
$ cd /path/to/.jar$ java -jar devstudio-10.3.0.GA-installer-eap.jar
Alternatively, you can start the installer by double-clicking the .jar file. On OS X systems,hold control and click the .jar file, click Open, review the .jar file details and if satisfied,click Open.
3. In the Introduction Step 1 of 9 window, read the information about the installer and clickNext.
Red Hat JBoss Developer Studio 10.3 Installation Guide
8
4. In the End User License Agreement Step 2 of 9 window, read the agreement and click Iaccept the terms of this license agreement and click Next.
5. In the Select Target Folder Step 3 of 9 window, click Browse, select the installation path,and click Next.
6. In the Warning dialog box, click Yes
7. In the Select Java VM Step 4 of 9 window, Default Java VM is selected by default. Ensurethat the disabled text field contains the path of the Java developer kit you want to use. Thisis based on the default Java developer kit of your system. To change the specified Javadeveloper kit, click Specific Java VM and click Browse to locate the Java developer kit.When the text field shows the correct Java developer kit path, click Next.
8. In the Select Platforms and Servers Step 5 of 9 window, Yes, and have it ready for usein Red Hat JBoss Developer Studio is selected by default. Alternatively, to add a location:
a. Click Add to add locations that you want to be scanned recursively to locateplatforms and servers.
b. In the Add Location window, click Browse to select the location path.
c. Click the Scan every start check box to scan the specified path for new applicationservers each time JBoss Developer Studio starts.
d. Click OK.
e. In the Select Platforms and Servers Step 5 of 9 window, click Next.
9. In the Summary Information Step 6 of 9 window, review the installation details and clickNext.
10. The Installation Step 7 of 9 window shows the progress of the installation. When the Packinstallation progress bar shows Finished, click Next.
11. In the Setup Shortcuts Step 8 of 9 window, click the relevant check box to create shortcutsand click Next.
12. In the Finish Step 9 of 9 window, the Run Red Hat JBoss Developer Studio afterinstallation check box is selected by default. Click Done.
13. In the Eclipse Launcher window, Workspace field, click Browse to select the directorywhere JBoss Developer Studio will store its preferences and development artifacts. ClickOK.
14. In the Red Hat JBoss Developer Studio Usage window, click Yes to allow Red Hat Inc. toreceive usage statistics for the installed JBoss Developer Studio instance or click No, asrequired.
This additional installer option installs JBoss EAP in a subdirectory of the JBoss Developer Studioinstallation and generates a complete default server definition within the IDE with which to managethe JBoss EAP instance and deployed applications.
CHAPTER 4. INSTALLING JBOSS DEVELOPER STUDIO USING THE INSTALLER
9
CHAPTER 5. INSTALLING JBOSS DEVELOPER STUDIOTHROUGH RED HAT DEVELOPMENT SUITE
You can install JBoss Developer Studio as part of Red Hat Development Suite on 64-bit MicrosoftWindows and macOS.
Note
The macOS Installer is released as Technology Preview in Red HatDevelopment Suite Development Suite. For information on support for features releasedas Technology Preview, see Technology Preview Features Support Scope.
The Red Hat Development Suite Installer installs the following components:
OpenJDK
Red Hat JBoss Developer Studio
Cygwin
Red Hat Container Development Kit
Vagrant
VirtualBox
For details of the components installed through Red Hat Development Suite, see Component Detailsin the Red Hat Development Suite Installation Guide.
For instructions on installing Red Hat Development Suite, see the Red Hat Development SuiteInstallation Guide.
Red Hat JBoss Developer Studio 10.3 Installation Guide
10
CHAPTER 6. INSTALLING JBOSS DEVELOPER STUDIOUSING RPM
Note
JBoss Developer Studio 10.3 IS NOT available for installation using RPM. However, youcan install JBoss Developer Studio 10.2 using RPM. For detailed steps, see:https://access.redhat.com/documentation/en/red-hat-jboss-developer-studio/10.2/paged/installation-guide/chapter-6-installing-jboss-developer-studio-using-rpm.
CHAPTER 6. INSTALLING JBOSS DEVELOPER STUDIO USING RPM
11
CHAPTER 7. PERFORMING ADVANCED INSTALLATIONTASKS
This section describes how to install JBoss Developer Studio using a script and how to build theJBoss Developer Studio installer from source code.
7.1. INSTALLING JBOSS DEVELOPER STUDIO USING A SCRIPT
Use the scripted method to install JBoss Developer Studio stand-alone using the GUI once and thena generated script for subsequent installations. This installation method enables simplified repeatinstallations or installations in bulk without stepping through the installer GUI for every installation.
The JBoss Developer Studio stand-alone installer is available from a variety of sources, includingthe Red Hat Customer Portal.
To install JBoss Developer Studio by script:
1. Download Red Hat JBoss Developer Studio 10.3 Stand-alone Installer fromJBoss Developer Studio Software Downloads.
2. Start the installer:
$ cd /path/to/.jar$ java -jar devstudio-10.3.0.GA-installer-standalone.jar
3. Follow the on-screen instructions to complete the installation process. After the installationis complete, an InstallConfigRecord.xml file is generated in theJBoss Developer Studio installation directory.
4. In the terminal window, enter the following command:
$ java -jar devstudio-10.3.0.GA-installer-standalone.jar \ /path/to/devstudio/InstallConfigRecord.xml
Note
The generated InstallConfigRecord.xml file is machine-specific and uses the JavaDeveloper Kit and installation paths of your system. To use the InstallConfigRecord.xml file for other operating systems, Java Developer Kits, orpaths, you must manually modify the file.
7.2. BUILDING THE JBOSS DEVELOPER STUDIO STAND-ALONEINSTALLER FROM SOURCE
Prerequisite
Maven 3.2 or later, with Java 8 must be installed to build the installer from the source code. Toobtain and configure Maven, see http://maven.apache.org/.
To build the JBoss Developer Studio stand-alone installer from source:
Red Hat JBoss Developer Studio 10.3 Installation Guide
12
1. Clone the git repository by running the command:
$ git clone https://github.com/jbdevstudio/jbdevstudio-product.git
2. Build the installer by following the instructions in the jbdevstudio-product/README.adocfile.
Note
The jbdevstudio-product/README.adoc file is located in the extracted current folderat the highest level.
Building takes some time to complete, after which the devstudio-[version]-installer-standalone.jar file will be located in the /path/to/jbdevstudio-product/installer/target directory.
CHAPTER 7. PERFORMING ADVANCED INSTALLATION TASKS
13
CHAPTER 8. UNINSTALLING JBOSS DEVELOPER STUDIO
You may want to uninstall a specific version of JBoss Developer Studio if you have concludeddevelopment in one version, say 9.x, and you now want to install a newer version, say 10.x.However, you can have more than one version of Installer-installed JBoss Developer Studio orEclipse-installed JBoss Developer Studio on your system, provided you have these versions locatedin different directories.
Note
You can not have more than one version of RPM-installed JBoss Developer Studio on thesame system.
There are three ways to uninstall JBoss Developer Studio, depending on how you installed it. Thefollowing sections describe the three methods:
Section 8.1, “Uninstalling JBoss Developer Studio Installed Using the Installer”
Section 8.2, “Uninstalling JBoss Developer Studio Installed in Eclipse”
Section 8.3, “Uninstalling JBoss Developer Studio Installed Using RPM”
8.1. UNINSTALLING JBOSS DEVELOPER STUDIO INSTALLEDUSING THE INSTALLER
To uninstall JBoss Developer Studio:
1. Ensure that JBoss Developer Studio is not running.
2. On the command line, navigate to path/to/JBoss Developer Studio/Uninstaller.
3. On the command line, type:
$ java -jar uninstaller.jar
4. In the IzPack Uninstaller dialog box:
a. Click the Force the deletion of <path_to_JBoss Developer Studio_directory>check box, to remove the entire JBoss Developer Studio installation directory. If thisis not selected, JBoss Developer Studio will be uninstalled but some files will be leftas is in the installation directory.
b. Click Uninstall.
5. After the progress bar shows Finished, click Quit to close the Uninstaller dialog box.
Figure 8.1. Uninstall JBoss Developer Studio
Red Hat JBoss Developer Studio 10.3 Installation Guide
14
8.2. UNINSTALLING JBOSS DEVELOPER STUDIO INSTALLED INECLIPSE
JBoss Developer Studio can be uninstalled using the following steps regardless of whether it wasinstalled via Eclipse Marketplace or the update .zip file.
To uninstall JBoss Developer Studio:
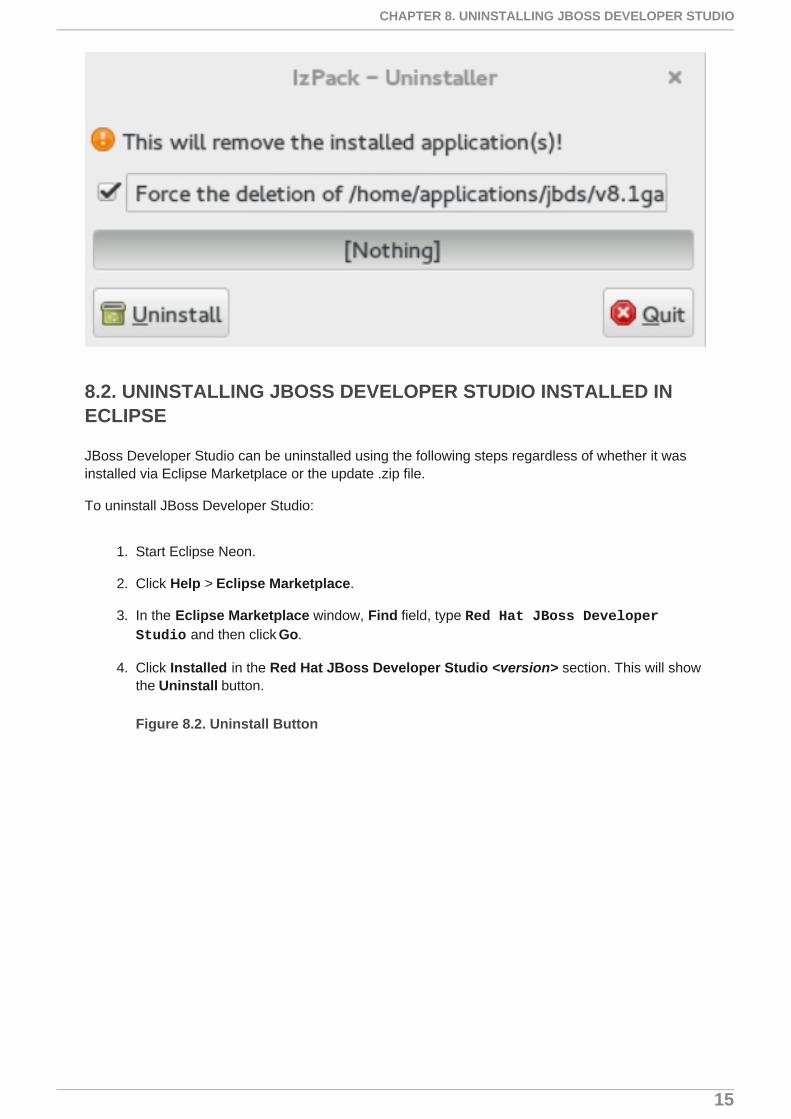
1. Start Eclipse Neon.
2. Click Help > Eclipse Marketplace.
3. In the Eclipse Marketplace window, Find field, type Red Hat JBoss Developer Studio and then click Go.
4. Click Installed in the Red Hat JBoss Developer Studio <version> section. This will showthe Uninstall button.
Figure 8.2. Uninstall Button
CHAPTER 8. UNINSTALLING JBOSS DEVELOPER STUDIO
15
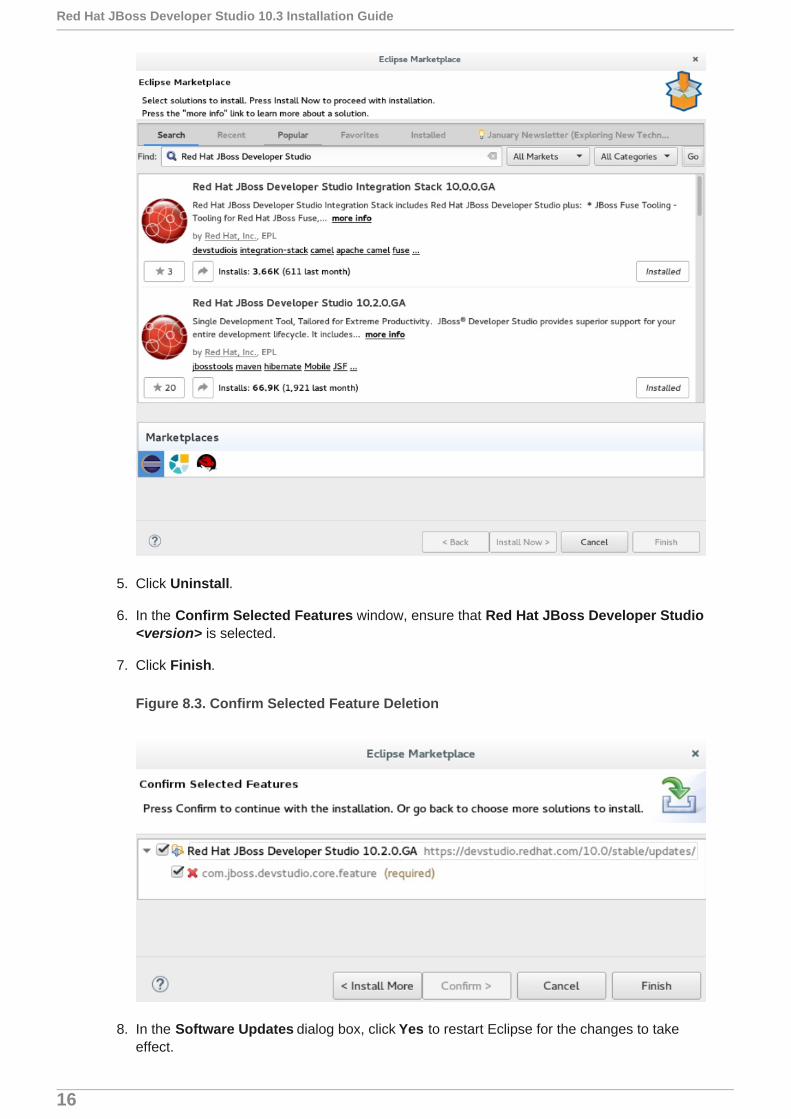
5. Click Uninstall.
6. In the Confirm Selected Features window, ensure that Red Hat JBoss Developer Studio<version> is selected.
7. Click Finish.
Figure 8.3. Confirm Selected Feature Deletion
8. In the Software Updates dialog box, click Yes to restart Eclipse for the changes to takeeffect.
Red Hat JBoss Developer Studio 10.3 Installation Guide
16
8.3. UNINSTALLING JBOSS DEVELOPER STUDIO INSTALLEDUSING RPM
To uninstall JBoss Developer Studio completely, including Eclipse and the included plugins, use thefollowing command:
$ sudo yum remove rh-eclipse46 *
To uninstall only JBoss Developer Studio and leave Eclipse and other plugins as is, use thefollowing command:
$ sudo yum remove rh-eclipse46-devstudio
CHAPTER 8. UNINSTALLING JBOSS DEVELOPER STUDIO
17
CHAPTER 9. UPGRADING JBOSS DEVELOPER STUDIO
This section describes how to upgrade to newer versions of JBoss Developer Studio.
9.1. UPGRADING MAJOR VERSIONS OFJBOSS DEVELOPER STUDIO
Each major version of JBoss Developer Studio is based on a different version of Eclipse. As a result,it is not possible to update an older major version of JBoss Developer Studio to a newer majorversion. For example, it is not possible to update a devstudio 8.x installation to 9.x, nor is it possibleto update a 9.x installation to 10.x. However, it is possible to use the workspaces created usingJBoss Developer Studio 9.x with JBoss Developer Studio 10.x.
The following table details the version of Eclipse supported with each major version ofJBoss Developer Studio:
Table 9.1. Eclipse Version Support Matrix
JBoss Developer Studio Version Base Eclipse Version
JBoss Developer Studio 10.x Eclipse Neon (4.6)
JBoss Developer Studio 9.x Eclipse Mars (4.5)
JBoss Developer Studio 8.x Eclipse Luna (4.4)
JBoss Developer Studio 7.x Eclipse Kepler (4.3)
JBoss Developer Studio 6.x Eclipse Juno (4.2)
9.2. UPDATING MINOR VERSIONS OF JBOSS DEVELOPER STUDIO
You can update your JBoss Developer Studio to the latest minor versions within the major release.For example, you can update your JBoss Developer Studio 10.0 installation to 10.1.
Important
Before updating, back up your workspace. In addition to your project files, your workspacecontains metadata about customized settings and preferences for the IDE. To back upyour workspace, either copy the workspace directory to a backup location, or save it as acompressed file.
Red Hat JBoss Developer Studio 10.3 Installation Guide
18
You may be automatically notified by the IDE when the JBoss Developer Studio 10.y update isavailable, depending on your IDE settings for automatic updates.
Note
If you have installed JBoss Developer Studio using the RPM package, you must updateusing your package manager (example: yum update) and not look for automatic updates.
Alternatively, use the following instructions to manually check for and apply the most recentJBoss Developer Studio update:
1. In the IDE, click Window > Preferences, expand Install/Update and click AvailableSoftware Sites.
2. In the Available Software Sites table, ensure the URLhttps://devstudio.redhat.com/10.0/stable/updates/ is listed or, if not listed, add it.
3. Close the Preferences window.
4. Click Help > Check for Updates.
5. For any JBoss Developer Studio updates found, follow the on-screen instructions to applythe update.
During the update process, you may receive warnings about installing unsigned content. If this is thecase, review the details of the content and if satisfied click OK to continue with the update.
Once updating is complete, you are prompted to restart the IDE. Click Yes to restart immediately orNo to save any unsaved changes to open projects. Note that IDE changes do not take effect untilthe IDE is restarted.
CHAPTER 9. UPGRADING JBOSS DEVELOPER STUDIO
19

CHAPTER 10. REPORTING ISSUES FROM WITHINJBOSS DEVELOPER STUDIO
Red Hat JBoss Developer Studio and JBoss Tools allow users to report issues from within the IDEas they are encountered. It is recommended that users report issues frequently and include as muchdetail as possible to help the development and testing teams replicate and fix the issue. The ReportProblem wizard creates a zip file containing the relevant IDE log files. This zip file can be attachedto the JIRAs submitted against each problem to provide context for the issue.
1. Click Help and then click Report Problem.
2. The Log file name field contains the zipped log files as a default. Click Browse to select adifferent log file to attach to the JIRA.
3. In the Problem Description field, outline details about the problem, such as:
What you wanted to do with JBoss Developer Studio.
What steps you followed to arrive at the problem or error message.
Any other noteworthy information about the environment or any unsupported add-ons orplug-ins in use.
4. Optionally, in the E-Mail field, add your e-mail address to be potentially contacted in thefuture about the issue.
5. Click OK to submit the problem report.
You can also enable error reporting from: Preferences → General → Error Reporting. If enabled,when you encounter a plugin related error, a pop-up notification describing the error will appear. Theuser can either dismiss or send the error directly, or provide more details about the error. You canoptionally provide your e-mail ID to be contacted for more details on the error.
Red Hat JBoss Developer Studio 10.3 Installation Guide
20