Massive virtual textures for games: Direct3D tiled resources
description
7/14/2019 RasterTek: Direct3D introduction
http://slidepdf.com/reader/full/rastertek-direct3d-introduction 1/709
Tutor ial 2: Creating a Framework and Window
Before starting to code with DirectX 11 I recommend building a simple code framework. This framework will handle the basic windowsfunctionality and provide an easy way to expand the code in an organized and readable manner. As the intention of these tutorials is just
to try different features of DirectX 11 we will purposely keep the framework as thin as possible.
The Framework
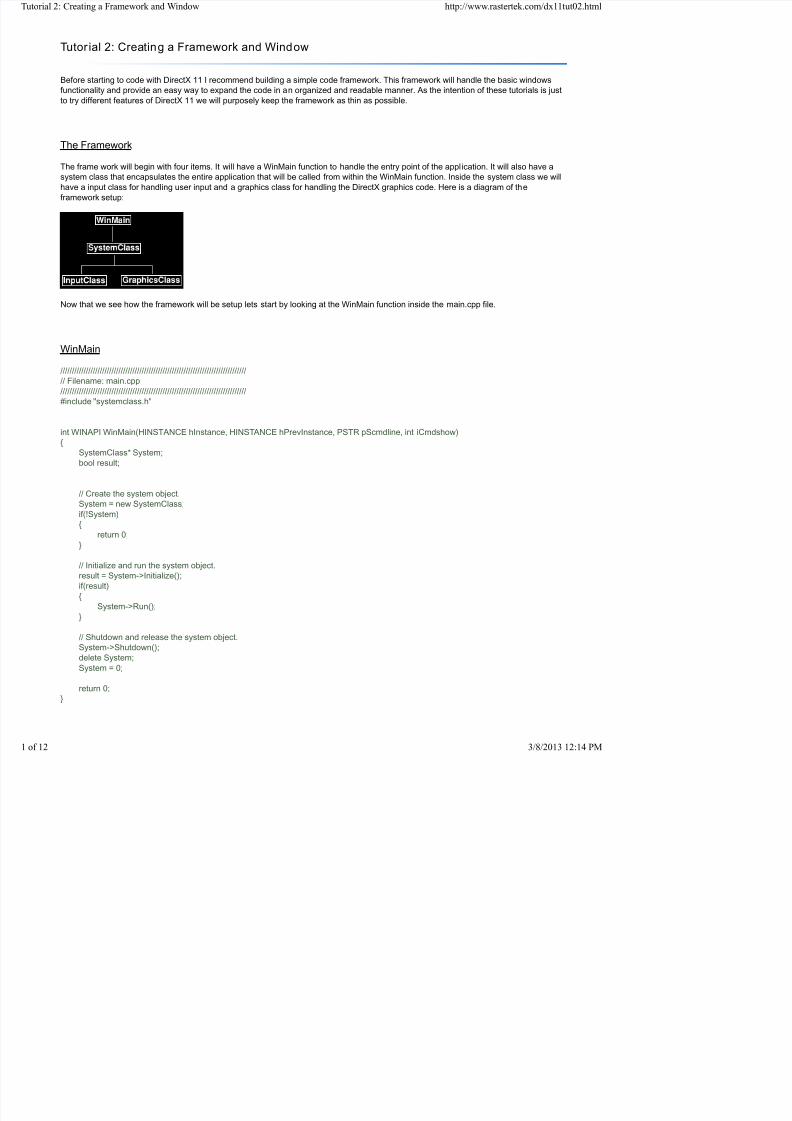
The frame work will begin with four items. It will have a WinMain function to handle the entry point of the application. It will also have asystem class that encapsulates the entire application that will be called from within the WinMain function. Inside the system class we willhave a input class for handling user input and a graphics class for handling the DirectX graphics code. Here is a diagram of theframework setup:
Now that we see how the framework will be setup lets start by looking at the WinMain function inside the main.cpp file.
WinMain
////////////////////////////////////////////////////////////////////////////////// Filename: main.cpp////////////////////////////////////////////////////////////////////////////////#include "systemclass.h"
int WINAPI WinMain(HINSTANCE hInstance, HINSTANCE hPrevInstance, PSTR pScmdline, int iCmdshow){
SystemClass* System;bool result;
// Create the system object.System =new SystemClass;if(!System){
return 0;}
// Initialize and run the system object.result =System->Initialize();
Tutorial 2: Creating a Framework and Window http://www.rastertek.com/dx11tut02.html

7/14/2019 RasterTek: Direct3D introduction
http://slidepdf.com/reader/full/rastertek-direct3d-introduction 2/709
As you can see we kept the WinMain function fairly simple. We create the system class and then initialize it. If it initializes with noproblems then we call the system class Run function. The Run function will run its own loop and do all the application code until itcompletes. After the Run function finishes we then shut down the system object and do the clean up of the system object. So we havekept it very simple and encapsulated the entire application inside the system class. Now lets take a look at the system class header file.
Systemclass.h
////////////////////////////////////////////////////////////////////////////////// Filename: systemclass.h////////////////////////////////////////////////////////////////////////////////#ifndef _SYSTEMCLASS_H_ #define _SYSTEMCLASS_H_
Here we define WIN32_LEAN_AND_MEAN. We do this to speed up the build process, it reduces the size of the Win32 header files byexcluding some of the less used APIs.
///////////////////////////////// PRE-PROCESSING DIRECTIVES /////////////////////////////////#define WIN32_LEAN_AND_MEAN
Windows.h is included so that we can call the functions to create/destroy windows and be able to use the other useful win32 functions.
//////////////// INCLUDES ////////////////#include <windows.h>
We have included the headers to the other two classes in the frame work at this point so we can use them in the system class.
///////////////////////// MY CLASS INCLUDES /////////////////////////#include "inputclass.h"#include "graphicsclass.h"
The definition of the class is fairly simple. We see the Initialize, Shutdown, and Run function that was called in WinMain defined here. There are also some private functions that will be called inside those functions. We have also put a MessageHandler function in theclass to handle the windows system messages that will get sent to the application while it is running. And finally we have some privatevariables m_Input and m_Graphics which will be pointers to the two objects that will handle graphics and input.
////////////////////////////////////////////////////////////////////////////////// Class name: SystemClass////////////////////////////////////////////////////////////////////////////////class SystemClass{public:
SystemClass();SystemClass(const SystemClass&);~SystemClass();
Tutorial 2: Creating a Framework and Window http://www.rastertek.com/dx11tut02.html

7/14/2019 RasterTek: Direct3D introduction
http://slidepdf.com/reader/full/rastertek-direct3d-introduction 3/709
HINSTANCE m_hinstance;HWND m_hwnd;
InputClass* m_Input;GraphicsClass* m_Graphics;
};
/////////////////////////// FUNCTION PROTOTYPES ///////////////////////////static LRESULT CALLBACK WndProc(HWND, UINT, WPARAM, LPARAM);
/////////////// GLOBALS //
/////////////static SystemClass* ApplicationHandle =0;
#endif
The WndProc function and ApplicationHandle pointer are also included in this class file so we can re-direct the windows systemmessaging into our MessageHandler function inside the system class.
Now lets take a look at the system class source file:
Systemclass.cpp
////////////////////////////////////////////////////////////////////////////////// Filename: systemclass.cpp////////////////////////////////////////////////////////////////////////////////#include "systemclass.h"
In the class constructor I initialize the object pointers to null. This is important because if the initialization of these objects fail then theShutdown function further on will attempt to clean up those objects. If the objects are not null then it assumes they were valid createdobjects and that they need to be cleaned up. It is also good practice to initialize all pointers and variables to null in your applications.Some release builds will fail if you do not do so.
SystemClass::SystemClass(){
m_Input =0;m_Graphics =0;
}
Here I create an empty copy constructor and empty class destructor. In this class I don't have need of them but if not defined somecompilers will generate them for you, and in which case I'd rather they be empty.
You will also notice I don't do any object clean up in the class destructor. I instead do all my object clean up in the Shutdown functionyou will see further down. The reason being is that I don't trust it to be called. Certain windows functions like ExitThread() are known fornot calling your class destructors resulting in memory leaks. You can of course call safer versions of these functions now but I'm justbeing careful when programming on windows.
Tutorial 2: Creating a Framework and Window http://www.rastertek.com/dx11tut02.html
T t i l 2 C ti F k d Wi d htt // t t k /d 11t t02 ht l

7/14/2019 RasterTek: Direct3D introduction
http://slidepdf.com/reader/full/rastertek-direct3d-introduction 4/709
bool SystemClass::Initialize(){
int screenWidth, screenHeight;bool result;
// Initialize the width and height of the screen to zero before sending the variables into the function.screenWidth =0;screenHeight =0;
// Initialize the windows api.InitializeWindows(screenWidth, screenHeight);
// Create the input object. This object will be used to handle reading the keyboard input from the user.m_Input =new InputClass;if(!m_Input)
{return false;
}
// Initialize the input object.m_Input->Initialize();
// Create the graphics object. This object will handle rendering all the graphics for this application.m_Graphics =new GraphicsClass;if(!m_Graphics)
{return false;
}
// Initialize the graphics object.result =m_Graphics->Initialize(screenWidth, screenHeight, m_hwnd);if(!result){
return false;}
return true;}
The Shutdown function does the clean up. It shuts down and releases everything associated with the graphics and input object. As wellit also shuts down the window and cleans up the handles associated with it.
void SystemClass::Shutdown(){
// Release the graphics object.
if(m_Graphics){
m_Graphics->Shutdown();delete m_Graphics;m_Graphics =0;
}
// Release the input object
Tutorial 2: Creating a Framework and Window http://www.rastertek.com/dx11tut02.html
Tutorial 2: Creating a Framework and Window http://www rastertek com/dx11tut02 html

7/14/2019 RasterTek: Direct3D introduction
http://slidepdf.com/reader/full/rastertek-direct3d-introduction 5/709
The Run function is where our application will loop and do all the application processing until we decide to quit. The applicationprocessing is done in the Frame function which is called each loop. This is an important concept to understand as now the rest of ourapplication must be written with this in mind. The pseudo code looks like the following:
while not donecheck for windows system messages
process system messagesprocess application loopcheck if user wanted to quit during the frame processing
void SystemClass::Run(){
MSG msg;bool done, result;
// Initialize the message structure.ZeroMemory(&msg, sizeof(MSG));
// Loop until there is a quit message from the window or the user.done =false;while(!done){
// Handle the windows messages.if(PeekMessage(&msg, NULL, 0, 0, PM_REMOVE)){
TranslateMessage(&msg);DispatchMessage(&msg);}
// If windows signals to end the application then exit out.if(msg.message ==WM_QUIT){
done =true;}else
{// Otherwise do the frame processing.result =Frame();if(!result){
done =true;}
}
}
return;
}
The following Frame function is where all the processing for our application is done. So far it is fairly simple, we check the input object tosee if the user has pressed escape and wants to quit. If they don't want to quit then we call the graphics object to do its frameprocessing which will render the graphics for that frame As the application grows we'll place more code inside here
Tutorial 2: Creating a Framework and Window http://www.rastertek.com/dx11tut02.html
Tutorial 2: Creating a Framework and Window http://www rastertek com/dx11tut02 html

7/14/2019 RasterTek: Direct3D introduction
http://slidepdf.com/reader/full/rastertek-direct3d-introduction 6/709
// Do the frame processing for the graphics object.result =m_Graphics->Frame();if(!result){
return false;}
return true;}
The MessageHandler function is where we direct the windows system messages into. This way we can listen for certain information thatwe are interested in. Currently we will just read if a key is pressed or if a key is released and pass that information on to the input object.All other information we will pass back to the windows default message handler.
LRESULT CALLBACK SystemClass::MessageHandler(HWND hwnd, UINT umsg, WPARAM wparam, LPARAM lparam){
switch(umsg){
// Check if a key has been pressed on the keyboard.case WM_KEYDOWN:{
// If a key is pressed send it to the input object so it can record that state.m_Input->KeyDown((unsigned int)wparam);return 0;
}
// Check if a key has been released on the keyboard.case WM_KEYUP:{
// If a key is released then send it to the input object so it can unset the state for that key.m_Input->KeyUp((unsigned int)wparam);return 0;
}
// Any other messages send to the default message handler as our application won't make use of them.default:
{return DefWindowProc(hwnd, umsg, wparam, lparam);
}}
}
The InitializeWindows function is where we put the code to build the window we will use to render to. It returns screenWidth andscreenHeight back to the calling function so we can make use of them throughout the application. We create the window using somedefault settings to initialize a plain black window with no borders. The function will make either a small window or make a full screenwindow depending on a global variable called FULL_SCREEN. If this is set to true then we make the screen cover the entire users
desktop window. If it is set to false we just make a 800x600 window in the middle of the screen. I placed the FULL_SCREEN globalvariable at the top of the graphicsclass.h file in case you want to modify it. It will make sense later why I placed the global in that fileinstead of the header for this file.
void SystemClass::InitializeWindows(int& screenWidth, int& screenHeight){
WNDCLASSEX wc;DEVMODE dmScreenSettings
Tutorial 2: Creating a Framework and Window http://www.rastertek.com/dx11tut02.html
Tutorial 2: Creating a Framework and Window http://www rastertek com/dx11tut02 html

7/14/2019 RasterTek: Direct3D introduction
http://slidepdf.com/reader/full/rastertek-direct3d-introduction 7/709
// Setup the windows class with default settings.wc.style =CS_HREDRAW | CS_VREDRAW | CS_OWNDC;wc.lpfnWndProc =WndProc;wc.cbClsExtra =0;wc.cbWndExtra =0;wc.hInstance =m_hinstance;
wc.hIcon =LoadIcon(NULL, IDI_WINLOGO);wc.hIconSm =wc.hIcon;wc.hCursor =LoadCursor(NULL, IDC_ARROW);wc.hbrBackground =(HBRUSH)GetStockObject(BLACK_BRUSH);wc.lpszMenuName =NULL;wc.lpszClassName =m_applicationName;wc.cbSize =sizeof(WNDCLASSEX);
// Register the window class.RegisterClassEx(&wc);
// Determine the resolution of the clients desktop screen.screenWidth =GetSystemMetrics(SM_CXSCREEN);screenHeight =GetSystemMetrics(SM_CYSCREEN);
// Setup the screen settings depending on whether it is running in full screen or in windowed mode.if(FULL_SCREEN){
// If full screen set the screen to maximum size of the users desktop and 32bit.memset(&dmScreenSettings, 0, sizeof(dmScreenSettings));
dmScreenSettings.dmSize =sizeof(dmScreenSettings);dmScreenSettings.dmPelsWidth =(unsigned long)screenWidth;dmScreenSettings.dmPelsHeight =(unsigned long)screenHeight;dmScreenSettings.dmBitsPerPel =32;dmScreenSettings.dmFields =DM_BITSPERPEL | DM_PELSWIDTH | DM_PELSHEIGHT;
// Change the display settings to full screen.ChangeDisplaySettings(&dmScreenSettings, CDS_FULLSCREEN);
// Set the position of the window to the top left corner.
posX =posY =0;}else{
// If windowed then set it to 800x600 resolution.screenWidth =800;screenHeight =600;
// Place the window in the middle of the screen.posX =(GetSystemMetrics(SM_CXSCREEN) - screenWidth) / 2;
posY =(GetSystemMetrics(SM_CYSCREEN) - screenHeight) / 2;}
// Create the window with the screen settings and get the handle to it.m_hwnd =CreateWindowEx(WS_EX_APPWINDOW, m_applicationName, m_applicationName,
WS_CLIPSIBLINGS | WS_CLIPCHILDREN | WS_POPUP,posX, posY, screenWidth, screenHeight, NULL, NULL, m_hinstance, NULL);
Tutorial 2: Creating a Framework and Window http://www.rastertek.com/dx11tut02.html
Tutorial 2: Creating a Framework and Window http://www.rastertek.com/dx11tut02.html

7/14/2019 RasterTek: Direct3D introduction
http://slidepdf.com/reader/full/rastertek-direct3d-introduction 8/709
with it.
void SystemClass::ShutdownWindows(){
// Show the mouse cursor.ShowCursor(true);
// Fix the display settings if leaving full screen mode.if(FULL_SCREEN){
ChangeDisplaySettings(NULL, 0);}
// Remove the window.DestroyWindow(m_hwnd);m_hwnd =NULL;
// Remove the application instance.UnregisterClass(m_applicationName, m_hinstance);m_hinstance =NULL;
// Release the pointer to this class.ApplicationHandle =NULL;
return;}
The WndProc function is where windows sends its messages to. You'll notice we tell windows the name of it when we initialize thewindow class with wc.lpfnWndProc =WndProc in the InitializeWindows function above. I included it in this class file since we tie itdirectly into the system class by having it send all the messages to the MessageHandler function defined inside SystemClass. Thisallows us to hook the messaging functionality straight into our class and keep the code clean.
LRESULT CALLBACK WndProc(HWND hwnd, UINT umessage, WPARAM wparam, LPARAM lparam){
switch(umessage){
// Check if the window is being destroyed.case WM_DESTROY:{
PostQuitMessage(0);return 0;
}
// Check if the window is being closed.case WM_CLOSE:{
PostQuitMessage(0);return 0;
}
// All other messages pass to the message handler in the system class.default:{
return ApplicationHandle >MessageHandler(hwnd umessage wparam lparam)
g p
Tutorial 2: Creating a Framework and Window http://www.rastertek.com/dx11tut02.html

7/14/2019 RasterTek: Direct3D introduction
http://slidepdf.com/reader/full/rastertek-direct3d-introduction 9/709
////////////////////////////////////////////////////////////////////////////////// Filename: inputclass.h////////////////////////////////////////////////////////////////////////////////#ifndef _INPUTCLASS_H_ #define _INPUTCLASS_H_
////////////////////////////////////////////////////////////////////////////////// Class name: InputClass////////////////////////////////////////////////////////////////////////////////class InputClass{public:
InputClass();InputClass(const InputClass&);
~InputClass();
void Initialize();
void KeyDown(unsigned int);void KeyUp(unsigned int);
bool IsKeyDown(unsigned int);
private:
bool m_keys[256];};
#endif
Inputclass.cpp
////////////////////////////////////////////////////////////////////////////////
// Filename: inputclass.cpp////////////////////////////////////////////////////////////////////////////////#include "inputclass.h"
InputClass::InputClass(){}
InputClass::InputClass(const InputClass& other){}
InputClass::~InputClass(){
g p
Tutorial 2: Creating a Framework and Window http://www.rastertek.com/dx11tut02.html

7/14/2019 RasterTek: Direct3D introduction
http://slidepdf.com/reader/full/rastertek-direct3d-introduction 10/709
return;}
void InputClass::KeyDown(unsigned int input)
{ // If a key is pressed then save that state in the key array.m_keys[input] =true;return;
}
void InputClass::KeyUp(unsigned int input){
// If a key is released then clear that state in the key array.
m_keys[input] =false;return;}
bool InputClass::IsKeyDown(unsigned int key){
// Return what state the key is in (pressed/not pressed).return m_keys[key];
}
Graphicsclass.h
The graphics class is the other object that is created by the system class. All the graphics functionality in this application will beencapsulated in this class. I will also use the header in this file for all the graphics related global settings that we may want to changesuch as full screen or windowed mode. Currently this class will be empty but in future tutorials will contain all the graphics objects.
////////////////////////////////////////////////////////////////////////////////// Filename: graphicsclass.h////////////////////////////////////////////////////////////////////////////////#ifndef _GRAPHICSCLASS_H_ #define _GRAPHICSCLASS_H_
//////////////// INCLUDES ////////////////
#include <windows.h>
/////////////// GLOBALS ///////////////const bool FULL_SCREEN =false;
Tutorial 2: Creating a Framework and Window http://www.rastertek.com/dx11tut02.html
7/14/2019 RasterTek: Direct3D introduction
http://slidepdf.com/reader/full/rastertek-direct3d-introduction 11/709
GraphicsClass(const GraphicsClass&);~GraphicsClass();
bool Initialize(int, int, HWND);void Shutdown();bool Frame();
private:bool Render();
private:
};
#endif
Graphicsclass.cpp
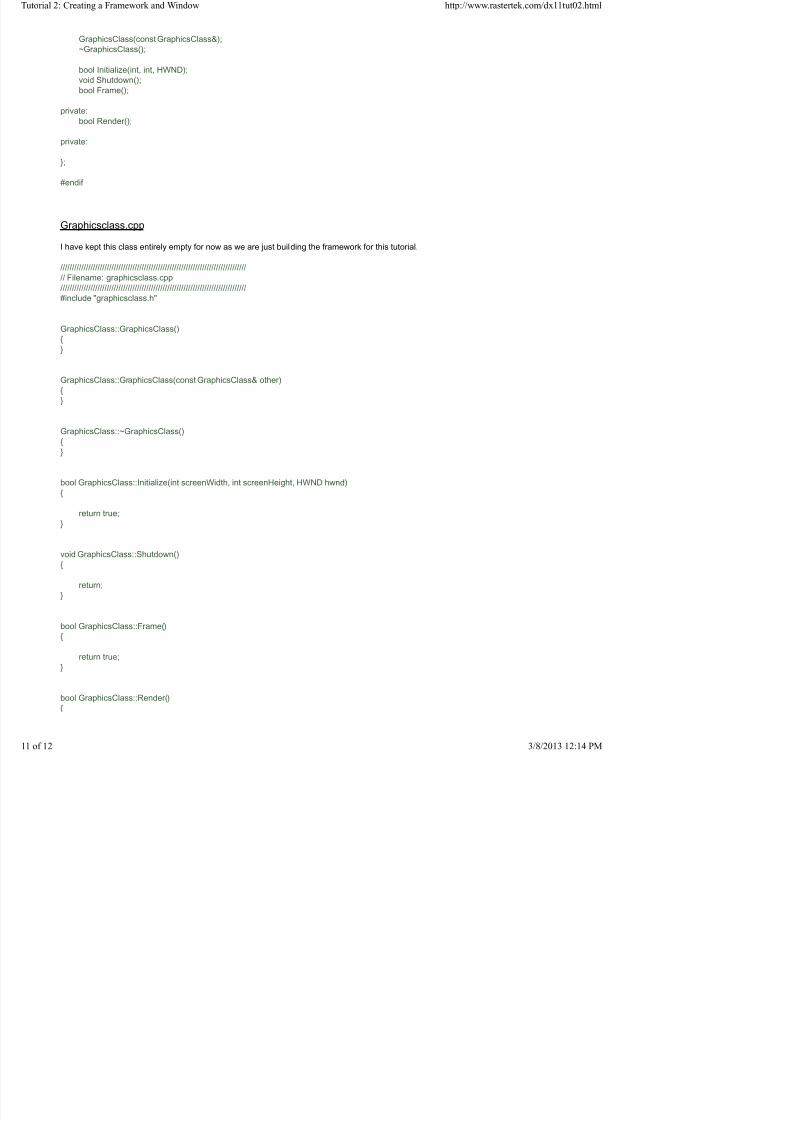
I have kept this class entirely empty for now as we are just building the framework for this tutorial.
////////////////////////////////////////////////////////////////////////////////// Filename: graphicsclass.cpp////////////////////////////////////////////////////////////////////////////////#include "graphicsclass.h"
GraphicsClass::GraphicsClass(){}
GraphicsClass::GraphicsClass(const GraphicsClass& other){}
GraphicsClass::~GraphicsClass(){}
bool GraphicsClass::Initialize(int screenWidth, int screenHeight, HWND hwnd){
return true;}
void GraphicsClass::Shutdown(){
Tutorial 2: Creating a Framework and Window http://www.rastertek.com/dx11tut02.html

7/14/2019 RasterTek: Direct3D introduction
http://slidepdf.com/reader/full/rastertek-direct3d-introduction 12/709
return true;}
Summary
So now we have a framework and a window that will pop up on the screen. This frame work will now be the base for all future tutorialsso understanding this frame work is fairly important. Please try the To Do exercise to make sure the code compiles and is working foryou before moving on to the next tutorial. If you don't understand this frame work you should still be fine to move onto the other tutorialsand they may make more sense to you later once the frame work is filled out more.
To Do Exercises
1. Change the FULL_SCREEN parameter to true in the graphicsclass.h header then recompile and run the program. Press the escapekey to quit after the window displays.
Source Code
Visual Studio 2010 Project: dx11tut02.zip
Source Only: dx11src02.zip
Executable Only: dx11exe02.zip
Back to Tutorial Index
Tutorial 3: Initializing DirectX 11 http://www.rastertek.com/dx11tut03.html

7/14/2019 RasterTek: Direct3D introduction
http://slidepdf.com/reader/full/rastertek-direct3d-introduction 13/709
Tutor ial 3: Initializing DirectX 11
This tutorial will be the first introduction to working with DirectX 11. We will address how to initialize and shut down Direct3D as well ashow to render to a window.
Updated Framework
We are going to add another class to the framework which will handle all the Direct3D system functions. We will call the classD3DClass. I have updated the framework diagram below:
As you can see the D3DClass will be located inside the GraphicsClass. The previous tutorial mentioned that all new graphics relatedclasses will be encapsulated in the GraphicsClass and that is why it is the best location for the new D3DClass. Now lets take a look atthe changes made to the GraphicsClass:
Graphicsclass.h
////////////////////////////////////////////////////////////////////////////////// Filename: graphicsclass.h
////////////////////////////////////////////////////////////////////////////////#ifndef _GRAPHICSCLASS_H_ #define _GRAPHICSCLASS_H_
Here is the first change. We have taken out the include for windows.h and instead included the new d3dclass.h.
///////////////////////// MY CLASS INCLUDES /////////////////////////#include "d3dclass.h"
/////////////// GLOBALS ///////////////const bool FULL_SCREEN =false;const bool VSYNC_ENABLED =true;const float SCREEN_DEPTH =1000.0f;
Tutorial 3: Initializing DirectX 11 http://www.rastertek.com/dx11tut03.html

7/14/2019 RasterTek: Direct3D introduction
http://slidepdf.com/reader/full/rastertek-direct3d-introduction 14/709
bool Initialize(int, int, HWND);void Shutdown();bool Frame();
private:bool Render();
private:
And the second change is the new private pointer to the D3DClass which we have called m_D3D. In case you were wondering I use theprefix m_ on all class variables. That way when I'm coding I can remember quickly what variables are members of the class and whichare not.
D3DClass* m_D3D;};
#endif
Graphicsclass.cpp
If you'll remember from the previous tutorial this class was entirely empty with no code in it at all. Now that we have a D3DClassmember we will start to fill out some code inside the GraphicsClass to initialize and shutdown the D3DClass object. We will also addcalls to BeginScene and EndScene in the Render function so that we are now drawing to the window using Direct3D.
So the very first change is in the class constructor. Here we initialize the pointer to null for safety reasons as we do with all classpointers.
GraphicsClass::GraphicsClass(){
m_D3D =0;
}
The second change is in the Initialize function inside the GraphicsClass. Here we create the D3DClass object and then call theD3DClass Initialize function. We send this function the screen width, screen height, handle to the window, and the four global variables
from the Graphicsclass.h file. The D3DClass will use all these variables to setup the Direct3D system. We'll go into more detail aboutthat once we look at the d3dclass.cpp file.
bool GraphicsClass::Initialize(int screenWidth, int screenHeight, HWND hwnd){
bool result;
// Create the Direct3D object.m_D3D =new D3DClass;
if(!m_D3D){
return false;}
// Initialize the Direct3D object.result =m_D3D->Initialize(screenWidth, screenHeight, VSYNC_ENABLED, hwnd, FULL_SCREEN, SCREEN_DEPTH, SCREEN_N
Tutorial 3: Initializing DirectX 11 http://www.rastertek.com/dx11tut03.html

7/14/2019 RasterTek: Direct3D introduction
http://slidepdf.com/reader/full/rastertek-direct3d-introduction 15/709
void GraphicsClass::Shutdown(){
if(m_D3D){
m_D3D->Shutdown();delete m_D3D;
m_D3D =0;}
return;}
The Frame function has been updated so that it now calls the Render function each frame.
bool GraphicsClass::Frame(){
bool result;
// Render the graphics scene.result =Render();if(!result){
return false;}
return true;}
The final change to this class is in the Render function. We call the D3D object to clear the screen to a grey color. After that we callEndScene so that the grey color is presented to the window.
bool GraphicsClass::Render(){
// Clear the buffers to begin the scene.m_D3D->BeginScene(0.5f, 0.5f, 0.5f, 1.0f);
// Present the rendered scene to the screen.m_D3D->EndScene();
return true;}
Now lets take a look at the new D3DClass header file:
D3dclass.h
////////////////////////////////////////////////////////////////////////////////// Filename: d3dclass.h////////////////////////////////////////////////////////////////////////////////
Tutorial 3: Initializing DirectX 11 http://www.rastertek.com/dx11tut03.html

7/14/2019 RasterTek: Direct3D introduction
http://slidepdf.com/reader/full/rastertek-direct3d-introduction 16/709
#pragma comment(lib, "d3dx11.lib")#pragma comment(lib, "d3dx10.lib")
The next thing we do is include the headers for those libraries that we are linking to this object module as well as headers for DirectXtype definitions and such.
//////////////// INCLUDES ////////////////#include <dxgi.h>#include <d3dcommon.h>#include <d3d11.h>#include <d3dx10math.h>
The class definition for the D3DClass is kept as simple as possible here. It has the regular constructor, copy constructor, and destructor. Then more importantly it has the Initialize and Shutdown function. This will be what we are mainly focused on in this tutorial. Other than
that I have a couple helper functions which aren't important to this tutorial and a number of private member variables that will be lookedat when we examine the d3dclass.cpp file. For now just realize the Initialize and Shutdown functions are what concerns us.
////////////////////////////////////////////////////////////////////////////////// Class name: D3DClass////////////////////////////////////////////////////////////////////////////////class D3DClass{public:
D3DClass();
D3DClass(const D3DClass&);~D3DClass();
bool Initialize(int, int, bool, HWND, bool, float, float);void Shutdown();
void BeginScene(float, float, float, float);void EndScene();
ID3D11Device* GetDevice();
ID3D11DeviceContext* GetDeviceContext();
void GetProjectionMatrix(D3DXMATRIX&);void GetWorldMatrix(D3DXMATRIX&);void GetOrthoMatrix(D3DXMATRIX&);
void GetVideoCardInfo(char*, int&);
private:bool m_vsync_enabled;
int m_videoCardMemory;char m_videoCardDescription[128];IDXGISwapChain* m_swapChain;ID3D11Device* m_device;ID3D11DeviceContext* m_deviceContext;ID3D11RenderTargetView* m_renderTargetView;ID3D11Texture2D* m_depthStencilBuffer;ID3D11DepthStencilState*m depthStencilState
Tutorial 3: Initializing DirectX 11 http://www.rastertek.com/dx11tut03.html
7/14/2019 RasterTek: Direct3D introduction
http://slidepdf.com/reader/full/rastertek-direct3d-introduction 17/709
D3dclass.cpp
////////////////////////////////////////////////////////////////////////////////// Filename: d3dclass.cpp
////////////////////////////////////////////////////////////////////////////////#include "d3dclass.h"
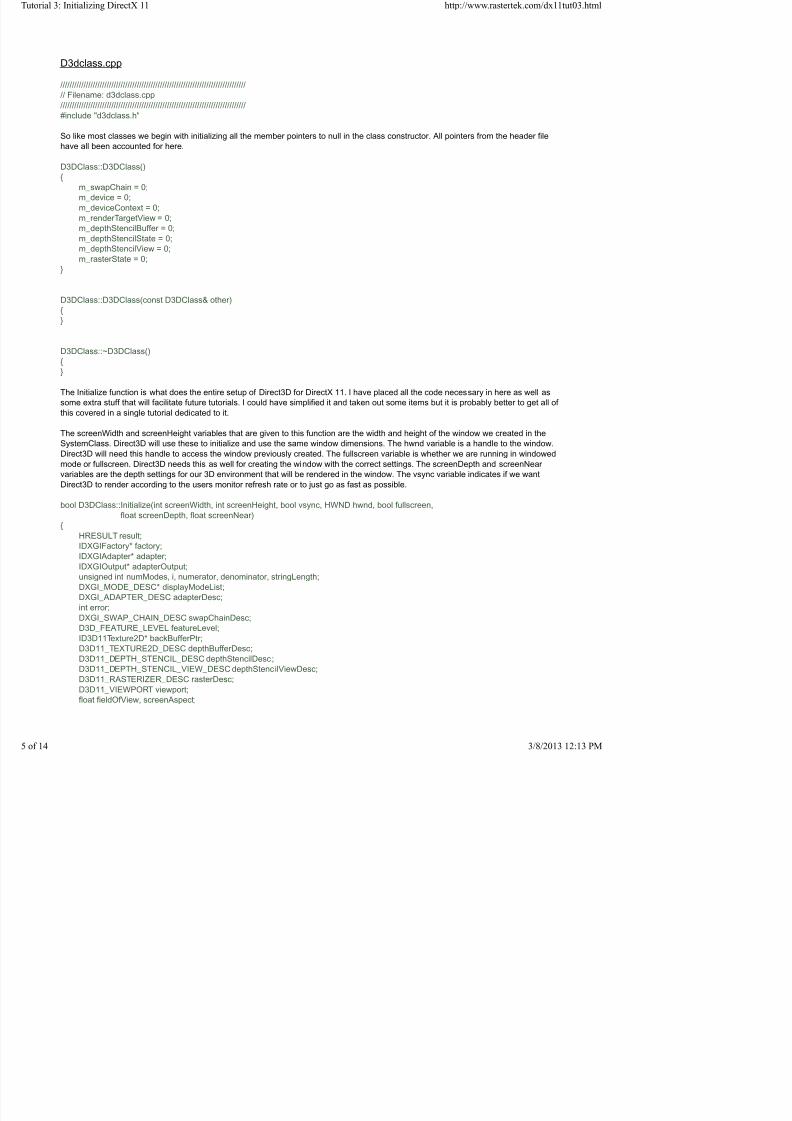
So like most classes we begin with initializing all the member pointers to null in the class constructor. All pointers from the header filehave all been accounted for here.
D3DClass::D3DClass(){
m_swapChain =0;m_device =0;
m_deviceContext =0;m_renderTargetView =0;m_depthStencilBuffer =0;m_depthStencilState =0;m_depthStencilView =0;m_rasterState =0;
}
D3DClass::D3DClass(const D3DClass& other)
{}
D3DClass::~D3DClass(){}
The Initialize function is what does the entire setup of Direct3D for DirectX 11. I have placed all the code necessary in here as well assome extra stuff that will facilitate future tutorials. I could have simplified it and taken out some items but it is probably better to get all of
this covered in a single tutorial dedicated to it.
The screenWidth and screenHeight variables that are given to this function are the width and height of the window we created in theSystemClass. Direct3D will use these to initialize and use the same window dimensions. The hwnd variable is a handle to the window.Direct3D will need this handle to access the window previously created. The fullscreen variable is whether we are running in windowedmode or fullscreen. Direct3D needs this as well for creating the window with the correct settings. The screenDepth and screenNearvariables are the depth settings for our 3D environment that will be rendered in the window. The vsync variable indicates if we wantDirect3D to render according to the users monitor refresh rate or to just go as fast as possible.
bool D3DClass::Initialize(int screenWidth, int screenHeight, bool vsync, HWND hwnd, bool fullscreen,
float screenDepth, float screenNear){
HRESULT result;IDXGIFactory* factory;IDXGIAdapter* adapter;IDXGIOutput* adapterOutput;unsigned int numModes, i, numerator, denominator, stringLength;
Tutorial 3: Initializing DirectX 11 http://www.rastertek.com/dx11tut03.html

7/14/2019 RasterTek: Direct3D introduction
http://slidepdf.com/reader/full/rastertek-direct3d-introduction 18/709
// Store the vsync setting.m_vsync_enabled =vsync;
Before we can initialize Direct3D we have to get the refresh rate from the video card/monitor. Each computer may be slightly different sowe will need to query for that information. We query for the numerator and denominator values and then pass them to DirectX during thesetup and it will calculate the proper refresh rate. If we don't do this and just set the refresh rate to a default value which may not existon all computers then DirectX will respond by performing a blit instead of a buffer flip which will degrade performance and give usannoying errors in the debug output.
// Create a DirectX graphics interface factory.result =CreateDXGIFactory(__uuidof(IDXGIFactory), (void**)&factory);if(FAILED(result)){
return false;}
// Use the factory to create an adapter for the primary graphics interface (video card).result =factory->EnumAdapters(0, &adapter);if(FAILED(result)){
return false;}
// Enumerate the primary adapter output (monitor).result =adapter->EnumOutputs(0, &adapterOutput);
if(FAILED(result)){return false;
}
// Get the number of modes that fit the DXGI_FORMAT_R8G8B8A8_UNORM display format for the adapter output (monitor).result =adapterOutput->GetDisplayModeList(DXGI_FORMAT_R8G8B8A8_UNORM, DXGI_ENUM_MODES_INTERLACED, &numif(FAILED(result)){
return false;
}
// Create a list to hold all the possible display modes for this monitor/video card combination.displayModeList =new DXGI_MODE_DESC[numModes];if(!displayModeList){
return false;}
// Now fill the display mode list structures.
result =adapterOutput->GetDisplayModeList(DXGI_FORMAT_R8G8B8A8_UNORM, DXGI_ENUM_MODES_INTERLACED, &numif(FAILED(result)){
return false;}
// Now go through all the display modes and find the one that matches the screen width and height.// When a match is found store the numerator and denominator of the refresh rate for that monitor
Tutorial 3: Initializing DirectX 11 http://www.rastertek.com/dx11tut03.html

7/14/2019 RasterTek: Direct3D introduction
http://slidepdf.com/reader/full/rastertek-direct3d-introduction 19/709
We now have the numerator and denominator for the refresh rate. The last thing we will retrieve using the adapter is the name of thevideo card and the amount of memory on the video card.
// Get the adapter (video card) description.result =adapter->GetDesc(&adapterDesc);if(FAILED(result)){
return false;}
// Store the dedicated video card memory in megabytes.m_videoCardMemory =(int)(adapterDesc.DedicatedVideoMemory / 1024 / 1024);
// Convert the name of the video card to a character array and store it.error =wcstombs_s(&stringLength, m_videoCardDescription, 128, adapterDesc.Description, 128);if(error !=0){
return false;}
Now that we have stored the numerator and denominator for the refresh rate and the video card information we can release thestructures and interfaces used to get that information.
// Release the display mode list.delete [] displayModeList;displayModeList =0;
// Release the adapter output.adapterOutput->Release();adapterOutput =0;
// Release the adapter.adapter->Release();adapter =0;
// Release the factory.
factory->Release();factory =0;
Now that we have the refresh rate from the system we can start the DirectX initialization. The first thing we'll do is fill out the descriptionof the swap chain. The swap chain is the front and back buffer to which the graphics will be drawn. Generally you use a single backbuffer, do all your drawing to it, and then swap it to the front buffer which then displays on the user's screen. That is why it is called aswap chain.
// Initialize the swap chain description.ZeroMemory(&swapChainDesc, sizeof(swapChainDesc));
// Set to a single back buffer.swapChainDesc.BufferCount =1;
// Set the width and height of the back buffer.swapChainDesc.BufferDesc.Width =screenWidth;swapChainDesc.BufferDesc.Height =screenHeight;
Tutorial 3: Initializing DirectX 11 http://www.rastertek.com/dx11tut03.html

7/14/2019 RasterTek: Direct3D introduction
http://slidepdf.com/reader/full/rastertek-direct3d-introduction 20/709
swapChainDesc.BufferDesc.RefreshRate.Numerator =numerator;swapChainDesc.BufferDesc.RefreshRate.Denominator =denominator;
}else{
swapChainDesc.BufferDesc.RefreshRate.Numerator =0;swapChainDesc.BufferDesc.RefreshRate.Denominator =1;
}
// Set the usage of the back buffer.swapChainDesc.BufferUsage =DXGI_USAGE_RENDER_TARGET_OUTPUT;
// Set the handle for the window to render to.swapChainDesc.OutputWindow =hwnd;
// Turn multisampling off.swapChainDesc.SampleDesc.Count =1;swapChainDesc.SampleDesc.Quality =0;
// Set to full screen or windowed mode.if(fullscreen){
swapChainDesc.Windowed =false;}else{
swapChainDesc.Windowed =true;}
// Set the scan line ordering and scaling to unspecified.swapChainDesc.BufferDesc.ScanlineOrdering =DXGI_MODE_SCANLINE_ORDER_UNSPECIFIED;swapChainDesc.BufferDesc.Scaling =DXGI_MODE_SCALING_UNSPECIFIED;
// Discard the back buffer contents after presenting.swapChainDesc.SwapEffect =DXGI_SWAP_EFFECT_DISCARD;
// Don't set the advanced flags.swapChainDesc.Flags =0;
After setting up the swap chain description we also need to setup one more variable called the feature level. This variable tells DirectXwhat version we plan to use. Here we set the feature level to 11.0 which is DirectX 11. You can set this to 10 or 9 to use a lower levelversion of DirectX if you plan on supporting multiple versions or running on lower end hardware.
// Set the feature level to DirectX 11.featureLevel =D3D_FEATURE_LEVEL_11_0;
Now that the swap chain description and feature level have been filled out we can create the swap chain, the Direct3D device, and theDirect3D device context. The Direct3D device and Direct3D device context are very important, they are the interface to all of theDirect3D functions. We will use the device and device context for almost everything from this point forward.
Those of you reading this who are familiar with the previous versions of DirectX will recognize the Direct3D device but will be unfamiliarwith the new Direct3D device context. Basically they took the functionality of the Direct3D device and split it up into two different devicesso you need to use both now.
Tutorial 3: Initializing DirectX 11 http://www.rastertek.com/dx11tut03.html

7/14/2019 RasterTek: Direct3D introduction
http://slidepdf.com/reader/full/rastertek-direct3d-introduction 21/709
}
Sometimes this call to create the device will fail if the primary video card is not compatible with DirectX 11. Some machines may havethe primary card as a DirectX 10 video card and the secondary card as a DirectX 11 video card. Also some hybrid graphics cards workthat way with the primary being the low power Intel card and the secondary being the high power Nvidia card. To get around this you willneed to not use the default device and instead enumerate all the video cards in the machine and have the user choose which one to useand then specify that card when creating the device.
Now that we have a swap chain we need to get a pointer to the back buffer and then attach it to the swap chain. We'll use theCreateRenderTargetView function to attach the back buffer to our swap chain.
// Get the pointer to the back buffer.result =m_swapChain->GetBuffer(0, __uuidof(ID3D11Texture2D), (LPVOID*)&backBufferPtr);if(FAILED(result)){
return false;}
// Create the render target view with the back buffer pointer.result =m_device->CreateRenderTargetView(backBufferPtr, NULL, &m_renderTargetView);if(FAILED(result)){
return false;}
// Release pointer to the back buffer as we no longer need it.backBufferPtr->Release();backBufferPtr =0;
We will also need to set up a depth buffer description. We'll use this to create a depth buffer so that our polygons can be renderedproperly in 3D space. At the same time we will attach a stencil buffer to our depth buffer. The stencil buffer can be used to achieveeffects such as motion blur, volumetric shadows, and other things.
// Initialize the description of the depth buffer.ZeroMemory(&depthBufferDesc, sizeof(depthBufferDesc));
// Set up the description of the depth buffer.depthBufferDesc.Width =screenWidth;depthBufferDesc.Height =screenHeight;depthBufferDesc.MipLevels =1;depthBufferDesc.ArraySize =1;depthBufferDesc.Format =DXGI_FORMAT_D24_UNORM_S8_UINT;depthBufferDesc.SampleDesc.Count =1;depthBufferDesc.SampleDesc.Quality =0;depthBufferDesc.Usage =D3D11_USAGE_DEFAULT;depthBufferDesc.BindFlags =D3D11_BIND_DEPTH_STENCIL;
depthBufferDesc.CPUAccessFlags =0;depthBufferDesc.MiscFlags =0;
Now we create the depth/stencil buffer using that description. You will notice we use the CreateTexture2D function to make the buffers,hence the buffer is just a 2D texture. The reason for this is that once your polygons are sorted and then rasterized they just end up beingcolored pixels in this 2D buffer. Then this 2D buffer is drawn to the screen.
// Create the texture for the depth buffer using the filled out description
Tutorial 3: Initializing DirectX 11 http://www.rastertek.com/dx11tut03.html

7/14/2019 RasterTek: Direct3D introduction
http://slidepdf.com/reader/full/rastertek-direct3d-introduction 22/709
depthStencilDesc.DepthEnable =true;depthStencilDesc.DepthWriteMask =D3D11_DEPTH_WRITE_MASK_ALL;depthStencilDesc.DepthFunc =D3D11_COMPARISON_LESS;
depthStencilDesc.StencilEnable =true;depthStencilDesc.StencilReadMask =0xFF;depthStencilDesc.StencilWriteMask =0xFF;
// Stencil operations if pixel is front-facing.depthStencilDesc.FrontFace.StencilFailOp =D3D11_STENCIL_OP_KEEP;depthStencilDesc.FrontFace.StencilDepthFailOp =D3D11_STENCIL_OP_INCR;depthStencilDesc.FrontFace.StencilPassOp =D3D11_STENCIL_OP_KEEP;depthStencilDesc.FrontFace.StencilFunc =D3D11_COMPARISON_ALWAYS;
// Stencil operations if pixel is back-facing.depthStencilDesc.BackFace.StencilFailOp =D3D11_STENCIL_OP_KEEP;depthStencilDesc.BackFace.StencilDepthFailOp =D3D11_STENCIL_OP_DECR;depthStencilDesc.BackFace.StencilPassOp =D3D11_STENCIL_OP_KEEP;depthStencilDesc.BackFace.StencilFunc =D3D11_COMPARISON_ALWAYS;
With the description filled out we can now create a depth stencil state.
// Create the depth stencil state.result =m_device->CreateDepthStencilState(&depthStencilDesc, &m_depthStencilState);if(FAILED(result)){
return false;}
With the created depth stencil state we can now set it so that it takes effect. Notice we use the device context to set it.
// Set the depth stencil state.m_deviceContext->OMSetDepthStencilState(m_depthStencilState, 1);
The next thing we need to create is the description of the view of the depth stencil buffer. We do this so that Direct3D knows to use thedepth buffer as a depth stencil texture. After filling out the description we then call the function CreateDepthStencilView to create it.
// Initailze the depth stencil view.ZeroMemory(&depthStencilViewDesc, sizeof(depthStencilViewDesc));
// Set up the depth stencil view description.depthStencilViewDesc.Format =DXGI_FORMAT_D24_UNORM_S8_UINT;depthStencilViewDesc.ViewDimension =D3D11_DSV_DIMENSION_TEXTURE2D;depthStencilViewDesc.Texture2D.MipSlice =0;
// Create the depth stencil view.
result =m_device->CreateDepthStencilView(m_depthStencilBuffer, &depthStencilViewDesc, &m_depthStencilView);if(FAILED(result)){
return false;}
With that created we can now call OMSetRenderTargets. This will bind the render target view and the depth stencil buffer to the outputrender pipeline This way the graphics that the pipeline renders will get drawn to our back buffer that we previously created With the
Tutorial 3: Initializing DirectX 11 http://www.rastertek.com/dx11tut03.html
7/14/2019 RasterTek: Direct3D introduction
http://slidepdf.com/reader/full/rastertek-direct3d-introduction 23/709
rasterDesc.AntialiasedLineEnable =false;rasterDesc.CullMode =D3D11_CULL_BACK;rasterDesc.DepthBias =0;rasterDesc.DepthBiasClamp =0.0f;rasterDesc.DepthClipEnable =true;rasterDesc.FillMode =D3D11_FILL_SOLID;rasterDesc.FrontCounterClockwise =false;rasterDesc.MultisampleEnable =false;rasterDesc.ScissorEnable =false;rasterDesc.SlopeScaledDepthBias =0.0f;
// Create the rasterizer state from the description we just filled out.result =m_device->CreateRasterizerState(&rasterDesc, &m_rasterState);if(FAILED(result)){
return false;}
// Now set the rasterizer state.m_deviceContext->RSSetState(m_rasterState);
The viewport also needs to be setup so that Direct3D can map clip space coordinates to the render target space. Set this to be theentire size of the window.
// Setup the viewport for rendering.viewport.Width =(float)screenWidth;viewport.Height =(float)screenHeight;viewport.MinDepth =0.0f;viewport.MaxDepth =1.0f;viewport.TopLeftX =0.0f;viewport.TopLeftY =0.0f;
// Create the viewport.m_deviceContext->RSSetViewports(1, &viewport);
Now we will create the projection matrix. The projection matrix is used to translate the 3D scene into the 2D viewport space that wepreviously created. We will need to keep a copy of this matrix so that we can pass it to our shaders that will be used to render ourscenes.
// Setup the projection matrix.fieldOfView =(float)D3DX_PI / 4.0f;screenAspect =(float)screenWidth / (float)screenHeight;
// Create the projection matrix for 3D rendering.D3DXMatrixPerspectiveFovLH(&m_projectionMatrix, fieldOfView, screenAspect, screenNear, screenDepth);
We will also create another matrix called the world matrix. This matrix is used to convert the vertices of our objects into vertices in the3D scene. This matrix will also be used to rotate, translate, and scale our objects in 3D space. From the start we will just initialize thematrix to the identity matrix and keep a copy of it in this object. The copy will be needed to be passed to the shaders for rendering also.
// Initialize the world matrix to the identity matrix.D3DXMatrixIdentity(&m_worldMatrix);
This is where youwouldgenerallycreate a view matrix Theview matrix is usedto calculate theposition ofwherewe are looking atthe
Tutorial 3: Initializing DirectX 11 http://www.rastertek.com/dx11tut03.html

7/14/2019 RasterTek: Direct3D introduction
http://slidepdf.com/reader/full/rastertek-direct3d-introduction 24/709
The Shutdown function will release and clean up all the pointers used in the Initialize function, its pretty straight forward. However beforedoing that I put in a call to force the swap chain to go into windowed mode first before releasing any pointers. If this is not done and youtry to release the swap chain in full screen mode it will throw some exceptions. So to avoid that happening we just always forcewindowed mode before shutting down Direct3D.
void D3DClass::Shutdown(){
// Before shutting down set to windowed mode or when you release the swap chain it will throw an exception.if(m_swapChain){
m_swapChain->SetFullscreenState(false, NULL);}
if(m_rasterState){
m_rasterState->Release();m_rasterState =0;
}
if(m_depthStencilView){
m_depthStencilView->Release();m_depthStencilView =0;
}
if(m_depthStencilState){
m_depthStencilState->Release();m_depthStencilState =0;
}
if(m_depthStencilBuffer){
m_depthStencilBuffer->Release();m_depthStencilBuffer =0;
}
if(m_renderTargetView){
m_renderTargetView->Release();m_renderTargetView =0;
}
if(m_deviceContext){
m_deviceContext->Release();m_deviceContext =0;
}
if(m_device){
m_device->Release();m_device =0;
}
Tutorial 3: Initializing DirectX 11 http://www.rastertek.com/dx11tut03.html

7/14/2019 RasterTek: Direct3D introduction
http://slidepdf.com/reader/full/rastertek-direct3d-introduction 25/709
drawn to. The other function is Endscene, it tells the swap chain to display our 3D scene once all the drawing has completed at the endof each frame.
void D3DClass::BeginScene(float red, float green, float blue, float alpha){
float color[4];
// Setup the color to clear the buffer to.color[0] =red;color[1] =green;color[2] =blue;color[3] =alpha;
// Clear the back buffer.m_deviceContext->ClearRenderTargetView(m_renderTargetView, color);
// Clear the depth buffer.m_deviceContext->ClearDepthStencilView(m_depthStencilView, D3D11_CLEAR_DEPTH, 1.0f, 0);
return;}
void D3DClass::EndScene(){
// Present the back buffer to the screen since rendering is complete.if(m_vsync_enabled){
// Lock to screen refresh rate.m_swapChain->Present(1, 0);
}else{
// Present as fast as possible.m_swapChain->Present(0, 0);
}
return;}
These next functions simply get pointers to the Direct3D device and the Direct3D device context. These helper functions will be calledby the framework often.
ID3D11Device* D3DClass::GetDevice(){
return m_device;}
ID3D11DeviceContext* D3DClass::GetDeviceContext(){
return m_deviceContext;}
Tutorial 3: Initializing DirectX 11 http://www.rastertek.com/dx11tut03.html

7/14/2019 RasterTek: Direct3D introduction
http://slidepdf.com/reader/full/rastertek-direct3d-introduction 26/709
void D3DClass::GetWorldMatrix(D3DXMATRIX& worldMatrix){
worldMatrix =m_worldMatrix;return;
}
void D3DClass::GetOrthoMatrix(D3DXMATRIX& orthoMatrix){
orthoMatrix =m_orthoMatrix;return;
}
The last helper function returns by reference the name of the video card and the amount of dedicated memory on the video card.Knowing the video card name and amount of video memory can help in debugging on different configurations.
void D3DClass::GetVideoCardInfo(char* cardName, int& memory){
strcpy_s(cardName, 128, m_videoCardDescription);memory =m_videoCardMemory;return;
}
Summary
So now we are finally able to initialize and shut down Direct3D as well as render a color to the window. Compiling and running the codewill produce the same window as the last tutorial but Direct3D is initialized now and the window is cleared to grey. Compiling andrunning the code will also show if your compiler is set up properly and if it can see the headers and libraries files from the DirectX SDK.
To Do Exercises
1. Re-compile the code and run the program to ensure DirectX works, if not look at the steps from the first tutorial. Press the escape key
to quit after the window displays.
2. Change the global in graphicsclass.h to full screen and re-compile/run.
3. Change the clear color in GraphicsClass::Render to yellow.
4. Write the video card name and memory out to a text file.
Source Code
Visual Studio 2010 Project: dx11tut03.zip
Source Only: dx11src03.zip
Tutorial 4: Buffers, Shaders, and HLSL http://www.rastertek.com/dx11tut04.html

7/14/2019 RasterTek: Direct3D introduction
http://slidepdf.com/reader/full/rastertek-direct3d-introduction 27/709
Tutor ial 4: Buffers, Shaders, and HLSL
This tutorial will be the introduction to writing vertex and pixel shaders in DirectX 11. It will also be the introduction to using vertex andindex buffers in DirectX 11. These are the most fundamental concepts that you need to understand and utilize to render 3D graphics.
Vertex Buffers
The first concept to understand is vertex buffers. To illustrate this concept let us take the example of a 3D model of a sphere:
The 3D sphere model is actually composed of hundreds of triangles:
Each of the triangles in the sphere model has three points to it, we call each point a vertex. So for us to render the sphere model weneed to put all the vertices that form the sphere into a special data array that we call a vertex buffer. Once all the points of the spheremodel are in the vertex buffer we can then send the vertex buffer to the GPU so that it can render the model.
Vertex Shaders
Tutorial 4: Buffers, Shaders, and HLSL http://www.rastertek.com/dx11tut04.html

7/14/2019 RasterTek: Direct3D introduction
http://slidepdf.com/reader/full/rastertek-direct3d-introduction 28/709
Vertex Shaders
Vertex shaders are small programs that are written mainly for transforming the vertices from the vertex buffer into 3D space. There areother calculations that can be done such as calculating normals for each vertex. The vertex shader program will be called by the GPUfor each vertex it needs to process. For example a 5,000 polygon model will run your vertex shader program 15,000 times each frame
just to draw that single model. So if you lock your graphics program to 60 fps it will call your vertex shader 900,000 times a second todraw just 5,000 triangles. As you can tell writing efficient vertex shaders is important.
Pixel Shaders
Pixel shaders are small programs that are written for doing the coloring of the polygons that we draw. They are run by the GPU for everyvisible pixel that will be drawn to the screen. Coloring, texturing, lighting, and most other effects you plan to do to your polygon faces arehandled by the pixel shader program. Pixel shaders must be efficiently written due to the number of times they will be called by theGPU.
HLSL
HLSL is the language we use in DirectX 11 to code these small vertex and pixel shader programs. The syntax is pretty much identical tothe C language with some pre-defined types. HLSL program files are composed of global variables, type defines, vertex shaders, pixelshaders, and geometry shaders. As this is the first HLSL tutorial we will do a very simple HLSL program using DirectX 11 to get started.
Updated Framework
The framework has been updated for this tutorial. Under GraphicsClass we have added three new classes called CameraClass,ModelClass, and ColorShaderClass. CameraClass will take care of our view matrix we talked about previously. It will handle the locationof the camera in the world and pass it to shaders when they need to draw and figure out where we are looking at the scene from. TheModelClass will handle the geometry of our 3D models, in this tutorial the 3D model will just be a single triangle for simplicity reasons.
And finally ColorShaderClass will be responsible for rendering the model to the screen invoking our HLSL shader.
We will begin the tutorial code by looking at the HLSL shader programs first.
Color vs
globals in buffer object types called "cbuffer" even if it is just a single global variable Logically organizing these buffers is important for
Tutorial 4: Buffers, Shaders, and HLSL http://www.rastertek.com/dx11tut04.html

7/14/2019 RasterTek: Direct3D introduction
http://slidepdf.com/reader/full/rastertek-direct3d-introduction 29/709
globals in buffer object types called cbuffer even if it is just a single global variable. Logically organizing these buffers is important forefficient execution of shaders as well as how the graphics card will store the buffers. In this example I've put three matrices in the samebuffer since I will update them each frame at the same time.
/////////////// GLOBALS ///////////////
cbuffer MatrixBuffer{
matrix worldMatrix;matrix viewMatrix;matrix projectionMatrix;
};
Similar to C we can create our own type definitions. We will use different types such as float4 that are available to HLSL which makeprogramming shaders easier and readable. In this example we are creating types that have x, y, z, w position vectors and red, green,blue, alpha colors. The POSITION, COLOR, and SV_POSITION are semantics that convey to the GPU the use of the variable. I have to
create two different structures here since the semantics are different for vertex and pixel shaders even though the structures are thesame otherwise. POSITION works for vertex shaders and SV_POSITION works for pixel shaders while COLOR works for both. If youwant more than one of the same type then you have to add a number to the end such as COLOR0, COLOR1, and so forth.
//////////////// TYPEDEFS ////////////////struct VertexInputType{
float4 position : POSITION;
float4 color : COLOR;};
struct PixelInputType{
float4 position : SV_POSITION;float4 color : COLOR;
};
The vertex shader is called by the GPU when it is processing data from the vertex buffers that have been sent to it. This vertex shaderwhich I named ColorVertexShader will be called for every single vertex in the vertex buffer. The input to the vertex shader must matchthe data format in the vertex buffer as well as the type definition in the shader source file which in this case is VertexInputType. Theoutput of the vertex shader will be sent to the pixel shader. In this case the output type is called PixelInputType which is defined aboveas well.
With that in mind you see that the vertex shader creates an output variable that is of the PixelInputType type. It then takes the position of the input vertex and multiplies it by the world, view, and then projection matrices. This will place the vertex in the correct location forrendering in 3D space according to our view and then onto the 2D screen. After that the output variable takes a copy of the input colorand then returns the output which will be used as input to the pixel shader. Also note that I do set the W value of the input position to 1.0otherwise it is undefined since we only read in a XYZ vector for position.
////////////////////////////////////////////////////////////////////////////////// Vertex Shader////////////////////////////////////////////////////////////////////////////////PixelInputType ColorVertexShader(VertexInputType input){
PixelInputTypeoutput
Tutorial 4: Buffers, Shaders, and HLSL http://www.rastertek.com/dx11tut04.html

7/14/2019 RasterTek: Direct3D introduction
http://slidepdf.com/reader/full/rastertek-direct3d-introduction 30/709
return output;
}
Color.ps
The pixel shader draws each pixel on the polygons that will be rendered to the screen. In this pixel shader it uses PixelInputType asinput and returns a float4 as output which represents the final pixel color. This pixel shader program is very simple as we just tell it tocolor the pixel the same as the input value of the color. Note that the pixel shader gets its input from the vertex shader output.
////////////////////////////////////////////////////////////////////////////////// Filename: color.ps////////////////////////////////////////////////////////////////////////////////
//////////////// TYPEDEFS ////////////////struct PixelInputType{
float4 position : SV_POSITION;float4 color : COLOR;
};
////////////////////////////////////////////////////////////////////////////////// Pixel Shader////////////////////////////////////////////////////////////////////////////////float4 ColorPixelShader(PixelInputType input) : SV_TARGET{
return input.color;}
Modelclass.h
As stated previously the ModelClass is responsible for encapsulating the geometry for 3D models. In this tutorial we will manually setupthe data for a single green triangle. We will also create a vertex and index buffer for the triangle so that it can be rendered.
////////////////////////////////////////////////////////////////////////////////// Filename: modelclass.h////////////////////////////////////////////////////////////////////////////////#ifndef _MODELCLASS_H_
#define _MODELCLASS_H_
//////////////// INCLUDES ////////////////#include <d3d11.h>
struct VertexType
Tutorial 4: Buffers, Shaders, and HLSL http://www.rastertek.com/dx11tut04.html

7/14/2019 RasterTek: Direct3D introduction
http://slidepdf.com/reader/full/rastertek-direct3d-introduction 31/709
yp{
D3DXVECTOR3 position;D3DXVECTOR4 color;
};
public:
ModelClass();ModelClass(const ModelClass&);~ModelClass();
The functions here handle initializing and shutdown of the model's vertex and index buffers. The Render function puts the modelgeometry on the video card to prepare it for drawing by the color shader.
bool Initialize(ID3D11Device*);void Shutdown();void Render(ID3D11DeviceContext*);
int GetIndexCount();
private:bool InitializeBuffers(ID3D11Device*);void ShutdownBuffers();void RenderBuffers(ID3D11DeviceContext*);
The private variables in the ModelClass are the vertex and index buffer as well as two integers to keep track of the size of each buffer.Note that all DirectX 11 buffers generally use the generic ID3D11Buffer type and are more clearly identified by a buffer description when
they are first created.
private:ID3D11Buffer *m_vertexBuffer, *m_indexBuffer;int m_vertexCount, m_indexCount;
};
#endif
Modelclass.cpp
////////////////////////////////////////////////////////////////////////////////// Filename: modelclass.cpp////////////////////////////////////////////////////////////////////////////////#include "modelclass.h"
The class constructor initializes the vertex and index buffer pointers to null.
ModelClass::ModelClass(){
m_vertexBuffer =0;m_indexBuffer =0;
}
{
Tutorial 4: Buffers, Shaders, and HLSL http://www.rastertek.com/dx11tut04.html

7/14/2019 RasterTek: Direct3D introduction
http://slidepdf.com/reader/full/rastertek-direct3d-introduction 32/709
bool result;
// Initialize the vertex and index buffer that hold the geometry for the triangle.result =InitializeBuffers(device);if(!result)
{return false;
}
return true;}
The Shutdown function will call the shutdown functions for the vertex and index buffers.
void ModelClass::Shutdown()
{// Release the vertex and index buffers.ShutdownBuffers();
return;}
Render is called from the GraphicsClass::Render function. This function calls RenderBuffers to put the vertex and index buffers on thegraphics pipeline so the color shader will be able to render them.
void ModelClass::Render(ID3D11DeviceContext* deviceContext){
// Put the vertex and index buffers on the graphics pipeline to prepare them for drawing.RenderBuffers(deviceContext);
return;}
GetIndexCount returns the number of indexes in the model. The color shader will need this information to draw this model.
int ModelClass::GetIndexCount(){
return m_indexCount;}
The InitializeBuffers function is where we handle creating the vertex and index buffers. Usually you would read in a model and create thebuffers from that data file. For this tutorial we will just set the points in the vertex and index buffer manually since it is only a singletriangle.
bool ModelClass::InitializeBuffers(ID3D11Device* device)
{VertexType* vertices;unsigned long* indices;D3D11_BUFFER_DESC vertexBufferDesc, indexBufferDesc;D3D11_SUBRESOURCE_DATA vertexData, indexData;HRESULT result;
return false;
Tutorial 4: Buffers, Shaders, and HLSL http://www.rastertek.com/dx11tut04.html

7/14/2019 RasterTek: Direct3D introduction
http://slidepdf.com/reader/full/rastertek-direct3d-introduction 33/709
}
// Create the index array.indices =new unsigned long[m_indexCount];if(!indices){
return false;}
Now fill both the vertex and index array with the three points of the triangle as well as the index to each of the points. Please note that Icreate the points in the clockwise order of drawing them. If you do this counter clockwise it will think the triangle is facing the oppositedirection and not draw it due to back face culling. Always remember that the order in which you send your vertices to the GPU is veryimportant. The color is set here as well since it is part of the vertex description. I set the color to green.
// Load the vertex array with data.vertices[0].position =D3DXVECTOR3(-1.0f, -1.0f, 0.0f); // Bottom left.
vertices[0].color =D3DXVECTOR4(0.0f, 1.0f, 0.0f, 1.0f);
vertices[1].position =D3DXVECTOR3(0.0f, 1.0f, 0.0f); // Top middle.vertices[1].color =D3DXVECTOR4(0.0f, 1.0f, 0.0f, 1.0f);
vertices[2].position =D3DXVECTOR3(1.0f, -1.0f, 0.0f); // Bottom right.vertices[2].color =D3DXVECTOR4(0.0f, 1.0f, 0.0f, 1.0f);
// Load the index array with data.indices[0] =0; // Bottom left.
indices[1] =1; // Top middle.indices[2] =2; // Bottom right.
With the vertex array and index array filled out we can now use those to create the vertex buffer and index buffer. Creating both buffersis done in the same fashion. First fill out a description of the buffer. In the description the ByteWidth (size of the buffer) and theBindFlags (type of buffer) are what you need to ensure are filled out correctly. After the description is filled out you need to also fill out asubresource pointer which will point to either your vertex or index array you previously created. With the description and subresourcepointer you can call CreateBuffer using the D3D device and it will return a pointer to your new buffer.
// Set up the description of the static vertex buffer.
vertexBufferDesc.Usage =D3D11_USAGE_DEFAULT;vertexBufferDesc.ByteWidth =sizeof(VertexType) * m_vertexCount;vertexBufferDesc.BindFlags =D3D11_BIND_VERTEX_BUFFER;vertexBufferDesc.CPUAccessFlags =0;vertexBufferDesc.MiscFlags =0;vertexBufferDesc.StructureByteStride =0;
// Give the subresource structure a pointer to the vertex data.vertexData.pSysMem =vertices;vertexData.SysMemPitch =0;
vertexData.SysMemSlicePitch =0;
// Now create the vertex buffer.result =device->CreateBuffer(&vertexBufferDesc, &vertexData, &m_vertexBuffer);if(FAILED(result)){
return false
indexData.SysMemPitch =0;i d D t S M Sli Pit h 0
Tutorial 4: Buffers, Shaders, and HLSL http://www.rastertek.com/dx11tut04.html

7/14/2019 RasterTek: Direct3D introduction
http://slidepdf.com/reader/full/rastertek-direct3d-introduction 34/709
indexData.SysMemSlicePitch =0;
// Create the index buffer.result =device->CreateBuffer(&indexBufferDesc, &indexData, &m_indexBuffer);if(FAILED(result)){
return false;}
After the vertex buffer and index buffer have been created you can delete the vertex and index arrays as they are no longer neededsince the data was copied into the buffers.
// Release the arrays now that the vertex and index buffers have been created and loaded.delete [] vertices;vertices =0;
delete [] indices;indices =0;
return true;}
The ShutdownBuffers function just releases the vertex buffer and index buffer that were created in the InitializeBuffers function.
void ModelClass::ShutdownBuffers(){
// Release the index buffer.if(m_indexBuffer){
m_indexBuffer->Release();m_indexBuffer =0;
}
// Release the vertex buffer.if(m_vertexBuffer){
m_vertexBuffer->Release();m_vertexBuffer =0;
}
return;}
RenderBuffers is called from the Render function. The purpose of this function is to set the vertex buffer and index buffer as active onthe input assembler in the GPU. Once the GPU has an active vertex buffer it can then use the shader to render that buffer. This functionalso defines how those buffers should be drawn such as triangles, lines, fans, and so forth. In this tutorial we set the vertex buffer and
index buffer as active on the input assembler and tell the GPU that the buffers should be drawn as triangles using theIASetPrimitiveTopology DirectX function.
void ModelClass::RenderBuffers(ID3D11DeviceContext* deviceContext){
unsigned int stride;unsigned int offset
// Set the type of primitive that should be rendered from this vertex buffer, in this case triangles.deviceContext>IASetPrimitiveTopology(D3D11 PRIMITIVE TOPOLOGY TRIANGLELIST);
Tutorial 4: Buffers, Shaders, and HLSL http://www.rastertek.com/dx11tut04.html

7/14/2019 RasterTek: Direct3D introduction
http://slidepdf.com/reader/full/rastertek-direct3d-introduction 35/709
deviceContext->IASetPrimitiveTopology(D3D11_PRIMITIVE_TOPOLOGY_TRIANGLELIST);
return;}
Colorshaderclass.h
The ColorShaderClass is what we will use to invoke our HLSL shaders for drawing the 3D models that are on the GPU.
////////////////////////////////////////////////////////////////////////////////// Filename: colorshaderclass.h////////////////////////////////////////////////////////////////////////////////#ifndef _COLORSHADERCLASS_H_ #define _COLORSHADERCLASS_H_
//////////////// INCLUDES ////////////////#include <d3d11.h>#include <d3dx10math.h>#include <d3dx11async.h>#include <fstream>using namespace std;
////////////////////////////////////////////////////////////////////////////////// Class name: ColorShaderClass////////////////////////////////////////////////////////////////////////////////class ColorShaderClass{private:
Here is the definition of the cBuffer type that will be used with the vertex shader. This typedef must be exactly the same as the one in thevertex shader as the model data needs to match the typedefs in the shader for proper rendering.
struct MatrixBufferType{
D3DXMATRIX world;D3DXMATRIX view;D3DXMATRIX projection;
};
public:ColorShaderClass();ColorShaderClass(const ColorShaderClass&);~ColorShaderClass();
The functions here handle initializing and shutdown of the shader. The render function sets the shader parameters and then draws theprepared model vertices using the shader.
private:ID3D11VertexShader* m vertexShader;
Tutorial 4: Buffers, Shaders, and HLSL http://www.rastertek.com/dx11tut04.html

7/14/2019 RasterTek: Direct3D introduction
http://slidepdf.com/reader/full/rastertek-direct3d-introduction 36/709
ID3D11VertexShader* m_vertexShader;ID3D11PixelShader* m_pixelShader;ID3D11InputLayout* m_layout;ID3D11Buffer* m_matrixBuffer;
};
#endif
Colorshaderclass.cpp
////////////////////////////////////////////////////////////////////////////////// Filename: colorshaderclass.cpp////////////////////////////////////////////////////////////////////////////////#include "colorshaderclass.h"
As usual the class constructor initializes all the private pointers in the class to null.
ColorShaderClass::ColorShaderClass(){
m_vertexShader =0;m_pixelShader =0;m_layout =0;m_matrixBuffer =0;
}
ColorShaderClass::ColorShaderClass(const ColorShaderClass& other){}
ColorShaderClass::~ColorShaderClass(){}
The Initialize function will call the initialization function for the shaders. We pass in the name of the HLSL shader files, in this tutorial theyare named color.vs and color.ps.
bool ColorShaderClass::Initialize(ID3D11Device* device, HWND hwnd){
bool result;
// Initialize the vertex and pixel shaders.result =InitializeShader(device, hwnd, L"../Engine/color.vs", L"../Engine/color.ps");if(!result){
return false;}
Render will first set the parameters inside the shader using the SetShaderParameters function. Once the parameters are set it then callsRenderShader to draw the green triangle using the HLSL shader.
Tutorial 4: Buffers, Shaders, and HLSL http://www.rastertek.com/dx11tut04.html

7/14/2019 RasterTek: Direct3D introduction
http://slidepdf.com/reader/full/rastertek-direct3d-introduction 37/709
RenderShader to draw the green triangle using the HLSL shader.
bool ColorShaderClass::Render(ID3D11DeviceContext* deviceContext, int indexCount, D3DXMATRIX worldMatrix,D3DXMATRIX viewMatrix, D3DXMATRIX projectionMatrix)
{bool result;
// Set the shader parameters that it will use for rendering.result =SetShaderParameters(deviceContext, worldMatrix, viewMatrix, projectionMatrix);if(!result){
return false;}
// Now render the prepared buffers with the shader.
RenderShader(deviceContext, indexCount);
return true;}
Now we will start with one of the more important functions to this tutorial which is called InitializeShader. This function is what actuallyloads the shader files and makes it usable to DirectX and the GPU. You will also see the setup of the layout and how the vertex bufferdata is going to look on the graphics pipeline in the GPU. The layout will need the match the VertexType in the modelclass.h file as wellas the one defined in the color.vs file.
bool ColorShaderClass::InitializeShader(ID3D11Device* device, HWND hwnd, WCHAR* vsFilename, WCHAR* psFilename){
HRESULT result;ID3D10Blob* errorMessage;ID3D10Blob* vertexShaderBuffer;ID3D10Blob* pixelShaderBuffer;D3D11_INPUT_ELEMENT_DESC polygonLayout[2];unsigned int numElements;D3D11_BUFFER_DESC matrixBufferDesc;
// Initialize the pointers this function will use to null.errorMessage =0;vertexShaderBuffer =0;pixelShaderBuffer =0;
Here is where we compile the shader programs into buffers. We give it the name of the shader file, the name of the shader, the shaderversion (5.0 in DirectX 11), and the buffer to compile the shader into. If it fails compiling the shader it will put an error message inside theerrorMessage string which we send to another function to write out the error. If it still fails and there is no errorMessage string then itmeans it could not find the shader file in which case we pop up a dialog box saying so.
// Compile the vertex shader code.result =D3DX11CompileFromFile(vsFilename, NULL, NULL, "ColorVertexShader", "vs_5_0", D3D10_SHADER_ENABLE_STRICTN
&vertexShaderBuffer, &errorMessage, NULL);if(FAILED(result)){
// If the shader failed to compile it should have writen something to the error message
// Compile the pixel shader code.
Tutorial 4: Buffers, Shaders, and HLSL http://www.rastertek.com/dx11tut04.html

7/14/2019 RasterTek: Direct3D introduction
http://slidepdf.com/reader/full/rastertek-direct3d-introduction 38/709
// p presult =D3DX11CompileFromFile(psFilename, NULL, NULL, "ColorPixelShader", "ps_5_0", D3D10_SHADER_ENABLE_STRICTNE
&pixelShaderBuffer, &errorMessage, NULL);if(FAILED(result)){
// If the shader failed to compile it should have writen something to the error message.
if(errorMessage){
OutputShaderErrorMessage(errorMessage, hwnd, psFilename);}// If there was nothing in the error message then it simply could not find the file itself.else{
MessageBox(hwnd, psFilename, L"Missing Shader File", MB_OK);}
return false;}
Once the vertex shader and pixel shader code has successfully compiled into buffers we then use those buffers to create the shaderobjects themselves. We will use these pointers to interface with the vertex and pixel shader from this point forward.
// Create the vertex shader from the buffer.result =device->CreateVertexShader(vertexShaderBuffer->GetBufferPointer(), vertexShaderBuffer->GetBufferSize(), NULL, &m_verif(FAILED(result)){
return false;}
// Create the pixel shader from the buffer.result =device->CreatePixelShader(pixelShaderBuffer->GetBufferPointer(), pixelShaderBuffer->GetBufferSize(), NULL, &m_pixelShif(FAILED(result)){
return false;}
The next step is to create the layout of the vertex data that will be processed by the shader. As this shader uses a position and colorvector we need to create both in the layout specifying the size of both. The semantic name is the first thing to fill out in the layout, thisallows the shader to determine the usage of this element of the layout. As we have two different elements we use POSITION for the firstone and COLOR for the second. The next important part of the layout is the Format. For the position vector we useDXGI_FORMAT_R32G32B32_FLOAT and for the color we use DXGI_FORMAT_R32G32B32A32_FLOAT. The final thing you need topay attention to is the AlignedByteOffset which indicates how the data is spaced in the buffer. For this layout we are telling it the first 12bytes are position and the next 16 bytes will be color, AlignedByteOffset shows where each element begins. You can useD3D11_APPEND_ALIGNED_ELEMENT instead of placing your own values in AlignedByteOffset and it will figure out the spacing foryou. The other settings I've made default for now as they are not needed in this tutorial.
// Now setup the layout of the data that goes into the shader.// This setup needs to match the VertexType stucture in the ModelClass and in the shader.polygonLayout[0].SemanticName ="POSITION";polygonLayout[0].SemanticIndex =0;polygonLayout[0].Format =DXGI_FORMAT_R32G32B32_FLOAT;polygonLayout[0].InputSlot =0;polygonLayout[0] AlignedByteOffset 0
the vertex and pixel shader buffers since they are no longer needed once the layout has been created.
Tutorial 4: Buffers, Shaders, and HLSL http://www.rastertek.com/dx11tut04.html

7/14/2019 RasterTek: Direct3D introduction
http://slidepdf.com/reader/full/rastertek-direct3d-introduction 39/709
// Get a count of the elements in the layout.numElements =sizeof(polygonLayout) / sizeof(polygonLayout[0]);
// Create the vertex input layout.result =device->CreateInputLayout(polygonLayout, numElements, vertexShaderBuffer->GetBufferPointer(),
vertexShaderBuffer->GetBufferSize(), &m_layout);if(FAILED(result)){
return false;}
// Release the vertex shader buffer and pixel shader buffer since they are no longer needed.vertexShaderBuffer->Release();vertexShaderBuffer =0;
pixelShaderBuffer->Release();pixelShaderBuffer =0;
The final thing that needs to be setup to utilize the shader is the constant buffer. As you saw in the vertex shader we currently have justone constant buffer so we only need to setup one here so we can interface with the shader. The buffer usage needs to be set todynamic since we will be updating it each frame. The bind flags indicate that this buffer will be a constant buffer. The cpu access flagsneed to match up with the usage so it is set to D3D11_CPU_ACCESS_WRITE. Once we fill out the description we can then create theconstant buffer interface and then use that to access the internal variables in the shader using the function SetShaderParameters.
// Setup the description of the dynamic matrix constant buffer that is in the vertex shader.
matrixBufferDesc.Usage =D3D11_USAGE_DYNAMIC;matrixBufferDesc.ByteWidth =sizeof(MatrixBufferType);matrixBufferDesc.BindFlags =D3D11_BIND_CONSTANT_BUFFER;matrixBufferDesc.CPUAccessFlags =D3D11_CPU_ACCESS_WRITE;matrixBufferDesc.MiscFlags =0;matrixBufferDesc.StructureByteStride =0;
// Create the constant buffer pointer so we can access the vertex shader constant buffer from within this class.result =device->CreateBuffer(&matrixBufferDesc, NULL, &m_matrixBuffer);if(FAILED(result))
{return false;
}
return true;}
ShutdownShader releases the four interfaces that were setup in the InitializeShader function.
void ColorShaderClass::ShutdownShader()
{// Release the matrix constant buffer.if(m_matrixBuffer){
m_matrixBuffer->Release();m_matrixBuffer =0;
}
m_pixelShader =0;}
Tutorial 4: Buffers, Shaders, and HLSL http://www.rastertek.com/dx11tut04.html

7/14/2019 RasterTek: Direct3D introduction
http://slidepdf.com/reader/full/rastertek-direct3d-introduction 40/709
// Release the vertex shader.if(m_vertexShader){
m_vertexShader->Release();
m_vertexShader =0;}
return;}
The OutputShaderErrorMessage writes out error messages that are generating when compiling either vertex shaders or pixel shaders.
void ColorShaderClass::OutputShaderErrorMessage(ID3D10Blob* errorMessage, HWND hwnd, WCHAR* shaderFilename){
char* compileErrors;unsigned long bufferSize, i;ofstream fout;
// Get a pointer to the error message text buffer.compileErrors =(char*)(errorMessage->GetBufferPointer());
// Get the length of the message.bufferSize =errorMessage->GetBufferSize();
// Open a file to write the error message to.fout.open("shader-error.txt");
// Write out the error message.for(i=0; i<bufferSize; i++){
fout <<compileErrors[i];}
// Close the file.fout.close();
// Release the error message.errorMessage->Release();errorMessage =0;
// Pop a message up on the screen to notify the user to check the text file for compile errors.MessageBox(hwnd, L"Error compiling shader. Check shader-error.txt for message.", shaderFilename, MB_OK);
return;}
The SetShaderVariables function exists to make setting the global variables in the shader easier. The matrices used in this function arecreated inside the GraphicsClass, after which this function is called to send them from there into the vertex shader during the Renderfunction call.
D3DXMatrixTranspose(&viewMatrix, &viewMatrix);D3DXMatrixTranspose(&projectionMatrix, &projectionMatrix);
Tutorial 4: Buffers, Shaders, and HLSL http://www.rastertek.com/dx11tut04.html

7/14/2019 RasterTek: Direct3D introduction
http://slidepdf.com/reader/full/rastertek-direct3d-introduction 41/709
Lock the m_matrixBuffer, set the new matrices inside it, and then unlock it.
// Lock the constant buffer so it can be written to.result =deviceContext->Map(m_matrixBuffer, 0, D3D11_MAP_WRITE_DISCARD, 0, &mappedResource);
if(FAILED(result)){
return false;}
// Get a pointer to the data in the constant buffer.dataPtr =(MatrixBufferType*)mappedResource.pData;
// Copy the matrices into the constant buffer.dataPtr->world =worldMatrix;
dataPtr->view =viewMatrix;dataPtr->projection =projectionMatrix;
// Unlock the constant buffer.deviceContext->Unmap(m_matrixBuffer, 0);
Now set the updated matrix buffer in the HLSL vertex shader.
// Set the position of the constant buffer in the vertex shader.bufferNumber =0;
// Finanly set the constant buffer in the vertex shader with the updated values.deviceContext->VSSetConstantBuffers(bufferNumber, 1, &m_matrixBuffer);
return true;}
RenderShader is the second function called in the Render function. SetShaderParameters is called before this to ensure the shaderparameters are setup correctly.
The first step in this function is to set our input layout to active in the input assembler. This lets the GPU know the format of the data inthe vertex buffer. The second step is to set the vertex shader and pixel shader we will be using to render this vertex buffer. Once theshaders are set we render the triangle by calling the DrawIndexed DirectX 11 function using the D3D device context. Once this functionis called it will render the green triangle.
void ColorShaderClass::RenderShader(ID3D11DeviceContext* deviceContext, int indexCount){
// Set the vertex input layout.deviceContext->IASetInputLayout(m_layout);
// Set the vertex and pixel shaders that will be used to render this triangle.deviceContext->VSSetShader(m_vertexShader, NULL, 0);deviceContext->PSSetShader(m_pixelShader, NULL, 0);
// Render the triangle.deviceContext->DrawIndexed(indexCount, 0, 0);
////////////////////////////////////////////////////////////////////////////////// Filename: cameraclass.h////////////////////////////////////////////////////////////////////////////////
Tutorial 4: Buffers, Shaders, and HLSL http://www.rastertek.com/dx11tut04.html

7/14/2019 RasterTek: Direct3D introduction
http://slidepdf.com/reader/full/rastertek-direct3d-introduction 42/709
////////////////////////////////////////////////////////////////////////////////#ifndef _CAMERACLASS_H_ #define _CAMERACLASS_H_
//////////////// INCLUDES ////////////////#include <d3dx10math.h>
////////////////////////////////////////////////////////////////////////////////// Class name: CameraClass////////////////////////////////////////////////////////////////////////////////class CameraClass
{public:
CameraClass();CameraClass(const CameraClass&);~CameraClass();
void SetPosition(float, float, float);void SetRotation(float, float, float);
D3DXVECTOR3 GetPosition();
D3DXVECTOR3 GetRotation();
void Render();void GetViewMatrix(D3DXMATRIX&);
private:float m_positionX, m_positionY, m_positionZ;float m_rotationX, m_rotationY, m_rotationZ;D3DXMATRIX m_viewMatrix;
};
#endif
The CameraClass header is quite simple with just four functions that will be used. The SetPosition and SetRotation functions will beused to set the position and rotation of the camera object. Render will be used to create the view matrix based on the position androtation of the camera. And finally GetViewMatrix will be used to retrieve the view matrix from the camera object so that the shaders canuse it for rendering.
Cameraclass.cpp
////////////////////////////////////////////////////////////////////////////////// Filename: cameraclass.cpp////////////////////////////////////////////////////////////////////////////////#include "cameraclass.h"
CameraClass::CameraClass(const CameraClass& other)
Tutorial 4: Buffers, Shaders, and HLSL http://www.rastertek.com/dx11tut04.html

7/14/2019 RasterTek: Direct3D introduction
http://slidepdf.com/reader/full/rastertek-direct3d-introduction 43/709
CameraClass::CameraClass(const CameraClass& other){}
CameraClass::~CameraClass(){}
The SetPosition and SetRotation functions are used for setting up the position and rotation of the camera.
void CameraClass::SetPosition(float x, float y, float z){
m_positionX =x;m_positionY =y;
m_positionZ =z;return;
}
void CameraClass::SetRotation(float x, float y, float z){
m_rotationX =x;m_rotationY =y;m_rotationZ =z;
return;}
The GetPosition and GetRotation functions return the location and rotation of the camera to calling functions.
D3DXVECTOR3 CameraClass::GetPosition(){
return D3DXVECTOR3(m_positionX, m_positionY, m_positionZ);}
D3DXVECTOR3 CameraClass::GetRotation(){
return D3DXVECTOR3(m_rotationX, m_rotationY, m_rotationZ);}
The Render function uses the position and rotation of the camera to build and update the view matrix. We first setup our variables forup, position, rotation, and so forth. Then at the origin of the scene we first rotate the camera based on the x, y, and z rotation of thecamera. Once it is properly rotated when then translate the camera to the position in 3D space. With the correct values in the position,lookAt, and up we can then use the D3DXMatrixLookAtLH function to create the view matrix to represent the current camera rotation
and translation.
void CameraClass::Render(){
D3DXVECTOR3 up, position, lookAt;float yaw, pitch, roll;D3DXMATRIX rotationMatrix
// Setup where the camera is looking by default.lookAt.x =0.0f;lookAt.y =0.0f;
Tutorial 4: Buffers, Shaders, and HLSL http://www.rastertek.com/dx11tut04.html

7/14/2019 RasterTek: Direct3D introduction
http://slidepdf.com/reader/full/rastertek-direct3d-introduction 44/709
lookAt.y 0.0f;lookAt.z =1.0f;
// Set the yaw (Y axis), pitch (X axis), and roll (Z axis) rotations in radians.pitch =m_rotationX * 0.0174532925f;
yaw =m_rotationY * 0.0174532925f;roll =m_rotationZ * 0.0174532925f;
// Create the rotation matrix from the yaw, pitch, and roll values.D3DXMatrixRotationYawPitchRoll(&rotationMatrix, yaw, pitch, roll);
// Transform the lookAt and up vector by the rotation matrix so the view is correctly rotated at the origin.D3DXVec3TransformCoord(&lookAt, &lookAt, &rotationMatrix);D3DXVec3TransformCoord(&up, &up, &rotationMatrix);
// Translate the rotated camera position to the location of the viewer.lookAt =position +lookAt;
// Finally create the view matrix from the three updated vectors.D3DXMatrixLookAtLH(&m_viewMatrix, &position, &lookAt, &up);
return;}
After the Render function has been called to create the view matrix we can provide the update view matrix to calling functions using this
GetViewMatrix function. The view matrix will be one of the three main matrices used in the HLSL vertex shader.
void CameraClass::GetViewMatrix(D3DXMATRIX& viewMatrix){
viewMatrix =m_viewMatrix;return;
}
Graphicsclass.h
GraphicsClass now has the three new classes added to it. CameraClass, ModelClass, and ColorShaderClass have headers added hereas well as private member variables. Remember that GraphicsClass is the main class that is used to render the scene by invoking allthe needed class objects for the project.
////////////////////////////////////////////////////////////////////////////////// Filename: graphicsclass.h////////////////////////////////////////////////////////////////////////////////#ifndef _GRAPHICSCLASS_H_
#define _GRAPHICSCLASS_H_
///////////////////////// MY CLASS INCLUDES /////////////////////////
////////////////////////////////////////////////////////////////////////////////
Tutorial 4: Buffers, Shaders, and HLSL http://www.rastertek.com/dx11tut04.html

7/14/2019 RasterTek: Direct3D introduction
http://slidepdf.com/reader/full/rastertek-direct3d-introduction 45/709
////////////////////////////////////////////////////////////////////////////////// Class name: GraphicsClass////////////////////////////////////////////////////////////////////////////////class GraphicsClass{
public:GraphicsClass();GraphicsClass(const GraphicsClass&);~GraphicsClass();
bool Initialize(int, int, HWND);void Shutdown();bool Frame();
private:
bool Render();
private:D3DClass* m_D3D;CameraClass* m_Camera;ModelClass* m_Model;ColorShaderClass* m_ColorShader;
};
#endif
Graphicsclass.cpp
////////////////////////////////////////////////////////////////////////////////// Filename: graphicsclass.cpp////////////////////////////////////////////////////////////////////////////////#include "graphicsclass.h"
The first change to GraphicsClass is initializing the camera, model, and color shader objects in the class constructor to null.
GraphicsClass::GraphicsClass(){
m_D3D =0;
m_Camera =0;m_Model =0;m_ColorShader =0;
}
The Initialize function has also been updated to create and initialize the three new objects.
bool GraphicsClass::Initialize(int screenWidth, int screenHeight, HWND hwnd){
bool result;
return false;}
Tutorial 4: Buffers, Shaders, and HLSL http://www.rastertek.com/dx11tut04.html

7/14/2019 RasterTek: Direct3D introduction
http://slidepdf.com/reader/full/rastertek-direct3d-introduction 46/709
// Create the camera object.m_Camera =new CameraClass;if(!m_Camera){
return false;}
// Set the initial position of the camera.m_Camera->SetPosition(0.0f, 0.0f, -10.0f);
// Create the model object.m_Model =new ModelClass;if(!m_Model){
return false;}
// Initialize the model object.result =m_Model->Initialize(m_D3D->GetDevice());if(!result){
MessageBox(hwnd, L"Could not initialize the model object.", L"Error", MB_OK);return false;
}
// Create the color shader object.m_ColorShader =new ColorShaderClass;if(!m_ColorShader){
return false;}
// Initialize the color shader object.result =m_ColorShader->Initialize(m_D3D->GetDevice(), hwnd);
if(!result){
MessageBox(hwnd, L"Could not initialize the color shader object.", L"Error", MB_OK);return false;
}
return true;}
Shutdown is also updated to shutdown and release the three new objects.
void GraphicsClass::Shutdown(){
// Release the color shader object.if(m_ColorShader){
m ColorShader >Shutdown()
// Release the camera object.if(m_Camera){
Tutorial 4: Buffers, Shaders, and HLSL http://www.rastertek.com/dx11tut04.html

7/14/2019 RasterTek: Direct3D introduction
http://slidepdf.com/reader/full/rastertek-direct3d-introduction 47/709
delete m_Camera;m_Camera =0;
}
// Release the Direct3D object.if(m_D3D){
m_D3D->Shutdown();delete m_D3D;m_D3D =0;
}
return;}
The Frame function has remained the same as the previous tutorial.
bool GraphicsClass::Frame(){
bool result;
// Render the graphics scene.result =Render();
if(!result){
return false;}
return true;}
As you would expect the Render function had the most changes to it. It still begins with clearing the scene except that it is cleared toblack. After that it calls the Render function for the camera object to create a view matrix based on the camera's location that was set in
the Initialize function. Once the view matrix is created we get a copy of it from the camera class. We also get copies of the world andprojection matrix from the D3DClass object. We then call the ModelClass::Render function to put the green triangle model geometry onthe graphics pipeline. With the vertices now prepared we call the color shader to draw the vertices using the model information and thethree matrices for positioning each vertex. The green triangle is now drawn to the back buffer. With that the scene is complete and wecall EndScene to display it to the screen.
bool GraphicsClass::Render(){
D3DXMATRIX viewMatrix, projectionMatrix, worldMatrix;bool result;
// Clear the buffers to begin the scene.m_D3D->BeginScene(0.0f, 0.0f, 0.0f, 1.0f);
// Generate the view matrix based on the camera's position.C >R d ()
{return false;
}
Tutorial 4: Buffers, Shaders, and HLSL http://www.rastertek.com/dx11tut04.html

7/14/2019 RasterTek: Direct3D introduction
http://slidepdf.com/reader/full/rastertek-direct3d-introduction 48/709
// Present the rendered scene to the screen.m_D3D->EndScene();
return true;}
Summary
So in summary you should have learned the basics about how vertex and index buffers work. You should have also learned the basicsof vertex and pixel shaders and how to write them using HLSL. And finally you should understand how we've incorporated these newconcepts into our frame work to produce a green triangle that renders to the screen. I also want to mention that I realize the code is fairly
long just to draw a single triangle and it could have all been stuck inside a single main() function. However I did it this way with a properframe work so that the coming tutorials require very few changes in the code to do far more complex graphics.
To Do Exercises
1. Compile and run the tutorial. Ensure it draws a green triangle to the screen. Press escape to quit once it does.
2. Change the color of the triangle to red.
3. Change the triangle to a square.
4. Move the camera back 10 more units.
5. Change the pixel shader to ouput the color half as bright. (huge hint: multiply something in ColorPixelShader by 0.5f)
Source Code
Visual Studio 2010 Project: dx11tut04zip
Tutor ial 5: Texturing
Tutorial 5: Texturing http://www.rastertek.com/dx11tut05.html

7/14/2019 RasterTek: Direct3D introduction
http://slidepdf.com/reader/full/rastertek-direct3d-introduction 49/709
This tutorial will explain how to use texturing in DirectX 11. Texturing allows us to add photorealism to our scenes by applyingphotographs and other images onto polygon faces. For example in this tutorial we will take the following image:
And then apply it to the polygon from the previous tutorial to produce the following:
The format of the textures we will be using are .dds files. This is the Direct Draw Surface format that DirectX uses. The tool used toproduce .dds files comes with the DirectX SDK. It is under DirectX Utilities and is called DirectX Texture Tool. You can create a newtexture of any size and format and then cut and paste your image or other format texture onto it and save it as a .dds file. It is verysimple to use.
And before we get into the code we should discuss how texture mapping works. To map pixels from the .dds image onto the polygon weuse what is called the Texel Coordinate System. This system converts the integer value of the pixel into a floating point value between0.0f and 1.0f. For example if a texture width is 256 pixels wide then the first pixel will map to 0.0f, the 256th pixel will map to 1.0f, and amiddle pixel of 128 would map to 0.5f.
In the texel coordinate system the width value is named "U" and the height value is named "V". The width goes from 0.0 on the left to1.0 on the right. The height goes from 0.0 on the top to 1.0 on the bottom. For example top left would be denoted as U 0.0, V 0.0 andbottom right would be denoted as U 1.0, V 1.0. I have made a diagram below to illustrate this system:
Now that we have a basic understanding of how to map textures onto polygons we can look at the updated frame work for this tutorial:
Tutorial 5: Texturing http://www.rastertek.com/dx11tut05.html

7/14/2019 RasterTek: Direct3D introduction
http://slidepdf.com/reader/full/rastertek-direct3d-introduction 50/709
The changes to the frame work since the previous tutorial is the new TextureClass which is inside ModelClass and the new TextureShaderClass which replaces the ColorShaderClass. We'll start the code section by looking at the new HLSL texture shaders first.
Texture.vs
The texture vertex shader is similar to the previous color shader except that there have been some changes to accommodate texturing.
////////////////////////////////////////////////////////////////////////////////// Filename: texture.vs////////////////////////////////////////////////////////////////////////////////
/////////////// GLOBALS ///////////////cbuffer MatrixBuffer{
matrix worldMatrix;matrix viewMatrix;matrix projectionMatrix;
};
We are no longer using color in our vertex type and have instead moved to using texture coordinates. Since texture coordinates take aU and V float coordinate we use float2 as its type. The semantic for texture coordinates is TEXCOORD0 for vertex shaders and pixelshaders. You can change the zero to any number to indicate which set of coordinates you are working with as multiple texturecoordinates are allowed.
//////////////// TYPEDEFS ////////////////struct VertexInputType{
float4 position : POSITION;float2 tex : TEXCOORD0;
};
struct PixelInputType{
// Change the position vector to be 4 units for proper matrix calculations.input.position.w =1.0f;
// Calculate the position of the vertex against the world, view, and projection matrices.
Tutorial 5: Texturing http://www.rastertek.com/dx11tut05.html

7/14/2019 RasterTek: Direct3D introduction
http://slidepdf.com/reader/full/rastertek-direct3d-introduction 51/709
// Calculate the position of the vertex against the world, view, and projection matrices.output.position =mul(input.position, worldMatrix);output.position =mul(output.position, viewMatrix);output.position =mul(output.position, projectionMatrix);
The only difference in the texture vertex shader in comparison to the color vertex shader from the previous tutorial is that instead of taking a copy of the color from the input vertex we take a copy of the texture coordinates and pass them to the pixel shader.
// Store the texture coordinates for the pixel shader.output.tex =input.tex;
return output;
}
Texture.ps
////////////////////////////////////////////////////////////////////////////////// Filename: texture.ps////////////////////////////////////////////////////////////////////////////////
The texture pixel shader has two global variables. The first is Texture2D shaderTexture which is the texture resource. This will be ourtexture resource that will be used for rendering the texture on the model. The second new variable is the SamplerState SampleType.
The sampler state allows us to modify how the pixels are written to the polygon face when shaded. For example if the polygon is reallyfar away and only makes up 8 pixels on the screen then we use the sample state to figure out which pixels or what combination of pixelswill actually be drawn from the original texture. The original texture may be 256 pixels by 256 pixels so deciding which pixels get drawnis really important to ensure that the texture still looks decent on the really small polygon face. We will setup the sampler state in the
TextureShaderClass also and then attach it to the resource pointer so this pixel shader can use it to determine which sample of pixels todraw.
/////////////// GLOBALS ///////////////
Texture2D shaderTexture;SamplerState SampleType;
The PixelInputType for the texture pixel shader is also modified using texture coordinates instead of the color values.
//////////////// TYPEDEFS ////////////////struct PixelInputType{
float4 position : SV_POSITION;float2 tex : TEXCOORD0;
};
The pixel shader has been modified so that it now uses the HLSL sample function. The sample function uses the sampler state wedefined above and the texture coordinates for this pixel. It uses these two variables to determine and return the pixel value for this UV
return textureColor;}
Tutorial 5: Texturing http://www.rastertek.com/dx11tut05.html

7/14/2019 RasterTek: Direct3D introduction
http://slidepdf.com/reader/full/rastertek-direct3d-introduction 52/709
Textureclass.h
The TextureClass encapsulates the loading, unloading, and accessing of a single texture resource. For each texture needed an object of this class must be instantiated.
////////////////////////////////////////////////////////////////////////////////// Filename: textureclass.h////////////////////////////////////////////////////////////////////////////////#ifndef _TEXTURECLASS_H_ #define _TEXTURECLASS_H_
//////////////// INCLUDES ////////////////#include <d3d11.h>#include <d3dx11tex.h>
////////////////////////////////////////////////////////////////////////////////// Class name: TextureClass////////////////////////////////////////////////////////////////////////////////
class TextureClass{public:
TextureClass(); TextureClass(const TextureClass&);~TextureClass();
The first two functions will load a texture from a given file name and unload that texture when it is no longer needed.
bool Initialize(ID3D11Device*, WCHAR*);
void Shutdown();
The GetTexture function returns a pointer to the texture resource so that it can be used for rendering by shaders.
ID3D11ShaderResourceView* GetTexture();
private:
This is the private texture resource.
ID3D11ShaderResourceView* m_texture;};
#endif
}
TextureClass::TextureClass(const TextureClass& other)
Tutorial 5: Texturing http://www.rastertek.com/dx11tut05.html

7/14/2019 RasterTek: Direct3D introduction
http://slidepdf.com/reader/full/rastertek-direct3d-introduction 53/709
{}
TextureClass::~TextureClass(){}
Initialize takes in the Direct3D device and file name of the texture and then loads the texture file into the shader resource variable calledm_texture. The texture can now be used to render with.
bool TextureClass::Initialize(ID3D11Device* device, WCHAR* filename){
HRESULT result;
// Load the texture in.result =D3DX11CreateShaderResourceViewFromFile(device, filename, NULL, NULL, &m_texture, NULL);if(FAILED(result)){
return false;}
return true;}
The Shutdown function releases the texture resource if it has been loaded and then sets the pointer to null.
void TextureClass::Shutdown(){
// Release the texture resource.if(m_texture){
m_texture->Release();m_texture =0;}
return;}
GetTexture is the function that is called by other objects that need access to the texture shader resource so that they can use the texturefor rendering.
ID3D11ShaderResourceView* TextureClass::GetTexture(){
return m_texture;}
// INCLUDES ////////////////#include <d3d11.h>#include <d3dx10math.h>
Tutorial 5: Texturing http://www.rastertek.com/dx11tut05.html

7/14/2019 RasterTek: Direct3D introduction
http://slidepdf.com/reader/full/rastertek-direct3d-introduction 54/709
The TextureClass header is now included in the ModelClass header.
///////////////////////// MY CLASS INCLUDES /////////////////////////#include "textureclass.h"
////////////////////////////////////////////////////////////////////////////////// Class name: ModelClass////////////////////////////////////////////////////////////////////////////////class ModelClass
{private:
The VertexType has replaced the color component with a texture coordinate component. The texture coordinate is now replacing thegreen color that was used in the previous tutorial.
struct VertexType{
D3DXVECTOR3 position;D3DXVECTOR2 texture;
};
public:ModelClass();ModelClass(const ModelClass&);~ModelClass();
bool Initialize(ID3D11Device*, WCHAR*);void Shutdown();void Render(ID3D11DeviceContext*);
int GetIndexCount();
The ModelClass also has a GetTexture function so it can pass its own texture resource to shaders that will draw this model.
ID3D11ShaderResourceView* GetTexture();
private:bool InitializeBuffers(ID3D11Device*);void ShutdownBuffers();
void RenderBuffers(ID3D11DeviceContext*);
ModelClass has both a private LoadTexture and ReleaseTexture for loading and releasing the texture that will be used to render thismodel.
bool LoadTexture(ID3D11Device*, WCHAR*);voidReleaseTexture()
Modelclass.cpp
Tutorial 5: Texturing http://www.rastertek.com/dx11tut05.html

7/14/2019 RasterTek: Direct3D introduction
http://slidepdf.com/reader/full/rastertek-direct3d-introduction 55/709
////////////////////////////////////////////////////////////////////////////////// Filename: modelclass.cpp////////////////////////////////////////////////////////////////////////////////
#include "modelclass.h"
ModelClass::ModelClass(){
m_vertexBuffer =0;m_indexBuffer =0;
The class constructor now initializes the new texture object to null.
m_Texture =0;}
ModelClass::ModelClass(const ModelClass& other){}
ModelClass::~ModelClass()
{}
Initialize now takes as input the file name of the .dds texture that the model will be using.
bool ModelClass::Initialize(ID3D11Device* device, WCHAR* textureFilename){
bool result;
// Initialize the vertex and index buffer that hold the geometry for the triangle.result =InitializeBuffers(device);if(!result){
return false;}
The Initialize function now calls a new private function that will load the texture.
// Load the texture for this model.
result =LoadTexture(device, textureFilename);if(!result){
return false;}
ShutdownBuffers();
return;}
Tutorial 5: Texturing http://www.rastertek.com/dx11tut05.html

7/14/2019 RasterTek: Direct3D introduction
http://slidepdf.com/reader/full/rastertek-direct3d-introduction 56/709
void ModelClass::Render(ID3D11DeviceContext* deviceContext){
// Put the vertex and index buffers on the graphics pipeline to prepare them for drawing.RenderBuffers(deviceContext);
return;}
int ModelClass::GetIndexCount(){
return m_indexCount;}
GetTexture returns the model texture resource. The texture shader will need access to this texture to render the model.
ID3D11ShaderResourceView* ModelClass::GetTexture(){
return m_Texture->GetTexture();}
bool ModelClass::InitializeBuffers(ID3D11Device* device){
VertexType* vertices;unsigned long* indices;D3D11_BUFFER_DESC vertexBufferDesc, indexBufferDesc;D3D11_SUBRESOURCE_DATA vertexData, indexData;HRESULT result;
// Set the number of vertices in the vertex array.m_vertexCount =3;
// Set the number of indices in the index array.m_indexCount =3;
// Create the vertex array.vertices =new VertexType[m_vertexCount];if(!vertices){
return false;}
// Create the index array.indices =new unsigned long[m_indexCount];if(!indices){
vertices[1].position =D3DXVECTOR3(0.0f, 1.0f, 0.0f); // Top middle.vertices[1].texture =D3DXVECTOR2(0.5f, 0.0f);
vertices[2].position =D3DXVECTOR3(1.0f, -1.0f, 0.0f); // Bottom right.vertices[2] texture =D3DXVECTOR2(1 0f 1 0f);
Tutorial 5: Texturing http://www.rastertek.com/dx11tut05.html

7/14/2019 RasterTek: Direct3D introduction
http://slidepdf.com/reader/full/rastertek-direct3d-introduction 57/709
vertices[2].texture =D3DXVECTOR2(1.0f, 1.0f);
// Load the index array with data.indices[0] =0; // Bottom left.indices[1] =1; // Top middle.indices[2] =2; // Bottom right.
// Set up the description of the vertex buffer.vertexBufferDesc.Usage =D3D11_USAGE_DEFAULT;vertexBufferDesc.ByteWidth =sizeof(VertexType) * m_vertexCount;vertexBufferDesc.BindFlags =D3D11_BIND_VERTEX_BUFFER;vertexBufferDesc.CPUAccessFlags =0;vertexBufferDesc.MiscFlags =0;
vertexBufferDesc.StructureByteStride =0;
// Give the subresource structure a pointer to the vertex data.vertexData.pSysMem =vertices;vertexData.SysMemPitch =0;vertexData.SysMemSlicePitch =0;
// Now create the vertex buffer.result =device->CreateBuffer(&vertexBufferDesc, &vertexData, &m_vertexBuffer);if(FAILED(result))
{ return false;}
// Set up the description of the static index buffer.indexBufferDesc.Usage =D3D11_USAGE_DEFAULT;indexBufferDesc.ByteWidth =sizeof(unsigned long) * m_indexCount;indexBufferDesc.BindFlags =D3D11_BIND_INDEX_BUFFER;indexBufferDesc.CPUAccessFlags =0;indexBufferDesc.MiscFlags =0;
indexBufferDesc.StructureByteStride =0;
// Give the subresource structure a pointer to the index data.indexData.pSysMem =indices;
// Create the index buffer.result =device->CreateBuffer(&indexBufferDesc, &indexData, &m_indexBuffer);if(FAILED(result)){
return false;
}
// Release the arrays now that the vertex and index buffers have been created and loaded.delete [] vertices;vertices =0;
delete [] indices
m_indexBuffer =0;}
// Release the vertex buffer.if(m vertexBuffer)
Tutorial 5: Texturing http://www.rastertek.com/dx11tut05.html

7/14/2019 RasterTek: Direct3D introduction
http://slidepdf.com/reader/full/rastertek-direct3d-introduction 58/709
if(m_vertexBuffer){
m_vertexBuffer->Release();m_vertexBuffer =0;
}
return;}
void ModelClass::RenderBuffers(ID3D11DeviceContext* deviceContext){
unsigned int stride;unsigned int offset;
// Set vertex buffer stride and offset.stride =sizeof(VertexType);offset =0;
// Set the vertex buffer to active in the input assembler so it can be rendered.deviceContext->IASetVertexBuffers(0, 1, &m_vertexBuffer, &stride, &offset);
// Set the index buffer to active in the input assembler so it can be rendered.deviceContext->IASetIndexBuffer(m_indexBuffer, DXGI_FORMAT_R32_UINT, 0);
// Set the type of primitive that should be rendered from this vertex buffer, in this case triangles.deviceContext->IASetPrimitiveTopology(D3D11_PRIMITIVE_TOPOLOGY_TRIANGLELIST);
return;}
LoadTexture is a new private function that will create the texture object and then initialize it with the input file name provided. This
function is called during initialization.
bool ModelClass::LoadTexture(ID3D11Device* device, WCHAR* filename){
bool result;
// Create the texture object.m_Texture =new TextureClass;if(!m_Texture)
{ return false;}
// Initialize the texture object.result =m_Texture->Initialize(device, filename);if(!result)
if(m_Texture){
m_Texture->Shutdown();delete m_Texture;m Texture =0;
Tutorial 5: Texturing http://www.rastertek.com/dx11tut05.html

7/14/2019 RasterTek: Direct3D introduction
http://slidepdf.com/reader/full/rastertek-direct3d-introduction 59/709
_ ;}
return;}
Textureshaderclass.h
The TextureShaderClass is just an updated version of the ColorShaderClass from the previous tutorial. This class will be used to drawthe 3D models using vertex and pixel shaders.
////////////////////////////////////////////////////////////////////////////////// Filename: textureshaderclass.h////////////////////////////////////////////////////////////////////////////////#ifndef _TEXTURESHADERCLASS_H_ #define _TEXTURESHADERCLASS_H_
//////////////// INCLUDES ////////////////
#include <d3d11.h>#include <d3dx10math.h>#include <d3dx11async.h>#include <fstream>using namespace std;
////////////////////////////////////////////////////////////////////////////////// Class name: TextureShaderClass////////////////////////////////////////////////////////////////////////////////
class TextureShaderClass{private:
struct MatrixBufferType{
D3DXMATRIX world;D3DXMATRIX view;D3DXMATRIX projection;
};
public: TextureShaderClass(); TextureShaderClass(const TextureShaderClass&);~TextureShaderClass();
bool Initialize(ID3D11Device*, HWND);
ID3D11PixelShader* m_pixelShader;ID3D11InputLayout* m_layout;ID3D11Buffer* m_matrixBuffer;
There is a new private variable for the sampler state pointer. This pointer will be used to interface with the texture shader.
Tutorial 5: Texturing http://www.rastertek.com/dx11tut05.html

7/14/2019 RasterTek: Direct3D introduction
http://slidepdf.com/reader/full/rastertek-direct3d-introduction 60/709
ID3D11SamplerState* m_sampleState;};
#endif
Textureshaderclass.cpp
////////////////////////////////////////////////////////////////////////////////// Filename: textureshaderclass.cpp
////////////////////////////////////////////////////////////////////////////////#include "textureshaderclass.h"
TextureShaderClass::TextureShaderClass(){
m_vertexShader =0;m_pixelShader =0;m_layout =0;m_matrixBuffer =0;
The new sampler variable is set to null in the class constructor.
m_sampleState =0;}
TextureShaderClass::TextureShaderClass(const TextureShaderClass& other){}
TextureShaderClass::~TextureShaderClass(){}
bool TextureShaderClass::Initialize(ID3D11Device* device, HWND hwnd){
bool result;
The new texture.vs and texture.ps HLSL files are loaded for this shader.
// Initialize the vertex and pixel shaders.result =InitializeShader(device, hwnd, L"../Engine/texture.vs", L"../Engine/texture.ps");if(!result)
ShutdownShader();
return;}
Tutorial 5: Texturing http://www.rastertek.com/dx11tut05.html

7/14/2019 RasterTek: Direct3D introduction
http://slidepdf.com/reader/full/rastertek-direct3d-introduction 61/709
The Render function now takes a new parameter called texture which is the pointer to the texture resource. This is then sent into theSetShaderParameters function so that the texture can be set in the shader and then used for rendering.
bool TextureShaderClass::Render(ID3D11DeviceContext* deviceContext, int indexCount, D3DXMATRIX worldMatrix, D3DXMATRIX viewD3DXMATRIX projectionMatrix, ID3D11ShaderResourceView* texture)
{bool result;
// Set the shader parameters that it will use for rendering.result =SetShaderParameters(deviceContext, worldMatrix, viewMatrix, projectionMatrix, texture);if(!result){
return false;}
// Now render the prepared buffers with the shader.RenderShader(deviceContext, indexCount);
return true;}
InitializeShader sets up the texture shader.
bool TextureShaderClass::InitializeShader(ID3D11Device* device, HWND hwnd, WCHAR* vsFilename, WCHAR* psFilename){
HRESULT result;ID3D10Blob* errorMessage;ID3D10Blob* vertexShaderBuffer;ID3D10Blob* pixelShaderBuffer;D3D11_INPUT_ELEMENT_DESC polygonLayout[2];unsigned int numElements;
D3D11_BUFFER_DESC matrixBufferDesc;
We have a new variable to hold the description of the texture sampler that will be setup in this function.
D3D11_SAMPLER_DESC samplerDesc;
// Initialize the pointers this function will use to null.errorMessage =0;vertexShaderBuffer =0;
pixelShaderBuffer =0;
Load in the new texture vertex and pixel shaders.
// Compile the vertex shader code.result =D3DX11CompileFromFile(vsFilename, NULL, NULL, "TextureVertexShader", "vs_5_0", D3D10_SHADER_ENABLE_STRICT
&vertexShaderBuffer &errorMessage NULL)
return false;}
// Compile the pixel shader code.lt D3DX11C il F Fil ( Fil NULL NULL "T t Pi lSh d " " 5 0" D3D10 SHADER ENABLE STRICT
Tutorial 5: Texturing http://www.rastertek.com/dx11tut05.html
7/14/2019 RasterTek: Direct3D introduction
http://slidepdf.com/reader/full/rastertek-direct3d-introduction 62/709
result =D3DX11CompileFromFile(psFilename, NULL, NULL, "TexturePixelShader", "ps_5_0", D3D10_SHADER_ENABLE_STRICT&pixelShaderBuffer, &errorMessage, NULL);
if(FAILED(result)){
// If the shader failed to compile it should have writen something to the error message.if(errorMessage){
OutputShaderErrorMessage(errorMessage, hwnd, psFilename);}// If there was nothing in the error message then it simply could not find the file itself.else{
MessageBox(hwnd, psFilename, L"Missing Shader File", MB_OK);}
return false;}
// Create the vertex shader from the buffer.result =device->CreateVertexShader(vertexShaderBuffer->GetBufferPointer(), vertexShaderBuffer->GetBufferSize(), NULL, &m_verif(FAILED(result)){
return false;}
// Create the pixel shader from the buffer.result =device->CreatePixelShader(pixelShaderBuffer->GetBufferPointer(), pixelShaderBuffer->GetBufferSize(), NULL, &m_pixelShif(FAILED(result)){
return false;}
The input layout has changed as we now have a texture element instead of color. The first position element stays unchanged but theSemanticName and Format of the second element have been changed to TEXCOORD and DXGI_FORMAT_R32G32_FLOAT. Thesetwo changes will now align this layout with our new VertexType in both the ModelClass definition and the typedefs in the shader files.
// Create the vertex input layout description.// This setup needs to match the VertexType stucture in the ModelClass and in the shader.polygonLayout[0].SemanticName ="POSITION";polygonLayout[0].SemanticIndex =0;polygonLayout[0].Format =DXGI_FORMAT_R32G32B32_FLOAT;polygonLayout[0].InputSlot =0;
polygonLayout[0].AlignedByteOffset =0;polygonLayout[0].InputSlotClass =D3D11_INPUT_PER_VERTEX_DATA;polygonLayout[0].InstanceDataStepRate =0;
polygonLayout[1].SemanticName ="TEXCOORD";polygonLayout[1].SemanticIndex =0;polygonLayout[1] Format DXGI FORMAT R32G32 FLOAT
{return false;
}
// Release the vertex shader buffer and pixel shader buffer since they are no longer needed.vertexShaderBuffer >Release();
Tutorial 5: Texturing http://www.rastertek.com/dx11tut05.html

7/14/2019 RasterTek: Direct3D introduction
http://slidepdf.com/reader/full/rastertek-direct3d-introduction 63/709
vertexShaderBuffer->Release();vertexShaderBuffer =0;
pixelShaderBuffer->Release();pixelShaderBuffer =0;
// Setup the description of the dynamic matrix constant buffer that is in the vertex shader.matrixBufferDesc.Usage =D3D11_USAGE_DYNAMIC;matrixBufferDesc.ByteWidth =sizeof(MatrixBufferType);matrixBufferDesc.BindFlags =D3D11_BIND_CONSTANT_BUFFER;matrixBufferDesc.CPUAccessFlags =D3D11_CPU_ACCESS_WRITE;matrixBufferDesc.MiscFlags =0;matrixBufferDesc.StructureByteStride =0;
// Create the constant buffer pointer so we can access the vertex shader constant buffer from within this class.result =device->CreateBuffer(&matrixBufferDesc, NULL, &m_matrixBuffer);if(FAILED(result)){
return false;}
The sampler state description is setup here and then can be passed to the pixel shader after. The most important element of the texturesampler description is Filter. Filter will determine how it decides which pixels will be used or combined to create the final look of thetexture on the polygon face. In the example here I use D3D11_FILTER_MIN_MAG_MIP_LINEAR which is more expensive in terms of processing but gives the best visual result. It tells the sampler to use linear interpolation for minification, magnification, and mip-levelsampling.
AddressU and AddressV are set to Wrap which ensures that the coordinates stay between 0.0f and 1.0f. Anything outside of that wrapsaround and is placed between 0.0f and 1.0f. All other settings for the sampler state description are defaults.
// Create a texture sampler state description.samplerDesc.Filter =D3D11_FILTER_MIN_MAG_MIP_LINEAR;samplerDesc.AddressU =D3D11_TEXTURE_ADDRESS_WRAP;samplerDesc.AddressV =D3D11_TEXTURE_ADDRESS_WRAP;samplerDesc.AddressW =D3D11_TEXTURE_ADDRESS_WRAP;samplerDesc.MipLODBias =0.0f;samplerDesc.MaxAnisotropy =1;samplerDesc.ComparisonFunc =D3D11_COMPARISON_ALWAYS;samplerDesc.BorderColor[0] =0;samplerDesc.BorderColor[1] =0;samplerDesc.BorderColor[2] =0;samplerDesc.BorderColor[3] =0;
samplerDesc.MinLOD =0;samplerDesc.MaxLOD =D3D11_FLOAT32_MAX;
// Create the texture sampler state.result =device->CreateSamplerState(&samplerDesc, &m_sampleState);if(FAILED(result)){
// Release the sampler state.if(m_sampleState){
m_sampleState->Release();m_sampleState =0;
}
Tutorial 5: Texturing http://www.rastertek.com/dx11tut05.html

7/14/2019 RasterTek: Direct3D introduction
http://slidepdf.com/reader/full/rastertek-direct3d-introduction 64/709
}
// Release the matrix constant buffer.
if(m_matrixBuffer){
m_matrixBuffer->Release();m_matrixBuffer =0;
}
// Release the layout.if(m_layout){
m_layout->Release();m_layout =0;
}
// Release the pixel shader.if(m_pixelShader){
m_pixelShader->Release();m_pixelShader =0;
}
// Release the vertex shader.if(m_vertexShader){
m_vertexShader->Release();m_vertexShader =0;
}
return;}
OutputShaderErrorMessage writes out errors to a text file if the HLSL shader could not be loaded.
void TextureShaderClass::OutputShaderErrorMessage(ID3D10Blob* errorMessage, HWND hwnd, WCHAR* shaderFilename){
char* compileErrors;unsigned long bufferSize, i;ofstream fout;
// Get a pointer to the error message text buffer.compileErrors =(char*)(errorMessage->GetBufferPointer());
// Get the length of the message.bufferSize =errorMessage->GetBufferSize();
// Open a file to write the error message to
errorMessage->Release();errorMessage =0;
// Pop a message up on the screen to notify the user to check the text file for compile errors.MessageBox(hwnd, L"Error compiling shader. Check shader-error.txt for message.", shaderFilename, MB_OK);
Tutorial 5: Texturing http://www.rastertek.com/dx11tut05.html

7/14/2019 RasterTek: Direct3D introduction
http://slidepdf.com/reader/full/rastertek-direct3d-introduction 65/709
return;}
SetShaderParameters function now takes in a pointer to a texture resource and then assigns it to the shader using the new textureresource pointer. Note that the texture has to be set before rendering of the buffer occurs.
bool TextureShaderClass::SetShaderParameters(ID3D11DeviceContext* deviceContext, D3DXMATRIX worldMatrix, D3DXMATRIX viewD3DXMATRIX projectionMatrix, ID3D11ShaderResourceView* texture)
{HRESULT result;D3D11_MAPPED_SUBRESOURCE mappedResource;MatrixBufferType* dataPtr;unsigned int bufferNumber;
// Transpose the matrices to prepare them for the shader.D3DXMatrixTranspose(&worldMatrix, &worldMatrix);D3DXMatrixTranspose(&viewMatrix, &viewMatrix);D3DXMatrixTranspose(&projectionMatrix, &projectionMatrix);
// Lock the constant buffer so it can be written to.result =deviceContext->Map(m_matrixBuffer, 0, D3D11_MAP_WRITE_DISCARD, 0, &mappedResource);if(FAILED(result)){
return false;}
// Get a pointer to the data in the constant buffer.dataPtr =(MatrixBufferType*)mappedResource.pData;
// Copy the matrices into the constant buffer.dataPtr->world =worldMatrix;dataPtr->view =viewMatrix;dataPtr->projection =projectionMatrix;
// Unlock the constant buffer.deviceContext->Unmap(m_matrixBuffer, 0);
// Set the position of the constant buffer in the vertex shader.bufferNumber =0;
// Now set the constant buffer in the vertex shader with the updated values.deviceContext->VSSetConstantBuffers(bufferNumber, 1, &m_matrixBuffer);
The SetShaderParameters function has been modified from the previous tutorial to include setting the texture in the pixel shader now.
// Set shader texture resource in the pixel shader.deviceContext >PSSetShaderResources(0 1 &texture)
deviceContext->VSSetShader(m_vertexShader, NULL, 0);deviceContext->PSSetShader(m_pixelShader, NULL, 0);
The RenderShader function has been changed to include setting the sample state in the pixel shader before rendering.
// Set the sampler state in the pixel shader.
Tutorial 5: Texturing http://www.rastertek.com/dx11tut05.html

7/14/2019 RasterTek: Direct3D introduction
http://slidepdf.com/reader/full/rastertek-direct3d-introduction 66/709
// p pdeviceContext->PSSetSamplers(0, 1, &m_sampleState);
// Render the triangle.deviceContext->DrawIndexed(indexCount, 0, 0);
return;}
Graphicsclass.h
////////////////////////////////////////////////////////////////////////////////// Filename: graphicsclass.h////////////////////////////////////////////////////////////////////////////////#ifndef _GRAPHICSCLASS_H_ #define _GRAPHICSCLASS_H_
///////////////////////// MY CLASS INCLUDES //
///////////////////////#include "d3dclass.h"#include "cameraclass.h"#include "modelclass.h"
The GraphicsClass now includes the new TextureShaderClass header and the ColorShaderClass header has been removed.
#include "textureshaderclass.h"
/////////////// GLOBALS ///////////////const bool FULL_SCREEN =true;const bool VSYNC_ENABLED =true;const float SCREEN_DEPTH =1000.0f;const float SCREEN_NEAR =0.1f;
////////////////////////////////////////////////////////////////////////////////
// Class name: GraphicsClass////////////////////////////////////////////////////////////////////////////////class GraphicsClass{public:
GraphicsClass();
ModelClass* m_Model;
A new TextureShaderClass private object has been added.
TextureShaderClass* m_TextureShader;};
Tutorial 5: Texturing http://www.rastertek.com/dx11tut05.html

7/14/2019 RasterTek: Direct3D introduction
http://slidepdf.com/reader/full/rastertek-direct3d-introduction 67/709
#endif
Graphicsclass.cpp
////////////////////////////////////////////////////////////////////////////////// Filename: graphicsclass.cpp////////////////////////////////////////////////////////////////////////////////#include "graphicsclass.h"
The m_TextureShader variable is set to null in the constructor.
GraphicsClass::GraphicsClass(){
m_D3D =0;m_Camera =0;m_Model =0;m_TextureShader =0;
}
GraphicsClass::GraphicsClass(const GraphicsClass& other){}
GraphicsClass::~GraphicsClass(){}
bool GraphicsClass::Initialize(int screenWidth, int screenHeight, HWND hwnd){
bool result;
// Create the Direct3D object.m_D3D =new D3DClass;if(!m_D3D)
{ return false;}
// Initialize the Direct3D object.result =m_D3D->Initialize(screenWidth, screenHeight, VSYNC_ENABLED, hwnd, FULL_SCREEN, SCREEN_DEPTH, SCREEN_N
// Create the model object.m_Model =new ModelClass;if(!m_Model){
return false;}
Tutorial 5: Texturing http://www.rastertek.com/dx11tut05.html

7/14/2019 RasterTek: Direct3D introduction
http://slidepdf.com/reader/full/rastertek-direct3d-introduction 68/709
The ModelClass::Initialize function now takes in the name of the texture that will be used for rendering the model.
// Initialize the model object.result =m_Model->Initialize(m_D3D->GetDevice(), L"../Engine/data/seafloor.dds");if(!result){
MessageBox(hwnd, L"Could not initialize the model object.", L"Error", MB_OK);return false;
}
The new TextureShaderClass object is created and initialized.
// Create the texture shader object.m_TextureShader =new TextureShaderClass;if(!m_TextureShader){
return false;}
// Initialize the texture shader object.result =m_TextureShader->Initialize(m_D3D->GetDevice(), hwnd);
if(!result){
MessageBox(hwnd, L"Could not initialize the texture shader object.", L"Error", MB_OK);return false;
}
return true;}
void GraphicsClass::Shutdown(){
The TextureShaderClass object is also released in the Shutdown function.
// Release the texture shader object.if(m_TextureShader){
m_TextureShader->Shutdown();delete m_TextureShader;m_TextureShader =0;
}
// Release the model object.if(m_Model){
// Release the Direct3D object.if(m_D3D){
m_D3D->Shutdown();delete m_D3D;m_D3D =0;
}
Tutorial 5: Texturing http://www.rastertek.com/dx11tut05.html

7/14/2019 RasterTek: Direct3D introduction
http://slidepdf.com/reader/full/rastertek-direct3d-introduction 69/709
}
return;}
bool GraphicsClass::Frame(){
bool result;
// Render the graphics scene.
result =Render();if(!result){
return false;}
return true;}
bool GraphicsClass::Render(){
D3DXMATRIX viewMatrix, projectionMatrix, worldMatrix;bool result;
// Clear the buffers to begin the scene.m_D3D->BeginScene(0.0f, 0.0f, 0.0f, 1.0f);
// Generate the view matrix based on the camera's position.m_Camera->Render();
// Get the view, projection, and world matrices from the camera and d3d objects.m_Camera->GetViewMatrix(viewMatrix);m_D3D->GetProjectionMatrix(projectionMatrix);m_D3D->GetWorldMatrix(worldMatrix);
// Put the model vertex and index buffers on the graphics pipeline to prepare them for drawing.m_Model->Render(m_D3D->GetDevice());
The texture shader is called now instead of the color shader to render the model. Notice it also takes the texture resource pointer fromthe model so the texture shader has access to the texture from the model object.
// Render the model using the texture shader.result =m_TextureShader->Render(m_D3D->GetDeviceContext(), m_Model->GetIndexCount(), worldMatrix, viewMatrix, projectionM
m Model >GetTexture())
Summary
You should now understand the basics of loading a texture, mapping it to a polygon face, and then rendering it with a shader.
Tutorial 5: Texturing http://www.rastertek.com/dx11tut05.html

7/14/2019 RasterTek: Direct3D introduction
http://slidepdf.com/reader/full/rastertek-direct3d-introduction 70/709
To Do Exercises
1. Re-compile the code and ensure that a texture mapped triangle does appear on your screen. Press escape to quit once done.
2. Create your own dds texture and place it in the same directory with seafloor.dds. Inside the GraphicsClass::Initialize function changethe model initialization to have your texture name and then re-compile and run the program.
3. Change the code to create two triangles that form a square. Map the entire texture to this square so that the entire texture shows upcorrectly on the screen.
4. Move the camera to different distances to see the effect of the MIN_MAG_MIP_LINEAR filter.
5. Try some of the other filters and move the camera to different distances to see the different results.
Source Code
Visual Studio 2010 Project: dx11tut05.zip
Source Only: dx11src05.zip
Executable Only: dx11exe05.zip
Back to Tutorial Index
Tutorial 6: Diffuse Lighting
In this tutorial I will cover how to light 3D objects using diffuse lighting and DirectX 11. We will start with the code from the previous tutorial and modify it.
Tutorial 6: Diffuse Lighting http://www.rastertek.com/dx11tut06.html

7/14/2019 RasterTek: Direct3D introduction
http://slidepdf.com/reader/full/rastertek-direct3d-introduction 71/709
The type of diffuse lighting we will be implementing is called directional lighting. Directional lighting is similar to how the Sun illuminates the Earth. It is a light source
that is a great distance away and based on the direction it is sending light you can determine the amount of light on any object. However unlike ambient lighting(another lighting model we will cover soon) it will not light up surfaces it does not directly touch.
I picked directional lighting to start with because it is very easy to debug visually. Also since it only requires a direction the formula is simpler than the other types of diffuse lighting such as spot lights and point lights.
The implementation of diffuse lighting in DirectX 11 is done with both vertex and pixel shaders. Diffuse lighting requires just the direction and a normal vector for anypolygons that we want to light. The direction is a single vector that you define, and you can calculate the normal for any polygon by using the three vertices thatcompose the polygon. In this tutorial we will also implement the color of the diffuse light in the lighting equation.
Framework
For this tutorial we will create a new class called LightClass which will represent the light sources in the scenes. LightClass won't actually do anything other thanhold the direction and color of the light. We will also remove the TextureShaderClass and replace it with LightShaderClass which handles the light shading on themodel. With the addition of the new classes the frame work now looks like the following:
We will start the code section by looking at the HLSL light shader. You will notice that the light shader is just an updated version of the texture shader from theprevious tutorial.
1 of 34 3/8/2013 12:27 PM
Light.vs
////////////////////////////////////////////////////////////////////////////////// Filename: light.vs////////////////////////////////////////////////////////////////////////////////
Tutorial 6: Diffuse Lighting http://www.rastertek.com/dx11tut06.html

7/14/2019 RasterTek: Direct3D introduction
http://slidepdf.com/reader/full/rastertek-direct3d-introduction 72/709
/////////////// GLOBALS ///////////////cbuffer MatrixBuffer{
matrix worldMatrix;matrix viewMatrix;matrix projectionMatrix;
};
Both structures now have a 3 float normal vector. The normal vector is used for calculating the amount of light by using the angle between the direction of thenormal and the direction of the light.
//////////////// TYPEDEFS ////////////////struct VertexInputType{
float4 position : POSITION;float2 tex : TEXCOORD0;float3 normal : NORMAL;
};
struct PixelInputType{
float4 position : SV_POSITION;float2 tex : TEXCOORD0;
float3 normal : NORMAL;};
////////////////////////////////////////////////////////////////////////////////// Vertex Shader////////////////////////////////////////////////////////////////////////////////PixelInputType LightVertexShader(VertexInputType input){
PixelInputType output;
2 of 34 3/8/2013 12:27 PM
// Change the position vector to be 4 units for proper matrix calculations.input.position.w =1.0f;
// Calculate the position of the vertex against the world, view, and projection matrices.i i l(i i i ld i )
Tutorial 6: Diffuse Lighting http://www.rastertek.com/dx11tut06.html

7/14/2019 RasterTek: Direct3D introduction
http://slidepdf.com/reader/full/rastertek-direct3d-introduction 73/709
output.position =mul(input.position, worldMatrix);
output.position =mul(output.position, viewMatrix);output.position =mul(output.position, projectionMatrix);
// Store the texture coordinates for the pixel shader.output.tex =input.tex;
The normal vector for this vertex is calculated in world space and then normalized before being sent as input into the pixel shader.
// Calculate the normal vector against the world matrix only.
output.normal =mul(input.normal, (float3x3)worldMatrix);
// Normalize the normal vector.output.normal =normalize(output.normal);
return output;}
Light.ps
////////////////////////////////////////////////////////////////////////////////// Filename: light.ps////////////////////////////////////////////////////////////////////////////////
/////////////// GLOBALS ///////////////
Texture2D shaderTexture;SamplerState SampleType;
We have two new global variables inside the LightBuffer that hold the diffuse color and the direction of the light. These two variables will be set from values in thenew LightClass object.
cbuffer LightBuffer{
3 of 34 3/8/2013 12:27 PM
float4 diffuseColor;float3 lightDirection;float padding;
};
//////////////
Tutorial 6: Diffuse Lighting http://www.rastertek.com/dx11tut06.html

7/14/2019 RasterTek: Direct3D introduction
http://slidepdf.com/reader/full/rastertek-direct3d-introduction 74/709
//////////////
// TYPEDEFS ////////////////struct PixelInputType{
float4 position : SV_POSITION;float2 tex : TEXCOORD0;float3 normal : NORMAL;
};
////////////////////////////////////////////////////////////////////////////////// Pixel Shader////////////////////////////////////////////////////////////////////////////////float4 LightPixelShader(PixelInputType input) : SV_TARGET{
float4 textureColor;float3 lightDir;float lightIntensity;
float4 color;
// Sample the pixel color from the texture using the sampler at this texture coordinate location.textureColor =shaderTexture.Sample(SampleType, input.tex);
This is where the lighting equation that was discussed earlier is now implemented. The light intensity value is calculated as the dot product between the normalvector of triangle and the light direction vector.
// Invert the light direction for calculations.lightDir =-lightDirection;
// Calculate the amount of light on this pixel.lightIntensity =saturate(dot(input.normal, lightDir));
And finally the diffuse value of the light is combined with the texture pixel value to produce the color result.
// Determine the final amount of diffuse color based on the diffuse color combined with the light intensity.
color =saturate(diffuseColor * lightIntensity);
4 of 34 3/8/2013 12:27 PM
// Multiply the texture pixel and the final diffuse color to get the final pixel color result.color =color * textureColor;
return color;}
Tutorial 6: Diffuse Lighting http://www.rastertek.com/dx11tut06.html

7/14/2019 RasterTek: Direct3D introduction
http://slidepdf.com/reader/full/rastertek-direct3d-introduction 75/709
Lightshaderclass.h
The new LightShaderClass is just the TextureShaderClass from the previous tutorials re-written slightly to incorporate lighting.
////////////////////////////////////////////////////////////////////////////////// Filename: lightshaderclass.h////////////////////////////////////////////////////////////////////////////////#ifndef _LIGHTSHADERCLASS_H_
#define _LIGHTSHADERCLASS_H_
//////////////// INCLUDES ////////////////#include <d3d11.h>#include <d3dx10math.h>#include <d3dx11async.h>
#include <fstream>using namespace std;
////////////////////////////////////////////////////////////////////////////////// Class name: LightShaderClass////////////////////////////////////////////////////////////////////////////////class LightShaderClass{
private:struct MatrixBufferType{
D3DXMATRIX world;D3DXMATRIX view;D3DXMATRIX projection;
};
The new LightBufferType structure will be used for holding lighting information. This typedef is the same as the new typedef in the pixel shader. Do note that I add aextra float for size padding to ensure the structure is a multiple of 16. Since the structure without an extra float is only 28 bytes CreateBuffer would have failed if we
5 of 34 3/8/2013 12:27 PM
used a sizeof(LightBufferType) because it requires sizes that are a multiple of 16 to succeed.
struct LightBufferType{
D3DXVECTOR4 diffuseColor;D3DXVECTOR3 lightDirection;float padding; // Added extra padding so structure is a multiple of 16 for CreateBuffer function requirements
Tutorial 6: Diffuse Lighting http://www.rastertek.com/dx11tut06.html

7/14/2019 RasterTek: Direct3D introduction
http://slidepdf.com/reader/full/rastertek-direct3d-introduction 76/709
float padding; // Added extra padding so structure is a multiple of 16 for CreateBuffer function requirements.
};
public:LightShaderClass();LightShaderClass(const LightShaderClass&);~LightShaderClass();
bool Initialize(ID3D11Device*, HWND);void Shutdown();
bool Render(ID3D11DeviceContext*, int, D3DXMATRIX, D3DXMATRIX, D3DXMATRIX, ID3D11ShaderResourceView*, D3DXVECTOR3, D3DXVECTOR4);
private:bool InitializeShader(ID3D11Device*, HWND, WCHAR*, WCHAR*);void ShutdownShader();void OutputShaderErrorMessage(ID3D10Blob*, HWND, WCHAR*);
bool SetShaderParameters(ID3D11DeviceContext*, D3DXMATRIX, D3DXMATRIX, D3DXMATRIX, ID3D11ShaderResourceView*, D3DXVECTOR3, D3DXVECvoid RenderShader(ID3D11DeviceContext*, int);
private:ID3D11VertexShader* m_vertexShader;ID3D11PixelShader* m_pixelShader;ID3D11InputLayout* m_layout;ID3D11SamplerState* m_sampleState;ID3D11Buffer* m_matrixBuffer;
There is a new private constant buffer for the light information (color and direction). The light buffer will be used by this class to set the global light variables inside
the HLSL pixel shader.
ID3D11Buffer* m_lightBuffer;};
#endif
Lightshaderclass.cpp
6 of 34 3/8/2013 12:27 PM
////////////////////////////////////////////////////////////////////////////////// Filename: lightshaderclass.cpp////////////////////////////////////////////////////////////////////////////////#include "lightshaderclass.h"
LightShaderClass::LightShaderClass()
Tutorial 6: Diffuse Lighting http://www.rastertek.com/dx11tut06.html

7/14/2019 RasterTek: Direct3D introduction
http://slidepdf.com/reader/full/rastertek-direct3d-introduction 77/709
LightShaderClass::LightShaderClass()
{m_vertexShader =0;m_pixelShader =0;m_layout =0;m_sampleState =0;m_matrixBuffer =0;
Set the light constant buffer to null in the class constructor.
m_lightBuffer =0;}
LightShaderClass::LightShaderClass(const LightShaderClass& other){}
LightShaderClass::~LightShaderClass(){}
bool LightShaderClass::Initialize(ID3D11Device* device, HWND hwnd){
bool result;
The new light.vs and light.ps HLSL shader files are used as input to initialize the light shader.
// Initialize the vertex and pixel shaders.result =InitializeShader(device, hwnd, L"../Engine/light.vs", L"../Engine/light.ps");if(!result){
return false;}
return true;}
7 of 34 3/8/2013 12:27 PM
void LightShaderClass::Shutdown(){
// Shutdown the vertex and pixel shaders as well as the related objects.ShutdownShader();
Tutorial 6: Diffuse Lighting http://www.rastertek.com/dx11tut06.html
7/14/2019 RasterTek: Direct3D introduction
http://slidepdf.com/reader/full/rastertek-direct3d-introduction 78/709
return;}
The Render function now takes in the light direction and light diffuse color as inputs. These variables are then sent into the SetShaderParameters function andfinally set inside the shader itself.
bool LightShaderClass::Render(ID3D11DeviceContext* deviceContext, int indexCount, D3DXMATRIX worldMatrix, D3DXMATRIX viewMatrix,D3DXMATRIX projectionMatrix, ID3D11ShaderResourceView* texture, D3DXVECTOR3 lightDirection, D3DXVECTOR4 diffuseColor)
{
bool result;
// Set the shader parameters that it will use for rendering.result =SetShaderParameters(deviceContext, worldMatrix, viewMatrix, projectionMatrix, texture, lightDirection, diffuseColor);if(!result){
return false;}
// Now render the prepared buffers with the shader.RenderShader(deviceContext, indexCount);
return true;}
bool LightShaderClass::InitializeShader(ID3D11Device* device, HWND hwnd, WCHAR* vsFilename, WCHAR* psFilename)
{HRESULT result;ID3D10Blob* errorMessage;ID3D10Blob* vertexShaderBuffer;ID3D10Blob* pixelShaderBuffer;
The polygonLayout variable has been changed to have three elements instead of two. This is so that it can accommodate a normal vector in the layout.
D3D11_INPUT_ELEMENT_DESC polygonLayout[3];
unsigned int numElements;D3D11_SAMPLER_DESC samplerDesc;
8 of 34 3/8/2013 12:27 PM
D3D11_BUFFER_DESC matrixBufferDesc;
We also add a new description variable for the light constant buffer.
D3D11_BUFFER_DESC lightBufferDesc;
Tutorial 6: Diffuse Lighting http://www.rastertek.com/dx11tut06.html

7/14/2019 RasterTek: Direct3D introduction
http://slidepdf.com/reader/full/rastertek-direct3d-introduction 79/709
// Initialize the pointers this function will use to null.errorMessage =0;vertexShaderBuffer =0;pixelShaderBuffer =0;
Load in the new light vertex shader.
// Compile the vertex shader code.result =D3DX11CompileFromFile(vsFilename, NULL, NULL, "LightVertexShader", "vs_5_0", D3D10_SHADER_ENABLE_STRICTNESS, 0, NULL,
&vertexShaderBuffer, &errorMessage, NULL);if(FAILED(result)){
// If the shader failed to compile it should have writen something to the error message.if(errorMessage){
OutputShaderErrorMessage(errorMessage, hwnd, vsFilename);}// If there was nothing in the error message then it simply could not find the shader file itself.
else{
MessageBox(hwnd, vsFilename, L"Missing Shader File", MB_OK);}
return false;}
Load in the new light pixel shader.
// Compile the pixel shader code.result =D3DX11CompileFromFile(psFilename, NULL, NULL, "LightPixelShader", "ps_5_0", D3D10_SHADER_ENABLE_STRICTNESS, 0, NULL,
&pixelShaderBuffer, &errorMessage, NULL);if(FAILED(result)){
// If the shader failed to compile it should have writen something to the error message.if(errorMessage){
OutputShaderErrorMessage(errorMessage, hwnd, psFilename);}
9 of 34 3/8/2013 12:27 PM
// If there was nothing in the error message then it simply could not find the file itself.else{
MessageBox(hwnd, psFilename, L"Missing Shader File", MB_OK);}
return false;
Tutorial 6: Diffuse Lighting http://www.rastertek.com/dx11tut06.html

7/14/2019 RasterTek: Direct3D introduction
http://slidepdf.com/reader/full/rastertek-direct3d-introduction 80/709
}
// Create the vertex shader from the buffer.result =device->CreateVertexShader(vertexShaderBuffer->GetBufferPointer(), vertexShaderBuffer->GetBufferSize(), NULL, &m_vertexShader);if(FAILED(result)){
return false;}
// Create the pixel shader from the buffer.result =device->CreatePixelShader(pixelShaderBuffer->GetBufferPointer(), pixelShaderBuffer->GetBufferSize(), NULL, &m_pixelShader);if(FAILED(result)){
return false;}
// Create the vertex input layout description.// This setup needs to match the VertexType stucture in the ModelClass and in the shader.
polygonLayout[0].SemanticName ="POSITION";polygonLayout[0].SemanticIndex =0;polygonLayout[0].Format =DXGI_FORMAT_R32G32B32_FLOAT;polygonLayout[0].InputSlot =0;polygonLayout[0].AlignedByteOffset =0;polygonLayout[0].InputSlotClass =D3D11_INPUT_PER_VERTEX_DATA;polygonLayout[0].InstanceDataStepRate =0;
polygonLayout[1].SemanticName ="TEXCOORD";
polygonLayout[1].SemanticIndex =0;polygonLayout[1].Format =DXGI_FORMAT_R32G32_FLOAT;polygonLayout[1].InputSlot =0;polygonLayout[1].AlignedByteOffset =D3D11_APPEND_ALIGNED_ELEMENT;polygonLayout[1].InputSlotClass =D3D11_INPUT_PER_VERTEX_DATA;polygonLayout[1].InstanceDataStepRate =0;
One of the major changes to the shader initialization is here in the polygonLayout. We add a third element for the normal vector that will be used for lighting. Thesemantic name is NORMAL and the format is the regular DXGI_FORMAT_R32G32B32_FLOAT which handles 3 floats for the x, y, and z of the normal vector. The
layout will now match the expected input to the HLSL vertex shader.
10 of 34 3/8/2013 12:27 PM
polygonLayout[2].SemanticName ="NORMAL";polygonLayout[2].SemanticIndex =0;polygonLayout[2].Format =DXGI_FORMAT_R32G32B32_FLOAT;polygonLayout[2].InputSlot =0;polygonLayout[2].AlignedByteOffset =D3D11_APPEND_ALIGNED_ELEMENT;polygonLayout[2].InputSlotClass =D3D11_INPUT_PER_VERTEX_DATA;polygonLayout[2].InstanceDataStepRate =0;
Tutorial 6: Diffuse Lighting http://www.rastertek.com/dx11tut06.html

7/14/2019 RasterTek: Direct3D introduction
http://slidepdf.com/reader/full/rastertek-direct3d-introduction 81/709
// Get a count of the elements in the layout.numElements =sizeof(polygonLayout) / sizeof(polygonLayout[0]);
// Create the vertex input layout.result =device->CreateInputLayout(polygonLayout, numElements, vertexShaderBuffer->GetBufferPointer(), vertexShaderBuffer->GetBufferSize(),
&m_layout);if(FAILED(result)){
return false;}
// Release the vertex shader buffer and pixel shader buffer since they are no longer needed.vertexShaderBuffer->Release();vertexShaderBuffer =0;
pixelShaderBuffer->Release();pixelShaderBuffer =0;
// Create a texture sampler state description.samplerDesc.Filter =D3D11_FILTER_MIN_MAG_MIP_LINEAR;samplerDesc.AddressU =D3D11_TEXTURE_ADDRESS_WRAP;samplerDesc.AddressV =D3D11_TEXTURE_ADDRESS_WRAP;samplerDesc.AddressW =D3D11_TEXTURE_ADDRESS_WRAP;samplerDesc.MipLODBias =0.0f;samplerDesc.MaxAnisotropy =1;samplerDesc.ComparisonFunc =D3D11_COMPARISON_ALWAYS;
samplerDesc.BorderColor[0] =0;samplerDesc.BorderColor[1] =0;samplerDesc.BorderColor[2] =0;samplerDesc.BorderColor[3] =0;samplerDesc.MinLOD =0;samplerDesc.MaxLOD =D3D11_FLOAT32_MAX;
// Create the texture sampler state.result =device->CreateSamplerState(&samplerDesc, &m_sampleState);
if(FAILED(result)){
11 of 34 3/8/2013 12:27 PM
return false;}
// Setup the description of the dynamic matrix constant buffer that is in the vertex shader.matrixBufferDesc.Usage =D3D11_USAGE_DYNAMIC;matrixBufferDesc.ByteWidth =sizeof(MatrixBufferType);matrixBufferDesc.BindFlags =D3D11_BIND_CONSTANT_BUFFER;
Tutorial 6: Diffuse Lighting http://www.rastertek.com/dx11tut06.html

7/14/2019 RasterTek: Direct3D introduction
http://slidepdf.com/reader/full/rastertek-direct3d-introduction 82/709
matrixBufferDesc.CPUAccessFlags =D3D11_CPU_ACCESS_WRITE;matrixBufferDesc.MiscFlags =0;matrixBufferDesc.StructureByteStride =0;
// Create the constant buffer pointer so we can access the vertex shader constant buffer from within this class.result =device->CreateBuffer(&matrixBufferDesc, NULL, &m_matrixBuffer);if(FAILED(result)){
return false;
}
Here we setup the light constant buffer description which will handle the diffuse light color and light direction. Pay attention to the size of the constant buffers, if theyare not multiples of 16 you need to pad extra space on to the end of them or the CreateBuffer function will fail. In this case the constant buffer is 28 bytes with 4bytes padding to make it 32.
// Setup the description of the light dynamic constant buffer that is in the pixel shader.// Note that ByteWidth always needs to be a multiple of 16 if using D3D11_BIND_CONSTANT_BUFFER or CreateBuffer will fail.lightBufferDesc.Usage =D3D11_USAGE_DYNAMIC;
lightBufferDesc.ByteWidth =sizeof(LightBufferType);lightBufferDesc.BindFlags =D3D11_BIND_CONSTANT_BUFFER;lightBufferDesc.CPUAccessFlags =D3D11_CPU_ACCESS_WRITE;lightBufferDesc.MiscFlags =0;lightBufferDesc.StructureByteStride =0;
// Create the constant buffer pointer so we can access the vertex shader constant buffer from within this class.result =device->CreateBuffer(&lightBufferDesc, NULL, &m_lightBuffer);if(FAILED(result))
{return false;
}
return true;}
void LightShaderClass::ShutdownShader()
{
12 of 34 3/8/2013 12:27 PM
The new light constant buffer is released in the ShutdownShader function.
// Release the light constant buffer.if(m_lightBuffer){
m_lightBuffer->Release();m_lightBuffer =0;
Tutorial 6: Diffuse Lighting http://www.rastertek.com/dx11tut06.html

7/14/2019 RasterTek: Direct3D introduction
http://slidepdf.com/reader/full/rastertek-direct3d-introduction 83/709
}
// Release the matrix constant buffer.if(m_matrixBuffer){
m_matrixBuffer->Release();m_matrixBuffer =0;
}
// Release the sampler state.if(m_sampleState){
m_sampleState->Release();m_sampleState =0;
}
// Release the layout.if(m_layout)
{m_layout->Release();m_layout =0;
}
// Release the pixel shader.if(m_pixelShader){
m_pixelShader->Release();
m_pixelShader =0;}
// Release the vertex shader.if(m_vertexShader){
m_vertexShader->Release();m_vertexShader =0;
}
return;
13 of 34 3/8/2013 12:27 PM
}
void LightShaderClass::OutputShaderErrorMessage(ID3D10Blob* errorMessage, HWND hwnd, WCHAR* shaderFilename){
char* compileErrors;unsigned long bufferSize, i;
Tutorial 6: Diffuse Lighting http://www.rastertek.com/dx11tut06.html

7/14/2019 RasterTek: Direct3D introduction
http://slidepdf.com/reader/full/rastertek-direct3d-introduction 84/709
ofstream fout;
// Get a pointer to the error message text buffer.compileErrors =(char*)(errorMessage->GetBufferPointer());
// Get the length of the message.bufferSize =errorMessage->GetBufferSize();
// Open a file to write the error message to.fout.open("shader-error.txt");
// Write out the error message.for(i=0; i<bufferSize; i++){
fout <<compileErrors[i];}
// Close the file.fout.close();
// Release the error message.errorMessage->Release();errorMessage =0;
// Pop a message up on the screen to notify the user to check the text file for compile errors.MessageBox(hwnd, L"Error compiling shader. Check shader-error.txt for message.", shaderFilename, MB_OK);
return;}
The SetShaderParameters function now takes in lightDirection and diffuseColor as inputs.
bool LightShaderClass::SetShaderParameters(ID3D11DeviceContext* deviceContext, D3DXMATRIX worldMatrix, D3DXMATRIX viewMatrix,D3DXMATRIX projectionMatrix, ID3D11ShaderResourceView* texture, D3DXVECTOR3 lightDirection,D3DXVECTOR4 diffuseColor)
{HRESULT result;
14 of 34 3/8/2013 12:27 PM
D3D11_MAPPED_SUBRESOURCE mappedResource;unsigned int bufferNumber;MatrixBufferType* dataPtr;LightBufferType* dataPtr2;
// Transpose the matrices to prepare them for the shader.
Tutorial 6: Diffuse Lighting http://www.rastertek.com/dx11tut06.html

7/14/2019 RasterTek: Direct3D introduction
http://slidepdf.com/reader/full/rastertek-direct3d-introduction 85/709
D3DXMatrixTranspose(&worldMatrix, &worldMatrix);D3DXMatrixTranspose(&viewMatrix, &viewMatrix);D3DXMatrixTranspose(&projectionMatrix, &projectionMatrix);
// Lock the constant buffer so it can be written to.result =deviceContext->Map(m_matrixBuffer, 0, D3D11_MAP_WRITE_DISCARD, 0, &mappedResource);if(FAILED(result)){
return false;
}
// Get a pointer to the data in the constant buffer.dataPtr =(MatrixBufferType*)mappedResource.pData;
// Copy the matrices into the constant buffer.dataPtr->world =worldMatrix;dataPtr->view =viewMatrix;dataPtr->projection =projectionMatrix;
// Unlock the constant buffer.deviceContext->Unmap(m_matrixBuffer, 0);
// Set the position of the constant buffer in the vertex shader.bufferNumber =0;
// Now set the constant buffer in the vertex shader with the updated values.deviceContext->VSSetConstantBuffers(bufferNumber, 1, &m_matrixBuffer);
// Set shader texture resource in the pixel shader.deviceContext->PSSetShaderResources(0, 1, &texture);
The light constant buffer is setup the same way as the matrix constant buffer. We first lock the buffer and get a pointer to it. After that we set the diffuse color andlight direction using that pointer. Once the data is set we unlock the buffer and then set it in the pixel shader. Note that we use the PSSetConstantBuffers functioninstead of VSSetConstantBuffers since this is a pixel shader buffer we are setting.
// Lock the light constant buffer so it can be written to.
result =deviceContext->Map(m_lightBuffer, 0, D3D11_MAP_WRITE_DISCARD, 0, &mappedResource);if(FAILED(result))
15 of 34 3/8/2013 12:27 PM
{return false;
}
// Get a pointer to the data in the constant buffer.dataPtr2 =(LightBufferType*)mappedResource.pData;
Tutorial 6: Diffuse Lighting http://www.rastertek.com/dx11tut06.html

7/14/2019 RasterTek: Direct3D introduction
http://slidepdf.com/reader/full/rastertek-direct3d-introduction 86/709
// Copy the lighting variables into the constant buffer.dataPtr2->diffuseColor =diffuseColor;dataPtr2->lightDirection =lightDirection;dataPtr2->padding =0.0f;
// Unlock the constant buffer.deviceContext->Unmap(m_lightBuffer, 0);
// Set the position of the light constant buffer in the pixel shader.
bufferNumber =0;
// Finally set the light constant buffer in the pixel shader with the updated values.deviceContext->PSSetConstantBuffers(bufferNumber, 1, &m_lightBuffer);
return true;}
void LightShaderClass::RenderShader(ID3D11DeviceContext* deviceContext, int indexCount){// Set the vertex input layout.deviceContext->IASetInputLayout(m_layout);
// Set the vertex and pixel shaders that will be used to render this triangle.deviceContext->VSSetShader(m_vertexShader, NULL, 0);deviceContext->PSSetShader(m_pixelShader, NULL, 0);
// Set the sampler state in the pixel shader.deviceContext->PSSetSamplers(0, 1, &m_sampleState);
// Render the triangle.deviceContext->DrawIndexed(indexCount, 0, 0);
return;}
16 of 34 3/8/2013 12:27 PM
Modelclass.h
The ModelClass has been slightly modified to handle lighting components.
////////////////////////////////////////////////////////////////////////////////// Filename: modelclass.h////////////////////////////////////////////////////////////////////////////////
#if d f MODELCLASS H
Tutorial 6: Diffuse Lighting http://www.rastertek.com/dx11tut06.html

7/14/2019 RasterTek: Direct3D introduction
http://slidepdf.com/reader/full/rastertek-direct3d-introduction 87/709
#ifndef _MODELCLASS_H_ #define _MODELCLASS_H_
//////////////// INCLUDES ////////////////#include <d3d11.h>#include <d3dx10math.h>
///////////////////////// MY CLASS INCLUDES /////////////////////////#include "textureclass.h"
////////////////////////////////////////////////////////////////////////////////
// Class name: ModelClass////////////////////////////////////////////////////////////////////////////////class ModelClass{private:
The VertexType structure now has a normal vector to accommodate lighting.
struct VertexType
{D3DXVECTOR3 position;D3DXVECTOR2 texture;D3DXVECTOR3 normal;
};
public:ModelClass();ModelClass(const ModelClass&);
~ModelClass();
17 of 34 3/8/2013 12:27 PM
bool Initialize(ID3D11Device*, WCHAR*);void Shutdown();void Render(ID3D11DeviceContext*);
int GetIndexCount();ID3D11ShaderResourceView* GetTexture();
Tutorial 6: Diffuse Lighting http://www.rastertek.com/dx11tut06.html

7/14/2019 RasterTek: Direct3D introduction
http://slidepdf.com/reader/full/rastertek-direct3d-introduction 88/709
private:bool InitializeBuffers(ID3D11Device*);void ShutdownBuffers();void RenderBuffers(ID3D11DeviceContext*);
bool LoadTexture(ID3D11Device*, WCHAR*);void ReleaseTexture();
private:ID3D11Buffer *m_vertexBuffer, *m_indexBuffer;int m_vertexCount, m_indexCount;
TextureClass* m_Texture;};
#endif
Modelclass.cpp
////////////////////////////////////////////////////////////////////////////////// Filename: modelclass.cpp////////////////////////////////////////////////////////////////////////////////#include "modelclass.h"
ModelClass::ModelClass(){
m_vertexBuffer =0;m_indexBuffer =0;m_Texture =0;
}
ModelClass::ModelClass(const ModelClass& other)
18 of 34 3/8/2013 12:27 PM
{}
ModelClass::~ModelClass(){}
Tutorial 6: Diffuse Lighting http://www.rastertek.com/dx11tut06.html
7/14/2019 RasterTek: Direct3D introduction
http://slidepdf.com/reader/full/rastertek-direct3d-introduction 89/709
bool ModelClass::Initialize(ID3D11Device* device, WCHAR* textureFilename){
bool result;
// Initialize the vertex and index buffers.result =InitializeBuffers(device);
if(!result){return false;
}
// Load the texture for this model.result =LoadTexture(device, textureFilename);if(!result){
return false;}
return true;}
void ModelClass::Shutdown(){
// Release the model texture.ReleaseTexture();
// Shutdown the vertex and index buffers.ShutdownBuffers();
return;}
void ModelClass::Render(ID3D11DeviceContext* deviceContext)
19 of 34 3/8/2013 12:27 PM
{// Put the vertex and index buffers on the graphics pipeline to prepare them for drawing.RenderBuffers(deviceContext);
return;}
int ModelClass::GetIndexCount()
Tutorial 6: Diffuse Lighting http://www.rastertek.com/dx11tut06.html

7/14/2019 RasterTek: Direct3D introduction
http://slidepdf.com/reader/full/rastertek-direct3d-introduction 90/709
int ModelClass::GetIndexCount(){
return m_indexCount;}
ID3D11ShaderResourceView* ModelClass::GetTexture(){
return m_Texture->GetTexture();}
bool ModelClass::InitializeBuffers(ID3D11Device* device){
VertexType* vertices;unsigned long* indices;D3D11_BUFFER_DESC vertexBufferDesc, indexBufferDesc;
D3D11_SUBRESOURCE_DATA vertexData, indexData;HRESULT result;
// Set the number of vertices in the vertex array.m_vertexCount =3;
// Set the number of indices in the index array.m_indexCount =3;
// Create the vertex array.vertices =new VertexType[m_vertexCount];if(!vertices){
return false;}
// Create the index array.
indices =new unsigned long[m_indexCount];if(!indices)
20 of 34 3/8/2013 12:27 PM
{return false;
}
The only change to the InitializeBuffers function is here in the vertex setup. Each vertex now has normals associated with it for lighting calculations. The normal is aline that is perpendicular to the face of the polygon so that the exact direction the face is pointing can be calculated. For simplicity purposes I set the normal for eachvertex along the Z axis by setting each Z component to -1.0f which makes the normal point towards the viewer.
// Load the vertex array with data
Tutorial 6: Diffuse Lighting http://www.rastertek.com/dx11tut06.html

7/14/2019 RasterTek: Direct3D introduction
http://slidepdf.com/reader/full/rastertek-direct3d-introduction 91/709
// Load the vertex array with data.vertices[0].position =D3DXVECTOR3(-1.0f, -1.0f, 0.0f); // Bottom left.vertices[0].texture =D3DXVECTOR2(0.0f, 1.0f);vertices[0].normal =D3DXVECTOR3(0.0f, 0.0f, -1.0f);
vertices[1].position =D3DXVECTOR3(0.0f, 1.0f, 0.0f); // Top middle.vertices[1].texture =D3DXVECTOR2(0.5f, 0.0f);vertices[1].normal =D3DXVECTOR3(0.0f, 0.0f, -1.0f);
vertices[2].position =D3DXVECTOR3(1.0f, -1.0f, 0.0f); // Bottom right.vertices[2].texture =D3DXVECTOR2(1.0f, 1.0f);vertices[2].normal =D3DXVECTOR3(0.0f, 0.0f, -1.0f);
// Load the index array with data.indices[0] =0; // Bottom left.indices[1] =1; // Top middle.indices[2] =2; // Bottom right.
// Set up the description of the static vertex buffer.vertexBufferDesc.Usage =D3D11_USAGE_DEFAULT;vertexBufferDesc.ByteWidth =sizeof(VertexType) * m_vertexCount;vertexBufferDesc.BindFlags =D3D11_BIND_VERTEX_BUFFER;vertexBufferDesc.CPUAccessFlags =0;vertexBufferDesc.MiscFlags =0;vertexBufferDesc.StructureByteStride =0;
// Give the subresource structure a pointer to the vertex data.vertexData.pSysMem =vertices;vertexData.SysMemPitch =0;vertexData.SysMemSlicePitch =0;
// Now create the vertex buffer.result =device->CreateBuffer(&vertexBufferDesc, &vertexData, &m_vertexBuffer);if(FAILED(result)){
return false;}
21 of 34 3/8/2013 12:27 PM
// Set up the description of the static index buffer.indexBufferDesc.Usage =D3D11_USAGE_DEFAULT;indexBufferDesc.ByteWidth =sizeof(unsigned long) * m_indexCount;indexBufferDesc.BindFlags =D3D11_BIND_INDEX_BUFFER;indexBufferDesc.CPUAccessFlags =0;indexBufferDesc.MiscFlags =0;indexBufferDesc.StructureByteStride =0;
Tutorial 6: Diffuse Lighting http://www.rastertek.com/dx11tut06.html

7/14/2019 RasterTek: Direct3D introduction
http://slidepdf.com/reader/full/rastertek-direct3d-introduction 92/709
// Give the subresource structure a pointer to the index data.indexData.pSysMem =indices;indexData.SysMemPitch =0;indexData.SysMemSlicePitch =0;
// Create the index buffer.result =device->CreateBuffer(&indexBufferDesc, &indexData, &m_indexBuffer);
if(FAILED(result)){return false;
}
// Release the arrays now that the vertex and index buffers have been created and loaded.delete [] vertices;vertices =0;
delete [] indices;indices =0;
return true;}
void ModelClass::ShutdownBuffers(){
// Release the index buffer.if(m_indexBuffer){
m_indexBuffer->Release();m_indexBuffer =0;
}
// Release the vertex buffer.if(m_vertexBuffer)
{ m_vertexBuffer->Release();
22 of 34 3/8/2013 12:27 PM
m_vertexBuffer =0;}
return;}
void ModelClass::RenderBuffers(ID3D11DeviceContext* deviceContext){
Tutorial 6: Diffuse Lighting http://www.rastertek.com/dx11tut06.html

7/14/2019 RasterTek: Direct3D introduction
http://slidepdf.com/reader/full/rastertek-direct3d-introduction 93/709
{unsigned int stride;unsigned int offset;
// Set vertex buffer stride and offset.stride =sizeof(VertexType);offset =0;
// Set the vertex buffer to active in the input assembler so it can be rendered.deviceContext->IASetVertexBuffers(0, 1, &m_vertexBuffer, &stride, &offset);
// Set the index buffer to active in the input assembler so it can be rendered.deviceContext->IASetIndexBuffer(m_indexBuffer, DXGI_FORMAT_R32_UINT, 0);
// Set the type of primitive that should be rendered from this vertex buffer, in this case triangles.deviceContext->IASetPrimitiveTopology(D3D11_PRIMITIVE_TOPOLOGY_TRIANGLELIST);
return;}
bool ModelClass::LoadTexture(ID3D11Device* device, WCHAR* filename){
bool result;
// Create the texture object.m_Texture =new TextureClass;if(!m_Texture){
return false;}
// Initialize the texture object.
result =m_Texture->Initialize(device, filename);if(!result)
23 of 34 3/8/2013 12:27 PM
{return false;
}
return true;}
void ModelClass::ReleaseTexture()
Tutorial 6: Diffuse Lighting http://www.rastertek.com/dx11tut06.html

7/14/2019 RasterTek: Direct3D introduction
http://slidepdf.com/reader/full/rastertek-direct3d-introduction 94/709
(){
// Release the texture object.if(m_Texture){
m_Texture->Shutdown();delete m_Texture;m_Texture =0;
}
return;}
Lightclass.h
Now we will look at the new light class which is very simple. Its purpose is only to maintain the direction and color of lights.
////////////////////////////////////////////////////////////////////////////////// Filename: lightclass.h////////////////////////////////////////////////////////////////////////////////#ifndef _LIGHTCLASS_H_ #define _LIGHTCLASS_H_
//////////////// INCLUDES ////////////////#include <d3dx10math.h>
////////////////////////////////////////////////////////////////////////////////// Class name: LightClass////////////////////////////////////////////////////////////////////////////////
class LightClass
24 of 34 3/8/2013 12:27 PM
{public:
LightClass();LightClass(const LightClass&);~LightClass();
void SetDiffuseColor(float, float, float, float);void SetDirection(float, float, float);
Tutorial 6: Diffuse Lighting http://www.rastertek.com/dx11tut06.html

7/14/2019 RasterTek: Direct3D introduction
http://slidepdf.com/reader/full/rastertek-direct3d-introduction 95/709
D3DXVECTOR4 GetDiffuseColor();D3DXVECTOR3 GetDirection();
private:D3DXVECTOR4 m_diffuseColor;D3DXVECTOR3 m_direction;
};
#endif
Lightclass.cpp
////////////////////////////////////////////////////////////////////////////////// Filename: lightclass.cpp
////////////////////////////////////////////////////////////////////////////////#include "lightclass.h"
LightClass::LightClass(){}
LightClass::LightClass(const LightClass& other){}
LightClass::~LightClass(){}
25 of 34 3/8/2013 12:27 PM
void LightClass::SetDiffuseColor(float red, float green, float blue, float alpha){
m_diffuseColor =D3DXVECTOR4(red, green, blue, alpha);return;
}
void LightClass::SetDirection(float x, float y, float z){
Tutorial 6: Diffuse Lighting http://www.rastertek.com/dx11tut06.html

7/14/2019 RasterTek: Direct3D introduction
http://slidepdf.com/reader/full/rastertek-direct3d-introduction 96/709
m_direction =D3DXVECTOR3(x, y, z);return;
}
D3DXVECTOR4 LightClass::GetDiffuseColor(){
return m_diffuseColor;}
D3DXVECTOR3 LightClass::GetDirection(){
return m_direction;}
Graphicsclass.h
////////////////////////////////////////////////////////////////////////////////// Filename: graphicsclass.h////////////////////////////////////////////////////////////////////////////////#ifndef _GRAPHICSCLASS_H_ #define _GRAPHICSCLASS_H_
///////////////////////// MY CLASS INCLUDES /////////////////////////#include "d3dclass.h"#include "cameraclass.h"#include "modelclass.h"
The GraphicsClass now has two new includes for the LightShaderClass and the LightClass.
26 of 34 3/8/2013 12:27 PM
#include "lightshaderclass.h"#include "lightclass.h"
/////////////// GLOBALS ///////////////const bool FULL_SCREEN =true;const bool VSYNC_ENABLED =true;
t fl t SCREEN DEPTH 1000 0f
Tutorial 6: Diffuse Lighting http://www.rastertek.com/dx11tut06.html
7/14/2019 RasterTek: Direct3D introduction
http://slidepdf.com/reader/full/rastertek-direct3d-introduction 97/709
const float SCREEN_DEPTH =1000.0f;const float SCREEN_NEAR =0.1f;
////////////////////////////////////////////////////////////////////////////////// Class name: GraphicsClass////////////////////////////////////////////////////////////////////////////////class GraphicsClass{public:
GraphicsClass();GraphicsClass(const GraphicsClass&);~GraphicsClass();
bool Initialize(int, int, HWND);void Shutdown();bool Frame();
private:
Render now takes a float value as input.
bool Render(float);
private:D3DClass* m_D3D;CameraClass* m_Camera;ModelClass* m_Model;
There are two new private variables for the light shader and the light object.
LightShaderClass* m_LightShader;LightClass* m_Light;
};
#endif
27 of 34 3/8/2013 12:27 PM
Graphicsclass.cpp
////////////////////////////////////////////////////////////////////////////////// Filename: graphicsclass.cpp////////////////////////////////////////////////////////////////////////////////
#include "graphicsclass.h"
Tutorial 6: Diffuse Lighting http://www.rastertek.com/dx11tut06.html

7/14/2019 RasterTek: Direct3D introduction
http://slidepdf.com/reader/full/rastertek-direct3d-introduction 98/709
GraphicsClass::GraphicsClass(){
m_D3D =0;m_Camera =0;m_Model =0;
The light shader and light object are set to null in the class constructor.
m_LightShader =0;m_Light =0;
}
GraphicsClass::GraphicsClass(const GraphicsClass& other){
}
GraphicsClass::~GraphicsClass(){}
bool GraphicsClass::Initialize(int screenWidth, int screenHeight, HWND hwnd)
{bool result;
// Create the Direct3D object.m_D3D =new D3DClass;if(!m_D3D){
return false;
}
28 of 34 3/8/2013 12:27 PM
// Initialize the Direct3D object.result =m_D3D->Initialize(screenWidth, screenHeight, VSYNC_ENABLED, hwnd, FULL_SCREEN, SCREEN_DEPTH, SCREEN_NEAR);if(!result){
MessageBox(hwnd, L"Could not initialize Direct3D.", L"Error", MB_OK);return false;
}
// Create the camera object
Tutorial 6: Diffuse Lighting http://www.rastertek.com/dx11tut06.html

7/14/2019 RasterTek: Direct3D introduction
http://slidepdf.com/reader/full/rastertek-direct3d-introduction 99/709
// Create the camera object.m_Camera =new CameraClass;if(!m_Camera){
return false;}
// Set the initial position of the camera.m_Camera->SetPosition(0.0f, 0.0f, -10.0f);
// Create the model object.m_Model =new ModelClass;if(!m_Model){
return false;}
// Initialize the model object.result =m_Model->Initialize(m_D3D->GetDevice(), L"../Engine/data/seafloor.dds");if(!result){
MessageBox(hwnd, L"Could not initialize the model object.", L"Error", MB_OK);return false;
}
The new light shader object is created and initialized here.
// Create the light shader object.m_LightShader =new LightShaderClass;if(!m_LightShader){
return false;}
// Initialize the light shader object.result =m_LightShader->Initialize(m_D3D->GetDevice(), hwnd);
29 of 34 3/8/2013 12:27 PM
if(!result){
MessageBox(hwnd, L"Could not initialize the light shader object.", L"Error", MB_OK);return false;
}
The new light object is created here.
// Create the light object.m Light =new LightClass;
Tutorial 6: Diffuse Lighting http://www.rastertek.com/dx11tut06.html

7/14/2019 RasterTek: Direct3D introduction
http://slidepdf.com/reader/full/rastertek-direct3d-introduction 100/709
m_Light new LightClass;if(!m_Light){
return false;}
The color of the light is set to purple and the light direction is set to point down the positive Z axis.
// Initialize the light object.m_Light->SetDiffuseColor(1.0f, 0.0f, 1.0f, 1.0f);m_Light->SetDirection(0.0f, 0.0f, 1.0f);
return true;}
void GraphicsClass::Shutdown(){
The Shutdown function releases the new light and light shader objects.
// Release the light object.if(m_Light){
delete m_Light;m_Light =0;
}
// Release the light shader object.if(m_LightShader){
m_LightShader->Shutdown();delete m_LightShader;m_LightShader =0;
}
30 of 34 3/8/2013 12:27 PM
// Release the model object.if(m_Model){
m_Model->Shutdown();delete m_Model;m_Model =0;
}
// Release the camera object.if(m Camera)
Tutorial 6: Diffuse Lighting http://www.rastertek.com/dx11tut06.html

7/14/2019 RasterTek: Direct3D introduction
http://slidepdf.com/reader/full/rastertek-direct3d-introduction 101/709
( _ ){
delete m_Camera;m_Camera =0;
}
// Release the D3D object.if(m_D3D){
m_D3D->Shutdown();delete m_D3D;m_D3D =0;
}
return;}
bool GraphicsClass::Frame(){
bool result;
We add a new static variable to hold an updated rotation value each frame that will be passed into the Render function.
static float rotation =0.0f;
// Update the rotation variable each frame.rotation +=(float)D3DX_PI * 0.01f;if(rotation >360.0f){
rotation -=360.0f;}
// Render the graphics scene.result =Render(rotation);
31 of 34 3/8/2013 12:27 PM
if(!result){
return false;}
return true;}
bool GraphicsClass::Render(float rotation)
Tutorial 6: Diffuse Lighting http://www.rastertek.com/dx11tut06.html

7/14/2019 RasterTek: Direct3D introduction
http://slidepdf.com/reader/full/rastertek-direct3d-introduction 102/709
p{
D3DXMATRIX worldMatrix, viewMatrix, projectionMatrix;bool result;
// Clear the buffers to begin the scene.m_D3D->BeginScene(0.0f, 0.0f, 0.0f, 1.0f);
// Generate the view matrix based on the camera's position.m_Camera->Render();
// Get the world, view, and projection matrices from the camera and d3d objects.m_Camera->GetViewMatrix(viewMatrix);m_D3D->GetWorldMatrix(worldMatrix);m_D3D->GetProjectionMatrix(projectionMatrix);
Here we rotate the world matrix by the rotation value so that when we render the triangle using this updated world matrix it will spin the triangle by the rotationamount.
// Rotate the world matrix by the rotation value so that the triangle will spin.D3DXMatrixRotationY(&worldMatrix, rotation);
// Put the model vertex and index buffers on the graphics pipeline to prepare them for drawing.m_Model->Render(m_D3D->GetDeviceContext());
The light shader is called here to render the triangle. The new light object is used to send the diffuse light color and light direction into the Render function so thatthe shader has access to those values.
// Render the model using the light shader.result =m_LightShader->Render(m_D3D->GetDeviceContext(), m_Model->GetIndexCount(), worldMatrix, viewMatrix, projectionMatrix,
m_Model->GetTexture(), m_Light->GetDirection(), m_Light->GetDiffuseColor());if(!result){
return false;}
32 of 34 3/8/2013 12:27 PM
// Present the rendered scene to the screen.m_D3D->EndScene();
return true;}
Summary
Tutorial 6: Diffuse Lighting http://www.rastertek.com/dx11tut06.html

7/14/2019 RasterTek: Direct3D introduction
http://slidepdf.com/reader/full/rastertek-direct3d-introduction 103/709
y
With a few changes to the code we were able to implement some basic directional lighting. Make sure you understand how normal vectors work and why they areimportant to calculating lighting on polygon faces. Note that the back of the spinning triangle will not light up since we have back face culling enabled in ourD3DClass.
To Do Exercises
1. Recompile the project and ensure you get a spinning textured triangle that is being illuminated by a purple light. Press escape to quit.
2. Comment out "color =color * textureColor;" in the pixel shader so that the shaderTexture is no longer used and you should see the lighting effect without thetexture.
3. Change the color of the light to green at the m_Light->SetDiffuseColor line of code in the GraphicsClass.
4. Change the direction of the light to go down the positive and the negative X axis. You might want to change the speed of the rotation also.
33 of 34 3/8/2013 12:27 PM
Source Code
Visual Studio 2010 Project: dx11tut06.zip
Source Only: dx11src06.zip
Executable Only:dx11exe06.zip
Back to Tutorial Index
Tutorial 6: Diffuse Lighting http://www.rastertek.com/dx11tut06.html

7/14/2019 RasterTek: Direct3D introduction
http://slidepdf.com/reader/full/rastertek-direct3d-introduction 104/709
34 of 34 3/8/2013 12:27 PM

7/14/2019 RasterTek: Direct3D introduction
http://slidepdf.com/reader/full/rastertek-direct3d-introduction 105/709
1.0 -1.0 -1.0 0.0 1.0 1.0 0.0 0.01.0 -1.0 -1.0 0.0 1.0 1.0 0.0 0.01.0 1.0 1.0 1.0 0.0 1.0 0.0 0.01.0 -1.0 1.0 1.0 1.0 1.0 0.0 0.01.0 1.0 1.0 0.0 0.0 0.0 0.0 1.0-1.0 1.0 1.0 1.0 0.0 0.0 0.0 1.01.0 -1.0 1.0 0.0 1.0 0.0 0.0 1.01.0 -1.0 1.0 0.0 1.0 0.0 0.0 1.0
-1.0 1.0 1.0 1.0 0.0 0.0 0.0 1.0-1.0 -1.0 1.0 1.0 1.0 0.0 0.0 1.01 0 1 0 1 0 0 0 0 0 1 0 0 0 0 0
Tutorial 7: 3D Model Rendering http://www.rastertek.com/dx11tut07.html

7/14/2019 RasterTek: Direct3D introduction
http://slidepdf.com/reader/full/rastertek-direct3d-introduction 106/709
-1.0 1.0 1.0 0.0 0.0 -1.0 0.0 0.0-1.0 1.0 -1.0 1.0 0.0 -1.0 0.0 0.0-1.0 -1.0 1.0 0.0 1.0 -1.0 0.0 0.0-1.0 -1.0 1.0 0.0 1.0 -1.0 0.0 0.0-1.0 1.0 -1.0 1.0 0.0 -1.0 0.0 0.0-1.0 -1.0 -1.0 1.0 1.0 -1.0 0.0 0.0-1.0 1.0 1.0 0.0 0.0 0.0 1.0 0.0
1.0 1.0 1.0 1.0 0.0 0.0 1.0 0.0-1.0 1.0 -1.0 0.0 1.0 0.0 1.0 0.0-1.0 1.0 -1.0 0.0 1.0 0.0 1.0 0.01.0 1.0 1.0 1.0 0.0 0.0 1.0 0.01.0 1.0 -1.0 1.0 1.0 0.0 1.0 0.0-1.0 -1.0 -1.0 0.0 0.0 0.0 -1.0 0.01.0 -1.0 -1.0 1.0 0.0 0.0 -1.0 0.0-1.0 -1.0 1.0 0.0 1.0 0.0 -1.0 0.0-1.0 -1.0 1.0 0.0 1.0 0.0 -1.0 0.0
1.0 -1.0 -1.0 1.0 0.0 0.0 -1.0 0.01.0 -1.0 1.0 1.0 1.0 0.0 -1.0 0.0
So as you can see there are 36 lines of x, y, z, tu, tv, nx, ny, nz data. Every three lines composes its own triangle giving us 12 triangles that will form a cube. Theformat is very straight forward and can be read directly into our vertex buffers and rendered without any modifications.
Now one thing to watch out for is that some 3D modeling programs export the data in different orders such as left hand or right hand coordinate systems.Remember that by default DirectX 11 is a left-handed coordinate system by default and so the model data needs to match that. Keep an eye out for thosedifferences and ensure your parsing program can handle converting data into the correct format/order.
Modelclass.h
For this tutorial all we needed to do was make some minor changes to the ModelClass for it to render 3D models from our text model files.
////////////////////////////////////////////////////////////////////////////////
// Filename: modelclass.h
2 of 19 3/8/2013 12:28 PM
////////////////////////////////////////////////////////////////////////////////#ifndef _MODELCLASS_H_ #define _MODELCLASS_H_
//////////////// INCLUDES ////////////////
#include <d3d11.h>#include <d3dx10math.h>
Tutorial 7: 3D Model Rendering http://www.rastertek.com/dx11tut07.html

7/14/2019 RasterTek: Direct3D introduction
http://slidepdf.com/reader/full/rastertek-direct3d-introduction 107/709
The fstream library is now included to handle reading from the model text file.
#include <fstream>using namespace std;
///////////////////////// MY CLASS INCLUDES /////////////////////////#include "textureclass.h"
////////////////////////////////////////////////////////////////////////////////// Class name: ModelClass////////////////////////////////////////////////////////////////////////////////
class ModelClass{private:
struct VertexType{
D3DXVECTOR3 position;D3DXVECTOR2 texture;D3DXVECTOR3 normal;
};
The next change is the addition of a new structure to represent the model format. It is called ModelType. It contains position, texture, and normal vectors the sameas our file format does.
struct ModelType{
float x, y, z;float tu, tv;float nx, ny, nz;
};
3 of 19 3/8/2013 12:28 PM
public:ModelClass();ModelClass(const ModelClass&);~ModelClass();
The Initialize function will now take as input the character string file name of the model to be loaded.
bool Initialize(ID3D11Device*, char*, WCHAR*);void Shutdown();void Render(ID3D11DeviceContext*);
Tutorial 7: 3D Model Rendering http://www.rastertek.com/dx11tut07.html

7/14/2019 RasterTek: Direct3D introduction
http://slidepdf.com/reader/full/rastertek-direct3d-introduction 108/709
void Render(ID3D11DeviceContext );
int GetIndexCount();ID3D11ShaderResourceView* GetTexture();
private:
bool InitializeBuffers(ID3D11Device*);void ShutdownBuffers();void RenderBuffers(ID3D11DeviceContext*);
bool LoadTexture(ID3D11Device*, WCHAR*);void ReleaseTexture();
We also have two new functions to handle loading and unloading the model data from the text file.
bool LoadModel(char*);void ReleaseModel();
private:ID3D11Buffer *m_vertexBuffer, *m_indexBuffer;int m_vertexCount, m_indexCount;
TextureClass* m_Texture;
The final change is a new private variable called m_model which is going to be an array of the new private structure ModelType. This variable will be used to read in
and hold the model data before it is placed in the vertex buffer.
ModelType* m_model;};
#endif
4 of 19 3/8/2013 12:28 PM
Modelclass.cpp
////////////////////////////////////////////////////////////////////////////////// Filename: modelclass.cpp////////////////////////////////////////////////////////////////////////////////#include "modelclass.h"
ModelClass::ModelClass(){
m vertexBuffer =0;
Tutorial 7: 3D Model Rendering http://www.rastertek.com/dx11tut07.html

7/14/2019 RasterTek: Direct3D introduction
http://slidepdf.com/reader/full/rastertek-direct3d-introduction 109/709
m_vertexBuffer =0;m_indexBuffer =0;m_Texture =0;
The new model structure is set to null in the class constructor.
m_model =0;}
ModelClass::ModelClass(const ModelClass& other){}
ModelClass::~ModelClass(){}
The Initialize function now takes as input the file name of the model that should be loaded.
bool ModelClass::Initialize(ID3D11Device* device, char* modelFilename, WCHAR* textureFilename){
bool result;
In the Initialize function we now call the new LoadModel function first. It will load the model data from the file name we provide into the new m_model array. Oncethis model array is filled we can then build the vertex and index buffers from it. Since InitializeBuffers now depends on this model data you have to make sure to callthe functions in the correct order.
// Load in the model data,result =LoadModel(modelFilename);if(!result){
return false;
5 of 19 3/8/2013 12:28 PM
}
// Initialize the vertex and index buffers.result =InitializeBuffers(device);if(!result){
return false;}
// Load the texture for this model.result =LoadTexture(device, textureFilename);
Tutorial 7: 3D Model Rendering http://www.rastertek.com/dx11tut07.html

7/14/2019 RasterTek: Direct3D introduction
http://slidepdf.com/reader/full/rastertek-direct3d-introduction 110/709
if(!result){
return false;}
return true;
}
void ModelClass::Shutdown(){
// Release the model texture.ReleaseTexture();
// Shutdown the vertex and index buffers.
ShutdownBuffers();
In the Shutdown function we add a call to the ReleaseModel function to delete the m_model array data once we are done.
// Release the model data.ReleaseModel();
return;}
void ModelClass::Render(ID3D11DeviceContext* deviceContext){
// Put the vertex and index buffers on the graphics pipeline to prepare them for drawing.RenderBuffers(deviceContext);
return;}
6 of 19 3/8/2013 12:28 PM
int ModelClass::GetIndexCount(){
return m_indexCount;}
ID3D11ShaderResourceView* ModelClass::GetTexture()
{return m_Texture->GetTexture();
}
Tutorial 7: 3D Model Rendering http://www.rastertek.com/dx11tut07.html

7/14/2019 RasterTek: Direct3D introduction
http://slidepdf.com/reader/full/rastertek-direct3d-introduction 111/709
bool ModelClass::InitializeBuffers(ID3D11Device* device){
VertexType* vertices;unsigned long* indices;
D3D11_BUFFER_DESC vertexBufferDesc, indexBufferDesc;D3D11_SUBRESOURCE_DATA vertexData, indexData;HRESULT result;int i;
Take note that we will no longer manually set the vertex and index count here. Once we get to the ModelClass::LoadModel function you will see that we read thevertex and index counts in at that point instead.
// Create the vertex array.
vertices =new VertexType[m_vertexCount];if(!vertices){
return false;}
// Create the index array.indices =new unsigned long[m_indexCount];if(!indices)
{return false;
}
Loading the vertex and index arrays has changed a bit. Instead of setting the values manually we loop through all the elements in the new m_model array and copythat data from there into the vertex array. The index array is easy to build as each vertex we load has the same index number as the position in the array it wasloaded into.
// Load the vertex array and index array with data.
for(i=0; i<m_vertexCount; i++)
7 of 19 3/8/2013 12:28 PM
{vertices[i].position =D3DXVECTOR3(m_model[i].x, m_model[i].y, m_model[i].z);vertices[i].texture =D3DXVECTOR2(m_model[i].tu, m_model[i].tv);vertices[i].normal =D3DXVECTOR3(m_model[i].nx, m_model[i].ny, m_model[i].nz);
indices[i] =i;}
// Set up the description of the static vertex buffer.vertexBufferDesc.Usage =D3D11_USAGE_DEFAULT;vertexBufferDesc.ByteWidth =sizeof(VertexType) * m_vertexCount;
t B ff D Bi dFl D3D11 BIND VERTEX BUFFER
Tutorial 7: 3D Model Rendering http://www.rastertek.com/dx11tut07.html

7/14/2019 RasterTek: Direct3D introduction
http://slidepdf.com/reader/full/rastertek-direct3d-introduction 112/709
vertexBufferDesc.BindFlags =D3D11_BIND_VERTEX_BUFFER;vertexBufferDesc.CPUAccessFlags =0;vertexBufferDesc.MiscFlags =0;vertexBufferDesc.StructureByteStride =0;
// Give the subresource structure a pointer to the vertex data.
vertexData.pSysMem =vertices;vertexData.SysMemPitch =0;vertexData.SysMemSlicePitch =0;
// Now create the vertex buffer.result =device->CreateBuffer(&vertexBufferDesc, &vertexData, &m_vertexBuffer);if(FAILED(result)){
return false;
}
// Set up the description of the static index buffer.indexBufferDesc.Usage =D3D11_USAGE_DEFAULT;indexBufferDesc.ByteWidth =sizeof(unsigned long) * m_indexCount;indexBufferDesc.BindFlags =D3D11_BIND_INDEX_BUFFER;indexBufferDesc.CPUAccessFlags =0;indexBufferDesc.MiscFlags =0;indexBufferDesc.StructureByteStride =0;
// Give the subresource structure a pointer to the index data.indexData.pSysMem =indices;indexData.SysMemPitch =0;indexData.SysMemSlicePitch =0;
// Create the index buffer.result =device->CreateBuffer(&indexBufferDesc, &indexData, &m_indexBuffer);if(FAILED(result))
{
8 of 19 3/8/2013 12:28 PM
return false;}
// Release the arrays now that the vertex and index buffers have been created and loaded.delete [] vertices;vertices =0;
delete [] indices;
indices =0;
return true;}
Tutorial 7: 3D Model Rendering http://www.rastertek.com/dx11tut07.html

7/14/2019 RasterTek: Direct3D introduction
http://slidepdf.com/reader/full/rastertek-direct3d-introduction 113/709
}
void ModelClass::ShutdownBuffers(){
// Release the index buffer.
if(m_indexBuffer){
m_indexBuffer->Release();m_indexBuffer =0;
}
// Release the vertex buffer.if(m_vertexBuffer){
m_vertexBuffer->Release();m_vertexBuffer =0;
}
return;}
void ModelClass::RenderBuffers(ID3D11DeviceContext* deviceContext)
{unsigned int stride;unsigned int offset;
// Set vertex buffer stride and offset.stride =sizeof(VertexType);offset =0;
// Set the vertex buffer to active in the input assembler so it can be rendered.
9 of 19 3/8/2013 12:28 PM
deviceContext->IASetVertexBuffers(0, 1, &m_vertexBuffer, &stride, &offset);
// Set the index buffer to active in the input assembler so it can be rendered.deviceContext->IASetIndexBuffer(m_indexBuffer, DXGI_FORMAT_R32_UINT, 0);
// Set the type of primitive that should be rendered from this vertex buffer, in this case triangles.deviceContext->IASetPrimitiveTopology(D3D11_PRIMITIVE_TOPOLOGY_TRIANGLELIST);
return;}
Tutorial 7: 3D Model Rendering http://www.rastertek.com/dx11tut07.html

7/14/2019 RasterTek: Direct3D introduction
http://slidepdf.com/reader/full/rastertek-direct3d-introduction 114/709
bool ModelClass::LoadTexture(ID3D11Device* device, WCHAR* filename){
bool result;
// Create the texture object.m_Texture =new TextureClass;if(!m_Texture){
return false;}
// Initialize the texture object.result =m_Texture->Initialize(device, filename);
if(!result){
return false;}
return true;}
void ModelClass::ReleaseTexture(){
// Release the texture object.if(m_Texture){
m_Texture->Shutdown();delete m_Texture;m_Texture =0;
}
10 of 19 3/8/2013 12:28 PM
return;}
This is the new LoadModel function which handles loading the model data from the text file into the m_model array variable. It opens the text file and reads in thevertex count first. After reading the vertex count it creates the ModelType array and then reads each line into the array. Both the vertex count and index count arenow set in this function.
bool ModelClass::LoadModel(char* filename)
{ifstream fin;char input;int i;
Tutorial 7: 3D Model Rendering http://www.rastertek.com/dx11tut07.html

7/14/2019 RasterTek: Direct3D introduction
http://slidepdf.com/reader/full/rastertek-direct3d-introduction 115/709
int i;
// Open the model file.fin.open(filename);
// If it could not open the file then exit.if(fin.fail()){
return false;}
// Read up to the value of vertex count.fin.get(input);while(input !=':')
{fin.get(input);
}
// Read in the vertex count.fin >>m_vertexCount;
// Set the number of indices to be the same as the vertex count.m_indexCount =m_vertexCount;
// Create the model using the vertex count that was read in.m_model =new ModelType[m_vertexCount];if(!m_model){
return false;}
// Read up to the beginning of the data.
fin.get(input);
11 of 19 3/8/2013 12:28 PM
while(input !=':'){
fin.get(input);}fin.get(input);fin.get(input);
// Read in the vertex data.
for(i=0; i<m_vertexCount; i++){
fin >>m_model[i].x >>m_model[i].y >>m_model[i].z;fin >>m model[i].tu >>m model[i].tv;
Tutorial 7: 3D Model Rendering http://www.rastertek.com/dx11tut07.html

7/14/2019 RasterTek: Direct3D introduction
http://slidepdf.com/reader/full/rastertek-direct3d-introduction 116/709
fin >>m_model[i].tu >>m_model[i].tv;fin >>m_model[i].nx >>m_model[i].ny >>m_model[i].nz;
}
// Close the model file.fin.close();
return true;}
The ReleaseModel function handles deleting the model data array.
void ModelClass::ReleaseModel(){
if(m_model)
{delete [] m_model;m_model =0;
}
return;}
Graphicsclass.h
The header for the GraphicsClass has not changed since the previous tutorial.
////////////////////////////////////////////////////////////////////////////////// Filename: graphicsclass.h////////////////////////////////////////////////////////////////////////////////#ifndef _GRAPHICSCLASS_H_
12 of 19 3/8/2013 12:28 PM
#define _GRAPHICSCLASS_H_
///////////////////////// MY CLASS INCLUDES /////////////////////////#include "d3dclass.h"#include "cameraclass.h"
#include "modelclass.h"#include "lightshaderclass.h"#include "lightclass.h"
Tutorial 7: 3D Model Rendering http://www.rastertek.com/dx11tut07.html
7/14/2019 RasterTek: Direct3D introduction
http://slidepdf.com/reader/full/rastertek-direct3d-introduction 117/709
/////////////// GLOBALS ///////////////const bool FULL_SCREEN =true;
const bool VSYNC_ENABLED =true;const float SCREEN_DEPTH =1000.0f;const float SCREEN_NEAR =0.1f;
////////////////////////////////////////////////////////////////////////////////// Class name: GraphicsClass////////////////////////////////////////////////////////////////////////////////class GraphicsClass
{public:
GraphicsClass();GraphicsClass(const GraphicsClass&);~GraphicsClass();
bool Initialize(int, int, HWND);void Shutdown();bool Frame();
private:bool Render(float);
private:D3DClass* m_D3D;CameraClass* m_Camera;ModelClass* m_Model;LightShaderClass* m_LightShader;
LightClass* m_Light;
13 of 19 3/8/2013 12:28 PM
};
#endif
Graphicsclass.cpp
////////////////////////////////////////////////////////////////////////////////// Filename: graphicsclass.cpp////////////////////////////////////////////////////////////////////////////////#include "graphicsclass.h"
Tutorial 7: 3D Model Rendering http://www.rastertek.com/dx11tut07.html

7/14/2019 RasterTek: Direct3D introduction
http://slidepdf.com/reader/full/rastertek-direct3d-introduction 118/709
#include graphicsclass.h
GraphicsClass::GraphicsClass(){
m_D3D =0;
m_Camera =0;m_Model =0;m_LightShader =0;m_Light =0;
}
GraphicsClass::GraphicsClass(const GraphicsClass& other){
}
GraphicsClass::~GraphicsClass(){}
bool GraphicsClass::Initialize(int screenWidth, int screenHeight, HWND hwnd)
{bool result;
// Create the Direct3D object.m_D3D =new D3DClass;if(!m_D3D){
return false;
14 of 19 3/8/2013 12:28 PM
}
// Initialize the Direct3D object.result =m_D3D->Initialize(screenWidth, screenHeight, VSYNC_ENABLED, hwnd, FULL_SCREEN, SCREEN_DEPTH, SCREEN_NEAR);if(!result){
MessageBox(hwnd, L"Could not initialize Direct3D.", L"Error", MB_OK);return false;
}
// Create the camera object.m_Camera =new CameraClass;
Tutorial 7: 3D Model Rendering http://www.rastertek.com/dx11tut07.html

7/14/2019 RasterTek: Direct3D introduction
http://slidepdf.com/reader/full/rastertek-direct3d-introduction 119/709
if(!m_Camera){
return false;}
// Set the initial position of the camera.m_Camera->SetPosition(0.0f, 0.0f, -10.0f);
// Create the model object.m_Model =new ModelClass;if(!m_Model){
return false;}
The model initialization now takes in the filename of the model file it is loading. In this tutorial we will use the cube.txt file so this model loads in a 3D cube object forrendering.
// Initialize the model object.result =m_Model->Initialize(m_D3D->GetDevice(), "../Engine/data/cube.txt", L"../Engine/data/seafloor.dds");if(!result){
MessageBox(hwnd, L"Could not initialize the model object.", L"Error", MB_OK);
return false;}
// Create the light shader object.m_LightShader =new LightShaderClass;if(!m_LightShader){
return false;}
15 of 19 3/8/2013 12:28 PM
// Initialize the light shader object.result =m_LightShader->Initialize(m_D3D->GetDevice(), hwnd);if(!result){
MessageBox(hwnd, L"Could not initialize the light shader object.", L"Error", MB_OK);return false;
}
// Create the light object.m_Light =new LightClass;if(!m_Light){
t f l
Tutorial 7: 3D Model Rendering http://www.rastertek.com/dx11tut07.html

7/14/2019 RasterTek: Direct3D introduction
http://slidepdf.com/reader/full/rastertek-direct3d-introduction 120/709
return false;}
I have changed the diffuse light color to white for this tutorial.
// Initialize the light object.m_Light->SetDiffuseColor(1.0f, 1.0f, 1.0f, 1.0f);m_Light->SetDirection(0.0f, 0.0f, 1.0f);
return true;}
void GraphicsClass::Shutdown()
{// Release the light object.if(m_Light){
delete m_Light;m_Light =0;
}
// Release the light shader object.
if(m_LightShader){
m_LightShader->Shutdown();delete m_LightShader;m_LightShader =0;
}
// Release the model object.if(m_Model)
{
16 of 19 3/8/2013 12:28 PM
m_Model->Shutdown();delete m_Model;m_Model =0;
}
// Release the camera object.if(m_Camera){
delete m_Camera;m_Camera =0;
}
// Release the D3D object
Tutorial 7: 3D Model Rendering http://www.rastertek.com/dx11tut07.html

7/14/2019 RasterTek: Direct3D introduction
http://slidepdf.com/reader/full/rastertek-direct3d-introduction 121/709
// Release the D3D object.if(m_D3D){
m_D3D->Shutdown();delete m_D3D;
m_D3D =0;}
return;}
bool GraphicsClass::Frame(){
bool result;static float rotation =0.0f;
// Update the rotation variable each frame.rotation +=(float)D3DX_PI * 0.01f;if(rotation >360.0f){
rotation -=360.0f;
}
// Render the graphics scene.result =Render(rotation);if(!result){
return false;}
return true;
17 of 19 3/8/2013 12:28 PM
}
bool GraphicsClass::Render(float rotation){
D3DXMATRIX worldMatrix, viewMatrix, projectionMatrix;bool result;
// Clear the buffers to begin the scene.m_D3D->BeginScene(0.0f, 0.0f, 0.0f, 1.0f);
// Generate the view matrix based on the camera's position
Tutorial 7: 3D Model Rendering http://www.rastertek.com/dx11tut07.html

7/14/2019 RasterTek: Direct3D introduction
http://slidepdf.com/reader/full/rastertek-direct3d-introduction 122/709
// Generate the view matrix based on the cameras position.m_Camera->Render();
// Get the world, view, and projection matrices from the camera and d3d objects.m_Camera->GetViewMatrix(viewMatrix);
m_D3D->GetWorldMatrix(worldMatrix);m_D3D->GetProjectionMatrix(projectionMatrix);
// Rotate the world matrix by the rotation value so that the triangle will spin.D3DXMatrixRotationY(&worldMatrix, rotation);
// Put the model vertex and index buffers on the graphics pipeline to prepare them for drawing.m_Model->Render(m_D3D->GetDeviceContext());
// Render the model using the light shader.result =m_LightShader->Render(m_D3D->GetDeviceContext(), m_Model->GetIndexCount(), worldMatrix, viewMatrix, projectionMatrix,
m_Model->GetTexture(), m_Light->GetDirection(), m_Light->GetDiffuseColor());if(!result){
return false;}
// Present the rendered scene to the screen.
m_D3D->EndScene();
return true;}
Summary
18 of 19 3/8/2013 12:28 PM
With the changes to the ModelClass we can now load in 3D models and render them. The format used here is just for basic static objects with lighting, however it isa good start to understanding how model formats work.
Tutorial 7: 3D Model Rendering http://www.rastertek.com/dx11tut07.html

7/14/2019 RasterTek: Direct3D introduction
http://slidepdf.com/reader/full/rastertek-direct3d-introduction 123/709
To Do Exercises
1. Recompile the code and run the program. You should get a rotating cube with the same seafloor.dds texture on it. Press escape to quit once done.
2. Find a decent 3D modeling package (hopefully something free) and create your own simple models and export them. Start looking at the format.
3. Write a simple parser program that takes the model exports and converts it to the format used here. Replace cube.txt with your model and run the program.
Source Code
Visual Studio 2010 Project: dx11tut07.zip
Source Only: dx11src07.zip
Executable Only:dx11exe07.zip
Back to Tutorial Index
19 of 19 3/8/2013 12:28 PM
Tutorial 8: Loading Maya 2011 Models
This tutorial will cover how to import static 3D models from Maya 2011. Note that this tutorial will be focused on Maya but it also applies to pretty much any other 3D
modeling software package with some slight changes.
In the previous tutorials we have already created our own model format and rendered 3D models using that format. The goal now is to convert Maya 2011 models
into our format and render them. I won't go into how to model 3D objects in Maya as there are hundreds of tutorials on the net already dedicated to that, we willinstead start at the point where you have a textured and triangulated 3D model ready for export.
For the Maya export format we will use the .OBJ format as it is easily readable and good for beginners to start with.
Tutorial 8: Loading Maya 2011 Models http://www.rastertek.com/dx11tut08.html

7/14/2019 RasterTek: Direct3D introduction
http://slidepdf.com/reader/full/rastertek-direct3d-introduction 124/709
To export your model in the .obj format you must first enable the .OBJ exporter in Maya. Click "Window", then "Settings/Preferences", then "Plug-in Manager". Scroll
down to objExport.mll and select both "Loaded" and "Auto load". Now to export your model in this format click on "File", then "Export All". Now at the bottom select
"Files of type:" and scroll down and select "OBJ export". Give it a file name and hit "Export All" and it will export it to a text file with a .obj extension. To look at the file
you can right click and select Open With and choose WordPad to read the file. You will then see something that looks like the following:
Cube.obj
#This file uses centimeters as units for non-parametric coordinates.
mtllib cube.mtl
g default
v -0.500000 -0.500000 0.500000v 0.500000 -0.500000 0.500000
v -0.500000 0.500000 0.500000
v 0.500000 0.500000 0.500000
v -0.500000 0.500000 -0.500000
v 0.500000 0.500000 -0.500000
v -0.500000 -0.500000 -0.500000
v 0.500000 -0.500000 -0.500000
vt 0.001992 0.001992
vt 0.998008 0.001992vt 0.001992 0.998008
vt 0.998008 0.998008
vt 0.001992 0.001992
vt 0.998008 0.001992
vt 0.001992 0.998008
vt 0.998008 0.998008
vt 0.001992 0.001992
vt 0.998008 0.001992
1 of 14 3/8/2013 12:29 PM
vt 0.001992 0.998008
vt 0.998008 0.998008
vt 0.001992 0.001992
vt 0.998008 0.001992
vt 0.001992 0.998008
vt 0.998008 0.998008
vt 0.001992 0.001992
vt 0.998008 0.001992
vt 0.001992 0.998008vt 0.998008 0.998008
vt 0.998008 0.998008
vt 0.001992 0.998008
vt 0.998008 0.001992
Tutorial 8: Loading Maya 2011 Models http://www.rastertek.com/dx11tut08.html

7/14/2019 RasterTek: Direct3D introduction
http://slidepdf.com/reader/full/rastertek-direct3d-introduction 125/709
vt 0.001992 0.001992
vn 0.000000 0.000000 1.000000
vn 0.000000 0.000000 1.000000
vn 0.000000 0.000000 1.000000
vn 0.000000 0.000000 1.000000vn 0.000000 1.000000 0.000000
vn 0.000000 1.000000 0.000000
vn 0.000000 1.000000 0.000000
vn 0.000000 1.000000 0.000000
vn 0.000000 0.000000 -1.000000
vn 0.000000 0.000000 -1.000000
vn 0.000000 0.000000 -1.000000
vn 0.000000 0.000000 -1.000000
vn 0.000000 -1.000000 0.000000vn 0.000000 -1.000000 0.000000
vn 0.000000 -1.000000 0.000000
vn 0.000000 -1.000000 0.000000
vn 1.000000 0.000000 0.000000
vn 1.000000 0.000000 0.000000
vn 1.000000 0.000000 0.000000
vn 1.000000 0.000000 0.000000
vn -1.000000 0.000000 0.000000
vn -1.000000 0.000000 0.000000vn -1.000000 0.000000 0.000000
vn -1.000000 0.000000 0.000000
s 1
g pCube1
usemtl file1SG
f 1/1/1 2/2/2 3/3/3
f 3/3/3 2/2/2 4/4/4
s 2
f 3/13/5 4/14/6 5/15/7
2 of 14 3/8/2013 12:29 PM
f 5/15/7 4/14/6 6/16/8
s 3
f 5/21/9 6/22/10 7/23/11
f 7/23/11 6/22/10 8/24/12
s 4
f 7/17/13 8/18/14 1/19/15
f 1/19/15 8/18/14 2/20/16
s 5
f 2/5/17 8/6/18 4/7/19f 4/7/19 8/6/18 6/8/20
s 6
f 7/9/21 1/10/22 5/11/23
f 5/11/23 1/10/22 3/12/24
Tutorial 8: Loading Maya 2011 Models http://www.rastertek.com/dx11tut08.html

7/14/2019 RasterTek: Direct3D introduction
http://slidepdf.com/reader/full/rastertek-direct3d-introduction 126/709
This particular .OBJ model file represents a 3D cube. It has 8 vertices, 24 texture coordinates and normal vectors, and 6 sides made up of 12 faces in total. When
examining the file you can ignore every line unless it starts with a "V", "VT", "VN", or "F". The extra information in the file will not be needed for converting .obj to our
file format. Lets look at what each of the important lines means:
1. The "V" lines are for the vertices. The cube is made up of 8 vertices for the eight corners of the cube. Each is listed in X, Y, Z float format.
2. The "VT" lines are for the texture coordinates. The cube is has 24 texture coordinates and most of them are duplicated since it records them for every vertex in
every triangle in the cube model. They are listed in TU, TV float format.
3. The "VN" lines are for the normal vectors. The cube is has 24 normal vectors and most of them are duplicated again since it records them for every vertex in
every triangle in the cube model. They are listed in NX, NY, NZ float format.
4. The "F" lines are for each triangle (face) in the cube model. The values listed are indexes into the vertices, texture coordinates, and normal vectors. The format of each face is:
f Vertex1/Texture1/Normal1 Vertex2/Texture2/Normal2 Vertex3/Texture3/Normal3
So a line that says "f 3/13/5 4/14/6 5/15/7" then translates to "Vertex3/Texture13/Normal5 Vertex4/Texture14/Normal6 Vertex5/Texture15/Normal7".
The order the data is listed in the .obj file is very important. For example the first vertex in the file corresponds to Vertex1 in the face list. This is the same for texture
coordinates and normals as well.
Looking at the face lines in the .obj file notice that the three index groups per line make an individual triangle. And in the case of this cube model the 12 total faces
make up the 6 sides of the cube that has 2 triangles per side.
Right hand to Left hand conversion
By default Maya 2011 is a right handed coordinate system and exports the .obj file data in right hand coordinates. To convert that data into a left handed system
3 of 14 3/8/2013 12:29 PM
which DirectX 11 is by default you have to do the following:
1. Invert the Z coordinate vertices. In the code you will see it do this: vertices[vertexIndex].z =vertices[vertexIndex].z * -1.0f;
2. Invert the TV texture coordinate. In the code you will see it do this: texcoords[texcoordIndex].y =1.0f - texcoords[texcoordIndex].y;
3. Invert the NZ normal vertex. In the code you will see it do this: normals[normalIndex].z =normals[normalIndex].z * -1.0f;
4. Convert the drawing order from counter clockwise to clockwise. In the code I simply read in the indexes in reverse order instead of re-organizing it after the fact:
fin >>faces[faceIndex].vIndex3 >>input2 >>faces[faceIndex].tIndex3 >>input2 >>faces[faceIndex].nIndex3;
fin >>faces[faceIndex].vIndex2 >>input2 >>faces[faceIndex].tIndex2 >>input2 >>faces[faceIndex].nIndex2;
fin >>faces[faceIndex].vIndex1 >>input2 >>faces[faceIndex].tIndex1 >>input2 >>faces[faceIndex].nIndex1;
Tutorial 8: Loading Maya 2011 Models http://www.rastertek.com/dx11tut08.html

7/14/2019 RasterTek: Direct3D introduction
http://slidepdf.com/reader/full/rastertek-direct3d-introduction 127/709
With those four steps complete the model data will be ready for DirectX 11 to render correctly.
Main.cpp
The program to convert the Maya 2011 .obj files into our DirectX 11 format is fairly simple and is a single program file called main.cpp. It opens a command prompt
and asks for the name of the .obj file to convert. Once the user types in the name it will attempt to open the file and read in the data counts and build the structures
required to read the data into. After that it reads the data into those structures and converts it to a left hand system. Once that is done it then writes the data out to a
model.txt file. That file can then be renamed and used for rendering in DirectX 11 using the 3D model render project from the previous tutorial.
////////////////////////////////////////////////////////////////////////////////
// Filename: main.cpp////////////////////////////////////////////////////////////////////////////////
//////////////
// INCLUDES //
//////////////
#include <iostream>
#include <fstream>
using namespace std;
//////////////
// TYPEDEFS //
//////////////
typedef struct
{
float x, y, z;
4 of 14 3/8/2013 12:29 PM
}VertexType;
typedef struct
{
int vIndex1, vIndex2, vIndex3;
int tIndex1, tIndex2, tIndex3;
int nIndex1, nIndex2, nIndex3;
}FaceType;
/////////////////////////
// FUNCTION PROTOTYPES //
/////////////////////////
id G tM d lFil ( h *)
Tutorial 8: Loading Maya 2011 Models http://www.rastertek.com/dx11tut08.html
7/14/2019 RasterTek: Direct3D introduction
http://slidepdf.com/reader/full/rastertek-direct3d-introduction 128/709
void GetModelFilename(char*);
bool ReadFileCounts(char*, int&, int&, int&, int&);
bool LoadDataStructures(char*, int, int, int, int);
//////////////////
// MAIN PROGRAM //
//////////////////
int main()
{
bool result;
char filename[256];
int vertexCount, textureCount, normalCount, faceCount;
char garbage;
// Read in the name of the model file.
GetModelFilename(filename);
// Read in the number of vertices, tex coords, normals, and faces so that the data structures can be initialized with the exact sizes needed.
result =ReadFileCounts(filename, vertexCount, textureCount, normalCount, faceCount);
if(!result)
{return -1;
}
// Display the counts to the screen for information purposes.
cout <<endl;
cout <<"Vertices: " <<vertexCount <<endl;
cout <<"UVs: " <<textureCount <<endl;
cout <<"Normals: " <<normalCount <<endl;
cout <<"Faces: " <<faceCount <<endl;
5 of 14 3/8/2013 12:29 PM
// Now read the data from the file into the data structures and then output it in our model format.
result =LoadDataStructures(filename, vertexCount, textureCount, normalCount, faceCount);
if(!result)
{
return -1;
}
// Notify the user the model has been converted.cout <<"\nFile has been converted." <<endl;
cout <<"\nDo you wish to exit (y/n)? ";
cin >>garbage;
return 0;
Tutorial 8: Loading Maya 2011 Models http://www.rastertek.com/dx11tut08.html

7/14/2019 RasterTek: Direct3D introduction
http://slidepdf.com/reader/full/rastertek-direct3d-introduction 129/709
return 0;
}
void GetModelFilename(char* filename){
bool done;
ifstream fin;
// Loop until we have a file name.
done =false;
while(!done)
{// Ask the user for the filename.
cout <<"Enter model filename: ";
// Read in the filename.
cin >>filename;
// Attempt to open the file.
fin.open(filename);
if(fin.good())
{
// If the file exists and there are no problems then exit since we have the file name.
done =true;
}
else
{
// If the file does not exist or there was an issue opening it then notify the user and repeat the process.
fin.clear();
6 of 14 3/8/2013 12:29 PM
cout <<endl;
cout <<"File " <<filename <<" could not be opened." <<endl <<endl;
}
}
return;
}
bool ReadFileCounts(char* filename, int& vertexCount, int& textureCount, int& normalCount, int& faceCount)
{
ifstream fin;
char input;
Tutorial 8: Loading Maya 2011 Models http://www.rastertek.com/dx11tut08.html
7/14/2019 RasterTek: Direct3D introduction
http://slidepdf.com/reader/full/rastertek-direct3d-introduction 130/709
// Initialize the counts.
vertexCount =0;
textureCount =0;normalCount =0;
faceCount =0;
// Open the file.
fin.open(filename);
// Check if it was successful in opening the file.
if(fin.fail() ==true)
{ return false;
}
// Read from the file and continue to read until the end of the file is reached.
fin.get(input);
while(!fin.eof())
{
// If the line starts with 'v' then count either the vertex, the texture coordinates, or the normal vector.
if(input =='v'){
fin.get(input);
if(input ==' ') {vertexCount++; }
if(input =='t') {textureCount++; }
if(input =='n') {normalCount++; }
}
// If the line starts with 'f' then increment the face count.
if(input =='f')
7 of 14 3/8/2013 12:29 PM
{
fin.get(input);
if(input ==' ') {faceCount++; }
}
// Otherwise read in the remainder of the line.
while(input !='\n')
{
fin.get(input);}
// Start reading the beginning of the next line.
fin.get(input);
}
Tutorial 8: Loading Maya 2011 Models http://www.rastertek.com/dx11tut08.html

7/14/2019 RasterTek: Direct3D introduction
http://slidepdf.com/reader/full/rastertek-direct3d-introduction 131/709
}
// Close the file.
fin.close();
return true;
}
bool LoadDataStructures(char* filename, int vertexCount, int textureCount, int normalCount, int faceCount)
{
VertexType *vertices, *texcoords, *normals;
FaceType *faces;
ifstream fin;int vertexIndex, texcoordIndex, normalIndex, faceIndex, vIndex, tIndex, nIndex;
char input, input2;
ofstream fout;
// Initialize the four data structures.
vertices =new VertexType[vertexCount];
if(!vertices)
{return false;
}
texcoords =new VertexType[textureCount];
if(!texcoords)
{
return false;
}
8 of 14 3/8/2013 12:29 PM
normals =new VertexType[normalCount];
if(!normals)
{
return false;
}
faces =new FaceType[faceCount];
if(!faces)
{ return false;
}
// Initialize the indexes.
vertexIndex =0;
Tutorial 8: Loading Maya 2011 Models http://www.rastertek.com/dx11tut08.html

7/14/2019 RasterTek: Direct3D introduction
http://slidepdf.com/reader/full/rastertek-direct3d-introduction 132/709
;
texcoordIndex =0;
normalIndex =0;
faceIndex =0;
// Open the file.
fin.open(filename);
// Check if it was successful in opening the file.
if(fin.fail() ==true)
{
return false;
}
// Read in the vertices, texture coordinates, and normals into the data structures.
// Important: Also convert to left hand coordinate system since Maya uses right hand coordinate system.
fin.get(input);
while(!fin.eof())
{
if(input =='v')
{
fin.get(input);
// Read in the vertices.
if(input ==' ')
{
fin >>vertices[vertexIndex].x >>vertices[vertexIndex].y >>vertices[vertexIndex].z;
// Invert the Z vertex to change to left hand system.
vertices[vertexIndex].z =vertices[vertexIndex].z * -1.0f;
vertexIndex++;
}
9 of 14 3/8/2013 12:29 PM
// Read in the texture uv coordinates.
if(input =='t')
{
fin >>texcoords[texcoordIndex].x >>texcoords[texcoordIndex].y;
// Invert the V texture coordinates to left hand system.
texcoords[texcoordIndex].y =1.0f - texcoords[texcoordIndex].y;
texcoordIndex++;}
// Read in the normals.
if(input =='n')
{
Tutorial 8: Loading Maya 2011 Models http://www.rastertek.com/dx11tut08.html

7/14/2019 RasterTek: Direct3D introduction
http://slidepdf.com/reader/full/rastertek-direct3d-introduction 133/709
fin >>normals[normalIndex].x >>normals[normalIndex].y >>normals[normalIndex].z;
// Invert the Z normal to change to left hand system.
normals[normalIndex].z =normals[normalIndex].z * -1.0f;normalIndex++;
}
}
// Read in the faces.
if(input =='f')
{
fin.get(input);
if(input ==' '){
// Read the face data in backwards to convert it to a left hand system from right hand system.
fin >>faces[faceIndex].vIndex3 >>input2 >>faces[faceIndex].tIndex3 >>input2 >>faces[faceIndex].nIndex3
>>faces[faceIndex].vIndex2 >>input2 >>faces[faceIndex].tIndex2 >>input2 >>faces[faceIndex].nIndex2
>>faces[faceIndex].vIndex1 >>input2 >>faces[faceIndex].tIndex1 >>input2 >>faces[faceIndex].nIndex1;
faceIndex++;
}
}
// Read in the remainder of the line.
while(input !='\n')
{
fin.get(input);
}
// Start reading the beginning of the next line.
fin.get(input);
}
10 of 14 3/8/2013 12:29 PM
// Close the file.
fin.close();
// Open the output file.
fout.open("model.txt");
// Write out the file header that our model format uses.
fout <<"Vertex Count: " <<(faceCount * 3) <<endl;
fout <<endl;
fout <<"Data:" <<endl;
fout <<endl;
// Now loop through all the faces and output the three vertices for each face.
Tutorial 8: Loading Maya 2011 Models http://www.rastertek.com/dx11tut08.html

7/14/2019 RasterTek: Direct3D introduction
http://slidepdf.com/reader/full/rastertek-direct3d-introduction 134/709
for(int i=0; i<faceIndex; i++)
{
vIndex =faces[i].vIndex1 - 1;
tIndex =faces[i].tIndex1 - 1;nIndex =faces[i].nIndex1 - 1;
fout <<vertices[vIndex].x <<' ' <<vertices[vIndex].y <<' ' <<vertices[vIndex].z <<' '
<<texcoords[tIndex].x <<' ' <<texcoords[tIndex].y <<' '
<<normals[nIndex].x <<' ' <<normals[nIndex].y <<' ' <<normals[nIndex].z <<endl;
vIndex =faces[i].vIndex2 - 1;
tIndex =faces[i].tIndex2 - 1;
nIndex =faces[i].nIndex2 - 1;
fout <<vertices[vIndex].x <<' ' <<vertices[vIndex].y <<' ' <<vertices[vIndex].z <<' '
<<texcoords[tIndex].x <<' ' <<texcoords[tIndex].y <<' '
<<normals[nIndex].x <<' ' <<normals[nIndex].y <<' ' <<normals[nIndex].z <<endl;
vIndex =faces[i].vIndex3 - 1;
tIndex =faces[i].tIndex3 - 1;
nIndex =faces[i].nIndex3 - 1;
fout <<vertices[vIndex].x <<' ' <<vertices[vIndex].y <<' ' <<vertices[vIndex].z <<' '
<<texcoords[tIndex].x <<' ' <<texcoords[tIndex].y <<' '
<<normals[nIndex].x <<' ' <<normals[nIndex].y <<' ' <<normals[nIndex].z <<endl;
}
// Close the output file.
fout.close();
// Release the four data structures.
11 of 14 3/8/2013 12:29 PM
if(vertices)
{
delete [] vertices;
vertices =0;
}
if(texcoords)
{
delete [] texcoords;
texcoords =0;
}
if(normals)
{
delete [] normals;
normals =0;
}
Tutorial 8: Loading Maya 2011 Models http://www.rastertek.com/dx11tut08.html

7/14/2019 RasterTek: Direct3D introduction
http://slidepdf.com/reader/full/rastertek-direct3d-introduction 135/709
}
if(faces)
{
delete [] faces;faces =0;
}
return true;
}
Summary
We can now convert Maya 2011 .obj files into our simple model format.
12 of 14 3/8/2013 12:29 PM
Tutorial 8: Loading Maya 2011 Models http://www.rastertek.com/dx11tut08.html
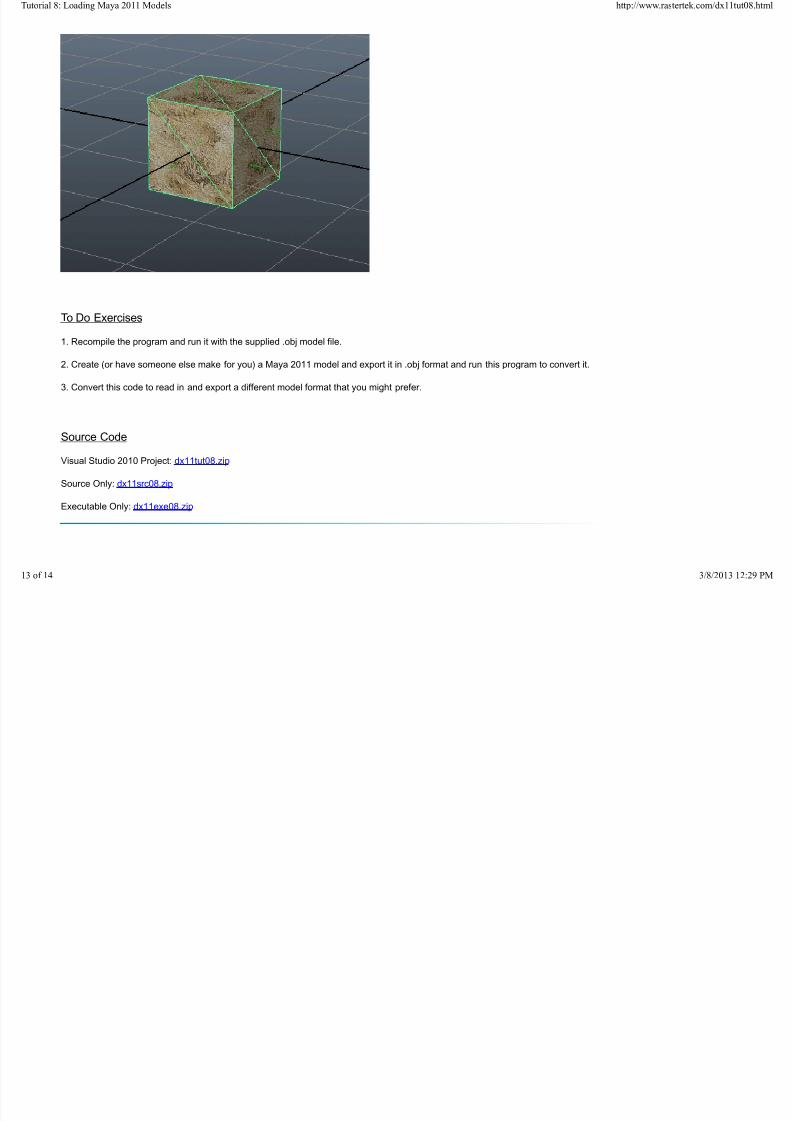
7/14/2019 RasterTek: Direct3D introduction
http://slidepdf.com/reader/full/rastertek-direct3d-introduction 136/709
To Do Exercises
1. Recompile the program and run it with the supplied .obj model file.
2. Create (or have someone else make for you) a Maya 2011 model and export it in .obj format and run this program to convert it.
3. Convert this code to read in and export a different model format that you might prefer.
Source CodeVisual Studio 2010 Project: dx11tut08.zip
Source Only: dx11src08.zip
Executable Only:dx11exe08.zip
13 of 14 3/8/2013 12:29 PM
Back to Tutorial Index
Tutorial 8: Loading Maya 2011 Models http://www.rastertek.com/dx11tut08.html

7/14/2019 RasterTek: Direct3D introduction
http://slidepdf.com/reader/full/rastertek-direct3d-introduction 137/709
14 of 14 3/8/2013 12:29 PM
Tutorial 9: Ambient Lighting
This tutorial will be an introduction to using ambient lighting in DirectX 11 with HLSL.
I will explain ambient lighting using an example. Imagine you are in a room and the only light source is sunlight which is coming in from a window. The sunlightdoesn't directly point at all the surfaces in the room but everything in the room is illuminated to a certain extent due to bouncing light particles. This lighting effect onthe surfaces that the sun isn't directly pointing at is called ambient lighting.
Now to simulate ambient lighting we use a very simple equation. We just set each pixel to be the value of the ambient light at the start of the pixel shader. From thatpoint forward all other operations just add their value to the ambient color. This way we ensure everything is at a minimum using the ambient color value.
Ambient lighting also adds far more realism to a 3D scene. Take for example the following picture that has only diffuse lighting pointing down the positive X axis at acube:
Tutorial 9: Ambient Lighting http://www.rastertek.com/dx11tut09.html

7/14/2019 RasterTek: Direct3D introduction
http://slidepdf.com/reader/full/rastertek-direct3d-introduction 138/709
cube:
The image produced doesn't look realistic because ambient light is almost always everywhere giving everything their proper shape even if it is only slightlyilluminated. Now if we just add 15% ambient white light to the same scene we get the following image instead:
1 of 26 3/8/2013 12:30 PM
Tutorial 9: Ambient Lighting http://www.rastertek.com/dx11tut09.html

7/14/2019 RasterTek: Direct3D introduction
http://slidepdf.com/reader/full/rastertek-direct3d-introduction 139/709
This now gives us a more realistic lighting effect that we as humans are used to.
We will now look at the changes to the code to implement ambient lighting. This tutorial is built on the previous tutorials that used diffuse lighting. We will now addthe ambient component with just a few changes.
Light.vs
The light shader is just the diffuse light shader updated from the previous tutorials. The vertex shader has no code changes to it, only the pixel shader was modified.
////////////////////////////////////////////////////////////////////////////////// Filename: light.vs////////////////////////////////////////////////////////////////////////////////
/////////////// GLOBALS ///////////////
cbuffer MatrixBuffer{
matrix worldMatrix;matrix viewMatrix;matrix projectionMatrix;
};
//////////////
2 of 26 3/8/2013 12:30 PM
// TYPEDEFS ////////////////struct VertexInputType{
float4 position : POSITION;float2 tex : TEXCOORD0;float3 normal : NORMAL;
};
struct PixelInputType{
float4 position : SV_POSITION;float2 tex : TEXCOORD0;float3 normal : NORMAL;
};
Tutorial 9: Ambient Lighting http://www.rastertek.com/dx11tut09.html

7/14/2019 RasterTek: Direct3D introduction
http://slidepdf.com/reader/full/rastertek-direct3d-introduction 140/709
};
////////////////////////////////////////////////////////////////////////////////// Vertex Shader////////////////////////////////////////////////////////////////////////////////PixelInputType LightVertexShader(VertexInputType input){
PixelInputType output;
// Change the position vector to be 4 units for proper matrix calculations.input.position.w =1.0f;
// Calculate the position of the vertex against the world, view, and projection matrices.output.position =mul(input.position, worldMatrix);output.position =mul(output.position, viewMatrix);output.position =mul(output.position, projectionMatrix);
// Store the texture coordinates for the pixel shader.output.tex =input.tex;
// Calculate the normal vector against the world matrix only.output.normal =mul(input.normal, (float3x3)worldMatrix);
// Normalize the normal vector.output.normal =normalize(output.normal);
return output;}
3 of 26 3/8/2013 12:30 PM
Light.ps
////////////////////////////////////////////////////////////////////////////////// Filename: light.ps////////////////////////////////////////////////////////////////////////////////
/////////////// GLOBALS ///////////////
Texture2D shaderTexture;SamplerState SampleType;
Tutorial 9: Ambient Lighting http://www.rastertek.com/dx11tut09.html
7/14/2019 RasterTek: Direct3D introduction
http://slidepdf.com/reader/full/rastertek-direct3d-introduction 141/709
The light constant buffer is updated with a new 4 float ambient color value. This will allow the ambient color to be set in this shader by outside classes.
cbuffer LightBuffer{
float4 ambientColor;float4 diffuseColor;float3 lightDirection;float padding;
};
//////////////// TYPEDEFS ////////////////struct PixelInputType{
float4 position : SV_POSITION;float2 tex : TEXCOORD0;float3 normal : NORMAL;
};
////////////////////////////////////////////////////////////////////////////////// Pixel Shader////////////////////////////////////////////////////////////////////////////////float4 LightPixelShader(PixelInputType input) : SV_TARGET{
float4 textureColor;float3 lightDir;
4 of 26 3/8/2013 12:30 PM
float lightIntensity;float4 color;
// Sample the pixel color from the texture using the sampler at this texture coordinate location.textureColor =shaderTexture.Sample(SampleType, input.tex);
We set the output color value to the base ambient color. All pixels will now be illuminated by a minimum of the ambient color value.
// Set the default output color to the ambient light value for all pixels.color =ambientColor;
// Invert the light direction for calculations.lightDir =-lightDirection;
Tutorial 9: Ambient Lighting http://www.rastertek.com/dx11tut09.html

7/14/2019 RasterTek: Direct3D introduction
http://slidepdf.com/reader/full/rastertek-direct3d-introduction 142/709
// Calculate the amount of light on this pixel.lightIntensity =saturate(dot(input.normal, lightDir));
Check if the N dot L is greater than zero. If it is then add the diffuse color to the ambient color. If not then you need to be careful to not add the diffuse color. Thereason being is that the diffuse color could be negative and it will subtract away some of the ambient color in the addition which is not correct.
if(lightIntensity >0.0f){
// Determine the final diffuse color based on the diffuse color and the amount of light intensity.color +=(diffuseColor * lightIntensity);
}
Make sure to saturate the final output light color since the combination of ambient and diffuse could have been greater than 1.
// Saturate the final light color.color =saturate(color);
// Multiply the texture pixel and the final diffuse color to get the final pixel color result.color =color * textureColor;
return color;}
Lightshaderclass.h
////////////////////////////////////////////////////////////////////////////////// Filename: lightshaderclass.h
5 of 26 3/8/2013 12:30 PM
////////////////////////////////////////////////////////////////////////////////#ifndef _LIGHTSHADERCLASS_H_ #define _LIGHTSHADERCLASS_H_
//////////////// INCLUDES ////////////////#include <d3d11.h>#include <d3dx10math.h>#include <d3dx11async.h>#include <fstream>using namespace std;
////////////////////////////////////////////////////////////////////////////////
Tutorial 9: Ambient Lighting http://www.rastertek.com/dx11tut09.html

7/14/2019 RasterTek: Direct3D introduction
http://slidepdf.com/reader/full/rastertek-direct3d-introduction 143/709
////////////////////////////////////////////////////////////////////////////////// Class name: LightShaderClass////////////////////////////////////////////////////////////////////////////////class LightShaderClass{private:
struct MatrixBufferType{
D3DXMATRIX world;D3DXMATRIX view;D3DXMATRIX projection;
};
The LightBufferType has been updated to have a ambient color component.
struct LightBufferType{
D3DXVECTOR4 ambientColor;D3DXVECTOR4 diffuseColor;D3DXVECTOR3 lightDirection;float padding;
};
public:LightShaderClass();LightShaderClass(const LightShaderClass&);~LightShaderClass();
bool Initialize(ID3D11Device*, HWND);void Shutdown();
6 of 26 3/8/2013 12:30 PM
bool Render(ID3D11DeviceContext*, int, D3DXMATRIX, D3DXMATRIX, D3DXMATRIX, ID3D11ShaderResourceView*, D3DXVECTOR3, D3DXVECTOR4, D3D
private:bool InitializeShader(ID3D11Device*, HWND, WCHAR*, WCHAR*);void ShutdownShader();void OutputShaderErrorMessage(ID3D10Blob*, HWND, WCHAR*);
bool SetShaderParameters(ID3D11DeviceContext*, D3DXMATRIX, D3DXMATRIX, D3DXMATRIX, ID3D11ShaderResourceView*, D3DXVECTOR3, D3DXVECvoid RenderShader(ID3D11DeviceContext*, int);
private:ID3D11VertexShader* m_vertexShader;ID3D11PixelShader* m_pixelShader;ID3D11InputLayout* m_layout;ID3D11SamplerState* m_sampleState;ID3D11Buffer*m matrixBuffer
Tutorial 9: Ambient Lighting http://www.rastertek.com/dx11tut09.html

7/14/2019 RasterTek: Direct3D introduction
http://slidepdf.com/reader/full/rastertek-direct3d-introduction 144/709
ID3D11Buffer* m_matrixBuffer;ID3D11Buffer* m_lightBuffer;
};
#endif
Lightshaderclass.cpp
////////////////////////////////////////////////////////////////////////////////
// Filename: lightshaderclass.cpp////////////////////////////////////////////////////////////////////////////////#include "lightshaderclass.h"
LightShaderClass::LightShaderClass(){
m_vertexShader =0;m_pixelShader =0;
m_layout =0;m_sampleState =0;m_matrixBuffer =0;m_lightBuffer =0;
}
LightShaderClass::LightShaderClass(const LightShaderClass& other){
7 of 26 3/8/2013 12:30 PM
}
LightShaderClass::~LightShaderClass(){}
bool LightShaderClass::Initialize(ID3D11Device* device, HWND hwnd)
{bool result;
// Initialize the vertex and pixel shaders.result =InitializeShader(device, hwnd, L"../Engine/light.vs", L"../Engine/light.ps");if(!result)
Tutorial 9: Ambient Lighting http://www.rastertek.com/dx11tut09.html

7/14/2019 RasterTek: Direct3D introduction
http://slidepdf.com/reader/full/rastertek-direct3d-introduction 145/709
if(!result){
return false;}
return true;}
void LightShaderClass::Shutdown(){
// Shutdown the vertex and pixel shaders as well as the related objects.ShutdownShader();
return;}
The Render function now takes in an ambient color value which is then sets in the shader before rendering.
bool LightShaderClass::Render(ID3D11DeviceContext* deviceContext, int indexCount, D3DXMATRIX worldMatrix, D3DXMATRIX viewMatrix,D3DXMATRIX projectionMatrix, ID3D11ShaderResourceView* texture, D3DXVECTOR3 lightDirection, D3DXVECTOR4 ambientColor,D3DXVECTOR4 diffuseColor)
{bool result;
// Set the shader parameters that it will use for rendering.result =SetShaderParameters(deviceContext, worldMatrix, viewMatrix, projectionMatrix, texture, lightDirection, ambientColor, diffuseColor);if(!result){
8 of 26 3/8/2013 12:30 PM
return false;}
// Now render the prepared buffers with the shader.RenderShader(deviceContext, indexCount);
return true;}
bool LightShaderClass::InitializeShader(ID3D11Device* device, HWND hwnd, WCHAR* vsFilename, WCHAR* psFilename){
HRESULT result;ID3D10Blob* errorMessage;ID3D10Blob* vertexShaderBuffer;ID3D10Blob* pixelShaderBuffer;
Tutorial 9: Ambient Lighting http://www.rastertek.com/dx11tut09.html

7/14/2019 RasterTek: Direct3D introduction
http://slidepdf.com/reader/full/rastertek-direct3d-introduction 146/709
ID3D10Blob pixelShaderBuffer;D3D11_INPUT_ELEMENT_DESC polygonLayout[3];unsigned int numElements;
D3D11_SAMPLER_DESC samplerDesc;D3D11_BUFFER_DESC matrixBufferDesc;D3D11_BUFFER_DESC lightBufferDesc;
// Initialize the pointers this function will use to null.errorMessage =0;vertexShaderBuffer =0;pixelShaderBuffer =0;
// Compile the vertex shader code.result =D3DX11CompileFromFile(vsFilename, NULL, NULL, "LightVertexShader", "vs_5_0", D3D10_SHADER_ENABLE_STRICTNESS, 0, NULL,
&vertexShaderBuffer, &errorMessage, NULL);if(FAILED(result)){
// If the shader failed to compile it should have writen something to the error message.if(errorMessage){
OutputShaderErrorMessage(errorMessage, hwnd, vsFilename);}// If there was nothing in the error message then it simply could not find the shader file itself.else{
MessageBox(hwnd, vsFilename, L"Missing Shader File", MB_OK);}
return false;
9 of 26 3/8/2013 12:30 PM
}
// Compile the pixel shader code.result =D3DX11CompileFromFile(psFilename, NULL, NULL, "LightPixelShader", "ps_5_0", D3D10_SHADER_ENABLE_STRICTNESS, 0, NULL,
&pixelShaderBuffer, &errorMessage, NULL);if(FAILED(result)){
// If the shader failed to compile it should have writen something to the error message.if(errorMessage)
{OutputShaderErrorMessage(errorMessage, hwnd, psFilename);
}// If there was nothing in the error message then it simply could not find the file itself.else{
MessageBox(hwnd, psFilename, L"Missing Shader File", MB OK);
Tutorial 9: Ambient Lighting http://www.rastertek.com/dx11tut09.html

7/14/2019 RasterTek: Direct3D introduction
http://slidepdf.com/reader/full/rastertek-direct3d-introduction 147/709
MessageBox(hwnd, psFilename, L Missing Shader File , MB_OK);}
return false;}
// Create the vertex shader from the buffer.result =device->CreateVertexShader(vertexShaderBuffer->GetBufferPointer(), vertexShaderBuffer->GetBufferSize(), NULL, &m_vertexShader);if(FAILED(result)){
return false;}
// Create the pixel shader from the buffer.result =device->CreatePixelShader(pixelShaderBuffer->GetBufferPointer(), pixelShaderBuffer->GetBufferSize(), NULL, &m_pixelShader);if(FAILED(result)){
return false;}
// Create the vertex input layout description.// This setup needs to match the VertexType stucture in the ModelClass and in the shader.polygonLayout[0].SemanticName ="POSITION";polygonLayout[0].SemanticIndex =0;polygonLayout[0].Format =DXGI_FORMAT_R32G32B32_FLOAT;polygonLayout[0].InputSlot =0;polygonLayout[0].AlignedByteOffset =0;polygonLayout[0].InputSlotClass =D3D11_INPUT_PER_VERTEX_DATA;polygonLayout[0].InstanceDataStepRate =0;
10 of 26 3/8/2013 12:30 PM
polygonLayout[1].SemanticName ="TEXCOORD";polygonLayout[1].SemanticIndex =0;polygonLayout[1].Format =DXGI_FORMAT_R32G32_FLOAT;polygonLayout[1].InputSlot =0;polygonLayout[1].AlignedByteOffset =D3D11_APPEND_ALIGNED_ELEMENT;polygonLayout[1].InputSlotClass =D3D11_INPUT_PER_VERTEX_DATA;polygonLayout[1].InstanceDataStepRate =0;
polygonLayout[2].SemanticName ="NORMAL";
polygonLayout[2].SemanticIndex =0;polygonLayout[2].Format =DXGI_FORMAT_R32G32B32_FLOAT;polygonLayout[2].InputSlot =0;polygonLayout[2].AlignedByteOffset =D3D11_APPEND_ALIGNED_ELEMENT;polygonLayout[2].InputSlotClass =D3D11_INPUT_PER_VERTEX_DATA;polygonLayout[2].InstanceDataStepRate =0;
Tutorial 9: Ambient Lighting http://www.rastertek.com/dx11tut09.html
7/14/2019 RasterTek: Direct3D introduction
http://slidepdf.com/reader/full/rastertek-direct3d-introduction 148/709
// Get a count of the elements in the layout.numElements =sizeof(polygonLayout) / sizeof(polygonLayout[0]);
// Create the vertex input layout.result =device->CreateInputLayout(polygonLayout, numElements, vertexShaderBuffer->GetBufferPointer(), vertexShaderBuffer->GetBufferSize(),
&m_layout);if(FAILED(result)){
return false;}
// Release the vertex shader buffer and pixel shader buffer since they are no longer needed.vertexShaderBuffer->Release();vertexShaderBuffer =0;
pixelShaderBuffer->Release();pixelShaderBuffer =0;
// Create a texture sampler state description.samplerDesc.Filter =D3D11_FILTER_MIN_MAG_MIP_LINEAR;samplerDesc.AddressU =D3D11_TEXTURE_ADDRESS_WRAP;samplerDesc.AddressV =D3D11_TEXTURE_ADDRESS_WRAP;samplerDesc.AddressW =D3D11_TEXTURE_ADDRESS_WRAP;samplerDesc.MipLODBias =0.0f;samplerDesc.MaxAnisotropy =1;samplerDesc.ComparisonFunc =D3D11_COMPARISON_ALWAYS;samplerDesc.BorderColor[0] =0;samplerDesc.BorderColor[1] =0;samplerDesc.BorderColor[2] =0;
11 of 26 3/8/2013 12:30 PM
samplerDesc.BorderColor[3] =0;samplerDesc.MinLOD =0;samplerDesc.MaxLOD =D3D11_FLOAT32_MAX;
// Create the texture sampler state.result =device->CreateSamplerState(&samplerDesc, &m_sampleState);if(FAILED(result)){
return false;
}
// Setup the description of the dynamic matrix constant buffer that is in the vertex shader.matrixBufferDesc.Usage =D3D11_USAGE_DYNAMIC;matrixBufferDesc.ByteWidth =sizeof(MatrixBufferType);matrixBufferDesc.BindFlags =D3D11_BIND_CONSTANT_BUFFER;matrixBufferDesc.CPUAccessFlags =D3D11_CPU_ACCESS_WRITE;
Tutorial 9: Ambient Lighting http://www.rastertek.com/dx11tut09.html

7/14/2019 RasterTek: Direct3D introduction
http://slidepdf.com/reader/full/rastertek-direct3d-introduction 149/709
matrixBufferDesc.MiscFlags =0;matrixBufferDesc.StructureByteStride =0;
// Create the constant buffer pointer so we can access the vertex shader constant buffer from within this class.result =device->CreateBuffer(&matrixBufferDesc, NULL, &m_matrixBuffer);if(FAILED(result)){
return false;}
// Setup the description of the light dynamic constant buffer that is in the pixel shader.
// Note that ByteWidth always needs to be a multiple of 16 if using D3D11_BIND_CONSTANT_BUFFER or CreateBuffer will fail.lightBufferDesc.Usage =D3D11_USAGE_DYNAMIC;lightBufferDesc.ByteWidth =sizeof(LightBufferType);lightBufferDesc.BindFlags =D3D11_BIND_CONSTANT_BUFFER;lightBufferDesc.CPUAccessFlags =D3D11_CPU_ACCESS_WRITE;lightBufferDesc.MiscFlags =0;lightBufferDesc.StructureByteStride =0;
// Create the constant buffer pointer so we can access the vertex shader constant buffer from within this class.result =device->CreateBuffer(&lightBufferDesc, NULL, &m_lightBuffer);if(FAILED(result)){
return false;}
return true;}
12 of 26 3/8/2013 12:30 PM
void LightShaderClass::ShutdownShader(){
// Release the light constant buffer.if(m_lightBuffer){
m_lightBuffer->Release();m_lightBuffer =0;
}
// Release the matrix constant buffer.if(m_matrixBuffer){
m_matrixBuffer->Release();m_matrixBuffer =0;
}
Tutorial 9: Ambient Lighting http://www.rastertek.com/dx11tut09.html

7/14/2019 RasterTek: Direct3D introduction
http://slidepdf.com/reader/full/rastertek-direct3d-introduction 150/709
// Release the sampler state.
if(m_sampleState){
m_sampleState->Release();m_sampleState =0;
}
// Release the layout.if(m_layout){
m_layout->Release();m_layout =0;
}
// Release the pixel shader.if(m_pixelShader){
m_pixelShader->Release();m_pixelShader =0;
}
// Release the vertex shader.if(m_vertexShader){
m_vertexShader->Release();m_vertexShader =0;
}
13 of 26 3/8/2013 12:30 PM
return;}
void LightShaderClass::OutputShaderErrorMessage(ID3D10Blob* errorMessage, HWND hwnd, WCHAR* shaderFilename){
char* compileErrors;unsigned long bufferSize, i;ofstream fout;
// Get a pointer to the error message text buffer.compileErrors =(char*)(errorMessage->GetBufferPointer());
// Get the length of the message.bufferSize =errorMessage->GetBufferSize();
Tutorial 9: Ambient Lighting http://www.rastertek.com/dx11tut09.html

7/14/2019 RasterTek: Direct3D introduction
http://slidepdf.com/reader/full/rastertek-direct3d-introduction 151/709
// Open a file to write the error message to.
fout.open("shader-error.txt");
// Write out the error message.for(i=0; i<bufferSize; i++){
fout <<compileErrors[i];}
// Close the file.
fout.close();
// Release the error message.errorMessage->Release();errorMessage =0;
// Pop a message up on the screen to notify the user to check the text file for compile errors.MessageBox(hwnd, L"Error compiling shader. Check shader-error.txt for message.", shaderFilename, MB_OK);
return;}
The SetShaderParameters function now takes in a ambient light color value.
bool LightShaderClass::SetShaderParameters(ID3D11DeviceContext* deviceContext, D3DXMATRIX worldMatrix, D3DXMATRIX viewMatrix,D3DXMATRIX projectionMatrix, ID3D11ShaderResourceView* texture, D3DXVECTOR3 lightDirection,D3DXVECTOR4 ambientColor, D3DXVECTOR4 diffuseColor)
{
14 of 26 3/8/2013 12:30 PM
HRESULT result;D3D11_MAPPED_SUBRESOURCE mappedResource;unsigned int bufferNumber;MatrixBufferType* dataPtr;LightBufferType* dataPtr2;
// Transpose the matrices to prepare them for the shader.D3DXMatrixTranspose(&worldMatrix, &worldMatrix);
D3DXMatrixTranspose(&viewMatrix, &viewMatrix);D3DXMatrixTranspose(&projectionMatrix, &projectionMatrix);
// Lock the constant buffer so it can be written to.result =deviceContext->Map(m_matrixBuffer, 0, D3D11_MAP_WRITE_DISCARD, 0, &mappedResource);if(FAILED(result)){
return false;
Tutorial 9: Ambient Lighting http://www.rastertek.com/dx11tut09.html

7/14/2019 RasterTek: Direct3D introduction
http://slidepdf.com/reader/full/rastertek-direct3d-introduction 152/709
return false;}
// Get a pointer to the data in the constant buffer.dataPtr =(MatrixBufferType*)mappedResource.pData;
// Copy the matrices into the constant buffer.dataPtr->world =worldMatrix;dataPtr->view =viewMatrix;dataPtr->projection =projectionMatrix;
// Unlock the constant buffer.deviceContext->Unmap(m_matrixBuffer, 0);
// Set the position of the constant buffer in the vertex shader.bufferNumber =0;
// Now set the constant buffer in the vertex shader with the updated values.deviceContext->VSSetConstantBuffers(bufferNumber, 1, &m_matrixBuffer);
// Set shader texture resource in the pixel shader.deviceContext->PSSetShaderResources(0, 1, &texture);
// Lock the light constant buffer so it can be written to.result =deviceContext->Map(m_lightBuffer, 0, D3D11_MAP_WRITE_DISCARD, 0, &mappedResource);if(FAILED(result)){
return false;}
15 of 26 3/8/2013 12:30 PM
// Get a pointer to the data in the constant buffer.dataPtr2 =(LightBufferType*)mappedResource.pData;
The ambient light color is mapped into the light buffer and then set as a constant in the pixel shader before rendering.
// Copy the lighting variables into the constant buffer.dataPtr2->ambientColor =ambientColor;dataPtr2->diffuseColor =diffuseColor;
dataPtr2->lightDirection =lightDirection;dataPtr2->padding =0.0f;
// Unlock the constant buffer.deviceContext->Unmap(m_lightBuffer, 0);
// Set the position of the light constant buffer in the pixel shader.bufferNumber =0;
Tutorial 9: Ambient Lighting http://www.rastertek.com/dx11tut09.html
7/14/2019 RasterTek: Direct3D introduction
http://slidepdf.com/reader/full/rastertek-direct3d-introduction 153/709
bufferNumber =0;
// Finally set the light constant buffer in the pixel shader with the updated values.deviceContext->PSSetConstantBuffers(bufferNumber, 1, &m_lightBuffer);
return true;}
void LightShaderClass::RenderShader(ID3D11DeviceContext* deviceContext, int indexCount){
// Set the vertex input layout.deviceContext->IASetInputLayout(m_layout);
// Set the vertex and pixel shaders that will be used to render this triangle.deviceContext->VSSetShader(m_vertexShader, NULL, 0);deviceContext->PSSetShader(m_pixelShader, NULL, 0);
// Set the sampler state in the pixel shader.deviceContext->PSSetSamplers(0, 1, &m_sampleState);
// Render the triangle.deviceContext->DrawIndexed(indexCount, 0, 0);
return;}
16 of 26 3/8/2013 12:30 PM
Lightclass.h
The LightClass was updated for this tutorial to have an ambient component and related helper functions.
////////////////////////////////////////////////////////////////////////////////// Filename: lightclass.h////////////////////////////////////////////////////////////////////////////////#ifndef _LIGHTCLASS_H_ #define _LIGHTCLASS_H_
//////////////// INCLUDES ////////////////#include <d3dx10math.h>
Tutorial 9: Ambient Lighting http://www.rastertek.com/dx11tut09.html

7/14/2019 RasterTek: Direct3D introduction
http://slidepdf.com/reader/full/rastertek-direct3d-introduction 154/709
////////////////////////////////////////////////////////////////////////////////// Class name: LightClass////////////////////////////////////////////////////////////////////////////////class LightClass{public:
LightClass();LightClass(const LightClass&);~LightClass();
void SetAmbientColor(float, float, float, float);void SetDiffuseColor(float, float, float, float);void SetDirection(float, float, float);
D3DXVECTOR4 GetAmbientColor();D3DXVECTOR4 GetDiffuseColor();D3DXVECTOR3 GetDirection();
private:D3DXVECTOR4 m_ambientColor;D3DXVECTOR4 m_diffuseColor;D3DXVECTOR3 m_direction;
};
#endif
17 of 26 3/8/2013 12:30 PM
Lightclass.cpp
////////////////////////////////////////////////////////////////////////////////// Filename: lightclass.cpp////////////////////////////////////////////////////////////////////////////////#include "lightclass.h"
LightClass::LightClass()
{}
LightClass::LightClass(const LightClass& other){}
Tutorial 9: Ambient Lighting http://www.rastertek.com/dx11tut09.html

7/14/2019 RasterTek: Direct3D introduction
http://slidepdf.com/reader/full/rastertek-direct3d-introduction 155/709
LightClass::~LightClass(){}
void LightClass::SetAmbientColor(float red, float green, float blue, float alpha){
m_ambientColor =D3DXVECTOR4(red, green, blue, alpha);return;
}
void LightClass::SetDiffuseColor(float red, float green, float blue, float alpha){
m_diffuseColor =D3DXVECTOR4(red, green, blue, alpha);return;
}
void LightClass::SetDirection(float x, float y, float z){
m_direction =D3DXVECTOR3(x, y, z);return;
}
18 of 26 3/8/2013 12:30 PM
D3DXVECTOR4 LightClass::GetAmbientColor(){
return m_ambientColor;}
D3DXVECTOR4 LightClass::GetDiffuseColor(){
return m_diffuseColor;
}
D3DXVECTOR3 LightClass::GetDirection(){
return m_direction;}
Tutorial 9: Ambient Lighting http://www.rastertek.com/dx11tut09.html

7/14/2019 RasterTek: Direct3D introduction
http://slidepdf.com/reader/full/rastertek-direct3d-introduction 156/709
Graphicsclass.h
The header for the GraphicsClass hasn't changed for this tutorial.
////////////////////////////////////////////////////////////////////////////////// Filename: graphicsclass.h////////////////////////////////////////////////////////////////////////////////#ifndef _GRAPHICSCLASS_H_ #define _GRAPHICSCLASS_H_
///////////////////////// MY CLASS INCLUDES /////////////////////////#include "d3dclass.h"#include "cameraclass.h"#include "modelclass.h"#include "lightshaderclass.h"#include "lightclass.h"
/////////////// GLOBALS ///////////////const bool FULL_SCREEN =true;
19 of 26 3/8/2013 12:30 PM
const bool VSYNC_ENABLED =true;const float SCREEN_DEPTH =1000.0f;const float SCREEN_NEAR =0.1f;
////////////////////////////////////////////////////////////////////////////////// Class name: GraphicsClass////////////////////////////////////////////////////////////////////////////////class GraphicsClass
{public:
GraphicsClass();GraphicsClass(const GraphicsClass&);~GraphicsClass();
bool Initialize(int, int, HWND);void Shutdown();
Tutorial 9: Ambient Lighting http://www.rastertek.com/dx11tut09.html

7/14/2019 RasterTek: Direct3D introduction
http://slidepdf.com/reader/full/rastertek-direct3d-introduction 157/709
bool Frame();
private:bool Render(float);
private:D3DClass* m_D3D;CameraClass* m_Camera;ModelClass* m_Model;LightShaderClass* m_LightShader;
LightClass* m_Light;};
#endif
Graphicsclass.cpp
////////////////////////////////////////////////////////////////////////////////// Filename: graphicsclass.cpp////////////////////////////////////////////////////////////////////////////////#include "graphicsclass.h"
GraphicsClass::GraphicsClass(){
20 of 26 3/8/2013 12:30 PM
m_D3D =0;m_Camera =0;m_Model =0;m_LightShader =0;m_Light =0;
}
GraphicsClass::GraphicsClass(const GraphicsClass& other)
{}
GraphicsClass::~GraphicsClass(){}
Tutorial 9: Ambient Lighting http://www.rastertek.com/dx11tut09.html

7/14/2019 RasterTek: Direct3D introduction
http://slidepdf.com/reader/full/rastertek-direct3d-introduction 158/709
bool GraphicsClass::Initialize(int screenWidth, int screenHeight, HWND hwnd){
bool result;
// Create the Direct3D object.m_D3D =new D3DClass;if(!m_D3D){
return false;}
// Initialize the Direct3D object.result =m_D3D->Initialize(screenWidth, screenHeight, VSYNC_ENABLED, hwnd, FULL_SCREEN, SCREEN_DEPTH, SCREEN_NEAR);if(!result){
MessageBox(hwnd, L"Could not initialize Direct3D.", L"Error", MB_OK);return false;
}
// Create the camera object.m_Camera =new CameraClass;if(!m_Camera){
return false;}
21 of 26 3/8/2013 12:30 PM
// Set the initial position of the camera.m_Camera->SetPosition(0.0f, 0.0f, -10.0f);
// Create the model object.m_Model =new ModelClass;if(!m_Model){
return false;}
// Initialize the model object.result =m_Model->Initialize(m_D3D->GetDevice(), "../Engine/data/cube.txt", L"../Engine/data/seafloor.dds");if(!result){
MessageBox(hwnd, L"Could not initialize the model object.", L"Error", MB_OK);return false;
}
Tutorial 9: Ambient Lighting http://www.rastertek.com/dx11tut09.html

7/14/2019 RasterTek: Direct3D introduction
http://slidepdf.com/reader/full/rastertek-direct3d-introduction 159/709
// Create the light shader object.m_LightShader =new LightShaderClass;if(!m_LightShader){
return false;}
// Initialize the light shader object.result =m_LightShader->Initialize(m_D3D->GetDevice(), hwnd);
if(!result){
MessageBox(hwnd, L"Could not initialize the light shader object.", L"Error", MB_OK);return false;
}
// Create the light object.m_Light =new LightClass;if(!m_Light)
{return false;
}
Set the intensity of the ambient light to 15% white color. Also set the direction of the light to point down the positive X axis so we can directly see the effect of ambient lighting on the cube.
// Initialize the light object.m_Light->SetAmbientColor(0.15f, 0.15f, 0.15f, 1.0f);
22 of 26 3/8/2013 12:30 PM
m_Light->SetDiffuseColor(1.0f, 1.0f, 1.0f, 1.0f);m_Light->SetDirection(1.0f, 0.0f, 0.0f);
return true;}
void GraphicsClass::Shutdown(){
// Release the light object.if(m_Light){
delete m_Light;m_Light =0;
}
// Release the light shader object.if(m LightShader)
Tutorial 9: Ambient Lighting http://www.rastertek.com/dx11tut09.html

7/14/2019 RasterTek: Direct3D introduction
http://slidepdf.com/reader/full/rastertek-direct3d-introduction 160/709
if(m_LightShader)
{m_LightShader->Shutdown();delete m_LightShader;m_LightShader =0;
}
// Release the model object.if(m_Model){
m_Model->Shutdown();delete m_Model;m_Model =0;
}
// Release the camera object.if(m_Camera){
delete m_Camera;
m_Camera =0;}
// Release the D3D object.if(m_D3D){
m_D3D->Shutdown();delete m_D3D;m_D3D =0;
23 of 26 3/8/2013 12:30 PM
}
return;}
bool GraphicsClass::Frame(){
bool result;
static float rotation =0.0f;
I have slowed down the rotation by half so the effect is easier to see.
// Update the rotation variable each frame.rotation +=(float)D3DX_PI * 0.005f;if(rotation >360.0f){
rotation -=360 0f;
Tutorial 9: Ambient Lighting http://www.rastertek.com/dx11tut09.html

7/14/2019 RasterTek: Direct3D introduction
http://slidepdf.com/reader/full/rastertek-direct3d-introduction 161/709
rotation -=360.0f;
}
// Render the graphics scene.result =Render(rotation);if(!result){
return false;}
return true;}
bool GraphicsClass::Render(float rotation){
D3DXMATRIX worldMatrix, viewMatrix, projectionMatrix;bool result;
// Clear the buffers to begin the scene.m_D3D->BeginScene(0.0f, 0.0f, 0.0f, 1.0f);
// Generate the view matrix based on the camera's position.m_Camera->Render();
// Get the world, view, and projection matrices from the camera and d3d objects.m_Camera->GetViewMatrix(viewMatrix);
24 of 26 3/8/2013 12:30 PM
m_D3D->GetWorldMatrix(worldMatrix);m_D3D->GetProjectionMatrix(projectionMatrix);
// Rotate the world matrix by the rotation value so that the triangle will spin.D3DXMatrixRotationY(&worldMatrix, rotation);
// Put the model vertex and index buffers on the graphics pipeline to prepare them for drawing.m_Model->Render(m_D3D->GetDeviceContext());
The light shader now takes in as input the ambient color of the light.
// Render the model using the light shader.result =m_LightShader->Render(m_D3D->GetDeviceContext(), m_Model->GetIndexCount(), worldMatrix, viewMatrix, projectionMatrix,
m_Model->GetTexture(), m_Light->GetDirection(), m_Light->GetAmbientColor(), m_Light->GetDiffuseColor());if(!result){
return false;}
Tutorial 9: Ambient Lighting http://www.rastertek.com/dx11tut09.html

7/14/2019 RasterTek: Direct3D introduction
http://slidepdf.com/reader/full/rastertek-direct3d-introduction 162/709
}
// Present the rendered scene to the screen.m_D3D->EndScene();
return true;}
Summary
With the addition of ambient lighting all surfaces now illuminate to a minimum degree to produce a more realistic lighting effect.
25 of 26 3/8/2013 12:30 PM
Tutorial 9: Ambient Lighting http://www.rastertek.com/dx11tut09.html

7/14/2019 RasterTek: Direct3D introduction
http://slidepdf.com/reader/full/rastertek-direct3d-introduction 163/709
To Do Exercises
1. Recompile the code and ensure you get a spinning cube that is illuminated on the dark side now.
2. Change the ambient light value to (0.0f, 0.0f, 0.0f, 1.0f) to see just the diffuse component again.
3. Comment out the color =color * textureColor; line in the pixel shader to see just the lighting effect.
Source Code
Visual Studio 2010 Project: dx11tut09.zip
Source Only: dx11src09.zip
Executable Only:dx11exe09.zip
Back to Tutorial Index
26 of 26 3/8/2013 12:30 PM
Tutorial 10: Specular Lighting
This tutorial will be an introduction to using specular lighting in DirectX 11 with HLSL. The code in this tutorial builds on the code from the previous tutorial.
Specular lighting is the use of bright spot highlights to give visual clues for light source locations. For example a red sphere with just ambient and diffuse lightinglooks like the following:
Tutorial 10: Specular Lighting http://www.rastertek.com/dx11tut10.html

7/14/2019 RasterTek: Direct3D introduction
http://slidepdf.com/reader/full/rastertek-direct3d-introduction 164/709
Now if we add a white specular highlight we get the following result:
Specular lighting is most commonly used to give light reflection off of metallic surfaces such as mirrors and highly polished/reflective metal surfaces. It is also usedon other materials such as reflecting sunlight off of water. Used well it can add a degree of photo realism to most 3D scenes.
The equation for specular lighting is the following:
SpecularLighting =SpecularColor * (SpecularColorOfLight * ((NormalVector dot HalfWayVector) power SpecularReflectionPower) * Attentuation * Spotlight)
1 of 30 3/8/2013 12:30 PM
We will modify the equation to produce just the basic specular lighting effect as follows:
SpecularLighting =SpecularLightColor * (ViewingDirection dot ReflectionVector) power SpecularReflectionPower
The reflection vector in this equation has to be produced by multiplying double the light intensity by the vertex normal. The direction of the light is subtracted whichthen gives the reflection vector between the light source and the viewing angle:
ReflectionVector =2 * LightIntensity * VertexNormal - LightDirection
The viewing direction in the equation is produced by subtracting the location of the camera by the position of the vertex:
ViewingDirection =CameraPosition - VertexPosition
Lets take a look at the modified light shader to see how this is implemented:
Light vs
Tutorial 10: Specular Lighting http://www.rastertek.com/dx11tut10.html

7/14/2019 RasterTek: Direct3D introduction
http://slidepdf.com/reader/full/rastertek-direct3d-introduction 165/709
Light.vs
////////////////////////////////////////////////////////////////////////////////// Filename: light.vs////////////////////////////////////////////////////////////////////////////////
/////////////// GLOBALS ///////////////cbuffer MatrixBuffer{
matrix worldMatrix;matrix viewMatrix;matrix projectionMatrix;
};
We add a new constant buffer to hold camera information. In this shader we require the position of the camera to determine where this vertex is being viewed fromfor specular calculations.
cbuffer CameraBuffer{
float3 cameraPosition;float padding;
};
2 of 30 3/8/2013 12:30 PM
//////////////// TYPEDEFS ////////////////struct VertexInputType{
float4 position : POSITION;float2 tex : TEXCOORD0;float3 normal : NORMAL;
};
The PixelInputType structure is modified as the viewing direction needs to be calculated in the vertex shader and then sent into the pixel shader for specular lightingcalculations.
struct PixelInputType{
float4 position : SV_POSITION;float2 tex : TEXCOORD0;float3 normal : NORMAL;
Tutorial 10: Specular Lighting http://www.rastertek.com/dx11tut10.html

7/14/2019 RasterTek: Direct3D introduction
http://slidepdf.com/reader/full/rastertek-direct3d-introduction 166/709
float3 viewDirection : TEXCOORD1;};
////////////////////////////////////////////////////////////////////////////////// Vertex Shader////////////////////////////////////////////////////////////////////////////////PixelInputType LightVertexShader(VertexInputType input){
PixelInputType output;float4 worldPosition;
// Change the position vector to be 4 units for proper matrix calculations.input.position.w =1.0f;
// Calculate the position of the vertex against the world, view, and projection matrices.output.position =mul(input.position, worldMatrix);
output.position =mul(output.position, viewMatrix);output.position =mul(output.position, projectionMatrix);
// Store the texture coordinates for the pixel shader.output.tex =input.tex;
// Calculate the normal vector against the world matrix only.output.normal =mul(input.normal, (float3x3)worldMatrix);
3 of 30 3/8/2013 12:30 PM
// Normalize the normal vector.output.normal =normalize(output.normal);
The viewing direction is calculated here in the vertex shader. We calculate the world position of the vertex and subtract that from the camera position to determinewhere we are viewing the scene from. The final value is normalized and sent into the pixel shader.
// Calculate the position of the vertex in the world.worldPosition =mul(input.position, worldMatrix);
// Determine the viewing direction based on the position of the camera and the position of the vertex in the world.output.viewDirection =cameraPosition.xyz - worldPosition.xyz;
// Normalize the viewing direction vector.output.viewDirection =normalize(output.viewDirection);
return output;}
Tutorial 10: Specular Lighting http://www.rastertek.com/dx11tut10.html

7/14/2019 RasterTek: Direct3D introduction
http://slidepdf.com/reader/full/rastertek-direct3d-introduction 167/709
Light.ps
////////////////////////////////////////////////////////////////////////////////// Filename: light.ps////////////////////////////////////////////////////////////////////////////////
/////////////// GLOBALS ///////////////
Texture2D shaderTexture;SamplerState SampleType;
The light buffer has been updated to hold specularColor and specularPower values for specular lighting calculations.
cbuffer LightBuffer
{float4 ambientColor;float4 diffuseColor;float3 lightDirection;float specularPower;float4 specularColor;
};
4 of 30 3/8/2013 12:30 PM
//////////////// TYPEDEFS ////////////////
The PixelInputType structure is modified here as well to reflect the changes to it in the vertex shader.
struct PixelInputType{
float4 position : SV_POSITION;float2 tex : TEXCOORD0;float3 normal : NORMAL;float3 viewDirection : TEXCOORD1;
};
////////////////////////////////////////////////////////////////////////////////// Pixel Shader
Tutorial 10: Specular Lighting http://www.rastertek.com/dx11tut10.html

7/14/2019 RasterTek: Direct3D introduction
http://slidepdf.com/reader/full/rastertek-direct3d-introduction 168/709
////////////////////////////////////////////////////////////////////////////////float4 LightPixelShader(PixelInputType input) : SV_TARGET{
float4 textureColor;float3 lightDir;float lightIntensity;float4 color;float3 reflection;float4 specular;
// Sample the pixel color from the texture using the sampler at this texture coordinate location.textureColor =shaderTexture.Sample(SampleType, input.tex);
// Set the default output color to the ambient light value for all pixels.color =ambientColor;
// Initialize the specular color.
specular =float4(0.0f, 0.0f, 0.0f, 0.0f);
// Invert the light direction for calculations.lightDir =-lightDirection;
// Calculate the amount of light on this pixel.lightIntensity =saturate(dot(input.normal, lightDir));
if(lightIntensity >0.0f)
5 of 30 3/8/2013 12:30 PM
{ // Determine the final diffuse color based on the diffuse color and the amount of light intensity.color +=(diffuseColor * lightIntensity);
// Saturate the ambient and diffuse color.color =saturate(color);
The reflection vector for specular lighting is calculated here in the pixel shader provided the light intensity is greater than zero. This is the same equation as listed atthe beginning of the tutorial.
// Calculate the reflection vector based on the light intensity, normal vector, and light direction.reflection =normalize(2 * lightIntensity * input.normal - lightDir);
The amount of specular light is then calculated using the reflection vector and the viewing direction. The smaller the angle between the viewer and the light sourcethe greater the specular light reflection will be. The result is taken to the power of the specularPower value. The lower the specularPower value the greater the finaleffect is.
// Determine the amount of specular light based on the reflection vector, viewing direction, and specular power.
Tutorial 10: Specular Lighting http://www.rastertek.com/dx11tut10.html

7/14/2019 RasterTek: Direct3D introduction
http://slidepdf.com/reader/full/rastertek-direct3d-introduction 169/709
specular =pow(saturate(dot(reflection, input.viewDirection)), specularPower);}
// Multiply the texture pixel and the input color to get the textured result.color =color * textureColor;
We don't add the specular effect until the end. It is a highlight and needs to be added to the final value or it will not show up properly.
// Add the specular component last to the output color.
color =saturate(color +specular);
return color;}
Lightshaderclass.h
The LightShaderClass has been modified from the previous tutorial to handle specular lighting now.
////////////////////////////////////////////////////////////////////////////////// Filename: lightshaderclass.h////////////////////////////////////////////////////////////////////////////////#ifndef _LIGHTSHADERCLASS_H_ #define _LIGHTSHADERCLASS_H_
6 of 30 3/8/2013 12:30 PM
//////////////// INCLUDES ////////////////#include <d3d11.h>#include <d3dx10math.h>#include <d3dx11async.h>#include <fstream>using namespace std;
////////////////////////////////////////////////////////////////////////////////// Class name: LightShaderClass////////////////////////////////////////////////////////////////////////////////class LightShaderClass{private:
struct MatrixBufferType
Tutorial 10: Specular Lighting http://www.rastertek.com/dx11tut10.html

7/14/2019 RasterTek: Direct3D introduction
http://slidepdf.com/reader/full/rastertek-direct3d-introduction 170/709
{D3DXMATRIX world;D3DXMATRIX view;D3DXMATRIX projection;
};
We add a new camera buffer structure to match the new camera constant buffer in the vertex shader. Note we add a padding to make the structure size a multipleof 16 to prevent CreateBuffer failing when using sizeof with this structure.
struct CameraBufferType{
D3DXVECTOR3 cameraPosition;float padding;
};
The LightBufferType has been modified to hold a specular color and specular power to match the light constant buffer in the pixel shader. Pay attention to the factthat I placed the specular power by the light direction to form a 4 float slot instead of using padding so that the structure could be kept in multiples of 16 bytes. Alsohad specular power been placed last in the structure and no padding used beneath light direction then the shader would not have functioned correctly. This is
because even though the structure was a multiple of 16 the individual slots themselves were not aligned logically to 16 bytes each.
struct LightBufferType{
D3DXVECTOR4 ambientColor;D3DXVECTOR4 diffuseColor;D3DXVECTOR3 lightDirection;float specularPower;D3DXVECTOR4 specularColor;
7 of 30 3/8/2013 12:30 PM
};
public:LightShaderClass();LightShaderClass(const LightShaderClass&);~LightShaderClass();
bool Initialize(ID3D11Device*, HWND);void Shutdown();
bool Render(ID3D11DeviceContext*, int, D3DXMATRIX, D3DXMATRIX, D3DXMATRIX, ID3D11ShaderResourceView*, D3DXVECTOR3, D3DXVECTOR4, D3DD3DXVECTOR3, D3DXVECTOR4, float);
private:bool InitializeShader(ID3D11Device*, HWND, WCHAR*, WCHAR*);void ShutdownShader();void OutputShaderErrorMessage(ID3D10Blob*, HWND, WCHAR*);
bool SetShaderParameters(ID3D11DeviceContext*, D3DXMATRIX, D3DXMATRIX, D3DXMATRIX, ID3D11ShaderResourceView*, D3DXVECTOR3, D3DXVEC
D3DXVECTOR3 D3DXVECTOR4 fl t)
Tutorial 10: Specular Lighting http://www.rastertek.com/dx11tut10.html

7/14/2019 RasterTek: Direct3D introduction
http://slidepdf.com/reader/full/rastertek-direct3d-introduction 171/709
D3DXVECTOR3, D3DXVECTOR4, float);void RenderShader(ID3D11DeviceContext*, int);
private:ID3D11VertexShader* m_vertexShader;ID3D11PixelShader* m_pixelShader;ID3D11InputLayout* m_layout;ID3D11SamplerState* m_sampleState;ID3D11Buffer* m_matrixBuffer;
We add a new camera constant buffer here which will be used for setting the camera position in the vertex shader.
ID3D11Buffer* m_cameraBuffer;ID3D11Buffer* m_lightBuffer;
};
#endif
Lightshaderclass.cpp
////////////////////////////////////////////////////////////////////////////////// Filename: lightshaderclass.cpp////////////////////////////////////////////////////////////////////////////////#include "lightshaderclass.h"
8 of 30 3/8/2013 12:30 PM
LightShaderClass::LightShaderClass(){
m_vertexShader =0;m_pixelShader =0;m_layout =0;m_sampleState =0;m_matrixBuffer =0;
Initialize the new camera constant buffer to null in the class constructor.
m_cameraBuffer =0;m_lightBuffer =0;
}
LightShaderClass::LightShaderClass(const LightShaderClass& other)
{
Tutorial 10: Specular Lighting http://www.rastertek.com/dx11tut10.html

7/14/2019 RasterTek: Direct3D introduction
http://slidepdf.com/reader/full/rastertek-direct3d-introduction 172/709
{}
LightShaderClass::~LightShaderClass(){}
bool LightShaderClass::Initialize(ID3D11Device* device, HWND hwnd){
bool result;
// Initialize the vertex and pixel shaders.result =InitializeShader(device, hwnd, L"../Engine/light.vs", L"../Engine/light.ps");if(!result){
return false;}
return true;}
void LightShaderClass::Shutdown(){
9 of 30 3/8/2013 12:30 PM
// Shutdown the vertex and pixel shaders as well as the related objects.ShutdownShader();
return;}
The Render function now takes in cameraPosition, specularColor, and specularPower values and sends them into the SetShaderParameters function to make themactive in the light shader before rendering occurs.
bool LightShaderClass::Render(ID3D11DeviceContext* deviceContext, int indexCount, D3DXMATRIX worldMatrix, D3DXMATRIX viewMatrix,D3DXMATRIX projectionMatrix, ID3D11ShaderResourceView* texture, D3DXVECTOR3 lightDirection, D3DXVECTOR4 ambientColor,D3DXVECTOR4 diffuseColor, D3DXVECTOR3 cameraPosition, D3DXVECTOR4 specularColor, float specularPower)
{bool result;
// Set the shader parameters that it will use for rendering.result =SetShaderParameters(deviceContext, worldMatrix, viewMatrix, projectionMatrix, texture, lightDirection, ambientColor, diffuseColor,
cameraPosition specularColor specularPower);
Tutorial 10: Specular Lighting http://www.rastertek.com/dx11tut10.html

7/14/2019 RasterTek: Direct3D introduction
http://slidepdf.com/reader/full/rastertek-direct3d-introduction 173/709
cameraPosition, specularColor, specularPower);if(!result){
return false;}
// Now render the prepared buffers with the shader.RenderShader(deviceContext, indexCount);
return true;}
bool LightShaderClass::InitializeShader(ID3D11Device* device, HWND hwnd, WCHAR* vsFilename, WCHAR* psFilename){
HRESULT result;ID3D10Blob* errorMessage;ID3D10Blob* vertexShaderBuffer;
ID3D10Blob* pixelShaderBuffer;D3D11_INPUT_ELEMENT_DESC polygonLayout[3];unsigned int numElements;D3D11_SAMPLER_DESC samplerDesc;D3D11_BUFFER_DESC matrixBufferDesc;D3D11_BUFFER_DESC cameraBufferDesc;D3D11_BUFFER_DESC lightBufferDesc;
10 of 30 3/8/2013 12:30 PM
// Initialize the pointers this function will use to null.errorMessage =0;vertexShaderBuffer =0;pixelShaderBuffer =0;
// Compile the vertex shader code.result =D3DX11CompileFromFile(vsFilename, NULL, NULL, "LightVertexShader", "vs_5_0", D3D10_SHADER_ENABLE_STRICTNESS, 0, NULL,
&vertexShaderBuffer, &errorMessage, NULL);if(FAILED(result))
{ // If the shader failed to compile it should have writen something to the error message.if(errorMessage){
OutputShaderErrorMessage(errorMessage, hwnd, vsFilename);}// If there was nothing in the error message then it simply could not find the shader file itself.else{
MessageBox(hwnd vsFilename L"Missing Shader File" MB OK);}
Tutorial 10: Specular Lighting http://www.rastertek.com/dx11tut10.html

7/14/2019 RasterTek: Direct3D introduction
http://slidepdf.com/reader/full/rastertek-direct3d-introduction 174/709
MessageBox(hwnd, vsFilename, L Missing Shader File , MB_OK);}
return false;}
// Compile the pixel shader code.result =D3DX11CompileFromFile(psFilename, NULL, NULL, "LightPixelShader", "ps_5_0", D3D10_SHADER_ENABLE_STRICTNESS, 0, NULL,
&pixelShaderBuffer, &errorMessage, NULL);
if(FAILED(result)){// If the shader failed to compile it should have writen something to the error message.if(errorMessage){
OutputShaderErrorMessage(errorMessage, hwnd, psFilename);}// If there was nothing in the error message then it simply could not find the file itself.else
{MessageBox(hwnd, psFilename, L"Missing Shader File", MB_OK);
}
return false;}
// Create the vertex shader from the buffer.result =device->CreateVertexShader(vertexShaderBuffer->GetBufferPointer(), vertexShaderBuffer->GetBufferSize(), NULL, &m_vertexShader);
11 of 30 3/8/2013 12:30 PM
if(FAILED(result)){return false;
}
// Create the pixel shader from the buffer.result =device->CreatePixelShader(pixelShaderBuffer->GetBufferPointer(), pixelShaderBuffer->GetBufferSize(), NULL, &m_pixelShader);if(FAILED(result)){
return false;}
// Create the vertex input layout description.// This setup needs to match the VertexType stucture in the ModelClass and in the shader.polygonLayout[0].SemanticName ="POSITION";polygonLayout[0].SemanticIndex =0;polygonLayout[0].Format =DXGI_FORMAT_R32G32B32_FLOAT;polygonLayout[0].InputSlot =0;
polygonLayout[0] AlignedByteOffset =0;polygonLayout[0] InputSlotClass D3D11 INPUT PER VERTEX DATA
Tutorial 10: Specular Lighting http://www.rastertek.com/dx11tut10.html
7/14/2019 RasterTek: Direct3D introduction
http://slidepdf.com/reader/full/rastertek-direct3d-introduction 175/709
polygonLayout[0].AlignedByteOffset 0;polygonLayout[0].InputSlotClass =D3D11_INPUT_PER_VERTEX_DATA;polygonLayout[0].InstanceDataStepRate =0;
polygonLayout[1].SemanticName ="TEXCOORD";polygonLayout[1].SemanticIndex =0;polygonLayout[1].Format =DXGI_FORMAT_R32G32_FLOAT;polygonLayout[1].InputSlot =0;polygonLayout[1].AlignedByteOffset =D3D11_APPEND_ALIGNED_ELEMENT;
polygonLayout[1].InputSlotClass =D3D11_INPUT_PER_VERTEX_DATA;polygonLayout[1].InstanceDataStepRate =0;
polygonLayout[2].SemanticName ="NORMAL";polygonLayout[2].SemanticIndex =0;polygonLayout[2].Format =DXGI_FORMAT_R32G32B32_FLOAT;polygonLayout[2].InputSlot =0;polygonLayout[2].AlignedByteOffset =D3D11_APPEND_ALIGNED_ELEMENT;polygonLayout[2].InputSlotClass =D3D11_INPUT_PER_VERTEX_DATA;
polygonLayout[2].InstanceDataStepRate =0;
// Get a count of the elements in the layout.numElements =sizeof(polygonLayout) / sizeof(polygonLayout[0]);
// Create the vertex input layout.result =device->CreateInputLayout(polygonLayout, numElements, vertexShaderBuffer->GetBufferPointer(), vertexShaderBuffer->GetBufferSize(),
&m_layout);if(FAILED(result))
12 of 30 3/8/2013 12:30 PM
{ return false;}
// Release the vertex shader buffer and pixel shader buffer since they are no longer needed.vertexShaderBuffer->Release();vertexShaderBuffer =0;
pixelShaderBuffer->Release();
pixelShaderBuffer =0;
// Create a texture sampler state description.samplerDesc.Filter =D3D11_FILTER_MIN_MAG_MIP_LINEAR;samplerDesc.AddressU =D3D11_TEXTURE_ADDRESS_WRAP;samplerDesc.AddressV =D3D11_TEXTURE_ADDRESS_WRAP;samplerDesc.AddressW =D3D11_TEXTURE_ADDRESS_WRAP;samplerDesc.MipLODBias =0.0f;samplerDesc.MaxAnisotropy =1;
samplerDesc.ComparisonFunc =D3D11 COMPARISON ALWAYS;samplerDesc BorderColor[0] =0;
Tutorial 10: Specular Lighting http://www.rastertek.com/dx11tut10.html

7/14/2019 RasterTek: Direct3D introduction
http://slidepdf.com/reader/full/rastertek-direct3d-introduction 176/709
samplerDesc.ComparisonFunc D3D11_COMPARISON_ALWAYS;samplerDesc.BorderColor[0] =0;samplerDesc.BorderColor[1] =0;samplerDesc.BorderColor[2] =0;samplerDesc.BorderColor[3] =0;samplerDesc.MinLOD =0;samplerDesc.MaxLOD =D3D11_FLOAT32_MAX;
// Create the texture sampler state.
result =device->CreateSamplerState(&samplerDesc, &m_sampleState);if(FAILED(result)){
return false;}
// Setup the description of the dynamic matrix constant buffer that is in the vertex shader.matrixBufferDesc.Usage =D3D11_USAGE_DYNAMIC;matrixBufferDesc.ByteWidth =sizeof(MatrixBufferType);
matrixBufferDesc.BindFlags =D3D11_BIND_CONSTANT_BUFFER;matrixBufferDesc.CPUAccessFlags =D3D11_CPU_ACCESS_WRITE;matrixBufferDesc.MiscFlags =0;matrixBufferDesc.StructureByteStride =0;
// Create the constant buffer pointer so we can access the vertex shader constant buffer from within this class.result =device->CreateBuffer(&matrixBufferDesc, NULL, &m_matrixBuffer);if(FAILED(result)){
13 of 30 3/8/2013 12:30 PM
return false;}
We setup the description of the new camera buffer and then create a buffer using that description. This will allow us to interface with and set the camera position inthe vertex shader.
// Setup the description of the camera dynamic constant buffer that is in the vertex shader.cameraBufferDesc.Usage =D3D11_USAGE_DYNAMIC;cameraBufferDesc.ByteWidth =sizeof(CameraBufferType);
cameraBufferDesc.BindFlags =D3D11_BIND_CONSTANT_BUFFER;cameraBufferDesc.CPUAccessFlags =D3D11_CPU_ACCESS_WRITE;cameraBufferDesc.MiscFlags =0;cameraBufferDesc.StructureByteStride =0;
// Create the camera constant buffer pointer so we can access the vertex shader constant buffer from within this class.result =device->CreateBuffer(&cameraBufferDesc, NULL, &m_cameraBuffer);if(FAILED(result)){
return false;}
Tutorial 10: Specular Lighting http://www.rastertek.com/dx11tut10.html

7/14/2019 RasterTek: Direct3D introduction
http://slidepdf.com/reader/full/rastertek-direct3d-introduction 177/709
}
// Setup the description of the light dynamic constant buffer that is in the pixel shader.// Note that ByteWidth always needs to be a multiple of 16 if using D3D11_BIND_CONSTANT_BUFFER or CreateBuffer will fail.lightBufferDesc.Usage =D3D11_USAGE_DYNAMIC;lightBufferDesc.ByteWidth =sizeof(LightBufferType);lightBufferDesc.BindFlags =D3D11_BIND_CONSTANT_BUFFER;lightBufferDesc.CPUAccessFlags =D3D11_CPU_ACCESS_WRITE;
lightBufferDesc.MiscFlags =0;lightBufferDesc.StructureByteStride =0;
// Create the constant buffer pointer so we can access the vertex shader constant buffer from within this class.result =device->CreateBuffer(&lightBufferDesc, NULL, &m_lightBuffer);if(FAILED(result)){
return false;}
return true;}
void LightShaderClass::ShutdownShader(){
// Release the light constant buffer.if(m_lightBuffer)
14 of 30 3/8/2013 12:30 PM
{m_lightBuffer->Release();m_lightBuffer =0;
}
Release the new camera constant buffer in the ShutdownShader function.
// Release the camera constant buffer.if(m_cameraBuffer)
{ m_cameraBuffer->Release();m_cameraBuffer =0;
}
// Release the matrix constant buffer.if(m_matrixBuffer){
m_matrixBuffer->Release();
m_matrixBuffer =0;}
Tutorial 10: Specular Lighting http://www.rastertek.com/dx11tut10.html

7/14/2019 RasterTek: Direct3D introduction
http://slidepdf.com/reader/full/rastertek-direct3d-introduction 178/709
}
// Release the sampler state.if(m_sampleState){
m_sampleState->Release();m_sampleState =0;
}
// Release the layout.if(m_layout){
m_layout->Release();m_layout =0;
}
// Release the pixel shader.
if(m_pixelShader){m_pixelShader->Release();m_pixelShader =0;
}
// Release the vertex shader.if(m_vertexShader){
15 of 30 3/8/2013 12:30 PM
m_vertexShader->Release();m_vertexShader =0;
}
return;}
void LightShaderClass::OutputShaderErrorMessage(ID3D10Blob* errorMessage, HWND hwnd, WCHAR* shaderFilename){
char* compileErrors;unsigned long bufferSize, i;ofstream fout;
// Get a pointer to the error message text buffer.compileErrors =(char*)(errorMessage->GetBufferPointer());
// Get the length of the message.bufferSize =errorMessage->GetBufferSize();
Tutorial 10: Specular Lighting http://www.rastertek.com/dx11tut10.html

7/14/2019 RasterTek: Direct3D introduction
http://slidepdf.com/reader/full/rastertek-direct3d-introduction 179/709
g ();
// Open a file to write the error message to.fout.open("shader-error.txt");
// Write out the error message.for(i=0; i<bufferSize; i++){
fout <<compileErrors[i];}
// Close the file.fout.close();
// Release the error message.errorMessage->Release();errorMessage =0;
// Pop a message up on the screen to notify the user to check the text file for compile errors.MessageBox(hwnd, L"Error compiling shader. Check shader-error.txt for message.", shaderFilename, MB_OK);
return;}
The SetShaderParameters function has been modified to take as input cameraPosition, specularColor, and specularPower.
16 of 30 3/8/2013 12:30 PM
bool LightShaderClass::SetShaderParameters(ID3D11DeviceContext* deviceContext, D3DXMATRIX worldMatrix, D3DXMATRIX viewMatrix,D3DXMATRIX projectionMatrix, ID3D11ShaderResourceView* texture, D3DXVECTOR3 lightDirection,D3DXVECTOR4 ambientColor, D3DXVECTOR4 diffuseColor, D3DXVECTOR3 cameraPosition, D3DXVECTOR4 specularColor,float specularPower)
{HRESULT result;D3D11_MAPPED_SUBRESOURCE mappedResource;unsigned int bufferNumber;MatrixBufferType* dataPtr;LightBufferType* dataPtr2;CameraBufferType* dataPtr3;
// Transpose the matrices to prepare them for the shader.D3DXMatrixTranspose(&worldMatrix, &worldMatrix);D3DXMatrixTranspose(&viewMatrix, &viewMatrix);D3DXMatrixTranspose(&projectionMatrix, &projectionMatrix);
// Lock the constant buffer so it can be written to.result =deviceContext->Map(m_matrixBuffer, 0, D3D11_MAP_WRITE_DISCARD, 0, &mappedResource);
Tutorial 10: Specular Lighting http://www.rastertek.com/dx11tut10.html
7/14/2019 RasterTek: Direct3D introduction
http://slidepdf.com/reader/full/rastertek-direct3d-introduction 180/709
if(FAILED(result)){
return false;}
// Get a pointer to the data in the constant buffer.dataPtr =(MatrixBufferType*)mappedResource.pData;
// Copy the matrices into the constant buffer.dataPtr->world =worldMatrix;dataPtr->view =viewMatrix;dataPtr->projection =projectionMatrix;
// Unlock the constant buffer.deviceContext->Unmap(m_matrixBuffer, 0);
// Set the position of the constant buffer in the vertex shader.bufferNumber =0;
// Now set the constant buffer in the vertex shader with the updated values.deviceContext->VSSetConstantBuffers(bufferNumber, 1, &m_matrixBuffer);
Here we lock the camera buffer and set the camera position value in it.
// Lock the camera constant buffer so it can be written to.
17 of 30 3/8/2013 12:30 PM
result =deviceContext->Map(m_cameraBuffer, 0, D3D11_MAP_WRITE_DISCARD, 0, &mappedResource);if(FAILED(result)){
return false;}
// Get a pointer to the data in the constant buffer.dataPtr3 =(CameraBufferType*)mappedResource.pData;
// Copy the camera position into the constant buffer.dataPtr3->cameraPosition =cameraPosition;dataPtr3->padding =0.0f;
// Unlock the camera constant buffer.deviceContext->Unmap(m_cameraBuffer, 0);
Note that we set the bufferNumber to 1 instead of 0 before setting the constant buffer. This is because it is the second buffer in the vertex shader (the first being thematrix buffer).
// Set the position of the camera constant buffer in the vertex shader.
Tutorial 10: Specular Lighting http://www.rastertek.com/dx11tut10.html
7/14/2019 RasterTek: Direct3D introduction
http://slidepdf.com/reader/full/rastertek-direct3d-introduction 181/709
bufferNumber =1;
// Now set the camera constant buffer in the vertex shader with the updated values.deviceContext->VSSetConstantBuffers(bufferNumber, 1, &m_cameraBuffer);
// Set shader texture resource in the pixel shader.deviceContext->PSSetShaderResources(0, 1, &texture);
// Lock the light constant buffer so it can be written to.result =deviceContext->Map(m_lightBuffer, 0, D3D11_MAP_WRITE_DISCARD, 0, &mappedResource);if(FAILED(result)){
return false;}
// Get a pointer to the data in the light constant buffer.
dataPtr2 =(LightBufferType*)mappedResource.pData;
The light constant buffer now sets the specular color and specular power so that the pixel shader can perform specular lighting calculations.
// Copy the lighting variables into the light constant buffer.dataPtr2->ambientColor =ambientColor;dataPtr2->diffuseColor =diffuseColor;dataPtr2->lightDirection =lightDirection;dataPtr2->specularColor =specularColor;
18 of 30 3/8/2013 12:30 PM
dataPtr2->specularPower =specularPower;
// Unlock the light constant buffer.deviceContext->Unmap(m_lightBuffer, 0);
// Set the position of the light constant buffer in the pixel shader.bufferNumber =0;
// Finally set the light constant buffer in the pixel shader with the updated values.deviceContext->PSSetConstantBuffers(bufferNumber, 1, &m_lightBuffer);
return true;}
void LightShaderClass::RenderShader(ID3D11DeviceContext* deviceContext, int indexCount){
// Set the vertex input layout.deviceContext->IASetInputLayout(m_layout);
// S t th t d i l h d th t ill b d t d thi t i l
Tutorial 10: Specular Lighting http://www.rastertek.com/dx11tut10.html

7/14/2019 RasterTek: Direct3D introduction
http://slidepdf.com/reader/full/rastertek-direct3d-introduction 182/709
// Set the vertex and pixel shaders that will be used to render this triangle.deviceContext->VSSetShader(m_vertexShader, NULL, 0);deviceContext->PSSetShader(m_pixelShader, NULL, 0);
// Set the sampler state in the pixel shader.deviceContext->PSSetSamplers(0, 1, &m_sampleState);
// Render the triangle.deviceContext->DrawIndexed(indexCount, 0, 0);
return;}
Lightclass.h
The LightClass has been modified for this tutorial to include specular components and specular related helper functions.
////////////////////////////////////////////////////////////////////////////////// Filename: lightclass.h////////////////////////////////////////////////////////////////////////////////#ifndef _LIGHTCLASS_H_ #define _LIGHTCLASS_H_
19 of 30 3/8/2013 12:30 PM
//////////////// INCLUDES ////////////////#include <d3dx10math.h>
////////////////////////////////////////////////////////////////////////////////// Class name: LightClass////////////////////////////////////////////////////////////////////////////////class LightClass{public:
LightClass();LightClass(const LightClass&);~LightClass();
void SetAmbientColor(float, float, float, float);void SetDiffuseColor(float, float, float, float);void SetDirection(float float float);
Tutorial 10: Specular Lighting http://www.rastertek.com/dx11tut10.html
7/14/2019 RasterTek: Direct3D introduction
http://slidepdf.com/reader/full/rastertek-direct3d-introduction 183/709
void SetDirection(float, float, float);void SetSpecularColor(float, float, float, float);void SetSpecularPower(float);
D3DXVECTOR4 GetAmbientColor();D3DXVECTOR4 GetDiffuseColor();D3DXVECTOR3 GetDirection();D3DXVECTOR4 GetSpecularColor();float GetSpecularPower();
private:D3DXVECTOR4 m_ambientColor;D3DXVECTOR4 m_diffuseColor;D3DXVECTOR3 m_direction;D3DXVECTOR4 m_specularColor;float m_specularPower;
};
#endif
Lightclass.cpp
20 of 30 3/8/2013 12:30 PM
////////////////////////////////////////////////////////////////////////////////// Filename: lightclass.cpp////////////////////////////////////////////////////////////////////////////////#include "lightclass.h"
LightClass::LightClass(){}
LightClass::LightClass(const LightClass& other){}
LightClass::~LightClass(){}
Tutorial 10: Specular Lighting http://www.rastertek.com/dx11tut10.html

7/14/2019 RasterTek: Direct3D introduction
http://slidepdf.com/reader/full/rastertek-direct3d-introduction 184/709
void LightClass::SetAmbientColor(float red, float green, float blue, float alpha){
m_ambientColor =D3DXVECTOR4(red, green, blue, alpha);return;
}
void LightClass::SetDiffuseColor(float red, float green, float blue, float alpha){
m_diffuseColor =D3DXVECTOR4(red, green, blue, alpha);return;
}
void LightClass::SetDirection(float x, float y, float z)
{ m_direction =D3DXVECTOR3(x, y, z);return;
}
void LightClass::SetSpecularColor(float red, float green, float blue, float alpha){
m_specularColor =D3DXVECTOR4(red, green, blue, alpha);
21 of 30 3/8/2013 12:30 PM
return;}
void LightClass::SetSpecularPower(float power){
m_specularPower =power;return;
}
D3DXVECTOR4 LightClass::GetAmbientColor(){
return m_ambientColor;}
D3DXVECTOR4 LightClass::GetDiffuseColor(){
return m_diffuseColor;}
Tutorial 10: Specular Lighting http://www.rastertek.com/dx11tut10.html

7/14/2019 RasterTek: Direct3D introduction
http://slidepdf.com/reader/full/rastertek-direct3d-introduction 185/709
}
D3DXVECTOR3 LightClass::GetDirection(){
return m_direction;}
D3DXVECTOR4 LightClass::GetSpecularColor(){
return m_specularColor;}
float LightClass::GetSpecularPower(){
return m_specularPower;}
Graphicsclass.h
22 of 30 3/8/2013 12:30 PM
The header file for the GraphicsClass has not changed for this tutorial.
////////////////////////////////////////////////////////////////////////////////// Filename: graphicsclass.h////////////////////////////////////////////////////////////////////////////////#ifndef _GRAPHICSCLASS_H_ #define _GRAPHICSCLASS_H_
///////////////////////// MY CLASS INCLUDES /////////////////////////#include "d3dclass.h"#include "cameraclass.h"#include "modelclass.h"#include "lightshaderclass.h"#include "lightclass.h"
/////////////// GLOBALS //
Tutorial 10: Specular Lighting http://www.rastertek.com/dx11tut10.html

7/14/2019 RasterTek: Direct3D introduction
http://slidepdf.com/reader/full/rastertek-direct3d-introduction 186/709
// GLOBALS ///////////////const bool FULL_SCREEN =true;const bool VSYNC_ENABLED =true;const float SCREEN_DEPTH =1000.0f;const float SCREEN_NEAR =0.1f;
////////////////////////////////////////////////////////////////////////////////// Class name: GraphicsClass////////////////////////////////////////////////////////////////////////////////class GraphicsClass{public:
GraphicsClass();GraphicsClass(const GraphicsClass&);~GraphicsClass();
bool Initialize(int, int, HWND);void Shutdown();bool Frame();
private:bool Render(float);
23 of 30 3/8/2013 12:30 PM
private:
D3DClass* m_D3D;CameraClass* m_Camera;ModelClass* m_Model;LightShaderClass* m_LightShader;LightClass* m_Light;
};
#endif
Graphicsclass.cpp
////////////////////////////////////////////////////////////////////////////////// Filename: graphicsclass.cpp////////////////////////////////////////////////////////////////////////////////#include "graphicsclass.h"
GraphicsClass::GraphicsClass()
Tutorial 10: Specular Lighting http://www.rastertek.com/dx11tut10.html

7/14/2019 RasterTek: Direct3D introduction
http://slidepdf.com/reader/full/rastertek-direct3d-introduction 187/709
GraphicsClass::GraphicsClass(){
m_D3D =0;m_Camera =0;m_Model =0;m_LightShader =0;m_Light =0;
}
GraphicsClass::GraphicsClass(const GraphicsClass& other){}
GraphicsClass::~GraphicsClass()
{}
bool GraphicsClass::Initialize(int screenWidth, int screenHeight, HWND hwnd){
bool result;
24 of 30 3/8/2013 12:30 PM
// Create the Direct3D object.m_D3D =new D3DClass;if(!m_D3D){
return false;}
// Initialize the Direct3D object.result =m_D3D->Initialize(screenWidth, screenHeight, VSYNC_ENABLED, hwnd, FULL_SCREEN, SCREEN_DEPTH, SCREEN_NEAR);
if(!result){
MessageBox(hwnd, L"Could not initialize Direct3D.", L"Error", MB_OK);return false;
}
// Create the camera object.m_Camera =new CameraClass;if(!m_Camera){
return false;
Tutorial 10: Specular Lighting http://www.rastertek.com/dx11tut10.html

7/14/2019 RasterTek: Direct3D introduction
http://slidepdf.com/reader/full/rastertek-direct3d-introduction 188/709
}
// Set the initial position of the camera.m_Camera->SetPosition(0.0f, 0.0f, -10.0f);
// Create the model object.m_Model =new ModelClass;if(!m_Model){
return false;}
// Initialize the model object.result =m_Model->Initialize(m_D3D->GetDevice(), "../Engine/data/cube.txt", L"../Engine/data/seafloor.dds");if(!result){
MessageBox(hwnd, L"Could not initialize the model object.", L"Error", MB_OK);return false;
}
// Create the light shader object.m_LightShader =new LightShaderClass;if(!m_LightShader){
25 of 30 3/8/2013 12:30 PM
return false;
}
// Initialize the light shader object.result =m_LightShader->Initialize(m_D3D->GetDevice(), hwnd);if(!result){
MessageBox(hwnd, L"Could not initialize the light shader object.", L"Error", MB_OK);return false;
}
// Create the light object.m_Light =new LightClass;if(!m_Light){
return false;}
In the light class object we now set the specular color and the specular power. For this tutorial we set the specular color to white and set the specular power to 32.Remember that the lower the specular power value the greater the specular effect will be.
Tutorial 10: Specular Lighting http://www.rastertek.com/dx11tut10.html

7/14/2019 RasterTek: Direct3D introduction
http://slidepdf.com/reader/full/rastertek-direct3d-introduction 189/709
// Initialize the light object.m_Light->SetAmbientColor(0.15f, 0.15f, 0.15f, 1.0f);m_Light->SetDiffuseColor(1.0f, 1.0f, 1.0f, 1.0f);m_Light->SetDirection(0.0f, 0.0f, 1.0f);m_Light->SetSpecularColor(1.0f, 1.0f, 1.0f, 1.0f);m_Light->SetSpecularPower(32.0f);
return true;}
void GraphicsClass::Shutdown(){
// Release the light object.if(m_Light){
delete m_Light;m_Light =0;
}
// Release the light shader object.if(m_LightShader){
m_LightShader->Shutdown();
26 of 30 3/8/2013 12:30 PM
delete m_LightShader;
m_LightShader =0;}
// Release the model object.if(m_Model){
m_Model->Shutdown();delete m_Model;m_Model =0;
}
// Release the camera object.if(m_Camera){
delete m_Camera;m_Camera =0;
}
// Release the D3D object.if(m_D3D){
Tutorial 10: Specular Lighting http://www.rastertek.com/dx11tut10.html

7/14/2019 RasterTek: Direct3D introduction
http://slidepdf.com/reader/full/rastertek-direct3d-introduction 190/709
{m_D3D->Shutdown();delete m_D3D;m_D3D =0;
}
return;}
bool GraphicsClass::Frame(){
bool result;static float rotation =0.0f;
// Update the rotation variable each frame.rotation +=(float)D3DX_PI * 0.005f;if(rotation >360.0f){
rotation -=360.0f;}
// Render the graphics scene.
27 of 30 3/8/2013 12:30 PM
result =Render(rotation);
if(!result){
return false;}
return true;}
bool GraphicsClass::Render(float rotation){
D3DXMATRIX worldMatrix, viewMatrix, projectionMatrix;bool result;
// Clear the buffers to begin the scene.m_D3D->BeginScene(0.0f, 0.0f, 0.0f, 1.0f);
// Generate the view matrix based on the camera's position.m_Camera->Render();
Tutorial 10: Specular Lighting http://www.rastertek.com/dx11tut10.html

7/14/2019 RasterTek: Direct3D introduction
http://slidepdf.com/reader/full/rastertek-direct3d-introduction 191/709
// Get the world, view, and projection matrices from the camera and d3d objects.m_Camera->GetViewMatrix(viewMatrix);m_D3D->GetWorldMatrix(worldMatrix);m_D3D->GetProjectionMatrix(projectionMatrix);
// Rotate the world matrix by the rotation value so that the triangle will spin.D3DXMatrixRotationY(&worldMatrix, rotation);
// Put the model vertex and index buffers on the graphics pipeline to prepare them for drawing.m_Model->Render(m_D3D->GetDeviceContext());
The light shader render function now takes in the camera position, the light specular color, and the light specular power.
// Render the model using the light shader.result =m_LightShader->Render(m_D3D->GetDeviceContext(), m_Model->GetIndexCount(), worldMatrix, viewMatrix, projectionMatrix,
m_Model->GetTexture(), m_Light->GetDirection(), m_Light->GetAmbientColor(), m_Light->GetDiffuseColor(),m_Camera->GetPosition(), m_Light->GetSpecularColor(), m_Light->GetSpecularPower());
if(!result){
return false;}
// Present the rendered scene to the screen.
28 of 30 3/8/2013 12:30 PM
m_D3D->EndScene();
return true;}
Summary
With the addition of specular lighting we now get a bright white flash each time the cube surface evenly faces the camera viewing direction.
Tutorial 10: Specular Lighting http://www.rastertek.com/dx11tut10.html

7/14/2019 RasterTek: Direct3D introduction
http://slidepdf.com/reader/full/rastertek-direct3d-introduction 192/709
To Do Exercises
1. Recompile and run the project and ensure you get a spinning cube that flashes a bright specular highlight each time if faces the camera.
2. Change the direction of the light such as m_Light->SetDirection(1.0f, 0.0f, 1.0f) to see the effect if the light source is from a different direction.
3. Create a 5000+poly sphere model with a red texture to recreate the sphere images at the top of the tutorial.
Source Code
Visual Studio 2010 Project: dx11tut10.zip
Source Only: dx11src10.zip
29 of 30 3/8/2013 12:30 PM
Executable Only:dx11exe10.zip
Back to Tutorial Index
Tutorial 10: Specular Lighting http://www.rastertek.com/dx11tut10.html

7/14/2019 RasterTek: Direct3D introduction
http://slidepdf.com/reader/full/rastertek-direct3d-introduction 193/709
30 of 30 3/8/2013 12:30 PM
Tutorial 11: 2D Rendering
Being able to render 2D images to the screen is very useful. For example most user interfaces, sprite systems, and text engines are made up of 2D images. DirectX11 allows you to render 2D images by mapping them to polygons and then rendering using an orthographic projection matrix.
2D Screen Coordinates To render 2D images to the screen you will need to calculate the screen X and Y coordinates. For DirectX the middle of the screen is 0,0. From there the left side of the screen and the bottom side of the screen go in the negative direction. The right side of the screen and the top of the screen go in the positive direction. As anexample take a screen that is 1024x768 resolution, the coordinates for the borders of the screen would be as follows:
Tutorial 11: 2D Rendering http://www.rastertek.com/dx11tut11.html

7/14/2019 RasterTek: Direct3D introduction
http://slidepdf.com/reader/full/rastertek-direct3d-introduction 194/709
So keep in mind that all your 2D rendering will need to work with these screen coordinate calculations and that you will also need the size of the user'swindow/screen for correct placement of 2D images.
Disabling Z buffer in DirectX 11
To draw in 2D you should be disabling the Z buffer. When the Z buffer is turned off it will write the 2D data over top of whatever is in that pixel location. Make sure touse the painter's algorithm and draw from the back to the front to ensure you get your expected rendering output. Once you are done drawing 2D graphics re-enablethe Z buffer again so you can render 3D objects properly again.
1 of 35 3/8/2013 12:31 PM
To turn the Z buffer on and off you will need to create a second depth stencil state the same as your 3D one except with DepthEnable set to false. Then just use
OMSetDepthStencilState to switch between the two states to turn the Z buffer on and off.
Dynamic Vertex Buffers
Another new concept that will be introduced is dynamic vertex buffers. So far we have used static vertex buffers in the previous tutorials. The issue with static vertexbuffers is that you can't change the data inside the buffer ever. Dynamic vertex buffers on the other hand allow us to manipulate the information inside the vertex
buffer each frame if we need to. These buffers are much slower than static vertex buffers but that is the trade off for the extra functionality.
The reason we use dynamic vertex buffers with 2D rendering is because we often want to move the 2D image around the screen to different locations. A goodexample is a mouse pointer, it gets moved often so the vertex data that represents its position on the screen needs to change often as well.
Two extra things to note. Don't use dynamic vertex buffers unless they are absolutely called for, they are quite a bit slower than static buffers. Secondly neverdestroy and recreate a static vertex buffer each frame, this can completely lock the video card (which I have seen on ATI but not on Nvidia) and is far worse inoverall performance when compared to using dynamic vertex buffers.
Orthographic Projection in DirectX 11
Tutorial 11: 2D Rendering http://www.rastertek.com/dx11tut11.html

7/14/2019 RasterTek: Direct3D introduction
http://slidepdf.com/reader/full/rastertek-direct3d-introduction 195/709
The final new concept required to render in 2D is to use an orthographic projection matrix in place of the regular 3D projection matrix. This will allow you to render to2D screen coordinates. Remember that we already did create this matrix in the Direct3D initialization code:
// Create an orthographic projection matrix for 2D rendering.D3DXMatrixOrthoLH(&m_orthoMatrix, (float)screenWidth, (float)screenHeight, screenNear, screenDepth);
Framework
The code in this tutorial is based on the previous tutorials. The major difference in this tutorial is that ModelClass has been replaced with BitmapClass and that weare using the TextureShaderClass again instead of the LightShaderClass. The framework will look like the following:
2 of 35 3/8/2013 12:31 PM
Bitmapclass.h
BitmapClass will be used to represent an individual 2D image that needs to be rendered to the screen. For every 2D image you have you will need a new
BitmapClass for each. Note that this class is just the ModelClass re-written to handle 2D images instead of 3D objects.
////////////////////////////////////////////////////////////////////////////////
Tutorial 11: 2D Rendering http://www.rastertek.com/dx11tut11.html

7/14/2019 RasterTek: Direct3D introduction
http://slidepdf.com/reader/full/rastertek-direct3d-introduction 196/709
// Filename: bitmapclass.h////////////////////////////////////////////////////////////////////////////////#ifndef _BITMAPCLASS_H_ #define _BITMAPCLASS_H_
//////////////// INCLUDES ////////////////#include <d3d11.h>#include <d3dx10math.h>
///////////////////////// MY CLASS INCLUDES //
///////////////////////#include "textureclass.h"
////////////////////////////////////////////////////////////////////////////////// Class name: BitmapClass////////////////////////////////////////////////////////////////////////////////class BitmapClass
3 of 35 3/8/2013 12:31 PM
{
private:
Each bitmap image is still a polygon object that gets rendered similar to 3D objects. For 2D images we just need a position vector and texture coordinates.
struct VertexType{
D3DXVECTOR3 position;D3DXVECTOR2 texture;
};
public:BitmapClass();BitmapClass(const BitmapClass&);~BitmapClass();
bool Initialize(ID3D11Device*, int, int, WCHAR*, int, int);void Shutdown();bool Render(ID3D11DeviceContext*, int, int);
int GetIndexCount();ID3D11ShaderResourceView* GetTexture();
Tutorial 11: 2D Rendering http://www.rastertek.com/dx11tut11.html

7/14/2019 RasterTek: Direct3D introduction
http://slidepdf.com/reader/full/rastertek-direct3d-introduction 197/709
private:bool InitializeBuffers(ID3D11Device*);void ShutdownBuffers();bool UpdateBuffers(ID3D11DeviceContext*, int, int);void RenderBuffers(ID3D11DeviceContext*);
bool LoadTexture(ID3D11Device*, WCHAR*);void ReleaseTexture();
private:ID3D11Buffer *m_vertexBuffer, *m_indexBuffer;int m_vertexCount, m_indexCount;
TextureClass* m_Texture;
The BitmapClass will need to maintain some extra information that a 3D model wouldn't such as the screen size, the bitmap size, and the last place it was rendered.We have added extra private variables here to track that extra information.
int m_screenWidth, m_screenHeight;int m_bitmapWidth, m_bitmapHeight;int m_previousPosX, m_previousPosY;
};
4 of 35 3/8/2013 12:31 PM
#endif
Bitmapclass.cpp
////////////////////////////////////////////////////////////////////////////////// Filename: bitmapclass.cpp////////////////////////////////////////////////////////////////////////////////#include "bitmapclass.h"
The class constructor initializes all the private pointers in the class.
BitmapClass::BitmapClass(){
m_vertexBuffer =0;m_indexBuffer =0;m_Texture =0;
}
BitmapClass::BitmapClass(const BitmapClass& other)
Tutorial 11: 2D Rendering http://www.rastertek.com/dx11tut11.html

7/14/2019 RasterTek: Direct3D introduction
http://slidepdf.com/reader/full/rastertek-direct3d-introduction 198/709
{}
BitmapClass::~BitmapClass(){}
bool BitmapClass::Initialize(ID3D11Device* device, int screenWidth, int screenHeight, WCHAR* textureFilename, int bitmapWidth, int bitmapHeight){
bool result;
In the Initialize function both the screen size and image size are stored. These will be required for generating exact vertex locations during rendering. Note that thepixels of the image do not need to be exactly the same as the texture that is used, you can set this to any size and use any size texture you want also.
// Store the screen size.m_screenWidth =screenWidth;m_screenHeight =screenHeight;
// Store the size in pixels that this bitmap should be rendered at.m_bitmapWidth =bitmapWidth;
5 of 35 3/8/2013 12:31 PM
m_bitmapHeight =bitmapHeight;
The previous rendering location is first initialized to negative one. This will be an important variable that will locate where it last drew this image. If the image locationhasn't changed since last frame then it won't modify the dynamic vertex buffer which will save us some cycles.
// Initialize the previous rendering position to negative one.m_previousPosX =-1;m_previousPosY =-1;
The buffers are then created and the texture for this bitmap image is also loaded in.
// Initialize the vertex and index buffers.result =InitializeBuffers(device);if(!result){
return false;}
// Load the texture for this model.
result =LoadTexture(device, textureFilename);if(!result){
return false;
Tutorial 11: 2D Rendering http://www.rastertek.com/dx11tut11.html
7/14/2019 RasterTek: Direct3D introduction
http://slidepdf.com/reader/full/rastertek-direct3d-introduction 199/709
return false;}
return true;}
The Shutdown function will release the vertex and index buffers as well as the texture that was used for the bitmap image.
void BitmapClass::Shutdown(){
// Release the model texture.ReleaseTexture();
// Shutdown the vertex and index buffers.ShutdownBuffers();
return;}
Render puts the buffers of the 2D image on the video card. As input it takes the position of where to render the image on the screen. The UpdateBuffers function iscalled with the position parameters. If the position has changed since the last frame it will then update the location of the vertices in the dynamic vertex buffer to thenew location. If not it will skip the UpdateBuffers function. After that the RenderBuffers function will prepare the final vertices/indices for rendering.
6 of 35 3/8/2013 12:31 PM
bool BitmapClass::Render(ID3D11DeviceContext* deviceContext, int positionX, int positionY)
{bool result;
// Re-build the dynamic vertex buffer for rendering to possibly a different location on the screen.result =UpdateBuffers(deviceContext, positionX, positionY);if(!result){
return false;
}
// Put the vertex and index buffers on the graphics pipeline to prepare them for drawing.RenderBuffers(deviceContext);
return true;}
GetIndexCount returns the number of indexes for the 2D image. This will pretty much always be six.
int BitmapClass::GetIndexCount(){
return m indexCount;
Tutorial 11: 2D Rendering http://www.rastertek.com/dx11tut11.html

7/14/2019 RasterTek: Direct3D introduction
http://slidepdf.com/reader/full/rastertek-direct3d-introduction 200/709
return m_indexCount;}
The GetTexture function returns a pointer to the texture resource for this 2D image. The shader will call this function so it has access to the image when drawing thebuffers.
ID3D11ShaderResourceView* BitmapClass::GetTexture(){
return m_Texture->GetTexture();}
InitializeBuffers is the function that is used to build the vertex and index buffer that will be used to draw the 2D image.
bool BitmapClass::InitializeBuffers(ID3D11Device* device){
VertexType* vertices;unsigned long* indices;D3D11_BUFFER_DESC vertexBufferDesc, indexBufferDesc;D3D11_SUBRESOURCE_DATA vertexData, indexData;HRESULT result;int i;
We set the vertices to six since we are making a square out of two triangles, so six points are needed. The indices will be the same.
7 of 35 3/8/2013 12:31 PM
// Set the number of vertices in the vertex array.
m_vertexCount =6;
// Set the number of indices in the index array.m_indexCount =m_vertexCount;
// Create the vertex array.vertices =new VertexType[m_vertexCount];if(!vertices){
return false;}
// Create the index array.indices =new unsigned long[m_indexCount];if(!indices){
return false;}
// Initialize vertex array to zeros at first.memset(vertices, 0, (sizeof(VertexType) * m_vertexCount));
Tutorial 11: 2D Rendering http://www.rastertek.com/dx11tut11.html

7/14/2019 RasterTek: Direct3D introduction
http://slidepdf.com/reader/full/rastertek-direct3d-introduction 201/709
// Load the index array with data.for(i=0; i<m_indexCount; i++){
indices[i] =i;}
Here is the big change in comparison to the ModelClass. We are now creating a dynamic vertex buffer so we can modify the data inside the vertex buffer eachframe if we need to. To make it dynamic we set Usage to D3D11_USAGE_DYNAMIC and CPUAccessFlags to D3D11_CPU_ACCESS_WRITE in the description.
// Set up the description of the static vertex buffer.vertexBufferDesc.Usage =D3D11_USAGE_DYNAMIC;vertexBufferDesc.ByteWidth =sizeof(VertexType) * m_vertexCount;vertexBufferDesc.BindFlags =D3D11_BIND_VERTEX_BUFFER;vertexBufferDesc.CPUAccessFlags =D3D11_CPU_ACCESS_WRITE;
vertexBufferDesc.MiscFlags =0;vertexBufferDesc.StructureByteStride =0;
// Give the subresource structure a pointer to the vertex data.vertexData.pSysMem =vertices;vertexData.SysMemPitch =0;vertexData.SysMemSlicePitch =0;
8 of 35 3/8/2013 12:31 PM
// Now create the vertex buffer.
result =device->CreateBuffer(&vertexBufferDesc, &vertexData, &m_vertexBuffer);if(FAILED(result)){
return false;}
We don't need to make the index buffer dynamic since the six indices will always point to the same six vertices even though the coordinates of the vertex maychange.
// Set up the description of the static index buffer.indexBufferDesc.Usage =D3D11_USAGE_DEFAULT;indexBufferDesc.ByteWidth =sizeof(unsigned long) * m_indexCount;indexBufferDesc.BindFlags =D3D11_BIND_INDEX_BUFFER;indexBufferDesc.CPUAccessFlags =0;indexBufferDesc.MiscFlags =0;indexBufferDesc.StructureByteStride =0;
// Give the subresource structure a pointer to the index data.
indexData.pSysMem =indices;indexData.SysMemPitch =0;indexData.SysMemSlicePitch =0;
Tutorial 11: 2D Rendering http://www.rastertek.com/dx11tut11.html

7/14/2019 RasterTek: Direct3D introduction
http://slidepdf.com/reader/full/rastertek-direct3d-introduction 202/709
// Create the index buffer.result =device->CreateBuffer(&indexBufferDesc, &indexData, &m_indexBuffer);if(FAILED(result)){
return false;
}
// Release the arrays now that the vertex and index buffers have been created and loaded.delete [] vertices;vertices =0;
delete [] indices;indices =0;
return true;}
ShutdownBuffers releases the vertex and index buffers.
void BitmapClass::ShutdownBuffers(){
// Release the index buffer.
9 of 35 3/8/2013 12:31 PM
if(m_indexBuffer)
{m_indexBuffer->Release();m_indexBuffer =0;
}
// Release the vertex buffer.if(m_vertexBuffer){
m_vertexBuffer->Release();
m_vertexBuffer =0;}
return;}
The UpdateBuffers function is called each frame to update the contents of the dynamic vertex buffer to re-position the 2D bitmap image on the screen if need be.
bool BitmapClass::UpdateBuffers(ID3D11DeviceContext* deviceContext, int positionX, int positionY)
{float left, right, top, bottom;VertexType* vertices;D3D11_MAPPED_SUBRESOURCE mappedResource;
Tutorial 11: 2D Rendering http://www.rastertek.com/dx11tut11.html

7/14/2019 RasterTek: Direct3D introduction
http://slidepdf.com/reader/full/rastertek-direct3d-introduction 203/709
_ _VertexType* verticesPtr;HRESULT result;
We check if the position to render this image has changed. If it hasn't changed then we just exit since the vertex buffer doesn't need any changes for this frame. This check can save us a lot of processing.
// If the position we are rendering this bitmap to has not changed then don't update the vertex buffer since it// currently has the correct parameters.if((positionX ==m_previousPosX) && (positionY ==m_previousPosY)){
return true;}
If the position to render this image has changed then we record the new location for the next time we come through this function.
// If it has changed then update the position it is being rendered to.m_previousPosX =positionX;m_previousPosY =positionY;
The four sides of the image need to be calculated. See the diagram at the top of the tutorial for a complete explaination.
// Calculate the screen coordinates of the left side of the bitmap.
10 of 35 3/8/2013 12:31 PM
left =(float)((m_screenWidth / 2) * -1) +(float)positionX;
// Calculate the screen coordinates of the right side of the bitmap.right =left +(float)m_bitmapWidth;
// Calculate the screen coordinates of the top of the bitmap.top =(float)(m_screenHeight / 2) - (float)positionY;
// Calculate the screen coordinates of the bottom of the bitmap.bottom =top - (float)m_bitmapHeight;
Now that the coordinates are calculated create a temporary vertex array and fill it with the new six vertex points.
// Create the vertex array.vertices =new VertexType[m_vertexCount];if(!vertices){
return false;}
// Load the vertex array with data.// First triangle.vertices[0].position =D3DXVECTOR3(left, top, 0.0f); // Top left.
Tutorial 11: 2D Rendering http://www.rastertek.com/dx11tut11.html

7/14/2019 RasterTek: Direct3D introduction
http://slidepdf.com/reader/full/rastertek-direct3d-introduction 204/709
vertices[0].texture =D3DXVECTOR2(0.0f, 0.0f);
vertices[1].position =D3DXVECTOR3(right, bottom, 0.0f); // Bottom right.vertices[1].texture =D3DXVECTOR2(1.0f, 1.0f);
vertices[2].position =D3DXVECTOR3(left, bottom, 0.0f); // Bottom left.vertices[2].texture =D3DXVECTOR2(0.0f, 1.0f);
// Second triangle.vertices[3].position =D3DXVECTOR3(left, top, 0.0f); // Top left.vertices[3].texture =D3DXVECTOR2(0.0f, 0.0f);
vertices[4].position =D3DXVECTOR3(right, top, 0.0f); // Top right.vertices[4].texture =D3DXVECTOR2(1.0f, 0.0f);
vertices[5].position =D3DXVECTOR3(right, bottom, 0.0f); // Bottom right.vertices[5].texture =D3DXVECTOR2(1.0f, 1.0f);
Now copy the contents of the vertex array into the vertex buffer using the Map and memcpy functions.
// Lock the vertex buffer so it can be written to.result =deviceContext->Map(m_vertexBuffer, 0, D3D11_MAP_WRITE_DISCARD, 0, &mappedResource);
11 of 35 3/8/2013 12:31 PM
if(FAILED(result))
{return false;
}
// Get a pointer to the data in the vertex buffer.verticesPtr =(VertexType*)mappedResource.pData;
// Copy the data into the vertex buffer.memcpy(verticesPtr, (void*)vertices, (sizeof(VertexType) * m_vertexCount));
// Unlock the vertex buffer.deviceContext->Unmap(m_vertexBuffer, 0);
// Release the vertex array as it is no longer needed.delete [] vertices;vertices =0;
return true;
}
The RenderBuffers function sets up the vertex and index buffers on the gpu to be drawn by the shader.
id Bit Cl R d B ff (ID3D11D i C t t* d i C t t)
Tutorial 11: 2D Rendering http://www.rastertek.com/dx11tut11.html
7/14/2019 RasterTek: Direct3D introduction
http://slidepdf.com/reader/full/rastertek-direct3d-introduction 205/709
void BitmapClass::RenderBuffers(ID3D11DeviceContext* deviceContext){
unsigned int stride;unsigned int offset;
// Set vertex buffer stride and offset.stride =sizeof(VertexType);offset =0;
// Set the vertex buffer to active in the input assembler so it can be rendered.deviceContext->IASetVertexBuffers(0, 1, &m_vertexBuffer, &stride, &offset);
// Set the index buffer to active in the input assembler so it can be rendered.
deviceContext->IASetIndexBuffer(m_indexBuffer, DXGI_FORMAT_R32_UINT, 0);
// Set the type of primitive that should be rendered from this vertex buffer, in this case triangles.deviceContext->IASetPrimitiveTopology(D3D11_PRIMITIVE_TOPOLOGY_TRIANGLELIST);
return;}
12 of 35 3/8/2013 12:31 PM
The following function loads the texture that will be used for drawing the 2D image.
bool BitmapClass::LoadTexture(ID3D11Device* device, WCHAR* filename){
bool result;
// Create the texture object.m_Texture =new TextureClass;if(!m_Texture)
{return false;
}
// Initialize the texture object.result =m_Texture->Initialize(device, filename);if(!result){
return false;
}
return true;}
Tutorial 11: 2D Rendering http://www.rastertek.com/dx11tut11.html

7/14/2019 RasterTek: Direct3D introduction
http://slidepdf.com/reader/full/rastertek-direct3d-introduction 206/709
This ReleaseTexture function releases the texture that was loaded.
void BitmapClass::ReleaseTexture(){
// Release the texture object.if(m_Texture){
m_Texture->Shutdown();delete m_Texture;m_Texture =0;
}
return;
}
D3dclass.h
The D3DClass has been modified to handle enabling and disabling the Z buffer.
13 of 35 3/8/2013 12:31 PM
////////////////////////////////////////////////////////////////////////////////
// Filename: d3dclass.h////////////////////////////////////////////////////////////////////////////////#ifndef _D3DCLASS_H_ #define _D3DCLASS_H_
/////////////// LINKING ///////////////
#pragma comment(lib, "dxgi.lib")#pragma comment(lib, "d3d11.lib")#pragma comment(lib, "d3dx11.lib")#pragma comment(lib, "d3dx10.lib")
//////////////// INCLUDES ////////////////
#include <dxgi.h>#include <d3dcommon.h>#include <d3d11.h>#include <d3dx10math.h>
Tutorial 11: 2D Rendering http://www.rastertek.com/dx11tut11.html

7/14/2019 RasterTek: Direct3D introduction
http://slidepdf.com/reader/full/rastertek-direct3d-introduction 207/709
////////////////////////////////////////////////////////////////////////////////// Class name: D3DClass////////////////////////////////////////////////////////////////////////////////
class D3DClass{public:
D3DClass();D3DClass(const D3DClass&);~D3DClass();
bool Initialize(int, int, bool, HWND, bool, float, float);void Shutdown();
void BeginScene(float, float, float, float);void EndScene();
ID3D11Device* GetDevice();ID3D11DeviceContext* GetDeviceContext();
void GetProjectionMatrix(D3DXMATRIX&);
14 of 35 3/8/2013 12:31 PM
void GetWorldMatrix(D3DXMATRIX&);
void GetOrthoMatrix(D3DXMATRIX&);
void GetVideoCardInfo(char*, int&);
We now have two new function in the D3DClass for turning the Z buffer on and off when rendering 2D images.
void TurnZBufferOn();void TurnZBufferOff();
private:bool m_vsync_enabled;int m_videoCardMemory;char m_videoCardDescription[128];IDXGISwapChain* m_swapChain;ID3D11Device* m_device;ID3D11DeviceContext* m_deviceContext;ID3D11RenderTargetView* m_renderTargetView;ID3D11Texture2D* m_depthStencilBuffer;
ID3D11DepthStencilState* m_depthStencilState;ID3D11DepthStencilView* m_depthStencilView;ID3D11RasterizerState* m_rasterState;D3DXMATRIX m_projectionMatrix;D3DXMATRIX m worldMatrix;
Tutorial 11: 2D Rendering http://www.rastertek.com/dx11tut11.html

7/14/2019 RasterTek: Direct3D introduction
http://slidepdf.com/reader/full/rastertek-direct3d-introduction 208/709
D3DXMATRIX m_worldMatrix;D3DXMATRIX m_orthoMatrix;
There is also a new depth stencil state for 2D drawing.
ID3D11DepthStencilState* m_depthDisabledStencilState;};
#endif
D3dclass.cpp
We will just cover the functions that have changed in this class since the texturing tutorial.
////////////////////////////////////////////////////////////////////////////////// Filename: d3dclass.cpp////////////////////////////////////////////////////////////////////////////////#include "d3dclass.h"
15 of 35 3/8/2013 12:31 PM
D3DClass::D3DClass(){
m_swapChain =0;m_device =0;m_deviceContext =0;m_renderTargetView =0;m_depthStencilBuffer =0;m_depthStencilState =0;m_depthStencilView =0;
m_rasterState =0;
Initialize the new depth stencil state to null in the class constructor.
m_depthDisabledStencilState =0;}
D3DClass::D3DClass(const D3DClass& other)
{}
D3DClass::~D3DClass()
Tutorial 11: 2D Rendering http://www.rastertek.com/dx11tut11.html

7/14/2019 RasterTek: Direct3D introduction
http://slidepdf.com/reader/full/rastertek-direct3d-introduction 209/709
D3DClass:: D3DClass(){}
bool D3DClass::Initialize(int screenWidth, int screenHeight, bool vsync, HWND hwnd, bool fullscreen, float screenDepth, float screenNear){
HRESULT result;IDXGIFactory* factory;IDXGIAdapter* adapter;IDXGIOutput* adapterOutput;unsigned int numModes, i, numerator, denominator, stringLength;DXGI_MODE_DESC* displayModeList;DXGI_ADAPTER_DESC adapterDesc;
int error;DXGI_SWAP_CHAIN_DESC swapChainDesc;D3D_FEATURE_LEVEL featureLevel;ID3D11Texture2D* backBufferPtr;D3D11_TEXTURE2D_DESC depthBufferDesc;D3D11_DEPTH_STENCIL_DESC depthStencilDesc;D3D11_DEPTH_STENCIL_VIEW_DESC depthStencilViewDesc;D3D11_RASTERIZER_DESC rasterDesc;
16 of 35 3/8/2013 12:31 PM
D3D11_VIEWPORT viewport;
float fieldOfView, screenAspect;
We have a new depth stencil description variable for setting up the new depth stencil.
D3D11_DEPTH_STENCIL_DESC depthDisabledStencilDesc;
// Store the vsync setting.m_vsync_enabled =vsync;
// Create a DirectX graphics interface factory.result =CreateDXGIFactory(__uuidof(IDXGIFactory), (void**)&factory);if(FAILED(result)){
return false;}
// Use the factory to create an adapter for the primary graphics interface (video card).
result =factory->EnumAdapters(0, &adapter);if(FAILED(result)){
return false;}
Tutorial 11: 2D Rendering http://www.rastertek.com/dx11tut11.html

7/14/2019 RasterTek: Direct3D introduction
http://slidepdf.com/reader/full/rastertek-direct3d-introduction 210/709
}
// Enumerate the primary adapter output (monitor).result =adapter->EnumOutputs(0, &adapterOutput);if(FAILED(result))
{return false;
}
// Get the number of modes that fit the DXGI_FORMAT_R8G8B8A8_UNORM display format for the adapter output (monitor).result =adapterOutput->GetDisplayModeList(DXGI_FORMAT_R8G8B8A8_UNORM, DXGI_ENUM_MODES_INTERLACED, &numModes, NULL);if(FAILED(result)){
return false;
}
// Create a list to hold all the possible display modes for this monitor/video card combination.displayModeList =new DXGI_MODE_DESC[numModes];if(!displayModeList){
return false;}
17 of 35 3/8/2013 12:31 PM
// Now fill the display mode list structures.result =adapterOutput->GetDisplayModeList(DXGI_FORMAT_R8G8B8A8_UNORM, DXGI_ENUM_MODES_INTERLACED, &numModes, displayModeList);if(FAILED(result)){
return false;}
// Now go through all the display modes and find the one that matches the screen width and height.// When a match is found store the numerator and denominator of the refresh rate for that monitor.
for(i=0; i<numModes; i++){
if(displayModeList[i].Width ==(unsigned int)screenWidth){
if(displayModeList[i].Height ==(unsigned int)screenHeight){
numerator =displayModeList[i].RefreshRate.Numerator;denominator =displayModeList[i].RefreshRate.Denominator;
}
}}
// Get the adapter (video card) description.result =adapter->GetDesc(&adapterDesc);
Tutorial 11: 2D Rendering http://www.rastertek.com/dx11tut11.html

7/14/2019 RasterTek: Direct3D introduction
http://slidepdf.com/reader/full/rastertek-direct3d-introduction 211/709
if(FAILED(result)){
return false;}
// Store the dedicated video card memory in megabytes.m_videoCardMemory =(int)(adapterDesc.DedicatedVideoMemory / 1024 / 1024);
// Convert the name of the video card to a character array and store it.error =wcstombs_s(&stringLength, m_videoCardDescription, 128, adapterDesc.Description, 128);if(error !=0){
return false;
}
// Release the display mode list.delete [] displayModeList;displayModeList =0;
// Release the adapter output.adapterOutput->Release();
18 of 35 3/8/2013 12:31 PM
adapterOutput =0;
// Release the adapter.adapter->Release();adapter =0;
// Release the factory.factory->Release();factory =0;
// Initialize the swap chain description.ZeroMemory(&swapChainDesc, sizeof(swapChainDesc));
// Set to a single back buffer.swapChainDesc.BufferCount =1;
// Set the width and height of the back buffer.swapChainDesc.BufferDesc.Width =screenWidth;swapChainDesc.BufferDesc.Height =screenHeight;
// Set regular 32-bit surface for the back buffer.swapChainDesc.BufferDesc.Format =DXGI_FORMAT_R8G8B8A8_UNORM;
// Set the refresh rate of the back buffer.
Tutorial 11: 2D Rendering http://www.rastertek.com/dx11tut11.html

7/14/2019 RasterTek: Direct3D introduction
http://slidepdf.com/reader/full/rastertek-direct3d-introduction 212/709
if(m_vsync_enabled){
swapChainDesc.BufferDesc.RefreshRate.Numerator =numerator;swapChainDesc.BufferDesc.RefreshRate.Denominator =denominator;
}else{
swapChainDesc.BufferDesc.RefreshRate.Numerator =0;swapChainDesc.BufferDesc.RefreshRate.Denominator =1;
}
// Set the usage of the back buffer.swapChainDesc.BufferUsage =DXGI_USAGE_RENDER_TARGET_OUTPUT;
// Set the handle for the window to render to.swapChainDesc.OutputWindow =hwnd;
// Turn multisampling off.swapChainDesc.SampleDesc.Count =1;swapChainDesc.SampleDesc.Quality =0;
19 of 35 3/8/2013 12:31 PM
// Set to full screen or windowed mode.
if(fullscreen){swapChainDesc.Windowed =false;
}else{
swapChainDesc.Windowed =true;}
// Set the scan line ordering and scaling to unspecified.swapChainDesc.BufferDesc.ScanlineOrdering =DXGI_MODE_SCANLINE_ORDER_UNSPECIFIED;swapChainDesc.BufferDesc.Scaling =DXGI_MODE_SCALING_UNSPECIFIED;
// Discard the back buffer contents after presenting.swapChainDesc.SwapEffect =DXGI_SWAP_EFFECT_DISCARD;
// Don't set the advanced flags.swapChainDesc.Flags =0;
// Set the feature level to DirectX 11.featureLevel =D3D_FEATURE_LEVEL_11_0;
// Create the swap chain, Direct3D device, and Direct3D device context.lt D3D11C t D i A dS Ch i (NULL D3D DRIVER TYPE HARDWARE NULL 0 &f t L l 1 D3D11 SDK VERSION & Ch i D
Tutorial 11: 2D Rendering http://www.rastertek.com/dx11tut11.html

7/14/2019 RasterTek: Direct3D introduction
http://slidepdf.com/reader/full/rastertek-direct3d-introduction 213/709
result =D3D11CreateDeviceAndSwapChain(NULL, D3D_DRIVER_TYPE_HARDWARE, NULL, 0, &featureLevel, 1, D3D11_SDK_VERSION, &swapChainDesc,&m_device, NULL, &m_deviceContext);
if(FAILED(result)){
return false;}
// Get the pointer to the back buffer.result =m_swapChain->GetBuffer(0, __uuidof(ID3D11Texture2D), (LPVOID*)&backBufferPtr);if(FAILED(result)){
return false;}
// Create the render target view with the back buffer pointer.result =m_device->CreateRenderTargetView(backBufferPtr, NULL, &m_renderTargetView);if(FAILED(result)){
return false;}
20 of 35 3/8/2013 12:31 PM
// Release pointer to the back buffer as we no longer need it.
backBufferPtr->Release();backBufferPtr =0;
// Initialize the description of the depth buffer.ZeroMemory(&depthBufferDesc, sizeof(depthBufferDesc));
// Set up the description of the depth buffer.depthBufferDesc.Width =screenWidth;depthBufferDesc.Height =screenHeight;
depthBufferDesc.MipLevels =1;depthBufferDesc.ArraySize =1;depthBufferDesc.Format =DXGI_FORMAT_D24_UNORM_S8_UINT;depthBufferDesc.SampleDesc.Count =1;depthBufferDesc.SampleDesc.Quality =0;depthBufferDesc.Usage =D3D11_USAGE_DEFAULT;depthBufferDesc.BindFlags =D3D11_BIND_DEPTH_STENCIL;depthBufferDesc.CPUAccessFlags =0;depthBufferDesc.MiscFlags =0;
// Create the texture for the depth buffer using the filled out description.result =m_device->CreateTexture2D(&depthBufferDesc, NULL, &m_depthStencilBuffer);if(FAILED(result)){
return false;
Tutorial 11: 2D Rendering http://www.rastertek.com/dx11tut11.html

7/14/2019 RasterTek: Direct3D introduction
http://slidepdf.com/reader/full/rastertek-direct3d-introduction 214/709
return false;}
// Initialize the description of the stencil state.
ZeroMemory(&depthStencilDesc, sizeof(depthStencilDesc));
// Set up the description of the stencil state.depthStencilDesc.DepthEnable =true;depthStencilDesc.DepthWriteMask =D3D11_DEPTH_WRITE_MASK_ALL;depthStencilDesc.DepthFunc =D3D11_COMPARISON_LESS;
depthStencilDesc.StencilEnable =true;depthStencilDesc.StencilReadMask =0xFF;
depthStencilDesc.StencilWriteMask =0xFF;
// Stencil operations if pixel is front-facing.depthStencilDesc.FrontFace.StencilFailOp =D3D11_STENCIL_OP_KEEP;depthStencilDesc.FrontFace.StencilDepthFailOp =D3D11_STENCIL_OP_INCR;depthStencilDesc.FrontFace.StencilPassOp =D3D11_STENCIL_OP_KEEP;depthStencilDesc.FrontFace.StencilFunc =D3D11_COMPARISON_ALWAYS;
21 of 35 3/8/2013 12:31 PM
// Stencil operations if pixel is back-facing.
depthStencilDesc.BackFace.StencilFailOp =D3D11_STENCIL_OP_KEEP;depthStencilDesc.BackFace.StencilDepthFailOp =D3D11_STENCIL_OP_DECR;depthStencilDesc.BackFace.StencilPassOp =D3D11_STENCIL_OP_KEEP;depthStencilDesc.BackFace.StencilFunc =D3D11_COMPARISON_ALWAYS;
// Create the depth stencil state.result =m_device->CreateDepthStencilState(&depthStencilDesc, &m_depthStencilState);if(FAILED(result)){
return false;}
// Set the depth stencil state.m_deviceContext->OMSetDepthStencilState(m_depthStencilState, 1);
// Initialize the depth stencil view.ZeroMemory(&depthStencilViewDesc, sizeof(depthStencilViewDesc));
// Set up the depth stencil view description.depthStencilViewDesc.Format =DXGI_FORMAT_D24_UNORM_S8_UINT;depthStencilViewDesc.ViewDimension =D3D11_DSV_DIMENSION_TEXTURE2D;depthStencilViewDesc.Texture2D.MipSlice =0;
// Create the depth stencil view
Tutorial 11: 2D Rendering http://www.rastertek.com/dx11tut11.html

7/14/2019 RasterTek: Direct3D introduction
http://slidepdf.com/reader/full/rastertek-direct3d-introduction 215/709
// Create the depth stencil view.result =m_device->CreateDepthStencilView(m_depthStencilBuffer, &depthStencilViewDesc, &m_depthStencilView);if(FAILED(result)){
return false;}
// Bind the render target view and depth stencil buffer to the output render pipeline.m_deviceContext->OMSetRenderTargets(1, &m_renderTargetView, m_depthStencilView);
// Setup the raster description which will determine how and what polygons will be drawn.rasterDesc.AntialiasedLineEnable =false;rasterDesc.CullMode =D3D11_CULL_BACK;
rasterDesc.DepthBias =0;rasterDesc.DepthBiasClamp =0.0f;rasterDesc.DepthClipEnable =true;rasterDesc.FillMode =D3D11_FILL_SOLID;rasterDesc.FrontCounterClockwise =false;rasterDesc.MultisampleEnable =false;rasterDesc.ScissorEnable =false;rasterDesc.SlopeScaledDepthBias =0.0f;
22 of 35 3/8/2013 12:31 PM
// Create the rasterizer state from the description we just filled out.result =m_device->CreateRasterizerState(&rasterDesc, &m_rasterState);if(FAILED(result)){
return false;}
// Now set the rasterizer state.m_deviceContext->RSSetState(m_rasterState);
// Setup the viewport for rendering.viewport.Width =(float)screenWidth;viewport.Height =(float)screenHeight;viewport.MinDepth =0.0f;viewport.MaxDepth =1.0f;viewport.TopLeftX =0.0f;viewport.TopLeftY =0.0f;
// Create the viewport.m_deviceContext->RSSetViewports(1, &viewport);
// Setup the projection matrix.fieldOfView =(float)D3DX_PI / 4.0f;screenAspect =(float)screenWidth / (float)screenHeight;
Tutorial 11: 2D Rendering http://www.rastertek.com/dx11tut11.html
7/14/2019 RasterTek: Direct3D introduction
http://slidepdf.com/reader/full/rastertek-direct3d-introduction 216/709
screenAspect =(float)screenWidth / (float)screenHeight;
// Create the projection matrix for 3D rendering.D3DXMatrixPerspectiveFovLH(&m_projectionMatrix, fieldOfView, screenAspect, screenNear, screenDepth);
// Initialize the world matrix to the identity matrix.D3DXMatrixIdentity(&m_worldMatrix);
// Create an orthographic projection matrix for 2D rendering.D3DXMatrixOrthoLH(&m_orthoMatrix, (float)screenWidth, (float)screenHeight, screenNear, screenDepth);
Here we setup the description of the depth stencil. Notice the only difference between this new depth stencil and the old one is the DepthEnable is set to false herefor 2D drawing.
// Clear the second depth stencil state before setting the parameters.ZeroMemory(&depthDisabledStencilDesc, sizeof(depthDisabledStencilDesc));
// Now create a second depth stencil state which turns off the Z buffer for 2D rendering. The only difference is// that DepthEnable is set to false, all other parameters are the same as the other depth stencil state.depthDisabledStencilDesc.DepthEnable =false;depthDisabledStencilDesc.DepthWriteMask =D3D11_DEPTH_WRITE_MASK_ALL;
23 of 35 3/8/2013 12:31 PM
depthDisabledStencilDesc.DepthFunc =D3D11_COMPARISON_LESS;
depthDisabledStencilDesc.StencilEnable =true;depthDisabledStencilDesc.StencilReadMask =0xFF;depthDisabledStencilDesc.StencilWriteMask =0xFF;depthDisabledStencilDesc.FrontFace.StencilFailOp =D3D11_STENCIL_OP_KEEP;depthDisabledStencilDesc.FrontFace.StencilDepthFailOp =D3D11_STENCIL_OP_INCR;depthDisabledStencilDesc.FrontFace.StencilPassOp =D3D11_STENCIL_OP_KEEP;depthDisabledStencilDesc.FrontFace.StencilFunc =D3D11_COMPARISON_ALWAYS;depthDisabledStencilDesc.BackFace.StencilFailOp =D3D11_STENCIL_OP_KEEP;depthDisabledStencilDesc.BackFace.StencilDepthFailOp =D3D11_STENCIL_OP_DECR;
depthDisabledStencilDesc.BackFace.StencilPassOp =D3D11_STENCIL_OP_KEEP;depthDisabledStencilDesc.BackFace.StencilFunc =D3D11_COMPARISON_ALWAYS;
Now create the new depth stencil.
// Create the state using the device.result =m_device->CreateDepthStencilState(&depthDisabledStencilDesc, &m_depthDisabledStencilState);if(FAILED(result)){
return false;}
return true;}
Tutorial 11: 2D Rendering http://www.rastertek.com/dx11tut11.html

7/14/2019 RasterTek: Direct3D introduction
http://slidepdf.com/reader/full/rastertek-direct3d-introduction 217/709
void D3DClass::Shutdown(){
// Before shutting down set to windowed mode or when you release the swap chain it will throw an exception.if(m_swapChain){
m_swapChain->SetFullscreenState(false, NULL);}
Here we release the new depth stencil during the Shutdown function.
if(m_depthDisabledStencilState)
{m_depthDisabledStencilState->Release();m_depthDisabledStencilState =0;
}
if(m_rasterState){
m_rasterState->Release();
24 of 35 3/8/2013 12:31 PM
m_rasterState =0;
}
if(m_depthStencilView){
m_depthStencilView->Release();m_depthStencilView =0;
}
if(m_depthStencilState)
{ m_depthStencilState->Release();m_depthStencilState =0;
}
if(m_depthStencilBuffer){
m_depthStencilBuffer->Release();m_depthStencilBuffer =0;
}
if(m_renderTargetView){
m_renderTargetView->Release();m renderTargetView =0;
Tutorial 11: 2D Rendering http://www.rastertek.com/dx11tut11.html

7/14/2019 RasterTek: Direct3D introduction
http://slidepdf.com/reader/full/rastertek-direct3d-introduction 218/709
_ g}
if(m_deviceContext)
{ m_deviceContext->Release();m_deviceContext =0;
}
if(m_device){
m_device->Release();m_device =0;
}
if(m_swapChain){
m_swapChain->Release();m_swapChain =0;
}
25 of 35 3/8/2013 12:31 PM
return;
}
void D3DClass::BeginScene(float red, float green, float blue, float alpha){
float color[4];
// Setup the color to clear the buffer to.
color[0] =red;color[1] =green;color[2] =blue;color[3] =alpha;
// Clear the back buffer.m_deviceContext->ClearRenderTargetView(m_renderTargetView, color);
// Clear the depth buffer.
m_deviceContext->ClearDepthStencilView(m_depthStencilView, D3D11_CLEAR_DEPTH, 1.0f, 0);
return;}
Tutorial 11: 2D Rendering http://www.rastertek.com/dx11tut11.html

7/14/2019 RasterTek: Direct3D introduction
http://slidepdf.com/reader/full/rastertek-direct3d-introduction 219/709
void D3DClass::EndScene(){
// Present the back buffer to the screen since rendering is complete.
if(m_vsync_enabled){// Lock to screen refresh rate.m_swapChain->Present(1, 0);
}else{
// Present as fast as possible.m_swapChain->Present(0, 0);
}
return;}
ID3D11Device* D3DClass::GetDevice(){
26 of 35 3/8/2013 12:31 PM
return m_device;
}
ID3D11DeviceContext* D3DClass::GetDeviceContext(){
return m_deviceContext;}
void D3DClass::GetProjectionMatrix(D3DXMATRIX& projectionMatrix){projectionMatrix =m_projectionMatrix;return;
}
void D3DClass::GetWorldMatrix(D3DXMATRIX& worldMatrix){
worldMatrix =m_worldMatrix;return;}
void D3DClass::GetOrthoMatrix(D3DXMATRIX& orthoMatrix)
Tutorial 11: 2D Rendering http://www.rastertek.com/dx11tut11.html

7/14/2019 RasterTek: Direct3D introduction
http://slidepdf.com/reader/full/rastertek-direct3d-introduction 220/709
{orthoMatrix =m_orthoMatrix;return;
}
void D3DClass::GetVideoCardInfo(char* cardName, int& memory){
strcpy_s(cardName, 128, m_videoCardDescription);memory =m_videoCardMemory;return;
}
These are the new functions for enabling and disabling the Z buffer. To turn Z buffering on we set the original depth stencil. To turn Z buffering off we set the newdepth stencil that has depthEnable set to false. Generally the best way to use these functions is first do all your 3D rendering, then turn the Z buffer off and do your2D rendering, and then turn the Z buffer on again.
void D3DClass::TurnZBufferOn(){
m_deviceContext->OMSetDepthStencilState(m_depthStencilState, 1);
27 of 35 3/8/2013 12:31 PM
return;
}
void D3DClass::TurnZBufferOff(){
m_deviceContext->OMSetDepthStencilState(m_depthDisabledStencilState, 1);return;
}
Graphicsclass.h
////////////////////////////////////////////////////////////////////////////////// Filename: graphicsclass.h////////////////////////////////////////////////////////////////////////////////#ifndef _GRAPHICSCLASS_H_ #define _GRAPHICSCLASS_H_
///////////////////////// MY CLASS INCLUDES /////////////////////////#include "d3dclass.h"
Tutorial 11: 2D Rendering http://www.rastertek.com/dx11tut11.html

7/14/2019 RasterTek: Direct3D introduction
http://slidepdf.com/reader/full/rastertek-direct3d-introduction 221/709
#include "cameraclass.h"#include "textureshaderclass.h"
Here we include the new BitmapClass header file.
#include "bitmapclass.h"
/////////////// GLOBALS ///////////////const bool FULL_SCREEN =true;
const bool VSYNC_ENABLED =true;const float SCREEN_DEPTH =1000.0f;const float SCREEN_NEAR =0.1f;
////////////////////////////////////////////////////////////////////////////////// Class name: GraphicsClass
28 of 35 3/8/2013 12:31 PM
////////////////////////////////////////////////////////////////////////////////class GraphicsClass{public:
GraphicsClass();GraphicsClass(const GraphicsClass&);~GraphicsClass();
bool Initialize(int, int, HWND);void Shutdown();
bool Frame();
private:bool Render(float);
private:D3DClass* m_D3D;CameraClass* m_Camera;
TextureShaderClass* m_TextureShader;
We create a new private BitmapClass object here.
BitmapClass* m_Bitmap;};
#endif
Tutorial 11: 2D Rendering http://www.rastertek.com/dx11tut11.html

7/14/2019 RasterTek: Direct3D introduction
http://slidepdf.com/reader/full/rastertek-direct3d-introduction 222/709
#endif
Graphicsclass.cpp
////////////////////////////////////////////////////////////////////////////////// Filename: graphicsclass.cpp////////////////////////////////////////////////////////////////////////////////#include "graphicsclass.h"
GraphicsClass::GraphicsClass(){
m_D3D =0;m_Camera =0;m_TextureShader =0;
We initialize the new bitmap object to null in the class constructor.
29 of 35 3/8/2013 12:31 PM
m_Bitmap =0;}
GraphicsClass::GraphicsClass(const GraphicsClass& other){}
GraphicsClass::~GraphicsClass()
{}
bool GraphicsClass::Initialize(int screenWidth, int screenHeight, HWND hwnd){
bool result;
// Create the Direct3D object.m_D3D =new D3DClass;if(!m_D3D){
return false;}
Tutorial 11: 2D Rendering http://www.rastertek.com/dx11tut11.html

7/14/2019 RasterTek: Direct3D introduction
http://slidepdf.com/reader/full/rastertek-direct3d-introduction 223/709
// Initialize the Direct3D object.result =m_D3D->Initialize(screenWidth, screenHeight, VSYNC_ENABLED, hwnd, FULL_SCREEN, SCREEN_DEPTH, SCREEN_NEAR);
if(!result){MessageBox(hwnd, L"Could not initialize Direct3D.", L"Error", MB_OK);return false;
}
// Create the camera object.m_Camera =new CameraClass;if(!m_Camera)
{ return false;}
// Set the initial position of the camera.m_Camera->SetPosition(0.0f, 0.0f, -10.0f);
// Create the texture shader object.
30 of 35 3/8/2013 12:31 PM
m_TextureShader =new TextureShaderClass;if(!m_TextureShader){
return false;}
// Initialize the texture shader object.result =m_TextureShader->Initialize(m_D3D->GetDevice(), hwnd);if(!result){
MessageBox(hwnd, L"Could not initialize the texture shader object.", L"Error", MB_OK);return false;
}
Here is where we create and initialize the new BitmapClass object. It uses the seafloor.dds as the texture and I set the size to 256x256. You can change this size towhatever you like as it does not need to reflect the exact size of the texture.
// Create the bitmap object.m_Bitmap =new BitmapClass;
if(!m_Bitmap){return false;
}
// Initialize the bitmap object.result =m Bitmap->Initialize(m D3D->GetDevice() screenWidth screenHeight L" /Engine/data/seafloor dds" 256 256);
Tutorial 11: 2D Rendering http://www.rastertek.com/dx11tut11.html

7/14/2019 RasterTek: Direct3D introduction
http://slidepdf.com/reader/full/rastertek-direct3d-introduction 224/709
result m_Bitmap >Initialize(m_D3D >GetDevice(), screenWidth, screenHeight, L ../Engine/data/seafloor.dds , 256, 256);if(!result){
MessageBox(hwnd, L"Could not initialize the bitmap object.", L"Error", MB_OK);return false;}
return true;}
void GraphicsClass::Shutdown()
{
The BitmapClass object is released in the Shutdown function.
// Release the bitmap object.if(m_Bitmap){
m_Bitmap->Shutdown();
31 of 35 3/8/2013 12:31 PM
delete m_Bitmap;m_Bitmap =0;
}
// Release the texture shader object.if(m_TextureShader){
m_TextureShader->Shutdown();delete m_TextureShader;m_TextureShader =0;
}
// Release the camera object.if(m_Camera){
delete m_Camera;m_Camera =0;
}
// Release the D3D object.if(m_D3D){
m_D3D->Shutdown();delete m_D3D;m_D3D =0;
}
Tutorial 11: 2D Rendering http://www.rastertek.com/dx11tut11.html
7/14/2019 RasterTek: Direct3D introduction
http://slidepdf.com/reader/full/rastertek-direct3d-introduction 225/709
}
return;
}
bool GraphicsClass::Frame(){
bool result;static float rotation =0.0f;
// Update the rotation variable each frame.rotation +=(float)D3DX_PI * 0.005f;if(rotation >360.0f){
rotation -=360.0f;}
// Render the graphics scene.
32 of 35 3/8/2013 12:31 PM
result =Render(rotation);if(!result){
return false;}
return true;}
bool GraphicsClass::Render(float rotation){
D3DXMATRIX worldMatrix, viewMatrix, projectionMatrix, orthoMatrix;bool result;
// Clear the buffers to begin the scene.m_D3D->BeginScene(0.0f, 0.0f, 0.0f, 1.0f);
// Generate the view matrix based on the camera's position.m_Camera->Render();
// Get the world, view, projection, and ortho matrices from the camera and d3d objects.m_Camera->GetViewMatrix(viewMatrix);m_D3D->GetWorldMatrix(worldMatrix);m_D3D->GetProjectionMatrix(projectionMatrix);
Tutorial 11: 2D Rendering http://www.rastertek.com/dx11tut11.html

7/14/2019 RasterTek: Direct3D introduction
http://slidepdf.com/reader/full/rastertek-direct3d-introduction 226/709
_ j p j
We now also get the ortho matrix from the D3DClass for 2D rendering. We will pass this in instead of the projection matrix.
m_D3D->GetOrthoMatrix(orthoMatrix);
The Z buffer is turned off before we do any 2D rendering.
// Turn off the Z buffer to begin all 2D rendering.m_D3D->TurnZBufferOff();
We then render the bitmap to the 100, 100 location on the screen. You can change this to wherever you want it rendered.
// Put the bitmap vertex and index buffers on the graphics pipeline to prepare them for drawing.result =m_Bitmap->Render(m_D3D->GetDeviceContext(), 100, 100);if(!result){
return false;}
33 of 35 3/8/2013 12:31 PM
Once the vertex/index buffers are prepared we draw them using the texture shader. Notice we send in the orthoMatrix instead of the projectionMatrix for rendering2D. Due note also that if your view matrix is changing you will need to create a default one for 2D rendering and use it instead of the regular view matrix. In thistutorial using the regular view matrix is fine as the camera in this tutorial is stationary.
// Render the bitmap with the texture shader.result =m_TextureShader->Render(m_D3D->GetDeviceContext(), m_Bitmap->GetIndexCount(), worldMatrix, viewMatrix, orthoMatrix, m_Bitmap->GetTexture());if(!result){
return false;}
After all the 2D rendering is done we turn the Z buffer back on for the next round of 3D rendering.
// Turn the Z buffer back on now that all 2D rendering has completed.m_D3D->TurnZBufferOn();
// Present the rendered scene to the screen.m_D3D->EndScene();
return true;}
Summary
Tutorial 11: 2D Rendering http://www.rastertek.com/dx11tut11.html

7/14/2019 RasterTek: Direct3D introduction
http://slidepdf.com/reader/full/rastertek-direct3d-introduction 227/709
With these new concepts we can now render 2D images onto the screen. This opens the door for rendering user interfaces and font systems.
34 of 35 3/8/2013 12:31 PM
To Do Exercises
1. Recompile the code and ensure you get a 2D image drawn to the 100, 100 location on your screen.
2. Change the location on the screen where the image is drawn to.
Tutorial 11: 2D Rendering http://www.rastertek.com/dx11tut11.html

7/14/2019 RasterTek: Direct3D introduction
http://slidepdf.com/reader/full/rastertek-direct3d-introduction 228/709
3. Change the size of the image in the m_Bitmap->Initialize function call in the GraphicsClass.
4. Change the texture that is used for the 2D image.
Source Code
Visual Studio 2010 Project: dx11tut11.zip
Source Only: dx11src11.zip
Executable Only:dx11exe11.zip
Back to Tutorial Index
35 of 35 3/8/2013 12:31 PM
Tutorial 16: Frustum Culling
The three dimensional viewing area on the screen where everything is drawn to is called the viewing frustum. Everything that is inside the frustum will be renderedto the screen by the video card. Everything that is outside of the frustum the video card will examine and then discard during the rendering process.
However the process of depending on the video card to cull for us can be expensive if we have large scenes. For example say we have a scene with 2000+modelsthat are 5,000 polygons each but only 10-20 are viewable at any given time. The video card has to examine every single triangle in all 2000 models to remove 1990models from the scene just so we can draw 10 models. As you can see this is very inefficient.
How frustum culling solves our problem is that we can instead determine before rendering if a model is in our frustum or not. This saves us sending all the trianglesto the video card and allows us to just send the triangles that need to be drawn. How we do this is that we put either a cube, a rectangle, or a sphere around eachmodel and just calculate if that cube, rectangle, or sphere is viewable. The math to do that is usually only a couple lines of code which then removes the need topossibly test several thousand triangles.
To demonstrate how this works we will first create a scene with 25 randomly placed spheres. We will then rotate the camera manually to test culling of the spheresthat are out of our view using the left and right arrow keys. We will also use a counter and display the number of spheres that are being drawn and not culled forconfirmation. We will use code from several of the previous tutorials to create the scene.
Framework
The frame work has mostly classes from several of the previous tutorials. We do have three new classes called FrustumClass, PositionClass, and ModelListClass.FrustumClass will encapsulate the frustum culling ability this tutorial is focused on. ModelListClass will contain a list of the position and color information of the 25
Tutorial 16: Frustum Culling http://www.rastertek.com/dx11tut16.html

7/14/2019 RasterTek: Direct3D introduction
http://slidepdf.com/reader/full/rastertek-direct3d-introduction 229/709
spheres that will be randomly generated each time we run the program. PositionClass will handle the viewing rotation of the camera based on if the user is pressingthe left or right arrow key.
1 of 32 3/8/2013 12:34 PM
Frustumclass.h
The header file for the FrustumClass is fairly simple. The class doesn't require any initialization or shutdown. Each frame the ConstructFrustum function is calledafter the camera has first been rendered. The ConstructFrustum function uses the private m planes to calculate and store the six planes of the view frustum based
Tutorial 16: Frustum Culling http://www.rastertek.com/dx11tut16.html

7/14/2019 RasterTek: Direct3D introduction
http://slidepdf.com/reader/full/rastertek-direct3d-introduction 230/709
p _p pon the updated viewing location. From there we can call any of the four check functions to seen if either a point, cube, sphere, or rectangle are inside the viewingfrustum or not.
////////////////////////////////////////////////////////////////////////////////// Filename: frustumclass.h////////////////////////////////////////////////////////////////////////////////#ifndef _FRUSTUMCLASS_H_ #define _FRUSTUMCLASS_H_
//////////////
// INCLUDES ////////////////#include <d3dx10math.h>
////////////////////////////////////////////////////////////////////////////////// Class name: FrustumClass
2 of 32 3/8/2013 12:34 PM
////////////////////////////////////////////////////////////////////////////////class FrustumClass
{public:
FrustumClass();FrustumClass(const FrustumClass&);~FrustumClass();
void ConstructFrustum(float, D3DXMATRIX, D3DXMATRIX);
bool CheckPoint(float, float, float);bool CheckCube(float, float, float, float);bool CheckSphere(float, float, float, float);bool CheckRectangle(float, float, float, float, float, float);
private:D3DXPLANE m_planes[6];
};
#endif
Frustumclass.cpp
////////////////////////////////////////////////////////////////////////////////// Fil f t l
Tutorial 16: Frustum Culling http://www.rastertek.com/dx11tut16.html

7/14/2019 RasterTek: Direct3D introduction
http://slidepdf.com/reader/full/rastertek-direct3d-introduction 231/709
// Filename: frustumclass.cpp////////////////////////////////////////////////////////////////////////////////
#include "frustumclass.h"
FrustumClass::FrustumClass(){}
FrustumClass::FrustumClass(const FrustumClass& other)
{}
FrustumClass::~FrustumClass(){}
3 of 32 3/8/2013 12:34 PM
ConstructFrustum is called every frame by the GraphicsClass. It passes in the the depth of the screen, the projection matrix, and the view matrix. We then use theseinput variables to calculate the matrix of the view frustum at that frame. With the new frustum matrix we then calculate the six planes that form the view frustum.
void FrustumClass::ConstructFrustum(float screenDepth, D3DXMATRIX projectionMatrix, D3DXMATRIX viewMatrix){
float zMinimum, r;D3DXMATRIX matrix;
// Calculate the minimum Z distance in the frustum.zMinimum =-projectionMatrix._43 / projectionMatrix._33;r =screenDepth / (screenDepth - zMinimum);projectionMatrix._33 =r;projectionMatrix._43 =-r * zMinimum;
// Create the frustum matrix from the view matrix and updated projection matrix.D3DXMatrixMultiply(&matrix, &viewMatrix, &projectionMatrix);
// Calculate near plane of frustum.m_planes[0].a =matrix._14 +matrix._13;m_planes[0].b =matrix._24 +matrix._23;m_planes[0].c =matrix._34 +matrix._33;m_planes[0].d =matrix._44 +matrix._43;D3DXPlaneNormalize(&m_planes[0], &m_planes[0]);
// Calculate far plane of frustum.m planes[1].a =matrix. 14 - matrix. 13;
Tutorial 16: Frustum Culling http://www.rastertek.com/dx11tut16.html

7/14/2019 RasterTek: Direct3D introduction
http://slidepdf.com/reader/full/rastertek-direct3d-introduction 232/709
m_planes[1].a matrix._14 matrix._13;m_planes[1].b =matrix._24 - matrix._23;m_planes[1].c =matrix._34 - matrix._33;m_planes[1].d =matrix._44 - matrix._43;D3DXPlaneNormalize(&m_planes[1], &m_planes[1]);
// Calculate left plane of frustum.m_planes[2].a =matrix._14 +matrix._11;m_planes[2].b =matrix._24 +matrix._21;m_planes[2].c =matrix._34 +matrix._31;m_planes[2].d =matrix._44 +matrix._41;D3DXPlaneNormalize(&m_planes[2], &m_planes[2]);
// Calculate right plane of frustum.m_planes[3].a =matrix._14 - matrix._11;m_planes[3].b =matrix._24 - matrix._21;m_planes[3].c =matrix._34 - matrix._31;m_planes[3].d =matrix._44 - matrix._41;D3DXPlaneNormalize(&m_planes[3], &m_planes[3]);
4 of 32 3/8/2013 12:34 PM
// Calculate top plane of frustum.
m_planes[4].a =matrix._14 - matrix._12;m_planes[4].b =matrix._24 - matrix._22;m_planes[4].c =matrix._34 - matrix._32;m_planes[4].d =matrix._44 - matrix._42;D3DXPlaneNormalize(&m_planes[4], &m_planes[4]);
// Calculate bottom plane of frustum.m_planes[5].a =matrix._14 +matrix._12;m_planes[5].b =matrix._24 +matrix._22;
m_planes[5].c =matrix._34 +matrix._32;m_planes[5].d =matrix._44 +matrix._42;D3DXPlaneNormalize(&m_planes[5], &m_planes[5]);
return;}
CheckPoint checks if a single point is inside the viewing frustum. This is the most general of the four checking algorithms but can be very efficient if used correctly inthe right situation over the other checking methods. It takes the point and checks to see if it is inside all six planes. If the point is inside all six then it returns true,otherwise it returns false if not.
bool FrustumClass::CheckPoint(float x, float y, float z){
int i;
Tutorial 16: Frustum Culling http://www.rastertek.com/dx11tut16.html

7/14/2019 RasterTek: Direct3D introduction
http://slidepdf.com/reader/full/rastertek-direct3d-introduction 233/709
// Check if the point is inside all six planes of the view frustum.for(i=0; i<6; i++){
if(D3DXPlaneDotCoord(&m_planes[i], &D3DXVECTOR3(x, y, z)) <0.0f){
return false;}
}
return true;}
CheckCube checks if any of the eight corner points of the cube are inside the viewing frustum. It only requires as input the center point of the cube and the radius, ituses those to calculate the 8 corner points of the cube. It then checks if any one of the corner points are inside all 6 planes of the viewing frustum. If it does find apoint inside all six planes of the viewing frustum it returns true, otherwise it returns false.
bool FrustumClass::CheckCube(float xCenter, float yCenter, float zCenter, float radius){
5 of 32 3/8/2013 12:34 PM
int i;
// Check if any one point of the cube is in the view frustum.for(i=0; i<6; i++){
if(D3DXPlaneDotCoord(&m_planes[i], &D3DXVECTOR3((xCenter - radius), (yCenter - radius), (zCenter - radius))) >=0.0f){
continue;}
if(D3DXPlaneDotCoord(&m_planes[i], &D3DXVECTOR3((xCenter +radius), (yCenter - radius), (zCenter - radius))) >=0.0f){
continue;}
if(D3DXPlaneDotCoord(&m_planes[i], &D3DXVECTOR3((xCenter - radius), (yCenter +radius), (zCenter - radius))) >=0.0f){
continue;}
if(D3DXPlaneDotCoord(&m_planes[i], &D3DXVECTOR3((xCenter +radius), (yCenter +radius), (zCenter - radius))) >=0.0f){
continue;}
if(D3DXPlaneDotCoord(&m_planes[i], &D3DXVECTOR3((xCenter - radius), (yCenter - radius), (zCenter +radius))) >=0.0f)
Tutorial 16: Frustum Culling http://www.rastertek.com/dx11tut16.html

7/14/2019 RasterTek: Direct3D introduction
http://slidepdf.com/reader/full/rastertek-direct3d-introduction 234/709
_{
continue;}
if(D3DXPlaneDotCoord(&m_planes[i], &D3DXVECTOR3((xCenter +radius), (yCenter - radius), (zCenter +radius))) >=0.0f){
continue;}
if(D3DXPlaneDotCoord(&m_planes[i], &D3DXVECTOR3((xCenter - radius), (yCenter +radius), (zCenter +radius))) >=0.0f){
continue;}
if(D3DXPlaneDotCoord(&m_planes[i], &D3DXVECTOR3((xCenter +radius), (yCenter +radius), (zCenter +radius))) >=0.0f){
continue;}
6 of 32 3/8/2013 12:34 PM
return false;
}
return true;}
CheckSphere checks if the radius of the sphere from the center point is inside all six planes of the viewing frustum. If it is outside any of them then the spherecannot be seen and the function will return false. If it is inside all six the function returns true that the sphere can be seen.
bool FrustumClass::CheckSphere(float xCenter, float yCenter, float zCenter, float radius)
{int i;
// Check if the radius of the sphere is inside the view frustum.for(i=0; i<6; i++){
if(D3DXPlaneDotCoord(&m_planes[i], &D3DXVECTOR3(xCenter, yCenter, zCenter)) <-radius){
return false;}
}
return true;}
Tutorial 16: Frustum Culling http://www.rastertek.com/dx11tut16.html

7/14/2019 RasterTek: Direct3D introduction
http://slidepdf.com/reader/full/rastertek-direct3d-introduction 235/709
CheckRectangle works the same as CheckCube except that that it takes as input the x radius, y radius, and z radius of the rectangle instead of just a single radiusof a cube. It can then calculate the 8 corner points of the rectangle and do the frustum checks similar to the CheckCube function.
bool FrustumClass::CheckRectangle(float xCenter, float yCenter, float zCenter, float xSize, float ySize, float zSize){
int i;
// Check if any of the 6 planes of the rectangle are inside the view frustum.for(i=0; i<6; i++){
if(D3DXPlaneDotCoord(&m_planes[i], &D3DXVECTOR3((xCenter - xSize), (yCenter - ySize), (zCenter - zSize))) >=0.0f){
continue;}
if(D3DXPlaneDotCoord(&m_planes[i], &D3DXVECTOR3((xCenter +xSize), (yCenter - ySize), (zCenter - zSize))) >=0.0f){
7 of 32 3/8/2013 12:34 PM
continue;}
if(D3DXPlaneDotCoord(&m_planes[i], &D3DXVECTOR3((xCenter - xSize), (yCenter +ySize), (zCenter - zSize))) >=0.0f){
continue;}
if(D3DXPlaneDotCoord(&m_planes[i], &D3DXVECTOR3((xCenter - xSize), (yCenter - ySize), (zCenter +zSize))) >=0.0f){
continue;
}
if(D3DXPlaneDotCoord(&m_planes[i], &D3DXVECTOR3((xCenter +xSize), (yCenter +ySize), (zCenter - zSize))) >=0.0f){
continue;}
if(D3DXPlaneDotCoord(&m_planes[i], &D3DXVECTOR3((xCenter +xSize), (yCenter - ySize), (zCenter +zSize))) >=0.0f){
continue;}
if(D3DXPlaneDotCoord(&m_planes[i], &D3DXVECTOR3((xCenter - xSize), (yCenter +ySize), (zCenter +zSize))) >=0.0f){
continue;}
Tutorial 16: Frustum Culling http://www.rastertek.com/dx11tut16.html

7/14/2019 RasterTek: Direct3D introduction
http://slidepdf.com/reader/full/rastertek-direct3d-introduction 236/709
if(D3DXPlaneDotCoord(&m_planes[i], &D3DXVECTOR3((xCenter +xSize), (yCenter +ySize), (zCenter +zSize))) >=0.0f){
continue;}
return false;}
return true;}
Modellistclass.h
ModelListClass is a new class for maintaining information about all the models in the scene. For this tutorial it only maintains the size and color of the sphere
8 of 32 3/8/2013 12:34 PM
models since we only have one model type. This class can be expanded to maintain all the different types of models in the scene and indexes to their ModelClassbut I am keeping this tutorial simple for now.
///////////////////////////////////////////////////////////////////////////////// Filename: modellistclass.h///////////////////////////////////////////////////////////////////////////////#ifndef _MODELLISTCLASS_H_ #define _MODELLISTCLASS_H_
//////////////
// INCLUDES ////////////////#include <d3dx10math.h>#include <stdlib.h>#include <time.h>
///////////////////////////////////////////////////////////////////////////////// Class name: ModelListClass
///////////////////////////////////////////////////////////////////////////////class ModelListClass{private:
struct ModelInfoType{
D3DXVECTOR4 color;float positionX positionY positionZ
Tutorial 16: Frustum Culling http://www.rastertek.com/dx11tut16.html

7/14/2019 RasterTek: Direct3D introduction
http://slidepdf.com/reader/full/rastertek-direct3d-introduction 237/709
float positionX, positionY, positionZ;};
public:ModelListClass();ModelListClass(const ModelListClass&);~ModelListClass();
bool Initialize(int);void Shutdown();
int GetModelCount();void GetData(int, float&, float&, float&, D3DXVECTOR4&);
private:int m_modelCount;ModelInfoType* m_ModelInfoList;
};
9 of 32 3/8/2013 12:34 PM
#endif
Modellistclass.cpp
///////////////////////////////////////////////////////////////////////////////// Filename: modellistclass.cpp///////////////////////////////////////////////////////////////////////////////#include "modellistclass.h"
The class constructor initializes the model information list to null.
ModelListClass::ModelListClass(){
m_ModelInfoList =0;}
ModelListClass::ModelListClass(const ModelListClass& other){}
ModelListClass::~ModelListClass(){}
Tutorial 16: Frustum Culling http://www.rastertek.com/dx11tut16.html

7/14/2019 RasterTek: Direct3D introduction
http://slidepdf.com/reader/full/rastertek-direct3d-introduction 238/709
}
bool ModelListClass::Initialize(int numModels){
int i;float red, green, blue;
First store the number of models that will be used and then create the list array of them using the ModelInfoType structure.
// Store the number of models.m_modelCount =numModels;
// Create a list array of the model information.m_ModelInfoList =new ModelInfoType[m_modelCount];if(!m_ModelInfoList){
10 of 32 3/8/2013 12:34 PM
return false;}
Seed the random number generator with the current time and then randomly generate the position of color of the models and store them in the list array.
// Seed the random generator with the current time.srand((unsigned int)time(NULL));
// Go through all the models and randomly generate the model color and position.for(i=0; i<m_modelCount; i++){
// Generate a random color for the model.red =(float)rand() / RAND_MAX;green =(float)rand() / RAND_MAX;blue =(float)rand() / RAND_MAX;
m_ModelInfoList[i].color =D3DXVECTOR4(red, green, blue, 1.0f);
// Generate a random position in front of the viewer for the mode.m_ModelInfoList[i].positionX =(((float)rand()-(float)rand())/RAND_MAX) * 10.0f;
m_ModelInfoList[i].positionY =(((float)rand()-(float)rand())/RAND_MAX) * 10.0f;m_ModelInfoList[i].positionZ =((((float)rand()-(float)rand())/RAND_MAX) * 10.0f) +5.0f;
}
return true;}
The Shutdown function releases the model information listarray
Tutorial 16: Frustum Culling http://www.rastertek.com/dx11tut16.html

7/14/2019 RasterTek: Direct3D introduction
http://slidepdf.com/reader/full/rastertek-direct3d-introduction 239/709
The Shutdown function releases the model information list array.
void ModelListClass::Shutdown(){
// Release the model information list.if(m_ModelInfoList){
delete [] m_ModelInfoList;m_ModelInfoList =0;
}
return;}
GetModelCount returns the number of models that this class maintains information about.
int ModelListClass::GetModelCount(){
11 of 32 3/8/2013 12:34 PM
return m_modelCount;}
The GetData function extracts the position and color of a sphere at the given input index location.
void ModelListClass::GetData(int index, float& positionX, float& positionY, float& positionZ, D3DXVECTOR4& color){
positionX =m_ModelInfoList[index].positionX;positionY =m_ModelInfoList[index].positionY;positionZ =m_ModelInfoList[index].positionZ;
color =m_ModelInfoList[index].color;
return;}
Graphicsclass.h
////////////////////////////////////////////////////////////////////////////////// Filename: graphicsclass.h////////////////////////////////////////////////////////////////////////////////#ifndef _GRAPHICSCLASS_H_ #define _GRAPHICSCLASS_H_
/////////////
Tutorial 16: Frustum Culling http://www.rastertek.com/dx11tut16.html

7/14/2019 RasterTek: Direct3D introduction
http://slidepdf.com/reader/full/rastertek-direct3d-introduction 240/709
/////////////// GLOBALS ///////////////const bool FULL_SCREEN =true;const bool VSYNC_ENABLED =true;const float SCREEN_DEPTH =1000.0f;const float SCREEN_NEAR =0.1f;
The GraphicsClass for this tutorial includes a number of class we have used in the previous tutorials. It also includes the frustumclass.h and modellistclass.h headerwhich are new.
///////////////////////// MY CLASS INCLUDES /////////////////////////#include "d3dclass.h"#include "cameraclass.h"#include "textclass.h"
12 of 32 3/8/2013 12:34 PM
#include "modelclass.h"#include "lightshaderclass.h"
#include "lightclass.h"#include "modellistclass.h"#include "frustumclass.h"
////////////////////////////////////////////////////////////////////////////////// Class name: GraphicsClass////////////////////////////////////////////////////////////////////////////////class GraphicsClass
{public:
GraphicsClass();GraphicsClass(const GraphicsClass&);~GraphicsClass();
bool Initialize(int, int, HWND);void Shutdown();bool Frame(float);
bool Render();
private:
Two of the new private class objects are the m_Frustum and m_ModelList.
D3DClass* m_D3D;CameraClass* m Camera;
Tutorial 16: Frustum Culling http://www.rastertek.com/dx11tut16.html

7/14/2019 RasterTek: Direct3D introduction
http://slidepdf.com/reader/full/rastertek-direct3d-introduction 241/709
_ ; TextClass* m_Text;
ModelClass* m_Model;LightShaderClass* m_LightShader;LightClass* m_Light;ModelListClass* m_ModelList;FrustumClass* m_Frustum;
};
#endif
Graphicsclass.cpp
I will just cover the functions that have changed since the previous tutorials.
13 of 32 3/8/2013 12:34 PM
////////////////////////////////////////////////////////////////////////////////// Filename: graphicsclass.cpp
////////////////////////////////////////////////////////////////////////////////#include "graphicsclass.h"
The class constructor initializes the private member variables to null.
GraphicsClass::GraphicsClass(){
m_D3D =0;m_Camera =0;
m_Text =0;m_Model =0;m_LightShader =0;m_Light =0;m_ModelList =0;m_Frustum =0;
}
bool GraphicsClass::Initialize(int screenWidth, int screenHeight, HWND hwnd){
bool result;D3DXMATRIX baseViewMatrix;
// Create the Direct3D object.m_D3D =new D3DClass;
Tutorial 16: Frustum Culling http://www.rastertek.com/dx11tut16.html

7/14/2019 RasterTek: Direct3D introduction
http://slidepdf.com/reader/full/rastertek-direct3d-introduction 242/709
if(!m_D3D)
{return false;
}
// Initialize the Direct3D object.result =m_D3D->Initialize(screenWidth, screenHeight, VSYNC_ENABLED, hwnd, FULL_SCREEN, SCREEN_DEPTH, SCREEN_NEAR);if(!result){
MessageBox(hwnd, L"Could not initialize Direct3D.", L"Error", MB_OK);
return false;}
// Create the camera object.m_Camera =new CameraClass;if(!m_Camera){
14 of 32 3/8/2013 12:34 PM
return false;}
// Initialize a base view matrix with the camera for 2D user interface rendering.m_Camera->SetPosition(0.0f, 0.0f, -1.0f);m_Camera->Render();m_Camera->GetViewMatrix(baseViewMatrix);
// Create the text object.m_Text =new TextClass;if(!m_Text)
{return false;
}
// Initialize the text object.result =m_Text->Initialize(m_D3D->GetDevice(), m_D3D->GetDeviceContext(), hwnd, screenWidth, screenHeight, baseViewMatrix);if(!result){
MessageBox(hwnd, L"Could not initialize the text object.", L"Error", MB_OK);
return false;}
// Create the model object.m_Model =new ModelClass;if(!m_Model){
return false;
Tutorial 16: Frustum Culling http://www.rastertek.com/dx11tut16.html

7/14/2019 RasterTek: Direct3D introduction
http://slidepdf.com/reader/full/rastertek-direct3d-introduction 243/709
}
We load a sphere model instead of a cube model for this tutorial.
// Initialize the model object.result =m_Model->Initialize(m_D3D->GetDevice(), L"../Engine/data/seafloor.dds", "../Engine/data/sphere.txt");if(!result){
MessageBox(hwnd, L"Could not initialize the model object.", L"Error", MB_OK);return false;
}
// Create the light shader object.m_LightShader =new LightShaderClass;if(!m_LightShader){
return false;
15 of 32 3/8/2013 12:34 PM
}
// Initialize the light shader object.result =m_LightShader->Initialize(m_D3D->GetDevice(), hwnd);if(!result){
MessageBox(hwnd, L"Could not initialize the light shader object.", L"Error", MB_OK);return false;
}
// Create the light object.
m_Light =new LightClass;if(!m_Light){
return false;}
// Initialize the light object.m_Light->SetDirection(0.0f, 0.0f, 1.0f);
Here we create the new ModelListClass object and have it create 25 randomly placed/colored sphere models.
// Create the model list object.m_ModelList =new ModelListClass;if(!m_ModelList){
return false;}
Tutorial 16: Frustum Culling http://www.rastertek.com/dx11tut16.html

7/14/2019 RasterTek: Direct3D introduction
http://slidepdf.com/reader/full/rastertek-direct3d-introduction 244/709
// Initialize the model list object.result =m_ModelList->Initialize(25);if(!result){
MessageBox(hwnd, L"Could not initialize the model list object.", L"Error", MB_OK);return false;
}
Here we create the new FrustumClass object. It doesn't need any initialization since that is done every frame using the ConstructFrustum function.
// Create the frustum object.m_Frustum =new FrustumClass;if(!m_Frustum){
return false;}
16 of 32 3/8/2013 12:34 PM
return true;
}
void GraphicsClass::Shutdown(){
We release the new FrustumClass and ModelListClass objects here in the Shutdown function.
// Release the frustum object.
if(m_Frustum){
delete m_Frustum;m_Frustum =0;
}
// Release the model list object.if(m_ModelList){
m_ModelList->Shutdown();delete m_ModelList;m_ModelList =0;
}
// Release the light object.if(m_Light){
delete m Light;
Tutorial 16: Frustum Culling http://www.rastertek.com/dx11tut16.html

7/14/2019 RasterTek: Direct3D introduction
http://slidepdf.com/reader/full/rastertek-direct3d-introduction 245/709
delete m_Light;
m_Light =0;}
// Release the light shader object.if(m_LightShader){
m_LightShader->Shutdown();delete m_LightShader;m_LightShader =0;
}
// Release the model object.if(m_Model){
m_Model->Shutdown();delete m_Model;
17 of 32 3/8/2013 12:34 PM
m_Model =0;}
// Release the text object.if(m_Text){
m_Text->Shutdown();delete m_Text;m_Text =0;
}
// Release the camera object.if(m_Camera){
delete m_Camera;m_Camera =0;
}
// Release the Direct3D object.if(m_D3D)
{m_D3D->Shutdown();delete m_D3D;m_D3D =0;
}
return;}
Tutorial 16: Frustum Culling http://www.rastertek.com/dx11tut16.html

7/14/2019 RasterTek: Direct3D introduction
http://slidepdf.com/reader/full/rastertek-direct3d-introduction 246/709
The Frame function now takes in the rotation of the camera from the SystemClass that calls it. The position and rotation of the camera are then set so the viewmatrix can be properly updated in the Render function.
bool GraphicsClass::Frame(float rotationY){
// Set the position of the camera.m_Camera->SetPosition(0.0f, 0.0f, -10.0f);
// Set the rotation of the camera.
m_Camera->SetRotation(0.0f, rotationY, 0.0f);
return true;}
bool GraphicsClass::Render()
18 of 32 3/8/2013 12:34 PM
{D3DXMATRIX worldMatrix, viewMatrix, projectionMatrix, orthoMatrix;
int modelCount, renderCount, index;float positionX, positionY, positionZ, radius;D3DXVECTOR4 color;bool renderModel, result;
// Clear the buffers to begin the scene.m_D3D->BeginScene(0.0f, 0.0f, 0.0f, 1.0f);
// Generate the view matrix based on the camera's position.m_Camera->Render();
// Get the world, view, projection, and ortho matrices from the camera and d3d objects.m_D3D->GetWorldMatrix(worldMatrix);m_Camera->GetViewMatrix(viewMatrix);m_D3D->GetProjectionMatrix(projectionMatrix);m_D3D->GetOrthoMatrix(orthoMatrix);
The major change to the Render function is that we now construct the viewing frustum each frame based on the updated viewing matrix. This construction has tooccur each time the view matrix changes or the frustum culling checks we do will not be correct.
// Construct the frustum.m_Frustum->ConstructFrustum(SCREEN_DEPTH, projectionMatrix, viewMatrix);
// Get the number of models that will be rendered.modelCount =m_ModelList->GetModelCount();
Tutorial 16: Frustum Culling http://www.rastertek.com/dx11tut16.html

7/14/2019 RasterTek: Direct3D introduction
http://slidepdf.com/reader/full/rastertek-direct3d-introduction 247/709
// Initialize the count of models that have been rendered.renderCount =0;
Now loop through all the models in the ModelListClass object.
// Go through all the models and render them only if they can be seen by the camera view.for(index=0; index<modelCount; index++){
// Get the position and color of the sphere model at this index.
m_ModelList->GetData(index, positionX, positionY, positionZ, color);
// Set the radius of the sphere to 1.0 since this is already known.radius =1.0f;
Here is where we use the new FrustumClass object. We check if the sphere is viewable in the viewing frustum. If it can be seen we render it, if it cannot be seen weskip it and check the next one. This is where we will gain all the speed by using frustum culling.
19 of 32 3/8/2013 12:34 PM
// Check if the sphere model is in the view frustum.renderModel =m_Frustum->CheckSphere(positionX, positionY, positionZ, radius);
// If it can be seen then render it, if not skip this model and check the next sphere.if(renderModel){
// Move the model to the location it should be rendered at.D3DXMatrixTranslation(&worldMatrix, positionX, positionY, positionZ);
// Put the model vertex and index buffers on the graphics pipeline to prepare them for drawing.m_Model->Render(m_D3D->GetDeviceContext());
// Render the model using the light shader.m_LightShader->Render(m_D3D->GetDeviceContext(), m_Model->GetIndexCount(), worldMatrix, viewMatrix, projectionMatrix,
m_Model->GetTexture(), m_Light->GetDirection(), color);
// Reset to the original world matrix.m_D3D->GetWorldMatrix(worldMatrix);
// Since this model was rendered then increase the count for this frame.
renderCount++;}
}
We use the slightly modified TextClass to display how many spheres were actually rendered. We can also infer for this number that the spheres that were notrendered were instead culled using the new FrustumClass object.
// Set the number of models that was actually rendered this frame.result =m Text->SetRenderCount(renderCount, m D3D->GetDeviceContext());
Tutorial 16: Frustum Culling http://www.rastertek.com/dx11tut16.html
7/14/2019 RasterTek: Direct3D introduction
http://slidepdf.com/reader/full/rastertek-direct3d-introduction 248/709
result m_Text SetRenderCount(renderCount, m_D3D GetDeviceContext());
if(!result){
return false;}
// Turn off the Z buffer to begin all 2D rendering.m_D3D->TurnZBufferOff();
// Turn on the alpha blending before rendering the text.
m_D3D->TurnOnAlphaBlending();
// Render the text string of the render count.m_Text->Render(m_D3D->GetDeviceContext(), worldMatrix, orthoMatrix);if(!result){
return false;
20 of 32 3/8/2013 12:34 PM
}
// Turn off alpha blending after rendering the text.m_D3D->TurnOffAlphaBlending();
// Turn the Z buffer back on now that all 2D rendering has completed.m_D3D->TurnZBufferOn();
// Present the rendered scene to the screen.m_D3D->EndScene();
return true;}
Positionclass.h
To allow for camera movement by using the left and right arrow key in this tutorial we create a new class to calculate and maintain the position of the viewer. Thisclass will only handle turning left and right for now but can be expanded to maintain all different movement changes. The movement also includes acceleration and
deceleration to create a smooth camera effect.
////////////////////////////////////////////////////////////////////////////////// Filename: positionclass.h////////////////////////////////////////////////////////////////////////////////#ifndef _POSITIONCLASS_H_ #define _POSITIONCLASS_H_
Tutorial 16: Frustum Culling http://www.rastertek.com/dx11tut16.html

7/14/2019 RasterTek: Direct3D introduction
http://slidepdf.com/reader/full/rastertek-direct3d-introduction 249/709
//////////////// INCLUDES ////////////////#include <math.h>
////////////////////////////////////////////////////////////////////////////////// Class name: PositionClass////////////////////////////////////////////////////////////////////////////////class PositionClass{public:
PositionClass();PositionClass(const PositionClass&);~PositionClass();
21 of 32 3/8/2013 12:34 PM
void SetFrameTime(float);
void GetRotation(float&);
void TurnLeft(bool);void TurnRight(bool);
private:float m_frameTime;float m_rotationY;float m_leftTurnSpeed, m_rightTurnSpeed;
};
#endif
Positionclass.cpp
////////////////////////////////////////////////////////////////////////////////
// Filename: positionclass.cpp////////////////////////////////////////////////////////////////////////////////#include "positionclass.h"
The class constructor initializes the private member variables to zero to start with.
PositionClass::PositionClass(){
m frameTime =0.0f;
Tutorial 16: Frustum Culling http://www.rastertek.com/dx11tut16.html
7/14/2019 RasterTek: Direct3D introduction
http://slidepdf.com/reader/full/rastertek-direct3d-introduction 250/709
m_frameTime 0.0f;
m_rotationY =0.0f;m_leftTurnSpeed =0.0f;m_rightTurnSpeed =0.0f;
}
PositionClass::PositionClass(const PositionClass& other){}
PositionClass::~PositionClass(){}
22 of 32 3/8/2013 12:34 PM
The SetFrameTime function is used to set the frame speed in this class. PositionClass will use that frame time speed to calculate how fast the viewer should bemoving and rotating. This function should always be called at the beginning of each frame before using this class to move the viewing position.
void PositionClass::SetFrameTime(float time){
m_frameTime =time;return;
}
GetRotation returns the Y-axis rotation of the viewer. This is the only helper function we need for this tutorial but could be expanded to get more information aboutthe location of the viewer.
void PositionClass::GetRotation(float& y){
y =m_rotationY;return;
}
The movement functions both work the same. Both functions are called each frame. The keydown input variable to each function indicates if the user is pressing theleft key or the right key. If they are pressing the key then each frame the speed will accelerate until it hits a maximum. This way the camera speeds up similar to the
acceleration in a vehicle creating the effect of smooth movement and high responsiveness. Likewise if the user releases the key and the keydown variable is false itwill then smoothly slow down each frame until the speed hits zero. The speed is calculated against the frame time to ensure the movement speed remains the sameregardless of the frame rate. Each function then uses some basic math to calculate the new position of the camera.
void PositionClass::TurnLeft(bool keydown){
// If the key is pressed increase the speed at which the camera turns left. If not slow down the turn speed.if(keydown){
Tutorial 16: Frustum Culling http://www.rastertek.com/dx11tut16.html

7/14/2019 RasterTek: Direct3D introduction
http://slidepdf.com/reader/full/rastertek-direct3d-introduction 251/709
m_leftTurnSpeed +=m_frameTime * 0.01f;
if(m_leftTurnSpeed >(m_frameTime * 0.15f)){
m_leftTurnSpeed =m_frameTime * 0.15f;}
}else{
m_leftTurnSpeed -=m_frameTime* 0.005f;
if(m_leftTurnSpeed <0.0f){
m_leftTurnSpeed =0.0f;}
}
23 of 32 3/8/2013 12:34 PM
// Update the rotation using the turning speed.
m_rotationY -=m_leftTurnSpeed;if(m_rotationY <0.0f){
m_rotationY +=360.0f;}
return;}
void PositionClass::TurnRight(bool keydown){
// If the key is pressed increase the speed at which the camera turns right. If not slow down the turn speed.if(keydown){
m_rightTurnSpeed +=m_frameTime * 0.01f;
if(m_rightTurnSpeed >(m_frameTime * 0.15f))
{m_rightTurnSpeed =m_frameTime * 0.15f;
}}else{
m_rightTurnSpeed -=m_frameTime* 0.005f;
if(m_rightTurnSpeed <0.0f)
Tutorial 16: Frustum Culling http://www.rastertek.com/dx11tut16.html

7/14/2019 RasterTek: Direct3D introduction
http://slidepdf.com/reader/full/rastertek-direct3d-introduction 252/709
{m_rightTurnSpeed =0.0f;
}}
// Update the rotation using the turning speed.m_rotationY +=m_rightTurnSpeed;if(m_rotationY >360.0f){
m_rotationY -=360.0f;}
return;}
24 of 32 3/8/2013 12:34 PM
Systemclass.h
The SystemClass has been modified to use the new PostionClass.
////////////////////////////////////////////////////////////////////////////////// Filename: systemclass.h////////////////////////////////////////////////////////////////////////////////#ifndef _SYSTEMCLASS_H_ #define _SYSTEMCLASS_H_
///////////////////////////////// PRE-PROCESSING DIRECTIVES /////////////////////////////////#define WIN32_LEAN_AND_MEAN
//////////////// INCLUDES ////////////////#include <windows.h>
///////////////////////// MY CLASS INCLUDES /////////////////////////#include "inputclass.h"
Tutorial 16: Frustum Culling http://www.rastertek.com/dx11tut16.html

7/14/2019 RasterTek: Direct3D introduction
http://slidepdf.com/reader/full/rastertek-direct3d-introduction 253/709
#include "graphicsclass.h"#include "timerclass.h"#include "positionclass.h"
////////////////////////////////////////////////////////////////////////////////// Class name: SystemClass////////////////////////////////////////////////////////////////////////////////class SystemClass{public:
SystemClass();SystemClass(const SystemClass&);~SystemClass();
25 of 32 3/8/2013 12:34 PM
bool Initialize();void Shutdown();
void Run();
LRESULT CALLBACK MessageHandler(HWND, UINT, WPARAM, LPARAM);
private:bool Frame();void InitializeWindows(int&, int&);void ShutdownWindows();
private:LPCWSTR m_applicationName;HINSTANCE m_hinstance;HWND m_hwnd;
InputClass* m_Input;GraphicsClass* m_Graphics;
TimerClass* m_Timer;PositionClass* m_Position;
};
/////////////////////////// FUNCTION PROTOTYPES ///////////////////////////static LRESULT CALLBACK WndProc(HWND, UINT, WPARAM, LPARAM);
Tutorial 16: Frustum Culling http://www.rastertek.com/dx11tut16.html

7/14/2019 RasterTek: Direct3D introduction
http://slidepdf.com/reader/full/rastertek-direct3d-introduction 254/709
/////////////// GLOBALS ///////////////static SystemClass* ApplicationHandle =0;
#endif
Systemclass.cpp
I will cover just the functions that have changed in this class since the previous tutorials.
////////////////////////////////////////////////////////////////////////////////
26 of 32 3/8/2013 12:34 PM
// Filename: systemclass.cpp////////////////////////////////////////////////////////////////////////////////
#include "systemclass.h"
SystemClass::SystemClass(){
m_Input =0;m_Graphics =0;m_Timer =0;
The new PositionClass object is initialized to null in the class constructor.
m_Position =0;}
bool SystemClass::Initialize(){
int screenWidth, screenHeight;
bool result;
// Initialize the width and height of the screen to zero before sending the variables into the function.screenWidth =0;screenHeight =0;
// Initialize the windows api.InitializeWindows(screenWidth, screenHeight);
Tutorial 16: Frustum Culling http://www.rastertek.com/dx11tut16.html

7/14/2019 RasterTek: Direct3D introduction
http://slidepdf.com/reader/full/rastertek-direct3d-introduction 255/709
// Create the input object. This object will be used to handle reading the keyboard input from the user.m_Input =new InputClass;if(!m_Input){
return false;}
// Initialize the input object.
result =m_Input->Initialize(m_hinstance, m_hwnd, screenWidth, screenHeight);if(!result){
MessageBox(m_hwnd, L"Could not initialize the input object.", L"Error", MB_OK);return false;
}
27 of 32 3/8/2013 12:34 PM
// Create the graphics object. This object will handle rendering all the graphics for this application.m_Graphics =new GraphicsClass;
if(!m_Graphics){
return false;}
// Initialize the graphics object.result =m_Graphics->Initialize(screenWidth, screenHeight, m_hwnd);if(!result){
return false;}
// Create the timer object.m_Timer =new TimerClass;if(!m_Timer){
return false;}
// Initialize the timer object.result =m_Timer->Initialize();if(!result){
MessageBox(m_hwnd, L"Could not initialize the Timer object.", L"Error", MB_OK);return false;
}
Create the new PositionClass object here It doesn't require any initialization
Tutorial 16: Frustum Culling http://www.rastertek.com/dx11tut16.html

7/14/2019 RasterTek: Direct3D introduction
http://slidepdf.com/reader/full/rastertek-direct3d-introduction 256/709
Create the new PositionClass object here. It doesn't require any initialization.
// Create the position object.m_Position =new PositionClass;if(!m_Position){
return false;}
return true;}
void SystemClass::Shutdown(){
28 of 32 3/8/2013 12:34 PM
The PositionClass object is released here in the Shutdown function.
// Release the position object.if(m_Position){
delete m_Position;m_Position =0;
}
// Release the timer object.if(m_Timer)
{delete m_Timer;m_Timer =0;
}
// Release the graphics object.if(m_Graphics){
m_Graphics->Shutdown();
delete m_Graphics;m_Graphics =0;
}
// Release the input object.if(m_Input){
m_Input->Shutdown();delete m_Input;
m Input =0;
Tutorial 16: Frustum Culling http://www.rastertek.com/dx11tut16.html

7/14/2019 RasterTek: Direct3D introduction
http://slidepdf.com/reader/full/rastertek-direct3d-introduction 257/709
m_Input =0;}
// Shutdown the window.ShutdownWindows();
return;}
bool SystemClass::Frame(){
bool keyDown, result;float rotationY;
29 of 32 3/8/2013 12:34 PM
// Update the system stats.m_Timer->Frame();
// Do the input frame processing.result =m_Input->Frame();if(!result){
return false;}
During each frame the PositionClass object is update with the frame time.
// Set the frame time for calculating the updated position.m_Position->SetFrameTime(m_Timer->GetTime());
After the frame time update the PositionClass movement functions can be updated with the current state of the keyboard. The movement functions will update theposition of the camera to the new location for this frame.
// Check if the left or right arrow key has been pressed, if so rotate the camera accordingly.keyDown =m_Input->IsLeftArrowPressed();
m_Position->TurnLeft(keyDown);
keyDown =m_Input->IsRightArrowPressed();m_Position->TurnRight(keyDown);
The new rotation of the camera is retrieved and sent to the Graphics::Frame function to update the camera position.
// Get the current view point rotation.m_Position->GetRotation(rotationY);
Tutorial 16: Frustum Culling http://www.rastertek.com/dx11tut16.html

7/14/2019 RasterTek: Direct3D introduction
http://slidepdf.com/reader/full/rastertek-direct3d-introduction 258/709
// Do the frame processing for the graphics object.result =m_Graphics->Frame(rotationY);if(!result){
return false;}
// Finally render the graphics to the screen.
result =m_Graphics->Render();if(!result){
return false;}
return true;
30 of 32 3/8/2013 12:34 PM
}
Summary
Now you have seen how to cull objects. The only trick from here is determining whether a cube, rectangle, sphere, or clever use of a point is better for culling yourdifferent objects.
Tutorial 16: Frustum Culling http://www.rastertek.com/dx11tut16.html

7/14/2019 RasterTek: Direct3D introduction
http://slidepdf.com/reader/full/rastertek-direct3d-introduction 259/709
31 of 32 3/8/2013 12:34 PM
To Do Exercises
1. Recompile and run the program. Use the left and right arrow key to move the camera and update the render count in the upper left corner.
2. Load the cube model instead and change the cull check to CheckCube.
3. Create some different models and test which of the culling checks works best for them.
Source Code
Visual Studio 2008 Project: dx11tut16.zip
Source Only: dx11src16.zip
Executable Only:dx11exe16.zip
Back to Tutorial Index
Tutorial 16: Frustum Culling http://www.rastertek.com/dx11tut16.html

7/14/2019 RasterTek: Direct3D introduction
http://slidepdf.com/reader/full/rastertek-direct3d-introduction 260/709
32 of 32 3/8/2013 12:34 PM
Tutorial 17: Multitexturing and Texture Arrays
This tutorial will cover how to do multitexturing in DirectX 11 as well as how to implement texture arrays in DirectX 11. Multitexturing is the process of blending twodifferent textures to create a final texture. The equation you use to blend the two textures can differ depending on the result you are trying to achieve. In this tutorialwe will look at just combining the average pixel color of the two textures to create an evenly blended final texture.
Texture arrays is a new feature since DirectX 10 that allows you to have multiple textures active at once in the gpu. Past methods where only a single texture wasever active in the gpu caused a lot of extra processing to load and unload textures all the time. Most people got around this problem by using texture aliases(loading a bunch of textures onto one large texture) and just using different UV coordinates. However texture aliases are no longer needed with this new feature.
The first texture used in this tutorial we will call the base texture which looks like the following:
Tutorial 17: Multitexturing and Texture Arrays http://www.rastertek.com/dx11tut17.html

7/14/2019 RasterTek: Direct3D introduction
http://slidepdf.com/reader/full/rastertek-direct3d-introduction 261/709
The second texture we will use to combine with the first one will be called the color texture. It looks like the following:
1 of 30 3/8/2013 12:37 PM
These two textures will be combined in the pixel shader on a pixel by pixel basis. The blending equation we will use will be the following:
blendColor =basePixel * colorPixel * gammaCorrection;
Using that equation and the two textures we will get the following result:
Tutorial 17: Multitexturing and Texture Arrays http://www.rastertek.com/dx11tut17.html

7/14/2019 RasterTek: Direct3D introduction
http://slidepdf.com/reader/full/rastertek-direct3d-introduction 262/709
Now you may be wondering why I didn't just add together the average of the pixels such as the following:
blendColor =(basePixel * 0.5) +(colorPixel * 0.5);
The reason being is that the pixel color presented to us has been corrected to the gamma of the monitor. This makes the pixel values from 0.0 to 1.0 follow a
2 of 30 3/8/2013 12:37 PM
non-linear curve. Therefore we need gamma correction when working in the pixel shader to deal with non-linear color values. If we don't correct for gamma and justdo the average addition function we get a washed out result such as this:
Also note that most devices have different gamma values and most require a look up table or a gamma slider so the user can choose the gamma settings for theirdevice. In this example I just choose 2.0 as my gamma value to make the tutorial simple.
We'll start the code section by first looking at the new multitexture shader which was originally based on the texture shader file with some slight changes.
Multitexture.vs
The only change to the vertex shader is the name.
Tutorial 17: Multitexturing and Texture Arrays http://www.rastertek.com/dx11tut17.html

7/14/2019 RasterTek: Direct3D introduction
http://slidepdf.com/reader/full/rastertek-direct3d-introduction 263/709
////////////////////////////////////////////////////////////////////////////////// Filename: multitexture.vs////////////////////////////////////////////////////////////////////////////////
/////////////// GLOBALS //
/////////////cbuffer MatrixBuffer{
matrix worldMatrix;matrix viewMatrix;matrix projectionMatrix;
3 of 30 3/8/2013 12:37 PM
};
//////////////// TYPEDEFS ////////////////struct VertexInputType{
float4 position : POSITION;float2 tex : TEXCOORD0;
};
struct PixelInputType{
float4 position : SV_POSITION;float2 tex : TEXCOORD0;
};
////////////////////////////////////////////////////////////////////////////////
// Vertex Shader////////////////////////////////////////////////////////////////////////////////PixelInputType MultiTextureVertexShader(VertexInputType input){
PixelInputType output;
// Change the position vector to be 4 units for proper matrix calculations.input.position.w =1.0f;
// Calculate the position of the vertex against the world, view, and projection matrices.
Tutorial 17: Multitexturing and Texture Arrays http://www.rastertek.com/dx11tut17.html

7/14/2019 RasterTek: Direct3D introduction
http://slidepdf.com/reader/full/rastertek-direct3d-introduction 264/709
// p g , , p joutput.position =mul(input.position, worldMatrix);output.position =mul(output.position, viewMatrix);output.position =mul(output.position, projectionMatrix);
// Store the texture coordinates for the pixel shader.output.tex =input.tex;
return output;}
Multitexture.ps
4 of 30 3/8/2013 12:37 PM
////////////////////////////////////////////////////////////////////////////////// Filename: multitexture.ps
////////////////////////////////////////////////////////////////////////////////
/////////////// GLOBALS ///////////////
We have added a two element texture array resource here for the two different textures that will be blended together. Texture arrays are more efficient that usingsingle texture resources in terms of performance on the graphics card. Switching textures was very costly in earlier versions of DirectX forcing most engines to be
written around texture and material switches. Texture arrays help reduce that performance cost.
Texture2D shaderTextures[2];SamplerState SampleType;
//////////////// TYPEDEFS ////////////////
struct PixelInputType{float4 position : SV_POSITION;float2 tex : TEXCOORD0;
};
The pixel shader is where all the work of this tutorial is done. We take a sample of the pixel from both textures at this current texture coordinate. After that wecombine them using multiplication since they are non-linear due to gamma correction. We also multiply by a gamma value, we have used 2.0 in this example as it isclose to most monitor's gamma value. Once we have the blended pixel we saturate it and then return it as our final result. Notice also the indexing method used to
access the two textures in the texture array.
Tutorial 17: Multitexturing and Texture Arrays http://www.rastertek.com/dx11tut17.html

7/14/2019 RasterTek: Direct3D introduction
http://slidepdf.com/reader/full/rastertek-direct3d-introduction 265/709
////////////////////////////////////////////////////////////////////////////////// Pixel Shader////////////////////////////////////////////////////////////////////////////////float4 MultiTexturePixelShader(PixelInputType input) : SV_TARGET{
float4 color1;float4 color2;
float4 blendColor;
// Get the pixel color from the first texture.color1 =shaderTextures[0].Sample(SampleType, input.tex);
// Get the pixel color from the second texture.
5 of 30 3/8/2013 12:37 PM
color2 =shaderTextures[1].Sample(SampleType, input.tex);
// Blend the two pixels together and multiply by the gamma value.blendColor =color1 * color2 * 2.0;
// Saturate the final color.blendColor =saturate(blendColor);
return blendColor;}
Multitextureshaderclass.h
The multitexture shader code is based on the TextureShaderClass with some slight modifications.
////////////////////////////////////////////////////////////////////////////////// Filename: multitextureshaderclass.h////////////////////////////////////////////////////////////////////////////////
#ifndef _MULTITEXTURESHADERCLASS_H_ #define _MULTITEXTURESHADERCLASS_H_
//////////////// INCLUDES ////////////////#include <d3d11.h>#include <d3dx10math.h>
#include <d3dx11async.h>#include <fstream>
Tutorial 17: Multitexturing and Texture Arrays http://www.rastertek.com/dx11tut17.html

7/14/2019 RasterTek: Direct3D introduction
http://slidepdf.com/reader/full/rastertek-direct3d-introduction 266/709
using namespace std;
////////////////////////////////////////////////////////////////////////////////// Class name: MultiTextureShaderClass////////////////////////////////////////////////////////////////////////////////class MultiTextureShaderClass
{private:
struct MatrixBufferType{
D3DXMATRIX world;D3DXMATRIX view;
6 of 30 3/8/2013 12:37 PM
D3DXMATRIX projection;};
public:MultiTextureShaderClass();MultiTextureShaderClass(const MultiTextureShaderClass&);~MultiTextureShaderClass();
bool Initialize(ID3D11Device*, HWND);void Shutdown();bool Render(ID3D11DeviceContext*, int, D3DXMATRIX, D3DXMATRIX, D3DXMATRIX, ID3D11ShaderResourceView**);
private:bool InitializeShader(ID3D11Device*, HWND, WCHAR*, WCHAR*);void ShutdownShader();void OutputShaderErrorMessage(ID3D10Blob*, HWND, WCHAR*);
bool SetShaderParameters(ID3D11DeviceContext*, D3DXMATRIX, D3DXMATRIX, D3DXMATRIX, ID3D11ShaderResourceView**);void RenderShader(ID3D11DeviceContext*, int);
private:ID3D11VertexShader* m_vertexShader;ID3D11PixelShader* m_pixelShader;ID3D11InputLayout* m_layout;ID3D11Buffer* m_matrixBuffer;ID3D11SamplerState* m_sampleState;
};
#endif
Tutorial 17: Multitexturing and Texture Arrays http://www.rastertek.com/dx11tut17.html

7/14/2019 RasterTek: Direct3D introduction
http://slidepdf.com/reader/full/rastertek-direct3d-introduction 267/709
Multitextureshaderclass.cpp
////////////////////////////////////////////////////////////////////////////////// Filename: multitextureshaderclass.cpp////////////////////////////////////////////////////////////////////////////////#include "multitextureshaderclass.h"
MultiTextureShaderClass::MultiTextureShaderClass(){
m_vertexShader =0;m_pixelShader =0;
7 of 30 3/8/2013 12:37 PM
m_layout =0;m_matrixBuffer =0;m_sampleState =0;
}
MultiTextureShaderClass::MultiTextureShaderClass(const MultiTextureShaderClass& other){}
MultiTextureShaderClass::~MultiTextureShaderClass(){}
bool MultiTextureShaderClass::Initialize(ID3D11Device* device, HWND hwnd){
bool result;
The multitexture HLSL shader files are loaded here in the Initialize function.
// Initialize the vertex and pixel shaders.result =InitializeShader(device, hwnd, L"../Engine/multitexture.vs", L"../Engine/multitexture.ps");if(!result){
return false;}
return true;}
Tutorial 17: Multitexturing and Texture Arrays http://www.rastertek.com/dx11tut17.html
7/14/2019 RasterTek: Direct3D introduction
http://slidepdf.com/reader/full/rastertek-direct3d-introduction 268/709
Shutdown calls the ShutdownShader function to release the shader related interfaces.
void MultiTextureShaderClass::Shutdown(){
// Shutdown the vertex and pixel shaders as well as the related objects.ShutdownShader();
return;}
The Render function now takes as input a pointer to the texture array. This will give the shader access to the two textures for blending operations.
bool MultiTextureShaderClass::Render(ID3D11DeviceContext* deviceContext, int indexCount, D3DXMATRIX worldMatrix,
8 of 30 3/8/2013 12:37 PM
D3DXMATRIX viewMatrix, D3DXMATRIX projectionMatrix, ID3D11ShaderResourceView** textureArray){
bool result;
// Set the shader parameters that it will use for rendering.result =SetShaderParameters(deviceContext, worldMatrix, viewMatrix, projectionMatrix, textureArray);if(!result){
return false;}
// Now render the prepared buffers with the shader.RenderShader(deviceContext, indexCount);
return true;}
The InitializeShader function loads the vertex and pixel shader as well as setting up the layout, matrix buffer, and sample state.
bool MultiTextureShaderClass::InitializeShader(ID3D11Device* device, HWND hwnd, WCHAR* vsFilename, WCHAR* psFilename){HRESULT result;ID3D10Blob* errorMessage;ID3D10Blob* vertexShaderBuffer;ID3D10Blob* pixelShaderBuffer;D3D11_INPUT_ELEMENT_DESC polygonLayout[2];unsigned int numElements;D3D11_BUFFER_DESC matrixBufferDesc;
D3D11_SAMPLER_DESC samplerDesc;
Tutorial 17: Multitexturing and Texture Arrays http://www.rastertek.com/dx11tut17.html

7/14/2019 RasterTek: Direct3D introduction
http://slidepdf.com/reader/full/rastertek-direct3d-introduction 269/709
// Initialize the pointers this function will use to null.errorMessage =0;vertexShaderBuffer =0;pixelShaderBuffer =0;
The multitexture vertex shader is loaded here.
// Compile the vertex shader code.result =D3DX11CompileFromFile(vsFilename, NULL, NULL, "MultiTextureVertexShader", "vs_5_0", D3D10_SHADER_ENABLE_STRICTNESS,
0, NULL, &vertexShaderBuffer, &errorMessage, NULL);if(FAILED(result)){
// If the shader failed to compile it should have writen something to the error message.
9 f 30 3/8/2013 12 37 PM
if(errorMessage){
OutputShaderErrorMessage(errorMessage, hwnd, vsFilename);}// If there was nothing in the error message then it simply could not find the shader file itself.else{
MessageBox(hwnd, vsFilename, L"Missing Shader File", MB_OK);}
return false;}
The multitexture pixel shader is loaded here.
// Compile the pixel shader code.result =D3DX11CompileFromFile(psFilename, NULL, NULL, "MultiTexturePixelShader", "ps_5_0", D3D10_SHADER_ENABLE_STRICTNESS,
0, NULL, &pixelShaderBuffer, &errorMessage, NULL);if(FAILED(result)){
// If the shader failed to compile it should have writen something to the error message.if(errorMessage){
OutputShaderErrorMessage(errorMessage, hwnd, psFilename);}// If there was nothing in the error message then it simply could not find the file itself.else{
MessageBox(hwnd, psFilename, L"Missing Shader File", MB_OK);
}
return false;
Tutorial 17: Multitexturing and Texture Arrays http://www.rastertek.com/dx11tut17.html
7/14/2019 RasterTek: Direct3D introduction
http://slidepdf.com/reader/full/rastertek-direct3d-introduction 270/709
return false;}
// Create the vertex shader from the buffer.result =device->CreateVertexShader(vertexShaderBuffer->GetBufferPointer(), vertexShaderBuffer->GetBufferSize(), NULL,
&m_vertexShader);if(FAILED(result))
{ return false;}
// Create the vertex shader from the buffer.result =device->CreatePixelShader(pixelShaderBuffer->GetBufferPointer(), pixelShaderBuffer->GetBufferSize(), NULL,
&m_pixelShader);
10 f 30 3/8/2013 12 37 PM
if(FAILED(result)){
return false;}
// Create the vertex input layout description.// This setup needs to match the VertexType stucture in the ModelClass and in the shader.polygonLayout[0].SemanticName ="POSITION";polygonLayout[0].SemanticIndex =0;polygonLayout[0].Format =DXGI_FORMAT_R32G32B32_FLOAT;polygonLayout[0].InputSlot =0;polygonLayout[0].AlignedByteOffset =0;polygonLayout[0].InputSlotClass =D3D11_INPUT_PER_VERTEX_DATA;polygonLayout[0].InstanceDataStepRate =0;
polygonLayout[1].SemanticName ="TEXCOORD";polygonLayout[1].SemanticIndex =0;polygonLayout[1].Format =DXGI_FORMAT_R32G32_FLOAT;polygonLayout[1].InputSlot =0;polygonLayout[1].AlignedByteOffset =D3D11_APPEND_ALIGNED_ELEMENT;polygonLayout[1].InputSlotClass =D3D11_INPUT_PER_VERTEX_DATA;polygonLayout[1].InstanceDataStepRate =0;
// Get a count of the elements in the layout.numElements =sizeof(polygonLayout) / sizeof(polygonLayout[0]);
// Create the vertex input layout.result =device->CreateInputLayout(polygonLayout, numElements, vertexShaderBuffer->GetBufferPointer(),
vertexShaderBuffer->GetBufferSize(), &m_layout);
if(FAILED(result)){return false;
Tutorial 17: Multitexturing and Texture Arrays http://www.rastertek.com/dx11tut17.html

7/14/2019 RasterTek: Direct3D introduction
http://slidepdf.com/reader/full/rastertek-direct3d-introduction 271/709
return false;}
// Release the vertex shader buffer and pixel shader buffer since they are no longer needed.vertexShaderBuffer->Release();vertexShaderBuffer =0;
pixelShaderBuffer->Release();pixelShaderBuffer =0;
// Setup the description of the matrix dynamic constant buffer that is in the vertex shader.matrixBufferDesc.Usage =D3D11_USAGE_DYNAMIC;matrixBufferDesc.ByteWidth =sizeof(MatrixBufferType);matrixBufferDesc.BindFlags =D3D11_BIND_CONSTANT_BUFFER;
11 f 30 3/8/2013 12 37 PM
matrixBufferDesc.CPUAccessFlags =D3D11_CPU_ACCESS_WRITE;matrixBufferDesc.MiscFlags =0;matrixBufferDesc.StructureByteStride =0;
// Create the matrix constant buffer pointer so we can access the vertex shader constant buffer from within this class.result =device->CreateBuffer(&matrixBufferDesc, NULL, &m_matrixBuffer);if(FAILED(result)){
return false;}
// Create a texture sampler state description.samplerDesc.Filter =D3D11_FILTER_MIN_MAG_MIP_LINEAR;samplerDesc.AddressU =D3D11_TEXTURE_ADDRESS_WRAP;samplerDesc.AddressV =D3D11_TEXTURE_ADDRESS_WRAP;samplerDesc.AddressW =D3D11_TEXTURE_ADDRESS_WRAP;samplerDesc.MipLODBias =0.0f;samplerDesc.MaxAnisotropy =1;samplerDesc.ComparisonFunc =D3D11_COMPARISON_ALWAYS;samplerDesc.BorderColor[0] =0;samplerDesc.BorderColor[1] =0;samplerDesc.BorderColor[2] =0;samplerDesc.BorderColor[3] =0;samplerDesc.MinLOD =0;samplerDesc.MaxLOD =D3D11_FLOAT32_MAX;
// Create the texture sampler state.result =device->CreateSamplerState(&samplerDesc, &m_sampleState);if(FAILED(result)){
return false;}
Tutorial 17: Multitexturing and Texture Arrays http://www.rastertek.com/dx11tut17.html

7/14/2019 RasterTek: Direct3D introduction
http://slidepdf.com/reader/full/rastertek-direct3d-introduction 272/709
}
return true;}
ShutdownShader releases all the interfaces that were setup in the InitializeShader function.
void MultiTextureShaderClass::ShutdownShader(){// Release the sampler state.if(m_sampleState){
m_sampleState->Release();m_sampleState =0;
12 f 30 3/8/2013 12 37 PM
}
// Release the matrix constant buffer.if(m_matrixBuffer){
m_matrixBuffer->Release();m_matrixBuffer =0;
}
// Release the layout.if(m_layout){
m_layout->Release();m_layout =0;
}
// Release the pixel shader.if(m_pixelShader){
m_pixelShader->Release();m_pixelShader =0;
}
// Release the vertex shader.if(m_vertexShader){
m_vertexShader->Release();m_vertexShader =0;
}
return;}
Tutorial 17: Multitexturing and Texture Arrays http://www.rastertek.com/dx11tut17.html

7/14/2019 RasterTek: Direct3D introduction
http://slidepdf.com/reader/full/rastertek-direct3d-introduction 273/709
The OutputShaderErrorMessage function writes out an error to a file if there is an issue compiling the vertex or pixel shader HLSL files.
void MultiTextureShaderClass::OutputShaderErrorMessage(ID3D10Blob* errorMessage, HWND hwnd, WCHAR* shaderFilename){
char* compileErrors;
unsigned long bufferSize, i;ofstream fout;
// Get a pointer to the error message text buffer.compileErrors =(char*)(errorMessage->GetBufferPointer());
13 f 30 3/8/2013 12 37 PM
// Get the length of the message.bufferSize =errorMessage->GetBufferSize();
// Open a file to write the error message to.fout.open("shader-error.txt");
// Write out the error message.for(i=0; i<bufferSize; i++){
fout <<compileErrors[i];}
// Close the file.fout.close();
// Release the error message.errorMessage->Release();errorMessage =0;
// Pop a message up on the screen to notify the user to check the text file for compile errors.MessageBox(hwnd, L"Error compiling shader. Check shader-error.txt for message.", shaderFilename, MB_OK);
return;}
SetShaderParameters sets the matrices and texture array in the shader before rendering.
bool MultiTextureShaderClass::SetShaderParameters(ID3D11DeviceContext* deviceContext, D3DXMATRIX worldMatrix,D3DXMATRIX viewMatrix, D3DXMATRIX projectionMatrix,ID3D11ShaderResourceView** textureArray)
{HRESULT result;
Tutorial 17: Multitexturing and Texture Arrays http://www.rastertek.com/dx11tut17.html

7/14/2019 RasterTek: Direct3D introduction
http://slidepdf.com/reader/full/rastertek-direct3d-introduction 274/709
D3D11_MAPPED_SUBRESOURCE mappedResource;MatrixBufferType* dataPtr;unsigned int bufferNumber;
// Transpose the matrices to prepare them for the shader.D3DXMatrixTranspose(&worldMatrix, &worldMatrix);D3DXMatrixTranspose(&viewMatrix, &viewMatrix);D3DXMatrixTranspose(&projectionMatrix, &projectionMatrix);
// Lock the matrix constant buffer so it can be written to.result =deviceContext->Map(m_matrixBuffer, 0, D3D11_MAP_WRITE_DISCARD, 0, &mappedResource);if(FAILED(result))
14 f 30 3/8/2013 12 37 PM
{return false;
}
// Get a pointer to the data in the constant buffer.dataPtr =(MatrixBufferType*)mappedResource.pData;
// Copy the matrices into the constant buffer.dataPtr->world =worldMatrix;dataPtr->view =viewMatrix;dataPtr->projection =projectionMatrix;
// Unlock the matrix constant buffer.deviceContext->Unmap(m_matrixBuffer, 0);
// Set the position of the matrix constant buffer in the vertex shader.bufferNumber =0;
// Now set the matrix constant buffer in the vertex shader with the updated values.deviceContext->VSSetConstantBuffers(bufferNumber, 1, &m_matrixBuffer);
Here is where the texture array is set before rendering. The PSSetShaderResources function is used to set the texture array. The first parameter is where to start inthe array. The second parameter is how many textures are in the array that is being passed in. And the third parameter is a pointer to the texture array.
// Set shader texture array resource in the pixel shader.deviceContext->PSSetShaderResources(0, 2, textureArray);
return true;}
The RenderShader function sets the layout, shaders, and sampler. It then draws the model using the shader.
id M ltiT t Sh d Cl R d Sh d (ID3D11D i C t t* d i C t t i t i d C t)
Tutorial 17: Multitexturing and Texture Arrays http://www.rastertek.com/dx11tut17.html

7/14/2019 RasterTek: Direct3D introduction
http://slidepdf.com/reader/full/rastertek-direct3d-introduction 275/709
void MultiTextureShaderClass::RenderShader(ID3D11DeviceContext* deviceContext, int indexCount){
// Set the vertex input layout.deviceContext->IASetInputLayout(m_layout);
// Set the vertex and pixel shaders that will be used to render this triangle.deviceContext->VSSetShader(m_vertexShader, NULL, 0);deviceContext->PSSetShader(m_pixelShader, NULL, 0);
// Set the sampler state in the pixel shader.deviceContext->PSSetSamplers(0, 1, &m_sampleState);
// Render the triangles.
15 f 30 3/8/2013 12 37 PM
deviceContext->DrawIndexed(indexCount, 0, 0);
return;
}
Texturearrayclass.h
The TextureArrayClass replaces the TextureClass that was used before. Instead of having just a single texture it can now have multiple textures and give callingobjects access to those textures. For this tutorial it just handles two textures but it can easily be expanded.
////////////////////////////////////////////////////////////////////////////////// Filename: texturearrayclass.h////////////////////////////////////////////////////////////////////////////////#ifndef _TEXTUREARRAYCLASS_H_ #define _TEXTUREARRAYCLASS_H_
//////////////
// INCLUDES ////////////////#include <d3d11.h>#include <d3dx11tex.h>
////////////////////////////////////////////////////////////////////////////////// Class name: TextureArrayClass////////////////////////////////////////////////////////////////////////////////
class TextureArrayClass{public:
Tutorial 17: Multitexturing and Texture Arrays http://www.rastertek.com/dx11tut17.html
7/14/2019 RasterTek: Direct3D introduction
http://slidepdf.com/reader/full/rastertek-direct3d-introduction 276/709
TextureArrayClass(); TextureArrayClass(const TextureArrayClass&);~TextureArrayClass();
bool Initialize(ID3D11Device*, WCHAR*, WCHAR*);void Shutdown();
ID3D11ShaderResourceView** GetTextureArray();
private:
This is the two element texture array private variable.
16 of 30 3/8/2013 12:37 PM
ID3D11ShaderResourceView* m_textures[2];};
#endif
Texturearrayclass.cpp
////////////////////////////////////////////////////////////////////////////////// Filename: texturearrayclass.cpp
////////////////////////////////////////////////////////////////////////////////#include "texturearrayclass.h"
The class constructor initializes the texture array elements to null.
TextureArrayClass::TextureArrayClass(){
m_textures[0] =0;m_textures[1] =0;
}
TextureArrayClass::TextureArrayClass(const TextureArrayClass& other){}
TextureArrayClass::~TextureArrayClass()
{}
I iti li t k i th t t t fil d t t t t i th t t f th fil
Tutorial 17: Multitexturing and Texture Arrays http://www.rastertek.com/dx11tut17.html
7/14/2019 RasterTek: Direct3D introduction
http://slidepdf.com/reader/full/rastertek-direct3d-introduction 277/709
Initialize takes in the two texture file names and creates two texture resources in the texture array from those files.
bool TextureArrayClass::Initialize(ID3D11Device* device, WCHAR* filename1, WCHAR* filename2){
HRESULT result;
// Load the first texture in.result =D3DX11CreateShaderResourceViewFromFile(device, filename1, NULL, NULL, &m_textures[0], NULL);if(FAILED(result)){
return false;
17 of 30 3/8/2013 12:37 PM
}
// Load the second texture in.
result =D3DX11CreateShaderResourceViewFromFile(device, filename2, NULL, NULL, &m_textures[1], NULL);if(FAILED(result)){
return false;}
return true;}
The Shutdown function releases each element in the texture array.
void TextureArrayClass::Shutdown(){
// Release the texture resources.if(m_textures[0]){
m_textures[0]->Release();m_textures[0] =0;
}
if(m_textures[1]){
m_textures[1]->Release();m_textures[1] =0;
}
return;}
GetTextureArray returns a pointer to the texture array so calling objects can have access to the textures in the texture array
Tutorial 17: Multitexturing and Texture Arrays http://www.rastertek.com/dx11tut17.html

7/14/2019 RasterTek: Direct3D introduction
http://slidepdf.com/reader/full/rastertek-direct3d-introduction 278/709
GetTextureArray returns a pointer to the texture array so calling objects can have access to the textures in the texture array.
ID3D11ShaderResourceView** TextureArrayClass::GetTextureArray(){
return m_textures;}
Modelclass.h
ModelClass has been modified to now use texture arrays.
18 of 30 3/8/2013 12:37 PM
////////////////////////////////////////////////////////////////////////////////// Filename: modelclass.h////////////////////////////////////////////////////////////////////////////////
#ifndef _MODELCLASS_H_ #define _MODELCLASS_H_
//////////////// INCLUDES ////////////////#include <d3d11.h>#include <d3dx10math.h>
#include <fstream>using namespace std;
The TextureArrayClass header file is included instead of the previous TextureClass header file.
///////////////////////// MY CLASS INCLUDES /////////////////////////#include "texturearrayclass.h"
////////////////////////////////////////////////////////////////////////////////// Class name: ModelClass////////////////////////////////////////////////////////////////////////////////class ModelClass{private:
struct VertexType{
D3DXVECTOR3 position;D3DXVECTOR2 texture;
Tutorial 17: Multitexturing and Texture Arrays http://www.rastertek.com/dx11tut17.html

7/14/2019 RasterTek: Direct3D introduction
http://slidepdf.com/reader/full/rastertek-direct3d-introduction 279/709
D3DXVECTOR2 texture;};
struct ModelType{
float x, y, z;float tu, tv;float nx, ny, nz;
};
public:ModelClass();ModelClass(const ModelClass&);
19 of 30 3/8/2013 12:37 PM
~ModelClass();
bool Initialize(ID3D11Device*, char*, WCHAR*, WCHAR*);
void Shutdown();void Render(ID3D11DeviceContext*);
int GetIndexCount();ID3D11ShaderResourceView** GetTextureArray();
private:bool InitializeBuffers(ID3D11Device*);void ShutdownBuffers();
void RenderBuffers(ID3D11DeviceContext*);
bool LoadTextures(ID3D11Device*, WCHAR*, WCHAR*);void ReleaseTextures();
bool LoadModel(char*);void ReleaseModel();
private:
ID3D11Buffer *m_vertexBuffer, *m_indexBuffer;int m_vertexCount, m_indexCount;ModelType* m_model;
We now have a TextureArrayClass variable instead of a TextureClass variable.
TextureArrayClass* m_TextureArray;};
#endif
Tutorial 17: Multitexturing and Texture Arrays http://www.rastertek.com/dx11tut17.html

7/14/2019 RasterTek: Direct3D introduction
http://slidepdf.com/reader/full/rastertek-direct3d-introduction 280/709
Modelclass.cpp
I will just cover the functions that have changed since the previous tutorials.
////////////////////////////////////////////////////////////////////////////////// Filename: modelclass.cpp////////////////////////////////////////////////////////////////////////////////#include "modelclass.h"
20 of 30 3/8/2013 12:37 PM
ModelClass::ModelClass(){
m_vertexBuffer =0;
m_indexBuffer =0;m_model =0;
We initialize the new TextureArray variable in the class constructor.
m_TextureArray =0;}
bool ModelClass::Initialize(ID3D11Device* device, char* modelFilename, WCHAR* textureFilename1, WCHAR* textureFilename2){
bool result;
// Load in the model data,result =LoadModel(modelFilename);if(!result){
return false;}
// Initialize the vertex and index buffers.result =InitializeBuffers(device);if(!result){
return false;}
We call the LoadTextures function which takes in multiple file names for textures that will be loaded into the texture array and rendered as a blended result on thismodel.
Tutorial 17: Multitexturing and Texture Arrays http://www.rastertek.com/dx11tut17.html

7/14/2019 RasterTek: Direct3D introduction
http://slidepdf.com/reader/full/rastertek-direct3d-introduction 281/709
// Load the textures for this model.result =LoadTextures(device, textureFilename1, textureFilename2);if(!result){
return false;}
return true;}
21 of 30 3/8/2013 12:37 PM
void ModelClass::Shutdown(){
ReleaseTextures is called to release the texture array in the Shutdown function.
// Release the model textures.ReleaseTextures();
// Shutdown the vertex and index buffers.ShutdownBuffers();
// Release the model data.
ReleaseModel();
return;}
We have a new function called GetTextureArray which gives calling objects access to the texture array that is used for rendering this model.
ID3D11ShaderResourceView** ModelClass::GetTextureArray(){
return m_TextureArray->GetTextureArray();}
LoadTextures has been changed to create a TextureArrayClass object and then initialize it by loading in the two textures that are given as input to this function.
bool ModelClass::LoadTextures(ID3D11Device* device, WCHAR* filename1, WCHAR* filename2){
bool result;
// Create the texture array object.m_TextureArray =new TextureArrayClass;
Tutorial 17: Multitexturing and Texture Arrays http://www.rastertek.com/dx11tut17.html

7/14/2019 RasterTek: Direct3D introduction
http://slidepdf.com/reader/full/rastertek-direct3d-introduction 282/709
if(!m_TextureArray){
return false;}
// Initialize the texture array object.result =m_TextureArray->Initialize(device, filename1, filename2);if(!result){
return false;}
22 of 30 3/8/2013 12:37 PM
return true;}
The ReleaseTextures function releases the TextureArrayClass object.
void ModelClass::ReleaseTextures(){
// Release the texture array object.if(m_TextureArray){
m_TextureArray->Shutdown();delete m_TextureArray;
m_TextureArray =0;}
return;}
Graphicsclass.h
////////////////////////////////////////////////////////////////////////////////// Filename: graphicsclass.h////////////////////////////////////////////////////////////////////////////////#ifndef _GRAPHICSCLASS_H_ #define _GRAPHICSCLASS_H_
/////////////// GLOBALS ///////////////const bool FULL_SCREEN =true;
Tutorial 17: Multitexturing and Texture Arrays http://www.rastertek.com/dx11tut17.html
7/14/2019 RasterTek: Direct3D introduction
http://slidepdf.com/reader/full/rastertek-direct3d-introduction 283/709
const bool VSYNC_ENABLED =true;const float SCREEN_DEPTH =1000.0f;const float SCREEN_NEAR =0.1f;
///////////////////////// MY CLASS INCLUDES /////////////////////////#include "d3dclass.h"#include "cameraclass.h"#include "modelclass.h"
23 of 30 3/8/2013 12:37 PM
The header for the MultiTextureShaderClass is now included in the GraphicsClass.
#include "multitextureshaderclass.h"
////////////////////////////////////////////////////////////////////////////////// Class name: GraphicsClass////////////////////////////////////////////////////////////////////////////////class GraphicsClass{public:
GraphicsClass();
GraphicsClass(const GraphicsClass&);~GraphicsClass();
bool Initialize(int, int, HWND);void Shutdown();bool Frame();bool Render();
private:
D3DClass* m_D3D;CameraClass* m_Camera;ModelClass* m_Model;
Here we create the new MultiTextureShaderClass object.
MultiTextureShaderClass* m_MultiTextureShader;};
#endif
Tutorial 17: Multitexturing and Texture Arrays http://www.rastertek.com/dx11tut17.html

7/14/2019 RasterTek: Direct3D introduction
http://slidepdf.com/reader/full/rastertek-direct3d-introduction 284/709
Graphicsclass.cpp
We will cover just the functions that have changed since the previous tutorials.
////////////////////////////////////////////////////////////////////////////////// Filename: graphicsclass.cpp////////////////////////////////////////////////////////////////////////////////#include "graphicsclass.h"
24 of 30 3/8/2013 12:37 PM
GraphicsClass::GraphicsClass(){
m_D3D =0;
m_Camera =0;m_Model =0;
We initialize the new multitexture shader object to null in the class constructor.
m_MultiTextureShader =0;}
bool GraphicsClass::Initialize(int screenWidth, int screenHeight, HWND hwnd){
bool result;D3DXMATRIX baseViewMatrix;
// Create the Direct3D object.m_D3D =new D3DClass;if(!m_D3D)
{return false;
}
// Initialize the Direct3D object.result =m_D3D->Initialize(screenWidth, screenHeight, VSYNC_ENABLED, hwnd, FULL_SCREEN, SCREEN_DEPTH, SCREEN_NEAR);if(!result){
MessageBox(hwnd, L"Could not initialize Direct3D", L"Error", MB_OK);
return false;}
// Create the camera object
Tutorial 17: Multitexturing and Texture Arrays http://www.rastertek.com/dx11tut17.html

7/14/2019 RasterTek: Direct3D introduction
http://slidepdf.com/reader/full/rastertek-direct3d-introduction 285/709
// Create the camera object.m_Camera =new CameraClass;if(!m_Camera){
return false;}
// Initialize a base view matrix with the camera for 2D user interface rendering.m_Camera->SetPosition(0.0f, 0.0f, -1.0f);m_Camera->Render();m_Camera->GetViewMatrix(baseViewMatrix);
25 of 30 3/8/2013 12:37 PM
// Create the model object.m_Model =new ModelClass;if(!m_Model)
{return false;
}
The ModelClass object is now initialized differently. For this tutorial we load in the square.txt model as the effect we want to display works best on just a plainsquare. We also now load in two textures for the texture array instead of just a single texture like we did in previous tutorials.
// Initialize the model object.result =m_Model->Initialize(m_D3D->GetDevice(), "../Engine/data/square.txt", L"../Engine/data/stone01.dds",
L"../Engine/data/dirt01.dds");if(!result){
MessageBox(hwnd, L"Could not initialize the model object.", L"Error", MB_OK);return false;
}
Here we create and initialize the new multitexture shader object.
// Create the multitexture shader object.m_MultiTextureShader =new MultiTextureShaderClass;if(!m_MultiTextureShader){
return false;}
// Initialize the multitexture shader object.result =m_MultiTextureShader->Initialize(m_D3D->GetDevice(), hwnd);
if(!result){
MessageBox(hwnd, L"Could not initialize the multitexture shader object.", L"Error", MB_OK);return false;
Tutorial 17: Multitexturing and Texture Arrays http://www.rastertek.com/dx11tut17.html

7/14/2019 RasterTek: Direct3D introduction
http://slidepdf.com/reader/full/rastertek-direct3d-introduction 286/709
return false;}
return true;}
void GraphicsClass::Shutdown(){
We release the multitexture shader in the Shutdown function.
26 of 30 3/8/2013 12:37 PM
// Release the multitexture shader object.if(m_MultiTextureShader){
m_MultiTextureShader->Shutdown();delete m_MultiTextureShader;m_MultiTextureShader =0;
}
// Release the model object.if(m_Model){
m_Model->Shutdown();
delete m_Model;m_Model =0;
}
// Release the camera object.if(m_Camera){
delete m_Camera;m_Camera =0;
}
// Release the D3D object.if(m_D3D){
m_D3D->Shutdown();delete m_D3D;m_D3D =0;
}
return;}
Tutorial 17: Multitexturing and Texture Arrays http://www.rastertek.com/dx11tut17.html

7/14/2019 RasterTek: Direct3D introduction
http://slidepdf.com/reader/full/rastertek-direct3d-introduction 287/709
bool GraphicsClass::Frame(){
We set the position of the camera a bit closer to see the blending effect more clearly.
// Set the position of the camera.m_Camera->SetPosition(0.0f, 0.0f, -5.0f);
return true;}
27 of 30 3/8/2013 12:37 PM
bool GraphicsClass::Render()
{D3DXMATRIX worldMatrix, viewMatrix, projectionMatrix, orthoMatrix;
// Clear the buffers to begin the scene.m_D3D->BeginScene(0.0f, 0.0f, 0.0f, 1.0f);
// Generate the view matrix based on the camera's position.m_Camera->Render();
// Get the world, view, projection, and ortho matrices from the camera and D3D objects.m_D3D->GetWorldMatrix(worldMatrix);m_Camera->GetViewMatrix(viewMatrix);m_D3D->GetProjectionMatrix(projectionMatrix);m_D3D->GetOrthoMatrix(orthoMatrix);
// Put the model vertex and index buffers on the graphics pipeline to prepare them for drawing.m_Model->Render(m_D3D->GetDeviceContext());
We use the new multitexture shader to render the model. Notice that we send in the texture array from the ModelClass as input to the shader.
// Render the model using the multitexture shader.m_MultiTextureShader->Render(m_D3D->GetDeviceContext(), m_Model->GetIndexCount(), worldMatrix, viewMatrix, projectionMatrix,
m_Model->GetTextureArray());
// Present the rendered scene to the screen.m_D3D->EndScene();
return true;}
Tutorial 17: Multitexturing and Texture Arrays http://www.rastertek.com/dx11tut17.html
7/14/2019 RasterTek: Direct3D introduction
http://slidepdf.com/reader/full/rastertek-direct3d-introduction 288/709
Summary
We now have a shader that will combine two textures evenly and apply gamma correction. We also now know how to use texture arrays for improved graphicsperformance.
28 of 30 3/8/2013 12:37 PM
To Do Exercises
1. Recompile the code and run the program to see the resulting image. Press escape to quit.
2. Replace the two textures with two new ones to see the results.
Tutorial 17: Multitexturing and Texture Arrays http://www.rastertek.com/dx11tut17.html

7/14/2019 RasterTek: Direct3D introduction
http://slidepdf.com/reader/full/rastertek-direct3d-introduction 289/709
Source Code
Visual Studio 2008 Project: dx11tut17.zip
Source Only: dx11src17.zip
Executable Only:dx11exe17.zip
29 of 30 3/8/2013 12:37 PM
Back to Tutorial Index
Tutorial 17: Multitexturing and Texture Arrays http://www.rastertek.com/dx11tut17.html

7/14/2019 RasterTek: Direct3D introduction
http://slidepdf.com/reader/full/rastertek-direct3d-introduction 290/709
30 of 30 3/8/2013 12:37 PM
Tutor ial 18: Light Maps
Light mapping in DirectX 11 is the process of using a secondary texture or data file to create a fast look up table to create unique lighting effects that require verylittle processing. Because we use a secondary source as the basis for our lighting we can remove any other light calculations from our application. This can gain usincredible speed.
As we covered multitexturing in the last tutorial we only need to change that code slightly to implement light mapping in this tutorial.
With light mapping we require two textures. The first texture is the base color texture. The one we will use in this tutorial is the following:
The second texture we need is the light map. Usually this is just a black and white texture with white representing the intensity of the light at each pixel. I created a
spotlight style light map that we will use in this tutorial:
Tutorial 18: Light Maps http://www.rastertek.com/dx11tut18.html
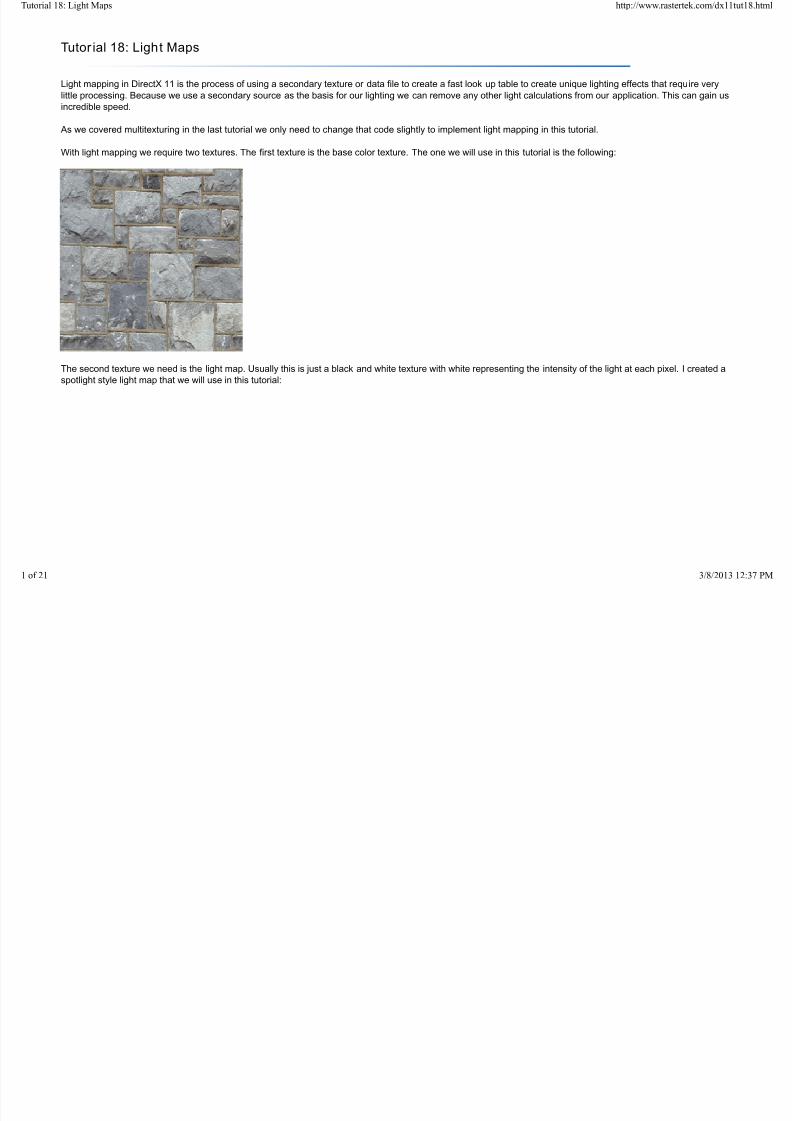
7/14/2019 RasterTek: Direct3D introduction
http://slidepdf.com/reader/full/rastertek-direct3d-introduction 291/709
1 of 21 3/8/2013 12:37 PM
Once we have our color texture and our light map we can combine them in the pixel shader to produce the light mapped texture. The shader is very simple as we just multiply the two pixels together which will produce the following output:
Tutorial 18: Light Maps http://www.rastertek.com/dx11tut18.html

7/14/2019 RasterTek: Direct3D introduction
http://slidepdf.com/reader/full/rastertek-direct3d-introduction 292/709
Lightmap.vs
The light map vertex shader is the same as the multitexture vertex shader from the previous tutorial. The only thing that has changed is the name.
////////////////////////////////////////////////////////////////////////////////
2 of 21 3/8/2013 12:37 PM
// Filename: lightmap.vs////////////////////////////////////////////////////////////////////////////////
/////////////// GLOBALS ///////////////cbuffer MatrixBuffer{
matrix worldMatrix;matrix viewMatrix;matrix projectionMatrix;
};
//////////////// TYPEDEFS ////////////////struct VertexInputType{
float4 position : POSITION;
float2 tex : TEXCOORD0;};
struct PixelInputType{
float4 position : SV_POSITION;float2 tex : TEXCOORD0;
};
////////////////////////////////////////////////////////////////////////////////// Vertex Shader////////////////////////////////////////////////////////////////////////////////PixelInputType LightMapVertexShader(VertexInputType input)
Tutorial 18: Light Maps http://www.rastertek.com/dx11tut18.html

7/14/2019 RasterTek: Direct3D introduction
http://slidepdf.com/reader/full/rastertek-direct3d-introduction 293/709
PixelInputType LightMapVertexShader(VertexInputType input){
PixelInputType output;
// Change the position vector to be 4 units for proper matrix calculations.input.position.w =1.0f;
// Calculate the position of the vertex against the world, view, and projection matrices.output.position =mul(input.position, worldMatrix);output.position =mul(output.position, viewMatrix);
3 of 21 3/8/2013 12:37 PM
output.position =mul(output.position, projectionMatrix);
// Store the texture coordinates for the pixel shader.
output.tex =input.tex;
return output;}
Lightmap.ps
////////////////////////////////////////////////////////////////////////////////// Filename: lightmap.ps////////////////////////////////////////////////////////////////////////////////
/////////////// GLOBALS ///////////////
Texture2D shaderTextures[2];
SamplerState SampleType;
//////////////// TYPEDEFS ////////////////struct PixelInputType{
float4 position : SV_POSITION;
float2 tex : TEXCOORD0;};
The light map pixel shader is very simple. It multiplies the color texture pixel and the light map texture value to get the desired output. This is not much different fromjusta regular multitexture blend other than there is no need to correct for gamma
Tutorial 18: Light Maps http://www.rastertek.com/dx11tut18.html

7/14/2019 RasterTek: Direct3D introduction
http://slidepdf.com/reader/full/rastertek-direct3d-introduction 294/709
just a regular multitexture blend other than there is no need to correct for gamma.
////////////////////////////////////////////////////////////////////////////////// Pixel Shader////////////////////////////////////////////////////////////////////////////////float4 LightMapPixelShader(PixelInputType input) : SV_TARGET{
float4 color;float4 lightColor;float4 finalColor;
4 of 21 3/8/2013 12:37 PM
// Get the pixel color from the color texture.
color =shaderTextures[0].Sample(SampleType, input.tex);
// Get the pixel color from the light map.lightColor =shaderTextures[1].Sample(SampleType, input.tex);
// Blend the two pixels together.finalColor =color * lightColor;
return finalColor;
}
Lightmapshaderclass.h
The LightMapShaderClass is just the MultiTextureShaderClass from the previous that has now been updated for light mapping.
////////////////////////////////////////////////////////////////////////////////// Filename: lightmapshaderclass.h////////////////////////////////////////////////////////////////////////////////#ifndef _LIGHTMAPSHADERCLASS_H_ #define _LIGHTMAPSHADERCLASS_H_
//////////////// INCLUDES //
//////////////#include <d3d11.h>#include <d3dx10math.h>#include <d3dx11async.h>#include<fstream>
Tutorial 18: Light Maps http://www.rastertek.com/dx11tut18.html

7/14/2019 RasterTek: Direct3D introduction
http://slidepdf.com/reader/full/rastertek-direct3d-introduction 295/709
#include <fstream>using namespace std;
////////////////////////////////////////////////////////////////////////////////
// Class name: LightMapShaderClass////////////////////////////////////////////////////////////////////////////////class LightMapShaderClass{private:
5 of 21 3/8/2013 12:37 PM
struct MatrixBufferType{
D3DXMATRIX world;
D3DXMATRIX view;D3DXMATRIX projection;
};
public:LightMapShaderClass();LightMapShaderClass(const LightMapShaderClass&);~LightMapShaderClass();
bool Initialize(ID3D11Device*, HWND);void Shutdown();bool Render(ID3D11DeviceContext*, int, D3DXMATRIX, D3DXMATRIX, D3DXMATRIX, ID3D11ShaderResourceView**);
private:bool InitializeShader(ID3D11Device*, HWND, WCHAR*, WCHAR*);void ShutdownShader();void OutputShaderErrorMessage(ID3D10Blob*, HWND, WCHAR*);
bool SetShaderParameters(ID3D11DeviceContext*, D3DXMATRIX, D3DXMATRIX, D3DXMATRIX, ID3D11ShaderResourceView**);void RenderShader(ID3D11DeviceContext*, int);
private:ID3D11VertexShader* m_vertexShader;ID3D11PixelShader* m_pixelShader;ID3D11InputLayout* m_layout;ID3D11Buffer* m_matrixBuffer;ID3D11SamplerState* m_sampleState;
};
#endif
Tutorial 18: Light Maps http://www.rastertek.com/dx11tut18.html

7/14/2019 RasterTek: Direct3D introduction
http://slidepdf.com/reader/full/rastertek-direct3d-introduction 296/709
Lightmapshaderclass.cpp
I will just go over the changes since the previous tutorial. Other than the name of the functions there are only a couple changes.
////////////////////////////////////////////////////////////////////////////////// Filename: lightmapshaderclass.cpp////////////////////////////////////////////////////////////////////////////////#include "lightmapshaderclass.h"
6 of 21 3/8/2013 12:37 PM
LightMapShaderClass::LightMapShaderClass()
{m_vertexShader =0;m_pixelShader =0;m_layout =0;m_matrixBuffer =0;m_sampleState =0;
}
LightMapShaderClass::LightMapShaderClass(const LightMapShaderClass& other){}
LightMapShaderClass::~LightMapShaderClass(){}
bool LightMapShaderClass::Initialize(ID3D11Device* device, HWND hwnd){
bool result;
We now load in the lightmap.vs and lightmap.ps HLSL shader files.
// Initialize the vertex and pixel shaders.result =InitializeShader(device, hwnd, L"../Engine/lightmap.vs", L"../Engine/lightmap.ps");
if(!result){
return false;}
Tutorial 18: Light Maps http://www.rastertek.com/dx11tut18.html

7/14/2019 RasterTek: Direct3D introduction
http://slidepdf.com/reader/full/rastertek-direct3d-introduction 297/709
return true;}
void LightMapShaderClass::Shutdown(){
// Shutdown the vertex and pixel shaders as well as the related objects.ShutdownShader();
return;
7 of 21 3/8/2013 12:37 PM
}
bool LightMapShaderClass::Render(ID3D11DeviceContext* deviceContext, int indexCount, D3DXMATRIX worldMatrix,D3DXMATRIX viewMatrix, D3DXMATRIX projectionMatrix, ID3D11ShaderResourceView** textureArray)
{bool result;
// Set the shader parameters that it will use for rendering.result =SetShaderParameters(deviceContext, worldMatrix, viewMatrix, projectionMatrix, textureArray);if(!result)
{return false;
}
// Now render the prepared buffers with the shader.RenderShader(deviceContext, indexCount);
return true;}
bool LightMapShaderClass::InitializeShader(ID3D11Device* device, HWND hwnd, WCHAR* vsFilename, WCHAR* psFilename){
HRESULT result;ID3D10Blob* errorMessage;ID3D10Blob* vertexShaderBuffer;ID3D10Blob* pixelShaderBuffer;D3D11_INPUT_ELEMENT_DESC polygonLayout[2];
unsigned int numElements;D3D11_BUFFER_DESC matrixBufferDesc;D3D11_SAMPLER_DESC samplerDesc;
// I iti li th i t thi f ti ill t ll
Tutorial 18: Light Maps http://www.rastertek.com/dx11tut18.html

7/14/2019 RasterTek: Direct3D introduction
http://slidepdf.com/reader/full/rastertek-direct3d-introduction 298/709
// Initialize the pointers this function will use to null.errorMessage =0;vertexShaderBuffer =0;pixelShaderBuffer =0;
The light map vertex shader is loaded here.
// Compile the vertex shader code.result =D3DX11CompileFromFile(vsFilename, NULL, NULL, "LightMapVertexShader", "vs_5_0", D3D10_SHADER_ENABLE_STRICTNESS,
0, NULL, &vertexShaderBuffer, &errorMessage, NULL);
8 of 21 3/8/2013 12:37 PM
if(FAILED(result)){
// If the shader failed to compile it should have writen something to the error message.
if(errorMessage){
OutputShaderErrorMessage(errorMessage, hwnd, vsFilename);}// If there was nothing in the error message then it simply could not find the shader file itself.else{
MessageBox(hwnd, vsFilename, L"Missing Shader File", MB_OK);}
return false;}
The light map pixel shader is loaded here.
// Compile the pixel shader code.result =D3DX11CompileFromFile(psFilename, NULL, NULL, "LightMapPixelShader", "ps_5_0", D3D10_SHADER_ENABLE_STRICTNESS,
0, NULL, &pixelShaderBuffer, &errorMessage, NULL);
if(FAILED(result)){
// If the shader failed to compile it should have writen something to the error message.if(errorMessage){
OutputShaderErrorMessage(errorMessage, hwnd, psFilename);}// If there was nothing in the error message then it simply could not find the file itself.else
{MessageBox(hwnd, psFilename, L"Missing Shader File", MB_OK);
}
return false;}
Tutorial 18: Light Maps http://www.rastertek.com/dx11tut18.html

7/14/2019 RasterTek: Direct3D introduction
http://slidepdf.com/reader/full/rastertek-direct3d-introduction 299/709
}
// Create the vertex shader from the buffer.result =device->CreateVertexShader(vertexShaderBuffer->GetBufferPointer(), vertexShaderBuffer->GetBufferSize(), NULL,
&m_vertexShader);if(FAILED(result)){
return false;}
9 of 21 3/8/2013 12:37 PM
// Create the vertex shader from the buffer.result =device->CreatePixelShader(pixelShaderBuffer->GetBufferPointer(), pixelShaderBuffer->GetBufferSize(), NULL,
&m_pixelShader);
if(FAILED(result)){
return false;}
// Create the vertex input layout description.// This setup needs to match the VertexType stucture in the ModelClass and in the shader.polygonLayout[0].SemanticName ="POSITION";polygonLayout[0].SemanticIndex =0;
polygonLayout[0].Format =DXGI_FORMAT_R32G32B32_FLOAT;polygonLayout[0].InputSlot =0;polygonLayout[0].AlignedByteOffset =0;polygonLayout[0].InputSlotClass =D3D11_INPUT_PER_VERTEX_DATA;polygonLayout[0].InstanceDataStepRate =0;
polygonLayout[1].SemanticName ="TEXCOORD";polygonLayout[1].SemanticIndex =0;polygonLayout[1].Format =DXGI_FORMAT_R32G32_FLOAT;
polygonLayout[1].InputSlot =0;polygonLayout[1].AlignedByteOffset =D3D11_APPEND_ALIGNED_ELEMENT;polygonLayout[1].InputSlotClass =D3D11_INPUT_PER_VERTEX_DATA;polygonLayout[1].InstanceDataStepRate =0;
// Get a count of the elements in the layout.numElements =sizeof(polygonLayout) / sizeof(polygonLayout[0]);
// Create the vertex input layout.
result =device->CreateInputLayout(polygonLayout, numElements, vertexShaderBuffer->GetBufferPointer(),vertexShaderBuffer->GetBufferSize(), &m_layout);
if(FAILED(result)){
return false;}
Tutorial 18: Light Maps http://www.rastertek.com/dx11tut18.html
7/14/2019 RasterTek: Direct3D introduction
http://slidepdf.com/reader/full/rastertek-direct3d-introduction 300/709
}
// Release the vertex shader buffer and pixel shader buffer since they are no longer needed.vertexShaderBuffer->Release();
vertexShaderBuffer =0;
pixelShaderBuffer->Release();pixelShaderBuffer =0;
// Setup the description of the matrix dynamic constant buffer that is in the vertex shader.
10 of 21 3/8/2013 12:37 PM
matrixBufferDesc.Usage =D3D11_USAGE_DYNAMIC;matrixBufferDesc.ByteWidth =sizeof(MatrixBufferType);matrixBufferDesc.BindFlags =D3D11_BIND_CONSTANT_BUFFER;
matrixBufferDesc.CPUAccessFlags =D3D11_CPU_ACCESS_WRITE;matrixBufferDesc.MiscFlags =0;matrixBufferDesc.StructureByteStride =0;
// Create the matrix constant buffer pointer so we can access the vertex shader constant buffer from within this class.result =device->CreateBuffer(&matrixBufferDesc, NULL, &m_matrixBuffer);if(FAILED(result)){
return false;
}
// Create a texture sampler state description.samplerDesc.Filter =D3D11_FILTER_MIN_MAG_MIP_LINEAR;samplerDesc.AddressU =D3D11_TEXTURE_ADDRESS_WRAP;samplerDesc.AddressV =D3D11_TEXTURE_ADDRESS_WRAP;samplerDesc.AddressW =D3D11_TEXTURE_ADDRESS_WRAP;samplerDesc.MipLODBias =0.0f;samplerDesc.MaxAnisotropy =1;
samplerDesc.ComparisonFunc =D3D11_COMPARISON_ALWAYS;samplerDesc.BorderColor[0] =0;samplerDesc.BorderColor[1] =0;samplerDesc.BorderColor[2] =0;samplerDesc.BorderColor[3] =0;samplerDesc.MinLOD =0;samplerDesc.MaxLOD =D3D11_FLOAT32_MAX;
// Create the texture sampler state.
result =device->CreateSamplerState(&samplerDesc, &m_sampleState);if(FAILED(result)){
return false;}
Tutorial 18: Light Maps http://www.rastertek.com/dx11tut18.html

7/14/2019 RasterTek: Direct3D introduction
http://slidepdf.com/reader/full/rastertek-direct3d-introduction 301/709
return true;}
void LightMapShaderClass::ShutdownShader(){
// Release the sampler state.if(m_sampleState){
11 of 21 3/8/2013 12:37 PM
m_sampleState->Release();m_sampleState =0;
}
// Release the matrix constant buffer.if(m_matrixBuffer){
m_matrixBuffer->Release();m_matrixBuffer =0;
}
// Release the layout.
if(m_layout){
m_layout->Release();m_layout =0;
}
// Release the pixel shader.if(m_pixelShader){
m_pixelShader->Release();m_pixelShader =0;
}
// Release the vertex shader.if(m_vertexShader){
m_vertexShader->Release();m_vertexShader =0;
}
return;}
Tutorial 18: Light Maps http://www.rastertek.com/dx11tut18.html

7/14/2019 RasterTek: Direct3D introduction
http://slidepdf.com/reader/full/rastertek-direct3d-introduction 302/709
void LightMapShaderClass::OutputShaderErrorMessage(ID3D10Blob* errorMessage, HWND hwnd, WCHAR* shaderFilename){
char* compileErrors;
unsigned long bufferSize, i;ofstream fout;
// Get a pointer to the error message text buffer.compileErrors =(char*)(errorMessage->GetBufferPointer());
12 of 21 3/8/2013 12:37 PM
// Get the length of the message.bufferSize =errorMessage->GetBufferSize();
// Open a file to write the error message to.fout.open("shader-error.txt");
// Write out the error message.for(i=0; i<bufferSize; i++){
fout <<compileErrors[i];}
// Close the file.fout.close();
// Release the error message.errorMessage->Release();errorMessage =0;
// Pop a message up on the screen to notify the user to check the text file for compile errors.
MessageBox(hwnd, L"Error compiling shader. Check shader-error.txt for message.", shaderFilename, MB_OK);
return;}
bool LightMapShaderClass::SetShaderParameters(ID3D11DeviceContext* deviceContext, D3DXMATRIX worldMatrix,D3DXMATRIX viewMatrix, D3DXMATRIX projectionMatrix,ID3D11ShaderResourceView** textureArray)
{HRESULT result;D3D11_MAPPED_SUBRESOURCE mappedResource;MatrixBufferType* dataPtr;unsigned int bufferNumber;
Tutorial 18: Light Maps http://www.rastertek.com/dx11tut18.html

7/14/2019 RasterTek: Direct3D introduction
http://slidepdf.com/reader/full/rastertek-direct3d-introduction 303/709
// Transpose the matrices to prepare them for the shader.D3DXMatrixTranspose(&worldMatrix, &worldMatrix);
D3DXMatrixTranspose(&viewMatrix, &viewMatrix);D3DXMatrixTranspose(&projectionMatrix, &projectionMatrix);
// Lock the matrix constant buffer so it can be written to.result =deviceContext->Map(m_matrixBuffer, 0, D3D11_MAP_WRITE_DISCARD, 0, &mappedResource);if(FAILED(result))
13 of 21 3/8/2013 12:37 PM
{return false;
}
// Get a pointer to the data in the constant buffer.dataPtr =(MatrixBufferType*)mappedResource.pData;
// Copy the matrices into the constant buffer.dataPtr->world =worldMatrix;dataPtr->view =viewMatrix;dataPtr->projection =projectionMatrix;
// Unlock the matrix constant buffer.deviceContext->Unmap(m_matrixBuffer, 0);
// Set the position of the matrix constant buffer in the vertex shader.bufferNumber =0;
// Now set the matrix constant buffer in the vertex shader with the updated values.deviceContext->VSSetConstantBuffers(bufferNumber, 1, &m_matrixBuffer);
The texture array is set the same as the previous tutorial. However instead of two color textures there is now just one color texture and the second texture in thearray is a light map.
// Set shader texture array resource in the pixel shader.deviceContext->PSSetShaderResources(0, 2, textureArray);
return true;}
void LightMapShaderClass::RenderShader(ID3D11DeviceContext* deviceContext, int indexCount){
// Set the vertex input layout.deviceContext->IASetInputLayout(m_layout);
Tutorial 18: Light Maps http://www.rastertek.com/dx11tut18.html

7/14/2019 RasterTek: Direct3D introduction
http://slidepdf.com/reader/full/rastertek-direct3d-introduction 304/709
// Set the vertex and pixel shaders that will be used to render this triangle.deviceContext->VSSetShader(m_vertexShader, NULL, 0);deviceContext->PSSetShader(m_pixelShader, NULL, 0);
// Set the sampler state in the pixel shader.deviceContext->PSSetSamplers(0, 1, &m_sampleState);
// Render the triangles.deviceContext->DrawIndexed(indexCount, 0, 0);
14 of 21 3/8/2013 12:37 PM
return;}
Graphicsclass.h
////////////////////////////////////////////////////////////////////////////////// Filename: graphicsclass.h////////////////////////////////////////////////////////////////////////////////#ifndef _GRAPHICSCLASS_H_
#define _GRAPHICSCLASS_H_
/////////////// GLOBALS ///////////////const bool FULL_SCREEN =true;const bool VSYNC_ENABLED =true;const float SCREEN_DEPTH =1000.0f;
const float SCREEN_NEAR =0.1f;
///////////////////////// MY CLASS INCLUDES /////////////////////////#include "d3dclass.h"#include "cameraclass.h"#include "modelclass.h"
The header for the LightMapShaderClass is now included in the GraphicsClass header file.
#include "lightmapshaderclass.h"
Tutorial 18: Light Maps http://www.rastertek.com/dx11tut18.html
7/14/2019 RasterTek: Direct3D introduction
http://slidepdf.com/reader/full/rastertek-direct3d-introduction 305/709
////////////////////////////////////////////////////////////////////////////////// Class name: GraphicsClass////////////////////////////////////////////////////////////////////////////////
class GraphicsClass{public:
GraphicsClass();GraphicsClass(const GraphicsClass&);
15 of 21 3/8/2013 12:37 PM
~GraphicsClass();
bool Initialize(int, int, HWND);
void Shutdown();bool Frame();bool Render();
private:D3DClass* m_D3D;CameraClass* m_Camera;ModelClass* m_Model;
We have a new variable for the LightMapShaderClass object.
LightMapShaderClass* m_LightMapShader;};
#endif
Graphicsclass.cpp
I will just cover the functions that have changed since the previous tutorial.
////////////////////////////////////////////////////////////////////////////////// Filename: graphicsclass.cpp////////////////////////////////////////////////////////////////////////////////#include "graphicsclass.h"
GraphicsClass::GraphicsClass(){
m_D3D =0;m_Camera =0;m_Model =0;
Tutorial 18: Light Maps http://www.rastertek.com/dx11tut18.html

7/14/2019 RasterTek: Direct3D introduction
http://slidepdf.com/reader/full/rastertek-direct3d-introduction 306/709
The new LightMapShaderClass object is initialized in the class constructor.
m_LightMapShader =0;}
bool GraphicsClass::Initialize(int screenWidth, int screenHeight, HWND hwnd)
16 of 21 3/8/2013 12:37 PM
{bool result;D3DXMATRIX baseViewMatrix;
// Create the Direct3D object.m_D3D =new D3DClass;if(!m_D3D){
return false;}
// Initialize the Direct3D object.result =m_D3D->Initialize(screenWidth, screenHeight, VSYNC_ENABLED, hwnd, FULL_SCREEN, SCREEN_DEPTH, SCREEN_NEAR);if(!result){
MessageBox(hwnd, L"Could not initialize Direct3D", L"Error", MB_OK);return false;
}
// Create the camera object.
m_Camera =new CameraClass;if(!m_Camera){
return false;}
// Initialize a base view matrix with the camera for 2D user interface rendering.m_Camera->SetPosition(0.0f, 0.0f, -1.0f);m_Camera->Render();
m_Camera->GetViewMatrix(baseViewMatrix);
// Create the model object.m_Model =new ModelClass;if(!m_Model){
return false;
Tutorial 18: Light Maps http://www.rastertek.com/dx11tut18.html

7/14/2019 RasterTek: Direct3D introduction
http://slidepdf.com/reader/full/rastertek-direct3d-introduction 307/709
return false;}
The ModelClass object takes as input the new light01.dds light map texture for the light map shading on this model.
// Initialize the model object.result =m_Model->Initialize(m_D3D->GetDevice(), "../Engine/data/square.txt", L"../Engine/data/stone01.dds",
L"../Engine/data/light01.dds");if(!result)
17 of 21 3/8/2013 12:37 PM
{MessageBox(hwnd, L"Could not initialize the model object.", L"Error", MB_OK);return false;
}
The new LightMapShaderClass object is created and initialized here.
// Create the light map shader object.m_LightMapShader =new LightMapShaderClass;if(!m_LightMapShader){
return false;
}
// Initialize the light map shader object.result =m_LightMapShader->Initialize(m_D3D->GetDevice(), hwnd);if(!result){
MessageBox(hwnd, L"Could not initialize the light map shader object.", L"Error", MB_OK);return false;
}
return true;}
void GraphicsClass::Shutdown(){
The LightMapShaderClass object is released here in the Shutdown function.
// Release the light map shader object.if(m_LightMapShader){
m_LightMapShader->Shutdown();delete m_LightMapShader;m LightMapShader =0;
Tutorial 18: Light Maps http://www.rastertek.com/dx11tut18.html

7/14/2019 RasterTek: Direct3D introduction
http://slidepdf.com/reader/full/rastertek-direct3d-introduction 308/709
m_LightMapShader =0;}
// Release the model object.if(m_Model){
m_Model->Shutdown();delete m_Model;m_Model =0;
18 of 21 3/8/2013 12:37 PM
}
// Release the camera object.
if(m_Camera){delete m_Camera;m_Camera =0;
}
// Release the D3D object.if(m_D3D){
m_D3D->Shutdown();delete m_D3D;m_D3D =0;
}
return;}
bool GraphicsClass::Render(){D3DXMATRIX worldMatrix, viewMatrix, projectionMatrix, orthoMatrix;
// Clear the buffers to begin the scene.m_D3D->BeginScene(0.0f, 0.0f, 0.0f, 1.0f);
// Generate the view matrix based on the camera's position.
m_Camera->Render();
// Get the world, view, projection, and ortho matrices from the camera and D3D objects.m_D3D->GetWorldMatrix(worldMatrix);m_Camera->GetViewMatrix(viewMatrix);m_D3D->GetProjectionMatrix(projectionMatrix);m D3D->GetOrthoMatrix(orthoMatrix);
Tutorial 18: Light Maps http://www.rastertek.com/dx11tut18.html

7/14/2019 RasterTek: Direct3D introduction
http://slidepdf.com/reader/full/rastertek-direct3d-introduction 309/709
m_D3D >GetOrthoMatrix(orthoMatrix);
// Put the model vertex and index buffers on the graphics pipeline to prepare them for drawing.
m_Model->Render(m_D3D->GetDeviceContext());
The model is rendered here using the light map shader.
// Render the model using the light map shader.m_LightMapShader->Render(m_D3D->GetDeviceContext(), m_Model->GetIndexCount(), worldMatrix, viewMatrix, projectionMatrix,
19 of 21 3/8/2013 12:37 PM
m_Model->GetTextureArray());
// Present the rendered scene to the screen.m_D3D->EndScene();
return true;}
Summary
This tutorial isn't much different than the previous blending tutorial but produces a very useful effect that can be very efficient in terms of processing speed.
Tutorial 18: Light Maps http://www.rastertek.com/dx11tut18.html

7/14/2019 RasterTek: Direct3D introduction
http://slidepdf.com/reader/full/rastertek-direct3d-introduction 310/709
To Do Exercises
1. Recompile the code and ensure you get a light mapped texture on the screen.
20 of 21 3/8/2013 12:37 PM
2. Create some of your own light maps and try them out.
3. Multiply the final output pixel in the pixel shader by 2.0. Notice you can create stronger and softer lighting effects by doing this.
Source Code
Visual Studio 2008 Project: dx11tut18.zip
Source Only: dx11src18.zip
Executable Only:dx11exe18.zip
Back to Tutorial Index
Tutorial 18: Light Maps http://www.rastertek.com/dx11tut18.html

7/14/2019 RasterTek: Direct3D introduction
http://slidepdf.com/reader/full/rastertek-direct3d-introduction 311/709
21 of 21 3/8/2013 12:37 PM
Tutor ial 19: Alpha Mapping
Alpha mapping in DirectX 11 is the process of using the alpha layer of a texture to determine the blending amount for each pixel when combining two textures.
To start the process you first create an alpha layer for a texture such as follows:
Each pixel is just a 0.0 to 1.0 float range indicating how to combine two textures. For example if the alpha value at a certain pixel is 0.3 you would take 30% of thebase texture pixel value and combine it with 70% of the color texture pixel. In this tutorial we will combine the following two textures based on the alpha map:
Tutorial 19: Alpha Mapping http://www.rastertek.com/dx11tut19.html

7/14/2019 RasterTek: Direct3D introduction
http://slidepdf.com/reader/full/rastertek-direct3d-introduction 312/709
1 of 28 3/8/2013 12:37 PM
The final result will be the following:
In this tutorial I will be separating the alpha map onto its own individual texture. This gives us the ability to create several alpha maps and then combine the samel d b i diff
Tutorial 19: Alpha Mapping http://www.rastertek.com/dx11tut19.html

7/14/2019 RasterTek: Direct3D introduction
http://slidepdf.com/reader/full/rastertek-direct3d-introduction 313/709
two color and base textures in many different ways.
The code in this tutorial is based on the previous tutorial.
Alphamap.vs
2 of 28 3/8/2013 12:37 PM
The alpha map vertex shader is just the light map shader renamed from the previous tutorial.
////////////////////////////////////////////////////////////////////////////////// Filename: alphamap.vs////////////////////////////////////////////////////////////////////////////////
/////////////// GLOBALS ///////////////cbuffer MatrixBuffer{
matrix worldMatrix;matrix viewMatrix;matrix projectionMatrix;
};
//////////////// TYPEDEFS ////////////////struct VertexInputType{
float4 position : POSITION;float2 tex : TEXCOORD0;
};
struct PixelInputType{
float4 position : SV_POSITION;
float2 tex : TEXCOORD0;};
////////////////////////////////////////////////////////////////////////////////// Vertex Shader////////////////////////////////////////////////////////////////////////////////Pi lI tT Al h M V t Sh d (V t I tT i t)
Tutorial 19: Alpha Mapping http://www.rastertek.com/dx11tut19.html

7/14/2019 RasterTek: Direct3D introduction
http://slidepdf.com/reader/full/rastertek-direct3d-introduction 314/709
PixelInputType AlphaMapVertexShader(VertexInputType input){
PixelInputType output;
// Change the position vector to be 4 units for proper matrix calculations.input.position.w =1.0f;
3 of 28 3/8/2013 12:37 PM
// Calculate the position of the vertex against the world, view, and projection matrices.output.position =mul(input.position, worldMatrix);output.position =mul(output.position, viewMatrix);output.position =mul(output.position, projectionMatrix);
// Store the texture coordinates for the pixel shader.output.tex =input.tex;
return output;
}
Alphamap.ps
////////////////////////////////////////////////////////////////////////////////// Filename: alphamap.ps////////////////////////////////////////////////////////////////////////////////
/////////////
// GLOBALS ///////////////
The first change to the pixel shader is the addition of a third element in the texture array for holding the alpha map texture.
Texture2D shaderTextures[3];SamplerState SampleType;
//////////////// TYPEDEFS ////////////////struct PixelInputType{
float4 position : SV_POSITION;float2 tex : TEXCOORD0;
Tutorial 19: Alpha Mapping http://www.rastertek.com/dx11tut19.html

7/14/2019 RasterTek: Direct3D introduction
http://slidepdf.com/reader/full/rastertek-direct3d-introduction 315/709
};
In the alpha map pixel shader we first take a sample of the pixel from the two color textures and alpha texture. Then we multiply the alpha value by the base color toget the pixel value for the base texture. After that we multiply the inverse of the alpha (1.0 - alpha) by the second color texture to get the pixel value for the secondtexture. We then add the two pixel values together and saturate to produce the final blended pixel.
////////////////////////////////////////////////////////////////////////////////
4 of 28 3/8/2013 12:37 PM
// Pixel Shader////////////////////////////////////////////////////////////////////////////////float4 AlphaMapPixelShader(PixelInputType input) : SV_TARGET{
float4 color1;float4 color2;float4 alphaValue;float4 blendColor;
// Get the pixel color from the first texture.color1 =shaderTextures[0].Sample(SampleType, input.tex);
// Get the pixel color from the second texture.color2 =shaderTextures[1].Sample(SampleType, input.tex);
// Get the alpha value from the alpha map texture.alphaValue =shaderTextures[2].Sample(SampleType, input.tex);
// Combine the two textures based on the alpha value.blendColor =(alphaValue * color1) +((1.0 - alphaValue) * color2);
// Saturate the final color value.blendColor =saturate(blendColor);
return blendColor;}
Alphamapshaderclass.h
The AlphaMapShaderClass is the LightMapShaderClass slightly modified from the previous tutorial.
////////////////////////////////////////////////////////////////////////////////// Filename: alphamapshaderclass.h////////////////////////////////////////////////////////////////////////////////#if d f ALPHAMAPSHADERCLASS H
Tutorial 19: Alpha Mapping http://www.rastertek.com/dx11tut19.html
7/14/2019 RasterTek: Direct3D introduction
http://slidepdf.com/reader/full/rastertek-direct3d-introduction 316/709
#ifndef _ALPHAMAPSHADERCLASS_H_ #define _ALPHAMAPSHADERCLASS_H_
//////////////// INCLUDES ////////////////
5 of 28 3/8/2013 12:37 PM
#include <d3d11.h>#include <d3dx10math.h>#include <d3dx11async.h>#include <fstream>using namespace std;
////////////////////////////////////////////////////////////////////////////////// Class name: AlphaMapShaderClass////////////////////////////////////////////////////////////////////////////////class AlphaMapShaderClass{private:
struct MatrixBufferType{
D3DXMATRIX world;D3DXMATRIX view;D3DXMATRIX projection;
};
public:AlphaMapShaderClass();AlphaMapShaderClass(const AlphaMapShaderClass&);~AlphaMapShaderClass();
bool Initialize(ID3D11Device*, HWND);void Shutdown();bool Render(ID3D11DeviceContext*, int, D3DXMATRIX, D3DXMATRIX, D3DXMATRIX, ID3D11ShaderResourceView**);
private:bool InitializeShader(ID3D11Device*, HWND, WCHAR*, WCHAR*);void ShutdownShader();void OutputShaderErrorMessage(ID3D10Blob*, HWND, WCHAR*);
bool SetShaderParameters(ID3D11DeviceContext*, D3DXMATRIX, D3DXMATRIX, D3DXMATRIX, ID3D11ShaderResourceView**);void RenderShader(ID3D11DeviceContext*, int);
private:
Tutorial 19: Alpha Mapping http://www.rastertek.com/dx11tut19.html

7/14/2019 RasterTek: Direct3D introduction
http://slidepdf.com/reader/full/rastertek-direct3d-introduction 317/709
private:ID3D11VertexShader* m_vertexShader;
ID3D11PixelShader* m_pixelShader;ID3D11InputLayout* m_layout;ID3D11Buffer* m_matrixBuffer;ID3D11SamplerState* m_sampleState;
};
6 of 28 3/8/2013 12:37 PM
#endif
Alphamapshaderclass.cpp
////////////////////////////////////////////////////////////////////////////////// Filename: alphamapshaderclass.cpp////////////////////////////////////////////////////////////////////////////////#include "alphamapshaderclass.h"
AlphaMapShaderClass::AlphaMapShaderClass(){m_vertexShader =0;m_pixelShader =0;m_layout =0;m_matrixBuffer =0;m_sampleState =0;
}
AlphaMapShaderClass::AlphaMapShaderClass(const AlphaMapShaderClass& other){}
AlphaMapShaderClass::~AlphaMapShaderClass(){}
bool AlphaMapShaderClass::Initialize(ID3D11Device* device, HWND hwnd){
bool result;
The first change is that the alphamap.vs and alphamap.ps HLSL shader files are now loaded.
Tutorial 19: Alpha Mapping http://www.rastertek.com/dx11tut19.html

7/14/2019 RasterTek: Direct3D introduction
http://slidepdf.com/reader/full/rastertek-direct3d-introduction 318/709
// Initialize the vertex and pixel shaders.
result =InitializeShader(device, hwnd, L"../Engine/alphamap.vs", L"../Engine/alphamap.ps");if(!result){
return false;}
7 of 28 3/8/2013 12:37 PM
return true;}
void AlphaMapShaderClass::Shutdown(){
// Shutdown the vertex and pixel shaders as well as the related objects.ShutdownShader();
return;}
bool AlphaMapShaderClass::Render(ID3D11DeviceContext* deviceContext, int indexCount, D3DXMATRIX worldMatrix,D3DXMATRIX viewMatrix, D3DXMATRIX projectionMatrix, ID3D11ShaderResourceView** textureArray)
{bool result;
// Set the shader parameters that it will use for rendering.result =SetShaderParameters(deviceContext, worldMatrix, viewMatrix, projectionMatrix, textureArray);if(!result){
return false;}
// Now render the prepared buffers with the shader.RenderShader(deviceContext, indexCount);
return true;}
bool AlphaMapShaderClass::InitializeShader(ID3D11Device* device, HWND hwnd, WCHAR* vsFilename, WCHAR* psFilename){
HRESULT result;ID3D10Blob* errorMessage;
Tutorial 19: Alpha Mapping http://www.rastertek.com/dx11tut19.html

7/14/2019 RasterTek: Direct3D introduction
http://slidepdf.com/reader/full/rastertek-direct3d-introduction 319/709
gID3D10Blob* vertexShaderBuffer;ID3D10Blob* pixelShaderBuffer;D3D11_INPUT_ELEMENT_DESC polygonLayout[2];unsigned int numElements;D3D11_BUFFER_DESC matrixBufferDesc;D3D11_SAMPLER_DESC samplerDesc;
8 of 28 3/8/2013 12:37 PM
// Initialize the pointers this function will use to null.errorMessage =0;vertexShaderBuffer =0;
pixelShaderBuffer =0;
The alpha map vertex shader is loaded here.
// Compile the vertex shader code.result =D3DX11CompileFromFile(vsFilename, NULL, NULL, "AlphaMapVertexShader", "vs_5_0", D3D10_SHADER_ENABLE_STRICTNESS,
0, NULL, &vertexShaderBuffer, &errorMessage, NULL);if(FAILED(result)){
// If the shader failed to compile it should have writen something to the error message.if(errorMessage){
OutputShaderErrorMessage(errorMessage, hwnd, vsFilename);}// If there was nothing in the error message then it simply could not find the shader file itself.else{
MessageBox(hwnd, vsFilename, L"Missing Shader File", MB_OK);}
return false;}
The alpha map pixel shader is loaded here.
// Compile the pixel shader code.result =D3DX11CompileFromFile(psFilename, NULL, NULL, "AlphaMapPixelShader", "ps_5_0", D3D10_SHADER_ENABLE_STRICTNESS,
0, NULL, &pixelShaderBuffer, &errorMessage, NULL);if(FAILED(result)){
// If the shader failed to compile it should have writen something to the error message.if(errorMessage){
OutputShaderErrorMessage(errorMessage, hwnd, psFilename);
Tutorial 19: Alpha Mapping http://www.rastertek.com/dx11tut19.html

7/14/2019 RasterTek: Direct3D introduction
http://slidepdf.com/reader/full/rastertek-direct3d-introduction 320/709
}// If there was nothing in the error message then it simply could not find the file itself.else{
MessageBox(hwnd, psFilename, L"Missing Shader File", MB_OK);}
9 of 28 3/8/2013 12:37 PM
return false;}
// Create the vertex shader from the buffer.
result =device->CreateVertexShader(vertexShaderBuffer->GetBufferPointer(), vertexShaderBuffer->GetBufferSize(), NULL,&m_vertexShader);
if(FAILED(result)){
return false;}
// Create the vertex shader from the buffer.result =device->CreatePixelShader(pixelShaderBuffer->GetBufferPointer(), pixelShaderBuffer->GetBufferSize(), NULL,
&m_pixelShader);if(FAILED(result)){
return false;}
// Create the vertex input layout description.// This setup needs to match the VertexType stucture in the ModelClass and in the shader.polygonLayout[0].SemanticName ="POSITION";polygonLayout[0].SemanticIndex =0;polygonLayout[0].Format =DXGI_FORMAT_R32G32B32_FLOAT;polygonLayout[0].InputSlot =0;polygonLayout[0].AlignedByteOffset =0;polygonLayout[0].InputSlotClass =D3D11_INPUT_PER_VERTEX_DATA;polygonLayout[0].InstanceDataStepRate =0;
polygonLayout[1].SemanticName ="TEXCOORD";polygonLayout[1].SemanticIndex =0;polygonLayout[1].Format =DXGI_FORMAT_R32G32_FLOAT;polygonLayout[1].InputSlot =0;polygonLayout[1].AlignedByteOffset =D3D11_APPEND_ALIGNED_ELEMENT;polygonLayout[1].InputSlotClass =D3D11_INPUT_PER_VERTEX_DATA;polygonLayout[1].InstanceDataStepRate =0;
// Get a count of the elements in the layout.El i f( l L ) / i f( l L [0])
Tutorial 19: Alpha Mapping http://www.rastertek.com/dx11tut19.html

7/14/2019 RasterTek: Direct3D introduction
http://slidepdf.com/reader/full/rastertek-direct3d-introduction 321/709
numElements =sizeof(polygonLayout) / sizeof(polygonLayout[0]);
// Create the vertex input layout.result =device->CreateInputLayout(polygonLayout, numElements, vertexShaderBuffer->GetBufferPointer(),
vertexShaderBuffer->GetBufferSize(), &m_layout);if(FAILED(result)){
10 of 28 3/8/2013 12:37 PM
return false;}
// Release the vertex shader buffer and pixel shader buffer since they are no longer needed.
vertexShaderBuffer->Release();vertexShaderBuffer =0;
pixelShaderBuffer->Release();pixelShaderBuffer =0;
// Setup the description of the matrix dynamic constant buffer that is in the vertex shader.matrixBufferDesc.Usage =D3D11_USAGE_DYNAMIC;matrixBufferDesc.ByteWidth =sizeof(MatrixBufferType);
matrixBufferDesc.BindFlags =D3D11_BIND_CONSTANT_BUFFER;matrixBufferDesc.CPUAccessFlags =D3D11_CPU_ACCESS_WRITE;matrixBufferDesc.MiscFlags =0;matrixBufferDesc.StructureByteStride =0;
// Create the matrix constant buffer pointer so we can access the vertex shader constant buffer from within this class.result =device->CreateBuffer(&matrixBufferDesc, NULL, &m_matrixBuffer);if(FAILED(result)){
return false;}
// Create a texture sampler state description.samplerDesc.Filter =D3D11_FILTER_MIN_MAG_MIP_LINEAR;samplerDesc.AddressU =D3D11_TEXTURE_ADDRESS_WRAP;samplerDesc.AddressV =D3D11_TEXTURE_ADDRESS_WRAP;samplerDesc.AddressW =D3D11_TEXTURE_ADDRESS_WRAP;samplerDesc.MipLODBias =0.0f;samplerDesc.MaxAnisotropy =1;samplerDesc.ComparisonFunc =D3D11_COMPARISON_ALWAYS;samplerDesc.BorderColor[0] =0;samplerDesc.BorderColor[1] =0;samplerDesc.BorderColor[2] =0;samplerDesc.BorderColor[3] =0;samplerDesc.MinLOD =0;samplerDesc Ma LOD D3D11 FLOAT32 MAX
Tutorial 19: Alpha Mapping http://www.rastertek.com/dx11tut19.html

7/14/2019 RasterTek: Direct3D introduction
http://slidepdf.com/reader/full/rastertek-direct3d-introduction 322/709
samplerDesc.MaxLOD =D3D11_FLOAT32_MAX;
// Create the texture sampler state.result =device->CreateSamplerState(&samplerDesc, &m_sampleState);if(FAILED(result)){
return false;
11 of 28 3/8/2013 12:37 PM
}
return true;}
void AlphaMapShaderClass::ShutdownShader(){
// Release the sampler state.if(m_sampleState){
m_sampleState->Release();m_sampleState =0;
}
// Release the matrix constant buffer.if(m_matrixBuffer){
m_matrixBuffer->Release();m_matrixBuffer =0;
}
// Release the layout.if(m_layout){
m_layout->Release();m_layout =0;
}
// Release the pixel shader.if(m_pixelShader){
m_pixelShader->Release();m_pixelShader =0;
}
// Release the vertex shader.if(m_vertexShader){
Tutorial 19: Alpha Mapping http://www.rastertek.com/dx11tut19.html

7/14/2019 RasterTek: Direct3D introduction
http://slidepdf.com/reader/full/rastertek-direct3d-introduction 323/709
{m_vertexShader->Release();m_vertexShader =0;
}
return;}
12 of 28 3/8/2013 12:37 PM
void AlphaMapShaderClass::OutputShaderErrorMessage(ID3D10Blob* errorMessage, HWND hwnd, WCHAR* shaderFilename){
char* compileErrors;unsigned long bufferSize, i;ofstream fout;
// Get a pointer to the error message text buffer.compileErrors =(char*)(errorMessage->GetBufferPointer());
// Get the length of the message.
bufferSize =errorMessage->GetBufferSize();
// Open a file to write the error message to.fout.open("shader-error.txt");
// Write out the error message.for(i=0; i<bufferSize; i++){
fout <<compileErrors[i];
}
// Close the file.fout.close();
// Release the error message.errorMessage->Release();errorMessage =0;
// Pop a message up on the screen to notify the user to check the text file for compile errors.MessageBox(hwnd, L"Error compiling shader. Check shader-error.txt for message.", shaderFilename, MB_OK);
return;}
bool AlphaMapShaderClass::SetShaderParameters(ID3D11DeviceContext*deviceContext D3DXMATRIX worldMatrix
Tutorial 19: Alpha Mapping http://www.rastertek.com/dx11tut19.html
7/14/2019 RasterTek: Direct3D introduction
http://slidepdf.com/reader/full/rastertek-direct3d-introduction 324/709
bool AlphaMapShaderClass::SetShaderParameters(ID3D11DeviceContext deviceContext, D3DXMATRIX worldMatrix,D3DXMATRIX viewMatrix, D3DXMATRIX projectionMatrix,ID3D11ShaderResourceView** textureArray)
{HRESULT result;D3D11_MAPPED_SUBRESOURCE mappedResource;MatrixBufferType* dataPtr;
13 of 28 3/8/2013 12:37 PM
unsigned int bufferNumber;
// Transpose the matrices to prepare them for the shader.
D3DXMatrixTranspose(&worldMatrix, &worldMatrix);D3DXMatrixTranspose(&viewMatrix, &viewMatrix);D3DXMatrixTranspose(&projectionMatrix, &projectionMatrix);
// Lock the matrix constant buffer so it can be written to.result =deviceContext->Map(m_matrixBuffer, 0, D3D11_MAP_WRITE_DISCARD, 0, &mappedResource);if(FAILED(result)){
return false;
}
// Get a pointer to the data in the constant buffer.dataPtr =(MatrixBufferType*)mappedResource.pData;
// Copy the matrices into the constant buffer.dataPtr->world =worldMatrix;dataPtr->view =viewMatrix;dataPtr->projection =projectionMatrix;
// Unlock the matrix constant buffer.deviceContext->Unmap(m_matrixBuffer, 0);
// Set the position of the matrix constant buffer in the vertex shader.bufferNumber =0;
// Now set the matrix constant buffer in the vertex shader with the updated values.deviceContext->VSSetConstantBuffers(bufferNumber, 1, &m_matrixBuffer);
The next major change is that we now set three textures in the shader instead of two like in the previous tutorials.
// Set shader texture array resource in the pixel shader.deviceContext->PSSetShaderResources(0, 3, textureArray);
return true;}
Tutorial 19: Alpha Mapping http://www.rastertek.com/dx11tut19.html

7/14/2019 RasterTek: Direct3D introduction
http://slidepdf.com/reader/full/rastertek-direct3d-introduction 325/709
}
void AlphaMapShaderClass::RenderShader(ID3D11DeviceContext* deviceContext, int indexCount){
// Set the vertex input layout.deviceContext->IASetInputLayout(m_layout);
14 of 28 3/8/2013 12:37 PM
// Set the vertex and pixel shaders that will be used to render this triangle.deviceContext->VSSetShader(m_vertexShader, NULL, 0);deviceContext->PSSetShader(m_pixelShader, NULL, 0);
// Set the sampler state in the pixel shader.deviceContext->PSSetSamplers(0, 1, &m_sampleState);
// Render the triangles.deviceContext->DrawIndexed(indexCount, 0, 0);
return;}
Texturearrayclass.h
The TextureArrayClass has been changed to handle three textures instead of two.
////////////////////////////////////////////////////////////////////////////////// Filename: texturearrayclass.h////////////////////////////////////////////////////////////////////////////////#ifndef _TEXTUREARRAYCLASS_H_ #define _TEXTUREARRAYCLASS_H_
//////////////// INCLUDES ////////////////
#include <d3d11.h>#include <d3dx11tex.h>
////////////////////////////////////////////////////////////////////////////////// Class name: TextureArrayClass////////////////////////////////////////////////////////////////////////////////class TextureArrayClass{
Tutorial 19: Alpha Mapping http://www.rastertek.com/dx11tut19.html

7/14/2019 RasterTek: Direct3D introduction
http://slidepdf.com/reader/full/rastertek-direct3d-introduction 326/709
{
public: TextureArrayClass(); TextureArrayClass(const TextureArrayClass&);~TextureArrayClass();
15 of 28 3/8/2013 12:37 PM
bool Initialize(ID3D11Device*, WCHAR*, WCHAR*, WCHAR*);void Shutdown();
ID3D11ShaderResourceView** GetTextureArray();
private:
The number of elements in the texture array is changed to three.
ID3D11ShaderResourceView* m_textures[3];};
#endif
Texturearrayclass.cpp
////////////////////////////////////////////////////////////////////////////////// Filename: texturearrayclass.cpp////////////////////////////////////////////////////////////////////////////////#include "texturearrayclass.h"
The three textures are initialized to null in the class constructor.
TextureArrayClass::TextureArrayClass(){
m_textures[0] =0;m_textures[1] =0;m_textures[2] =0;
}
TextureArrayClass::TextureArrayClass(const TextureArrayClass& other){}
TextureArrayClass::~TextureArrayClass()
Tutorial 19: Alpha Mapping http://www.rastertek.com/dx11tut19.html

7/14/2019 RasterTek: Direct3D introduction
http://slidepdf.com/reader/full/rastertek-direct3d-introduction 327/709
TextureArrayClass:: TextureArrayClass()
{}
The Initialize function now loads three textures into the texture array.
16 of 28 3/8/2013 12:37 PM
bool TextureArrayClass::Initialize(ID3D11Device* device, WCHAR* filename1, WCHAR* filename2, WCHAR* filename3){
HRESULT result;
// Load the first texture in.result =D3DX11CreateShaderResourceViewFromFile(device, filename1, NULL, NULL, &m_textures[0], NULL);if(FAILED(result)){
return false;}
// Load the second texture in.
result =D3DX11CreateShaderResourceViewFromFile(device, filename2, NULL, NULL, &m_textures[1], NULL);if(FAILED(result)){
return false;}
// Load the third texture in.result =D3DX11CreateShaderResourceViewFromFile(device, filename3, NULL, NULL, &m_textures[2], NULL);if(FAILED(result))
{return false;
}
return true;}
Shutdown now releases three textures.
void TextureArrayClass::Shutdown(){
// Release the texture resources.if(m_textures[0]){
m_textures[0]->Release();m_textures[0] =0;
}
Tutorial 19: Alpha Mapping http://www.rastertek.com/dx11tut19.html

7/14/2019 RasterTek: Direct3D introduction
http://slidepdf.com/reader/full/rastertek-direct3d-introduction 328/709
if(m_textures[1]){
m_textures[1]->Release();m_textures[1] =0;
}
17 of 28 3/8/2013 12:37 PM
if(m_textures[2]){
m_textures[2]->Release();
m_textures[2] =0;}
return;}
ID3D11ShaderResourceView** TextureArrayClass::GetTextureArray(){
return m_textures;}
Modelclass.h
The ModelClass has been modified just slightly to handle three textures instead of two.
////////////////////////////////////////////////////////////////////////////////// Filename: modelclass.h////////////////////////////////////////////////////////////////////////////////#ifndef _MODELCLASS_H_ #define _MODELCLASS_H_
//////////////// INCLUDES ////////////////#include <d3d11.h>#include <d3dx10math.h>#include <fstream>using namespace std;
///////////////////////
Tutorial 19: Alpha Mapping http://www.rastertek.com/dx11tut19.html

7/14/2019 RasterTek: Direct3D introduction
http://slidepdf.com/reader/full/rastertek-direct3d-introduction 329/709
// MY CLASS INCLUDES /////////////////////////#include "texturearrayclass.h"
18 of 28 3/8/2013 12:37 PM
////////////////////////////////////////////////////////////////////////////////// Class name: ModelClass////////////////////////////////////////////////////////////////////////////////class ModelClass
{private:
struct VertexType{
D3DXVECTOR3 position;D3DXVECTOR2 texture;
};
struct ModelType
{float x, y, z;float tu, tv;float nx, ny, nz;
};
public:ModelClass();ModelClass(const ModelClass&);
~ModelClass();
bool Initialize(ID3D11Device*, char*, WCHAR*, WCHAR*, WCHAR*);void Shutdown();void Render(ID3D11DeviceContext*);
int GetIndexCount();ID3D11ShaderResourceView** GetTextureArray();
private:bool InitializeBuffers(ID3D11Device*);void ShutdownBuffers();void RenderBuffers(ID3D11DeviceContext*);
bool LoadTextures(ID3D11Device*, WCHAR*, WCHAR*, WCHAR*);void ReleaseTextures();
bool LoadModel(char*);
Tutorial 19: Alpha Mapping http://www.rastertek.com/dx11tut19.html

7/14/2019 RasterTek: Direct3D introduction
http://slidepdf.com/reader/full/rastertek-direct3d-introduction 330/709
bool LoadModel(char*);
void ReleaseModel();
private:ID3D11Buffer *m_vertexBuffer, *m_indexBuffer;int m_vertexCount, m_indexCount;
19 of 28 3/8/2013 12:37 PM
ModelType* m_model; TextureArrayClass* m_TextureArray;
};
#endif
Modelclass.cpp
I will only cover the functions that have changed since the previous tutorial.
////////////////////////////////////////////////////////////////////////////////// Filename: modelclass.cpp////////////////////////////////////////////////////////////////////////////////#include "modelclass.h"
The Initialize function now takes as input three texture names. The first two are the color texture and the third is the alpha texture.
bool ModelClass::Initialize(ID3D11Device* device, char* modelFilename, WCHAR* textureFilename1, WCHAR* textureFilename2,WCHAR* textureFilename3)
{bool result;
// Load in the model data,result =LoadModel(modelFilename);if(!result){
return false;}
// Initialize the vertex and index buffers.result =InitializeBuffers(device);if(!result){
return false;}
L dT t t k th th t t i t
Tutorial 19: Alpha Mapping http://www.rastertek.com/dx11tut19.html

7/14/2019 RasterTek: Direct3D introduction
http://slidepdf.com/reader/full/rastertek-direct3d-introduction 331/709
LoadTextures now takes the three texture names as input.
// Load the textures for this model.result =LoadTextures(device, textureFilename1, textureFilename2, textureFilename3);if(!result)
20 of 28 3/8/2013 12:37 PM
{return false;
}
return true;}
The LoadTextures function now takes the three texture file names as input and then creates and loads a texture array using the three texture files. Once again thefirst two textures are the color textures and the third is the alpha texture.
bool ModelClass::LoadTextures(ID3D11Device* device, WCHAR* filename1, WCHAR* filename2, WCHAR* filename3){
bool result;
// Create the texture array object.m_TextureArray =new TextureArrayClass;if(!m_TextureArray){
return false;}
// Initialize the texture array object.result =m_TextureArray->Initialize(device, filename1, filename2, filename3);if(!result){
return false;}
return true;}
Graphicsclass.h
////////////////////////////////////////////////////////////////////////////////// Filename: graphicsclass.h////////////////////////////////////////////////////////////////////////////////#ifndef GRAPHICSCLASS H
Tutorial 19: Alpha Mapping http://www.rastertek.com/dx11tut19.html

7/14/2019 RasterTek: Direct3D introduction
http://slidepdf.com/reader/full/rastertek-direct3d-introduction 332/709
#ifndef _GRAPHICSCLASS_H_ #define _GRAPHICSCLASS_H_
/////////////
21 of 28 3/8/2013 12:37 PM
// GLOBALS ///////////////const bool FULL_SCREEN =true;const bool VSYNC_ENABLED =true;
const float SCREEN_DEPTH =1000.0f;const float SCREEN_NEAR =0.1f;
///////////////////////// MY CLASS INCLUDES /////////////////////////#include "d3dclass.h"#include "cameraclass.h"
#include "modelclass.h"
The new AlphaMapShaderClass header is now included in the GraphicsClass header file.
#include "alphamapshaderclass.h"
////////////////////////////////////////////////////////////////////////////////// Class name: GraphicsClass
////////////////////////////////////////////////////////////////////////////////class GraphicsClass{public:
GraphicsClass();GraphicsClass(const GraphicsClass&);~GraphicsClass();
bool Initialize(int, int, HWND);
void Shutdown();bool Frame();bool Render();
private:D3DClass* m_D3D;CameraClass* m_Camera;ModelClass* m_Model;
Tutorial 19: Alpha Mapping http://www.rastertek.com/dx11tut19.html
7/14/2019 RasterTek: Direct3D introduction
http://slidepdf.com/reader/full/rastertek-direct3d-introduction 333/709
We create the new AlphaMapShaderClass object here.
AlphaMapShaderClass* m_AlphaMapShader;};
22 of 28 3/8/2013 12:37 PM
#endif
Graphicsclass.cpp
I will only cover the functions that have changed since the previous tutorial.
////////////////////////////////////////////////////////////////////////////////// Filename: graphicsclass.cpp////////////////////////////////////////////////////////////////////////////////#include "graphicsclass.h"
GraphicsClass::GraphicsClass(){
m_D3D =0;m_Camera =0;m_Model =0;
The new AlphaMapShaderClass object is initialized to null in the class constructor.
m_AlphaMapShader =0;}
bool GraphicsClass::Initialize(int screenWidth, int screenHeight, HWND hwnd){
bool result;D3DXMATRIX baseViewMatrix;
// Create the Direct3D object.m_D3D =new D3DClass;if(!m_D3D){
return false;}
// Initialize the Direct3D object
Tutorial 19: Alpha Mapping http://www.rastertek.com/dx11tut19.html

7/14/2019 RasterTek: Direct3D introduction
http://slidepdf.com/reader/full/rastertek-direct3d-introduction 334/709
// Initialize the Direct3D object.result =m_D3D->Initialize(screenWidth, screenHeight, VSYNC_ENABLED, hwnd, FULL_SCREEN, SCREEN_DEPTH, SCREEN_NEAR);if(!result){
MessageBox(hwnd, L"Could not initialize Direct3D", L"Error", MB_OK);
23 of 28 3/8/2013 12:37 PM
return false;}
// Create the camera object.
m_Camera =new CameraClass;if(!m_Camera){
return false;}
// Initialize a base view matrix with the camera for 2D user interface rendering.m_Camera->SetPosition(0.0f, 0.0f, -1.0f);m_Camera->Render();
m_Camera->GetViewMatrix(baseViewMatrix);
// Create the model object.m_Model =new ModelClass;if(!m_Model){
return false;}
The ModelClass object is initialized with three textures. The first two textures are the color textures. The third input texture is the alpha texture that will be used toblend the first two textures.
// Initialize the model object.result =m_Model->Initialize(m_D3D->GetDevice(), "../Engine/data/square.txt", L"../Engine/data/stone01.dds",
L"../Engine/data/dirt01.dds", L"../Engine/data/alpha01.dds");if(!result){
MessageBox(hwnd, L"Could not initialize the model object.", L"Error", MB_OK);
return false;}
The new AlphaMapShaderClass object is created and initialized here.
// Create the alpha map shader object.m_AlphaMapShader =new AlphaMapShaderClass;if(!m_AlphaMapShader){
Tutorial 19: Alpha Mapping http://www.rastertek.com/dx11tut19.html

7/14/2019 RasterTek: Direct3D introduction
http://slidepdf.com/reader/full/rastertek-direct3d-introduction 335/709
return false;}
// Initialize the alpha map shader object.result =m_AlphaMapShader->Initialize(m_D3D->GetDevice(), hwnd);
24 of 28 3/8/2013 12:37 PM
if(!result){
MessageBox(hwnd, L"Could not initialize the alpha map shader object.", L"Error", MB_OK);return false;
}
return true;}
void GraphicsClass::Shutdown(){
The new AlphaMapShaderClass object is released here in the Shutdown function.
// Release the alpha map shader object.if(m_AlphaMapShader){
m_AlphaMapShader->Shutdown();delete m_AlphaMapShader;m_AlphaMapShader =0;
}
// Release the model object.if(m_Model){
m_Model->Shutdown();delete m_Model;m_Model =0;
}
// Release the camera object.if(m_Camera){
delete m_Camera;m_Camera =0;
}
// Release the D3D object.if(m_D3D)
Tutorial 19: Alpha Mapping http://www.rastertek.com/dx11tut19.html

7/14/2019 RasterTek: Direct3D introduction
http://slidepdf.com/reader/full/rastertek-direct3d-introduction 336/709
{m_D3D->Shutdown();delete m_D3D;m_D3D =0;
}
25 of 28 3/8/2013 12:37 PM
return;}
bool GraphicsClass::Render(){
D3DXMATRIX worldMatrix, viewMatrix, projectionMatrix, orthoMatrix;
// Clear the buffers to begin the scene.m_D3D->BeginScene(0.0f, 0.0f, 0.0f, 1.0f);
// Generate the view matrix based on the camera's position.m_Camera->Render();
// Get the world, view, projection, and ortho matrices from the camera and D3D objects.m_D3D->GetWorldMatrix(worldMatrix);m_Camera->GetViewMatrix(viewMatrix);m_D3D->GetProjectionMatrix(projectionMatrix);m_D3D->GetOrthoMatrix(orthoMatrix);
// Put the model vertex and index buffers on the graphics pipeline to prepare them for drawing.m_Model->Render(m_D3D->GetDeviceContext());
The new AlphaMapShaderClass object is used to render the model object using alpha blending.
// Render the model using the alpha map shader.m_AlphaMapShader->Render(m_D3D->GetDeviceContext(), m_Model->GetIndexCount(), worldMatrix, viewMatrix, projectionMatrix,
m_Model->GetTextureArray());
// Present the rendered scene to the screen.m_D3D->EndScene();
return true;}
Summary
Tutorial 19: Alpha Mapping http://www.rastertek.com/dx11tut19.html

7/14/2019 RasterTek: Direct3D introduction
http://slidepdf.com/reader/full/rastertek-direct3d-introduction 337/709
Alpha mapping provides an easy way of controlling on a very fine level of how to combine textures. Many terrain based applications use this to provide smoothtransitions between different textures over a very large landscape.
26 of 28 3/8/2013 12:37 PM
To Do Exercises
1. Recompile and run the program to see the alpha mapped texture combination. Press escape to quit.
2. Make some of your own alpha maps and use them to combine the two textures in different ways.
Source Code
Visual Studio 2008 Project: dx11tut19.zip
Source Only: dx11src19.zip
Tutorial 19: Alpha Mapping http://www.rastertek.com/dx11tut19.html

7/14/2019 RasterTek: Direct3D introduction
http://slidepdf.com/reader/full/rastertek-direct3d-introduction 338/709
Executable Only:dx11exe19.zip
27 of 28 3/8/2013 12:37 PM
Back to Tutorial Index
Tutorial 19: Alpha Mapping http://www.rastertek.com/dx11tut19.html

7/14/2019 RasterTek: Direct3D introduction
http://slidepdf.com/reader/full/rastertek-direct3d-introduction 339/709
28 of 28 3/8/2013 12:37 PM
Tutor ial 20: Bump Mapping
This tutorial will cover how to perform bump mapping in DirectX 11 using HLSL and C++. The code in this tutorial is based on the code in the previous tutorials.
The proper terminology for the bump mapping technique we use is called normal mapping. The reason being is that we use a special texture called a normal mapwhich is essentially a look up table for surface normals. Each pixel in this normal map indicates the light direction for the corresponding pixel on the texture colormap.
For example take the following color map:
A normal map for the above texture would look like the following:
Tutorial 20: Bump Mapping http://www.rastertek.com/dx11tut20.html

7/14/2019 RasterTek: Direct3D introduction
http://slidepdf.com/reader/full/rastertek-direct3d-introduction 340/709
1 of 37 3/8/2013 12:39 PM
Using the normal map with the current light direction for each pixel would then produce the following bump mapped texture:
As you can see the effect is very realistic and the cost of producing it using bump mapping is far less expensive then rendering a high polygon surface to get thesame result.
To create a normal map you usually need someone to produce a 3D model of the surface and then use a tool to convert that 3D model into a normal map. There are
also certain tools that will work with 2D textures to produce a somewhat decent normal map but it is obviously not as accurate as the 3D model version would be
Tutorial 20: Bump Mapping http://www.rastertek.com/dx11tut20.html

7/14/2019 RasterTek: Direct3D introduction
http://slidepdf.com/reader/full/rastertek-direct3d-introduction 341/709
also certain tools that will work with 2D textures to produce a somewhat decent normal map but it is obviously not as accurate as the 3D model version would be.
The tools that create normal maps take the x, y, z coordinates and translate them to red, green, blue pixels with the intensity of each color indicating the angle of thenormal they represent. The normal of our polygon surface is still calculated the same way as before. However the two other normals we need to calculate requirethe vertex and texture coordinates for that polygon surface. These two normals are called the tangent and binormal. The diagram below shows the direction of each
2 of 37 3/8/2013 12:39 PM
normal:
The normal is still pointing straight out towards the viewer. The tangent and binormal however run across the surface of the polygon with the tangent going along thex-axis and the binormal going along the y-axis. These two normals then directly translate to the tu and tv texture coordinates of the normal map with the texture Ucoordinate mapping to the tangent and the texture V coordinate mapping to the binormal.
We will need to do some precalculation to determine the binormal and tangent vector using the normal and texture coordinates. Also note that you should never dothis inside the shader as it is fairly expensive with all the floating point math involved, I instead use a function in my C++code that you will see to do this during the
model loading. Also if you are looking to use this effect on a large number of high polygon models it may be best to precalculate these different normals and storethem in your model format. Once we have precalculated the tangent and binormal we can use this equation to determine the bump normal at any pixel using thenormal map:
bumpNormal =normal +bumpMap.x * tangent +bumpMap.y * binormal;
Once we have the normal for that pixel we can then calculate against the light direction and multiply by the color value of the pixel from the color texture to get ourfinal result.
Framework
The frame work for this tutorial looks like the following. The only new class is the BumpMapShaderClass.
Tutorial 20: Bump Mapping http://www.rastertek.com/dx11tut20.html

7/14/2019 RasterTek: Direct3D introduction
http://slidepdf.com/reader/full/rastertek-direct3d-introduction 342/709
3 of 37 3/8/2013 12:39 PM
We will start the tutorial by looking at the bump map HLSL shader code:
Bumpmap.vs
////////////////////////////////////////////////////////////////////////////////
// Filename: bumpmap.vs////////////////////////////////////////////////////////////////////////////////
/////////////// GLOBALS ///////////////cbuffer MatrixBuffer{
matrix worldMatrix;matrix viewMatrix;matrix projectionMatrix;
};
Both the VertexInputType and PixelInputType now have a tangent and binormal vector for bump map calculations.
//////////////// TYPEDEFS //
//////////////t t V t I tT
Tutorial 20: Bump Mapping http://www.rastertek.com/dx11tut20.html

7/14/2019 RasterTek: Direct3D introduction
http://slidepdf.com/reader/full/rastertek-direct3d-introduction 343/709
//////////////struct VertexInputType{
float4 position : POSITION;float2 tex : TEXCOORD0;
4 of 37 3/8/2013 12:39 PM
float3 normal : NORMAL;float3 tangent : TANGENT;float3 binormal : BINORMAL;
};
struct PixelInputType{
float4 position : SV_POSITION;float2 tex : TEXCOORD0;float3 normal : NORMAL;float3 tangent : TANGENT;float3 binormal : BINORMAL;
};
////////////////////////////////////////////////////////////////////////////////// Vertex Shader////////////////////////////////////////////////////////////////////////////////PixelInputType BumpMapVertexShader(VertexInputType input){
PixelInputType output;
// Change the position vector to be 4 units for proper matrix calculations.input.position.w =1.0f;
// Calculate the position of the vertex against the world, view, and projection matrices.output.position =mul(input.position, worldMatrix);output.position =mul(output.position, viewMatrix);output.position =mul(output.position, projectionMatrix);
// Store the texture coordinates for the pixel shader.output.tex =input.tex;
// Calculate the normal vector against the world matrix only and then normalize the final value.output.normal =mul(input.normal, (float3x3)worldMatrix);output.normal =normalize(output.normal);
Both the input tangent and binormal are calculated against the world matrix and then normalized the same as the input normal vector.
// Calculate the tangent vector against the world matrix only and then normalize the final value.l(i (fl ) ld i )
Tutorial 20: Bump Mapping http://www.rastertek.com/dx11tut20.html

7/14/2019 RasterTek: Direct3D introduction
http://slidepdf.com/reader/full/rastertek-direct3d-introduction 344/709
// Calculate the tangent vector against the world matrix only and then normalize the final value.output.tangent =mul(input.tangent, (float3x3)worldMatrix);output.tangent =normalize(output.tangent);
// Calculate the binormal vector against the world matrix only and then normalize the final value.
5 of 37 3/8/2013 12:39 PM
output.binormal =mul(input.binormal, (float3x3)worldMatrix);output.binormal =normalize(output.binormal);
return output;
}
Bumpmap.ps
////////////////////////////////////////////////////////////////////////////////// Filename: bumpmap.ps////////////////////////////////////////////////////////////////////////////////
/////////////// GLOBALS ///////////////
The bump map shader requires two textures. The first texture in the array is the color texture. The second texture is the normal map.
Texture2D shaderTextures[2];
SamplerState SampleType;
J ust like most light shaders the direction and color of the light is required for lighting calculations.
cbuffer LightBuffer{
float4 diffuseColor;float3 lightDirection;
};
//////////////// TYPEDEFS ////////////////struct PixelInputType{
float4 position : SV_POSITION;float2 tex : TEXCOORD0;
float3 normal : NORMAL;
Tutorial 20: Bump Mapping http://www.rastertek.com/dx11tut20.html

7/14/2019 RasterTek: Direct3D introduction
http://slidepdf.com/reader/full/rastertek-direct3d-introduction 345/709
;float3 tangent : TANGENT;float3 binormal : BINORMAL;
};
6 of 37 3/8/2013 12:39 PM
The pixel shader works as we described above with a couple additional lines of code. First we sample the pixel from the color texture and the normal map. We thenmultiply the normal map value by two and then subtract one to move it into the -1.0 to +1.0 float range. We have to do this because the sampled value that ispresented to us in the 0.0 to +1.0 texture range which only covers half the range we need for bump map normal calculations. After that we then calculate the bumpnormal which uses the equation we described earlier. This bump normal is normalized and then used to determine the light intensity at this pixel by doing a dot
product with the light direction. Once we have the light intensity at this pixel the bump mapping is now done. We use the light intensity with the light color and texturecolor to get the final pixel color.
////////////////////////////////////////////////////////////////////////////////// Pixel Shader////////////////////////////////////////////////////////////////////////////////float4 BumpMapPixelShader(PixelInputType input) : SV_TARGET{
float4 textureColor;
float4 bumpMap;float3 bumpNormal;float3 lightDir;float lightIntensity;float4 color;
// Sample the texture pixel at this location.textureColor =shaderTextures[0].Sample(SampleType, input.tex);
// Sample the pixel in the bump map.bumpMap =shaderTextures[1].Sample(SampleType, input.tex);
// Expand the range of the normal value from (0, +1) to (-1, +1).bumpMap =(bumpMap * 2.0f) - 1.0f;
// Calculate the normal from the data in the bump map.bumpNormal =input.normal +bumpMap.x * input.tangent +bumpMap.y * input.binormal;
// Normalize the resulting bump normal.bumpNormal =normalize(bumpNormal);
// Invert the light direction for calculations.lightDir =-lightDirection;
// Calculate the amount of light on this pixel based on the bump map normal value.lightIntensity =saturate(dot(bumpNormal, lightDir));
// Determine the final diffuse color based on the diffuse color and the amount of light intensity
Tutorial 20: Bump Mapping http://www.rastertek.com/dx11tut20.html

7/14/2019 RasterTek: Direct3D introduction
http://slidepdf.com/reader/full/rastertek-direct3d-introduction 346/709
// Determine the final diffuse color based on the diffuse color and the amount of light intensity.color =saturate(diffuseColor * lightIntensity);
// Combine the final bump light color with the texture color.
7 of 37 3/8/2013 12:39 PM
color =color * textureColor;
return color;}
Bumpmapshaderclass.h
The BumpMapShaderClass is just a modified version of the shader classes from the previous tutorials.
////////////////////////////////////////////////////////////////////////////////// Filename: bumpmapshaderclass.h
////////////////////////////////////////////////////////////////////////////////#ifndef _BUMPMAPSHADERCLASS_H_ #define _BUMPMAPSHADERCLASS_H_
//////////////// INCLUDES ////////////////#include <d3d11.h>
#include <d3dx10math.h>#include <d3dx11async.h>#include <fstream>using namespace std;
////////////////////////////////////////////////////////////////////////////////// Class name: BumpMapShaderClass////////////////////////////////////////////////////////////////////////////////
class BumpMapShaderClass{private:
struct MatrixBufferType{
D3DXMATRIX world;D3DXMATRIX view;D3DXMATRIX projection;
};
t tLi htB ff T
Tutorial 20: Bump Mapping http://www.rastertek.com/dx11tut20.html
7/14/2019 RasterTek: Direct3D introduction
http://slidepdf.com/reader/full/rastertek-direct3d-introduction 347/709
struct LightBufferType{
D3DXVECTOR4 diffuseColor;
8 of 37 3/8/2013 12:39 PM
D3DXVECTOR3 lightDirection;float padding;
};
public:BumpMapShaderClass();BumpMapShaderClass(const BumpMapShaderClass&);~BumpMapShaderClass();
bool Initialize(ID3D11Device*, HWND);void Shutdown();bool Render(ID3D11DeviceContext*, int, D3DXMATRIX, D3DXMATRIX, D3DXMATRIX, ID3D11ShaderResourceView**, D3DXVECTOR3,
D3DXVECTOR4);
private:bool InitializeShader(ID3D11Device*, HWND, WCHAR*, WCHAR*);void ShutdownShader();void OutputShaderErrorMessage(ID3D10Blob*, HWND, WCHAR*);
bool SetShaderParameters(ID3D11DeviceContext*, D3DXMATRIX, D3DXMATRIX, D3DXMATRIX, ID3D11ShaderResourceView**, D3DXVECTOR3,D3DXVECTOR4);
void RenderShader(ID3D11DeviceContext*, int);
private:ID3D11VertexShader* m_vertexShader;ID3D11PixelShader* m_pixelShader;ID3D11InputLayout* m_layout;ID3D11Buffer* m_matrixBuffer;ID3D11SamplerState* m_sampleState;
The bump map shader will require a constant buffer to interface with the light direction and light color.
ID3D11Buffer* m_lightBuffer;};
#endif
Bumpmapshaderclass.cpp
////////////////////////////////////////////////////////////////////////////////
Tutorial 20: Bump Mapping http://www.rastertek.com/dx11tut20.html
7/14/2019 RasterTek: Direct3D introduction
http://slidepdf.com/reader/full/rastertek-direct3d-introduction 348/709
////////////////////////////////////////////////////////////////////////////////// Filename: bumpmapshaderclass.cpp////////////////////////////////////////////////////////////////////////////////
9 of 37 3/8/2013 12:39 PM
#include "bumpmapshaderclass.h"
The class constructor initializes the pointers to null.
BumpMapShaderClass::BumpMapShaderClass(){m_vertexShader =0;m_pixelShader =0;m_layout =0;m_matrixBuffer =0;m_sampleState =0;m_lightBuffer =0;
}
BumpMapShaderClass::BumpMapShaderClass(const BumpMapShaderClass& other){}
BumpMapShaderClass::~BumpMapShaderClass(){
}
The Initialize function will call the shader to load the bump map HLSL files.
bool BumpMapShaderClass::Initialize(ID3D11Device* device, HWND hwnd){
bool result;
// Initialize the vertex and pixel shaders.result =InitializeShader(device, hwnd, L"../Engine/bumpmap.vs", L"../Engine/bumpmap.ps");if(!result){
return false;}
return true;}
Shutdown releases the shader effect.
Tutorial 20: Bump Mapping http://www.rastertek.com/dx11tut20.html

7/14/2019 RasterTek: Direct3D introduction
http://slidepdf.com/reader/full/rastertek-direct3d-introduction 349/709
void BumpMapShaderClass::Shutdown(){
10 of 37 3/8/2013 12:39 PM
// Shutdown the vertex and pixel shaders as well as the related objects.ShutdownShader();
return;
}
The Render function sets the shader parameters first and then renders the model using the bump map shader.
bool BumpMapShaderClass::Render(ID3D11DeviceContext* deviceContext, int indexCount, D3DXMATRIX worldMatrix, D3DXMATRIX viewMatrix,D3DXMATRIX projectionMatrix, ID3D11ShaderResourceView** textureArray, D3DXVECTOR3 lightDirection,D3DXVECTOR4 diffuseColor)
{bool result;
// Set the shader parameters that it will use for rendering.result =SetShaderParameters(deviceContext, worldMatrix, viewMatrix, projectionMatrix, textureArray, lightDirection,
diffuseColor);if(!result){
return false;}
// Now render the prepared buffers with the shader.RenderShader(deviceContext, indexCount);
return true;}
InitializeShader sets up the bump map shader.
bool BumpMapShaderClass::InitializeShader(ID3D11Device* device, HWND hwnd, WCHAR* vsFilename, WCHAR* psFilename){
HRESULT result;ID3D10Blob* errorMessage;ID3D10Blob* vertexShaderBuffer;ID3D10Blob* pixelShaderBuffer;
The polygon layout is now set to five elements to accommodate the tangent and binormal.
D3D11_INPUT_ELEMENT_DESC polygonLayout[5];unsigned int numElements;
Tutorial 20: Bump Mapping http://www.rastertek.com/dx11tut20.html

7/14/2019 RasterTek: Direct3D introduction
http://slidepdf.com/reader/full/rastertek-direct3d-introduction 350/709
gD3D11_BUFFER_DESC matrixBufferDesc;D3D11_SAMPLER_DESC samplerDesc;D3D11_BUFFER_DESC lightBufferDesc;
11 of 37 3/8/2013 12:39 PM
// Initialize the pointers this function will use to null.errorMessage =0;
vertexShaderBuffer =0;pixelShaderBuffer =0;
The bump map vertex shader is loaded here.
// Compile the vertex shader code.result =D3DX11CompileFromFile(vsFilename, NULL, NULL, "BumpMapVertexShader", "vs_5_0", D3D10_SHADER_ENABLE_STRICTNESS,
0, NULL, &vertexShaderBuffer, &errorMessage, NULL);if(FAILED(result))
{ // If the shader failed to compile it should have writen something to the error message.if(errorMessage){
OutputShaderErrorMessage(errorMessage, hwnd, vsFilename);}// If there was nothing in the error message then it simply could not find the shader file itself.else{
MessageBox(hwnd, vsFilename, L"Missing Shader File", MB_OK);}
return false;}
The bump map pixel shader is loaded here.
// Compile the pixel shader code.
result =D3DX11CompileFromFile(psFilename, NULL, NULL, "BumpMapPixelShader", "ps_5_0", D3D10_SHADER_ENABLE_STRICTNESS,0, NULL, &pixelShaderBuffer, &errorMessage, NULL);if(FAILED(result)){
// If the shader failed to compile it should have writen something to the error message.if(errorMessage){
OutputShaderErrorMessage(errorMessage, hwnd, psFilename);}
// If there was nothing in the error message then it simply could not find the file itself.else
Tutorial 20: Bump Mapping http://www.rastertek.com/dx11tut20.html

7/14/2019 RasterTek: Direct3D introduction
http://slidepdf.com/reader/full/rastertek-direct3d-introduction 351/709
{MessageBox(hwnd, psFilename, L"Missing Shader File", MB_OK);
}
12 of 37 3/8/2013 12:39 PM
return false;}
// Create the vertex shader from the buffer.result =device->CreateVertexShader(vertexShaderBuffer->GetBufferPointer(), vertexShaderBuffer->GetBufferSize(), NULL,&m_vertexShader);
if(FAILED(result)){
return false;}
// Create the vertex shader from the buffer.
result =device->CreatePixelShader(pixelShaderBuffer->GetBufferPointer(), pixelShaderBuffer->GetBufferSize(), NULL,&m_pixelShader);if(FAILED(result)){
return false;}
// Create the vertex input layout description.// This setup needs to match the VertexType stucture in the ModelClass and in the shader.
polygonLayout[0].SemanticName ="POSITION";polygonLayout[0].SemanticIndex =0;polygonLayout[0].Format =DXGI_FORMAT_R32G32B32_FLOAT;polygonLayout[0].InputSlot =0;polygonLayout[0].AlignedByteOffset =0;polygonLayout[0].InputSlotClass =D3D11_INPUT_PER_VERTEX_DATA;polygonLayout[0].InstanceDataStepRate =0;
polygonLayout[1].SemanticName ="TEXCOORD";
polygonLayout[1].SemanticIndex =0;polygonLayout[1].Format =DXGI_FORMAT_R32G32_FLOAT;polygonLayout[1].InputSlot =0;polygonLayout[1].AlignedByteOffset =D3D11_APPEND_ALIGNED_ELEMENT;polygonLayout[1].InputSlotClass =D3D11_INPUT_PER_VERTEX_DATA;polygonLayout[1].InstanceDataStepRate =0;
polygonLayout[2].SemanticName ="NORMAL";polygonLayout[2].SemanticIndex =0;
polygonLayout[2].Format =DXGI_FORMAT_R32G32B32_FLOAT;polygonLayout[2].InputSlot =0;
l L [2]Ali dB Off D3D11 APPEND ALIGNED ELEMENT
Tutorial 20: Bump Mapping http://www.rastertek.com/dx11tut20.html

7/14/2019 RasterTek: Direct3D introduction
http://slidepdf.com/reader/full/rastertek-direct3d-introduction 352/709
polygonLayout[2].AlignedByteOffset =D3D11_APPEND_ALIGNED_ELEMENT;polygonLayout[2].InputSlotClass =D3D11_INPUT_PER_VERTEX_DATA;polygonLayout[2].InstanceDataStepRate =0;
13 of 37 3/8/2013 12:39 PM
The layout now includes a tangent and binormal element which are setup the same as the normal element with the exception of the semantic name.
polygonLayout[3].SemanticName ="TANGENT";polygonLayout[3].SemanticIndex =0;
polygonLayout[3].Format =DXGI_FORMAT_R32G32B32_FLOAT;polygonLayout[3].InputSlot =0;polygonLayout[3].AlignedByteOffset =D3D11_APPEND_ALIGNED_ELEMENT;polygonLayout[3].InputSlotClass =D3D11_INPUT_PER_VERTEX_DATA;polygonLayout[3].InstanceDataStepRate =0;
polygonLayout[4].SemanticName ="BINORMAL";polygonLayout[4].SemanticIndex =0;polygonLayout[4].Format =DXGI_FORMAT_R32G32B32_FLOAT;
polygonLayout[4].InputSlot =0;polygonLayout[4].AlignedByteOffset =D3D11_APPEND_ALIGNED_ELEMENT;polygonLayout[4].InputSlotClass =D3D11_INPUT_PER_VERTEX_DATA;polygonLayout[4].InstanceDataStepRate =0;
// Get a count of the elements in the layout.numElements =sizeof(polygonLayout) / sizeof(polygonLayout[0]);
// Create the vertex input layout.
result =device->CreateInputLayout(polygonLayout, numElements, vertexShaderBuffer->GetBufferPointer(),vertexShaderBuffer->GetBufferSize(), &m_layout);if(FAILED(result)){
return false;}
// Release the vertex shader buffer and pixel shader buffer since they are no longer needed.vertexShaderBuffer->Release();
vertexShaderBuffer =0;
pixelShaderBuffer->Release();pixelShaderBuffer =0;
// Setup the description of the matrix dynamic constant buffer that is in the vertex shader.matrixBufferDesc.Usage =D3D11_USAGE_DYNAMIC;matrixBufferDesc.ByteWidth =sizeof(MatrixBufferType);matrixBufferDesc.BindFlags =D3D11_BIND_CONSTANT_BUFFER;
matrixBufferDesc.CPUAccessFlags =D3D11_CPU_ACCESS_WRITE;matrixBufferDesc.MiscFlags =0;matri BufferDesc StructureB teStride 0
Tutorial 20: Bump Mapping http://www.rastertek.com/dx11tut20.html

7/14/2019 RasterTek: Direct3D introduction
http://slidepdf.com/reader/full/rastertek-direct3d-introduction 353/709
matrixBufferDesc.StructureByteStride =0;
// Create the matrix constant buffer pointer so we can access the vertex shader constant buffer from within this class.
14 of 37 3/8/2013 12:39 PM
result =device->CreateBuffer(&matrixBufferDesc, NULL, &m_matrixBuffer);if(FAILED(result)){
return false;}
// Create a texture sampler state description.samplerDesc.Filter =D3D11_FILTER_MIN_MAG_MIP_LINEAR;samplerDesc.AddressU =D3D11_TEXTURE_ADDRESS_WRAP;samplerDesc.AddressV =D3D11_TEXTURE_ADDRESS_WRAP;samplerDesc.AddressW =D3D11_TEXTURE_ADDRESS_WRAP;samplerDesc.MipLODBias =0.0f;samplerDesc.MaxAnisotropy =1;
samplerDesc.ComparisonFunc =D3D11_COMPARISON_ALWAYS;samplerDesc.BorderColor[0] =0;samplerDesc.BorderColor[1] =0;samplerDesc.BorderColor[2] =0;samplerDesc.BorderColor[3] =0;samplerDesc.MinLOD =0;samplerDesc.MaxLOD =D3D11_FLOAT32_MAX;
// Create the texture sampler state.
result =device->CreateSamplerState(&samplerDesc, &m_sampleState);if(FAILED(result)){
return false;}
The light constant buffer is setup here.
// Setup the description of the light dynamic constant buffer that is in the pixel shader.
lightBufferDesc.Usage =D3D11_USAGE_DYNAMIC;lightBufferDesc.ByteWidth =sizeof(LightBufferType);lightBufferDesc.BindFlags =D3D11_BIND_CONSTANT_BUFFER;lightBufferDesc.CPUAccessFlags =D3D11_CPU_ACCESS_WRITE;lightBufferDesc.MiscFlags =0;lightBufferDesc.StructureByteStride =0;
// Create the constant buffer pointer so we can access the vertex shader constant buffer from within this class.result =device->CreateBuffer(&lightBufferDesc, NULL, &m_lightBuffer);
if(FAILED(result)){return false;
Tutorial 20: Bump Mapping http://www.rastertek.com/dx11tut20.html

7/14/2019 RasterTek: Direct3D introduction
http://slidepdf.com/reader/full/rastertek-direct3d-introduction 354/709
return false;}
15 of 37 3/8/2013 12:39 PM
return true;}
The ShutdownShader function releases all the pointers that were setup in the InitializeShader function.
void BumpMapShaderClass::ShutdownShader(){
// Release the light constant buffer.if(m_lightBuffer){
m_lightBuffer->Release();m_lightBuffer =0;
}
// Release the sampler state.if(m_sampleState){
m_sampleState->Release();m_sampleState =0;
}
// Release the matrix constant buffer.
if(m_matrixBuffer){m_matrixBuffer->Release();m_matrixBuffer =0;
}
// Release the layout.if(m_layout){
m_layout->Release();m_layout =0;}
// Release the pixel shader.if(m_pixelShader){
m_pixelShader->Release();m_pixelShader =0;
}
// Release the vertex shader
Tutorial 20: Bump Mapping http://www.rastertek.com/dx11tut20.html

7/14/2019 RasterTek: Direct3D introduction
http://slidepdf.com/reader/full/rastertek-direct3d-introduction 355/709
// Release the vertex shader.if(m_vertexShader){
16 of 37 3/8/2013 12:39 PM
m_vertexShader->Release();m_vertexShader =0;
}
return;}
OutputShaderErrorMessage writes out errors to a text file if the HLSL shader file won't compile properly.
void BumpMapShaderClass::OutputShaderErrorMessage(ID3D10Blob* errorMessage, HWND hwnd, WCHAR* shaderFilename){
char* compileErrors;unsigned long bufferSize, i;ofstream fout;
// Get a pointer to the error message text buffer.compileErrors =(char*)(errorMessage->GetBufferPointer());
// Get the length of the message.bufferSize =errorMessage->GetBufferSize();
// Open a file to write the error message to.fout.open("shader-error.txt");
// Write out the error message.for(i=0; i<bufferSize; i++){
fout <<compileErrors[i];}
// Close the file.fout.close();
// Release the error message.errorMessage->Release();errorMessage =0;
// Pop a message up on the screen to notify the user to check the text file for compile errors.MessageBox(hwnd, L"Error compiling shader. Check shader-error.txt for message.", shaderFilename, MB_OK);
return;}
Tutorial 20: Bump Mapping http://www.rastertek.com/dx11tut20.html

7/14/2019 RasterTek: Direct3D introduction
http://slidepdf.com/reader/full/rastertek-direct3d-introduction 356/709
}
The SetShaderParameters function sets the shader parameters before rendering occurs.
17 of 37 3/8/2013 12:39 PM
bool BumpMapShaderClass::SetShaderParameters(ID3D11DeviceContext* deviceContext, D3DXMATRIX worldMatrix,D3DXMATRIX viewMatrix, D3DXMATRIX projectionMatrix,ID3D11ShaderResourceView** textureArray, D3DXVECTOR3 lightDirection,D3DXVECTOR4 diffuseColor)
{HRESULT result;D3D11_MAPPED_SUBRESOURCE mappedResource;MatrixBufferType* dataPtr;unsigned int bufferNumber;LightBufferType* dataPtr2;
// Transpose the matrices to prepare them for the shader.D3DXMatrixTranspose(&worldMatrix, &worldMatrix);D3DXMatrixTranspose(&viewMatrix, &viewMatrix);D3DXMatrixTranspose(&projectionMatrix, &projectionMatrix);
// Lock the matrix constant buffer so it can be written to.result =deviceContext->Map(m_matrixBuffer, 0, D3D11_MAP_WRITE_DISCARD, 0, &mappedResource);if(FAILED(result)){
return false;
}
// Get a pointer to the data in the constant buffer.dataPtr =(MatrixBufferType*)mappedResource.pData;
// Copy the matrices into the constant buffer.dataPtr->world =worldMatrix;dataPtr->view =viewMatrix;dataPtr->projection =projectionMatrix;
// Unlock the matrix constant buffer.deviceContext->Unmap(m_matrixBuffer, 0);
// Set the position of the matrix constant buffer in the vertex shader.bufferNumber =0;
// Now set the matrix constant buffer in the vertex shader with the updated values.deviceContext->VSSetConstantBuffers(bufferNumber, 1, &m_matrixBuffer);
The texture array is set here, it contains two textures. The first texture is the color texture and the second texture is the normal map.
Tutorial 20: Bump Mapping http://www.rastertek.com/dx11tut20.html

7/14/2019 RasterTek: Direct3D introduction
http://slidepdf.com/reader/full/rastertek-direct3d-introduction 357/709
// Set shader texture array resource in the pixel shader.deviceContext->PSSetShaderResources(0, 2, textureArray);
18 of 37 3/8/2013 12:39 PM
The light buffer in the pixel shader is then set with the diffuse light color and light direction.
// Lock the light constant buffer so it can be written to.result =deviceContext->Map(m_lightBuffer, 0, D3D11_MAP_WRITE_DISCARD, 0, &mappedResource);if(FAILED(result)){
return false;}
// Get a pointer to the data in the constant buffer.dataPtr2 =(LightBufferType*)mappedResource.pData;
// Copy the lighting variables into the constant buffer.dataPtr2->diffuseColor =diffuseColor;dataPtr2->lightDirection =lightDirection;
// Unlock the constant buffer.deviceContext->Unmap(m_lightBuffer, 0);
// Set the position of the light constant buffer in the pixel shader.bufferNumber =0;
// Finally set the light constant buffer in the pixel shader with the updated values.deviceContext->PSSetConstantBuffers(bufferNumber, 1, &m_lightBuffer);
return true;}
RenderShader draws the model using the bump map shader.
void BumpMapShaderClass::RenderShader(ID3D11DeviceContext* deviceContext, int indexCount)
{ // Set the vertex input layout.deviceContext->IASetInputLayout(m_layout);
// Set the vertex and pixel shaders that will be used to render this triangle.deviceContext->VSSetShader(m_vertexShader, NULL, 0);deviceContext->PSSetShader(m_pixelShader, NULL, 0);
// Set the sampler state in the pixel shader.
deviceContext->PSSetSamplers(0, 1, &m_sampleState);
// Render the triangles.
Tutorial 20: Bump Mapping http://www.rastertek.com/dx11tut20.html

7/14/2019 RasterTek: Direct3D introduction
http://slidepdf.com/reader/full/rastertek-direct3d-introduction 358/709
deviceContext->DrawIndexed(indexCount, 0, 0);
19 of 37 3/8/2013 12:39 PM
return;}
Modelclass.h
////////////////////////////////////////////////////////////////////////////////// Filename: modelclass.h////////////////////////////////////////////////////////////////////////////////#ifndef _MODELCLASS_H_ #define _MODELCLASS_H_
//////////////// INCLUDES ////////////////#include <d3d11.h>#include <d3dx10math.h>#include <fstream>using namespace std;
///////////////////////// MY CLASS INCLUDES /////////////////////////#include "texturearrayclass.h"
////////////////////////////////////////////////////////////////////////////////// Class name: ModelClass
////////////////////////////////////////////////////////////////////////////////class ModelClass{private:
The VertexType structure has been changed to now have a tangent and binormal vector.
struct VertexType{
D3DXVECTOR3 position;D3DXVECTOR2 texture;D3DXVECTOR3 normal;
Tutorial 20: Bump Mapping http://www.rastertek.com/dx11tut20.html

7/14/2019 RasterTek: Direct3D introduction
http://slidepdf.com/reader/full/rastertek-direct3d-introduction 359/709
;D3DXVECTOR3 tangent;
20 of 37 3/8/2013 12:39 PM
D3DXVECTOR3 binormal;};
The ModelType structure has also been changed to have a tangent and binormal vector.
struct ModelType{
float x, y, z;float tu, tv;float nx, ny, nz;float tx, ty, tz;float bx, by, bz;
};
The following two structures will be used for calculating the tangent and binormal.
struct TempVertexType{
float x, y, z;float tu, tv;float nx, ny, nz;
};
struct VectorType{
float x, y, z;};
public:ModelClass();ModelClass(const ModelClass&);~ModelClass();
bool Initialize(ID3D11Device*, char*, WCHAR*, WCHAR*);void Shutdown();void Render(ID3D11DeviceContext*);
int GetIndexCount();ID3D11ShaderResourceView** GetTextureArray();
private:bool InitializeBuffers(ID3D11Device*);void ShutdownBuffers();
id R d B ff (ID3D11D i C t t*)
Tutorial 20: Bump Mapping http://www.rastertek.com/dx11tut20.html

7/14/2019 RasterTek: Direct3D introduction
http://slidepdf.com/reader/full/rastertek-direct3d-introduction 360/709
void RenderBuffers(ID3D11DeviceContext*);
21 of 37 3/8/2013 12:39 PM
bool LoadTextures(ID3D11Device*, WCHAR*, WCHAR*);void ReleaseTextures();
bool LoadModel(char*);void ReleaseModel();
We have three new functions for calculating the tangent and binormal vectors for the model.
void CalculateModelVectors();void CalculateTangentBinormal(TempVertexType, TempVertexType, TempVertexType, VectorType&, VectorType&);void CalculateNormal(VectorType, VectorType, VectorType&);
private:ID3D11Buffer *m_vertexBuffer, *m_indexBuffer;int m_vertexCount, m_indexCount;ModelType* m_model;
TextureArrayClass* m_TextureArray;};
#endif
Modelclass.cpp
////////////////////////////////////////////////////////////////////////////////// Filename: modelclass.cpp////////////////////////////////////////////////////////////////////////////////#include "modelclass.h"
The Initialize function now takes in two texture filenames. The first texture filename is for the color texture. The second texture filename is for the normal map that
will be used to create the bump effect.
bool ModelClass::Initialize(ID3D11Device* device, char* modelFilename, WCHAR* textureFilename1, WCHAR* textureFilename2){
bool result;
// Load in the model data,result =LoadModel(modelFilename);
if(!result){
return false;
Tutorial 20: Bump Mapping http://www.rastertek.com/dx11tut20.html

7/14/2019 RasterTek: Direct3D introduction
http://slidepdf.com/reader/full/rastertek-direct3d-introduction 361/709
}
22 of 37 3/8/2013 12:39 PM
After the model data has been loaded we now call the new CalculateModelVectors function to calculate the tangent and binormal. It also recalculates the normalvector.
// Calculate the normal, tangent, and binormal vectors for the model.CalculateModelVectors();
// Initialize the vertex and index buffers.result =InitializeBuffers(device);if(!result){
return false;}
The two textures for the model are loaded here. The first is the color texture and the second is the normal map.
// Load the textures for this model.result =LoadTextures(device, textureFilename1, textureFilename2);if(!result){
return false;}
return true;}
bool ModelClass::InitializeBuffers(ID3D11Device* device){
VertexType* vertices;unsigned long* indices;D3D11_BUFFER_DESC vertexBufferDesc, indexBufferDesc;D3D11_SUBRESOURCE_DATA vertexData, indexData;HRESULT result;int i;
// Create the vertex array.vertices =new VertexType[m_vertexCount];if(!vertices){
return false;}
// Create the index array
Tutorial 20: Bump Mapping http://www.rastertek.com/dx11tut20.html

7/14/2019 RasterTek: Direct3D introduction
http://slidepdf.com/reader/full/rastertek-direct3d-introduction 362/709
// Create the index array.indices =new unsigned long[m_indexCount];
23 of 37 3/8/2013 12:39 PM
if(!indices){
return false;}
The InitializeBuffers function has changed at this point where the vertex array is loaded with data from the ModelType array. The ModelType array now has tangentand binormal values for the model so they need to be copied into the vertex array which will then be copied into the vertex buffer.
// Load the vertex array and index array with data.for(i=0; i<m_vertexCount; i++){
vertices[i].position =D3DXVECTOR3(m_model[i].x, m_model[i].y, m_model[i].z);vertices[i].texture =D3DXVECTOR2(m_model[i].tu, m_model[i].tv);vertices[i].normal =D3DXVECTOR3(m_model[i].nx, m_model[i].ny, m_model[i].nz);vertices[i].tangent =D3DXVECTOR3(m_model[i].tx, m_model[i].ty, m_model[i].tz);vertices[i].binormal =D3DXVECTOR3(m_model[i].bx, m_model[i].by, m_model[i].bz);
indices[i] =i;}
// Set up the description of the static vertex buffer.vertexBufferDesc.Usage =D3D11_USAGE_DEFAULT;vertexBufferDesc.ByteWidth =sizeof(VertexType) * m_vertexCount;vertexBufferDesc.BindFlags =D3D11_BIND_VERTEX_BUFFER;vertexBufferDesc.CPUAccessFlags =0;vertexBufferDesc.MiscFlags =0;vertexBufferDesc.StructureByteStride =0;
// Give the subresource structure a pointer to the vertex data.vertexData.pSysMem =vertices;vertexData.SysMemPitch =0;vertexData.SysMemSlicePitch =0;
// Now create the vertex buffer.result =device->CreateBuffer(&vertexBufferDesc, &vertexData, &m_vertexBuffer);if(FAILED(result)){
return false;}
// Set up the description of the static index buffer.indexBufferDesc.Usage =D3D11_USAGE_DEFAULT;indexBufferDesc.ByteWidth =sizeof(unsigned long) * m_indexCount;indexBufferDesc BindFlags =D3D11 BIND INDEX BUFFER;
Tutorial 20: Bump Mapping http://www.rastertek.com/dx11tut20.html

7/14/2019 RasterTek: Direct3D introduction
http://slidepdf.com/reader/full/rastertek-direct3d-introduction 363/709
indexBufferDesc.BindFlags =D3D11_BIND_INDEX_BUFFER;indexBufferDesc.CPUAccessFlags =0;
24 of 37 3/8/2013 12:39 PM
indexBufferDesc.MiscFlags =0;indexBufferDesc.StructureByteStride =0;
// Give the subresource structure a pointer to the index data.indexData.pSysMem =indices;
indexData.SysMemPitch =0;indexData.SysMemSlicePitch =0;
// Create the index buffer.result =device->CreateBuffer(&indexBufferDesc, &indexData, &m_indexBuffer);if(FAILED(result)){
return false;}
// Release the arrays now that the vertex and index buffers have been created and loaded.delete [] vertices;vertices =0;
delete [] indices;indices =0;
return true;}
LoadTextures now creates a vertex array and then loads the color texture and normal map into the two element texture array.
bool ModelClass::LoadTextures(ID3D11Device* device, WCHAR* filename1, WCHAR* filename2){
bool result;
// Create the texture array object.m_TextureArray =new TextureArrayClass;if(!m_TextureArray){
return false;}
// Initialize the texture array object.result =m_TextureArray->Initialize(device, filename1, filename2);if(!result){
return false;
Tutorial 20: Bump Mapping http://www.rastertek.com/dx11tut20.html

7/14/2019 RasterTek: Direct3D introduction
http://slidepdf.com/reader/full/rastertek-direct3d-introduction 364/709
return false;}
25 of 37 3/8/2013 12:39 PM
return true;}
CalculateModelVectors generates the tangent and binormal for the model as well as a recalculated normal vector. To start it calculates how many faces (triangles)
are in the model. Then for each of those triangles it gets the three vertices and uses that to calculate the tangent, binormal, and normal. After calculating those threenormal vectors it then saves them back into the model structure.
void ModelClass::CalculateModelVectors(){
int faceCount, i, index; TempVertexType vertex1, vertex2, vertex3;VectorType tangent, binormal, normal;
// Calculate the number of faces in the model.faceCount =m_vertexCount / 3;
// Initialize the index to the model data.index =0;
// Go through all the faces and calculate the the tangent, binormal, and normal vectors.for(i=0; i<faceCount; i++){
// Get the three vertices for this face from the model.vertex1.x =m_model[index].x;vertex1.y =m_model[index].y;vertex1.z =m_model[index].z;vertex1.tu =m_model[index].tu;vertex1.tv =m_model[index].tv;vertex1.nx =m_model[index].nx;vertex1.ny =m_model[index].ny;vertex1.nz =m_model[index].nz;index++;
vertex2.x =m_model[index].x;vertex2.y =m_model[index].y;vertex2.z =m_model[index].z;vertex2.tu =m_model[index].tu;vertex2.tv =m_model[index].tv;vertex2.nx =m_model[index].nx;vertex2.ny =m_model[index].ny;vertex2.nz =m_model[index].nz;index++;
Tutorial 20: Bump Mapping http://www.rastertek.com/dx11tut20.html

7/14/2019 RasterTek: Direct3D introduction
http://slidepdf.com/reader/full/rastertek-direct3d-introduction 365/709
26 of 37 3/8/2013 12:39 PM
vertex3.x =m_model[index].x;vertex3.y =m_model[index].y;vertex3.z =m_model[index].z;vertex3.tu =m_model[index].tu;vertex3.tv =m_model[index].tv;
vertex3.nx =m_model[index].nx;vertex3.ny =m_model[index].ny;vertex3.nz =m_model[index].nz;index++;
// Calculate the tangent and binormal of that face.CalculateTangentBinormal(vertex1, vertex2, vertex3, tangent, binormal);
// Calculate the new normal using the tangent and binormal.
CalculateNormal(tangent, binormal, normal);
// Store the normal, tangent, and binormal for this face back in the model structure.m_model[index-1].nx =normal.x;m_model[index-1].ny =normal.y;m_model[index-1].nz =normal.z;m_model[index-1].tx =tangent.x;m_model[index-1].ty =tangent.y;m_model[index-1].tz =tangent.z;m_model[index-1].bx =binormal.x;m_model[index-1].by =binormal.y;m_model[index-1].bz =binormal.z;
m_model[index-2].nx =normal.x;m_model[index-2].ny =normal.y;m_model[index-2].nz =normal.z;m_model[index-2].tx =tangent.x;m_model[index-2].ty =tangent.y;m_model[index-2].tz =tangent.z;m_model[index-2].bx =binormal.x;m_model[index-2].by =binormal.y;m_model[index-2].bz =binormal.z;
m_model[index-3].nx =normal.x;m_model[index-3].ny =normal.y;m_model[index-3].nz =normal.z;m_model[index-3].tx =tangent.x;m_model[index-3].ty =tangent.y;m_model[index-3].tz =tangent.z;m_model[index-3].bx =binormal.x;
Tutorial 20: Bump Mapping http://www.rastertek.com/dx11tut20.html

7/14/2019 RasterTek: Direct3D introduction
http://slidepdf.com/reader/full/rastertek-direct3d-introduction 366/709
m_model[index-3].by =binormal.y;
27 of 37 3/8/2013 12:39 PM
m_model[index-3].bz =binormal.z;}
return;}
The CalculateTangentBinormal function takes in three vertices and then calculates and returns the tangent and binormal of those three vertices.
void ModelClass::CalculateTangentBinormal(TempVertexType vertex1, TempVertexType vertex2, TempVertexType vertex3,VectorType& tangent, VectorType& binormal)
{float vector1[3], vector2[3];float tuVector[2], tvVector[2];float den;
float length;
// Calculate the two vectors for this face.vector1[0] =vertex2.x - vertex1.x;vector1[1] =vertex2.y - vertex1.y;vector1[2] =vertex2.z - vertex1.z;
vector2[0] =vertex3.x - vertex1.x;
vector2[1] =vertex3.y - vertex1.y;vector2[2] =vertex3.z - vertex1.z;
// Calculate the tu and tv texture space vectors.tuVector[0] =vertex2.tu - vertex1.tu;tvVector[0] =vertex2.tv - vertex1.tv;
tuVector[1] =vertex3.tu - vertex1.tu;tvVector[1] =vertex3.tv - vertex1.tv;
// Calculate the denominator of the tangent/binormal equation.den =1.0f / (tuVector[0] * tvVector[1] - tuVector[1] * tvVector[0]);
// Calculate the cross products and multiply by the coefficient to get the tangent and binormal.tangent.x =(tvVector[1] * vector1[0] - tvVector[0] * vector2[0]) * den;tangent.y =(tvVector[1] * vector1[1] - tvVector[0] * vector2[1]) * den;tangent.z =(tvVector[1] * vector1[2] - tvVector[0] * vector2[2]) * den;
binormal.x =(tuVector[0] * vector2[0] - tuVector[1] * vector1[0]) * den;binormal.y =(tuVector[0] * vector2[1] - tuVector[1] * vector1[1]) * den;binormal.z =(tuVector[0] * vector2[2] - tuVector[1] * vector1[2]) * den;
Tutorial 20: Bump Mapping http://www.rastertek.com/dx11tut20.html

7/14/2019 RasterTek: Direct3D introduction
http://slidepdf.com/reader/full/rastertek-direct3d-introduction 367/709
28 of 37 3/8/2013 12:39 PM
// Calculate the length of this normal.length =sqrt((tangent.x * tangent.x) +(tangent.y * tangent.y) +(tangent.z * tangent.z));
// Normalize the normal and then store ittangent.x =tangent.x / length;
tangent.y =tangent.y / length;tangent.z =tangent.z / length;
// Calculate the length of this normal.length =sqrt((binormal.x * binormal.x) +(binormal.y * binormal.y) +(binormal.z * binormal.z));
// Normalize the normal and then store itbinormal.x =binormal.x / length;binormal.y =binormal.y / length;
binormal.z =binormal.z / length;
return;}
The CalculateNormal function takes in the tangent and binormal and then does a cross product to give back the normal vector.
void ModelClass::CalculateNormal(VectorType tangent, VectorType binormal, VectorType& normal){
float length;
// Calculate the cross product of the tangent and binormal which will give the normal vector.normal.x =(tangent.y * binormal.z) - (tangent.z * binormal.y);normal.y =(tangent.z * binormal.x) - (tangent.x * binormal.z);normal.z =(tangent.x * binormal.y) - (tangent.y * binormal.x);
// Calculate the length of the normal.length =sqrt((normal.x * normal.x) +(normal.y * normal.y) +(normal.z * normal.z));
// Normalize the normal.normal.x =normal.x / length;normal.y =normal.y / length;normal.z =normal.z / length;
return;}
Tutorial 20: Bump Mapping http://www.rastertek.com/dx11tut20.html

7/14/2019 RasterTek: Direct3D introduction
http://slidepdf.com/reader/full/rastertek-direct3d-introduction 368/709
29 of 37 3/8/2013 12:39 PM
Graphicsclass.h
////////////////////////////////////////////////////////////////////////////////// Filename: graphicsclass.h////////////////////////////////////////////////////////////////////////////////#ifndef _GRAPHICSCLASS_H_ #define _GRAPHICSCLASS_H_
/////////////// GLOBALS ///////////////const bool FULL_SCREEN =true;const bool VSYNC_ENABLED =true;const float SCREEN_DEPTH =1000.0f;const float SCREEN_NEAR =0.1f;
///////////////////////// MY CLASS INCLUDES /////////////////////////#include "d3dclass.h"#include "cameraclass.h"#include "modelclass.h"
The new BumpMapShaderClass header file is included here in the GraphicsClass header.
#include "bumpmapshaderclass.h"#include "lightclass.h"
////////////////////////////////////////////////////////////////////////////////// Class name: GraphicsClass////////////////////////////////////////////////////////////////////////////////class GraphicsClass{public:
GraphicsClass();GraphicsClass(const GraphicsClass&);~GraphicsClass();
bool Initialize(int, int, HWND);void Shutdown();bool Frame();
Tutorial 20: Bump Mapping http://www.rastertek.com/dx11tut20.html

7/14/2019 RasterTek: Direct3D introduction
http://slidepdf.com/reader/full/rastertek-direct3d-introduction 369/709
30 of 37 3/8/2013 12:39 PM
bool Render();
private:D3DClass* m_D3D;CameraClass* m_Camera;
ModelClass* m_Model;
The new BumpMapShaderClass object is created here.
BumpMapShaderClass* m_BumpMapShader;LightClass* m_Light;
};
#endif
Graphicsclass.cpp
////////////////////////////////////////////////////////////////////////////////// Filename: graphicsclass.cpp////////////////////////////////////////////////////////////////////////////////#include "graphicsclass.h"
GraphicsClass::GraphicsClass(){
m_D3D =0;m_Camera =0;m_Model =0;
We initialize the BumpMapShaderClass object to null in the class constructor.
m_BumpMapShader =0;m_Light =0;
}
bool GraphicsClass::Initialize(int screenWidth, int screenHeight, HWND hwnd){
bool result;D3DXMATRIX baseViewMatrix;
Tutorial 20: Bump Mapping http://www.rastertek.com/dx11tut20.html

7/14/2019 RasterTek: Direct3D introduction
http://slidepdf.com/reader/full/rastertek-direct3d-introduction 370/709
31 of 37 3/8/2013 12:39 PM
// Create the Direct3D object.m_D3D =new D3DClass;if(!m_D3D){
return false;
}
// Initialize the Direct3D object.result =m_D3D->Initialize(screenWidth, screenHeight, VSYNC_ENABLED, hwnd, FULL_SCREEN, SCREEN_DEPTH, SCREEN_NEAR);if(!result){
MessageBox(hwnd, L"Could not initialize Direct3D", L"Error", MB_OK);return false;
}
// Create the camera object.m_Camera =new CameraClass;if(!m_Camera){
return false;}
// Initialize a base view matrix with the camera for 2D user interface rendering.
m_Camera->SetPosition(0.0f, 0.0f, -1.0f);m_Camera->Render();m_Camera->GetViewMatrix(baseViewMatrix);
// Create the model object.m_Model =new ModelClass;if(!m_Model){
return false;
}
The ModelClass object is initialized with the cube model, the stone01.dds color texture, and the bump01.dds normal map.
// Initialize the model object.result =m_Model->Initialize(m_D3D->GetDevice(), "../Engine/data/cube.txt", L"../Engine/data/stone01.dds",
L"../Engine/data/bump01.dds");if(!result){
MessageBox(hwnd, L"Could not initialize the model object.", L"Error", MB_OK);return false;
}
Tutorial 20: Bump Mapping http://www.rastertek.com/dx11tut20.html

7/14/2019 RasterTek: Direct3D introduction
http://slidepdf.com/reader/full/rastertek-direct3d-introduction 371/709
32 of 37 3/8/2013 12:39 PM
Here we create and initialize the BumpMapShaderClass object.
// Create the bump map shader object.m_BumpMapShader =new BumpMapShaderClass;if(!m_BumpMapShader)
{return false;
}
// Initialize the bump map shader object.result =m_BumpMapShader->Initialize(m_D3D->GetDevice(), hwnd);if(!result){
MessageBox(hwnd, L"Could not initialize the bump map shader object.", L"Error", MB_OK);
return false;}
// Create the light object.m_Light =new LightClass;if(!m_Light){
return false;}
The light color is set to white and the light direction is set down the positive Z axis.
// Initialize the light object.m_Light->SetDiffuseColor(1.0f, 1.0f, 1.0f, 1.0f);m_Light->SetDirection(0.0f, 0.0f, 1.0f);
return true;}
void GraphicsClass::Shutdown(){
// Release the light object.if(m_Light){
delete m_Light;m_Light =0;
}
The new BumpMapShaderClass is released here in the Shutdown function.
Tutorial 20: Bump Mapping http://www.rastertek.com/dx11tut20.html
7/14/2019 RasterTek: Direct3D introduction
http://slidepdf.com/reader/full/rastertek-direct3d-introduction 372/709
33 of 37 3/8/2013 12:39 PM
// Release the bump map shader object.if(m_BumpMapShader){
m_BumpMapShader->Shutdown();delete m_BumpMapShader;
m_BumpMapShader =0;}
// Release the model object.if(m_Model){
m_Model->Shutdown();delete m_Model;m_Model =0;
}
// Release the camera object.if(m_Camera){
delete m_Camera;m_Camera =0;
}
// Release the D3D object.if(m_D3D){
m_D3D->Shutdown();delete m_D3D;m_D3D =0;
}
return;
}
bool GraphicsClass::Render(){
D3DXMATRIX worldMatrix, viewMatrix, projectionMatrix, orthoMatrix;static float rotation =0.0f;
// Clear the buffers to begin the scene.m_D3D->BeginScene(0.0f, 0.0f, 0.0f, 1.0f);
// Generate the view matrix based on the camera's position.
Tutorial 20: Bump Mapping http://www.rastertek.com/dx11tut20.html

7/14/2019 RasterTek: Direct3D introduction
http://slidepdf.com/reader/full/rastertek-direct3d-introduction 373/709
p
34 of 37 3/8/2013 12:39 PM
m_Camera->Render();
// Get the world, view, projection, and ortho matrices from the camera and D3D objects.m_D3D->GetWorldMatrix(worldMatrix);m_Camera->GetViewMatrix(viewMatrix);
m_D3D->GetProjectionMatrix(projectionMatrix);m_D3D->GetOrthoMatrix(orthoMatrix);
Rotate the cube model each frame to show the effect.
// Update the rotation variable each frame.rotation +=(float)D3DX_PI * 0.0025f;if(rotation >360.0f){
rotation -=360.0f;}
// Rotate the world matrix by the rotation value.D3DXMatrixRotationY(&worldMatrix, rotation);
// Put the model vertex and index buffers on the graphics pipeline to prepare them for drawing.m_Model->Render(m_D3D->GetDeviceContext());
Render the model using the bump map shader.
// Render the model using the bump map shader.m_BumpMapShader->Render(m_D3D->GetDeviceContext(), m_Model->GetIndexCount(), worldMatrix, viewMatrix, projectionMatrix,
m_Model->GetTextureArray(), m_Light->GetDirection(), m_Light->GetDiffuseColor());
// Present the rendered scene to the screen.m_D3D->EndScene();
return true;}
Summary
With the bump map shader you can create very detailed scenes that look 3D with just two 2D textures.
Tutorial 20: Bump Mapping http://www.rastertek.com/dx11tut20.html

7/14/2019 RasterTek: Direct3D introduction
http://slidepdf.com/reader/full/rastertek-direct3d-introduction 374/709
35 of 37 3/8/2013 12:39 PM
To Do Exercises
1. Recompile and run the program. You should see a bump mapped rotating cube. Press escape to quit.
2. Change the bump map effect from 2.5 to something smaller (like 1.0) and larger (like 5.0) in the shader to see the change in the bump depth.
3. Comment out the color =color * textureColor; line in the pixel shader to see just the bump lighting effect.
4. Move the camera and light position around to see the effect from different angles.
Source Code
Visual Studio 2008 Project: dx11tut20.zip
Tutorial 20: Bump Mapping http://www.rastertek.com/dx11tut20.html

7/14/2019 RasterTek: Direct3D introduction
http://slidepdf.com/reader/full/rastertek-direct3d-introduction 375/709
36 of 37 3/8/2013 12:39 PM
Source Only: dx11src20.zip
Executable Only:dx11exe20.zip
Back to Tutorial Index
Tutorial 20: Bump Mapping http://www.rastertek.com/dx11tut20.html

7/14/2019 RasterTek: Direct3D introduction
http://slidepdf.com/reader/full/rastertek-direct3d-introduction 376/709
37 of 37 3/8/2013 12:39 PM
Tutorial 25: Texture Translation
Texture translation is the technique used to animate a texture moving over a polygon surface. This tutorial will cover how to implement texture translation using
DirectX 11 and HLSL. The code in this tutorial is based on the previous tutorial.
As discussed in the texturing tutorial we use UV coordinates to map textures to polygons. The UV coordinates translate to X and Y coordinates with X goinghorizontally across the polygon face and Y going vertically across the polygon face. To implement texture translation we have to modify the X and Y coordinate of the texture in the pixel shader. We can do this by simply adding or subtracting a value between 0 and 1 to either the X or Y coordinate.
For example we have the following texture mapped to the polygon:
We then add 0.5 to the texture X coordinate in the pixel shader and it translates the texture coordinates over by half:
Framework
The frame work has been updated to include the new TranslateShaderClass.
Tutorial 25: Texture Translation http://www.rastertek.com/dx11tut25.html

7/14/2019 RasterTek: Direct3D introduction
http://slidepdf.com/reader/full/rastertek-direct3d-introduction 377/709
1 of 22 3/8/2013 12:39 PM
Translate.vs
The vertex shader is the same as the texture vertex shader.
////////////////////////////////////////////////////////////////////////////////// Filename: translate.vs////////////////////////////////////////////////////////////////////////////////
/////////////// GLOBALS ///////////////cbuffer MatrixBuffer{
matrix worldMatrix;matrix viewMatrix;
matrix projectionMatrix;};
//////////////// TYPEDEFS ////////////////struct VertexInputType{
float4 position : POSITION;float2 tex : TEXCOORD0;};
Tutorial 25: Texture Translation http://www.rastertek.com/dx11tut25.html
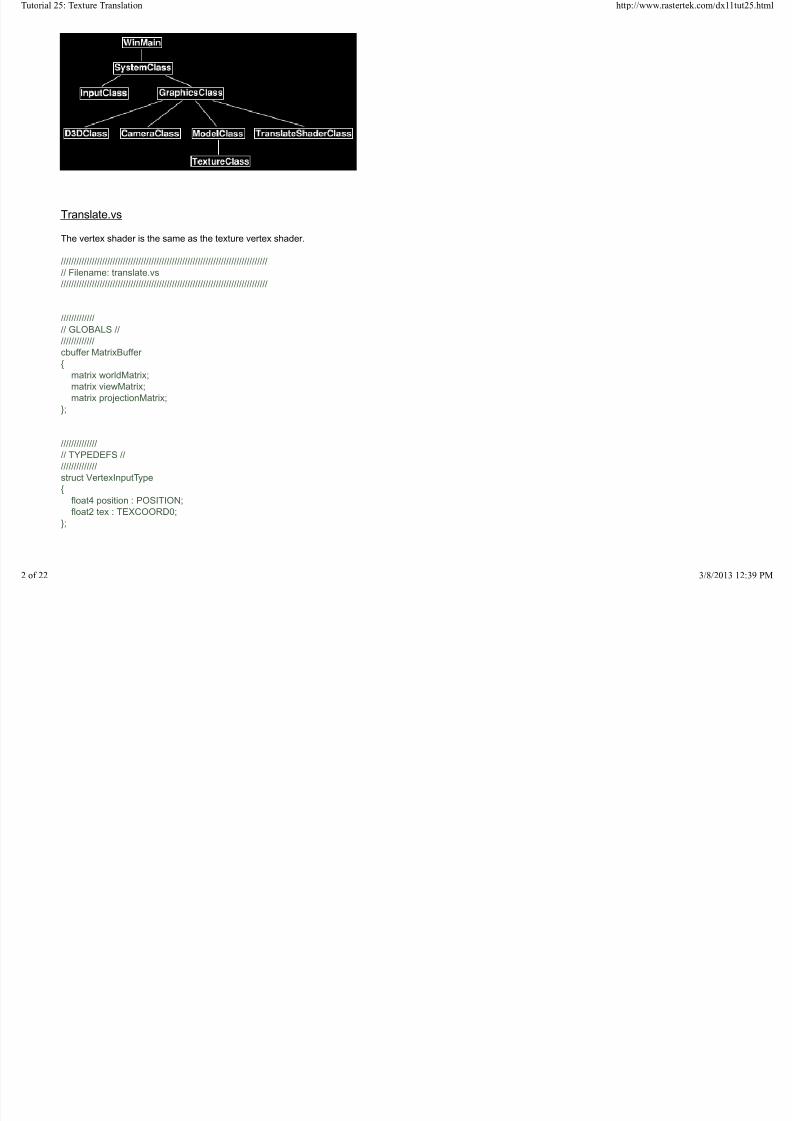
7/14/2019 RasterTek: Direct3D introduction
http://slidepdf.com/reader/full/rastertek-direct3d-introduction 378/709
2 of 22 3/8/2013 12:39 PM
struct PixelInputType{
float4 position : SV_POSITION;float2 tex : TEXCOORD0;
};
////////////////////////////////////////////////////////////////////////////////// Vertex Shader////////////////////////////////////////////////////////////////////////////////PixelInputType TranslateVertexShader(VertexInputType input){
PixelInputType output;
// Change the position vector to be 4 units for proper matrix calculations.input.position.w =1.0f;
// Calculate the position of the vertex against the world, view, and projection matrices.output.position =mul(input.position, worldMatrix);output.position =mul(output.position, viewMatrix);output.position =mul(output.position, projectionMatrix);
// Store the texture coordinates for the pixel shader.output.tex =input.tex;
return output;}
Translate.ps
////////////////////////////////////////////////////////////////////////////////// Filename: translate.ps////////////////////////////////////////////////////////////////////////////////
/////////////// GLOBALS ///////////////
Texture2D shaderTexture;SamplerState SampleType;
Tutorial 25: Texture Translation http://www.rastertek.com/dx11tut25.html

7/14/2019 RasterTek: Direct3D introduction
http://slidepdf.com/reader/full/rastertek-direct3d-introduction 379/709
3 of 22 3/8/2013 12:39 PM
We add a new buffer with a float variable called textureTranslation. This is set in the graphicsclass.cpp during the Render call to update the position of the texturetranslation. The value set here will be between 0 and 1.
cbuffer TranslationBuffer{
float textureTranslation;};
//////////////// TYPEDEFS ////////////////struct PixelInputType{
float4 position : SV_POSITION;float2 tex : TEXCOORD0;
};
The pixel shader is where we do the work of translating the texture coordinate by the textureTranslation amount. We take the input texture coordinate and add thetranslation amount for each pixel shader call. This will uniformly translate the texture across the polygon face.
////////////////////////////////////////////////////////////////////////////////// Pixel Shader
////////////////////////////////////////////////////////////////////////////////float4 TranslatePixelShader(PixelInputType input) : SV_TARGET{
// Translate the position where we sample the pixel from.input.tex.x +=textureTranslation;
return shaderTexture.Sample(SampleType, input.tex);}
Translateshaderclass.h
The TranslateShaderClass is just the TextureShaderClass with extra functionality for texture translation.
////////////////////////////////////////////////////////////////////////////////// Filename: translateshaderclass.h////////////////////////////////////////////////////////////////////////////////#ifndef _TRANSLATESHADERCLASS_H_ #define _TRANSLATESHADERCLASS_H_
Tutorial 25: Texture Translation http://www.rastertek.com/dx11tut25.html

7/14/2019 RasterTek: Direct3D introduction
http://slidepdf.com/reader/full/rastertek-direct3d-introduction 380/709
4 of 22 3/8/2013 12:39 PM
//////////////// INCLUDES ////////////////#include <d3d11.h>
#include <d3dx10math.h>#include <d3dx11async.h>#include <fstream>using namespace std;
////////////////////////////////////////////////////////////////////////////////// Class name: TranslateShaderClass////////////////////////////////////////////////////////////////////////////////
class TranslateShaderClass{private:
struct MatrixBufferType{
D3DXMATRIX world;D3DXMATRIX view;D3DXMATRIX projection;
};
This is the new structure type for the texture translation buffer. We had padding to ensure it is a multiple of 16.
struct TranslateBufferType{
float translation;D3DXVECTOR3 padding;
};
public: TranslateShaderClass(); TranslateShaderClass(const TranslateShaderClass&);~TranslateShaderClass();
bool Initialize(ID3D11Device*, HWND);void Shutdown();bool Render(ID3D11DeviceContext*, int, D3DXMATRIX, D3DXMATRIX, D3DXMATRIX, ID3D11ShaderResourceView*, float);
private:bool InitializeShader(ID3D11Device*, HWND, WCHAR*, WCHAR*);void ShutdownShader();void OutputShaderErrorMessage(ID3D10Blob*, HWND, WCHAR*);
Tutorial 25: Texture Translation http://www.rastertek.com/dx11tut25.html

7/14/2019 RasterTek: Direct3D introduction
http://slidepdf.com/reader/full/rastertek-direct3d-introduction 381/709
5 of 22 3/8/2013 12:39 PM
bool SetShaderParameters(ID3D11DeviceContext*, D3DXMATRIX, D3DXMATRIX, D3DXMATRIX, ID3D11ShaderResourceView*, float);void RenderShader(ID3D11DeviceContext*, int);
private:
ID3D11VertexShader* m_vertexShader;ID3D11PixelShader* m_pixelShader;ID3D11InputLayout* m_layout;ID3D11Buffer* m_matrixBuffer;ID3D11SamplerState* m_sampleState;
We add a new buffer pointer for the texture translation buffer.
ID3D11Buffer* m_translateBuffer;
};
#endif
Translateshaderclass.cpp
////////////////////////////////////////////////////////////////////////////////
// Filename: translateshaderclass.cpp////////////////////////////////////////////////////////////////////////////////#include "translateshaderclass.h"
TranslateShaderClass::TranslateShaderClass(){
m_vertexShader =0;m_pixelShader =0;
m_layout =0;m_matrixBuffer =0;m_sampleState =0;
Initialize the texture translation buffer to null in the class constructor.
m_translateBuffer =0;}
TranslateShaderClass::TranslateShaderClass(const TranslateShaderClass& other){
Tutorial 25: Texture Translation http://www.rastertek.com/dx11tut25.html

7/14/2019 RasterTek: Direct3D introduction
http://slidepdf.com/reader/full/rastertek-direct3d-introduction 382/709
6 of 22 3/8/2013 12:39 PM
}
TranslateShaderClass::~TranslateShaderClass(){
}
bool TranslateShaderClass::Initialize(ID3D11Device* device, HWND hwnd){
bool result;
Load the texture translate shader HLSL files.
// Initialize the vertex and pixel shaders.result =InitializeShader(device, hwnd, L"../Engine/translate.vs", L"../Engine/translate.ps");if(!result){
return false;}
return true;}
void TranslateShaderClass::Shutdown(){
// Shutdown the vertex and pixel shaders as well as the related objects.ShutdownShader();
return;}
The Render function now takes as input the translation value to be used for translating the texture in the pixel shader. It then sends that value into theSetShaderParameters function so that it is set before rendering.
bool TranslateShaderClass::Render(ID3D11DeviceContext* deviceContext, int indexCount, D3DXMATRIX worldMatrix,D3DXMATRIX viewMatrix, D3DXMATRIX projectionMatrix, ID3D11ShaderResourceView* texture,float translation)
{bool result;
// Set the shader parameters that it will use for rendering.result =SetShaderParameters(deviceContext, worldMatrix, viewMatrix, projectionMatrix, texture, translation);
Tutorial 25: Texture Translation http://www.rastertek.com/dx11tut25.html
7/14/2019 RasterTek: Direct3D introduction
http://slidepdf.com/reader/full/rastertek-direct3d-introduction 383/709
7 of 22 3/8/2013 12:39 PM
if(!result){
return false;}
// Now render the prepared buffers with the shader.RenderShader(deviceContext, indexCount);
return true;}
bool TranslateShaderClass::InitializeShader(ID3D11Device* device, HWND hwnd, WCHAR* vsFilename, WCHAR* psFilename){
HRESULT result;ID3D10Blob* errorMessage;ID3D10Blob* vertexShaderBuffer;ID3D10Blob* pixelShaderBuffer;D3D11_INPUT_ELEMENT_DESC polygonLayout[2];unsigned int numElements;D3D11_BUFFER_DESC matrixBufferDesc;D3D11_SAMPLER_DESC samplerDesc;D3D11_BUFFER_DESC translateBufferDesc;
// Initialize the pointers this function will use to null.errorMessage =0;vertexShaderBuffer =0;pixelShaderBuffer =0;
Load the texture translate vertex shader.
// Compile the vertex shader code.result =D3DX11CompileFromFile(vsFilename, NULL, NULL, "TranslateVertexShader", "vs_5_0", D3D10_SHADER_ENABLE_STRICTNESS,
0, NULL, &vertexShaderBuffer, &errorMessage, NULL);if(FAILED(result)){
// If the shader failed to compile it should have writen something to the error message.if(errorMessage){
OutputShaderErrorMessage(errorMessage, hwnd, vsFilename);
}// If there was nothing in the error message then it simply could not find the shader file itself.else{
Tutorial 25: Texture Translation http://www.rastertek.com/dx11tut25.html

7/14/2019 RasterTek: Direct3D introduction
http://slidepdf.com/reader/full/rastertek-direct3d-introduction 384/709
8 of 22 3/8/2013 12:39 PM
MessageBox(hwnd, vsFilename, L"Missing Shader File", MB_OK);}
return false;}
Load the texture translate pixel shader.
// Compile the pixel shader code.result =D3DX11CompileFromFile(psFilename, NULL, NULL, "TranslatePixelShader", "ps_5_0", D3D10_SHADER_ENABLE_STRICTNESS,
0, NULL, &pixelShaderBuffer, &errorMessage, NULL);if(FAILED(result)){
// If the shader failed to compile it should have writen something to the error message.
if(errorMessage){
OutputShaderErrorMessage(errorMessage, hwnd, psFilename);}// If there was nothing in the error message then it simply could not find the file itself.else{
MessageBox(hwnd, psFilename, L"Missing Shader File", MB_OK);}
return false;}
// Create the vertex shader from the buffer.result =device->CreateVertexShader(vertexShaderBuffer->GetBufferPointer(), vertexShaderBuffer->GetBufferSize(), NULL,
&m_vertexShader);if(FAILED(result)){
return false;}
// Create the vertex shader from the buffer.result =device->CreatePixelShader(pixelShaderBuffer->GetBufferPointer(), pixelShaderBuffer->GetBufferSize(), NULL,
&m_pixelShader);if(FAILED(result)){
return false;
}
// Create the vertex input layout description.// This setup needs to match the VertexType stucture in the ModelClass and in the shader.
Tutorial 25: Texture Translation http://www.rastertek.com/dx11tut25.html

7/14/2019 RasterTek: Direct3D introduction
http://slidepdf.com/reader/full/rastertek-direct3d-introduction 385/709
9 of 22 3/8/2013 12:39 PM
polygonLayout[0].SemanticName ="POSITION";polygonLayout[0].SemanticIndex =0;polygonLayout[0].Format =DXGI_FORMAT_R32G32B32_FLOAT;polygonLayout[0].InputSlot =0;polygonLayout[0].AlignedByteOffset =0;
polygonLayout[0].InputSlotClass =D3D11_INPUT_PER_VERTEX_DATA;polygonLayout[0].InstanceDataStepRate =0;
polygonLayout[1].SemanticName ="TEXCOORD";polygonLayout[1].SemanticIndex =0;polygonLayout[1].Format =DXGI_FORMAT_R32G32_FLOAT;polygonLayout[1].InputSlot =0;polygonLayout[1].AlignedByteOffset =D3D11_APPEND_ALIGNED_ELEMENT;polygonLayout[1].InputSlotClass =D3D11_INPUT_PER_VERTEX_DATA;
polygonLayout[1].InstanceDataStepRate =0;
// Get a count of the elements in the layout.numElements =sizeof(polygonLayout) / sizeof(polygonLayout[0]);
// Create the vertex input layout.result =device->CreateInputLayout(polygonLayout, numElements, vertexShaderBuffer->GetBufferPointer(),
vertexShaderBuffer->GetBufferSize(), &m_layout);if(FAILED(result))
{return false;
}
// Release the vertex shader buffer and pixel shader buffer since they are no longer needed.vertexShaderBuffer->Release();vertexShaderBuffer =0;
pixelShaderBuffer->Release();
pixelShaderBuffer =0;
// Setup the description of the dynamic constant buffer that is in the vertex shader.matrixBufferDesc.Usage =D3D11_USAGE_DYNAMIC;matrixBufferDesc.ByteWidth =sizeof(MatrixBufferType);matrixBufferDesc.BindFlags =D3D11_BIND_CONSTANT_BUFFER;matrixBufferDesc.CPUAccessFlags =D3D11_CPU_ACCESS_WRITE;matrixBufferDesc.MiscFlags =0;matrixBufferDesc.StructureByteStride =0;
// Create the constant buffer pointer so we can access the vertex shader constant buffer from within this class.result =device->CreateBuffer(&matrixBufferDesc, NULL, &m_matrixBuffer);if(FAILED(result))
Tutorial 25: Texture Translation http://www.rastertek.com/dx11tut25.html

7/14/2019 RasterTek: Direct3D introduction
http://slidepdf.com/reader/full/rastertek-direct3d-introduction 386/709
10 of 22 3/8/2013 12:39 PM
{return false;
}
// Create a texture sampler state description.
samplerDesc.Filter =D3D11_FILTER_MIN_MAG_MIP_LINEAR;samplerDesc.AddressU =D3D11_TEXTURE_ADDRESS_WRAP;samplerDesc.AddressV =D3D11_TEXTURE_ADDRESS_WRAP;samplerDesc.AddressW =D3D11_TEXTURE_ADDRESS_WRAP;samplerDesc.MipLODBias =0.0f;samplerDesc.MaxAnisotropy =1;samplerDesc.ComparisonFunc =D3D11_COMPARISON_ALWAYS;samplerDesc.BorderColor[0] =0;samplerDesc.BorderColor[1] =0;
samplerDesc.BorderColor[2] =0;samplerDesc.BorderColor[3] =0;samplerDesc.MinLOD =0;samplerDesc.MaxLOD =D3D11_FLOAT32_MAX;
// Create the texture sampler state.result =device->CreateSamplerState(&samplerDesc, &m_sampleState);if(FAILED(result)){
return false;}
Create the translate buffer so we have an interface to setting the texture translation value in the pixel shader.
// Setup the description of the texture translation dynamic constant buffer that is in the pixel shader.translateBufferDesc.Usage =D3D11_USAGE_DYNAMIC;translateBufferDesc.ByteWidth =sizeof(TranslateBufferType);translateBufferDesc.BindFlags =D3D11_BIND_CONSTANT_BUFFER;
translateBufferDesc.CPUAccessFlags =D3D11_CPU_ACCESS_WRITE;translateBufferDesc.MiscFlags =0;translateBufferDesc.StructureByteStride =0;
// Create the constant buffer pointer so we can access the pixel shader constant buffer from within this class.result =device->CreateBuffer(&translateBufferDesc, NULL, &m_translateBuffer);if(FAILED(result)){
return false;
}
return true;}
Tutorial 25: Texture Translation http://www.rastertek.com/dx11tut25.html

7/14/2019 RasterTek: Direct3D introduction
http://slidepdf.com/reader/full/rastertek-direct3d-introduction 387/709
11 of 22 3/8/2013 12:39 PM
void TranslateShaderClass::ShutdownShader(){
Release the new translate buffer in the ShutdownShader function.
// Release the texture translation constant buffer.if(m_translateBuffer){
m_translateBuffer->Release();m_translateBuffer =0;
}
// Release the sampler state.if(m_sampleState){
m_sampleState->Release();m_sampleState =0;
}
// Release the matrix constant buffer.if(m_matrixBuffer)
{m_matrixBuffer->Release();m_matrixBuffer =0;
}
// Release the layout.if(m_layout){
m_layout->Release();
m_layout =0;}
// Release the pixel shader.if(m_pixelShader){
m_pixelShader->Release();m_pixelShader =0;
}
// Release the vertex shader.if(m_vertexShader){
Tutorial 25: Texture Translation http://www.rastertek.com/dx11tut25.html

7/14/2019 RasterTek: Direct3D introduction
http://slidepdf.com/reader/full/rastertek-direct3d-introduction 388/709
12 of 22 3/8/2013 12:39 PM
m_vertexShader->Release();m_vertexShader =0;
}
return;
}
void TranslateShaderClass::OutputShaderErrorMessage(ID3D10Blob* errorMessage, HWND hwnd, WCHAR* shaderFilename){
char* compileErrors;unsigned long bufferSize, i;ofstream fout;
// Get a pointer to the error message text buffer.compileErrors =(char*)(errorMessage->GetBufferPointer());
// Get the length of the message.bufferSize =errorMessage->GetBufferSize();
// Open a file to write the error message to.fout.open("shader-error.txt");
// Write out the error message.for(i=0; i<bufferSize; i++){
fout <<compileErrors[i];}
// Close the file.fout.close();
// Release the error message.errorMessage->Release();errorMessage =0;
// Pop a message up on the screen to notify the user to check the text file for compile errors.MessageBox(hwnd, L"Error compiling shader. Check shader-error.txt for message.", shaderFilename, MB_OK);
return;
}
bool TranslateShaderClass::SetShaderParameters(ID3D11DeviceContext* deviceContext, D3DXMATRIX worldMatrix, D3DXMATRIX viewMatrix,
Tutorial 25: Texture Translation http://www.rastertek.com/dx11tut25.html

7/14/2019 RasterTek: Direct3D introduction
http://slidepdf.com/reader/full/rastertek-direct3d-introduction 389/709
13 of 22 3/8/2013 12:39 PM
D3DXMATRIX projectionMatrix, ID3D11ShaderResourceView* texture,float translation)
{HRESULT result;D3D11_MAPPED_SUBRESOURCE mappedResource;
MatrixBufferType* dataPtr;unsigned int bufferNumber; TranslateBufferType* dataPtr2;
// Transpose the matrices to prepare them for the shader.D3DXMatrixTranspose(&worldMatrix, &worldMatrix);D3DXMatrixTranspose(&viewMatrix, &viewMatrix);D3DXMatrixTranspose(&projectionMatrix, &projectionMatrix);
// Lock the matrix constant buffer so it can be written to.result =deviceContext->Map(m_matrixBuffer, 0, D3D11_MAP_WRITE_DISCARD, 0, &mappedResource);if(FAILED(result)){
return false;}
// Get a pointer to the data in the matrix constant buffer.
dataPtr =(MatrixBufferType*)mappedResource.pData;
// Copy the matrices into the matrix constant buffer.dataPtr->world =worldMatrix;dataPtr->view =viewMatrix;dataPtr->projection =projectionMatrix;
// Unlock the buffer.deviceContext->Unmap(m_matrixBuffer, 0);
// Set the position of the matrix constant buffer in the vertex shader.bufferNumber =0;
// Now set the matrix constant buffer in the vertex shader with the updated values.deviceContext->VSSetConstantBuffers(bufferNumber, 1, &m_matrixBuffer);
// Set shader texture resource in the pixel shader.deviceContext->PSSetShaderResources(0, 1, &texture);
Here is where we set the texture translation value in the pixel shader. We first lock the texture translation constant buffer and then copy the translation value into thebuffer. After that we unlock the buffer and set the constant buffer in the pixel shader.
Tutorial 25: Texture Translation http://www.rastertek.com/dx11tut25.html

7/14/2019 RasterTek: Direct3D introduction
http://slidepdf.com/reader/full/rastertek-direct3d-introduction 390/709
14 of 22 3/8/2013 12:39 PM
// Lock the texture translation constant buffer so it can be written to.result =deviceContext->Map(m_translateBuffer, 0, D3D11_MAP_WRITE_DISCARD, 0, &mappedResource);if(FAILED(result)){
return false;
}
// Get a pointer to the data in the texture translation constant buffer.dataPtr2 =(TranslateBufferType*)mappedResource.pData;
// Copy the translation value into the texture translation constant buffer.dataPtr2->translation =translation;
// Unlock the buffer.
deviceContext->Unmap(m_translateBuffer, 0);
// Set the position of the texture translation constant buffer in the pixel shader.bufferNumber =0;
// Now set the texture translation constant buffer in the pixel shader with the updated values.deviceContext->PSSetConstantBuffers(bufferNumber, 1, &m_translateBuffer);
return true;
}
void TranslateShaderClass::RenderShader(ID3D11DeviceContext* deviceContext, int indexCount){
// Set the vertex input layout.deviceContext->IASetInputLayout(m_layout);
// Set the vertex and pixel shaders that will be used to render this triangle.
deviceContext->VSSetShader(m_vertexShader, NULL, 0);deviceContext->PSSetShader(m_pixelShader, NULL, 0);
// Set the sampler state in the pixel shader.deviceContext->PSSetSamplers(0, 1, &m_sampleState);
// Render the triangle.deviceContext->DrawIndexed(indexCount, 0, 0);
return;}
Tutorial 25: Texture Translation http://www.rastertek.com/dx11tut25.html
1 f 22 3/8/2013 12 39

7/14/2019 RasterTek: Direct3D introduction
http://slidepdf.com/reader/full/rastertek-direct3d-introduction 391/709
15 of 22 3/8/2013 12:39 PM
Graphicsclass.h
////////////////////////////////////////////////////////////////////////////////
// Filename: graphicsclass.h////////////////////////////////////////////////////////////////////////////////#ifndef _GRAPHICSCLASS_H_ #define _GRAPHICSCLASS_H_
/////////////// GLOBALS ///////////////
const bool FULL_SCREEN =true;const bool VSYNC_ENABLED =true;const float SCREEN_DEPTH =1000.0f;const float SCREEN_NEAR =0.1f;
///////////////////////// MY CLASS INCLUDES /////////////////////////
#include "d3dclass.h"#include "cameraclass.h"#include "modelclass.h"
Include the header file for the new TranslateShaderClass.
#include "translateshaderclass.h"
////////////////////////////////////////////////////////////////////////////////// Class name: GraphicsClass////////////////////////////////////////////////////////////////////////////////class GraphicsClass{public:
GraphicsClass();GraphicsClass(const GraphicsClass&);~GraphicsClass();
bool Initialize(int, int, HWND);void Shutdown();
Tutorial 25: Texture Translation http://www.rastertek.com/dx11tut25.html
16 f 22 3/8/2013 12 39 PM

7/14/2019 RasterTek: Direct3D introduction
http://slidepdf.com/reader/full/rastertek-direct3d-introduction 392/709
16 of 22 3/8/2013 12:39 PM
bool Frame();bool Render();
private:D3DClass* m_D3D;
CameraClass* m_Camera;ModelClass* m_Model;
Create a new object for the new TranslateShaderClass.
TranslateShaderClass* m_TranslateShader;};
#endif
Graphicsclass.cpp
I will just cover the functions that have changed since the previous tutorial.
////////////////////////////////////////////////////////////////////////////////// Filename: graphicsclass.cpp
////////////////////////////////////////////////////////////////////////////////#include "graphicsclass.h"
GraphicsClass::GraphicsClass(){
m_D3D =0;m_Camera =0;m_Model =0;
Set the TranslateShaderClass object to null in the class constructor.
m_TranslateShader =0;}
bool GraphicsClass::Initialize(int screenWidth, int screenHeight, HWND hwnd){
bool result;
Tutorial 25: Texture Translation http://www.rastertek.com/dx11tut25.html
17 of 22 3/8/2013 12:39 PM

7/14/2019 RasterTek: Direct3D introduction
http://slidepdf.com/reader/full/rastertek-direct3d-introduction 393/709
17 of 22 3/8/2013 12:39 PM
// Create the Direct3D object.m_D3D =new D3DClass;if(!m_D3D){
return false;
}
// Initialize the Direct3D object.result =m_D3D->Initialize(screenWidth, screenHeight, VSYNC_ENABLED, hwnd, FULL_SCREEN, SCREEN_DEPTH, SCREEN_NEAR);if(!result){
MessageBox(hwnd, L"Could not initialize Direct3D.", L"Error", MB_OK);return false;
}
// Create the camera object.m_Camera =new CameraClass;if(!m_Camera){
return false;}
// Create the model object.
m_Model =new ModelClass;if(!m_Model){
return false;}
// Initialize the model object.result =m_Model->Initialize(m_D3D->GetDevice(), L"../Engine/data/seafloor.dds", "../Engine/data/triangle.txt");if(!result)
{MessageBox(hwnd, L"Could not initialize the model object.", L"Error", MB_OK);return false;
}
Create and initialize the TranslateShaderClass object.
// Create the texture translation shader object.m_TranslateShader =new TranslateShaderClass;
if(!m_TranslateShader){
return false;}
Tutorial 25: Texture Translation http://www.rastertek.com/dx11tut25.html
18 of 22 3/8/2013 12:39 PM

7/14/2019 RasterTek: Direct3D introduction
http://slidepdf.com/reader/full/rastertek-direct3d-introduction 394/709
18 of 22 3/8/2013 12:39 PM
// Initialize the texture translation shader object.result =m_TranslateShader->Initialize(m_D3D->GetDevice(), hwnd);if(!result){
MessageBox(hwnd, L"Could not initialize the texture translation shader object.", L"Error", MB_OK);return false;}
return true;}
void GraphicsClass::Shutdown()
{
Release the new TranslateShaderClass object in the Shutdown function.
// Release the texture translation shader object.if(m_TranslateShader){
m_TranslateShader->Shutdown();delete m_TranslateShader;
m_TranslateShader =0;}
// Release the model object.if(m_Model){
m_Model->Shutdown();delete m_Model;m_Model =0;
}
// Release the camera object.if(m_Camera){
delete m_Camera;m_Camera =0;
}
// Release the D3D object.if(m_D3D){
m_D3D->Shutdown();
Tutorial 25: Texture Translation http://www.rastertek.com/dx11tut25.html
19 of 22 3/8/2013 12:39 PM
7/14/2019 RasterTek: Direct3D introduction
http://slidepdf.com/reader/full/rastertek-direct3d-introduction 395/709
19 of 22 3/8/2013 12:39 PM
delete m_D3D;m_D3D =0;
}
return;
}
bool GraphicsClass::Render(){
D3DXMATRIX worldMatrix, viewMatrix, projectionMatrix;bool result;static float textureTranslation =0.0f;
Here the translation value is incremented by a small amount each frame. If it goes over 1.0 then it is reset down to 0.0 again.
// Increment the texture translation position.textureTranslation +=0.01f;if(textureTranslation >1.0f){
textureTranslation -=1.0f;}
// Clear the buffers to begin the scene.m_D3D->BeginScene(0.0f, 0.0f, 0.0f, 1.0f);
// Generate the view matrix based on the camera's position.m_Camera->Render();
// Get the world, view, and projection matrices from the camera and d3d objects.m_D3D->GetWorldMatrix(worldMatrix);m_Camera->GetViewMatrix(viewMatrix);
m_D3D->GetProjectionMatrix(projectionMatrix);
// Put the model vertex and index buffers on the graphics pipeline to prepare them for drawing.m_Model->Render(m_D3D->GetDeviceContext());
Now render the model with the TranslateShaderClass and send in the texture translation value.
// Render the model with the texture translation shader.result =m_TranslateShader->Render(m_D3D->GetDeviceContext(), m_Model->GetIndexCount(), worldMatrix, viewMatrix,
projectionMatrix, m_Model->GetTexture(), textureTranslation);if(!result){
return false;
Tutorial 25: Texture Translation http://www.rastertek.com/dx11tut25.html
20 of 22 3/8/2013 12:39 PM

7/14/2019 RasterTek: Direct3D introduction
http://slidepdf.com/reader/full/rastertek-direct3d-introduction 396/709
}
// Present the rendered scene to the screen.m_D3D->EndScene();
return true;}
Summary
Using a very simple pixel shader we can achieve a very useful effect. This can be modified to affect how textures appear on surfaces and we can create a widevariety of effects by doing some simple math with the texture coordinates or by animating different textures over planes to simulation motion.
To Do Exercises
1. Recompile the code and ensure you get a texture translating across the polygon surface.
2. Change the pixel shader to affect the Y axis instead of the X axis.
3. Change the pixel shader to affect both the Y axis and then X axis by the same translation value.
Source Code
Visual Studio 2008 Project: dx11tut25.zip
Tutorial 25: Texture Translation http://www.rastertek.com/dx11tut25.html
21 of 22 3/8/2013 12:39 PM

7/14/2019 RasterTek: Direct3D introduction
http://slidepdf.com/reader/full/rastertek-direct3d-introduction 397/709
Source Only: dx11src25.zip
Executable Only:dx11exe25.zip
Back to Tutorial Index
Tutorial 25: Texture Translation http://www.rastertek.com/dx11tut25.html
22 of 22 3/8/2013 12:39 PM

7/14/2019 RasterTek: Direct3D introduction
http://slidepdf.com/reader/full/rastertek-direct3d-introduction 398/709
Tutor ial 26: Transparency
Transparency is the effect that allows textured objects to appear see-through. For example take the following texture:
We can make it half transparent and then render it over another texture to create the following transparency effect:
Tutorial 26: Transparency http://www.rastertek.com/dx11tut26.html
1 of 25 3/8/2013 12:41 PM
T t i l 26 T htt // t t k /d 11t t26 ht l

7/14/2019 RasterTek: Direct3D introduction
http://slidepdf.com/reader/full/rastertek-direct3d-introduction 399/709
Transparency is implemented in DirectX 11 and HLSL by using alpha blending. The alpha component of any pixel is used to determine the transparency of thatpixel. For example if a pixel alpha value is 0.5 then it would appear half transparent. Many textures have an alpha component that can be modified to make thetexture transparent in some areas and opaque in others.
However for alpha values to take effect you have to first turn on alpha blending in the shader and set the blending equation for how to blend pixels. In this tutorial wemodify the blending state in the D3DClass such as follows:
blendStateDescription.RenderTarget[0].BlendEnable =TRUE;blendStateDescription.RenderTarget[0].SrcBlend =D3D11_BLEND_SRC_ALPHA;
blendStateDescription.RenderTarget[0].DestBlend =D3D11_BLEND_INV_SRC_ALPHA;
DestBlend is for the destination color. It is the pixel that already exists in this location. The blending function we are going to use for the destination isINV_SRC_ALPHA which is the inverse of the source alpha. This equates to one minus the source alpha value. For example if the source alpha is 0.3 then the destalpha would be 0.7 so we will combine 70% of the destination pixel color in the final combine.
SrcBlend is for the source pixel which will be the input texture color value in this tutorial. The function we are going to use is SRC_ALPHA which is the source colormultiplied by its own alpha value.
The source and destination value will be added together to produce the final output pixel.
Tutorial 26: Transparency http://www.rastertek.com/dx11tut26.html
2 of 25 3/8/2013 12:41 PM
Tutorial 26: Transparency http://www rastertek com/dx11tut26 html

7/14/2019 RasterTek: Direct3D introduction
http://slidepdf.com/reader/full/rastertek-direct3d-introduction 400/709
Framework
The framework for this tutorial has a new class called TransparentShaderClass. This class is the same as the TextureShaderClass except that is has a alphablending value.
D3dclass.cpp
As discussed we have just modified the blend state inside the D3DClass::Initialize function so that texture transparency works. This is the only change to that class.
// Create an alpha enabled blend state description.blendStateDescription.RenderTarget[0].BlendEnable =TRUE;blendStateDescription.RenderTarget[0].SrcBlend =D3D11_BLEND_SRC_ALPHA;blendStateDescription.RenderTarget[0].DestBlend =D3D11_BLEND_INV_SRC_ALPHA;
blendStateDescription.RenderTarget[0].BlendOp =D3D11_BLEND_OP_ADD;blendStateDescription.RenderTarget[0].SrcBlendAlpha =D3D11_BLEND_ONE;blendStateDescription.RenderTarget[0].DestBlendAlpha =D3D11_BLEND_ZERO;blendStateDescription.RenderTarget[0].BlendOpAlpha =D3D11_BLEND_OP_ADD;blendStateDescription.RenderTarget[0].RenderTargetWriteMask =0x0f;
Transparent.vs
The transparent texture vertex shader is the same as the normal texture vertex shader.
Tutorial 26: Transparency http://www.rastertek.com/dx11tut26.html
3 of 25 3/8/2013 12:41 PM
Tutorial 26: Transparency http://www rastertek com/dx11tut26 html

7/14/2019 RasterTek: Direct3D introduction
http://slidepdf.com/reader/full/rastertek-direct3d-introduction 401/709
////////////////////////////////////////////////////////////////////////////////// Filename: transparent.vs////////////////////////////////////////////////////////////////////////////////
/////////////// GLOBALS ///////////////cbuffer MatrixBuffer{
matrix worldMatrix;matrix viewMatrix;matrix projectionMatrix;
};
//////////////// TYPEDEFS ////////////////struct VertexInputType{
float4 position : POSITION;float2 tex : TEXCOORD0;
};
struct PixelInputType{
float4 position : SV_POSITION;float2 tex : TEXCOORD0;
};
////////////////////////////////////////////////////////////////////////////////// Vertex Shader////////////////////////////////////////////////////////////////////////////////PixelInputType TransparentVertexShader(VertexInputType input){
PixelInputType output;
// Change the position vector to be 4 units for proper matrix calculations.
input.position.w =1.0f;
// Calculate the position of the vertex against the world, view, and projection matrices.output.position =mul(input.position, worldMatrix);
Tutorial 26: Transparency http://www.rastertek.com/dx11tut26.html
4 of 25 3/8/2013 12:41 PM
Tutorial 26: Transparency http://www rastertek com/dx11tut26 html

7/14/2019 RasterTek: Direct3D introduction
http://slidepdf.com/reader/full/rastertek-direct3d-introduction 402/709
output.position =mul(output.position, viewMatrix);output.position =mul(output.position, projectionMatrix);
// Store the texture coordinates for the pixel shader.output.tex =input.tex;
return output;}
Transparent.ps
////////////////////////////////////////////////////////////////////////////////
// Filename: transparent.ps////////////////////////////////////////////////////////////////////////////////
/////////////// GLOBALS ///////////////
Texture2D shaderTexture;SamplerState SampleType;
We add a new constant buffer to hold the blendAmount variable. The blendAmount indicates was percentage to blend the texture. The acceptable value range is afloat value from 0 to 1. In this tutorial it is set to 0.5 which means 50% transparency.
cbuffer TransparentBuffer{
float blendAmount;};
//////////////// TYPEDEFS ////////////////struct PixelInputType{
float4 position : SV_POSITION;float2 tex : TEXCOORD0;
};
////////////////////////////////////////////////////////////////////////////////
Tutorial 26: Transparency http://www.rastertek.com/dx11tut26.html
5 of 25 3/8/2013 12:41 PM
Tutorial 26: Transparency http://www.rastertek.com/dx11tut26.html
7/14/2019 RasterTek: Direct3D introduction
http://slidepdf.com/reader/full/rastertek-direct3d-introduction 403/709
// Pixel Shader////////////////////////////////////////////////////////////////////////////////float4 TransparentPixelShader(PixelInputType input) : SV_TARGET{
float4 color;
// Sample the texture pixel at this location.color =shaderTexture.Sample(SampleType, input.tex);
Here we use the blendAmount variable to set the transparency of the texture. We set the alpha value of the pixel to the blend amount and when rendered it will usethe alpha value with the blend state we setup to create the transparency effect.
// Set the alpha value of this pixel to the blending amount to create the alpha blending effect.color.a =blendAmount;
return color;}
Transparentshaderclass.h
The TransparentShaderClass is the same as the TextureShaderClass with some extra changes to accommodate transparency.
////////////////////////////////////////////////////////////////////////////////// Filename: transparentshaderclass.h////////////////////////////////////////////////////////////////////////////////#ifndef _TRANSPARENTSHADERCLASS_H_ #define _TRANSPARENTSHADERCLASS_H_
//////////////// INCLUDES ////////////////#include <d3d11.h>#include <d3dx10math.h>#include <d3dx11async.h>#include <fstream>using namespace std;
////////////////////////////////////////////////////////////////////////////////// Class name: TransparentShaderClass
p y p
6 of 25 3/8/2013 12:41 PM
Tutorial 26: Transparency http://www.rastertek.com/dx11tut26.html

7/14/2019 RasterTek: Direct3D introduction
http://slidepdf.com/reader/full/rastertek-direct3d-introduction 404/709
////////////////////////////////////////////////////////////////////////////////class TransparentShaderClass{private:
struct MatrixBufferType{
D3DXMATRIX world;D3DXMATRIX view;D3DXMATRIX projection;
};
We have a new buffer type to match the constant buffer inside the pixel shader. We add 12 bytes of padding so the CreateBuffer function won't fail.
struct TransparentBufferType{
float blendAmount;D3DXVECTOR3 padding;
};
public: TransparentShaderClass(); TransparentShaderClass(const TransparentShaderClass&);~TransparentShaderClass();
bool Initialize(ID3D11Device*, HWND);void Shutdown();bool Render(ID3D11DeviceContext*, int, D3DXMATRIX, D3DXMATRIX, D3DXMATRIX, ID3D11ShaderResourceView*, float);
private:bool InitializeShader(ID3D11Device*, HWND, WCHAR*, WCHAR*);void ShutdownShader();void OutputShaderErrorMessage(ID3D10Blob*, HWND, WCHAR*);
bool SetShaderParameters(ID3D11DeviceContext*, D3DXMATRIX, D3DXMATRIX, D3DXMATRIX, ID3D11ShaderResourceView*, float);void RenderShader(ID3D11DeviceContext*, int);
private:ID3D11VertexShader* m_vertexShader;ID3D11PixelShader* m_pixelShader;ID3D11InputLayout* m_layout;ID3D11Buffer* m_matrixBuffer;
ID3D11SamplerState* m_sampleState;
We have a new buffer variable to provide an interface to the blendAmount value inside the transparent HLSL pixel shader.
p y p
7 of 25 3/8/2013 12:41 PM
Tutorial 26: Transparency http://www.rastertek.com/dx11tut26.html

7/14/2019 RasterTek: Direct3D introduction
http://slidepdf.com/reader/full/rastertek-direct3d-introduction 405/709
ID3D11Buffer* m_transparentBuffer;};
#endif
Transparentshaderclass.cpp
////////////////////////////////////////////////////////////////////////////////// Filename: transparentshaderclass.cpp////////////////////////////////////////////////////////////////////////////////#include "transparentshaderclass.h"
TransparentShaderClass::TransparentShaderClass(){
m_vertexShader =0;m_pixelShader =0;m_layout =0;m_matrixBuffer =0;m_sampleState =0;
Initialize the new transparent constant buffer to null inside the class constructor.
m_transparentBuffer =0;}
TransparentShaderClass::TransparentShaderClass(const TransparentShaderClass& other){}
TransparentShaderClass::~TransparentShaderClass(){}
bool TransparentShaderClass::Initialize(ID3D11Device* device, HWND hwnd){
bool result;
Load the transparent HLSL shader files.
8 of 25 3/8/2013 12:41 PM
Tutorial 26: Transparency http://www.rastertek.com/dx11tut26.html

7/14/2019 RasterTek: Direct3D introduction
http://slidepdf.com/reader/full/rastertek-direct3d-introduction 406/709
// Initialize the vertex and pixel shaders.result =InitializeShader(device, hwnd, L"../Engine/transparent.vs", L"../Engine/transparent.ps");if(!result){
return false;}
return true;}
void TransparentShaderClass::Shutdown(){
// Shutdown the vertex and pixel shaders as well as the related objects.ShutdownShader();
return;}
The Render function now takes as input a blend float value which will set the amount of transparency to use in the shader.
bool TransparentShaderClass::Render(ID3D11DeviceContext* deviceContext, int indexCount, D3DXMATRIX worldMatrix,D3DXMATRIX viewMatrix, D3DXMATRIX projectionMatrix, ID3D11ShaderResourceView* texture,float blend)
{bool result;
// Set the shader parameters that it will use for rendering.result =SetShaderParameters(deviceContext, worldMatrix, viewMatrix, projectionMatrix, texture, blend);if(!result){
return false;}
// Now render the prepared buffers with the shader.RenderShader(deviceContext, indexCount);
return true;}
bool TransparentShaderClass::InitializeShader(ID3D11Device* device, HWND hwnd, WCHAR* vsFilename, WCHAR* psFilename){
HRESULT result;
9 of 25 3/8/2013 12:41 PM
Tutorial 26: Transparency http://www.rastertek.com/dx11tut26.html

7/14/2019 RasterTek: Direct3D introduction
http://slidepdf.com/reader/full/rastertek-direct3d-introduction 407/709
ID3D10Blob* errorMessage;ID3D10Blob* vertexShaderBuffer;ID3D10Blob* pixelShaderBuffer;D3D11_INPUT_ELEMENT_DESC polygonLayout[2];unsigned int numElements;D3D11_BUFFER_DESC matrixBufferDesc;
D3D11_SAMPLER_DESC samplerDesc;D3D11_BUFFER_DESC transparentBufferDesc;
// Initialize the pointers this function will use to null.errorMessage =0;vertexShaderBuffer =0;pixelShaderBuffer =0;
Load the transparent vertex shader.
// Compile the vertex shader code.result =D3DX11CompileFromFile(vsFilename, NULL, NULL, "TransparentVertexShader", "vs_5_0", D3D10_SHADER_ENABLE_STRICTNESS,
0, NULL, &vertexShaderBuffer, &errorMessage, NULL);if(FAILED(result)){
// If the shader failed to compile it should have writen something to the error message.if(errorMessage){
OutputShaderErrorMessage(errorMessage, hwnd, vsFilename);}// If there was nothing in the error message then it simply could not find the shader file itself.else{
MessageBox(hwnd, vsFilename, L"Missing Shader File", MB_OK);}
return false;}
Load the transparent pixel shader.
// Compile the pixel shader code.result =D3DX11CompileFromFile(psFilename, NULL, NULL, "TransparentPixelShader", "ps_5_0", D3D10_SHADER_ENABLE_STRICTNESS,
0, NULL, &pixelShaderBuffer, &errorMessage, NULL);if(FAILED(result)){
// If the shader failed to compile it should have writen something to the error message.if(errorMessage)
10 of 25 3/8/2013 12:41 PM
Tutorial 26: Transparency http://www.rastertek.com/dx11tut26.html

7/14/2019 RasterTek: Direct3D introduction
http://slidepdf.com/reader/full/rastertek-direct3d-introduction 408/709
{OutputShaderErrorMessage(errorMessage, hwnd, psFilename);
}// If there was nothing in the error message then it simply could not find the file itself.else{
MessageBox(hwnd, psFilename, L"Missing Shader File", MB_OK);}
return false;}
// Create the vertex shader from the buffer.result =device->CreateVertexShader(vertexShaderBuffer->GetBufferPointer(), vertexShaderBuffer->GetBufferSize(), NULL,
&m_vertexShader);if(FAILED(result)){
return false;}
// Create the vertex shader from the buffer.result =device->CreatePixelShader(pixelShaderBuffer->GetBufferPointer(), pixelShaderBuffer->GetBufferSize(), NULL,
&m_pixelShader);if(FAILED(result)){
return false;}
// Create the vertex input layout description.// This setup needs to match the VertexType stucture in the ModelClass and in the shader.polygonLayout[0].SemanticName ="POSITION";polygonLayout[0].SemanticIndex =0;polygonLayout[0].Format =DXGI_FORMAT_R32G32B32_FLOAT;polygonLayout[0].InputSlot =0;polygonLayout[0].AlignedByteOffset =0;polygonLayout[0].InputSlotClass =D3D11_INPUT_PER_VERTEX_DATA;polygonLayout[0].InstanceDataStepRate =0;
polygonLayout[1].SemanticName ="TEXCOORD";polygonLayout[1].SemanticIndex =0;polygonLayout[1].Format =DXGI_FORMAT_R32G32_FLOAT;polygonLayout[1].InputSlot =0;polygonLayout[1].AlignedByteOffset =D3D11_APPEND_ALIGNED_ELEMENT;polygonLayout[1].InputSlotClass =D3D11_INPUT_PER_VERTEX_DATA;polygonLayout[1].InstanceDataStepRate =0;
11 of 25 3/8/2013 12:41 PM
Tutorial 26: Transparency http://www.rastertek.com/dx11tut26.html

7/14/2019 RasterTek: Direct3D introduction
http://slidepdf.com/reader/full/rastertek-direct3d-introduction 409/709
// Get a count of the elements in the layout.numElements =sizeof(polygonLayout) / sizeof(polygonLayout[0]);
// Create the vertex input layout.result =device->CreateInputLayout(polygonLayout, numElements, vertexShaderBuffer->GetBufferPointer(),
vertexShaderBuffer->GetBufferSize(), &m_layout);if(FAILED(result)){
return false;}
// Release the vertex shader buffer and pixel shader buffer since they are no longer needed.vertexShaderBuffer->Release();vertexShaderBuffer =0;
pixelShaderBuffer->Release();pixelShaderBuffer =0;
// Setup the description of the dynamic constant buffer that is in the vertex shader.matrixBufferDesc.Usage =D3D11_USAGE_DYNAMIC;matrixBufferDesc.ByteWidth =sizeof(MatrixBufferType);matrixBufferDesc.BindFlags =D3D11_BIND_CONSTANT_BUFFER;matrixBufferDesc.CPUAccessFlags =D3D11_CPU_ACCESS_WRITE;matrixBufferDesc.MiscFlags =0;matrixBufferDesc.StructureByteStride =0;
// Create the constant buffer pointer so we can access the vertex shader constant buffer from within this class.result =device->CreateBuffer(&matrixBufferDesc, NULL, &m_matrixBuffer);if(FAILED(result)){
return false;}
// Create a texture sampler state description.samplerDesc.Filter =D3D11_FILTER_MIN_MAG_MIP_LINEAR;samplerDesc.AddressU =D3D11_TEXTURE_ADDRESS_WRAP;samplerDesc.AddressV =D3D11_TEXTURE_ADDRESS_WRAP;samplerDesc.AddressW =D3D11_TEXTURE_ADDRESS_WRAP;samplerDesc.MipLODBias =0.0f;samplerDesc.MaxAnisotropy =1;samplerDesc.ComparisonFunc =D3D11_COMPARISON_ALWAYS;samplerDesc.BorderColor[0] =0;samplerDesc.BorderColor[1] =0;samplerDesc.BorderColor[2] =0;
12 of 25 3/8/2013 12:41 PM
Tutorial 26: Transparency http://www.rastertek.com/dx11tut26.html

7/14/2019 RasterTek: Direct3D introduction
http://slidepdf.com/reader/full/rastertek-direct3d-introduction 410/709
samplerDesc.BorderColor[3] =0;samplerDesc.MinLOD =0;samplerDesc.MaxLOD =D3D11_FLOAT32_MAX;
// Create the texture sampler state.result =device->CreateSamplerState(&samplerDesc, &m_sampleState);
if(FAILED(result)){
return false;}
Setup the constant buffer interface to TransparentBuffer in the pixel shader which holds the blendAmount value.
// Setup the description of the transparent dynamic constant buffer that is in the pixel shader.transparentBufferDesc.Usage =D3D11_USAGE_DYNAMIC;
transparentBufferDesc.ByteWidth =sizeof(TransparentBufferType);transparentBufferDesc.BindFlags =D3D11_BIND_CONSTANT_BUFFER;transparentBufferDesc.CPUAccessFlags =D3D11_CPU_ACCESS_WRITE;transparentBufferDesc.MiscFlags =0;transparentBufferDesc.StructureByteStride =0;
// Create the constant buffer pointer so we can access the pixel shader constant buffer from within this class.result =device->CreateBuffer(&transparentBufferDesc, NULL, &m_transparentBuffer);if(FAILED(result))
{return false;
}
return true;}
void TransparentShaderClass::ShutdownShader(){
Release the new transparent buffer in the ShutdownShader function.
// Release the transparent constant buffer.if(m_transparentBuffer){
m_transparentBuffer->Release();m_transparentBuffer =0;
}
// Release the sampler state.
13 of 25 3/8/2013 12:41 PM
Tutorial 26: Transparency http://www.rastertek.com/dx11tut26.html

7/14/2019 RasterTek: Direct3D introduction
http://slidepdf.com/reader/full/rastertek-direct3d-introduction 411/709
if(m_sampleState){
m_sampleState->Release();m_sampleState =0;
}
// Release the matrix constant buffer.if(m_matrixBuffer){
m_matrixBuffer->Release();m_matrixBuffer =0;
}
// Release the layout.if(m_layout)
{m_layout->Release();m_layout =0;
}
// Release the pixel shader.if(m_pixelShader){
m_pixelShader->Release();
m_pixelShader =0;}
// Release the vertex shader.if(m_vertexShader){
m_vertexShader->Release();m_vertexShader =0;
}
return;}
void TransparentShaderClass::OutputShaderErrorMessage(ID3D10Blob* errorMessage, HWND hwnd, WCHAR* shaderFilename){
char* compileErrors;unsigned long bufferSize, i;ofstream fout;
14 of 25 3/8/2013 12:41 PM
Tutorial 26: Transparency http://www.rastertek.com/dx11tut26.html

7/14/2019 RasterTek: Direct3D introduction
http://slidepdf.com/reader/full/rastertek-direct3d-introduction 412/709
// Get a pointer to the error message text buffer.compileErrors =(char*)(errorMessage->GetBufferPointer());
// Get the length of the message.bufferSize =errorMessage->GetBufferSize();
// Open a file to write the error message to.fout.open("shader-error.txt");
// Write out the error message.for(i=0; i<bufferSize; i++){
fout <<compileErrors[i];}
// Close the file.fout.close();
// Release the error message.errorMessage->Release();errorMessage =0;
// Pop a message up on the screen to notify the user to check the text file for compile errors.MessageBox(hwnd, L"Error compiling shader. Check shader-error.txt for message.", shaderFilename, MB_OK);
return;}
bool TransparentShaderClass::SetShaderParameters(ID3D11DeviceContext* deviceContext, D3DXMATRIX worldMatrix, D3DXMATRIX viewMatrix,D3DXMATRIX projectionMatrix, ID3D11ShaderResourceView* texture, float blend)
{HRESULT result;
D3D11_MAPPED_SUBRESOURCE mappedResource;MatrixBufferType* dataPtr;unsigned int bufferNumber;
TransparentBufferType* dataPtr2;
// Transpose the matrices to prepare them for the shader.D3DXMatrixTranspose(&worldMatrix, &worldMatrix);D3DXMatrixTranspose(&viewMatrix, &viewMatrix);D3DXMatrixTranspose(&projectionMatrix, &projectionMatrix);
// Lock the matrix constant buffer so it can be written to.
15 of 25 3/8/2013 12:41 PM
Tutorial 26: Transparency http://www.rastertek.com/dx11tut26.html

7/14/2019 RasterTek: Direct3D introduction
http://slidepdf.com/reader/full/rastertek-direct3d-introduction 413/709
result =deviceContext->Map(m_matrixBuffer, 0, D3D11_MAP_WRITE_DISCARD, 0, &mappedResource);if(FAILED(result)){
return false;}
// Get a pointer to the data in the matrix constant buffer.dataPtr =(MatrixBufferType*)mappedResource.pData;
// Copy the matrices into the matrix constant buffer.dataPtr->world =worldMatrix;dataPtr->view =viewMatrix;dataPtr->projection =projectionMatrix;
// Unlock the buffer.
deviceContext->Unmap(m_matrixBuffer, 0);
// Set the position of the matrix constant buffer in the vertex shader.bufferNumber =0;
// Now set the matrix constant buffer in the vertex shader with the updated values.deviceContext->VSSetConstantBuffers(bufferNumber, 1, &m_matrixBuffer);
// Set shader texture resource in the pixel shader.
deviceContext->PSSetShaderResources(0, 1, &texture);
Here is where we set the blendAmount value inside the pixel shader before rendering. We lock the transparent constant buffer, copy the blend amount value into thebuffer, and then unlock it again so the shader can access the new value.
// Lock the transparent constant buffer so it can be written to.result =deviceContext->Map(m_transparentBuffer, 0, D3D11_MAP_WRITE_DISCARD, 0, &mappedResource);if(FAILED(result)){
return false;}
// Get a pointer to the data in the transparent constant buffer.dataPtr2 =(TransparentBufferType*)mappedResource.pData;
// Copy the blend amount value into the transparent constant buffer.dataPtr2->blendAmount =blend;
// Unlock the buffer.deviceContext->Unmap(m_transparentBuffer, 0);
16 of 25 3/8/2013 12:41 PM
Tutorial 26: Transparency http://www.rastertek.com/dx11tut26.html

7/14/2019 RasterTek: Direct3D introduction
http://slidepdf.com/reader/full/rastertek-direct3d-introduction 414/709
// Set the position of the transparent constant buffer in the pixel shader.bufferNumber =0;
// Now set the texture translation constant buffer in the pixel shader with the updated values.deviceContext->PSSetConstantBuffers(bufferNumber, 1, &m_transparentBuffer);
return true;}
void TransparentShaderClass::RenderShader(ID3D11DeviceContext* deviceContext, int indexCount){
// Set the vertex input layout.deviceContext->IASetInputLayout(m_layout);
// Set the vertex and pixel shaders that will be used to render this triangle.deviceContext->VSSetShader(m_vertexShader, NULL, 0);deviceContext->PSSetShader(m_pixelShader, NULL, 0);
// Set the sampler state in the pixel shader.deviceContext->PSSetSamplers(0, 1, &m_sampleState);
// Render the triangle.deviceContext->DrawIndexed(indexCount, 0, 0);
return;}
Graphicsclass.h
////////////////////////////////////////////////////////////////////////////////// Filename: graphicsclass.h////////////////////////////////////////////////////////////////////////////////#ifndef _GRAPHICSCLASS_H_ #define _GRAPHICSCLASS_H_
/////////////// GLOBALS //
/////////////const bool FULL_SCREEN =true;const bool VSYNC_ENABLED =true;
17 of 25 3/8/2013 12:41 PM
Tutorial 26: Transparency http://www.rastertek.com/dx11tut26.html

7/14/2019 RasterTek: Direct3D introduction
http://slidepdf.com/reader/full/rastertek-direct3d-introduction 415/709
const float SCREEN_DEPTH =1000.0f;const float SCREEN_NEAR =0.1f;
///////////////////////// MY CLASS INCLUDES //
///////////////////////#include "d3dclass.h"#include "cameraclass.h"#include "modelclass.h"#include "textureshaderclass.h"
Include the header filer for the new TransparentShaderClass.
#include "transparentshaderclass.h"
////////////////////////////////////////////////////////////////////////////////// Class name: GraphicsClass////////////////////////////////////////////////////////////////////////////////class GraphicsClass{public:
GraphicsClass();
GraphicsClass(const GraphicsClass&);~GraphicsClass();
bool Initialize(int, int, HWND);void Shutdown();bool Frame();bool Render();
private:
D3DClass* m_D3D;CameraClass* m_Camera;
Create two models for this tutorial.
ModelClass* m_Model1;ModelClass* m_Model2;
TextureShaderClass* m_TextureShader;
Create a TransparentShaderClass object.
TransparentShaderClass* m_TransparentShader;
18 of 25 3/8/2013 12:41 PM
Tutorial 26: Transparency http://www.rastertek.com/dx11tut26.html

7/14/2019 RasterTek: Direct3D introduction
http://slidepdf.com/reader/full/rastertek-direct3d-introduction 416/709
};
#endif
Graphicsclass.cpp
////////////////////////////////////////////////////////////////////////////////// Filename: graphicsclass.cpp////////////////////////////////////////////////////////////////////////////////#include "graphicsclass.h"
Initialize the two models and the new TransparentShaderClass to null in the class constructor.
GraphicsClass::GraphicsClass(){
m_D3D =0;m_Camera =0;m_Model1 =0;m_Model2 =0;m_TextureShader =0;m_TransparentShader =0;
}
GraphicsClass::GraphicsClass(const GraphicsClass& other){}
GraphicsClass::~GraphicsClass(){}
bool GraphicsClass::Initialize(int screenWidth, int screenHeight, HWND hwnd){
bool result;
// Create the Direct3D object.m_D3D =new D3DClass;if(!m_D3D)
19 of 25 3/8/2013 12:41 PM
Tutorial 26: Transparency http://www.rastertek.com/dx11tut26.html

7/14/2019 RasterTek: Direct3D introduction
http://slidepdf.com/reader/full/rastertek-direct3d-introduction 417/709
{return false;
}
// Initialize the Direct3D object.result =m_D3D->Initialize(screenWidth, screenHeight, VSYNC_ENABLED, hwnd, FULL_SCREEN, SCREEN_DEPTH, SCREEN_NEAR);
if(!result){
MessageBox(hwnd, L"Could not initialize Direct3D.", L"Error", MB_OK);return false;
}
// Create the camera object.m_Camera =new CameraClass;if(!m_Camera)
{return false;
}
Create and initialize the first model which will be a square with a dirt texture on it.
// Create the first model object.m_Model1 =new ModelClass;if(!m_Model1)
{return false;
}
// Initialize the first model object.result =m_Model1->Initialize(m_D3D->GetDevice(), L"../Engine/data/dirt01.dds", "../Engine/data/square.txt");if(!result){
MessageBox(hwnd, L"Could not initialize the first model object.", L"Error", MB_OK);
return false;}
Create and initialize the second model which will be a square with a stone texture on it.
// Create the second model object.m_Model2 =new ModelClass;if(!m_Model2){
return false;}
20 of 25 3/8/2013 12:41 PM
Tutorial 26: Transparency http://www.rastertek.com/dx11tut26.html

7/14/2019 RasterTek: Direct3D introduction
http://slidepdf.com/reader/full/rastertek-direct3d-introduction 418/709
// Initialize the second model object.result =m_Model2->Initialize(m_D3D->GetDevice(), L"../Engine/data/stone01.dds", "../Engine/data/square.txt");if(!result){
MessageBox(hwnd, L"Could not initialize the second model object.", L"Error", MB_OK);return false;
}
// Create the texture shader object.m_TextureShader =new TextureShaderClass;if(!m_TextureShader){
return false;}
// Initialize the texture shader object.result =m_TextureShader->Initialize(m_D3D->GetDevice(), hwnd);if(!result){
MessageBox(hwnd, L"Could not initialize the texture shader object.", L"Error", MB_OK);return false;
}
Create and initialize the new TransparentShaderClass object.
// Create the transparent shader object.m_TransparentShader =new TransparentShaderClass;if(!m_TransparentShader){
return false;}
// Initialize the transparent shader object.
result =m_TransparentShader->Initialize(m_D3D->GetDevice(), hwnd);if(!result){
MessageBox(hwnd, L"Could not initialize the transparent shader object.", L"Error", MB_OK);return false;
}
return true;}
Release the new TransparentShaderClass object and two model objects in the Shutdown function.
21 of 25 3/8/2013 12:41 PM
Tutorial 26: Transparency http://www.rastertek.com/dx11tut26.html

7/14/2019 RasterTek: Direct3D introduction
http://slidepdf.com/reader/full/rastertek-direct3d-introduction 419/709
void GraphicsClass::Shutdown(){
// Release the transparent shader object.if(m_TransparentShader){
m_TransparentShader->Shutdown();
delete m_TransparentShader;m_TransparentShader =0;
}
// Release the texture shader object.if(m_TextureShader){
m_TextureShader->Shutdown();delete m_TextureShader;
m_TextureShader =0;}
// Release the second model object.if(m_Model2){
m_Model2->Shutdown();delete m_Model2;m_Model2 =0;
}
// Release the first model object.if(m_Model1){
m_Model1->Shutdown();delete m_Model1;m_Model1 =0;
}
// Release the camera object.if(m_Camera){
delete m_Camera;m_Camera =0;
}
// Release the D3D object.
if(m_D3D){
m_D3D->Shutdown();
22 of 25 3/8/2013 12:41 PM
Tutorial 26: Transparency http://www.rastertek.com/dx11tut26.html

7/14/2019 RasterTek: Direct3D introduction
http://slidepdf.com/reader/full/rastertek-direct3d-introduction 420/709
delete m_D3D;m_D3D =0;
}
return;}
bool GraphicsClass::Frame(){
// Set the position of the camera.m_Camera->SetPosition(0.0f, 0.0f, -5.0f);
return true;}
bool GraphicsClass::Render(){
D3DXMATRIX worldMatrix, viewMatrix, projectionMatrix;bool result;float blendAmount;
Setup a blend variable that will be sent into the transparent shader.
// Set the blending amount to 50%.blendAmount =0.5f;
// Clear the buffers to begin the scene.m_D3D->BeginScene(0.0f, 0.0f, 0.0f, 1.0f);
// Generate the view matrix based on the camera's position.m_Camera->Render();
// Get the world, view, and projection matrices from the camera and d3d objects.m_D3D->GetWorldMatrix(worldMatrix);m_Camera->GetViewMatrix(viewMatrix);m_D3D->GetProjectionMatrix(projectionMatrix);
Render the first square model with the dirt texture in the center of the screen. Use just the regular texture shader for this.
// Put the model vertex and index buffers on the graphics pipeline to prepare them for drawing.
m_Model1->Render(m_D3D->GetDeviceContext());
// Render the model with the texture shader.
23 of 25 3/8/2013 12:41 PM
Tutorial 26: Transparency http://www.rastertek.com/dx11tut26.html

7/14/2019 RasterTek: Direct3D introduction
http://slidepdf.com/reader/full/rastertek-direct3d-introduction 421/709
result =m_TextureShader->Render(m_D3D->GetDeviceContext(), m_Model1->GetIndexCount(), worldMatrix, viewMatrix,projectionMatrix, m_Model1->GetTexture());
if(!result){
return false;}
Render the second square model with the stone texture slightly to the right and above the previous square texture. Use the new TransparentShaderClass objectwith the blendAmount input to render the square stone texture with transparency so we can see through it. Also turn on the alpha blending from the D3DClassbefore rendering and then turn it off after rendering.
// Translate to the right by one unit and towards the camera by one unit.D3DXMatrixTranslation(&worldMatrix, 1.0f, 0.0f, -1.0f);
// Turn on alpha blending for the transparency to work.
m_D3D->TurnOnAlphaBlending();
// Put the second square model on the graphics pipeline.m_Model2->Render(m_D3D->GetDeviceContext());
// Render the second square model with the stone texture and use the 50% blending amount for transparency.result =m_TransparentShader->Render(m_D3D->GetDeviceContext(), m_Model2->GetIndexCount(), worldMatrix, viewMatrix,
projectionMatrix, m_Model2->GetTexture(), blendAmount);if(!result)
{return false;
}
// Turn off alpha blending.m_D3D->TurnOffAlphaBlending();
// Present the rendered scene to the screen.m_D3D->EndScene();
return true;}
Summary
With transparency we can create see through textures and models which allows us to create a number of different effects.
24 of 25 3/8/2013 12:41 PM
Tutorial 26: Transparency http://www.rastertek.com/dx11tut26.html

7/14/2019 RasterTek: Direct3D introduction
http://slidepdf.com/reader/full/rastertek-direct3d-introduction 422/709
To Do Exercises
1. Recompile the and run the program. Press escape to quit.
2. Change the value of the blendAmount in the GraphicsRender function to see different amounts of transparency.
Source Code
Visual Studio 2008 Project: dx11tut26.zip
Source Only: dx11src26.zip
Executable Only:dx11exe26.zip
Back to Tutorial Index
25 of 25 3/8/2013 12:41 PM
Tutorial 27: Reflection http://www.rastertek.com/dx11tut27.html

7/14/2019 RasterTek: Direct3D introduction
http://slidepdf.com/reader/full/rastertek-direct3d-introduction 423/709
Tutor ial 27: Reflect ion
This tutorial will cover how to implement basic planar reflections in DirectX 11 using HLSL and C++. The code in this tutorial is based on the previous tutorials. Inthis tutorial we will render a cube being reflected by the floor.
To create the reflection effect we first need a reflection view matrix. This is the same as the regular camera created view matrix except that we render from theopposite side of the plane to create the reflection.
The cube is being reflected by the floor object so we need to setup the reflection matrix along the Y plane to match the floor. In this example the camera is locatedat 0.0 on the Y axis and the floor is located at -1.5 on the Y axis, so our reflection view point will need to be the inverse of the camera in relation to the floor whichwill end up being -3.0 on the Y axis. Here is a diagram to illustrate the example:
Now that we have a reflection matrix we can use it to render the scene from the reflection camera view point instead of the regular camera view point. And when werender from the reflection view point we will render that data to a texture instead of the back buffer. This will give us the reflection of our scene on a texture.
The final step is to make a second render pass of our scene but when we do so we use the reflection render to texture and blend it with the floor. This will be doneusing the reflection matrix and the normal view matrix to project the texture accurately onto the floor geometry.
Framework
The frame work has been updated to include a new class called ReflectionShaderClass for this tutorial. This class is the same as the TextureShaderClass except ithandles a reflection view matrix and a reflection texture for interfacing with the new HLSL reflection shader code.
1 of 30 3/8/2013 12:41 PM
Tutorial 27: Reflection http://www.rastertek.com/dx11tut27.html

7/14/2019 RasterTek: Direct3D introduction
http://slidepdf.com/reader/full/rastertek-direct3d-introduction 424/709
We will start the code section of the tutorial by examining the HLSL reflection shader code first:
Reflection.vs
////////////////////////////////////////////////////////////////////////////////// Filename: reflection.vs////////////////////////////////////////////////////////////////////////////////
/////////////// GLOBALS ///////////////cbuffer MatrixBuffer{
matrix worldMatrix;matrix viewMatrix;matrix projectionMatrix;
};
We add a new constant buffer to hold the reflection matrix.
cbuffer ReflectionBuffer{
matrix reflectionMatrix;};
//////////////
2 of 30 3/8/2013 12:41 PM
// TYPEDEFS //
Tutorial 27: Reflection http://www.rastertek.com/dx11tut27.html

7/14/2019 RasterTek: Direct3D introduction
http://slidepdf.com/reader/full/rastertek-direct3d-introduction 425/709
// TYPEDEFS ////////////////struct VertexInputType{
float4 position : POSITION;float2 tex : TEXCOORD0;
};
The PixleInputType now has a 4 float texture coordinate variable called reflectionPosition that will be used to hold the projected reflection texture input position.
struct PixelInputType{
float4 position : SV_POSITION;float2 tex : TEXCOORD0;float4 reflectionPosition : TEXCOORD1;
};
////////////////////////////////////////////////////////////////////////////////// Vertex Shader////////////////////////////////////////////////////////////////////////////////PixelInputType ReflectionVertexShader(VertexInputType input){
PixelInputType output;
matrix reflectProjectWorld;
// Change the position vector to be 4 units for proper matrix calculations.input.position.w =1.0f;
// Calculate the position of the vertex against the world, view, and projection matrices.output.position =mul(input.position, worldMatrix);output.position =mul(output.position, viewMatrix);
output.position =mul(output.position, projectionMatrix);
// Store the texture coordinates for the pixel shader.output.tex =input.tex;
The first change to the vertex shader is that we create a matrix for transforming the input position values into the projected reflection position. This matrix is acombination of the reflection matrix, the projection matrix, and the world matrix.
// Create the reflection projection world matrix.
reflectProjectWorld =mul(reflectionMatrix, projectionMatrix);reflectProjectWorld =mul(worldMatrix, reflectProjectWorld);
3 of 30 3/8/2013 12:41 PM
Now transform the input position into the projected reflection position. These transformed position coordinates will be used in the pixel shader to derive where to
Tutorial 27: Reflection http://www.rastertek.com/dx11tut27.html

7/14/2019 RasterTek: Direct3D introduction
http://slidepdf.com/reader/full/rastertek-direct3d-introduction 426/709
Now transform the input position into the projected reflection position. These transformed position coordinates will be used in the pixel shader to derive where tomap our projected reflection texture to.
// Calculate the input position against the reflectProjectWorld matrix.output.reflectionPosition =mul(input.position, reflectProjectWorld);
return output;}
Reflection.ps
////////////////////////////////////////////////////////////////////////////////// Filename: reflection.ps
////////////////////////////////////////////////////////////////////////////////
/////////////// GLOBALS ///////////////
Texture2D shaderTexture;SamplerState SampleType;
We add a new texture variable for the scene reflection render to texture.
Texture2D reflectionTexture;
//////////////// TYPEDEFS ////////////////struct PixelInputType
{float4 position : SV_POSITION;float2 tex : TEXCOORD0;float4 reflectionPosition : TEXCOORD1;
};
////////////////////////////////////////////////////////////////////////////////// Pixel Shader
////////////////////////////////////////////////////////////////////////////////float4 ReflectionPixelShader(PixelInputType input) : SV_TARGET
4 of 30 3/8/2013 12:41 PM
{
Tutorial 27: Reflection http://www.rastertek.com/dx11tut27.html

7/14/2019 RasterTek: Direct3D introduction
http://slidepdf.com/reader/full/rastertek-direct3d-introduction 427/709
{float4 textureColor;float2 reflectTexCoord;float4 reflectionColor;float4 color;
// Sample the texture pixel at this location.textureColor =shaderTexture.Sample(SampleType, input.tex);
The input reflection position homogenous coordinates need to be converted to proper texture coordinates. To do so first divide by the W coordinate. This leaves uswith tu and tv coordinates in the -1 to +1 range, to fix it to map to a 0 to +1 range just divide by 2 and add 0.5.
// Calculate the projected reflection texture coordinates.reflectTexCoord.x =input.reflectionPosition.x / input.reflectionPosition.w / 2.0f +0.5f;
reflectTexCoord.y =-input.reflectionPosition.y / input.reflectionPosition.w / 2.0f +0.5f;
Now when we sample from the reflection texture we use the projected reflection coordinates that have been converted to get the right reflection pixel for thisprojected reflection position.
// Sample the texture pixel from the reflection texture using the projected texture coordinates.reflectionColor =reflectionTexture.Sample(SampleType, reflectTexCoord);
Finally we blend the texture from the floor with the reflection texture to create the effect of the reflected cube on the floor. Here we use a linear interpolation between
the two textures with a factor of 0.15. You can change this to a different blend equation or change the factor amount for a different or stronger effect.
// Do a linear interpolation between the two textures for a blend effect.color =lerp(textureColor, reflectionColor, 0.15f);
return color;}
Reflectionshaderclass.h
The ReflectionShaderClass is the same as the TextureShaderClass except that it also handles a reflection view matrix buffer and a reflection texture.
////////////////////////////////////////////////////////////////////////////////// Filename: reflectionshaderclass.h////////////////////////////////////////////////////////////////////////////////#ifndef _REFLECTIONSHADERCLASS_H_
#define _REFLECTIONSHADERCLASS_H_
5 of 30 3/8/2013 12:41 PM
Tutorial 27: Reflection http://www.rastertek.com/dx11tut27.html

7/14/2019 RasterTek: Direct3D introduction
http://slidepdf.com/reader/full/rastertek-direct3d-introduction 428/709
//////////////// INCLUDES ////////////////#include <d3d11.h>#include <d3dx10math.h>
#include <d3dx11async.h>#include <fstream>using namespace std;
////////////////////////////////////////////////////////////////////////////////// Class name: ReflectionShaderClass////////////////////////////////////////////////////////////////////////////////class ReflectionShaderClass
{private:
struct MatrixBufferType{
D3DXMATRIX world;D3DXMATRIX view;D3DXMATRIX projection;
};
This is the structure for the reflection view matrix dynamic constant buffer.
struct ReflectionBufferType{
D3DXMATRIX reflectionMatrix;};
public:ReflectionShaderClass();
ReflectionShaderClass(const ReflectionShaderClass&);~ReflectionShaderClass();
bool Initialize(ID3D11Device*, HWND);void Shutdown();bool Render(ID3D11DeviceContext*, int, D3DXMATRIX, D3DXMATRIX, D3DXMATRIX, ID3D11ShaderResourceView*,
ID3D11ShaderResourceView*, D3DXMATRIX);
private:
bool InitializeShader(ID3D11Device*, HWND, WCHAR*, WCHAR*);void ShutdownShader();void OutputShaderErrorMessage(ID3D10Blob*, HWND, WCHAR*);
6 of 30 3/8/2013 12:41 PM
Tutorial 27: Reflection http://www.rastertek.com/dx11tut27.html
7/14/2019 RasterTek: Direct3D introduction
http://slidepdf.com/reader/full/rastertek-direct3d-introduction 429/709
bool SetShaderParameters(ID3D11DeviceContext*, D3DXMATRIX, D3DXMATRIX, D3DXMATRIX, ID3D11ShaderResourceView*,ID3D11ShaderResourceView*, D3DXMATRIX);
void RenderShader(ID3D11DeviceContext*, int);
private:
ID3D11VertexShader* m_vertexShader;ID3D11PixelShader* m_pixelShader;ID3D11InputLayout* m_layout;ID3D11Buffer* m_matrixBuffer;ID3D11SamplerState* m_sampleState;
This is the new buffer for the reflection view matrix.
ID3D11Buffer* m_reflectionBuffer;
};
#endif
Reflectionshaderclass.cpp
////////////////////////////////////////////////////////////////////////////////
// Filename: reflectionshaderclass.cpp////////////////////////////////////////////////////////////////////////////////#include "reflectionshaderclass.h"
ReflectionShaderClass::ReflectionShaderClass(){
m_vertexShader =0;m_pixelShader =0;
m_layout =0;m_matrixBuffer =0;m_sampleState =0;
Initialize the reflection constant buffer to null in the class constructor.
m_reflectionBuffer =0;}
ReflectionShaderClass::ReflectionShaderClass(const ReflectionShaderClass& other)
7 of 30 3/8/2013 12:41 PM
{}
Tutorial 27: Reflection http://www.rastertek.com/dx11tut27.html

7/14/2019 RasterTek: Direct3D introduction
http://slidepdf.com/reader/full/rastertek-direct3d-introduction 430/709
}
ReflectionShaderClass::~ReflectionShaderClass(){
}
bool ReflectionShaderClass::Initialize(ID3D11Device* device, HWND hwnd){
bool result;
Load the new reflection HLSL shader files.
// Initialize the vertex and pixel shaders.result =InitializeShader(device, hwnd, L"../Engine/reflection.vs", L"../Engine/reflection.ps");if(!result){
return false;}
return true;}
void ReflectionShaderClass::Shutdown(){
// Shutdown the vertex and pixel shaders as well as the related objects.ShutdownShader();
return;}
The Render function now takes as input the new reflection texture and reflection matrix. These are then set in the shader before rendering.
bool ReflectionShaderClass::Render(ID3D11DeviceContext* deviceContext, int indexCount, D3DXMATRIX worldMatrix,D3DXMATRIX viewMatrix, D3DXMATRIX projectionMatrix, ID3D11ShaderResourceView* texture,ID3D11ShaderResourceView* reflectionTexture, D3DXMATRIX reflectionMatrix)
{bool result;
// Set the shader parameters that it will use for rendering.result =SetShaderParameters(deviceContext, worldMatrix, viewMatrix, projectionMatrix, texture, reflectionTexture,
8 of 30 3/8/2013 12:41 PM
reflectionMatrix);if(!result)
Tutorial 27: Reflection http://www.rastertek.com/dx11tut27.html

7/14/2019 RasterTek: Direct3D introduction
http://slidepdf.com/reader/full/rastertek-direct3d-introduction 431/709
if(!result){
return false;}
// Now render the prepared buffers with the shader.RenderShader(deviceContext, indexCount);
return true;}
bool ReflectionShaderClass::InitializeShader(ID3D11Device* device, HWND hwnd, WCHAR* vsFilename, WCHAR* psFilename){
HRESULT result;ID3D10Blob* errorMessage;ID3D10Blob* vertexShaderBuffer;ID3D10Blob* pixelShaderBuffer;D3D11_INPUT_ELEMENT_DESC polygonLayout[2];unsigned int numElements;D3D11_BUFFER_DESC matrixBufferDesc;D3D11_SAMPLER_DESC samplerDesc;D3D11_BUFFER_DESC reflectionBufferDesc;
// Initialize the pointers this function will use to null.errorMessage =0;vertexShaderBuffer =0;pixelShaderBuffer =0;
Load the new reflection vertex shader.
// Compile the vertex shader code.result =D3DX11CompileFromFile(vsFilename, NULL, NULL, "ReflectionVertexShader", "vs_5_0", D3D10_SHADER_ENABLE_STRICTNESS,
0, NULL, &vertexShaderBuffer, &errorMessage, NULL);if(FAILED(result)){
// If the shader failed to compile it should have writen something to the error message.if(errorMessage){
OutputShaderErrorMessage(errorMessage, hwnd, vsFilename);
}// If there was nothing in the error message then it simply could not find the shader file itself.else
9 of 30 3/8/2013 12:41 PM
{MessageBox(hwnd vsFilename L"Missing Shader File" MB OK);
Tutorial 27: Reflection http://www.rastertek.com/dx11tut27.html

7/14/2019 RasterTek: Direct3D introduction
http://slidepdf.com/reader/full/rastertek-direct3d-introduction 432/709
MessageBox(hwnd, vsFilename, L Missing Shader File , MB_OK);}
return false;}
Load the new reflection pixel shader.
// Compile the pixel shader code.result =D3DX11CompileFromFile(psFilename, NULL, NULL, "ReflectionPixelShader", "ps_5_0", D3D10_SHADER_ENABLE_STRICTNESS,
0, NULL, &pixelShaderBuffer, &errorMessage, NULL);if(FAILED(result)){
// If the shader failed to compile it should have writen something to the error message.
if(errorMessage){
OutputShaderErrorMessage(errorMessage, hwnd, psFilename);}// If there was nothing in the error message then it simply could not find the file itself.else{
MessageBox(hwnd, psFilename, L"Missing Shader File", MB_OK);}
return false;}
// Create the vertex shader from the buffer.result =device->CreateVertexShader(vertexShaderBuffer->GetBufferPointer(), vertexShaderBuffer->GetBufferSize(), NULL,
&m_vertexShader);if(FAILED(result)){
return false;}
// Create the vertex shader from the buffer.result =device->CreatePixelShader(pixelShaderBuffer->GetBufferPointer(), pixelShaderBuffer->GetBufferSize(), NULL,
&m_pixelShader);if(FAILED(result)){
return false;
}
// Create the vertex input layout description.
10 of 30 3/8/2013 12:41 PM
// This setup needs to match the VertexType stucture in the ModelClass and in the shader.polygonLayout[0]SemanticName="POSITION";
Tutorial 27: Reflection http://www.rastertek.com/dx11tut27.html

7/14/2019 RasterTek: Direct3D introduction
http://slidepdf.com/reader/full/rastertek-direct3d-introduction 433/709
polygonLayout[0].SemanticName POSITION ;polygonLayout[0].SemanticIndex =0;polygonLayout[0].Format =DXGI_FORMAT_R32G32B32_FLOAT;polygonLayout[0].InputSlot =0;polygonLayout[0].AlignedByteOffset =0;
polygonLayout[0].InputSlotClass =D3D11_INPUT_PER_VERTEX_DATA;polygonLayout[0].InstanceDataStepRate =0;
polygonLayout[1].SemanticName ="TEXCOORD";polygonLayout[1].SemanticIndex =0;polygonLayout[1].Format =DXGI_FORMAT_R32G32_FLOAT;polygonLayout[1].InputSlot =0;polygonLayout[1].AlignedByteOffset =D3D11_APPEND_ALIGNED_ELEMENT;polygonLayout[1].InputSlotClass =D3D11_INPUT_PER_VERTEX_DATA;
polygonLayout[1].InstanceDataStepRate =0;
// Get a count of the elements in the layout.numElements =sizeof(polygonLayout) / sizeof(polygonLayout[0]);
// Create the vertex input layout.result =device->CreateInputLayout(polygonLayout, numElements, vertexShaderBuffer->GetBufferPointer(),
vertexShaderBuffer->GetBufferSize(), &m_layout);if(FAILED(result))
{return false;
}
// Release the vertex shader buffer and pixel shader buffer since they are no longer needed.vertexShaderBuffer->Release();vertexShaderBuffer =0;
pixelShaderBuffer->Release();
pixelShaderBuffer =0;
// Setup the description of the matrix dynamic constant buffer that is in the vertex shader.matrixBufferDesc.Usage =D3D11_USAGE_DYNAMIC;matrixBufferDesc.ByteWidth =sizeof(MatrixBufferType);matrixBufferDesc.BindFlags =D3D11_BIND_CONSTANT_BUFFER;matrixBufferDesc.CPUAccessFlags =D3D11_CPU_ACCESS_WRITE;matrixBufferDesc.MiscFlags =0;matrixBufferDesc.StructureByteStride =0;
// Create the constant buffer pointer so we can access the vertex shader constant buffer from within this class.result =device->CreateBuffer(&matrixBufferDesc, NULL, &m_matrixBuffer);
11 of 30 3/8/2013 12:41 PM
if(FAILED(result)){
Tutorial 27: Reflection http://www.rastertek.com/dx11tut27.html

7/14/2019 RasterTek: Direct3D introduction
http://slidepdf.com/reader/full/rastertek-direct3d-introduction 434/709
{return false;
}
// Create a texture sampler state description.
samplerDesc.Filter =D3D11_FILTER_MIN_MAG_MIP_LINEAR;samplerDesc.AddressU =D3D11_TEXTURE_ADDRESS_WRAP;samplerDesc.AddressV =D3D11_TEXTURE_ADDRESS_WRAP;samplerDesc.AddressW =D3D11_TEXTURE_ADDRESS_WRAP;samplerDesc.MipLODBias =0.0f;samplerDesc.MaxAnisotropy =1;samplerDesc.ComparisonFunc =D3D11_COMPARISON_ALWAYS;samplerDesc.BorderColor[0] =0;samplerDesc.BorderColor[1] =0;
samplerDesc.BorderColor[2] =0;samplerDesc.BorderColor[3] =0;samplerDesc.MinLOD =0;samplerDesc.MaxLOD =D3D11_FLOAT32_MAX;
// Create the texture sampler state.result =device->CreateSamplerState(&samplerDesc, &m_sampleState);if(FAILED(result)){
return false;}
Here we setup the new reflection matrix dynamic constant buffer.
// Setup the description of the reflection dynamic constant buffer that is in the vertex shader.reflectionBufferDesc.Usage =D3D11_USAGE_DYNAMIC;reflectionBufferDesc.ByteWidth =sizeof(ReflectionBufferType);reflectionBufferDesc.BindFlags =D3D11_BIND_CONSTANT_BUFFER;
reflectionBufferDesc.CPUAccessFlags =D3D11_CPU_ACCESS_WRITE;reflectionBufferDesc.MiscFlags =0;reflectionBufferDesc.StructureByteStride =0;
// Create the constant buffer pointer so we can access the vertex shader constant buffer from within this class.result =device->CreateBuffer(&reflectionBufferDesc, NULL, &m_reflectionBuffer);if(FAILED(result)){
return false;
}
return true;
12 of 30 3/8/2013 12:41 PM
}
Tutorial 27: Reflection http://www.rastertek.com/dx11tut27.html
7/14/2019 RasterTek: Direct3D introduction
http://slidepdf.com/reader/full/rastertek-direct3d-introduction 435/709
void ReflectionShaderClass::ShutdownShader(){
We release the new reflection buffer here in the ShutdownShader function.
// Release the reflection constant buffer.if(m_reflectionBuffer){
m_reflectionBuffer->Release();m_reflectionBuffer =0;
}
// Release the sampler state.if(m_sampleState){
m_sampleState->Release();m_sampleState =0;
}
// Release the matrix constant buffer.if(m_matrixBuffer)
{m_matrixBuffer->Release();m_matrixBuffer =0;
}
// Release the layout.if(m_layout){
m_layout->Release();
m_layout =0;}
// Release the pixel shader.if(m_pixelShader){
m_pixelShader->Release();m_pixelShader =0;
}
// Release the vertex shader.if(m_vertexShader)
13 of 30 3/8/2013 12:41 PM
{m_vertexShader->Release();
Tutorial 27: Reflection http://www.rastertek.com/dx11tut27.html

7/14/2019 RasterTek: Direct3D introduction
http://slidepdf.com/reader/full/rastertek-direct3d-introduction 436/709
m_vertexShader =0;}
return;
}
void ReflectionShaderClass::OutputShaderErrorMessage(ID3D10Blob* errorMessage, HWND hwnd, WCHAR* shaderFilename){
char* compileErrors;unsigned long bufferSize, i;ofstream fout;
// Get a pointer to the error message text buffer.compileErrors =(char*)(errorMessage->GetBufferPointer());
// Get the length of the message.bufferSize =errorMessage->GetBufferSize();
// Open a file to write the error message to.fout.open("shader-error.txt");
// Write out the error message.for(i=0; i<bufferSize; i++){
fout <<compileErrors[i];}
// Close the file.fout.close();
// Release the error message.errorMessage->Release();errorMessage =0;
// Pop a message up on the screen to notify the user to check the text file for compile errors.MessageBox(hwnd, L"Error compiling shader. Check shader-error.txt for message.", shaderFilename, MB_OK);
return;
}
14 of 30 3/8/2013 12:41 PM
bool ReflectionShaderClass::SetShaderParameters(ID3D11DeviceContext* deviceContext, D3DXMATRIX worldMatrix, D3DXMATRIX viewMatrix,D3DXMATRIX projectionMatrix, ID3D11ShaderResourceView* texture,
3 Sh d i * fl i 3 fl i i )
Tutorial 27: Reflection http://www.rastertek.com/dx11tut27.html

7/14/2019 RasterTek: Direct3D introduction
http://slidepdf.com/reader/full/rastertek-direct3d-introduction 437/709
ID3D11ShaderResourceView* reflectionTexture, D3DXMATRIX reflectionMatrix){
HRESULT result;D3D11_MAPPED_SUBRESOURCE mappedResource;
MatrixBufferType* dataPtr;unsigned int bufferNumber;ReflectionBufferType* dataPtr2;
// Transpose the matrices to prepare them for the shader.D3DXMatrixTranspose(&worldMatrix, &worldMatrix);D3DXMatrixTranspose(&viewMatrix, &viewMatrix);D3DXMatrixTranspose(&projectionMatrix, &projectionMatrix);
Transpose the reflection matrix first as DirectX 11 requires all input matrices to be transposed for memory alignment reasons.
// Transpose the relfection matrix to prepare it for the shader.D3DXMatrixTranspose(&reflectionMatrix, &reflectionMatrix);
// Lock the matrix constant buffer so it can be written to.result =deviceContext->Map(m_matrixBuffer, 0, D3D11_MAP_WRITE_DISCARD, 0, &mappedResource);if(FAILED(result))
{ return false;}
// Get a pointer to the data in the matrix constant buffer.dataPtr =(MatrixBufferType*)mappedResource.pData;
// Copy the matrices into the matrix constant buffer.dataPtr->world =worldMatrix;
dataPtr->view =viewMatrix;dataPtr->projection =projectionMatrix;
// Unlock the matrix constant buffer.deviceContext->Unmap(m_matrixBuffer, 0);
// Set the position of the matrix constant buffer in the vertex shader.bufferNumber =0;
// Now set the matrix constant buffer in the vertex shader with the updated values.deviceContext->VSSetConstantBuffers(bufferNumber, 1, &m_matrixBuffer);
15 of 30 3/8/2013 12:41 PM
Lock the reflection buffer and copy the reflection matrix into it. After that unlock it and set it in the vertex shader.
// L k th fl ti t t b ff it b itt t
Tutorial 27: Reflection http://www.rastertek.com/dx11tut27.html

7/14/2019 RasterTek: Direct3D introduction
http://slidepdf.com/reader/full/rastertek-direct3d-introduction 438/709
// Lock the reflection constant buffer so it can be written to.result =deviceContext->Map(m_reflectionBuffer, 0, D3D11_MAP_WRITE_DISCARD, 0, &mappedResource);if(FAILED(result)){
return false;}
// Get a pointer to the data in the matrix constant buffer.dataPtr2 =(ReflectionBufferType*)mappedResource.pData;
// Copy the matrix into the reflection constant buffer.dataPtr2->reflectionMatrix =reflectionMatrix;
// Unlock the reflection constant buffer.deviceContext->Unmap(m_reflectionBuffer, 0);
// Set the position of the reflection constant buffer in the vertex shader.bufferNumber =1;
// Now set the reflection constant buffer in the vertex shader with the updated values.deviceContext->VSSetConstantBuffers(bufferNumber, 1, &m_reflectionBuffer);
// Set shader texture resource in the pixel shader.deviceContext->PSSetShaderResources(0, 1, &texture);
Set the reflection texture as the second texture inside the pixel shader.
// Set the reflection texture resource in the pixel shader.deviceContext->PSSetShaderResources(1, 1, &reflectionTexture);
return true;
}
void ReflectionShaderClass::RenderShader(ID3D11DeviceContext* deviceContext, int indexCount){
// Set the vertex input layout.deviceContext->IASetInputLayout(m_layout);
// Set the vertex and pixel shaders that will be used to render this triangle.
deviceContext->VSSetShader(m_vertexShader, NULL, 0);deviceContext->PSSetShader(m_pixelShader, NULL, 0);
16 of 30 3/8/2013 12:41 PM
// Set the sampler state in the pixel shader.deviceContext->PSSetSamplers(0, 1, &m_sampleState);
Tutorial 27: Reflection http://www.rastertek.com/dx11tut27.html

7/14/2019 RasterTek: Direct3D introduction
http://slidepdf.com/reader/full/rastertek-direct3d-introduction 439/709
// Render the triangle.deviceContext->DrawIndexed(indexCount, 0, 0);
return;}
Cameraclass.h
The CameraClass has been slightly modified to handle planar reflections.
////////////////////////////////////////////////////////////////////////////////// Filename: cameraclass.h////////////////////////////////////////////////////////////////////////////////#ifndef _CAMERACLASS_H_ #define _CAMERACLASS_H_
//////////////// INCLUDES //
//////////////#include <d3dx10math.h>
////////////////////////////////////////////////////////////////////////////////// Class name: CameraClass////////////////////////////////////////////////////////////////////////////////class CameraClass{
public:CameraClass();CameraClass(const CameraClass&);~CameraClass();
void SetPosition(float, float, float);void SetRotation(float, float, float);
void Render();
void GetViewMatrix(D3DXMATRIX&);
17 of 30 3/8/2013 12:41 PM
We add two new functions for reflection. One is to build the reflection matrix and the other is to retrieve the reflection matrix.
voidRenderReflection(float);
Tutorial 27: Reflection http://www.rastertek.com/dx11tut27.html
7/14/2019 RasterTek: Direct3D introduction
http://slidepdf.com/reader/full/rastertek-direct3d-introduction 440/709
void RenderReflection(float);D3DXMATRIX GetReflectionViewMatrix();
private:
D3DXMATRIX m_viewMatrix;float m_positionX, m_positionY, m_positionZ;float m_rotationX, m_rotationY, m_rotationZ;
Here is the new reflection matrix.
D3DXMATRIX m_reflectionViewMatrix;};
#endif
Cameraclass.cpp
I will just cover the new functions since the older CameraClass functions have not changed.
////////////////////////////////////////////////////////////////////////////////
// Filename: cameraclass.cpp////////////////////////////////////////////////////////////////////////////////#include "cameraclass.h"
The new RenderReflection function builds a reflection view matrix the same way as the regular Render function builds a view matrix. The only difference is that wetake as input the height of the object that will act as the Y axis plane and then we use that height to invert the position.y variable for reflection. This will build thereflection view matrix that we can then use in the shader. Note that this function only works for the Y axis plane.
void CameraClass::RenderReflection(float height)
{D3DXVECTOR3 up, position, lookAt;float radians;
// Setup the vector that points upwards.up.x =0.0f;up.y =1.0f;up.z =0.0f;
// Setup the position of the camera in the world.
18 of 30 3/8/2013 12:41 PM
// For planar reflection invert the Y position of the camera.position.x =m_positionX;position.y =-m positionY +(height * 2.0f);
Tutorial 27: Reflection http://www.rastertek.com/dx11tut27.html

7/14/2019 RasterTek: Direct3D introduction
http://slidepdf.com/reader/full/rastertek-direct3d-introduction 441/709
position.y m_positionY +(height 2.0f);position.z =m_positionZ;
// Calculate the rotation in radians.
radians =m_rotationY * 0.0174532925f;
// Setup where the camera is looking.lookAt.x =sinf(radians) +m_positionX;lookAt.y =position.y;lookAt.z =cosf(radians) +m_positionZ;
// Create the view matrix from the three vectors.D3DXMatrixLookAtLH(&m_reflectionViewMatrix, &position, &lookAt, &up);
return;}
GetReflectionViewMatrix returns the reflection view matrix to calling functions.
D3DXMATRIX CameraClass::GetReflectionViewMatrix(){
return m_reflectionViewMatrix;
}
Graphicsclass.h
////////////////////////////////////////////////////////////////////////////////// Filename: graphicsclass.h////////////////////////////////////////////////////////////////////////////////
#ifndef _GRAPHICSCLASS_H_ #define _GRAPHICSCLASS_H_
/////////////// GLOBALS ///////////////const bool FULL_SCREEN =true;const bool VSYNC_ENABLED =true;
const float SCREEN_DEPTH =1000.0f;const float SCREEN_NEAR =0.1f;
19 of 30 3/8/2013 12:41 PM
///////////////////////
Tutorial 27: Reflection http://www.rastertek.com/dx11tut27.html
7/14/2019 RasterTek: Direct3D introduction
http://slidepdf.com/reader/full/rastertek-direct3d-introduction 442/709
///////////////////////// MY CLASS INCLUDES /////////////////////////#include "d3dclass.h"#include "cameraclass.h"#include "modelclass.h"#include "textureshaderclass.h"#include "rendertextureclass.h"
We include the new ReflectionShaderClass header file.
#include "reflectionshaderclass.h"
////////////////////////////////////////////////////////////////////////////////// Class name: GraphicsClass////////////////////////////////////////////////////////////////////////////////class GraphicsClass{public:
GraphicsClass();GraphicsClass(const GraphicsClass&);
~GraphicsClass();
bool Initialize(int, int, HWND);void Shutdown();bool Frame();bool Render();
private:bool RenderToTexture();
bool RenderScene();
private:D3DClass* m_D3D;CameraClass* m_Camera;ModelClass* m_Model;
TextureShaderClass* m_TextureShader;
We will be using a render to texture object in this tutorial.
RenderTextureClass* m_RenderTexture;
20 of 30 3/8/2013 12:41 PM
We will create a second model object for the floor.
ModelClass* m_FloorModel;
Tutorial 27: Reflection http://www.rastertek.com/dx11tut27.html

7/14/2019 RasterTek: Direct3D introduction
http://slidepdf.com/reader/full/rastertek-direct3d-introduction 443/709
_
Create the new reflection shader object.
ReflectionShaderClass* m_ReflectionShader;};
#endif
Graphicsclass.cpp
////////////////////////////////////////////////////////////////////////////////// Filename: graphicsclass.cpp////////////////////////////////////////////////////////////////////////////////#include "graphicsclass.h"
GraphicsClass::GraphicsClass(){
m_D3D =0;
m_Camera =0;m_Model =0;m_TextureShader =0;
Initialize the render to texture, floor model, and reflection shader objects to null in the class constructor.
m_RenderTexture =0;m_FloorModel =0;m_ReflectionShader =0;
}
GraphicsClass::GraphicsClass(const GraphicsClass& other){}
GraphicsClass::~GraphicsClass()
{}
21 of 30 3/8/2013 12:41 PM
bool GraphicsClass::Initialize(int screenWidth, int screenHeight, HWND hwnd)
Tutorial 27: Reflection http://www.rastertek.com/dx11tut27.html

7/14/2019 RasterTek: Direct3D introduction
http://slidepdf.com/reader/full/rastertek-direct3d-introduction 444/709
{bool result;
// Create the Direct3D object.m_D3D =new D3DClass;if(!m_D3D){
return false;}
// Initialize the Direct3D object.result =m_D3D->Initialize(screenWidth, screenHeight, VSYNC_ENABLED, hwnd, FULL_SCREEN, SCREEN_DEPTH, SCREEN_NEAR);if(!result){
MessageBox(hwnd, L"Could not initialize Direct3D.", L"Error", MB_OK);return false;
}
// Create the camera object.m_Camera =new CameraClass;
if(!m_Camera){return false;
}
// Create the model object.m_Model =new ModelClass;if(!m_Model){
return false;}
// Initialize the model object.result =m_Model->Initialize(m_D3D->GetDevice(), L"../Engine/data/seafloor.dds", "../Engine/data/cube.txt");if(!result){
MessageBox(hwnd, L"Could not initialize the model object.", L"Error", MB_OK);return false;
}
// Create the texture shader object.
22 of 30 3/8/2013 12:41 PM
m_TextureShader =new TextureShaderClass;if(!m_TextureShader){
f l
Tutorial 27: Reflection http://www.rastertek.com/dx11tut27.html

7/14/2019 RasterTek: Direct3D introduction
http://slidepdf.com/reader/full/rastertek-direct3d-introduction 445/709
return false;}
// Initialize the texture shader object.result =m_TextureShader->Initialize(m_D3D->GetDevice(), hwnd);if(!result){
MessageBox(hwnd, L"Could not initialize the texture shader object.", L"Error", MB_OK);return false;
}
Create and initialize the render to texture object.
// Create the render to texture object.m_RenderTexture =new RenderTextureClass;if(!m_RenderTexture){
return false;}
// Initialize the render to texture object.
result =m_RenderTexture->Initialize(m_D3D->GetDevice(), screenWidth, screenHeight);if(!result){
return false;}
Create and initialize the blue floor model object.
// Create the floor model object.
m_FloorModel =new ModelClass;if(!m_FloorModel){
return false;}
// Initialize the floor model object.result =m_FloorModel->Initialize(m_D3D->GetDevice(), L"../Engine/data/blue01.dds", "../Engine/data/floor.txt");if(!result)
{ MessageBox(hwnd, L"Could not initialize the floor model object.", L"Error", MB_OK);return false;
23 of 30 3/8/2013 12:41 PM
}
Create and initialize the new reflection shader object.
Tutorial 27: Reflection http://www.rastertek.com/dx11tut27.html
7/14/2019 RasterTek: Direct3D introduction
http://slidepdf.com/reader/full/rastertek-direct3d-introduction 446/709
// Create the reflection shader object.m_ReflectionShader =new ReflectionShaderClass;if(!m_ReflectionShader){
return false;}
// Initialize the reflection shader object.result =m_ReflectionShader->Initialize(m_D3D->GetDevice(), hwnd);if(!result){
MessageBox(hwnd, L"Could not initialize the reflection shader object.", L"Error", MB_OK);return false;
}
return true;}
void GraphicsClass::Shutdown(){
Release the render to texture, floor model, and reflection shader objects in the Shutdown function.
// Release the reflection shader object.if(m_ReflectionShader){
m_ReflectionShader->Shutdown();delete m_ReflectionShader;
m_ReflectionShader =0;}
// Release the floor model object.if(m_FloorModel){
m_FloorModel->Shutdown();delete m_FloorModel;m_FloorModel =0;
}
// Release the render to texture object.
24 of 30 3/8/2013 12:41 PM
if(m_RenderTexture){
m_RenderTexture->Shutdown();delete m RenderTexture;
Tutorial 27: Reflection http://www.rastertek.com/dx11tut27.html

7/14/2019 RasterTek: Direct3D introduction
http://slidepdf.com/reader/full/rastertek-direct3d-introduction 447/709
delete m_RenderTexture;m_RenderTexture =0;
}
// Release the texture shader object.if(m_TextureShader){
m_TextureShader->Shutdown();delete m_TextureShader;m_TextureShader =0;
}
// Release the model object.if(m_Model){
m_Model->Shutdown();delete m_Model;m_Model =0;
}
// Release the camera object.if(m_Camera){
delete m_Camera;m_Camera =0;
}
// Release the D3D object.if(m_D3D){
m_D3D->Shutdown();delete m_D3D;m_D3D =0;
}
return;}
bool GraphicsClass::Frame(){// Set the position of the camera.
25 of 30 3/8/2013 12:41 PM
m_Camera->SetPosition(0.0f, 0.0f, -10.0f);
return true;}
Tutorial 27: Reflection http://www.rastertek.com/dx11tut27.html

7/14/2019 RasterTek: Direct3D introduction
http://slidepdf.com/reader/full/rastertek-direct3d-introduction 448/709
}
bool GraphicsClass::Render(){
bool result;
First render the scene as a reflection to a texture.
// Render the entire scene as a reflection to the texture first.result =RenderToTexture();if(!result){
return false;}
Then render the scene normally and use the reflection texture to blend on the floor and create the reflection effect.
// Render the scene as normal to the back buffer.result =RenderScene();if(!result){
return false;}
return true;}
bool GraphicsClass::RenderToTexture(){
D3DXMATRIX worldMatrix, reflectionViewMatrix, projectionMatrix;static float rotation =0.0f;
// Set the render target to be the render to texture.m_RenderTexture->SetRenderTarget(m_D3D->GetDeviceContext(), m_D3D->GetDepthStencilView());
// Clear the render to texture.
m_RenderTexture->ClearRenderTarget(m_D3D->GetDeviceContext(), m_D3D->GetDepthStencilView(), 0.0f, 0.0f, 0.0f, 1.0f);
Before rendering the scene to a texture we need to create the reflection matrix using the position of the floor (-1.5) as the height input variable.
26 of 30 3/8/2013 12:41 PM
// Use the camera to calculate the reflection matrix.m_Camera->RenderReflection(-1.5f);
Now render the scene as normal but use the reflection matrix instead of the normal view matrix. Also there is no need to render the floor as we only need to render
Tutorial 27: Reflection http://www.rastertek.com/dx11tut27.html

7/14/2019 RasterTek: Direct3D introduction
http://slidepdf.com/reader/full/rastertek-direct3d-introduction 449/709
Now render the scene as normal but use the reflection matrix instead of the normal view matrix. Also there is no need to render the floor as we only need to renderwhat will be reflected.
// Get the camera reflection view matrix instead of the normal view matrix.reflectionViewMatrix =m_Camera->GetReflectionViewMatrix();
// Get the world and projection matrices.m_D3D->GetWorldMatrix(worldMatrix);m_D3D->GetProjectionMatrix(projectionMatrix);
// Update the rotation variable each frame.rotation +=(float)D3DX_PI * 0.005f;if(rotation >360.0f){
rotation -=360.0f;}D3DXMatrixRotationY(&worldMatrix, rotation);
// Put the model vertex and index buffers on the graphics pipeline to prepare them for drawing.m_Model->Render(m_D3D->GetDeviceContext());
// Render the model using the texture shader and the reflection view matrix.m_TextureShader->Render(m_D3D->GetDeviceContext(), m_Model->GetIndexCount(), worldMatrix, reflectionViewMatrix,
projectionMatrix, m_Model->GetTexture());
// Reset the render target back to the original back buffer and not the render to texture anymore.m_D3D->SetBackBufferRenderTarget();
return true;}
bool GraphicsClass::RenderScene(){
D3DXMATRIX worldMatrix, viewMatrix, projectionMatrix, reflectionMatrix;bool result;static float rotation =0.0f;
// Clear the buffers to begin the scene.m_D3D->BeginScene(0.0f, 0.0f, 0.0f, 1.0f);
27 of 30 3/8/2013 12:41 PM
// Generate the view matrix based on the camera's position.m_Camera->Render();
Tutorial 27: Reflection http://www.rastertek.com/dx11tut27.html

7/14/2019 RasterTek: Direct3D introduction
http://slidepdf.com/reader/full/rastertek-direct3d-introduction 450/709
// Get the world, view, and projection matrices from the camera and d3d objects.m_D3D->GetWorldMatrix(worldMatrix);m_Camera->GetViewMatrix(viewMatrix);m_D3D->GetProjectionMatrix(projectionMatrix);
// Update the rotation variable each frame.rotation +=(float)D3DX_PI * 0.005f;if(rotation >360.0f){
rotation -=360.0f;}
// Multiply the world matrix by the rotation.D3DXMatrixRotationY(&worldMatrix, rotation);
// Put the model vertex and index buffers on the graphics pipeline to prepare them for drawing.m_Model->Render(m_D3D->GetDeviceContext());
// Render the model with the texture shader.result =m_TextureShader->Render(m_D3D->GetDeviceContext(), m_Model->GetIndexCount(), worldMatrix, viewMatrix,
projectionMatrix, m_Model->GetTexture());if(!result){
return false;}
// Get the world matrix again and translate down for the floor model to render underneath the cube.m_D3D->GetWorldMatrix(worldMatrix);D3DXMatrixTranslation(&worldMatrix, 0.0f, -1.5f, 0.0f);
// Get the camera reflection view matrix.reflectionMatrix =m_Camera->GetReflectionViewMatrix();
// Put the floor model vertex and index buffers on the graphics pipeline to prepare them for drawing.m_FloorModel->Render(m_D3D->GetDeviceContext());
When we render the floor it will require the normal matrices and textures as well as the new reflection view matrix and reflection render to texture.
// Render the floor model using the reflection shader, reflection texture, and reflection view matrix.result =m_ReflectionShader->Render(m_D3D->GetDeviceContext(), m_FloorModel->GetIndexCount(), worldMatrix, viewMatrix,
projectionMatrix, m_FloorModel->GetTexture(), m_RenderTexture->GetShaderResourceView(),
28 of 30 3/8/2013 12:41 PM
reflectionMatrix);
// Present the rendered scene to the screen.m_D3D->EndScene();
Tutorial 27: Reflection http://www.rastertek.com/dx11tut27.html

7/14/2019 RasterTek: Direct3D introduction
http://slidepdf.com/reader/full/rastertek-direct3d-introduction 451/709
return true;}
Summary
We now have a planar reflection effect that can be used to mirror objects and blend them as reflections into other objects.
To Do Exercises
29 of 30 3/8/2013 12:41 PM
1. Recompile and run the program. You should get a spinning cube that is reflected by the blue floor object.
2. Change the blending factor and try a different blending equation to produce a different effect.
Tutorial 27: Reflection http://www.rastertek.com/dx11tut27.html

7/14/2019 RasterTek: Direct3D introduction
http://slidepdf.com/reader/full/rastertek-direct3d-introduction 452/709
3. Change the planar reflection to the Z plane and move/rotate the floor object to create a upright mirror effect.
Source Code
Visual Studio 2008 Project: dx11tut27.zip
Source Only: dx11src27.zip
Executable Only:dx11exe27.zip
Back to Tutorial Index
30 of 30 3/8/2013 12:41 PM
Tutorial 28: Screen Fades
In this tutorial we will go over how to create the effect of fading in a scene The code in this tutorial is based on the previous tutorials and uses DirectX 11 with HLSL
Tutorial 28: Screen Fades http://www.rastertek.com/dx11tut28.html

7/14/2019 RasterTek: Direct3D introduction
http://slidepdf.com/reader/full/rastertek-direct3d-introduction 453/709
In this tutorial we will go over how to create the effect of fading in a scene. The code in this tutorial is based on the previous tutorials and uses DirectX 11 with HLSLand C++.
To add a level of polish to our application one of the nice effects to do is to add quick fades when transitioning between scenes. The traditional approach of instantlydisplaying a loading screen and then abruptly rendering the next scene leaves something to be desired. One of the easiest ways to do a scene fade is to use renderto texture and just increase or decrease the pixel color over a short period of time. This can also be expanded to do different types of scene transitions such asrendering two scenes and sliding between them, or different types of dissolves.
In this tutorial I will just do a fade in using render to texture and once the scene is 100% faded in I will switch to rendering as normal to remove the cost of usingrender to texture all the time.
Framework
The frame work has a new FadeShaderClass for handling the shading of the fade in. We have also brought back the BitmapClass which has been modified to workwith the FadeShaderClass and RenderTextureClass. The TimerClass is also used in this tutorial to time the fade in.
Fade.vs
1 of 36 3/8/2013 12:42 PM
The fade HLSL shaders are just a modified version of the texture shaders.
////////////////////////////////////////////////////////////////////////////////// Filename: fade.vs////////////////////////////////////////////////////////////////////////////////
Tutorial 28: Screen Fades http://www.rastertek.com/dx11tut28.html

7/14/2019 RasterTek: Direct3D introduction
http://slidepdf.com/reader/full/rastertek-direct3d-introduction 454/709
////////////////////////////////////////////////////////////////////////////////
/////////////// GLOBALS ///////////////cbuffer MatrixBuffer{
matrix worldMatrix;matrix viewMatrix;matrix projectionMatrix;
};
//////////////// TYPEDEFS ////////////////struct VertexInputType{
float4 position : POSITION;float2 tex : TEXCOORD0;
};
struct PixelInputType{
float4 position : SV_POSITION;float2 tex : TEXCOORD0;
};
////////////////////////////////////////////////////////////////////////////////// Vertex Shader////////////////////////////////////////////////////////////////////////////////PixelInputType FadeVertexShader(VertexInputType input){
PixelInputType output;
// Change the position vector to be 4 units for proper matrix calculations.input.position.w =1.0f;
2 of 36 3/8/2013 12:42 PM
// Calculate the position of the vertex against the world, view, and projection matrices.output.position =mul(input.position, worldMatrix);output.position =mul(output.position, viewMatrix);output.position =mul(output.position, projectionMatrix);
Tutorial 28: Screen Fades http://www.rastertek.com/dx11tut28.html

7/14/2019 RasterTek: Direct3D introduction
http://slidepdf.com/reader/full/rastertek-direct3d-introduction 455/709
// Store the texture coordinates for the pixel shader.output.tex =input.tex;
return output;
}
Fade.ps
////////////////////////////////////////////////////////////////////////////////// Filename: fade.ps////////////////////////////////////////////////////////////////////////////////
/////////////// GLOBALS ///////////////
Texture2D shaderTexture;
SamplerState SampleType;
We add a new buffer called FadeBuffer to control the color level of the texture by using the fadeAmount variable. This value will be incremented each frame to makethe image brighter and brighter creating the fade in effect. The value range is between 0.0 (0%) and 1.0 (100%). The padding variable is just to ensure the buffer isa multiple of 16.
cbuffer FadeBuffer{
float fadeAmount;
float3 padding;};
//////////////// TYPEDEFS ////////////////struct PixelInputType{
float4 position : SV_POSITION;float2 tex : TEXCOORD0;
3 of 36 3/8/2013 12:42 PM
};
////////////////////////////////////////////////////////////////////////////////// Pixel Shader
Tutorial 28: Screen Fades http://www.rastertek.com/dx11tut28.html

7/14/2019 RasterTek: Direct3D introduction
http://slidepdf.com/reader/full/rastertek-direct3d-introduction 456/709
// Pixel Shader////////////////////////////////////////////////////////////////////////////////float4 FadePixelShader(PixelInputType input) : SV_TARGET
{float4 color;
// Sample the texture pixel at this location.color =shaderTexture.Sample(SampleType, input.tex);
Here is where we use the fadeAmount to control the output color of all pixels from the texture to be set to a certain brightness.
// Reduce the color brightness to the current fade percentage.color =color * fadeAmount;
return color;}
Fadeshaderclass.h The FadeShaderClass is just the TextureShaderClass modified to accommodate texture fading.
////////////////////////////////////////////////////////////////////////////////// Filename: fadeshaderclass.h////////////////////////////////////////////////////////////////////////////////#ifndef _FADESHADERCLASS_H_ #define _FADESHADERCLASS_H_
//////////////// INCLUDES ////////////////#include <d3d11.h>#include <d3dx10math.h>#include <d3dx11async.h>#include <fstream>
using namespace std;
4 of 36 3/8/2013 12:42 PM
////////////////////////////////////////////////////////////////////////////////// Class name: FadeShaderClass////////////////////////////////////////////////////////////////////////////////class FadeShaderClass
Tutorial 28: Screen Fades http://www.rastertek.com/dx11tut28.html

7/14/2019 RasterTek: Direct3D introduction
http://slidepdf.com/reader/full/rastertek-direct3d-introduction 457/709
class FadeShaderClass{private:
struct MatrixBufferType{
D3DXMATRIX world;D3DXMATRIX view;D3DXMATRIX projection;
};
This is the new structure to match the fade constant buffer in the pixel shader.
struct FadeBufferType{
float fadeAmount;D3DXVECTOR3 padding;
};
public:FadeShaderClass();FadeShaderClass(const FadeShaderClass&);
~FadeShaderClass();
bool Initialize(ID3D11Device*, HWND);void Shutdown();bool Render(ID3D11DeviceContext*, int, D3DXMATRIX, D3DXMATRIX, D3DXMATRIX, ID3D11ShaderResourceView*, float);
private:bool InitializeShader(ID3D11Device*, HWND, WCHAR*, WCHAR*);void ShutdownShader();
void OutputShaderErrorMessage(ID3D10Blob*, HWND, WCHAR*);
bool SetShaderParameters(ID3D11DeviceContext*, D3DXMATRIX, D3DXMATRIX, D3DXMATRIX, ID3D11ShaderResourceView*, float);void RenderShader(ID3D11DeviceContext*, int);
private:ID3D11VertexShader* m_vertexShader;ID3D11PixelShader* m_pixelShader;ID3D11InputLayout* m_layout;ID3D11Buffer* m_matrixBuffer;ID3D11SamplerState* m_sampleState;
5 of 36 3/8/2013 12:42 PM
This is the new fade amount buffer that is used to control the brightness of all the pixels from the texture.
ID3D11Buffer* m_fadeBuffer;};
Tutorial 28: Screen Fades http://www.rastertek.com/dx11tut28.html

7/14/2019 RasterTek: Direct3D introduction
http://slidepdf.com/reader/full/rastertek-direct3d-introduction 458/709
#endif
Fadeshaderclass.cpp
////////////////////////////////////////////////////////////////////////////////// Filename: fadeshaderclass.cpp////////////////////////////////////////////////////////////////////////////////#include "fadeshaderclass.h"
FadeShaderClass::FadeShaderClass(){
m_vertexShader =0;m_pixelShader =0;m_layout =0;m_matrixBuffer =0;m_sampleState =0;
Initialize the new buffer to null in the class constructor.
m_fadeBuffer =0;}
FadeShaderClass::FadeShaderClass(const FadeShaderClass& other){
}
FadeShaderClass::~FadeShaderClass(){}
bool FadeShaderClass::Initialize(ID3D11Device* device, HWND hwnd)
{ bool result;
6 of 36 3/8/2013 12:42 PM
Load in the new fade.vs and fade.ps HLSL shader code.
// Initialize the vertex and pixel shaders.result =InitializeShader(device, hwnd, L"../Engine/fade.vs", L"../Engine/fade.ps");if(!result)
Tutorial 28: Screen Fades http://www.rastertek.com/dx11tut28.html
7/14/2019 RasterTek: Direct3D introduction
http://slidepdf.com/reader/full/rastertek-direct3d-introduction 459/709
{return false;
}
return true;}
void FadeShaderClass::Shutdown(){
// Shutdown the vertex and pixel shaders as well as the related objects.
ShutdownShader();
return;}
The Render function now takes in a new float variable called fadeAmount. This variable contains the current percentage of brightness the texture should be drawnat. It will be set in the shader first before rendering the texture.
bool FadeShaderClass::Render(ID3D11DeviceContext* deviceContext, int indexCount, D3DXMATRIX worldMatrix, D3DXMATRIX viewMatrix,
D3DXMATRIX projectionMatrix, ID3D11ShaderResourceView* texture, float fadeAmount){
bool result;
// Set the shader parameters that it will use for rendering.result =SetShaderParameters(deviceContext, worldMatrix, viewMatrix, projectionMatrix, texture, fadeAmount);if(!result){
return false;}
// Now render the prepared buffers with the shader.RenderShader(deviceContext, indexCount);
return true;}
bool FadeShaderClass::InitializeShader(ID3D11Device* device, HWND hwnd, WCHAR* vsFilename, WCHAR* psFilename)
7 of 36 3/8/2013 12:42 PM
{HRESULT result;ID3D10Blob* errorMessage;ID3D10Blob* vertexShaderBuffer;ID3D10Blob* pixelShaderBuffer;
Tutorial 28: Screen Fades http://www.rastertek.com/dx11tut28.html

7/14/2019 RasterTek: Direct3D introduction
http://slidepdf.com/reader/full/rastertek-direct3d-introduction 460/709
D3D11_INPUT_ELEMENT_DESC polygonLayout[2];unsigned int numElements;
D3D11_BUFFER_DESC matrixBufferDesc;D3D11_SAMPLER_DESC samplerDesc;D3D11_BUFFER_DESC fadeBufferDesc;
// Initialize the pointers this function will use to null.errorMessage =0;vertexShaderBuffer =0;pixelShaderBuffer =0;
Load the new fade vertex shader.
// Compile the vertex shader code.result =D3DX11CompileFromFile(vsFilename, NULL, NULL, "FadeVertexShader", "vs_5_0", D3D10_SHADER_ENABLE_STRICTNESS, 0, NULL,
&vertexShaderBuffer, &errorMessage, NULL);if(FAILED(result)){
// If the shader failed to compile it should have writen something to the error message.
if(errorMessage){
OutputShaderErrorMessage(errorMessage, hwnd, vsFilename);}// If there was nothing in the error message then it simply could not find the shader file itself.else{
MessageBox(hwnd, vsFilename, L"Missing Shader File", MB_OK);}
return false;}
Load the new fade pixel shader.
// Compile the pixel shader code.result =D3DX11CompileFromFile(psFilename, NULL, NULL, "FadePixelShader", "ps_5_0", D3D10_SHADER_ENABLE_STRICTNESS, 0, NULL,
&pixelShaderBuffer, &errorMessage, NULL);
if(FAILED(result)){
8 of 36 3/8/2013 12:42 PM
// If the shader failed to compile it should have writen something to the error message.if(errorMessage){
OutputShaderErrorMessage(errorMessage, hwnd, psFilename);}// If th thi i th th it i l ld t fi dth fil it lf
Tutorial 28: Screen Fades http://www.rastertek.com/dx11tut28.html

7/14/2019 RasterTek: Direct3D introduction
http://slidepdf.com/reader/full/rastertek-direct3d-introduction 461/709
// If there was nothing in the error message then it simply could not find the file itself.else
{MessageBox(hwnd, psFilename, L"Missing Shader File", MB_OK);
}
return false;}
// Create the vertex shader from the buffer.result =device->CreateVertexShader(vertexShaderBuffer->GetBufferPointer(), vertexShaderBuffer->GetBufferSize(), NULL,
&m_vertexShader);if(FAILED(result)){
return false;}
// Create the vertex shader from the buffer.result =device->CreatePixelShader(pixelShaderBuffer->GetBufferPointer(), pixelShaderBuffer->GetBufferSize(), NULL,
&m_pixelShader);
if(FAILED(result)){
return false;}
// Create the vertex input layout description.// This setup needs to match the VertexType stucture in the ModelClass and in the shader.polygonLayout[0].SemanticName ="POSITION";polygonLayout[0].SemanticIndex =0;
polygonLayout[0].Format =DXGI_FORMAT_R32G32B32_FLOAT;polygonLayout[0].InputSlot =0;polygonLayout[0].AlignedByteOffset =0;polygonLayout[0].InputSlotClass =D3D11_INPUT_PER_VERTEX_DATA;polygonLayout[0].InstanceDataStepRate =0;
polygonLayout[1].SemanticName ="TEXCOORD";polygonLayout[1].SemanticIndex =0;polygonLayout[1].Format =DXGI_FORMAT_R32G32_FLOAT;
polygonLayout[1].InputSlot =0;polygonLayout[1].AlignedByteOffset =D3D11_APPEND_ALIGNED_ELEMENT;
9 of 36 3/8/2013 12:42 PM
polygonLayout[1].InputSlotClass =D3D11_INPUT_PER_VERTEX_DATA;polygonLayout[1].InstanceDataStepRate =0;
// Get a count of the elements in the layout.numElements =sizeof(polygonLayout) / sizeof(polygonLayout[0]);
Tutorial 28: Screen Fades http://www.rastertek.com/dx11tut28.html

7/14/2019 RasterTek: Direct3D introduction
http://slidepdf.com/reader/full/rastertek-direct3d-introduction 462/709
// Create the vertex input layout.
result =device->CreateInputLayout(polygonLayout, numElements, vertexShaderBuffer->GetBufferPointer(),vertexShaderBuffer->GetBufferSize(), &m_layout);
if(FAILED(result)){
return false;}
// Release the vertex shader buffer and pixel shader buffer since they are no longer needed.vertexShaderBuffer->Release();
vertexShaderBuffer =0;
pixelShaderBuffer->Release();pixelShaderBuffer =0;
// Setup the description of the matrix dynamic constant buffer that is in the vertex shader.matrixBufferDesc.Usage =D3D11_USAGE_DYNAMIC;matrixBufferDesc.ByteWidth =sizeof(MatrixBufferType);matrixBufferDesc.BindFlags =D3D11_BIND_CONSTANT_BUFFER;
matrixBufferDesc.CPUAccessFlags =D3D11_CPU_ACCESS_WRITE;matrixBufferDesc.MiscFlags =0;matrixBufferDesc.StructureByteStride =0;
// Create the constant buffer pointer so we can access the vertex shader constant buffer from within this class.result =device->CreateBuffer(&matrixBufferDesc, NULL, &m_matrixBuffer);if(FAILED(result)){
return false;
}
// Create a texture sampler state description.samplerDesc.Filter =D3D11_FILTER_MIN_MAG_MIP_LINEAR;samplerDesc.AddressU =D3D11_TEXTURE_ADDRESS_WRAP;samplerDesc.AddressV =D3D11_TEXTURE_ADDRESS_WRAP;samplerDesc.AddressW =D3D11_TEXTURE_ADDRESS_WRAP;samplerDesc.MipLODBias =0.0f;samplerDesc.MaxAnisotropy =1;
samplerDesc.ComparisonFunc =D3D11_COMPARISON_ALWAYS;samplerDesc.BorderColor[0] =0;
10 of 36 3/8/2013 12:42 PM
samplerDesc.BorderColor[1] =0;samplerDesc.BorderColor[2] =0;samplerDesc.BorderColor[3] =0;samplerDesc.MinLOD =0;samplerDesc.MaxLOD =D3D11_FLOAT32_MAX;
Tutorial 28: Screen Fades http://www.rastertek.com/dx11tut28.html

7/14/2019 RasterTek: Direct3D introduction
http://slidepdf.com/reader/full/rastertek-direct3d-introduction 463/709
// Create the texture sampler state.
result =device->CreateSamplerState(&samplerDesc, &m_sampleState);if(FAILED(result)){
return false;}
Setup a buffer that will hold the fadeAmount variable so we can interface with the pixel shader fade buffer.
// Setup the description of the fade dynamic constant buffer that is in the vertex shader.
fadeBufferDesc.Usage =D3D11_USAGE_DYNAMIC;fadeBufferDesc.ByteWidth =sizeof(FadeBufferType);fadeBufferDesc.BindFlags =D3D11_BIND_CONSTANT_BUFFER;fadeBufferDesc.CPUAccessFlags =D3D11_CPU_ACCESS_WRITE;fadeBufferDesc.MiscFlags =0;fadeBufferDesc.StructureByteStride =0;
// Create the constant buffer pointer so we can access the pixel shader constant buffer from within this class.result =device->CreateBuffer(&fadeBufferDesc, NULL, &m_fadeBuffer);
if(FAILED(result)){
return false;}
return true;}
void FadeShaderClass::ShutdownShader(){
Release the new fade buffer in the ShutdownShader function.
// Release the fade constant buffer.if(m_fadeBuffer){
m_fadeBuffer->Release();
m_fadeBuffer =0;}
11 of 36 3/8/2013 12:42 PM
// Release the sampler state.if(m_sampleState){
m_sampleState->Release();m sampleState =0;
Tutorial 28: Screen Fades http://www.rastertek.com/dx11tut28.html

7/14/2019 RasterTek: Direct3D introduction
http://slidepdf.com/reader/full/rastertek-direct3d-introduction 464/709
m_sampleState 0;}
// Release the matrix constant buffer.if(m_matrixBuffer){
m_matrixBuffer->Release();m_matrixBuffer =0;
}
// Release the layout.
if(m_layout){
m_layout->Release();m_layout =0;
}
// Release the pixel shader.if(m_pixelShader){
m_pixelShader->Release();m_pixelShader =0;
}
// Release the vertex shader.if(m_vertexShader){
m_vertexShader->Release();m_vertexShader =0;
}
return;}
void FadeShaderClass::OutputShaderErrorMessage(ID3D10Blob* errorMessage, HWND hwnd, WCHAR* shaderFilename){
char* compileErrors;
unsigned long bufferSize, i;ofstream fout;
12 of 36 3/8/2013 12:42 PM
// Get a pointer to the error message text buffer.compileErrors =(char*)(errorMessage->GetBufferPointer());
// Get the length of the message.
Tutorial 28: Screen Fades http://www.rastertek.com/dx11tut28.html

7/14/2019 RasterTek: Direct3D introduction
http://slidepdf.com/reader/full/rastertek-direct3d-introduction 465/709
// Ge e e g o e essagebufferSize =errorMessage->GetBufferSize();
// Open a file to write the error message to.fout.open("shader-error.txt");
// Write out the error message.for(i=0; i<bufferSize; i++){
fout <<compileErrors[i];}
// Close the file.fout.close();
// Release the error message.errorMessage->Release();errorMessage =0;
// Pop a message up on the screen to notify the user to check the text file for compile errors.
MessageBox(hwnd, L"Error compiling shader. Check shader-error.txt for message.", shaderFilename, MB_OK);
return;}
bool FadeShaderClass::SetShaderParameters(ID3D11DeviceContext* deviceContext, D3DXMATRIX worldMatrix, D3DXMATRIX viewMatrix,D3DXMATRIX projectionMatrix, ID3D11ShaderResourceView* texture, float fadeAmount)
{
HRESULT result;D3D11_MAPPED_SUBRESOURCE mappedResource;MatrixBufferType* dataPtr;unsigned int bufferNumber;FadeBufferType* dataPtr2;
// Transpose the matrices to prepare them for the shader.D3DXMatrixTranspose(&worldMatrix, &worldMatrix);
D3DXMatrixTranspose(&viewMatrix, &viewMatrix);D3DXMatrixTranspose(&projectionMatrix, &projectionMatrix);
13 of 36 3/8/2013 12:42 PM
// Lock the matrix constant buffer so it can be written to.result =deviceContext->Map(m_matrixBuffer, 0, D3D11_MAP_WRITE_DISCARD, 0, &mappedResource);if(FAILED(result)){
return false;
Tutorial 28: Screen Fades http://www.rastertek.com/dx11tut28.html

7/14/2019 RasterTek: Direct3D introduction
http://slidepdf.com/reader/full/rastertek-direct3d-introduction 466/709
}
// Get a pointer to the data in the matrix constant buffer.dataPtr =(MatrixBufferType*)mappedResource.pData;
// Copy the matrices into the matrix constant buffer.dataPtr->world =worldMatrix;dataPtr->view =viewMatrix;dataPtr->projection =projectionMatrix;
// Unlock the matrix constant buffer.deviceContext->Unmap(m_matrixBuffer, 0);
// Set the position of the matrix constant buffer in the vertex shader.bufferNumber =0;
// Now set the matrix constant buffer in the vertex shader with the updated values.deviceContext->VSSetConstantBuffers(bufferNumber, 1, &m_matrixBuffer);
// Set shader texture resource in the pixel shader.deviceContext->PSSetShaderResources(0, 1, &texture);
This is where we set the fadeAmount value inside the pixel shader. We first lock the fade buffer and then copy the updated fadeAmount value into it. After that weunlock the fade buffer and then set it in the pixel shader using the PSSetConstantBuffers function.
// Lock the fade constant buffer so it can be written to.result =deviceContext->Map(m_fadeBuffer, 0, D3D11_MAP_WRITE_DISCARD, 0, &mappedResource);if(FAILED(result))
{return false;
}
// Get a pointer to the data in the fade constant buffer.dataPtr2 =(FadeBufferType*)mappedResource.pData;
// Copy the fade amount into the fade constant buffer.dataPtr2->fadeAmount =fadeAmount;
dataPtr2->padding =D3DXVECTOR3(0.0f, 0.0f, 0.0f);
14 of 36 3/8/2013 12:42 PM
// Unlock the fade constant buffer.deviceContext->Unmap(m_fadeBuffer, 0);
// Set the position of the fade constant buffer in the pixel shader.bufferNumber =0;
Tutorial 28: Screen Fades http://www.rastertek.com/dx11tut28.html

7/14/2019 RasterTek: Direct3D introduction
http://slidepdf.com/reader/full/rastertek-direct3d-introduction 467/709
// Now set the fade constant buffer in the pixel shader with the updated values.
deviceContext->PSSetConstantBuffers(bufferNumber, 1, &m_fadeBuffer);
return true;}
void FadeShaderClass::RenderShader(ID3D11DeviceContext* deviceContext, int indexCount){
// Set the vertex input layout.
deviceContext->IASetInputLayout(m_layout);
// Set the vertex and pixel shaders that will be used to render this triangle.deviceContext->VSSetShader(m_vertexShader, NULL, 0);deviceContext->PSSetShader(m_pixelShader, NULL, 0);
// Set the sampler state in the pixel shader.deviceContext->PSSetSamplers(0, 1, &m_sampleState);
// Render the triangle.deviceContext->DrawIndexed(indexCount, 0, 0);
return;}
Bitmapclass.h
The BitmapClass is the exact same as before except that it has been modified to not have any texture information. The FadeShaderClass will be supplied with atexture from the RenderTextureClass object instead of using the BitmapClass to supply the texture. However since we want to treat the render to texture like abitmap and draw it 2D on the screen we use this modified BitmapClass to build the buffers and render the geometry before calling the fade shader.
////////////////////////////////////////////////////////////////////////////////// Filename: bitmapclass.h////////////////////////////////////////////////////////////////////////////////#ifndef _BITMAPCLASS_H_ #define _BITMAPCLASS_H_
15 of 36 3/8/2013 12:42 PM
//////////////// INCLUDES ////////////////#include <d3d11.h>
i l d d3d 0 hh
Tutorial 28: Screen Fades http://www.rastertek.com/dx11tut28.html

7/14/2019 RasterTek: Direct3D introduction
http://slidepdf.com/reader/full/rastertek-direct3d-introduction 468/709
#include <d3dx10math.h>
////////////////////////////////////////////////////////////////////////////////// Class name: BitmapClass////////////////////////////////////////////////////////////////////////////////class BitmapClass{private:
struct VertexType
{D3DXVECTOR3 position;D3DXVECTOR2 texture;
};
public:BitmapClass();BitmapClass(const BitmapClass&);~BitmapClass();
bool Initialize(ID3D11Device*, int, int, int, int);void Shutdown();bool Render(ID3D11DeviceContext*, int, int);
int GetIndexCount();
private:bool InitializeBuffers(ID3D11Device*);
void ShutdownBuffers();bool UpdateBuffers(ID3D11DeviceContext*, int, int);void RenderBuffers(ID3D11DeviceContext*);
bool LoadTexture(ID3D11Device*, WCHAR*);void ReleaseTexture();
private:ID3D11Buffer *m_vertexBuffer, *m_indexBuffer;
int m_vertexCount, m_indexCount;int m_screenWidth, m_screenHeight;
16 of 36 3/8/2013 12:42 PM
int m_bitmapWidth, m_bitmapHeight;int m_previousPosX, m_previousPosY;
};
#endif
Tutorial 28: Screen Fades http://www.rastertek.com/dx11tut28.html
7/14/2019 RasterTek: Direct3D introduction
http://slidepdf.com/reader/full/rastertek-direct3d-introduction 469/709
Bitmapclass.cpp
////////////////////////////////////////////////////////////////////////////////// Filename: bitmapclass.cpp////////////////////////////////////////////////////////////////////////////////#include "bitmapclass.h"
BitmapClass::BitmapClass(){
m_vertexBuffer =0;m_indexBuffer =0;
}
BitmapClass::BitmapClass(const BitmapClass& other){
}
BitmapClass::~BitmapClass(){}
bool BitmapClass::Initialize(ID3D11Device* device, int screenWidth, int screenHeight, int bitmapWidth, int bitmapHeight)
{bool result;
// Store the screen size.m_screenWidth =screenWidth;m_screenHeight =screenHeight;
// Store the size in pixels that this bitmap should be rendered at.m_bitmapWidth =bitmapWidth;
17 of 36 3/8/2013 12:42 PM
m_bitmapHeight =bitmapHeight;
// Initialize the previous rendering position to -1.m_previousPosX =-1;m_previousPosY =-1;
// Initialize the vertex and index buffers
Tutorial 28: Screen Fades http://www.rastertek.com/dx11tut28.html

7/14/2019 RasterTek: Direct3D introduction
http://slidepdf.com/reader/full/rastertek-direct3d-introduction 470/709
// Initialize the vertex and index buffers.
result =InitializeBuffers(device);if(!result){
return false;}
return true;}
void BitmapClass::Shutdown(){
// Shutdown the vertex and index buffers.ShutdownBuffers();
return;}
bool BitmapClass::Render(ID3D11DeviceContext* deviceContext, int positionX, int positionY){
bool result;
// Re-build the dynamic vertex buffer for rendering to possibly a different location on the screen.result =UpdateBuffers(deviceContext, positionX, positionY);if(!result)
{return false;
}
// Put the vertex and index buffers on the graphics pipeline to prepare them for drawing.RenderBuffers(deviceContext);
return true;}
18 of 36 3/8/2013 12:42 PM
int BitmapClass::GetIndexCount(){
return m_indexCount;}
bool BitmapClass::InitializeBuffers(ID3D11Device* device)
Tutorial 28: Screen Fades http://www.rastertek.com/dx11tut28.html

7/14/2019 RasterTek: Direct3D introduction
http://slidepdf.com/reader/full/rastertek-direct3d-introduction 471/709
bool BitmapClass::InitializeBuffers(ID3D11Device device)
{VertexType* vertices;unsigned long* indices;D3D11_BUFFER_DESC vertexBufferDesc, indexBufferDesc;D3D11_SUBRESOURCE_DATA vertexData, indexData;HRESULT result;int i;
// Set the number of vertices in the vertex array.m_vertexCount =6;
// Set the number of indices in the index array.m_indexCount =m_vertexCount;
// Create the vertex array.vertices =new VertexType[m_vertexCount];if(!vertices)
{return false;
}
// Create the index array.indices =new unsigned long[m_indexCount];if(!indices){
return false;
}
// Initialize vertex array to zeros at first.memset(vertices, 0, (sizeof(VertexType) * m_vertexCount));
// Load the index array with data.for(i=0; i<m_indexCount; i++){
indices[i] =i;
}
19 of 36 3/8/2013 12:42 PM
// Set up the description of the static vertex buffer.vertexBufferDesc.Usage =D3D11_USAGE_DYNAMIC;vertexBufferDesc.ByteWidth =sizeof(VertexType) * m_vertexCount;vertexBufferDesc.BindFlags =D3D11_BIND_VERTEX_BUFFER;vertexBufferDesc.CPUAccessFlags =D3D11_CPU_ACCESS_WRITE;vertexBufferDesc.MiscFlags =0;vertexBufferDesc.StructureByteStride =0;
Tutorial 28: Screen Fades http://www.rastertek.com/dx11tut28.html

7/14/2019 RasterTek: Direct3D introduction
http://slidepdf.com/reader/full/rastertek-direct3d-introduction 472/709
vertexBufferDesc.StructureByteStride 0;
// Give the subresource structure a pointer to the vertex data.vertexData.pSysMem =vertices;vertexData.SysMemPitch =0;vertexData.SysMemSlicePitch =0;
// Now create the vertex buffer.result =device->CreateBuffer(&vertexBufferDesc, &vertexData, &m_vertexBuffer);if(FAILED(result))
{return false;
}
// Set up the description of the static index buffer.indexBufferDesc.Usage =D3D11_USAGE_DEFAULT;indexBufferDesc.ByteWidth =sizeof(unsigned long) * m_indexCount;indexBufferDesc.BindFlags =D3D11_BIND_INDEX_BUFFER;indexBufferDesc.CPUAccessFlags =0;
indexBufferDesc.MiscFlags =0;indexBufferDesc.StructureByteStride =0;
// Give the subresource structure a pointer to the index data.indexData.pSysMem =indices;indexData.SysMemPitch =0;indexData.SysMemSlicePitch =0;
// Create the index buffer.
result =device->CreateBuffer(&indexBufferDesc, &indexData, &m_indexBuffer);if(FAILED(result)){
return false;}
// Release the arrays now that the vertex and index buffers have been created and loaded.delete [] vertices;vertices =0;
delete [] indices;
20 of 36 3/8/2013 12:42 PM
indices =0;
return true;}
void BitmapClass::ShutdownBuffers()
Tutorial 28: Screen Fades http://www.rastertek.com/dx11tut28.html

7/14/2019 RasterTek: Direct3D introduction
http://slidepdf.com/reader/full/rastertek-direct3d-introduction 473/709
p ()
{// Release the index buffer.if(m_indexBuffer){
m_indexBuffer->Release();m_indexBuffer =0;
}
// Release the vertex buffer.
if(m_vertexBuffer){
m_vertexBuffer->Release();m_vertexBuffer =0;
}
return;}
bool BitmapClass::UpdateBuffers(ID3D11DeviceContext* deviceContext, int positionX, int positionY){
float left, right, top, bottom;VertexType* vertices;D3D11_MAPPED_SUBRESOURCE mappedResource;VertexType* verticesPtr;HRESULT result;
// If the position we are rendering this bitmap to has not changed then don't update the vertex buffer since it// currently has the correct parameters.if((positionX ==m_previousPosX) && (positionY ==m_previousPosY)){
return true;}
// If it has changed then update the position it is being rendered to.
m_previousPosX =positionX;m_previousPosY =positionY;
21 of 36 3/8/2013 12:42 PM
// Calculate the screen coordinates of the left side of the bitmap.left =(float)((m_screenWidth / 2) * -1) +(float)positionX;
// Calculate the screen coordinates of the right side of the bitmap.right =left +(float)m_bitmapWidth;
Tutorial 28: Screen Fades http://www.rastertek.com/dx11tut28.html

7/14/2019 RasterTek: Direct3D introduction
http://slidepdf.com/reader/full/rastertek-direct3d-introduction 474/709
// Calculate the screen coordinates of the top of the bitmap.top =(float)(m_screenHeight / 2) - (float)positionY;
// Calculate the screen coordinates of the bottom of the bitmap.bottom =top - (float)m_bitmapHeight;
// Create the vertex array.vertices =new VertexType[m_vertexCount];if(!vertices)
{return false;
}
// Load the vertex array with data.// First triangle.vertices[0].position =D3DXVECTOR3(left, top, 0.0f); // Top left.vertices[0].texture =D3DXVECTOR2(0.0f, 0.0f);
vertices[1].position =D3DXVECTOR3(right, bottom, 0.0f); // Bottom right.vertices[1].texture =D3DXVECTOR2(1.0f, 1.0f);
vertices[2].position =D3DXVECTOR3(left, bottom, 0.0f); // Bottom left.vertices[2].texture =D3DXVECTOR2(0.0f, 1.0f);
// Second triangle.vertices[3].position =D3DXVECTOR3(left, top, 0.0f); // Top left.vertices[3].texture =D3DXVECTOR2(0.0f, 0.0f);
vertices[4].position =D3DXVECTOR3(right, top, 0.0f); // Top right.vertices[4].texture =D3DXVECTOR2(1.0f, 0.0f);
vertices[5].position =D3DXVECTOR3(right, bottom, 0.0f); // Bottom right.vertices[5].texture =D3DXVECTOR2(1.0f, 1.0f);
// Lock the vertex buffer so it can be written to.result =deviceContext->Map(m_vertexBuffer, 0, D3D11_MAP_WRITE_DISCARD, 0, &mappedResource);
if(FAILED(result)){
22 of 36 3/8/2013 12:42 PM
return false;}
// Get a pointer to the data in the vertex buffer.verticesPtr =(VertexType*)mappedResource.pData;
// Copy the data into the vertex buffer.
Tutorial 28: Screen Fades http://www.rastertek.com/dx11tut28.html

7/14/2019 RasterTek: Direct3D introduction
http://slidepdf.com/reader/full/rastertek-direct3d-introduction 475/709
memcpy(verticesPtr, (void*)vertices, (sizeof(VertexType) * m_vertexCount));
// Unlock the vertex buffer.deviceContext->Unmap(m_vertexBuffer, 0);
// Release the vertex array as it is no longer needed.delete [] vertices;vertices =0;
return true;}
void BitmapClass::RenderBuffers(ID3D11DeviceContext* deviceContext){
unsigned int stride;unsigned int offset;
// Set vertex buffer stride and offset.stride =sizeof(VertexType);offset =0;
// Set the vertex buffer to active in the input assembler so it can be rendered.deviceContext->IASetVertexBuffers(0, 1, &m_vertexBuffer, &stride, &offset);
// Set the index buffer to active in the input assembler so it can be rendered.
deviceContext->IASetIndexBuffer(m_indexBuffer, DXGI_FORMAT_R32_UINT, 0);
// Set the type of primitive that should be rendered from this vertex buffer, in this case triangles.deviceContext->IASetPrimitiveTopology(D3D11_PRIMITIVE_TOPOLOGY_TRIANGLELIST);
return;}
23 of 36 3/8/2013 12:42 PM
Graphicsclass.h
////////////////////////////////////////////////////////////////////////////////// Filename: graphicsclass.h////////////////////////////////////////////////////////////////////////////////#ifndef _GRAPHICSCLASS_H_ #define _GRAPHICSCLASS_H_
Tutorial 28: Screen Fades http://www.rastertek.com/dx11tut28.html

7/14/2019 RasterTek: Direct3D introduction
http://slidepdf.com/reader/full/rastertek-direct3d-introduction 476/709
/////////////// GLOBALS ///////////////const bool FULL_SCREEN =true;const bool VSYNC_ENABLED =true;const float SCREEN_DEPTH =1000.0f;const float SCREEN_NEAR =0.1f;
///////////////////////// MY CLASS INCLUDES /////////////////////////#include "d3dclass.h"#include "cameraclass.h"#include "modelclass.h"#include "textureshaderclass.h"
#include "rendertextureclass.h"#include "bitmapclass.h"
We include the new FadeShaderClass header file here.
#include "fadeshaderclass.h"
////////////////////////////////////////////////////////////////////////////////
// Class name: GraphicsClass////////////////////////////////////////////////////////////////////////////////class GraphicsClass{public:
GraphicsClass();GraphicsClass(const GraphicsClass&);~GraphicsClass();
bool Initialize(int, int, HWND);
24 of 36 3/8/2013 12:42 PM
void Shutdown();bool Frame(float);bool Render();
private:bool RenderToTexture(float);bool RenderFadingScene();
Tutorial 28: Screen Fades http://www.rastertek.com/dx11tut28.html

7/14/2019 RasterTek: Direct3D introduction
http://slidepdf.com/reader/full/rastertek-direct3d-introduction 477/709
bool RenderNormalScene(float);
private:D3DClass* m_D3D;CameraClass* m_Camera;ModelClass* m_Model;
TextureShaderClass* m_TextureShader;RenderTextureClass* m_RenderTexture;BitmapClass* m_Bitmap;
We have new variables to maintain information about the fade in effect.
float m_fadeInTime, m_accumulatedTime, m_fadePercentage;bool m_fadeDone;
We create a new FadeShaderClass object here.
FadeShaderClass* m_FadeShader;
};
#endif
Graphicsclass.cpp
////////////////////////////////////////////////////////////////////////////////
// Filename: graphicsclass.cpp////////////////////////////////////////////////////////////////////////////////#include "graphicsclass.h"
GraphicsClass::GraphicsClass(){
m_D3D =0;m_Camera =0;
m_Model =0;
25 of 36 3/8/2013 12:42 PM
m_TextureShader =0;m_RenderTexture =0;m_Bitmap =0;
Initialize the new FadeShaderClass object to null in the class constructor.
m_FadeShader =0;
Tutorial 28: Screen Fades http://www.rastertek.com/dx11tut28.html

7/14/2019 RasterTek: Direct3D introduction
http://slidepdf.com/reader/full/rastertek-direct3d-introduction 478/709
}
GraphicsClass::GraphicsClass(const GraphicsClass& other){}
GraphicsClass::~GraphicsClass()
{}
bool GraphicsClass::Initialize(int screenWidth, int screenHeight, HWND hwnd){
bool result;
// Create the Direct3D object.m_D3D =new D3DClass;if(!m_D3D){
return false;}
// Initialize the Direct3D object.result =m_D3D->Initialize(screenWidth, screenHeight, VSYNC_ENABLED, hwnd, FULL_SCREEN, SCREEN_DEPTH, SCREEN_NEAR);
if(!result){
MessageBox(hwnd, L"Could not initialize Direct3D.", L"Error", MB_OK);return false;
}
// Create the camera object.m_Camera =new CameraClass;if(!m_Camera)
{return false;
26 of 36 3/8/2013 12:42 PM
}
// Create the model object.m_Model =new ModelClass;if(!m_Model){
return false;
Tutorial 28: Screen Fades http://www.rastertek.com/dx11tut28.html

7/14/2019 RasterTek: Direct3D introduction
http://slidepdf.com/reader/full/rastertek-direct3d-introduction 479/709
}
// Initialize the model object.result =m_Model->Initialize(m_D3D->GetDevice(), L"../Engine/data/seafloor.dds", "../Engine/data/cube.txt");if(!result){
MessageBox(hwnd, L"Could not initialize the model object.", L"Error", MB_OK);return false;
}
// Create the texture shader object.m_TextureShader =new TextureShaderClass;if(!m_TextureShader){
return false;}
// Initialize the texture shader object.
result =m_TextureShader->Initialize(m_D3D->GetDevice(), hwnd);if(!result){
MessageBox(hwnd, L"Could not initialize the texture shader object.", L"Error", MB_OK);return false;
}
Create and initialize the render to texture object here.
// Create the render to texture object.m_RenderTexture =new RenderTextureClass;if(!m_RenderTexture){
return false;}
// Initialize the render to texture object.result =m_RenderTexture->Initialize(m_D3D->GetDevice(), screenWidth, screenHeight);
if(!result){
27 of 36 3/8/2013 12:42 PM
return false;}
Create and initialize the bitmap object here. Set it to the size of the screen since it will be rendered full screen.
// Create the bitmap object.m_Bitmap =new BitmapClass;
Tutorial 28: Screen Fades http://www.rastertek.com/dx11tut28.html

7/14/2019 RasterTek: Direct3D introduction
http://slidepdf.com/reader/full/rastertek-direct3d-introduction 480/709
if(!m_Bitmap){return false;
}
// Initialize the bitmap object.result =m_Bitmap->Initialize(m_D3D->GetDevice(), screenWidth, screenHeight, screenWidth, screenHeight);if(!result){
MessageBox(hwnd, L"Could not initialize the bitmap object.", L"Error", MB_OK);return false;}
Setup the fade in variables here.
// Set the fade in time to 3000 milliseconds.m_fadeInTime =3000.0f;
// Initialize the accumulated time to zero milliseconds.m_accumulatedTime =0;
// Initialize the fade percentage to zero at first so the scene is black.m_fadePercentage =0;
// Set the fading in effect to not done.m_fadeDone =false;
Create and initialize the fade shader class object here.
// Create the fade shader object.m_FadeShader =new FadeShaderClass;if(!m_FadeShader){
return false;}
// Initialize the fade shader object.result =m_FadeShader->Initialize(m_D3D->GetDevice(), hwnd);
28 of 36 3/8/2013 12:42 PM
if(!result){
MessageBox(hwnd, L"Could not initialize the fade shader object.", L"Error", MB_OK);return false;
}
return true;
Tutorial 28: Screen Fades http://www.rastertek.com/dx11tut28.html

7/14/2019 RasterTek: Direct3D introduction
http://slidepdf.com/reader/full/rastertek-direct3d-introduction 481/709
}
void GraphicsClass::Shutdown(){
Release the new FadeShaderClass object in the Shutdown function.
// Release the fade shader object.
if(m_FadeShader){m_FadeShader->Shutdown();delete m_FadeShader;m_FadeShader =0;
}
// Release the bitmap object.if(m_Bitmap)
{ m_Bitmap->Shutdown();delete m_Bitmap;m_Bitmap =0;
}
// Release the render to texture object.if(m_RenderTexture){
m_RenderTexture->Shutdown();delete m_RenderTexture;m_RenderTexture =0;
}
// Release the texture shader object.if(m_TextureShader){
m_TextureShader->Shutdown();
delete m_TextureShader;m_TextureShader =0;
29 of 36 3/8/2013 12:42 PM
}
// Release the model object.if(m_Model){
m_Model->Shutdown();delete m_Model;
M d l 0
Tutorial 28: Screen Fades http://www.rastertek.com/dx11tut28.html

7/14/2019 RasterTek: Direct3D introduction
http://slidepdf.com/reader/full/rastertek-direct3d-introduction 482/709
m_Model =0;}
// Release the camera object.if(m_Camera){
delete m_Camera;m_Camera =0;
}
// Release the D3D object.if(m_D3D){
m_D3D->Shutdown();delete m_D3D;m_D3D =0;
}
return;}
The Frame function handles the fade in process. Each frame the frame time is passed into the Frame function and that is used to calculate the percentage of howmuch the texture should be faded in at this time. If the accumulated frame time exceeds the fade in time then we set the m_fadeDone variable to true so that we areno longer fading in and instead are rendering the scene normally.
bool GraphicsClass::Frame(float frameTime){
if(!m_fadeDone){
// Update the accumulated time with the extra frame time addition.m_accumulatedTime +=frameTime;
// While the time goes on increase the fade in amount by the time that is passing each frame.if(m_accumulatedTime <m_fadeInTime){
// Calculate the percentage that the screen should be faded in based on the accumulated time.
m_fadePercentage =m_accumulatedTime / m_fadeInTime;}
30 of 36 3/8/2013 12:42 PM
else{
// If the fade in time is complete then turn off the fade effect and render the scene normally.m_fadeDone =true;
// Set the percentage to 100%.m_fadePercentage =1.0f;
}
Tutorial 28: Screen Fades http://www.rastertek.com/dx11tut28.html

7/14/2019 RasterTek: Direct3D introduction
http://slidepdf.com/reader/full/rastertek-direct3d-introduction 483/709
}}
// Set the position of the camera.m_Camera->SetPosition(0.0f, 0.0f, -10.0f);
return true;}
The Render function handles the rotation of the cube and switches between rendering to texture and fading in or rendering normally if fading in is complete.
bool GraphicsClass::Render(){
bool result;static float rotation =0.0f;
// Update the rotation variable each frame.
rotation +=(float)D3DX_PI * 0.005f;if(rotation >360.0f){
rotation -=360.0f;}
if(m_fadeDone){
// If fading in is complete then render the scene normally using the back buffer.
RenderNormalScene(rotation);}else{
// If fading in is not complete then render the scene to a texture and fade that texture in.result =RenderToTexture(rotation);if(!result){
return false;
}
31 of 36 3/8/2013 12:42 PM
result =RenderFadingScene();if(!result){
return false;}
}
return true;}
Tutorial 28: Screen Fades http://www.rastertek.com/dx11tut28.html

7/14/2019 RasterTek: Direct3D introduction
http://slidepdf.com/reader/full/rastertek-direct3d-introduction 484/709
return true;}
The RenderToTexture function renders the 3D rotating cube scene to a texture instead of the back buffer.
bool GraphicsClass::RenderToTexture(float rotation){
D3DXMATRIX worldMatrix, viewMatrix, projectionMatrix;bool result;
// Set the render target to be the render to texture.m_RenderTexture->SetRenderTarget(m_D3D->GetDeviceContext(), m_D3D->GetDepthStencilView());
// Clear the render to texture.m_RenderTexture->ClearRenderTarget(m_D3D->GetDeviceContext(), m_D3D->GetDepthStencilView(), 0.0f, 0.0f, 0.0f, 1.0f);
// Generate the view matrix based on the camera's position.
m_Camera->Render();
// Get the world, view, and projection matrices from the camera and d3d objects.m_D3D->GetWorldMatrix(worldMatrix);m_Camera->GetViewMatrix(viewMatrix);m_D3D->GetProjectionMatrix(projectionMatrix);
// Multiply the world matrix by the rotation.D3DXMatrixRotationY(&worldMatrix, rotation);
// Put the model vertex and index buffers on the graphics pipeline to prepare them for drawing.m_Model->Render(m_D3D->GetDeviceContext());
// Render the model with the texture shader.result =m_TextureShader->Render(m_D3D->GetDeviceContext(), m_Model->GetIndexCount(), worldMatrix, viewMatrix,
projectionMatrix, m_Model->GetTexture());if(!result){
return false;}
32 of 36 3/8/2013 12:42 PM
// Reset the render target back to the original back buffer and not the render to texture anymore.m_D3D->SetBackBufferRenderTarget();
return true;}
The RenderFadingScene function uses the render to texture of the 3D rotating cube scene and draws itas a 2D bitmapto thescreen usingthe FadeShaderClassobject The FadeShaderClass object takes in the m fadePercentage value to determine what percentage of brightness the texture should be at this frame which
Tutorial 28: Screen Fades http://www.rastertek.com/dx11tut28.html

7/14/2019 RasterTek: Direct3D introduction
http://slidepdf.com/reader/full/rastertek-direct3d-introduction 485/709
The RenderFadingScene function uses the render to texture of the 3D rotating cube scene and draws it as a 2D bitmap to the screen using the FadeShaderClassobject. The FadeShaderClass object takes in the m_fadePercentage value to determine what percentage of brightness the texture should be at this frame whichcreates the fade in effect.
bool GraphicsClass::RenderFadingScene(){
D3DXMATRIX worldMatrix, viewMatrix, orthoMatrix;bool result;
// Clear the buffers to begin the scene.m_D3D->BeginScene(0.0f, 0.0f, 0.0f, 1.0f);
// Generate the view matrix based on the camera's position.m_Camera->Render();
// Get the world, view, and ortho matrices from the camera and d3d objects.m_D3D->GetWorldMatrix(worldMatrix);
m_Camera->GetViewMatrix(viewMatrix);m_D3D->GetOrthoMatrix(orthoMatrix);
// Turn off the Z buffer to begin all 2D rendering.m_D3D->TurnZBufferOff();
// Put the bitmap vertex and index buffers on the graphics pipeline to prepare them for drawing.result =m_Bitmap->Render(m_D3D->GetDeviceContext(), 0, 0);if(!result)
{ return false;}
// Render the bitmap using the fade shader.result =m_FadeShader->Render(m_D3D->GetDeviceContext(), m_Bitmap->GetIndexCount(), worldMatrix, viewMatrix, orthoMatrix,
m_RenderTexture->GetShaderResourceView(), m_fadePercentage);if(!result){
return false;}
33 of 36 3/8/2013 12:42 PM
// Turn the Z buffer back on now that all 2D rendering has completed.m_D3D->TurnZBufferOn();
// Present the rendered scene to the screen.m_D3D->EndScene();
return true;}
Tutorial 28: Screen Fades http://www.rastertek.com/dx11tut28.html

7/14/2019 RasterTek: Direct3D introduction
http://slidepdf.com/reader/full/rastertek-direct3d-introduction 486/709
}
If we are no longer fading in the scene then we switch to using this function to draw the scene normally and remove the cost of using render to texture.
bool GraphicsClass::RenderNormalScene(float rotation){
D3DXMATRIX worldMatrix, viewMatrix, projectionMatrix;bool result;
// Clear the buffers to begin the scene.m_D3D->BeginScene(0.0f, 0.0f, 0.0f, 1.0f);
// Generate the view matrix based on the camera's position.m_Camera->Render();
// Get the world, view, and projection matrices from the camera and d3d objects.
m_D3D->GetWorldMatrix(worldMatrix);m_Camera->GetViewMatrix(viewMatrix);m_D3D->GetProjectionMatrix(projectionMatrix);
// Multiply the world matrix by the rotation.D3DXMatrixRotationY(&worldMatrix, rotation);
// Put the model vertex and index buffers on the graphics pipeline to prepare them for drawing.m_Model->Render(m_D3D->GetDeviceContext());
// Render the model with the texture shader.result =m_TextureShader->Render(m_D3D->GetDeviceContext(), m_Model->GetIndexCount(), worldMatrix, viewMatrix,
projectionMatrix, m_Model->GetTexture());if(!result){
return false;}
// Present the rendered scene to the screen.m_D3D->EndScene();
34 of 36 3/8/2013 12:42 PM
return true;}
Summary
Using render to texture we can now fade in and fade out our 3D scenes This effect can be extended to render the new and old scene at the same time to create
Tutorial 28: Screen Fades http://www.rastertek.com/dx11tut28.html

7/14/2019 RasterTek: Direct3D introduction
http://slidepdf.com/reader/full/rastertek-direct3d-introduction 487/709
Using render to texture we can now fade in and fade out our 3D scenes. This effect can be extended to render the new and old scene at the same time to createmore interesting transition effects.
To Do Exercises
1. Recompile and run the program. The cube show slowly fade in over a 5 second period and then start rendering normally. Press escape to quit.
2. Change the speed at which the scene fades in.
3. Change the color the back buffer is cleared to in the render to texture so you can see the exact moment the application switches to rendering normally.
4. Change the code to fade the scene out after fading it in.
Source Code
Visual Studio 2008 Project: dx11tut28.zip
35 of 36 3/8/2013 12:42 PM
Source Only: dx11src28.zip
Executable Only:dx11exe28.zip
Back to Tutorial Index
Tutorial 28: Screen Fades http://www.rastertek.com/dx11tut28.html
7/14/2019 RasterTek: Direct3D introduction
http://slidepdf.com/reader/full/rastertek-direct3d-introduction 488/709
36 of 36 3/8/2013 12:42 PM

7/14/2019 RasterTek: Direct3D introduction
http://slidepdf.com/reader/full/rastertek-direct3d-introduction 489/709
rendering the scene to texture and then projecting it onto the glass model produces the following refraction result:
Tutorial 32: Glass and Ice http://www.rastertek.com/dx11tut32.html

7/14/2019 RasterTek: Direct3D introduction
http://slidepdf.com/reader/full/rastertek-direct3d-introduction 490/709
If the scene were more complex your window would actually become invisible and everything would look the same. The reason being is that if the texture isperfectly projected it would just cover the same 3D scene section with a 2D texture of the same scene making the resulting glass model a perfectly clear seethrough glass with no way to differentiate it from the 3D scene itself. To even determine what is your glass model and what is the scene you will need to dim orbrighten the glass texture to see that it actually is still there for debugging purposes.
Now that the scene is projected onto a texture you need a normal map so you can eventually perturb the refraction texture to make it look like it is behind glass. Wewill use the following normal map which will give a stripped faceted look to the glass:
Now that we have a normal map we can use each individual pixel in the normal map as a look up for how to modify what pixel in the refraction texture is sampled.
2 of 34 3/8/2013 12:43 PM
This allows us to sample the refraction texture slightly above, beside, and below to simulate light not traveling straight through but instead being bent slightly suchas it is in glass. The scale of light being bent is controlled by the refractionScale variable which we set fairly low for glass, in this example it was set to 0.01. Notethat this is entirely dependent on the normal map used as the normals can vary little or greatly in the normal map which prevents us from really having a scale valuethat will always work.
So now if we sample the refraction texture using the normal map texture as a lookup with the scale being 0.01 we get the following image:
Tutorial 32: Glass and Ice http://www.rastertek.com/dx11tut32.html

7/14/2019 RasterTek: Direct3D introduction
http://slidepdf.com/reader/full/rastertek-direct3d-introduction 491/709
The basic effect is mostly complete now. However most glass has a tint or color associated with it and sometimes other markings. For the glass in this example wewill use the following color texture:
We take the color texture and the perturbed refraction and combine them to get the final glass effect:
3 of 34 3/8/2013 12:43 PM
Tutorial 32: Glass and Ice http://www.rastertek.com/dx11tut32.html

7/14/2019 RasterTek: Direct3D introduction
http://slidepdf.com/reader/full/rastertek-direct3d-introduction 492/709
Ice
Ice works exactly the same as glass with just different inputs into the shader.
To start with we have the same scene of the textured square projected onto the ice surface model:
However with ice we want a different look to the final surface so we will use a different color texture:
4 of 34 3/8/2013 12:43 PM
Tutorial 32: Glass and Ice http://www.rastertek.com/dx11tut32.html

7/14/2019 RasterTek: Direct3D introduction
http://slidepdf.com/reader/full/rastertek-direct3d-introduction 493/709
Also the normal map will need to be different to simulate all the tiny bumps all over the surface with ice. Fortunately the color texture has just the right amount of noise in it to be used to make a ice normal map. Simply take the color texture above and use the Nivida normal map filter in Photoshop with a Scale of 5 and itcreates the following normal map:
Now if we use that normal map and a stronger refractionScale such as 0.1 for ice (instead of how we used 0.01 for glass) we get the following heavily perturbedrefraction image:
5 of 34 3/8/2013 12:43 PM
Tutorial 32: Glass and Ice http://www.rastertek.com/dx11tut32.html

7/14/2019 RasterTek: Direct3D introduction
http://slidepdf.com/reader/full/rastertek-direct3d-introduction 494/709
Finally if we combine the perturbed refraction texture with the ice color texture the resulting image is very realistic:
One final comment before we get into the code is that when you see these shaders working on surfaces that have motion behind them (such as a spinning cubebehind the glass or ice) they look incredibly real. Make sure you at least run the executable for this tutorial to see what I'm talking about.
Framework
The frame work for this tutorial is similar to the previous tutorials. The only new class added is the GlassShaderClass which handles the glass and ice shading. The
6 of 34 3/8/2013 12:43 PM
RenderTextureClass is used in this tutorial for rendering the 3D scene to a texture. Also the TextureShaderClass is used to render the spinning cube model for theregular scene that will be behind the glass object.
Tutorial 32: Glass and Ice http://www.rastertek.com/dx11tut32.html
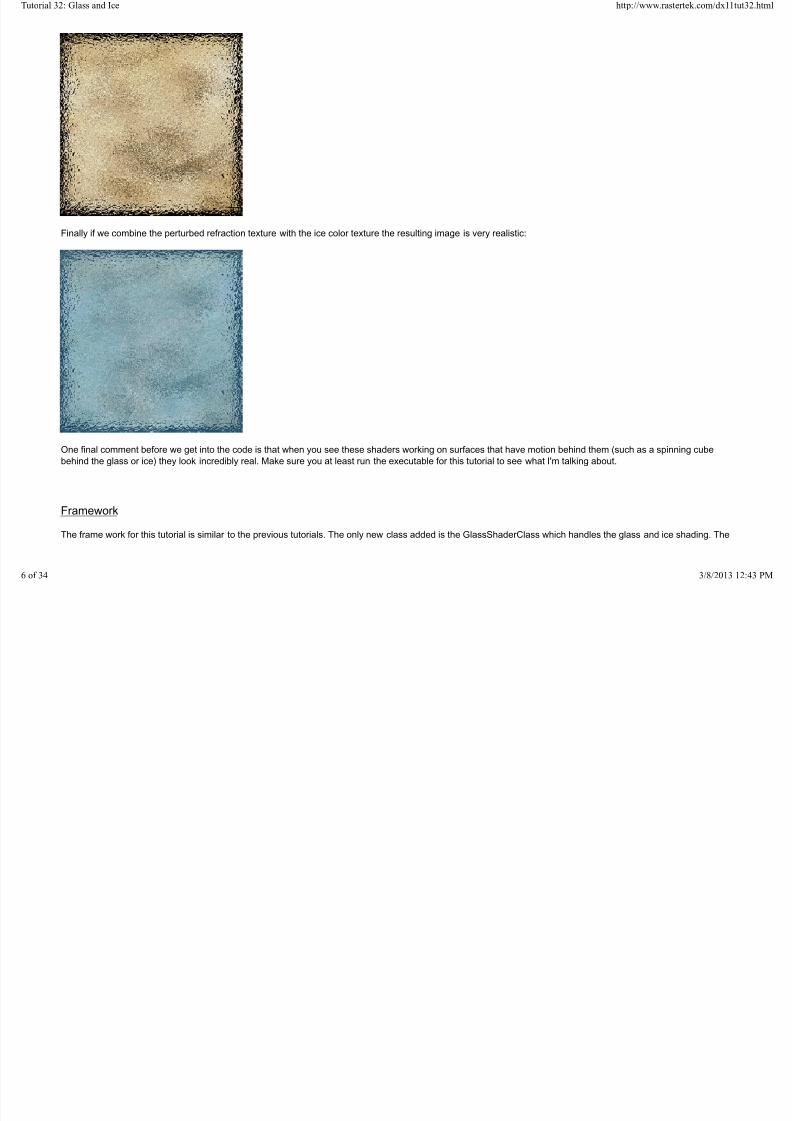
7/14/2019 RasterTek: Direct3D introduction
http://slidepdf.com/reader/full/rastertek-direct3d-introduction 495/709
We will start the code section by examining the HLSL code for the glass shader.
Glass.vs
////////////////////////////////////////////////////////////////////////////////// Filename: glass.vs////////////////////////////////////////////////////////////////////////////////
/////////////// GLOBALS ///////////////cbuffer MatrixBuffer
{matrix worldMatrix;matrix viewMatrix;matrix projectionMatrix;
};
//////////////// TYPEDEFS //
//////////////
7 of 34 3/8/2013 12:43 PM
struct VertexInputType{
float4 position : POSITION;float2 tex : TEXCOORD0;
};
The PixelInputType structure has a new refractionPosition variable for the refraction vertex coordinates that will be passed into the pixel shader.
struct PixelInputType{
Tutorial 32: Glass and Ice http://www.rastertek.com/dx11tut32.html

7/14/2019 RasterTek: Direct3D introduction
http://slidepdf.com/reader/full/rastertek-direct3d-introduction 496/709
{float4 position : SV_POSITION;float2 tex : TEXCOORD0;float4 refractionPosition : TEXCOORD1;
};
////////////////////////////////////////////////////////////////////////////////// Vertex Shader////////////////////////////////////////////////////////////////////////////////PixelInputType GlassVertexShader(VertexInputType input){
PixelInputType output;matrix viewProjectWorld;
// Change the position vector to be 4 units for proper matrix calculations.input.position.w =1.0f;
// Calculate the position of the vertex against the world, view, and projection matrices.output.position =mul(input.position, worldMatrix);output.position =mul(output.position, viewMatrix);output.position =mul(output.position, projectionMatrix);
// Store the texture coordinates for the pixel shader.output.tex =input.tex;
Create the matrix used for transforming the input vertex coordinates to the projected coordinates.
// Create the view projection world matrix for refraction.viewProjectWorld =mul(viewMatrix, projectionMatrix);viewProjectWorld =mul(worldMatrix, viewProjectWorld);
Transform the input vertex coordinates to the projected values and pass it into the pixel shader.
// Calculate the input position against the viewProjectWorld matrix.
8 of 34 3/8/2013 12:43 PM
output.refractionPosition =mul(input.position, viewProjectWorld);
return output;}
Glass.ps////////////////////////////////////////////////////////////////////////////////
Tutorial 32: Glass and Ice http://www.rastertek.com/dx11tut32.html

7/14/2019 RasterTek: Direct3D introduction
http://slidepdf.com/reader/full/rastertek-direct3d-introduction 497/709
////////////////////////////////////////////////////////////////////////////////// Filename: glass.ps////////////////////////////////////////////////////////////////////////////////
/////////////// GLOBALS //
/////////////SamplerState SampleType;
The glass shader uses three different textures. The colorTexture is the basic surface color used for the glass. The normalTexture is the normal map look up tablecontaining all the normal vectors. And finally the refractionTexture contains the 3D scene that is behind the glass rendered to a 2D texture. You will also notice Ihave used the direct register assignments. This helps clarify which texture is bound to which register instead of relying on the order they are placed in the HLSL file.
Texture2D colorTexture : register(t0); Texture2D normalTexture : register(t1);
Texture2D refractionTexture : register(t2);
The GlassBuffer is used for setting the refractionScale. The refractionScale variable is used for scaling the amount of perturbation to the refraction texture. This isgenerally low for glass and higher for ice.
cbuffer GlassBuffer{
float refractionScale;float3 padding;
};
//////////////// TYPEDEFS ////////////////struct PixelInputType{
float4 position : SV_POSITION;
float2 tex : TEXCOORD0;
9 of 34 3/8/2013 12:43 PM
float4 refractionPosition : TEXCOORD1;};
////////////////////////////////////////////////////////////////////////////////// Pixel Shader////////////////////////////////////////////////////////////////////////////////float4 GlassPixelShader(PixelInputType input) : SV_TARGET
{float2 refractTexCoord;
Tutorial 32: Glass and Ice http://www.rastertek.com/dx11tut32.html

7/14/2019 RasterTek: Direct3D introduction
http://slidepdf.com/reader/full/rastertek-direct3d-introduction 498/709
float4 normalMap;float3 normal;float4 refractionColor;float4 textureColor;float4 color;
First convert the input projected homogenous coordinates (-1, +1) to (0, 1) texture coordinates.
// Calculate the projected refraction texture coordinates.refractTexCoord.x =input.refractionPosition.x / input.refractionPosition.w / 2.0f +0.5f;refractTexCoord.y =-input.refractionPosition.y / input.refractionPosition.w / 2.0f +0.5f;
Next sample the normal map and move it from (0, 1) texture coordinates to (-1, 1) coordinates.
// Sample the normal from the normal map texture.normalMap =normalTexture.Sample(SampleType, input.tex);
// Expand the range of the normal from (0,1) to (-1,+1).normal =(normalMap.xyz * 2.0f) - 1.0f;
Now perturb the refraction texture sampling location by the normals that were calculated. Also multiply the normal by the refraction scale to increase or decrease theperturbation.
// Re-position the texture coordinate sampling position by the normal map value to simulate light distortion through glass.refractTexCoord =refractTexCoord +(normal.xy * refractionScale);
Next sample the refraction texture using the perturbed coordinates and sample the color texture using the normal input texture coordinates.
// Sample the texture pixel from the refraction texture using the perturbed texture coordinates.refractionColor =refractionTexture.Sample(SampleType, refractTexCoord);
// Sample the texture pixel from the glass color texture.textureColor =colorTexture.Sample(SampleType, input.tex);
Finally combine the refraction and color texture for the final result.
10 of 34 3/8/2013 12:43 PM
// Evenly combine the glass color and refraction value for the final color.color =lerp(refractionColor, textureColor, 0.5f);
return color;}
Glassshaderclass.h
Tutorial 32: Glass and Ice http://www.rastertek.com/dx11tut32.html

7/14/2019 RasterTek: Direct3D introduction
http://slidepdf.com/reader/full/rastertek-direct3d-introduction 499/709
The GlassShaderClass is based on the TextureShaderClass with slight changes for glass shading.
////////////////////////////////////////////////////////////////////////////////// Filename: glassshaderclass.h////////////////////////////////////////////////////////////////////////////////
#ifndef _GLASSSHADERCLASS_H_ #define _GLASSSHADERCLASS_H_
//////////////// INCLUDES ////////////////#include <d3d11.h>#include <d3dx10math.h>
#include <d3dx11async.h>#include <fstream>using namespace std;
////////////////////////////////////////////////////////////////////////////////// Class name: GlassShaderClass////////////////////////////////////////////////////////////////////////////////class GlassShaderClass
{private:struct MatrixBufferType{
D3DXMATRIX world;D3DXMATRIX view;D3DXMATRIX projection;
};
We have a new structure type used for setting the refraction scale in the constant buffer inside the pixel shader.
11 of 34 3/8/2013 12:43 PM
struct GlassBufferType{
float refractionScale;D3DXVECTOR3 padding;
};
public:
GlassShaderClass();GlassShaderClass(const GlassShaderClass&);Gl Sh d Cl ()
Tutorial 32: Glass and Ice http://www.rastertek.com/dx11tut32.html

7/14/2019 RasterTek: Direct3D introduction
http://slidepdf.com/reader/full/rastertek-direct3d-introduction 500/709
~GlassShaderClass();
bool Initialize(ID3D11Device*, HWND);void Shutdown();bool Render(ID3D11DeviceContext*, int, D3DXMATRIX, D3DXMATRIX, D3DXMATRIX, ID3D11ShaderResourceView*,
ID3D11ShaderResourceView*, ID3D11ShaderResourceView*, float);
private:bool InitializeShader(ID3D11Device*, HWND, WCHAR*, WCHAR*);void ShutdownShader();void OutputShaderErrorMessage(ID3D10Blob*, HWND, WCHAR*);
bool SetShaderParameters(ID3D11DeviceContext*, D3DXMATRIX, D3DXMATRIX, D3DXMATRIX, ID3D11ShaderResourceView*,ID3D11ShaderResourceView*, ID3D11ShaderResourceView*, float);
void RenderShader(ID3D11DeviceContext*, int);
private:ID3D11VertexShader* m_vertexShader;ID3D11PixelShader* m_pixelShader;ID3D11InputLayout* m_layout;ID3D11SamplerState* m_sampleState;ID3D11Buffer* m_matrixBuffer;
The glass shader needs a refraction scale value which the m_glassBuffer pointer provides an interface to.
ID3D11Buffer* m_glassBuffer;};
#endif
Glassshaderclass.cpp
12 of 34 3/8/2013 12:43 PM
////////////////////////////////////////////////////////////////////////////////// Filename: glassshaderclass.cpp////////////////////////////////////////////////////////////////////////////////#include "glassshaderclass.h"
GlassShaderClass::GlassShaderClass(){
m_vertexShader =0;m_pixelShader =0;m layout=0;
Tutorial 32: Glass and Ice http://www.rastertek.com/dx11tut32.html

7/14/2019 RasterTek: Direct3D introduction
http://slidepdf.com/reader/full/rastertek-direct3d-introduction 501/709
m_layout =0;m_sampleState =0;m_matrixBuffer =0;
Initialize the glass buffer to null in the class constructor.
m_glassBuffer =0;
}
GlassShaderClass::GlassShaderClass(const GlassShaderClass& other){}
GlassShaderClass::~GlassShaderClass()
{}
bool GlassShaderClass::Initialize(ID3D11Device* device, HWND hwnd){
bool result;
Initialize the glass shader with the new glass.vs and glass.ps HLSL files.
// Initialize the vertex and pixel shaders.result =InitializeShader(device, hwnd, L"../Engine/glass.vs", L"../Engine/glass.ps");if(!result){
return false;}
return true;}
13 of 34 3/8/2013 12:43 PM
void GlassShaderClass::Shutdown(){
// Shutdown the vertex and pixel shaders as well as the related objects.ShutdownShader();
return;
}
The Render function nowtakes as input the color texture normal maptexture refraction texture and refraction scale value These values are set in the shader first
Tutorial 32: Glass and Ice http://www.rastertek.com/dx11tut32.html

7/14/2019 RasterTek: Direct3D introduction
http://slidepdf.com/reader/full/rastertek-direct3d-introduction 502/709
The Render function now takes as input the color texture, normal map texture, refraction texture, and refraction scale value. These values are set in the shader firstusing the SetShaderParameters function before the rendering occurs in the RenderShader function which is called afterward.
bool GlassShaderClass::Render(ID3D11DeviceContext* deviceContext, int indexCount, D3DXMATRIX worldMatrix, D3DXMATRIX viewMatrix,D3DXMATRIX projectionMatrix, ID3D11ShaderResourceView* colorTexture,ID3D11ShaderResourceView* normalTexture, ID3D11ShaderResourceView* refractionTexture,float refractionScale)
{bool result;
// Set the shader parameters that it will use for rendering.result =SetShaderParameters(deviceContext, worldMatrix, viewMatrix, projectionMatrix, colorTexture,
normalTexture, refractionTexture, refractionScale);if(!result){
return false;}
// Now render the prepared buffers with the shader.RenderShader(deviceContext, indexCount);
return true;}
bool GlassShaderClass::InitializeShader(ID3D11Device* device, HWND hwnd, WCHAR* vsFilename, WCHAR* psFilename){
HRESULT result;ID3D10Blob* errorMessage;ID3D10Blob* vertexShaderBuffer;ID3D10Blob* pixelShaderBuffer;D3D11_INPUT_ELEMENT_DESC polygonLayout[2];unsigned int numElements;D3D11_SAMPLER_DESC samplerDesc;
14 of 34 3/8/2013 12:43 PM
D3D11_BUFFER_DESC matrixBufferDesc;D3D11_BUFFER_DESC glassBufferDesc;
// Initialize the pointers this function will use to null.errorMessage =0;vertexShaderBuffer =0;pixelShaderBuffer =0;
Load the glass vertex shader.
Tutorial 32: Glass and Ice http://www.rastertek.com/dx11tut32.html

7/14/2019 RasterTek: Direct3D introduction
http://slidepdf.com/reader/full/rastertek-direct3d-introduction 503/709
// Compile the vertex shader code.result =D3DX11CompileFromFile(vsFilename, NULL, NULL, "GlassVertexShader", "vs_5_0", D3D10_SHADER_ENABLE_STRICTNESS, 0, NULL,
&vertexShaderBuffer, &errorMessage, NULL);if(FAILED(result)){
// If the shader failed to compile it should have writen something to the error message.
if(errorMessage){
OutputShaderErrorMessage(errorMessage, hwnd, vsFilename);}// If there was nothing in the error message then it simply could not find the shader file itself.else{
MessageBox(hwnd, vsFilename, L"Missing Shader File", MB_OK);}
return false;}
Load the glass pixel shader.
// Compile the pixel shader code.result =D3DX11CompileFromFile(psFilename, NULL, NULL, "GlassPixelShader", "ps_5_0", D3D10_SHADER_ENABLE_STRICTNESS, 0, NULL,
&pixelShaderBuffer, &errorMessage, NULL);
if(FAILED(result)){
// If the shader failed to compile it should have writen something to the error message.if(errorMessage){
OutputShaderErrorMessage(errorMessage, hwnd, psFilename);}// If there was nothing in the error message then it simply could not find the file itself.else
{
15 of 34 3/8/2013 12:43 PM
MessageBox(hwnd, psFilename, L"Missing Shader File", MB_OK);}
return false;}
// Create the vertex shader from the buffer.result =device->CreateVertexShader(vertexShaderBuffer->GetBufferPointer(), vertexShaderBuffer->GetBufferSize(), NULL,
&m_vertexShader);if(FAILED(result)){
Tutorial 32: Glass and Ice http://www.rastertek.com/dx11tut32.html

7/14/2019 RasterTek: Direct3D introduction
http://slidepdf.com/reader/full/rastertek-direct3d-introduction 504/709
{return false;
}
// Create the vertex shader from the buffer.result =device->CreatePixelShader(pixelShaderBuffer->GetBufferPointer(), pixelShaderBuffer->GetBufferSize(), NULL,
&m_pixelShader);
if(FAILED(result)){
return false;}
// Create the vertex input layout description.// This setup needs to match the VertexType stucture in the ModelClass and in the shader.polygonLayout[0].SemanticName ="POSITION";polygonLayout[0].SemanticIndex =0;
polygonLayout[0].Format =DXGI_FORMAT_R32G32B32_FLOAT;polygonLayout[0].InputSlot =0;polygonLayout[0].AlignedByteOffset =0;polygonLayout[0].InputSlotClass =D3D11_INPUT_PER_VERTEX_DATA;polygonLayout[0].InstanceDataStepRate =0;
polygonLayout[1].SemanticName ="TEXCOORD";polygonLayout[1].SemanticIndex =0;polygonLayout[1].Format =DXGI_FORMAT_R32G32_FLOAT;
polygonLayout[1].InputSlot =0;polygonLayout[1].AlignedByteOffset =D3D11_APPEND_ALIGNED_ELEMENT;polygonLayout[1].InputSlotClass =D3D11_INPUT_PER_VERTEX_DATA;polygonLayout[1].InstanceDataStepRate =0;
// Get a count of the elements in the layout.numElements =sizeof(polygonLayout) / sizeof(polygonLayout[0]);
// Create the vertex input layout.
result =device->CreateInputLayout(polygonLayout, numElements, vertexShaderBuffer->GetBufferPointer(),
16 of 34 3/8/2013 12:43 PM
vertexShaderBuffer->GetBufferSize(), &m_layout);if(FAILED(result)){
return false;}
// Release the vertex shader buffer and pixel shader buffer since they are no longer needed.vertexShaderBuffer->Release();
vertexShaderBuffer =0;
pixelShaderBuffer->Release();
Tutorial 32: Glass and Ice http://www.rastertek.com/dx11tut32.html

7/14/2019 RasterTek: Direct3D introduction
http://slidepdf.com/reader/full/rastertek-direct3d-introduction 505/709
pixelShaderBuffer =0;
// Create a texture sampler state description.samplerDesc.Filter =D3D11_FILTER_MIN_MAG_MIP_LINEAR;samplerDesc.AddressU =D3D11_TEXTURE_ADDRESS_WRAP;samplerDesc.AddressV =D3D11_TEXTURE_ADDRESS_WRAP;
samplerDesc.AddressW =D3D11_TEXTURE_ADDRESS_WRAP;samplerDesc.MipLODBias =0.0f;samplerDesc.MaxAnisotropy =1;samplerDesc.ComparisonFunc =D3D11_COMPARISON_ALWAYS;samplerDesc.BorderColor[0] =0;samplerDesc.BorderColor[1] =0;samplerDesc.BorderColor[2] =0;samplerDesc.BorderColor[3] =0;samplerDesc.MinLOD =0;
samplerDesc.MaxLOD =D3D11_FLOAT32_MAX;
// Create the texture sampler state.result =device->CreateSamplerState(&samplerDesc, &m_sampleState);if(FAILED(result)){
return false;}
// Setup the description of the matrix dynamic constant buffer that is in the vertex shader.matrixBufferDesc.Usage =D3D11_USAGE_DYNAMIC;matrixBufferDesc.ByteWidth =sizeof(MatrixBufferType);matrixBufferDesc.BindFlags =D3D11_BIND_CONSTANT_BUFFER;matrixBufferDesc.CPUAccessFlags =D3D11_CPU_ACCESS_WRITE;matrixBufferDesc.MiscFlags =0;matrixBufferDesc.StructureByteStride =0;
// Create the constant buffer pointer so we can access the vertex shader constant buffer from within this class.
result =device->CreateBuffer(&matrixBufferDesc, NULL, &m_matrixBuffer);
17 of 34 3/8/2013 12:43 PM
if(FAILED(result)){
return false;}
Setup the description and create the glass buffer which will be used to set the refraction scale in the pixel shader.
// Setup the description of the glass dynamic constant buffer that is in the pixel shader.
glassBufferDesc.Usage =D3D11_USAGE_DYNAMIC;glassBufferDesc.ByteWidth =sizeof(GlassBufferType);glassBufferDesc.BindFlags =D3D11_BIND_CONSTANT_BUFFER;
Tutorial 32: Glass and Ice http://www.rastertek.com/dx11tut32.html

7/14/2019 RasterTek: Direct3D introduction
http://slidepdf.com/reader/full/rastertek-direct3d-introduction 506/709
glassBufferDesc.CPUAccessFlags =D3D11_CPU_ACCESS_WRITE;glassBufferDesc.MiscFlags =0;glassBufferDesc.StructureByteStride =0;
// Create the constant buffer pointer so we can access the pixel shader constant buffer from within this class.result =device->CreateBuffer(&glassBufferDesc, NULL, &m_glassBuffer);
if(FAILED(result)){
return false;}
return true;}
void GlassShaderClass::ShutdownShader(){
Release the new glass buffer in the ShutdownShader function.
// Release the glass constant buffer.if(m_glassBuffer){
m_glassBuffer->Release();
m_glassBuffer =0;}
// Release the matrix constant buffer.if(m_matrixBuffer){
m_matrixBuffer->Release();m_matrixBuffer =0;
}
18 of 34 3/8/2013 12:43 PM
// Release the sampler state.if(m_sampleState){
m_sampleState->Release();m_sampleState =0;
}
// Release the layout.
if(m_layout){
m_layout->Release();l t 0
Tutorial 32: Glass and Ice http://www.rastertek.com/dx11tut32.html

7/14/2019 RasterTek: Direct3D introduction
http://slidepdf.com/reader/full/rastertek-direct3d-introduction 507/709
m_layout =0;}
// Release the pixel shader.if(m_pixelShader){
m_pixelShader->Release();m_pixelShader =0;
}
// Release the vertex shader.if(m_vertexShader){
m_vertexShader->Release();m_vertexShader =0;
}
return;}
void GlassShaderClass::OutputShaderErrorMessage(ID3D10Blob* errorMessage, HWND hwnd, WCHAR* shaderFilename){
char* compileErrors;
unsigned long bufferSize, i;ofstream fout;
// Get a pointer to the error message text buffer.compileErrors =(char*)(errorMessage->GetBufferPointer());
// Get the length of the message.bufferSize =errorMessage->GetBufferSize();
19 of 34 3/8/2013 12:43 PM
// Open a file to write the error message to.fout.open("shader-error.txt");
// Write out the error message.for(i=0; i<bufferSize; i++){
fout <<compileErrors[i];}
// Close the file.fout.close();
Tutorial 32: Glass and Ice http://www.rastertek.com/dx11tut32.html

7/14/2019 RasterTek: Direct3D introduction
http://slidepdf.com/reader/full/rastertek-direct3d-introduction 508/709
// Release the error message.errorMessage->Release();errorMessage =0;
// Pop a message up on the screen to notify the user to check the text file for compile errors.
MessageBox(hwnd, L"Error compiling shader. Check shader-error.txt for message.", shaderFilename, MB_OK);
return;}
bool GlassShaderClass::SetShaderParameters(ID3D11DeviceContext* deviceContext, D3DXMATRIX worldMatrix, D3DXMATRIX viewMatrix,D3DXMATRIX projectionMatrix, ID3D11ShaderResourceView* colorTexture,ID3D11ShaderResourceView* normalTexture, ID3D11ShaderResourceView* refractionTexture,
float refractionScale){
HRESULT result;D3D11_MAPPED_SUBRESOURCE mappedResource;MatrixBufferType* dataPtr;GlassBufferType* dataPtr2;unsigned int bufferNumber;
// Transpose the matrices to prepare them for the shader.D3DXMatrixTranspose(&worldMatrix, &worldMatrix);D3DXMatrixTranspose(&viewMatrix, &viewMatrix);D3DXMatrixTranspose(&projectionMatrix, &projectionMatrix);
// Lock the matrix constant buffer so it can be written to.result =deviceContext->Map(m_matrixBuffer, 0, D3D11_MAP_WRITE_DISCARD, 0, &mappedResource);if(FAILED(result)){
return false;
20 of 34 3/8/2013 12:43 PM
}
// Get a pointer to the data in the matrix constant buffer.dataPtr =(MatrixBufferType*)mappedResource.pData;
// Copy the matrices into the matrix constant buffer.dataPtr->world =worldMatrix;dataPtr->view =viewMatrix;
dataPtr->projection =projectionMatrix;
// Unlock the matrix constant buffer.deviceContext >Unmap(m matrixBuffer 0);
Tutorial 32: Glass and Ice http://www.rastertek.com/dx11tut32.html

7/14/2019 RasterTek: Direct3D introduction
http://slidepdf.com/reader/full/rastertek-direct3d-introduction 509/709
deviceContext->Unmap(m_matrixBuffer, 0);
// Set the position of the matrix constant buffer in the vertex shader.bufferNumber =0;
// Now set the matrix constant buffer in the vertex shader with the updated values.
deviceContext->VSSetConstantBuffers(bufferNumber, 1, &m_matrixBuffer);
The color, normal, and refraction textures are set in the pixel shader here.
// Set the three shader texture resources in the pixel shader.deviceContext->PSSetShaderResources(0, 1, &colorTexture);deviceContext->PSSetShaderResources(1, 1, &normalTexture);deviceContext->PSSetShaderResources(2, 1, &refractionTexture);
The glass buffer is locked and then the refractionScale value is copied into the glass buffer and then set in the pixel shader.
// Lock the glass constant buffer so it can be written to.result =deviceContext->Map(m_glassBuffer, 0, D3D11_MAP_WRITE_DISCARD, 0, &mappedResource);if(FAILED(result)){
return false;}
// Get a pointer to the data in the glass constant buffer.dataPtr2 =(GlassBufferType*)mappedResource.pData;
// Copy the variables into the glass constant buffer.dataPtr2->refractionScale =refractionScale;dataPtr2->padding =D3DXVECTOR3(0.0f, 0.0f, 0.0f);
// Unlock the glass constant buffer.deviceContext->Unmap(m_glassBuffer, 0);
21 of 34 3/8/2013 12:43 PM
// Set the position of the glass constant buffer in the pixel shader.bufferNumber =0;
// Now set the glass constant buffer in the pixel shader with the updated values.deviceContext->PSSetConstantBuffers(bufferNumber, 1, &m_glassBuffer);
return true;}
void GlassShaderClass::RenderShader(ID3D11DeviceContext* deviceContext, int indexCount){
Tutorial 32: Glass and Ice http://www.rastertek.com/dx11tut32.html

7/14/2019 RasterTek: Direct3D introduction
http://slidepdf.com/reader/full/rastertek-direct3d-introduction 510/709
{// Set the vertex input layout.deviceContext->IASetInputLayout(m_layout);
// Set the vertex and pixel shaders that will be used to render this triangle.deviceContext->VSSetShader(m_vertexShader, NULL, 0);
deviceContext->PSSetShader(m_pixelShader, NULL, 0);
// Set the sampler state in the pixel shader.deviceContext->PSSetSamplers(0, 1, &m_sampleState);
// Render the triangle.deviceContext->DrawIndexed(indexCount, 0, 0);
return;
}
Graphicsclass.h
////////////////////////////////////////////////////////////////////////////////// Filename: graphicsclass.h////////////////////////////////////////////////////////////////////////////////#ifndef _GRAPHICSCLASS_H_ #define _GRAPHICSCLASS_H_
/////////////// GLOBALS ///////////////const bool FULL_SCREEN =true;const bool VSYNC_ENABLED =true;
22 of 34 3/8/2013 12:43 PM
const float SCREEN_DEPTH =1000.0f;const float SCREEN_NEAR =0.1f;
///////////////////////// MY CLASS INCLUDES /////////////////////////#include "d3dclass.h"
#include "cameraclass.h"#include "modelclass.h"#include "rendertextureclass.h"#include "textureshaderclass.h"
Tutorial 32: Glass and Ice http://www.rastertek.com/dx11tut32.html

7/14/2019 RasterTek: Direct3D introduction
http://slidepdf.com/reader/full/rastertek-direct3d-introduction 511/709
#include textureshaderclass.h
The new GlassShaderClass header file is included now.
#include "glassshaderclass.h"
////////////////////////////////////////////////////////////////////////////////// Class name: GraphicsClass////////////////////////////////////////////////////////////////////////////////class GraphicsClass{public:
GraphicsClass();GraphicsClass(const GraphicsClass&);
~GraphicsClass();
bool Initialize(int, int, HWND);void Shutdown();bool Frame();
private:bool RenderToTexture(float);bool Render(float);
private:D3DClass* m_D3D;CameraClass* m_Camera;
We create a model for the spinning cube and the glass window.
ModelClass* m_Model;ModelClass* m_WindowModel;
23 of 34 3/8/2013 12:43 PM
We need a render to texture object to render the spinning cube part of the scene.
RenderTextureClass* m_RenderTexture;
The texture shader is used to render the normal scene. The glass shader is used to render the glass window model.
TextureShaderClass* m_TextureShader;GlassShaderClass* m_GlassShader;
};
#endif
Tutorial 32: Glass and Ice http://www.rastertek.com/dx11tut32.html

7/14/2019 RasterTek: Direct3D introduction
http://slidepdf.com/reader/full/rastertek-direct3d-introduction 512/709
Graphicsclass.cpp
////////////////////////////////////////////////////////////////////////////////
// Filename: graphicsclass.cpp////////////////////////////////////////////////////////////////////////////////#include "graphicsclass.h"
GraphicsClass::GraphicsClass(){
m_D3D =0;m_Camera =0;
m_Model =0;m_WindowModel =0;m_RenderTexture =0;m_TextureShader =0;
The new GlassShaderClass object is initialized to null in the class constructor.
m_GlassShader =0;}
GraphicsClass::GraphicsClass(const GraphicsClass& other){}
GraphicsClass::~GraphicsClass(){
24 of 34 3/8/2013 12:43 PM
}
bool GraphicsClass::Initialize(int screenWidth, int screenHeight, HWND hwnd){
bool result;
// Create the Direct3D object.m_D3D =new D3DClass;if(!m_D3D){
Tutorial 32: Glass and Ice http://www.rastertek.com/dx11tut32.html

7/14/2019 RasterTek: Direct3D introduction
http://slidepdf.com/reader/full/rastertek-direct3d-introduction 513/709
return false;}
// Initialize the Direct3D object.result =m_D3D->Initialize(screenWidth, screenHeight, VSYNC_ENABLED, hwnd, FULL_SCREEN, SCREEN_DEPTH, SCREEN_NEAR);
if(!result){
MessageBox(hwnd, L"Could not initialize Direct3D.", L"Error", MB_OK);return false;
}
// Create the camera object.m_Camera =new CameraClass;if(!m_Camera)
{return false;
}
Create a model for the cube that will be spinning behind the glass window. It has a normal map associated with it but is not used so you can ignore the lastparameter of the Initialize. I did this just to make the function generic.
// Create the model object.m_Model =new ModelClass;
if(!m_Model){
return false;}
// Initialize the model object.result =m_Model->Initialize(m_D3D->GetDevice(), "../Engine/data/cube.txt", L"../Engine/data/seafloor.dds", L"../Engine/data/bump03.dds");if(!result){
MessageBox(hwnd, L"Could not initialize the model object.", L"Error", MB_OK);
25 of 34 3/8/2013 12:43 PM
return false;}
Create a model for the glass window. It uses the square .obj model since the window will just be two triangles that make up a square. It also uses a texture calledglass01.dds for the glass color and a normal map called bump03.dds for the perturbation of the glass refraction.
// Create the window model object.m_WindowModel =new ModelClass;
if(!m_WindowModel){
return false;}
Tutorial 32: Glass and Ice http://www.rastertek.com/dx11tut32.html
7/14/2019 RasterTek: Direct3D introduction
http://slidepdf.com/reader/full/rastertek-direct3d-introduction 514/709
// Initialize the window model object.result =m_WindowModel->Initialize(m_D3D->GetDevice(), "../Engine/data/square.txt", L"../Engine/data/glass01.dds", L"../Engine/data/bump03.dds");if(!result){
MessageBox(hwnd, L"Could not initialize the window model object.", L"Error", MB_OK);return false;
}
The render to texture object will be used to render the refraction of the scene to a texture and then passed into the glass shader as input.
// Create the render to texture object.m_RenderTexture =new RenderTextureClass;if(!m_RenderTexture)
{return false;
}
// Initialize the render to texture object.result =m_RenderTexture->Initialize(m_D3D->GetDevice(), screenWidth, screenHeight);if(!result){
return false;
}
The texture shader is used to render the spinning cube.
// Create the texture shader object.m_TextureShader =new TextureShaderClass;if(!m_TextureShader){
return false;
}
26 of 34 3/8/2013 12:43 PM
// Initialize the texture shader object.result =m_TextureShader->Initialize(m_D3D->GetDevice(), hwnd);if(!result){
MessageBox(hwnd, L"Could not initialize the texture shader object.", L"Error", MB_OK);return false;
}
This is where the new glass shader is created and initialized.
// Create the glass shader object.Gl Sh d Gl Sh d Cl
Tutorial 32: Glass and Ice http://www.rastertek.com/dx11tut32.html

7/14/2019 RasterTek: Direct3D introduction
http://slidepdf.com/reader/full/rastertek-direct3d-introduction 515/709
m_GlassShader =new GlassShaderClass;if(!m_GlassShader){
return false;}
// Initialize the glass shader object.result =m_GlassShader->Initialize(m_D3D->GetDevice(), hwnd);if(!result){
MessageBox(hwnd, L"Could not initialize the glass shader object.", L"Error", MB_OK);return false;
}
return true;}
void GraphicsClass::Shutdown(){
The new glass shader is released here in the Shutdown function.
// Release the glass shader object.if(m_GlassShader){
m_GlassShader->Shutdown();delete m_GlassShader;m_GlassShader =0;
}
// Release the texture shader object.
if(m_TextureShader)
27 of 34 3/8/2013 12:43 PM
{m_TextureShader->Shutdown();delete m_TextureShader;m_TextureShader =0;
}
// Release the render to texture object.if(m_RenderTexture)
{m_RenderTexture->Shutdown();delete m_RenderTexture;m_RenderTexture =0;
}
Tutorial 32: Glass and Ice http://www.rastertek.com/dx11tut32.html
7/14/2019 RasterTek: Direct3D introduction
http://slidepdf.com/reader/full/rastertek-direct3d-introduction 516/709
}
// Release the window model object.if(m_WindowModel){
m_WindowModel->Shutdown();delete m_WindowModel;m_WindowModel =0;
}
// Release the model object.if(m_Model){
m_Model->Shutdown();
delete m_Model;m_Model =0;
}
// Release the camera object.if(m_Camera){
delete m_Camera;m_Camera =0;
}
// Release the Direct3D object.if(m_D3D){
m_D3D->Shutdown();delete m_D3D;m_D3D =0;
}
28 of 34 3/8/2013 12:43 PM
return;}
bool GraphicsClass::Frame(){
static float rotation =0.0f;bool result;
We update the rotation of the cube each frame and send the same value into both the RenderToTexture and Render function to keep the rotation in sync.
// Update the rotation variable each frame.rotation+=(float)D3DX PI * 0005f;
Tutorial 32: Glass and Ice http://www.rastertek.com/dx11tut32.html

7/14/2019 RasterTek: Direct3D introduction
http://slidepdf.com/reader/full/rastertek-direct3d-introduction 517/709
rotation +=(float)D3DX_PI * 0.005f;if(rotation >360.0f){
rotation -=360.0f;}
The position of the camera is set here also.
// Set the position of the camera.m_Camera->SetPosition(0.0f, 0.0f, -10.0f);
First we render the 3D scene to a texture so the glass shader will have a refraction texture as input.
// Render the scene to texture first.
result =RenderToTexture(rotation);if(!result){
return false;}
Then we render the scene again normally and render the glass over top of it with the perturbed and colored refraction texture rendered on the glass model.
// Render the scene.
result =Render(rotation);if(!result){
return false;}
return true;}
The RenderToTexture function just renders the 3D spinning cube scene to a texture.
29 of 34 3/8/2013 12:43 PM
bool GraphicsClass::RenderToTexture(float rotation){
D3DXMATRIX worldMatrix, viewMatrix, projectionMatrix;bool result;
// Set the render target to be the render to texture.m_RenderTexture->SetRenderTarget(m_D3D->GetDeviceContext(), m_D3D->GetDepthStencilView());
// Clear the render to texture.m_RenderTexture->ClearRenderTarget(m_D3D->GetDeviceContext(), m_D3D->GetDepthStencilView(), 0.0f, 0.0f, 0.0f, 1.0f);
// Generate the view matrix based on the camera's position
Tutorial 32: Glass and Ice http://www.rastertek.com/dx11tut32.html
7/14/2019 RasterTek: Direct3D introduction
http://slidepdf.com/reader/full/rastertek-direct3d-introduction 518/709
// Generate the view matrix based on the cameras position.m_Camera->Render();
// Get the world, view, and projection matrices from the camera and d3d objects.m_D3D->GetWorldMatrix(worldMatrix);
m_Camera->GetViewMatrix(viewMatrix);m_D3D->GetProjectionMatrix(projectionMatrix);
// Multiply the world matrix by the rotation.D3DXMatrixRotationY(&worldMatrix, rotation);
// Put the cube model vertex and index buffers on the graphics pipeline to prepare them for drawing.m_Model->Render(m_D3D->GetDeviceContext());
// Render the cube model using the texture shader.result =m_TextureShader->Render(m_D3D->GetDeviceContext(), m_Model->GetIndexCount(), worldMatrix, viewMatrix, projectionMatrix, m_Model->GetTexturif(!result){
return false;}
// Reset the render target back to the original back buffer and not the render to texture anymore.m_D3D->SetBackBufferRenderTarget();
return true;}
bool GraphicsClass::Render(float rotation){
D3DXMATRIX worldMatrix, viewMatrix, projectionMatrix;float refractionScale;
bool result;
30 of 34 3/8/2013 12:43 PM
First set the refraction scale to modify how much perturbation occurs in the glass.
// Set the refraction scale for the glass shader.refractionScale =0.01f;
// Clear the buffers to begin the scene.m_D3D->BeginScene(0.0f, 0.0f, 0.0f, 1.0f);
// Generate the view matrix based on the camera's position.m_Camera->Render();
// Get the world, view, and projection matrices from the camera and d3d objects.m D3D->GetWorldMatrix(worldMatrix);
Tutorial 32: Glass and Ice http://www.rastertek.com/dx11tut32.html
7/14/2019 RasterTek: Direct3D introduction
http://slidepdf.com/reader/full/rastertek-direct3d-introduction 519/709
m_D3D GetWorldMatrix(worldMatrix);m_Camera->GetViewMatrix(viewMatrix);m_D3D->GetProjectionMatrix(projectionMatrix);
Then render the 3D spinning cube scene as normal.
// Multiply the world matrix by the rotation.D3DXMatrixRotationY(&worldMatrix, rotation);
// Put the cube model vertex and index buffers on the graphics pipeline to prepare them for drawing.m_Model->Render(m_D3D->GetDeviceContext());
// Render the cube model using the texture shader.result =m_TextureShader->Render(m_D3D->GetDeviceContext(), m_Model->GetIndexCount(), worldMatrix, viewMatrix, projectionMatrix,
m_Model->GetTexture());if(!result){
return false;}
// Reset the world matrix.m_D3D->GetWorldMatrix(worldMatrix);
Now render the window model using the glass shader with the color texture, normal map, refraction render to texture, and refraction scale as input.
// Translate to back where the window model will be rendered.D3DXMatrixTranslation(&worldMatrix, 0.0f, 0.0f, -1.5f);
// Put the window model vertex and index buffers on the graphics pipeline to prepare them for drawing.m_WindowModel->Render(m_D3D->GetDeviceContext());
// Render the window model using the glass shader.
result =m_GlassShader->Render(m_D3D->GetDeviceContext(), m_WindowModel->GetIndexCount(), worldMatrix, viewMatrix, projectionMatrix,
31 of 34 3/8/2013 12:43 PM
m_WindowModel->GetTexture(), m_WindowModel->GetNormalMap(), m_RenderTexture->GetShaderResourceView(),refractionScale);
if(!result){
return false;}
// Present the rendered scene to the screen.
m_D3D->EndScene();
return true;}
Tutorial 32: Glass and Ice http://www.rastertek.com/dx11tut32.html

7/14/2019 RasterTek: Direct3D introduction
http://slidepdf.com/reader/full/rastertek-direct3d-introduction 520/709
Summary
We can now render both glass and ice effects through the use of refraction and a normal map for perturbation.
32 of 34 3/8/2013 12:43 PM
Tutorial 32: Glass and Ice http://www.rastertek.com/dx11tut32.html
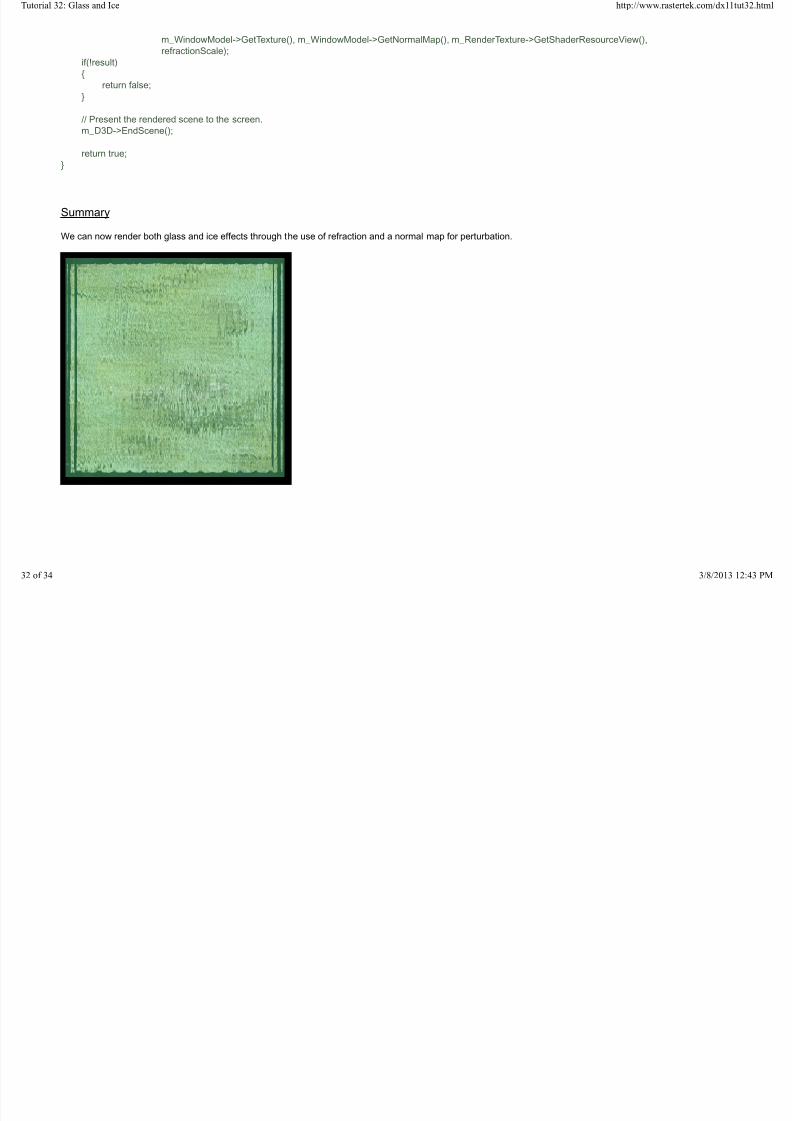
7/14/2019 RasterTek: Direct3D introduction
http://slidepdf.com/reader/full/rastertek-direct3d-introduction 521/709
33 of 34 3/8/2013 12:43 PM
To Do Exercises
1. Recompile and run the program. You should get a spinning cube behind green perturbed glass. Press escape to quit.
2. To see the ice effect change the following function in GraphicsClass::Initialize from:
result =m_WindowModel->Initialize(m_D3D->GetDevice(), "../Engine/data/square.txt", L"../Engine/data/glass01.dds", L"../Engine/data/bump03.dds");
To:
result =m WindowModel->Initialize(m D3D->GetDevice(), "../Engine/data/square.txt", L"../Engine/data/ice01.dds", L"../Engine/data/icebump01.dds");
Tutorial 32: Glass and Ice http://www.rastertek.com/dx11tut32.html

7/14/2019 RasterTek: Direct3D introduction
http://slidepdf.com/reader/full/rastertek-direct3d-introduction 522/709
result m_WindowModel >Initialize(m_D3D >GetDevice(), ../Engine/data/square.txt , L ../Engine/data/ice01.dds , L ../Engine/data/icebump01.dds );
And change the refractionScale to 0.1f and move the camera closer:
m_Camera->SetPosition(0.0f, 0.0f, -5.0f);
refractionScale =0.1f;
Now recompile and run the program with those three changes to see the ice effect.
3. Change the value of the refractionScale to see how it affects the perturbation.
4. Modify the combination of the color texture and the perturbed refraction texture in the pixel shader to get different output results.
5. Make your own glass color texture and normal map and get your own personal glass shader effect to work (also modify the refractionScale so it looks right for
your normal map).
Source Code
Visual Studio 2008 Project: dx11tut32.zip
Source Only: dx11src32.zip
Executable Only:dx11exe32.zip
Back to Tutorial Index
34 of 34 3/8/2013 12:43 PM
Tutorial 33: Fire
This tutorial will cover how to implement a fire shader in DirectX 11 using HLSL and C++. The code in this tutorial is based on the previous tutorials.
One of the most realistic ways to create a fire effect in DirectX is to use a noise texture and to perturb the sampling of that texture in the same way we have forwater, glass, and ice. The only major difference is in the manipulation of the noise texture and the specific way we perturb the texture coordinates.
First start with a grey scale noise texture such as follows:
Tutorial 33: Fire http://www.rastertek.com/dx11tut33.html

7/14/2019 RasterTek: Direct3D introduction
http://slidepdf.com/reader/full/rastertek-direct3d-introduction 523/709
These noise textures can be procedurally generated with several different graphics manipulation programs. The key is to produce one that has noise propertiesspecific to a good looking fire.
The second texture needed for fire effect will be a texture composed of fire colored noise and a flame outline. For example the following texture is composed of atexture that uses perlin noise with fire colors and a texture of a small flame. If you look closely at the middle bottom part of the texture you can see the umbra andpenumbra of the flame:
And finally you will need an alpha texture for transparency of the flame so that the final shape is very close to that of a small flame. This can be rough as theperturbation will take care of making it take shape of a good flame:
1 of 31 3/8/2013 12:42 PM
Now that we have the three textures required for the fire effect we can explain how the shader works. The first thing we do is take the noise texture and create threeseparate textures from it. The three separate textures are all based on the original noise texture except that they are scaled differently. These scales are calledoctaves as they are simply repeated tiles of the original noise texture to create numerous more detailed noise textures. The following three noise textures are scaled(tiled) by 1, 2, and 3:
Tutorial 33: Fire http://www.rastertek.com/dx11tut33.html

7/14/2019 RasterTek: Direct3D introduction
http://slidepdf.com/reader/full/rastertek-direct3d-introduction 524/709
We are also going to scroll all three noise textures upwards to create an upward moving noise which will correlate with a fire that burns upwards. The scroll speedwill be set differently for all three so that each moves at a different rate. We will eventually combine the three noise textures so having them move at different ratesadds dimension to the fire.
2 of 31 3/8/2013 12:42 PM

7/14/2019 RasterTek: Direct3D introduction
http://slidepdf.com/reader/full/rastertek-direct3d-introduction 525/709
To complete the effect we set the perturbed alpha value to be the alpha channel of the perturbed fire color texture and the blending takes care of the rest:
Tutorial 33: Fire http://www.rastertek.com/dx11tut33.html

7/14/2019 RasterTek: Direct3D introduction
http://slidepdf.com/reader/full/rastertek-direct3d-introduction 526/709
When you see this animated it looks very realistic.
Framework
The frame work has one new class called FireShaderClass which is just the TextureShaderClass updated for the fire effect.
4 of 31 3/8/2013 12:42 PM
We will start the code section by examining the HLSL fire shader.
Fire.vs
////////////////////////////////////////////////////////////////////////////////// Filename: fire.vs
////////////////////////////////////////////////////////////////////////////////
/////////////// GLOBALS ///////////////
Tutorial 33: Fire http://www.rastertek.com/dx11tut33.html

7/14/2019 RasterTek: Direct3D introduction
http://slidepdf.com/reader/full/rastertek-direct3d-introduction 527/709
/////////////cbuffer MatrixBuffer{
matrix worldMatrix;
matrix viewMatrix;matrix projectionMatrix;
};
For the vertex shader we create a new constant buffer that will contain the values needed for calculations each frame.
The first variable called frameTime is updated each frame so the shader has access to an incremental time that is used for scrolling the different noise textures. Thesecond variable scrollSpeeds is a 3 float array that contains three different scrolling speeds. The x value is the scroll speed for the first noise texture. The y value isthe scroll speed for the second noise texture. And the z value is the scroll speed for the third noise texture. The third variable scales is a 3 float array that contains
three different scales (or octaves) for the three different noise textures. The x, y, and z values of scales is generally set to 1, 2, and 3. This will make the first noisetexture a single tile. It also makes the second noise texture tiled twice in both directions. And finally it makes the third noise texture tiled three times in bothdirections.
The last variable is called padding. It is a single float that is used to make the NoiseBuffer a size that is divisible by 16. Padding will generally just be set to 0.0f.
cbuffer NoiseBuffer{
float frameTime;
float3 scrollSpeeds;float3 scales;float padding;
};
//////////////// TYPEDEFS ////////////////
5 of 31 3/8/2013 12:42 PM
struct VertexInputType{
float4 position : POSITION;float2 tex : TEXCOORD0;
};
The PixelInputType structure has been changed to take three different texture coordinates. We use it for sampling the same noise texture in three different ways tobasically create three different noise textures from one.
struct PixelInputType{
float4 position : SV_POSITION;float2 tex : TEXCOORD0;float2 texCoords1 : TEXCOORD1;
Tutorial 33: Fire http://www.rastertek.com/dx11tut33.html

7/14/2019 RasterTek: Direct3D introduction
http://slidepdf.com/reader/full/rastertek-direct3d-introduction 528/709
float2 texCoords2 : TEXCOORD2;float2 texCoords3 : TEXCOORD3;
};
////////////////////////////////////////////////////////////////////////////////// Vertex Shader////////////////////////////////////////////////////////////////////////////////PixelInputType FireVertexShader(VertexInputType input){
PixelInputType output;
// Change the position vector to be 4 units for proper matrix calculations.input.position.w =1.0f;
// Calculate the position of the vertex against the world, view, and projection matrices.output.position =mul(input.position, worldMatrix);output.position =mul(output.position, viewMatrix);output.position =mul(output.position, projectionMatrix);
// Store the texture coordinates for the pixel shader.output.tex =input.tex;
Here is where we create three different texture sampling values so that the same noise texture can be used to create three different noise textures. For each texturecoordinate we first scale it by the scale value which then tiles the texture a number of times depending on the value in the scales array. After that we scroll the threedifferent y coordinates upwards using the frame time and the value in the scrollSpeeds array. The scroll speed for all three will be different which gives the firedimension.
// Compute texture coordinates for first noise texture using the first scale and upward scrolling speed values.
output.texCoords1 =(input.tex * scales.x);
6 of 31 3/8/2013 12:42 PM
output.texCoords1.y =output.texCoords1.y +(frameTime * scrollSpeeds.x);
// Compute texture coordinates for second noise texture using the second scale and upward scrolling speed values.output.texCoords2 =(input.tex * scales.y);output.texCoords2.y =output.texCoords2.y +(frameTime * scrollSpeeds.y);
// Compute texture coordinates for third noise texture using the third scale and upward scrolling speed values.output.texCoords3 =(input.tex * scales.z);
output.texCoords3.y =output.texCoords3.y +(frameTime * scrollSpeeds.z);
return output;}
Tutorial 33: Fire http://www.rastertek.com/dx11tut33.html

7/14/2019 RasterTek: Direct3D introduction
http://slidepdf.com/reader/full/rastertek-direct3d-introduction 529/709
Fire.ps
////////////////////////////////////////////////////////////////////////////////// Filename: fire.ps////////////////////////////////////////////////////////////////////////////////
/////////////// GLOBALS ///////////////
The three textures for the fire effect are the fire color texture, the noise texture, and the alpha texture.
Texture2D fireTexture : register(t0); Texture2D noiseTexture : register(t1); Texture2D alphaTexture : register(t2);SamplerState SampleType;
We add a second sample state that uses Clamp. The Wrap used in the first sample state would cause the fire to wrap around which ruins the effect.
SamplerState SampleType2;
The pixel shader has a constant buffer called DistorionBuffer which contains the values needed by the pixel shader to create the fire effect. The three distortionarrays in the buffer contain a x and y value for distorting the three different noise textures by individual x and y parameters. The distortion scale and bias values inthe DistortionBuffer are used for perturbing the final combined noise texture to make it take the shape of a flame.
cbuffer DistortionBuffer{
float2 distortion1;
7 of 31 3/8/2013 12:42 PM
float2 distortion2;float2 distortion3;float distortionScale;float distortionBias;
};
//////////////// TYPEDEFS ////////////////struct PixelInputType{
float4 position : SV_POSITION;float2 tex : TEXCOORD0;fl 2 C d COO
Tutorial 33: Fire http://www.rastertek.com/dx11tut33.html

7/14/2019 RasterTek: Direct3D introduction
http://slidepdf.com/reader/full/rastertek-direct3d-introduction 530/709
float2 texCoords1 : TEXCOORD1;float2 texCoords2 : TEXCOORD2;float2 texCoords3 : TEXCOORD3;
};
////////////////////////////////////////////////////////////////////////////////// Pixel Shader////////////////////////////////////////////////////////////////////////////////float4 FirePixelShader(PixelInputType input) : SV_TARGET{
float4 noise1;
float4 noise2;float4 noise3;float4 finalNoise;float perturb;float2 noiseCoords;float4 fireColor;float4 alphaColor;
First create three different noise values by sampling the noise texture three different ways. Afterward move the texture pixel value into the (-1, +1) range.
// Sample the same noise texture using the three different texture coordinates to get three different noise scales.noise1 =noiseTexture.Sample(SampleType, input.texCoords1);noise2 =noiseTexture.Sample(SampleType, input.texCoords2);noise3 =noiseTexture.Sample(SampleType, input.texCoords3);
// Move the noise from the (0, 1) range to the (-1, +1) range.noise1 =(noise1 - 0.5f) * 2.0f;noise2 =(noise2 - 0.5f) * 2.0f;
noise3 =(noise3 - 0.5f) * 2.0f;
8 of 31 3/8/2013 12:42 PM
Now scale down the x and y sampling coordinates by the distortion amount. After they are distorted all three texture values are combined into a single value whichrepresents the final noise value for this pixel.
// Distort the three noise x and y coordinates by the three different distortion x and y values.noise1.xy =noise1.xy * distortion1.xy;noise2.xy =noise2.xy * distortion2.xy;noise3.xy =noise3.xy * distortion3.xy;
// Combine all three distorted noise results into a single noise result.finalNoise =noise1 +noise2 +noise3;
We now perturb the final noise result to create a fire look to the overall noise texture. Note that we perturb it more at the top and less as it moves to the bottom. Thiscreates a flickering flame at the top and as it progresses downwards it creates a more solid flame base.
// P t bth i t t t Y di t b th di t ti l d bi l
Tutorial 33: Fire http://www.rastertek.com/dx11tut33.html

7/14/2019 RasterTek: Direct3D introduction
http://slidepdf.com/reader/full/rastertek-direct3d-introduction 531/709
// Perturb the input texture Y coordinates by the distortion scale and bias values.// The perturbation gets stronger as you move up the texture which creates the flame flickering at the top effect.perturb =((1.0f - input.tex.y) * distortionScale) +distortionBias;
// Now create the perturbed and distorted texture sampling coordinates that will be used to sample the fire color texture.noiseCoords.xy =(finalNoise.xy * perturb) +input.tex.xy;
Sample both the fire color texture and the alpha texture by the perturbed noise sampling coordinates to create the fire effect.
// Sample the color from the fire texture using the perturbed and distorted texture sampling coordinates.// Use the clamping sample state instead of the wrap sample state to prevent flames wrapping around.fireColor =fireTexture.Sample(SampleType2, noiseCoords.xy);
// Sample the alpha value from the alpha texture using the perturbed and distorted texture sampling coordinates.// This will be used for transparency of the fire.// Use the clamping sample state instead of the wrap sample state to prevent flames wrapping around.alphaColor =alphaTexture.Sample(SampleType2, noiseCoords.xy);
Combine the alpha and the fire color to create the transparent blended final fire effect.
// Set the alpha blending of the fire to the perturbed and distored alpha texture value.
fireColor.a =alphaColor;
return fireColor;}
Fireshaderclass.h
9 of 31 3/8/2013 12:42 PM
The FireShaderClass is just the TextureShaderClass modified for the fire effect.
////////////////////////////////////////////////////////////////////////////////// Filename: fireshaderclass.h////////////////////////////////////////////////////////////////////////////////#ifndef _FIRESHADERCLASS_H_ #define _FIRESHADERCLASS_H_
//////////////// INCLUDES ////////////////#include <d3d11.h>#include <d3dx10math.h>#include <d3dx11asynch>
Tutorial 33: Fire http://www.rastertek.com/dx11tut33.html
7/14/2019 RasterTek: Direct3D introduction
http://slidepdf.com/reader/full/rastertek-direct3d-introduction 532/709
#include <d3dx11async.h>#include <fstream>using namespace std;
////////////////////////////////////////////////////////////////////////////////// Class name: FireShaderClass////////////////////////////////////////////////////////////////////////////////class FireShaderClass{private:
struct MatrixBufferType
{ D3DXMATRIX world;D3DXMATRIX view;D3DXMATRIX projection;
};
The vertex shader has a constant buffer with variables for calculating noise so we need to create a structure that mirrors it so that we can set those values. Thisstructure contains the frame speed, the three different scroll speeds, and the three different noise scales. The structure also has a padding variable that is used tomake the structure a multiple of 16 which is a requirement for when the noise buffer is created.
struct NoiseBufferType{
float frameTime;D3DXVECTOR3 scrollSpeeds;D3DXVECTOR3 scales;float padding;
};
The pixel shader also has a constant buffer with variables used for distorting the noise values to create the fire effect. This new structure is used in conjunction with
10 of 31 3/8/2013 12:42 PM
a buffer to set the values in the pixel shader. The structure contains the three distortion arrays and the distortion scale and bias.
struct DistortionBufferType{
D3DXVECTOR2 distortion1;D3DXVECTOR2 distortion2;D3DXVECTOR2 distortion3;float distortionScale;float distortionBias;
};
public:FireShaderClass();FireShaderClass(const FireShaderClass&);~FireShaderClass();
Tutorial 33: Fire http://www.rastertek.com/dx11tut33.html

7/14/2019 RasterTek: Direct3D introduction
http://slidepdf.com/reader/full/rastertek-direct3d-introduction 533/709
~FireShaderClass();
bool Initialize(ID3D11Device*, HWND);void Shutdown();bool Render(ID3D11DeviceContext*, int, D3DXMATRIX, D3DXMATRIX, D3DXMATRIX, ID3D11ShaderResourceView*, ID3D11ShaderResourceView*,
ID3D11ShaderResourceView*, float, D3DXVECTOR3, D3DXVECTOR3, D3DXVECTOR2, D3DXVECTOR2, D3DXVECTOR2, float, float);
private:bool InitializeShader(ID3D11Device*, HWND, WCHAR*, WCHAR*);void ShutdownShader();void OutputShaderErrorMessage(ID3D10Blob*, HWND, WCHAR*);
bool SetShaderParameters(ID3D11DeviceContext*, D3DXMATRIX, D3DXMATRIX, D3DXMATRIX, ID3D11ShaderResourceView*,ID3D11ShaderResourceView*, ID3D11ShaderResourceView*, float, D3DXVECTOR3, D3DXVECTOR3, D3DXVECTOR2,D3DXVECTOR2, D3DXVECTOR2, float, float);
void RenderShader(ID3D11DeviceContext*, int);
private:ID3D11VertexShader* m_vertexShader;ID3D11PixelShader* m_pixelShader;ID3D11InputLayout* m_layout;
ID3D11Buffer* m_matrixBuffer;
We have a new buffer for the noise constant buffer in the vertex shader.
ID3D11Buffer* m_noiseBuffer;ID3D11SamplerState* m_sampleState;
There is a new sampler state which will use Clamp instead of Wrap for the fire effect.
ID3D11SamplerState* m_sampleState2;
11 of 31 3/8/2013 12:42 PM
Also there is a new distortion buffer for the distortion constant buffer in the pixel shader.
ID3D11Buffer* m_distortionBuffer;};
#endif
Fireshaderclass.cpp
////////////////////////////////////////////////////////////////////////////////// Filename: fireshaderclass.cpp////////////////////////////////////////////////////////////////////////////////#include "fireshaderclass h"
Tutorial 33: Fire http://www.rastertek.com/dx11tut33.html

7/14/2019 RasterTek: Direct3D introduction
http://slidepdf.com/reader/full/rastertek-direct3d-introduction 534/709
#include fireshaderclass.h
All the private pointers in the class are initialized to null in the class constructor.
FireShaderClass::FireShaderClass(){
m_vertexShader =0;m_pixelShader =0;m_layout =0;m_matrixBuffer =0;m_noiseBuffer =0;m_sampleState =0;
m_sampleState2 =0;m_distortionBuffer =0;
}
FireShaderClass::FireShaderClass(const FireShaderClass& other){}
FireShaderClass::~FireShaderClass(){}
bool FireShaderClass::Initialize(ID3D11Device* device, HWND hwnd){
bool result;
12 of 31 3/8/2013 12:42 PM
The fire.vs and fire.ps HLSL files are loaded here.
// Initialize the vertex and pixel shaders.result =InitializeShader(device, hwnd, L"../Engine/fire.vs", L"../Engine/fire.ps");if(!result){
return false;}
return true;}
void FireShaderClass::Shutdown(){
Tutorial 33: Fire http://www.rastertek.com/dx11tut33.html

7/14/2019 RasterTek: Direct3D introduction
http://slidepdf.com/reader/full/rastertek-direct3d-introduction 535/709
{// Shutdown the vertex and pixel shaders as well as the related objects.ShutdownShader();
return;}
The Render function takes in all the numerous input variables that are used to render and tweak the look of the fire. They are first set in the shader using theSetShaderParameters function. Once all the values are set the shader is used for rendering by then calling the RenderShader function.
bool FireShaderClass::Render(ID3D11DeviceContext* deviceContext, int indexCount, D3DXMATRIX worldMatrix, D3DXMATRIX viewMatrix,D3DXMATRIX projectionMatrix, ID3D11ShaderResourceView* fireTexture,ID3D11ShaderResourceView* noiseTexture, ID3D11ShaderResourceView* alphaTexture, float frameTime,D3DXVECTOR3 scrollSpeeds, D3DXVECTOR3 scales, D3DXVECTOR2 distortion1, D3DXVECTOR2 distortion2,D3DXVECTOR2 distortion3, float distortionScale, float distortionBias)
{bool result;
// Set the shader parameters that it will use for rendering.result =SetShaderParameters(deviceContext, worldMatrix, viewMatrix, projectionMatrix, fireTexture, noiseTexture, alphaTexture,
frameTime, scrollSpeeds, scales, distortion1, distortion2, distortion3, distortionScale,distortionBias);if(!result){
return false;}
// Now render the prepared buffers with the shader.RenderShader(deviceContext, indexCount);
13 of 31 3/8/2013 12:42 PM
return true;}
bool FireShaderClass::InitializeShader(ID3D11Device* device, HWND hwnd, WCHAR* vsFilename, WCHAR* psFilename){
HRESULT result;ID3D10Blob* errorMessage;ID3D10Blob* vertexShaderBuffer;ID3D10Blob* pixelShaderBuffer;D3D11_INPUT_ELEMENT_DESC polygonLayout[2];unsigned int numElements;D3D11_BUFFER_DESC matrixBufferDesc;D3D11_BUFFER_DESC noiseBufferDesc;D3D11_SAMPLER_DESC samplerDesc;
Tutorial 33: Fire http://www.rastertek.com/dx11tut33.html

7/14/2019 RasterTek: Direct3D introduction
http://slidepdf.com/reader/full/rastertek-direct3d-introduction 536/709
_ _D3D11_SAMPLER_DESC samplerDesc2;D3D11_BUFFER_DESC distortionBufferDesc;
// Initialize the pointers this function will use to null.errorMessage =0;vertexShaderBuffer =0;pixelShaderBuffer =0;
Load the fire vertex shader.
// Compile the vertex shader code.result =D3DX11CompileFromFile(vsFilename, NULL, NULL, "FireVertexShader", "vs_5_0", D3D10_SHADER_ENABLE_STRICTNESS, 0, NULL,
&vertexShaderBuffer, &errorMessage, NULL);if(FAILED(result)){
// If the shader failed to compile it should have writen something to the error message.if(errorMessage){
OutputShaderErrorMessage(errorMessage, hwnd, vsFilename);}// If there was nothing in the error message then it simply could not find the shader file itself.else{
MessageBox(hwnd, vsFilename, L"Missing Shader File", MB_OK);}
return false;}
14 of 31 3/8/2013 12:42 PM
Load the fire pixel shader.
// Compile the pixel shader code.result =D3DX11CompileFromFile(psFilename, NULL, NULL, "FirePixelShader", "ps_5_0", D3D10_SHADER_ENABLE_STRICTNESS, 0, NULL,
&pixelShaderBuffer, &errorMessage, NULL);if(FAILED(result)){
// If the shader failed to compile it should have writen something to the error message.if(errorMessage){
OutputShaderErrorMessage(errorMessage, hwnd, psFilename);}// If there was nothing in the error message then it simply could not find the file itself.else{
Tutorial 33: Fire http://www.rastertek.com/dx11tut33.html

7/14/2019 RasterTek: Direct3D introduction
http://slidepdf.com/reader/full/rastertek-direct3d-introduction 537/709
MessageBox(hwnd, psFilename, L"Missing Shader File", MB_OK);}
return false;}
// Create the vertex shader from the buffer.result =device->CreateVertexShader(vertexShaderBuffer->GetBufferPointer(), vertexShaderBuffer->GetBufferSize(), NULL,
&m_vertexShader);if(FAILED(result)){
return false;}
// Create the vertex shader from the buffer.result =device->CreatePixelShader(pixelShaderBuffer->GetBufferPointer(), pixelShaderBuffer->GetBufferSize(), NULL,
&m_pixelShader);if(FAILED(result)){
return false;}
// Create the vertex input layout description.// This setup needs to match the VertexType stucture in the ModelClass and in the shader.polygonLayout[0].SemanticName ="POSITION";polygonLayout[0].SemanticIndex =0;polygonLayout[0].Format =DXGI_FORMAT_R32G32B32_FLOAT;polygonLayout[0].InputSlot =0;polygonLayout[0].AlignedByteOffset =0;
polygonLayout[0].InputSlotClass =D3D11_INPUT_PER_VERTEX_DATA;
15 of 31 3/8/2013 12:42 PM
polygonLayout[0].InstanceDataStepRate =0;
polygonLayout[1].SemanticName ="TEXCOORD";polygonLayout[1].SemanticIndex =0;polygonLayout[1].Format =DXGI_FORMAT_R32G32_FLOAT;polygonLayout[1].InputSlot =0;polygonLayout[1].AlignedByteOffset =D3D11_APPEND_ALIGNED_ELEMENT;polygonLayout[1].InputSlotClass =D3D11_INPUT_PER_VERTEX_DATA;polygonLayout[1].InstanceDataStepRate =0;
// Get a count of the elements in the layout.numElements =sizeof(polygonLayout) / sizeof(polygonLayout[0]);
// Create the vertex input layout.result =device->CreateInputLayout(polygonLayout, numElements, vertexShaderBuffer->GetBufferPointer(),
t Sh d B ff G tB ff Si () & l t)
Tutorial 33: Fire http://www.rastertek.com/dx11tut33.html

7/14/2019 RasterTek: Direct3D introduction
http://slidepdf.com/reader/full/rastertek-direct3d-introduction 538/709
vertexShaderBuffer->GetBufferSize(), &m_layout);if(FAILED(result)){
return false;}
// Release the vertex shader buffer and pixel shader buffer since they are no longer needed.vertexShaderBuffer->Release();vertexShaderBuffer =0;
pixelShaderBuffer->Release();pixelShaderBuffer =0;
// Setup the description of the dynamic matrix constant buffer that is in the vertex shader.matrixBufferDesc.Usage =D3D11_USAGE_DYNAMIC;matrixBufferDesc.ByteWidth =sizeof(MatrixBufferType);matrixBufferDesc.BindFlags =D3D11_BIND_CONSTANT_BUFFER;matrixBufferDesc.CPUAccessFlags =D3D11_CPU_ACCESS_WRITE;matrixBufferDesc.MiscFlags =0;matrixBufferDesc.StructureByteStride =0;
// Create the matrix buffer pointer so we can access the vertex shader constant buffer from within this class.result =device->CreateBuffer(&matrixBufferDesc, NULL, &m_matrixBuffer);if(FAILED(result)){
return false;}
Setup and create the new noise buffer.
16 of 31 3/8/2013 12:42 PM
// Setup the description of the dynamic noise constant buffer that is in the vertex shader.noiseBufferDesc.Usage =D3D11_USAGE_DYNAMIC;noiseBufferDesc.ByteWidth =sizeof(NoiseBufferType);noiseBufferDesc.BindFlags =D3D11_BIND_CONSTANT_BUFFER;noiseBufferDesc.CPUAccessFlags =D3D11_CPU_ACCESS_WRITE;noiseBufferDesc.MiscFlags =0;noiseBufferDesc.StructureByteStride =0;
// Create the noise buffer pointer so we can access the vertex shader constant buffer from within this class.
result =device->CreateBuffer(&noiseBufferDesc, NULL, &m_noiseBuffer);if(FAILED(result)){
return false;}
// Create a texture sampler state description
Tutorial 33: Fire http://www.rastertek.com/dx11tut33.html

7/14/2019 RasterTek: Direct3D introduction
http://slidepdf.com/reader/full/rastertek-direct3d-introduction 539/709
// Create a texture sampler state description.samplerDesc.Filter =D3D11_FILTER_MIN_MAG_MIP_LINEAR;samplerDesc.AddressU =D3D11_TEXTURE_ADDRESS_WRAP;samplerDesc.AddressV =D3D11_TEXTURE_ADDRESS_WRAP;samplerDesc.AddressW =D3D11_TEXTURE_ADDRESS_WRAP;samplerDesc.MipLODBias =0.0f;samplerDesc.MaxAnisotropy =1;samplerDesc.ComparisonFunc =D3D11_COMPARISON_ALWAYS;samplerDesc.BorderColor[0] =0;samplerDesc.BorderColor[1] =0;samplerDesc.BorderColor[2] =0;samplerDesc.BorderColor[3] =0;samplerDesc.MinLOD =0;samplerDesc.MaxLOD =D3D11_FLOAT32_MAX;
// Create the texture sampler state.result =device->CreateSamplerState(&samplerDesc, &m_sampleState);if(FAILED(result)){
return false;}
Setup and create the new sampler state that uses CLAMP instead of WRAP.
// Create a second texture sampler state description for a Clamp sampler.samplerDesc2.Filter =D3D11_FILTER_MIN_MAG_MIP_LINEAR;samplerDesc2.AddressU =D3D11_TEXTURE_ADDRESS_CLAMP;samplerDesc2.AddressV =D3D11_TEXTURE_ADDRESS_CLAMP;samplerDesc2.AddressW =D3D11_TEXTURE_ADDRESS_CLAMP;samplerDesc2.MipLODBias =0.0f;
17 of 31 3/8/2013 12:42 PM
samplerDesc2.MaxAnisotropy =1;samplerDesc2.ComparisonFunc =D3D11_COMPARISON_ALWAYS;samplerDesc2.BorderColor[0] =0;samplerDesc2.BorderColor[1] =0;samplerDesc2.BorderColor[2] =0;samplerDesc2.BorderColor[3] =0;samplerDesc2.MinLOD =0;samplerDesc2.MaxLOD =D3D11_FLOAT32_MAX;
// Create the texture sampler state.result =device->CreateSamplerState(&samplerDesc2, &m_sampleState2);if(FAILED(result)){
return false;}
Tutorial 33: Fire http://www.rastertek.com/dx11tut33.html

7/14/2019 RasterTek: Direct3D introduction
http://slidepdf.com/reader/full/rastertek-direct3d-introduction 540/709
Setup and create the new distortion buffer.
// Setup the description of the dynamic distortion constant buffer that is in the pixel shader.distortionBufferDesc.Usage =D3D11_USAGE_DYNAMIC;distortionBufferDesc.ByteWidth =sizeof(DistortionBufferType);distortionBufferDesc.BindFlags =D3D11_BIND_CONSTANT_BUFFER;distortionBufferDesc.CPUAccessFlags =D3D11_CPU_ACCESS_WRITE;distortionBufferDesc.MiscFlags =0;distortionBufferDesc.StructureByteStride =0;
// Create the distortion buffer pointer so we can access the pixel shader constant buffer from within this class.result =device->CreateBuffer(&distortionBufferDesc, NULL, &m_distortionBuffer);if(FAILED(result)){
return false;}
return true;}
void FireShaderClass::ShutdownShader(){
The ShutdownShader function releases all the pointers that were used to access values inside the fire shader.
// Release the distortion constant buffer.if(m_distortionBuffer){
18 of 31 3/8/2013 12:42 PM
m_distortionBuffer->Release();m_distortionBuffer =0;
}
// Release the second sampler state.if(m_sampleState2){
m_sampleState2->Release();m_sampleState2 =0;
}
// Release the sampler state.if(m_sampleState){
m_sampleState->Release();m sampleState =0;
Tutorial 33: Fire http://www.rastertek.com/dx11tut33.html
7/14/2019 RasterTek: Direct3D introduction
http://slidepdf.com/reader/full/rastertek-direct3d-introduction 541/709
m_sampleState =0;}
// Release the noise constant buffer.if(m_noiseBuffer){
m_noiseBuffer->Release();m_noiseBuffer =0;
}
// Release the matrix constant buffer.if(m_matrixBuffer){
m_matrixBuffer->Release();m_matrixBuffer =0;
}
// Release the layout.if(m_layout){
m_layout->Release();m_layout =0;
}
// Release the pixel shader.if(m_pixelShader){
m_pixelShader->Release();m_pixelShader =0;
}
19 of 31 3/8/2013 12:42 PM
// Release the vertex shader.if(m_vertexShader){
m_vertexShader->Release();m_vertexShader =0;
}
return;
}
void FireShaderClass::OutputShaderErrorMessage(ID3D10Blob* errorMessage, HWND hwnd, WCHAR* shaderFilename){
char* compileErrors;unsigned long bufferSize, i;
Tutorial 33: Fire http://www.rastertek.com/dx11tut33.html

7/14/2019 RasterTek: Direct3D introduction
http://slidepdf.com/reader/full/rastertek-direct3d-introduction 542/709
unsigned long bufferSize, i;ofstream fout;
// Get a pointer to the error message text buffer.compileErrors =(char*)(errorMessage->GetBufferPointer());
// Get the length of the message.bufferSize =errorMessage->GetBufferSize();
// Open a file to write the error message to.fout.open("shader-error.txt");
// Write out the error message.for(i=0; i<bufferSize; i++){
fout <<compileErrors[i];}
// Close the file.fout.close();
// Release the error message.errorMessage->Release();errorMessage =0;
// Pop a message up on the screen to notify the user to check the text file for compile errors.MessageBox(hwnd, L"Error compiling shader. Check shader-error.txt for message.", shaderFilename, MB_OK);
return;
20 of 31 3/8/2013 12:42 PM
}
bool FireShaderClass::SetShaderParameters(ID3D11DeviceContext* deviceContext, D3DXMATRIX worldMatrix, D3DXMATRIX viewMatrix,D3DXMATRIX projectionMatrix, ID3D11ShaderResourceView* fireTexture,ID3D11ShaderResourceView* noiseTexture, ID3D11ShaderResourceView* alphaTexture,float frameTime, D3DXVECTOR3 scrollSpeeds, D3DXVECTOR3 scales, D3DXVECTOR2 distortion1,D3DXVECTOR2 distortion2, D3DXVECTOR2 distortion3, float distortionScale,float distortionBias)
{HRESULT result;D3D11_MAPPED_SUBRESOURCE mappedResource;MatrixBufferType* dataPtr;NoiseBufferType* dataPtr2;DistortionBufferType* dataPtr3;unsigned int bufferNumber;
Tutorial 33: Fire http://www.rastertek.com/dx11tut33.html

7/14/2019 RasterTek: Direct3D introduction
http://slidepdf.com/reader/full/rastertek-direct3d-introduction 543/709
g ;
// Transpose the matrices to prepare them for the shader.D3DXMatrixTranspose(&worldMatrix, &worldMatrix);D3DXMatrixTranspose(&viewMatrix, &viewMatrix);D3DXMatrixTranspose(&projectionMatrix, &projectionMatrix);
Set the matrix buffer in the vertex shader as usual.
// Lock the matrix constant buffer so it can be written to.result =deviceContext->Map(m_matrixBuffer, 0, D3D11_MAP_WRITE_DISCARD, 0, &mappedResource);
if(FAILED(result)){
return false;}
// Get a pointer to the data in the matrix constant buffer.dataPtr =(MatrixBufferType*)mappedResource.pData;
// Copy the matrices into the matrix constant buffer.dataPtr->world =worldMatrix;dataPtr->view =viewMatrix;dataPtr->projection =projectionMatrix;
// Unlock the matrix constant buffer.deviceContext->Unmap(m_matrixBuffer, 0);
// Set the position of the matrix constant buffer in the vertex shader.bufferNumber =0;
21 of 31 3/8/2013 12:42 PM
// Now set the matrix constant buffer in the vertex shader with the updated values.deviceContext->VSSetConstantBuffers(bufferNumber, 1, &m_matrixBuffer);
Set the new noise buffer in the vertex shader.
// Lock the noise constant buffer so it can be written to.result =deviceContext->Map(m_noiseBuffer, 0, D3D11_MAP_WRITE_DISCARD, 0, &mappedResource);if(FAILED(result))
{return false;
}
// Get a pointer to the data in the noise constant buffer.dataPtr2 =(NoiseBufferType*)mappedResource.pData;
Tutorial 33: Fire http://www.rastertek.com/dx11tut33.html

7/14/2019 RasterTek: Direct3D introduction
http://slidepdf.com/reader/full/rastertek-direct3d-introduction 544/709
// Copy the data into the noise constant buffer.dataPtr2->frameTime =frameTime;
dataPtr2->scrollSpeeds =scrollSpeeds;dataPtr2->scales =scales;dataPtr2->padding =0.0f;
// Unlock the noise constant buffer.deviceContext->Unmap(m_noiseBuffer, 0);
// Set the position of the noise constant buffer in the vertex shader.bufferNumber =1;
// Now set the noise constant buffer in the vertex shader with the updated values.deviceContext->VSSetConstantBuffers(bufferNumber, 1, &m_noiseBuffer);
Set the three textures in the pixel shader.
// Set the three shader texture resources in the pixel shader.deviceContext->PSSetShaderResources(0, 1, &fireTexture);deviceContext->PSSetShaderResources(1, 1, &noiseTexture);deviceContext->PSSetShaderResources(2, 1, &alphaTexture);
Set the new distortion buffer in the pixel shader.
// Lock the distortion constant buffer so it can be written to.result =deviceContext->Map(m_distortionBuffer, 0, D3D11_MAP_WRITE_DISCARD, 0, &mappedResource);if(FAILED(result)){
return false;
22 of 31 3/8/2013 12:42 PM
}
// Get a pointer to the data in the distortion constant buffer.dataPtr3 =(DistortionBufferType*)mappedResource.pData;
// Copy the data into the distortion constant buffer.dataPtr3->distortion1 =distortion1;dataPtr3->distortion2 =distortion2;dataPtr3->distortion3 =distortion3;
dataPtr3->distortionScale =distortionScale;dataPtr3->distortionBias =distortionBias;
// Unlock the distortion constant buffer.deviceContext->Unmap(m_distortionBuffer, 0);
// Set the position of the distortion constant buffer in the pixel shader.
Tutorial 33: Fire http://www.rastertek.com/dx11tut33.html

7/14/2019 RasterTek: Direct3D introduction
http://slidepdf.com/reader/full/rastertek-direct3d-introduction 545/709
bufferNumber =0;
// Now set the distortion constant buffer in the pixel shader with the updated values.deviceContext->PSSetConstantBuffers(bufferNumber, 1, &m_distortionBuffer);
return true;}
void FireShaderClass::RenderShader(ID3D11DeviceContext* deviceContext, int indexCount){
// Set the vertex input layout.deviceContext->IASetInputLayout(m_layout);
// Set the vertex and pixel shaders that will be used to render this triangle.deviceContext->VSSetShader(m_vertexShader, NULL, 0);deviceContext->PSSetShader(m_pixelShader, NULL, 0);
// Set the sampler states in the pixel shader.deviceContext->PSSetSamplers(0, 1, &m_sampleState);
Set the new sampler state that use CLAMP in the pixel shader.
deviceContext->PSSetSamplers(1, 1, &m_sampleState2);
// Render the triangle.deviceContext->DrawIndexed(indexCount, 0, 0);
return;
23 of 31 3/8/2013 12:42 PM
}
Graphicsclass.h
////////////////////////////////////////////////////////////////////////////////// Filename: graphicsclass.h////////////////////////////////////////////////////////////////////////////////#ifndef _GRAPHICSCLASS_H_ #define _GRAPHICSCLASS_H_
/////////////// GLOBALS ///////////////
Tutorial 33: Fire http://www.rastertek.com/dx11tut33.html

7/14/2019 RasterTek: Direct3D introduction
http://slidepdf.com/reader/full/rastertek-direct3d-introduction 546/709
const bool FULL_SCREEN =true;const bool VSYNC_ENABLED =true;const float SCREEN_DEPTH =1000.0f;const float SCREEN_NEAR =0.1f;
///////////////////////// MY CLASS INCLUDES /////////////////////////#include "d3dclass.h"#include "cameraclass.h"#include "modelclass.h"
We add the header for the new FireShaderClass.
#include "fireshaderclass.h"
////////////////////////////////////////////////////////////////////////////////
// Class name: GraphicsClass////////////////////////////////////////////////////////////////////////////////class GraphicsClass{public:
GraphicsClass();GraphicsClass(const GraphicsClass&);~GraphicsClass();
24 of 31 3/8/2013 12:42 PM
bool Initialize(int, int, HWND);void Shutdown();bool Frame();
private:bool Render();
private:D3DClass* m_D3D;
CameraClass* m_Camera;ModelClass* m_Model;
The private FireShaderClass object is added here also.
FireShaderClass* m_FireShader;};
Tutorial 33: Fire http://www.rastertek.com/dx11tut33.html

7/14/2019 RasterTek: Direct3D introduction
http://slidepdf.com/reader/full/rastertek-direct3d-introduction 547/709
#endif
Graphicsclass.cpp
////////////////////////////////////////////////////////////////////////////////// Filename: graphicsclass.cpp////////////////////////////////////////////////////////////////////////////////#include "graphicsclass.h"
GraphicsClass::GraphicsClass(){
m_D3D =0;m_Camera =0;m_Model =0;
Initialize the new fire shader object to null in the class constructor.
m_FireShader =0;}
GraphicsClass::GraphicsClass(const GraphicsClass& other){}
25 of 31 3/8/2013 12:42 PM
GraphicsClass::~GraphicsClass(){}
bool GraphicsClass::Initialize(int screenWidth, int screenHeight, HWND hwnd){
bool result;
// Create the Direct3D object.m_D3D =new D3DClass;if(!m_D3D){
return false;
Tutorial 33: Fire http://www.rastertek.com/dx11tut33.html

7/14/2019 RasterTek: Direct3D introduction
http://slidepdf.com/reader/full/rastertek-direct3d-introduction 548/709
return false;}
// Initialize the Direct3D object.result =m_D3D->Initialize(screenWidth, screenHeight, VSYNC_ENABLED, hwnd, FULL_SCREEN, SCREEN_DEPTH, SCREEN_NEAR);if(!result){
MessageBox(hwnd, L"Could not initialize Direct3D.", L"Error", MB_OK);return false;
}
// Create the camera object.m_Camera =new CameraClass;if(!m_Camera){
return false;}
// Create the model object.m_Model =new ModelClass;
if(!m_Model){
return false;}
Load a square model for the fire. Also load the three textures that will be used to create the fire effect for this model.
// Initialize the model object.result =m_Model->Initialize(m_D3D->GetDevice(), "../Engine/data/square.txt", L"../Engine/data/fire01.dds",
26 of 31 3/8/2013 12:42 PM
L"../Engine/data/noise01.dds", L"../Engine/data/alpha01.dds");if(!result){
MessageBox(hwnd, L"Could not initialize the model object.", L"Error", MB_OK);return false;
}
Create and initialize the new fire shader object.
// Create the fire shader object.m_FireShader =new FireShaderClass;if(!m_FireShader){
return false;}
// Initialize the fire shader object
Tutorial 33: Fire http://www.rastertek.com/dx11tut33.html

7/14/2019 RasterTek: Direct3D introduction
http://slidepdf.com/reader/full/rastertek-direct3d-introduction 549/709
// Initialize the fire shader object.result =m_FireShader->Initialize(m_D3D->GetDevice(), hwnd);
if(!result){
MessageBox(hwnd, L"Could not initialize the fire shader object.", L"Error", MB_OK);return false;
}
return true;}
void GraphicsClass::Shutdown(){
Shutdown and release the new fire shader object in the Shutdown function.
// Release the fire shader object.if(m_FireShader){
m_FireShader->Shutdown();delete m_FireShader;m_FireShader =0;
}
// Release the model object.if(m_Model){
m_Model->Shutdown();
27 of 31 3/8/2013 12:42 PM
delete m_Model;m_Model =0;
}
// Release the camera object.if(m_Camera){
delete m_Camera;m_Camera =0;
}
// Release the Direct3D object.if(m_D3D){
m_D3D->Shutdown();delete m_D3D;m D3D =0;
Tutorial 33: Fire http://www.rastertek.com/dx11tut33.html

7/14/2019 RasterTek: Direct3D introduction
http://slidepdf.com/reader/full/rastertek-direct3d-introduction 550/709
m_D3D 0;}
return;}
bool GraphicsClass::Frame(){
bool result;
// Set the position of the camera.m_Camera->SetPosition(0.0f, 0.0f, -10.0f);
// Render the scene.result =Render();if(!result){
return false;
}
return true;}
bool GraphicsClass::Render(){
D3DXMATRIX worldMatrix, viewMatrix, projectionMatrix;
28 of 31 3/8/2013 12:42 PM
bool result;D3DXVECTOR3 scrollSpeeds, scales;D3DXVECTOR2 distortion1, distortion2, distortion3;float distortionScale, distortionBias;static float frameTime =0.0f;
Each frame increment the time. This is used to scroll the three different noise textures in the shader. Note that if you don't lock the FPS to 60 then you will need todetermine the difference of time each frame and update a timer to keep the fire burning at a consistent speed regardless of the FPS.
// Increment the frame time counter.frameTime +=0.01f;if(frameTime >1000.0f){
frameTime =0.0f;}
Set the three scroll speeds, scales, and distortion values for the three different noise textures.
Tutorial 33: Fire http://www.rastertek.com/dx11tut33.html

7/14/2019 RasterTek: Direct3D introduction
http://slidepdf.com/reader/full/rastertek-direct3d-introduction 551/709
p
// Set the three scrolling speeds for the three different noise textures.scrollSpeeds =D3DXVECTOR3(1.3f, 2.1f, 2.3f);
// Set the three scales which will be used to create the three different noise octave textures.scales =D3DXVECTOR3(1.0f, 2.0f, 3.0f);
// Set the three different x and y distortion factors for the three different noise textures.distortion1 =D3DXVECTOR2(0.1f, 0.2f);distortion2 =D3DXVECTOR2(0.1f, 0.3f);
distortion3 =D3DXVECTOR2(0.1f, 0.1f);
Set the bias and scale that are used for perturbing the noise texture into a flame form.
// The the scale and bias of the texture coordinate sampling perturbation.distortionScale =0.8f;distortionBias =0.5f;
// Clear the buffers to begin the scene.
m_D3D->BeginScene(0.0f, 0.0f, 0.0f, 1.0f);
// Generate the view matrix based on the camera's position.m_Camera->Render();
// Get the world, view, and projection matrices from the camera and d3d objects.m_D3D->GetWorldMatrix(worldMatrix);m_Camera->GetViewMatrix(viewMatrix);m_D3D->GetProjectionMatrix(projectionMatrix);
29 of 31 3/8/2013 12:42 PM
This shader requires blending as we use a perturbed alpha texture for sampling and creating see through parts of the final fire effect.
// Turn on alpha blending for the fire transparency.m_D3D->TurnOnAlphaBlending();
Put the square model on the graphics pipeline.
// Put the square model vertex and index buffers on the graphics pipeline to prepare them for drawing.m_Model->Render(m_D3D->GetDeviceContext());
Render the square model using the flame shader.
// Render the square model using the fire shader.result =m_FireShader->Render(m_D3D->GetDeviceContext(), m_Model->GetIndexCount(), worldMatrix, viewMatrix, projectionMatrix,
m_Model->GetTexture1(), m_Model->GetTexture2(), m_Model->GetTexture3(), frameTime, scrollSpeeds,scales, distortion1, distortion2, distortion3, distortionScale, distortionBias);
if(!result)
Tutorial 33: Fire http://www.rastertek.com/dx11tut33.html

7/14/2019 RasterTek: Direct3D introduction
http://slidepdf.com/reader/full/rastertek-direct3d-introduction 552/709
{
return false;}
// Turn off alpha blending.m_D3D->TurnOffAlphaBlending();
// Present the rendered scene to the screen.m_D3D->EndScene();
return true;}
Summary
The fire shader produces an incredibly realistic fire effect. It is also highly customizable giving it the ability to produce almost any type of fire flame by just modifyingone or more of the many tweakable shader variables. The flame will still need to be bill boarded or rendered a couple times at different angles in the same locationto be used realistically in a 3D setting.
30 of 31 3/8/2013 12:42 PM
To Do Exercises
Tutorial 33: Fire http://www.rastertek.com/dx11tut33.html

7/14/2019 RasterTek: Direct3D introduction
http://slidepdf.com/reader/full/rastertek-direct3d-introduction 553/709
1. Recompile and run the program. You should get an animated fire effect. Press escape to quit.
2. Modify the many different shader values to see the different effects they produce. Start with scale and bias. You may also want to comment out certain parts of the fire shader to see the effect they have on the different textures.
3. Create your own noise texture and see how it changes the fire.
4. Create your own alpha texture to modify the overall shape of the flame.
Source Code
Visual Studio 2008 Project: dx11tut33.zip
Source Only: dx11src33.zip
Executable Only:dx11exe33.zip
Back to Tutorial Index
31 of 31 3/8/2013 12:42 PM
Tutor ial 35: Depth Buffer
In DirectX 11 the depth buffer (also called the Z buffer) is primarily used for recording the depth of every pixel inside the viewing frustum. When more than one pixeltake up the same location the depth values are then used to determine which pixel to keep. However usage of the depth buffer is very flexible and it can be used todo many different things.
Most video cards come with a 32 bit depth buffer, it is then up to you how you want to use those 32 bits. If you look at the D3DClass::Initialize function you will see
we set the depth buffer format to DXGI_FORMAT_D24_UNORM_S8_UINT. What this means is that we use the depth buffer as both a depth buffer and a stencilbuffer, and the format of the buffer is set to 24 bits for the depth channel and 8 bits for the stencil channel. Also we can actually define how the depth bufferfunctions. In our current setup we discard pixels that are further than the current pixel. However this can be modified to do whatever we want to create differenteffects. You have complete control over how this buffer functions.
The depth buffer values are floating point. The range is from 0.0f to 1.0f with 0.0 set at the near clipping plane and 1.0 set at the far clipping plane. However thefloating point values in the depth buffer are not in a linear distribution. Approximately 90% of the floating point values occur in the first 10% of the depth buffer closeto the near clipping plane. The remaining 10% (from 0.9f to 1.0f) take up the last 90% of the depth buffer. The following diagram shows the value distribution withblack representing 0 0f and white representing 1 0f You will notice at the halfway mark I put a 0 5 but you will see the color is almost 99 999% white showing the
Tutorial 35: Depth Buffer http://www.rastertek.com/dx11tut35.html
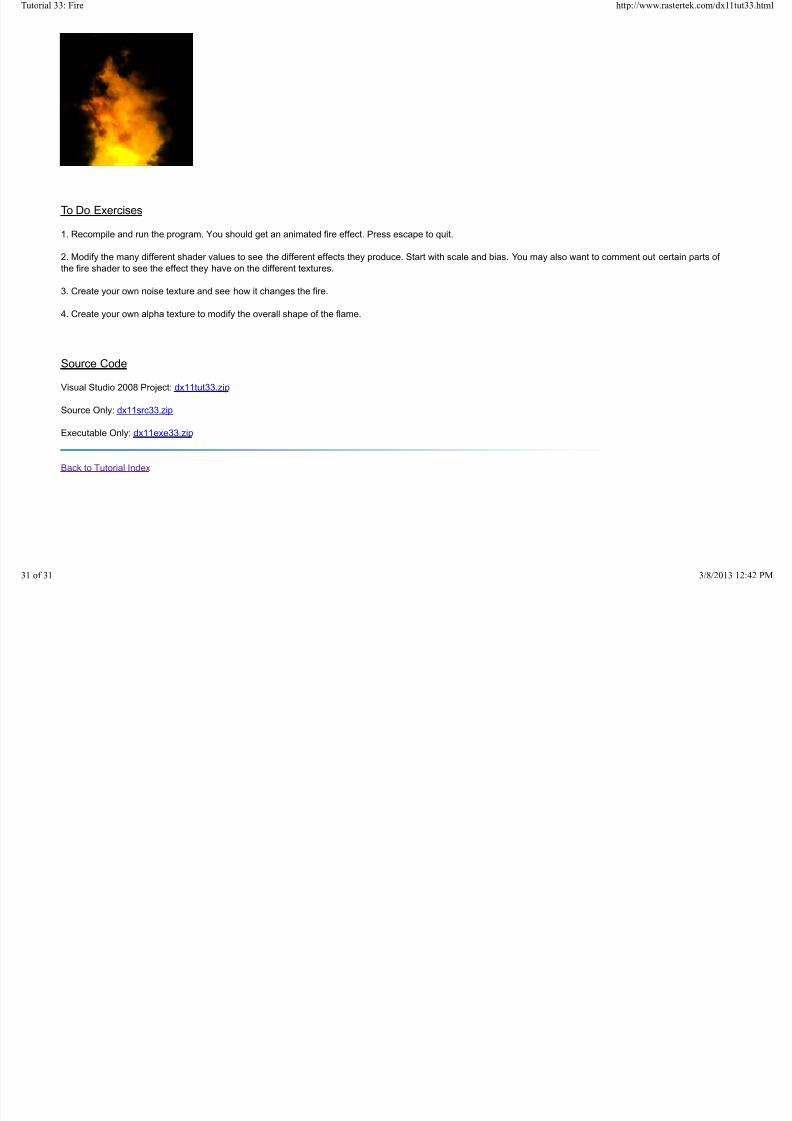
7/14/2019 RasterTek: Direct3D introduction
http://slidepdf.com/reader/full/rastertek-direct3d-introduction 554/709
black representing 0.0f and white representing 1.0f. You will notice at the halfway mark I put a 0.5 but you will see the color is almost 99.999% white showing the
lack of precision at that distance:
Also if we want to look at it from a 3D scene perspective take for example the following scene:
1 of 21 3/8/2013 12:39 PM
Tutorial 35: Depth Buffer http://www.rastertek.com/dx11tut35.html

7/14/2019 RasterTek: Direct3D introduction
http://slidepdf.com/reader/full/rastertek-direct3d-introduction 555/709
Now if we just render the objects with their depth value as their color you will see the close cube object has a decent range of color and the sphere is almostcompletely white with little detail:
The reason the depth buffer is setup this way is because the majority of applications want a lot of precise detail up close and are not as concerned about precisionwith distant objects. If distance is important in your application then you may run into issues with distant objects that are close together overlapping causing pixels to
2 of 21 3/8/2013 12:39 PM
flicker (also called Z fighting). There are a number of well known solutions to this issue but it comes at a cost depending on your implementation.
In this tutorial we are going to look at just rendering a simple 10 float unit plane and coloring it based on the depth information. We will color the portion that isclosest to the screen as red, then the next small portion as green, and then finally the remainder to the far clip plane as blue. The reason we are doing this is toshow you a way of performing detail calculations with depth. This will allow you to extend the technique to do things such as bump mapping things that are closeand then as they get distant you can move to just regular diffuse lighting. Also note that depth buffers can be used for so much more, one example being projectiveshadow mapping, but we are going to just start with the basics.
Framework
The frame work for this tutorial has just the basics with a new class called DepthShaderClass which will handle the depth shading.
Tutorial 35: Depth Buffer http://www.rastertek.com/dx11tut35.html

7/14/2019 RasterTek: Direct3D introduction
http://slidepdf.com/reader/full/rastertek-direct3d-introduction 556/709
We will start the code section of the tutorial by examining the HLSL depth shader first.
Depth.vs
////////////////////////////////////////////////////////////////////////////////// Filename: depth.vs////////////////////////////////////////////////////////////////////////////////
The depth vertex shader only requires the matrix buffer, no other globals are needed.
/////////////// GLOBALS ///////////////cbuffer MatrixBuffer{
matrix worldMatrix;matrix viewMatrix;
3 of 21 3/8/2013 12:39 PM
matrix projectionMatrix;};
//////////////// TYPEDEFS ////////////////
For input into the vertex shader we only require position. Texturing, normals, and anything else is not required since we are only planning to color pixels based on
depth.
struct VertexInputType{
float4 position : POSITION;};
For input into the pixel shader we will need the vertex position in homogeneous clip space stored in the position variable as usual. However since theSV POSITION semantic offsets the position by 0 5 we will need a second set of coordinates called depthPosition that are not modified so that we can perform
Tutorial 35: Depth Buffer http://www.rastertek.com/dx11tut35.html

7/14/2019 RasterTek: Direct3D introduction
http://slidepdf.com/reader/full/rastertek-direct3d-introduction 557/709
SV_POSITION semantic offsets the position by 0.5 we will need a second set of coordinates called depthPosition that are not modified so that we can perform
depth calculations.
struct PixelInputType{
float4 position : SV_POSITION;float4 depthPosition : TEXTURE0;
};
////////////////////////////////////////////////////////////////////////////////// Vertex Shader////////////////////////////////////////////////////////////////////////////////PixelInputType DepthVertexShader(VertexInputType input){
PixelInputType output;
// Change the position vector to be 4 units for proper matrix calculations.
input.position.w =1.0f;
// Calculate the position of the vertex against the world, view, and projection matrices.output.position =mul(input.position, worldMatrix);output.position =mul(output.position, viewMatrix);output.position =mul(output.position, projectionMatrix);
As described in the pixel shader input we store a second pair of position coordinates that will not be offset which will be used for depth calculations.
4 of 21 3/8/2013 12:39 PM
// Store the position value in a second input value for depth value calculations.output.depthPosition =output.position;
return output;}
Depth.ps
////////////////////////////////////////////////////////////////////////////////// Filename: depth.ps////////////////////////////////////////////////////////////////////////////////
//////////////// TYPEDEFS ////////////////
Tutorial 35: Depth Buffer http://www.rastertek.com/dx11tut35.html

7/14/2019 RasterTek: Direct3D introduction
http://slidepdf.com/reader/full/rastertek-direct3d-introduction 558/709
//////////////
struct PixelInputType{
float4 position : SV_POSITION;float4 depthPosition : TEXTURE0;
};
////////////////////////////////////////////////////////////////////////////////// Pixel Shader
////////////////////////////////////////////////////////////////////////////////float4 DepthPixelShader(PixelInputType input) : SV_TARGET{
float depthValue;float4 color;
First we get the depth value for this pixel, note that it is stored as z/w so we perform the necessary division to get the depth.
// Get the depth value of the pixel by dividing the Z pixel depth by the homogeneous W coordinate.
depthValue =input.depthPosition.z / input.depthPosition.w;
The following section is where we determine how to color the pixel. Remember the diagram at the top of the tutorial which describes how the first 10% of the depthbuffer contains 90% of the float values. In this tutorial we will color that entire section as red. Then following that we will color a very tiny portion of the depth buffergreen, notice it is only 0.025% in terms of precision but it takes up a large section close to the near plane. This green section helps you understand how quickly theprecision falls off. The remaining section of the depth buffer is colored blue.
// First 10% of the depth buffer color red.
5 of 21 3/8/2013 12:39 PM
if(depthValue <0.9f){
color =float4(1.0, 0.0f, 0.0f, 1.0f);}
// The next 0.025% portion of the depth buffer color green.if(depthValue >0.9f){
color =float4(0.0, 1.0f, 0.0f, 1.0f);
}
// The remainder of the depth buffer color blue.if(depthValue >0.925f){
color =float4(0.0, 0.0f, 1.0f, 1.0f);}
return color;
Tutorial 35: Depth Buffer http://www.rastertek.com/dx11tut35.html

7/14/2019 RasterTek: Direct3D introduction
http://slidepdf.com/reader/full/rastertek-direct3d-introduction 559/709
}
Depthshaderclass.h
The DepthShaderClass is a very simple shader class that is similar to the first color shader we looked at when we first started examining HLSL.
////////////////////////////////////////////////////////////////////////////////
// Filename: depthshaderclass.h////////////////////////////////////////////////////////////////////////////////#ifndef _DEPTHSHADERCLASS_H_ #define _DEPTHSHADERCLASS_H_
//////////////// INCLUDES ////////////////
#include <d3d11.h>#include <d3dx10math.h>#include <d3dx11async.h>#include <fstream>using namespace std;
////////////////////////////////////////////////////////////////////////////////
6 of 21 3/8/2013 12:39 PM
// Class name: DepthShaderClass////////////////////////////////////////////////////////////////////////////////class DepthShaderClass{private:
struct MatrixBufferType{
D3DXMATRIX world;D3DXMATRIX view;
D3DXMATRIX projection;};
public:DepthShaderClass();DepthShaderClass(const DepthShaderClass&);~DepthShaderClass();
bool Initialize(ID3D11Device*, HWND);
Tutorial 35: Depth Buffer http://www.rastertek.com/dx11tut35.html

7/14/2019 RasterTek: Direct3D introduction
http://slidepdf.com/reader/full/rastertek-direct3d-introduction 560/709
void Shutdown();bool Render(ID3D11DeviceContext*, int, D3DXMATRIX, D3DXMATRIX, D3DXMATRIX);
private:bool InitializeShader(ID3D11Device*, HWND, WCHAR*, WCHAR*);void ShutdownShader();void OutputShaderErrorMessage(ID3D10Blob*, HWND, WCHAR*);
bool SetShaderParameters(ID3D11DeviceContext*, D3DXMATRIX, D3DXMATRIX, D3DXMATRIX);
void RenderShader(ID3D11DeviceContext*, int);
private:ID3D11VertexShader* m_vertexShader;ID3D11PixelShader* m_pixelShader;ID3D11InputLayout* m_layout;
We only require the matrix constant buffer.
ID3D11Buffer* m_matrixBuffer;};
#endif
Depthshaderclass.cpp
7 of 21 3/8/2013 12:39 PM
////////////////////////////////////////////////////////////////////////////////// Filename: depthshaderclass.cpp////////////////////////////////////////////////////////////////////////////////#include "depthshaderclass.h"
The class constructor initializes all the private pointers to null.
DepthShaderClass::DepthShaderClass(){
m_vertexShader =0;m_pixelShader =0;m_layout =0;m_matrixBuffer =0;
}
DepthShaderClass::DepthShaderClass(const DepthShaderClass& other){
Tutorial 35: Depth Buffer http://www.rastertek.com/dx11tut35.html

7/14/2019 RasterTek: Direct3D introduction
http://slidepdf.com/reader/full/rastertek-direct3d-introduction 561/709
}
DepthShaderClass::~DepthShaderClass(){}
bool DepthShaderClass::Initialize(ID3D11Device* device, HWND hwnd)
{bool result;
We load the depth.fx HLSL shader here.
// Initialize the vertex and pixel shaders.result =InitializeShader(device, hwnd, L"../Engine/depth.vs", L"../Engine/depth.ps");if(!result){
return false;}
return true;}
void DepthShaderClass::Shutdown(){
8 of 21 3/8/2013 12:39 PM
// Shutdown the vertex and pixel shaders as well as the related objects.ShutdownShader();
return;}
Once again this shader is fairly simple and only requires the three regular matrices as input.
bool DepthShaderClass::Render(ID3D11DeviceContext* deviceContext, int indexCount, D3DXMATRIX worldMatrix, D3DXMATRIX viewMatrix,
D3DXMATRIX projectionMatrix){
bool result;
// Set the shader parameters that it will use for rendering.result =SetShaderParameters(deviceContext, worldMatrix, viewMatrix, projectionMatrix);if(!result){
Tutorial 35: Depth Buffer http://www.rastertek.com/dx11tut35.html

7/14/2019 RasterTek: Direct3D introduction
http://slidepdf.com/reader/full/rastertek-direct3d-introduction 562/709
return false;}
// Now render the prepared buffers with the shader.RenderShader(deviceContext, indexCount);
return true;}
bool DepthShaderClass::InitializeShader(ID3D11Device* device, HWND hwnd, WCHAR* vsFilename, WCHAR* psFilename){
HRESULT result;ID3D10Blob* errorMessage;ID3D10Blob* vertexShaderBuffer;ID3D10Blob* pixelShaderBuffer;
We only need a single element in our polygonLayout description.
D3D11_INPUT_ELEMENT_DESC polygonLayout[1];unsigned int numElements;D3D11_BUFFER_DESC matrixBufferDesc;
// Initialize the pointers this function will use to null.errorMessage =0;vertexShaderBuffer =0;
9 of 21 3/8/2013 12:39 PM
pixelShaderBuffer =0;
Load in the depth vertex shader.
// Compile the vertex shader code.result =D3DX11CompileFromFile(vsFilename, NULL, NULL, "DepthVertexShader", "vs_5_0", D3D10_SHADER_ENABLE_STRICTNESS, 0, NULL,
&vertexShaderBuffer, &errorMessage, NULL);if(FAILED(result)){
// If the shader failed to compile it should have writen something to the error message.if(errorMessage){
OutputShaderErrorMessage(errorMessage, hwnd, vsFilename);}// If there was nothing in the error message then it simply could not find the shader file itself.else{
MessageBox(hwnd, vsFilename, L"Missing Shader File", MB_OK);
Tutorial 35: Depth Buffer http://www.rastertek.com/dx11tut35.html
7/14/2019 RasterTek: Direct3D introduction
http://slidepdf.com/reader/full/rastertek-direct3d-introduction 563/709
}
return false;}
Load in the depth pixel shader.
// Compile the pixel shader code.result =D3DX11CompileFromFile(psFilename, NULL, NULL, "DepthPixelShader", "ps_5_0", D3D10_SHADER_ENABLE_STRICTNESS, 0, NULL,
&pixelShaderBuffer, &errorMessage, NULL);if(FAILED(result)){
// If the shader failed to compile it should have writen something to the error message.if(errorMessage){
OutputShaderErrorMessage(errorMessage, hwnd, psFilename);}// If there was nothing in the error message then it simply could not find the file itself.
else{
MessageBox(hwnd, psFilename, L"Missing Shader File", MB_OK);}
return false;}
// Create the vertex shader from the buffer.
10 of 21 3/8/2013 12:39 PM
result =device->CreateVertexShader(vertexShaderBuffer->GetBufferPointer(), vertexShaderBuffer->GetBufferSize(), NULL, &m_vertexShader);if(FAILED(result)){
return false;}
// Create the pixel shader from the buffer.result =device->CreatePixelShader(pixelShaderBuffer->GetBufferPointer(), pixelShaderBuffer->GetBufferSize(), NULL, &m_pixelShader);if(FAILED(result))
{return false;
}
Notice the layout only uses position to match the input to the HLSL shader. The VertexType in the ModelClass will need to be modified to match this also.
// Create the vertex input layout description.// This setup needs to match the VertexType stucture in the ModelClass and in the shader.polygonLayout[0].SemanticName ="POSITION";
Tutorial 35: Depth Buffer http://www.rastertek.com/dx11tut35.html

7/14/2019 RasterTek: Direct3D introduction
http://slidepdf.com/reader/full/rastertek-direct3d-introduction 564/709
polygonLayout[0].SemanticIndex =0;polygonLayout[0].Format =DXGI_FORMAT_R32G32B32_FLOAT;polygonLayout[0].InputSlot =0;polygonLayout[0].AlignedByteOffset =0;polygonLayout[0].InputSlotClass =D3D11_INPUT_PER_VERTEX_DATA;polygonLayout[0].InstanceDataStepRate =0;
// Get a count of the elements in the layout.numElements =sizeof(polygonLayout) / sizeof(polygonLayout[0]);
// Create the vertex input layout.result =device->CreateInputLayout(polygonLayout, numElements, vertexShaderBuffer->GetBufferPointer(), vertexShaderBuffer->GetBufferSize(), &m_layout);if(FAILED(result)){
return false;}
// Release the vertex shader buffer and pixel shader buffer since they are no longer needed.
vertexShaderBuffer->Release();vertexShaderBuffer =0;
pixelShaderBuffer->Release();pixelShaderBuffer =0;
// Setup the description of the dynamic matrix constant buffer that is in the vertex shader.matrixBufferDesc.Usage =D3D11_USAGE_DYNAMIC;matrixBufferDesc.ByteWidth =sizeof(MatrixBufferType);
11 of 21 3/8/2013 12:39 PM
matrixBufferDesc.BindFlags =D3D11_BIND_CONSTANT_BUFFER;matrixBufferDesc.CPUAccessFlags =D3D11_CPU_ACCESS_WRITE;matrixBufferDesc.MiscFlags =0;matrixBufferDesc.StructureByteStride =0;
// Create the constant buffer pointer so we can access the vertex shader constant buffer from within this class.result =device->CreateBuffer(&matrixBufferDesc, NULL, &m_matrixBuffer);if(FAILED(result)){
return false;}
return true;}
void DepthShaderClass::ShutdownShader(){
Tutorial 35: Depth Buffer http://www.rastertek.com/dx11tut35.html

7/14/2019 RasterTek: Direct3D introduction
http://slidepdf.com/reader/full/rastertek-direct3d-introduction 565/709
// Release the matrix constant buffer.if(m_matrixBuffer){
m_matrixBuffer->Release();m_matrixBuffer =0;
}
// Release the layout.if(m_layout)
{m_layout->Release();m_layout =0;
}
// Release the pixel shader.if(m_pixelShader){
m_pixelShader->Release();
m_pixelShader =0;}
// Release the vertex shader.if(m_vertexShader){
m_vertexShader->Release();m_vertexShader =0;
}
12 of 21 3/8/2013 12:39 PM
return;}
void DepthShaderClass::OutputShaderErrorMessage(ID3D10Blob* errorMessage, HWND hwnd, WCHAR* shaderFilename){
char* compileErrors;unsigned long bufferSize, i;
ofstream fout;
// Get a pointer to the error message text buffer.compileErrors =(char*)(errorMessage->GetBufferPointer());
// Get the length of the message.bufferSize =errorMessage->GetBufferSize();
// O fil t it th t
Tutorial 35: Depth Buffer http://www.rastertek.com/dx11tut35.html

7/14/2019 RasterTek: Direct3D introduction
http://slidepdf.com/reader/full/rastertek-direct3d-introduction 566/709
// Open a file to write the error message to.fout.open("shader-error.txt");
// Write out the error message.for(i=0; i<bufferSize; i++){
fout <<compileErrors[i];}
// Close the file.fout.close();
// Release the error message.errorMessage->Release();errorMessage =0;
// Pop a message up on the screen to notify the user to check the text file for compile errors.MessageBox(hwnd, L"Error compiling shader. Check shader-error.txt for message.", shaderFilename, MB_OK);
return;}
Only the three regular matrices are needed as global inputs to the shader.
bool DepthShaderClass::SetShaderParameters(ID3D11DeviceContext* deviceContext, D3DXMATRIX worldMatrix, D3DXMATRIX viewMatrix, D3DXMATRIX projecti{
HRESULT result;
13 of 21 3/8/2013 12:39 PM
D3D11_MAPPED_SUBRESOURCE mappedResource;unsigned int bufferNumber;MatrixBufferType* dataPtr;
// Transpose the matrices to prepare them for the shader.D3DXMatrixTranspose(&worldMatrix, &worldMatrix);D3DXMatrixTranspose(&viewMatrix, &viewMatrix);D3DXMatrixTranspose(&projectionMatrix, &projectionMatrix);
// Lock the constant buffer so it can be written to.result =deviceContext->Map(m_matrixBuffer, 0, D3D11_MAP_WRITE_DISCARD, 0, &mappedResource);if(FAILED(result)){
return false;}
// Get a pointer to the data in the constant buffer.
dataPtr (MatrixBufferType*)mappedResource pData
Tutorial 35: Depth Buffer http://www.rastertek.com/dx11tut35.html

7/14/2019 RasterTek: Direct3D introduction
http://slidepdf.com/reader/full/rastertek-direct3d-introduction 567/709
dataPtr =(MatrixBufferType*)mappedResource.pData;
// Copy the matrices into the constant buffer.dataPtr->world =worldMatrix;dataPtr->view =viewMatrix;dataPtr->projection =projectionMatrix;
// Unlock the constant buffer.deviceContext->Unmap(m_matrixBuffer, 0);
// Set the position of the constant buffer in the vertex shader.bufferNumber =0;
// Now set the constant buffer in the vertex shader with the updated values.deviceContext->VSSetConstantBuffers(bufferNumber, 1, &m_matrixBuffer);
return true;}
void DepthShaderClass::RenderShader(ID3D11DeviceContext* deviceContext, int indexCount){
// Set the vertex input layout.deviceContext->IASetInputLayout(m_layout);
// Set the vertex and pixel shaders that will be used to render this triangle.deviceContext->VSSetShader(m_vertexShader, NULL, 0);
14 of 21 3/8/2013 12:39 PM
deviceContext->PSSetShader(m_pixelShader, NULL, 0);
// Render the triangle.deviceContext->DrawIndexed(indexCount, 0, 0);
return;}
Graphicsclass.h
////////////////////////////////////////////////////////////////////////////////// Filename: graphicsclass.h////////////////////////////////////////////////////////////////////////////////#ifndef _GRAPHICSCLASS_H_ #define _GRAPHICSCLASS_H_
Tutorial 35: Depth Buffer http://www.rastertek.com/dx11tut35.html

7/14/2019 RasterTek: Direct3D introduction
http://slidepdf.com/reader/full/rastertek-direct3d-introduction 568/709
///////////////////////// MY CLASS INCLUDES /////////////////////////#include "d3dclass.h"#include "cameraclass.h"#include "modelclass.h"
We include the new header for the DepthShaderClass.
#include "depthshaderclass.h"
/////////////// GLOBALS ///////////////const bool FULL_SCREEN =true;const bool VSYNC_ENABLED =true;
We have changed the near and far plane values to reduce how much precision is usually lost by the larger values.
const float SCREEN_DEPTH =100.0f;const float SCREEN_NEAR =1.0f;
////////////////////////////////////////////////////////////////////////////////
15 of 21 3/8/2013 12:39 PM
// Class name: GraphicsClass////////////////////////////////////////////////////////////////////////////////class GraphicsClass{public:
GraphicsClass();GraphicsClass(const GraphicsClass&);~GraphicsClass();
bool Initialize(int, int, HWND);void Shutdown();bool Frame();
private:bool Render();
private:D3DClass* m_D3D;
CameraClass* m Camera;M d lCl * M d l
Tutorial 35: Depth Buffer http://www.rastertek.com/dx11tut35.html

7/14/2019 RasterTek: Direct3D introduction
http://slidepdf.com/reader/full/rastertek-direct3d-introduction 569/709
CameraClass m_Camera;ModelClass* m_Model;
We now have a private object for the new DepthShaderClass.
DepthShaderClass* m_DepthShader;};
#endif
Graphicsclass.cpp
////////////////////////////////////////////////////////////////////////////////// Filename: graphicsclass.cpp////////////////////////////////////////////////////////////////////////////////#include "graphicsclass.h"
GraphicsClass::GraphicsClass(){
m_D3D =0;m_Camera =0;m_Model =0;
16 of 21 3/8/2013 12:39 PM
Initialize the DepthShaderClass object to null in the class constructor.
m_DepthShader =0;}
GraphicsClass::GraphicsClass(const GraphicsClass& other){}
GraphicsClass::~GraphicsClass(){}
bool GraphicsClass::Initialize(int screenWidth, int screenHeight, HWND hwnd){
bool result;
Tutorial 35: Depth Buffer http://www.rastertek.com/dx11tut35.html

7/14/2019 RasterTek: Direct3D introduction
http://slidepdf.com/reader/full/rastertek-direct3d-introduction 570/709
bool result;
// Create the Direct3D object.m_D3D =new D3DClass;if(!m_D3D){
return false;}
// Initialize the Direct3D object.result =m_D3D->Initialize(screenWidth, screenHeight, VSYNC_ENABLED, hwnd, FULL_SCREEN, SCREEN_DEPTH, SCREEN_NEAR);if(!result){
MessageBox(hwnd, L"Could not initialize Direct3D.", L"Error", MB_OK);return false;
}
// Create the camera object.m_Camera =new CameraClass;if(!m_Camera){
return false;}
Set the camera up a bit to view the plane that will be rendered.
17 of 21 3/8/2013 12:39 PM
// Set the initial position of the camera.m_Camera->SetPosition(0.0f, 2.0f, -10.0f);
// Create the model object.m_Model =new ModelClass;if(!m_Model){
return false;}
Load the floor.txt model in.
// Initialize the model object.result =m_Model->Initialize(m_D3D->GetDevice(), "../Engine/data/floor.txt");if(!result){
MessageBox(hwnd, L"Could not initialize the model object.", L"Error", MB_OK);return false;
}
Tutorial 35: Depth Buffer http://www.rastertek.com/dx11tut35.html

7/14/2019 RasterTek: Direct3D introduction
http://slidepdf.com/reader/full/rastertek-direct3d-introduction 571/709
}
Load the floor.txt model in.
// Create the depth shader object.m_DepthShader =new DepthShaderClass;if(!m_DepthShader){
return false;
}
// Initialize the depth shader object.result =m_DepthShader->Initialize(m_D3D->GetDevice(), hwnd);if(!result){
MessageBox(hwnd, L"Could not initialize the depth shader object.", L"Error", MB_OK);return false;
}
return true;}
void GraphicsClass::Shutdown(){
Release the new DepthShaderClass object in the Shutdown function.
18 of 21 3/8/2013 12:39 PM
// Release the depth shader object.if(m_DepthShader){
m_DepthShader->Shutdown();delete m_DepthShader;m_DepthShader =0;
}
// Release the model object.
if(m_Model){m_Model->Shutdown();delete m_Model;m_Model =0;
}
// Release the camera object.if(m_Camera)
{ delete m Camera;
Tutorial 35: Depth Buffer http://www.rastertek.com/dx11tut35.html

7/14/2019 RasterTek: Direct3D introduction
http://slidepdf.com/reader/full/rastertek-direct3d-introduction 572/709
{ delete m_Camera;m_Camera =0;
}
// Release the D3D object.if(m_D3D){
m_D3D->Shutdown();
delete m_D3D;m_D3D =0;}
return;}
bool GraphicsClass::Frame()
{ bool result;
// Render the graphics scene.result =Render();if(!result){
return false;
19 of 21 3/8/2013 12:39 PM
}
return true;}
bool GraphicsClass::Render(){
D3DXMATRIX worldMatrix, viewMatrix, projectionMatrix;
bool result;
// Clear the buffers to begin the scene.m_D3D->BeginScene(0.0f, 0.0f, 0.0f, 1.0f);
// Generate the view matrix based on the camera's position.m_Camera->Render();
// Get the world, view, and projection matrices from the camera and d3d objects.m Camera->GetViewMatrix(viewMatrix);
Tutorial 35: Depth Buffer http://www.rastertek.com/dx11tut35.html

7/14/2019 RasterTek: Direct3D introduction
http://slidepdf.com/reader/full/rastertek-direct3d-introduction 573/709
m_Camera >GetViewMatrix(viewMatrix);m_D3D->GetWorldMatrix(worldMatrix);m_D3D->GetProjectionMatrix(projectionMatrix);
// Put the model vertex and index buffers on the graphics pipeline to prepare them for drawing.m_Model->Render(m_D3D->GetDeviceContext());
Render the floor model using the new depth shader.
// Render the model using the depth shader.result =m_DepthShader->Render(m_D3D->GetDeviceContext(), m_Model->GetIndexCount(), worldMatrix, viewMatrix, projectionMatrix);if(!result){
return false;}
// Present the rendered scene to the screen.
m_D3D->EndScene();
return true;}
Summary
20 of 21 3/8/2013 12:39 PM
We can now render the floor using color values to represent depth ranges. Also remember that the depth buffer can be used for many other purposes.
To Do Exercises
1. Recompile and run the program, you should see a floor rendered with three colored depth values.
2. Modify the ranges in the pixel shader to see the range output it changes.
3. Add a fourth color between the green and blue specifying a very small range.
Tutorial 35: Depth Buffer http://www.rastertek.com/dx11tut35.html
7/14/2019 RasterTek: Direct3D introduction
http://slidepdf.com/reader/full/rastertek-direct3d-introduction 574/709
4. Have the pixel shader return the depth value instead of the color.
5. Modify the near and far plane in the GraphicsClass.h file to see the effects it has on the precision.
Source Code
Visual Studio 2010 Project: dx11tut35.zip
Source Only: dx11src35.zip
Executable Only:dx11exe35.zip
Back to Tutorial Index
21 of 21 3/8/2013 12:39 PM
Tutor ial 37: Instancing
Sometimes graphics engines have a requirement to render numerous copies of the exact same geometry with just slight changes in position, scaling, color, and soforth. Particle, foliage, and tree engines are good examples of these types of systems that use the same model hundreds or thousands of times with just slightchanges for each time it renders a copy. These systems tend to be very inefficient and send a large amount of data to the graphics card.
Instancing is a method of rendering in DirectX 11 that eliminates this problem by accepting a single vertex buffer with the geometry and then uses a second buffercalled an Instance Buffer which carries the modification information for each instance of the model geometry. The vertex buffer stays cached on the video card andthen it is modified and rendered for each instance in the instance buffer.
For this tutorial I will be modifying Tutorial 5: Texturing and use instancing to render four copies of the triangle with slightly different positions to show how instancingworks on a basic level. The ModelClass, TextureShaderClass, and the texture HLSL program will need slight modifications for instancing to work. We will start bylooking at how to modify the ModelClass to implement instancing.
Modelclass.h
Tutorial 37: Instancing http://www.rastertek.com/dx11tut37.html

7/14/2019 RasterTek: Direct3D introduction
http://slidepdf.com/reader/full/rastertek-direct3d-introduction 575/709
////////////////////////////////////////////////////////////////////////////////// Filename: modelclass.h////////////////////////////////////////////////////////////////////////////////#ifndef _MODELCLASS_H_ #define _MODELCLASS_H_
//////////////// INCLUDES ////////////////#include <d3d11.h>#include <d3dx10math.h>
///////////////////////// MY CLASS INCLUDES //
///////////////////////#include "textureclass.h"
////////////////////////////////////////////////////////////////////////////////// Class name: ModelClass////////////////////////////////////////////////////////////////////////////////class ModelClass
1 of 28 3/8/2013 12:43 PM
{private:
struct VertexType{
D3DXVECTOR3 position;D3DXVECTOR2 texture;
};
We add a new structure that will hold the instance information. In this tutorial we are modifying the position of each instance of the triangle so we use a positionvector. But note that it could be anything else you want to modify for each instance such as color, size, rotation, and so forth. You can modify multiple things at oncefor each instance also.
struct InstanceType{
D3DXVECTOR3 position;};
public:ModelClass();ModelClass(const ModelClass&);
Tutorial 37: Instancing http://www.rastertek.com/dx11tut37.html

7/14/2019 RasterTek: Direct3D introduction
http://slidepdf.com/reader/full/rastertek-direct3d-introduction 576/709
~ModelClass();
bool Initialize(ID3D11Device*, WCHAR*);void Shutdown();void Render(ID3D11DeviceContext*);
We have two new functions for getting the vertex and instance counts. We also removed the helper function which previously returned the index count as the
instance count has replaced that.
int GetVertexCount();int GetInstanceCount();ID3D11ShaderResourceView* GetTexture();
private:bool InitializeBuffers(ID3D11Device*);void ShutdownBuffers();
void RenderBuffers(ID3D11DeviceContext*);
bool LoadTexture(ID3D11Device*, WCHAR*);void ReleaseTexture();
private:ID3D11Buffer* m_vertexBuffer;
The ModelClass now has an instance buffer instead of an index buffer. All buffers in DirectX 11 are generic so it uses the ID3D11Buffer type.
2 of 28 3/8/2013 12:43 PM
ID3D11Buffer* m_instanceBuffer;int m_vertexCount;
The index count has been replaced with the instance count.
int m_instanceCount; TextureClass* m_Texture;
};
#endif
Modelclass.cpp
////////////////////////////////////////////////////////////////////////////////// Filename: modelclass.cpp////////////////////////////////////////////////////////////////////////////////
#include "modelclass.h"
Tutorial 37: Instancing http://www.rastertek.com/dx11tut37.html

7/14/2019 RasterTek: Direct3D introduction
http://slidepdf.com/reader/full/rastertek-direct3d-introduction 577/709
ModelClass::ModelClass(){
m_vertexBuffer =0;
Initialize the new instance buffer to null in the class constructor.
m_instanceBuffer =0;m_Texture =0;
}
ModelClass::ModelClass(const ModelClass& other){}
ModelClass::~ModelClass(){}
bool ModelClass::Initialize(ID3D11Device* device, WCHAR* textureFilename){
3 of 28 3/8/2013 12:43 PM
bool result;
// Initialize the vertex and instance buffers.result =InitializeBuffers(device);if(!result){
return false;}
// Load the texture for this model.result =LoadTexture(device, textureFilename);if(!result){
return false;}
return true;}
Tutorial 37: Instancing http://www.rastertek.com/dx11tut37.html

7/14/2019 RasterTek: Direct3D introduction
http://slidepdf.com/reader/full/rastertek-direct3d-introduction 578/709
void ModelClass::Shutdown(){
// Release the model texture.ReleaseTexture();
// Shutdown the vertex and instance buffers.ShutdownBuffers();
return;}
void ModelClass::Render(ID3D11DeviceContext* deviceContext){
// Put the vertex and instance buffers on the graphics pipeline to prepare them for drawing.
RenderBuffers(deviceContext);
return;}
These are the two new helper functions which return the vertex and instance counts.
int ModelClass::GetVertexCount(){
4 of 28 3/8/2013 12:43 PM
return m_vertexCount;}
int ModelClass::GetInstanceCount(){
return m_instanceCount;}
ID3D11ShaderResourceView* ModelClass::GetTexture(){
return m_Texture->GetTexture();}
bool ModelClass::InitializeBuffers(ID3D11Device* device){
VertexType* vertices;InstanceType* instances;D3D11 BUFFER DESC vertexBufferDesc instanceBufferDesc;
Tutorial 37: Instancing http://www.rastertek.com/dx11tut37.html

7/14/2019 RasterTek: Direct3D introduction
http://slidepdf.com/reader/full/rastertek-direct3d-introduction 579/709
D3D11_BUFFER_DESC vertexBufferDesc, instanceBufferDesc;D3D11_SUBRESOURCE_DATA vertexData, instanceData;HRESULT result;
We will start by manually setting up the vertex buffer that holds the triangle as usual, however there will be no index buffer setup with it this time.
// Set the number of vertices in the vertex array.m_vertexCount =3;
// Create the vertex array.vertices =new VertexType[m_vertexCount];if(!vertices){
return false;}
// Load the vertex array with data.vertices[0].position =D3DXVECTOR3(-1.0f, -1.0f, 0.0f); // Bottom left.vertices[0].texture =D3DXVECTOR2(0.0f, 1.0f);
vertices[1].position =D3DXVECTOR3(0.0f, 1.0f, 0.0f); // Top middle.vertices[1].texture =D3DXVECTOR2(0.5f, 0.0f);
vertices[2].position =D3DXVECTOR3(1.0f, -1.0f, 0.0f); // Bottom right.vertices[2].texture =D3DXVECTOR2(1.0f, 1.0f);
5 of 28 3/8/2013 12:43 PM
// Set up the description of the static vertex buffer.vertexBufferDesc.Usage =D3D11_USAGE_DEFAULT;vertexBufferDesc.ByteWidth =sizeof(VertexType) * m_vertexCount;vertexBufferDesc.BindFlags =D3D11_BIND_VERTEX_BUFFER;vertexBufferDesc.CPUAccessFlags =0;vertexBufferDesc.MiscFlags =0;vertexBufferDesc.StructureByteStride =0;
// Give the subresource structure a pointer to the vertex data.vertexData.pSysMem =vertices;vertexData.SysMemPitch =0;vertexData.SysMemSlicePitch =0;
// Now create the vertex buffer.result =device->CreateBuffer(&vertexBufferDesc, &vertexData, &m_vertexBuffer);if(FAILED(result)){
return false;}
Tutorial 37: Instancing http://www.rastertek.com/dx11tut37.html
7/14/2019 RasterTek: Direct3D introduction
http://slidepdf.com/reader/full/rastertek-direct3d-introduction 580/709
// Release the vertex array now that the vertex buffer has been created and loaded.delete [] vertices;vertices =0;
We will now setup the new instance buffer. We start by first setting the number of instances of the triangle that will need to be rendered. For this tutorial I havemanually set it to 4 so that we will have four triangles rendered on the screen.
// Set the number of instances in the array.m_instanceCount =4;
Next we create a temporary instance array using the instance count. Note we use the InstanceType structure for the array type which is defined in the ModelClassheader file.
// Create the instance array.instances =new InstanceType[m_instanceCount];if(!instances){
return false;}
Now here is where we setup the different positions for each instance of the triangle. I have set four different x, y, z positions for each triangle. Note that this is whereyou could set color, scaling, different texture coordinates, and so forth. An instance can be modified in any way you want it to be. For this tutorial I used position as itis easy to see visually which helps understand how instancing works.
6 of 28 3/8/2013 12:43 PM
// Load the instance array with data.
instances[0].position =D3DXVECTOR3(-1.5f, -1.5f, 5.0f);instances[1].position =D3DXVECTOR3(-1.5f, 1.5f, 5.0f);instances[2].position =D3DXVECTOR3( 1.5f, -1.5f, 5.0f);instances[3].position =D3DXVECTOR3( 1.5f, 1.5f, 5.0f);
The instance buffer description is setup exactly the same as a vertex buffer description.
// Set up the description of the instance buffer.instanceBufferDesc.Usage =D3D11_USAGE_DEFAULT;instanceBufferDesc.ByteWidth =sizeof(InstanceType) * m_instanceCount;instanceBufferDesc.BindFlags =D3D11_BIND_VERTEX_BUFFER;instanceBufferDesc.CPUAccessFlags =0;instanceBufferDesc.MiscFlags =0;instanceBufferDesc.StructureByteStride =0;
J ust like the vertex buffer we get the pointer to the instance array and then create the instance buffer. Once the instance buffer is created we can release thetemporary instance array since the data from the array has been copied into the instance buffer.
// Give the subresource structure a pointer to the instance data.instanceData.pSysMem=instances;
Tutorial 37: Instancing http://www.rastertek.com/dx11tut37.html
7/14/2019 RasterTek: Direct3D introduction
http://slidepdf.com/reader/full/rastertek-direct3d-introduction 581/709
instanceData.pSysMem instances;instanceData.SysMemPitch =0;instanceData.SysMemSlicePitch =0;
// Create the instance buffer.result =device->CreateBuffer(&instanceBufferDesc, &instanceData, &m_instanceBuffer);if(FAILED(result)){
return false;}
// Release the instance array now that the instance buffer has been created and loaded.delete [] instances;instances =0;
return true;}
void ModelClass::ShutdownBuffers(){
Release the new instance buffer in the ShutdownBuffers function.
// Release the instance buffer.
7 of 28 3/8/2013 12:43 PM
if(m_instanceBuffer)
{m_instanceBuffer->Release();m_instanceBuffer =0;
}
// Release the vertex buffer.if(m_vertexBuffer){
m_vertexBuffer->Release();m_vertexBuffer =0;
}
return;}
void ModelClass::RenderBuffers(ID3D11DeviceContext* deviceContext){
unsigned int strides[2];unsigned int offsets[2];
Tutorial 37: Instancing http://www.rastertek.com/dx11tut37.html

7/14/2019 RasterTek: Direct3D introduction
http://slidepdf.com/reader/full/rastertek-direct3d-introduction 582/709
gID3D11Buffer* bufferPointers[2];
The instance buffer is just a second vertex buffer containing different information so it is set on the device at the same time using the same call as the vertex buffer.So instead of how we previously sent in a single stride, offset, and buffer we now send an array of strides, offsets, and buffers to the IASetVertexBuffers call.
First we set the two strides to the size of the VertexType and InstanceType.
// Set the buffer strides.strides[0] =sizeof(VertexType);strides[1] =sizeof(InstanceType);
We then set the offsets for both the vertex and instance buffer.
// Set the buffer offsets.offsets[0] =0;offsets[1] =0;
Next we create an array that holds the pointers to the vertex buffer and the instance buffer.
// Set the array of pointers to the vertex and instance buffers.bufferPointers[0] =m_vertexBuffer;bufferPointers[1] =m_instanceBuffer;
Finally we set both the vertex buffer and the instance buffer on the device context in the same call.
8 of 28 3/8/2013 12:43 PM
// Set the vertex buffer to active in the input assembler so it can be rendered.
deviceContext->IASetVertexBuffers(0, 2, bufferPointers, strides, offsets);
// Set the type of primitive that should be rendered from this vertex buffer, in this case triangles.deviceContext->IASetPrimitiveTopology(D3D11_PRIMITIVE_TOPOLOGY_TRIANGLELIST);
return;}
bool ModelClass::LoadTexture(ID3D11Device* device, WCHAR* filename){
bool result;
// Create the texture object.m_Texture =new TextureClass;if(!m_Texture){
return false;}
Tutorial 37: Instancing http://www.rastertek.com/dx11tut37.html

7/14/2019 RasterTek: Direct3D introduction
http://slidepdf.com/reader/full/rastertek-direct3d-introduction 583/709
// Initialize the texture object.result =m_Texture->Initialize(device, filename);if(!result){
return false;}
return true;}
void ModelClass::ReleaseTexture(){
// Release the texture object.if(m_Texture){
m_Texture->Shutdown();delete m_Texture;m_Texture =0;
}
return;}
9 of 28 3/8/2013 12:43 PM
Textureshaderclass.h
The TextureShaderClass has been modified also to handle setting up instancing for the shader.
////////////////////////////////////////////////////////////////////////////////// Filename: textureshaderclass.h////////////////////////////////////////////////////////////////////////////////
#ifndef _TEXTURESHADERCLASS_H_ #define _TEXTURESHADERCLASS_H_
//////////////// INCLUDES ////////////////#include <d3d11.h>#include <d3dx10math.h>
#include <d3dx11async.h>#include <fstream>using namespace std;
Tutorial 37: Instancing http://www.rastertek.com/dx11tut37.html

7/14/2019 RasterTek: Direct3D introduction
http://slidepdf.com/reader/full/rastertek-direct3d-introduction 584/709
using namespace std;
////////////////////////////////////////////////////////////////////////////////// Class name: TextureShaderClass////////////////////////////////////////////////////////////////////////////////class TextureShaderClass
{private:
struct MatrixBufferType{
D3DXMATRIX world;D3DXMATRIX view;D3DXMATRIX projection;
};
public: TextureShaderClass(); TextureShaderClass(const TextureShaderClass&);~TextureShaderClass();
bool Initialize(ID3D11Device*, HWND);void Shutdown();bool Render(ID3D11DeviceContext*, int, int, D3DXMATRIX, D3DXMATRIX, D3DXMATRIX, ID3D11ShaderResourceView*);
10 of 28 3/8/2013 12:43 PM
private:bool InitializeShader(ID3D11Device*, HWND, WCHAR*, WCHAR*);void ShutdownShader();void OutputShaderErrorMessage(ID3D10Blob*, HWND, WCHAR*);
bool SetShaderParameters(ID3D11DeviceContext*, D3DXMATRIX, D3DXMATRIX, D3DXMATRIX, ID3D11ShaderResourceView*);void RenderShader(ID3D11DeviceContext*, int, int);
private:
ID3D11VertexShader* m_vertexShader;ID3D11PixelShader* m_pixelShader;ID3D11InputLayout* m_layout;ID3D11Buffer* m_matrixBuffer;ID3D11SamplerState* m_sampleState;
};
#endif
T h d l
Tutorial 37: Instancing http://www.rastertek.com/dx11tut37.html

7/14/2019 RasterTek: Direct3D introduction
http://slidepdf.com/reader/full/rastertek-direct3d-introduction 585/709
Textureshaderclass.cpp
////////////////////////////////////////////////////////////////////////////////// Filename: textureshaderclass.cpp////////////////////////////////////////////////////////////////////////////////#include "textureshaderclass.h"
TextureShaderClass::TextureShaderClass(){
m_vertexShader =0;m_pixelShader =0;m_layout =0;m_matrixBuffer =0;m_sampleState =0;
}
TextureShaderClass::TextureShaderClass(const TextureShaderClass& other){}
11 of 28 3/8/2013 12:43 PM
TextureShaderClass::~TextureShaderClass()
{}
bool TextureShaderClass::Initialize(ID3D11Device* device, HWND hwnd){
bool result;
// Initialize the vertex and pixel shaders.result =InitializeShader(device, hwnd, L"../Engine/texture.vs", L"../Engine/texture.ps");if(!result){
return false;}
return true;}
void TextureShaderClass::Shutdown()
Tutorial 37: Instancing http://www.rastertek.com/dx11tut37.html

7/14/2019 RasterTek: Direct3D introduction
http://slidepdf.com/reader/full/rastertek-direct3d-introduction 586/709
void TextureShaderClass::Shutdown(){
// Shutdown the vertex and pixel shaders as well as the related objects.ShutdownShader();
return;}
The Render function now takes as input a vertex count and an instance count instead of the old index count.
bool TextureShaderClass::Render(ID3D11DeviceContext* deviceContext, int vertexCount, int instanceCount, D3DXMATRIX worldMatrix, D3DXMATRIX viewMatrix,D3DXMATRIX projectionMatrix, ID3D11ShaderResourceView* texture)
{bool result;
// Set the shader parameters that it will use for rendering.result =SetShaderParameters(deviceContext, worldMatrix, viewMatrix, projectionMatrix, texture);if(!result){
return false;}
// Now render the prepared buffers with the shader.
12 of 28 3/8/2013 12:43 PM
RenderShader(deviceContext, vertexCount, instanceCount);
return true;}
bool TextureShaderClass::InitializeShader(ID3D11Device* device, HWND hwnd, WCHAR* vsFilename, WCHAR* psFilename){
HRESULT result;ID3D10Blob* errorMessage;
ID3D10Blob* vertexShaderBuffer;ID3D10Blob* pixelShaderBuffer;D3D11_INPUT_ELEMENT_DESC polygonLayout[3];unsigned int numElements;D3D11_BUFFER_DESC matrixBufferDesc;D3D11_SAMPLER_DESC samplerDesc;
// Initialize the pointers this function will use to null.
errorMessage =0;vertexShaderBuffer =0;pixelShaderBuffer=0;
Tutorial 37: Instancing http://www.rastertek.com/dx11tut37.html

7/14/2019 RasterTek: Direct3D introduction
http://slidepdf.com/reader/full/rastertek-direct3d-introduction 587/709
pixelShaderBuffer =0;
// Compile the vertex shader code.result =D3DX11CompileFromFile(vsFilename, NULL, NULL, "TextureVertexShader", "vs_5_0", D3D10_SHADER_ENABLE_STRICTNESS, 0, NULL,
&vertexShaderBuffer, &errorMessage, NULL);if(FAILED(result)){
// If the shader failed to compile it should have writen something to the error message.if(errorMessage){
OutputShaderErrorMessage(errorMessage, hwnd, vsFilename);}// If there was nothing in the error message then it simply could not find the shader file itself.else{
MessageBox(hwnd, vsFilename, L"Missing Shader File", MB_OK);}
return false;}
// Compile the pixel shader code.result =D3DX11CompileFromFile(psFilename, NULL, NULL, "TexturePixelShader", "ps_5_0", D3D10_SHADER_ENABLE_STRICTNESS, 0, NULL,
&pixelShaderBuffer, &errorMessage, NULL);
13 of 28 3/8/2013 12:43 PM
if(FAILED(result))
{// If the shader failed to compile it should have writen something to the error message.if(errorMessage){
OutputShaderErrorMessage(errorMessage, hwnd, psFilename);}// If there was nothing in the error message then it simply could not find the file itself.else{
MessageBox(hwnd, psFilename, L"Missing Shader File", MB_OK);}
return false;}
// Create the vertex shader from the buffer.result =device->CreateVertexShader(vertexShaderBuffer->GetBufferPointer(), vertexShaderBuffer->GetBufferSize(), NULL, &m_vertexShader);if(FAILED(result))
{return false;
}
Tutorial 37: Instancing http://www.rastertek.com/dx11tut37.html

7/14/2019 RasterTek: Direct3D introduction
http://slidepdf.com/reader/full/rastertek-direct3d-introduction 588/709
}
// Create the pixel shader from the buffer.result =device->CreatePixelShader(pixelShaderBuffer->GetBufferPointer(), pixelShaderBuffer->GetBufferSize(), NULL, &m_pixelShader);if(FAILED(result)){
return false;
}
// Create the vertex input layout description.// This setup needs to match the VertexType stucture in the ModelClass and in the shader.polygonLayout[0].SemanticName ="POSITION";polygonLayout[0].SemanticIndex =0;polygonLayout[0].Format =DXGI_FORMAT_R32G32B32_FLOAT;polygonLayout[0].InputSlot =0;polygonLayout[0].AlignedByteOffset =0;polygonLayout[0].InputSlotClass =D3D11_INPUT_PER_VERTEX_DATA;polygonLayout[0].InstanceDataStepRate =0;
polygonLayout[1].SemanticName ="TEXCOORD";polygonLayout[1].SemanticIndex =0;polygonLayout[1].Format =DXGI_FORMAT_R32G32_FLOAT;polygonLayout[1].InputSlot =0;polygonLayout[1].AlignedByteOffset =D3D11_APPEND_ALIGNED_ELEMENT;
14 of 28 3/8/2013 12:43 PM
polygonLayout[1].InputSlotClass =D3D11_INPUT_PER_VERTEX_DATA;
polygonLayout[1].InstanceDataStepRate =0;
For instancing we are going to add a third element to the layout. As we plan to position the four instanced triangles in different positions in 3D space we need tosend the shader an extra position vector composed of three floats representing x, y, and z. Therefore the format is set to DXGI_FORMAT_R32G32B32_FLOAT. Thesemantic name is set to TEXCOORD as we are just using a generic semantic. Note that we have to set the semantic index to 1 in the layout since there is already a
TEXCOORD for the texture coordinates using slot 0.
Now for the instancing specific stuff we set the InputSlotClass to D3D11_INPUT_PER_INSTANCE_DATA which indicates that this is instanced data. Secondly theInstanceDataStepRate is now used and we set the step rate to 1 so that it will draw one instance before stepping forward a unit in the instance data. Note also that
this is the first unit in the instance buffer so we set the AlignedByteOffset to 0 again since we are not aligning to the vertex buffer with the instance data.
polygonLayout[2].SemanticName ="TEXCOORD";polygonLayout[2].SemanticIndex =1;polygonLayout[2].Format =DXGI_FORMAT_R32G32B32_FLOAT;polygonLayout[2].InputSlot =1;polygonLayout[2].AlignedByteOffset =0;polygonLayout[2].InputSlotClass =D3D11_INPUT_PER_INSTANCE_DATA;polygonLayout[2].InstanceDataStepRate =1;
// Get a count of the elements in the layout.numElements =sizeof(polygonLayout) / sizeof(polygonLayout[0]);
Tutorial 37: Instancing http://www.rastertek.com/dx11tut37.html

7/14/2019 RasterTek: Direct3D introduction
http://slidepdf.com/reader/full/rastertek-direct3d-introduction 589/709
(p yg y ) / (p yg y [ ]);
// Create the vertex input layout.result =device->CreateInputLayout(polygonLayout, numElements, vertexShaderBuffer->GetBufferPointer(), vertexShaderBuffer->GetBufferSize(),
&m_layout);if(FAILED(result)){
return false;}
// Release the vertex shader buffer and pixel shader buffer since they are no longer needed.vertexShaderBuffer->Release();vertexShaderBuffer =0;
pixelShaderBuffer->Release();pixelShaderBuffer =0;
// Setup the description of the dynamic matrix constant buffer that is in the vertex shader.matrixBufferDesc.Usage =D3D11_USAGE_DYNAMIC;matrixBufferDesc.ByteWidth =sizeof(MatrixBufferType);matrixBufferDesc.BindFlags =D3D11_BIND_CONSTANT_BUFFER;matrixBufferDesc.CPUAccessFlags =D3D11_CPU_ACCESS_WRITE;matrixBufferDesc.MiscFlags =0;matrixBufferDesc.StructureByteStride =0;
15 of 28 3/8/2013 12:43 PM
// Create the constant buffer pointer so we can access the vertex shader constant buffer from within this class.result =device->CreateBuffer(&matrixBufferDesc, NULL, &m_matrixBuffer);if(FAILED(result)){
return false;}
// Create a texture sampler state description.samplerDesc.Filter =D3D11_FILTER_MIN_MAG_MIP_LINEAR;
samplerDesc.AddressU =D3D11_TEXTURE_ADDRESS_WRAP;samplerDesc.AddressV =D3D11_TEXTURE_ADDRESS_WRAP;samplerDesc.AddressW =D3D11_TEXTURE_ADDRESS_WRAP;samplerDesc.MipLODBias =0.0f;samplerDesc.MaxAnisotropy =1;samplerDesc.ComparisonFunc =D3D11_COMPARISON_ALWAYS;samplerDesc.BorderColor[0] =0;samplerDesc.BorderColor[1] =0;samplerDesc.BorderColor[2] =0;
samplerDesc.BorderColor[3] =0;samplerDesc.MinLOD =0;samplerDesc.MaxLOD =D3D11_FLOAT32_MAX;
Tutorial 37: Instancing http://www.rastertek.com/dx11tut37.html

7/14/2019 RasterTek: Direct3D introduction
http://slidepdf.com/reader/full/rastertek-direct3d-introduction 590/709
p _ _
// Create the texture sampler state.result =device->CreateSamplerState(&samplerDesc, &m_sampleState);if(FAILED(result)){
return false;
}
return true;}
void TextureShaderClass::ShutdownShader(){
// Release the sampler state.
if(m_sampleState){
m_sampleState->Release();m_sampleState =0;
}
// Release the matrix constant buffer.if(m_matrixBuffer)
16 of 28 3/8/2013 12:43 PM
{
m_matrixBuffer->Release();m_matrixBuffer =0;
}
// Release the layout.if(m_layout){
m_layout->Release();m_layout =0;
}
// Release the pixel shader.if(m_pixelShader){
m_pixelShader->Release();m_pixelShader =0;
}
// Release the vertex shader.if(m_vertexShader){
Tutorial 37: Instancing http://www.rastertek.com/dx11tut37.html

7/14/2019 RasterTek: Direct3D introduction
http://slidepdf.com/reader/full/rastertek-direct3d-introduction 591/709
m_vertexShader->Release();m_vertexShader =0;
}
return;}
void TextureShaderClass::OutputShaderErrorMessage(ID3D10Blob* errorMessage, HWND hwnd, WCHAR* shaderFilename){
char* compileErrors;unsigned long bufferSize, i;ofstream fout;
// Get a pointer to the error message text buffer.compileErrors =(char*)(errorMessage->GetBufferPointer());
// Get the length of the message.bufferSize =errorMessage->GetBufferSize();
// Open a file to write the error message to.fout.open("shader-error.txt");
17 of 28 3/8/2013 12:43 PM
// Write out the error message.for(i=0; i<bufferSize; i++){
fout <<compileErrors[i];}
// Close the file.fout.close();
// Release the error message.errorMessage->Release();errorMessage =0;
// Pop a message up on the screen to notify the user to check the text file for compile errors.MessageBox(hwnd, L"Error compiling shader. Check shader-error.txt for message.", shaderFilename, MB_OK);
return;}
bool TextureShaderClass::SetShaderParameters(ID3D11DeviceContext* deviceContext, D3DXMATRIX worldMatrix, D3DXMATRIX viewMatrix,D3DXMATRIX j i M i ID3D11Sh d R Vi * )
Tutorial 37: Instancing http://www.rastertek.com/dx11tut37.html

7/14/2019 RasterTek: Direct3D introduction
http://slidepdf.com/reader/full/rastertek-direct3d-introduction 592/709
D3DXMATRIX projectionMatrix, ID3D11ShaderResourceView* texture){
HRESULT result;D3D11_MAPPED_SUBRESOURCE mappedResource;MatrixBufferType* dataPtr;unsigned int bufferNumber;
// Transpose the matrices to prepare them for the shader.D3DXMatrixTranspose(&worldMatrix, &worldMatrix);D3DXMatrixTranspose(&viewMatrix, &viewMatrix);D3DXMatrixTranspose(&projectionMatrix, &projectionMatrix);
// Lock the constant buffer so it can be written to.result =deviceContext->Map(m_matrixBuffer, 0, D3D11_MAP_WRITE_DISCARD, 0, &mappedResource);
if(FAILED(result)){
return false;}
// Get a pointer to the data in the constant buffer.dataPtr =(MatrixBufferType*)mappedResource.pData;
18 of 28 3/8/2013 12:43 PM
// Copy the matrices into the constant buffer.
dataPtr->world =worldMatrix;dataPtr->view =viewMatrix;dataPtr->projection =projectionMatrix;
// Unlock the constant buffer.deviceContext->Unmap(m_matrixBuffer, 0);
// Set the position of the constant buffer in the vertex shader.bufferNumber =0;
// Now set the constant buffer in the vertex shader with the updated values.deviceContext->VSSetConstantBuffers(bufferNumber, 1, &m_matrixBuffer);
// Set shader texture resource in the pixel shader.deviceContext->PSSetShaderResources(0, 1, &texture);
return true;}
The RenderShader function is different in two ways. First is that it takes as input the vertex and instance count instead of how it used to take in just an index count.Secondly it uses the DrawInstanced function to draw the triangles instead of using the DrawIndexed function.
Tutorial 37: Instancing http://www.rastertek.com/dx11tut37.html

7/14/2019 RasterTek: Direct3D introduction
http://slidepdf.com/reader/full/rastertek-direct3d-introduction 593/709
void TextureShaderClass::RenderShader(ID3D11DeviceContext* deviceContext, int vertexCount, int instanceCount){
// Set the vertex input layout.deviceContext->IASetInputLayout(m_layout);
// Set the vertex and pixel shaders that will be used to render this triangle.deviceContext->VSSetShader(m_vertexShader, NULL, 0);deviceContext->PSSetShader(m_pixelShader, NULL, 0);
// Set the sampler state in the pixel shader.deviceContext->PSSetSamplers(0, 1, &m_sampleState);
// Render the triangle.deviceContext->DrawInstanced(vertexCount, instanceCount, 0, 0);
return;}
Texture.vs
19 of 28 3/8/2013 12:43 PM
The vertex shader has now been modified to use instancing.
////////////////////////////////////////////////////////////////////////////////// Filename: texture.vs////////////////////////////////////////////////////////////////////////////////
/////////////// GLOBALS ///////////////
cbuffer MatrixBuffer{
matrix worldMatrix;matrix viewMatrix;matrix projectionMatrix;
};
//////////////
// TYPEDEFS ////////////////
The VertexInputType structure nowhas the third element which will hold the instanced input position data
Tutorial 37: Instancing http://www.rastertek.com/dx11tut37.html

7/14/2019 RasterTek: Direct3D introduction
http://slidepdf.com/reader/full/rastertek-direct3d-introduction 594/709
The VertexInputType structure now has the third element which will hold the instanced input position data.
struct VertexInputType{
float4 position : POSITION;float2 tex : TEXCOORD0;
float3 instancePosition : TEXCOORD1;};
struct PixelInputType{
float4 position : SV_POSITION;float2 tex : TEXCOORD0;
};
////////////////////////////////////////////////////////////////////////////////// Vertex Shader////////////////////////////////////////////////////////////////////////////////PixelInputType TextureVertexShader(VertexInputType input){
PixelInputType output;
20 of 28 3/8/2013 12:43 PM
// Change the position vector to be 4 units for proper matrix calculations.input.position.w =1.0f;
Here is where we use the instanced position information to modify the position of each triangle we are drawing.
// Update the position of the vertices based on the data for this particular instance.input.position.x +=input.instancePosition.x;input.position.y +=input.instancePosition.y;input.position.z +=input.instancePosition.z;
// Calculate the position of the vertex against the world, view, and projection matrices.output.position =mul(input.position, worldMatrix);output.position =mul(output.position, viewMatrix);output.position =mul(output.position, projectionMatrix);
// Store the texture coordinates for the pixel shader.output.tex =input.tex;
return output;}
Tutorial 37: Instancing http://www.rastertek.com/dx11tut37.html

7/14/2019 RasterTek: Direct3D introduction
http://slidepdf.com/reader/full/rastertek-direct3d-introduction 595/709
Texture.ps
The pixel shader has not changed for this tutorial.
////////////////////////////////////////////////////////////////////////////////// Filename: texture.ps////////////////////////////////////////////////////////////////////////////////
/////////////// GLOBALS ///////////////
Texture2D shaderTexture;SamplerState SampleType;
//////////////// TYPEDEFS ////////////////struct PixelInputType
21 of 28 3/8/2013 12:43 PM
{
float4 position : SV_POSITION;float2 tex : TEXCOORD0;
};
////////////////////////////////////////////////////////////////////////////////// Pixel Shader////////////////////////////////////////////////////////////////////////////////float4 TexturePixelShader(PixelInputType input) : SV_TARGET
{float4 textureColor;
// Sample the pixel color from the texture using the sampler at this texture coordinate location.textureColor =shaderTexture.Sample(SampleType, input.tex);
return textureColor;}
Graphicsclass h
Tutorial 37: Instancing http://www.rastertek.com/dx11tut37.html

7/14/2019 RasterTek: Direct3D introduction
http://slidepdf.com/reader/full/rastertek-direct3d-introduction 596/709
Graphicsclass.h
The GraphicsClass header hasn't changed for this tutorial.
////////////////////////////////////////////////////////////////////////////////// Filename: graphicsclass.h////////////////////////////////////////////////////////////////////////////////#ifndef _GRAPHICSCLASS_H_ #define _GRAPHICSCLASS_H_
///////////////////////// MY CLASS INCLUDES /////////////////////////#include "d3dclass.h"#include "cameraclass.h"#include "modelclass.h"#include "textureshaderclass.h"
/////////////// GLOBALS //
22 of 28 3/8/2013 12:43 PM
/////////////
const bool FULL_SCREEN =true;const bool VSYNC_ENABLED =true;const float SCREEN_DEPTH =1000.0f;const float SCREEN_NEAR =0.1f;
////////////////////////////////////////////////////////////////////////////////// Class name: GraphicsClass////////////////////////////////////////////////////////////////////////////////
class GraphicsClass{public:
GraphicsClass();GraphicsClass(const GraphicsClass&);~GraphicsClass();
bool Initialize(int, int, HWND);void Shutdown();
bool Frame();
private:bool Render();
Tutorial 37: Instancing http://www.rastertek.com/dx11tut37.html

7/14/2019 RasterTek: Direct3D introduction
http://slidepdf.com/reader/full/rastertek-direct3d-introduction 597/709
();
private:D3DClass* m_D3D;CameraClass* m_Camera;ModelClass* m_Model;
TextureShaderClass* m_TextureShader;};
#endif
Graphicsclass.cpp
////////////////////////////////////////////////////////////////////////////////// Filename: graphicsclass.cpp////////////////////////////////////////////////////////////////////////////////#include "graphicsclass.h"
GraphicsClass::GraphicsClass()
23 of 28 3/8/2013 12:43 PM
{
m_D3D =0;m_Camera =0;m_Model =0;m_TextureShader =0;
}
GraphicsClass::GraphicsClass(const GraphicsClass& other){
}
GraphicsClass::~GraphicsClass(){}
bool GraphicsClass::Initialize(int screenWidth, int screenHeight, HWND hwnd)
{bool result;
Tutorial 37: Instancing http://www.rastertek.com/dx11tut37.html

7/14/2019 RasterTek: Direct3D introduction
http://slidepdf.com/reader/full/rastertek-direct3d-introduction 598/709
// Create the Direct3D object.m_D3D =new D3DClass;if(!m_D3D){
return false;
}
// Initialize the Direct3D object.result =m_D3D->Initialize(screenWidth, screenHeight, VSYNC_ENABLED, hwnd, FULL_SCREEN, SCREEN_DEPTH, SCREEN_NEAR);if(!result){
MessageBox(hwnd, L"Could not initialize Direct3D.", L"Error", MB_OK);return false;
}
// Create the camera object.m_Camera =new CameraClass;if(!m_Camera){
return false;}
24 of 28 3/8/2013 12:43 PM
// Set the initial position of the camera.
m_Camera->SetPosition(0.0f, 0.0f, -10.0f);
// Create the model object.m_Model =new ModelClass;if(!m_Model){
return false;}
// Initialize the model object.result =m_Model->Initialize(m_D3D->GetDevice(), L"../Engine/data/seafloor.dds");if(!result){
MessageBox(hwnd, L"Could not initialize the model object.", L"Error", MB_OK);return false;
}
// Create the texture shader object.
m_TextureShader =new TextureShaderClass;if(!m_TextureShader){
return false;
Tutorial 37: Instancing http://www.rastertek.com/dx11tut37.html

7/14/2019 RasterTek: Direct3D introduction
http://slidepdf.com/reader/full/rastertek-direct3d-introduction 599/709
}
// Initialize the texture shader object.result =m_TextureShader->Initialize(m_D3D->GetDevice(), hwnd);if(!result)
{MessageBox(hwnd, L"Could not initialize the texture shader object.", L"Error", MB_OK);return false;
}
return true;}
void GraphicsClass::Shutdown(){
// Release the texture shader object.if(m_TextureShader){
m_TextureShader->Shutdown();delete m_TextureShader;m_TextureShader =0;
25 of 28 3/8/2013 12:43 PM
}
// Release the model object.if(m_Model){
m_Model->Shutdown();delete m_Model;m_Model =0;
}
// Release the camera object.if(m_Camera){
delete m_Camera;m_Camera =0;
}
// Release the D3D object.if(m_D3D)
{m_D3D->Shutdown();delete m_D3D;m_D3D =0;
}
Tutorial 37: Instancing http://www.rastertek.com/dx11tut37.html

7/14/2019 RasterTek: Direct3D introduction
http://slidepdf.com/reader/full/rastertek-direct3d-introduction 600/709
}
return;}
bool GraphicsClass::Frame(){
bool result;
// Render the graphics scene.result =Render();if(!result)
{return false;
}
return true;}
26 of 28 3/8/2013 12:43 PM
bool GraphicsClass::Render()
{D3DXMATRIX worldMatrix, viewMatrix, projectionMatrix;bool result;
// Clear the buffers to begin the scene.m_D3D->BeginScene(0.0f, 0.0f, 0.0f, 1.0f);
// Generate the view matrix based on the camera's position.
m_Camera->Render();
// Get the world, view, and projection matrices from the camera and d3d objects.m_Camera->GetViewMatrix(viewMatrix);m_D3D->GetWorldMatrix(worldMatrix);m_D3D->GetProjectionMatrix(projectionMatrix);
// Put the model vertex and index buffers on the graphics pipeline to prepare them for drawing.m_Model->Render(m_D3D->GetDeviceContext());
The Render function for the shader now requires the vertex and instance count from the model object.
// Render the model using the texture shader.result m TextureShader >Render(m D3D >GetDeviceContext() m Model >GetVertexCount() m Model >GetInstanceCount() worldMatrix viewMatrix
Tutorial 37: Instancing http://www.rastertek.com/dx11tut37.html

7/14/2019 RasterTek: Direct3D introduction
http://slidepdf.com/reader/full/rastertek-direct3d-introduction 601/709
result =m_TextureShader->Render(m_D3D->GetDeviceContext(), m_Model->GetVertexCount(), m_Model->GetInstanceCount(), worldMatrix, viewMatrix,projectionMatrix, m_Model->GetTexture());
if(!result){
return false;
}
// Present the rendered scene to the screen.m_D3D->EndScene();
return true;}
Summary
With instancing we can now use just a single copy of geometry and render it multiple times with each instance having its own unique rendering properties.
27 of 28 3/8/2013 12:43 PM
T D E i
Tutorial 37: Instancing http://www.rastertek.com/dx11tut37.html

7/14/2019 RasterTek: Direct3D introduction
http://slidepdf.com/reader/full/rastertek-direct3d-introduction 602/709
To Do Exercises
1. Recompile and run the program. You should see four triangles drawn using just a single triangle model.
2. Modify the position information to place the four triangles differently.
3. Add a fifth instance of the triangle.
4. Modify the color information also for each instance.
Source Code
Source Code and Data Files: dx11src37.zip
Executable: dx11exe37.zip
Back to Tutorial Index
28 of 28 3/8/2013 12:43 PM
Tutor ial 43: Projective Texturing
This tutorial will cover projective texturing in DirectX 11 using HLSL and C++.
Projective texturing is one of the most critical concepts you need to have a strong understanding of to perform most of the advanced rendering techniques for realtime applications. For example soft shadows, water, projective light maps, and reflections all require projective texturing.
Projective texturing simply put is just projecting a 2D texture onto a 3D scene from a specific view point. It works in a similar fashion to the way we use a camera
view point to render a 3D scene onto the 2D back buffer. We first create a viewing frustum from the view point from where we want to project the texture from. Thiswould look something like the following:
Tutorial 43: Projective Texturing http://www.rastertek.com/dx11tut43.html

7/14/2019 RasterTek: Direct3D introduction
http://slidepdf.com/reader/full/rastertek-direct3d-introduction 603/709
Then whenever we find that the viewing frustum has intersected with another 3D object we would draw a pixel from the texture that matches the projected location.For example if we projected a texture onto a blue plane we would end up rendering the texture inside the green boundary area that intersects with the blue 3Dplane:
1 of 32 3/8/2013 12:45 PM
For this tutorial we will start with the following 3D scene of a cube sitting on a plane:
Tutorial 43: Projective Texturing http://www.rastertek.com/dx11tut43.html

7/14/2019 RasterTek: Direct3D introduction
http://slidepdf.com/reader/full/rastertek-direct3d-introduction 604/709
Then we will use the following texture as the texture we want to project onto our 3D scene:
2 of 32 3/8/2013 12:45 PM
Then we will setup the view point from where we want to project and also the location to where we want to project. The "from" location will be called the view point,and the "to" location will be called the look at point. In this example our from location (view point) will be behind the camera to the upper right corner of the scene.
And we will set the location to project to (the look at point) as the center of the scene. We then setup a view and projection matrix with these parameters and thenrender the scene projecting the texture onto it. This gives us the following result:
Tutorial 43: Projective Texturing http://www.rastertek.com/dx11tut43.html

7/14/2019 RasterTek: Direct3D introduction
http://slidepdf.com/reader/full/rastertek-direct3d-introduction 605/709
We will start the code section of the tutorial by looking at the projection shader HLSL code first.
3 of 32 3/8/2013 12:45 PM
Projection.vs
The code for the projection shaders is the directional light shaders modified to handle projected texturing.
////////////////////////////////////////////////////////////////////////////////// Filename: projection.vs////////////////////////////////////////////////////////////////////////////////
/////////////
// GLOBALS ///////////////cbuffer MatrixBuffer{
matrix worldMatrix;matrix viewMatrix;matrix projectionMatrix;
We will require a separate view matrix and projection matrix for the view point that we want to project the texture from.
matrix viewMatrix2;matrix projectionMatrix2;
};
Tutorial 43: Projective Texturing http://www.rastertek.com/dx11tut43.html

7/14/2019 RasterTek: Direct3D introduction
http://slidepdf.com/reader/full/rastertek-direct3d-introduction 606/709
//////////////// TYPEDEFS ////////////////
struct VertexInputType{
float4 position : POSITION;float2 tex : TEXCOORD0;float3 normal : NORMAL;
};
struct PixelInputType{
float4 position : SV_POSITION;float2 tex : TEXCOORD0;float3 normal : NORMAL;
The viewPosition is the position of the vertice as viewed by the location where we are going to the project the texture from.
float4 viewPosition : TEXCOORD1;
4 of 32 3/8/2013 12:45 PM
};
////////////////////////////////////////////////////////////////////////////////// Vertex Shader////////////////////////////////////////////////////////////////////////////////PixelInputType ProjectionVertexShader(VertexInputType input){
PixelInputType output;
// Change the position vector to be 4 units for proper matrix calculations.input.position.w =1.0f;
// Calculate the position of the vertex against the world, view, and projection matrices.output.position =mul(input.position, worldMatrix);output.position =mul(output.position, viewMatrix);output.position =mul(output.position, projectionMatrix);
Calculate the position of the vertice from the view point of where we are projecting the texture from. Note we can use the regular world matrix but we use the secondpair of view and projection matrices.
// Store the position of the vertice as viewed by the projection view point in a separate variable.output.viewPosition =mul(input.position, worldMatrix);
Tutorial 43: Projective Texturing http://www.rastertek.com/dx11tut43.html

7/14/2019 RasterTek: Direct3D introduction
http://slidepdf.com/reader/full/rastertek-direct3d-introduction 607/709
output.viewPosition =mul(output.viewPosition, viewMatrix2);output.viewPosition =mul(output.viewPosition, projectionMatrix2);
// Store the texture coordinates for the pixel shader.
output.tex =input.tex;
// Calculate the normal vector against the world matrix only.output.normal =mul(input.normal, (float3x3)worldMatrix);
// Normalize the normal vector.output.normal =normalize(output.normal);
return output;
}
Projection.ps
////////////////////////////////////////////////////////////////////////////////
5 of 32 3/8/2013 12:45 PM
// Filename: projection.ps
////////////////////////////////////////////////////////////////////////////////
//////////////// TEXTURES ////////////////
Texture2D shaderTexture : register(t0);
The projectionTexture is the texture that we will be projecting onto the scene.
Texture2D projectionTexture : register(t1);
//////////////// SAMPLERS ////////////////SamplerState SampleType;
//////////////////////// CONSTANT BUFFERS ////////////////////////cbuffer LightBuffer{
Tutorial 43: Projective Texturing http://www.rastertek.com/dx11tut43.html

7/14/2019 RasterTek: Direct3D introduction
http://slidepdf.com/reader/full/rastertek-direct3d-introduction 608/709
{float4 ambientColor;float4 diffuseColor;float3 lightDirection;
float padding;};
//////////////// TYPEDEFS ////////////////struct PixelInputType{
float4 position : SV_POSITION;float2 tex : TEXCOORD0;float3 normal : NORMAL;float4 viewPosition : TEXCOORD1;
};
////////////////////////////////////////////////////////////////////////////////
6 of 32 3/8/2013 12:45 PM
// Pixel Shader
////////////////////////////////////////////////////////////////////////////////float4 ProjectionPixelShader(PixelInputType input) : SV_TARGET{
float4 color;float3 lightDir;float lightIntensity;float4 textureColor;float2 projectTexCoord;float4 projectionColor;
Perform regular directional lighting and texturing as usual.
// Set the default output color to the ambient light value for all pixels.color =ambientColor;
// Invert the light direction for calculations.lightDir =-lightDirection;
// Calculate the amount of light on this pixel.lightIntensity =saturate(dot(input.normal, lightDir));
if(lightIntensity >0.0f){
// Determine the light color based on the diffuse color and the amount of light intensity
Tutorial 43: Projective Texturing http://www.rastertek.com/dx11tut43.html

7/14/2019 RasterTek: Direct3D introduction
http://slidepdf.com/reader/full/rastertek-direct3d-introduction 609/709
// Determine the light color based on the diffuse color and the amount of light intensity.color +=(diffuseColor * lightIntensity);
}
// Saturate the light color.color =saturate(color);
// Sample the pixel color from the texture using the sampler at this texture coordinate location.textureColor =shaderTexture.Sample(SampleType, input.tex);
// Combine the light color and the texture color.color =color * textureColor;
Now we calculate the projection coordinates for sampling the projected texture from. These coordinates are the position the vertex is being viewed from by thelocation of the projection view point. The coordinates are translated into 2D screen coordinates and moved into the 0.0f to 1.0f range from the -0.5f to +0.5f range.
// Calculate the projected texture coordinates.projectTexCoord.x = input.viewPosition.x / input.viewPosition.w / 2.0f +0.5f;projectTexCoord.y =-input.viewPosition.y / input.viewPosition.w / 2.0f +0.5f;
Next we need to check if the coordinates are in the 0.0f to 1.0f range. If they are not in that range then this pixel is not in the projection area so it is just illuminated
7 of 32 3/8/2013 12:45 PM
and textured as normal. However if it is inside the 0.0f to 1.0f range then this pixel is inside the projected texture area and we need to apply the projected texture to
the output pixel.
// Determine if the projected coordinates are in the 0 to 1 range. If it is then this pixel is inside the projected view port.if((saturate(projectTexCoord.x) ==projectTexCoord.x) && (saturate(projectTexCoord.y) ==projectTexCoord.y)){
Sample the projection texture using the projected texture coordinates and then set the output pixel color to be the projected texture color.
// Sample the color value from the projection texture using the sampler at the projected texture coordinate location.
projectionColor =projectionTexture.Sample(SampleType, projectTexCoord);
// Set the output color of this pixel to the projection texture overriding the regular color value.color =projectionColor;
}
return color;}
Projectionshaderclass.h
The ProjectionShaderClass is just the LightShaderClass rewritten to handle texture projection.
Tutorial 43: Projective Texturing http://www.rastertek.com/dx11tut43.html

7/14/2019 RasterTek: Direct3D introduction
http://slidepdf.com/reader/full/rastertek-direct3d-introduction 610/709
////////////////////////////////////////////////////////////////////////////////// Filename: projectionshaderclass.h////////////////////////////////////////////////////////////////////////////////
#ifndef _PROJ ECTIONSHADERCLASS_H_ #define _PROJ ECTIONSHADERCLASS_H_
//////////////// INCLUDES ////////////////#include <d3d11.h>#include <d3dx10math.h>
#include <d3dx11async.h>#include <fstream>using namespace std;
////////////////////////////////////////////////////////////////////////////////// Class name: ProjectionShaderClass
8 of 32 3/8/2013 12:45 PM
////////////////////////////////////////////////////////////////////////////////
class ProjectionShaderClass{private:
struct MatrixBufferType{
D3DXMATRIX world;D3DXMATRIX view;D3DXMATRIX projection;
We will require a view matrix and a projection matrix from the view point of the projection to perform projected texturing.
D3DXMATRIX view2;D3DXMATRIX projection2;
};
struct LightBufferType{
D3DXVECTOR4 ambientColor;
D3DXVECTOR4 diffuseColor;D3DXVECTOR3 lightDirection;float padding;
};
public:
Tutorial 43: Projective Texturing http://www.rastertek.com/dx11tut43.html

7/14/2019 RasterTek: Direct3D introduction
http://slidepdf.com/reader/full/rastertek-direct3d-introduction 611/709
public:ProjectionShaderClass();ProjectionShaderClass(const ProjectionShaderClass&);~ProjectionShaderClass();
bool Initialize(ID3D11Device*, HWND);void Shutdown();bool Render(ID3D11DeviceContext*, int, D3DXMATRIX, D3DXMATRIX, D3DXMATRIX, ID3D11ShaderResourceView*, D3DXVECTOR4, D3DXVECTOR4, D3D
D3DXMATRIX, D3DXMATRIX, ID3D11ShaderResourceView*);
private:bool InitializeShader(ID3D11Device*, HWND, WCHAR*, WCHAR*);void ShutdownShader();
void OutputShaderErrorMessage(ID3D10Blob*, HWND, WCHAR*);
bool SetShaderParameters(ID3D11DeviceContext*, D3DXMATRIX, D3DXMATRIX, D3DXMATRIX, ID3D11ShaderResourceView*, D3DXVECTOR4, D3DXVECD3DXMATRIX, D3DXMATRIX, ID3D11ShaderResourceView*);
void RenderShader(ID3D11DeviceContext*, int);
private:ID3D11VertexShader* m_vertexShader;
9 of 32 3/8/2013 12:45 PM
ID3D11PixelShader* m_pixelShader;
ID3D11InputLayout* m_layout;ID3D11SamplerState* m_sampleState;ID3D11Buffer* m_matrixBuffer;ID3D11Buffer* m_lightBuffer;
};
#endif
Projectionshaderclass.cpp
////////////////////////////////////////////////////////////////////////////////// Filename: projectionshaderclass.cpp////////////////////////////////////////////////////////////////////////////////#include "projectionshaderclass.h"
ProjectionShaderClass::ProjectionShaderClass(){
m_vertexShader =0;m_pixelShader =0;m_layout =0;m sampleState =0;
Tutorial 43: Projective Texturing http://www.rastertek.com/dx11tut43.html

7/14/2019 RasterTek: Direct3D introduction
http://slidepdf.com/reader/full/rastertek-direct3d-introduction 612/709
m_sampleState =0;m_matrixBuffer =0;m_lightBuffer =0;
}
ProjectionShaderClass::ProjectionShaderClass(const ProjectionShaderClass& other){}
ProjectionShaderClass::~ProjectionShaderClass(){
}
bool ProjectionShaderClass::Initialize(ID3D11Device* device, HWND hwnd){
bool result;
10 of 32 3/8/2013 12:45 PM
Load the projection HLSL files.
// Initialize the vertex and pixel shaders.result =InitializeShader(device, hwnd, L"../Engine/projection.vs", L"../Engine/projection.ps");if(!result){
return false;}
return true;
}
void ProjectionShaderClass::Shutdown(){
// Shutdown the vertex and pixel shaders as well as the related objects.ShutdownShader();
return;
}
bool ProjectionShaderClass::Render(ID3D11DeviceContext* deviceContext, int indexCount, D3DXMATRIX worldMatrix, D3DXMATRIX viewMatrix,D3DXMATRIX projectionMatrix, ID3D11ShaderResourceView* texture, D3DXVECTOR4 ambientColor, D3DXVECTOR4 diffuseColor,D3DXVECTOR3 lightDirection, D3DXMATRIX viewMatrix2, D3DXMATRIX projectionMatrix2,
Tutorial 43: Projective Texturing http://www.rastertek.com/dx11tut43.html

7/14/2019 RasterTek: Direct3D introduction
http://slidepdf.com/reader/full/rastertek-direct3d-introduction 613/709
g p jID3D11ShaderResourceView* projectionTexture)
{bool result;
// Set the shader parameters that it will use for rendering.result =SetShaderParameters(deviceContext, worldMatrix, viewMatrix, projectionMatrix, texture, ambientColor, diffuseColor, lightDirection,
viewMatrix2, projectionMatrix2, projectionTexture);if(!result){
return false;}
// Now render the prepared buffers with the shader.RenderShader(deviceContext, indexCount);
return true;}
11 of 32 3/8/2013 12:45 PM
bool ProjectionShaderClass::InitializeShader(ID3D11Device* device, HWND hwnd, WCHAR* vsFilename, WCHAR* psFilename)
{ HRESULT result;ID3D10Blob* errorMessage;ID3D10Blob* vertexShaderBuffer;ID3D10Blob* pixelShaderBuffer;D3D11_INPUT_ELEMENT_DESC polygonLayout[3];unsigned int numElements;D3D11_SAMPLER_DESC samplerDesc;D3D11_BUFFER_DESC matrixBufferDesc;
D3D11_BUFFER_DESC lightBufferDesc;
// Initialize the pointers this function will use to null.errorMessage =0;vertexShaderBuffer =0;pixelShaderBuffer =0;
Compile the projection vertex shader.
// Compile the vertex shader code.result =D3DX11CompileFromFile(vsFilename, NULL, NULL, "ProjectionVertexShader", "vs_5_0", D3D10_SHADER_ENABLE_STRICTNESS, 0, NULL,
&vertexShaderBuffer, &errorMessage, NULL);if(FAILED(result)){
Tutorial 43: Projective Texturing http://www.rastertek.com/dx11tut43.html
7/14/2019 RasterTek: Direct3D introduction
http://slidepdf.com/reader/full/rastertek-direct3d-introduction 614/709
// If the shader failed to compile it should have writen something to the error message.if(errorMessage){
OutputShaderErrorMessage(errorMessage, hwnd, vsFilename);}// If there was nothing in the error message then it simply could not find the shader file itself.else{
MessageBox(hwnd, vsFilename, L"Missing Shader File", MB_OK);}
return false;
}
Compile the projection pixel shader.
// Compile the pixel shader code.result =D3DX11CompileFromFile(psFilename, NULL, NULL, "ProjectionPixelShader", "ps_5_0", D3D10_SHADER_ENABLE_STRICTNESS, 0, NULL,
&pixelShaderBuffer, &errorMessage, NULL);if(FAILED(result))
12 of 32 3/8/2013 12:45 PM
{
// If the shader failed to compile it should have writen something to the error message.if(errorMessage){
OutputShaderErrorMessage(errorMessage, hwnd, psFilename);}// If there was nothing in the error message then it simply could not find the file itself.else{
MessageBox(hwnd, psFilename, L"Missing Shader File", MB_OK);
}
return false;}
// Create the vertex shader from the buffer.result =device->CreateVertexShader(vertexShaderBuffer->GetBufferPointer(), vertexShaderBuffer->GetBufferSize(), NULL, &m_vertexShader);if(FAILED(result)){
return false;}
// Create the pixel shader from the buffer.result =device->CreatePixelShader(pixelShaderBuffer->GetBufferPointer(), pixelShaderBuffer->GetBufferSize(), NULL, &m_pixelShader);if(FAILED(result)){
Tutorial 43: Projective Texturing http://www.rastertek.com/dx11tut43.html
7/14/2019 RasterTek: Direct3D introduction
http://slidepdf.com/reader/full/rastertek-direct3d-introduction 615/709
{return false;
}
// Create the vertex input layout description.polygonLayout[0].SemanticName ="POSITION";polygonLayout[0].SemanticIndex =0;polygonLayout[0].Format =DXGI_FORMAT_R32G32B32_FLOAT;polygonLayout[0].InputSlot =0;polygonLayout[0].AlignedByteOffset =0;polygonLayout[0].InputSlotClass =D3D11_INPUT_PER_VERTEX_DATA;polygonLayout[0].InstanceDataStepRate =0;
polygonLayout[1].SemanticName ="TEXCOORD";polygonLayout[1].SemanticIndex =0;polygonLayout[1].Format =DXGI_FORMAT_R32G32_FLOAT;polygonLayout[1].InputSlot =0;polygonLayout[1].AlignedByteOffset =D3D11_APPEND_ALIGNED_ELEMENT;polygonLayout[1].InputSlotClass =D3D11_INPUT_PER_VERTEX_DATA;polygonLayout[1].InstanceDataStepRate =0;
13 of 32 3/8/2013 12:45 PM
polygonLayout[2].SemanticName ="NORMAL";polygonLayout[2].SemanticIndex =0;polygonLayout[2].Format =DXGI_FORMAT_R32G32B32_FLOAT;polygonLayout[2].InputSlot =0;polygonLayout[2].AlignedByteOffset =D3D11_APPEND_ALIGNED_ELEMENT;polygonLayout[2].InputSlotClass =D3D11_INPUT_PER_VERTEX_DATA;polygonLayout[2].InstanceDataStepRate =0;
// Get a count of the elements in the layout.
numElements =sizeof(polygonLayout) / sizeof(polygonLayout[0]);
// Create the vertex input layout.result =device->CreateInputLayout(polygonLayout, numElements, vertexShaderBuffer->GetBufferPointer(), vertexShaderBuffer->GetBufferSize(),
&m_layout);if(FAILED(result)){
return false;}
// Release the vertex shader buffer and pixel shader buffer since they are no longer needed.vertexShaderBuffer->Release();vertexShaderBuffer =0;
pixelShaderBuffer->Release();i lSh d B ff 0
Tutorial 43: Projective Texturing http://www.rastertek.com/dx11tut43.html

7/14/2019 RasterTek: Direct3D introduction
http://slidepdf.com/reader/full/rastertek-direct3d-introduction 616/709
pixelShaderBuffer =0;
// Create a texture sampler state description.
samplerDesc.Filter =D3D11_FILTER_MIN_MAG_MIP_LINEAR;samplerDesc.AddressU =D3D11_TEXTURE_ADDRESS_WRAP;samplerDesc.AddressV =D3D11_TEXTURE_ADDRESS_WRAP;samplerDesc.AddressW =D3D11_TEXTURE_ADDRESS_WRAP;samplerDesc.MipLODBias =0.0f;samplerDesc.MaxAnisotropy =1;samplerDesc.ComparisonFunc =D3D11_COMPARISON_ALWAYS;samplerDesc.BorderColor[0] =0;samplerDesc.BorderColor[1] =0;
samplerDesc.BorderColor[2] =0;samplerDesc.BorderColor[3] =0;samplerDesc.MinLOD =0;samplerDesc.MaxLOD =D3D11_FLOAT32_MAX;
// Create the texture sampler state.result =device->CreateSamplerState(&samplerDesc, &m_sampleState);if(FAILED(result))
14 of 32 3/8/2013 12:45 PM
{return false;
}
// Setup the description of the dynamic matrix constant buffer that is in the vertex shader.matrixBufferDesc.Usage =D3D11_USAGE_DYNAMIC;matrixBufferDesc.ByteWidth =sizeof(MatrixBufferType);matrixBufferDesc.BindFlags =D3D11_BIND_CONSTANT_BUFFER;matrixBufferDesc.CPUAccessFlags =D3D11_CPU_ACCESS_WRITE;matrixBufferDesc.MiscFlags =0;
matrixBufferDesc.StructureByteStride =0;
// Create the constant buffer pointer so we can access the vertex shader constant buffer from within this class.result =device->CreateBuffer(&matrixBufferDesc, NULL, &m_matrixBuffer);if(FAILED(result)){
return false;}
// Setup the description of the light dynamic constant buffer that is in the pixel shader.lightBufferDesc.Usage =D3D11_USAGE_DYNAMIC;lightBufferDesc.ByteWidth =sizeof(LightBufferType);lightBufferDesc.BindFlags =D3D11_BIND_CONSTANT_BUFFER;lightBufferDesc.CPUAccessFlags =D3D11_CPU_ACCESS_WRITE;lightBufferDesc.MiscFlags =0;lightBufferDesc StructureByteStride =0;
Tutorial 43: Projective Texturing http://www.rastertek.com/dx11tut43.html

7/14/2019 RasterTek: Direct3D introduction
http://slidepdf.com/reader/full/rastertek-direct3d-introduction 617/709
lightBufferDesc.StructureByteStride =0;
// Create the constant buffer pointer so we can access the pixel shader constant buffer from within this class.
result =device->CreateBuffer(&lightBufferDesc, NULL, &m_lightBuffer);if(FAILED(result)){
return false;}
return true;}
void ProjectionShaderClass::ShutdownShader(){
// Release the light constant buffer.if(m_lightBuffer){
m_lightBuffer->Release();m_lightBuffer =0;
15 of 32 3/8/2013 12:45 PM
}
// Release the matrix constant buffer.if(m_matrixBuffer){
m_matrixBuffer->Release();m_matrixBuffer =0;
}
// Release the sampler state.
if(m_sampleState){m_sampleState->Release();m_sampleState =0;
}
// Release the layout.if(m_layout){
m_layout->Release();m_layout =0;}
// Release the pixel shader.if(m_pixelShader){
Tutorial 43: Projective Texturing http://www.rastertek.com/dx11tut43.html

7/14/2019 RasterTek: Direct3D introduction
http://slidepdf.com/reader/full/rastertek-direct3d-introduction 618/709
{m_pixelShader->Release();m_pixelShader =0;
}
// Release the vertex shader.if(m_vertexShader){
m_vertexShader->Release();m_vertexShader =0;
}
return;}
void ProjectionShaderClass::OutputShaderErrorMessage(ID3D10Blob* errorMessage, HWND hwnd, WCHAR* shaderFilename){
char* compileErrors;unsigned long bufferSize, i;
16 of 32 3/8/2013 12:45 PM
ofstream fout;
// Get a pointer to the error message text buffer.compileErrors =(char*)(errorMessage->GetBufferPointer());
// Get the length of the message.bufferSize =errorMessage->GetBufferSize();
// Open a file to write the error message to.fout.open("shader-error.txt");
// Write out the error message.for(i=0; i<bufferSize; i++){
fout <<compileErrors[i];}
// Close the file.
fout.close();
// Release the error message.errorMessage->Release();errorMessage =0;
// Pop a message up on the screen to notify the user to check the text file for compile errors
Tutorial 43: Projective Texturing http://www.rastertek.com/dx11tut43.html

7/14/2019 RasterTek: Direct3D introduction
http://slidepdf.com/reader/full/rastertek-direct3d-introduction 619/709
// Pop a message up on the screen to notify the user to check the text file for compile errors.MessageBox(hwnd, L"Error compiling shader. Check shader-error.txt for message.", shaderFilename, MB_OK);
return;}
bool ProjectionShaderClass::SetShaderParameters(ID3D11DeviceContext* deviceContext, D3DXMATRIX worldMatrix, D3DXMATRIX viewMatrix,D3DXMATRIX projectionMatrix, ID3D11ShaderResourceView* texture, D3DXVECTOR4 ambientColor,D3DXVECTOR4 diffuseColor, D3DXVECTOR3 lightDirection, D3DXMATRIX viewMatrix2, D3DXMATRIX projectionMatrix2,ID3D11ShaderResourceView* projectionTexture)
{
HRESULT result;D3D11_MAPPED_SUBRESOURCE mappedResource;unsigned int bufferNumber;MatrixBufferType* dataPtr;LightBufferType* dataPtr2;
// Transpose the matrices to prepare them for the shader.
17 of 32 3/8/2013 12:45 PM
D3DXMatrixTranspose(&worldMatrix, &worldMatrix);D3DXMatrixTranspose(&viewMatrix, &viewMatrix);D3DXMatrixTranspose(&projectionMatrix, &projectionMatrix);
Transpose the second view and projection matrices.
D3DXMatrixTranspose(&viewMatrix2, &viewMatrix2);D3DXMatrixTranspose(&projectionMatrix2, &projectionMatrix2);
// Lock the constant buffer so it can be written to.result =deviceContext->Map(m_matrixBuffer, 0, D3D11_MAP_WRITE_DISCARD, 0, &mappedResource);if(FAILED(result)){
return false;}
// Get a pointer to the data in the constant buffer.dataPtr =(MatrixBufferType*)mappedResource.pData;
// Copy the matrices into the constant buffer.dataPtr->world =worldMatrix;dataPtr->view =viewMatrix;dataPtr->projection =projectionMatrix;
Set the two new matrices in the shader.
Tutorial 43: Projective Texturing http://www.rastertek.com/dx11tut43.html

7/14/2019 RasterTek: Direct3D introduction
http://slidepdf.com/reader/full/rastertek-direct3d-introduction 620/709
dataPtr->view2 =viewMatrix2;dataPtr->projection2 =projectionMatrix2;
// Unlock the constant buffer.deviceContext->Unmap(m_matrixBuffer, 0);
// Set the position of the constant buffer in the vertex shader.bufferNumber =0;
// Now set the constant buffer in the vertex shader with the updated values.deviceContext->VSSetConstantBuffers(bufferNumber, 1, &m_matrixBuffer);
// Lock the light constant buffer so it can be written to.result =deviceContext->Map(m_lightBuffer, 0, D3D11_MAP_WRITE_DISCARD, 0, &mappedResource);if(FAILED(result)){
return false;}
18 of 32 3/8/2013 12:45 PM
// Get a pointer to the data in the constant buffer.dataPtr2 =(LightBufferType*)mappedResource.pData;
// Copy the lighting variables into the constant buffer.dataPtr2->ambientColor =ambientColor;dataPtr2->diffuseColor =diffuseColor;dataPtr2->lightDirection =lightDirection;dataPtr2->padding =0.0f;
// Unlock the constant buffer.deviceContext->Unmap(m_lightBuffer, 0);
// Set the position of the light constant buffer in the pixel shader.bufferNumber =0;
// Finally set the light constant buffer in the pixel shader with the updated values.deviceContext->PSSetConstantBuffers(bufferNumber, 1, &m_lightBuffer);
// Set shader texture resource in the pixel shader.deviceContext->PSSetShaderResources(0, 1, &texture);
Set the projection texture in the pixel shader.
deviceContext->PSSetShaderResources(1, 1, &projectionTexture);
return true;
Tutorial 43: Projective Texturing http://www.rastertek.com/dx11tut43.html

7/14/2019 RasterTek: Direct3D introduction
http://slidepdf.com/reader/full/rastertek-direct3d-introduction 621/709
}
void ProjectionShaderClass::RenderShader(ID3D11DeviceContext* deviceContext, int indexCount){
// Set the vertex input layout.deviceContext->IASetInputLayout(m_layout);
// Set the vertex and pixel shaders that will be used to render this triangle.deviceContext->VSSetShader(m_vertexShader, NULL, 0);deviceContext->PSSetShader(m_pixelShader, NULL, 0);
// Set the sampler state in the pixel shader.deviceContext->PSSetSamplers(0, 1, &m_sampleState);
// Render the triangle.deviceContext->DrawIndexed(indexCount, 0, 0);
return;
19 of 32 3/8/2013 12:45 PM
}
Viewpointclass.h
The ViewPointClass encapsulates the view point that we will be looking at the scene from in terms of projecting a texture. It is similar to the LightClass orCameraClass that it has a position in the 3D world and it has a position that it is looking at in the 3D world. With the position variables and projection variables set itcan then generate a view matrix and a projection matrix to represent the view point in the 3D world. Those two matrices can then be sent into the shader to be usedto project the texture onto the 3D scene.
////////////////////////////////////////////////////////////////////////////////// Filename: viewpointclass.h////////////////////////////////////////////////////////////////////////////////#ifndef _VIEWPOINTCLASS_H_ #define _VIEWPOINTCLASS_H_
//////////////
// INCLUDES ////////////////#include <d3dx10math.h>
////////////////////////////////////////////////////////////////////////////////// Class name: ViewPointClass
Tutorial 43: Projective Texturing http://www.rastertek.com/dx11tut43.html

7/14/2019 RasterTek: Direct3D introduction
http://slidepdf.com/reader/full/rastertek-direct3d-introduction 622/709
//////////////////////////////////////////////////////////////////////////////////class ViewPointClass
{public:
ViewPointClass();ViewPointClass(const ViewPointClass&);~ViewPointClass();
void SetPosition(float, float, float);void SetLookAt(float, float, float);void SetProjectionParameters(float, float, float, float);
void GenerateViewMatrix();void GenerateProjectionMatrix();
void GetViewMatrix(D3DXMATRIX&);void GetProjectionMatrix(D3DXMATRIX&);
20 of 32 3/8/2013 12:45 PM
private:D3DXVECTOR3 m_position, m_lookAt;D3DXMATRIX m_viewMatrix, m_projectionMatrix;float m_fieldOfView, m_aspectRatio, m_nearPlane, m_farPlane;
};
#endif
Viewpointclass.cpp////////////////////////////////////////////////////////////////////////////////// Filename: viewpointclass.cpp////////////////////////////////////////////////////////////////////////////////#include "viewpointclass.h"
ViewPointClass::ViewPointClass()
{}
ViewPointClass::ViewPointClass(const ViewPointClass& other){}
Tutorial 43: Projective Texturing http://www.rastertek.com/dx11tut43.html

7/14/2019 RasterTek: Direct3D introduction
http://slidepdf.com/reader/full/rastertek-direct3d-introduction 623/709
ViewPointClass::~ViewPointClass(){}
void ViewPointClass::SetPosition(float x, float y, float z){
m_position =D3DXVECTOR3(x, y, z);return;
}
void ViewPointClass::SetLookAt(float x, float y, float z){
m_lookAt =D3DXVECTOR3(x, y, z);return;
21 of 32 3/8/2013 12:45 PM
}
void ViewPointClass::SetProjectionParameters(float fieldOfView, float aspectRatio, float nearPlane, float farPlane){
m_fieldOfView =fieldOfView;m_aspectRatio =aspectRatio;m_nearPlane =nearPlane;m_farPlane =farPlane;return;
}
void ViewPointClass::GenerateViewMatrix(){
D3DXVECTOR3 up;
// Setup the vector that points upwards.up.x =0.0f;up.y =1.0f;up.z =0.0f;
// Create the view matrix from the three vectors.D3DXMatrixLookAtLH(&m_viewMatrix, &m_position, &m_lookAt, &up);
t
Tutorial 43: Projective Texturing http://www.rastertek.com/dx11tut43.html

7/14/2019 RasterTek: Direct3D introduction
http://slidepdf.com/reader/full/rastertek-direct3d-introduction 624/709
return;}
void ViewPointClass::GenerateProjectionMatrix(){
// Create the projection matrix for the view point.D3DXMatrixPerspectiveFovLH(&m_projectionMatrix, m_fieldOfView, m_aspectRatio, m_nearPlane, m_farPlane);
return;}
void ViewPointClass::GetViewMatrix(D3DXMATRIX& viewMatrix){
viewMatrix =m_viewMatrix;return;
}
22 of 32 3/8/2013 12:45 PM
void ViewPointClass::GetProjectionMatrix(D3DXMATRIX& projectionMatrix){
projectionMatrix =m_projectionMatrix;return;
}
Graphicsclass.h
////////////////////////////////////////////////////////////////////////////////// Filename: graphicsclass.h////////////////////////////////////////////////////////////////////////////////#ifndef _GRAPHICSCLASS_H_ #define _GRAPHICSCLASS_H_
///////////////////////
// MY CLASS INCLUDES /////////////////////////#include "d3dclass.h"#include "cameraclass.h"#include "modelclass.h"#include "lightclass.h"
l d h h d i d f j i h
Tutorial 43: Projective Texturing http://www.rastertek.com/dx11tut43.html

7/14/2019 RasterTek: Direct3D introduction
http://slidepdf.com/reader/full/rastertek-direct3d-introduction 625/709
Include the headers required for projecting a texture onto the scene.
#include "projectionshaderclass.h"#include "textureclass.h"#include "viewpointclass.h"
/////////////// GLOBALS ///////////////const bool FULL_SCREEN =true;
const bool VSYNC_ENABLED =true;const float SCREEN_DEPTH =100.0f;const float SCREEN_NEAR =1.0f;
////////////////////////////////////////////////////////////////////////////////// Class name: GraphicsClass
23 of 32 3/8/2013 12:45 PM
////////////////////////////////////////////////////////////////////////////////class GraphicsClass
{public:
GraphicsClass();GraphicsClass(const GraphicsClass&);~GraphicsClass();
bool Initialize(int, int, HWND);void Shutdown();bool Frame();
private:bool Render();
private:D3DClass* m_D3D;CameraClass* m_Camera;ModelClass *m_GroundModel, *m_CubeModel;LightClass* m_Light;
Define the class pointer variables that will be used for projecting the texture.
ProjectionShaderClass* m_ProjectionShader; TextureClass* m_ProjectionTexture;ViewPointClass* m_ViewPoint;
};
Tutorial 43: Projective Texturing http://www.rastertek.com/dx11tut43.html

7/14/2019 RasterTek: Direct3D introduction
http://slidepdf.com/reader/full/rastertek-direct3d-introduction 626/709
};
#endif
Graphicsclass.cpp
////////////////////////////////////////////////////////////////////////////////// Filename: graphicsclass.cpp////////////////////////////////////////////////////////////////////////////////
#include "graphicsclass.h"
GraphicsClass::GraphicsClass(){
m_D3D =0;m_Camera =0;
24 of 32 3/8/2013 12:45 PM
m_GroundModel =0;m_CubeModel =0;
m_Light =0;
Initialize the three pointers to null in the class constructor.
m_ProjectionShader =0;m_ProjectionTexture =0;m_ViewPoint =0;
}
GraphicsClass::GraphicsClass(const GraphicsClass& other){}
GraphicsClass::~GraphicsClass(){}
bool GraphicsClass::Initialize(int screenWidth, int screenHeight, HWND hwnd){
bool result;
Tutorial 43: Projective Texturing http://www.rastertek.com/dx11tut43.html

7/14/2019 RasterTek: Direct3D introduction
http://slidepdf.com/reader/full/rastertek-direct3d-introduction 627/709
// Create the Direct3D object.m_D3D =new D3DClass;if(!m_D3D){
return false;}
// Initialize the Direct3D object.result =m_D3D->Initialize(screenWidth, screenHeight, VSYNC_ENABLED, hwnd, FULL_SCREEN, SCREEN_DEPTH, SCREEN_NEAR);if(!result){
MessageBox(hwnd, L"Could not initialize Direct3D.", L"Error", MB_OK);return false;
}
// Create the camera object.m_Camera =new CameraClass;if(!m_Camera)
25 of 32 3/8/2013 12:45 PM
{return false;
}
// Set the initial position and rotation of the camera.m_Camera->SetPosition(0.0f, 7.0f, -10.0f);m_Camera->SetRotation(35.0f, 0.0f, 0.0f);
// Create the ground model object.m_GroundModel =new ModelClass;if(!m_GroundModel)
{return false;
}
// Initialize the ground model object.result =m_GroundModel->Initialize(m_D3D->GetDevice(), "../Engine/data/floor.txt", L"../Engine/data/stone.dds");if(!result){
MessageBox(hwnd, L"Could not initialize the ground model object.", L"Error", MB_OK);return false;
}
// Create the cube model object.m_CubeModel =new ModelClass;if(!m CubeModel)
Tutorial 43: Projective Texturing http://www.rastertek.com/dx11tut43.html

7/14/2019 RasterTek: Direct3D introduction
http://slidepdf.com/reader/full/rastertek-direct3d-introduction 628/709
( _ ){
return false;}
// Initialize the cube model object.result =m_CubeModel->Initialize(m_D3D->GetDevice(), "../Engine/data/cube.txt", L"../Engine/data/seafloor.dds");if(!result){
MessageBox(hwnd, L"Could not initialize the cube model object.", L"Error", MB_OK);return false;
}
// Create the light object.m_Light =new LightClass;if(!m_Light){
return false;}
26 of 32 3/8/2013 12:45 PM
// Initialize the light object.
m_Light->SetAmbientColor(0.15f, 0.15f, 0.15f, 1.0f);m_Light->SetDiffuseColor(1.0f, 1.0f, 1.0f, 1.0f);m_Light->SetDirection(0.0f, -0.75f, 0.5f);
Create and initialize the projection shader object.
// Create the projection shader object.m_ProjectionShader =new ProjectionShaderClass;if(!m_ProjectionShader)
{return false;
}
// Initialize the projection shader object.result =m_ProjectionShader->Initialize(m_D3D->GetDevice(), hwnd);if(!result){
MessageBox(hwnd, L"Could not initialize the projection shader object.", L"Error", MB_OK);return false;
}
Create and initialize the DirectX 11 texture that we will be projecting onto the 3D scene.
// Create the projection texture object.m_ProjectionTexture =new TextureClass;
Tutorial 43: Projective Texturing http://www.rastertek.com/dx11tut43.html

7/14/2019 RasterTek: Direct3D introduction
http://slidepdf.com/reader/full/rastertek-direct3d-introduction 629/709
_if(!m_ProjectionTexture){
return false;}
// Initialize the projection texture object.result =m_ProjectionTexture->Initialize(m_D3D->GetDevice(), L"../Engine/data/dx11.dds");if(!result){
MessageBox(hwnd, L"Could not initialize the projection texture object.", L"Error", MB_OK);return false;
}
Create and initialize the view point object that will be used as the location to project the texture from. When setting the projection parameters here I have set it up tocreate a square viewing frustum.
// Create the view point object.m_ViewPoint =new ViewPointClass;
27 of 32 3/8/2013 12:45 PM
if(!m_ViewPoint){
return false;}
// Initialize the view point object.m_ViewPoint->SetPosition(2.0f, 5.0f, -2.0f);m_ViewPoint->SetLookAt(0.0f, 0.0f, 0.0f);m_ViewPoint->SetProjectionParameters((float)(D3DX_PI / 2.0f), 1.0f, 0.1f, 100.0f);m_ViewPoint->GenerateViewMatrix();m_ViewPoint->GenerateProjectionMatrix();
return true;}
void GraphicsClass::Shutdown(){
We release the three texture projection related objects in the Shutdown function.
// Release the view point object.if(m_ViewPoint){
delete m_ViewPoint;m_ViewPoint =0;
}
Tutorial 43: Projective Texturing http://www.rastertek.com/dx11tut43.html

7/14/2019 RasterTek: Direct3D introduction
http://slidepdf.com/reader/full/rastertek-direct3d-introduction 630/709
// Release the projection texture object.if(m_ProjectionTexture){
m_ProjectionTexture->Shutdown();delete m_ProjectionTexture;m_ProjectionTexture =0;
}
// Release the projection shader object.if(m_ProjectionShader){
m_ProjectionShader->Shutdown();delete m_ProjectionShader;m_ProjectionShader =0;
}
// Release the light object.
28 of 32 3/8/2013 12:45 PM
if(m_Light){
delete m_Light;m_Light =0;
}
// Release the cube model object.if(m_CubeModel){
m_CubeModel->Shutdown();delete m_CubeModel;
m_CubeModel =0;}
// Release the ground model object.if(m_GroundModel){
m_GroundModel->Shutdown();delete m_GroundModel;m_GroundModel =0;
}
// Release the camera object.if(m_Camera){
delete m_Camera;m_Camera =0;
}
Tutorial 43: Projective Texturing http://www.rastertek.com/dx11tut43.html

7/14/2019 RasterTek: Direct3D introduction
http://slidepdf.com/reader/full/rastertek-direct3d-introduction 631/709
}
// Release the D3D object.if(m_D3D){
m_D3D->Shutdown();delete m_D3D;m_D3D =0;
}
return;}
bool GraphicsClass::Frame(){
bool result;
29 of 32 3/8/2013 12:45 PM
// Render the graphics scene.
result =Render();if(!result){
return false;}
return true;}
bool GraphicsClass::Render(){
D3DXMATRIX worldMatrix, viewMatrix, projectionMatrix;D3DXMATRIX viewMatrix2, projectionMatrix2;bool result;
// Clear the buffers to begin the scene.
m_D3D->BeginScene(0.0f, 0.0f, 0.0f, 1.0f);
// Generate the view matrix based on the camera's position.m_Camera->Render();
// Get the world, view, and projection matrices from the camera and d3d objects.m_D3D->GetWorldMatrix(worldMatrix);m Camera >GetViewMatrix(viewMatrix)
Tutorial 43: Projective Texturing http://www.rastertek.com/dx11tut43.html

7/14/2019 RasterTek: Direct3D introduction
http://slidepdf.com/reader/full/rastertek-direct3d-introduction 632/709
m_Camera->GetViewMatrix(viewMatrix);m_D3D->GetProjectionMatrix(projectionMatrix);
Get the second view and projection matrix from the view point object. These two matrices will be used for projecting the texture.
// Get the view and projection matrices from the view point object.m_ViewPoint->GetViewMatrix(viewMatrix2);m_ViewPoint->GetProjectionMatrix(projectionMatrix2);
Now render the two models using the projection shader to project the texture onto them as well as light and texture them.
// Setup the translation for the ground model.D3DXMatrixTranslation(&worldMatrix, 0.0f, 1.0f, 0.0f);
// Render the ground model using the projection shader.m_GroundModel->Render(m_D3D->GetDeviceContext());result =m_ProjectionShader->Render(m_D3D->GetDeviceContext(), m_GroundModel->GetIndexCount(), worldMatrix, viewMatrix, projectionMatrix,
m_GroundModel->GetTexture(), m_Light->GetAmbientColor(), m_Light->GetDiffuseColor(), m_Light->GetDirection(),
30 of 32 3/8/2013 12:45 PM
viewMatrix2, projectionMatrix2, m_ProjectionTexture->GetTexture());if(!result)
{return false;
}
// Reset the world matrix and setup the translation for the cube model.m_D3D->GetWorldMatrix(worldMatrix);D3DXMatrixTranslation(&worldMatrix, 0.0f, 2.0f, 0.0f);
// Render the cube model using the projection shader.
m_CubeModel->Render(m_D3D->GetDeviceContext());result =m_ProjectionShader->Render(m_D3D->GetDeviceContext(), m_CubeModel->GetIndexCount(), worldMatrix, viewMatrix, projectionMatrix,
m_CubeModel->GetTexture(), m_Light->GetAmbientColor(), m_Light->GetDiffuseColor(), m_Light->GetDirection(),viewMatrix2, projectionMatrix2, m_ProjectionTexture->GetTexture());
if(!result){
return false;}
// Present the rendered scene to the screen.m_D3D->EndScene();
return true;}
Tutorial 43: Projective Texturing http://www.rastertek.com/dx11tut43.html
7/14/2019 RasterTek: Direct3D introduction
http://slidepdf.com/reader/full/rastertek-direct3d-introduction 633/709
SummaryWe can now project 2D textures onto 3D scenes from any defined view point.
31 of 32 3/8/2013 12:45 PM
To Do Exercises
1. Compile and run the program. You will see a 3D scene with a 2D texture projected onto it.
2. Change the texture that is being projected onto the scene.
3 Set the cube to rotate to see the effect of the projected texture on it
Tutorial 43: Projective Texturing http://www.rastertek.com/dx11tut43.html

7/14/2019 RasterTek: Direct3D introduction
http://slidepdf.com/reader/full/rastertek-direct3d-introduction 634/709
3. Set the cube to rotate to see the effect of the projected texture on it.
4. Modify the location of the view point.
5. Modify the projection parameters of the view point to create a different shaped projection.
Source Code
Source Code and Data Files: dx11src43.zip
Executable: dx11exe43.zip
Back to Tutorial Index
32 of 32 3/8/2013 12:45 PM
Tutor ial 45: Managing Multiple Shaders
One of the issues that quickly arises in a graphics application that uses multiple shaders is how to manage them. In the DirectX 11 tutorial series I generally don'tshow how manage them as it makes the tutorials less focused and harder to comprehend. So in this tutorial I will present one of the simpler methods for managingmultiple shaders.
For this tutorial we will use a new class called ShaderManagerClass. What this class does is it encapsulates the loading, unloading, and usage of all the shadersthat the application requires. In design patterns terminology this is usually referred to as a facade pattern as we are encapsulating and providing a singularsimplified interface to a much larger body of code.
In this tutorial the ShaderManagerClass will contain the texture, light, and bump map shader objects. It will load and unload all three of them, and it will also provideinterfaces to have them render objects. This allows us to create just a single ShaderManagerClass object and then pass a single pointer to the class object aroundthe application so that rendering objects is just a single function call using the object pointer. This is similar to how the D3DClass has been used in previoustutorials.
The following image shows a cube being rendered with a texture shader, a light shader, and a bump map shader all at the same time through the use of theShaderManagerClass:
Tutorial 45: Managing Multiple Shaders http://www.rastertek.com/dx11tut45.html

7/14/2019 RasterTek: Direct3D introduction
http://slidepdf.com/reader/full/rastertek-direct3d-introduction 635/709
We will start the code section by examining the ShaderManagerClass.
Shadermanagerclass.h
////////////////////////////////////////////////////////////////////////////////// Filename: shadermanagerclass.h
////////////////////////////////////////////////////////////////////////////////#ifndef _SHADERMANAGERCLASS_H_ #define _SHADERMANAGERCLASS_H_
///////////////////////// MY CLASS INCLUDES //
1 of 16 3/8/2013 12:43 PM
///////////////////////#include "d3dclass.h"
Here is where we include each shader class header file that we want to use in the application.
#include "textureshaderclass.h"#include "lightshaderclass.h"#include "bumpmapshaderclass.h"
////////////////////////////////////////////////////////////////////////////////
// Class name: ShaderManagerClass////////////////////////////////////////////////////////////////////////////////class ShaderManagerClass{public:
ShaderManagerClass();ShaderManagerClass(const ShaderManagerClass&);~ShaderManagerClass();
bool Initialize(ID3D11Device*, HWND);void Shutdown();
We create a single render function for each shader that the ShaderManagerClass handles.
bool RenderTextureShader(ID3D11DeviceContext*, int, D3DXMATRIX, D3DXMATRIX, D3DXMATRIX, ID3D11ShaderResourceView*);
bool RenderLightShader(ID3D11DeviceContext*, int, D3DXMATRIX, D3DXMATRIX, D3DXMATRIX, ID3D11ShaderResourceView*,
Tutorial 45: Managing Multiple Shaders http://www.rastertek.com/dx11tut45.html

7/14/2019 RasterTek: Direct3D introduction
http://slidepdf.com/reader/full/rastertek-direct3d-introduction 636/709
g ( , , , , , ,D3DXVECTOR3, D3DXVECTOR4, D3DXVECTOR4, D3DXVECTOR3, D3DXVECTOR4, float);
bool RenderBumpMapShader(ID3D11DeviceContext*, int, D3DXMATRIX, D3DXMATRIX, D3DXMATRIX, ID3D11ShaderResourceView*,ID3D11ShaderResourceView*, D3DXVECTOR3, D3DXVECTOR4);
private:
The ShaderManagerClass contains a private class object for each shader type the application will be using.
TextureShaderClass* m_TextureShader;
LightShaderClass* m_LightShader;BumpMapShaderClass* m_BumpMapShader;
};
#endif
2 of 16 3/8/2013 12:43 PM
Shadermanagerclass.cpp
////////////////////////////////////////////////////////////////////////////////// Filename: shadermanagerclass.cpp////////////////////////////////////////////////////////////////////////////////#include "shadermanagerclass.h"
ShaderManagerClass::ShaderManagerClass(){
Initialize the private shader class objects to null in the class constructor.
m_TextureShader =0;m_LightShader =0;m_BumpMapShader =0;
}
ShaderManagerClass::ShaderManagerClass(const ShaderManagerClass& other){}
ShaderManagerClass::~ShaderManagerClass(){
Tutorial 45: Managing Multiple Shaders http://www.rastertek.com/dx11tut45.html

7/14/2019 RasterTek: Direct3D introduction
http://slidepdf.com/reader/full/rastertek-direct3d-introduction 637/709
{
}
bool ShaderManagerClass::Initialize(ID3D11Device* device, HWND hwnd){
bool result;
Create and initialize the texture shader object.
// Create the texture shader object.m_TextureShader =new TextureShaderClass;if(!m_TextureShader){
return false;}
3 of 16 3/8/2013 12:43 PM
// Initialize the texture shader object.result =m_TextureShader->Initialize(device, hwnd);
if(!result){
MessageBox(hwnd, L"Could not initialize the texture shader object.", L"Error", MB_OK);return false;
}
Create and initialize the light shader object.
// Create the light shader object.
m_LightShader =new LightShaderClass;if(!m_LightShader){
return false;}
// Initialize the light shader object.result =m_LightShader->Initialize(device, hwnd);if(!result)
{MessageBox(hwnd, L"Could not initialize the light shader object.", L"Error", MB_OK);return false;
}
Create and initialize the bump map shader object.
// Create the bump map shader object.
Tutorial 45: Managing Multiple Shaders http://www.rastertek.com/dx11tut45.html

7/14/2019 RasterTek: Direct3D introduction
http://slidepdf.com/reader/full/rastertek-direct3d-introduction 638/709
m_BumpMapShader =new BumpMapShaderClass;
if(!m_BumpMapShader){
return false;}
// Initialize the bump map shader object.result =m_BumpMapShader->Initialize(device, hwnd);if(!result){
MessageBox(hwnd, L"Could not initialize the bump map shader object.", L"Error", MB_OK);return false;
}
return true;}
4 of 16 3/8/2013 12:43 PM
The Shutdown function releases all the shaders that were in use by the application.
void ShaderManagerClass::Shutdown(){
// Release the bump map shader object.if(m_BumpMapShader){
m_BumpMapShader->Shutdown();delete m_BumpMapShader;m_BumpMapShader =0;
}
// Release the light shader object.if(m_LightShader){
m_LightShader->Shutdown();delete m_LightShader;m_LightShader =0;
}
// Release the texture shader object.if(m_TextureShader){
m_TextureShader->Shutdown();delete m_TextureShader;m_TextureShader =0;
}
t
Tutorial 45: Managing Multiple Shaders http://www.rastertek.com/dx11tut45.html

7/14/2019 RasterTek: Direct3D introduction
http://slidepdf.com/reader/full/rastertek-direct3d-introduction 639/709
return;
}
Here is where we create a specialized render function for each shader type that ShaderManagerClass uses. In the application we can now just pass around apointer to the ShaderManagerClass object and then make a call to one of the following functions to render any model with the desired shader.
bool ShaderManagerClass::RenderTextureShader(ID3D11DeviceContext* device, int indexCount, D3DXMATRIX worldMatrix, D3DXMATRIX viewMatrix, D3DXMATRIID3D11ShaderResourceView* texture)
{bool result;
// Render the model using the texture shader.result =m_TextureShader->Render(device, indexCount, worldMatrix, viewMatrix, projectionMatrix, texture);if(!result){
return false;
5 of 16 3/8/2013 12:43 PM
}
return true;}
bool ShaderManagerClass::RenderLightShader(ID3D11DeviceContext* deviceContext, int indexCount, D3DXMATRIX worldMatrix, D3DXMATRIX viewMatrix, D3DXID3D11ShaderResourceView* texture, D3DXVECTOR3 lightDirection, D3DXVECTOR4 ambient, D3DXVECTOR4 diffuse,D3DXVECTOR3 cameraPosition, D3DXVECTOR4 specular, float specularPower)
{bool result;
// Render the model using the light shader.result =m_LightShader->Render(deviceContext, indexCount, worldMatrix, viewMatrix, projectionMatrix, texture, lightDirection, ambient, diffuse, cameraPosition,
specular, specularPower);if(!result){
return false;}
return true;}
bool ShaderManagerClass::RenderBumpMapShader(ID3D11DeviceContext* deviceContext, int indexCount, D3DXMATRIX worldMatrix, D3DXMATRIX viewMatrix, DID3D11ShaderResourceView* colorTexture, ID3D11ShaderResourceView* normalTexture, D3DXVECTOR3 lightDirection,D3DXVECTOR4 diffuse)
{
Tutorial 45: Managing Multiple Shaders http://www.rastertek.com/dx11tut45.html

7/14/2019 RasterTek: Direct3D introduction
http://slidepdf.com/reader/full/rastertek-direct3d-introduction 640/709
{
bool result;
// Render the model using the bump map shader.result =m_BumpMapShader->Render(deviceContext, indexCount, worldMatrix, viewMatrix, projectionMatrix, colorTexture, normalTexture, lightDirection, diffuse);if(!result){
return false;}
return true;}
6 of 16 3/8/2013 12:43 PM
Graphicsclass.h
////////////////////////////////////////////////////////////////////////////////// Filename: graphicsclass.h////////////////////////////////////////////////////////////////////////////////#ifndef _GRAPHICSCLASS_H_ #define _GRAPHICSCLASS_H_
///////////////////////// MY CLASS INCLUDES //
///////////////////////#include "d3dclass.h"
So now in the GraphicsClass we include just the header for the ShaderManagerClass instead of all the individual shader headers.
#include "shadermanagerclass.h"#include "cameraclass.h"#include "lightclass.h"#include "modelclass.h"
#include "bumpmodelclass.h"
/////////////// GLOBALS ///////////////const bool FULL_SCREEN =true;const bool VSYNC_ENABLED =true;
t fl t SCREEN DEPTH 1000 0f
Tutorial 45: Managing Multiple Shaders http://www.rastertek.com/dx11tut45.html

7/14/2019 RasterTek: Direct3D introduction
http://slidepdf.com/reader/full/rastertek-direct3d-introduction 641/709
const float SCREEN_DEPTH =1000.0f;
const float SCREEN_NEAR =0.1f;
////////////////////////////////////////////////////////////////////////////////// Class name: GraphicsClass////////////////////////////////////////////////////////////////////////////////class GraphicsClass{public:
GraphicsClass();GraphicsClass(const GraphicsClass&);~GraphicsClass();
bool Initialize(int, int, HWND);void Shutdown();
7 of 16 3/8/2013 12:43 PM
bool Frame();
private:bool Render(float);
private:D3DClass* m_D3D;
We create a private pointer to the ShaderManagerClass object here.
ShaderManagerClass* m_ShaderManager;
CameraClass* m_Camera;LightClass* m_Light;
We will use three different cube models for the purposes of the tutorial.
ModelClass* m_Model1;ModelClass* m_Model2;BumpModelClass* m_Model3;
};
#endif
Graphicsclass.cpp
////////////////////////////////////////////////////////////////////////////////// Filename: graphicsclass cpp
Tutorial 45: Managing Multiple Shaders http://www.rastertek.com/dx11tut45.html

7/14/2019 RasterTek: Direct3D introduction
http://slidepdf.com/reader/full/rastertek-direct3d-introduction 642/709
// Filename: graphicsclass.cpp////////////////////////////////////////////////////////////////////////////////#include "graphicsclass.h"
GraphicsClass::GraphicsClass(){
m_D3D =0;m_ShaderManager =0;m_Light =0;m_Camera =0;m_Model1 =0;m_Model2 =0;m_Model3 =0;
}
8 of 16 3/8/2013 12:43 PM
GraphicsClass::GraphicsClass(const GraphicsClass& other)
{}
GraphicsClass::~GraphicsClass(){}
bool GraphicsClass::Initialize(int screenWidth, int screenHeight, HWND hwnd){
bool result;
// Create the Direct3D object.m_D3D =new D3DClass;if(!m_D3D){
return false;}
// Initialize the Direct3D object.result =m_D3D->Initialize(screenWidth, screenHeight, VSYNC_ENABLED, hwnd, FULL_SCREEN, SCREEN_DEPTH, SCREEN_NEAR);if(!result){
MessageBox(hwnd, L"Could not initialize Direct3D.", L"Error", MB_OK);return false;
Tutorial 45: Managing Multiple Shaders http://www.rastertek.com/dx11tut45.html

7/14/2019 RasterTek: Direct3D introduction
http://slidepdf.com/reader/full/rastertek-direct3d-introduction 643/709
return false;
}
We create and initialize the ShaderManagerClass object here.
// Create the shader manager object.m_ShaderManager =new ShaderManagerClass;if(!m_ShaderManager){
return false;
}
// Initialize the shader manager object.result =m_ShaderManager->Initialize(m_D3D->GetDevice(), hwnd);if(!result){
MessageBox(hwnd, L"Could not initialize the shader manager object.", L"Error", MB_OK);
9 of 16 3/8/2013 12:43 PM
return false;}
// Create the camera object.m_Camera =new CameraClass;if(!m_Camera){
return false;}
// Set the initial position of the camera.
m_Camera->SetPosition(0.0f, 0.0f, -10.0f);
// Create the light object.m_Light =new LightClass;if(!m_Light){
return false;}
// Initialize the light object.m_Light->SetAmbientColor(0.15f, 0.15f, 0.15f, 1.0f);m_Light->SetDiffuseColor(1.0f, 1.0f, 1.0f, 1.0f);m_Light->SetDirection(0.0f, 0.0f, 1.0f);m_Light->SetSpecularColor(1.0f, 1.0f, 1.0f, 1.0f);m_Light->SetSpecularPower(64.0f);
Load the three different cube models with their associated textures. This way we have three different cubes that we can each render with a different shader usingthe ShaderManagerClass.
Tutorial 45: Managing Multiple Shaders http://www.rastertek.com/dx11tut45.html

7/14/2019 RasterTek: Direct3D introduction
http://slidepdf.com/reader/full/rastertek-direct3d-introduction 644/709
g
// Create the model object.m_Model1 =new ModelClass;if(!m_Model1){
return false;}
// Initialize the model object.
result =m_Model1->Initialize(m_D3D->GetDevice(), "../Engine/data/cube.txt", L"../Engine/data/marble.dds");if(!result){
MessageBox(hwnd, L"Could not initialize the first model object.", L"Error", MB_OK);return false;
}
10 of 16 3/8/2013 12:43 PM
// Create the second model object.m_Model2 =new ModelClass;
if(!m_Model2){
return false;}
// Initialize the second model object.result =m_Model2->Initialize(m_D3D->GetDevice(), "../Engine/data/cube.txt", L"../Engine/data/metal.dds");if(!result){
MessageBox(hwnd, L"Could not initialize the second model object.", L"Error", MB_OK);return false;
}
// Create the third bump model object for models with normal maps and related vectors.m_Model3 =new BumpModelClass;if(!m_Model3){
return false;
}
// Initialize the bump model object.result =m_Model3->Initialize(m_D3D->GetDevice(), "../Engine/data/cube.txt", L"../Engine/data/stone.dds",
L"../Engine/data/normal.dds");if(!result){
MessageBox(hwnd, L"Could not initialize the third model object.", L"Error", MB_OK);return false;
Tutorial 45: Managing Multiple Shaders http://www.rastertek.com/dx11tut45.html

7/14/2019 RasterTek: Direct3D introduction
http://slidepdf.com/reader/full/rastertek-direct3d-introduction 645/709
}
return true;}
void GraphicsClass::Shutdown(){
// Release the model objects.
if(m_Model1){
m_Model1->Shutdown();delete m_Model1;m_Model1 =0;
}
11 of 16 3/8/2013 12:43 PM
if(m_Model2){
m_Model2->Shutdown();delete m_Model2;m_Model2 =0;
}
if(m_Model3){
m_Model3->Shutdown();delete m_Model3;
m_Model3 =0;}
// Release the light object.if(m_Light){
delete m_Light;m_Light =0;
}
// Release the camera object.if(m_Camera){
delete m_Camera;m_Camera =0;
}
// Release the shader manager object.
Tutorial 45: Managing Multiple Shaders http://www.rastertek.com/dx11tut45.html

7/14/2019 RasterTek: Direct3D introduction
http://slidepdf.com/reader/full/rastertek-direct3d-introduction 646/709
if(m_ShaderManager){
m_ShaderManager->Shutdown();delete m_ShaderManager;m_ShaderManager =0;
}
// Release the D3D object.if(m_D3D)
{m_D3D->Shutdown();delete m_D3D;m_D3D =0;
}
return;
12 of 16 3/8/2013 12:43 PM
}
bool GraphicsClass::Frame(){
bool result;static float rotation =0.0f;
// Update the rotation variable each frame.rotation +=(float)D3DX_PI * 0.005f;
if(rotation >360.0f){
rotation -=360.0f;}
// Render the graphics scene.result =Render(rotation);if(!result){
return false;}
return true;}
bool GraphicsClass::Render(float rotation){
Tutorial 45: Managing Multiple Shaders http://www.rastertek.com/dx11tut45.html

7/14/2019 RasterTek: Direct3D introduction
http://slidepdf.com/reader/full/rastertek-direct3d-introduction 647/709
D3DXMATRIX worldMatrix, viewMatrix, projectionMatrix, translateMatrix;bool result;
// Clear the buffers to begin the scene.m_D3D->BeginScene(0.0f, 0.0f, 0.0f, 1.0f);
// Generate the view matrix based on the camera's position.m_Camera->Render();
// Get the world, view, and projection matrices from the camera and d3d objects.m_D3D->GetWorldMatrix(worldMatrix);m_Camera->GetViewMatrix(viewMatrix);m_D3D->GetProjectionMatrix(projectionMatrix);
// Setup the rotation and translation of the first model.
13 of 16 3/8/2013 12:43 PM
D3DXMatrixRotationY(&worldMatrix, rotation);D3DXMatrixTranslation(&translateMatrix, -3.5f, 0.0f, 0.0f);
D3DXMatrixMultiply(&worldMatrix, &worldMatrix, &translateMatrix);
Render the first cube model using the texture shader from the ShaderManagerClass object.
// Render the first model using the texture shader.m_Model1->Render(m_D3D->GetDeviceContext());result =m_ShaderManager->RenderTextureShader(m_D3D->GetDeviceContext(), m_Model1->GetIndexCount(), worldMatrix, viewMatrix, projectionMatrix,
m_Model1->GetTexture());if(!result)
{return false;
}
// Setup the rotation and translation of the second model.m_D3D->GetWorldMatrix(worldMatrix);D3DXMatrixRotationY(&worldMatrix, rotation);D3DXMatrixTranslation(&translateMatrix, 0.0f, 0.0f, 0.0f);D3DXMatrixMultiply(&worldMatrix, &worldMatrix, &translateMatrix);
Render the second cube model using the light shader from the ShaderManagerClass object.
// Render the second model using the light shader.m_Model2->Render(m_D3D->GetDeviceContext());result =m_ShaderManager->RenderLightShader(m_D3D->GetDeviceContext(), m_Model2->GetIndexCount(), worldMatrix, viewMatrix, projectionMatrix,
m_Model2->GetTexture(), m_Light->GetDirection(), m_Light->GetAmbientColor(), m_Light->GetDiffuseColor(),m_Camera->GetPosition(), m_Light->GetSpecularColor(), m_Light->GetSpecularPower());
if(!result)
Tutorial 45: Managing Multiple Shaders http://www.rastertek.com/dx11tut45.html

7/14/2019 RasterTek: Direct3D introduction
http://slidepdf.com/reader/full/rastertek-direct3d-introduction 648/709
{return false;
}
// Setup the rotation and translation of the third model.m_D3D->GetWorldMatrix(worldMatrix);D3DXMatrixRotationY(&worldMatrix, rotation);D3DXMatrixTranslation(&translateMatrix, 3.5f, 0.0f, 0.0f);D3DXMatrixMultiply(&worldMatrix, &worldMatrix, &translateMatrix);
Render the third cube model using the bump map shader from the ShaderManagerClass object.
// Render the third model using the bump map shader.m_Model3->Render(m_D3D->GetDeviceContext());result =m_ShaderManager->RenderBumpMapShader(m_D3D->GetDeviceContext(), m_Model3->GetIndexCount(), worldMatrix, viewMatrix, projectionMatrix,
m_Model3->GetColorTexture(), m_Model3->GetNormalMapTexture(), m_Light->GetDirection(),
14 of 16 3/8/2013 12:43 PM
m_Light->GetDiffuseColor());if(!result)
{return false;
}
// Present the rendered scene to the screen.m_D3D->EndScene();
return true;}
Summary
Now we have a single class which encapsulates all the shading functionality that our graphics application will need.
Tutorial 45: Managing Multiple Shaders http://www.rastertek.com/dx11tut45.html

7/14/2019 RasterTek: Direct3D introduction
http://slidepdf.com/reader/full/rastertek-direct3d-introduction 649/709
To Do Exercises
1. Compile and run the code. You should see three cubes each shaded with a different shader. Press escape to quit.
2. Add another shader to the ShaderManagerClass and render a fourth cube using that shader.
3. Add some intelligence to the ShaderManagerClass to load and unload shaders on demand.
Source Code
Source Code and Data Files: dx11src45.zip
15 of 16 3/8/2013 12:43 PM
Executable: dx11exe45.zip
Back to Tutorial Index
Tutorial 45: Managing Multiple Shaders http://www.rastertek.com/dx11tut45.html

7/14/2019 RasterTek: Direct3D introduction
http://slidepdf.com/reader/full/rastertek-direct3d-introduction 650/709
16 of 16 3/8/2013 12:43 PM

7/14/2019 RasterTek: Direct3D introduction
http://slidepdf.com/reader/full/rastertek-direct3d-introduction 651/709
Also remember that 3D objects are done in the exact same way. Render the portions of the 3D object using the glow map to a render to texture, blur it, and combineit with the regular 3D scene using the glow shader.
For this tutorial the following steps and the related render to texture objects for each step will be the following:
1. Render the glow maps to a render to texture object (output is m_RenderTexture).
2. Down sample the render to texture of the glow maps to a render to texture object that is half the size (new output is m_DownSampleTexure).
3. Perform a horizontal blur on the output of the previous step (new output is m_HorizontalBlurTexture).
4. Perform a vertical blur on the horizontal blur texture (new output is m_VerticalBlurTexture).
5. Up sample the vertical blurred texture to regular screen size again (new output is m_UpSampleTexure).
6. Now render the user interface elements to render to texture (output will be m_RenderTexture).
7. Combine the up sampled texture and the render texture of the user interface elements using the glow shader and write it to the back buffer.
For the code section of this tutorial we won't be discussing anything related to blur as it was already covered in the blur tutorial. We will start by looking at the
modified BitmapClass.
Bitmapclass.h
The BitmapClass has been modified and now has a glow map texture associated with it.
////////////////////////////////////////////////////////////////////////////////
// Filename: bitmapclass h
Tutorial 46: Glow http://www.rastertek.com/dx11tut46.html

7/14/2019 RasterTek: Direct3D introduction
http://slidepdf.com/reader/full/rastertek-direct3d-introduction 652/709
// Filename: bitmapclass.h////////////////////////////////////////////////////////////////////////////////#ifndef _BITMAPCLASS_H_ #define _BITMAPCLASS_H_
//////////////// INCLUDES ////////////////#include <d3d11.h>#include <d3dx10math.h>
///////////////////////// MY CLASS INCLUDES //
2 of 59 3/8/2013 12:47 PM
///////////////////////#include "textureclass.h"
////////////////////////////////////////////////////////////////////////////////// Class name: BitmapClass////////////////////////////////////////////////////////////////////////////////class BitmapClass{private:
struct VertexType
{D3DXVECTOR3 position;D3DXVECTOR2 texture;
};
public:BitmapClass();BitmapClass(const BitmapClass&);~BitmapClass();
bool Initialize(ID3D11Device*, int, int, WCHAR*, WCHAR*, int, int);void Shutdown();bool Render(ID3D11DeviceContext*, int, int);
int GetIndexCount();ID3D11ShaderResourceView* GetTexture();ID3D11ShaderResourceView* GetGlowMap();
private:
Tutorial 46: Glow http://www.rastertek.com/dx11tut46.html

7/14/2019 RasterTek: Direct3D introduction
http://slidepdf.com/reader/full/rastertek-direct3d-introduction 653/709
private:bool InitializeBuffers(ID3D11Device*);void ShutdownBuffers();bool UpdateBuffers(ID3D11DeviceContext*, int, int);void RenderBuffers(ID3D11DeviceContext*);
bool LoadTextures(ID3D11Device*, WCHAR*, WCHAR*);void ReleaseTextures();
private:ID3D11Buffer *m_vertexBuffer, *m_indexBuffer;int m_vertexCount, m_indexCount;
TextureClass* m_Texture; TextureClass* m_GlowMap;int m_screenWidth, m_screenHeight;int m_bitmapWidth, m_bitmapHeight;
3 of 59 3/8/2013 12:47 PM
int m_previousPosX, m_previousPosY;};
#endif
Bitmapclass.cpp
////////////////////////////////////////////////////////////////////////////////// Filename: bitmapclass.cpp
////////////////////////////////////////////////////////////////////////////////#include "bitmapclass.h"
BitmapClass::BitmapClass(){
m_vertexBuffer =0;m_indexBuffer =0;m_Texture =0;
m_GlowMap =0;}
BitmapClass::BitmapClass(const BitmapClass& other){}
BitmapClass::~BitmapClass()
Tutorial 46: Glow http://www.rastertek.com/dx11tut46.html

7/14/2019 RasterTek: Direct3D introduction
http://slidepdf.com/reader/full/rastertek-direct3d-introduction 654/709
BitmapClass:: BitmapClass(){}
bool BitmapClass::Initialize(ID3D11Device* device, int screenWidth, int screenHeight, WCHAR* textureFilename, WCHAR* glowMapFilename, int bitmapWidth, int bit{
bool result;
// Store the screen size.m_screenWidth =screenWidth;m_screenHeight =screenHeight;
// Store the size in pixels that this bitmap should be rendered at.
4 of 59 3/8/2013 12:47 PM
m_bitmapWidth =bitmapWidth;m_bitmapHeight =bitmapHeight;
// Initialize the previous rendering position to negative one.m_previousPosX =-1;m_previousPosY =-1;
// Initialize the vertex and index buffers.result =InitializeBuffers(device);if(!result){
return false;}
// Load the textures for this bitmap.result =LoadTextures(device, textureFilename, glowMapFilename);if(!result){
return false;}
return true;}
void BitmapClass::Shutdown(){
// Release the bitmap textures.ReleaseTextures();
// Shutdo n the erte and inde buffers
Tutorial 46: Glow http://www.rastertek.com/dx11tut46.html

7/14/2019 RasterTek: Direct3D introduction
http://slidepdf.com/reader/full/rastertek-direct3d-introduction 655/709
// Shutdown the vertex and index buffers.ShutdownBuffers();
return;}
bool BitmapClass::Render(ID3D11DeviceContext* deviceContext, int positionX, int positionY)
{bool result;
// Re-build the dynamic vertex buffer for rendering to possibly a different location on the screen.result =UpdateBuffers(deviceContext, positionX, positionY);if(!result)
5 of 59 3/8/2013 12:47 PM
{return false;
}
// Put the vertex and index buffers on the graphics pipeline to prepare them for drawing.RenderBuffers(deviceContext);
return true;}
int BitmapClass::GetIndexCount(){return m_indexCount;
}
ID3D11ShaderResourceView* BitmapClass::GetTexture(){
return m_Texture->GetTexture();
}
ID3D11ShaderResourceView* BitmapClass::GetGlowMap(){
return m_GlowMap->GetTexture();}
bool BitmapClass::InitializeBuffers(ID3D11Device* device){
Tutorial 46: Glow http://www.rastertek.com/dx11tut46.html

7/14/2019 RasterTek: Direct3D introduction
http://slidepdf.com/reader/full/rastertek-direct3d-introduction 656/709
p ( ){
VertexType* vertices;unsigned long* indices;D3D11_BUFFER_DESC vertexBufferDesc, indexBufferDesc;D3D11_SUBRESOURCE_DATA vertexData, indexData;HRESULT result;int i;
// Set the number of vertices in the vertex array.m_vertexCount =6;
// Set the number of indices in the index array.m_indexCount =m_vertexCount;
6 of 59 3/8/2013 12:47 PM
// Create the vertex array.vertices =new VertexType[m_vertexCount];
if(!vertices){return false;
}
// Create the index array.indices =new unsigned long[m_indexCount];if(!indices){
return false;}
// Initialize vertex array to zeros at first.memset(vertices, 0, (sizeof(VertexType) * m_vertexCount));
// Load the index array with data.for(i=0; i<m_indexCount; i++){
indices[i] =i;}
// Set up the description of the static vertex buffer.vertexBufferDesc.Usage =D3D11_USAGE_DYNAMIC;vertexBufferDesc.ByteWidth =sizeof(VertexType) * m_vertexCount;vertexBufferDesc.BindFlags =D3D11_BIND_VERTEX_BUFFER;vertexBufferDesc.CPUAccessFlags =D3D11_CPU_ACCESS_WRITE;vertexBufferDesc.MiscFlags =0;
vertexBufferDesc.StructureByteStride =0;
Tutorial 46: Glow http://www.rastertek.com/dx11tut46.html

7/14/2019 RasterTek: Direct3D introduction
http://slidepdf.com/reader/full/rastertek-direct3d-introduction 657/709
// Give the subresource structure a pointer to the vertex data.vertexData.pSysMem =vertices;vertexData.SysMemPitch =0;vertexData.SysMemSlicePitch =0;
// Now create the vertex buffer.result =device->CreateBuffer(&vertexBufferDesc, &vertexData, &m_vertexBuffer);
if(FAILED(result)){
return false;}
// Set up the description of the static index buffer.indexBufferDesc.Usage =D3D11_USAGE_DEFAULT;
7 of 59 3/8/2013 12:47 PM
indexBufferDesc.ByteWidth =sizeof(unsigned long) * m_indexCount;indexBufferDesc.BindFlags =D3D11_BIND_INDEX_BUFFER;
indexBufferDesc.CPUAccessFlags =0;indexBufferDesc.MiscFlags =0;indexBufferDesc.StructureByteStride =0;
// Give the subresource structure a pointer to the index data.indexData.pSysMem =indices;indexData.SysMemPitch =0;indexData.SysMemSlicePitch =0;
// Create the index buffer.result =device->CreateBuffer(&indexBufferDesc, &indexData, &m_indexBuffer);if(FAILED(result)){
return false;}
// Release the arrays now that the vertex and index buffers have been created and loaded.delete [] vertices;
vertices =0;
delete [] indices;indices =0;
return true;}
void BitmapClass::ShutdownBuffers(){
Tutorial 46: Glow http://www.rastertek.com/dx11tut46.html

7/14/2019 RasterTek: Direct3D introduction
http://slidepdf.com/reader/full/rastertek-direct3d-introduction 658/709
{// Release the index buffer.if(m_indexBuffer){
m_indexBuffer->Release();m_indexBuffer =0;
}
// Release the vertex buffer.if(m_vertexBuffer){
m_vertexBuffer->Release();m_vertexBuffer =0;
}
8 of 59 3/8/2013 12:47 PM
return;}
bool BitmapClass::UpdateBuffers(ID3D11DeviceContext* deviceContext, int positionX, int positionY){
float left, right, top, bottom;VertexType* vertices;D3D11_MAPPED_SUBRESOURCE mappedResource;VertexType* verticesPtr;HRESULT result;
// If the position we are rendering this bitmap to has not changed then don't update the vertex buffer since it// currently has the correct parameters.if((positionX ==m_previousPosX) && (positionY ==m_previousPosY)){
return true;}
// If it has changed then update the position it is being rendered to.m_previousPosX =positionX;m_previousPosY =positionY;
// Calculate the screen coordinates of the left side of the bitmap.left =(float)((m_screenWidth / 2) * -1) +(float)positionX;
// Calculate the screen coordinates of the right side of the bitmap.right =left +(float)m_bitmapWidth;
// Calculate the screen coordinates of the top of the bitmap.
Tutorial 46: Glow http://www.rastertek.com/dx11tut46.html

7/14/2019 RasterTek: Direct3D introduction
http://slidepdf.com/reader/full/rastertek-direct3d-introduction 659/709
// p ptop =(float)(m_screenHeight / 2) - (float)positionY;
// Calculate the screen coordinates of the bottom of the bitmap.bottom =top - (float)m_bitmapHeight;
// Create the vertex array.vertices =new VertexType[m_vertexCount];
if(!vertices){return false;
}
// Load the vertex array with data.// First triangle.
9 of 59 3/8/2013 12:47 PM
vertices[0].position =D3DXVECTOR3(left, top, 0.0f); // Top left.vertices[0].texture =D3DXVECTOR2(0.0f, 0.0f);
vertices[1].position =D3DXVECTOR3(right, bottom, 0.0f); // Bottom right.vertices[1].texture =D3DXVECTOR2(1.0f, 1.0f);
vertices[2].position =D3DXVECTOR3(left, bottom, 0.0f); // Bottom left.vertices[2].texture =D3DXVECTOR2(0.0f, 1.0f);
// Second triangle.vertices[3].position =D3DXVECTOR3(left, top, 0.0f); // Top left.
vertices[3].texture =D3DXVECTOR2(0.0f, 0.0f);
vertices[4].position =D3DXVECTOR3(right, top, 0.0f); // Top right.vertices[4].texture =D3DXVECTOR2(1.0f, 0.0f);
vertices[5].position =D3DXVECTOR3(right, bottom, 0.0f); // Bottom right.vertices[5].texture =D3DXVECTOR2(1.0f, 1.0f);
// Lock the vertex buffer so it can be written to.
result =deviceContext->Map(m_vertexBuffer, 0, D3D11_MAP_WRITE_DISCARD, 0, &mappedResource);if(FAILED(result)){
return false;}
// Get a pointer to the data in the vertex buffer.verticesPtr =(VertexType*)mappedResource.pData;
// Copy the data into the vertex buffer.memcpy(verticesPtr, (void*)vertices, (sizeof(VertexType) * m_vertexCount));
Tutorial 46: Glow http://www.rastertek.com/dx11tut46.html

7/14/2019 RasterTek: Direct3D introduction
http://slidepdf.com/reader/full/rastertek-direct3d-introduction 660/709
_
// Unlock the vertex buffer.deviceContext->Unmap(m_vertexBuffer, 0);
// Release the vertex array as it is no longer needed.delete [] vertices;vertices =0;
return true;}
void BitmapClass::RenderBuffers(ID3D11DeviceContext* deviceContext){
10 of 59 3/8/2013 12:47 PM
unsigned int stride;unsigned int offset;
// Set vertex buffer stride and offset.stride =sizeof(VertexType);offset =0;
// Set the vertex buffer to active in the input assembler so it can be rendered.deviceContext->IASetVertexBuffers(0, 1, &m_vertexBuffer, &stride, &offset);
// Set the index buffer to active in the input assembler so it can be rendered.deviceContext->IASetIndexBuffer(m_indexBuffer, DXGI_FORMAT_R32_UINT, 0);
// Set the type of primitive that should be rendered from this vertex buffer, in this case triangles.deviceContext->IASetPrimitiveTopology(D3D11_PRIMITIVE_TOPOLOGY_TRIANGLELIST);
return;}
bool BitmapClass::LoadTextures(ID3D11Device* device, WCHAR* filename, WCHAR* glowMapFilename){
bool result;
// Create the texture object.m_Texture =new TextureClass;if(!m_Texture)
{ return false;
Tutorial 46: Glow http://www.rastertek.com/dx11tut46.html

7/14/2019 RasterTek: Direct3D introduction
http://slidepdf.com/reader/full/rastertek-direct3d-introduction 661/709
}
// Initialize the texture object.result =m_Texture->Initialize(device, filename);if(!result){
return false;
}
// Create the glow map texture object.m_GlowMap =new TextureClass;if(!m_GlowMap){
return false;
11 of 59 3/8/2013 12:47 PM
}
// Initialize the glow map texture object.result =m_GlowMap->Initialize(device, glowMapFilename);if(!result){
return false;}
return true;}
void BitmapClass::ReleaseTextures(){
// Release the texture objects.if(m_Texture){
m_Texture->Shutdown();delete m_Texture;
m_Texture =0;}
if(m_GlowMap){
m_GlowMap->Shutdown();delete m_GlowMap;m_GlowMap =0;
}
return;}
Tutorial 46: Glow http://www.rastertek.com/dx11tut46.html

7/14/2019 RasterTek: Direct3D introduction
http://slidepdf.com/reader/full/rastertek-direct3d-introduction 662/709
}
Glowmap.vs
The purpose of the glow map shader is to render just the glow map portions of the color bitmap onto a render to texture so that it can be further processed (blurred).
The code here for the HLSL glow map shader is just the texture shader HLSL code modified to handle glow map rendering.
////////////////////////////////////////////////////////////////////////////////// Filename: glowmap.vs////////////////////////////////////////////////////////////////////////////////
12 of 59 3/8/2013 12:47 PM
/////////////// GLOBALS ///////////////cbuffer MatrixBuffer{
matrix worldMatrix;matrix viewMatrix;matrix projectionMatrix;
};
//////////////// TYPEDEFS ////////////////struct VertexInputType{
float4 position : POSITION;float2 tex : TEXCOORD0;
};
struct PixelInputType{
float4 position : SV_POSITION;float2 tex : TEXCOORD0;
};
////////////////////////////////////////////////////////////////////////////////
// Vertex Shader////////////////////////////////////////////////////////////////////////////////PixelInputType GlowMapVertexShader(VertexInputType input)
Tutorial 46: Glow http://www.rastertek.com/dx11tut46.html

7/14/2019 RasterTek: Direct3D introduction
http://slidepdf.com/reader/full/rastertek-direct3d-introduction 663/709
PixelInputType GlowMapVertexShader(VertexInputType input){
PixelInputType output;
// Change the position vector to be 4 units for proper matrix calculations.input.position.w =1.0f;
// Calculate the position of the vertex against the world, view, and projection matrices.output.position =mul(input.position, worldMatrix);output.position =mul(output.position, viewMatrix);output.position =mul(output.position, projectionMatrix);
// Store the texture coordinates for the pixel shader.
13 of 59 3/8/2013 12:47 PM
output.tex =input.tex;
return output;}
Glowmap.ps
////////////////////////////////////////////////////////////////////////////////// Filename: glowmap.ps
////////////////////////////////////////////////////////////////////////////////
/////////////// GLOBALS ///////////////
Texture2D shaderTexture : register(t0);
We add a texture resource for the glow map.
Texture2D glowMapTexture : register(t1);SamplerState SampleType;
//////////////// TYPEDEFS ////////////////struct PixelInputType
{float4 position : SV_POSITION;fl t2 t TEXCOORD0
Tutorial 46: Glow http://www.rastertek.com/dx11tut46.html

7/14/2019 RasterTek: Direct3D introduction
http://slidepdf.com/reader/full/rastertek-direct3d-introduction 664/709
float2 tex : TEXCOORD0;};
////////////////////////////////////////////////////////////////////////////////// Pixel Shader////////////////////////////////////////////////////////////////////////////////
float4 GlowMapPixelShader(PixelInputType input) : SV_TARGET{
float4 textureColor;float4 glowMap;float4 color;
14 f 59 3/8/2013 12 47 PM
First sample both the bitmap texture and the glow map texture.
// Sample the pixel color from the texture using the sampler at this texture coordinate location.textureColor =shaderTexture.Sample(SampleType, input.tex);
// Sample the glow map.glowMap =glowMapTexture.Sample(SampleType, input.tex);
Now return just the portions of the color texture that aligns with the white pixels in the glow map. In other words black is transparent, and anything else in the bitmapthat isn't black gets drawn.
// If the glow map is black then return just black. Otherwise if the glow map has color then return the color from the texture.if((glowMap.r ==0.0f) && (glowMap.g ==0.0f) && (glowMap.b ==0.0f)){
color =float4(0.0f, 0.0f, 0.0f, 1.0f);}else{
color =textureColor;}
return color;}
Glowmapshaderclass.h
The GlowMapShaderClass is just the TextureShaderClass modified to handle an extra texture (glow map).
////////////////////////////////////////////////////////////////////////////////
Tutorial 46: Glow http://www.rastertek.com/dx11tut46.html

7/14/2019 RasterTek: Direct3D introduction
http://slidepdf.com/reader/full/rastertek-direct3d-introduction 665/709
////////////////////////////////////////////////////////////////////////////////// Filename: glowmapshaderclass.h////////////////////////////////////////////////////////////////////////////////#ifndef _GLOWMAPSHADERCLASS_H_ #define _GLOWMAPSHADERCLASS_H_
//////////////// INCLUDES ////////////////#include <d3d11.h>#include <d3dx10math.h>#include <d3dx11async.h>
15 f 59 3/8/2013 12 47 PM
#include <fstream>using namespace std;
////////////////////////////////////////////////////////////////////////////////// Class name: GlowMapShaderClass////////////////////////////////////////////////////////////////////////////////class GlowMapShaderClass{private:
struct MatrixBufferType{
D3DXMATRIX world;D3DXMATRIX view;D3DXMATRIX projection;
};
public:GlowMapShaderClass();GlowMapShaderClass(const GlowMapShaderClass&);~GlowMapShaderClass();
bool Initialize(ID3D11Device*, HWND);void Shutdown();bool Render(ID3D11DeviceContext*, int, D3DXMATRIX, D3DXMATRIX, D3DXMATRIX, ID3D11ShaderResourceView*, ID3D11ShaderResourceView*);
private:bool InitializeShader(ID3D11Device*, HWND, WCHAR*, WCHAR*);void ShutdownShader();
void OutputShaderErrorMessage(ID3D10Blob*, HWND, WCHAR*);
bool SetShaderParameters(ID3D11DeviceContext*, D3DXMATRIX, D3DXMATRIX, D3DXMATRIX, ID3D11ShaderResourceView*, ID3D11ShaderResourceView
Tutorial 46: Glow http://www.rastertek.com/dx11tut46.html

7/14/2019 RasterTek: Direct3D introduction
http://slidepdf.com/reader/full/rastertek-direct3d-introduction 666/709
bool SetShaderParameters(ID3D11DeviceContext , D3DXMATRIX, D3DXMATRIX, D3DXMATRIX, ID3D11ShaderResourceView , ID3D11ShaderResourceViewvoid RenderShader(ID3D11DeviceContext*, int);
private:ID3D11VertexShader* m_vertexShader;ID3D11PixelShader* m_pixelShader;ID3D11InputLayout* m_layout;
ID3D11Buffer* m_matrixBuffer;ID3D11SamplerState* m_sampleState;};
#endif
16 f 59 3/8/2013 12 47 PM
Glowmapshaderclass.cpp
////////////////////////////////////////////////////////////////////////////////// Filename: glowmapshaderclass.cpp////////////////////////////////////////////////////////////////////////////////#include "glowmapshaderclass.h"
GlowMapShaderClass::GlowMapShaderClass()
{m_vertexShader =0;m_pixelShader =0;m_layout =0;m_matrixBuffer =0;m_sampleState =0;
}
GlowMapShaderClass::GlowMapShaderClass(const GlowMapShaderClass& other){}
GlowMapShaderClass::~GlowMapShaderClass(){}
bool GlowMapShaderClass::Initialize(ID3D11Device* device, HWND hwnd){
Tutorial 46: Glow http://www.rastertek.com/dx11tut46.html

7/14/2019 RasterTek: Direct3D introduction
http://slidepdf.com/reader/full/rastertek-direct3d-introduction 667/709
{bool result;
// Initialize the vertex and pixel shaders.result =InitializeShader(device, hwnd, L"../Engine/glowmap.vs", L"../Engine/glowmap.ps");if(!result)
{return false;
}
return true;}
17 f 59 3/8/2013 12 47 PM
void GlowMapShaderClass::Shutdown(){
// Shutdown the vertex and pixel shaders as well as the related objects.ShutdownShader();
return;}
bool GlowMapShaderClass::Render(ID3D11DeviceContext* deviceContext, int indexCount, D3DXMATRIX worldMatrix, D3DXMATRIX viewMatrix,D3DXMATRIX projectionMatrix, ID3D11ShaderResourceView* texture, ID3D11ShaderResourceView* glowMap)
{bool result;
// Set the shader parameters that it will use for rendering.result =SetShaderParameters(deviceContext, worldMatrix, viewMatrix, projectionMatrix, texture, glowMap);if(!result){
return false;}
// Now render the prepared buffers with the shader.RenderShader(deviceContext, indexCount);
return true;}
bool GlowMapShaderClass::InitializeShader(ID3D11Device* device, HWND hwnd, WCHAR* vsFilename, WCHAR* psFilename)
Tutorial 46: Glow http://www.rastertek.com/dx11tut46.html

7/14/2019 RasterTek: Direct3D introduction
http://slidepdf.com/reader/full/rastertek-direct3d-introduction 668/709
{HRESULT result;ID3D10Blob* errorMessage;ID3D10Blob* vertexShaderBuffer;ID3D10Blob* pixelShaderBuffer;D3D11_INPUT_ELEMENT_DESC polygonLayout[2];
unsigned int numElements;D3D11_BUFFER_DESC matrixBufferDesc;D3D11_SAMPLER_DESC samplerDesc;
// Initialize the pointers this function will use to null.errorMessage =0;
18 f 59 3/8/2013 12 47 PM
vertexShaderBuffer =0;pixelShaderBuffer =0;
// Compile the vertex shader code.result =D3DX11CompileFromFile(vsFilename, NULL, NULL, "GlowMapVertexShader", "vs_5_0", D3D10_SHADER_ENABLE_STRICTNESS, 0, NULL,
&vertexShaderBuffer, &errorMessage, NULL);if(FAILED(result)){
// If the shader failed to compile it should have writen something to the error message.if(errorMessage){
OutputShaderErrorMessage(errorMessage, hwnd, vsFilename);}// If there was nothing in the error message then it simply could not find the shader file itself.else{
MessageBox(hwnd, vsFilename, L"Missing Shader File", MB_OK);}
return false;}
// Compile the pixel shader code.result =D3DX11CompileFromFile(psFilename, NULL, NULL, "GlowMapPixelShader", "ps_5_0", D3D10_SHADER_ENABLE_STRICTNESS, 0, NULL,
&pixelShaderBuffer, &errorMessage, NULL);if(FAILED(result)){
// If the shader failed to compile it should have writen something to the error message.if(errorMessage){
OutputShaderErrorMessage(errorMessage, hwnd, psFilename);}
Tutorial 46: Glow http://www.rastertek.com/dx11tut46.html

7/14/2019 RasterTek: Direct3D introduction
http://slidepdf.com/reader/full/rastertek-direct3d-introduction 669/709
// If there was nothing in the error message then it simply could not find the file itself.else{
MessageBox(hwnd, psFilename, L"Missing Shader File", MB_OK);}
return false;}
// Create the vertex shader from the buffer.result =device->CreateVertexShader(vertexShaderBuffer->GetBufferPointer(), vertexShaderBuffer->GetBufferSize(), NULL, &m_vertexShader);if(FAILED(result)){
19 f 59 3/8/2013 12 47 PM
return false;}
// Create the pixel shader from the buffer.result =device->CreatePixelShader(pixelShaderBuffer->GetBufferPointer(), pixelShaderBuffer->GetBufferSize(), NULL, &m_pixelShader);if(FAILED(result)){
return false;}
// Create the vertex input layout description.polygonLayout[0].SemanticName ="POSITION";polygonLayout[0].SemanticIndex =0;polygonLayout[0].Format =DXGI_FORMAT_R32G32B32_FLOAT;polygonLayout[0].InputSlot =0;polygonLayout[0].AlignedByteOffset =0;polygonLayout[0].InputSlotClass =D3D11_INPUT_PER_VERTEX_DATA;polygonLayout[0].InstanceDataStepRate =0;
polygonLayout[1].SemanticName ="TEXCOORD";polygonLayout[1].SemanticIndex =0;polygonLayout[1].Format =DXGI_FORMAT_R32G32_FLOAT;polygonLayout[1].InputSlot =0;polygonLayout[1].AlignedByteOffset =D3D11_APPEND_ALIGNED_ELEMENT;polygonLayout[1].InputSlotClass =D3D11_INPUT_PER_VERTEX_DATA;polygonLayout[1].InstanceDataStepRate =0;
// Get a count of the elements in the layout.numElements =sizeof(polygonLayout) / sizeof(polygonLayout[0]);
// Create the vertex input layout.result =device->CreateInputLayout(polygonLayout, numElements, vertexShaderBuffer->GetBufferPointer(), vertexShaderBuffer->GetBufferSize(),
& l t)
Tutorial 46: Glow http://www.rastertek.com/dx11tut46.html

7/14/2019 RasterTek: Direct3D introduction
http://slidepdf.com/reader/full/rastertek-direct3d-introduction 670/709
&m_layout);if(FAILED(result)){
return false;}
// Release the vertex shader buffer and pixel shader buffer since they are no longer needed.vertexShaderBuffer->Release();vertexShaderBuffer =0;
pixelShaderBuffer->Release();pixelShaderBuffer =0;
20 f 59 3/8/2013 12 47 PM
// Setup the description of the dynamic matrix constant buffer that is in the vertex shader.matrixBufferDesc.Usage =D3D11_USAGE_DYNAMIC;matrixBufferDesc.ByteWidth =sizeof(MatrixBufferType);
matrixBufferDesc.BindFlags =D3D11_BIND_CONSTANT_BUFFER;matrixBufferDesc.CPUAccessFlags =D3D11_CPU_ACCESS_WRITE;matrixBufferDesc.MiscFlags =0;matrixBufferDesc.StructureByteStride =0;
// Create the constant buffer pointer so we can access the vertex shader constant buffer from within this class.result =device->CreateBuffer(&matrixBufferDesc, NULL, &m_matrixBuffer);if(FAILED(result)){
return false;}
// Create a texture sampler state description.samplerDesc.Filter =D3D11_FILTER_MIN_MAG_MIP_LINEAR;samplerDesc.AddressU =D3D11_TEXTURE_ADDRESS_CLAMP;samplerDesc.AddressV =D3D11_TEXTURE_ADDRESS_CLAMP;samplerDesc.AddressW =D3D11_TEXTURE_ADDRESS_CLAMP;samplerDesc.MipLODBias =0.0f;samplerDesc.MaxAnisotropy =1;samplerDesc.ComparisonFunc =D3D11_COMPARISON_ALWAYS;samplerDesc.BorderColor[0] =0;samplerDesc.BorderColor[1] =0;samplerDesc.BorderColor[2] =0;samplerDesc.BorderColor[3] =0;samplerDesc.MinLOD =0;samplerDesc.MaxLOD =D3D11_FLOAT32_MAX;
// Create the texture sampler state.result =device->CreateSamplerState(&samplerDesc, &m_sampleState);if(FAILED(result))
Tutorial 46: Glow http://www.rastertek.com/dx11tut46.html

7/14/2019 RasterTek: Direct3D introduction
http://slidepdf.com/reader/full/rastertek-direct3d-introduction 671/709
if(FAILED(result)){
return false;}
return true;}
void GlowMapShaderClass::ShutdownShader(){
// Release the sampler state.if(m_sampleState)
21 of 59 3/8/2013 12:47 PM
{m_sampleState->Release();m_sampleState =0;
}
// Release the matrix constant buffer.if(m_matrixBuffer){
m_matrixBuffer->Release();m_matrixBuffer =0;
}
// Release the layout.if(m_layout){
m_layout->Release();m_layout =0;
}
// Release the pixel shader.if(m_pixelShader){
m_pixelShader->Release();m_pixelShader =0;
}
// Release the vertex shader.if(m_vertexShader){
m_vertexShader->Release();m_vertexShader =0;
}
Tutorial 46: Glow http://www.rastertek.com/dx11tut46.html

7/14/2019 RasterTek: Direct3D introduction
http://slidepdf.com/reader/full/rastertek-direct3d-introduction 672/709
return;}
void GlowMapShaderClass::OutputShaderErrorMessage(ID3D10Blob* errorMessage, HWND hwnd, WCHAR* shaderFilename){
char* compileErrors;unsigned long bufferSize, i;ofstream fout;
// Get a pointer to the error message text buffer.
22 of 59 3/8/2013 12:47 PM
compileErrors =(char*)(errorMessage->GetBufferPointer());
// Get the length of the message.
bufferSize =errorMessage->GetBufferSize();
// Open a file to write the error message to.fout.open("shader-error.txt");
// Write out the error message.for(i=0; i<bufferSize; i++){
fout <<compileErrors[i];
}
// Close the file.fout.close();
// Release the error message.errorMessage->Release();errorMessage =0;
// Pop a message up on the screen to notify the user to check the text file for compile errors.MessageBox(hwnd, L"Error compiling shader. Check shader-error.txt for message.", shaderFilename, MB_OK);
return;}
bool GlowMapShaderClass::SetShaderParameters(ID3D11DeviceContext* deviceContext, D3DXMATRIX worldMatrix, D3DXMATRIX viewMatrix,D3DXMATRIX projectionMatrix, ID3D11ShaderResourceView* texture, ID3D11ShaderResourceView* glowMap)
{HRESULT result;D3D11 MAPPED SUBRESOURCE mappedResource;
Tutorial 46: Glow http://www.rastertek.com/dx11tut46.html

7/14/2019 RasterTek: Direct3D introduction
http://slidepdf.com/reader/full/rastertek-direct3d-introduction 673/709
D3D11_MAPPED_SUBRESOURCE mappedResource;MatrixBufferType* dataPtr;unsigned int bufferNumber;
// Transpose the matrices to prepare them for the shader.D3DXMatrixTranspose(&worldMatrix, &worldMatrix);D3DXMatrixTranspose(&viewMatrix, &viewMatrix);D3DXMatrixTranspose(&projectionMatrix, &projectionMatrix);
// Lock the constant buffer so it can be written to.result =deviceContext->Map(m_matrixBuffer, 0, D3D11_MAP_WRITE_DISCARD, 0, &mappedResource);if(FAILED(result))
23 of 59 3/8/2013 12:47 PM
{return false;
}
// Get a pointer to the data in the constant buffer.dataPtr =(MatrixBufferType*)mappedResource.pData;
// Copy the matrices into the constant buffer.dataPtr->world =worldMatrix;dataPtr->view =viewMatrix;dataPtr->projection =projectionMatrix;
// Unlock the constant buffer.deviceContext->Unmap(m_matrixBuffer, 0);
// Set the position of the constant buffer in the vertex shader.bufferNumber =0;
// Now set the constant buffer in the vertex shader with the updated values.deviceContext->VSSetConstantBuffers(bufferNumber, 1, &m_matrixBuffer);
// Set shader texture resources in the pixel shader.deviceContext->PSSetShaderResources(0, 1, &texture);deviceContext->PSSetShaderResources(1, 1, &glowMap);
return true;}
void GlowMapShaderClass::RenderShader(ID3D11DeviceContext* deviceContext, int indexCount){
// Set the vertex input layout.deviceContext->IASetInputLayout(m layout);
Tutorial 46: Glow http://www.rastertek.com/dx11tut46.html

7/14/2019 RasterTek: Direct3D introduction
http://slidepdf.com/reader/full/rastertek-direct3d-introduction 674/709
deviceContext IASetInputLayout(m_layout);
// Set the vertex and pixel shaders that will be used to render this triangle.deviceContext->VSSetShader(m_vertexShader, NULL, 0);deviceContext->PSSetShader(m_pixelShader, NULL, 0);
// Set the sampler state in the pixel shader.deviceContext->PSSetSamplers(0, 1, &m_sampleState);
// Render the triangle.deviceContext->DrawIndexed(indexCount, 0, 0);
return;
24 of 59 3/8/2013 12:47 PM
}
Glow.vs
The purpose of the glow shader is to combine the blurred glow map texture with the actual regular color rendering of the scene. The regular scene is rendered tothe input colorTexture, and the glow (blurred glow map) part of the scene has been rendered to the input glowTexture. The shader then multiplies the glowTexture bythe glowStrength value to increase the glow. After that it adds the glow texture with the color texture to get the final pixel result.
////////////////////////////////////////////////////////////////////////////////// Filename: glow.vs////////////////////////////////////////////////////////////////////////////////
/////////////// GLOBALS ///////////////cbuffer MatrixBuffer{
matrix worldMatrix;matrix viewMatrix;matrix projectionMatrix;
};
//////////////// TYPEDEFS ////////////////
struct VertexInputType{float4 position : POSITION;float2 tex : TEXCOORD0;
Tutorial 46: Glow http://www.rastertek.com/dx11tut46.html

7/14/2019 RasterTek: Direct3D introduction
http://slidepdf.com/reader/full/rastertek-direct3d-introduction 675/709
float2 tex : TEXCOORD0;};
struct PixelInputType{
float4 position : SV_POSITION;
float2 tex : TEXCOORD0;};
////////////////////////////////////////////////////////////////////////////////// Vertex Shader
25 of 59 3/8/2013 12:47 PM
////////////////////////////////////////////////////////////////////////////////PixelInputType GlowVertexShader(VertexInputType input){
PixelInputType output;
// Change the position vector to be 4 units for proper matrix calculations.input.position.w =1.0f;
// Calculate the position of the vertex against the world, view, and projection matrices.output.position =mul(input.position, worldMatrix);output.position =mul(output.position, viewMatrix);
output.position =mul(output.position, projectionMatrix);
// Store the texture coordinates for the pixel shader.output.tex =input.tex;
return output;
}
Glow.ps
////////////////////////////////////////////////////////////////////////////////// Filename: glow.ps////////////////////////////////////////////////////////////////////////////////
/////////////// GLOBALS ///////////////
Tutorial 46: Glow http://www.rastertek.com/dx11tut46.html

7/14/2019 RasterTek: Direct3D introduction
http://slidepdf.com/reader/full/rastertek-direct3d-introduction 676/709
The render to texture of the regular scene is sent into the shader as colorTexture.
Texture2D colorTexture : register(t0);
The blurred glow map render to texture is sent into the shader as glowTexture.
Texture2D glowTexture : register(t1);SamplerState SampleType;
The glowStrength variable in the GlowBuffer is for increasing the blurred glow map texture so that the glow has a stronger effect.
26 of 59 3/8/2013 12:47 PM
cbuffer GlowBuffer{
float glowStrength;
float3 padding;};
//////////////// TYPEDEFS ////////////////struct PixelInputType{
float4 position : SV_POSITION;float2 tex : TEXCOORD0;
};
////////////////////////////////////////////////////////////////////////////////// Pixel Shader////////////////////////////////////////////////////////////////////////////////float4 GlowPixelShader(PixelInputType input) : SV_TARGET
{float4 textureColor;float4 glowColor;float4 color;
Sample the regular scene texture and the glow map texture.
// Sample the pixel color from the texture using the sampler at this texture coordinate location.textureColor =colorTexture.Sample(SampleType, input.tex);
// Sample the glow texture.glowColor =glowTexture.Sample(SampleType, input.tex);
Tutorial 46: Glow http://www.rastertek.com/dx11tut46.html

7/14/2019 RasterTek: Direct3D introduction
http://slidepdf.com/reader/full/rastertek-direct3d-introduction 677/709
Add the two textures together to create the final glow. The glow map texture is also multiplied by the glow strength to increase the appearance of the glow effect.
// Add the texture color to the glow color multiplied by the glow stength.color =saturate(textureColor +(glowColor * glowStrength));
return color;}
27 of 59 3/8/2013 12:47 PM
Glowshaderclass.h
The GlowShaderClass is just the TextureShaderClass modified to handle glow related variables.
////////////////////////////////////////////////////////////////////////////////// Filename: glowshaderclass.h////////////////////////////////////////////////////////////////////////////////#ifndef _GLOWSHADERCLASS_H_ #define _GLOWSHADERCLASS_H_
//////////////// INCLUDES ////////////////#include <d3d11.h>#include <d3dx10math.h>#include <d3dx11async.h>#include <fstream>using namespace std;
////////////////////////////////////////////////////////////////////////////////// Class name: GlowShaderClass////////////////////////////////////////////////////////////////////////////////class GlowShaderClass{private:
struct MatrixBufferType{
D3DXMATRIX world;D3DXMATRIX view;D3DXMATRIX projection;
};
Tutorial 46: Glow http://www.rastertek.com/dx11tut46.html

7/14/2019 RasterTek: Direct3D introduction
http://slidepdf.com/reader/full/rastertek-direct3d-introduction 678/709
struct GlowBufferType{
float glowStrength;D3DXVECTOR3 padding;
};
public:GlowShaderClass();GlowShaderClass(const GlowShaderClass&);~GlowShaderClass();
28 of 59 3/8/2013 12:47 PM
bool Initialize(ID3D11Device*, HWND);void Shutdown();
bool Render(ID3D11DeviceContext*, int, D3DXMATRIX, D3DXMATRIX, D3DXMATRIX, ID3D11ShaderResourceView*, ID3D11ShaderResourceView*, float);
private:bool InitializeShader(ID3D11Device*, HWND, WCHAR*, WCHAR*);void ShutdownShader();void OutputShaderErrorMessage(ID3D10Blob*, HWND, WCHAR*);
bool SetShaderParameters(ID3D11DeviceContext*, D3DXMATRIX, D3DXMATRIX, D3DXMATRIX, ID3D11ShaderResourceView*, ID3D11ShaderResourceViewvoid RenderShader(ID3D11DeviceContext*, int);
private:ID3D11VertexShader* m_vertexShader;ID3D11PixelShader* m_pixelShader;ID3D11InputLayout* m_layout;ID3D11Buffer* m_matrixBuffer;ID3D11Buffer* m_glowBuffer;ID3D11SamplerState* m_sampleState;
};
#endif
Glowshaderclass.cpp
////////////////////////////////////////////////////////////////////////////////// Filename: glowshaderclass.cpp////////////////////////////////////////////////////////////////////////////////#include "glowshaderclass.h"
Tutorial 46: Glow http://www.rastertek.com/dx11tut46.html

7/14/2019 RasterTek: Direct3D introduction
http://slidepdf.com/reader/full/rastertek-direct3d-introduction 679/709
GlowShaderClass::GlowShaderClass(){
m_vertexShader =0;m_pixelShader =0;
m_layout =0;m_matrixBuffer =0;m_glowBuffer =0;m_sampleState =0;
}
29 of 59 3/8/2013 12:47 PM
GlowShaderClass::GlowShaderClass(const GlowShaderClass& other){
}
GlowShaderClass::~GlowShaderClass(){}
bool GlowShaderClass::Initialize(ID3D11Device* device, HWND hwnd)
{bool result;
// Initialize the vertex and pixel shaders.result =InitializeShader(device, hwnd, L"../Engine/glow.vs", L"../Engine/glow.ps");if(!result){
return false;
}
return true;}
void GlowShaderClass::Shutdown(){
// Shutdown the vertex and pixel shaders as well as the related objects.
ShutdownShader();
return;}
Tutorial 46: Glow http://www.rastertek.com/dx11tut46.html

7/14/2019 RasterTek: Direct3D introduction
http://slidepdf.com/reader/full/rastertek-direct3d-introduction 680/709
}
bool GlowShaderClass::Render(ID3D11DeviceContext* deviceContext, int indexCount, D3DXMATRIX worldMatrix, D3DXMATRIX viewMatrix,D3DXMATRIX projectionMatrix, ID3D11ShaderResourceView* colorTexture, ID3D11ShaderResourceView* glowTexture,float glowStrength)
{bool result;
// Set the shader parameters that it will use for rendering.result =SetShaderParameters(deviceContext, worldMatrix, viewMatrix, projectionMatrix, colorTexture, glowTexture, glowStrength);
30 of 59 3/8/2013 12:47 PM
if(!result){
return false;
}
// Now render the prepared buffers with the shader.RenderShader(deviceContext, indexCount);
return true;}
bool GlowShaderClass::InitializeShader(ID3D11Device* device, HWND hwnd, WCHAR* vsFilename, WCHAR* psFilename){
HRESULT result;ID3D10Blob* errorMessage;ID3D10Blob* vertexShaderBuffer;ID3D10Blob* pixelShaderBuffer;D3D11_INPUT_ELEMENT_DESC polygonLayout[2];unsigned int numElements;D3D11_BUFFER_DESC matrixBufferDesc;
D3D11_BUFFER_DESC glowBufferDesc;D3D11_SAMPLER_DESC samplerDesc;
// Initialize the pointers this function will use to null.errorMessage =0;vertexShaderBuffer =0;pixelShaderBuffer =0;
// Compile the vertex shader code.result =D3DX11CompileFromFile(vsFilename, NULL, NULL, "GlowVertexShader", "vs_5_0", D3D10_SHADER_ENABLE_STRICTNESS, 0, NULL,
&vertexShaderBuffer, &errorMessage, NULL);if(FAILED(result))
Tutorial 46: Glow http://www.rastertek.com/dx11tut46.html

7/14/2019 RasterTek: Direct3D introduction
http://slidepdf.com/reader/full/rastertek-direct3d-introduction 681/709
if(FAILED(result)){
// If the shader failed to compile it should have writen something to the error message.if(errorMessage){
OutputShaderErrorMessage(errorMessage, hwnd, vsFilename);
}// If there was nothing in the error message then it simply could not find the shader file itself.else{
MessageBox(hwnd, vsFilename, L"Missing Shader File", MB_OK);}
31 of 59 3/8/2013 12:47 PM
return false;}
// Compile the pixel shader code.result =D3DX11CompileFromFile(psFilename, NULL, NULL, "GlowPixelShader", "ps_5_0", D3D10_SHADER_ENABLE_STRICTNESS, 0, NULL,
&pixelShaderBuffer, &errorMessage, NULL);if(FAILED(result)){
// If the shader failed to compile it should have writen something to the error message.if(errorMessage){
OutputShaderErrorMessage(errorMessage, hwnd, psFilename);}// If there was nothing in the error message then it simply could not find the file itself.else{
MessageBox(hwnd, psFilename, L"Missing Shader File", MB_OK);}
return false;
}
// Create the vertex shader from the buffer.result =device->CreateVertexShader(vertexShaderBuffer->GetBufferPointer(), vertexShaderBuffer->GetBufferSize(), NULL, &m_vertexShader);if(FAILED(result)){
return false;}
// Create the pixel shader from the buffer.result =device->CreatePixelShader(pixelShaderBuffer->GetBufferPointer(), pixelShaderBuffer->GetBufferSize(), NULL, &m_pixelShader);if(FAILED(result)){
Tutorial 46: Glow http://www.rastertek.com/dx11tut46.html

7/14/2019 RasterTek: Direct3D introduction
http://slidepdf.com/reader/full/rastertek-direct3d-introduction 682/709
{return false;
}
// Create the vertex input layout description.polygonLayout[0].SemanticName ="POSITION";
polygonLayout[0].SemanticIndex =0;polygonLayout[0].Format =DXGI_FORMAT_R32G32B32_FLOAT;polygonLayout[0].InputSlot =0;polygonLayout[0].AlignedByteOffset =0;polygonLayout[0].InputSlotClass =D3D11_INPUT_PER_VERTEX_DATA;polygonLayout[0].InstanceDataStepRate =0;
32 of 59 3/8/2013 12:47 PM
polygonLayout[1].SemanticName ="TEXCOORD";polygonLayout[1].SemanticIndex =0;
polygonLayout[1].Format =DXGI_FORMAT_R32G32_FLOAT;polygonLayout[1].InputSlot =0;polygonLayout[1].AlignedByteOffset =D3D11_APPEND_ALIGNED_ELEMENT;polygonLayout[1].InputSlotClass =D3D11_INPUT_PER_VERTEX_DATA;polygonLayout[1].InstanceDataStepRate =0;
// Get a count of the elements in the layout.numElements =sizeof(polygonLayout) / sizeof(polygonLayout[0]);
// Create the vertex input layout.result =device->CreateInputLayout(polygonLayout, numElements, vertexShaderBuffer->GetBufferPointer(), vertexShaderBuffer->GetBufferSize(),
&m_layout);if(FAILED(result)){
return false;}
// Release the vertex shader buffer and pixel shader buffer since they are no longer needed.
vertexShaderBuffer->Release();vertexShaderBuffer =0;
pixelShaderBuffer->Release();pixelShaderBuffer =0;
// Setup the description of the dynamic matrix constant buffer that is in the vertex shader.matrixBufferDesc.Usage =D3D11_USAGE_DYNAMIC;matrixBufferDesc.ByteWidth =sizeof(MatrixBufferType);
matrixBufferDesc.BindFlags =D3D11_BIND_CONSTANT_BUFFER;matrixBufferDesc.CPUAccessFlags =D3D11_CPU_ACCESS_WRITE;matrixBufferDesc.MiscFlags =0;matrixBufferDesc.StructureByteStride =0;
Tutorial 46: Glow http://www.rastertek.com/dx11tut46.html
7/14/2019 RasterTek: Direct3D introduction
http://slidepdf.com/reader/full/rastertek-direct3d-introduction 683/709
y
// Create the constant buffer pointer so we can access the vertex shader constant buffer from within this class.result =device->CreateBuffer(&matrixBufferDesc, NULL, &m_matrixBuffer);if(FAILED(result)){
return false;}
// Setup the description of the dynamic glow constant buffer that is in the pixel shader.glowBufferDesc.Usage =D3D11_USAGE_DYNAMIC;glowBufferDesc.ByteWidth =sizeof(GlowBufferType);
33 of 59 3/8/2013 12:47 PM
glowBufferDesc.BindFlags =D3D11_BIND_CONSTANT_BUFFER;glowBufferDesc.CPUAccessFlags =D3D11_CPU_ACCESS_WRITE;glowBufferDesc.MiscFlags =0;
glowBufferDesc.StructureByteStride =0;
// Create the constant buffer pointer so we can access the pixel shader constant buffer from within this class.result =device->CreateBuffer(&glowBufferDesc, NULL, &m_glowBuffer);if(FAILED(result)){
return false;}
// Create a texture sampler state description.samplerDesc.Filter =D3D11_FILTER_MIN_MAG_MIP_LINEAR;samplerDesc.AddressU =D3D11_TEXTURE_ADDRESS_WRAP;samplerDesc.AddressV =D3D11_TEXTURE_ADDRESS_WRAP;samplerDesc.AddressW =D3D11_TEXTURE_ADDRESS_WRAP;samplerDesc.MipLODBias =0.0f;samplerDesc.MaxAnisotropy =1;samplerDesc.ComparisonFunc =D3D11_COMPARISON_ALWAYS;samplerDesc.BorderColor[0] =0;
samplerDesc.BorderColor[1] =0;samplerDesc.BorderColor[2] =0;samplerDesc.BorderColor[3] =0;samplerDesc.MinLOD =0;samplerDesc.MaxLOD =D3D11_FLOAT32_MAX;
// Create the texture sampler state.result =device->CreateSamplerState(&samplerDesc, &m_sampleState);if(FAILED(result))
{return false;
}
Tutorial 46: Glow http://www.rastertek.com/dx11tut46.html

7/14/2019 RasterTek: Direct3D introduction
http://slidepdf.com/reader/full/rastertek-direct3d-introduction 684/709
return true;}
void GlowShaderClass::ShutdownShader()
{// Release the sampler state.if(m_sampleState){
m_sampleState->Release();m_sampleState =0;
34 of 59 3/8/2013 12:47 PM
}
// Release the glow constant buffer.
if(m_glowBuffer){
m_glowBuffer->Release();m_glowBuffer =0;
}
// Release the matrix constant buffer.if(m_matrixBuffer){
m_matrixBuffer->Release();m_matrixBuffer =0;
}
// Release the layout.if(m_layout){
m_layout->Release();m_layout =0;
}
// Release the pixel shader.if(m_pixelShader){
m_pixelShader->Release();m_pixelShader =0;
}
// Release the vertex shader.if(m_vertexShader){
m_vertexShader->Release();Sh d 0
Tutorial 46: Glow http://www.rastertek.com/dx11tut46.html

7/14/2019 RasterTek: Direct3D introduction
http://slidepdf.com/reader/full/rastertek-direct3d-introduction 685/709
m_vertexShader =0;}
return;}
void GlowShaderClass::OutputShaderErrorMessage(ID3D10Blob* errorMessage, HWND hwnd, WCHAR* shaderFilename){
char* compileErrors;unsigned long bufferSize, i;
35 of 59 3/8/2013 12:47 PM
ofstream fout;
// Get a pointer to the error message text buffer.compileErrors =(char*)(errorMessage->GetBufferPointer());
// Get the length of the message.bufferSize =errorMessage->GetBufferSize();
// Open a file to write the error message to.fout.open("shader-error.txt");
// Write out the error message.for(i=0; i<bufferSize; i++){
fout <<compileErrors[i];}
// Close the file.fout.close();
// Release the error message.errorMessage->Release();errorMessage =0;
// Pop a message up on the screen to notify the user to check the text file for compile errors.MessageBox(hwnd, L"Error compiling shader. Check shader-error.txt for message.", shaderFilename, MB_OK);
return;}
bool GlowShaderClass::SetShaderParameters(ID3D11DeviceContext* deviceContext, D3DXMATRIX worldMatrix, D3DXMATRIX viewMatrix,D3DXMATRIX projectionMatrix, ID3D11ShaderResourceView* colorTexture,ID3D11ShaderResourceVie * glo Te ture float glo Strength)
Tutorial 46: Glow http://www.rastertek.com/dx11tut46.html

7/14/2019 RasterTek: Direct3D introduction
http://slidepdf.com/reader/full/rastertek-direct3d-introduction 686/709
ID3D11ShaderResourceView* glowTexture, float glowStrength){
HRESULT result;D3D11_MAPPED_SUBRESOURCE mappedResource;MatrixBufferType* dataPtr;
GlowBufferType* dataPtr2;unsigned int bufferNumber;
// Transpose the matrices to prepare them for the shader.D3DXMatrixTranspose(&worldMatrix, &worldMatrix);
36 of 59 3/8/2013 12:47 PM
D3DXMatrixTranspose(&viewMatrix, &viewMatrix);D3DXMatrixTranspose(&projectionMatrix, &projectionMatrix);
// Lock the constant buffer so it can be written to.result =deviceContext->Map(m_matrixBuffer, 0, D3D11_MAP_WRITE_DISCARD, 0, &mappedResource);if(FAILED(result)){
return false;}
// Get a pointer to the data in the constant buffer.dataPtr =(MatrixBufferType*)mappedResource.pData;
// Copy the matrices into the constant buffer.dataPtr->world =worldMatrix;dataPtr->view =viewMatrix;dataPtr->projection =projectionMatrix;
// Unlock the constant buffer.deviceContext->Unmap(m_matrixBuffer, 0);
// Set the position of the constant buffer in the vertex shader.bufferNumber =0;
// Now set the constant buffer in the vertex shader with the updated values.deviceContext->VSSetConstantBuffers(bufferNumber, 1, &m_matrixBuffer);
// Lock the constant buffer so it can be written to.result =deviceContext->Map(m_glowBuffer, 0, D3D11_MAP_WRITE_DISCARD, 0, &mappedResource);if(FAILED(result))
{return false;
}
// Get a pointer to the data in the constant buffer
Tutorial 46: Glow http://www.rastertek.com/dx11tut46.html

7/14/2019 RasterTek: Direct3D introduction
http://slidepdf.com/reader/full/rastertek-direct3d-introduction 687/709
// Get a pointer to the data in the constant buffer.dataPtr2 =(GlowBufferType*)mappedResource.pData;
// Copy the data into the constant buffer.dataPtr2->glowStrength =glowStrength;
dataPtr2->padding =D3DXVECTOR3(0.0f, 0.0f, 0.0f);
// Unlock the constant buffer.deviceContext->Unmap(m_glowBuffer, 0);
// Set the position of the constant buffer in the pixel shader.
37 of 59 3/8/2013 12:47 PM
bufferNumber =0;
// Now set the constant buffer in the pixel shader with the updated values.
deviceContext->PSSetConstantBuffers(bufferNumber, 1, &m_glowBuffer);
// Set shader texture resources in the pixel shader.deviceContext->PSSetShaderResources(0, 1, &colorTexture);deviceContext->PSSetShaderResources(1, 1, &glowTexture);
return true;}
void GlowShaderClass::RenderShader(ID3D11DeviceContext* deviceContext, int indexCount){
// Set the vertex input layout.deviceContext->IASetInputLayout(m_layout);
// Set the vertex and pixel shaders that will be used to render this triangle.deviceContext->VSSetShader(m_vertexShader, NULL, 0);deviceContext->PSSetShader(m_pixelShader, NULL, 0);
// Set the sampler state in the pixel shader.deviceContext->PSSetSamplers(0, 1, &m_sampleState);
// Render the triangle.deviceContext->DrawIndexed(indexCount, 0, 0);
return;}
Graphicsclass.h
Tutorial 46: Glow http://www.rastertek.com/dx11tut46.html

7/14/2019 RasterTek: Direct3D introduction
http://slidepdf.com/reader/full/rastertek-direct3d-introduction 688/709
The GraphicsClass is the same as the blur tutorial except that we add shaders for rendering both the glow and the glow map.
////////////////////////////////////////////////////////////////////////////////// Filename: graphicsclass.h////////////////////////////////////////////////////////////////////////////////#ifndef _GRAPHICSCLASS_H_ #define _GRAPHICSCLASS_H_
38 of 59 3/8/2013 12:47 PM
///////////////////////// MY CLASS INCLUDES /////////////////////////
#include "d3dclass.h"#include "cameraclass.h"#include "textureshaderclass.h"#include "bitmapclass.h"#include "rendertextureclass.h"#include "orthowindowclass.h"#include "horizontalblurshaderclass.h"#include "verticalblurshaderclass.h"#include "glowmapshaderclass.h"
#include "glowshaderclass.h"
/////////////// GLOBALS ///////////////const bool FULL_SCREEN =true;const bool VSYNC_ENABLED =true;const float SCREEN_DEPTH =1000.0f;
const float SCREEN_NEAR =0.1f;
////////////////////////////////////////////////////////////////////////////////// Class name: GraphicsClass////////////////////////////////////////////////////////////////////////////////class GraphicsClass{public:
GraphicsClass();GraphicsClass(const GraphicsClass&);~GraphicsClass();
bool Initialize(int, int, HWND);
Tutorial 46: Glow http://www.rastertek.com/dx11tut46.html

7/14/2019 RasterTek: Direct3D introduction
http://slidepdf.com/reader/full/rastertek-direct3d-introduction 689/709
bool Initialize(int, int, HWND);void Shutdown();bool Frame();
private:
bool Render();bool RenderGlowMapToTexture();bool DownSampleTexture();bool RenderHorizontalBlurToTexture();bool RenderVerticalBlurToTexture();bool UpSampleTexture();
39 of 59 3/8/2013 12:47 PM
bool RenderUIElementsToTexture();bool RenderGlowScene();
private:D3DClass* m_D3D;CameraClass* m_Camera;
TextureShaderClass* m_TextureShader;BitmapClass* m_Bitmap;RenderTextureClass *m_RenderTexture, *m_DownSampleTexure, *m_HorizontalBlurTexture, *m_VerticalBlurTexture, *m_UpSampleTexure;OrthoWindowClass *m_SmallWindow, *m_FullScreenWindow;HorizontalBlurShaderClass* m_HorizontalBlurShader;VerticalBlurShaderClass* m_VerticalBlurShader;
GlowMapShaderClass* m_GlowMapShader;GlowShaderClass* m_GlowShader;
};
#endif
Graphicsclass.cpp
////////////////////////////////////////////////////////////////////////////////// Filename: graphicsclass.cpp////////////////////////////////////////////////////////////////////////////////#include "graphicsclass.h"
GraphicsClass::GraphicsClass(){
m_D3D =0;m_Camera =0;m_TextureShader =0;m_Bitmap =0;m RenderTexture =0;
Tutorial 46: Glow http://www.rastertek.com/dx11tut46.html

7/14/2019 RasterTek: Direct3D introduction
http://slidepdf.com/reader/full/rastertek-direct3d-introduction 690/709
m_RenderTexture =0;m_DownSampleTexure =0;m_SmallWindow =0;m_HorizontalBlurTexture =0;m_HorizontalBlurShader =0;
m_VerticalBlurTexture =0;m_VerticalBlurShader =0;m_UpSampleTexure =0;m_FullScreenWindow =0;m_GlowMapShader =0;
40 of 59 3/8/2013 12:47 PM
m_GlowShader =0;}
GraphicsClass::GraphicsClass(const GraphicsClass& other){}
GraphicsClass::~GraphicsClass(){}
bool GraphicsClass::Initialize(int screenWidth, int screenHeight, HWND hwnd){
bool result;
// Create the Direct3D object.m_D3D =new D3DClass;
if(!m_D3D){
return false;}
// Initialize the Direct3D object.result =m_D3D->Initialize(screenWidth, screenHeight, VSYNC_ENABLED, hwnd, FULL_SCREEN, SCREEN_DEPTH, SCREEN_NEAR);if(!result){
MessageBox(hwnd, L"Could not initialize Direct3D.", L"Error", MB_OK);return false;
}
// Create the camera object.
Tutorial 46: Glow http://www.rastertek.com/dx11tut46.html

7/14/2019 RasterTek: Direct3D introduction
http://slidepdf.com/reader/full/rastertek-direct3d-introduction 691/709
m_Camera =new CameraClass;if(!m_Camera){
return false;
}
// Set the initial position of the camera.m_Camera->SetPosition(0.0f, 0.0f, -10.0f);
// Create the texture shader object.
41 of 59 3/8/2013 12:47 PM
m_TextureShader =new TextureShaderClass;if(!m_TextureShader){
return false;}
// Initialize the texture shader object.result =m_TextureShader->Initialize(m_D3D->GetDevice(), hwnd);if(!result){
MessageBox(hwnd, L"Could not initialize the texture shader object.", L"Error", MB_OK);return false;
}
// Create the bitmap object.m_Bitmap =new BitmapClass;if(!m_Bitmap){
return false;}
// Initialize the bitmap object.result =m_Bitmap->Initialize(m_D3D->GetDevice(), screenWidth, screenHeight, L"../Engine/data/test.dds",
L"../Engine/data/glowmap.dds", 256, 32);if(!result){
MessageBox(hwnd, L"Could not initialize the bitmap object.", L"Error", MB_OK);return false;
}
// Create the render to texture object.m_RenderTexture =new RenderTextureClass;if(!m_RenderTexture){
return false;
Tutorial 46: Glow http://www.rastertek.com/dx11tut46.html

7/14/2019 RasterTek: Direct3D introduction
http://slidepdf.com/reader/full/rastertek-direct3d-introduction 692/709
}
// Initialize the render to texture object.result =m_RenderTexture->Initialize(m_D3D->GetDevice(), screenWidth, screenHeight, SCREEN_DEPTH, SCREEN_NEAR);
if(!result){
MessageBox(hwnd, L"Could not initialize the render to texture object.", L"Error", MB_OK);return false;
}
42 of 59 3/8/2013 12:47 PM
// Create the down sample render to texture object.m_DownSampleTexure =new RenderTextureClass;if(!m_DownSampleTexure)
{return false;
}
// Initialize the down sample render to texture object.result =m_DownSampleTexure->Initialize(m_D3D->GetDevice(), (screenWidth / 2), (screenHeight / 2), SCREEN_DEPTH, SCREEN_NEAR);if(!result){
MessageBox(hwnd, L"Could not initialize the down sample render to texture object.", L"Error", MB_OK);
return false;}
// Create the small ortho window object.m_SmallWindow =new OrthoWindowClass;if(!m_SmallWindow){
return false;}
// Initialize the small ortho window object.result =m_SmallWindow->Initialize(m_D3D->GetDevice(), (screenWidth / 2), (screenHeight / 2));if(!result){
MessageBox(hwnd, L"Could not initialize the small ortho window object.", L"Error", MB_OK);return false;
}
// Create the horizontal blur render to texture object.m_HorizontalBlurTexture =new RenderTextureClass;if(!m_HorizontalBlurTexture){
return false;}
Tutorial 46: Glow http://www.rastertek.com/dx11tut46.html

7/14/2019 RasterTek: Direct3D introduction
http://slidepdf.com/reader/full/rastertek-direct3d-introduction 693/709
}
// Initialize the horizontal blur render to texture object.result =m_HorizontalBlurTexture->Initialize(m_D3D->GetDevice(), (screenWidth / 2), (screenHeight / 2), SCREEN_DEPTH, SCREEN_NEAR);
if(!result){
MessageBox(hwnd, L"Could not initialize the horizontal blur render to texture object.", L"Error", MB_OK);return false;
}
43 of 59 3/8/2013 12:47 PM
// Create the horizontal blur shader object.m_HorizontalBlurShader =new HorizontalBlurShaderClass;if(!m_HorizontalBlurShader)
{return false;
}
// Initialize the horizontal blur shader object.result =m_HorizontalBlurShader->Initialize(m_D3D->GetDevice(), hwnd);if(!result){
MessageBox(hwnd, L"Could not initialize the horizontal blur shader object.", L"Error", MB_OK);
return false;}
// Create the vertical blur render to texture object.m_VerticalBlurTexture =new RenderTextureClass;if(!m_VerticalBlurTexture){
return false;}
// Initialize the vertical blur render to texture object.result =m_VerticalBlurTexture->Initialize(m_D3D->GetDevice(), (screenWidth / 2), (screenHeight / 2), SCREEN_DEPTH, SCREEN_NEAR);if(!result){
MessageBox(hwnd, L"Could not initialize the vertical blur render to texture object.", L"Error", MB_OK);return false;
}
// Create the vertical blur shader object.m_VerticalBlurShader =new VerticalBlurShaderClass;if(!m_VerticalBlurShader){
return false;}
Tutorial 46: Glow http://www.rastertek.com/dx11tut46.html

7/14/2019 RasterTek: Direct3D introduction
http://slidepdf.com/reader/full/rastertek-direct3d-introduction 694/709
}
// Initialize the vertical blur shader object.result =m_VerticalBlurShader->Initialize(m_D3D->GetDevice(), hwnd);
if(!result){
MessageBox(hwnd, L"Could not initialize the vertical blur shader object.", L"Error", MB_OK);return false;
}
44 of 59 3/8/2013 12:47 PM
// Create the up sample render to texture object.m_UpSampleTexure =new RenderTextureClass;if(!m_UpSampleTexure)
{return false;
}
// Initialize the up sample render to texture object.result =m_UpSampleTexure->Initialize(m_D3D->GetDevice(), screenWidth, screenHeight, SCREEN_DEPTH, SCREEN_NEAR);if(!result){
MessageBox(hwnd, L"Could not initialize the up sample render to texture object.", L"Error", MB_OK);
return false;}
// Create the full screen ortho window object.m_FullScreenWindow =new OrthoWindowClass;if(!m_FullScreenWindow){
return false;}
// Initialize the full screen ortho window object.result =m_FullScreenWindow->Initialize(m_D3D->GetDevice(), screenWidth, screenHeight);if(!result){
MessageBox(hwnd, L"Could not initialize the full screen ortho window object.", L"Error", MB_OK);return false;
}
// Create the glow map shader object.m_GlowMapShader =new GlowMapShaderClass;if(!m_GlowMapShader){
return false;}
Tutorial 46: Glow http://www.rastertek.com/dx11tut46.html

7/14/2019 RasterTek: Direct3D introduction
http://slidepdf.com/reader/full/rastertek-direct3d-introduction 695/709
}
// Initialize the glow map shader object.result =m_GlowMapShader->Initialize(m_D3D->GetDevice(), hwnd);
if(!result){
MessageBox(hwnd, L"Could not initialize the glow map shader object.", L"Error", MB_OK);return false;
}
45 of 59 3/8/2013 12:47 PM
// Create the glow shader object.m_GlowShader =new GlowShaderClass;if(!m_GlowShader)
{ return false;}
// Initialize the glow shader object.result =m_GlowShader->Initialize(m_D3D->GetDevice(), hwnd);if(!result){
MessageBox(hwnd, L"Could not initialize the glow shader object.", L"Error", MB_OK);
return false;}
return true;}
void GraphicsClass::Shutdown(){
// Release the glow shader object.if(m_GlowShader){
m_GlowShader->Shutdown();delete m_GlowShader;m_GlowShader =0;
}
// Release the glow map shader object.
if(m_GlowMapShader){
m_GlowMapShader->Shutdown();delete m_GlowMapShader;m_GlowMapShader =0;
}
Tutorial 46: Glow http://www.rastertek.com/dx11tut46.html

7/14/2019 RasterTek: Direct3D introduction
http://slidepdf.com/reader/full/rastertek-direct3d-introduction 696/709
}
// Release the full screen ortho window object.if(m_FullScreenWindow)
{m_FullScreenWindow->Shutdown();delete m_FullScreenWindow;m_FullScreenWindow =0;
}
46 of 59 3/8/2013 12:47 PM
// Release the up sample render to texture object.if(m_UpSampleTexure){
m_UpSampleTexure->Shutdown();delete m_UpSampleTexure;m_UpSampleTexure =0;
}
// Release the vertical blur shader object.if(m_VerticalBlurShader){
m_VerticalBlurShader->Shutdown();
delete m_VerticalBlurShader;m_VerticalBlurShader =0;
}
// Release the vertical blur render to texture object.if(m_VerticalBlurTexture){
m_VerticalBlurTexture->Shutdown();delete m_VerticalBlurTexture;
m_VerticalBlurTexture =0;}
// Release the horizontal blur shader object.if(m_HorizontalBlurShader){
m_HorizontalBlurShader->Shutdown();delete m_HorizontalBlurShader;m_HorizontalBlurShader =0;
}
// Release the horizontal blur render to texture object.if(m_HorizontalBlurTexture){
m HorizontalBlurTexture->Shutdown();
Tutorial 46: Glow http://www.rastertek.com/dx11tut46.html

7/14/2019 RasterTek: Direct3D introduction
http://slidepdf.com/reader/full/rastertek-direct3d-introduction 697/709
m_HorizontalBlurTexture >Shutdown();delete m_HorizontalBlurTexture;m_HorizontalBlurTexture =0;
}
// Release the small ortho window object.if(m_SmallWindow){
m_SmallWindow->Shutdown();delete m_SmallWindow;
47 of 59 3/8/2013 12:47 PM
m_SmallWindow =0;}
// Release the down sample render to texture object.if(m_DownSampleTexure){
m_DownSampleTexure->Shutdown();delete m_DownSampleTexure;m_DownSampleTexure =0;
}
// Release the render to texture object.
if(m_RenderTexture){m_RenderTexture->Shutdown();delete m_RenderTexture;m_RenderTexture =0;
}
// Release the bitmap object.if(m_Bitmap)
{m_Bitmap->Shutdown();delete m_Bitmap;m_Bitmap =0;
}
// Release the texture shader object.if(m_TextureShader){
m_TextureShader->Shutdown();delete m_TextureShader;m_TextureShader =0;
}
// Release the camera object.
Tutorial 46: Glow http://www.rastertek.com/dx11tut46.html

7/14/2019 RasterTek: Direct3D introduction
http://slidepdf.com/reader/full/rastertek-direct3d-introduction 698/709
jif(m_Camera){
delete m_Camera;
m_Camera =0;}
// Release the D3D object.if(m_D3D){
48 of 59 3/8/2013 12:47 PM
m_D3D->Shutdown();delete m_D3D;m_D3D =0;
}
return;}
bool GraphicsClass::Frame(){
bool result;
// Render the graphics scene.result =Render();if(!result){
return false;}
return true;}
The Render function calls the different steps required to produce the glow. It is similar to the blur tutorial except that we start by rendering the glow map to a textureinstead of the 3D scene. After that we do the blurring as normal. Once the blur is complete we render the UI elements to another render to texture and combine itwith the blurred texture for the final result.
bool GraphicsClass::Render(){
bool result;
// First render the glow maps to a render texture.result =RenderGlowMapToTexture();if(!result)
Tutorial 46: Glow http://www.rastertek.com/dx11tut46.html
7/14/2019 RasterTek: Direct3D introduction
http://slidepdf.com/reader/full/rastertek-direct3d-introduction 699/709
{return false;
}
// Next down sample the render texture to a smaller sized texture.result =DownSampleTexture();if(!result){
return false;
49 of 59 3/8/2013 12:47 PM
}
// Perform a horizontal blur on the down sampled render texture.
result =RenderHorizontalBlurToTexture();if(!result){
return false;}
// Now perform a vertical blur on the horizontal blur render texture.result =RenderVerticalBlurToTexture();if(!result)
{ return false;}
// Up sample the final blurred render texture to screen size again.result =UpSampleTexture();if(!result){
return false;
}
// Render the regular UI elements to a full screen texture.result =RenderUIElementsToTexture();if(!result){
return false;}
// Render the final scene combining the UI elements with the glowing UI elements.RenderGlowScene();
return true;}
Tutorial 46: Glow http://www.rastertek.com/dx11tut46.html

7/14/2019 RasterTek: Direct3D introduction
http://slidepdf.com/reader/full/rastertek-direct3d-introduction 700/709
This function is what renders the glow map portions of the color bitmap onto the render to texture object.
bool GraphicsClass::RenderGlowMapToTexture()
{D3DXMATRIX worldMatrix, viewMatrix, orthoMatrix;bool result;
// Set the render target to be the render to texture.
50 of 59 3/8/2013 12:47 PM
m_RenderTexture->SetRenderTarget(m_D3D->GetDeviceContext());
// Clear the render to texture.
m_RenderTexture->ClearRenderTarget(m_D3D->GetDeviceContext(), 0.0f, 0.0f, 0.0f, 1.0f);
// Generate the view matrix based on the camera's position.m_Camera->Render();
// Get the world, view, and projection matrices from the camera and d3d objects.m_D3D->GetWorldMatrix(worldMatrix);m_Camera->GetViewMatrix(viewMatrix);m_D3D->GetOrthoMatrix(orthoMatrix);
// Turn off the Z buffer to begin all 2D rendering.m_D3D->TurnZBufferOff();
// Put the bitmap vertex and index buffers on the graphics pipeline to prepare them for drawing.result =m_Bitmap->Render(m_D3D->GetDeviceContext(), 100, 100);if(!result){
return false;
}
// Render the bitmap using the glow map shader.m_GlowMapShader->Render(m_D3D->GetDeviceContext(), m_Bitmap->GetIndexCount(), worldMatrix, viewMatrix, orthoMatrix,
m_Bitmap->GetTexture(), m_Bitmap->GetGlowMap());
// Turn the Z buffer back on now that all 2D rendering has completed.m_D3D->TurnZBufferOn();
// Reset the render target back to the original back buffer and not the render to texture anymore.m_D3D->SetBackBufferRenderTarget();
// Reset the viewport back to the original.m_D3D->ResetViewport();
t t
Tutorial 46: Glow http://www.rastertek.com/dx11tut46.html

7/14/2019 RasterTek: Direct3D introduction
http://slidepdf.com/reader/full/rastertek-direct3d-introduction 701/709
return true;}
bool GraphicsClass::DownSampleTexture(){
D3DXMATRIX worldMatrix, viewMatrix, orthoMatrix;bool result;
51 of 59 3/8/2013 12:47 PM
// Set the render target to be the render to texture.m_DownSampleTexure->SetRenderTarget(m_D3D->GetDeviceContext());
// Clear the render to texture.m_DownSampleTexure->ClearRenderTarget(m_D3D->GetDeviceContext(), 0.0f, 1.0f, 0.0f, 1.0f);
// Generate the view matrix based on the camera's position.m_Camera->Render();
// Get the world and view matrices from the camera and d3d objects.m_D3D->GetWorldMatrix(worldMatrix);
m_Camera->GetViewMatrix(viewMatrix);
// Get the ortho matrix from the render to texture since texture has different dimensions being that it is smaller.m_DownSampleTexure->GetOrthoMatrix(orthoMatrix);
// Turn off the Z buffer to begin all 2D rendering.m_D3D->TurnZBufferOff();
// Put the small ortho window vertex and index buffers on the graphics pipeline to prepare them for drawing.
m_SmallWindow->Render(m_D3D->GetDeviceContext());
// Render the small ortho window using the texture shader and the render to texture of the scene as the texture resource.result =m_TextureShader->Render(m_D3D->GetDeviceContext(), m_SmallWindow->GetIndexCount(), worldMatrix, viewMatrix, orthoMatrix,
m_RenderTexture->GetShaderResourceView());if(!result){
return false;}
// Turn the Z buffer back on now that all 2D rendering has completed.m_D3D->TurnZBufferOn();
// Reset the render target back to the original back buffer and not the render to texture anymore.m_D3D->SetBackBufferRenderTarget();
Tutorial 46: Glow http://www.rastertek.com/dx11tut46.html

7/14/2019 RasterTek: Direct3D introduction
http://slidepdf.com/reader/full/rastertek-direct3d-introduction 702/709
// Reset the viewport back to the original.m_D3D->ResetViewport();
return true;}
bool GraphicsClass::RenderHorizontalBlurToTexture()
52 of 59 3/8/2013 12:47 PM
{D3DXMATRIX worldMatrix, viewMatrix, orthoMatrix;float screenSizeX;
bool result;
// Set the render target to be the render to texture.m_HorizontalBlurTexture->SetRenderTarget(m_D3D->GetDeviceContext());
// Clear the render to texture.m_HorizontalBlurTexture->ClearRenderTarget(m_D3D->GetDeviceContext(), 0.0f, 0.0f, 0.0f, 1.0f);
// Generate the view matrix based on the camera's position.m_Camera->Render();
// Get the world and view matrices from the camera and d3d objects.m_Camera->GetViewMatrix(viewMatrix);m_D3D->GetWorldMatrix(worldMatrix);
// Get the ortho matrix from the render to texture since texture has different dimensions.m_HorizontalBlurTexture->GetOrthoMatrix(orthoMatrix);
// Turn off the Z buffer to begin all 2D rendering.m_D3D->TurnZBufferOff();
// Store the screen width in a float that will be used in the horizontal blur shader.screenSizeX =(float)m_HorizontalBlurTexture->GetTextureWidth();
// Put the small ortho window vertex and index buffers on the graphics pipeline to prepare them for drawing.m_SmallWindow->Render(m_D3D->GetDeviceContext());
// Render the small ortho window using the horizontal blur shader and the down sampled render to texture resource.result =m_HorizontalBlurShader->Render(m_D3D->GetDeviceContext(), m_SmallWindow->GetIndexCount(), worldMatrix, viewMatrix, orthoMatrix,
m_DownSampleTexure->GetShaderResourceView(), screenSizeX);if(!result){
return false;
Tutorial 46: Glow http://www.rastertek.com/dx11tut46.html

7/14/2019 RasterTek: Direct3D introduction
http://slidepdf.com/reader/full/rastertek-direct3d-introduction 703/709
return false;}
// Turn the Z buffer back on now that all 2D rendering has completed.m_D3D->TurnZBufferOn();
// Reset the render target back to the original back buffer and not the render to texture anymore.m_D3D->SetBackBufferRenderTarget();
53 of 59 3/8/2013 12:47 PM
// Reset the viewport back to the original.m_D3D->ResetViewport();
return true;}
bool GraphicsClass::RenderVerticalBlurToTexture(){
D3DXMATRIX worldMatrix, viewMatrix, orthoMatrix;float screenSizeY;bool result;
// Set the render target to be the render to texture.m_VerticalBlurTexture->SetRenderTarget(m_D3D->GetDeviceContext());
// Clear the render to texture.m_VerticalBlurTexture->ClearRenderTarget(m_D3D->GetDeviceContext(), 0.0f, 0.0f, 0.0f, 1.0f);
// Generate the view matrix based on the camera's position.
m_Camera->Render();
// Get the world and view matrices from the camera and d3d objects.m_Camera->GetViewMatrix(viewMatrix);m_D3D->GetWorldMatrix(worldMatrix);
// Get the ortho matrix from the render to texture since texture has different dimensions.m_VerticalBlurTexture->GetOrthoMatrix(orthoMatrix);
// Turn off the Z buffer to begin all 2D rendering.m_D3D->TurnZBufferOff();
// Store the screen height in a float that will be used in the vertical blur shader.screenSizeY =(float)m_VerticalBlurTexture->GetTextureHeight();
// Put the small ortho window vertex and index buffers on the graphics pipeline to prepare them for drawing
Tutorial 46: Glow http://www.rastertek.com/dx11tut46.html

7/14/2019 RasterTek: Direct3D introduction
http://slidepdf.com/reader/full/rastertek-direct3d-introduction 704/709
// Put the small ortho window vertex and index buffers on the graphics pipeline to prepare them for drawing.m_SmallWindow->Render(m_D3D->GetDeviceContext());
// Render the small ortho window using the vertical blur shader and the horizontal blurred render to texture resource.result =m_VerticalBlurShader->Render(m_D3D->GetDeviceContext(), m_SmallWindow->GetIndexCount(), worldMatrix, viewMatrix, orthoMatrix,m_HorizontalBlurTexture->GetShaderResourceView(), screenSizeY);
if(!result){
return false;
54 of 59 3/8/2013 12:47 PM
}
// Turn the Z buffer back on now that all 2D rendering has completed.m_D3D->TurnZBufferOn();
// Reset the render target back to the original back buffer and not the render to texture anymore.m_D3D->SetBackBufferRenderTarget();
// Reset the viewport back to the original.m_D3D->ResetViewport();
return true;
}
bool GraphicsClass::UpSampleTexture(){
D3DXMATRIX worldMatrix, viewMatrix, orthoMatrix;bool result;
// Set the render target to be the render to texture.m_UpSampleTexure->SetRenderTarget(m_D3D->GetDeviceContext());
// Clear the render to texture.m_UpSampleTexure->ClearRenderTarget(m_D3D->GetDeviceContext(), 0.0f, 0.0f, 0.0f, 1.0f);
// Generate the view matrix based on the camera's position.m_Camera->Render();
// Get the world and view matrices from the camera and d3d objects.m_D3D->GetWorldMatrix(worldMatrix);m_Camera->GetViewMatrix(viewMatrix);
// Get the ortho matrix from the render to texture since texture has different dimensions.m_UpSampleTexure->GetOrthoMatrix(orthoMatrix);
Tutorial 46: Glow http://www.rastertek.com/dx11tut46.html
7/14/2019 RasterTek: Direct3D introduction
http://slidepdf.com/reader/full/rastertek-direct3d-introduction 705/709
// Turn off the Z buffer to begin all 2D rendering.m_D3D->TurnZBufferOff();
// Put the full screen ortho window vertex and index buffers on the graphics pipeline to prepare them for drawing.m_FullScreenWindow->Render(m_D3D->GetDeviceContext());
// Render the full screen ortho window using the texture shader and the small sized final blurred render to texture resource.result =m_TextureShader->Render(m_D3D->GetDeviceContext(), m_FullScreenWindow->GetIndexCount(), worldMatrix, viewMatrix, orthoMatrix,
55 of 59 3/8/2013 12:47 PM
m_VerticalBlurTexture->GetShaderResourceView());if(!result){
return false;}
// Turn the Z buffer back on now that all 2D rendering has completed.m_D3D->TurnZBufferOn();
// Reset the render target back to the original back buffer and not the render to texture anymore.m_D3D->SetBackBufferRenderTarget();
// Reset the viewport back to the original.m_D3D->ResetViewport();
return true;}
This next function is what renders the user interface elements to their own render to texture object.
bool GraphicsClass::RenderUIElementsToTexture()
{ D3DXMATRIX worldMatrix, viewMatrix, orthoMatrix;bool result;
// Set the render target to be the render to texture.m_RenderTexture->SetRenderTarget(m_D3D->GetDeviceContext());
// Clear the render to texture.
m_RenderTexture->ClearRenderTarget(m_D3D->GetDeviceContext(), 0.0f, 0.0f, 0.0f, 1.0f);
// Generate the view matrix based on the camera's position.m_Camera->Render();
// Get the world, view, and ortho matrices from the camera and d3d objects.m D3D->GetWorldMatrix(worldMatrix);
Tutorial 46: Glow http://www.rastertek.com/dx11tut46.html
7/14/2019 RasterTek: Direct3D introduction
http://slidepdf.com/reader/full/rastertek-direct3d-introduction 706/709
_m_Camera->GetViewMatrix(viewMatrix);m_D3D->GetOrthoMatrix(orthoMatrix);
// Turn off the Z buffer to begin all 2D rendering.m_D3D->TurnZBufferOff();
// Put the bitmap vertex and index buffers on the graphics pipeline to prepare them for drawing.result =m_Bitmap->Render(m_D3D->GetDeviceContext(), 100, 100);
56 of 59 3/8/2013 12:47 PM
if(!result){
return false;}
// Render the bitmap using the texture shader.result =m_TextureShader->Render(m_D3D->GetDeviceContext(), m_Bitmap->GetIndexCount(), worldMatrix, viewMatrix, orthoMatrix, m_Bitmap->GetTexture());if(!result){
return false;}
// Turn the Z buffer back on now that all 2D rendering has completed.m_D3D->TurnZBufferOn();
// Reset the render target back to the original back buffer and not the render to texture anymore.m_D3D->SetBackBufferRenderTarget();
// Reset the viewport back to the original.m_D3D->ResetViewport();
return true;}
And then this final function is what combines the user interface elements texture with the blurred glow map texture to produce the final glow result.
bool GraphicsClass::RenderGlowScene(){
D3DXMATRIX worldMatrix, viewMatrix, orthoMatrix;
// Clear the buffers to begin the scene.m_D3D->BeginScene(1.0f, 0.0f, 0.0f, 0.0f);
// Generate the view matrix based on the camera's position.m_Camera->Render();
Tutorial 46: Glow http://www.rastertek.com/dx11tut46.html

7/14/2019 RasterTek: Direct3D introduction
http://slidepdf.com/reader/full/rastertek-direct3d-introduction 707/709
// Get the world, view, and ortho matrices from the camera and d3d objects.m_Camera->GetViewMatrix(viewMatrix);
m_D3D->GetWorldMatrix(worldMatrix);m_D3D->GetOrthoMatrix(orthoMatrix);
// Turn off the Z buffer to begin all 2D rendering.m_D3D->TurnZBufferOff();
57 of 59 3/8/2013 12:47 PM
// Put the full screen ortho window vertex and index buffers on the graphics pipeline to prepare them for drawing.m_FullScreenWindow->Render(m_D3D->GetDeviceContext());
// Render the full screen ortho window using the texture shader and the full screen sized blurred render to texture resource.m_GlowShader->Render(m_D3D->GetDeviceContext(), m_FullScreenWindow->GetIndexCount(), worldMatrix, viewMatrix, orthoMatrix,
m_RenderTexture->GetShaderResourceView(), m_UpSampleTexure->GetShaderResourceView(), 3.0f);
// Turn the Z buffer back on now that all 2D rendering has completed.m_D3D->TurnZBufferOn();
// Present the rendered scene to the screen.m_D3D->EndScene();
return true;}
Summary
We can now apply selective glow to our scene using glow maps.
To Do Exercises
1. Compile and run the program. You should see a glow applied to the bitmap object. Press escape to quit.
2. Modify the glow strength to see the effect it has.
3. Create a different glow map to make only the text glow.
4 Add l t 3D ( h th i i b f th th t t i l )
Tutorial 46: Glow http://www.rastertek.com/dx11tut46.html

7/14/2019 RasterTek: Direct3D introduction
http://slidepdf.com/reader/full/rastertek-direct3d-introduction 708/709
4. Add glow to a 3D scene (such as the spinning cube from the other tutorials).
5. Use an additional texture such as noise or a gradient and animate the glow by translating the noise or gradient texture and using it as intensity for the glow.
Source Code
58 of 59 3/8/2013 12:47 PM
Source Code and Data Files: dx11src46.zip
Executable: dx11exe46.zip
Back to Tutorial Index
Tutorial 46: Glow http://www.rastertek.com/dx11tut46.html

7/14/2019 RasterTek: Direct3D introduction
http://slidepdf.com/reader/full/rastertek-direct3d-introduction 709/709
59 of 59 3/8/2013 12:47 PM