Angelfire: Welcome to Angelfire · Created Date: 5/24/2005 11:33:43 AM
This is my version of Travis' excellent Lightwave tut rewritten for Wings. Many of the tools used are similar, the biggest difference is that wings only works with solids which actually makes things easier in this case!Just a few words about shortcuts and so on first. Wings is still under development so there may be slight differences between the version I'm using and the one you use. Techniques also vary depending on your platform and mouse type but there isn't that much difference so we should do OK!I can't tell you about the camera controls, there are too many options but the info is all there in the programme i'm sure you can figure it out :o)Wings works with contextual menus. If you right click (Windows) or control click (Mac, although I believe they've changed it to Command click in the latest version) in the modelling window WHEN NOTHING IS SELECTED the object menu will appear, this allows you to create primitives and lights. If you have something selected a modelling menu will appear, the tools available will vary depending on whether you are in Vertex, Edge, Face or Body mode. (Shortcuts v, e, f and b)Make sure advanced menus are enabled in the preferences window (in the edit menu)Two tools that we will be using are in the tool menu at the top of
the screen, Tweak and Virtual Mirror.You can tumble and zoom the view with the mouse (like I said you'll have to figure it out!) but you can also view along the axes by pressing the shortcut keys z,x and y.Shift clicking these keys will view along the appropriate axis from the opposite direction.Other useful shortcuts are c for connecting edges, g to select an edge-ring from a single selected edge, l to select an edge loop, backspace to delete whatever you have selected, spacebar to deselect, Cntrl Alt z to udo the last action, u to see the model rotate, s to smooth and subdivide the mesh and shift to see a smooth preview. r will reset the view to default. If I use any others I'll try to remember to mention them at the time :o)
On to the modelling!
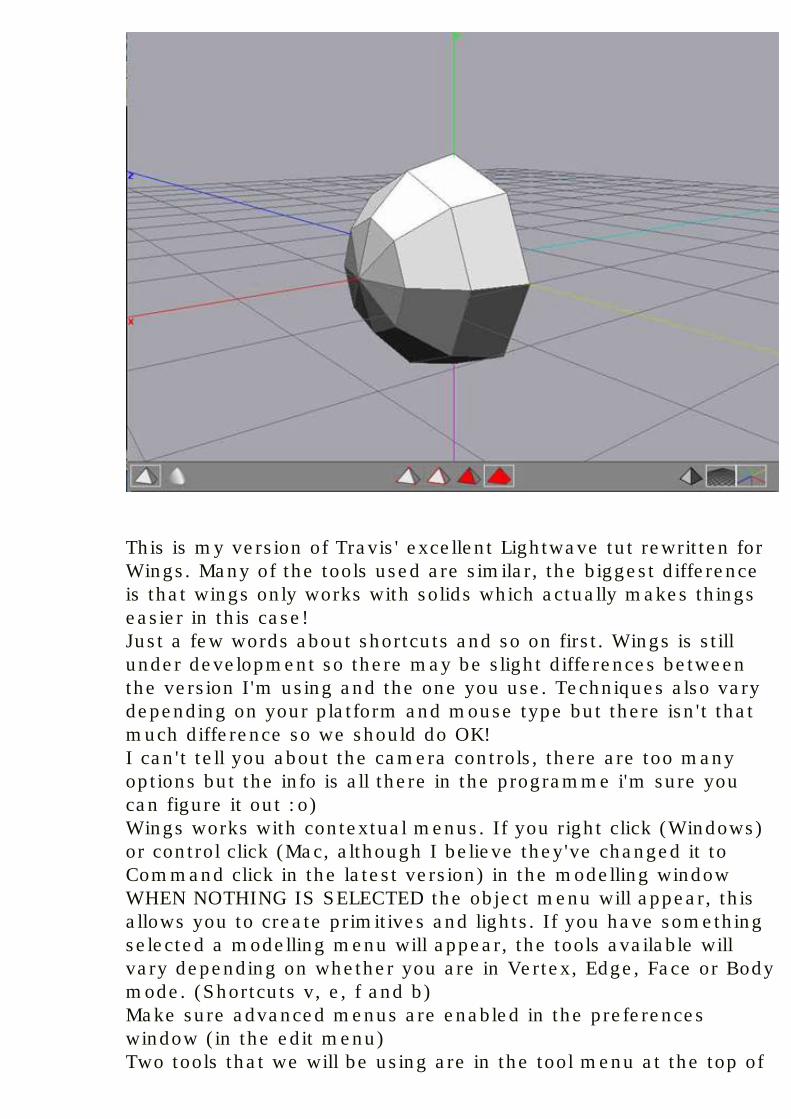
Create a sphere by right clicking or Cntrl clicking in the window selecting the little box by sphere and entering 8 for the number of sections and 6 for the number of slices. Press b and click on the sphere to select the object. Right click for the rotate tool and rotate about the z axis so that the sphere's axis runs along the x axis.Delete half the sphere so that it looks like this image. This is best done by viewing down the z axis (z) and selecting a vertical edge in the centre of the sphere and pressing l to selct an edgeloop, rightclick for the loopcut tool. This will highlight one half of the sphere, if it has highlighted the right half invert the selection (selection menu at the top of the screen). Once the left half is highlighted press backspace to delete the left half. Your object should now look like this!
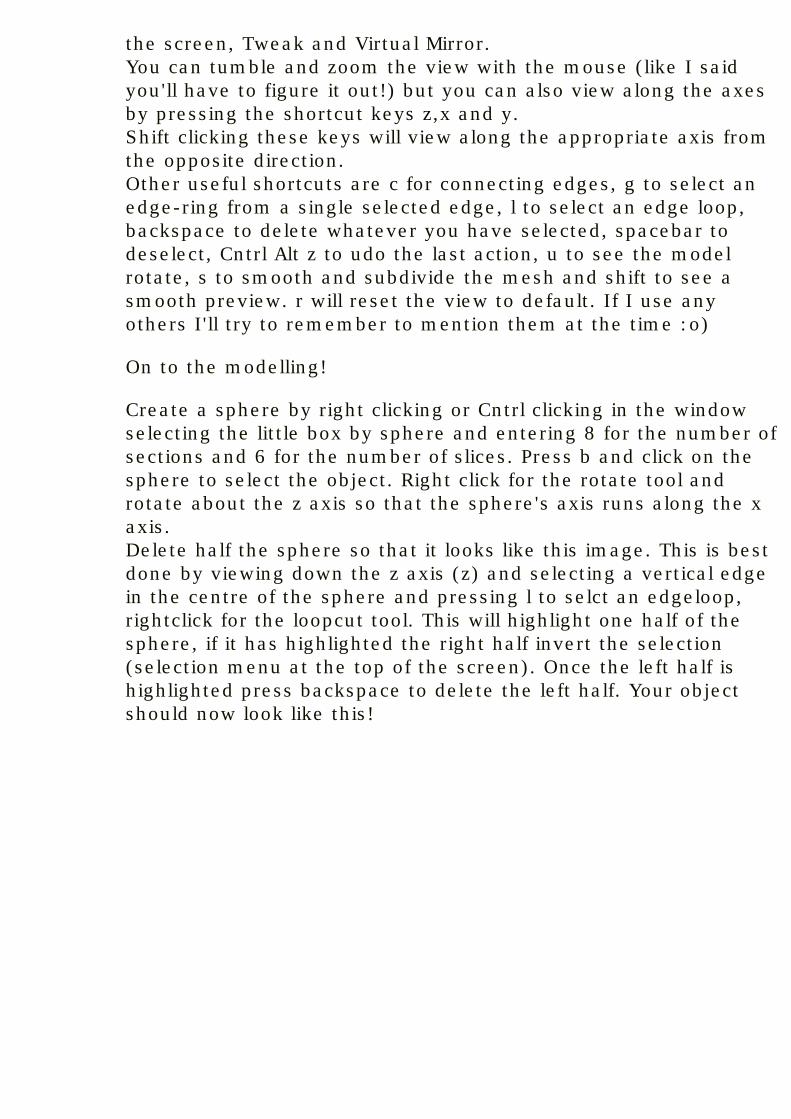
Press b, select the hemisphere and use the duplicate tool along the z axis, then the scale tool to reduce the size of the righthand sphere.
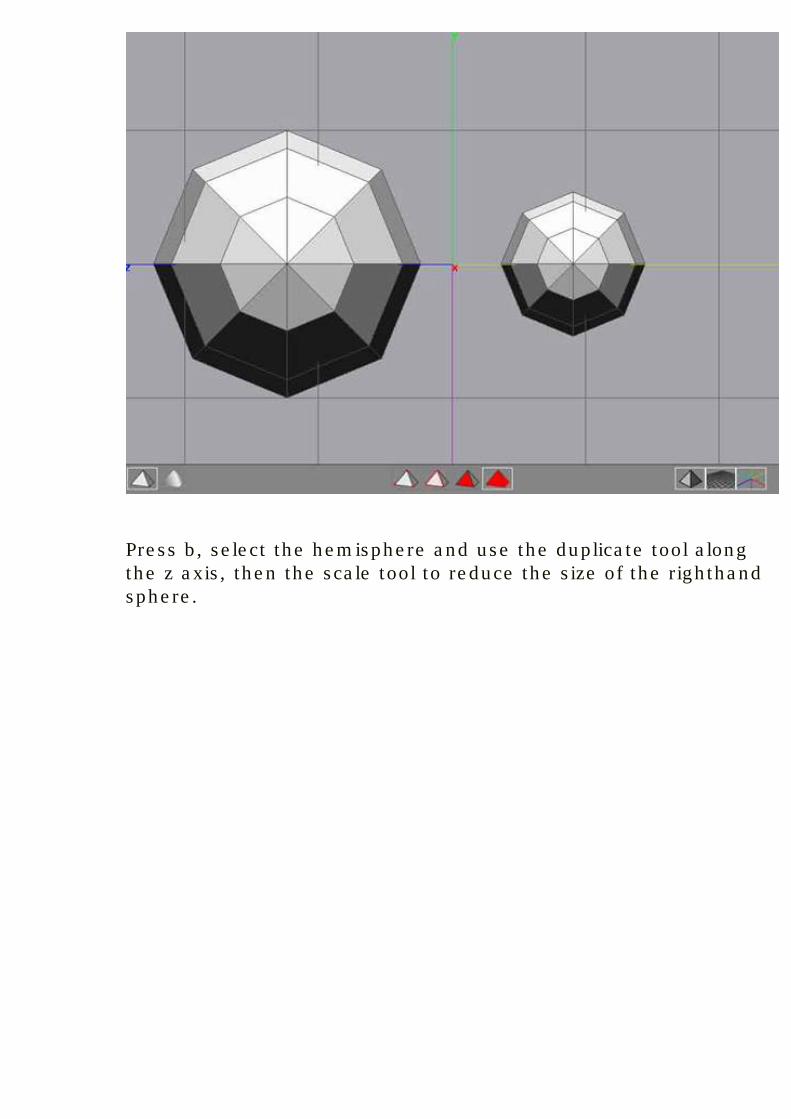
Select the face shown, use the dissolve tool and then the bridge tool,
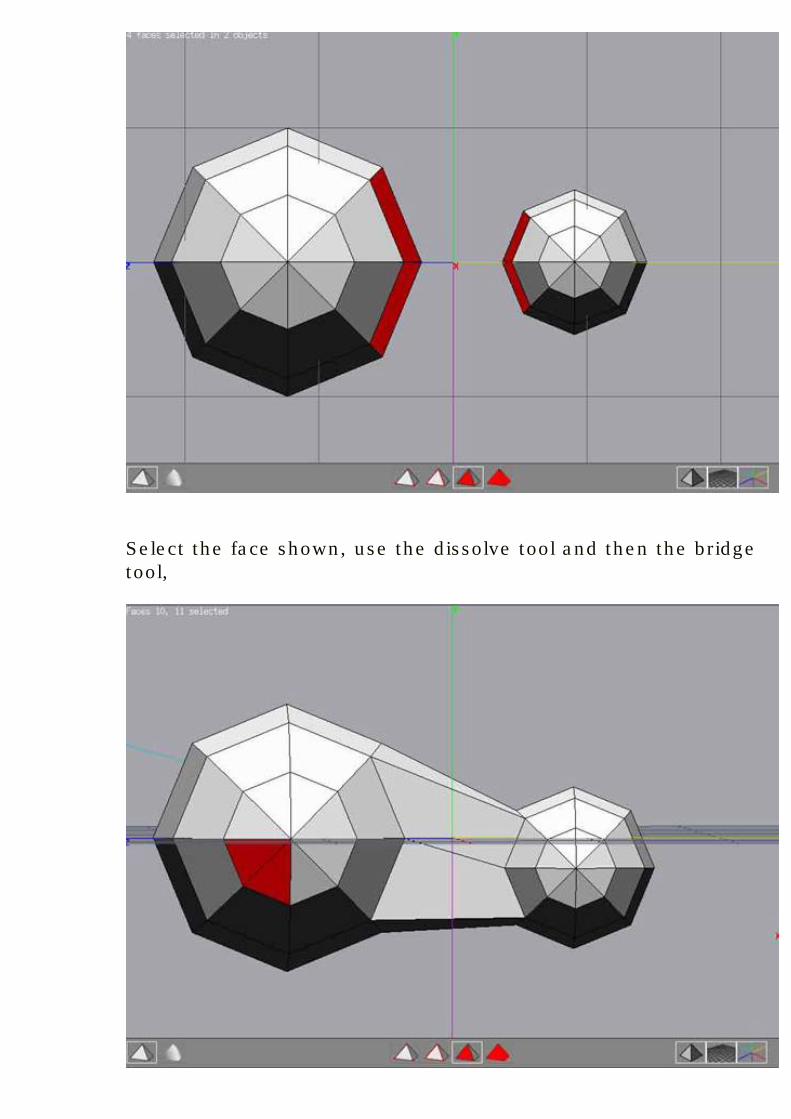
Now we need to get rid of the trigons so selct pairs of faces as I've shown and use the dissolve tool till they're all quads!I've also selected the smaller sphere and moved and scaled it again.
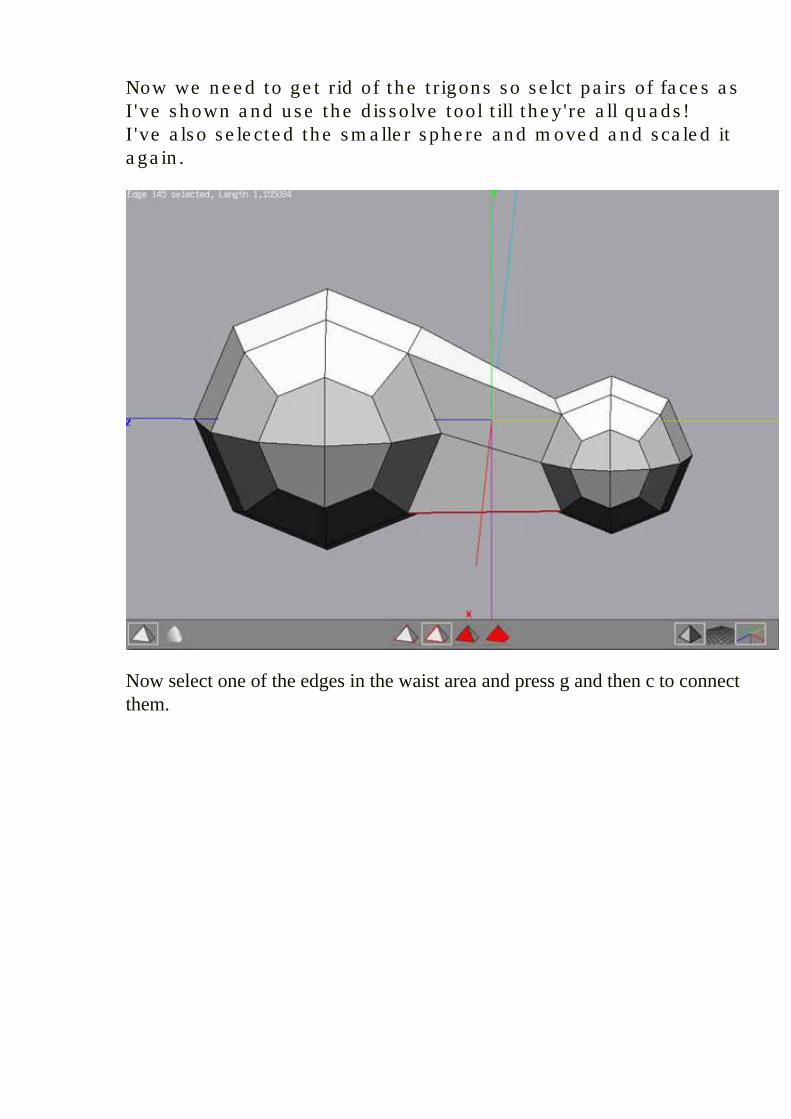
Now select one of the edges in the waist area and press g and then c to connect them.
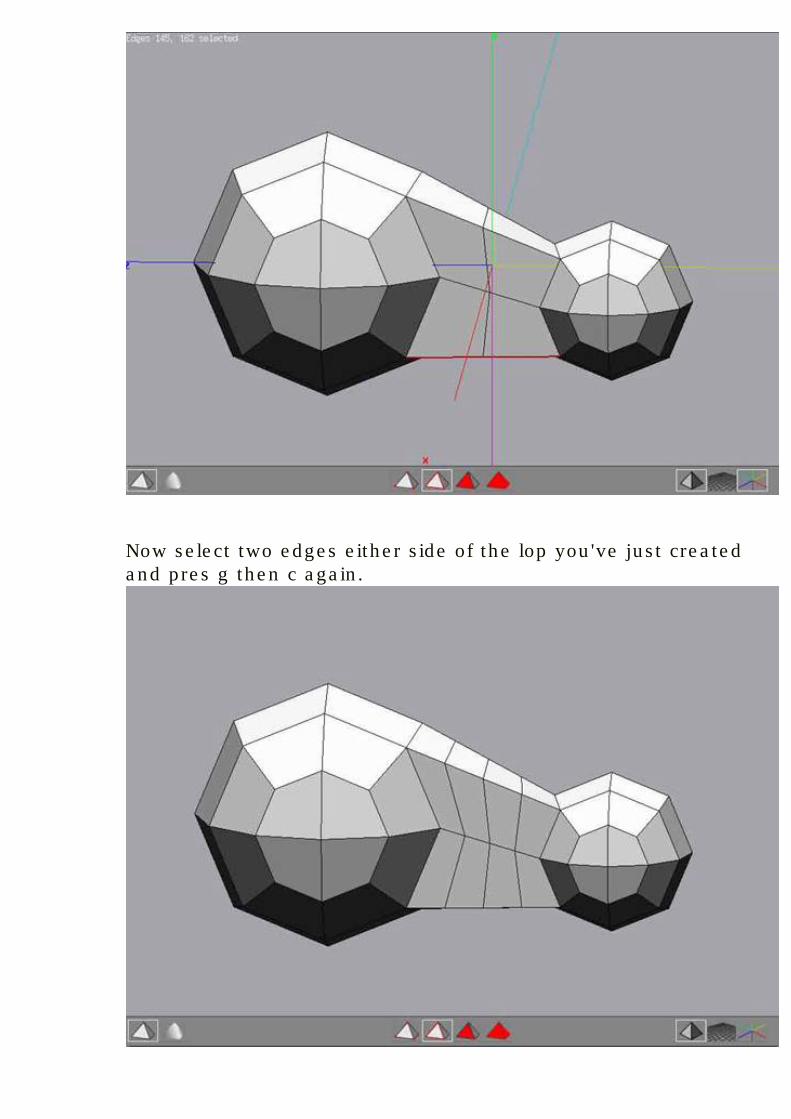
Now select two edges either side of the lop you've just created and pres g then c again.
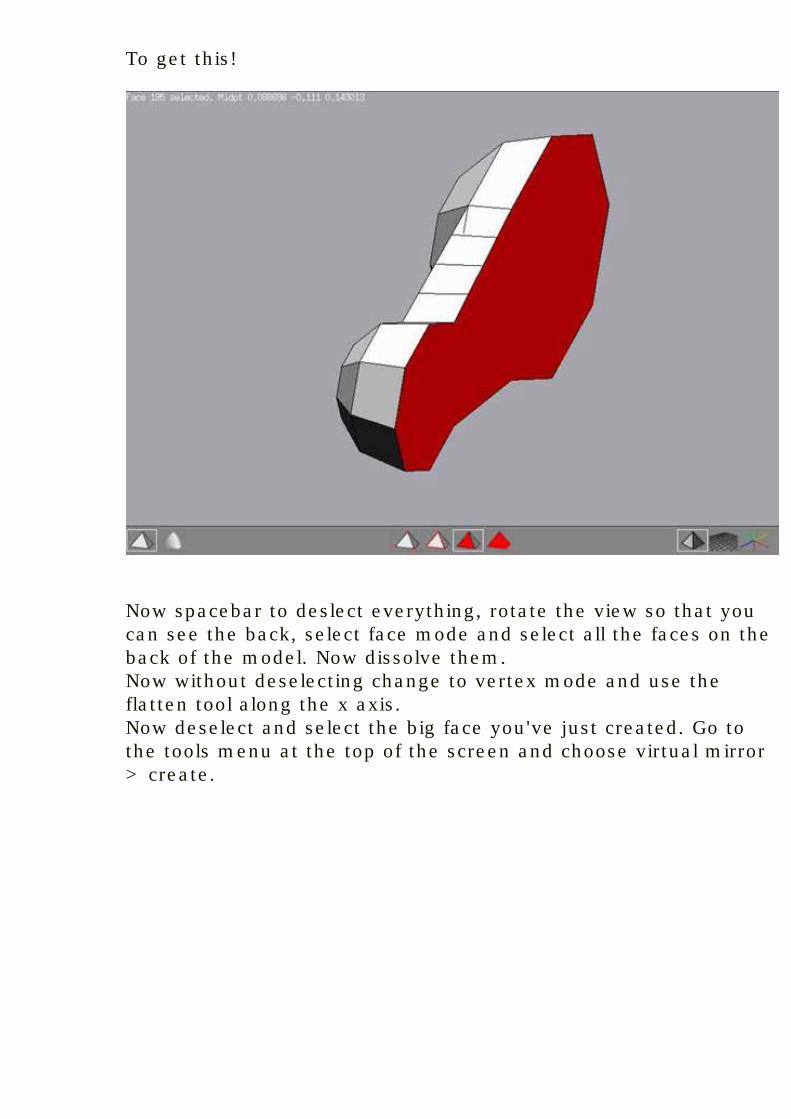
To get this!
Now spacebar to deslect everything, rotate the view so that you can see the back, select face mode and select all the faces on the back of the model. Now dissolve them.Now without deselecting change to vertex mode and use the flatten tool along the x axis.Now deselect and select the big face you've just created. Go to the tools menu at the top of the screen and choose virtual mirror > create.
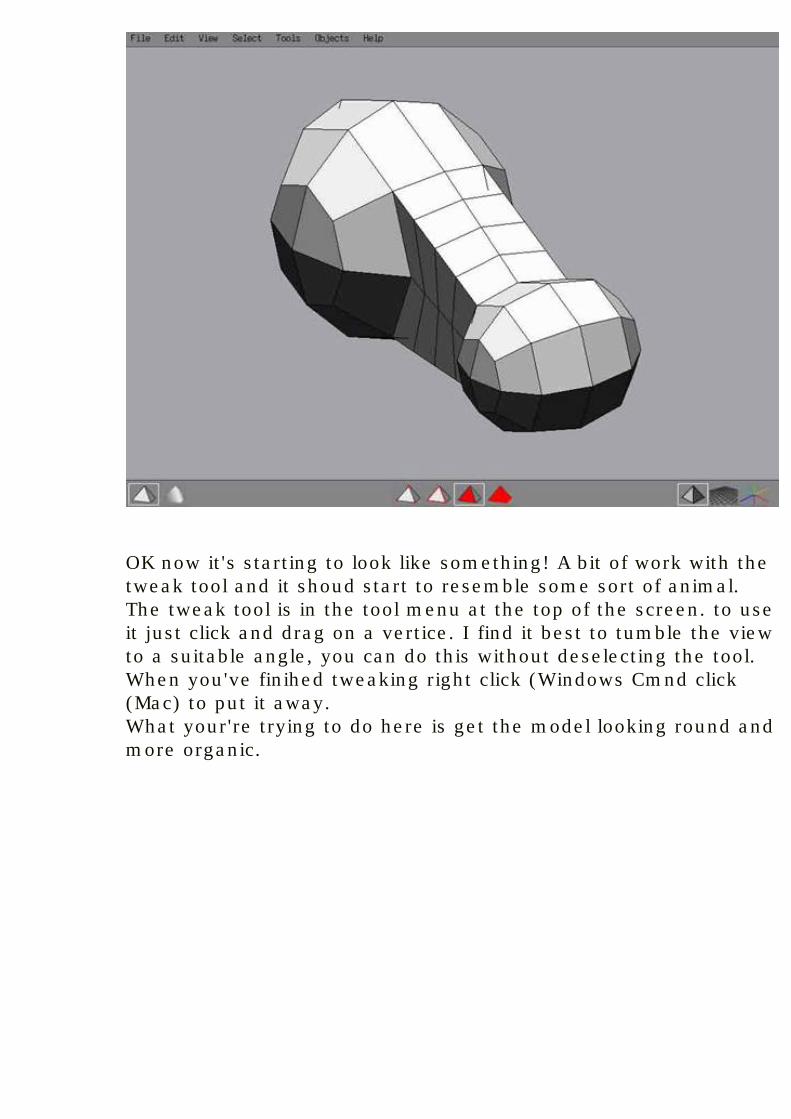
OK now it's starting to look like something! A bit of work with the tweak tool and it shoud start to resemble some sort of animal.The tweak tool is in the tool menu at the top of the screen. to use it just click and drag on a vertice. I find it best to tumble the view to a suitable angle, you can do this without deselecting the tool. When you've finihed tweaking right click (Windows Cmnd click (Mac) to put it away.What your're trying to do here is get the model looking round and more organic.
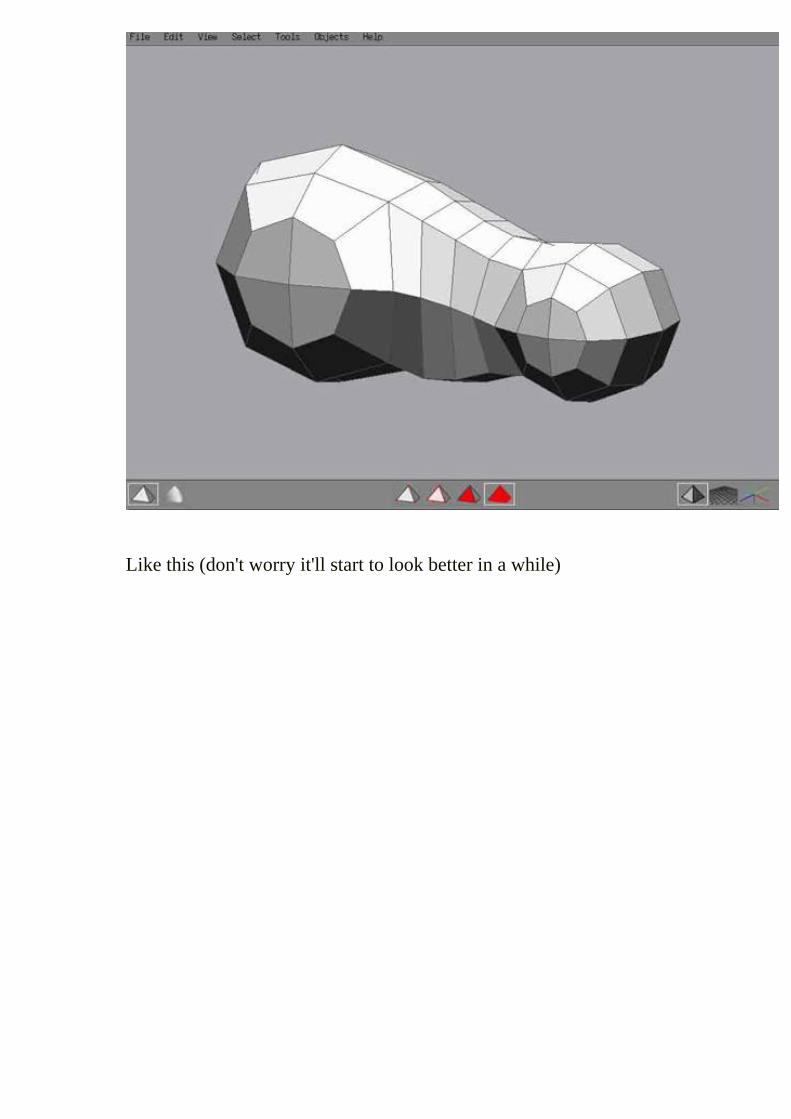
Like this (don't worry it'll start to look better in a while)
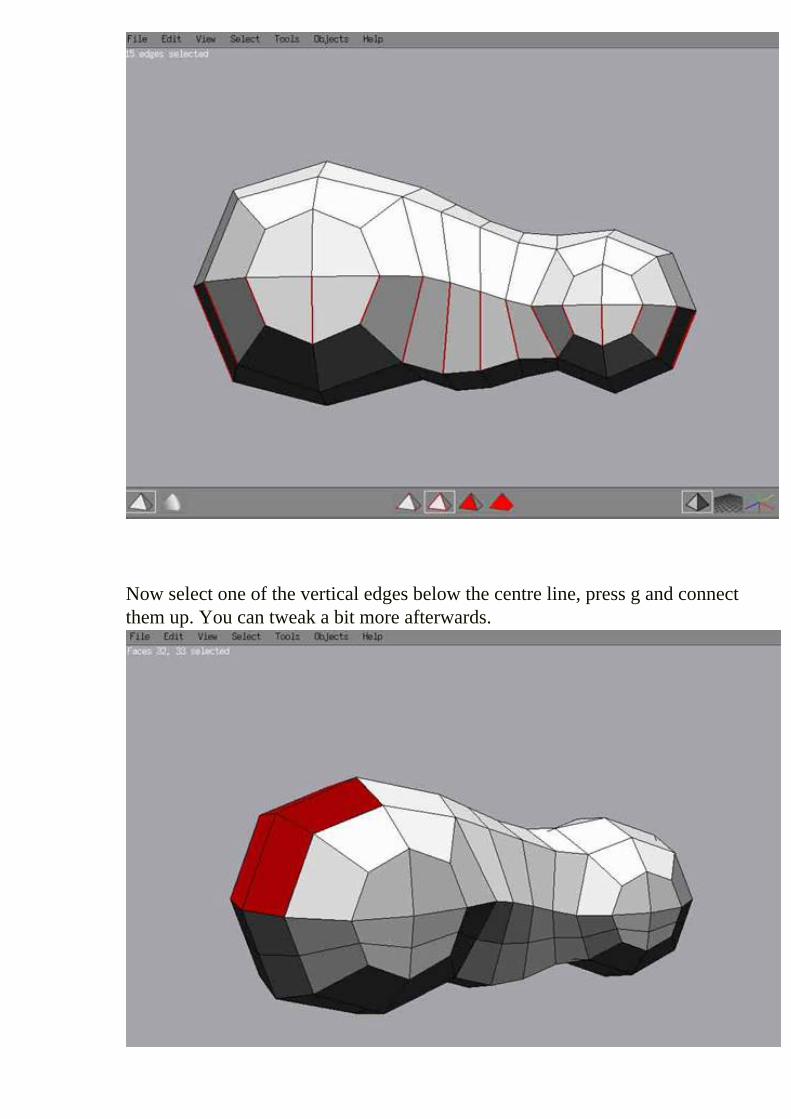
Now select one of the vertical edges below the centre line, press g and connect them up. You can tweak a bit more afterwards.

Now select these polys and use the extrude region tool twice. Then tweak to taper and round the neck.
Ta da!!!!!
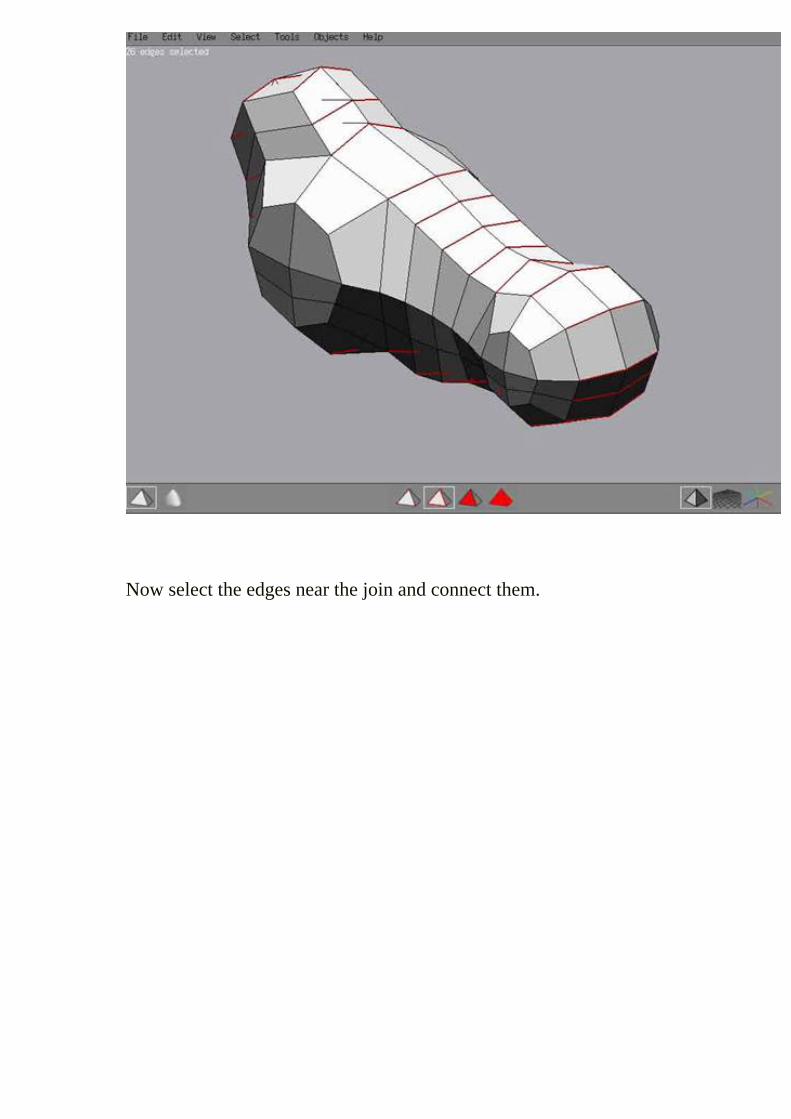
Now select the edges near the join and connect them.
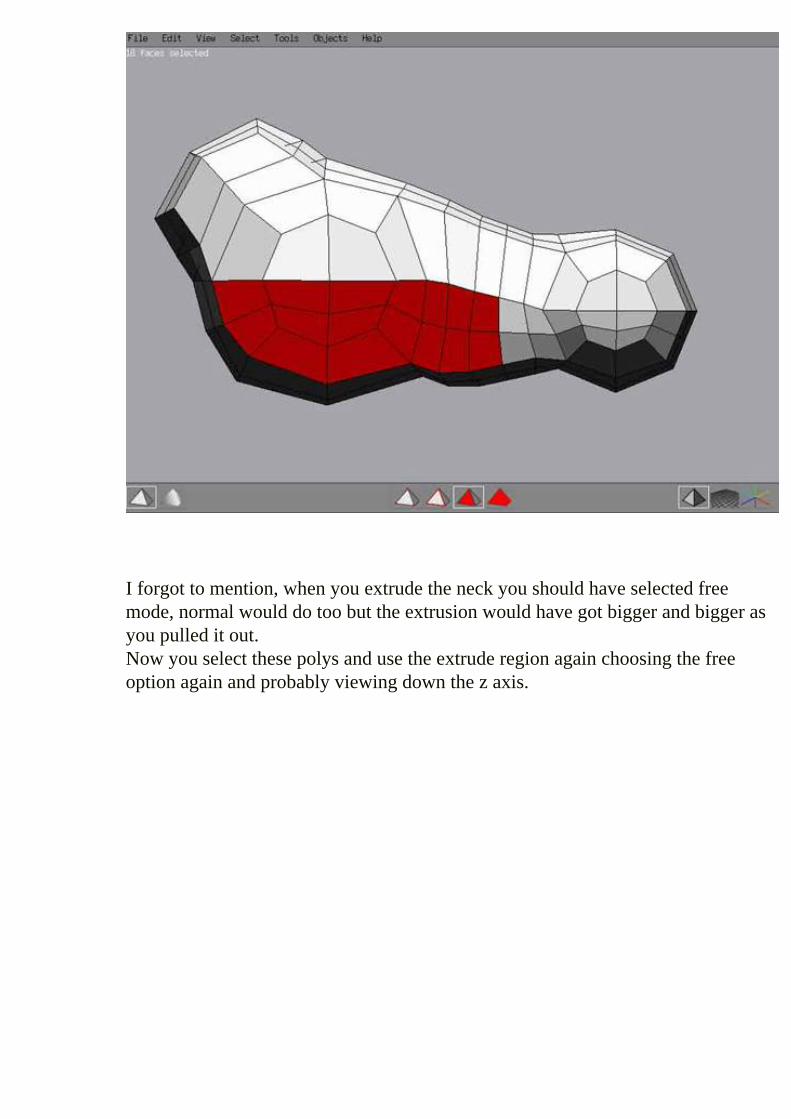
I forgot to mention, when you extrude the neck you should have selected free mode, normal would do too but the extrusion would have got bigger and bigger as you pulled it out.Now you select these polys and use the extrude region again choosing the free option again and probably viewing down the z axis.
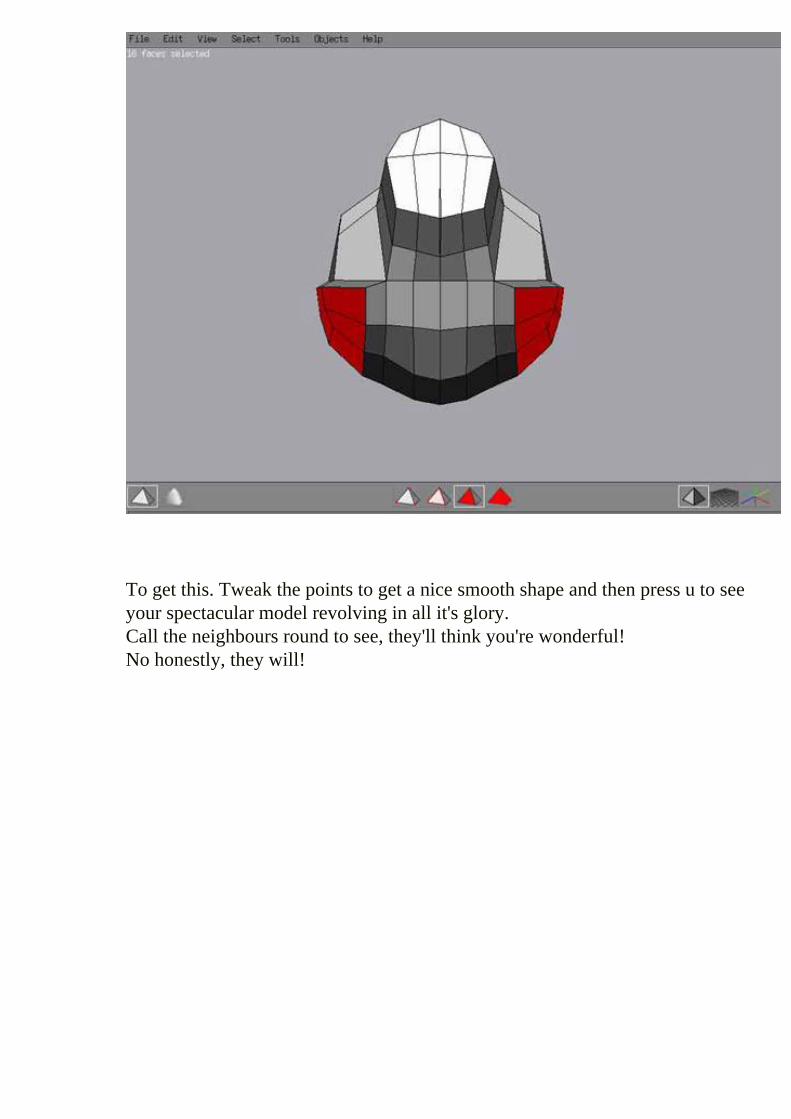
To get this. Tweak the points to get a nice smooth shape and then press u to see your spectacular model revolving in all it's glory. Call the neighbours round to see, they'll think you're wonderful!No honestly, they will!
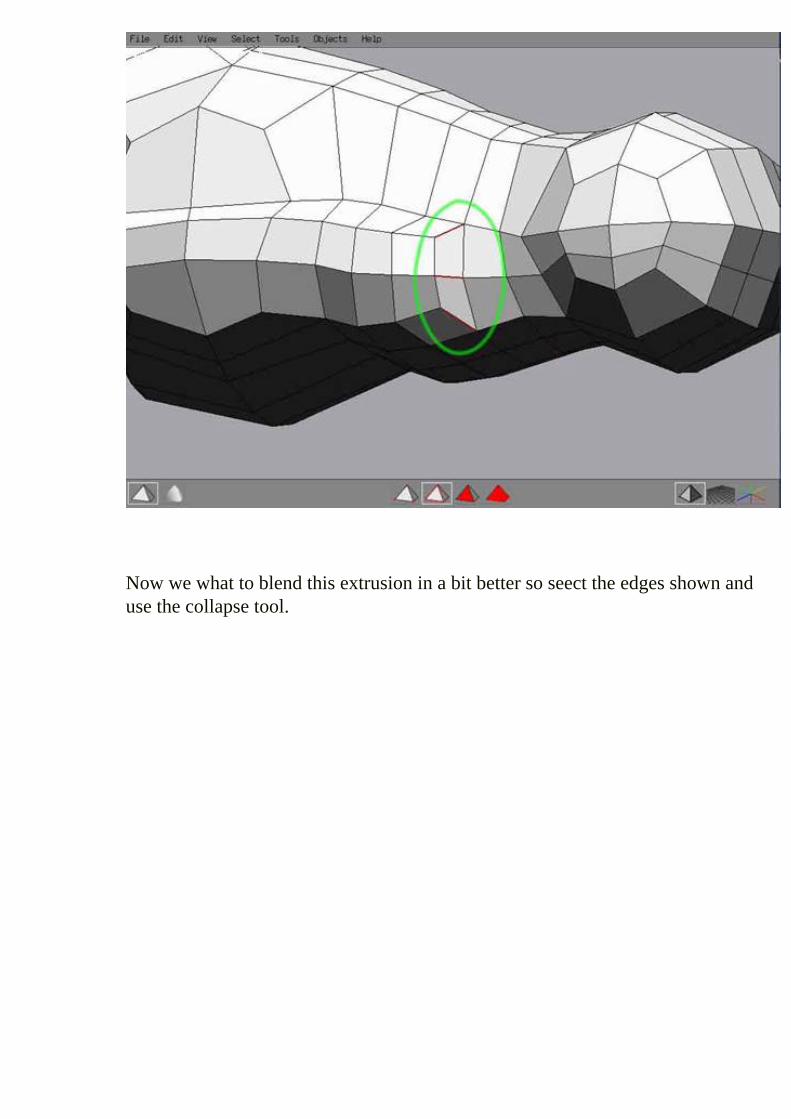
Now we what to blend this extrusion in a bit better so seect the edges shown and use the collapse tool.
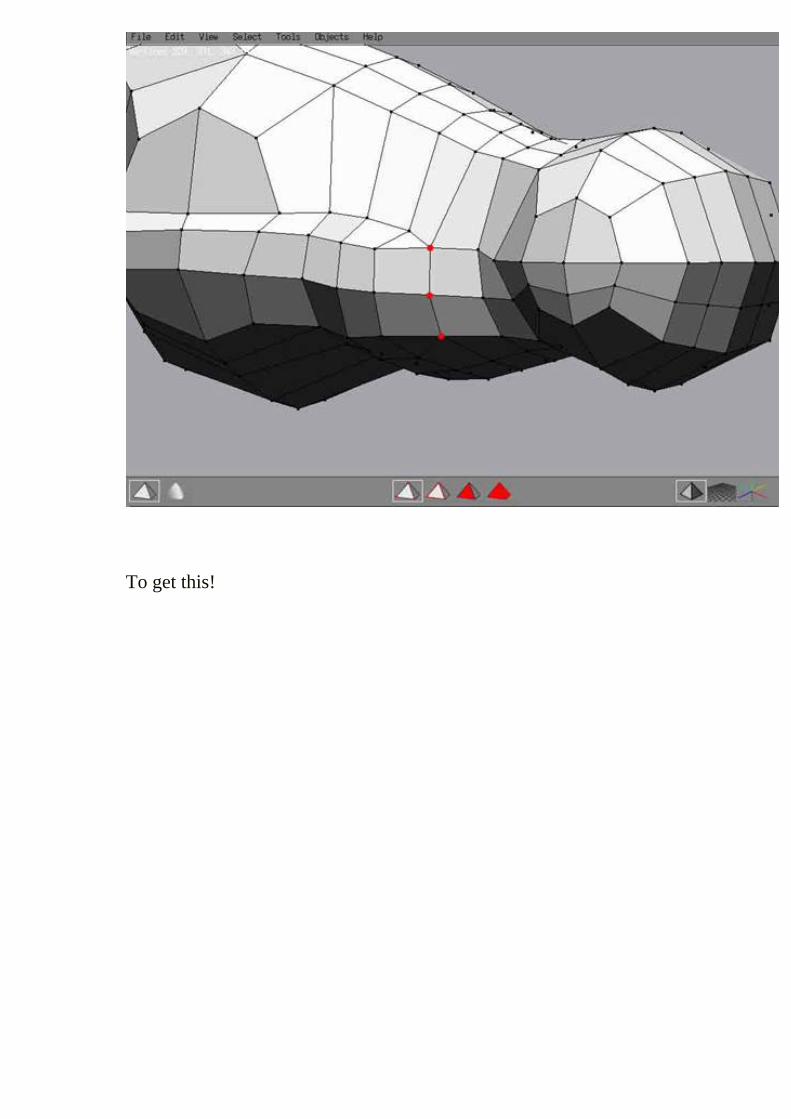
To get this!
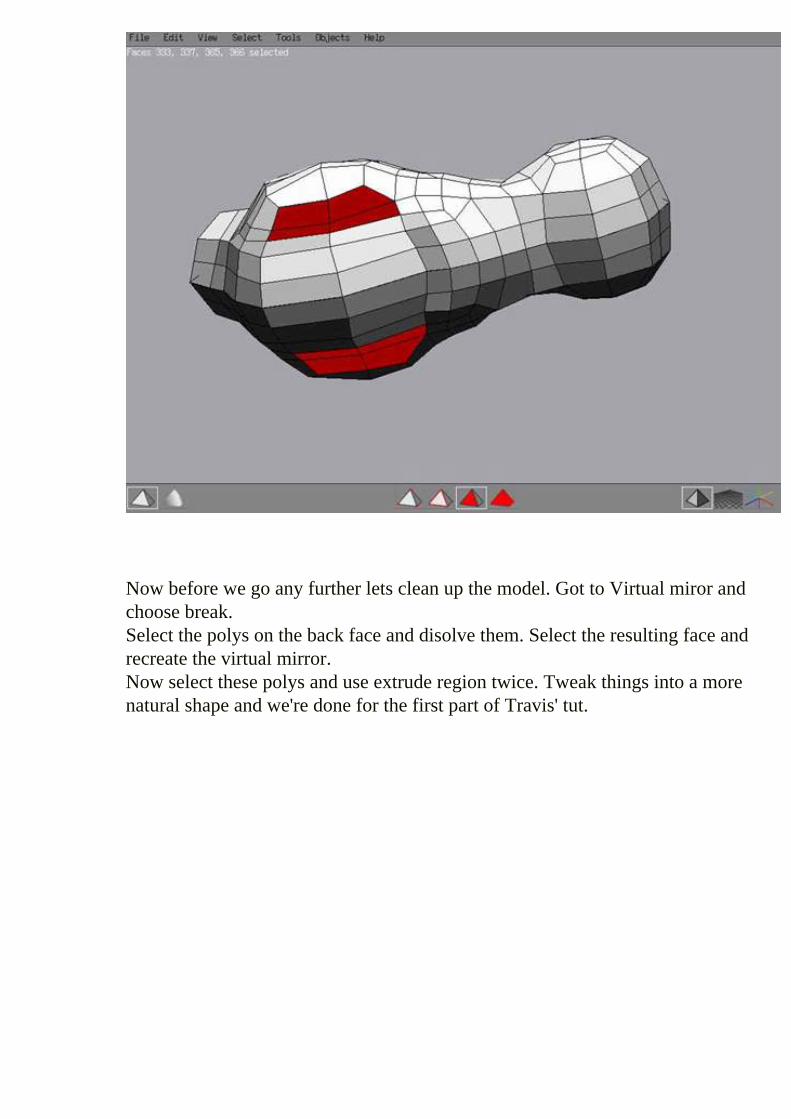
Now before we go any further lets clean up the model. Got to Virtual miror and choose break.Select the polys on the back face and disolve them. Select the resulting face and recreate the virtual mirror.Now select these polys and use extrude region twice. Tweak things into a more natural shape and we're done for the first part of Travis' tut.
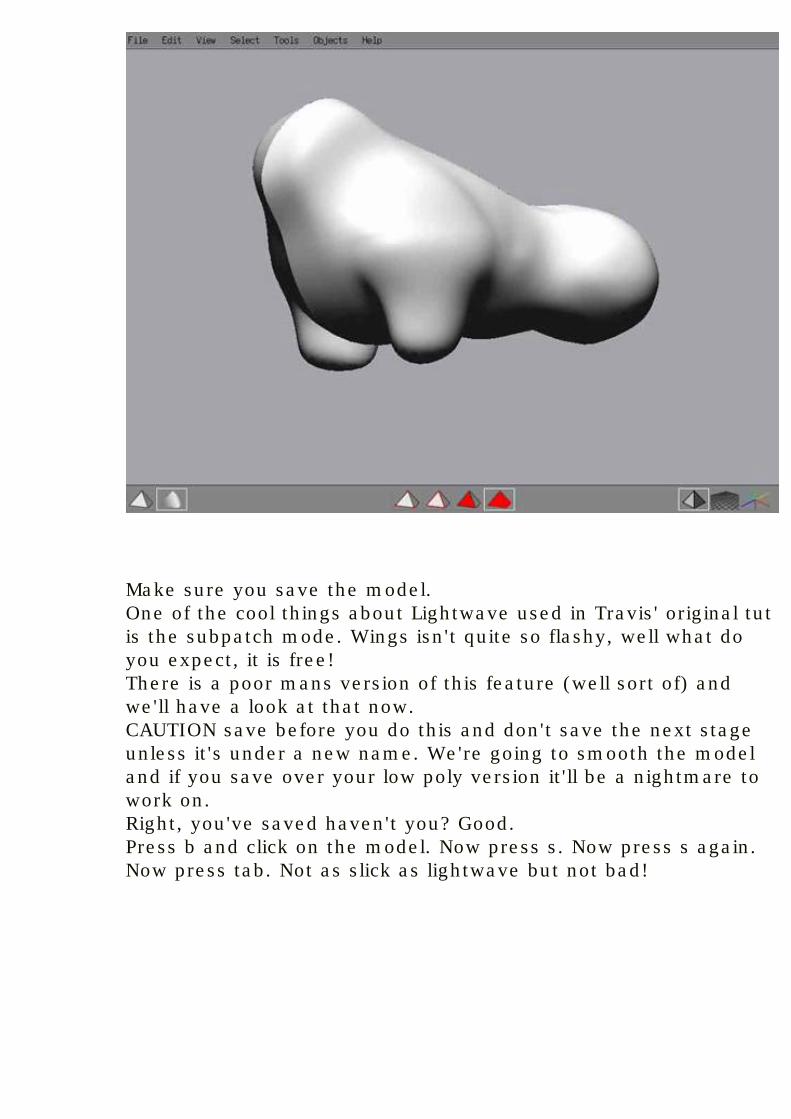
Make sure you save the model. One of the cool things about Lightwave used in Travis' original tut is the subpatch mode. Wings isn't quite so flashy, well what do you expect, it is free!There is a poor mans version of this feature (well sort of) and we'll have a look at that now.CAUTION save before you do this and don't save the next stage unless it's under a new name. We're going to smooth the model and if you save over your low poly version it'll be a nightmare to work on.Right, you've saved haven't you? Good.Press b and click on the model. Now press s. Now press s again. Now press tab. Not as slick as lightwave but not bad!