QtQuick Training Course Module Seven. Understanding the User Interface Design and Code Panels...
32
QtQuick Training Course Module Seven
-
Upload
albert-preston -
Category
Documents
-
view
216 -
download
0
Transcript of QtQuick Training Course Module Seven. Understanding the User Interface Design and Code Panels...
QtQuick Training Course
Module Seven
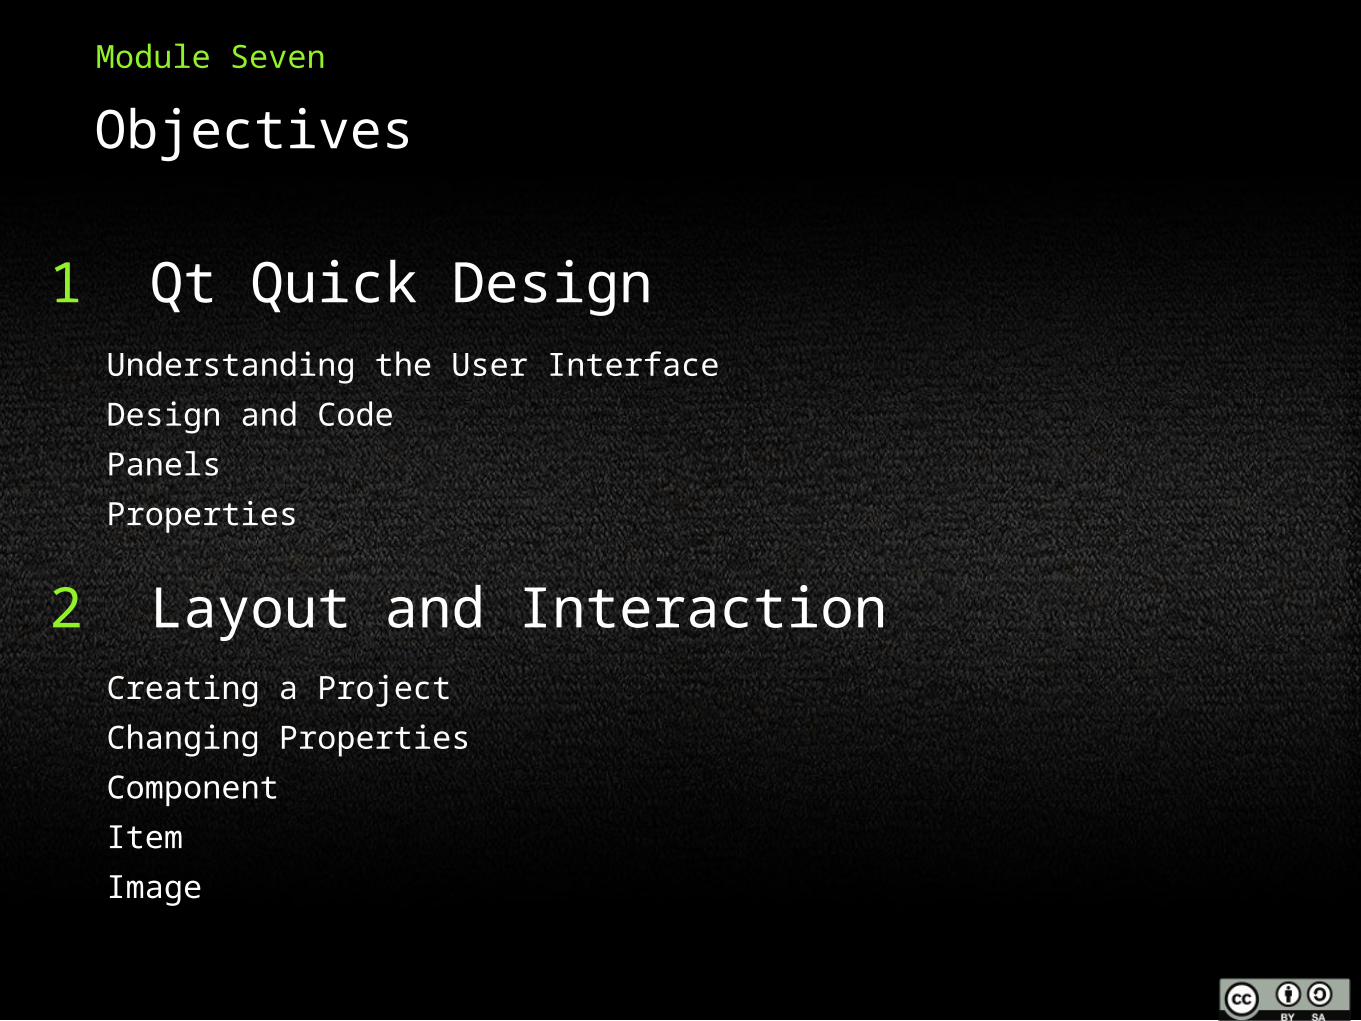
Understanding the User Interface
Design and Code
Panels
Properties
1 Qt Quick Design
Module Seven
Objectives
Creating a Project
Changing Properties
Component
Item
Image
2 Layout and Interaction
MouseArea
Using Components
States
Running your Project
2 Layout and Interaction (cont.)
Module Seven
Objectives
2 Layout and Interaction
3 Questions
4 Lab
1 Qt Quick Design
Module Seven
Topics
Understanding the User Interface
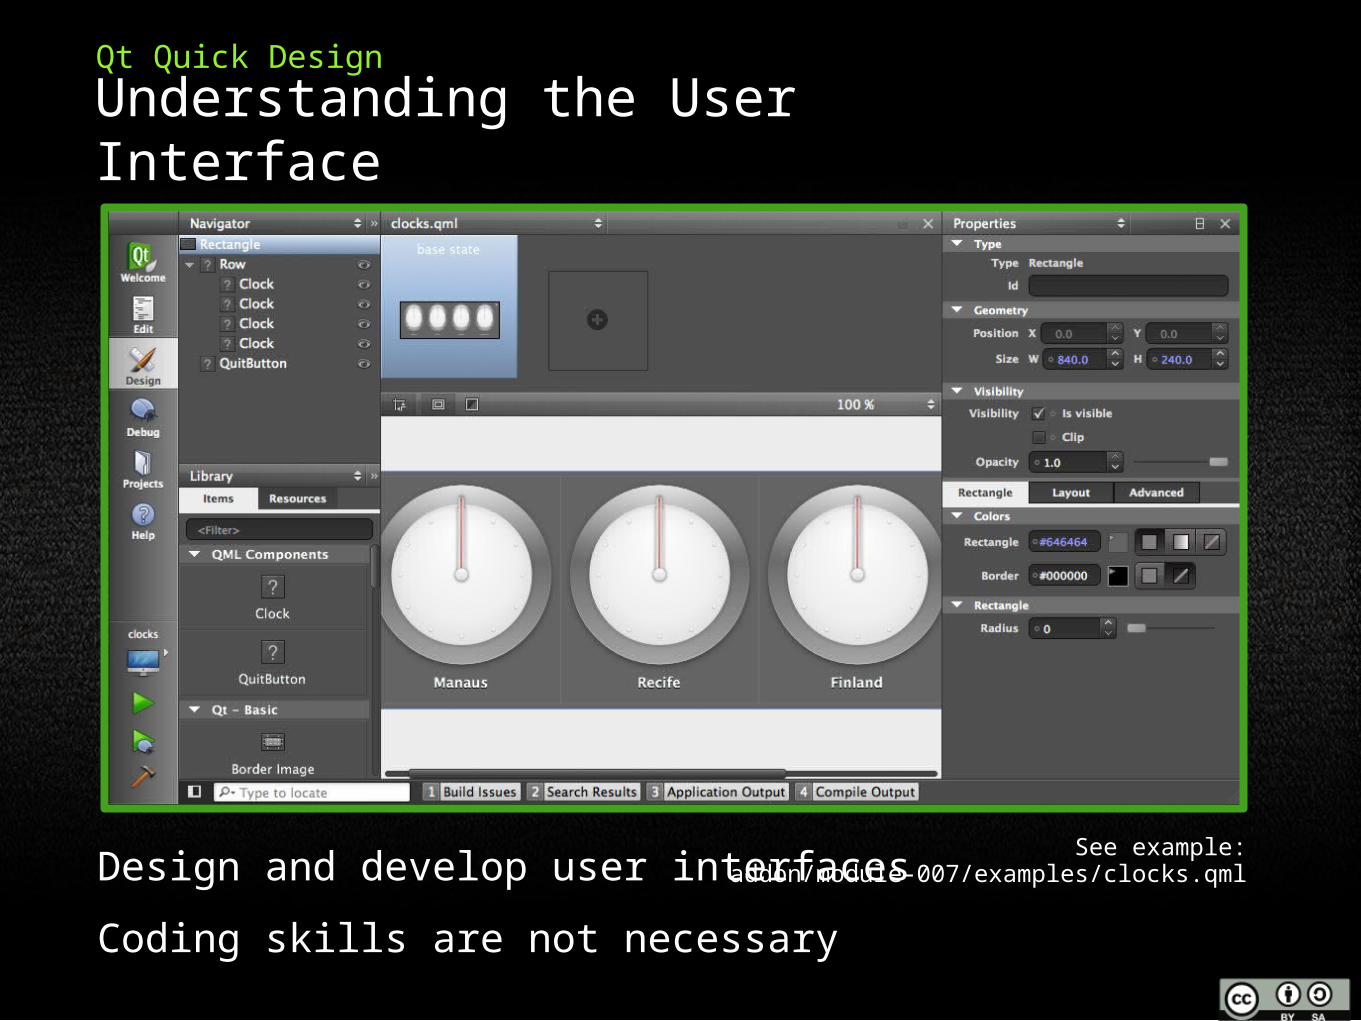
Qt Quick Design
Design and develop user interfaces
Coding skills are not necessary
See example: addon/module-007/examples/clocks.qml
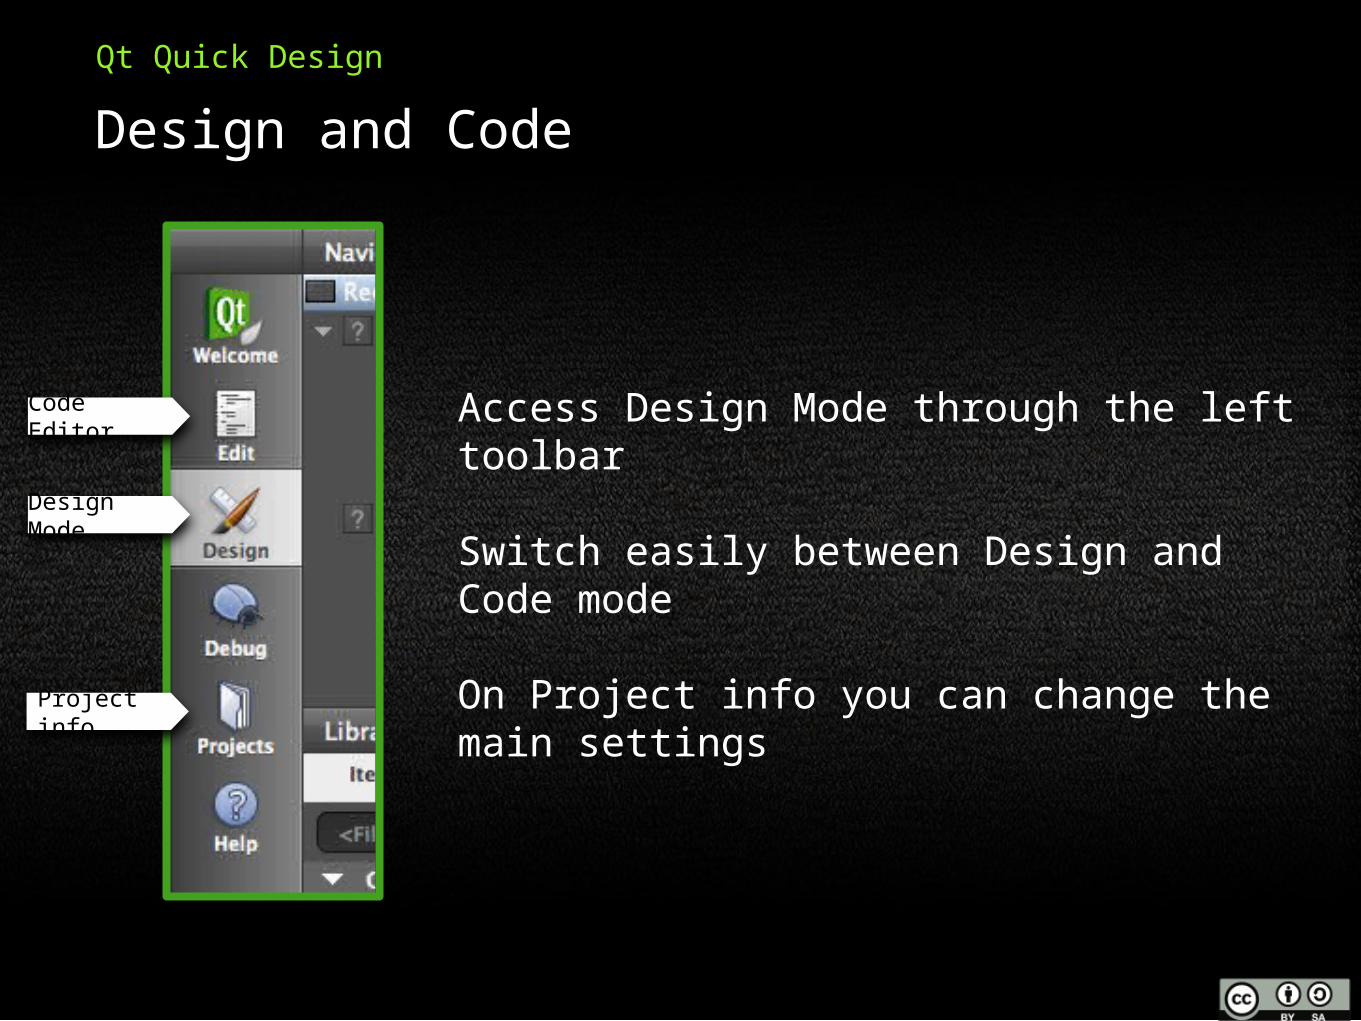
Design and Code
Qt Quick Design
Access Design Mode through the left toolbar
Switch easily between Design and Code mode
On Project info you can change the main settings
Code Editor
Design Mode
Project info
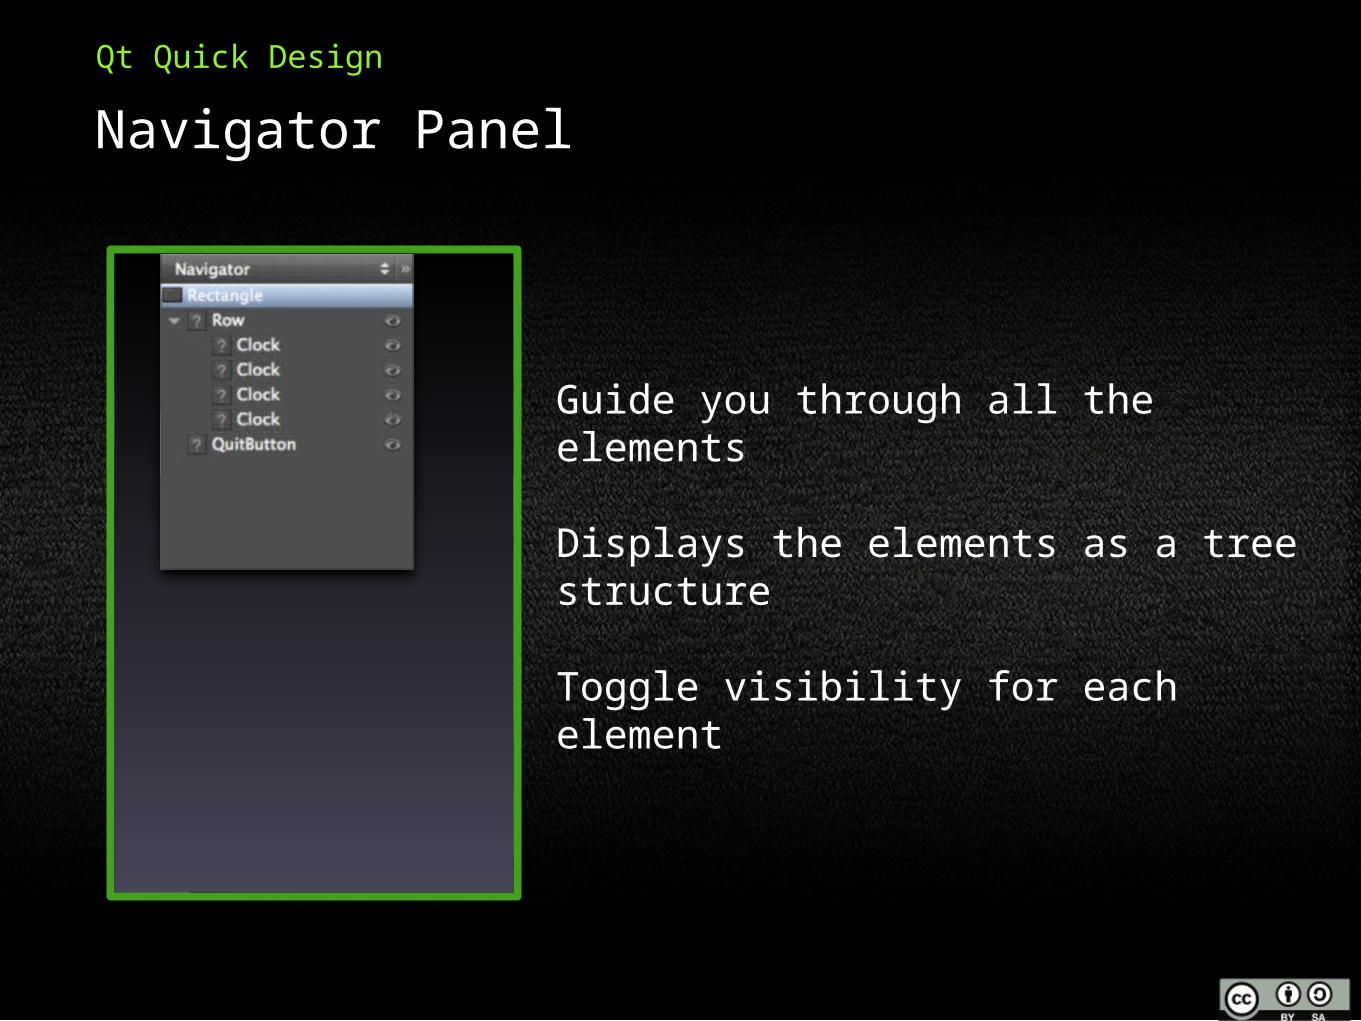
Navigator Panel
Qt Quick Design
Guide you through all the elements
Displays the elements as a tree structure
Toggle visibility for each element
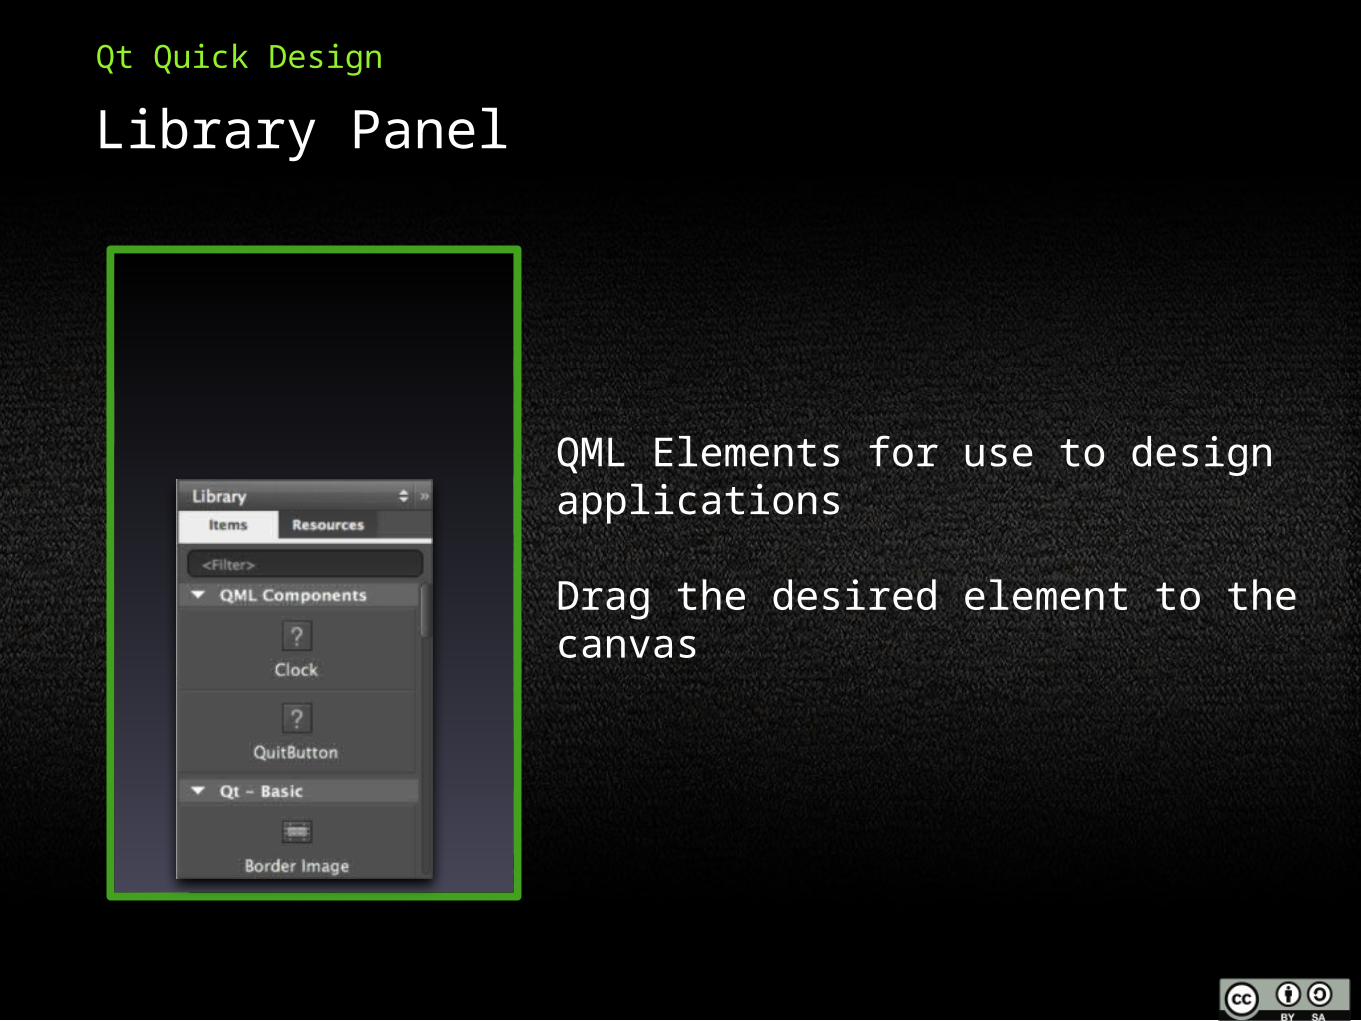
Library Panel
Qt Quick Design
QML Elements for use to design applications
Drag the desired element to the canvas
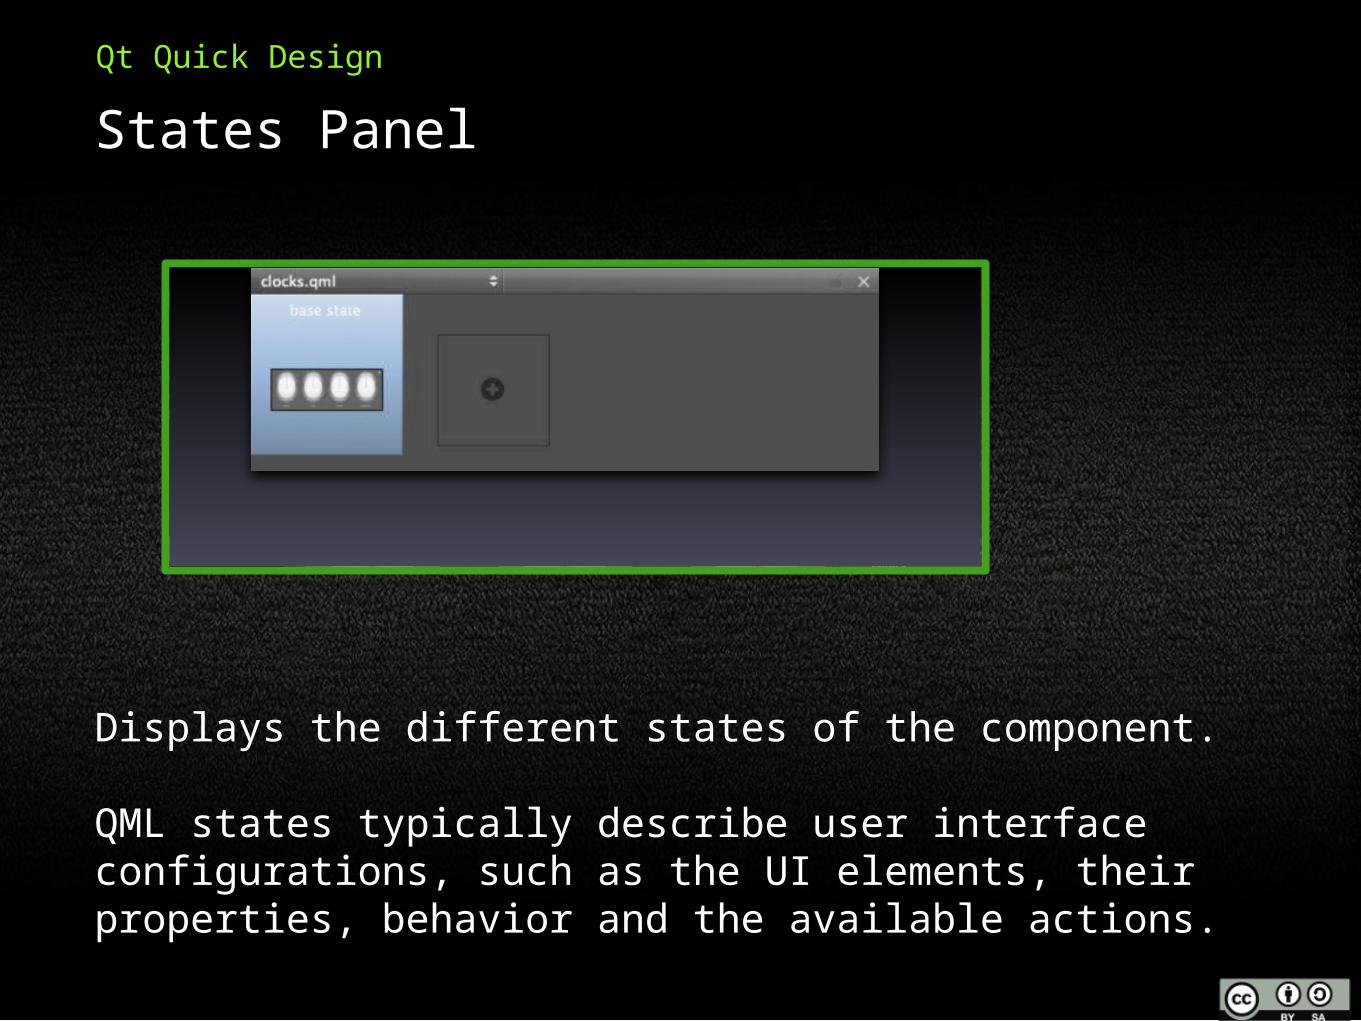
States Panel
Qt Quick Design
Displays the different states of the component.
QML states typically describe user interface configurations, such as the UI elements, their properties, behavior and the available actions.
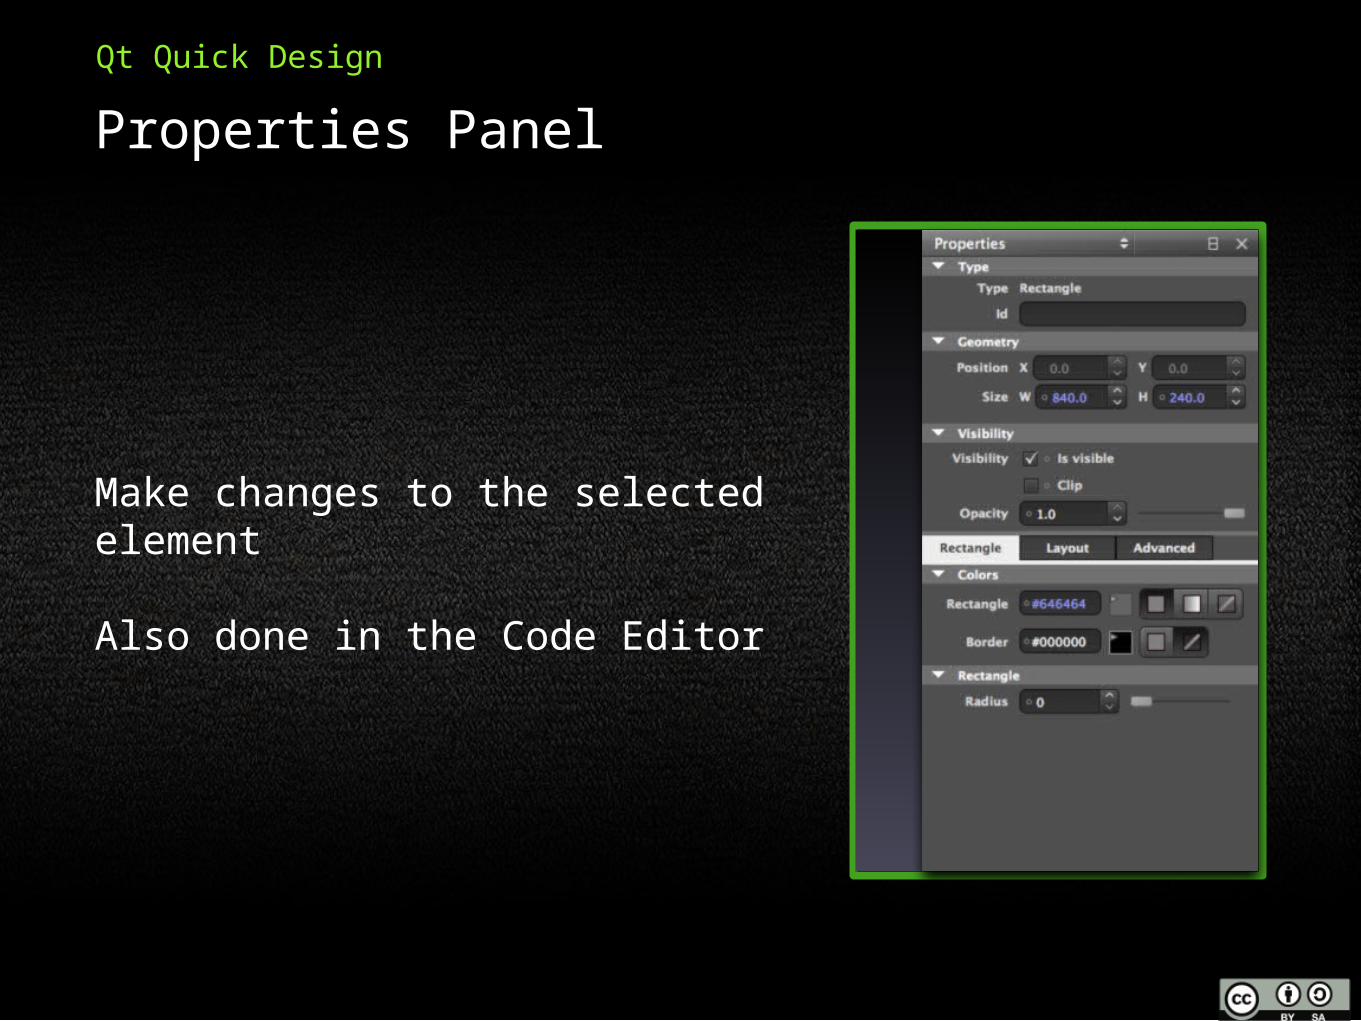
Properties Panel
Qt Quick Design
Make changes to the selected element
Also done in the Code Editor
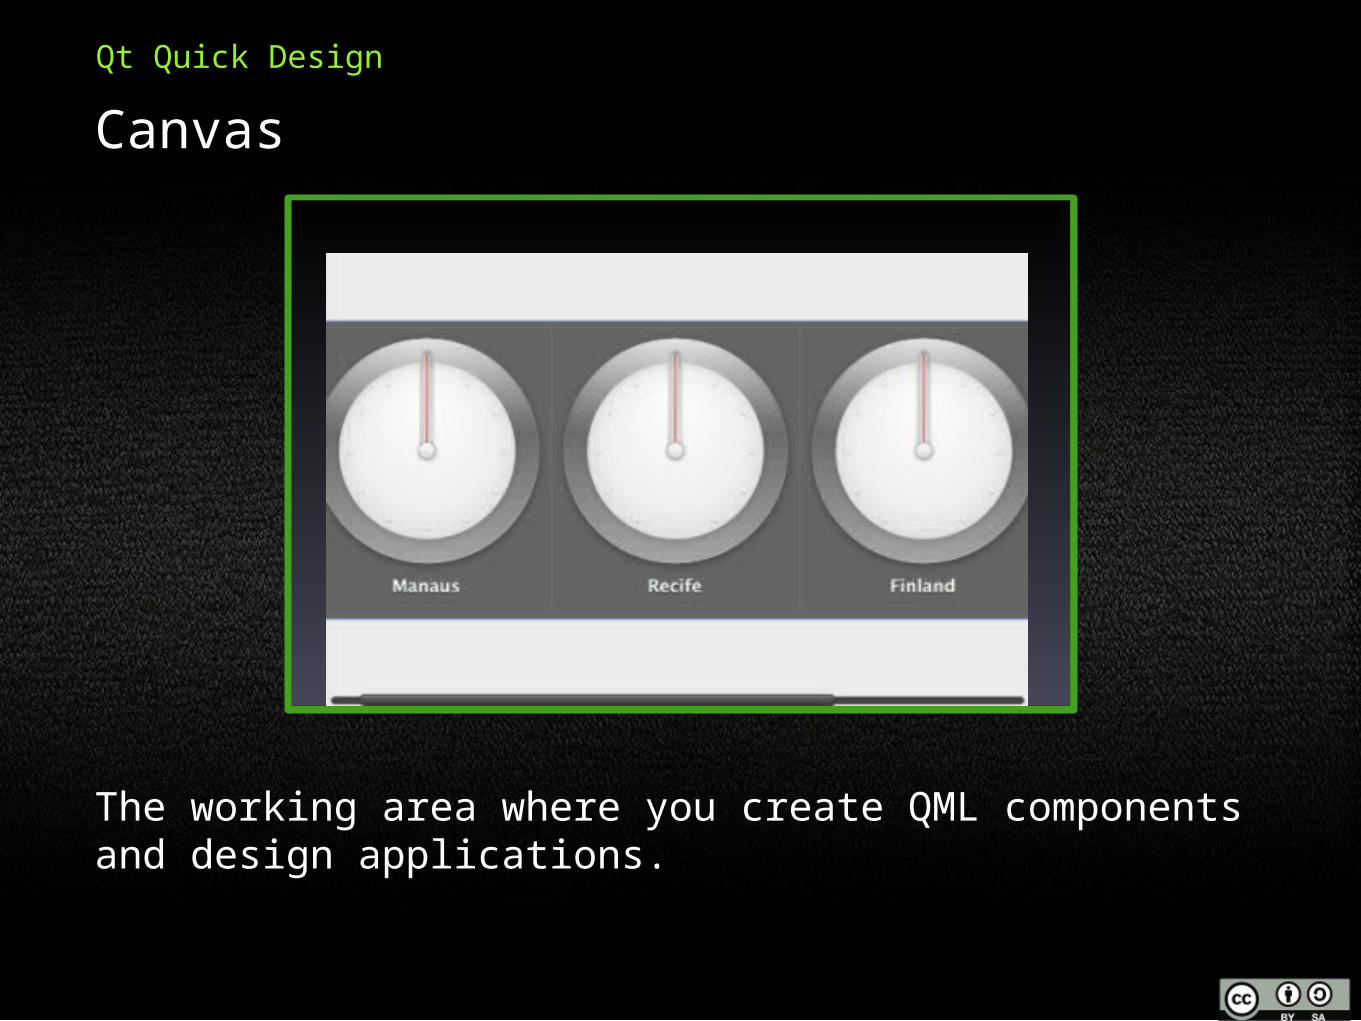
Canvas
Qt Quick Design
The working area where you create QML components and design applications.

2 Layout and Interaction
3 Questions
4 Lab
1 Qt Quick Design
Module Seven
Topics
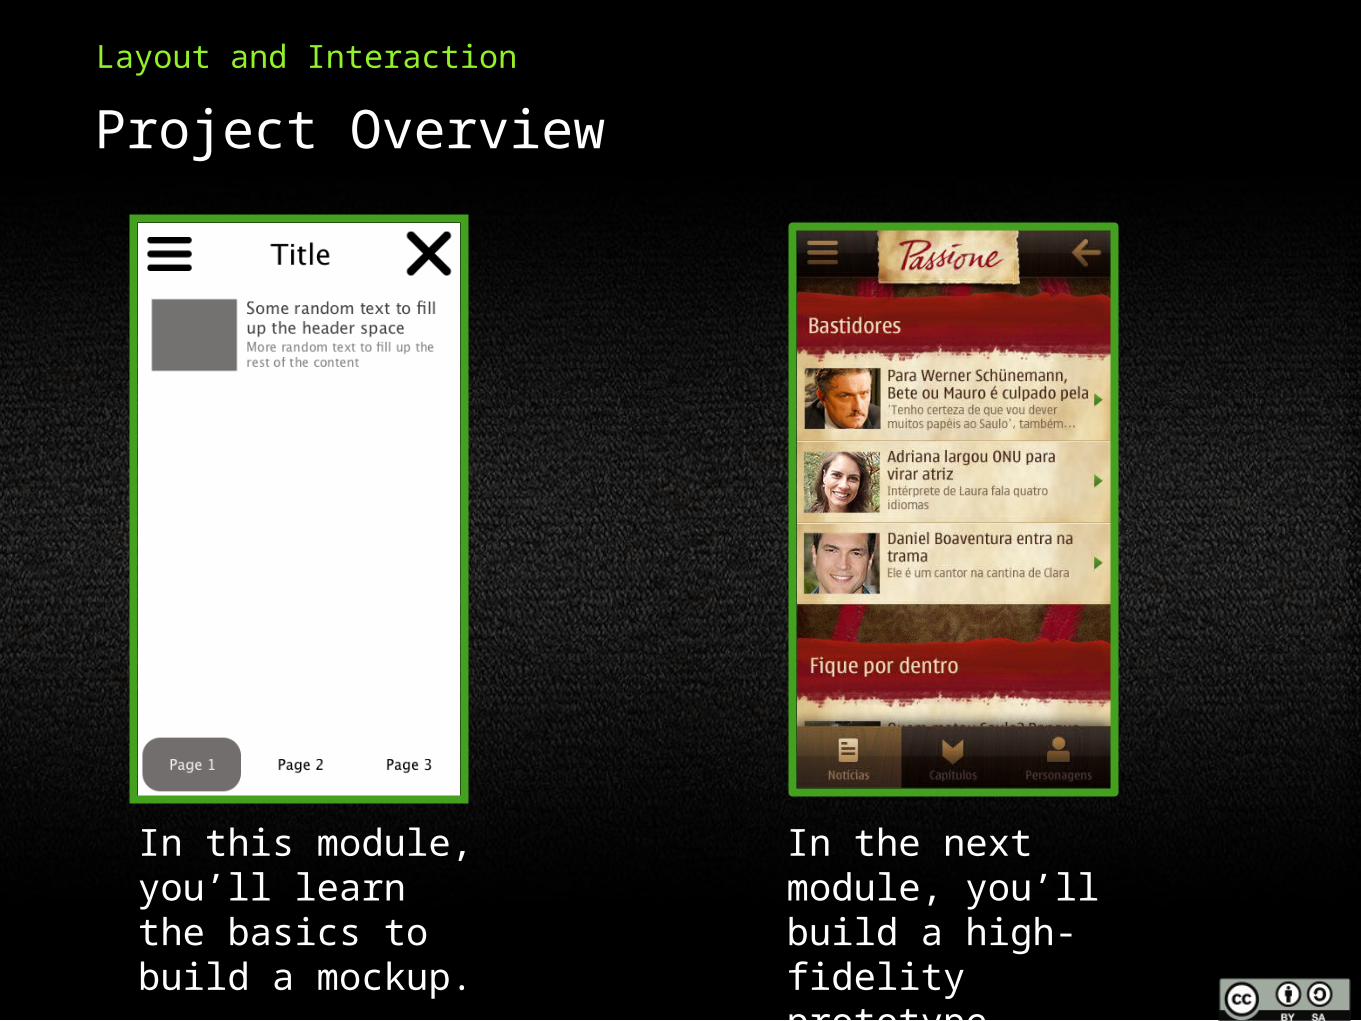
Project Overview
Layout and Interaction
In this module, you’ll learn the basics to build a mockup.
In the next module, you’ll build a high-fidelity prototype.
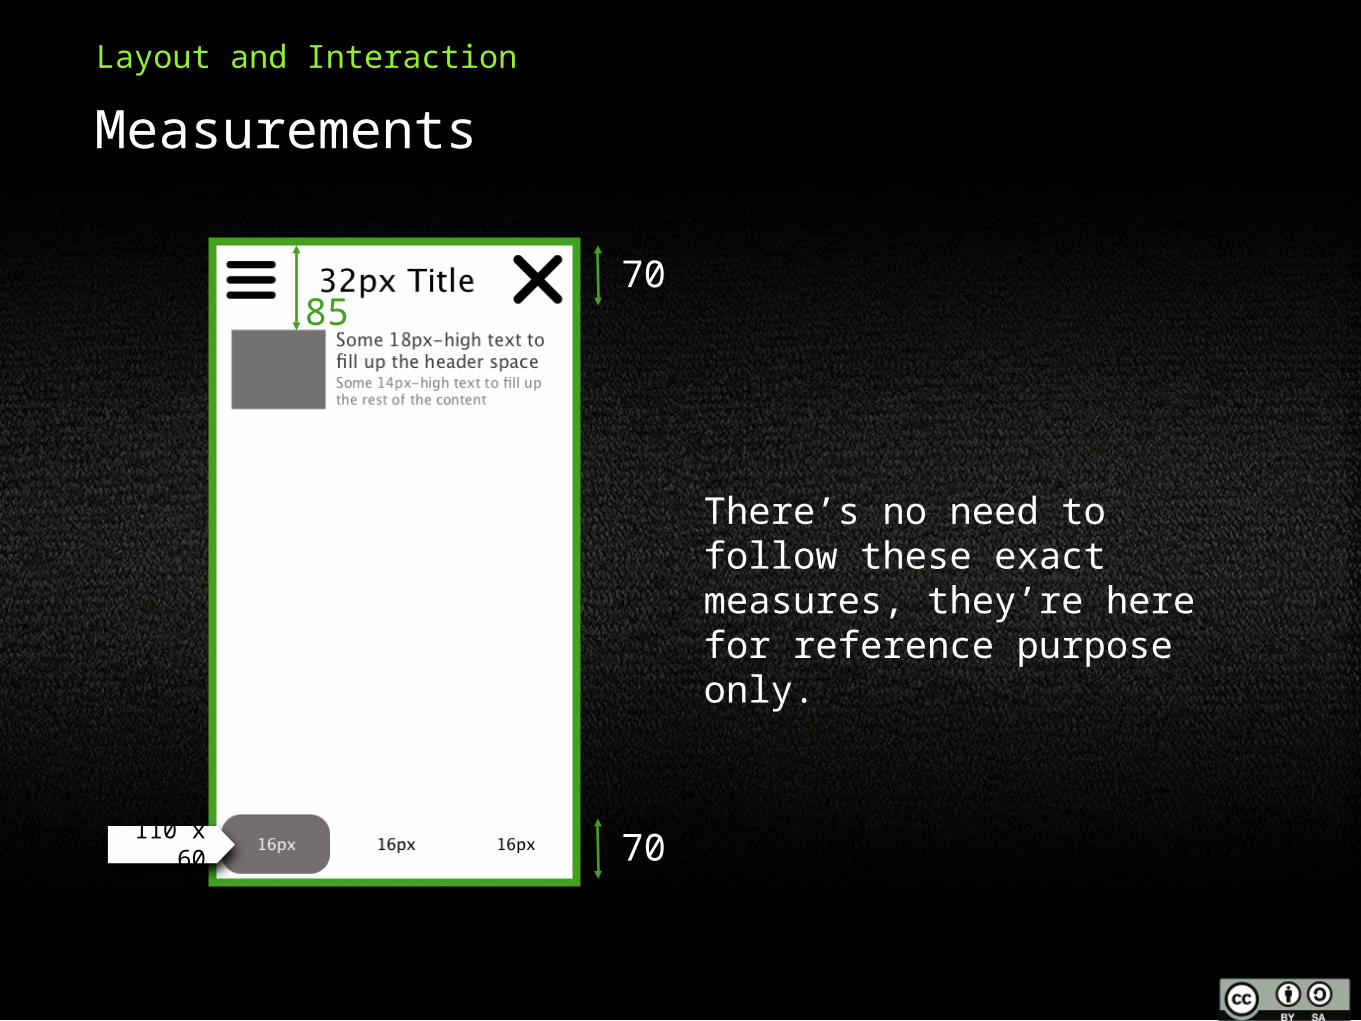
Measurements
Layout and Interaction
70
70110 x
60
85
There’s no need to follow these exact measures, they’re here for reference purpose only.
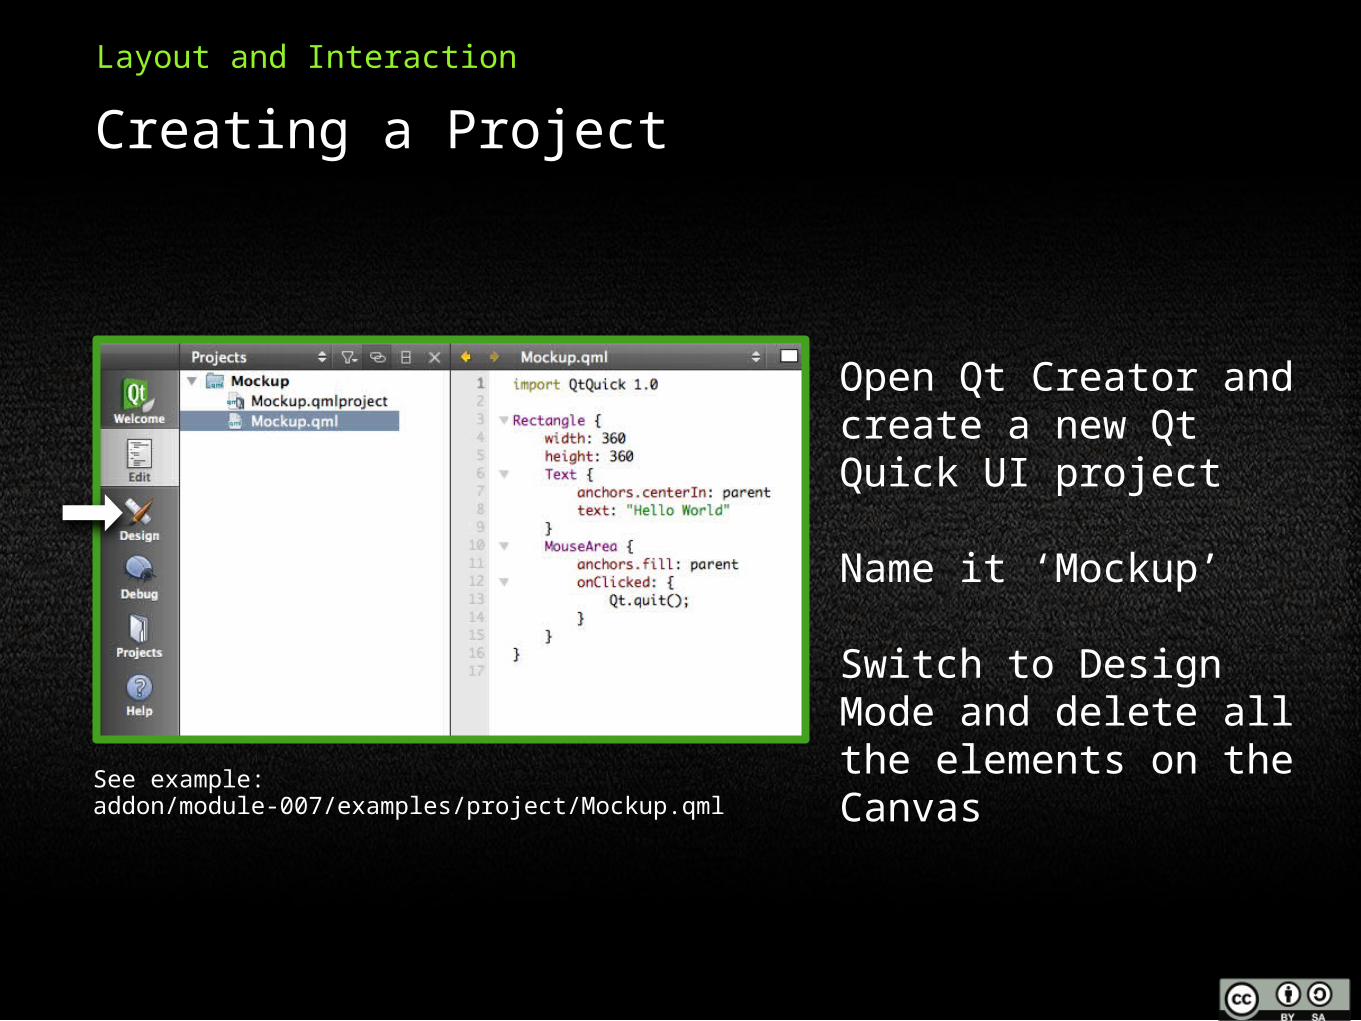
Creating a Project
Layout and Interaction
Open Qt Creator and create a new Qt Quick UI project
Name it ‘Mockup’
Switch to Design Mode and delete all the elements on the Canvas
See example: addon/module-007/examples/project/Mockup.qml
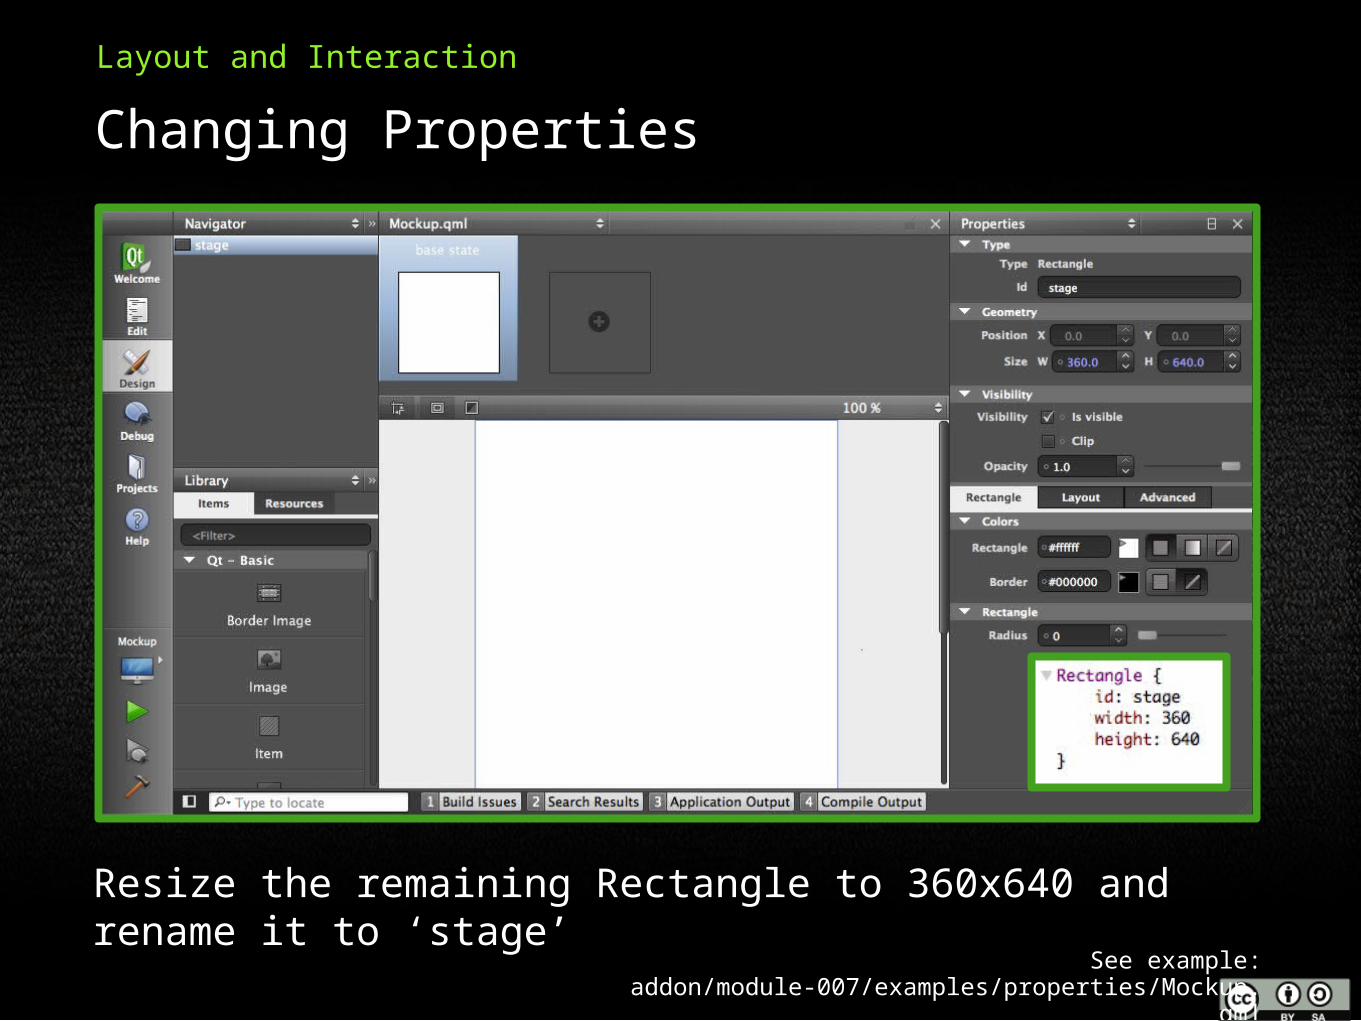
Changing Properties
Layout and Interaction
Resize the remaining Rectangle to 360x640 and rename it to ‘stage’
See example: addon/module-007/examples/properties/Mockup.qml
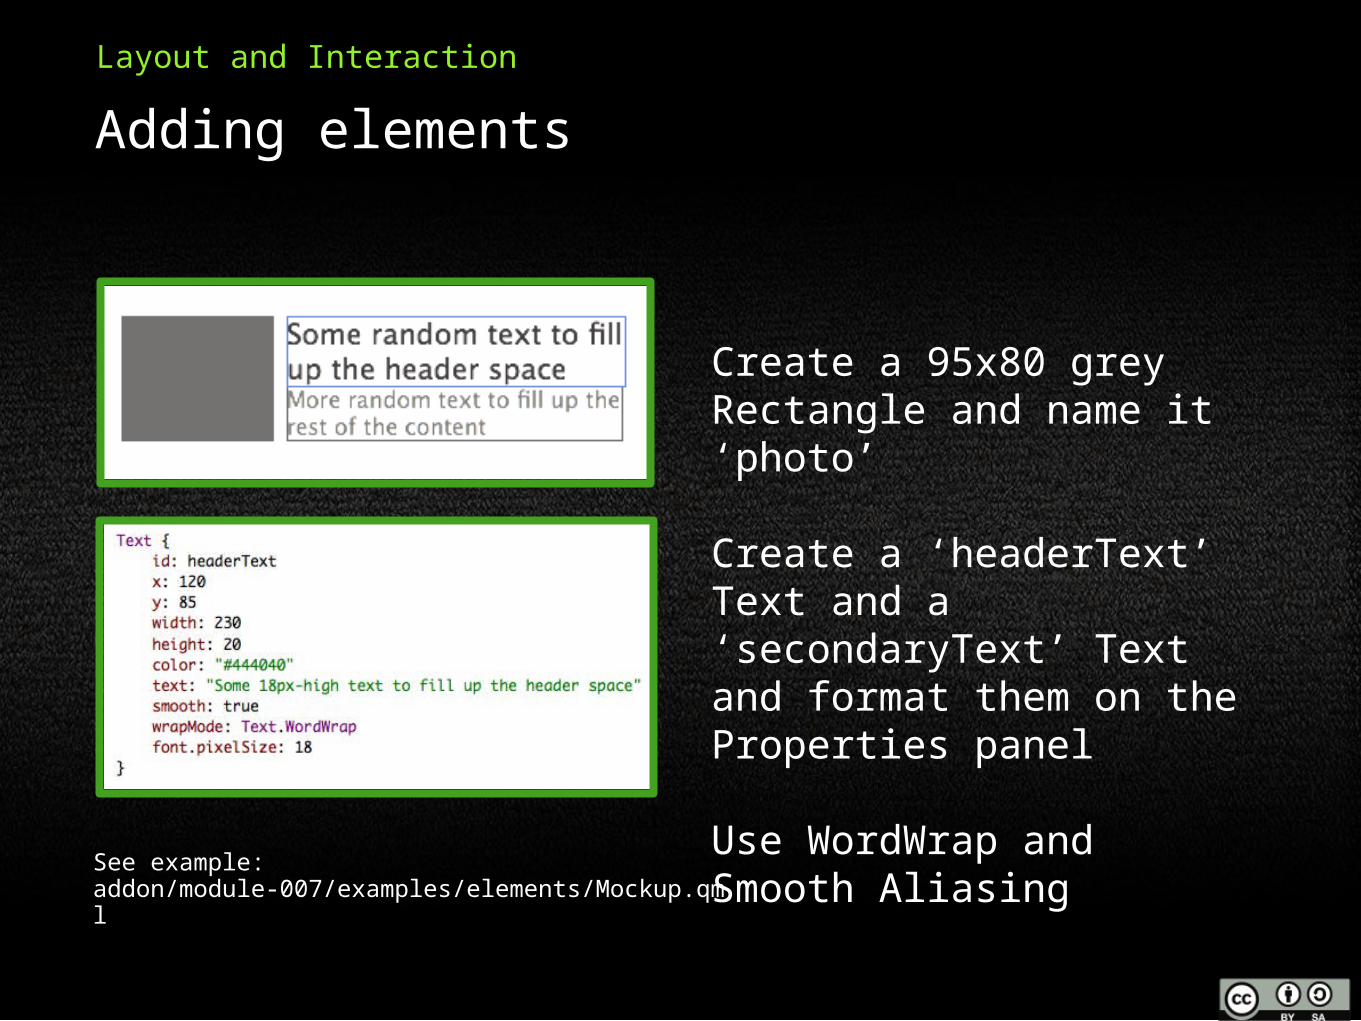
Adding elements
Layout and Interaction
Create a 95x80 grey Rectangle and name it ‘photo’
Create a ‘headerText’ Text and a ‘secondaryText’ Text and format them on the Properties panel
Use WordWrap and Smooth Aliasing
See example: addon/module-007/examples/elements/Mockup.qml
Component
Layout and Interaction
QML files that can be re-used many times, as elements, throughout a project
To create a new QML component go to:File > New File or Project > Files and Classes > QML > Choose…
Name the file “Header”
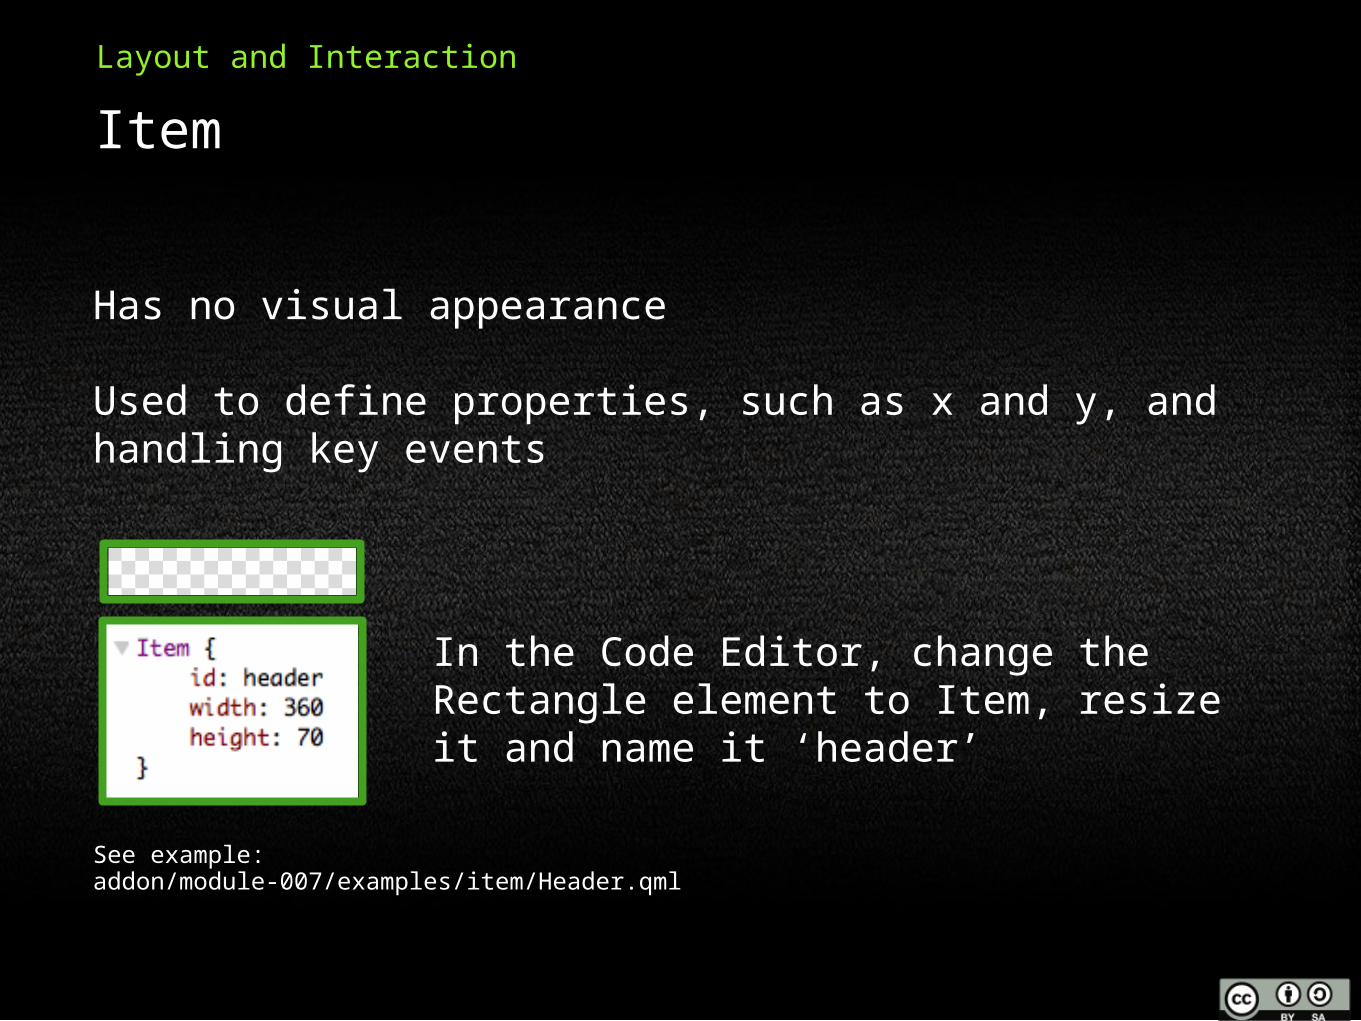
Item
Layout and Interaction
In the Code Editor, change the Rectangle element to Item, resize it and name it ‘header’
Has no visual appearance
Used to define properties, such as x and y, and handling key events
See example: addon/module-007/examples/item/Header.qml
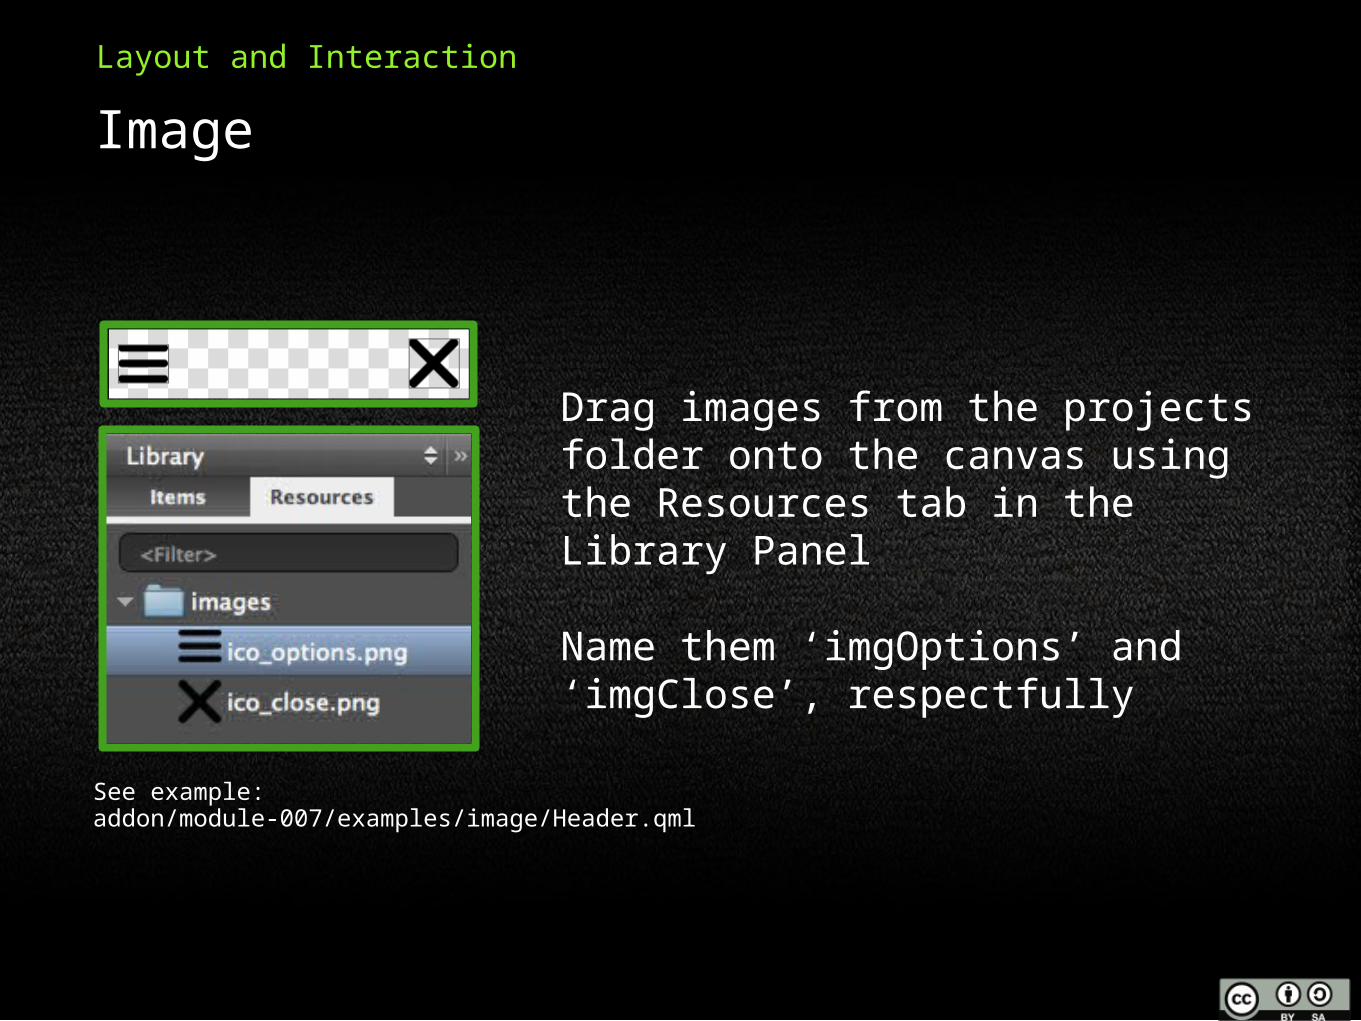
Image
Layout and Interaction
Drag images from the projects folder onto the canvas using the Resources tab in the Library Panel
Name them ‘imgOptions’ and ‘imgClose’, respectfully
See example: addon/module-007/examples/image/Header.qml

Anchors
Layout and Interaction
Create a ‘title’ Text and use Anchors to center it to the stage
Anchors can be found in the Layout tab on the Properties panel
Use anchors to position the images left and right, respectfully, with a margin of 10
See example: addon/module-007/examples/anchors/Header.qml
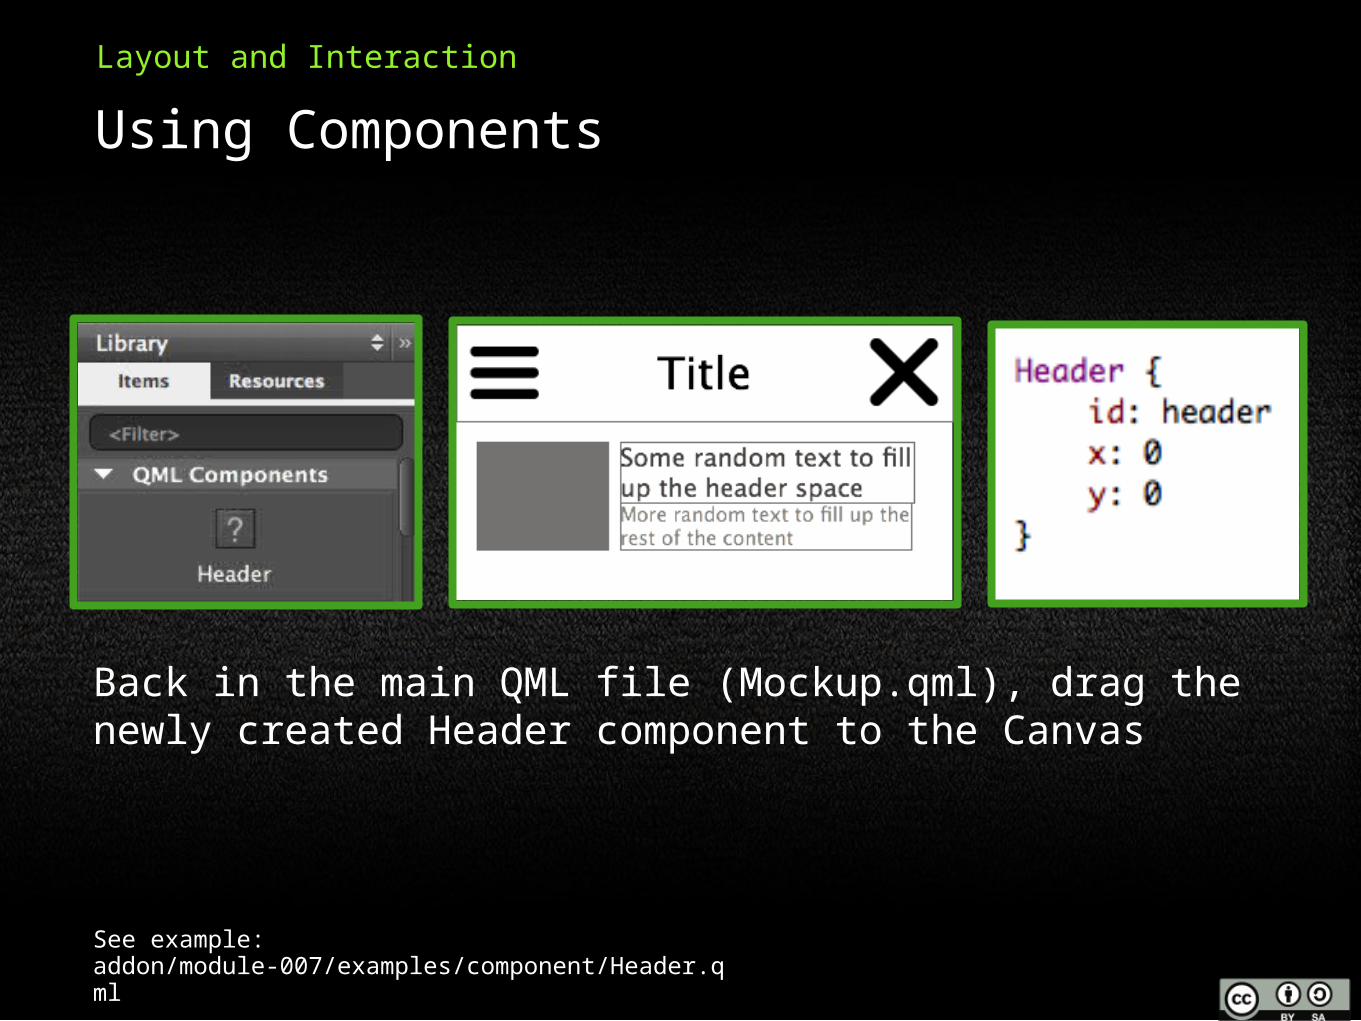
Using Components
Layout and Interaction
Back in the main QML file (Mockup.qml), drag the newly created Header component to the Canvas
See example: addon/module-007/examples/component/Header.qml

States
Layout and Interaction
Create a 360x70 Footer.qml component with a 20px-rounded rectangle and three Texts, serving as button placeholders
Add two new states for the component and name them accordingly
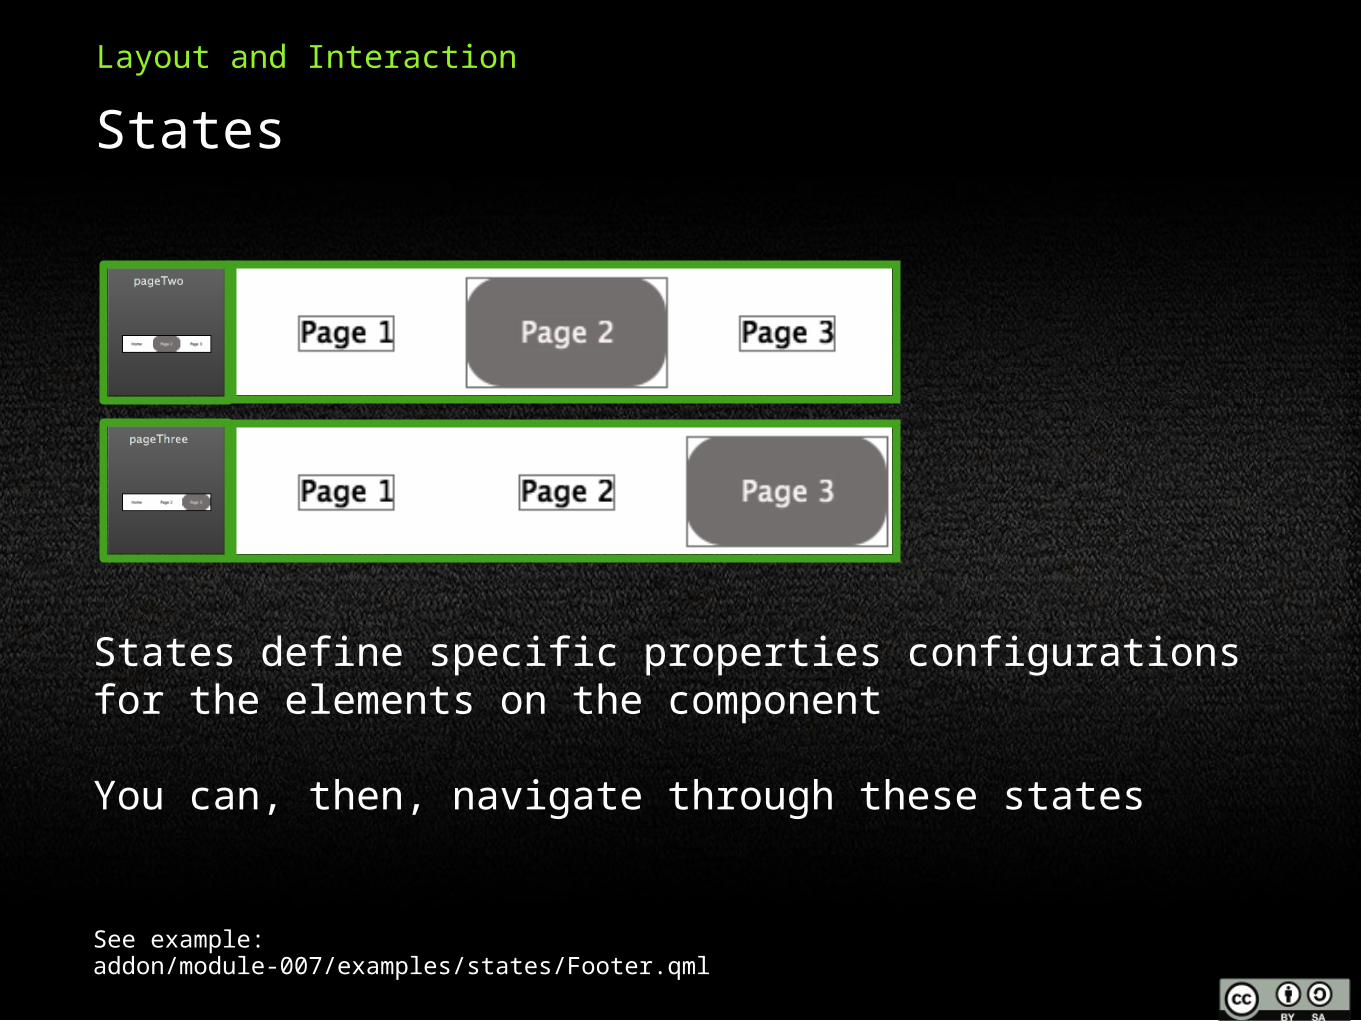
States
Layout and Interaction
States define specific properties configurations for the elements on the component
You can, then, navigate through these states
See example: addon/module-007/examples/states/Footer.qml
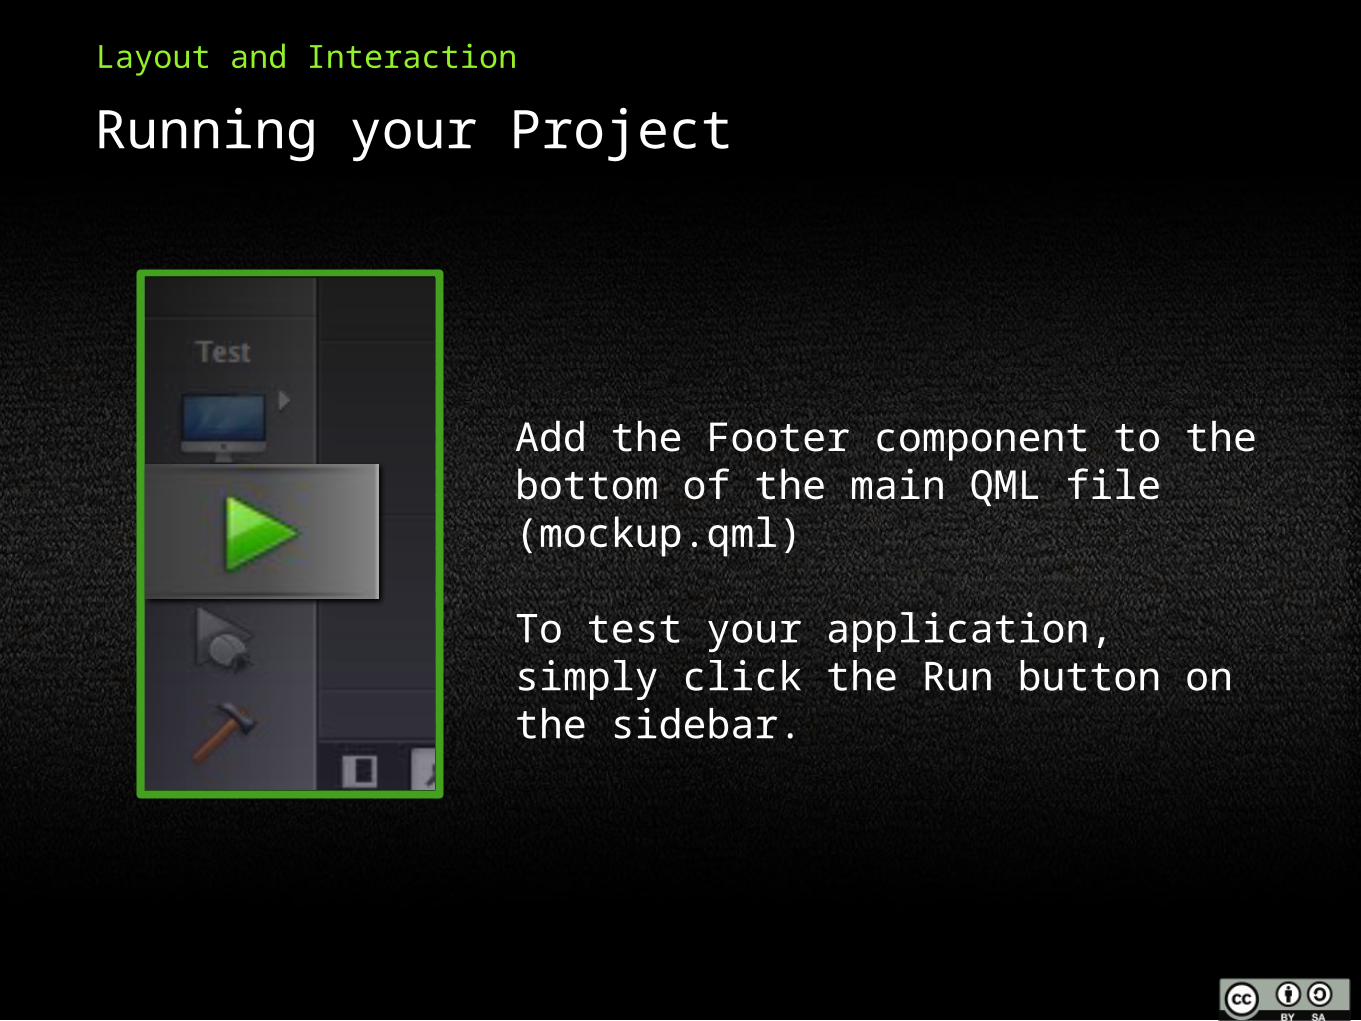
Running your Project
Layout and Interaction
Add the Footer component to the bottom of the main QML file (mockup.qml)
To test your application, simply click the Run button on the sidebar.
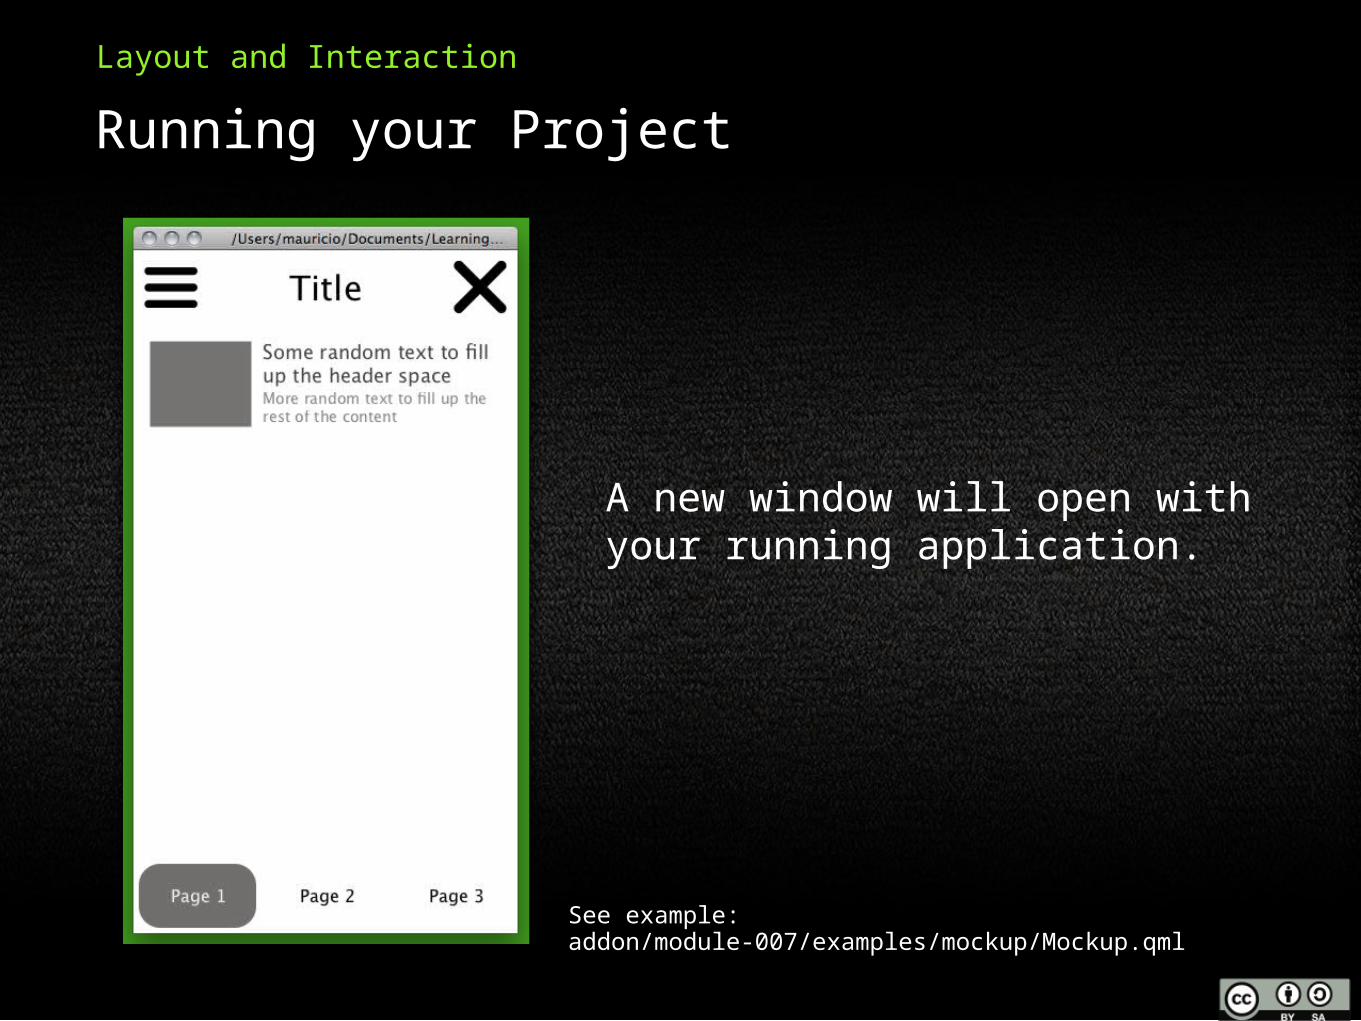
Running your Project
Layout and Interaction
A new window will open with your running application.
See example: addon/module-007/examples/mockup/Mockup.qml
2 Layout and Interaction
3 Questions
4 Lab
1 Qt Quick Design
Module Seven
Topics
Questions
What is the main purpose of Qt Quick Designer?
In what panel can you find qml elements to add to your application?
How do you add components to your application?
What are States?
How can you edit an element?
What use of Item would benefit more than using Rectangle?
What’s the difference between dragging onto stage a standard Image element and dragging an Image from the Resources Library?
2 Layout and Interaction
3 Questions
4 Lab
1 Qt Quick Design
Module Seven
Topics
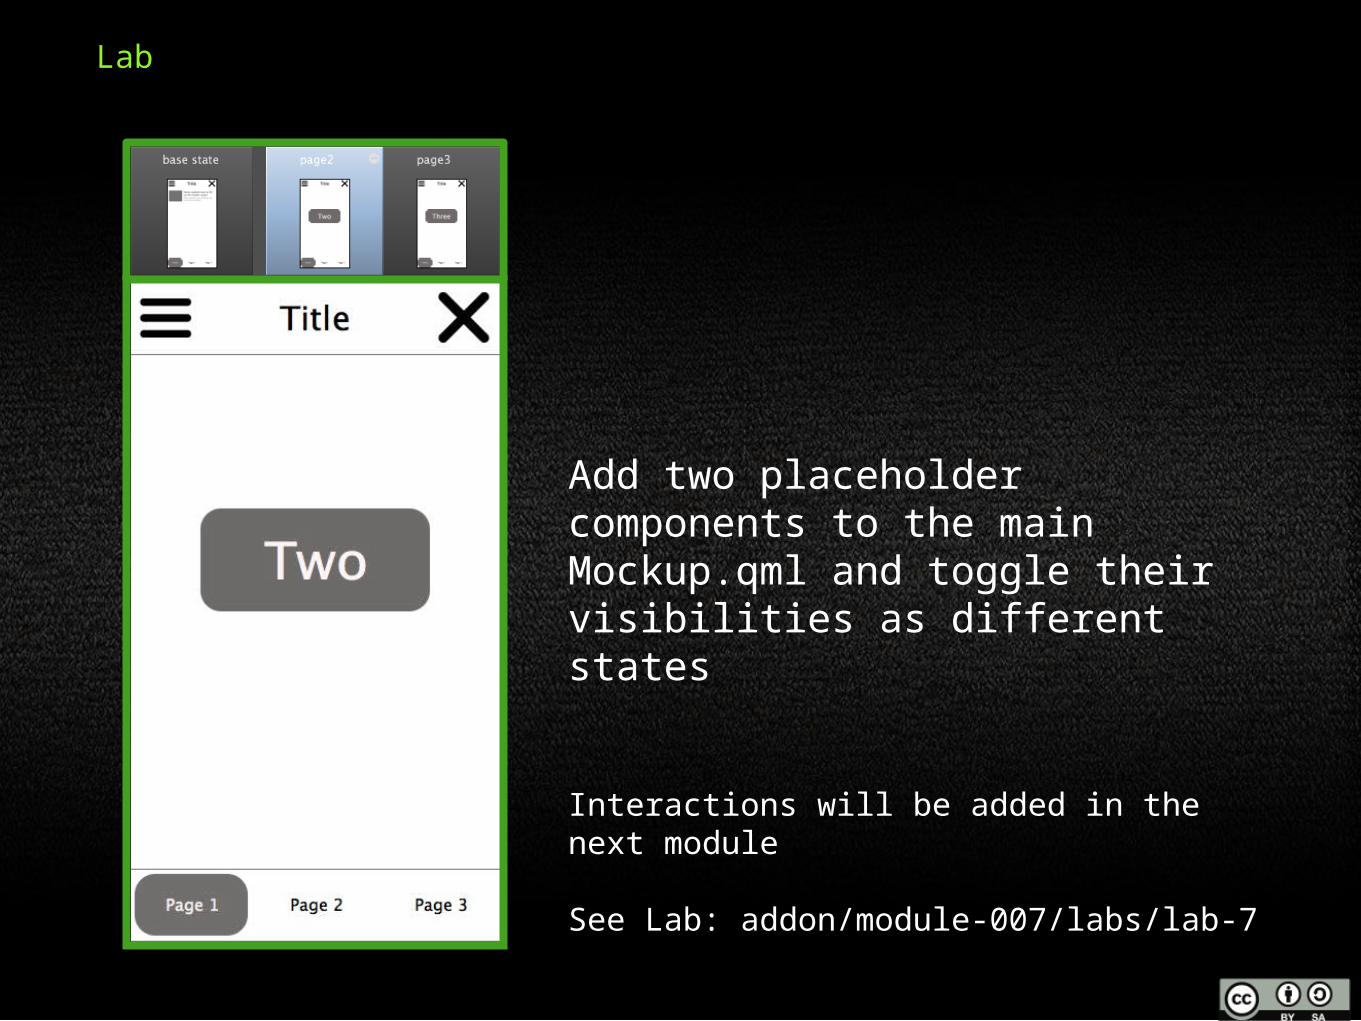
Lab
Add two placeholder components to the main Mockup.qml and toggle their visibilities as different states
Interactions will be added in the next module
See Lab: addon/module-007/labs/lab-7
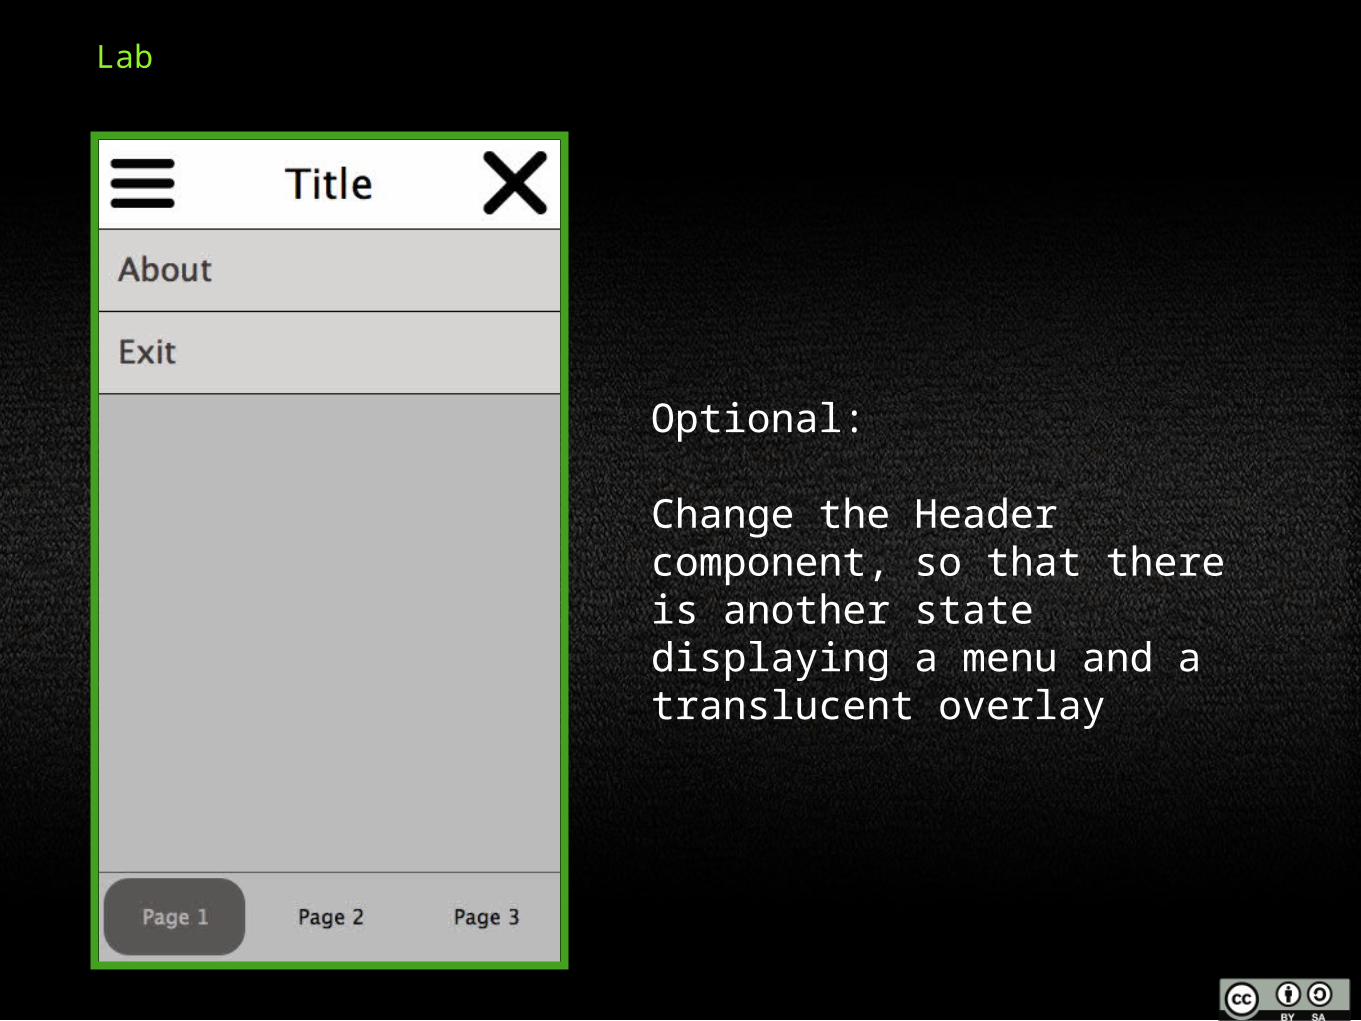
Lab
Optional:
Change the Header component, so that there is another state displaying a menu and a translucent overlay
(c) 2011 Nokia Corporation and its Subsidiary(-ies).
The enclosed Qt Training Materials are provided under the CreativeCommons
Attribution ShareAlike 2.5 License Agreement.
The full license text is available here:
http://creativecommons.org/licenses/by-sa/2.5/legalcode
Nokia, Qt and the Nokia and Qt logos are the registered trademarks of Nokia
Corporation in Finland and other countries worldwide.