Getting Started with AWS IoT and the Dragon IoT Starter Kit - AWS May 2016 Webinar Series
PyPortal IoT Plant Monitor with AWS IoT and CircuitPythonCreated by Brent Rubell
Last updated on 2020-04-14 06:58:23 PM EDT

Overview
Give your succulent some smarts by building an internet-connected plant monitor with Amazon AWSIoT (https://adafru.it/Efe) and CircuitPython.
This smart-planter monitors your plant's vitals on the PyPortal's screen, logs data to Amazon AWS IoT, and sends anemail to your inbox when your plant needs to be watered!
Using Amazon AWS IoT with CircuitPython allows you to prototype internet-of-things projects faster than everbefore. With CircuitPython, you're able to instantly provision your device for AWS IoT by dragging and droppingcertificates/keys.
We've adapted the excellent Monitoring Soil Moisture with AWS IoT And Raspberry Pi guide on the AWS IoT DeveloperGuide (https://adafru.it/Gcy) to work with CircuitPython on microcontrollers.
© Adafruit Industries https://learn.adafruit.com/pyportal-iot-plant-monitor-with-aws-iot-and-circuitpython Page 4 of 54
AWS IoTAWS IoT (https://adafru.it/Efe) is an IoT service for those
looking for an incredibly scalable and secure Internet-of-
Things (IoT) service.
Integration with the AWS Ecosystem
Connect your CircuitPython device to integrate with
Amazon Web Services such as Amazon S3, AWS
Lambda, Amazon Kinesis, and more!
Security
We've tried all the major IoT cloud service providers,
and AWS IoT offers a higher level of security. This is due
to features such as secure device provisioning, access-
resource policies for device MQTT feeds, and a service
to continuously monitor and report potential security
threats.
CircuitPythonCircuitPython is perfect for building Internet-of-Things
projects. This project uses the ESP32SPI
CircuitPython (https://adafru.it/DWV) library, which can
use the ESP32 as a WiFi-coprocessor.
We've built an CircuitPython AWS
IoT (https://adafru.it/Gcz) helper module to make
interacting with AWS IoT incredibly simple. Provisioning
CircuitPython devices is as simple as adding your device
certificate and private RSA key to a file.
You can rapidly update your code without having to
compile and store WiFi information and AWS IoT device
configuration on your microcontroller. This means that
there's no editing code and re-uploading whenever you
move the PyPortal to another network - just update a file
and you're set.
Prerequisite Guides
This is an intermediate-level CircuitPython guide. If you're new to CircuitPython, take a moment to walk through thefollowing guides to get you started and up-to-speed:
Welcome to CircuitPython (https://adafru.it/cpy-welcome)PyPortal Introduction Guide (https://adafru.it/Ecp)MQTT in CircuitPython (https://adafru.it/FGp)
Parts
© Adafruit Industries https://learn.adafruit.com/pyportal-iot-plant-monitor-with-aws-iot-and-circuitpython Page 5 of 54

Materials
1 x Female/Female STEMMA CableSTEMMA Cable - 150mm/6" Long 4 Pin JST-PH Cable–Female/Female
Add To Cart
1 x PyPortal StandAdafruit PyPortal Desktop Stand Enclosure Kit
Add To Cart
1 x USB CablePink and Purple Braided USB A to Micro B Cable - 2 meter long
Add To Cart
Adafruit PyPortal - CircuitPython Powered Internet Display
$54.95IN STOCK
Add To Cart
Adafruit STEMMA Soil Sensor - I2C Capacitive MoistureSensor
$7.50IN STOCK
Add To Cart
© Adafruit Industries https://learn.adafruit.com/pyportal-iot-plant-monitor-with-aws-iot-and-circuitpython Page 6 of 54

PyPortal Wiring
We recommend using a Female-to-Female Stemma Connector and plugging it in between the PyPortal and theSTEMMA Soil Sensor. No soldering is involved - just connect the cable between the Stemma Soil Sensor and thePyPortal's I2C port.
The cable makes the following connections between the
PyPortal's I2C port and the STEMMA Soil Sensor:
PyPortal 5V to Sensor VIN
PyPortal GND to Sensor GND
PyPortal SCL to Sensor SCL
PyPortal SDA to Sensor SDA
That's it - your PyPortal is wired up!
When you're ready, just stick the STEMMA Soil sensor into your plant's soil. Be sure to leave the white portion of thesensor not covered by soil. You may also want to position the sensor at the edge of your plant's pot.
STEMMA Cable - 150mm/6" Long 4 Pin JST-PH Cable–Female/Female
$0.75IN STOCK
Add To Cart
© Adafruit Industries https://learn.adafruit.com/pyportal-iot-plant-monitor-with-aws-iot-and-circuitpython Page 7 of 54

© Adafruit Industries https://learn.adafruit.com/pyportal-iot-plant-monitor-with-aws-iot-and-circuitpython Page 8 of 54

AWS IoT Setup
The setup required for this guide is a bit lengthy (about 15-30 minutes if you already have an Amazon Web Servicesaccount). However, it's mostly setup and you do not need to repeat the entire guide each time you start a new project.
You'll need an AWS account to access the Amazon AWS platform. Head over tohttps://aws.amazon.com/iot/ (https://adafru.it/Efe) and click Create an AWS Account to create an account.
Create an AWS IoT Policy
AWS uses IoT policies to "give devices permissions to access AWS IoT resources". These resources range from data,such as information stored in MQTT topics, to actions such as publishing/subscribing to AWS IoT MQTT topics.
Each AWS IoT policy is tied to a device-specific X.509 certificate, which authenticates your CircuitPython device withthe AWS IoT server. It's a good security practice to have a separate AWS IoT Policy and X.509 certificate for eachCircuitPython device you're connecting to AWS IoT.
From the AWS Management Console, search for the "IoT Core" service .
The AWS IoT monitor page should open. From here, click Secure on the left-hand sidebar.
Please note: Amazon AWS IoT is a PAID IoT service - you will be charged for usage. For non-production usage, keep track of the billing & make sure that you disable any running services if you're not using them.�
© Adafruit Industries https://learn.adafruit.com/pyportal-iot-plant-monitor-with-aws-iot-and-circuitpython Page 9 of 54
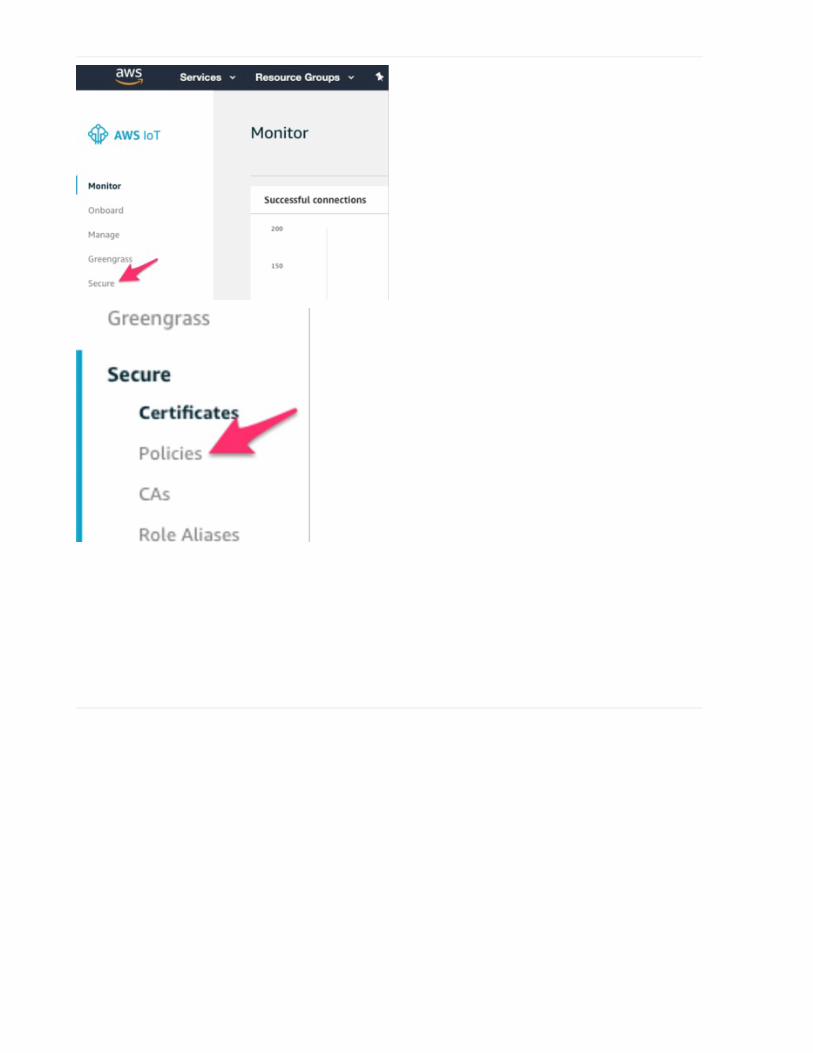
You should be directed to the AWS IoT Monitor
page.
Click Secure on the left-hand sidebar.
From the dropdown, click Policies.
You'll be directed to the AWS IoT Policies page. Click the Create button on the header of this page.
© Adafruit Industries https://learn.adafruit.com/pyportal-iot-plant-monitor-with-aws-iot-and-circuitpython Page 10 of 54
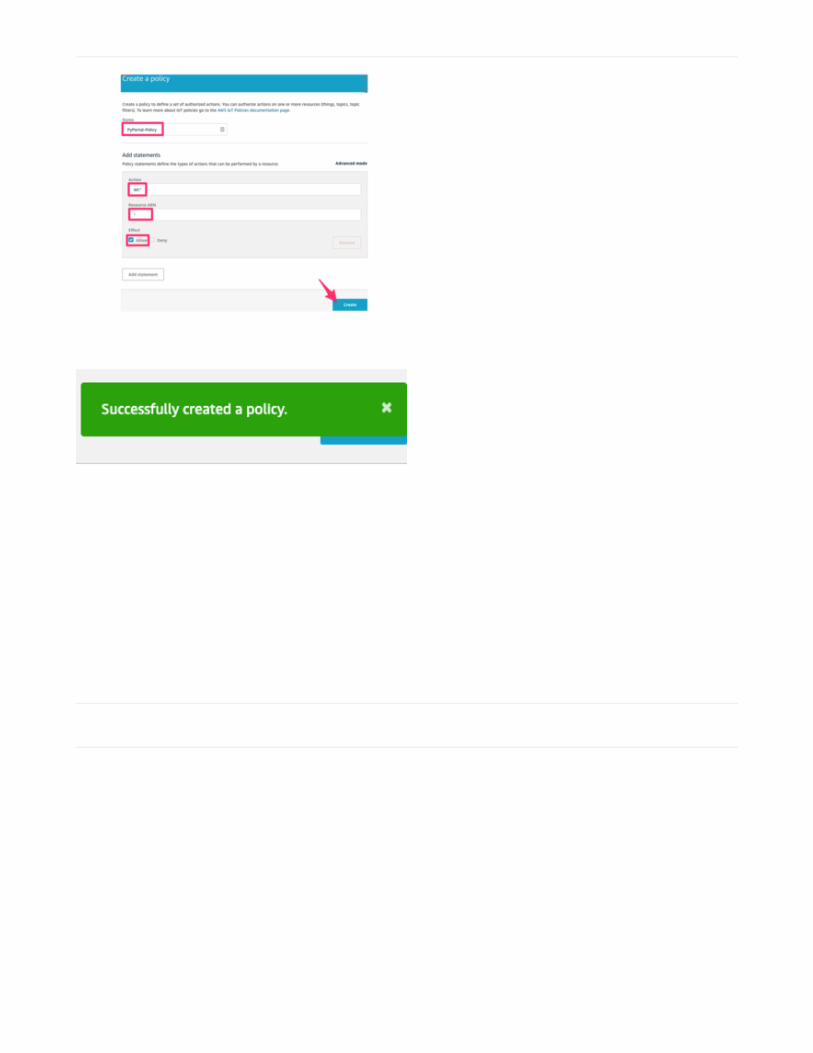
Set the name of the policy to PyPortal-Policy
Set the Action to iot:*
Set the Resource ARN to *
Note: We are creating an "allow-all" (by using the *
wildcard) ARN here to keep the guide's
instructions simple. If you're actively deploying
AWS IoT devices, you'll want to only allow specific
actions/topics for specific devices.
Check out the AWS IoT Developer Guide
page on AWS IoT Policies for more
information (https://adafru.it/GcA)...
Under Effect, Click Allow to allow all clients using this
policy to connect to AWS IoT.
Click Create. You should see the new policy appear
under Policies and a green dialog stating that you've
successfully created a policy.
Create an AWS IoT Thing
In AWS IoT terms, we're going to register your PyPortal as an AWS IoT Thing. Each device registered to AWS IoT iscalled a thing and tracked/managed in a thing registry.
You'll be creating an AWS IoT Thing named PyPortal.
© Adafruit Industries https://learn.adafruit.com/pyportal-iot-plant-monitor-with-aws-iot-and-circuitpython Page 11 of 54
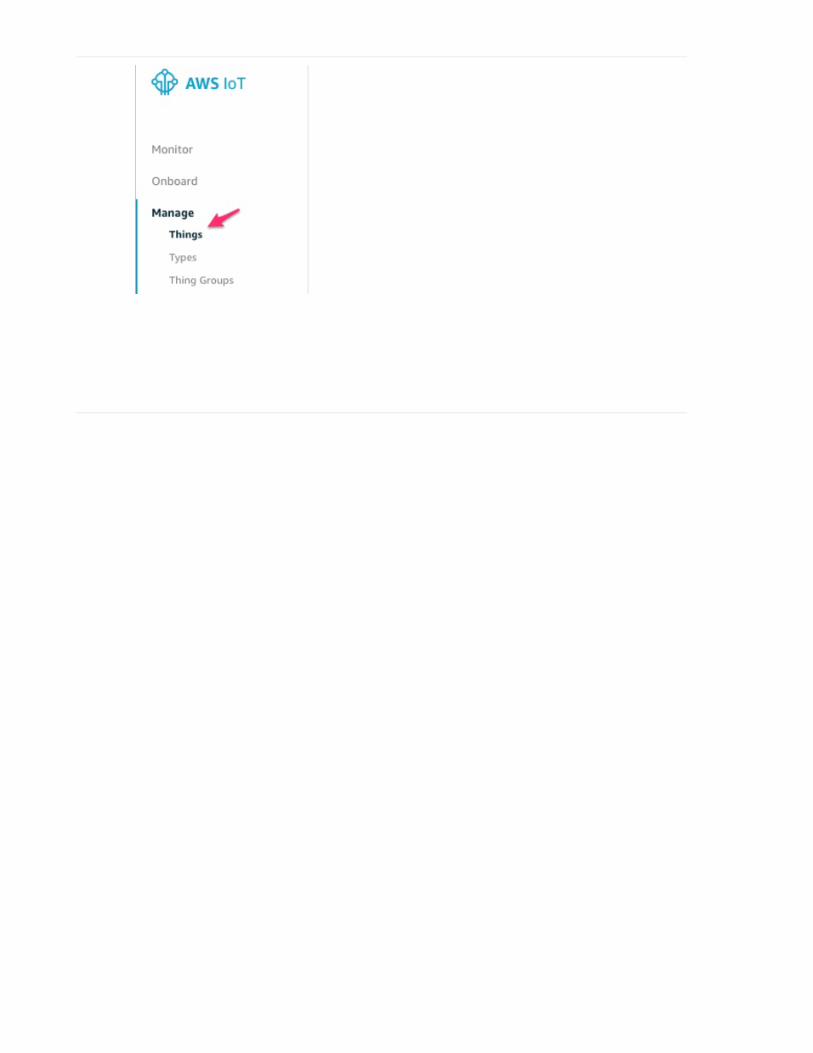
From the AWS IoT sidebar, click Manage.
You should be brought to your Things registry
page.
From the Things registry, click the Create button.
© Adafruit Industries https://learn.adafruit.com/pyportal-iot-plant-monitor-with-aws-iot-and-circuitpython Page 12 of 54
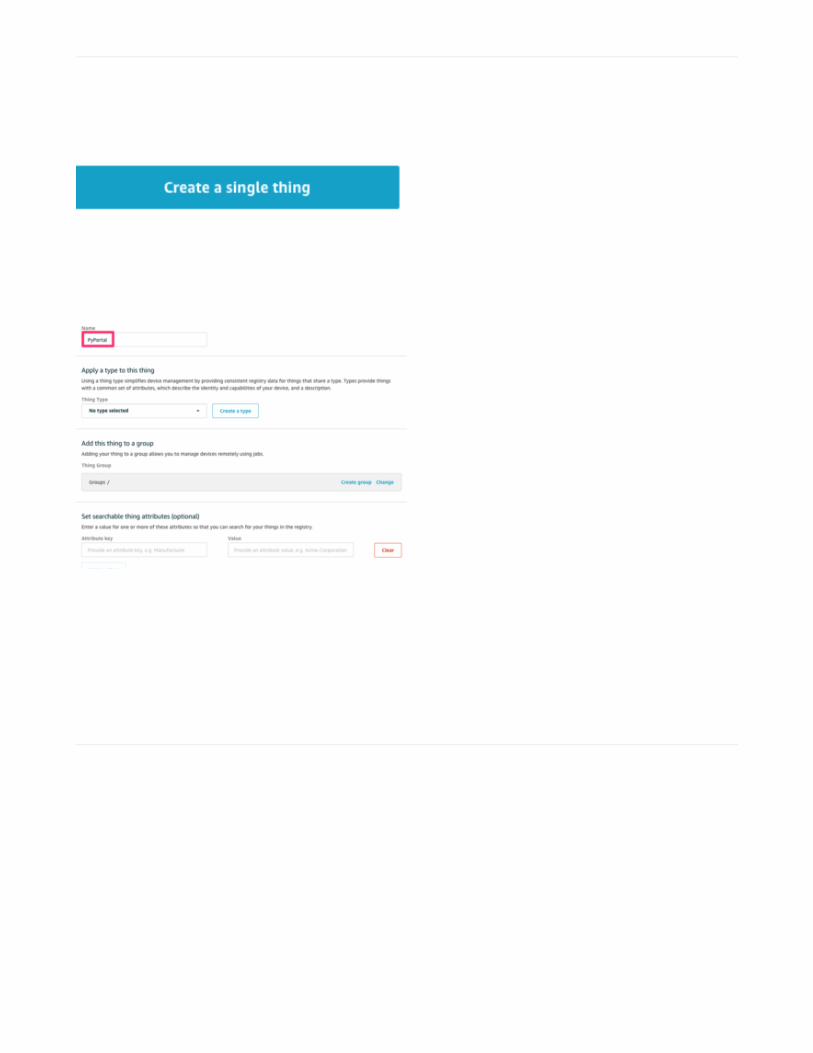
You'll be registering a thing, your PyPortal, in your
registry.
Click the Create a single thing button.
Name the thing PyPortal. Click Next.
© Adafruit Industries https://learn.adafruit.com/pyportal-iot-plant-monitor-with-aws-iot-and-circuitpython Page 13 of 54
Next, you'll need to create (or add) a certificate to your
PyPortal. This helps authenticate its connection with the
AWS IoT server.
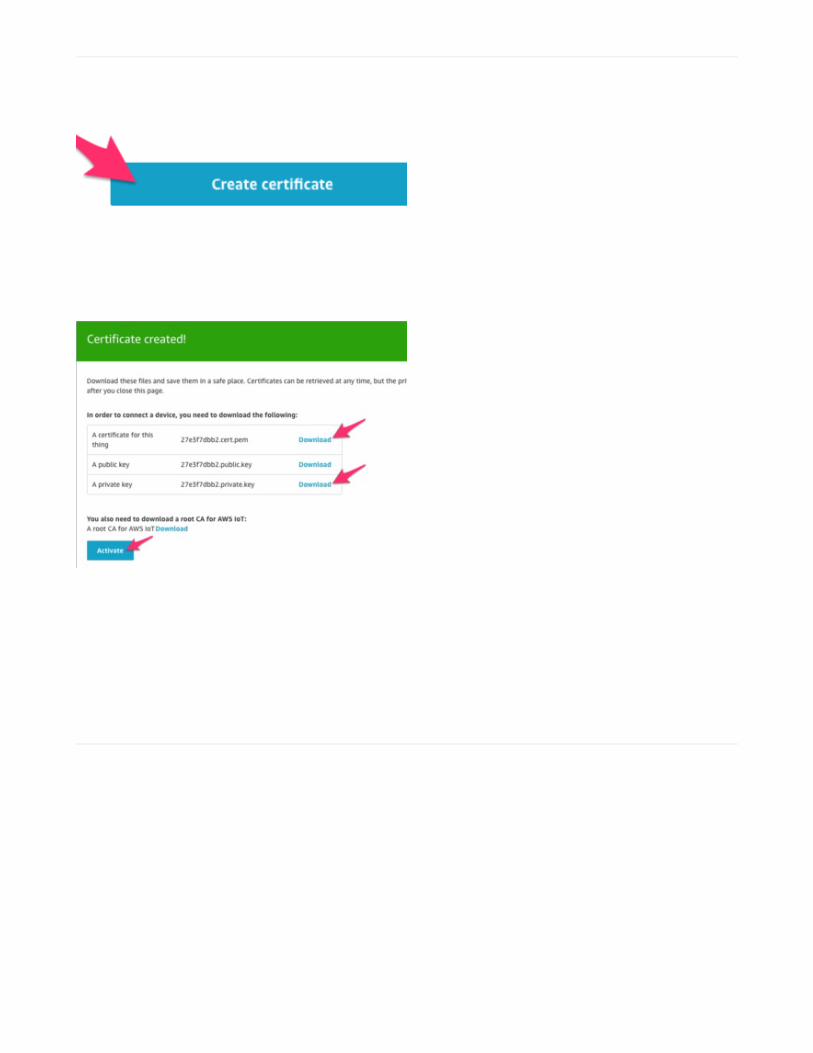
Click One-click certificate creation.
Note - if you're using an ATECC608
breakout to generate a Certificate Signing
Request (https://adafru.it/GcB), click Use
CSR and upload the CSR your module
generated.
After the certificate has been created. Download
the device's certificate and private key to your
desktop.
You may also download the public key, but
it's not required for this guide.
Then, click Activate to activate the root CA for
AWS IoT. If successfully activated, the text for the
button should change to Deactivate.
You do not need to download the root CA.
This certificate, along may other root CA
certificates is already burned into your
PyPortal's ESP32 already.
Click Attach a policy
Select the PyPortal-Policy you made earlier. You can click view to verify your policy against the policy in thescreenshot below. This step attaches the policy you created to the PyPortal's X.509 certificate.
If everything looks correct, click Register Thing.
© Adafruit Industries https://learn.adafruit.com/pyportal-iot-plant-monitor-with-aws-iot-and-circuitpython Page 14 of 54
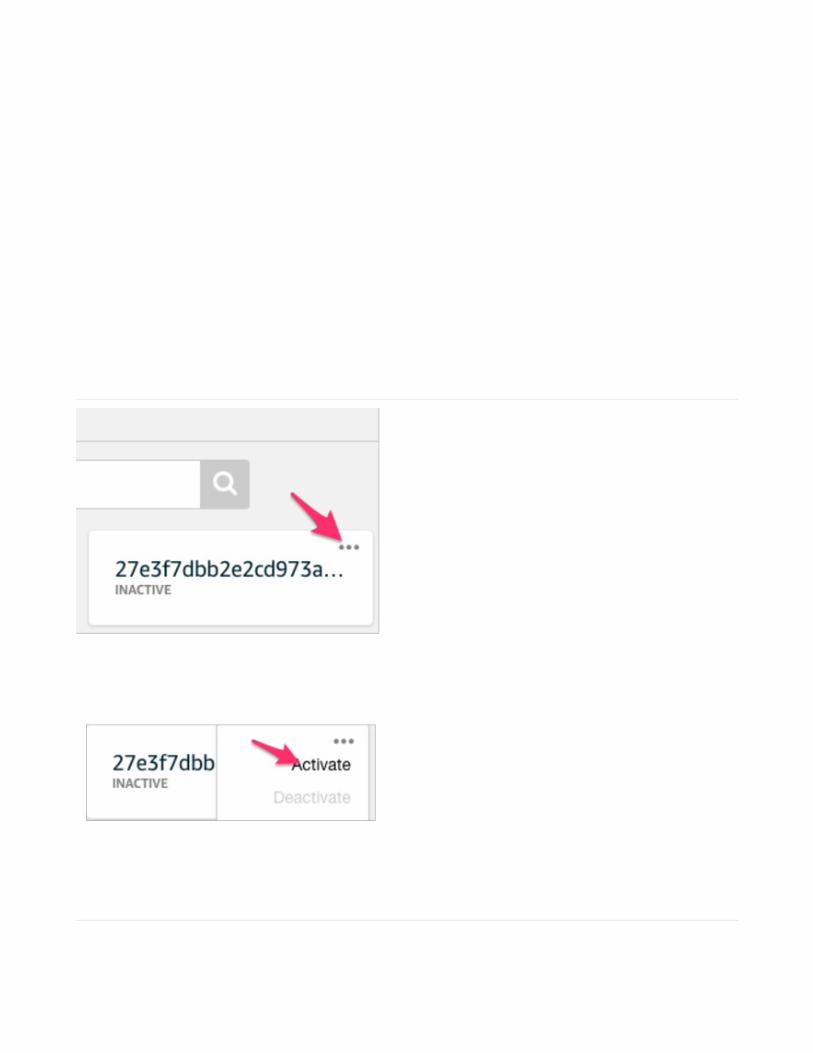
One last thing - certificates are inactive by default. You'll
need to activate yours.
From the AWS IoT sidebar, navigate to Secure ->
Certificates.
Your newly generated certificate should appear
below as INACTIVE.
Click the three-bubble icon to bring up a
dropdown menu.
Click Activate, your certificate should show up on
this page as ACTIVE.
With your AWS IoT Device, policy, and certificate created, you can move on.
© Adafruit Industries https://learn.adafruit.com/pyportal-iot-plant-monitor-with-aws-iot-and-circuitpython Page 15 of 54

Create an Amazon SNS Topic/Subscription
Amazon's Simple Notification Service (SNS) (https://adafru.it/GcC) is a way to send notification topics to an endpoint. Inthis project, you'll be writing to Amazon AWS IoT topics and using Amazon SNS to send notification messages from atopic to your inbox.
From the AWS Management Console, use the search-box to search for the Simple Notification Service
From the Amazon SNS sidebar, click Topics. Then, click Create Topic.
Name the topic moisture
Set the Display name to PyPortal Moisture Sensor
Topic
Click the Create Topic button.
© Adafruit Industries https://learn.adafruit.com/pyportal-iot-plant-monitor-with-aws-iot-and-circuitpython Page 16 of 54
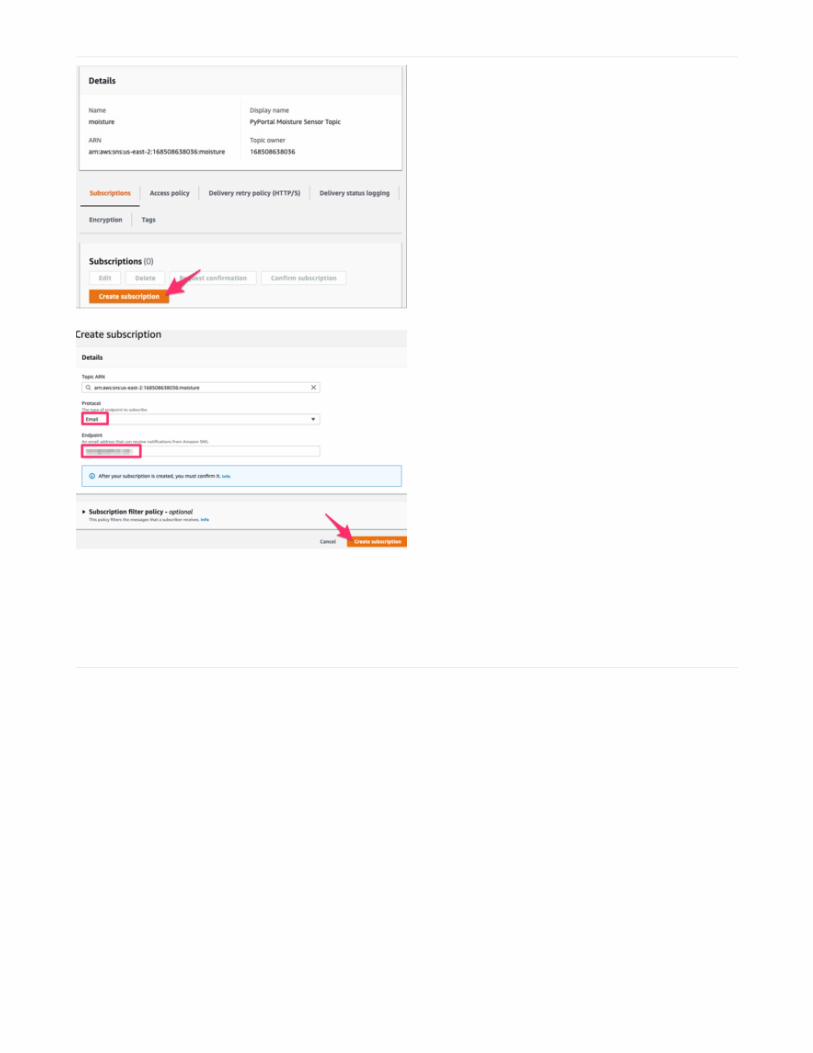
Next, you'll need to create a subscription to this topic.
This subscription will be updated whenever the topic
receives new data (i.e. whenever your PyPortal's
moisture sensor sends an update to AWS IoT).
From the moisture topic page, click Create
Subscription
Set the protocol to Email
Set the Endpoint to your email address
Click Create Subscription
Check the inbox of the email you entered as an endpoint. You should receive an email to confirm your topicsubscription.
Click Confirm Subscription
© Adafruit Industries https://learn.adafruit.com/pyportal-iot-plant-monitor-with-aws-iot-and-circuitpython Page 17 of 54
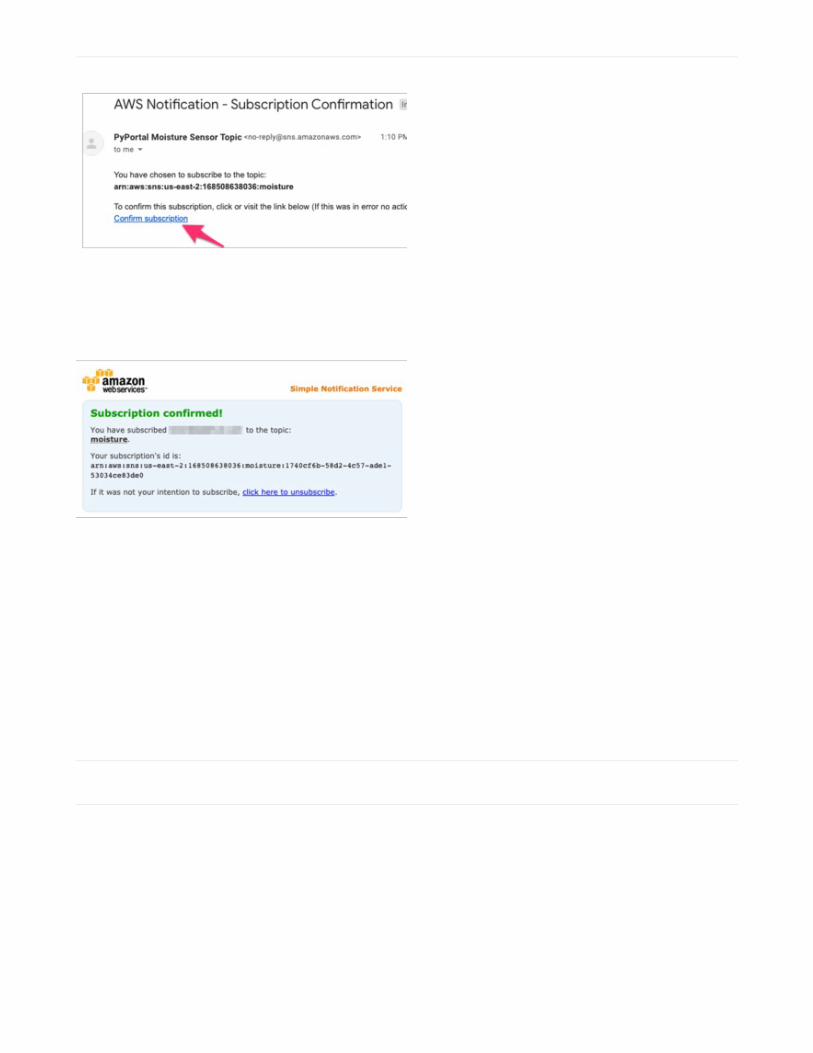
Check the inbox of the email you entered as an
endpoint. You should receive an email to confirm your
topic subscription.
If you did not receive an email, check your spam
folder.
Click Confirm Subscription. You should be redirected to
an AWS link notifying you that your subscription has
been confirmed.
Create an AWS IoT Rule
One of the advantages of using AWS IoT is the ability to send data from your devices with other AWS services such asS3, Lambda or Amazon ML. You are going to create a rule to send data to the Amazon SNS topic, from AWS IoT.
For more information about AWS IoT Rules, visit the AWS IoT docs (https://adafru.it/GcD).
© Adafruit Industries https://learn.adafruit.com/pyportal-iot-plant-monitor-with-aws-iot-and-circuitpython Page 18 of 54
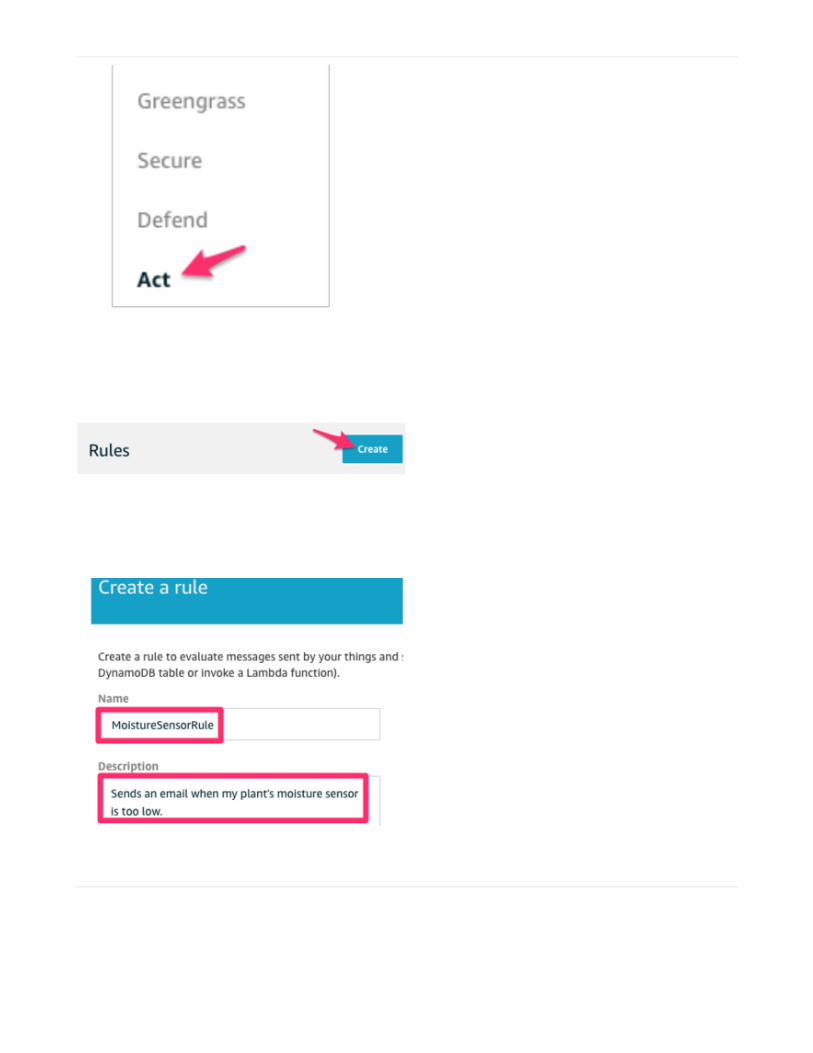
To set up a new rule:
Navigate to your AWS IoT Console and click Act.
Click the Create button
Name the rule MoistureSensorRule
Set the description to what the rule does when
invoked
For example, this rule will send an email
when the plant's moisture sensor is too low.
Under Rule query statement, make sure you're Using SQL version 2016-03-23.
Copy and paste the SQL statement below into the Rule query statement field:
© Adafruit Industries https://learn.adafruit.com/pyportal-iot-plant-monitor-with-aws-iot-and-circuitpython Page 19 of 54

SELECT * FROM '$aws/things/PyPortal/shadow/update/accepted' WHERE state.reported.moisture < 400
AWS IoT rules use a SQL statement to filter messages received on a MQTT topic. This SQL statement selectseverything on the AWS IoT MQTT topic $aws/things/PyPortal/shadow/update/accepted. Then, it filters the data pointson this topic for where the moisture level is less than 400.
For more information about AWS IoT's SQL rules, visit the AWS IoT SQL Reference page (https://adafru.it/GcE).
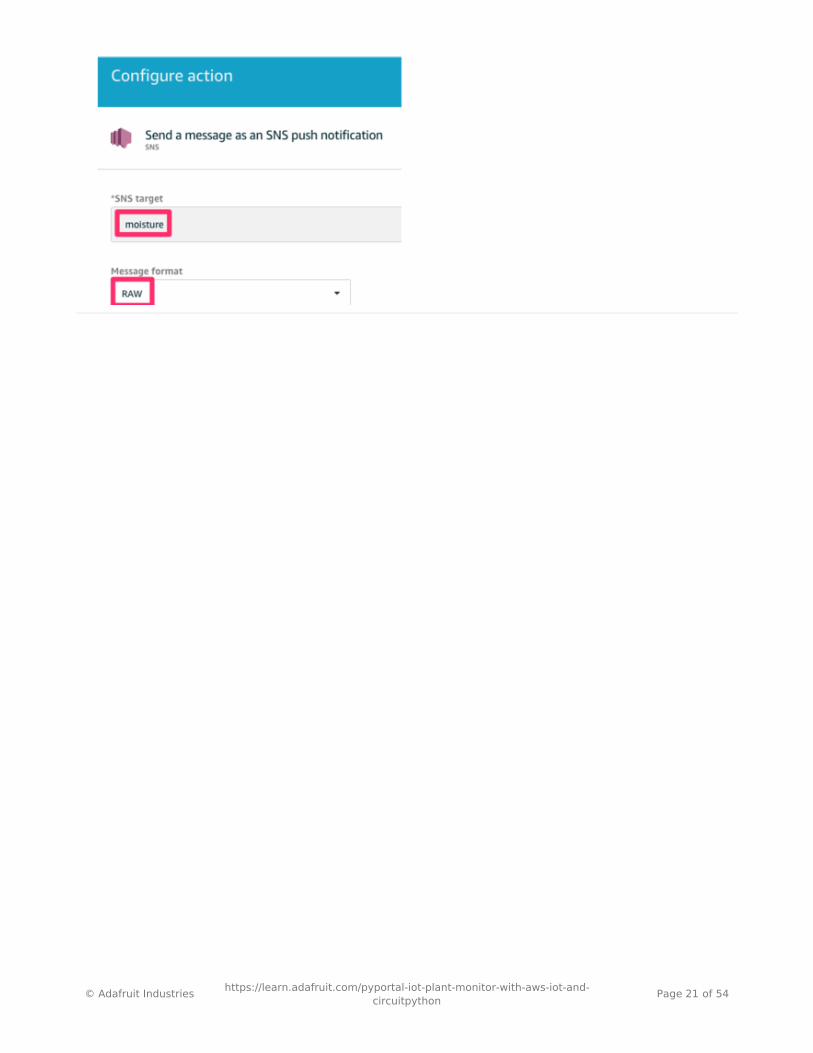
Next, let's select and configure an action to be invoked
when this rule is satisfied.
Click Add action.
From Select an action, click Send a message as
an SNS push notification.
On the Configure action page,
Select moisture as the SNS target.
Set the message format to RAW.
© Adafruit Industries https://learn.adafruit.com/pyportal-iot-plant-monitor-with-aws-iot-and-circuitpython Page 20 of 54
© Adafruit Industries https://learn.adafruit.com/pyportal-iot-plant-monitor-with-aws-iot-and-circuitpython Page 21 of 54
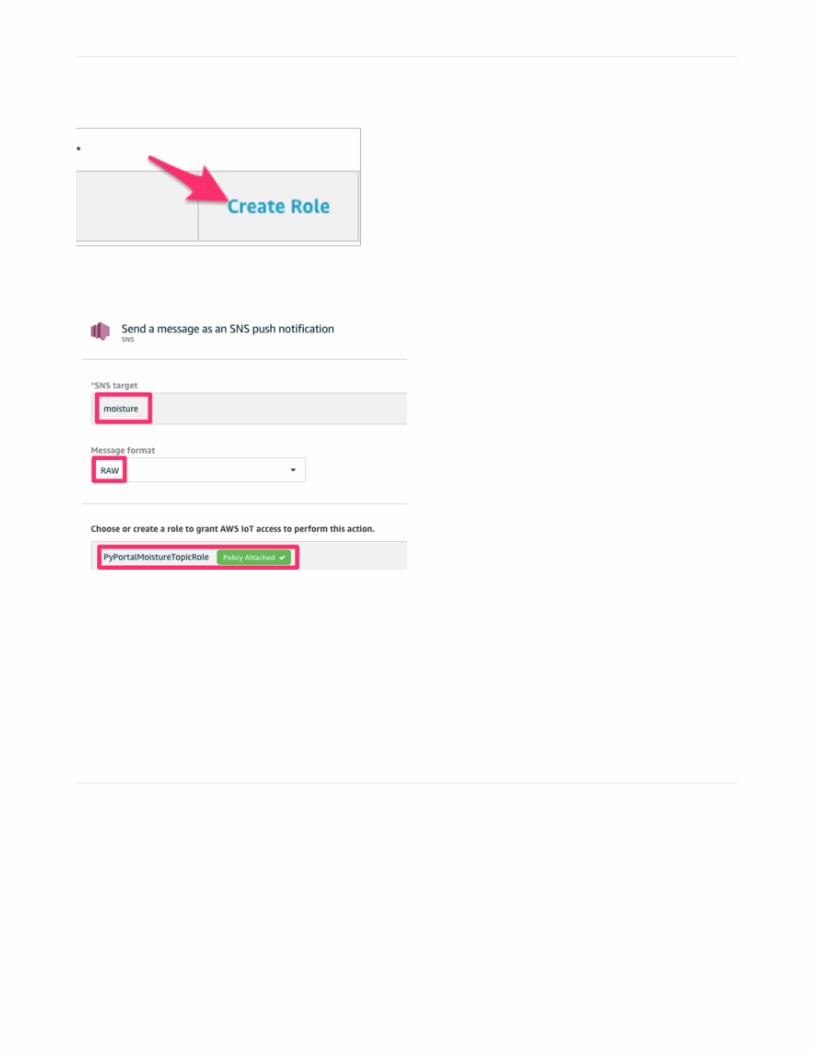
We'll want to create a role to grant AWS access to
perform the action.
Click Create Role and name this role
PyPortalMoistureTopicRole.
Click the Add action button.
© Adafruit Industries https://learn.adafruit.com/pyportal-iot-plant-monitor-with-aws-iot-and-circuitpython Page 22 of 54

You should be brought back to the Create a
rule page. Click Create Rule.
The MoistureSensorRule should appear in your AWS IoT
Console's Rules page.
Congrats, you've set up AWS IoT, configured a device, and configured AWS IoT to send an email when a AWS IoTMQTT topic is updated with a value below a set threshold.
© Adafruit Industries https://learn.adafruit.com/pyportal-iot-plant-monitor-with-aws-iot-and-circuitpython Page 23 of 54

Upgrading ESP32 Firmware
The ESP32 on your PyPortal is running an older version of the firmware which runs on the ESP32 (named nina-fw (https://adafru.it/E7O)). To use your PyPortal with AWS IoT, you'll need to update the ESP32's firmware the latestversion of nina-fw.
Click the button below for the relevant steps on upgrading the ESP32 on your PyPortal and continue with the guidewhen you've successfully upgraded to nina-fw 1.4.0 or above.
https://adafru.it/FWs
https://adafru.it/FWs
You MUST update the nina-fw version on your PyPortal before continuing with this guide. You will not be able to use the code in this guide successfully without performing this step.�
© Adafruit Industries https://learn.adafruit.com/pyportal-iot-plant-monitor-with-aws-iot-and-circuitpython Page 24 of 54

PyPortal CircuitPython Setup
To use all the amazing features of your PyPortal with CircuitPython, you must first install a number of libraries. Thispage covers that process.
Adafruit CircuitPython Bundle
Download the Adafruit CircuitPython Library Bundle. You can find the latest release here:
https://adafru.it/ENC
https://adafru.it/ENC
Download the adafruit-circuitpython-bundle-*.x-mpy-*.zip bundle zip file where *.x MATCHES THE VERSION OFCIRCUITPYTHON YOU INSTALLED, and unzip a folder of the same name. Inside you'll find a lib folder. You have twooptions:
You can add the lib folder to your CIRCUITPY drive. This will ensure you have all the drivers. But it will take abunch of space on the 8 MB diskAdd each library as you need it, this will reduce the space usage but you'll need to put in a little more effort.
At a minimum we recommend the following libraries, in fact we more than recommend. They're basically required. Sograb them and install them into CIRCUITPY/lib now!
adafruit_esp32spi - This is the library that gives you internet access via the ESP32 using (you guessed it!) SPItransport. You need this for anything Internetadafruit_requests - This library allows us to perform HTTP requests and get responses back from servers.GET/POST/PUT/PATCH - they're all in here!adafruit_pyportal - This is our friendly wrapper library that does a lot of our projects, displays graphics and text,fetches data from the internet. Nearly all of our projects depend on it!adafruit_touchscreen - a library for reading touches from the resistive touchscreen. Handles all the analognoodling, rotation and calibration for you.adafruit_cursorcontrol - a library for reading PyGamer and PyBadge joystick and buttons. Handles all thegraphics, button press reading and joystick movement for you.adafruit_io - this library helps connect the PyPortal to our free datalogging and viewing serviceadafruit_imageload - an image display helper, required for any graphics!adafruit_display_text - not surprisingly, it displays text on the screenadafruit_bitmap_font - we have fancy font support, and its easy to make new fonts. This library reads and parsesfont files.adafruit_slideshow - for making image slideshows - handy for quick display of graphics and soundneopixel - for controlling the onboard neopixeladafruit_adt7410 - library to read the temperature from the on-board Analog Devices ADT7410 precisiontemperature sensoradafruit_sdcard - support for reading/writing data from the onboard SD card slot.adafruit_bus_device - low level support for I2C/SPI
© Adafruit Industries https://learn.adafruit.com/pyportal-iot-plant-monitor-with-aws-iot-and-circuitpython Page 25 of 54

Internet Connect!
Once you have CircuitPython setup and libraries installed we can get your board connected to the Internet. Note thataccess to enterprise level secured WiFi networks is not currently supported, only WiFi networks that require SSID andpassword.
To get connected, you will need to start by creating a secrets file.
What's a secrets file?
We expect people to share tons of projects as they build CircuitPython WiFi widgets. What we want to avoid is peopleaccidentally sharing their passwords or secret tokens and API keys. So, we designed all our examples to use asecrets.py file, that is in your CIRCUITPY drive, to hold secret/private/custom data. That way you can share your main
project without worrying about accidentally sharing private stuff.
Your secrets.py file should look like this:
# This file is where you keep secret settings, passwords, and tokens!# If you put them in the code you risk committing that info or sharing it
secrets = { 'ssid' : 'home ssid', 'password' : 'my password', 'timezone' : "America/New_York", # http://worldtimeapi.org/timezones 'github_token' : 'fawfj23rakjnfawiefa', 'hackaday_token' : 'h4xx0rs3kret', }
Inside is a python dictionary named secrets with a line for each entry. Each entry has an entry name (say 'ssid' ) and
then a colon to separate it from the entry key 'home ssid' and finally a comma ,
At a minimum you'll need the ssid and password for your local WiFi setup. As you make projects you may need more
tokens and keys, just add them one line at a time. See for example other tokens such as one for accessing github orthe hackaday API. Other non-secret data like your timezone can also go here, just cause its called secrets doesn'tmean you can't have general customization data in there!
For the correct time zone string, look at http://worldtimeapi.org/timezones (https://adafru.it/EcP) and remember that ifyour city is not listed, look for a city in the same time zone, for example Boston, New York, Philadelphia, WashingtonDC, and Miami are all on the same time as New York.
Of course, don't share your secrets.py - keep that out of GitHub, Discord or other project-sharing sites.
Connect to WiFi
OK now you have your secrets setup - you can connect to the Internet. Lets use the ESP32SPI and the Requestslibraries - you'll need to visit the CircuitPython bundle and install (https://adafru.it/ENC):
adafruit_bus_deviceadafruit_esp32spiadafruit_requestsneopixel
© Adafruit Industries https://learn.adafruit.com/pyportal-iot-plant-monitor-with-aws-iot-and-circuitpython Page 26 of 54

Into your lib folder. Once that's done, load up the following example using Mu or your favorite editor:
import boardimport busiofrom digitalio import DigitalInOutimport adafruit_esp32spi.adafruit_esp32spi_socket as socketfrom adafruit_esp32spi import adafruit_esp32spiimport adafruit_requests as requests
print("ESP32 SPI webclient test")
TEXT_URL = "http://wifitest.adafruit.com/testwifi/index.html"JSON_URL = "http://api.coindesk.com/v1/bpi/currentprice/USD.json"
# If you are using a board with pre-defined ESP32 Pins:esp32_cs = DigitalInOut(board.ESP_CS)esp32_ready = DigitalInOut(board.ESP_BUSY)esp32_reset = DigitalInOut(board.ESP_RESET)
# If you have an ItsyBitsy Airlift:# esp32_cs = DigitalInOut(board.D13)# esp32_ready = DigitalInOut(board.D11)# esp32_reset = DigitalInOut(board.D12)
# If you have an externally connected ESP32:# esp32_cs = DigitalInOut(board.D9)# esp32_ready = DigitalInOut(board.D10)# esp32_reset = DigitalInOut(board.D5)
spi = busio.SPI(board.SCK, board.MOSI, board.MISO)esp = adafruit_esp32spi.ESP_SPIcontrol(spi, esp32_cs, esp32_ready, esp32_reset)
requests.set_socket(socket, esp)
if esp.status == adafruit_esp32spi.WL_IDLE_STATUS: print("ESP32 found and in idle mode")print("Firmware vers.", esp.firmware_version)print("MAC addr:", [hex(i) for i in esp.MAC_address])
for ap in esp.scan_networks(): print("\t%s\t\tRSSI: %d" % (str(ap["ssid"], "utf-8"), ap["rssi"]))
print("Connecting to AP...")while not esp.is_connected: try: esp.connect_AP(b"MY_SSID_NAME", b"MY_SSID_PASSWORD") except RuntimeError as e: print("could not connect to AP, retrying: ", e) continueprint("Connected to", str(esp.ssid, "utf-8"), "\tRSSI:", esp.rssi)print("My IP address is", esp.pretty_ip(esp.ip_address))print( "IP lookup adafruit.com: %s" % esp.pretty_ip(esp.get_host_by_name("adafruit.com"))
This first connection example doesn't use a secrets file - you'll hand-enter your SSID/password to verify connectivity first! See the detailed instructions after the code below.�
© Adafruit Industries https://learn.adafruit.com/pyportal-iot-plant-monitor-with-aws-iot-and-circuitpython Page 27 of 54
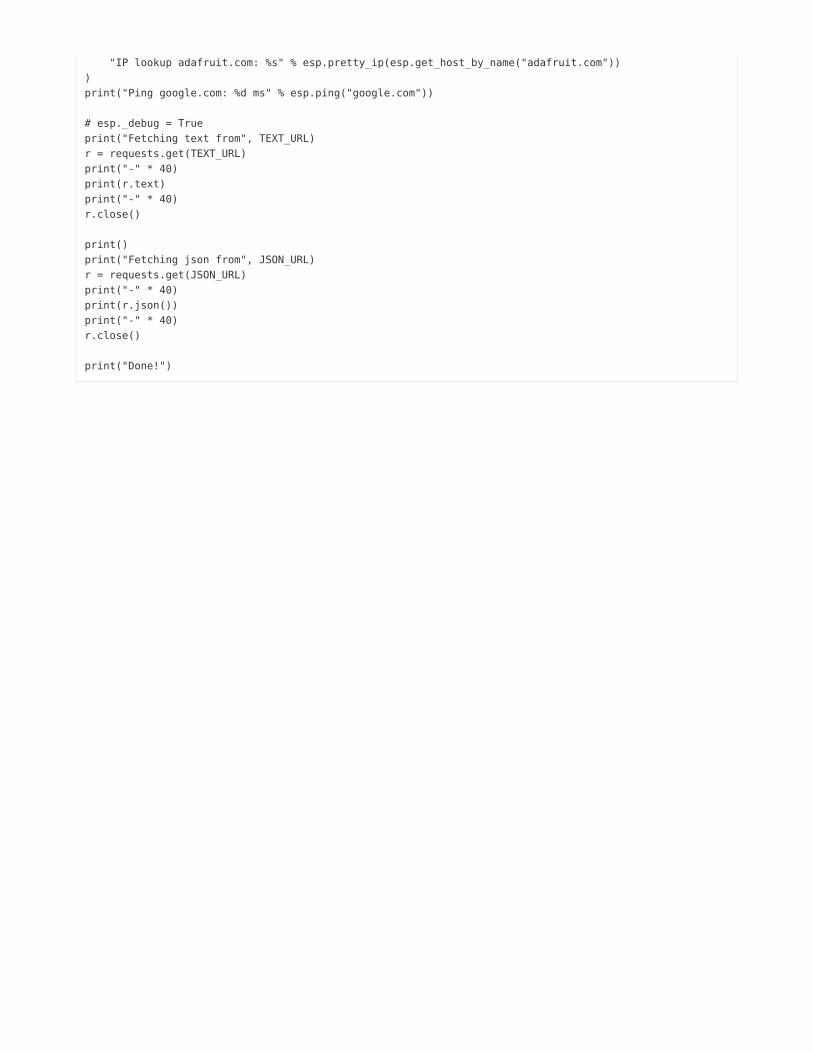
"IP lookup adafruit.com: %s" % esp.pretty_ip(esp.get_host_by_name("adafruit.com")))print("Ping google.com: %d ms" % esp.ping("google.com"))
# esp._debug = Trueprint("Fetching text from", TEXT_URL)r = requests.get(TEXT_URL)print("-" * 40)print(r.text)print("-" * 40)r.close()
print()print("Fetching json from", JSON_URL)r = requests.get(JSON_URL)print("-" * 40)print(r.json())print("-" * 40)r.close()
print("Done!")
And save it to your board, with the name code.py .
Then go down to this line
esp.connect_AP(b'MY_SSID_NAME', b'MY_SSID_PASSWORD')
and change MY_SSID_NAME and MY_SSID_PASSWORD to your access point name and password, keeping them
within the '' quotes. (This example doesn't use the secrets' file, but it's also very stand-alone so if other things seem tonot work you can always re-load this to verify basic connectivity.) You should get something like the following:
As mentioned, this first connection example doesn't use a secrets file - you'll hand-enter your SSID/password to verify connectivity first!�
© Adafruit Industries https://learn.adafruit.com/pyportal-iot-plant-monitor-with-aws-iot-and-circuitpython Page 28 of 54

In order, the example code...
Initializes the ESP32 over SPI using the SPI port and 3 control pins:
esp32_cs = DigitalInOut(board.ESP_CS)esp32_ready = DigitalInOut(board.ESP_BUSY)esp32_reset = DigitalInOut(board.ESP_RESET)
spi = busio.SPI(board.SCK, board.MOSI, board.MISO)esp = adafruit_esp32spi.ESP_SPIcontrol(spi, esp32_cs, esp32_ready, esp32_reset)
Tells our requests library the type of socket we're using (socket type varies by connectivity type - we'll be using
the adafruit_esp32spi_socket for this example). We'll also set the interface to an esp object. This is a little bit of a
hack, but it lets us use requests like CPython does.
requests.set_socket(socket, esp)
Verifies an ESP32 is found, checks the firmware and MAC address
if esp.status == adafruit_esp32spi.WL_IDLE_STATUS: print("ESP32 found and in idle mode")print("Firmware vers.", esp.firmware_version)print("MAC addr:", [hex(i) for i in esp.MAC_address])
© Adafruit Industries https://learn.adafruit.com/pyportal-iot-plant-monitor-with-aws-iot-and-circuitpython Page 29 of 54

Performs a scan of all access points it can see and prints out the name and signal strength:
for ap in esp.scan_networks(): print("\t%s\t\tRSSI: %d" % (str(ap['ssid'], 'utf-8'), ap['rssi']))
Connects to the AP we've defined here, then prints out the local IP address, attempts to do a domain name lookup andping google.com to check network connectivity (note sometimes the ping fails or takes a while, this isn't a big deal)
print("Connecting to AP...")esp.connect_AP(b'MY_SSID_NAME', b'MY_SSID_PASSWORD')print("Connected to", str(esp.ssid, 'utf-8'), "\tRSSI:", esp.rssi)print("My IP address is", esp.pretty_ip(esp.ip_address))print("IP lookup adafruit.com: %s" % esp.pretty_ip(esp.get_host_by_name("adafruit.com")))print("Ping google.com: %d ms" % esp.ping("google.com"))
OK now we're getting to the really interesting part. With a SAMD51 or other large-RAM (well, over 32 KB) device, wecan do a lot of neat tricks. Like for example we can implement an interface a lot like requests (https://adafru.it/E9o) -which makes getting data really really easy
To read in all the text from a web URL call requests.get - you can pass in https URLs for SSL connectivity
TEXT_URL = "http://wifitest.adafruit.com/testwifi/index.html"print("Fetching text from", TEXT_URL)r = requests.get(TEXT_URL)print('-'*40)print(r.text)print('-'*40)r.close()
Or, if the data is in structured JSON, you can get the json pre-parsed into a Python dictionary that can be easily queriedor traversed. (Again, only for nRF52840, M4 and other high-RAM boards)
JSON_URL = "http://api.coindesk.com/v1/bpi/currentprice/USD.json"print("Fetching json from", JSON_URL)r = requests.get(JSON_URL)print('-'*40)print(r.json())print('-'*40)r.close()
Requests
We've written a requests-like (https://adafru.it/Kpa) library for web interfacingnamed Adafruit_CircuitPython_Requests (https://adafru.it/FpW). This library allows you to send HTTP/1.1 requestswithout "crafting" them and provides helpful methods for parsing the response from the server.
# adafruit_requests usage with an esp32spi_socketimport boardimport busiofrom digitalio import DigitalInOutimport adafruit_esp32spi.adafruit_esp32spi_socket as socket
© Adafruit Industries https://learn.adafruit.com/pyportal-iot-plant-monitor-with-aws-iot-and-circuitpython Page 30 of 54
import adafruit_esp32spi.adafruit_esp32spi_socket as socketfrom adafruit_esp32spi import adafruit_esp32spiimport adafruit_requests as requests
# If you are using a board with pre-defined ESP32 Pins:esp32_cs = DigitalInOut(board.ESP_CS)esp32_ready = DigitalInOut(board.ESP_BUSY)esp32_reset = DigitalInOut(board.ESP_RESET)
# If you have an externally connected ESP32:# esp32_cs = DigitalInOut(board.D9)# esp32_ready = DigitalInOut(board.D10)# esp32_reset = DigitalInOut(board.D5)
spi = busio.SPI(board.SCK, board.MOSI, board.MISO)esp = adafruit_esp32spi.ESP_SPIcontrol(spi, esp32_cs, esp32_ready, esp32_reset)
print("Connecting to AP...")while not esp.is_connected: try: esp.connect_AP(b"MY_SSID_NAME", b"MY_SSID_PASSWORD") except RuntimeError as e: print("could not connect to AP, retrying: ", e) continueprint("Connected to", str(esp.ssid, "utf-8"), "\tRSSI:", esp.rssi)
# Initialize a requests object with a socket and esp32spi interfacerequests.set_socket(socket, esp)
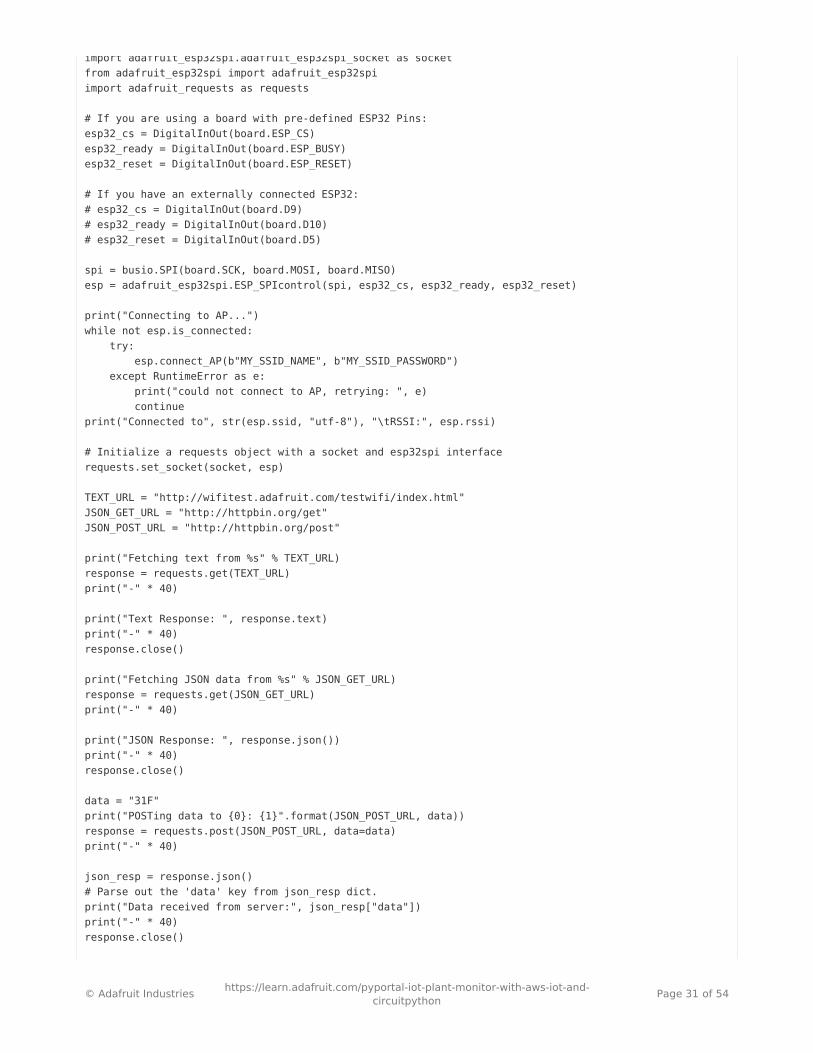
TEXT_URL = "http://wifitest.adafruit.com/testwifi/index.html"JSON_GET_URL = "http://httpbin.org/get"JSON_POST_URL = "http://httpbin.org/post"
print("Fetching text from %s" % TEXT_URL)response = requests.get(TEXT_URL)print("-" * 40)
print("Text Response: ", response.text)print("-" * 40)response.close()
print("Fetching JSON data from %s" % JSON_GET_URL)response = requests.get(JSON_GET_URL)print("-" * 40)
print("JSON Response: ", response.json())print("-" * 40)response.close()
data = "31F"print("POSTing data to {0}: {1}".format(JSON_POST_URL, data))response = requests.post(JSON_POST_URL, data=data)print("-" * 40)
json_resp = response.json()# Parse out the 'data' key from json_resp dict.print("Data received from server:", json_resp["data"])print("-" * 40)response.close()
© Adafruit Industries https://learn.adafruit.com/pyportal-iot-plant-monitor-with-aws-iot-and-circuitpython Page 31 of 54

json_data = {"Date": "July 25, 2019"}print("POSTing data to {0}: {1}".format(JSON_POST_URL, json_data))response = requests.post(JSON_POST_URL, json=json_data)print("-" * 40)
json_resp = response.json()# Parse out the 'json' key from json_resp dict.print("JSON Data received from server:", json_resp["json"])print("-" * 40)response.close()
The code first sets up the ESP32SPI interface. Then, it initializes a request object using an ESP32 socket and the
esp object.
import boardimport busiofrom digitalio import DigitalInOutimport adafruit_esp32spi.adafruit_esp32spi_socket as socketfrom adafruit_esp32spi import adafruit_esp32spiimport adafruit_requests as requests
# If you are using a board with pre-defined ESP32 Pins:esp32_cs = DigitalInOut(board.ESP_CS)esp32_ready = DigitalInOut(board.ESP_BUSY)esp32_reset = DigitalInOut(board.ESP_RESET)
# If you have an externally connected ESP32:# esp32_cs = DigitalInOut(board.D9)# esp32_ready = DigitalInOut(board.D10)# esp32_reset = DigitalInOut(board.D5)
spi = busio.SPI(board.SCK, board.MOSI, board.MISO)esp = adafruit_esp32spi.ESP_SPIcontrol(spi, esp32_cs, esp32_ready, esp32_reset)
print("Connecting to AP...")while not esp.is_connected: try: esp.connect_AP(b'MY_SSID_NAME', b'MY_SSID_PASSWORD') except RuntimeError as e: print("could not connect to AP, retrying: ",e) continueprint("Connected to", str(esp.ssid, 'utf-8'), "\tRSSI:", esp.rssi)
# Initialize a requests object with a socket and esp32spi interfacerequests.set_socket(socket, esp)
HTTP GET with Requests
The code makes a HTTP GET request to Adafruit's WiFi testing website- http://wifitest.adafruit.com/testwifi/index.html (https://adafru.it/FpZ).
To do this, we'll pass the URL into requests.get() . We're also going to save the response from the server into a
variable named response .
While we requested data from the server, we'd what the server responded with. Since we already saved the
© Adafruit Industries https://learn.adafruit.com/pyportal-iot-plant-monitor-with-aws-iot-and-circuitpython Page 32 of 54

server's response , we can read it back. Luckily for us, requests automatically decodes the server's response into
human-readable text, you can read it back by calling response.text .
Lastly, we'll perform a bit of cleanup by calling response.close() . This closes, deletes, and collect's the response's
data.
print("Fetching text from %s"%TEXT_URL)response = requests.get(TEXT_URL)print('-'*40)
print("Text Response: ", response.text)print('-'*40)response.close()
While some servers respond with text, some respond with json-formatted data consisting of attribute–value pairs.
CircuitPython_Requests can convert a JSON-formatted response from a server into a CPython dict. object.
We can also fetch and parse json data. We'll send a HTTP get to a url we know returns a json-formatted response(instead of text data).
Then, the code calls response.json() to convert the response to a CPython dict .
print("Fetching JSON data from %s"%JSON_GET_URL)response = requests.get(JSON_GET_URL)print('-'*40)
print("JSON Response: ", response.json())print('-'*40)response.close()
HTTP POST with Requests
Requests can also POST data to a server by calling the requests.post method, passing it a data value.
data = '31F'print("POSTing data to {0}: {1}".format(JSON_POST_URL, data))response = requests.post(JSON_POST_URL, data=data)print('-'*40)
json_resp = response.json()# Parse out the 'data' key from json_resp dict.print("Data received from server:", json_resp['data'])print('-'*40)response.close()
You can also post json-formatted data to a server by passing json_data into the requests.post method.
© Adafruit Industries https://learn.adafruit.com/pyportal-iot-plant-monitor-with-aws-iot-and-circuitpython Page 33 of 54
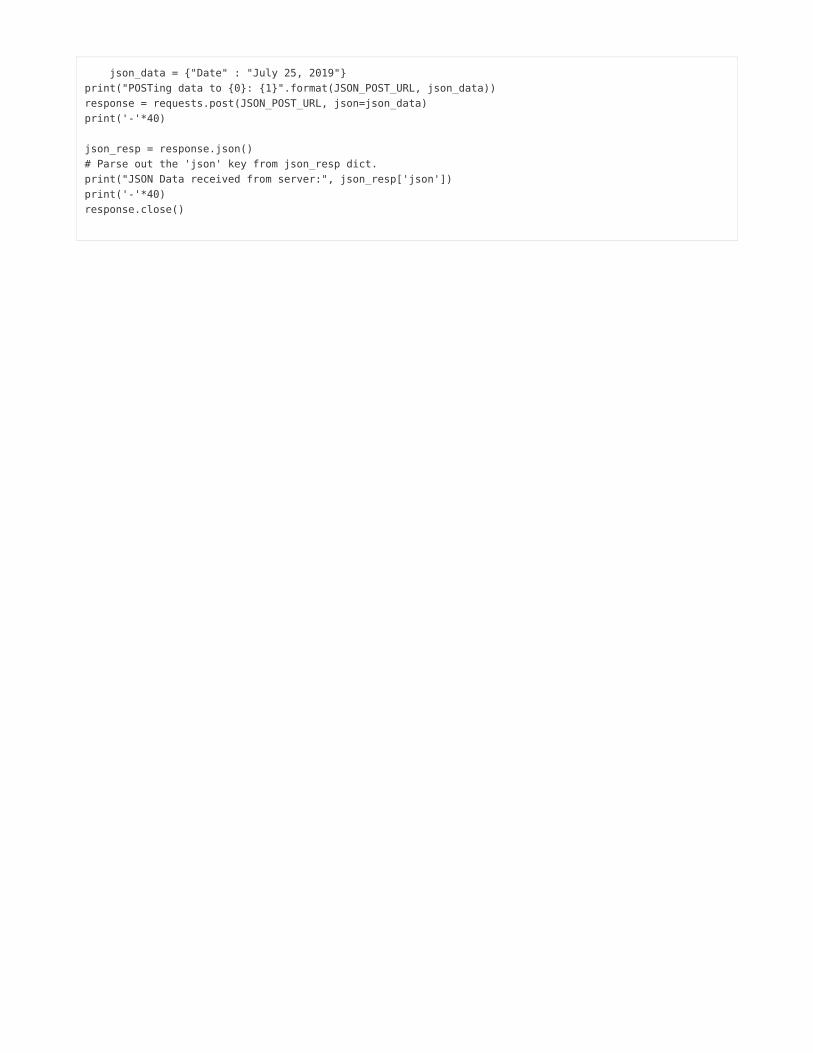
json_data = {"Date" : "July 25, 2019"}print("POSTing data to {0}: {1}".format(JSON_POST_URL, json_data))response = requests.post(JSON_POST_URL, json=json_data)print('-'*40)
json_resp = response.json()# Parse out the 'json' key from json_resp dict.print("JSON Data received from server:", json_resp['json'])print('-'*40)response.close()
Advanced Requests Usage
Want to send custom HTTP headers, parse the response as raw bytes, or handle a response's http status code in yourCircuitPython code?
We've written an example to show advanced usage of the requests module below.
© Adafruit Industries https://learn.adafruit.com/pyportal-iot-plant-monitor-with-aws-iot-and-circuitpython Page 34 of 54

import boardimport busiofrom digitalio import DigitalInOutimport adafruit_esp32spi.adafruit_esp32spi_socket as socketfrom adafruit_esp32spi import adafruit_esp32spiimport adafruit_requests as requests
# If you are using a board with pre-defined ESP32 Pins:esp32_cs = DigitalInOut(board.ESP_CS)esp32_ready = DigitalInOut(board.ESP_BUSY)esp32_reset = DigitalInOut(board.ESP_RESET)
# If you have an externally connected ESP32:# esp32_cs = DigitalInOut(board.D9)# esp32_ready = DigitalInOut(board.D10)# esp32_reset = DigitalInOut(board.D5)
spi = busio.SPI(board.SCK, board.MOSI, board.MISO)esp = adafruit_esp32spi.ESP_SPIcontrol(spi, esp32_cs, esp32_ready, esp32_reset)
print("Connecting to AP...")while not esp.is_connected: try: esp.connect_AP(b"MY_SSID_NAME", b"MY_SSID_PASSWORD") except RuntimeError as e: print("could not connect to AP, retrying: ", e) continueprint("Connected to", str(esp.ssid, "utf-8"), "\tRSSI:", esp.rssi)
# Initialize a requests object with a socket and esp32spi interfacerequests.set_socket(socket, esp)
JSON_GET_URL = "http://httpbin.org/get"
# Define a custom header as a dict.headers = {"user-agent": "blinka/1.0.0"}
print("Fetching JSON data from %s..." % JSON_GET_URL)response = requests.get(JSON_GET_URL, headers=headers)print("-" * 60)
json_data = response.json()headers = json_data["headers"]print("Response's Custom User-Agent Header: {0}".format(headers["User-Agent"]))print("-" * 60)
# Read Response's HTTP status codeprint("Response HTTP Status Code: ", response.status_code)print("-" * 60)
# Read Response, as raw bytes instead of pretty textprint("Raw Response: ", response.content)
# Close, delete and collect the response dataresponse.close()
WiFi Manager
© Adafruit Industries https://learn.adafruit.com/pyportal-iot-plant-monitor-with-aws-iot-and-circuitpython Page 35 of 54

That simpletest example works but its a little finicky - you need to constantly check WiFi status and have many loops tomanage connections and disconnections. For more advanced uses, we recommend using the WiFiManager object. Itwill wrap the connection/status/requests loop for you - reconnecting if WiFi drops, resetting the ESP32 if it gets into abad state, etc.
Here's a more advanced example that shows the WiFi manager and also how to POST data with some extra headers:
import timeimport boardimport busiofrom digitalio import DigitalInOutimport neopixelfrom adafruit_esp32spi import adafruit_esp32spifrom adafruit_esp32spi import adafruit_esp32spi_wifimanager
print("ESP32 SPI webclient test")
# Get wifi details and more from a secrets.py filetry: from secrets import secretsexcept ImportError: print("WiFi secrets are kept in secrets.py, please add them there!") raise
# If you are using a board with pre-defined ESP32 Pins:esp32_cs = DigitalInOut(board.ESP_CS)esp32_ready = DigitalInOut(board.ESP_BUSY)esp32_reset = DigitalInOut(board.ESP_RESET)
# If you have an externally connected ESP32:# esp32_cs = DigitalInOut(board.D9)# esp32_ready = DigitalInOut(board.D10)# esp32_reset = DigitalInOut(board.D5)
spi = busio.SPI(board.SCK, board.MOSI, board.MISO)esp = adafruit_esp32spi.ESP_SPIcontrol(spi, esp32_cs, esp32_ready, esp32_reset)"""Use below for Most Boards"""status_light = neopixel.NeoPixel( board.NEOPIXEL, 1, brightness=0.2) # Uncomment for Most Boards"""Uncomment below for ItsyBitsy M4"""# status_light = dotstar.DotStar(board.APA102_SCK, board.APA102_MOSI, 1, brightness=0.2)# Uncomment below for an externally defined RGB LED# import adafruit_rgbled# from adafruit_esp32spi import PWMOut# RED_LED = PWMOut.PWMOut(esp, 26)# GREEN_LED = PWMOut.PWMOut(esp, 27)# BLUE_LED = PWMOut.PWMOut(esp, 25)# status_light = adafruit_rgbled.RGBLED(RED_LED, BLUE_LED, GREEN_LED)wifi = adafruit_esp32spi_wifimanager.ESPSPI_WiFiManager(esp, secrets, status_light)
counter = 0
while True: try: print("Posting data...", end="") data = counter feed = "test"
© Adafruit Industries https://learn.adafruit.com/pyportal-iot-plant-monitor-with-aws-iot-and-circuitpython Page 36 of 54
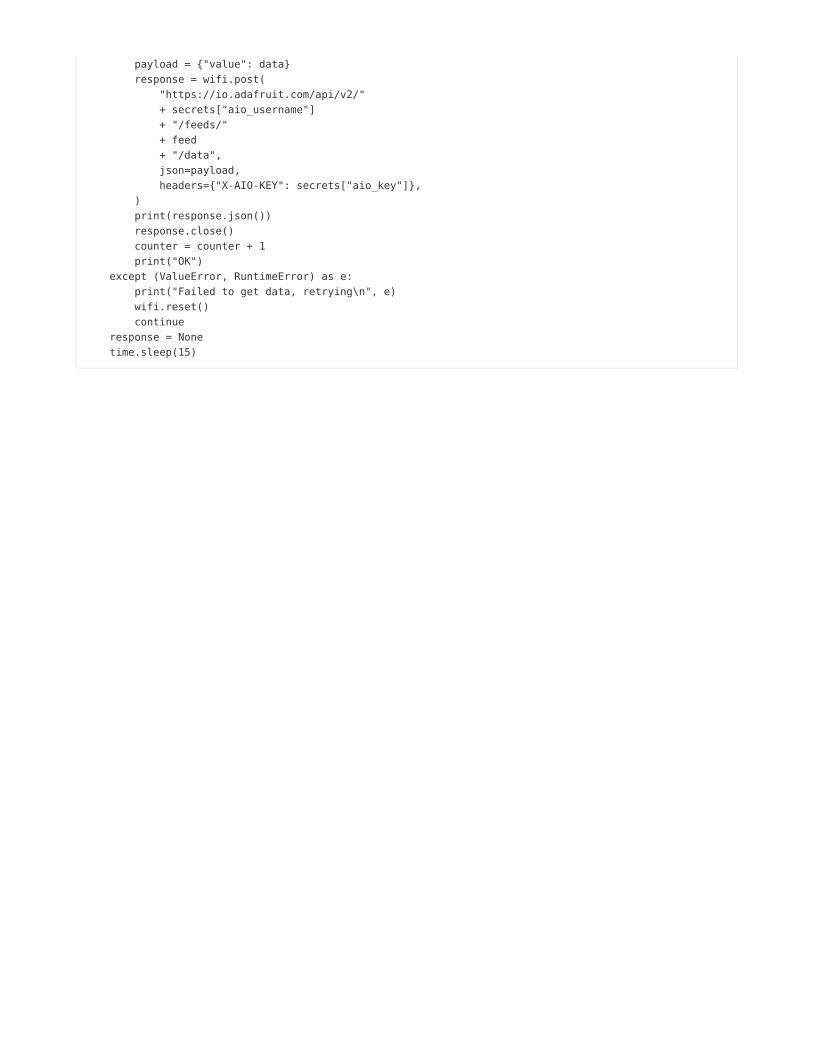
payload = {"value": data} response = wifi.post( "https://io.adafruit.com/api/v2/" + secrets["aio_username"] + "/feeds/" + feed + "/data", json=payload, headers={"X-AIO-KEY": secrets["aio_key"]}, ) print(response.json()) response.close() counter = counter + 1 print("OK") except (ValueError, RuntimeError) as e: print("Failed to get data, retrying\n", e) wifi.reset() continue response = None time.sleep(15)
You'll note here we use a secrets.py file to manage our SSID info. The wifimanager is given the ESP32 object, secretsand a neopixel for status indication.
Note, you'll need to add a some additional information to your secrets file so that the code can query the Adafruit IOAPI:
aio_usernameaio_key
You can go to your adafruit.io View AIO Key link to get those two values and add them to the secrets file, which willnow look something like this:
# This file is where you keep secret settings, passwords, and tokens!# If you put them in the code you risk committing that info or sharing it
secrets = { 'ssid' : '_your_ssid_', 'password' : '_your_wifi_password_', 'timezone' : "America/Los_Angeles", # http://worldtimeapi.org/timezones 'aio_username' : '_your_aio_username_', 'aio_key' : '_your_aio_key_', }
Next, set up an Adafruit IO feed named test
If you do not know how to set up a feed, follow this page and come back when you've set up a feed namedtest . (https://adafru.it/f5k)
We can then have a simple loop for posting data to Adafruit IO without having to deal with connecting or initializing thehardware!
Take a look at your test feed on Adafruit.io and you'll see the value increase each time the CircuitPython board postsdata to it!
© Adafruit Industries https://learn.adafruit.com/pyportal-iot-plant-monitor-with-aws-iot-and-circuitpython Page 37 of 54

© Adafruit Industries https://learn.adafruit.com/pyportal-iot-plant-monitor-with-aws-iot-and-circuitpython Page 38 of 54

Code Setup
CircuitPython Library Installation
First make sure you are running the latest version of Adafruit CircuitPython (https://adafru.it/Egk) for your board.
Next you'll need to install the necessary libraries to use the hardware--carefully follow the steps to find and install theselibraries from Adafruit's CircuitPython library bundle (https://adafru.it/zdx) matching your version of CircuitPython.PyPortal requires at least CircuitPython version 4.0.0.
Before continuing make sure your board's lib folder has the following files and folders copied over:
adafruit_aws_iot.mpyadafruit_esp32spiadafruit_requests.mpyadafruit_bus_deviceadafruit_logging.mpyadafruit_seesawadafruit_display_textadafruit_minimqtt.mpyneopixel.mpy
Add CircuitPython Code and Project Assets
In the embedded code element below, click on the Download: Project Zip link, and save the .zip archive file to yourcomputer.
Then, uncompress the .zip file, it will unpack to a folder named PyPortal_AWS_IOT_Planter.
Copy the contents of PyPortal_AWS_IOT_Planter directory to your PyPortal's CIRCUITPY drive.
"""PyPortal Amazon AWS IoT Plant Monitor=========================================================Log your plant's vitals to AWS IoT and receive emailnotifications when it needs watering with your PyPortal.
Author: Brent Rubell for Adafruit Industries, 2019"""import timeimport jsonimport boardimport busiofrom digitalio import DigitalInOutimport neopixelfrom adafruit_esp32spi import adafruit_esp32spifrom adafruit_esp32spi import adafruit_esp32spi_wifimanagerimport adafruit_esp32spi.adafruit_esp32spi_socket as socketimport adafruit_minimqtt as MQTTfrom adafruit_aws_iot import MQTT_CLIENTfrom adafruit_seesaw.seesaw import Seesawimport aws_gfx_helper
© Adafruit Industries https://learn.adafruit.com/pyportal-iot-plant-monitor-with-aws-iot-and-circuitpython Page 39 of 54
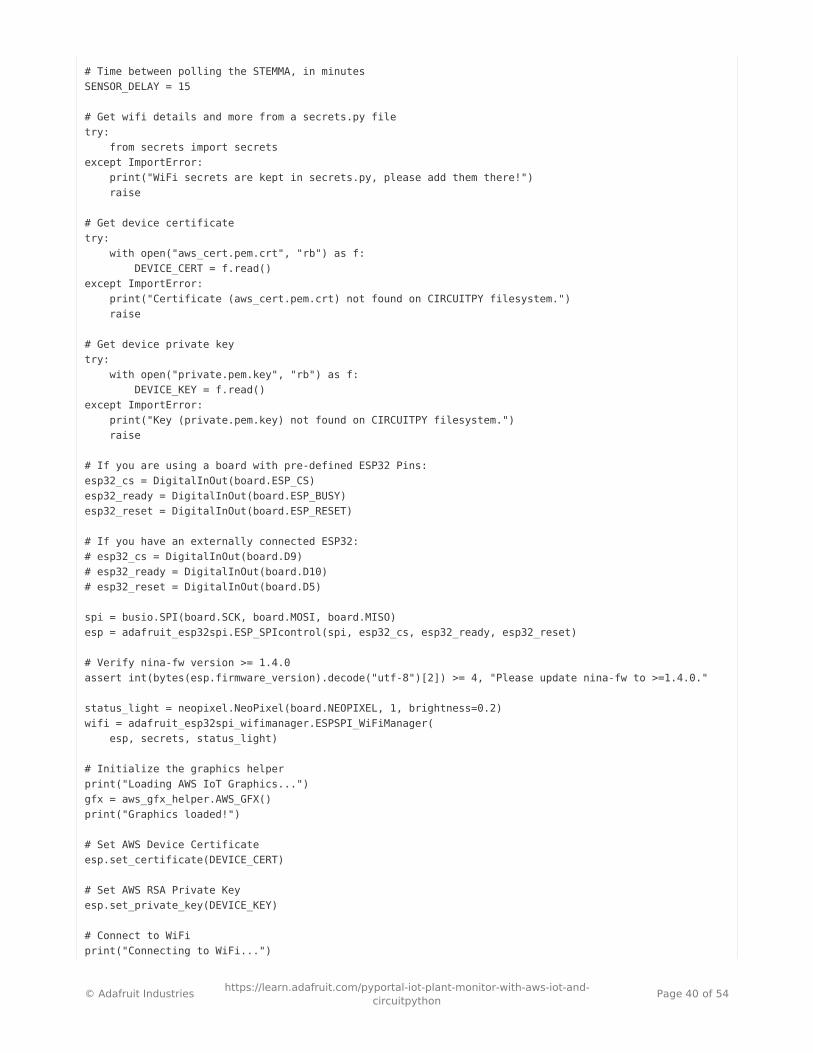
# Time between polling the STEMMA, in minutesSENSOR_DELAY = 15
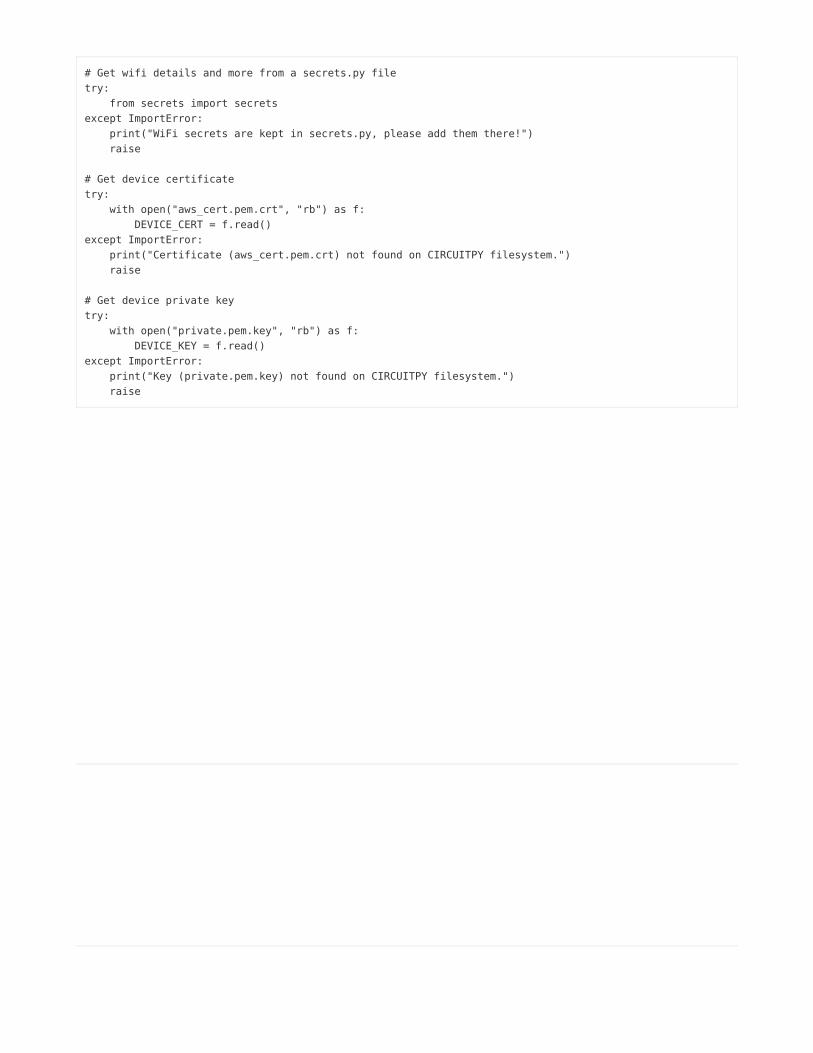
# Get wifi details and more from a secrets.py filetry: from secrets import secretsexcept ImportError: print("WiFi secrets are kept in secrets.py, please add them there!") raise
# Get device certificatetry: with open("aws_cert.pem.crt", "rb") as f: DEVICE_CERT = f.read()except ImportError: print("Certificate (aws_cert.pem.crt) not found on CIRCUITPY filesystem.") raise
# Get device private keytry: with open("private.pem.key", "rb") as f: DEVICE_KEY = f.read()except ImportError: print("Key (private.pem.key) not found on CIRCUITPY filesystem.") raise
# If you are using a board with pre-defined ESP32 Pins:esp32_cs = DigitalInOut(board.ESP_CS)esp32_ready = DigitalInOut(board.ESP_BUSY)esp32_reset = DigitalInOut(board.ESP_RESET)
# If you have an externally connected ESP32:# esp32_cs = DigitalInOut(board.D9)# esp32_ready = DigitalInOut(board.D10)# esp32_reset = DigitalInOut(board.D5)
spi = busio.SPI(board.SCK, board.MOSI, board.MISO)esp = adafruit_esp32spi.ESP_SPIcontrol(spi, esp32_cs, esp32_ready, esp32_reset)
# Verify nina-fw version >= 1.4.0assert int(bytes(esp.firmware_version).decode("utf-8")[2]) >= 4, "Please update nina-fw to >=1.4.0."
status_light = neopixel.NeoPixel(board.NEOPIXEL, 1, brightness=0.2)wifi = adafruit_esp32spi_wifimanager.ESPSPI_WiFiManager( esp, secrets, status_light)
# Initialize the graphics helperprint("Loading AWS IoT Graphics...")gfx = aws_gfx_helper.AWS_GFX()print("Graphics loaded!")
# Set AWS Device Certificateesp.set_certificate(DEVICE_CERT)
# Set AWS RSA Private Keyesp.set_private_key(DEVICE_KEY)
# Connect to WiFiprint("Connecting to WiFi...")
© Adafruit Industries https://learn.adafruit.com/pyportal-iot-plant-monitor-with-aws-iot-and-circuitpython Page 40 of 54
wifi.connect()print("Connected!")
# Initialize MQTT interface with the esp interfaceMQTT.set_socket(socket, esp)
# Soil Sensor Setupi2c_bus = busio.I2C(board.SCL, board.SDA)ss = Seesaw(i2c_bus, addr=0x36)
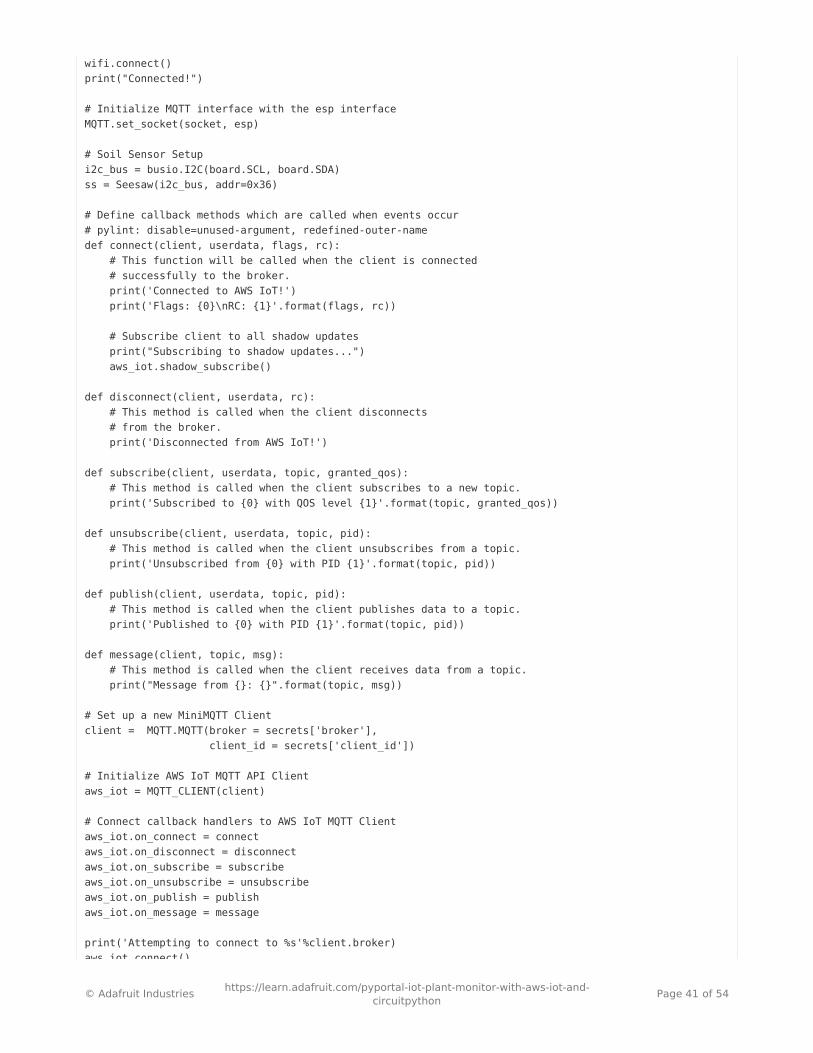
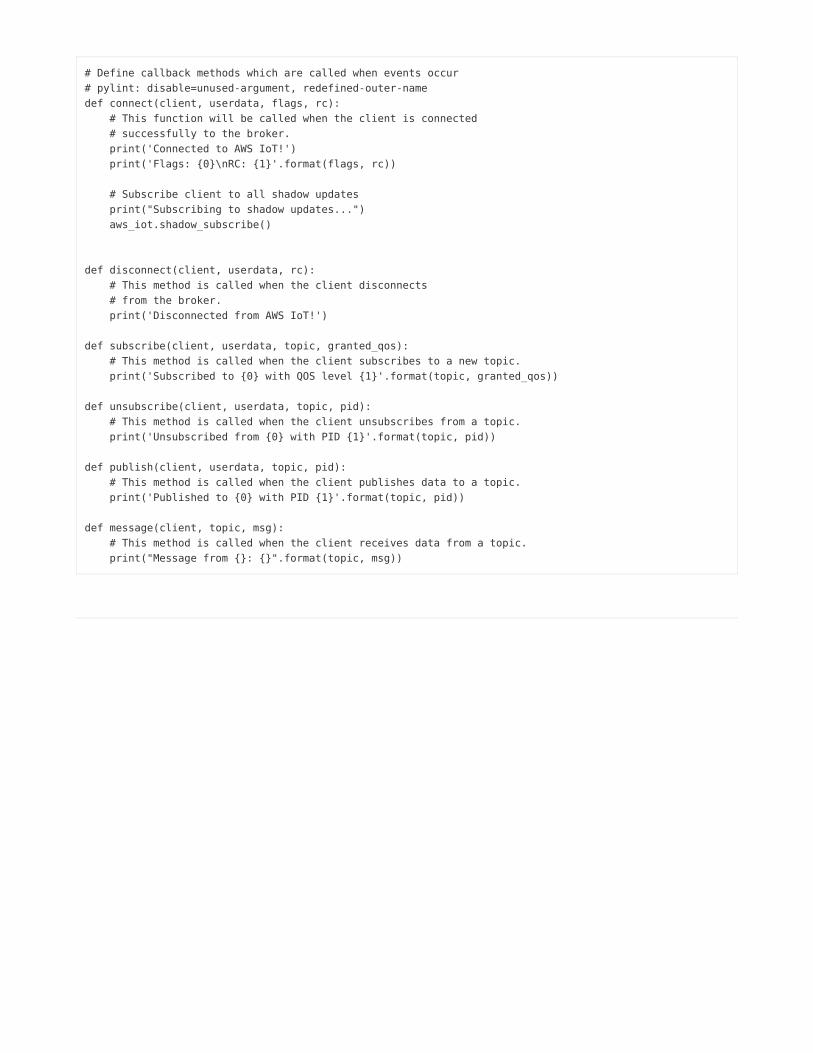
# Define callback methods which are called when events occur# pylint: disable=unused-argument, redefined-outer-namedef connect(client, userdata, flags, rc): # This function will be called when the client is connected # successfully to the broker. print('Connected to AWS IoT!') print('Flags: {0}\nRC: {1}'.format(flags, rc))
# Subscribe client to all shadow updates print("Subscribing to shadow updates...") aws_iot.shadow_subscribe()
def disconnect(client, userdata, rc): # This method is called when the client disconnects # from the broker. print('Disconnected from AWS IoT!')
def subscribe(client, userdata, topic, granted_qos): # This method is called when the client subscribes to a new topic. print('Subscribed to {0} with QOS level {1}'.format(topic, granted_qos))
def unsubscribe(client, userdata, topic, pid): # This method is called when the client unsubscribes from a topic. print('Unsubscribed from {0} with PID {1}'.format(topic, pid))
def publish(client, userdata, topic, pid): # This method is called when the client publishes data to a topic. print('Published to {0} with PID {1}'.format(topic, pid))
def message(client, topic, msg): # This method is called when the client receives data from a topic. print("Message from {}: {}".format(topic, msg))
# Set up a new MiniMQTT Clientclient = MQTT.MQTT(broker = secrets['broker'], client_id = secrets['client_id'])
# Initialize AWS IoT MQTT API Clientaws_iot = MQTT_CLIENT(client)
# Connect callback handlers to AWS IoT MQTT Clientaws_iot.on_connect = connectaws_iot.on_disconnect = disconnectaws_iot.on_subscribe = subscribeaws_iot.on_unsubscribe = unsubscribeaws_iot.on_publish = publishaws_iot.on_message = message
print('Attempting to connect to %s'%client.broker)aws_iot.connect()
© Adafruit Industries https://learn.adafruit.com/pyportal-iot-plant-monitor-with-aws-iot-and-circuitpython Page 41 of 54
aws_iot.connect()
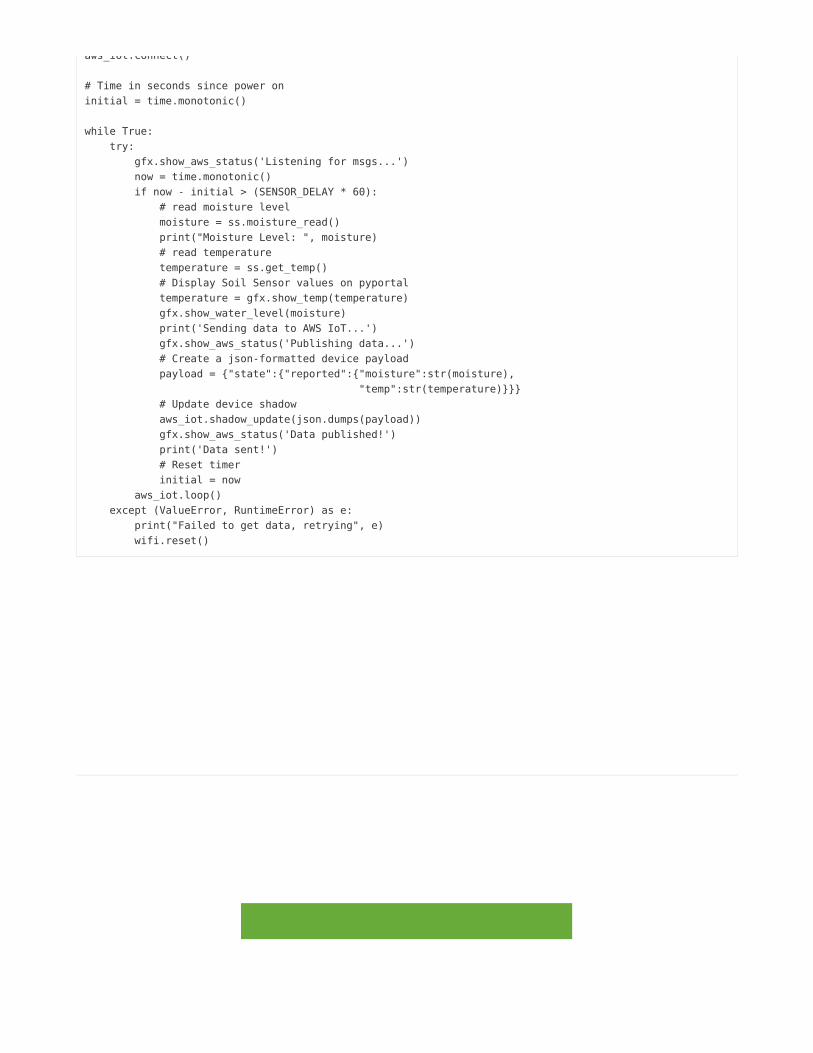
# Time in seconds since power oninitial = time.monotonic()
while True: try: gfx.show_aws_status('Listening for msgs...') now = time.monotonic() if now - initial > (SENSOR_DELAY * 60): # read moisture level moisture = ss.moisture_read() print("Moisture Level: ", moisture) # read temperature temperature = ss.get_temp() # Display Soil Sensor values on pyportal temperature = gfx.show_temp(temperature) gfx.show_water_level(moisture) print('Sending data to AWS IoT...') gfx.show_aws_status('Publishing data...') # Create a json-formatted device payload payload = {"state":{"reported":{"moisture":str(moisture), "temp":str(temperature)}}} # Update device shadow aws_iot.shadow_update(json.dumps(payload)) gfx.show_aws_status('Data published!') print('Data sent!') # Reset timer initial = now aws_iot.loop() except (ValueError, RuntimeError) as e: print("Failed to get data, retrying", e) wifi.reset()
This is what the final contents of the CIRCUITPY drive will look like:
Install the Mu Editor
This guide requires you to edit and interact with CircuitPython code. While you can use any text editor of yourchoosing, Mu is a simple code editor that works with the Adafruit CircuitPython boards. It's written in Python andworks on Windows, MacOS, Linux and Raspberry Pi. The serial console is built right in, so you get immediate feedbackfrom your board's serial output!
Before proceeding, click the button below to install the Mu Editor. There are versions for PC, mac, and Linux.
https://adafru.it/ANO
https://adafru.it/ANO
© Adafruit Industries https://learn.adafruit.com/pyportal-iot-plant-monitor-with-aws-iot-and-circuitpython Page 42 of 54

Secrets File Setup
Before you set up the secrets file for this project, you'll need to retrieve your AWS IOT's custom endpoint URL.
Navigate to your AWS IoT dashboard and click Settings on the sidebar. Your custom endpoint will be posted at the topof this page. Copy this value and save it somewhere safe, you'll need it in the next step.
Open the secrets.py file on your CIRCUITPY drive using Mu. You're going to edit the file to enter your local WiFicredentials along with data about your AWS IoT configuration.
Make the following changes to the code below in the secrets.py file:
Replace MY_WIFI_SSID with the name of your WiFi SSID
Replace MY_WIFI_PASSWORD with your WiFi's password
Replace broker with the URL of your AWS IoT custom endpoint
# This file is where you keep secret settings, passwords, and tokens!# If you put them in the code you risk committing that info or sharing it
secrets = { 'ssid' : 'MY_WIFI_SSID', 'password' : 'MY_WIFI_PASSWORD', "timezone" : "America/New_York", # http://worldtimeapi.org/timezones "broker" : "MY_AWS_IOT_ENDPOINT_URL", "client_id": "PyPortal"}
Adding your AWS IoT Device Certificate and Key to CIRCUITPY
CircuitPython makes loading your AWS IoT device certificate and private key as easy as drag and drop. Seriously -we're going to drag and drop the two files we downloaded earlier onto the filesystem.
AWS IoT names the certificate and RSA private key randomly (your private key file should look something like:8a1018d558-private.pem.key ). You're going to rename the key/certificate so they'll be easier to reference them in
the code.
Rename your key from RANDOMALPHANUMERICSTRING-private.pem.key to private.pem.key
© Adafruit Industries https://learn.adafruit.com/pyportal-iot-plant-monitor-with-aws-iot-and-circuitpython Page 43 of 54

Rename your certificate from RANDOMALPHANUMERICSTRING-certificate.pem.crt to aws_cert.pem.crt .
Then, copy them over to the CIRCUITPY volume.
With the certificates copied over, you're good to go! Let's continue to the usage section.
© Adafruit Industries https://learn.adafruit.com/pyportal-iot-plant-monitor-with-aws-iot-and-circuitpython Page 44 of 54

Code Usage
When the PyPortal starts up, it will first load the
aws_splash.bmp image in the images folder on your
CIRCUITPY drive. This is a "loading screen" while the
code waits for the fonts and display objects load on the
screen.
Opening the REPL will help you view what's happening in the code. First, the code attempts to load the PyPortal'sgraphical interface
Loading AWS IoT Graphics...Displaying splash screenSet icon to /images/aws_splash.bmpSetting up labels...Graphics loaded!
Then, the PyPortal's ESP32 will attempt to connect to the WiFi network defined in the secrets.py file. Once connectedto a wireless network, the PyPortal will attempt to authenticate with the AWS IOT endpoint with the certificate andprivate key .
Connecting to WiFi...Connected!Attempting to connect to a39rd7hlvdi9mt-ats.iot.us-east-2.amazonaws.comConnected to AWS IoT!
Once connected, the MiniMQTT client subscribes to all messages on the device's shadow topic.
Subscribing to shadow updates...Subscribed to $aws/things/PyPortal/shadow/update/# with QOS level 1
Every SENSOR_DELAY minutes, the PyPortal will read the STEMMA sensor's moisture level and temperature. Then, it'll
send it to Amazon AWS IoT.
Moisture Level: 380Temperature: 61°FSending data to AWS IoT...Data sent!
© Adafruit Industries https://learn.adafruit.com/pyportal-iot-plant-monitor-with-aws-iot-and-circuitpython Page 45 of 54

Since you subscribed to the $aws/things/thingName/shadow/update feed, you'll see a message returned by the
message callback signifying that the message has been accepted by the Adafruit AWS device shadow.
Message from $aws/things/PyPortal/shadow/update/accepted: {"state":{"reported":{"temp":"61","moisture":"380"}}
Viewing Sensor Data on PyPortal
You should see the PyPortal display update to display
the temperature value and moisture level.
The status indicator at the bottom of the PyPortal will
display when it's sending data to AWS IoT. The PyPortal
only sends data to AWS IoT every
SENSOR_DELAY minutes. Adjust this value in the code
to increase or decrease the delay.
Receiving Emails from AWS IoT and Amazon SNS
Once the moisture level dips below 400 (the limit you set earlier), Amazon Simple Notification Service will send anemail to you to remind you to water your plant.
Want to change this value? Simply edit the AWS IoT Rule you configured earlier in the guide here (https://adafru.it/GcF).
Remember to Check Your Inbox!
AWS SNS will deliver up to a thousand emails to your inbox, free of charge. After that limit is reached, SNS will chargeyou $2.00 per 100,000 emails.
While it's unlikely your PyPortal Plant Monitor will ever reach 1,000 emails per month, it's important to check the emailconnected to Amazon SNS to ensure your code isn't continuously firing notifications when your plant needs to bewatered. You may also want to increase the SENSOR_DELAY in your code to check the plant's vitals every few hours,
instead of every fifteen minutes.
Visit the Amazon SNS product page to learn more about its pricing (https://adafru.it/GcG).
© Adafruit Industries https://learn.adafruit.com/pyportal-iot-plant-monitor-with-aws-iot-and-circuitpython Page 46 of 54

© Adafruit Industries https://learn.adafruit.com/pyportal-iot-plant-monitor-with-aws-iot-and-circuitpython Page 47 of 54

Code Walkthrough
Importing CircuitPython Libraries
import timeimport jsonimport boardimport busiofrom digitalio import DigitalInOutimport neopixelfrom adafruit_esp32spi import adafruit_esp32spifrom adafruit_esp32spi import adafruit_esp32spi_wifimanagerimport adafruit_esp32spi.adafruit_esp32spi_socket as socketfrom adafruit_minimqtt import MQTTfrom adafruit_aws_iot import MQTT_CLIENTfrom adafruit_seesaw.seesaw import Seesawimport aws_gfx_helper
The code first imports all of the modules required to run the code. Some of these libraries are CircuitPython coremodules (https://adafru.it/ETy) (they're "burned into" the firmware) and some of them you dragged into the library folder(lib on the PyPortal's CIRCUITPY drive).
The code for this project imports a special adafruit_aws_iot library. To help simplify managing communication
between your PyPortal and AWS IoT's MQTT API, we wrote a CircuitPython helper modulecalled Adafruit_CircuitPython_AWS_IOT (https://adafru.it/Gcz)
For more information about using the MQTT protocol with CircuitPython - check out our MQTT in CircuitPythonguide on this topic here (https://adafru.it/FGp).
We've also included a aws_gfx_helper.py file which handles displaying the status of the code on the PyPortal'sdisplay.
Configuring the PyPortal's ESP32
The next chunk of code grabs information from a secrets.py file about your WiFi AP configuration, AWS deviceidentifier and AWS IoT endpoint. The device certificate and RSA private key are read into variables, DEVICE_CERT and
DEVICE_KEY .
© Adafruit Industries https://learn.adafruit.com/pyportal-iot-plant-monitor-with-aws-iot-and-circuitpython Page 48 of 54
# Get wifi details and more from a secrets.py filetry: from secrets import secretsexcept ImportError: print("WiFi secrets are kept in secrets.py, please add them there!") raise
# Get device certificatetry: with open("aws_cert.pem.crt", "rb") as f: DEVICE_CERT = f.read()except ImportError: print("Certificate (aws_cert.pem.crt) not found on CIRCUITPY filesystem.") raise
# Get device private keytry: with open("private.pem.key", "rb") as f: DEVICE_KEY = f.read()except ImportError: print("Key (private.pem.key) not found on CIRCUITPY filesystem.") raise
Then, it sets up the ESP32's SPI connections for use with the PyPortal along with a wifi manager for interfacing with
the ESP32.
# If you are using a board with pre-defined ESP32 Pins:esp32_cs = DigitalInOut(board.ESP_CS)esp32_ready = DigitalInOut(board.ESP_BUSY)esp32_reset = DigitalInOut(board.ESP_RESET)
# If you have an externally connected ESP32:# esp32_cs = DigitalInOut(board.D9)# esp32_ready = DigitalInOut(board.D10)# esp32_reset = DigitalInOut(board.D5)
spi = busio.SPI(board.SCK, board.MOSI, board.MISO)esp = adafruit_esp32spi.ESP_SPIcontrol(spi, esp32_cs, esp32_ready, esp32_reset)status_light = neopixel.NeoPixel(board.NEOPIXEL, 1, brightness=0.2)wifi = adafruit_esp32spi_wifimanager.ESPSPI_WiFiManager( esp, secrets, status_light)
Configuring the Graphical Helper
The graphics helper, which manages' the PyPortal's display, is created. If you wish to display the temperature inFahrenheit instead of Celsius, add is_celsius=True to the method call.
# Initialize the graphics helperprint("Loading AWS IoT Graphics...")gfx = aws_gfx_helper.AWS_GFX()print("Graphics loaded!")
Connecting to WiFi and AWS IoT
© Adafruit Industries https://learn.adafruit.com/pyportal-iot-plant-monitor-with-aws-iot-and-circuitpython Page 49 of 54

Prior to establishing a connection with the AWS MQTT broker, we'll use the esp object to set the AWS device
certificate and private key.
# Set AWS Device Certificateesp.set_certificate(DEVICE_CERT)
# Set AWS RSA Private Keyesp.set_private_key(DEVICE_KEY)
Once the certificate and private key have been set, we can connect to the WiFi network and the AWS IoT MQTTbroker.
# Connect to WiFiprint("Connecting to WiFi...")wifi.connect()print("Connected!")
Configure the STEMMA Sensor
An I2C busio device is set up and linked to the soil sensor's address ( 0x36 ).
# Soil Sensor Setupi2c_bus = busio.I2C(board.SCL, board.SDA)ss = Seesaw(i2c_bus, addr=0x36)
MQTT Connection Callback Methods
The following methods are used as MQTT client callbacks. They only execute when the broker (AWS IoT MQTT) communicates with your PyPortal.
For a complete explanation of how MiniMQTT's callback methods work, click here (https://adafru.it/FGB).
© Adafruit Industries https://learn.adafruit.com/pyportal-iot-plant-monitor-with-aws-iot-and-circuitpython Page 50 of 54
# Define callback methods which are called when events occur# pylint: disable=unused-argument, redefined-outer-namedef connect(client, userdata, flags, rc): # This function will be called when the client is connected # successfully to the broker. print('Connected to AWS IoT!') print('Flags: {0}\nRC: {1}'.format(flags, rc))
# Subscribe client to all shadow updates print("Subscribing to shadow updates...") aws_iot.shadow_subscribe()
def disconnect(client, userdata, rc): # This method is called when the client disconnects # from the broker. print('Disconnected from AWS IoT!')
def subscribe(client, userdata, topic, granted_qos): # This method is called when the client subscribes to a new topic. print('Subscribed to {0} with QOS level {1}'.format(topic, granted_qos))
def unsubscribe(client, userdata, topic, pid): # This method is called when the client unsubscribes from a topic. print('Unsubscribed from {0} with PID {1}'.format(topic, pid))
def publish(client, userdata, topic, pid): # This method is called when the client publishes data to a topic. print('Published to {0} with PID {1}'.format(topic, pid))
def message(client, topic, msg): # This method is called when the client receives data from a topic. print("Message from {}: {}".format(topic, msg))
Connecting to AWS IoT
The code first initializes the AWS MQTT client with the endpoint identifier ( broker ) and device identifier ( client_id ).
# Set up a new MiniMQTT Clientclient = MQTT(socket, broker = secrets['broker'], client_id = secrets['client_id'], network_manager = wifi)
# Initialize AWS IoT MQTT API Clientaws_iot = MQTT_CLIENT(client)
The connection callback methods created earlier are connected to the aws_iot client and the code attempts to
connect to AWS IoT.
© Adafruit Industries https://learn.adafruit.com/pyportal-iot-plant-monitor-with-aws-iot-and-circuitpython Page 51 of 54

# Connect callback handlers to AWS IoT MQTT Clientaws_iot.on_connect = connectaws_iot.on_disconnect = disconnectaws_iot.on_subscribe = subscribeaws_iot.on_unsubscribe = unsubscribeaws_iot.on_publish = publishaws_iot.on_message = message
print('Attempting to connect to %s'%client.broker)aws_iot.connect()
Once AWS IoT's MQTT broker successfully connects with your client, it'll call the connect() callback method. This
method subscribes to the device's shadow topic (https://adafru.it/GcH) and listens for updates( aws_iot.shadow_subscribe() ). Any data sent to this topic will be received by the code's message() callback.
def connect(client, userdata, flags, rc): # This function will be called when the client is connected # successfully to the broker. print('Connected to AWS IoT!') print('Flags: {0}\nRC: {1}'.format(flags, rc))
# Subscribe client to all shadow updates print("Subscribing to shadow updates...") aws_iot.shadow_subscribe()
Main Loop
The main loop takes the current time and compares it to the desired SENSOR_DELAY time in minutes (set at the top of
the code).
If the time has exceeded SENSOR_DELAY , the code reads the moisture level and temperature from the STEMMA soil
sensor. Then, it displays the values of the soil sensor on the PyPortal using the gfx module.
# Time in seconds since power oninitial = time.monotonic()
while True: try: gfx.show_aws_status('Listening for msgs...') now = time.monotonic() if now - initial > (0.1 * 60): # read moisture level moisture = ss.moisture_read() print("Moisture Level: ", moisture) # read temperature temperature = ss.get_temp() print("Temperature:{}F".format(temperature)) # Display Soil Sensor values on pyportal temperature = gfx.show_temp(temperature) gfx.show_water_level(moisture)
We create a JSON-formatted payload (AWS device shadows require this format) to hold both the moisture andtemperature. Then, we update the shadow using the handy shadow_update() helper method from the CircuitPython
© Adafruit Industries https://learn.adafruit.com/pyportal-iot-plant-monitor-with-aws-iot-and-circuitpython Page 52 of 54

AWS IoT library.
We'll update the display to show data has been published to AWS IoT and set the timer to the current time.monotonicvalue.
print('Sending data to AWS IoT...') gfx.show_aws_status('Publishing data...') # Create a json-formatted device payload payload = {"state":{"reported": {"moisture":str(moisture), "temp":str(temperature)}}} # Update device shadow aws_iot.shadow_update(json.dumps(payload)) gfx.show_aws_status('Data published!') print('Data sent!') # Reset timer initial = now
If the SENSOR_DELAY time has not yet elapsed, we'll poll the AWS MQTT broker to ensure we retain communication
with the broker. aws_iot.loop() pings AWS IOT's MQTT broker and listenings for a response back from it. It also
queries the broker for any messages received.
All of this code is wrapped inside a try/except control flow. If the WiFi module fails at any point, the program willexecute the except and reset the module before going back to the top of the try .
© Adafruit Industries https://learn.adafruit.com/pyportal-iot-plant-monitor-with-aws-iot-and-circuitpython Page 53 of 54

© Adafruit Industries Last Updated: 2020-04-14 06:58:22 PM EDT Page 54 of 54