
pykota
58
PyKota Documentation A full featured Print Quota Solution for CUPS Jérôme Alet C@LL - Conseil Internet & Logiciels Libres 48 Avenue Vincent Arnaud 06300 Nice France Email : [email protected] Phone : +33 (0) 4 93 27 12 98
description
quotas
Transcript of pykota

PyKota Documentation
A full featured Print Quota Solution for CUPS
Jérôme AletC@LL - Conseil Internet & Logiciels Libres
48 Avenue Vincent Arnaud06300 Nice
FranceEmail : [email protected] : +33 (0) 4 93 27 12 98

PyKota Documentation: A full featured Print Quota Solution for CUPSby Jérôme Alet
Copyright © 2003, 2004, 2005, 2006 Jerome Alet
Abstract
This document will describe the setup of the PyKota Print Quota system for the Common UNIX Printing System,and its day-to-day use.
Legal Notice
This documentation is licensed under the terms of the GNU General Public License as described below.
This program is free software; you can redistribute it and/or modify it under the terms of the GNU General Public License as published by the
Free Software Foundation; either version 2 of the License, or (at your option) any later version.
This program is distributed in the hope that it will be useful, but WITHOUT ANY WARRANTY; without even the implied warranty of
MERCHANTABILITY or FITNESS FOR A PARTICULAR PURPOSE. See the GNU General Public License for more details.
You should have received a copy of the GNU General Public License along with this program; if not, write to the Free Software Foundation, Inc.,
51 Franklin Street, Fifth Floor, Boston, MA 02110-1301, USA.
A copy of the entire license is included in the section entitled "GNU General Public License".
In case you encounter any problem, please contact Jérôme Alet (mailto:[email protected]) , author of the present document.
$Date: 2006-12-03 11:50:20 +0100 (dim, 03 déc 2006) $ $Revision: 2422 $

Table of Contents1. Introduction to PyKota .........................................................................................................................1
1.1. What is PyKota ?.........................................................................................................................1
2. Installation..............................................................................................................................................42.1. Interactive step-by-step installation of PyKota with pksetup......................................................42.2. Manual installation......................................................................................................................5
2.2.1. Database server installation ............................................................................................52.2.2. Print Server Installation ................................................................................................13
3. PyKota’s internals................................................................................................................................204. Initialize your database with pkturnkey............................................................................................22
4.1. Reference ..................................................................................................................................22
5. Manage printers with pkprinters .......................................................................................................245.1. Reference ..................................................................................................................................25
6. Manage Users and Groups with pkusers...........................................................................................267. Manage Print Quotas with edpykota .................................................................................................288. Create print quota usage reports with repykota...............................................................................29
8.1. Command line based Print Quota reports .................................................................................298.1.1. Reference......................................................................................................................29
8.2. Web based Print Quota reports..................................................................................................30
9. Get print quotes before printing for real with pykotme...................................................................329.1. Examples ...................................................................................................................................329.2. Reference ..................................................................................................................................33
10. Warn users above print quota with warnpykota ............................................................................3410.1. Reference ................................................................................................................................34
11. Export datas to other software with dumpykota ............................................................................3511.1. Reference ................................................................................................................................36
12. Manage billing codes with pkbcodes................................................................................................3712.1. Reference ................................................................................................................................37
13. Uses On Screen Display to show personal print quota information with pykosd........................3813.1. Reference ................................................................................................................................38
14. Automate user account creation with autopykota ..........................................................................3914.1. Reference ................................................................................................................................39
15. Invoice your users with pkinvoice ....................................................................................................4016. Refund your users with pkrefund ....................................................................................................4117. Generate banners with pkbanner.....................................................................................................42
17.1. Reference ................................................................................................................................42
18. Interact with end users with pknotify and pykoticon.....................................................................4319. Control PyKota by email with pkmail .............................................................................................45
19.1. Installation...............................................................................................................................4519.2. Usage.......................................................................................................................................4619.3. Reference ................................................................................................................................46
iii

20. Useful Shell Scripts ............................................................................................................................4720.1. waitprinter.sh...........................................................................................................................4720.2. papwaitprinter.sh .....................................................................................................................4720.3. mailandpopup.sh .....................................................................................................................4820.4. pagecount.pl ............................................................................................................................48
A. GNU General Public License .............................................................................................................49A.1. Preamble...................................................................................................................................49A.2. TERMS AND CONDITIONS FOR COPYING, DISTRIBUTION AND MODIFICATION 50
A.2.1. Section 0 ......................................................................................................................50A.2.2. Section 1 ......................................................................................................................50A.2.3. Section 2 ......................................................................................................................50A.2.4. Section 3 ......................................................................................................................51A.2.5. Section 4 ......................................................................................................................52A.2.6. Section 5 ......................................................................................................................52A.2.7. Section 6 ......................................................................................................................52A.2.8. Section 7 ......................................................................................................................52A.2.9. Section 8 ......................................................................................................................53A.2.10. Section 9 ....................................................................................................................53A.2.11. Section 10 ..................................................................................................................54A.2.12. NO WARRANTY......................................................................................................54A.2.13. Section 12 ..................................................................................................................54
iv

Chapter 1. Introduction to PyKota
Last modified on $Date: 2006-12-03 12:26:33 +0100 (dim, 03 déc 2006) $
This chapter will briefly introduce you to PyKota, and will familiarize you with this software and itscomponents.
1.1. What is PyKota ?
PyKota is a print quota and print accounting software solution for GNU/Linux and compatible printservers.
PyKota currently supports the CUPS (http://www.cups.org) 1 printing subsystem, although older releasesalso supported LPRng (http://lprng.sourceforge.net).
PyKota is distributed under the terms of the GNU General Public License of the Free SoftwareFoundation (http://www.fsf.org). This means that you are allowed to use, modify or redistribute its codeprovided that you respect the terms of this license.
We believe that despite being a bit rough around the edges sometimes, PyKota offers an unmatchedflexibility and probably all you want to do with a print quota software is either already included, easilyscriptable with a few lines of shell scripting, or planned for the next release.
PyKota is however a somewhat complex piece of software, and installing it will mandate that you alsoinstall several dependencies beforehand, as you’ll see in the next chapter.
PyKota is made of the following components :
• Configuration files, which must be placed into the system user pykota’s home directory as defined in/etc/passwd 2 :
• pykotadmin.conf : this file contains sensitive database settings allowing the PyKota software tomodify the print quota database. This file should be protected and should only be made readable bythe administrators of PyKota and the system user the printing subsystem is running as. Thepossibility for a particular user to read this file determines if this user is a PyKota Administrator ornot, so please give particular attention to this file’s permissions.
• pykota.conf : this is the main configuration file for PyKota. It contains database settings whichallow the PyKota software to access to the print quota database in readonly mode, as well as globaland print queue specific configuration directives. With a properly configured PyKota, letting normalusers read this file is safe excepted where you want to forbid users to read other users’ print quota
1
Chapter 1. Introduction to PyKota
information. However if you’re not confident about your database settings, it’s better to not letnormal users read this file. This way they can’t even use any of the PyKota command line tools.
• Either a PostgreSQL, MySQL or SQLite database, or an LDAP 3 DIT 4 : PyKota can store its datasinto any of these. Support for other database backends might be added in a future release.
• A generic CUPS backend wrapper, named cupspykota : this software captures all print jobs passingthrough the print queues it manages, and does the accounting and quota checking. It can reject printjobs in a number of circumstances like the user being over quota, and interact with the end userthrough the use of external commands or shell scripts. This software is written in such a manner thansystem administrators can plug their own scripts at the most strategic points of the printing process,through specific directives that you put in PyKota’s configuration files.
• Several command line tools to manage print quotas and accounting. All of these commands accept the--version and --help command line switches, and all have a manual page. Many manual pages areavailable in several native languages and contain usage examples. Some commands have many optionsand switches, so please read their help carefully.
• pksetup : to install PyKota in a completely interactive way, but currently only under Debian andUbuntu.
• pkturnkey : to help you do the initial configuration and database initialization. This commandalmost transforms PyKota into a turn-key solution, hence the name.
• pkprinters : to manage printers and printers groups.
• pkusers : to manage users and users groups.
• edpykota : to manage users’ and users groups’ print quota entries.
• pkbcodes : to manage billing codes.
• repykota : to do some basic print quota reporting.
• dumpykota : to dump the database’s contents in a portable way. This command can be used toexport PyKota’s datas to third party software, like print log analyzers or spreadsheets, and numerousoutput formats are supported, like csv and XML
• autopykota : to automate the creation of user print accounts on first print. This command is notmeant to be used from the command line, but instead from pykota.conf’s policy directive.
• pykosd : to display their remaining credits or pages to end users. This is an OSD 5 applicationwhich works under the X Window system.
• pykotme : to give detailed quotes to end users before they print, this way they know in advance howmuch a print job will cost to them and can decide to route it to a less costly printer.
• pkbanner : to generate dynamic banner pages when printing. This command is not meant to beused from the command line, but instead from pykota.conf’s startingbanner andendingbanner directives. If you prefer you can use your own generator of dynamic banner pagesor even static banner pages.
• warnpykota : to warn users over quota from time to time, for example from crontab. Users arewarned while printing in any case, so this command is meant to be used as a periodic reminder.
• pkmail : to let users obtain their print quota situation by email. In the future other functionnalitieswill be added. This command is not meant to be used from the command line, but instead as a pipefrom your mail server’s /etc/aliases file.
2

Chapter 1. Introduction to PyKota
• pknotify : a client for the PyKotIcon cross-platform generic network dialog box manager. Thistools allow you to interact with end users at printing time.
• pkinvoice : an invoice generator which can create personalized PDF invoices for your users fromtheir printing history.
• pkrefund : a tool with which you can refund print jobs when there was an accounting problem. Itcan generate printable receipts in the PDF format.
• Several CGI scripts which constitute PyKota’s web interface. All these scripts behave differently whenthey are protected with an username and password compared to when they are not. Seepykota/cgi-bin/README for details.
• printquota.cgi : to do basic print quota reports like repykota, and also to examine the printinghistory, which is not possible with repykota for now.
• dumpykota.cgi : identical to the dumpykota command line tool, but works from within a webbrowser.
• pykotme.cgi : identical to the pykotme command line tool, but works from within a web browser.
• Several helper scripts and contributed stuff to handle very specific configurations. Please visit thesubdirectories of the pykota/ source directory, and you may find interesting things...
Notes1. Common UNIX Printing System
2. If your /etc/passwd contains something like pykota:x:1001:1001:PyKotaAdmin„,:/etc/pykota:/bin/sh then the home directory is /etc/pykota
3. Lightweight Directory Access Protocol
4. Directory Information Tree
5. On Screen Display
3

Chapter 2. Installation
Last modified on $Date: 2007-07-09 21:53:04 +0200 (lun, 09 jui 2007) $
Before being able to use PyKota, you have of course to install it first. But before installing, you mustcarefully plan your installation.
First you have to determine which machine will be the PyKota database server. The database server is thehost responsible for keeping a centralized database of print usage for all your printers, users and groups.
Then you have to list all the Print Servers for which you plan to use print quota facilities.
With most database backends, several print servers can share a single database, however as we’ll see laterthis is not possible if you choose to use SQLite as your print quota database backend.
Finally you have to download PyKota’s latest version or buy an official package, fromhttp://www.pykota.com/software/pykota. If you’ve just bought an official package, then as soon as you’vereceive it you have to decompress and visit its archive, to do so just type the following commands :
jerome@nordine:~$ tar -zxf pykota-1.26_official.tar.gzjerome@nordine:~$ cd pykota-1.26_officialjerome@nordine:~/pykota-1.26_official$
You can see many files in this directory, the first ones to read are README, then COPYING and LICENSE.They will give you basic installation instructions and explain the licensing terms under which PyKota isdistributed. Of course they are also mostly boring to read ! Detailed installation and operatinginstructions are defined in the ./docs directory, in the form of SGML documentation in the DocBook(http://www.docbook.org) format. You have to compile these files into readable documentation like theHTML or PDF formats, or buy an official PyKota package which already contains these compiled formsof the documentation. Of course you already know this because that’s what you are currently reading !
2.1. Interactive step-by-step installation of PyKota withpksetup
pksetup is a command line tool with which you’ll be able to install PyKota and all its dependencies in acompletely interactive way. At the end of the installation, a shell script is created which allows you toreplicate the very same installation in an automated way. This can be useful if you’ve got several serversto install identically.
4

Chapter 2. Installation
Currently, pksetup is experimental, and only works with Debian (http://www.debian.org) and Ubuntu(http://www.ubuntu.com) distributions. In addition, the database backend which will be installed withthis command is PostgreSQL (http://www.postgresql.org) and you have no choice for another backend. Ifyou want another database backend, or use a different distribution, or want to do the installationmanually, then read and follow the instructions in the next section.
To launch the installation procedure, just type pksetup followed with the name of your distribution, like:
jerome@nordine:~/pykota-1.26_official$ ./bin/pksetup debian
and then follow the instructions and answer to the several questions you’ll be asked.
2.2. Manual installation
To do a manual installation, we will see what has to be done on each of the servers we are planning touse.
Note: Of course, depending on the size of your network, you may very well use the same machine asboth a Print Server and a database server. This is especially the case if you’ve got only one server.
2.2.1. Database server installation
Depending on PyKota’s version number, different types of storage backends may be supported, so wewill see for each one of them how to configure it.
2.2.1.1. PostgreSQL
PostgreSQL is an Object Relationnal DataBase Management System distributed under a Free Softwarelicense from the http://www.postgresql.org web site. It certainely is the free RDBMS which has the mostadvanced features, and is widely used all over the world.
To configure your database, you must have PostgreSQL already working. The complete installation ofPostgreSQL is not covered by the present manual, please refer to your system’s documentation or tohttp://www.postgresql.org for details.
One thing you have to check, though, is that every Print Server on which you want to install the printquota mechanism, must be able to connect to the PostgreSQL server. In the default installation of
5

Chapter 2. Installation
PostgreSQL this may not be the case for security reasons, except if both servers are in fact the samemachine. In any case, it is recommended that you check the /etc/postgresql/pg_hba.conf file andmodify it if needed. This file is self documented and its modification is straightforward. You also have tomake sure that PostgreSQL accepts TCP/IP connections. To do so you either have to launch it with the-i option or modify the /etc/postgresql/postgresql.conf file, which is self documented andeasy to modify too. Allowing TCP/IP connections is not necessary though if your print quota databaseserver and your Print Server are the very same host.
Here’s an excerpt from a pg_hba.conf file. This one rejects all connections to PyKota’s databaseexcepted when made from the same host by PostgreSQL users pykotauser or pykotaadmin with thecorrect password.
local all postgres ident sameuserlocal all all rejecthost pykota pykotauser 127.0.0.1 255.255.255.255 crypthost pykota pykotaadmin 127.0.0.1 255.255.255.255 crypthost pykota all 127.0.0.1 255.255.255.255 reject
Of course if your print server and your database servers have different IP addresses, you have to replacethe 127.0.0.1 address above with your print server’s IP address. As an alternative, you could still keepthese lines and add similar lines with other IP addresses if you have several print servers for which youwant a single centralized database.
Tip: Don’t forget to restart PostgreSQL if you modify any of its configuration files, in order for thechanges to take effect.
Be careful, you may be unable to connect from a Print Server to the PostgreSQL server even if theconfiguration is correct. Sometimes your connections may be blocked by one or more network firewallsalong the route from one machine to the other. If this is the case, then the best thing you can do is to askyour Network Administrator to not filter the IP port used by PostgreSQL, which is usually port5432/tcp.
Note: The TCP/IP network port used by PostgreSQL may be different. When in doubt, ask yourSystem Administrator for the correct value.
Now that your PostgreSQL server is up and running, and is waiting for your connections, you have tocreate the print quota database. To do so, you’ll have to feed PostgreSQL with thepykota-1.26_official/initscripts/postgresql/pykota-postgresql.sql file. This filewill create a print quota database administrator in the PostgreSQL system, then create an empty print
6

Chapter 2. Installation
quota database and set some permissions on it. The print quota database administrator is thePostgreSQL’s user used to manage the quota database. The print quota database Administrator is notpresent in the quota database itself, he is only defined in PostgreSQL and don’t have to exist on anysystem, nor in the print quota database. His default name is pykotaadmin. A print quota databaseread-only user is also created under the name of pykotauser. This read-only user is used by PyKota toconnect to the print quota database when an user who is not a PyKota administrator 1 launches a pykotacommand. This prevents normal users from being able to modify their own, or other users’, quotainformation. The database which will be created will be named pykota by default. The pykotaadminand pykotauser users by default respectively have readwritepw and readonlypw as theirpasswords.
Note: You can choose other names and passwords if you want by modifying theinitscripts/postgresql/pykota-postgresql.sql file accordingly, and report your changes intoPyKota’s configuration files.
To run this script, you can use the psql frontend to PostgreSQL, but your priviledges must be sufficient tobe allowed to create users and databases. You can launch psql as the postgres user which isPostgreSQL’s default administrator, and connect to the default database named template1. From acommand line interpreter (i.e. shell), type the following commands :
jerome@nordine:~$ cd pykota-1.26_official/initscripts/postgresqljerome@nordine:~/pykota-1.26_official/initscripts$ psql -h localhost -U postgres template1Welcome to psql, the PostgreSQL interactive terminal.
Type: \copyright for distribution terms\h for help with SQL commands\? for help on internal slash commands\g or terminate with semicolon to execute query\q to quit
template1=# \i pykota-postgresql.sql... a lot of output lines
pykota=#
Note: If you use RPM or DEB packages, usually the pykota-postgresql.sql file gets installed intothe /usr/share/pykota/postgresql directory, along with a README file.
If you want to you can change passwords later in PostgreSQL for the pykotaadmin and pykotauser
users. To do so, just type the following lines while still being at the psql prompt (replace the passwordvalues by your own :
pykota=# ALTER USER pykotaadmin PASSWORD ’somepassword’;
7

Chapter 2. Installation
ALTER USERpykota=# ALTER USER pykotauser PASSWORD ’anotherpassword’;pykota=# \qjerome@nordine:~/pykota-1.26_official/initscripts/postgresql$
The \q command above will quit the psql program and return you to the shell’s command line prompt.
To improve security further, you could encrypt your database connections, or take any other step asneeded. Please refer to PostgreSQL’s documentation for details.
Warning
Defining passwords may not be sufficient if your database access rule is set totrust in the /etc/postgresql/pg_hba.conf. Again, please refer toPostgreSQL’s documentation for details. Also, passwords will fly unencrypted overthe network by default, so be sure to take any necessary step to secure yourdatabase server from unauthorized use. This has nothing to do with PyKotathough, it is just a general rule to keep in mind.
For more details, please see initscripts/mysql/README.postgresql.
If no error occured, then your print quota database is ready to be used. Now you can let the print quotadatabase server alone, the remaining work will have to be done on each one of the print servers whichwill use this particular print quota database server.
Tip: If an error occured, maybe your PostgreSQL version is too old, or an unexpected problem (like abug) happened. Please contact us via email so that we can try to fix the problem. Thanks in advance.
2.2.1.2. LDAP
Any LDAP server, and particularly OpenLDAP, can be used as a print quota database backend. Someother LDAP servers can be used, but this is currently untested in production.
OpenLDAP is a Lightweight Directory Access Protocol server implementation published as FreeSoftware. You can download it from http://www.openldap.org.
8

Chapter 2. Installation
To use OpenLDAP as your print quota database backend, you have to copy thepykota/initscripts/ldap/pykota.schema into OpenLDAP’s schemas directory. Under DebianGNU/Linux, this is something like :
$ cp pykota.schema /etc/ldap/schema
Note: If you use RPM or DEB packages, the pykota.schema file is usually installed into the/usr/share/pykota/ldap directory, along with a README file, and may also be installedautomatically in your LDAP server’s schemas directory.
Then edit /etc/ldap/slapd.conf and add a line to include the PyKota schema. You should havesomething like :
# Schema and objectClass definitionsinclude /etc/ldap/schema/core.schemainclude /etc/ldap/schema/cosine.schemainclude /etc/ldap/schema/nis.schemainclude /etc/ldap/schema/inetorgperson.schemainclude /etc/ldap/schema/pykota.schema
While this is not mandatory, it is recommended that you setup some indexes for some often accessedPyKota attributes. Here are the minimal indexes lines you may want to put in slapd.conf :
# Indexes for PyKotaindex pykotaUserName pres,eq,subindex pykotaGroupName pres,eq,subindex pykotaPrinterName pres,eq,subindex pykotaBillingCode pres,eq,subindex pykotaLastJobIdent eq
Now you must ensure that the DNs you’ll use to bind to your OpenLDAP server don’t have searchqueries size limits, which gives for example (OpenLDAP 2.1.x or above) :
# No Limits for PyKota’s administrator and read-only userlimits dn="cn=pykotaadmin,dc=example,dc=com" size.soft=-1 size.hard=softlimits dn="cn=pykotauser,dc=example,dc=com" size.soft=-1 size.hard=soft
9

Chapter 2. Installation
Where pykotaadmin and pykotauser are the usernames used to bind to your OpenLDAP server withinPyKota, respectively in ReadWrite mode (as set in pykotadmin.conf) and in ReadOnly mode (as set inpykota.conf).
Finally, stop the OpenLDAP server, generate the index files, and restart OpenLDAP
$ /etc/init.d/slapd stop$ slapindex$ /etc/init.d/slapd start
With an LDAP backend, PyKota will need some branches in your LDAP directory to put its own datas.You can configure PyKota to either attach its datas to your existing users and groups, or to put them intheir own ou. But some ous dedicated to PyKota are needed in any case, so the best bet may be to put allPyKota’s datas below an ou=PyKota branch. While this will separate these datas from your existingusers and groups entries, this may ease the maintainance.
PyKota needs at least an ou for printers, for users quotas, for groups quotas, for print jobs, for billingcodes, and for pointers to the last job of each printer. In the future, this last ou may disappear as itscontent will probably be attached to each printer.
Actually PyKota doesn’t create these ous for you, because it’s difficult to guess what is the bestconfiguration for you. So you have to create them by yourself, either directly with a text editor and theldapadd command, or with some specialized tool like gq. You can look at theinitscripts/ldap/pykota-sample.ldif file to see which minimal branches are necessary.
Note: If you use RPM or DEB packages, usually the pykota-sample.ldif file is installed into the/usr/share/pykota/ldap directory, along with a README file.
If no error occured, then your print quota database is ready to be used. Now you can let the print quotadatabase server alone, the remaining work will have to be done on each one of the print servers whichwill use this particular print quota database server.
Tip: If an error occured, maybe your OpenLDAP version is too old, or an unexpected problem (like abug) happened. Please contact us via email so that we can try to fix the problem. Thanks in advance.
10
Chapter 2. Installation
2.2.1.3. MySQL
MySQL is a simple Relationnal DataBase Management System distributed under a Free Software licensefrom the http://www.mysql.org web site.
To configure your database, you must have MySQL version 4.1 or higher already working. Werecommend that you use MySQL 5.0 or higher though. The complete installation of MySQL is notcovered by the present manual, please refer to your system’s documentation or to http://www.mysql.orgfor details.
One thing you have to check, though, is that every Print Server on which you want to install the printquota mechanism, must be able to connect to the MySQL server. In the default installation of MySQLthis may not be the case for security reasons, except if both servers are in fact the same machine. In anycase, it is recommended that you check the /etc/mysql/my.cnf file and modify it if needed.
Tip: Don’t forget to restart MySQL if you modify any of its configuration files, in order for the changesto take effect.
Be careful, you may be unable to connect from a Print Server to the MySQL server even if theconfiguration is correct. Sometimes your connections may be blocked by one or more network firewallsalong the route from one machine to the other. If this is the case, then the best thing you can do is to askyour Network Administrator to not filter the IP port used by MySQL, which is usually port 3306/tcp.
Note: The TCP/IP network port used by MySQL may be different. When in doubt, ask your SystemAdministrator for the correct value.
Now that your MySQL server is up and running, and is waiting for your connections, you have to createthe print quota database. To do so, you’ll have to feed MySQL with thepykota-1.26_official/initscripts/mysql/pykota-mysql.sql file. This file will create anempty print quota database and set some permissions on it. The database which will be created will benamed pykota by default. Two database users will be defined to have access in readonly and read+writemodes under the respective names pykotauser and pykotaadmin. The pykotaadmin andpykotauser users by default respectively have readwritepw and readonlypw as their passwords.
Note: You can choose other names and passwords if you want by modifying theinitscripts/mysql/pykota-mysql.sql file accordingly, and report your changes into PyKota’sconfiguration files.
11

Chapter 2. Installation
To run this script, you can use the mysql frontend to MySQL, but your priviledges must be sufficient tobe allowed to create databases. You can launch mysql as the root user for example. From a commandline interpreter (i.e. shell), type the following commands :
jerome@nordine:~$ cd pykota-1.26_official/initscripts/mysqljerome@nordine:~/pykota-1.26_official/initscripts$ mysql <pykota-mysql.sql
Note: If you use RPM or DEB packages, usually the pykota-mysql.sql file gets installed into the/usr/share/pykota/mysql directory, along with a README file.
To improve security further, you could encrypt your database connections, or take any other step asneeded. Please refer to MySQL’s documentation for details.
For more details, please see initscripts/mysql/README.mysql.
If no error occured, then your print quota database is ready to be used. Now you can let the print quotadatabase server alone, the remaining work will have to be done on each one of the print servers whichwill use this particular print quota database server.
Tip: If an error occured, maybe your MySQL version is too old, or an unexpected problem (like abug) happened. Please contact us via email so that we can try to fix the problem. Thanks in advance.
2.2.1.4. SQLite
SQLite is an embeddable Relationnal DataBase distributed under a Free Software license from thehttp://www.sqlite.org web site. If is very easy to configure and use, offers a very small memory footprint,is very fast, but can only be used on the print server because it doesn’t include a server daemon : thedatabase is directly embedded in the application.
To configure your database, you must have SQLite already working. The complete installation of SQLiteis not covered by the present manual, please refer to your system’s documentation or tohttp://www.sqlite.org for details.
Once SQLite is installed, you have to decide where you’ll put your database. A good idea is to store itinto the pykota user’s home directory. Then to create the database, just type :
# sqlite3 ~pykota/pykota.db <pykota/initscripts/sqlite/pykota.sqlite
12
Chapter 2. Installation
# chown pykota.pykota ~pykota/pykota.db# chmod 660 ~pykota/pykota.db# chown pykota.pykota ~pykota
If user pykota doesn’t exist yet, then please follow the instructions a bit below which explain how toinstall PyKota on the print server.
Once this is done, you’ll want to set in ~pykota/pykota.conf the following lines in the [global]section :
storagebackend : sqlitestoragestoragename : /etc/pykota/pykota.db
Of course you’ll want to replace the path on the storagename line with the full path to the newlycreated SQLite database.
If no error occured, then your print quota database is ready to be used. In case you need them, additionalinstructions are available in pykota/initscripts/sqlite/README.sqlite
Tip: If an error occured, maybe your SQLite version is too old, or an unexpected problem (like a bug)happened. Please contact us via email so that we can try to fix the problem. Thanks in advance.
2.2.1.5. Berkeley DB
A Berkeley DB backend is planned, but it actually doesn’t exist. It seems that remote storage won’t bepossible with such a backend, so in other terms this means that you will have a different quota databaseon each print server. This may still prove to be useful for small configurations.
2.2.2. Print Server Installation
For each Print Server on which you plan to implement the print quota mechanism, you have, of course, tohave an already working printing environment. Currently PyKota works with CUPS(http://www.cups.org) but older releases also supported LPRng (http://lprng.sourceforge.net). LPRngsupport might be re-added in the future.
13

Chapter 2. Installation
Here’s the list of software you have to install on each Print Server, version numbers are given as anindication of which was successfully tested, but older versions may work too.
• CUPS version 1.1.14 or higher, version 1.2.4 or higher is recommanded. You can download it fromhttp://www.cups.org
• Python version 2.3 or higher. You can download it from http://www.python.org. While PyKota itselfwill try to preserve compatibility with Python version 2.3 for the near future, some Python moduleswhich are needed by PyKota may require a more recent version of this language.
• print quota database client libraries, depending on your print quota database backend :
• PostgreSQL backend :
• PostgreSQL client libraries. They must match the PostgreSQL version used on your print quotadatabase server.
• The PygreSQL python module. PygreSQL is normally included in PostgreSQL, but you maywant to download it from http://www.pygresql.org
• OpenLDAP backend :
• OpenLDAP client libraries. They must match the OpenLDAP version used on your print quotadatabase server.
• The Python-LDAP python module. You may download this module fromhttp://python-ldap.sourceforge.net
• MySQL backend :
• MySQL client libraries. They must match the MySQL version used on your database server.
• The Python-MySQL python module, version 1.2.x or higher. You can download it fromhttp://sourceforge.net/projects/mysql-python
• SQLite backend : SQLite is not a database server, but an embeddable database, so if you want to useit you MUST install SQLite on your print server. With PostgreSQL, MySQL or OpenLDAP you canstore your datas on a different machine than the print server, but this is not possible with SQLite.
• SQLite version 3.2.1 or higher and its library. You can download it from http://www.sqlite.org
• The Python-SQLite python module version 2.0.5 or higher. You can download it fromhttp://www.pysqlite.org
• Berkeley DB backend : Not supported yet.
• ucd-snmp or net-snmp tools, version 4.2.5 or above. You only need the snmpget command. You candownload this software from http://www.sourceforge.net/projects/net-snmp/. You only need this ifPyKota’s internal SNMP accounting code doesn’t work for your SNMP-aware printers.
• netatalk version 1.6.1 or above. You only need the pap command. You can download this softwarefrom http://netatalk.sourceforge.net/. You only need this if you plan to query your printers for theirinternal page counter via AppleTalk.
• eGenix’ mxDateTime Python module version 2.0.3 or above. It must match your default Pythonversion. You can download it from http://www.egenix.com.
14

Chapter 2. Installation
• The Python acccelerator Psyco. It must match your default Python version. You can download it fromhttp://psyco.sourceforge.net. You only need this if you run on the x86 architecture because Psycodoesn’t yet exist on other architectures.
• The pysnmp Python module version 3.4.2, or higher, version 4 is recommanded. You can download itfrom http://pysnmp.sourceforge.net.
• The JAXML Python module. You can download it from http://www.librelogiciel.com/software/.
• The ReportLab Toolkit Python module. You can download it from http://www.reportlab.org.
• The Python Imaging Library - PIL module. You can download it from http://www.pythonware.com.
• The PyOSD Python module. You can download it from http://repose.cx/pyosd/.
• The pkpgcounter Generic Page Description Language parser. You can download it fromhttp://www.pykota.com/software/pkpgcounter (http://www.pykota.com.com/software/pkpgcounter).
• The PyPAM Python interface to PAM. You’ll need this if you plan to ask users to authenticate whenprinting through pknotify and pykoticon. You don’t need this module otherwise. If needed, you candownload it from http://www.pangalactic.org/PyPAM/.
• The PkIPPLib Python IPP library. You can download it fromhttp://www.pykota.com/software/pkipplib.
Instead of downloading all these programs’ sources and compiling them, which really is a boring taskconsidering that many software are needed, you may prefer to look into the packages included with yourGNU/Linux distribution of choice (if you use this operating system of course). Most, if not all,GNU/Linux distributions include all the software mentionned above, in the form of packages which areeasier to install than sources tarballs. This is probably the same for the many *BSD distributions.
You can check that all needed software is installed by launching the checkdeps.py command :
$ python checkdeps.py
Once all these software are installed, installing PyKota itself is a breeze. PyKota being written entirely inthe Python language, which is interpreted, there’s no need to compile anything. You just have to executethe installation script :
$ python setup.py install
The setup script will automatically create the /usr/share/pykota/conf directory and put the sampleconfiguration files conf/pykota.conf.sample and conf/pykotadmin.conf.sample there, alongwith a README file explaining their purpose.
15

Chapter 2. Installation
Now you have to create a pykota system user and group. The PyKota software will automatically searchits configuration files in user pykota’s home directory. For example we could create the user and group,and set /etc/pykota as the home directory, but any other home directory will do :
adduser --system --group --home /etc/pykota --gecos PyKota pykota
You now have to copy the sample configuration files into the ~pykota directory, under the respectivenames pykota.conf and pykotadmin.conf. Once copied there, you just have to modify these files toadapt them to your own setup. These files are heavily commented, so you should have no problem. Alsotheir format is quite common, because it’s the one used by Samba for example, or by .ini files underMS-Windows, so you may already be familiar with this syntax. In a future release, this documentationwill include the complete reference for all configuration fields available. Keep in mind that PyKota canbe really heavily customized, and can delegate some work to any external command of your choice.
Please create a backup copy of the ~pykota directory before modifying a working installation.
PyKota features some interesting possibilities which allow you to define options either globally so thatthey apply to all printers, or on a per printer basis. Please see the sample configuration files to see what Imean. In the simplest form, only a [global] section is needed. In more complex configurations, youwill have to create one section per printer. Each section in the configuration files begins with a namebetween square brackets []. The name to use to define a particular printer section is the name of the printqueue you want to manage with PyKota.
After you have modified PyKota’s configuration files, you have to double check their permissions,otherwise your installation may be insecure or may not work at all. The main configuration file~pykota/pykota.conf doesn’t contain much sensitive information, so it can be made readable byanyone. If normal users read this file, at best they will learn the username and optional password of theread-only database user. This means that beside being allowed to read all the contents of the quotadatabase, they won’t be allowed to modify or delete it. On the other hand, the~pykota/pykotadmin.conf file contains the read-write user’s identity and password. You must thenensure that no normal user can read this file. It should only be readable by the root user, which is alwaysthe case, and by PyKota administrators. In addition, users for which CUPS doesn’t run as user root willhave to ensure that the user their printing system is run as can read both of these files. An easy way to doso is to put the lp user (for example) into the pykota system group, then to give the correct permissionsto PyKota’s configuration files :
$ chown -R pykota.pykota ~pykota/$ chmod 750 ~pykota/$ chmod 644 ~pykota/pykota.conf$ chmod 640 ~pykota/pykotadmin.conf
16

Chapter 2. Installation
Warning
All the users allowed to read the ~pykota/pykotadmin.conf are considered to bePyKota administrators. So be careful with these files permissions.
On some systems, you may be able to strenghten permissions like this :
$ chown -R pykota.pykota ~pykota/$ chmod 750 ~pykota/$ chmod 640 ~pykota/pykota.conf$ chmod 600 ~pykota/pykotadmin.conf
And on other ones, you may need to relax them, and change the files’ owner :
$ chown pykota.pykota ~pykota/$ chmod 755 ~pykota/$ chown lp.pykota ~pykota/pykota.conf$ chmod 640 ~pykota/pykota.conf$ chown lp.pykota ~pykota/pykotadmin.conf$ chmod 640 ~pykota/pykotadmin.conf
This all depends on the printing system you are using, and the user the printing system is usually runningas. You need to remember three things :
• The user your printing system runs as MUST be allowed to read both PyKota’s configuration files.
• Any user who can read pykotadmin.conf is a PyKota administrator, and can do whatever he wantsto the print quota database.
• If cupsd.conf contains RunAsUser, then you won’t be able to authenticate users with pknotify andpykoticon. Also in this case you may have to make PyKota’s configuration files owned by the userCUPS runs as.
Don’t forget to restart your print server sofware if you changed group membership for the user it runs as,otherwise your change wouldn’t be taken into account.
Now depending on your printing system, the configuration to do is particular. We will now see how toplug PyKota into CUPS since LPRng is not supported anymore.
17

Chapter 2. Installation
2.2.2.1. With CUPS
From version 1.16alpha7 on, configuring PyKota to integrate within CUPS is more than easy.
You just have to create a symbolic link to the cupspykota command in CUPS’ backend directory :
$ cd /usr/lib/cups/backend$ ln -s /usr/share/pykota/cupspykota cupspykota
If you use CUPS v1.2 or higher, you must also type the following command to allow the cupspykotabackend to correctly support other backends which must be run as the root user (e.g. the lpd backend) :
$ chmod 700 /usr/share/pykota/cupspykota
You have to restart CUPS for this modification to take effect :
$ /etc/init.d/cupsys restart
Now point your web browser to CUPS configuration page, usually at http://localhost:631 on your printserver.
Then when creating new printers or reconfiguring existing ones, just choose devices which are PyKotamanaged 2 instead of normal devices. You’ve got one PyKota managed device for each regular deviceavailable from CUPS, so just choose the appropriate one.
Repeat the above procedure for each print queue on which you want to use PyKota. That’s all !
2.2.2.1.1. Troubleshooting
In case of problem, the simplest way to solve it is currently to ask on PyKota’s mailing list, describingthe symptoms, as well as the hardware and software you use.
A searchable FAQ is now available at http://otrs.librelogiciel.com/public.pl(http://otrs.librelogiciel.com/otrs/public.pl). A FAQ entry explaining in great details how to diagnose aproblem correctly is available at http://otrs.librelogiciel.com/public.pl?ID=2(http://otrs.librelogiciel.com/otrs/public.pl?ID=2).
18

Chapter 2. Installation
You can also ask questions on IRC :
/server irc.freenode.net/join #pykota
Notes1. a PyKota administrator is an user who can read the ~pykota/pykotadmin.conf file.
2. Debian 3.0 Woody is known to have problems : CUPS 1.1.14 doesn’t automatically detect PyKotamanaged devices. So you have to manually modify CUPS’ printers.conf file as explained inPyKota’s toplevel README file.
19

Chapter 3. PyKota’s internals
Last modified on $Date: 2005-03-06 17:52:43 +0100 (dim, 06 mar 2005) $
To account for pages or eventually ink usage 1 , you must plug your accounting system somewhere intothe printing system you use. One way to do this without having to modify the printing system itself, is byusing a filter.
A filter is a computer program which takes data in one format as its input, and outputs the same data buttransformed into another format. CUPS already contains many filters. For example there’s one filternamed pstops which accepts PostScript data as its input, and, as its name implies, outputs PostScriptdata too, but after having eventually rearranged the pages to fit several pages on a single sheet of paper,or other manipulations like that.
The pstops filter described above is also in charge of doing basic page accounting, but PyKota currentlydoesn’t use this facility since it may prove to be unreliable depending on the drivers used or if a paperjam occurs for example.
So to do its own accounting, PyKota has its own filters, for CUPS it’s named cupspykota, which is infact a CUPS backends wrapper. The procedure to plug the correct filter into your printing system isdescribed in the Installation chapter.
Currently with CUPS’ internal accounting mechanism, the pstops filter can be bypassed. That’s whyPyKota uses its own backend. The cupspykota backend wrapper ensures that jobs can’t bypass it, so youcan use any printer with any driver and any command line option, and you can be sure that your print jobwill be correctly accounted for.
When using the hardware accounting method, PyKota launches the script you specified to ask theprinter for its internal page counter at the start and at the end of the print job, and computes the values’difference to know the job’s size.
When using the software accounting method, the command you specified is launched with the job’sdata on its standard input. Your command must print the job’s size in number of pages on a single line onits standard output. This number is then read by PyKota and used to update the current user’s quotainformation.
If a problem occurs, it is logged either to the filter’s standard error or to the system logger, depending onyour preferences in PyKota’s configuration files. Also if a print quota is reached you may choose if theadministrator, the user, both or no-one will receive an email message explaining the situation andproposing a solution. You can even configure another action instead of sending email messages if youwant.
20

Chapter 3. PyKota’s internals
Notes1. PyKota doesn’t currently account for ink usage, it only accounts pages. To account for ink usage, you
should use PrintBill instead for now.
21

Chapter 4. Initialize your database withpkturnkey
Last modified on $Date: 2005-10-09 23:44:19 +0200 (dim, 09 oct 2005) $
The ultimate goal of the pkturnkey command line tool is to transform PyKota into a turn-key solution.
For now its functionnalities are fairly limited, but it can :
• Import existing print queues into PyKota’s database.
• Import existing users into PyKota’s database.
• Import existing users groups into PyKota’s database.
• Tell you which accounting method is the best for your printers.
In the future, it is possible that this command will entirely generate configuration files for you, and do abunch of other things to ease the installation and configuration of PyKota
One very important thing to remember is that, by default, pkturnkey doesn’t modify anything, unlessyou tell it to really do so by using its --force (or -f) command line switch. This lets you familiarizewith what would happen before doing it for real, especially because pkturnkey displays the othercommands it would launch.
You can restrict the datas you want to import into the database by using the appropriate command lineswitches, or by passing printers’ names as non-option arguments at the end of the command line.
The following example will import all existing print queues, as well as all users whose uid is comprisedbetween 1000 and 50000 and all groups whose gid is comprised between 5000 and 6000 :
$ pkturnkey --force --uidmin 1000 --dousers --uidmax 50000 --dogroups --gidmin 5000 --gidmax 6000
4.1. Reference
pkturnkey [-v | --version] [-h | --help] [-f | --force] [-d | --dousers] [-D | --dogroups] [-u uid | --uidminuid] [-U uid | --uidmax uid] [-g gid | --gidmin gid] [-G gid | --gidmax gid]
22

Chapter 4. Initialize your database with pkturnkey
23
Chapter 5. Manage printers with pkprinters
Last modified on $Date: 2005-10-09 22:39:06 +0200 (dim, 09 oct 2005) $
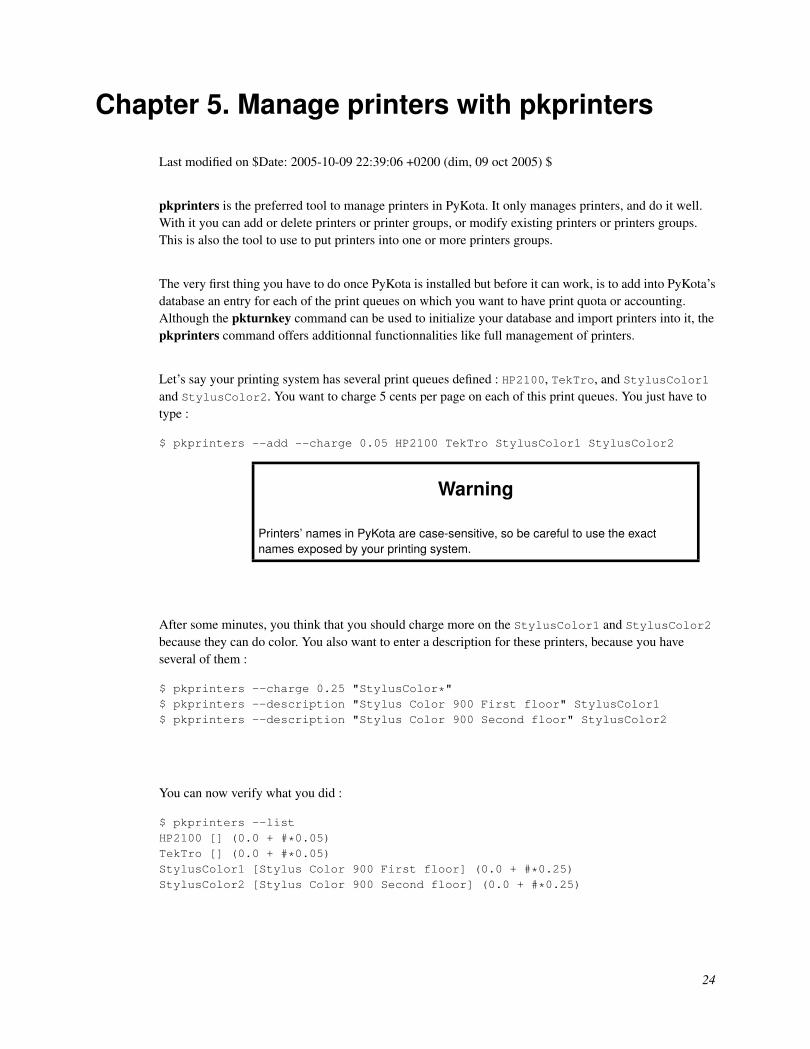
pkprinters is the preferred tool to manage printers in PyKota. It only manages printers, and do it well.With it you can add or delete printers or printer groups, or modify existing printers or printers groups.This is also the tool to use to put printers into one or more printers groups.
The very first thing you have to do once PyKota is installed but before it can work, is to add into PyKota’sdatabase an entry for each of the print queues on which you want to have print quota or accounting.Although the pkturnkey command can be used to initialize your database and import printers into it, thepkprinters command offers additionnal functionnalities like full management of printers.
Let’s say your printing system has several print queues defined : HP2100, TekTro, and StylusColor1
and StylusColor2. You want to charge 5 cents per page on each of this print queues. You just have totype :
$ pkprinters --add --charge 0.05 HP2100 TekTro StylusColor1 StylusColor2
Warning
Printers’ names in PyKota are case-sensitive, so be careful to use the exactnames exposed by your printing system.
After some minutes, you think that you should charge more on the StylusColor1 and StylusColor2
because they can do color. You also want to enter a description for these printers, because you haveseveral of them :
$ pkprinters --charge 0.25 "StylusColor*"$ pkprinters --description "Stylus Color 900 First floor" StylusColor1$ pkprinters --description "Stylus Color 900 Second floor" StylusColor2
You can now verify what you did :
$ pkprinters --listHP2100 [] (0.0 + #*0.05)TekTro [] (0.0 + #*0.05)StylusColor1 [Stylus Color 900 First floor] (0.0 + #*0.25)StylusColor2 [Stylus Color 900 Second floor] (0.0 + #*0.25)
24
Chapter 5. Manage printers with pkprinters
The command above has listed all print queues present in PyKota’s database, along with their optionaldescription and their base cost formula. The cost formula includes the price per job, 0.0 in ourexamples, and the price per page (# representing the number of pages).
If you defined printers groups, then the total cost is computed as the recursive sum of the printing cost onthe current printer plus all the printers groups it is a member of. In addition, each user can have anovercharging (or undercharging) factor, by which the total printing cost will be multiplied to determinethe real cost of printing on a particular printer for a particular user.
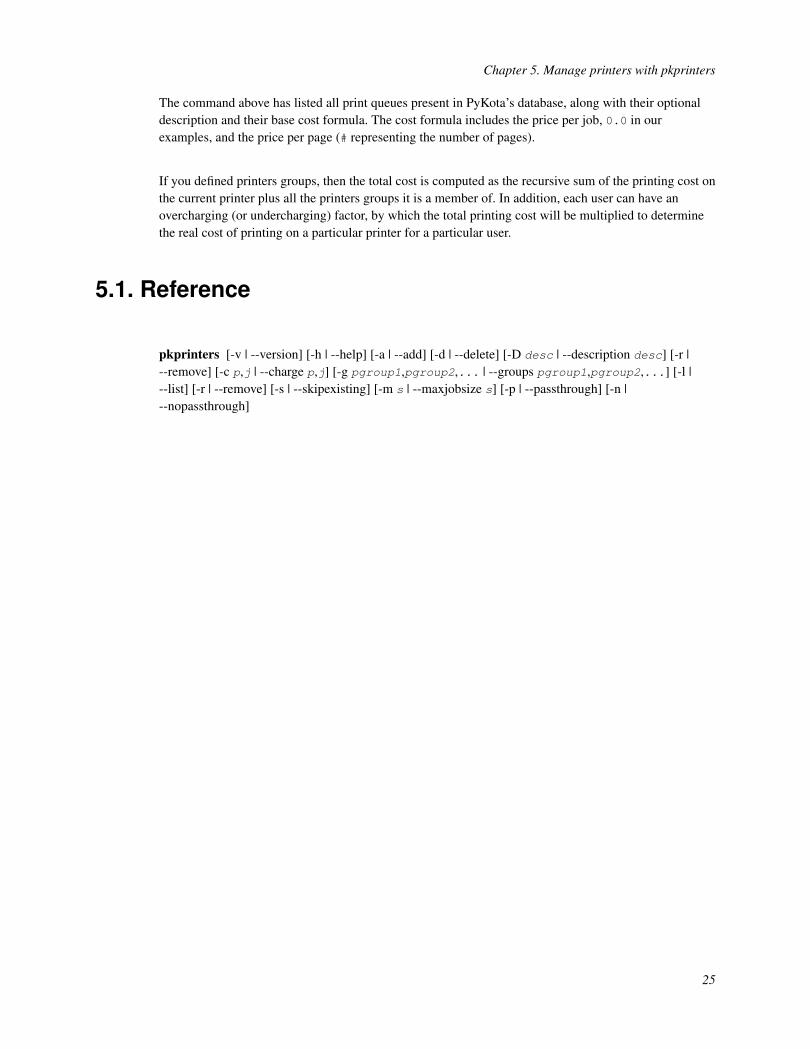
5.1. Reference
pkprinters [-v | --version] [-h | --help] [-a | --add] [-d | --delete] [-D desc | --description desc] [-r |--remove] [-c p,j | --charge p,j] [-g pgroup1,pgroup2,... | --groups pgroup1,pgroup2,...] [-l |--list] [-r | --remove] [-s | --skipexisting] [-m s | --maxjobsize s] [-p | --passthrough] [-n |--nopassthrough]
25

Chapter 6. Manage Users and Groups withpkusers
Last modified on $Date: 2006-04-05 21:17:51 +0200 (mer, 05 avr 2006) $
You’ll use this tool to create, manage or delete users or users groups from the database. Before you canassign print quotas to an user or group with the edpykota you MUST add this user or group to thedatabase using pkusers.
The simplest way to add an user named jerome to the database is to type :
$ pkusers --add jerome
The commands above have created user jerome in the database. By default this user will be limited bypage quotas, that is a maximal number of pages can be assigned to this user on any printer. This has to bedone through the edpykota command line tool.
You can apply different sorts of limitations to an user or users group, by specifying a different value forthe --limitby command line option to pkusers :
• --limitby quota : Page quotas are defined for each user on each printer. This means that an usercan be limited to print more than 20 pages on printer HP2100 while still being allowed to print 500pages on printer TekTro. This is the default.
• --limitby balance : Account balance quotas are defined once for each user. You give a number ofcredits to an user, and whenever he prints on any printer, his number of credits diminishes by the costof the current print job, until his balance reaches 0 (or the value defined in the balancezeroconfiguration directive in ~pykota/pykota.conf). In other terms, while page quotas are specific toa particular printer for a particular user, account balance quotas are shared between all printers for aparticular user.
• --limitby noquota : the user or group can print without any limitation, but accounting continuesto be done.
• --limitby nochange : the user can print without any limitation, but accounting is not done. Thisvalue is not supported for users groups.
• --limitby noprint : the user can not print. This value is not supported for users groups.
Here’s an incomplete list of features :
• Add and delete users and groups ;
• Add or remove users from users groups ;
26

Chapter 6. Manage Users and Groups with pkusers
• Choose the way you will limit printing for users or groups ;
• Set users’ account balances. An optional comment can be added to each payment ;
• Set users’ overcharging (or undercharging) factor ;
• Sets a textual description for users or groups ;
• Sets users’ email addresses (on creation only) ;
• Lists users or groups ;
For more details on the use of pkusers, please see this command’s manual page or help.
27

Chapter 7. Manage Print Quotas with edpykota
Last modified on $Date: 2006-04-05 21:17:51 +0200 (mer, 05 avr 2006) $
You’ll use this tool to create, manage or delete print quota entries for users or users groups on printers orprinters groups.
By default, before being allowed to print through PyKota, an user must exist in the database and have aprint quota entry on every printer he should be allowed to use. As seen in the previous chapter, thesimplest way to add an user named jerome to the database is to type :
$ pkusers --add jerome
But this is not sufficient to allow user jerome to print. You have to create a print quota entry for jeromeon all printers he is allowed to print to. The easiest way to do so is to type :
$ edpykota --add jerome
The commands above have created user jerome in the database, and have automatically created printquota entries with no limit for this user on all existing printers. This means that user jerome is allowedto print without limitation, but that full accounting will still be done for this user : you’ll know wheneverhe prints and how much.
Here’s an incomplete list of features :
• Add and delete users and groups print quota entries ;
• Define, increase or decrease hard and soft page limits for users ou users groups, on a per printer basis ;
• Reset or modify page counters for users or groups, on a per printer basis ;
• List print quota entries ;
For more details on the use of edpykota, please see this command’s manual page or help.
28

Chapter 8. Create print quota usage reportswith repykota
Last modified on $Date: 2006-04-07 22:34:44 +0200 (ven, 07 avr 2006) $
To account for print usage is good, however there must be a way to easily query the print quota databaseand generate reports describing current usage for every user on every printer.
8.1. Command line based Print Quota reports
PyKota features a quota report generator, named repykota, with which you can print the current state ofthe quota database.
repykota behaves differently when it is launched by a PyKota administrator, compared to when it islaunched by a normal user.
In the first case, the print quota report will contain current account balance, soft and hard limits, numberof pages printed since last reset, total number of pages printed, total paid, for possibly all users or allgroups, depending on command line options.
In the second case, i.e. when repykota is launched by a normal user, the user will only be allowed to seeinformations about himself or the groups he his a member of.
Any user can limit the report to only one or more printers, by specifying the -P or --printer commandline option, followed by one or more printer name or wildcard. If more than one printer name or wildcardis used, they must be separated by commas.
Launching repykota with no arguments will generate a complete print quota report, depending on whatyou are allowed to see.
Use the --help command line argument to learn what are the different command line options available.
8.1.1. Reference
repykota [-v | --version] [-h | --help] [-u | --users] [-g | --groups] [-P printername | --printerprintername] [name1 | name2 | ... | nameN ]
29

Chapter 8. Create print quota usage reports with repykota
8.2. Web based Print Quota reports
PyKota also features a CGI script to remotely access to print quota reports with a web browser, it iscalled printquota.cgi and you can put it in your web server’s cgi-bin directory if a web server isinstalled on any machine on which PyKota is also installed and configured correctly.
You may also want to copy the CSS stylesheets which are present in the stylesheets/ directory toyour web server’s DocumentRoot (e.g. /var/lib/www) so that the CGI script can find them to presenta nicer web interface.
You can find printquota.cgi in the pykota/cgi-bin directory. Here’s how to install it, provided thatyour web server’s cgi-bin directory is /usr/lib/cgi-bin :
port50-2:/home/jerome/pykota$ cp cgi-bin/printquota.cgi /usr/lib/cgi-binport50-2:/home/jerome/pykota$ chmod 755 /usr/lib/cgi-bin/printquota.cgi
Note: Please ensure that the user your web server is run as, for example www-data under Debian, isallowed to read ~pykota/pykota.conf but for security reasons you must ensure that this user is notallowed to read ~pykota/pykotadmin.conf
If you install the CGI script as described above, any user will be allowed to view the complete printquota report, for all users, groups and printers. This is then a different behavior compared to when anormal user wants a print quota report from the command line through repykota. If you find thisdisturbing, then the best is to ask for user authentication whenever the printquota.cgi CGI script isaccessed. This CGI script will then automatically behave as expected, showing in the print quota reportonly what the authenticated user is allowed to see, just like when he launches repykota from thecommand line. As a special case, if the user authenticates using the root username, then there’s norestriction on what may appear on the print quota report.
To automatically ask for an authentication dialog whenever the CGI script is accessed, you have toconfigure your web server to do so. If your webserver is Apache (http://httpd.apache.org), then it’srelatively easy. First you have to put printquota.cgi in its own subdirectory below your web server’scgi-bin directory, for example in cgi-bin/PyKota/. Then use the htpasswd command line tool tocreate a file which contains usernames and passwords for all your users allowed to see the print quotareport from a web browser, and put this file outside of the directories served by Apache so that nobodycould retrieve it. Finally create a file named .htaccess in cgi-bin/PyKota/ with appropriate contentin it. This file should tell Apache to automatically ask for an authentication whenever something fromthis directory is accessed, and to use the password file previously created to match usernames and
30

Chapter 8. Create print quota usage reports with repykota
passwords. You may also have to tweak Apache’s default configuration to allow the authenticationmechanism.
The detailed procedure to do all this is out of the scope of the present document, please refer to Apache’sdocumentation (http://httpd.apache.org/docs-project/) for all the gory details.
31

Chapter 9. Get print quotes before printing forreal with pykotme
Last modified on $Date: 2006-06-01 15:56:00 +0200 (jeu, 01 jun 2006) $
PyKota features a print quote generator, named pykotme. This command line tool can be used to learn inadvance how much a print job will cost to you if you really send it to a printer. You can then decide ifprinting your document is a good idea or not, and do it knowingly.
To get a print quote, you have to launch pykotme from the command line, passing your print job’scontent in any format recognized by PyKota 1, either in the form of one or more file names on thecommand line, or on its standard input (i.e. in a shell pipe or redirection).
Without any command line argument, pykotme automatically reads your job’s data from its standardinput.
By default, pykotme will display a quote for your job on all printers. You can restrict this by using the-p | --printer command line option followed with either a printer’s name or a wildcard which willbe used to search all printers which name matches. You can pass more than one printer name wildcard,separating them with commas.
pykotme’s functionnality is also available through the use of the pykotme.cgi CGI script. Howeverwithout authentication pykotme.cgi will only return the print job’s size and not its cost, because the costdepends on the value of the user’s overcharging factor and the printer being used. That’s why if you wantto obtain the same functionnality with the CGI script than with the command line tool, you mustconfigure your web server to force users to authenticate whevenver they access to pykotme.cgi. Thenthey will be able to choose one or more printers (all by default), and also to enter their username, and theexact cost of the print job will be computed.
9.1. Examples
Here are some examples of pykotme usage.
The simplest form :
port50-2:~$ pykotme pykota.psYour account balance : 16.25Job size : 22 pagesCost on printer apple : 1.35port50-2:~$
32

Chapter 9. Get print quotes before printing for real with pykotme
More complex, with printer name wildcard and within a pipe :
port50-2:~$ a2ps -o - pykota/README | pykotme --printer "a*"[pykota/README (plain): 6 pages on 3 sheets][Total: 6 pages on 3 sheets] sent to the standard outputYour account balance : 16.25Job size : 3 pagesCost on printer apple : 0.40port50-2:~$
9.2. Reference
pykotme [-v | --version] [-h | --help] [-P printername | --printer printername] [filename1 |filename2 | ... | filenameN ]
Notes1. PyKota now uses pkpgcounter (http://www.pykota.com/software/pkpgcounter) which recognizes
PostScript (both binary and DSC compliant), PCLXL (aka PCL6), PDF, PCL3/4/5, ESC/P2, TIFF,DVI, OpenOffice Writer, and OpenOffice Impress.
33

Chapter 10. Warn users above print quota withwarnpykota
Last modified on $Date: 2006-04-07 22:34:44 +0200 (ven, 07 avr 2006) $
Whenever a user tries to print a document, if he is over his print quota, then the job is refused. Dependingon PyKota’s configuration, especially the mailto option, he and/or the administrator may eventuallyreceive an email message which explains the situation and invites him to solve the problem before beingallowed to print again.
However this may not be sufficient, and you may want to warn users who have reached their print quotaat regular intervals, like every day, for example from a cron job.
This may be useful if the user has reached his print quota, and have received an email message tellinghim so, but then he doesn’t print for some days and may forget to fix the problem, by buying more paperfor example.
The warnpykota command was written with this in mind. If you put this command in your crontab,launching it for example every day, then you’ll be sure that all your users who are above their print quotawill not forget it ! Of course they may delete the messages without having read them, but at least theywon’t be able to say that they didn’t receive them ;-)
When an user who is not a PyKota administrator launches this command, only him can receive a warningmessage. He can specify a printer name’s filter to check his quota only on specific printers. If a normaluser uses the --groups command line argument, then for each group he is a member of in the printquota database, each group member may receive a warning message. You can take care of this if thisbecomes annoying by forbidding normal users to launch the warnpykota command.
PyKota administrators can pass additionnal user or group names (or wildcard filters) to only check theusers or groups whose name matches.
10.1. Reference
warnpykota [-v | --version] [-h | --help] [-u | --users] [-g | --groups] [-P printername | --printerprintername] [name1 | name2 | ... | nameN ]
34

Chapter 11. Export datas to other software withdumpykota
Last modified on $Date: 2005-10-09 22:39:06 +0200 (dim, 09 oct 2005) $
If you want to reuse PyKota datas from another software, but don’t want to modify your existingapplication to have it connect to PyKota’s database, your best option is the new dumpykota command.
dumpykota can export PyKota datas in a number of formats. The supported output formats are commaseparated values, semicolon separated values, tab separated values, and XML.
For the print job history’s datas, a special format identical to CUPS’ page_log format is also supported.This allows you to interface PyKota with third party tools like phpPrintAnalyzer which is a logfileanalyzer for CUPS.
More formats may be added in the future. In particular, SQL and LDIF are planned, but are currently notimplemented.
dumpykota can’t dump all datas at once though, you have to specify which type of datas you want. Thepossible types are :
• Users
• Users groups
• Printers
• Printers groups membership
• Users groups membership
• Users print quota entries
• Users groups print quota entries
• History of payments
• History of print jobs
You can then import the dumped datas into a spreadsheet for example, if you want to create complexreports with nice looking graphs and the like.
An important feature of this command is the possibility to use a simple but powerful filtering mechanismto only export the datas you want. You can pass any number of filter expressions which will be ANDedtogether to select only certain records in the database. For example the filter expression
35
Chapter 11. Export datas to other software with dumpykota
username=jerome would only dump datas pertaining to user jerome while the filter expressionstart=2005 used when dumping the history would only dump jobs printed during the year 2005.
Several keys like username are possible, but some only apply to certain data types. Using a key which isnot supported for a particular data type may return an incorrect result.
Tip: Please refer to dumpykota’s help or manual page to obtain the complete list of supported keys.
This command could also be used if you plan to write your own management tools : just write wrappersaround the pkprinters, edpykota, and dumpykota tools, and your own tools will automatically benefitfrom PyKota database backend independance layer. This is exactly what the third party softwarephpPykotaAdmin does.
Finally, dumpykota’s functionnality is now also available remotely through the use of thedumpykota.cgi CGI script.
Warning
Only PyKota administrators can dump PyKota’s datas.
11.1. Reference
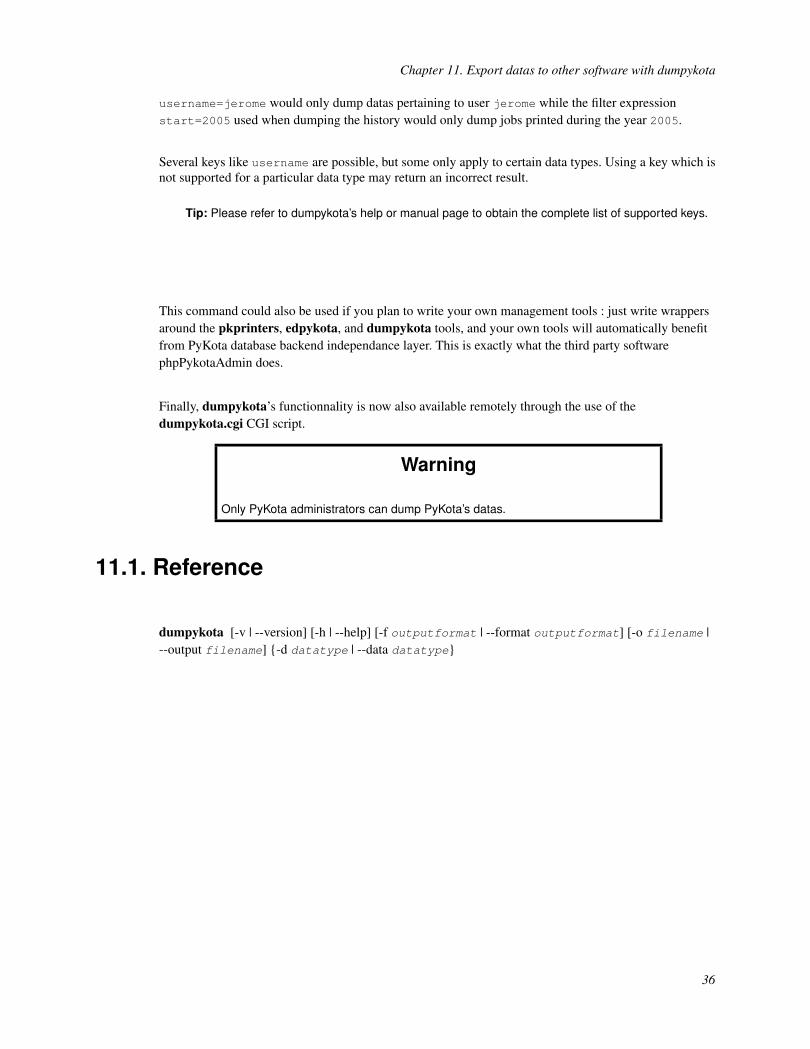
dumpykota [-v | --version] [-h | --help] [-f outputformat | --format outputformat] [-o filename |--output filename] {-d datatype | --data datatype}
36

Chapter 12. Manage billing codes withpkbcodes
Last modified on $Date: 2005-10-09 23:02:24 +0200 (dim, 09 oct 2005) $
Some people like lawyers for example need to be able to invoice their own clients for printouts. Toaddress such needs, CUPS features the possibility to attach a particular billing code to each print job, andof course, PyKota can make use of it.
To use a billing code when printing, you have to pass an additionnal argument to the lp command, forexample for a client named smith this could be something like :
$ lp -o job-billing=smith the_file_to_print.ps
For PyKota to be able to maintain statistics per billing code, you first have to add these billing codes toPyKota’s database. This is the main goal of the pkbcodes command line tool.
But pkbcodes also allows you to add a textual description to each billing code, to delete them, to resetbilling code specific counters, and finally to list existing billing codes.
With the help of the unknown_billingcode directive in pykota.conf, you can decide what happenswhen a billing code is encountered when printing, and this billing code is not yet in PyKota’s database.Automatically adding it to the database is a common choice, which saves time for the PyKotaadministrator.
Finally, the overwrite_jobticket directive in pykota.conf allows you to overwrite the job billinginformation at the latest stage of printing, for example if the application used to print doesn’t allow endusers to give a value to the billing code when submitting the print job.
12.1. Reference
pkbcodes [-v | --version] [-h | --help] [-a | --add] [-d | --delete] [-D desc | --description desc] [-l |--list] [-r | --reset] [-s | --skipexisting]
37

Chapter 13. Uses On Screen Display to showpersonal print quota information with pykosd
Last modified on $Date: 2005-10-09 22:39:06 +0200 (dim, 09 oct 2005) $
pykosd is a graphical X Window application which when launched will display print quota informationfor the current user.
Whenever you launch pykosd, it will display the current user’s print quota information in the top-leftcorner of the screen, above all existing windows, and with a transparent background.
By default, the information will remain displayed during 3 seconds, and will be refreshed every 180seconds. The program will loop forever until Ctrl+C is pressed, unless a specific number of iterationswas asked for.
Tip: Use command line options to change this behaviour.
13.1. Reference
pykosd [-v | --version] [-h | --help] [-d d | --duration d] [-l n | --loop n] [-s s | --sleep s]
38

Chapter 14. Automate user account creationwith autopykota
Last modified on $Date: 2005-03-06 17:52:43 +0100 (dim, 06 mar 2005) $
If you want to automate the users account and quota entries creation on first print, you can do this easilywith the policy: external( your command here ) directive in pykota.conf. You just have toput your command of choice there.
autopykota was designed to automatically set an initial account balance value to newly added users,while taking care of not resetting the balance value if the user already exists but doesn’t have a quotaentry on the current printer.
If you want to limit your users by page quota then you must not use this command. Just use some form ofthe edpykota command and it will work just fine. On the other hand, if you want to limit your users bytheir account balance, this command was made to ease your life : you don’t have to design a complexshell script to check if user already exists or have a quota entry on the current printer before deciding ifyou have to set the initial balance value or not : autopykota takes care of all this automagically.
14.1. Reference
autopykota [-v | --version] [-h | --help] [-i value | --initbalance value]
39

Chapter 15. Invoice your users with pkinvoice
Last modified on $Date: 2006-12-03 11:50:20 +0100 (dim, 03 déc 2006) $
pkinvoice is a command line tool with which you’ll be able to extract jobs from the printing history, andgenerate nice looking and configurable PDF invoices.
You’ll be allowed to optionally filter the data extraction based on starting and ending dates, whichdefaults to the complete history, user, printer, client hostname, etc...
The generated documents will contain one page per user, and the amount on the invoice will representhow many credits each user spent during the specified time period.
For more details, please refer to pkinvoice’s manual page.
40

Chapter 16. Refund your users with pkrefund
Last modified on $Date: 2006-12-03 11:50:20 +0100 (dim, 03 déc 2006) $
pkrefund is a command line tool with which you’ll be able to extract jobs from the printing history, andrefund them with the possibility to generate nice looking and configurable PDF receipts.
You’ll be allowed to optionally filter the data extraction based on starting and ending dates, whichdefaults to the complete history, user, printer, client hostname, etc...
The generated documents will contain one page per user, with the number of pages and credits whichwere refunded.
For more details, please refer to pkrefund’s manual page.
41

Chapter 17. Generate banners with pkbanner
Last modified on $Date: 2005-10-10 00:04:12 +0200 (lun, 10 oct 2005) $
CUPS integrated bannering facility sucks because banners can only be static PostScript files, even if theycan include a few dynamic datas. Also it is possible to have several banners and jobs mixed in anunexpected way because of the way CUPS works.
To fix this problem for good, PyKota can use its own banners, which can be :
• Any static file, not only PostScript ones.
• The output of any executable command of your choice, launched at printing time, and to which aremade available a bunch of environment variables which can help your command create a purelydynamic banner on the fly. In particular your command knows all about the status of the current user’sprint quota information.
Although you can use any command to generate banners for you, you can also use the pkbannercommand line tool which is included in PyKota. It was designed for ease of use, without anycompromise on its flexibility.
For example pkbanner allows you to specify a particular logo and url to be printed on the banner pages,as well as define a transparency factor to save toner while printing banners. You can also choose aparticular page size to use, as well as include additionnal textual information on the banner page.
pkbanner generates PostScript code, but PyKota accepts that you pipe its output into any othercommand if you ever need to use another file format for your printer.
pkbanner is not meant to be launched from the command line though, but only through thestartingbanner and endingbanner directives in pykota.conf.
17.1. Reference
pkbanner [-v | --version] [-h | --help] [-l image | --logo image] [-p size | --pagesize size] [-sluminosity | --savetoner luminosity] [-u link | --url link] [additionnal info]
42

Chapter 18. Interact with end users withpknotify and pykoticon
Last modified on $Date: 2006-04-06 22:17:58 +0200 (jeu, 06 avr 2006) $
Printing under GNU/Linux and UNIX-Like systems usually lack features to dialog with end users. Theyusually submit their print jobs, and then wait for them to complete, most of the time silently.
Some add-ons to printing systems, like print accounting software, could however benefit a lot from beingable to interact with users who submitted print jobs. That’s exactly what allow the pknotify andpykoticon commands, and they do so in a completely generic way.
PyKotIcon is a cross-platform, generic, networked, dialog box manager which sits on client hosts andlisten for incoming connections coming from the print servers. This application is in fact a small serverwhich publishes some of its functions over XML-RPC. These functions offer the following possibilities :
• Display an informational message to the end user ;
• Display a message to the end user and asks for confirmation or cancellation. The result is sent back tothe calling program, usually on the print server ;
• Asks the end user to fill a simple form containing a number of labelled fields. The values the usertyped in are sent back to the calling program, usually on the print server ;
• Automatically shutdown the PyKotIcon application when asked to do so by an authorized host, usuallythe print server.
It is important to know that PyKotIcon is completely independant from PyKota and can be used outsideof PyKota. In reality PyKotIcon knows NOTHING about print accounting, and doesn’t need to. That’swhy it’s distributed separately.
pknotify is a client program for PyKotIcon, which is usually launched from directives in~pykota/pykota.conf, but which can be used directly from the command line as well, if needed.
pknotify, through command line options, can use any of the functions published by PyKotIcon. Inaddition, if it is configured to tell PyKotIcon to ask the end user for an username and password, it can tryto authenticate this user with this password on the print server side. This possibility is extremely usefulwhen you allow anonymous logins on printing clients, but still want print accounting to be done on a peruser basis : each time an anonymous user prints, we can ask him remotely to enter his authenticationcredentials. These credentials are then sent back to the print server (NB : in the clear for now), whichuses them to decide if printing is to be denied, or allowed to continue until the next phase of printaccounting and optional quota enforcement.
43

Chapter 18. Interact with end users with pknotify and pykoticon
For more details, see pknotify’s manual page.
Warning
While PyKotIcon sits on the printing clients, it is in fact a server application. Whilepknotify is run on the print server, it is in fact a client application to PyKotIcon.
44

Chapter 19. Control PyKota by email withpkmail
Last modified on $Date: 2005-10-09 22:39:06 +0200 (dim, 09 oct 2005) $
pkmail is an email gateway which allows you to control PyKota using email messages.
For now, this command can’t do more than print quota reports, but more powerful functionnalities areplanned for a future release.
19.1. Installation
Contrary to other commands included with PyKota, pkmail is not meant to be used from the commandline, but instead launched from your mail server when particular messages are received.
In order to achieve this, the easiest way is to define a special email alias. Every message received on thisaddress will cause your webserver to automatically launch pkmail, passing the message’s content onpkmail’s standard input.
The name of the email alias is completely free, let’s call it pykotacmd for example. Now edit/etc/aliases with your favorite text editor and enter the following :
pykotacmd : "|/usr/bin/pkmail"
Finally, tell your mail server that new aliases are available. To do so, at the command prompt just type :
$ newaliases
But to be useful, pkmail must be able to read PyKota’s pykotadmin.conf configuration file. A simpleway to do so is to put the system user your mail server runs aliases commands as into the pykota systemgroup, then restart your mail server software.
Tip: Depending on the software you use as the mail server, additional work may be needed. Forexample Exim doesn’t by default initialize all the groups when launching a command from the/etc/aliases database. Please refer to your mail server’s documentation for details.
45

Chapter 19. Control PyKota by email with pkmail
19.2. Usage
Now that pkmail is installed, we can use it by sending email messages to the [email protected]. This command will then process your request, andsend the result back to you by email.
For now, pkmail only accepts commands in the Subject: field of the email message you send to it.
pkmail is still in a pretty experimental state, and only recognizes a single command : report
The report takes an username as its only optional argument. So for example to receive a print quotareport for user jerome, you’ll just have to send an email message with report jerome in the subject.
19.3. Reference
pkmail [-v | --version] [-h | --help]
46

Chapter 20. Useful Shell Scripts
Last modified on $Date: 2005-10-09 22:39:06 +0200 (dim, 09 oct 2005) $
PyKota comes with a number of shell scripts which help do complex things. They can be used as-is, butyou may prefer to adapt them to your own configuration. All are installed in the /usr/share/pykotadirectory.
20.1. waitprinter.sh
This script which accepts a printer’s hostname or IP address as its first parameter is used to wait for aprinter which supports the SNMP protocol to be in idle state. It exits as soon as the printer is idle, elseloops forever.
When defining an hardware accounter for a printer, it is important to wait for the printer being idle
before asking it for its internal page counter, otherwise results could be inaccurate. If the printer is askedwhile the job is still being printed, then the page counter’s value will be lower than expected with regardto the real job’s size.
waitprinter.sh can be used to be sure that PyKota waits until no job is being printed, and no paper sheetis travelling inside the printer.
Tip: See the sample configuration file conf/pykota.conf.sample for examples.
20.2. papwaitprinter.sh
This script which accepts a printer’s AppleTalk name as its first parameter is used to wait for a printerwhich supports the AppleTalk protocol to be in idle state. It exits as soon as the printer is idle, elseloops forever.
When defining an hardware accounter for a printer, it is important to wait for the printer being idle
before asking it for its internal page counter, otherwise results could be inaccurate. If the printer is askedwhile the job is still being printed, then the page counter’s value will be lower than expected with regardto the real job’s size.
papwaitprinter.sh can be used to be sure that PyKota waits until no job is being printed, and no papersheet is travelling inside the printer.
47
Chapter 20. Useful Shell Scripts
Tip: See the sample configuration file conf/pykota.conf.sample for examples.
20.3. mailandpopup.sh
This script can be used in the mailto directive of pykota.conf to both send an email and display aWinpopup message on the user’s screen, whenever print quota is low or reached.
For this script to work successfully, you may need to have a Samba Primary Domain Controller. Somemodifications may be needed in other configurations.
Tip: See the sample configuration file conf/pykota.conf.sample for examples.
20.4. pagecount.pl
This Perl script can be used in the accounter directive of pykota.conf, to ask a printer for its internalpage counter by sending a specially crafted PJL job to it over the AppSocket protocol, usually on TCPport 9100. It accepts the printer’s hostname or IP address as its first parameter, and the optional TCP portas its second parameter (it defaults to 9100).
Most of the time you’ll use this script in combination with a script which waits for the printer to be inidle state, in something like :
accounter: hardware(somewaitscript.sh && pagecount.pl %(printer)s)
Tip: See the sample configuration file conf/pykota.conf.sample for examples.
48

Appendix A. GNU General Public License
A.1. Preamble
The licenses for most software are designed to take away your freedom to share and change it. Bycontrast, the GNU General Public License is intended to guarantee your freedom to share and changefree software - to make sure the software is free for all its users. This General Public License applies tomost of the Free Software Foundation’s software and to any other program whose authors commit tousing it. (Some other Free Software Foundation software is covered by the GNU Library General PublicLicense instead.) You can apply it to your programs, too.
When we speak of free software, we are referring to freedom, not price. Our General Public Licenses aredesigned to make sure that you have the freedom to distribute copies of free software (and charge for thisservice if you wish), that you receive source code or can get it if you want it, that you can change thesoftware or use pieces of it in new free programs; and that you know you can do these things.
To protect your rights, we need to make restrictions that forbid anyone to deny you these rights or to askyou to surrender the rights. These restrictions translate to certain responsibilities for you if you distributecopies of the software, or if you modify it.
For example, if you distribute copies of such a program, whether gratis or for a fee, you must give therecipients all the rights that you have. You must make sure that they, too, receive or can get the sourcecode. And you must show them these terms so they know their rights.
We protect your rights with two steps:
1. copyright the software, and
2. offer you this license which gives you legal permission to copy, distribute and/or modify thesoftware.
Also, for each author’s protection and ours, we want to make certain that everyone understands that thereis no warranty for this free software. If the software is modified by someone else and passed on, we wantits recipients to know that what they have is not the original, so that any problems introduced by otherswill not reflect on the original authors’ reputations.
Finally, any free program is threatened constantly by software patents. We wish to avoid the danger thatredistributors of a free program will individually obtain patent licenses, in effect making the programproprietary. To prevent this, we have made it clear that any patent must be licensed for everyone’s freeuse or not licensed at all.
49

Appendix A. GNU General Public License
The precise terms and conditions for copying, distribution and modification follow.
A.2. TERMS AND CONDITIONS FOR COPYING,DISTRIBUTION AND MODIFICATION
A.2.1. Section 0
This License applies to any program or other work which contains a notice placed by the copyrightholder saying it may be distributed under the terms of this General Public License. The "Program",below, refers to any such program or work, and a “work based on the Program” means either the Programor any derivative work under copyright law: that is to say, a work containing the Program or a portion ofit, either verbatim or with modifications and/or translated into another language. (Hereinafter, translationis included without limitation in the term “modification”.) Each licensee is addressed as “you”.
Activities other than copying, distribution and modification are not covered by this License; they areoutside its scope. The act of running the Program is not restricted, and the output from the Program iscovered only if its contents constitute a work based on the Program (independent of having been madeby running the Program). Whether that is true depends on what the Program does.
A.2.2. Section 1
You may copy and distribute verbatim copies of the Program’s source code as you receive it, in anymedium, provided that you conspicuously and appropriately publish on each copy an appropriatecopyright notice and disclaimer of warranty; keep intact all the notices that refer to this License and tothe absence of any warranty; and give any other recipients of the Program a copy of this License alongwith the Program.
You may charge a fee for the physical act of transferring a copy, and you may at your option offerwarranty protection in exchange for a fee.
A.2.3. Section 2
You may modify your copy or copies of the Program or any portion of it, thus forming a work based onthe Program, and copy and distribute such modifications or work under the terms of Section 1 above,provided that you also meet all of these conditions:
a. You must cause the modified files to carry prominent notices stating that you changed the files andthe date of any change.
50

Appendix A. GNU General Public License
b. You must cause any work that you distribute or publish, that in whole or in part contains or isderived from the Program or any part thereof, to be licensed as a whole at no charge to all thirdparties under the terms of this License.
c. If the modified program normally reads commands interactively when run, you must cause it, whenstarted running for such interactive use in the most ordinary way, to print or display anannouncement including an appropriate copyright notice and a notice that there is no warranty (orelse, saying that you provide a warranty) and that users may redistribute the program under theseconditions, and telling the user how to view a copy of this License.
Exception:: If the Program itself is interactive but does not normally print such an announcement,your work based on the Program is not required to print an announcement.)
These requirements apply to the modified work as a whole. If identifiable sections of that work are notderived from the Program, and can be reasonably considered independent and separate works inthemselves, then this License, and its terms, do not apply to those sections when you distribute them asseparate works. But when you distribute the same sections as part of a whole which is a work based onthe Program, the distribution of the whole must be on the terms of this License, whose permissions forother licensees extend to the entire whole, and thus to each and every part regardless of who wrote it.
Thus, it is not the intent of this section to claim rights or contest your rights to work written entirely byyou; rather, the intent is to exercise the right to control the distribution of derivative or collective worksbased on the Program.
In addition, mere aggregation of another work not based on the Program with the Program (or with awork based on the Program) on a volume of a storage or distribution medium does not bring the otherwork under the scope of this License.
A.2.4. Section 3
You may copy and distribute the Program (or a work based on it, under Section 2 in object code orexecutable form under the terms of Sections 1 and 2 above provided that you also do one of thefollowing:
a. Accompany it with the complete corresponding machine-readable source code, which must bedistributed under the terms of Sections 1 and 2 above on a medium customarily used for softwareinterchange; or,
b. Accompany it with a written offer, valid for at least three years, to give any third party, for a chargeno more than your cost of physically performing source distribution, a complete machine-readablecopy of the corresponding source code, to be distributed under the terms of Sections 1 and 2 aboveon a medium customarily used for software interchange; or,
51

Appendix A. GNU General Public License
c. Accompany it with the information you received as to the offer to distribute corresponding sourcecode. (This alternative is allowed only for noncommercial distribution and only if you received theprogram in object code or executable form with such an offer, in accord with Subsection b above.)
The source code for a work means the preferred form of the work for making modifications to it. For anexecutable work, complete source code means all the source code for all modules it contains, plus anyassociated interface definition files, plus the scripts used to control compilation and installation of theexecutable. However, as a special exception, the source code distributed need not include anything that isnormally distributed (in either source or binary form) with the major components (compiler, kernel, andso on) of the operating system on which the executable runs, unless that component itself accompaniesthe executable.
If distribution of executable or object code is made by offering access to copy from a designated place,then offering equivalent access to copy the source code from the same place counts as distribution of thesource code, even though third parties are not compelled to copy the source along with the object code.
A.2.5. Section 4
You may not copy, modify, sublicense, or distribute the Program except as expressly provided under thisLicense. Any attempt otherwise to copy, modify, sublicense or distribute the Program is void, and willautomatically terminate your rights under this License. However, parties who have received copies, orrights, from you under this License will not have their licenses terminated so long as such parties remainin full compliance.
A.2.6. Section 5
You are not required to accept this License, since you have not signed it. However, nothing else grantsyou permission to modify or distribute the Program or its derivative works. These actions are prohibitedby law if you do not accept this License. Therefore, by modifying or distributing the Program (or anywork based on the Program), you indicate your acceptance of this License to do so, and all its terms andconditions for copying, distributing or modifying the Program or works based on it.
A.2.7. Section 6
Each time you redistribute the Program (or any work based on the Program), the recipient automaticallyreceives a license from the original licensor to copy, distribute or modify the Program subject to theseterms and conditions. You may not impose any further restrictions on the recipients’ exercise of therights granted herein. You are not responsible for enforcing compliance by third parties to this License.
52

Appendix A. GNU General Public License
A.2.8. Section 7
If, as a consequence of a court judgment or allegation of patent infringement or for any other reason (notlimited to patent issues), conditions are imposed on you (whether by court order, agreement orotherwise) that contradict the conditions of this License, they do not excuse you from the conditions ofthis License. If you cannot distribute so as to satisfy simultaneously your obligations under this Licenseand any other pertinent obligations, then as a consequence you may not distribute the Program at all. Forexample, if a patent license would not permit royalty-free redistribution of the Program by all those whoreceive copies directly or indirectly through you, then the only way you could satisfy both it and thisLicense would be to refrain entirely from distribution of the Program.
If any portion of this section is held invalid or unenforceable under any particular circumstance, thebalance of the section is intended to apply and the section as a whole is intended to apply in othercircumstances.
It is not the purpose of this section to induce you to infringe any patents or other property right claims orto contest validity of any such claims; this section has the sole purpose of protecting the integrity of thefree software distribution system, which is implemented by public license practices. Many people havemade generous contributions to the wide range of software distributed through that system in reliance onconsistent application of that system; it is up to the author/donor to decide if he or she is willing todistribute software through any other system and a licensee cannot impose that choice.
This section is intended to make thoroughly clear what is believed to be a consequence of the rest of thisLicense.
A.2.9. Section 8
If the distribution and/or use of the Program is restricted in certain countries either by patents or bycopyrighted interfaces, the original copyright holder who places the Program under this License may addan explicit geographical distribution limitation excluding those countries, so that distribution is permittedonly in or among countries not thus excluded. In such case, this License incorporates the limitation as ifwritten in the body of this License.
A.2.10. Section 9
The Free Software Foundation may publish revised and/or new versions of the General Public Licensefrom time to time. Such new versions will be similar in spirit to the present version, but may differ indetail to address new problems or concerns.
Each version is given a distinguishing version number. If the Program specifies a version number of thisLicense which applies to it and "any later version", you have the option of following the terms andconditions either of that version or of any later version published by the Free Software Foundation. If the
53

Appendix A. GNU General Public License
Program does not specify a version number of this License, you may choose any version ever publishedby the Free Software Foundation.
A.2.11. Section 10
If you wish to incorporate parts of the Program into other free programs whose distribution conditionsare different, write to the author to ask for permission. For software which is copyrighted by the FreeSoftware Foundation, write to the Free Software Foundation; we sometimes make exceptions for this.Our decision will be guided by the two goals of preserving the free status of all derivatives of our freesoftware and of promoting the sharing and reuse of software generally.
A.2.12. NO WARRANTY
BECAUSE THE PROGRAM IS LICENSED FREE OF CHARGE, THERE IS NO WARRANTY FORTHE PROGRAM, TO THE EXTENT PERMITTED BY APPLICABLE LAW. EXCEPT WHENOTHERWISE STATED IN WRITING THE COPYRIGHT HOLDERS AND/OR OTHER PARTIESPROVIDE THE PROGRAM "AS IS" WITHOUT WARRANTY OF ANY KIND, EITHEREXPRESSED OR IMPLIED, INCLUDING, BUT NOT LIMITED TO, THE IMPLIED WARRANTIESOF MERCHANTABILITY AND FITNESS FOR A PARTICULAR PURPOSE. THE ENTIRE RISKAS TO THE QUALITY AND PERFORMANCE OF THE PROGRAM IS WITH YOU. SHOULD THEPROGRAM PROVE DEFECTIVE, YOU ASSUME THE COST OF ALL NECESSARY SERVICING,REPAIR OR CORRECTION.
A.2.13. Section 12
IN NO EVENT UNLESS REQUIRED BY APPLICABLE LAW OR AGREED TO IN WRITING WILLANY COPYRIGHT HOLDER, OR ANY OTHER PARTY WHO MAY MODIFY AND/ORREDISTRIBUTE THE PROGRAM AS PERMITTED ABOVE, BE LIABLE TO YOU FORDAMAGES, INCLUDING ANY GENERAL, SPECIAL, INCIDENTAL OR CONSEQUENTIALDAMAGES ARISING OUT OF THE USE OR INABILITY TO USE THE PROGRAM (INCLUDINGBUT NOT LIMITED TO LOSS OF DATA OR DATA BEING RENDERED INACCURATE ORLOSSES SUSTAINED BY YOU OR THIRD PARTIES OR A FAILURE OF THE PROGRAM TOOPERATE WITH ANY OTHER PROGRAMS), EVEN IF SUCH HOLDER OR OTHER PARTY HASBEEN ADVISED OF THE POSSIBILITY OF SUCH DAMAGES.
54


