puppet enterprise
210
Puppet Enterprise 2.8 User's Guide (Generated on July 01, 2013, from git revision 46784ac1656bd7b57fcfb51d0865ec7ff65533d9)
-
Upload
durgadivya30 -
Category
Documents
-
view
176 -
download
7
description
user guide for puppet enterprise
Transcript of puppet enterprise

Puppet Enterprise 2.8 User's Guide(Generated on July 01, 2013, from git revision 46784ac1656bd7b57fcfb51d0865ec7ff65533d9)�

Puppet Enterprise User's GuideWelcome! This is the userʼs guide for Puppet Enterprise 2.8.
If you are new to Puppet Enterprise, begin with the quick start guide to create a small proof-of-concept deployment and experience the core Puppet Enterprise tools and workflows. This�guided walkthrough will take approximately 30 minutes.To install Puppet Enterprise, see the following pages:
System RequirementsInstalling PEInstalling Windows AgentsPuppet Enterprise Downloads
To see whatʼs new since the last release, see New Features.The Deployment Guide has a ton of information to help you set up and deploy Puppet Enterprisein accordance with the best practices and methods used by Puppet Labsʼ professional servicesengineers.
Otherwise, use the navigation to the left to move between this guideʼs sections and chapters.
About Puppet EnterpriseThank you for choosing Puppet Enterprise, IT automation software that allows systemadministrators to programmatically provision, configure, and manage servers, network devices and�storage, in the data center or in the cloud.
Puppet Enterprise (PE) offers:�
Configuration management tools that let sysadmins define a desired state for their infrastructure��and then automatically enforce that state.A web-based console UI, for analyzing reports, managing your Puppet systems and users, andediting resources on the fly.�Powerful orchestration capabilities.An alternate compliance workflow for auditing changes to unmanaged resources.�Cloud provisioning tools for creating and configuring new VM instances.�
This userʼs guide will help you start using Puppet Enterprise 2.8, and will serve as a reference asyou gain more experience. It covers PE-specific features and offers brief introductions to Puppet��and MCollective. Use the navigation at left to move between the guideʼs sections and chapters.
Puppet Enterprise 2.8 User's Guide • Puppet Enterprise User's Guide 2/210

About PuppetPuppet is the leading open source configuration management tool. It allows system configuration��“manifests” to be written in a high-level DSL, and can compose modular chunks of configuration to�create a machineʼs unique configuration. By default, Puppet Enterprise uses a client/server Puppet�deployment, where agent nodes fetch configurations from a central puppet master.�
About OrchestrationPuppet Enterprise includes distributed task orchestration features. Nodes managed by PE will listenfor commands over a message bus, and independently take action when they hear an authorizedrequest. This lets you investigate and command your infrastructure in real time without relying on acentral inventory.
About the ConsolePEʼs console is the web front-end for managing your systems. The console can:
Trigger immediate Puppet runs on an arbitrary subset of your nodesBrowse and edit resources on your nodes in real timeAnalyze reports to help visualize your infrastructure over timeBrowse inventory data and backed-up file contents from your nodes�Group similar nodes and control the Puppet classes they receive in their catalogsRun advanced tasks powered by MCollective plugins
For New UsersIf youʼve never used Puppet before and want to evaluate Puppet Enterprise, follow the PuppetEnterprise quick start guide. This walkthrough will guide you through creating a smallproof-of-concept deployment while demonstrating the core features and workflows of�Puppet Enterprise.
For Returning UsersSee the whatʼs new page for the new features in this release of Puppet Enterprise. You canfind detailed release notes for updates within the 2.8.x series in the �appendix of this guide.
NOTE: Orchestration and live management are not yet supported on Windows nodes.
Puppet Enterprise 2.8 User's Guide • Puppet Enterprise User's Guide 3/210

About the Cloud Provisioning ToolsPE includes command line tools for building new nodes, which can create new VMware, Openstackand Amazon EC2 instances, install PE on any virtual or physical machine, and classify newlyprovisioned nodes within your Puppet infrastructure.
LicensingPE can be evaluated with a complimentary ten node license; beyond that, a commercial per-nodelicense is required for use. A license key file will have been emailed to you after your purchase, and�the puppet master will look for this key at /etc/puppetlabs/license.key . Puppet will log warningsif the license is expired or exceeded, and you can view the status of your license by running puppetlicense at the command line on the puppet master.
To purchase a license, please see the Puppet Enterprise pricing page, or contact Puppet Labs [email protected] or (877) 575-9775. For more information on licensing terms, please see thelicensing FAQ. If you have misplaced or never received your license key, please [email protected].
Next: New Features
New Features in PE 2.8Version 2.8.2
PE 2.8.2 is a maintenance release that patches a critical security vulnerability. For details, check therelease notes.
Version 2.8.1
PE 2.8.1 is a maintenance release. It includes a fix for a bug that caused Live Management and�MCollective filtering failures. �Some other minor bug fixes are also included. For details, check the�release notes. Users of 2.8.0 are strongly encouraged to upgrade to 2.8.1. If you applied the 2.8.0hotfix that predates the 2.8.1 release, you should still upgrade to 2.8.1 in order to get all of the�latest fixes.�
Version 2.8.0
PE 2.8.0 is a feature and maintenance release. Specifically, the 2.8.0 release includes:�
1. New Support for AIX The puppet agent can now be installed on nodes running AIX so you canmanage them using PE. To help you configure AIX nodes, support for AIX package providers, RPM,�NIM and BFF, has been added as well. For information on installation on AIX nodes, check thesystem requirements and the installing PE page. In addition, the type reference has detailedinformation on AIX package providers.Puppet Enterprise 2.8 User's Guide • New Features in PE 2.8 4/210

2. Component Version Bumps Several of the components that comprise PE have been bumped tonewer versions in 2.8. The updates include bug fixes and performance improvements. With PE 2.8,�most users should notice faster compiliation times and better performance. The updatedcomponents include:
Puppet 2.7.21Facter 1.6.17Hiera 1.1.2Hiera-Puppet 1.0.0Stomp 1.2.3
3. Security Patch A vulnerability in the PE installer has been patched. For details, check the releasenotes.
Next: Getting Support
Getting Support for Puppet EnterpriseGetting support for Puppet Enterprise is easy, both from Puppet Labs and the community of PuppetEnterprise users. We provide responsive, dependable, quality support to resolve any issuesregarding the installation, operation and use of Puppet.
There are three primary ways to get support for Puppet Enterprise:
Reporting issues to the Puppet Labs customer support portalJoining the Puppet Enterprise user group.Seeking help from the Puppet open source community.
Reporting Issues to the customer support portalPaid Support
Puppet Labs provides two levels of commercial support offerings for Puppet Enterprise�: Standardand Premium. Both offerings allow you to report your support issues to our confidential ��customersupport portal. You will receive an account and log-on for this portal when you purchase PuppetEnterprise.
Customer support portal: https://support.puppetlabs.comTHE PE SUPPORT SCRIPT
When seeking support, you may be asked to run the information-gathering support script includedwith in the Puppet Enterprise installer tarball. This script is located in the root of the unzippedtarball and is named simply “support .”
Puppet Enterprise 2.8 User's Guide • Getting Support for Puppet Enterprise 5/210
This script will collect a large amount of system information, compress it, and print the location ofthe zipped tarball when it finishes running; an uncompressed directory (named �support )containing the same data will be left in the same directory the compressed copy. We recommendthat you examine the collected data before forwarding it to Puppet Labs, as it may contain sensitiveinformation that you will wish to redact.
The information collected by the support script includes:
iptables info (is it loaded? what are the inbound and outbound rules?) (both ipv4 and ipv6)a full run of facter (if installed)selinux statusthe amount of free disk and memory on the systemhostname info (/etc/hosts and the output of hostname--fqdn )the umask of the systemntp configuration (what servers are available, the offset from them)��a listing (no content) of the files in �/opt/puppet , /var/opt/lib/pe-puppet and/var/opt/lib/pe-puppetmaster
the os and kernela list of installed packagesthe current process lista listing of puppet certsa listing of all services (except on Debian, which lacks the equivalent command)current environment variableswhether the puppet master is reachablethe output of mcoping and mcoinventory
It also copies the following files:�
system logsthe contents of /etc/puppetlabsthe contents of /var/log/pe-*
Free Support
If you are evaluating Puppet Enterprise, we also offer support during your evaluation period. �Duringthis period you can report issues with Puppet Enterprise to our public support portal. Please beaware that all issues filed here are viewable by all other users.�
Public support portal: http://projects.puppetlabs.com/projects/puppet-enterprise
Join the Puppet Enterprise user groupPuppet Enterprise 2.8 User's Guide • Getting Support for Puppet Enterprise 6/210

http://groups.google.com/a/puppetlabs.com/group/pe-users
Click on “Sign in and apply for membership”Click on “Enter your email address to access the document”Enter your email address.
Your request to join will be sent to Puppet Labs for authorization and you will receive an emailwhen youʼve been added to the user group.
Getting support from the existing Puppet CommunityAs a Puppet Enterprise customer you are more than welcome to participate in our large and helpfulopen source community as well as report issues against the open source project.
Puppet open source user group:
http://groups.google.com/group/puppet-usersPuppet Developers group:
http://groups.google.com/group/puppet-devReport issues with the open source Puppet project:
http://projects.puppetlabs.com/projects/puppet
Next: Quick Start
Quick Start: Using PE 2.8Welcome to the PE 2.8 quick start guide. This document is a short walkthrough to help you evaluatePuppet Enterprise and become familiar with its features. Follow along to learn how to:
Install a small proof-of-concept deploymentAdd nodes to your deploymentExamine nodes in real time with live managementInstall a third-party Puppet moduleApply Puppet classes to nodes with the console
Creating a DeploymentA standard Puppet Enterprise deployment consists of:
Following this walkthrough will take approximately 30 minutes.
Puppet Enterprise 2.8 User's Guide • Quick Start: Using PE 2.8 7/210

Many agent nodes, which are computers managed by Puppet.At least one puppet master server, which serves configurations to agent nodes.�At least one console server, which analyzes agent reports and presents a GUI for managing yoursite.
For this deployment, the puppet master and the console will be the same machine, and we will haveone additional agent node.
Preparing Your Proof-of-Concept Systems
To create this small deployment, you will need the following:
At least two computers (“nodes”) running a *nix operating system supported by PuppetEnterprise.
These can be virtual machines or physical servers.One of these nodes (the puppet master server) should have at least 1 GB of RAM. Note:For actual production use, a puppet master node should have at least 4 GB of RAM.
Optionally, a computer running a version of Microsoft Windows supported by PuppetEnterprise.Puppet Enterprise installer tarballs suitable for the OS and architecture your nodes areusing.A network — all of your nodes should be able to reach each other.An internet connection or a local mirror of your operating systemʼs package repositories,for downloading additional software that Puppet Enterprise may require.Properly configured firewalls��.
For demonstration purposes, all nodes should allow all traffic on ports 8140, 61613,��and 443. (Production deployments can and should partially restrict this traffic.)��
Properly configured name resolution�.Each node needs a unique hostname, and they should be on a shared domain. For therest of this walkthrough, we will refer to the puppet master as master.example.com ,the first agent node as �agent1.example.com , and the Windows node aswindows.example.com . You can use any hostnames and any domain; simply substitutethe names as needed throughout this document.All nodes must know their own hostnames. This can be done by properly configuring�reverse DNS on your local DNS server, or by setting the hostname explicitly. Setting thehostname usually involves the hostname command and one or more configuration�files, while the exact method varies by platform.�All nodes must be able to reach each other by name. This can be done with a local DNSserver, or by editing the /etc/hosts file on each node to point to the proper IP�addresses. Test this by running pingmaster.example.com and pingagent1.example.com on every node, including the Windows node if present.
Puppet Enterprise 2.8 User's Guide • Quick Start: Using PE 2.8 8/210

Installing the Puppet Master
On the puppet master node, log in as root or with a root shell. (Use sudo-s to get a root shell ifyour operating systemʼs root account is disabled, as on Debian and Ubuntu.)Download the Puppet Enterprise tarball, extract it, and navigate to the directory it creates.Run ./puppet-enterprise-installer . The installer will ask a series of questions about whichcomponents to install, and how to configure them.�
Install the puppet master and console roles; the cloud provisioner role is not required, butmay be useful if you later promote this machine to production.Make sure that the unique “certname” matches the hostname you chose for this node. (Forexample, master.example.com .)You will need the email address and console password it requests in order to use the console;choose something memorable.None of the other passwords are relevant to this quick start guide. Choose somethingrandom.Accept the default responses for every other question by hitting enter.
The installer will then install and configure Puppet Enterprise. It will probably need to install�additional packages from your OSʼs repository, including Java and MySQL.
Installing the Agent Node
On the agent node, log in as root or with a root shell. (Use sudo-s to get a root shell if youroperating systemʼs root account is disabled.)Download the Puppet Enterprise tarball, extract it, and navigate to the directory it creates.Run ./puppet-enterprise-installer . The installer will ask a series of questions about whichcomponents to install, and how to configure them.�
Skip the puppet master and console roles; install the puppet agent role. The cloud provisionerrole is optional and is not used in this exercise.Make sure that the unique “certname” matches the hostname you chose for this node. (For
Optionally, to simplify configuration later, all nodes should also be able to �reach thepuppet master node at the hostname puppet . This can be done with DNS or with hostsfiles. Test this by running �pingpuppet on every node.The control workstation from which you are carrying out these instructions must beable to reach every node in the deployment by name.
You have now installed the puppet master node. A puppet master node is also an agentnode, and can configure itself the same way it configures the other nodes in a deployment.��Stay logged in as root for further exercises.
Puppet Enterprise 2.8 User's Guide • Quick Start: Using PE 2.8 9/210

example, agent1.example.com .)Set the puppet master hostname as master.example.com . If you configured the master to be�reachable at puppet , you can alternately accept the default.Accept the default responses for every other question by hitting enter.
The installer will then install and configure Puppet Enterprise.�
Installing the Optional Windows Node
On the Windows node, log in as a user with administrator privileges.Download the Puppet Enterprise installer for Windows.Run the Windows installer by double-clicking it. The installer will ask for the name of the puppetmaster to connect to; set this to master.example.com .
Adding Nodes to a DeploymentAfter installing, the agent nodes are not yet allowed to fetch configurations from the puppet�master; they must be explicitly approved and granted a certificate.�
Approving the Certificate Request�
During installation, the agent node contacted the puppet master and requested a certificate. To add�the agent node to the deployment, approve its request on the puppet master.
On the puppet master node, run puppetcertlist to view all outstanding certificate requests.�Note that nodes called agent1.example.com and windows.example.com (or whichever namesyou chose) have requested certificates, and fingerprints for the requests are shown.��On the puppet master node, run puppetcertsignagent1.example.com to approve therequest and add the node to the deployment. Run puppetcertsignwindows.example.com toapprove the Windows node.
Testing the Agent Nodes
During this walkthrough, we will be running puppet agent interactively. Normally, puppet agent
You have now installed the puppet agent node. Stay logged in as root for further exercises.
You have now installed the Windows puppet agent node. Stay logged in as administrator forfurther exercises.
The agent nodes can now retrieve configurations from the master.�
Puppet Enterprise 2.8 User's Guide • Quick Start: Using PE 2.8 10/210

runs in the background and fetches configurations from the puppet master every 30 minutes. (This�interval is configurable with the �runinterval setting in puppet.conf.)
On the first agent node,� run puppetagent--test . This will trigger a single puppet agent runwith verbose logging.Note the long string of log messages, which should end with notice:Finishedcatalogrunin[...]seconds .On the Windows node, open the start menu, navigate to the Puppet Enterprise folder, andchoose “Run Puppet Agent,” elevating privileges if necessary.Note the similar string of log messages.
Viewing the Agent Nodes in the Console
You can now log into the console and see all agent nodes, including the puppet master node.
On your control workstation, open a web browser and point it to https://master.example.com.You will receive a warning about an untrusted certificate. This is because �you were the signingauthority for the consoleʼs certificate, and your Puppet Enterprise deployment is not known to�the major browser vendors as a valid signing authority. Ignore the warning and accept thecertificate.� The steps to do this vary by browser; see here for detailed steps for the major webbrowsers.Next, you will see a login screen for the console. Log in with the email address and password youprovided when installing the puppet master.
You are now fully managing these nodes. They have checked in with the puppet master forthe first time, and will continue to check in and fetch new configurations every 30 minutes.��They will also appear in the console, where you can make changes to them by assigningclasses.
Puppet Enterprise 2.8 User's Guide • Quick Start: Using PE 2.8 11/210

Next, you will see the front page of the console, which shows a summary of your deploymentʼsrecent puppet runs. Notice that the master and any agent nodes appear in the list of nodes:
Explore the console. Note that if you click on a node to view its details, you can see its recenthistory, the Puppet classes it receives, and a very large list of inventory information about it. Seehere for more information about navigating the console.
Avoiding the Wait
Although puppet agent is now fully functional on any agent nodes, some other Puppet Enterprisesoftware is not; specifically, the daemon that listens for orchestration messages is not configured.��This is because Puppet Enterprise uses Puppet to configure itself.�
Puppet Enterprise does this automatically within 30 minutes of a nodeʼs first check-in. To fast-track�the process and avoid the wait, do the following:
You now know how to find detailed information about any node in your deployment,�including its status, inventory details, and the results of its last Puppet run.
Puppet Enterprise 2.8 User's Guide • Quick Start: Using PE 2.8 12/210

On the console, use the sidebar to navigate to the default group:
Check the list of nodes at the bottom of the page for agent1.example.com — depending on yourtiming, it may already be present. If so, skip the next two steps and go directly to the agent node.If agent1 is not a member of the group already, click the “edit” button:
In the “nodes” field, begin typing �agent1.example.com ʼs name. You can then select it from thelist of autocompletion guesses. Click the update button after you have selected it.
Puppet Enterprise 2.8 User's Guide • Quick Start: Using PE 2.8 13/210

On the first agent node,� run puppetagent--test again. Note the long string of log messagesrelated to the pe_mcollective class.You do not need to repeat this for the Windows node. Orchestration is not supported onWindows for this release of Puppet Enterprise.
Using Live Management to Control Agent NodesLive management uses Puppet Enterpriseʼs orchestration features to view and edit resources in realtime. It can also trigger Puppet runs and orchestration tasks.
On the console, click the “Live Management” tab in the top navigation.
The first agent node can now respond to orchestration messages, and its resources can be�edited live in the console.
Puppet Enterprise 2.8 User's Guide • Quick Start: Using PE 2.8 14/210

Note that the master and the first agent node are visible in the sidebar, but the Windows node is�not. Live management is not supported on Windows nodes for this release of Puppet Enterprise.
Discovering and Cloning Resources
Note that you are currently in the “manage resources” tab. Click the “user resources” link, thenclick the “find resources” button:�
Examine the complete list of user accounts found on all of the nodes currently selected in thesidebar node list. (In this case, both the master and the first agent node are selected.) Most of�the users will be identical, as these machines are very close to a default OS install, but someusers related to the puppet masterʼs functionality are only on one node:
Puppet Enterprise 2.8 User's Guide • Quick Start: Using PE 2.8 15/210

Click the MySQL user, which is only present on the puppet master. (If the MySQL server wasinstalled on both nodes, you can use a different user like �peadmin .)
Click the “Clone resource” link, then click the blue “Preview” button that appears. This willprepare the console to duplicate the mysql user across all of the nodes selected in the sidebar.
Puppet Enterprise 2.8 User's Guide • Quick Start: Using PE 2.8 16/210

Click the red “Clone” button to finish.�
Triggering Puppet Runs
On the console, in the live management page, click the “control puppet” tab.Click the “runonce” action to reveal the red “Run” button, then click the “Run” button.
The mysql user is now present on both the master and the first agent node.�
You can clone user accounts, user groups, entries in the /etc/hosts file, and software�packages using this interface. This can let you quickly make many nodes resemble a singlemodel node.
Puppet Enterprise 2.8 User's Guide • Quick Start: Using PE 2.8 17/210

Installing a Puppet ModulePuppet configures nodes by applying classes to them. Classes are chunks of Puppet code that�configure a specific aspect or feature of a machine.��
Puppet classes are distributed in the form of modules. You can save time by using pre-existingmodules. Pre-existing modules are distributed on the Puppet Forge, and can be installed with thepuppetmodule subcommand. Any module installed on the puppet master can be used to configure�agent nodes.
Installing two Forge Modules
On your control workstation, navigate to http://forge.puppetlabs.com/puppetlabs/motd. This isthe Forge listing for an example module that sets the message of the day file (�/etc/motd ), whichis displayed to users when they log into a *nix system.Navigate to https://forge.puppetlabs.com/puppetlabs/win_desktop_shortcut. This is the Forge
You have just triggered a puppet agent run on several agents at once; in this case, themaster and the first agent node. The “runonce” action will trigger a puppet run on every�node currently selected in the sidebar.
In production deployments, select target nodes carefully, as running this action on dozens orhundreds of nodes at once can put strain on the puppet master server.
Puppet Enterprise 2.8 User's Guide • Quick Start: Using PE 2.8 18/210

listing for an example module that manages a desktop shortcut on Windows.On the puppet master, run puppetmodulesearchmotd . This is an alternate way to find the�same information as a Forge listing contains:
Searchinghttp://forge.puppetlabs.com...NAMEDESCRIPTIONAUTHORKEYWORDSpuppetlabs-motdThismodulepopulates`/etc/motd`withthecontentsof...@puppetlabsTestingjeffmccune-motdThismanagesabasicmessageofthedaybasedonuseful...@jeffmccunemotddhoppe-motdThismodulemanagesmotd@dhoppedebianubuntumotdsaz-motdManage'MessageOfTheDay'viaPuppet@sazmotd
Install the first module by running �puppetmoduleinstallpuppetlabs-motd :
Preparingtoinstallinto/etc/puppetlabs/puppet/modules...Downloadingfromhttp://forge.puppetlabs.com...Installing--donotinterrupt.../etc/puppetlabs/puppet/modules└──puppetlabs-motd(v1.0.0)
Install the second module by running puppetmoduleinstallpuppetlabs-win_desktop_shortcut . (If you are not using any Windows nodes, this module is inert; you caninstall it or skip it.)
Using Modules in the Console
Every module contains one or more classes. The modules you just installed contain classes calledmotd and win_desktop_shortcut . To use any class, you must tell the console about it and thenassign it to one or more nodes.
On the console, click the “Classes” link in the top navigation bar, then click the “Add class”button in the sidebar:
You have just installed multiple Puppet modules. All of the classes in them are now availableto be added to the console and assigned to nodes.
Puppet Enterprise 2.8 User's Guide • Quick Start: Using PE 2.8 19/210

Type the name of the motd class, and click the “create” button:
Do the same for the win_desktop_shortcut class.Navigate to agent1.example.com (by clicking the “Nodes” link in the top nav bar and clickingagent1 ʼs name), click the “Edit” button, and begin typing “motd” in the “classes” field; you can�select the motd class from the list of autocomplete suggestions. Click the “Save changes” buttonafter you have selected it.
Note that the motd class now appears in the list of agent1 ʼs classes.Navigate to windows.example.com , click the edit button, and begin typing“win_desktop_shortcut” in the “classes” field; select the class and click the “save changes”�button.
Puppet Enterprise 2.8 User's Guide • Quick Start: Using PE 2.8 20/210

Note that the win_desktop_shortcut class now appears in the list of windows.example.com ʼsclasses.Navigate to the live management page, and select the “control Puppet” tab. Use the “runonce”action to trigger a puppet run on both the master and the first agent. Wait one or two minutes.�On the first agent node,� run cat/etc/motd . Note that its contents resemble the following:
TheoperatingsystemisCentOSThefreememoryis82.27MBThedomainisexample.com
On the puppet master, run cat/etc/motd . Note that its contents are either empty or theoperating systemʼs default, since the motd class wasnʼt applied to it.On the Windows node, choose “Run Puppet Agent” from the start menu, elevating privileges ifnecessary.View the desktop; note that there is a shortcut to the Puppet Labs website.
SummaryYou have now experienced the core features and workflows of Puppet Enterprise. In summary, a�Puppet Enterprise user will:
Deploy new nodes, install PE on them, and add them to their deployment by approving theircertificate requests.�Use pre-built modules from the Forge to save time and effort.�Assign classes to nodes in the console.Use live management for ad-hoc edits to nodes, and for triggering puppet agent runs whennecessary.
Next
In addition to what this walkthrough has covered, most users will also:
Edit modules from the Forge to make them better suit the deployment.Create new modules from scratch by writing classes that manage resources.Examine reports in the console.Use a site module to compose other modules into machine roles, allowing console users to
Puppet is now managing the first agent nodeʼs message of the day file, and will revert it to��the specified state if it is ever modified. Puppet is also managing the desktop shortcut on the��Windows machine, and will restore it if it is ever deleted or modified.�
For more recommended modules, search the Forge or check out the Module of the Weekseries on the Puppet Labs blog.
Puppet Enterprise 2.8 User's Guide • Quick Start: Using PE 2.8 21/210

control policy instead of implementation.Assign classes to groups in the console instead of individual nodes.
To learn about these workflows, continue to the �writing modules quick start guide.
To explore the rest of the PE userʼs guide, use the sidebar at the top of this page, or return to theindex.
Next: Quick Start: Writing Modules
Module Writing BasicsWelcome to the PE 2.8 advanced quick start guide. This document is a continuation of the quickstart guide, and is a short walkthrough to help you become more familiar with PEʼs features. Followalong to learn how to:
Modify modules obtained from the ForgeWrite your own Puppet moduleExamine reports in the consoleCreate a site module that composes other modules into machine rolesApply Puppet classes to groups with the console
Editing a Forge ModuleAlthough many Forge modules are exact solutions that fit your site, many more are �almost whatyou need. Most users will edit many of their Forge modules.
Module Basics
Modules are stored in /etc/puppetlabs/puppet/modules . (This can be configured with the�modulepath setting in puppet.conf .)
Modules are directories. Their basic structure looks like this:
motd/ (the module name)manifests/
init.pp (contains the motd class)public.pp (contains the motd::public class)
Before starting this walkthrough, you should have completed the previous quick start guide.You should still be logged in as root or administrator on your nodes.
Puppet Enterprise 2.8 User's Guide • Module Writing Basics 22/210

Every manifest (.pp) file contains a single class. File names map to class names in a predictable way:�init.pp will contain a class with the same name as the module, <NAME>.pp will contain a classcalled <MODULENAME>::<NAME> , and <NAME>/<OTHERNAME>.pp will contain <MODULENAME>::<NAME>::<OTHERNAME> .
Many modules contain directories other than manifests ; these will not be covered in this guide.
For more on how modules work, see Module Fundamentals in the Puppet documentation.For a more detailed guided tour, see the module chapters of Learning Puppet.
Editing a Manifest
This exercise will modify the desktop shortcut being managed on your Windows node.
On the puppet master, navigate to the modules directory by running cd/etc/puppetlabs/puppet/modules .Run ls to view the currently installed modules; note that motd and win_desktop_shortcut arepresent.Open and begin editing win_desktop_shortcut/manifests/init.pp , using the text editor ofyour choice.
If you do not have a preferred Unix text editor, run nanowin_desktop_shortcut/manifests/init.pp .
If Nano is not installed, run puppetresourcepackagenanoensure=installed to installit from your OSʼs package repositories.
Note that the desktop shortcut is being managed as a file resource, and its content is being setwith the content attribute:
classwin_desktop_shortcut{
if$osfamily=="windows"{if$win_common_desktop_directory{
file{"${win_common_desktop_directory}\\PuppetLabs.URL":ensure=>present,content=>"[InternetShortcut]\nURL=http://puppetlabs.com",}
}}
}
For more on resource declarations, see the manifests chapter of Learning Puppet or the resourcessection of the language guide. For more about how file paths with backslashes work in manifests�for Windows, see the page on writing manifests for Windows.Puppet Enterprise 2.8 User's Guide • Module Writing Basics 23/210
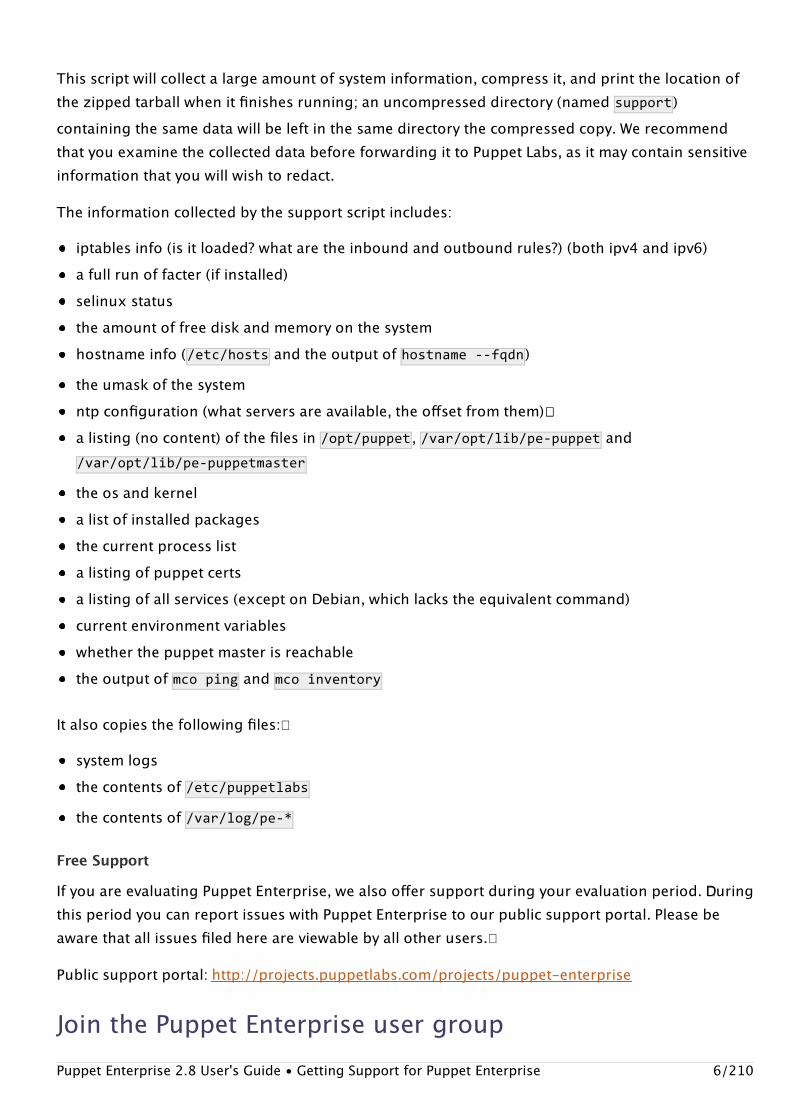
Change the ensure attribute of the file resource to absent .Delete the content line of the file resource.Create two new file resources to manage other files on the desktop, mimicking the structure of�the first resource:�
file{"${win_common_desktop_directory}\\RunningPuppet.URL":ensure=>present,content=>"[InternetShortcut]\nURL=http://docs.puppetlabs.com/windows/running.html",}
file{"${win_common_desktop_directory}\\Readme.txt":ensure=>present,content=>"ThisnodeismanagedbyPuppet.Somefilesandservicescannotbeeditedlocally;contactyoursysadminfordetails.",}
Make sure that these resources are within the two “if” blocks, alongside the first resource.�
Save and close the file.�On the Windows node, choose “Run Puppet Agent” from the Start menu, elevating privileges ifnecessary.Note that the original shortcut is gone, and a new shortcut and Readme.txt file have appeared�on the desktop.
Editing a Template
On the puppet master, navigate to the modules directory by running cd/etc/puppetlabs/puppet/modules .Open and begin editing motd/manifests/init.pp , using the text editor of your choice.Note that the content of the motd file is being filled with the ��template function, referring to atemplate within the module:
classmotd{if$kernel=="Linux"{file{'/etc/motd':
Your copy of the Windows example module now behaves differently.�
If you had deleted the original resource instead of setting ensure to absent, it would havebecome a normal, unmanaged file — Puppet would not have deleted it, but it also would not�have restored it if a local user were to delete it. Puppet does not care about resources thatare not declared.
Puppet Enterprise 2.8 User's Guide • Module Writing Basics 24/210

ensure=>file,backup=>false,content=>template("motd/motd.erb"),}}}
Close the manifest file, then open and begin editing �motd/templates/motd.erb .Add the line Welcometo<%=hostname%> at the beginning of the template file.�Save and close the file.�On the first agent node,� run puppetagent--test , then log out and log back in.Note that the message of the day has changed to show the machineʼs hostname.
Writing a Puppet ModuleThird-party modules save time, but most users will also write their own modules.
Writing a Class in a Module
This exercise will create a class that manages the permissions of the fstab , passwd , and crontabfiles.�
Run mkdir-pcore_permissions/manifests to create the module directory and manifestsdirectory.Create and begin editing the core_permissions/manifests/init.pp file.�Edit the init.pp file so it contains the following, then save it and exit the editor:�
classcore_permissions{if$osfamily!='windows'{
$rootgroup=$operatingsystem?{'Solaris'=>'wheel',default=>'root',}$fstab=$operatingsystem?{'Solaris'=>'/etc/vfstab',default=>'/etc/fstab',
Your copy of the motd module now behaves differently.�
For more about templates, see the templates chapter of Learning Puppet or the templatessection of the Puppet documentation.For more about variables, including “facts” like hostname , see the variables chapter ofLearning Puppet or the variables section of the language guide.
Puppet Enterprise 2.8 User's Guide • Module Writing Basics 25/210
}
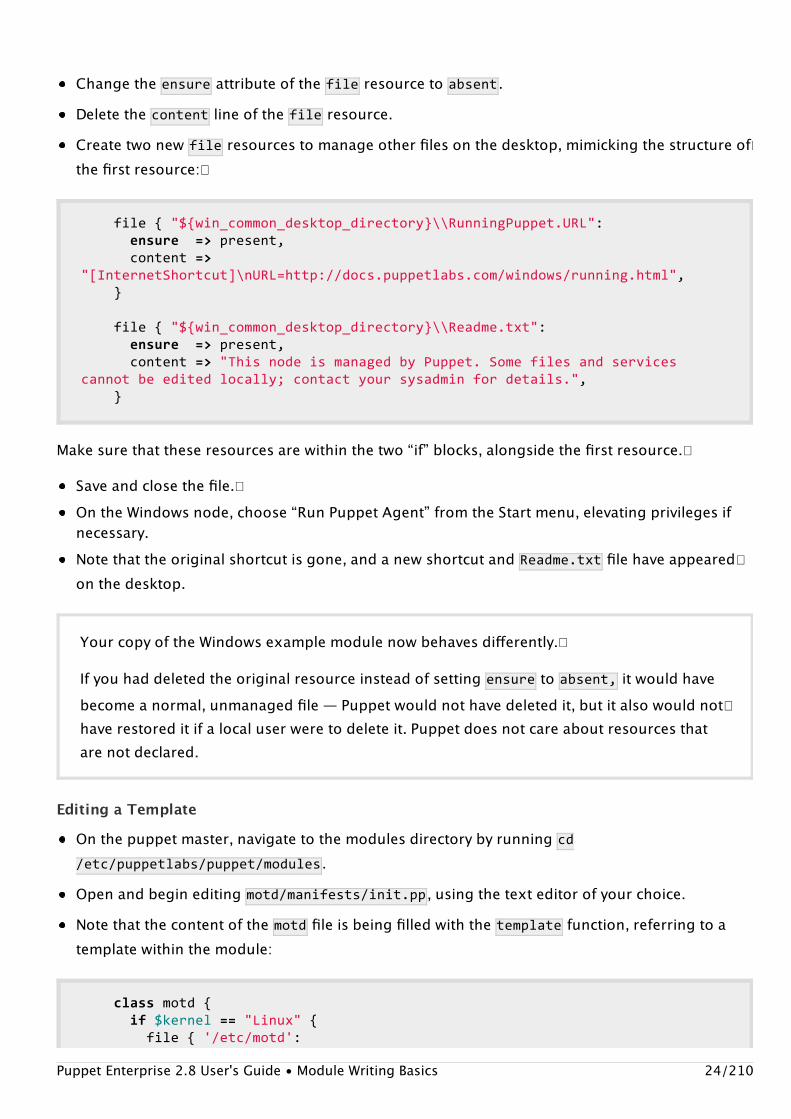
file{'fstab':path=>$fstab,ensure=>present,mode=>0644,owner=>'root',group=>"$rootgroup",}
file{'/etc/passwd':ensure=>present,mode=>0644,owner=>'root',group=>"$rootgroup",}
file{'/etc/crontab':ensure=>present,mode=>0644,owner=>'root',group=>"$rootgroup",}
}}
See the Puppet documentation for more information about writing classes.
To learn how to write resource declarations, conditionals, and classes in a guided tour format,start at the beginning of Learning Puppet.For a complete but terse guide to the Puppet languageʼs syntax, see the language guide.For complete documentation of the available resource types, see the type reference.For short printable references, see the modules cheat sheet and the core types cheat sheet.
Using a Homemade Module in the Console
You have created a new module containing a single class. Puppet now knows about thisclass, and it can be added to the console and assigned to nodes.
This new class:
Uses an “if” conditional to only manage *nix systems.Uses a selector conditional and a variable to change the name of the root userʼs primarygroup on Solaris.Uses three file resources to manage the fstab , passwd , and crontab files on *nix�systems. These resources do not manage the content of the files, only their ownership�and permissions.
Puppet Enterprise 2.8 User's Guide • Module Writing Basics 26/210

On the console, use the “add class” button to make the class available, just as in the previousexample.Instead of assigning the class to a single node, assign it to a group. Navigate to the defaultgroup and use the edit button, then add the core_permissions class to its list of classes. Do notdelete the existing classes, which are necessary for configuring new nodes.�
On the puppet master node, manually set dangerous permissions for the crontab and passwdfiles. This will make them editable by any unprivileged user.�
#chmod0666/etc/crontab/etc/passwd#ls-lah/etc/crontab/etc/passwd/etc/fstab-rw-rw-rw-1rootroot255Jan62007/etc/crontab-rw-r--r--1rootroot534Aug222011/etc/fstab-rw-rw-rw-1rootroot2.3KMar2608:18/etc/passwd
On the first agent node,� manually set dangerous permissions for the fstab file:�
#chmod0666/etc/fstab#ls-lah/etc/crontab/etc/passwd/etc/fstab-rw-rw-r--1rootroot255Jan62007/etc/crontab-rw-rw-rw-1rootroot534Aug222011/etc/fstab-rw-rw-r--1rootroot2.3KMar2608:18/etc/passwd
Run puppet agent once on every node. You can do this by:
Puppet Enterprise 2.8 User's Guide • Module Writing Basics 27/210

Doing nothing and waiting 30 minutesUsing live management to run Puppet on the two *nix nodes, then triggering a manual run onWindowsTriggering a manual run on every node, with either puppetagent--test or the “Run PuppetAgent” Start menu item
On the master and first agent nodes,� note that the permissions of the three files have been�returned to safe defaults, such that only root can edit them:
#ls-lah/etc/fstab/etc/passwd/etc/crontab-rw-r--r--1rootroot255Jan62007/etc/crontab-rw-r--r--1rootroot534Aug222011/etc/fstab-rw-r--r--1rootroot2.3KMar2608:18/etc/passwd
On the Windows node, note that the class has safely done nothing, and has not accidentallycreated any files in �C:\etc\ .On the console, navigate to master.example.com , by clicking the nodes item in the topnavigation and then clicking on the nodeʼs name. Scroll down to the list of recent reports, andnote that the most recent one is blue, signifying that changes were made:
Puppet Enterprise 2.8 User's Guide • Module Writing Basics 28/210
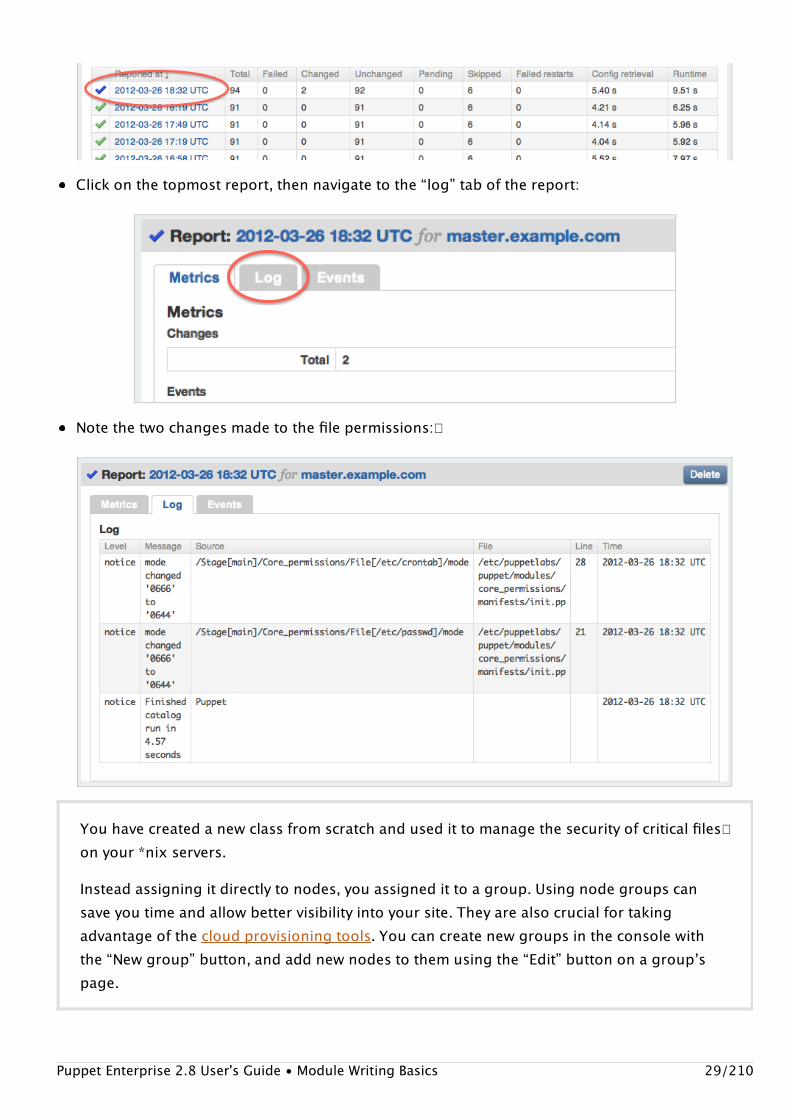
Click on the topmost report, then navigate to the “log” tab of the report:
Note the two changes made to the file permissions:�
You have created a new class from scratch and used it to manage the security of critical files�on your *nix servers.
Instead assigning it directly to nodes, you assigned it to a group. Using node groups cansave you time and allow better visibility into your site. They are also crucial for takingadvantage of the cloud provisioning tools. You can create new groups in the console withthe “New group” button, and add new nodes to them using the “Edit” button on a groupʼspage.
Puppet Enterprise 2.8 User's Guide • Module Writing Basics 29/210

Using a Site ModuleMany users create a “site” module. Instead of describing smaller units of a configuration, the�classes in a site module describe a complete configuration� for a given type of machine. Forexample, a site module might contain:
A site::basic class, for nodes that require security management but havenʼt been given aspecialized role yet.A site::webserver class for nodes that serve web content.A site::dbserver class for nodes that provide a database server to other applications.
Site modules hide complexity so you can more easily divide labor at your site. System architects cancreate the site classes, and junior admins can create new machines and assign a single “role” classto them in the console. In this workflow, the console controls �policy, not fine-graned�implementation.
On the puppet master, create the /etc/puppetlabs/puppet/modules/site/manifests/basic.ppfile, and edit it to contain the following:�
classsite::basic{if$osfamily=='windows'{includewin_desktop_shortcut}else{includemotdincludecore_permissions}}
This class declares other classes with the include function. Note the “if” conditional that setsdifferent classes for different OSes using the ��$osfamily fact. For more information about declaringclasses, see the modules and classes chapters of Learning Puppet.
On the console, remove all of the previous example classes from your nodes and groups, usingthe “edit” button in each node or group page. Be sure to leave the pe_* classes in place.Add the site::basic class to the console with the “add class” button in the sidebar.Assign the site::basic class to the default group.
Your nodes are now receiving the same configurations as before, but with a simplified��interface in the console. Instead of deciding which classes a new node should receive, youcan decide what type of node it is and take advantage of decisions you made earlier.
Puppet Enterprise 2.8 User's Guide • Module Writing Basics 30/210

SummaryYou have now performed the core workflows of an intermediate Puppet user. In the course of their�normal work, an intermediate user will:
Download and hack Forge modules that almost (but not quite) fit their deploymentʼs needs.�Create new modules and write new classes to manage many types of resources, including files,�services, packages, user accounts, and more.Build and curate a site module to empower junior admins and simplify the decisions involved indeploying new machines.
Next: System Requirements
System Requirements and Pre-InstallationBefore installing Puppet Enterprise:
Ensure that your nodes are running a supported operating system.Ensure that your puppet master and console servers are sufficiently powerful.��Ensure that your network, firewalls, and name resolution are configured correctly.��Plan to install the puppet master server before the console server, and the console server beforeany agent nodes.
Operating SystemPuppet Enterprise 2.8 supports the following systems:
Operating system Version(s) Arch Roles
Red Hat Enterprise Linux 5 and 6 x86 and x86_64 all roles
CentOS 5 and 6 x86 and x86_64 all roles
Ubuntu LTS 10.04 and 12.04 32- and 64-bit all roles
Debian Squeeze (6) i386 and amd64 all roles
Oracle Linux 5 and 6 x86 and x86_64 all roles
Scientific Linux� 5 and 6 x86 and x86_864 all roles
SUSE Linux Enterprise Server 11 x86 and x86_864 all roles
Solaris 10 SPARC and x86_64 agent
Microsoft Windows 2003, 2008, and 7 x86 and x86_864 agent
AIX 5, 6, and 7 Power Arch. agent
Puppet Enterprise 2.8 User's Guide • System Requirements and Pre-Installation 31/210
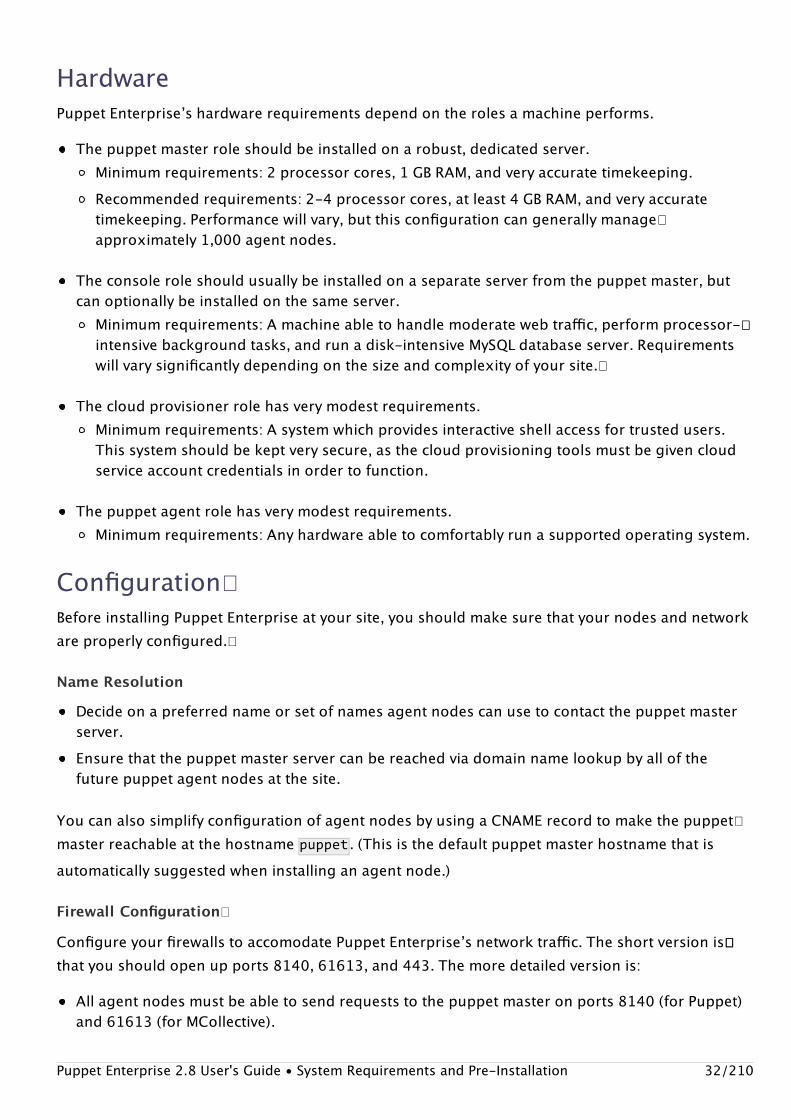
HardwarePuppet Enterpriseʼs hardware requirements depend on the roles a machine performs.
The puppet master role should be installed on a robust, dedicated server.Minimum requirements: 2 processor cores, 1 GB RAM, and very accurate timekeeping.Recommended requirements: 2-4 processor cores, at least 4 GB RAM, and very accuratetimekeeping. Performance will vary, but this configuration can generally manage�approximately 1,000 agent nodes.
The console role should usually be installed on a separate server from the puppet master, butcan optionally be installed on the same server.
Minimum requirements: A machine able to handle moderate web traffic, perform processor-��intensive background tasks, and run a disk-intensive MySQL database server. Requirementswill vary significantly depending on the size and complexity of your site.�
The cloud provisioner role has very modest requirements.Minimum requirements: A system which provides interactive shell access for trusted users.This system should be kept very secure, as the cloud provisioning tools must be given cloudservice account credentials in order to function.
The puppet agent role has very modest requirements.Minimum requirements: Any hardware able to comfortably run a supported operating system.
Configuration�Before installing Puppet Enterprise at your site, you should make sure that your nodes and networkare properly configured.�
Name Resolution
Decide on a preferred name or set of names agent nodes can use to contact the puppet masterserver.Ensure that the puppet master server can be reached via domain name lookup by all of thefuture puppet agent nodes at the site.
You can also simplify configuration of agent nodes by using a CNAME record to make the puppet�master reachable at the hostname puppet . (This is the default puppet master hostname that isautomatically suggested when installing an agent node.)
Firewall Configuration�
Configure your firewalls to accomodate Puppet Enterpriseʼs network traffic. The short version is����that you should open up ports 8140, 61613, and 443. The more detailed version is:
All agent nodes must be able to send requests to the puppet master on ports 8140 (for Puppet)and 61613 (for MCollective).
Puppet Enterprise 2.8 User's Guide • System Requirements and Pre-Installation 32/210

The puppet master must be able to accept inbound traffic from agents on ports ��8140 (forPuppet) and 61613 (for MCollective).Any hosts you will use to access the console must be able to reach the console server on port443, or whichever port you specify during installation. (Users who cannot run the console onport 443 will often run it on port 3000.)If you will be invoking MCollective client commands from machines other than the puppetmaster, they will need to be able to reach the master on port 61613.If you will be running the console and puppet master on separate servers, the console servermust be able to accept traffic from the puppet master (and the master must be able to send��requests) on ports 443 and 8140. The Dashboard server must also be able to send requests tothe puppet master on port 8140, both for retrieving its own catalog and for viewing archived file�contents.
Dependencies and OS Specific Details�
This section details the packages that are installed from the various OS repos. Unless you do nothave internet access, you shouldnʼt need to worry about installing these manually, they will be setup during PE installation.
Amazon Linux AMI
All Nodes Master Nodes Console Nodes Console/Console DB Nodes Cloud Provisioner Nodes
pciutils apr apr sudo libxslt
system-logos apr-util apr-util mysql51 libxml2
which curl curl mysql51-server
libxml2 mailcap mailcap
dmidecode java-1.6.0-openjdk*
net-tools
*Only needed if java isnʼt already installed.
Centos
All Nodes Master Nodes Console Nodes Console/Console DB Nodes Cloud Provisioner Nodes
pciutils apr apr sudo libxslt
system-logos apr-util apr-util mysql libxml2
which curl curl mysql-server
libxml2 mailcap mailcap
dmidecode
net-tools
java-1.6.0-openjdk*
Puppet Enterprise 2.8 User's Guide • System Requirements and Pre-Installation 33/210

*Only needed if java isnʼt already installed.
RHEL
All Nodes Master Nodes Console Nodes Console/Console DB Nodes Cloud Provisioner Nodes
pciutils apr apr sudo libxslt
system-logos apr-util apr-util mysql libxml2
which apr-util-ldap (RHEL 6) curl mysql-server
libxml2 curl mailcap
dmidecode mailcap apr-util-ldap (RHEL 6)
net-tools java-1.6.0-openjdk*
cronie (RHEL 6)
vixie-cron (RHEL 5)
*Only needed if java isnʼt already installed.
SLES
All Nodes Master Nodes Console Nodes Console/Console DB Nodes Cloud Provisioner Nodes
pciutils libapr1 libapr1 sudo libxslt
pmtools libapr-util1 libapr-util1 mysql libxml2
cron java-160-ibm curl mysql-client
libxml2 curl
net-tools
Debian
All Nodes Master Nodes Console Nodes Console/Console DB Nodes Cloud Provisioner Nodes
pciutils file� file� mysql-common libxslt1.1
dmidecode libmagic1 libmagic1 mysql-server
cron libpcre3 libpcre3 mysql-client
libxml2 curl curl
hostname perl perl
libldap-2.4-2 mime-support mime-support
libreadline5 libapr1 libapr1
libcap2 libcap2
Puppet Enterprise 2.8 User's Guide • System Requirements and Pre-Installation 34/210

libaprutil1 libaprutil1
libaprutil1-dbd-sqlite3 libaprutil1-dbd-sqlite3
libaprutil1-ldap ibaprutil1-ldap
openjdk-6-jre-headless
Ubuntu
All Nodes Master Nodes Console Nodes Console/Console DB Nodes Cloud Provisioner Nodes
pciutils file� file� mysql-common libxslt1.1
dmidecode libmagic1 libmagic1 mysql-server
cron libpcre3 libpcre3 mysql-client
libxml2 curl curl
hostname perl perl
libldap-2.4-2 mime-support mime-support
libreadline5 libapr1 libapr1
libcap2 libcap2
libaprutil1 libaprutil1
libaprutil1-dbd-sqlite3 libaprutil1-dbd-sqlite3
libaprutil1-ldap ibaprutil1-ldap
openjdk-6-jre-headless
AIXIn order to run the puppet agent on AIX systems, youʼll need to ensure the following are installedbefore attempting to install the puppet agent:
bashzlibreadline
All AIX toolbox packages are available from IBM.
To install the packages on your selected node directly, you can run rpm-Uvh with the followingURLs (note that the RPM package provider on AIX must be run as root):
ftp://ftp.software.ibm.com/aix/freeSoftware/aixtoolbox/RPMS/ppc/bash/bash-3.2-1.aix5.2.ppc.rpmftp://ftp.software.ibm.com/aix/freeSoftware/aixtoolbox/RPMS/ppc/zlib/zlib-1.2.3-
Puppet Enterprise 2.8 User's Guide • System Requirements and Pre-Installation 35/210

4.aix5.2.ppc.rpmftp://ftp.software.ibm.com/aix/freeSoftware/aixtoolbox/RPMS/ppc/readline/readline-4.3-2.aix5.1.ppc.rpm
Note: if you are behind a firewall or running an http proxy, the above commands may not work. Use�the link above instead to find the packages you need.�
Note: GPG verification will not work on AIX, the RPM version used by AIX (even 7.1) is too old. Also,�The AIX package provider doesnʼt support package downgrades (installing an older package over anewer package). Lastly, avoid using leading zeros when specifying a version number for the AIXprovider (i.e., use 2.3.4 not 02.03.04 ).
The PE AIX implementation supports the NIM, BFF, and RPM package providers. Check the TypeReference for technical details on these providers.
SolarisIn some instances, bash may not be present on Solaris systems. It needs to be installed beforerunning the PE installer. Install it via the media used to install the OS or via CSW if that is present onyour system.
NextTo install Puppet Enterprise on *nix nodes, continue to Installing Puppet Enterprise.To install Puppet Enterprise on Windows nodes, continue to Installing Windows Agents.
Installing Puppet Enterprise
Downloading PEBefore installing Puppet Enterprise, you must download it from the Puppet Labs website.
Choosing an Installer Tarball
Puppet Enterprise can be downloaded in tarballs specific to your OS version and architecture, or as�a universal tarball.
This chapter covers *nix operating systems. To install PE on Windows, see InstallingWindows Agents.
Note: The universal tarball is simpler to use, but is roughly ten times the size of a version-specific tarball.�
Puppet Enterprise 2.8 User's Guide • Installing Puppet Enterprise 36/210

AVAILABLE *NIX TARBALLS
Filename ends with… Will install…
-all.tar anywhere
-debian-<versionandarch>.tar.gz on Debian
-el-<versionandarch>.tar.gz on RHEL, CentOS, Scientific Linux, or Oracle Linux�
-sles-<versionandarch>.tar.gz on SUSE Linux Enterprise Server
-solaris-<versionandarch>.tar.gz on Solaris
-ubuntu-<versionandarch>.tar.gz on Ubuntu LTS
-aix-<versionandarch>.tar.gz on AIX
Starting the InstallerUnarchive the installer tarball, usually with tar-xzf<TARBALLFILE> .Navigate to the resulting directory in your shell.Run the puppet-enterprise-installer script with root privileges:
$sudo./puppet-enterprise-installer
Answer the interview questions to select and configure PEʼs roles�.Log into the puppet master server and sign the new nodeʼs certificate�.If you have purchased PE and are installing the puppet master, copy your license key into place.
The installer can also be run non-interactively; see the chapter on automated installation fordetails.
Note that after the installer has finished installing and configuring PE, it will save your interview��answers to a file called �answers.lastrun .
Using the InstallerThe PE installer configures Puppet by asking a series of questions. Most questions have a default�answer (displayed in brackets), which you can accept by pressing enter without typing areplacement. For questions with a yes or no answer, the default answer is capitalized (e.g. “[y/N]”).
Installer Options
The installer will accept the following command-line flags:�
-h
Puppet Enterprise 2.8 User's Guide • Installing Puppet Enterprise 37/210

Display a brief help message.
-s<ANSWERFILE>
Save answers to file and quit without installing.�
-a<ANSWERFILE>
Read answers from file and fail if an answer is missing.�
-A<ANSWERFILE>
Read answers from file and prompt for input if an answer is missing.�
-D
Display debugging information.
-l<LOGFILE>
Log commands and results to file.�
-n
Run in ʻnoopʼ mode; show commands that would have been run during installation withoutrunning them.
Selecting RolesFirst, the installer will ask which of PEʼs roles to install. The roles you choose will determine whichother questions the installer will ask.
The Puppet Agent Role
This role should be installed on every node in your deployment, including the master and consolenodes. (If you choose the puppet master or console roles, the puppet agent role will be installedautomatically.) Nodes with the puppet agent role can:
Run the puppet agent daemon, which pulls configurations from the puppet master and applies�them.Listen for MCollective messages, and invoke MCollective agent actions when they receive a validcommand.Report changes to any resources being audited for PEʼs compliance workflow.�
The Puppet Master Role
In most deployments, this role should be installed on one node; installing multiple puppet mastersrequires additional configuration. The puppet master must be a robust, dedicated server; see the�system requirements for more detail. The puppet master server can:
Compile and serve configuration catalogs to puppet agent nodes.�
Puppet Enterprise 2.8 User's Guide • Installing Puppet Enterprise 38/210

Route MCollective messages through its ActiveMQ server.Issue valid MCollective commands (from an administrator logged in as the peadmin user).
Note: By default, the puppet master will check for updates whenever the pe-httpd service restarts.In order to retrieve the correct update, the master will pass some basic, anonymous information toPuppet Labsʼ servers. This behavior can be disabled if need be. The details on what is collected andhow to disable upgrade checking can be found in the answer file reference�.
The Console Role
This role should be installed on one node. It should usually run on its own dedicated server, butcan also run on the same server as the puppet master. The console server can:
Serve the console web interface, with which administrators can directly edit resources on nodes,trigger immediate Puppet runs, group and assign classes to nodes, view reports and graphs,view inventory information, approve and reject audited changes, and invoke MCollective agentactions.Collect reports from, and serve node information to the puppet master.
The Cloud Provisioner Role
This optional role can be installed on a computer where administrators have shell access. Since itrequires confidential information about your cloud accounts to function, it should be installed on a�secure system. Administrators can use the cloud provisioner tools to:
Create new VMware and Amazon EC2 virtual machine instances.Install Puppet Enterprise on any virtual or physical system.Add newly provisioned nodes to a group in the console.
Customizing Your InstallationAfter you choose the roles for the system youʼre installing onto, the installer will ask questions toconfigure those roles.�
Passwords
The following characters are forbidden in all passwords: \ (backslash), ' (single quote), " (doublequote), , (comma), () (right and left parentheses), | (pipe), & (ampersand), and $ (dollar sign). Forall passwords used during installation, we recommend using only alphanumeric characters.
Puppet Master QuestionsCERTNAME
The certname is the puppet masterʼs unique identifier. It should be a DNS name at which the master�server can be reliably reached, and defaults to its fully-qualified domain name.�
(If the masterʼs certname is not one of its DNS names, you may need to edit puppet.conf after
Puppet Enterprise 2.8 User's Guide • Installing Puppet Enterprise 39/210

installation.)VALID DNS NAMES
The masterʼs certificate contains a static list of valid DNS names, and agents wonʼt trust the master�if they contact it at an unlisted address. You should make sure that this list contains the DNS nameor alias youʼll be configuring your agents to contact.�
The valid DNS names setting should be a comma-separated list of hostnames. The default set ofDNS names will be derived from the certname you chose, and will include the default puppet mastername of “puppet.”LOCATION OF THE CONSOLE SERVER
If you are splitting the puppet master and console roles across different machines, the installer will�ask you for the hostname and port of the console server.
Console Questions
The console should usually run on its own dedicated server, but can also run on the same server asthe puppet master. If you are running the console and puppet master roles on separate servers,install the console after the puppet master.PORT
You must choose a port on which to serve the consoleʼs web interface. If you arenʼt already servingweb content from this machine, it will default to port 443, so you can reach it athttps://yourconsoleserver without specifying a port.
If the installer detects another web server on the node, it will suggest the first open port at or above�3000.USER EMAIL AND PASSWORD
Access to the consoleʼs web interface is limited to approved users and governed by a lightweightsystem of roles. During installation, you must create an initial admin user for the console byproviding an email address and password. Recall the limitations on characters in passwords listedabove.SMTP SERVER
The consoleʼs account management tools will send activation emails to new users, and requires anSMTP server to do so.
If you cannot provide an SMTP server, an admin user can manually copy and email the activationcodes for new users. (Note that localhost will usually work as well.)If your SMTP server requires TLS or a user name and password, you must perform additionalconfiguration after installing.�
INVENTORY CERTNAME AND DNS NAMES (OPTIONAL)
If you are splitting the master and the console roles, the console will maintain an inventory serviceto collect facts from the puppet master. Like the master, the inventory service needs a unique
Puppet Enterprise 2.8 User's Guide • Installing Puppet Enterprise 40/210

certname and a list of valid DNS names.DATABASES
The console needs multiple MySQL databases and MySQL users in order to operate, but canautomatically configure them. It can also automatically install the MySQL server if it isnʼt already�present on the system.
The installer gives slightly different options to choose from depending on your systemʼs�configuration:�
Automatically install a MySQL server and auto-configure databases (only available if MySQL is not�yet installed). This option will generate a random root MySQL password, and you will need tolook it up in the saved answer file after installation finishes. A message at the end of the installer��will tell you the location of the answer file.�Auto-configure databases on an existing local or remote MySQL server. You will need to provide�your serverʼs root MySQL password to the installer. (Note that if you want to auto-configure�databases on a remote server, you must make sure the root MySQL user is allowed to log inremotely.)Use a set of pre-existing manually configured databases and users.�
MANUAL DATABASE CONFIGURATIONIf you are manually configuring your databases, the installer will ask you to provide:�
A name for the consoleʼs primary databaseA MySQL user name for the consoleA password for the consoleʼs userA name for the console authentication databaseA MySQL user name for console authenticationA password for the console authentication userThe database serverʼs hostname (if remote)The database serverʼs port (if remote; default: 3306)
You will also need to make sure the databases and users actually exist. The SQL commands youneed will resemble the following:
CREATEDATABASEconsoleCHARACTERSETutf8;CREATEDATABASEconsole_inventory_serviceCHARACTERSETutf8;CREATEUSER'console'@'localhost'IDENTIFIEDBY'password';GRANTALLPRIVILEGESONconsole.*TO'console'@'localhost';GRANTALLPRIVILEGESONconsole_inventory_service.*TO'console'@'localhost';
CREATEDATABASEconsole_authCHARACTERSETutf8;CREATEUSER'console_auth'@'localhost'IDENTIFIEDBY'password';GRANTALLPRIVILEGESONconsole_auth.*TO'console_auth'@'localhost';FLUSHPRIVILEGES;
Puppet Enterprise 2.8 User's Guide • Installing Puppet Enterprise 41/210

Note that the names of the console and inventory databases are related: the name of the inventoryservice database must start with the name of the primary console database, followed by_inventory_service .
Consult the MySQL documentation for more info.
Puppet Agent QuestionsCERTNAME
The certname is the agent nodeʼs unique identifier.�
This defaults to the nodeʼs fully-qualified domain name, but any arbitrary string can be used. If�hostnames change frequently at your site or are otherwise unreliable, you may wish to use UUIDs orhashed firmware attributes for your agent certnames.�PUPPET MASTER HOSTNAME
Agent nodes need the hostname of a puppet master server. This must be one of the valid DNSnames you chose when installing the puppet master.
This setting defaults to puppet .
OPTIONAL: OVERRIDE FAILED PUPPET MASTER COMMUNICATIONS
The installer will attempt to contact the puppet master before completing the installation. If it isnʼtable to reach it, it will give you a choice between correcting the puppet master hostname, orcontinuing anyway.
Final QuestionsVendor Packages
Puppet Enterprise may need some extra system software from your OS vendorʼs packagerepositories.
The puppet master role requires a Java runtime, in order to run the ActiveMQ server fororchestration.The console role requires MySQL; if using local databases, it also requires MySQL server.
If these arenʼt already present, the installer will offer to automatically install them. If you decline, it�will exit, and you will need to install them manually before running the installer again.
As of PE 2.7.0, you also have the option of verifying the integrity of the selected packages by usingPuppet Labsʼ public GPG key. This is done by answering “yes” when asked if you want to verify thesignatures of the PE RPM packages.. The key will be used to verify the signatures of the selectedRPM packages. Because the key is added to the RPM database, the option to verify is only availableon platforms that support RPM packages (currently EL 5,6-based and sles 11 platforms). Thequestion will not be presented on non-RPM based platforms (e.g. Debian) and if it is present in apre-made answer file it will be ignored on those platforms.�
Puppet Enterprise 2.8 User's Guide • Installing Puppet Enterprise 42/210

The option will appear in answer files as �verify_packages=y|n .
Answering “no” to the question will preserve the PE 2.6.1 and earlier behavior of not verifyingpackages.JAVA AND MYSQL VERSIONS
On every supported platform, PE can use the default system packages for MySQL and Java(OpenJDK on most Linuxes, and IBM Java on SUSE).Custom-compiled MySQL or Java versions may or may not work, as Puppet Enterprise expects tofind shared objects and binaries in their standard locations. In particular, we have noticed�problems with custom compiled MySQL 5.5 on Enterprise Linux variants.On Enterprise Linux variants, you may optionally use the Java and MySQL packages provided byOracle. Before installing PE, you must manually install Java and/or MySQL, then install the pe-virtual-java and/or pe-virtual-mysql packages included with Puppet Enterprise:
$sudorpm-ivhpackages/pe-virtual-java-1.0-1.pe.el5.noarch.rpm
Find these in the installerʼs packages/ directory. Note that these packages may have additionalramifications if you later install other software that depends on OS MySQL or Java packages.�
Note: If installing pe-virtual-java , make sure that the keytool binary is in one of the followingdirectories:
/opt/puppet/bin
/usr/kerberos/sbin
/usr/kerberos/bin
/usr/local/sbin
/usr/local/bin
/sbin
/bin
/usr/sbin
/usr/bin
If keytool isnʼt already there, use find or which to locate it, and symlink it into place so that the PEinstaller can find it during installation. This binary is necessary for configuring MCollective.��
$whichkeytool/path/to/keytool$sudoln-s/path/to/keytool/usr/local/bin/keytool
Puppet Enterprise 2.8 User's Guide • Installing Puppet Enterprise 43/210

Convenience Links
PE installs its binaries in /opt/puppet/bin and /opt/puppet/sbin , which arenʼt included in yourdefault $PATH . If you want to make the Puppet tools more visible to all users, the installer can makesymlinks in /usr/local/bin for the facter,puppet,pe-man , and mco binaries.
Confirming Installation�
The installer will offer a final chance to confirm your answers before installing.���
After InstallingSecuring the Answer File
After finishing, the installer will print a message telling you where it saved its answer file. If you��automatically configured console databases, �you should save and secure this file,� as it will containthe randomly-generated root MySQL password.
Signing Agent Certificates�
Before nodes with the puppet agent role can fetch configurations or appear in the console, an�administrator has to sign their certificate requests. This helps prevent unauthorized nodes from�intercepting sensitive configuration data.�
During installation, PE will automatically submit a certificate request to the puppet master. Before�the agent can retrieve any configurations, a user will have to sign a certificate for it.��
Node requests can be approved or rejected using the consoleʼs certificate management capability.�Pending node requests are indicated in the main nav bar. Click on the “node requests” indicator togo to a view where you can see current requests and approve or reject them as needed.
Alternatively, you can use the CLI. Certificate signing with the CLI is done on the puppet master�node. To view the list of pending certificate requests, run:�
$sudopuppetcertlist
To sign one of the pending requests, run:
$sudopuppetcertsign<name>
After signing a new nodeʼs certificate, it may take up to 30 minutes before that node appears in the�console and begins retrieving configurations. You can trigger a puppet run manually on the node if�you want to see it right away.
Verifying Your License
Puppet Enterprise 2.8 User's Guide • Installing Puppet Enterprise 44/210

When you purchased Puppet Enterprise, you should have been sent a license.key file that lists�how many nodes you can deploy. For PE to run without logging license warnings, you should copythis file to the puppet master node as �/etc/puppetlabs/license.key . If you donʼt have yourlicense key file, please email �[email protected] and weʼll re-send it.
Note that you can download and install Puppet Enterprise on up to ten nodes at no charge. Nolicence key is needed to run PE on up to ten nodes.
Next: Upgrading
Installing Windows Agents
PE includes support for Windows agent nodes. Windows nodes:
Can fetch configurations from a puppet master and apply manifests locally�Cannot serve as a puppet masterCannot respond to live management or orchestration
See the main Puppet on Windows documentation for details on running Puppet on Windows andwriting manifests for Windows.
Installing PuppetTo install Puppet Enterprise on a Windows node, simply download and run the installer, which is astandard Windows .msi package and will run as a graphical wizard.
The installer must be run with elevated privileges. Installing Puppet does not require a systemreboot.
The only information you need to specify during installation is the hostname of your puppet masterserver:
This chapter refers to Windows functionality. To install PE on *nix nodes, see InstallingPuppet Enterprise.
Puppet Enterprise 2.8 User's Guide • Installing Windows Agents 45/210
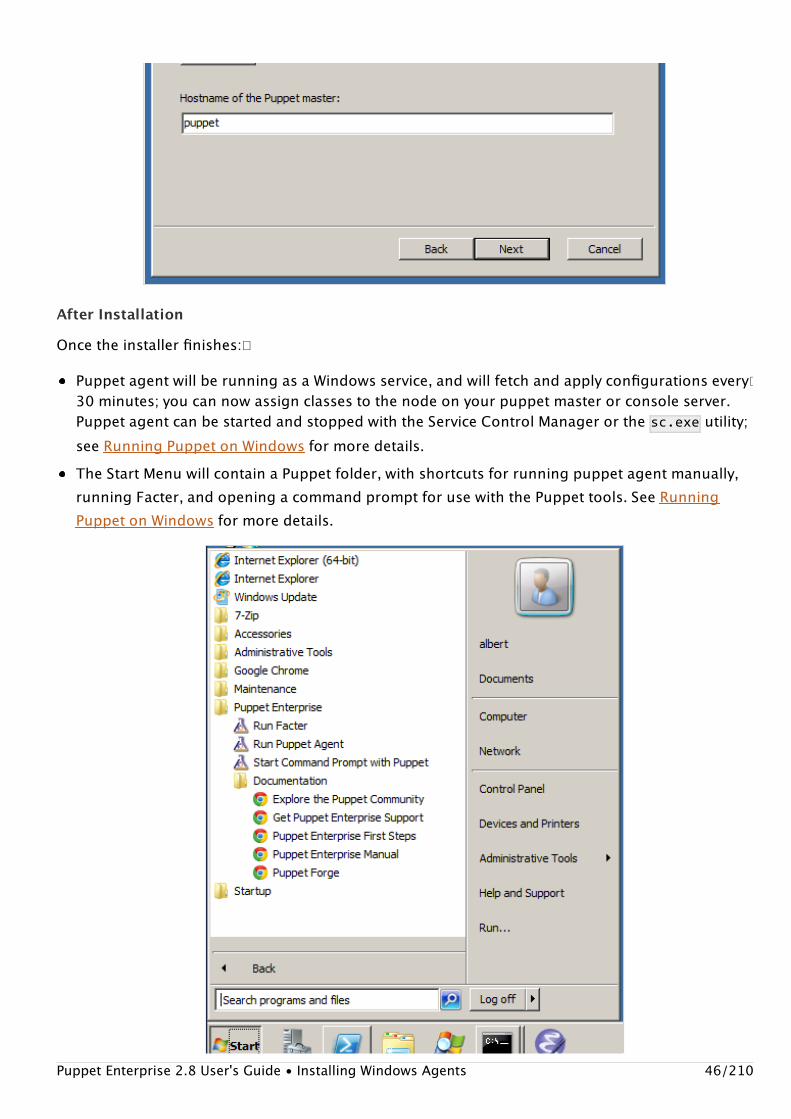
After Installation
Once the installer finishes:�
Puppet agent will be running as a Windows service, and will fetch and apply configurations every�30 minutes; you can now assign classes to the node on your puppet master or console server.Puppet agent can be started and stopped with the Service Control Manager or the sc.exe utility;see Running Puppet on Windows for more details.The Start Menu will contain a Puppet folder, with shortcuts for running puppet agent manually,running Facter, and opening a command prompt for use with the Puppet tools. See RunningPuppet on Windows for more details.
Puppet Enterprise 2.8 User's Guide • Installing Windows Agents 46/210

Automated InstallationFor automated deployments, Puppet can be installed unattended on the command line as follows:
msiexec/qn/ipuppet.msi
You can also specify /l*vinstall.txt to log the progress of the installation to a file.�
The following public MSI properties can also be specified:�
MSI Property Puppet Setting Default Value
INSTALLDIR n/a Version-dependent, see below
PUPPET_MASTER_SERVER server puppet
PUPPET_CA_SERVER ca_server Value of PUPPET_MASTER_SERVER
PUPPET_AGENT_CERTNAME certname Value of facterfdqn (must be lowercase)
For example:
msiexec/qn/ipuppet.msiPUPPET_MASTER_SERVER=puppet.acme.com
UpgradingPuppet can be upgraded by installing a new version of the MSI package. No extra steps arerequired, and the installer will handle stopping and re-starting the puppet agent service.
When upgrading, the installer will not replace any settings in the main puppet.conf configuration�file, but it can add previously unspecified settings if they are provided on the command line.��
UninstallingPuppet can be uninstalled through Windowsʼ standard “Add or Remove Programs” interface, orfrom the command line.
To uninstall from the command line, you must have the original MSI file or know the �ProductCodeof the installed MSI:
msiexec/qn/x[puppet.msi|product-code]
Uninstalling will remove Puppetʼs program directory, the puppet agent service, and all relatedregistry keys. It will leave the data directory intact, including any SSL keys. To completely remove
Puppet Enterprise 2.8 User's Guide • Installing Windows Agents 47/210

Puppet from the system, the data directory can be manually deleted.
Installation DetailsWhat Gets Installed
In order to provide a self-contained installation, the Puppet installer includes all of Puppetʼsdependencies, including Ruby, Gems, and Facter. (Puppet redistributes the 32-bit Ruby applicationfrom rubyinstaller.org.
These prerequisites are used only for Puppet and do not interfere with other local copies of Ruby.
Program Directory
Unless overridden during installation, Puppet and its dependencies are installed into the standardProgram Files directory for 32-bit applications.
Puppet Enterpriseʼs the default installation path is:
OS type Default Install Path
32-bit C:\ProgramFiles\PuppetLabs\PuppetEnterprise
64-bit C:\ProgramFiles(x86)\PuppetLabs\PuppetEnterprise
The program files directory can be located using the �PROGRAMFILES environment variable on 32-bitversions of Windows, or the PROGRAMFILES(X86) variable on 64-bit versions.
Puppetʼs program directory contains the following subdirectories:
Directory Description
bin scripts for running Puppet and Facter
facter Facter source
misc resources
puppet Puppet source
service code to run puppet agent as a service
sys Ruby and other tools
Data Directory
Puppet stores its settings (puppet.conf ), manifests, and generated data (like logs and catalogs) inits data directory.
When run with elevated privileges — Puppetʼs intended state — the data directory is located in theCOMMON_APPDATA folder. This folderʼs location varies by Windows version:
Puppet Enterprise 2.8 User's Guide • Installing Windows Agents 48/210

OSVersion
Path Default
2003 %ALLUSERSPROFILE%\ApplicationData\PuppetLabs\puppet
C:\DocumentsandSettings\AllUsers\ApplicationData\PuppetLabs\puppet
7, 2008 %PROGRAMDATA%\PuppetLabs\puppet C:\ProgramData\PuppetLabs\puppet
Since CommonAppData directory is a system folder, it is hidden by default. Seehttp://support.microsoft.com/kb/812003 for steps to show system and hidden files and folders.�
If Puppet is run without elevated privileges, it will use a .puppet directory in the current userʼshome folder as its data directory. This may result in Puppet having unexpected settings.
Puppetʼs data directory contains two subdirectories:
etc contains configuration files, manifests, certificates, and other important files����var contains generated data and logs
More
For more details about using Puppet on Windows, see:
Running Puppet on WindowsWriting Manifests for Windows
Next: Upgrading
Upgrading Puppet EnterpriseSummaryYou can upgrade PE manually or with an unofficial Puppet module.��
Upgrading Manually
To upgrade, use the same installer tarball as in a basic installation, but run the puppet-enterprise-upgrader script instead of the -installer script. The rest of this page goes into moredetail about manual upgrades.
The pe_upgrade Module
To automate the upgrades of your agent nodes, you can use the adrien/pe_upgrade module.
To upgrade Windows nodes, simply download and run the new MSI package asdescribed in Installing Windows Agents.
Puppet Enterprise 2.8 User's Guide • Upgrading Puppet Enterprise 49/210

Instructions are available on the moduleʼs Forge page.
This module is unofficial,�� but Puppet Labs will support it on a best-effort basis. Feel free to call us if�you need help with it.
Important Notes and Warnings
Upgrade the master first, then the console, then other agent nodes.�
Depending on the version you upgrade from, you may need to take extra steps after running theupgrader. See below for your specific version.�
Note that if your console database is very large, the upgrader may take a long time on the consolenode, possibly thirty minutes or more. This is due to a resource-intensive database migration thatmust be run. Make sure that you schedule your upgrade appropriately, and avoid interrupting theupgrade process.
Warning: If you have created custom modules and stored them in/opt/puppet/share/puppet/modules , the upgrader will fail. Before upgrading, you should moveyour custom modules to /etc/puppetlabs/puppet/modules . Alternatively, you can update yourmodules manually to have the correct metadata.
Checking For UpdatesCheck here to find out what the latest maintenance release of Puppet Enterprise is. You can run�puppet--version at the command line to see the version of PE you are currently running.
Note: By default, the puppet master will check for updates whenever the pe-httpd service restarts.As part of the check, it passes some basic, anonymous information to Puppet Labsʼ servers. Thisbehavior can be disabled if need be. The details on what is collected and how to disable checkingcan be found in the answer file reference�.
Downloading PESee the Installing PE of this guide for information on downloading Puppet Enterprise tarballs.
Starting the UpgraderThe upgrader must be run with root privileges:
#./puppet-enterprise-upgrader
Important note: Only use version 0.4.0 or later of the pe_upgrade module. If youʼre gettingmysterious “Not a Puppet Enterprise node” errors on your Puppet runs, you may need toupdate this module to 0.4.0 or later.
Puppet Enterprise 2.8 User's Guide • Upgrading Puppet Enterprise 50/210

This will start the upgrader in interactive mode. If the puppet master role and the console role areinstalled on different servers, �you must upgrade the puppet master first.�
Note that if your console database is very large, the upgrader may take a long time on the consolenode, possibly thirty minutes or more. This is due to a resource-intensive database migration thatmust be run. Make sure that you schedule your upgrade appropriately, and avoid interrupting theupgrade process.
Upgrader Options
Like the installer, the upgrade will accept some command-line options:
-h
Display a brief help message.
-s<ANSWERFILE>
Save answers to file and quit without installing.�
-a<ANSWERFILE>
Read answers from file and fail if an answer is missing. See the �upgrader answers section ofthe answer file reference for a list of available answers.�
-A<ANSWERFILE>
Read answers from file and prompt for input if an answer is missing. See the �upgraderanswers section of the answer file reference for a list of available answers.�
-D
Display debugging information.
-l<LOGFILE>
Log commands and results to file.�
-n
Run in ʻnoopʼ mode; show commands that would have been run during installation withoutrunning them.
Non-interactive upgrades work identically to non-interactive installs, albeit with different answers�available.
Configuring the Upgrade�The upgrader will ask you the following questions:
Puppet Enterprise 2.8 User's Guide • Upgrading Puppet Enterprise 51/210

Cloud Provisioner
PE includes a cloud provisioner tool that can be installed on trusted nodes where administratorshave shell access. On nodes which lack the cloud provisioner role, youʼll be asked whether you wishto install it.
Vendor Packages
If PE needs any packages from your OSʼs repositories, it will ask permission to install them.
As with the installer, the upgrader in PE and later will ask you if you want to verify the integrity ofthe chosen packages by using Puppet Labsʼ public GPG key to verify the package signatures. If thepublic key is already present, the verification process will take place by default and the question will�not be presented. However, you can over-ride this behavior and prevent package verification by�setting verify_packages=n in an answer file.�
Puppet Master OptionsREMOVING MCO ʼS HOME DIRECTORY
When upgrading from PE 1.2, the mco user gets deleted during the upgrade and is replaced withthe peadmin user.
If the mco user had any preference files or documents you need, you should tell the upgrader to�preserve the mco userʼs home directory; otherwise, it will be deleted.
INSTALLING WRAPPER MODULES
When upgrading from PE 1.2, the mcollectivepe , accounts , and baselines modules will berenamed to pe_mcollective,pe_accounts, and pe_compliance , respectively. If you have usedany of these modules by their previous names, you should install the wrapper modules so your sitewill continue to work while you switch over.
Console OptionsADMIN USER EMAIL AND PASSWORD
The console now uses role-based user authentication. You will be asked for an email address andpassword for the initial admin user; additional users can be configured after the upgrade is�completed.
Upgrader WarningsOn console servers, the upgrader will check your MySQL serverʼs innodb_buffer_pool_sizesetting. If it is too small, the upgrader will advise you to increase it.
If you receive a warning about the innodb_buffer_pool_size setting, you should:
Cancel the upgrade and exit the upgrader.Follow these instructions to increase the buffer size.�
Puppet Enterprise 2.8 User's Guide • Upgrading Puppet Enterprise 52/210

Re-run the upgrader and allow it to finish.�
Final Steps: From PE 2.0 or 1.2If you received an upgrader warning on your console server as described above, be sure toincrease your MySQL serverʼs innodb_buffer_pool_size .
Otherwise, no extra steps are needed when upgrading from PE 2.0 or 1.2.
Note that some features may not be available until puppet agent has run once on every node. Innormal installations, this means all features will be available within 30 minutes after upgrading allnodes.
Final Steps: From PE 1.1 or 1.0Important note: Upgrades from some configurations of PE 1.1 and 1.0 arenʼt fully supported.� Toupgrade from PE 1.1 or 1.0, you must have originally installed the puppet master and PuppetDashboard roles on the same node. Contact Puppet Labs support for help with other configurations�on a case-by-case basis, and see issue #10872 for more information.
After running the upgrader on the puppet master/Dashboard (now console) node, you must:
Stop the pe-httpd serviceCreate a new database for the inventory service and grant all permissions on it to the consoleʼsMySQL user.Manually edit the puppet masterʼs puppet.conf , auth.conf , site.pp , and settings.yml files�Generate and sign certificates for the console, to enable inventory and filebucket viewing.��Edit passenger-extra.confRestart the pe-httpd service.
You can upgrade agent nodes after upgrading the puppet master and console. After upgrading anagent node, you must:
Manually edit puppet.conf .
Stop pe-httpd
For the duration of these manual steps, Puppet Enterpriseʼs web server should be stopped.
$sudo/etc/init.d/pe-httpdstop
Create a New Inventory Database
To support the inventory service, you must manually create a new database for puppet master tostore node facts in. To do this, use the mysql client on the node running the database server. (ThisPuppet Enterprise 2.8 User's Guide • Upgrading Puppet Enterprise 53/210

will almost always be the same server running the puppet master and console.)
#mysql-uroot-pEnterpassword:mysql>CREATEDATABASEconsole_inventory_service;mysql>GRANTALLPRIVILEGESONconsole_inventory_service.*TO'<USER>'@'localhost';
Replace <USER> with the MySQL user name you gave Dashboard during your original installation.
Edit Puppet Masterʼs /etc/puppetlabs/puppet/puppet.conf
To support the inventory service, you must configure Puppet to save facts to a MySQL database.�
[master]#...facts_terminus=inventory_active_recorddbadapter=mysqldbname=console_inventory_servicedbuser=<CONSOLE/DASHBOARD'SMYSQLUSER>dbpassword=<PASSWORDFORCONSOLE'SMYSQLUSER>dbserver=localhost
If you chose a different MySQL user name for Puppet Dashboard when you originally installed PE,�use that user name as the dbuser instead of “dashboard”. If the database is served by a remotemachine, use that serverʼs hostname instead of “localhost”.If you configured the puppet master to not send reports to the Dashboard, you must configure it��to report to the console now:
[master]#...reports=https,storereporturl=https://<CONSOLEHOSTNAME>:<PORT>/reports/upload
Puppet agent on this node also has some new requirements:
[agent]#supportfilebucketviewingwhenusingcompliancefeatures:archive_files=true#ifyoudidn'toriginallyenablepluginsync,enableitnow:pluginsync=true
Edit Puppet Masterʼs /etc/puppetlabs/puppet/auth.conf
To support the inventory service, you must add the following two stanzas to your puppet masterʼsauth.conf file:�Puppet Enterprise 2.8 User's Guide • Upgrading Puppet Enterprise 54/210

#Allowtheconsoletoretrieveinventoryfacts:
path/factsauthyesmethodfind,searchallowpe-internal-dashboard
#Allowpuppetmastertosavefactstotheinventory:
path/factsauthyesmethodsaveallow<PUPPETMASTER'SCERTNAME>
These stanzas must be inserted before the final stanza, which looks like this:�
path/authany
If you paste the new stanzas after this final stanza, they will not take effect.��
Edit /etc/puppetlabs/puppet/manifests/site.pp
You must add the following lines to site.pp in order to view file contents in the console:�
#specifyremotefilebucketfilebucket{'main':server=>'<puppetmaster'shostname>',path=>false,}
File{backup=>'main'}
Edit /etc/puppetlabs/puppet-dashboard/settings.yml
Change the following three settings to point to one of the puppet masterʼs valid DNS names:
ca_server:'<PUPPETMASTERHOSTNAME>'inventory_server:'<PUPPETMASTERHOSTNAME>'file_bucket_server:'<PUPPETMASTERHOSTNAME>'
Change the following two settings to true:
enable_inventory_service:trueuse_file_bucket_diffs:true
Puppet Enterprise 2.8 User's Guide • Upgrading Puppet Enterprise 55/210

Ensure that the following settings exist and are set to the suggested values; if any are missing, youwill need to add them to settings.yml yourself:
private_key_path:'certs/pe-internal-dashboard.private_key.pem'public_key_path:'certs/pe-internal-dashboard.public_key.pem'ca_crl_path:'certs/pe-internal-dashboard.ca_crl.pem'ca_certificate_path:'certs/pe-internal-dashboard.ca_cert.pem'certificate_path:'certs/pe-internal-dashboard.cert.pem'key_length:1024cn_name:'pe-internal-dashboard'
Generate and Sign Console Certificates�
First, navigate to the consoleʼs installation directory:
$cd/opt/puppet/share/puppet-dashboard
Next, start a temporary WEBrick puppet master:
$sudo/opt/puppet/bin/puppetmaster
Next, create a keypair and request a certificate:�
$sudo/opt/puppet/bin/rakecert:create_key_pair$sudo/opt/puppet/bin/rakecert:request
Next, sign the certificate request:�
$sudo/opt/puppet/bin/puppetcertsigndashboard
Next, retrieve the signed certificate:�
$sudo/opt/puppet/bin/rakecert:retrieve
Next, stop the temporary puppet master:
$sudokill$(cat$(puppetmaster--configprintpidfile))
Finally, chown the certificates directory to �puppet-dashboard :
$sudochown-Rpuppet-dashboard:puppet-dashboardcerts
Puppet Enterprise 2.8 User's Guide • Upgrading Puppet Enterprise 56/210

TROUBLESHOOTING
If these rake tasks fail with errors like can'tconvertnilintoString , you may be missing acertificate-related setting from the �settings.yml file. Go back to the previous section and make�sure all of the required settings exist.
Start pe-httpd
You can now start PEʼs web server again.
$sudo/etc/init.d/pe-httpdstart
Edit puppet.conf on Each Agent Node
On each agent node you upgrade, make the following edits to/etc/puppetlabs/puppet/puppet.conf :
[agent]#supportfilebucketviewingwhenusingcompliancefeatures:archive_files=true#ifyoudidn'toriginallyenablepluginsync,enableitnow:pluginsync=true
Next: Uninstalling
Uninstalling Puppet EnterpriseUse the puppet-enterprise-uninstaller script to uninstall PE. This script can remove a workingPE installation, or undo a partially failed installation to prepare for a re-install.
Using the UninstallerTo run the uninstaller, ensure that it is in the same directory as the installer script, and run it withroot privileges from the command line:
$sudo./puppet-enterprise-uninstaller
The uninstaller will ask you to confirm that you want to uninstall.�
By default, the uninstaller will remove the Puppet Enterprise software, users, logs, cron jobs, andcaches, but it will leave your modules, manifests, certificates, databases, and configuration files in���place, as well as the home directories of any users it removes.
Puppet Enterprise 2.8 User's Guide • Uninstalling Puppet Enterprise 57/210

You can use the following command-line flags to change the installerʼs behavior:�
Uninstaller Options
-p
Purge additional files. With this flag, the uninstaller will also remove all configuration files,����modules, manifests, certificates, and the home directories of any users created by the PE�installer. This will also remove the Puppet Labs public GPG key used for package verification.�
-d
Also remove any databases during the uninstall.
-h
Display a help message.
-n
Run in ʻnoopʼ mode; show commands that would have been run during uninstallationwithout running them.
-y
Donʼt ask to confirm uninstallation, assuming an answer of yes.�
-s
Save an answer file� and quit without uninstalling.
-a
Read answers from file and fail if an answer is missing. See the �uninstaller answers section ofthe answer file reference for a list of available answers.�
-A
Read answers from file and prompt for input if an answer is missing. See the �uninstalleranswers section of the answer file reference for a list of available answers.�
Thus, to remove every trace of PE from a system, you would run:
$sudo./puppet-enterprise-uninstaller-d-p
Next: Automated Installation
Automated InstallationPuppet Enterprise 2.8 User's Guide • Automated Installation 58/210

To streamline deployment, the PE installer can run non-interactively. To do this, you must:
Create an answer file�Run the installer with the -a or -A flags�
Instead of interviewing a user to customize the installation, the installer will read your choices fromthe answer file and act on them immediately.�
Automated installation can greatly speed up large deployments, and is crucial when installing PEwith the cloud provisioning tools.
Obtaining an Answer FileAnswer files are simply shell scripts that declare variables used by the installer:�
q_install=yq_puppet_cloud_install=nq_puppet_enterpriseconsole_install=nq_puppet_symlinks_install=yq_puppetagent_certname=webmirror1.example.comq_puppetagent_install=yq_puppetagent_server=puppetq_puppetmaster_install=nq_vendor_packages_install=y
(A full list of these variables is available in the answer file reference�.)
To obtain an answer file, you can:�
Use one of the example files provided in the installerʼs �answers directoryRetrieve the answers.lastrun file from a node on which youʼve already installed PE�Run the installer with the -s<FILE> flag, which saves �an answer file without installing�Write one by hand
You must hand edit any pre-made answer file before using it,� as new nodes will need, at aminimum, a unique agent certname.
Editing Answer FilesAlthough you can use literal strings in an answer file for one-off installations, you should fill certain���variables dynamically with bash subshells if you want your answer files to be reusable.�
To run a subshell that will return the output of its command, use either the $() notation…
q_puppetagent_certname=$(hostname-f)
Puppet Enterprise 2.8 User's Guide • Automated Installation 59/210

…or backticks:
q_puppetagent_certname=`uuidgen`
Answer files can also contain arbitrary shell code and control logic, but you will probably be able to�get by with a few simple name-discovery commands.
See the answer file reference� for a complete list of variables and the conditions where theyʼreneeded, or simply start editing one of the example files in �answers/ .
Running the Installer in Automated ModeOnce you have your answer file, simply run the installer with the �-a or -A option, providing youranswer file as an argument:�
$sudo./puppet-enterprise-installer-a~/normal_agent.answers
Installing with the -a option will fail if any required variables are not set.Installing with the -A option will prompt the user for any missing answers.
Next: Answer File Reference →
Answer File ReferenceAnswer files are used for automated installations of PE. See �the chapter on automated installationfor more details.
Answer File SyntaxAnswer files consist of normal shell script variable assignments:�
q_puppet_enterpriseconsole_database_port=3306
Boolean answers should use Y or N (case-insensitive) rather than true, false, 1, or 0.
A variable can be omitted if another answer ensures that it wonʼt be used (i.e.q_puppetmaster_certname can be left blank if q_puppetmaster_install = n).
Answer files can include arbitrary bash control logic, and can assign variables with commands in�subshells ($(command) ). For example, to set an agent nodeʼs certname to its fqdn:
Puppet Enterprise 2.8 User's Guide • Answer File Reference 60/210

q_puppetagent_certname=$(hostname-f)
To set it to a UUID:
q_puppetagent_certname=$(uuidgen)
Sample Answer FilesPE includes a collection of sample answer files in the �answers directory of your distribution tarball.A successful installation will also save an answer file called �answers.lastrun , which can be used asa foundation for later installations. Finally, you can generate a new answer file without installing by�running the installer with the -s option and a filename argument.�
Installer AnswersGlobal Answers
These answers are always needed.
q_install
Y or N — Whether to install. Answer files must set this to Y.�
q_vendor_packages_install
Y or N — Whether the installer has permission to install additional packages from the OSʼsrepositories. If this is set to N, the installation will fail if the installer detects missingdependencies.
q_puppet_symlinks_install
Y or N — Whether to make the Puppet tools more visible to all users by installing symlinks in/usr/local/bin .
Roles
These answers are always needed.
q_puppetmaster_install
Y or N — Whether to install the puppet master role.
q_puppet_enterpriseconsole_install
Y or N — Whether to install the console role.
q_puppetagent_install
Puppet Enterprise 2.8 User's Guide • Answer File Reference 61/210

Y or N — Whether to install the puppet agent role.
q_puppet_cloud_install
Y or N — Whether to install the cloud provisioner role.
Puppet Agent Answers
These answers are always needed.
q_puppetagent_certname
String — An identifying string for this agent node. This per-node ID must be unique acrossyour entire site. Fully qualified domain names are often used as agent certnames.�
q_puppetagent_server
String — The hostname of the puppet master server. For the agent to trust the masterʼscertificate, this must be one of the valid DNS names you chose when installing the puppet�master.
q_fail_on_unsuccessful_master_lookup
Y or N — Whether to quit the install if the puppet master cannot be reached.
Puppet Master Answers
These answers are only needed if you are installing the puppet master role.
q_puppetmaster_certname
String — An identifying string for the puppet master. This ID must be unique across yourentire site. The serverʼs fully qualified domain name is often used as the puppet masterʼs�certname.
q_puppetmaster_dnsaltnames
String — Valid DNS names at which the puppet master can be reached. Must be a comma-separated list. In a normal installation, defaults to<hostname>,<hostname.domain>,puppet,puppet.<domain> .
q_puppetmaster_enterpriseconsole_hostname
String — The hostname of the server running the console role. Only needed if you are notinstalling the console role on the puppet master server.
q_puppetmaster_enterpriseconsole_port
Integer — The port on which to contact the console server. Only needed if you are notinstalling the console role on the puppet master server.
In addition, by default the puppet master will check for available PE software updates whenever thepe-httpd service restarts. To help ensure the correct update is retrieved, the master will pass somePuppet Enterprise 2.8 User's Guide • Answer File Reference 62/210

basic, anonymous info to Puppet Labsʼ servers. Specifically, it will transmit: �* the IP address of theclient * the type and version of the clientʼs OS * the Installed version of PE
If you wish to disable manual update checks, or if your company policy forbids transmitting thisinformation, you will need to add the following line to the answer file: �q_pe_check_for_updates=n
Console Answers
These answers are only needed if you are installing the console role.
q_puppet_enterpriseconsole_httpd_port
Integer — The port on which to serve the console. If this is set to 443, you can access theconsole from a web browser without manually specifying a port.
q_puppet_enterpriseconsole_auth_user_email
String — The email address with which the consoleʼs admin user will log in. Note that thisanswer has changed from PE 2.0.
q_puppet_enterpriseconsole_auth_password
String — The password for the consoleʼs admin user. Must be longer than eight characters.
q_puppet_enterpriseconsole_smtp_host
String – The SMTP server with which to email account activation codes to new console users.
q_puppet_enterpriseconsole_inventory_certname
String — An identifying string for the inventory service. This ID must be unique across yourentire site. Only needed if you are not installing the puppet master role on the console server.
q_puppet_enterpriseconsole_inventory_dnsaltnames
String — Valid DNS names at which the console server can be reached. Only needed if you arenot installing the puppet master role on the console server. Must be a comma-separated list.In a normal installation, defaults to<hostname>,<hostname.domain>,puppetinventory,puppetinventory.<domain> .
q_puppet_enterpriseconsole_database_install
Y or N — Whether to install and configure a new MySQL database from the OSʼs package�repositories. If set to Y, the installer will also create a new database and user with the..._name,..._user, and ..._password answers below.
q_puppet_enterpriseconsole_setup_db
Y or N — Whether to automatically configure the console and inventory service databases.�Only used when q_puppet_enterpriseconsole_database_install is N.
q_puppet_enterpriseconsole_database_root_password
Puppet Enterprise 2.8 User's Guide • Answer File Reference 63/210

String — The password for MySQLʼs root user. Whenq_puppet_enterpriseconsole_database_install is Y, this will set the root userʼs password;when q_puppet_enterpriseconsole_setup_db is Y, it will be used to log in and automaticallyconfigure the necessary databases. If neither of these answers is Y, this answer is not used.�
q_puppet_enterpriseconsole_database_remote
Y or N — Whether the pre-existing database is on a remote MySQL server. Only used whenq_puppet_enterpriseconsole_database_install is N.
q_puppet_enterpriseconsole_database_host
String — The hostname of the remote MySQL server. Only used whenq_puppet_enterpriseconsole_database_remote is Y.
q_puppet_enterpriseconsole_database_port
String — The port used by the remote MySQL server. Only used whenq_puppet_enterpriseconsole_database_remote is Y. In a normal installation, defaults to3306 .
q_puppet_enterpriseconsole_database_name
String — The database the console will use. Note that if you are not automatically configuring�the databases, this database must already exist on the MySQL server.
q_puppet_enterpriseconsole_database_user
String — The MySQL user the console will use. Note that if you are not automaticallyconfiguring the databases, this user must already exist on the MySQL server and must be able�to edit the consoleʼs database.
q_puppet_enterpriseconsole_database_password
String — The password for the consoleʼs MySQL user.
q_puppet_enterpriseconsole_setup_auth_db
Y or N — Whether to automatically configure the console authentication database.�
q_puppet_enterpriseconsole_auth_database_name
String — The database the console authentication will use. Note that if you are notautomatically configuring the auth database, this database must already exist on the MySQL�server.
q_puppet_enterpriseconsole_auth_database_user
String — The MySQL user the console authentication will use. Note that if you are notautomatically configuring the databases, this user must already exist on the MySQL server�and must be able to edit the auth database.
Puppet Enterprise 2.8 User's Guide • Answer File Reference 64/210

q_puppet_enterpriseconsole_auth_database_password
String — The password for the auth databaseʼs MySQL user.
Upgrader Answersq_upgrade_installation
Y or N — Whether to upgrade. Answer files must set this to Y.�
q_puppet_cloud_install
Y or N — Whether to install the cloud provisioner tools on this node during the upgrade.Previous versions of PE did not include the cloud provisioner tools.
q_puppet_enterpriseconsole_setup_auth_db
Y or N — Whether to automatically configure the consoleʼs authentication database.�
q_puppet_enterpriseconsole_database_root_password
String — The password for the root user on the consoleʼs database server. Only required ifq_puppet_enterpriseconsole_setup_auth_db is true.
q_puppet_enterpriseconsole_auth_user_email
String — The email address with which the consoleʼs admin user will log in. Note that thisanswer has changed from PE 2.0. Only required if this node has the console role installed.
q_puppet_enterpriseconsole_auth_password
String — A password for accessing the console. Previous versions of PE did not secure theDashboard with a username and password. Only required if this node has the console role(previously Puppet Dashboard) installed.
q_puppet_enterpriseconsole_auth_database_name
String — The database the console authentication will use. Note that if you are notautomatically configuring the auth database, this database must already exist on the MySQL�server.
q_puppet_enterpriseconsole_auth_database_user
String — The MySQL user the console authentication will use. Note that if you are notautomatically configuring the databases, this user must already exist on the MySQL server�and must be able to edit the auth database.
q_puppet_enterpriseconsole_auth_database_password
String — The password for the auth databaseʼs MySQL user.
q_puppet_enterpriseconsole_smtp_host
Puppet Enterprise 2.8 User's Guide • Answer File Reference 65/210

String – The SMTP server with which to email account activation codes to new console users.
q_vendor_packages_install
Y or N — Whether to install additional packages from your OS vendorʼs repository, if theupgrader determines any are needed.
q_upgrade_remove_mco_homedir
Y or N — Whether to delete the mco userʼs home directory. (The mco user from PE 1.2 wasreplaced with the peadmin user in PE 2.0.)
q_upgrade_install_wrapper_modules
Y or N — Whether to install wrapper modules, so that you can continue to use the Puppetmodules provided with PE 1.2 under their previous names as well as their new names. (Theaccounts,baselines, and mcollectivepe modules from PE 1.2 were renamed tope_accounts,pe_compliance, and pe_mcollective in PE 2.0.)
Uninstaller Answersq_pe_uninstall
Y or N — Whether to uninstall. Answer files must set this to Y.�
q_pe_purge
Y or N — Whether to purge additional files when uninstalling, including all configuration files,���modules, manifests, certificates, and the home directories of any users created by the PE�installer.
q_pe_remove_db
Y or N — Whether to remove any PE-specific databases when uninstalling.�
q_pe_db_root_pass
String — The MySQL root userʼs password, to be used when deleting databases. Only usedwhen q_pe_remove_db is Y.
Next: What gets installed where?
PE 2.8 » Installing » What Gets InstalledWhere?License FilePuppet Enterprise 2.8 User's Guide • PE 2.8 » Installing » What Gets Installed Where? 66/210

Your PE license file (which was emailed to you when you purchased Puppet Enterprise) should be�placed at /etc/puppetlabs/license.key .
Puppet Enterprise can be evaluated with a complementary ten-node license; beyond that, acommercial per-node license is required for use. A license key file will have been emailed to you�after your purchase, and the puppet master will look for this key at /etc/puppetlabs/license.key .Puppet will log warnings if the license is expired or exceeded, and you can view the status of yourlicense by running puppetlicense at the command line on the puppet master.
To purchase a license, please see the Puppet Enterprise pricing page, or contact Puppet Labs [email protected] or (877) 575-9775. For more information on licensing terms, please see thelicensing FAQ. If you have misplaced or never received your license key, please [email protected].
SoftwareWhat
All working components of PE, excluding configuration files. These are files you are not likely to���need to change.
Where
All PE software (excluding config files) is installed under ��/opt/puppet .
Executable binaries are in /opt/puppet/bin and /opt/puppet/sbin .Optionally, you can choose at install time to symlink the most common binaries into/usr/local/bin .The Puppet modules included with PE are installed in /opt/puppet/share/puppet/modules .Donʼt edit this directory to add modules of your own. Instead, install them in/etc/puppetlabs/puppet/modules .MCollective plugins are installed in /opt/puppet/libexec/mcollective/ . If you are adding newplugins to your PE agent nodes, you should distribute them via Puppet.
Configuration Files�What
Files used to configure Puppet and its subsidiary components. These are the files you will likely��change to accomodate the needs of your environment.
Where
Puppet Enterpriseʼs configuration files all live under ��/etc/puppetlabs , with subdirectories for eachof PEʼs components.
Puppet Enterprise 2.8 User's Guide • PE 2.8 » Installing » What Gets Installed Where? 67/210

Puppetʼs confdir is in /etc/puppetlabs/puppet . This directory contains the puppet.conf file,�the site manifest (manifests/site.pp ), and the modules directory.MCollectiveʼs config files are in ��/etc/puppetlabs/mcollective .The consoleʼs config files are in ��/etc/puppetlabs/puppet-dashboard .
Log FilesWhat
The software distributed with Puppet Enterprise generates the following log files, which can be�found as follows.
Where
Puppet Master Logs
/var/log/pe-httpd/access.log
/var/log/pe-httpd/error.log
These logs are solely for HTTP activity; the puppet master service logs most of its activity to thesyslog service. Your syslog configuration dictates where these messages will be saved, but the�default location is /var/log/messages on Linux and /var/adm/messages on Solaris.
Puppet Agent Logs
The puppet agent service logs its activity to the syslog service. Your syslog configuration dictates�where these messages will be saved, but the default location is /var/log/messages on Linux and/var/adm/messages on Solaris.
ActiveMQ Logs
/var/log/pe-activemq/wrapper.log
/var/log/pe-activemq/activemq.log
/var/opt/puppet/activemq/data/kahadb/db-1.log
/var/opt/puppet/activemq/data/audit.log
Orchestration Service Log
This log is maintained by the orchestration service, which is installed on all nodes.
/var/log/pe-mcollective/mcollective.log
Console Log
/var/log/pe-httpd/puppetdashboard.access.log
/var/log/pe-httpd/puppetdashboard.error.log
Puppet Enterprise 2.8 User's Guide • PE 2.8 » Installing » What Gets Installed Where? 68/210

/var/log/pe-puppet-dashboard/delayed_job.log
/var/log/pe-puppet-dashboard/mcollective_client.log
/var/log/pe-puppet-dashboard/production.log
Miscellaneous Logs
These files may or may not be present.�
/var/log/pe-httpd/other_vhosts_access.log
/var/log/pe-puppet/masterhttp.log
/var/log/pe-puppet/rails.log
Puppet Enterprise ComponentsTools
Puppet Enterprise installs several suites of command line tools to help you work with the majorcomponents of the software. These include:
Puppet Tools: Tools that control basic functions of Puppet such as puppetmaster, puppetapply and puppetcert. See the Tools Section of the Puppet Manual for more information.Cloud Provisioning Tools: Tools used to provision new nodes. Mostly based around the nodesubcommand, these tools are used for tasks such as creating or destroying virtual machines,classifying new nodes, etc. See the Cloud Provisioning Section for more information.Orchestration Tools: Tools used to orchestrate simultaneous actions across a number of nodes.These tools are built on the MCollective framework and are accessed either via the mco commandor via the Live Management tab of the PE console. See the Orchestration Section for moreinformation.Module Tools: The Module tool is used to access and create Puppet Modules, which are reusablechunks of Puppet code users have written to automate configuration and deployment tasks. For�more information, and to access modules, visit the Puppet Forge.Console: The console is Puppet Enterpriseʼs GUI web interface. The console provides tools toview and edit resources on your nodes, view reports and activity graphs, trigger Puppet runs, etc.See the Console Section of the Puppet Manual for more information.
For more details, you can also refer to the man page for a given command or subcommand.
Services
PE uses the following services:
pe-puppet (on EL platforms) and pe-puppet-agent (on Debian-based platforms) — The puppetagent daemon. Runs on every agent node.pe-httpd — Apache 2, which manages and serves puppet master and the console on serverswith those roles. (Note that PE uses Passenger to run puppet master, instead of running it as a
Puppet Enterprise 2.8 User's Guide • PE 2.8 » Installing » What Gets Installed Where? 69/210
standalone daemon.)pe-mcollective — The MCollective server. Runs on every agent node.pe-puppet-dashboard-workers — A supervisor that manages the consoleʼs backgroundprocesses. Runs on servers with the console role.pe-activemq — The ActiveMQ message server, which passes messages to the MCollective serverson agent nodes. Runs on servers with the puppet master role.
User Accounts
PE creates the following users:
peadmin — An administrative account which can issue MCollective client commands. This is theonly PE user account intended for use in a login shell. See the section on orchestration for moreabout this user. This user exists on servers with the puppet master role, and replaces the mcouser that was present in PE 1.2.pe-puppet — A system user which runs the puppet master processes spawned by Passenger.pe-apache — A system user which runs Apache (pe-httpd ).pe-activemq — A system user which runs the ActiveMQ message bus used by MCollective.puppet-dashboard — A system user which runs the console processes spawned by Passenger.
Certificates�
PE generates a number of certificates at install. These are:�
pe-internal-dashboard — The certificate for the puppet dashboard.�q_puppet_enterpriseconsole_install — The certificate for the PE console. Only generated if�the user has chosen to install the console.q_puppetmaster_install— This certificate is either generated at install if the puppet master�and console are the same machine or is signed by the master if the console is on a separatemachine.pe-internal-mcollective-servers — A shared certificate generated on the puppet master and�shared to all Mcollective servers.pe-internal-peadmin-mcollective-client — The certificate for the peadmin account on the�puppet master.pe-internal-puppet-console-mcollective-client — The certificate for the PE Console/Live�Managementpe-internal-broker — The certificate generated for the activemq instance running over SSL on�the puppet master. Added to /etc/puppetlabs/activemq/broker.ks.
A fresh PE install should thus give the following list of certificates:�
root@master:~#puppetcertlist--all
Puppet Enterprise 2.8 User's Guide • PE 2.8 » Installing » What Gets Installed Where? 70/210

+"master"(40:D5:40:FA:E2:94:36:4D:C4:8C:CE:68:FB:77:73:AB)(altnames:"DNS:master","DNS:puppet","DNS:puppet.soupkitchen.internal")+"pe-internal-broker"(D3:E1:A8:B1:3A:88:6B:73:76:D1:E3:DA:49:EF:D0:4D)(altnames:"DNS:master","DNS:master.soupkitchen.internal","DNS:pe-internal-broker","DNS:stomp")+"pe-internal-dashboard"(F9:10:E7:7F:97:C8:1B:2F:CC:D9:F1:EA:B2:FE:1E:79)+"pe-internal-mcollective-servers"(96:4F:AA:75:B5:7E:12:46:C2:CE:1B:7B:49:FF:05:49)+"pe-internal-peadmin-mcollective-client"(3C:4D:8E:15:07:41:18:E2:21:57:19:01:2E:DB:AB:07)+"pe-internal-puppet-console-mcollective-client"(97:10:76:B5:3E:8D:02:D2:3D:A6:43:F4:89:F4:8B:94)
Documentation
Man pages for the Puppet subcommands are generated on the fly. To view them, run �puppetman<SUBCOMMAND> .
The pe-man command from previous versions of Puppet Enterprise is no longer functional. Use theabove method instead.
Next: Accessing the Console
Accessing the ConsoleThe console is Puppet Enterpriseʼs web GUI. Use it to:
Browse and edit resources on your nodesTrigger Puppet runs at willView reports and activity graphsAssign Puppet classes to nodesView inventory dataTrack compliance auditsInvoke MCollective agents on your nodesManage console users and their access privileges
Browser RequirementsThe following browsers are supported for use with the console:
NOTE: Live management and MCollective are not yet supported on Windows nodes.
Puppet Enterprise 2.8 User's Guide • Accessing the Console 71/210

Chrome (current versions)Firefox 3.5 and higherSafari 4 and higherInternet Explorer 8 and higher
Reaching the ConsoleThe console will be served as a website over SSL, on whichever port you chose when installing theconsole role.
Letʼs say your console server is console.domain.com . If you chose to use the default port of 443,you can omit the port from the URL and can reach the console by navigating to:
https://console.domain.com
If you chose to use port 3000, you would reach the console at:
https://console.domain.com:3000
Note the https protocol handler — you cannot reach the console over plain http .
Accepting the Consoleʼs Certificate�The console uses an SSL certificate created by your own local Puppet certificate authority. Since this��authority is specific to your site, web browsers wonʼt know it or trust it, and youʼll have to add a�security exception in order to access the console.
This is safe to do. Your web browser will warn you that the consoleʼs identity hasnʼt been verified by�one of the external authorities it knows of, but that doesnʼt mean itʼs untrustworthy. Since you oranother administrator at your site is in full control of which certificates the Puppet certificate��authority signs, the authority verifying the site is you.
Accepting the Certificate in Google Chrome or Chromium�
Use the “Proceed anyway” button on Chromeʼs warning page.
Puppet Enterprise 2.8 User's Guide • Accessing the Console 72/210

Accepting the Certificate in Mozilla Firefox�
Click “I Understand the Risks” to reveal more of the page, then click the “Add Exception…” button.On the dialog this raises, click the “Confirm Security Exception” button.�
Step 1:
Step 2:
Puppet Enterprise 2.8 User's Guide • Accessing the Console 73/210

Accepting the Certificate in Apple Safari�
Click the “Continue” button on the warning dialog.
Puppet Enterprise 2.8 User's Guide • Accessing the Console 74/210

Accepting the Certificate in Microsoft Internet Explorer�
Click the “Continue to this website (not recommended)” link on the warning page.
Logging InFor security, accessing the console requires a user name and password. PE allows three different�levels of user access: read, read-write, and admin. If you are an admin setting up the console oraccessing it for the first time, use the user and password you chose when you installed the console.�Otherwise, you will need to get credentials from your siteʼs administrator. See the UserManagement page for more information on managing console user accounts.
Puppet Enterprise 2.8 User's Guide • Accessing the Console 75/210
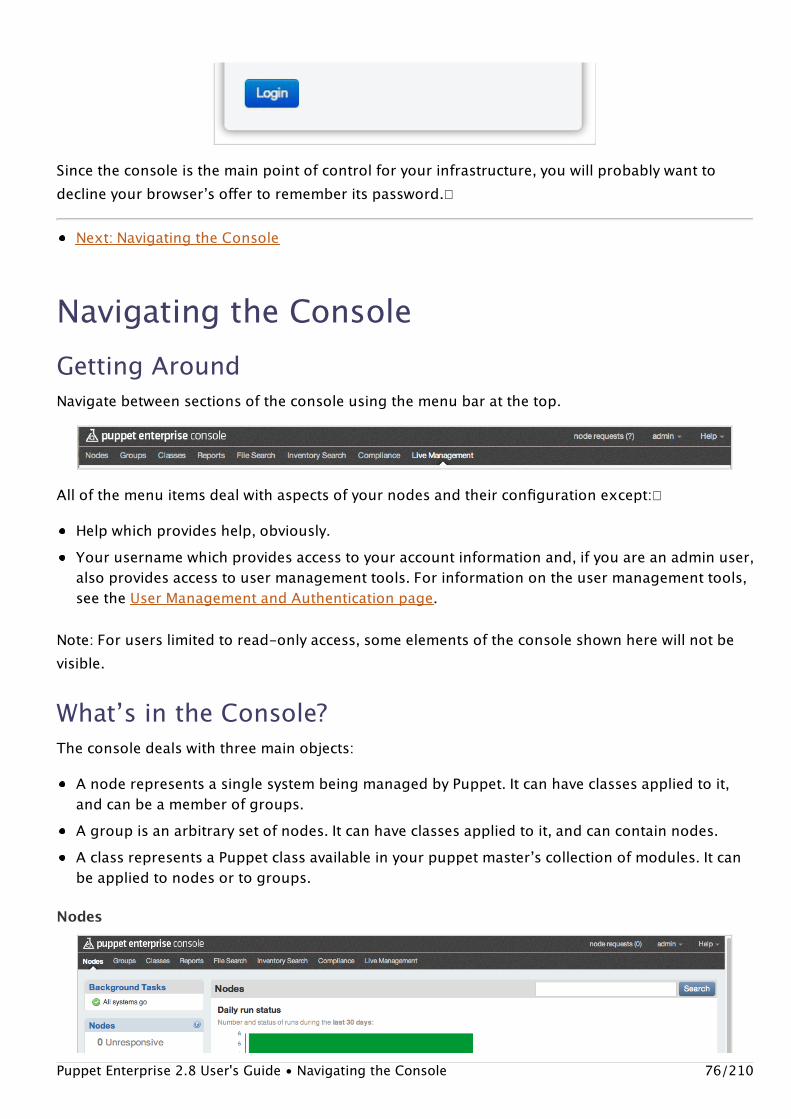
Since the console is the main point of control for your infrastructure, you will probably want todecline your browserʼs offer to remember its password.�
Next: Navigating the Console
Navigating the ConsoleGetting AroundNavigate between sections of the console using the menu bar at the top.
All of the menu items deal with aspects of your nodes and their configuration except:�
Help which provides help, obviously.Your username which provides access to your account information and, if you are an admin user,also provides access to user management tools. For information on the user management tools,see the User Management and Authentication page.
Note: For users limited to read-only access, some elements of the console shown here will not bevisible.
Whatʼs in the Console?The console deals with three main objects:
A node represents a single system being managed by Puppet. It can have classes applied to it,and can be a member of groups.A group is an arbitrary set of nodes. It can have classes applied to it, and can contain nodes.A class represents a Puppet class available in your puppet masterʼs collection of modules. It canbe applied to nodes or to groups.
Nodes
Puppet Enterprise 2.8 User's Guide • Navigating the Console 76/210

You can see nodes requesting to join your site by clicking on the “node requests” indicator at thetop right of the main navigation bar. After a node completes its first Puppet run (which may take up�to 30 minutes after youʼve approved its request), it will appear in the console and can be added togroups and have classes applied to it.
Since the console receives a report every time Puppet runs on a node, it keeps a running count inthe sidebar of what state your nodes are in:
This can tell you at a glance whether your nodes have suddenly started failing their Puppet runs,whether any nodes have stopped responding, and whether Puppet is making many changes to yoursystems. Click these state totals to see complete lists of nodes in each state.
Individual node pages contain graphs of recent runs, lists of reports, inventory data, compliancedata, and any classes the node has or groups itʼs a part of.
Groups
Puppet Enterprise 2.8 User's Guide • Navigating the Console 77/210

Groups contain nodes. Any classes applied to a group will also be applied to all the nodes in it.
Classes
Classes arenʼt automatically detected or validated; you have to enter a classʼs name yourself beforeyou can apply it to a node or group. Once you do, though, youʼre all set; Puppet will apply it asneeded, and you can click the class in the console to see which nodes itʼs been assigned to.
Next: Responding to Node Requests with Certificate Management�
Puppet Enterprise 2.8 User's Guide • Navigating the Console 78/210

Working with Node RequestsIntro/Overview
In previous versions of PE, sysadmins had to use the command line on the puppet master tomanually approve or reject certificates from agent nodes attempting to join the site. Node request�management is a new capability of the PE console which allows sysadmins to view and respond torequests graphically, from within the console. This means nodes can now be approved withoutneeding access to the puppet master. For further security, node request management supports theconsoleʼs user management system: only users with read/write privileges can take action on noderequests.
Once the console has been properly configured to point at the appropriate Certificate Authority, it��will display all of the nodes that have generated Certificate Signing Requests (CSRs). You can then�approve or deny the requests, individually or in a batch.
For each node making a request, you can also see its name and associated CSR fingerprint.�
Viewing Node Requests
You can view the number of pending node requests from anywhere in the console by checking theindicator in the top right of the main menu bar.
Click on the pending nodes indicator to view and manage the current requests.Puppet Enterprise 2.8 User's Guide • Working with Node Requests 79/210

You will see a view containing a list of all the pending node requests. Each item on the list showsthe nodeʼs name and its corresponding CSRʼs fingerprint. (Click on the truncated fingerprint to view��the whole thing in a pop-up.)
If there are no pending node requests, you will see some instructions for adding new nodes. If thisis not what you expect to see, the location of your Certificate Authority (CA) may not be configured��correctly.
Rejecting and Approving Nodes
The ability to respond to node requests is linked to your user privileges. You must be logged in tothe console as a user with read/write privileges before you can respond to requests.
Use the buttons to accept or reject nodes, singly or all at once. Note that once a node request isapproved, the node will not show up in the console until the next puppet run takes place. Thiscould be as long as 30 minutes, depending on how you have set up your puppet master. Dependingon how many nodes you have in your site total, and on the number of pending requests, it can alsotake up to two seconds per request for “Reject All” or “Accept All” to finish processing.�
In some cases, DNS altnames may be set up for agent nodes. In such cases, you cannot use theconsole to approve/reject node requests. The CSR for those nodes must be accepted or rejectedusing puppetcert on the CA. For more information, see the DNS altnames entry in the referenceguide.
Puppet Enterprise 2.8 User's Guide • Working with Node Requests 80/210
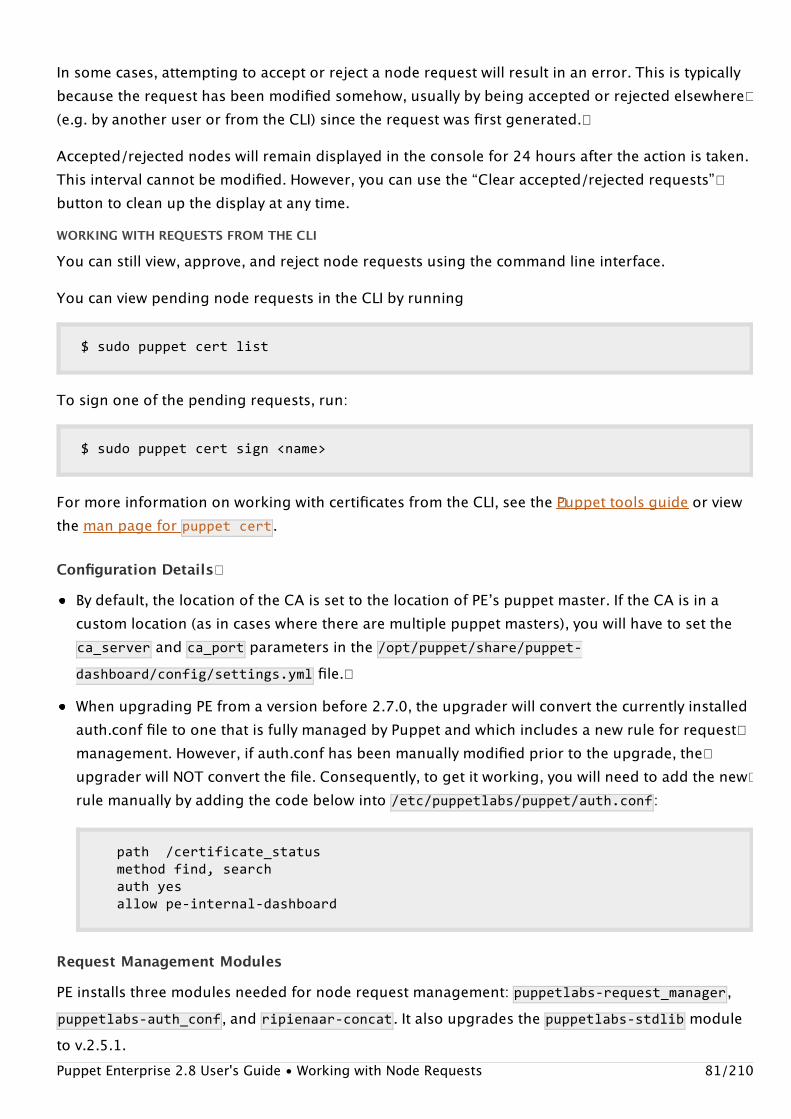
In some cases, attempting to accept or reject a node request will result in an error. This is typicallybecause the request has been modified somehow, usually by being accepted or rejected elsewhere�(e.g. by another user or from the CLI) since the request was first generated.�
Accepted/rejected nodes will remain displayed in the console for 24 hours after the action is taken.This interval cannot be modified. However, you can use the “Clear accepted/rejected requests”�button to clean up the display at any time.WORKING WITH REQUESTS FROM THE CLI
You can still view, approve, and reject node requests using the command line interface.
You can view pending node requests in the CLI by running
$sudopuppetcertlist
To sign one of the pending requests, run:
$sudopuppetcertsign<name>
For more information on working with certificates from the CLI, see the �Puppet tools guide or viewthe man page for puppetcert .
Configuration Details�
By default, the location of the CA is set to the location of PEʼs puppet master. If the CA is in acustom location (as in cases where there are multiple puppet masters), you will have to set theca_server and ca_port parameters in the /opt/puppet/share/puppet-dashboard/config/settings.yml file.�When upgrading PE from a version before 2.7.0, the upgrader will convert the currently installedauth.conf file to one that is fully managed by Puppet and which includes a new rule for request�management. However, if auth.conf has been manually modified prior to the upgrade, the�upgrader will NOT convert the file. Consequently, to get it working, you will need to add the new�rule manually by adding the code below into /etc/puppetlabs/puppet/auth.conf :
path/certificate_statusmethodfind,searchauthyesallowpe-internal-dashboard
Request Management Modules
PE installs three modules needed for node request management: puppetlabs-request_manager ,puppetlabs-auth_conf , and ripienaar-concat . It also upgrades the puppetlabs-stdlib moduleto v.2.5.1.Puppet Enterprise 2.8 User's Guide • Working with Node Requests 81/210

The puppetlabs-auth_conf module contains a new defined type: �auth_conf::acl . The type takesthe following parameters:
parameter description value types default value required
path URL path of ACL string $title no
acl_method find, search save, delete� string, array no
auth yes, no, any sring yes no
allow certnames to access path array [ ] no
order order in auth.conf file� string 99 no
regex is the path a regex? bool false no
environment environments to allow string no
Next: Viewing Reports and Inventory Data
Viewing Reports and Inventory DataWhen nodes fetch their configurations from the puppet master, they send back inventory data and a�report of their run. These end up in the console, where you can view them in that nodeʼs page.
Reading ReportsGraphs
Each node page has a pair of graphs: a histogram showing the number of runs per day and theresults of those runs, and a line chart tracking how long each run took.
Puppet Enterprise 2.8 User's Guide • Viewing Reports and Inventory Data 82/210

The daily run status histogram is broken down with the same colors that indicate run status in theconsoleʼs sidebar: red for failed runs, orange for pending runs (where a change would have beenmade, but the resource to be changed was marked as no-op), blue for successful runs wherechanges were made, and green for successful runs that did nothing. You can hover over a block ofcolor for a tooltip showing how many runs of that type occurred:
Note: Run status histograms also appear on group pages, class pages, and run status pages.
The run-time chart graphs how long each of the last 30 Puppet runs took to complete. A longer runusually means changes were made, but could also indicate heavy server load or some othercircumstance. You can hover over a point on the line for a tooltip showing the number of seconds itrepresents:
Normal Reports
Each node page has a short list of recent reports, with a “More” button at the bottom for viewingolder reports:
Puppet Enterprise 2.8 User's Guide • Viewing Reports and Inventory Data 83/210

Each report represents a single Puppet run. Clicking a report will take you to a tabbed view thatsplits the report up into metrics, log, and events.
Metrics is a rough summary of what happened during the run, with resource totals and the timespent retrieving the configuration and acting on each resource type.�
Log is a table of all the messages logged during the run.
Puppet Enterprise 2.8 User's Guide • Viewing Reports and Inventory Data 84/210
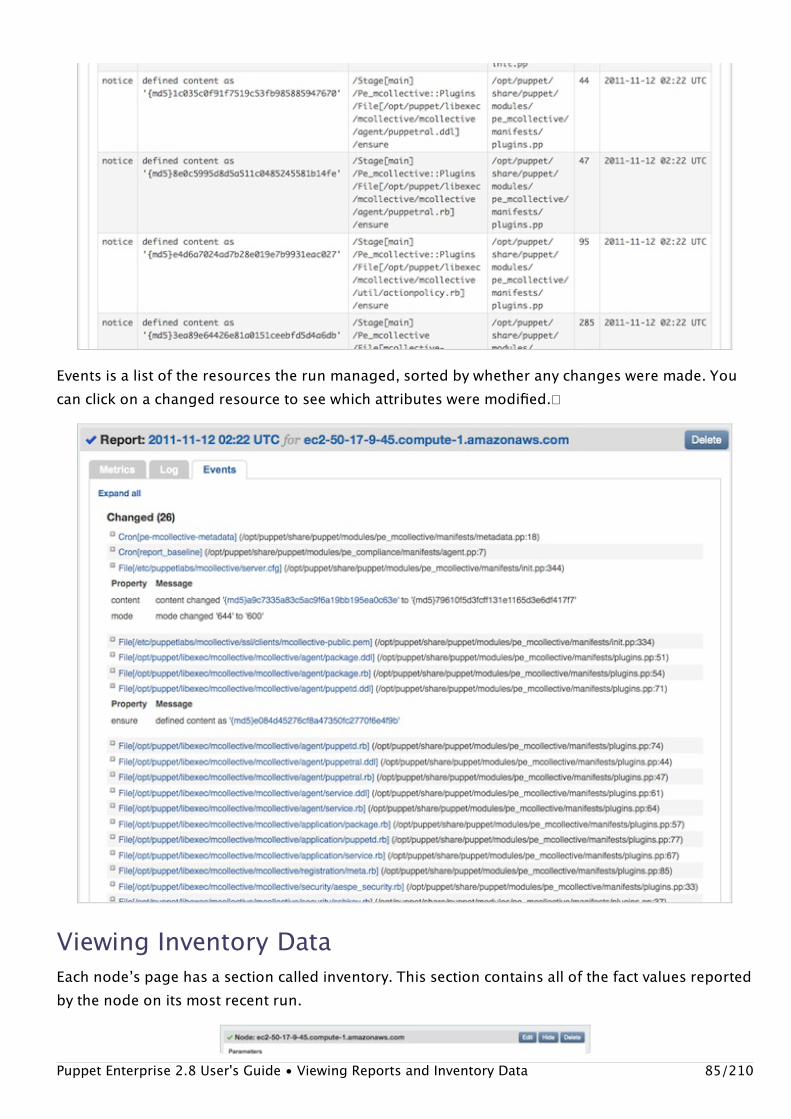
Events is a list of the resources the run managed, sorted by whether any changes were made. Youcan click on a changed resource to see which attributes were modified.�
Viewing Inventory DataEach nodeʼs page has a section called inventory. This section contains all of the fact values reportedby the node on its most recent run.
Puppet Enterprise 2.8 User's Guide • Viewing Reports and Inventory Data 85/210

Puppet Enterprise 2.8 User's Guide • Viewing Reports and Inventory Data 86/210

Facts include things like the operating system (operatingsystem ), the amount of memory(memorytotal ), and the primary IP address (ipaddress ). You can also add arbitrary custom facts toyour Puppet modules, and they too will show up in the inventory.
The facts you see in the inventory can be useful when filtering nodes in the live management page�.
Searching by Fact
Use the “inventory search” page to find a list of nodes with a certain fact value.�
Puppet Enterprise 2.8 User's Guide • Viewing Reports and Inventory Data 87/210

You can add more facts to further filter the search results , and you can change the comparison�criteria for each one.
Next: Managing Users
Managing Console UsersStarting with PE 2.5, the console has supported individual user management, access andauthentication. Instead of a single, shared username and password authenticated over HTTP withSSL, the console allows secure individual user accounts with different access privileges. Specifically,��
Puppet Enterprise 2.8 User's Guide • Managing Console Users 88/210

user accounts allow the assignment of one of three access levels: read-only, read-write, or admin.As of PE 2.6, users can also be managed using external, third-party authentication services such asLDAP, Active Directory or Google Accounts.
Following standard security practices, user passwords are hashed with a salt and then stored in adatabase separated from other console data. Authentication is built on CAS, an industry standard,single sign-on protocol.
Note: By default, CAS authentication for the console runs over port 443. If your console needs toaccess CAS on a different host/port, you can configure that in ��/etc/puppetlabs/console-auth/cas_client_config_yml .
User Access and PrivilegesDepending on the access privileges assigned to them, users will be able to see and access different�parts of the console:
Read-Only Users can only view information on the console, but cannot perform any actions. Inparticular, read-only users are restricted from:
cloning resources in Live Managementaccessing the Control Puppet tab in Live Managementaccessing the Advanced Tasks tab in Live Managementaccepting or rejecting changes to the baseline in Complianceadding, editing, or removing nodes, groups, or classes
Read-Write Users have access to all parts of the console EXCEPT the user-management interface.Read-write users can interact with the console and use it to perform node management tasks.
Admin Users have unrestricted access to all parts of the console, including the user-managementinterface. Through this interface, admin users can:
add a new userdelete a userchange a userʼs rolere-enable a disabled userdisable an enabled useredit a userʼs emailprompt a change to the userʼs password
There is one exception to this: admin users cannot disable, delete or change the privileges of theirown accounts. Only another admin user can make these changes.
Anonymous Users In addition to authenticated, per-user access, the console can also be configured�
Puppet Enterprise 2.8 User's Guide • Managing Console Users 89/210

to allow anonymous, read-only access. When so configured, the console can be viewed by anyone�with a web browser who can access the site URL. For instructions on how to do this, visit theadvanced configuration page�.
Managing Accounts and Users InternallySigning Up
In order to sign up as a console user at any access level, an account must be created for you by anadmin. Upon account creation, you will receive an email containing an activation link. You mustfollow this link in order to set your password and activate your account. The link will take you to ascreen where you can enter and confirm your password, thereby completing account activation.�Once you have completed activation you will be taken to the Login screen where you can enter yournew credentials.
Logging In
You will encounter the login screen whenever you try to access a protected part of the console. Thescreen will ask for your email address and password. After successfully authenticating, you will betaken to the part of the console you were trying to access.
When youʼre done working in the console, choose Logout from the user account menu. Note thatyou will be logged out automatically after 48 hours.
Puppet Enterprise 2.8 User's Guide • Managing Console Users 90/210
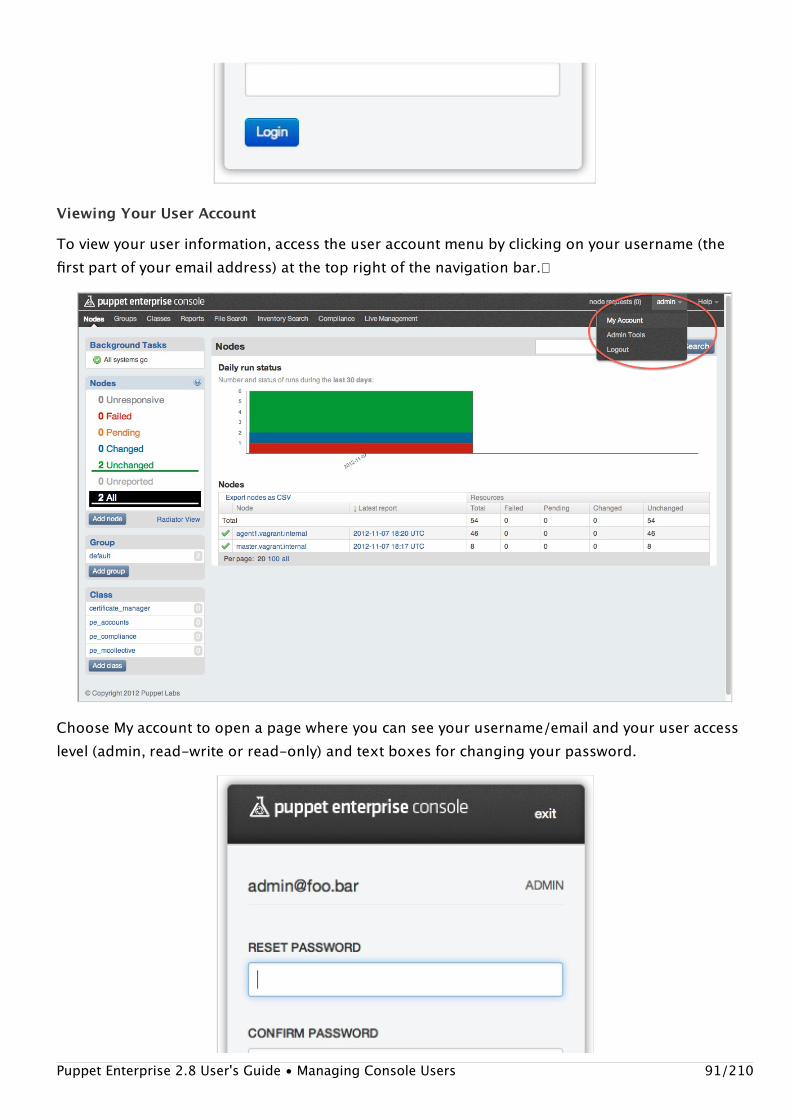
Viewing Your User Account
To view your user information, access the user account menu by clicking on your username (thefirst part of your email address) at the top right of the navigation bar.�
Choose My account to open a page where you can see your username/email and your user accesslevel (admin, read-write or read-only) and text boxes for changing your password.
Puppet Enterprise 2.8 User's Guide • Managing Console Users 91/210

User Administration Tools
Users with admin level access can view information about users and manage their access, includingadding and deleting users as needed. Admin level users will see an additional menu choice in theuser account menu: Admin Tools. Users with read-write or read-only accounts will NOT see theAdmin Tools menu item.
VIEWING USERS AND SETTINGS
Selecting Admin Tools will open a screen showing a list of users by email address, their access roleand status. Note that users who have not yet activated their accounts by responding to theactivation email and setting a password will show a status of pending.
Puppet Enterprise 2.8 User's Guide • Managing Console Users 92/210
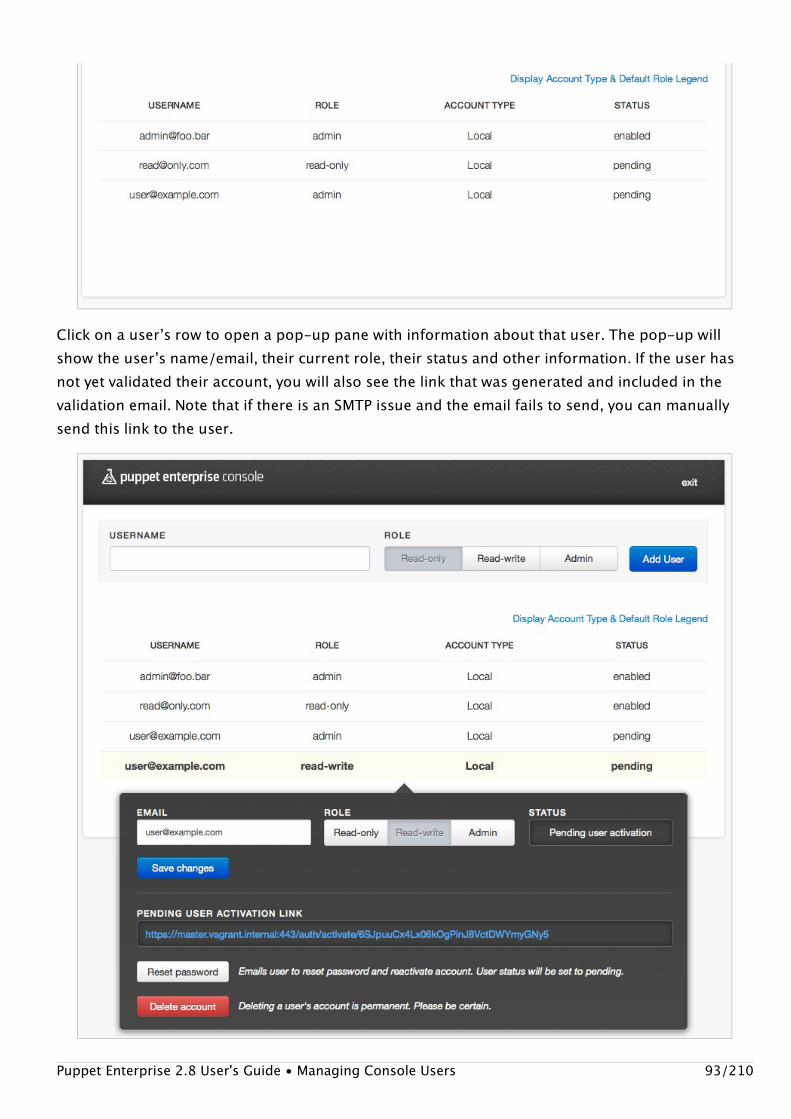
Click on a userʼs row to open a pop-up pane with information about that user. The pop-up willshow the userʼs name/email, their current role, their status and other information. If the user hasnot yet validated their account, you will also see the link that was generated and included in thevalidation email. Note that if there is an SMTP issue and the email fails to send, you can manuallysend this link to the user.
Puppet Enterprise 2.8 User's Guide • Managing Console Users 93/210

MODIFYING USER SETTINGS
To modify the settings for a given user, click on the userʼs row to open the pop-up pane. In thispane, you can change their role and their email address or reset their password. Donʼt forget toclick the Save changes button after making your edits.
Note that resetting a password or changing an email address will change that userʼs status back toPending, which will send them another validation email and require them to complete the validationand password setting process again.
For users who have completed the validation process, you can also enable or disable a userʼsaccount. Disabling the account will prevent that user from accessing the console, but will notremove them from the users database.
ADDING/DELETING USERS
To add a new user, open the user admin screen by choosing Admin Tools in the user menu. Enterthe userʼs email address and their desired role, then click the “Add user” button. The user will beadded to the list with a pending status and an activation email will be automatically sent to them.
To delete an existing user (including pending users), click on the userʼs name in the list and thenclick the Delete account button. Note that deleting a user cannot be undone, so be sure this is whatyou want to do before proceeding.
Puppet Enterprise 2.8 User's Guide • Managing Console Users 94/210

Creating Users From the Command Line
New console users can also be created from the command line. This can be used to automate usercreation or to import large numbers of users from an external source at once.
On the console server, the following command will add a new user:
$sudo/opt/puppet/bin/rake-f/opt/puppet/share/console-auth/Rakefiledb:create_userUSERNAME="<emailaddress>"PASSWORD="<password>"ROLE="<Admin|Read-Only|Read-Write>"
Thus, to add a read-write user named [email protected], you would run:
$sudo/opt/puppet/bin/rake-f/opt/puppet/share/console-auth/Rakefiledb:create_userUSERNAME="[email protected]"PASSWORD="good_password_1"ROLE="Read-Write"
You cannot currently delete or disable users or reset passwords from the command line.
Using Third-Party Authentication ServicesAs of PE 2.6, admins can use external, third-party authentication services to manage user access.The following external services are supported:
LDAPActive Directory (AD)Google accounts
When using third-party services, the consoleʼs RBAC retains control over the access privileges.When a user logs in using an external service, the console will check their level of access privileges.If they have never logged in before, they are assigned a default role. (This role can be configured.�See “Configuration”� below.) External usersʼ access privileges are managed in the same manner asinternal users, via the consoleʼs user administration interface.
The account interface for an externally authenticated user differs slightly from internal users in that�external users do not have UI for changing their passwords or deleting accounts.
Note: The “EMAIL” variable used in PE 2.5 has been changed to “USERNAME” starting with PE2.7.
Puppet Enterprise 2.8 User's Guide • Managing Console Users 95/210

Admins will also notice additional UI on the user administration page which indicates theauthentication service (“Account Type”) being used for a given user and a link to a legend that liststhe external authentication services and the default access privileges given to users of a givenservice.
Puppet Enterprise 2.8 User's Guide • Managing Console Users 96/210

Lastly, note that built-in auth accounts use the email address specified at the end (e.g.�“[email protected]”), whereas AD/LDAP accounts are generally accessed using just theusername (e..g “a.user”), although this may vary in your specific organizationʼs implementation.�
There is more, albeit sparse and specialized, information at the Ruby-CAS github site
Configuration�
To use external authentication, the following two files must be correctly configured:��
Note: If you upgraded from PE 2.5, your cas_client_config.yml and rubycas-server/config.ymlfiles will not have the relevant commented-out sections, as they were added for 2.6 and the�upgrader does not overwrite the config files.��
You can find example config code that can be copied and pasted into the live config files, look in����files with �the same names and either the .rpmnew or .dpkg-new extension.
After editing these files, which weʼll discuss more below, youʼll want to restart �pe-httpd and pe-puppet-dashboard-workers via their init.d scripts. Note that YAML requires that whitespace andtabs match up exactly. Type carefully.CONFIGURING CAS_CLIENT_CONFIG.YML
The cas_client_config.yml file contains several commented-out lines under the �authorization:key. Simply un-comment the lines that correspond to the RubyCAS authenticators you wish to use.You can also set the default access level for a given authentication service using default_role ,which accepts the following values: read-only , read-write , or admin .
Each entry consists of the following:
A common identifier (e.g. �local , or ldap , etc.) which is used in the console_auth database andcorresponds to the classname of the RubyCAS authenticator.default_role which defines the role to assign to users by default�description which is simply a human readable description of the service
The order in which authentication services are listed in the cas_client_config.yml file (see below)�is the order in which the services will be checked for valid accounts. In other words, the first service�that returns an account matching the entered user credential is the service that will performauthentication and log-in.
This example shows what you would do if you wanted to use AD and the built-in (local) auth
1. /etc/puppetlabs/console-auth/cas_client_config.yml2. /etc/puppetlabs/rubycas-server/config.yml
Puppet Enterprise 2.8 User's Guide • Managing Console Users 97/210

services and disable Google and LDAP.
##Thisconfigurationfilecontainsinformationrequiredbyanyweb##servicethatmakesuseoftheCASserverforauthentication.
authentication:
##UsethisconfigurationoptioniftheCASserverisonahostdifferent##fromtheconsole-authserver.#cas_host:master:443
##TheportCASislisteningon.Thisisignoredifcas_hostisset.#cas_port:443
##ThesessionsecretisrandomlygeneratedduringinstallationofPuppet##Enterpriseandwillberegeneratedanytimeconsole-authisenabledordisabled.session_key:'puppet_enterprise_console'session_secret:[REDACTED]
##Setthistotruetoallowanonymoususersread-onlyaccesstoallof##PuppetEnterpriseConsole.global_unauthenticated_access:false
authorization:local:default_role:read-onlydescription:Local#ldap:#default_role:read-only#description:LDAPactivedirectoryldap:default_role:read-onlydescription:ActiveDirectory#google:#default_role:read-only#description:Google
CONFIGURING RUBYCAS-SERVER/CONFIG.YML
This file is used to configure RubyCAS to use external authentication services. As before, you will��need to un-comment the classes for the third-party services you wish to enable. The values for thelisted keys are LDAP and ActiveDirectory standards. If you are not the administrator of thosedatabases, you should check with that administrator for the correct values.
The authenticators are listed in the file in the following manner (note how this example disables the�Google authenticator):
authenticator:-class:CASServer::Authenticators::SQLEncrypteddatabase:adapter:mysqldatabase:console_auth
Puppet Enterprise 2.8 User's Guide • Managing Console Users 98/210

username:console_authpassword:easnthycea098iu7aeo6oeu#installer-generatedpasswordserver:localhostuser_table:usersusername_column:username#-class:CASServer::Authenticators::Google#restricted_domain:example.com-class:CASServer::Authenticators::LDAPldap:host:tb-driver.example.comport:389base:dc=example,dc=testfilter:(objectClass=person)username_attribute:mail-class:CASServer::Authenticators::ActiveDirectoryLDAPldap:host:winbox.example.comport:389base:dc=example,dc=devfilter:(memberOf=CN=ExampleUsers,CN=Users,DC=example,DC=dev)auth_user:cn=TestI.Am,cn=users,dc=example,dc=devauth_password:P4ssword
As the above example shows, itʼs generally best to specify just dc= attributes in the base key. Thecriteria for the Organizational Unit (OU ) and Common Name (CN ) should be specified in the �filterkey. The value of the filter: key is where authorized users should be located in the ADorganizational structure. Generally speaking, the filter: key is where you would specify an OU oran AD Group. In order to authenticate, users will need to be in the specified OU or Group.�
Also note that the value for the filter: key must be the full name for the leftmost cn= ; you cannotuse the user ID or logon name. In addition, the auth_user: key requires the full DistinguishedName (DN), including any CNs associated with the user and all of the dc= attributes used in the DN.
Next: Grouping and Classifying Nodes
Grouping and Classifying NodesGroups, classes, and parameters are used to control which Puppet configurations your nodes�receive.
NOTE To use the console to control node configuration, you must be logged in as a read-write or�admin level user. Read-only users can only view node configuration data, they cannot modify it.�
ParametersParameters are simple: theyʼre top-scope variables that your Puppet manifests can use. Use them toconfigure the behavior of classes.�Puppet Enterprise 2.8 User's Guide • Grouping and Classifying Nodes 99/210

Add parameters by clicking the edit button in a node view (or group view) and typing a key andvalue under the “parameters” heading. Use the “add parameter” button below to make additionalkey/value fields. Be sure to save your changes when done.�
Parameters can only be strings, not arrays or hashes.
ClassesThe classes the console knows about are a subset of the classes in your puppet masterʼs collectionof modules. You must add classes to the console manually if you want to assign them to any nodesor groups.
See the Puppet section of this userʼs guide for an introduction to Puppet classes.
Puppet Enterprise 2.8 User's Guide • Grouping and Classifying Nodes 100/210
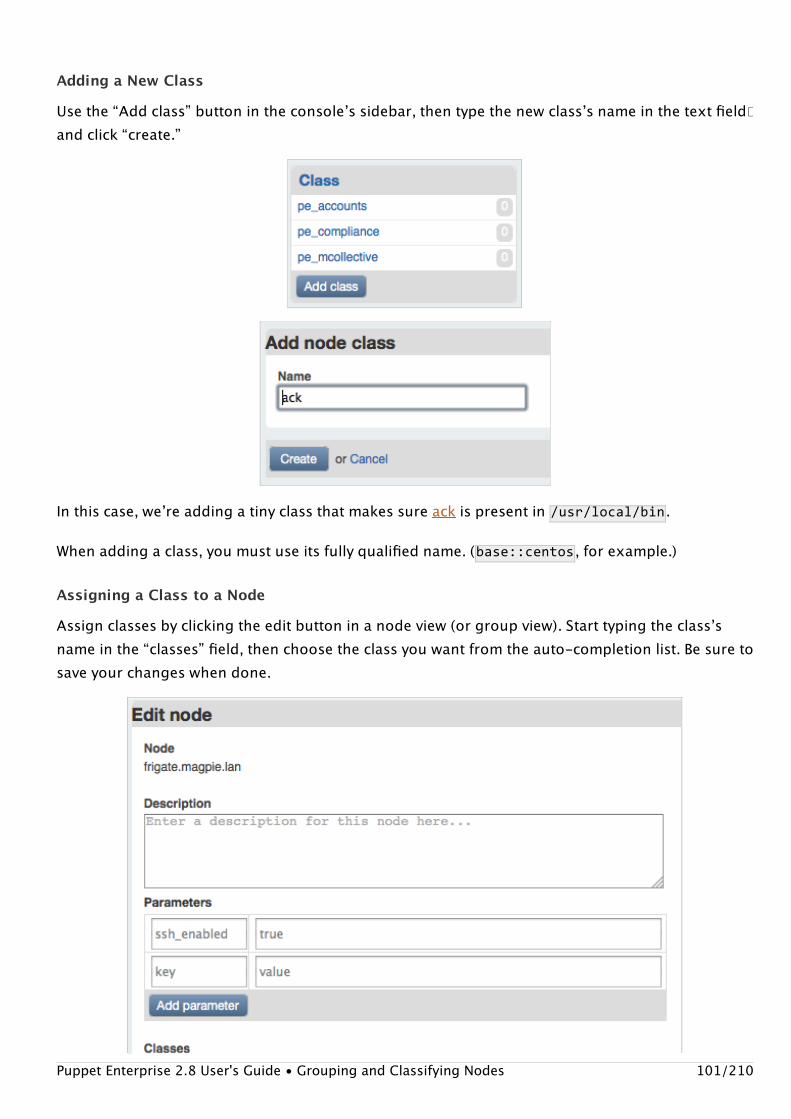
Adding a New Class
Use the “Add class” button in the consoleʼs sidebar, then type the new classʼs name in the text field�and click “create.”
In this case, weʼre adding a tiny class that makes sure ack is present in /usr/local/bin .
When adding a class, you must use its fully qualified name. (�base::centos , for example.)
Assigning a Class to a Node
Assign classes by clicking the edit button in a node view (or group view). Start typing the classʼsname in the “classes” field, then choose the class you want from the auto-completion list. Be sure to�save your changes when done.
Puppet Enterprise 2.8 User's Guide • Grouping and Classifying Nodes 101/210

Writing Classes for the Console
Defining wrapper classes in a “site” module can help you use the console more effectively, and may��be mandatory if you use parameterized classes heavily.
Most Puppet modules are written so each class manages a logical chunk of configuration. This�means any nodeʼs configuration could be composed of dozens of Puppet classes. Although you can�add these dozens of classes to the console, itʼs often better to create a module called site andpopulate it with super-classes, which declare all of the smaller classes a given type of machine willneed.
There are many ways to compose these classes; which one you choose depends on how your owncollection of modules works. Some possibilities:
Create many non-overlapping classes, such that any node will only have one class assigned to it.Create several separated “levels” of classes — a “base” layer, a layer for role-specific packages�and services, a layer for application data, etc. This way, each node can get the base class for itsown OS or machine type, but use the same application classes as some other quite different�node.
Wrapper classes are also necessary for working with parameterized classes — you can declareparameters in nodes and groups, then have your wrapper classes pass them through when theydeclare each smaller class.
Grouping NodesGroups let you assign a class or parameter to many nodes at once. This saves you time and makesthe structure of your site more knowable.
Nodes can belong to many groups, and inherit classes and parameters from all of them. Groups canalso contain other groups, which will inherit information the same way nodes do.
Adding a New Group
Use the “add group” button in the consoleʼs sidebar, then enter the groupʼs name and any classesor parameters you want to assign.
Puppet Enterprise 2.8 User's Guide • Grouping and Classifying Nodes 102/210
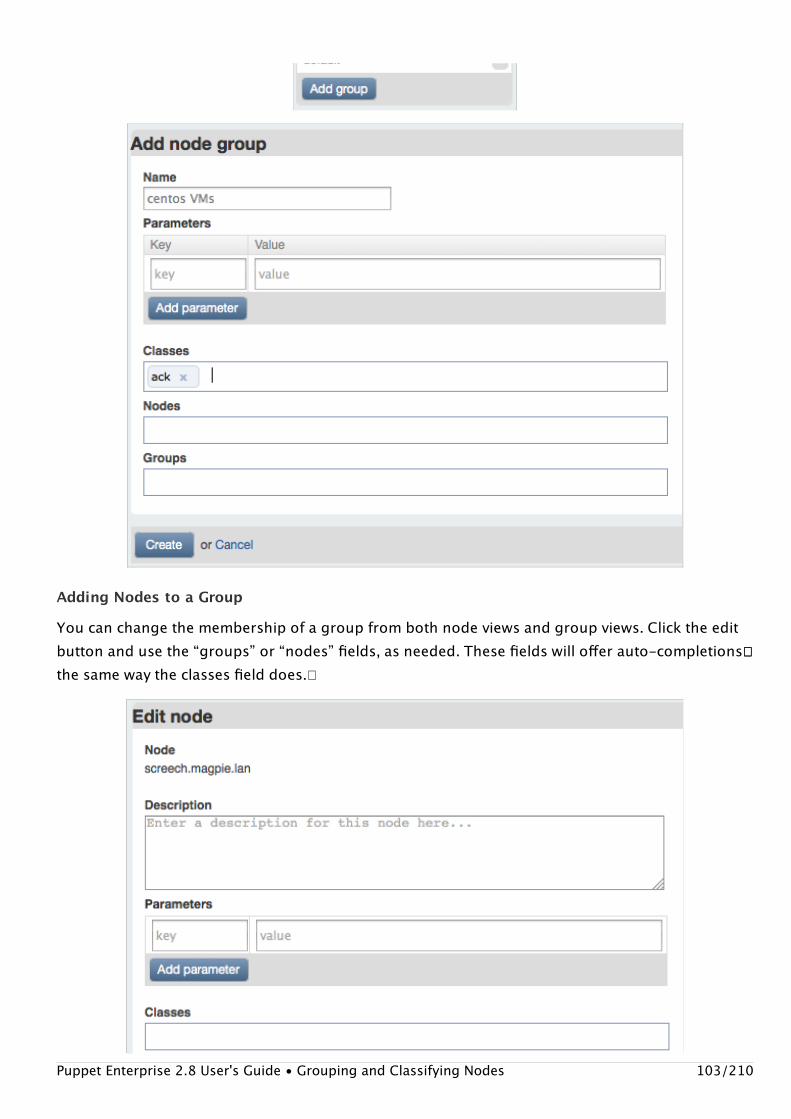
Adding Nodes to a Group
You can change the membership of a group from both node views and group views. Click the editbutton and use the “groups” or “nodes” fields, as needed. These fields will offer auto-completions���the same way the classes field does.�
Puppet Enterprise 2.8 User's Guide • Grouping and Classifying Nodes 103/210

Assigning Classes and Parameters to a Group
This works identically to assigning classes and parameters to a single node. Use the edit button andthe classes or key/value fields.�
The Default Group
The console automatically adds every node to a group called default . Use this group for anyclasses you need assigned to every single node.
Nodes are added to the default group by a periodic background task, so it may take several minutesafter a node first checks in before it joins the group.�
Rake APIThe console provides rake tasks that can group nodes, create classes, and assign classes to groups.You can use these tasks as an API to automate workflows or bypass the consoleʼs GUI when�performing large tasks.
Puppet Enterprise 2.8 User's Guide • Grouping and Classifying Nodes 104/210

All of these tasks should be run as follows, replacing <TASK> with the task name and any argumentsit requires:
$sudo/opt/puppet/bin/rake-f/opt/puppet/share/puppet-dashboard/RakefileRAILS_ENV=production<TASK>
Node Tasks
node:list[match=<REGULAREXPRESSION>]
List nodes. Can optionally match nodes by regex.
node:addname=<NAME>[groups=<GROUPS>][classes=<CLASSES>]
Add a new node. Classes and groups can be specified as comma-separated lists.�
node:delname=<NAME>
Delete a node.
node:classesname=<NAME>classes=<CLASSES>
Replace the list of classes assigned to a node. Classes must be specified as a comma-�separated list.
node:groupsname=<NAME>groups=<GROUPS>
Replace the list of groups a node belongs to. Groups must be specified as a comma-�separated list.
Class Tasks
nodeclass:list[match=<REGULAREXPRESSION>]
List node classes. Can optionally match classes by regex.
nodeclass:addname=<NAME>
Add a new class. This must be a class available to the Puppet autoloader via a module.
nodeclass:delname=<NAME>
Delete a node class.
Group Tasks
nodegroup:list[match=<REGULAREXPRESSION>]
List node groups. Can optionally match groups by regex.
nodegroup:addname=<NAME>[classes=<CLASSES>]
Puppet Enterprise 2.8 User's Guide • Grouping and Classifying Nodes 105/210
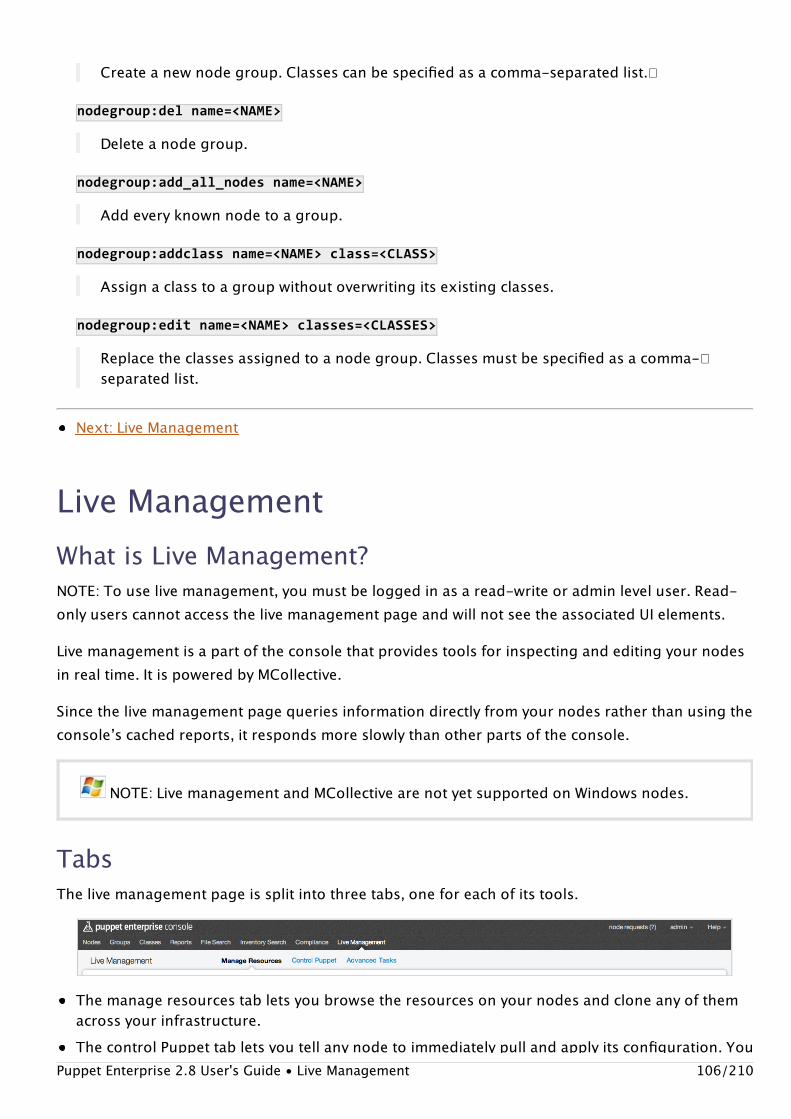
Create a new node group. Classes can be specified as a comma-separated list.�
nodegroup:delname=<NAME>
Delete a node group.
nodegroup:add_all_nodesname=<NAME>
Add every known node to a group.
nodegroup:addclassname=<NAME>class=<CLASS>
Assign a class to a group without overwriting its existing classes.
nodegroup:editname=<NAME>classes=<CLASSES>
Replace the classes assigned to a node group. Classes must be specified as a comma-�separated list.
Next: Live Management
Live ManagementWhat is Live Management?NOTE: To use live management, you must be logged in as a read-write or admin level user. Read-only users cannot access the live management page and will not see the associated UI elements.
Live management is a part of the console that provides tools for inspecting and editing your nodesin real time. It is powered by MCollective.
Since the live management page queries information directly from your nodes rather than using theconsoleʼs cached reports, it responds more slowly than other parts of the console.
TabsThe live management page is split into three tabs, one for each of its tools.
The manage resources tab lets you browse the resources on your nodes and clone any of themacross your infrastructure.The control Puppet tab lets you tell any node to immediately pull and apply its configuration. You�
NOTE: Live management and MCollective are not yet supported on Windows nodes.
Puppet Enterprise 2.8 User's Guide • Live Management 106/210

The control Puppet tab lets you tell any node to immediately pull and apply its configuration. You�can also temporarily disable puppet agent on some of your nodes to control the rollout speed ofnew configurations.�The advanced tasks tab is a direct interface to the MCollective agents on your systems, and willauto-generate a GUI for any new agents you install.
Subsequent chapters of this section cover the use of each tab.
The Node ListEvery task in live management inspects or modifies a �selection of nodes. Use the node list in the livemanagement sidebar to choose the nodes for your next action. (This list will only contain nodesthat have completed at least one Puppet run, which may take up to 30 minutes after youʼve signedits certificate�.)
Nodes are listed by their hostnames in the live management pages. A nodeʼs hostname may matchthe name Puppet knows it by, but this isnʼt always the case, especially in cloud environments likeEC2.
As long as you stay within the live management page, your selection and filtering in the node list�will persist across all three tabs. The node list gets reset once you navigate to a different area of the�console.
Selecting Nodes
Clicking a node selects it or deselects it. Use the “select all” and “select none” controls to select anddeselect all nodes that match the current filter.�Puppet Enterprise 2.8 User's Guide • Live Management 107/210

Only nodes that match the current filter can be selected. You donʼt have to worry about acidentally�modifying “invisibly” selected nodes.
Filtering by Name
Use the “node filter” field to filter your nodes by hostname. This type of filtering is most useful for����small numbers of nodes, or for situations where your hostnames have been assigned according tosome logical plan.
You can use the following wildcards in the node filter field:��
? matches one character* matches many (or zero) characters
Use the “filter” button or the enter key to confirm your search, then wait for the node list to be��updated.
Advanced Search
You can also filter by Puppet class or by the value of any fact on your nodes. Click the “advanced�search” link to reveal these fields.�
Puppet Enterprise 2.8 User's Guide • Live Management 108/210

You can select from some of the more useful fact names with the “common fact names” popover:
The inventory data in the consoleʼs node views is another good source of facts to search with.
Filtering by Puppet class can be the most powerful filtering tool on this page, but it requires you to�have already sorted your nodes by assigning distinctive classes to them. See the chapter ongrouping and classifying nodes for more details.
Puppet Enterprise 2.8 User's Guide • Live Management 109/210

Next: Live Management: Managing Resources
Live Management: Managing Resources
Use the “Manage Resources” tab to browse the resources on your nodes and clone any of themacross your infrastructure.
Resource TypesThe live management tools can manage the following resource types:
usergroup
NOTE: Live management and MCollective are not yet supported on Windows nodes.
IMPORTANT The resource cloning controls are deprecated, and will be removed in PuppetEnterprise 3.0. We are continuing to improve resource inspection and interactive MCollectivecommands in the console.
Puppet Enterprise 2.8 User's Guide • Live Management: Managing Resources 110/210

hostpackage
For an introduction to resources and types, please see the Resources chapter of Learning Puppet.
The Summary ViewThe summary view “Inspect All” button scans all resources of all types and reports on theirsimilarity. This is mostly useful when you think youʼve selected a group of identical nodes but wantto make sure.
Using “Inspect All” at the start of a session will pre-load a lot of information into memory, whichcan speed up later operations.
Finding ResourcesTo find a resource to work with, you must first select a resource type. Then, either search for your��resource by name or load all resources of the type and browse them.
Searching and browsing only use the current selection of nodes.
Browsing a Type
When you select a type for the first time in a session, it wonʼt automatically display any resources:�
To browse a list of all resources, use the “find resources” button.�
Puppet Enterprise 2.8 User's Guide • Live Management: Managing Resources 111/210

This will return a list of all resources of the selected type on the selected nodes, plus a summary ofhow similar the resources are. In general, a set of nodes that perform similar tasks should have verysimilar resources. You can make a set of nodes more similar by cloning resources across them.
The resource list shows the name of each resource, the number of nodes it was found on, and howmany variants of it were found. You can sort the list by any of these properties.
To inspect a resource, click its name.
Puppet Enterprise 2.8 User's Guide • Live Management: Managing Resources 112/210

When you inspect a resource, you can see the values of all its properties. If there is more than onevariant, you can see all of them and the properties that differ will be highlighted.�
To see which nodes have each variant, click the “on N nodes” labels to expand the node lists.
Searching by Name
To search, enter a resource name in the search field and confirm with the enter key or the “search”��button.
Puppet Enterprise 2.8 User's Guide • Live Management: Managing Resources 113/210

The name you search for has to be exact; wildcards are not allowed.
Once youʼve located a resource, the inspect view is the same as that used when browsing.
Cloning Resources
You can use the “clone resource” links on a resourceʼs inspect view to make it identical on all of theselected nodes. This lets you make your population of nodes more alike without having to write anyPuppet code.
Clicking the clone link for one of the variants will raise a confirmation dialog. You can change the�set of selected nodes before clicking the “preview” button.
IMPORTANT The resource cloning controls are deprecated, and will be removed in PuppetEnterprise 3.0. We are continuing to improve resource inspection and interactive MCollectivecommands in the console.
Puppet Enterprise 2.8 User's Guide • Live Management: Managing Resources 114/210
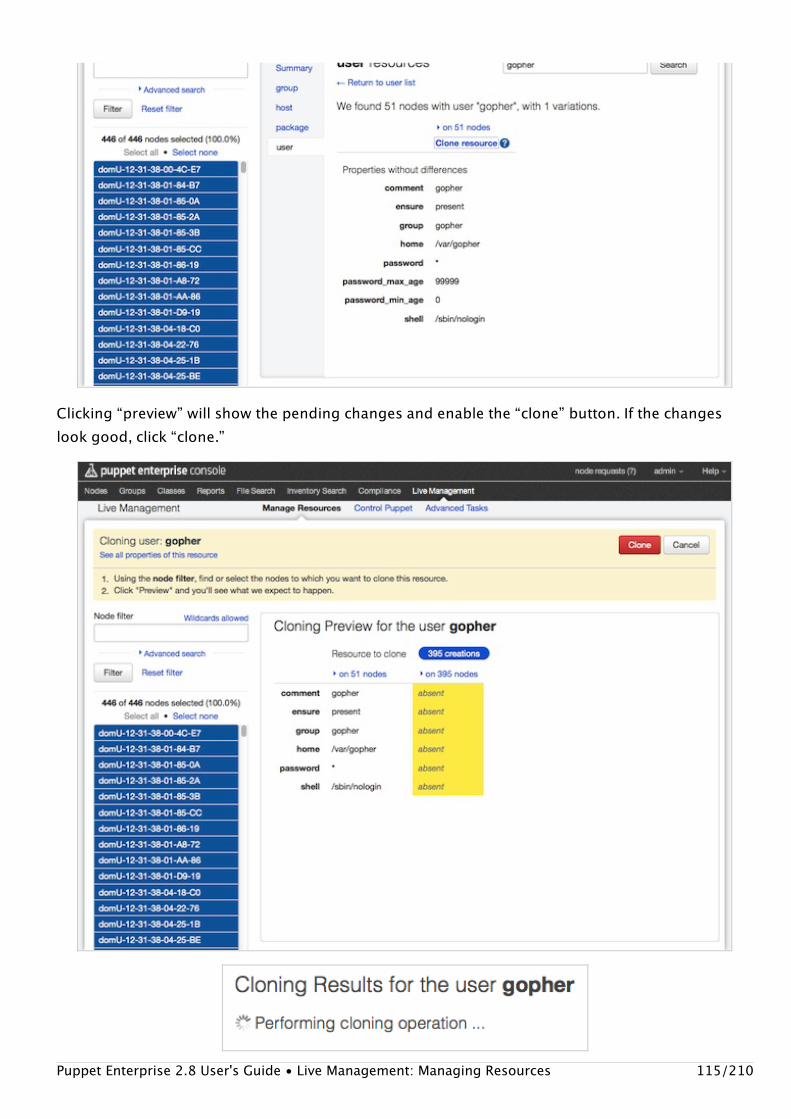
Clicking “preview” will show the pending changes and enable the “clone” button. If the changeslook good, click “clone.”
Puppet Enterprise 2.8 User's Guide • Live Management: Managing Resources 115/210

After the resource has been cloned, you can see a summary of the results and the new state of theresource.
Special Behavior When Cloning Users
When you clone a user, any groups it belongs to are also automatically cloned.
Note also that the UID of a user and the GIDs of its groups arenʼt cloned across nodes. This means acloned userʼs UID will likely differ across nodes. We hope to support UID/GID cloning in a future�release.
Next: Live Management: Controlling Puppet
Live Management: Controlling Puppet
Use the “Control Puppet” tab to immediately trigger a puppet agent run on any of your nodes. Youcan also check puppet agentʼs status, and enable or disable it to control the spread of newconfigurations.�
NOTE: Live management and MCollective are not yet supported on Windows nodes.
Puppet Enterprise 2.8 User's Guide • Live Management: Controlling Puppet 116/210
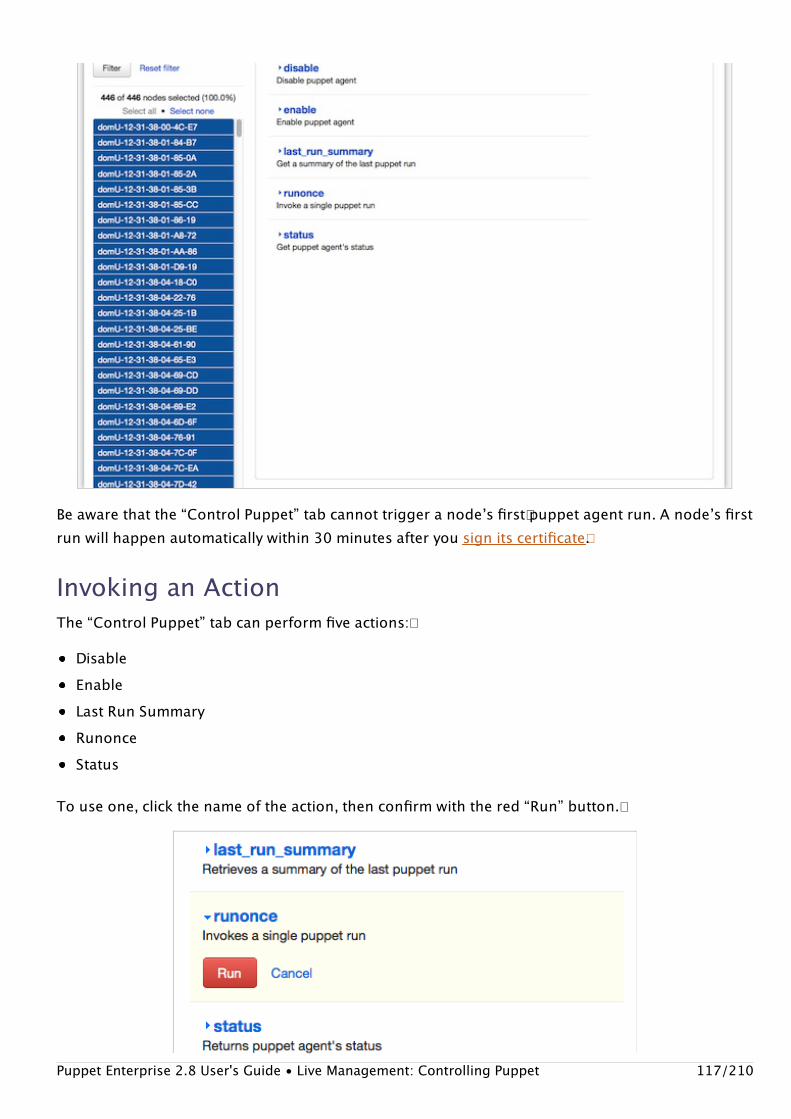
Be aware that the “Control Puppet” tab cannot trigger a nodeʼs first� puppet agent run. A nodeʼs first�run will happen automatically within 30 minutes after you sign its certificate�.
Invoking an ActionThe “Control Puppet” tab can perform five actions:�
DisableEnableLast Run SummaryRunonceStatus
To use one, click the name of the action, then confirm with the red “Run” button.�
Puppet Enterprise 2.8 User's Guide • Live Management: Controlling Puppet 117/210

Running an action returns a results view. Results views will attempt to group similar results toreduce noise; click the “on N nodes” links to see which nodes returned a given result.
A collapsed results view:
An expanded results view:
ActionsRun Puppet Once
Use the “runonce” action to make the selected nodes immediately pull and apply theirconfigurations from the puppet master.�
Normally, puppet agent pulls configurations at a regular interval (30 minutes, by default). However,�when testing new Puppet classes, youʼll probably need to trigger agent runs at irregular times onyour test nodes.
Nodes where puppet agent is disabled will ignore this action.
Enable and DisablePuppet Enterprise 2.8 User's Guide • Live Management: Controlling Puppet 118/210

Use the “enable” and “disable” actions to control whether puppet agent does anything. When youdisable Puppet on a node, the agent daemon will continue running, but it will not pullconfigurations from the master.�
After a node has been disabled for an hour, it will appear as “unresponsive” in the consoleʼs nodeviews, and will stay that way until it is re-enabled. Disabled nodes will ignore runonce commandsfrom the “Control Puppet” tab.
Disabling nodes is great for hedging your bets when youʼve made major changes to an existingPuppet module:
Filter the node list by Puppet class to find every node that will be affected by the change��Disable Puppet on all but a few of these nodesRun Puppet on the test nodes, and carefully examine the reports to make sure the changesworkedRe-enable Puppet on the rest of your nodes (or a subset thereof, if you think you need moretesting)
A confirmation screen will appear after disabling some nodes:�
Results after trying to run a mix of enabled and disabled nodes — note the three nodes whose onlyresponse was “—”:
Puppet Enterprise 2.8 User's Guide • Live Management: Controlling Puppet 119/210

A view of unresponsive nodes in the console (note that node certnames on EC2 donʼt necessarilyalign with hostnames):
Status
Use the “status” action to check up on puppet agent.
The status action gets three pieces of information from each node:
Whether Puppet is enabled or disabledWhether Puppet is idle (“not running”) or actively applying a configuration (“running”)�When the last Puppet run occurred
The results of the status action, with a mix of enabled and disabled nodes:
Puppet Enterprise 2.8 User's Guide • Live Management: Controlling Puppet 120/210

Last Run Summary
Use the “last_run_summary” action for a quick view of what the most recent Puppet run did.
Usually, you should use the graphs and reports on the consoleʼs node views to investigate previousPuppet runs; they are more detailed, and provide more historical context. However, the overviewprovided by this action can be useful when combined with live managementʼs class and factfiltering.�
Part of a last run summary results view:
Next: Live Management: Advanced Tasks
Puppet Enterprise 2.8 User's Guide • Live Management: Controlling Puppet 121/210

Live Management: Advanced Tasks
Use the “Advanced Tasks” tab to invoke actions from any MCollective agent installed on your nodes.
Agents and ActionsThis tab is a direct interface to your nodesʼ MCollective agents. It automatically generates a GUI forevery agent installed on your systems, exposing all of their actions through the console. If youinstall any custom MCollective agents, theyʼll appear in the “Advanced Tasks” tab.
Puppet Enterprise ships with the following MCollective agents:
package — installs and uninstalls software packages.rpcutil — performs miscellaneous meta-tasks.service — starts and stops services.puppetral — the agent used to implement the manage resources tab. When used from theadvanced tasks tab, it can only inspect resources, not clone them.
Each agent view includes explanatory text for each action.
NOTE: Live management and MCollective are not yet supported on Windows nodes.
Puppet Enterprise 2.8 User's Guide • Live Management: Advanced Tasks 122/210

Invoking ActionsNavigate to an agent to see a list of actions. To invoke an action, click its name, enter any requiredarguments, and confirm with the red “Run” button.�
Invoking an action with no arguments:
Invoking an action with an argument:
Puppet Enterprise 2.8 User's Guide • Live Management: Advanced Tasks 123/210
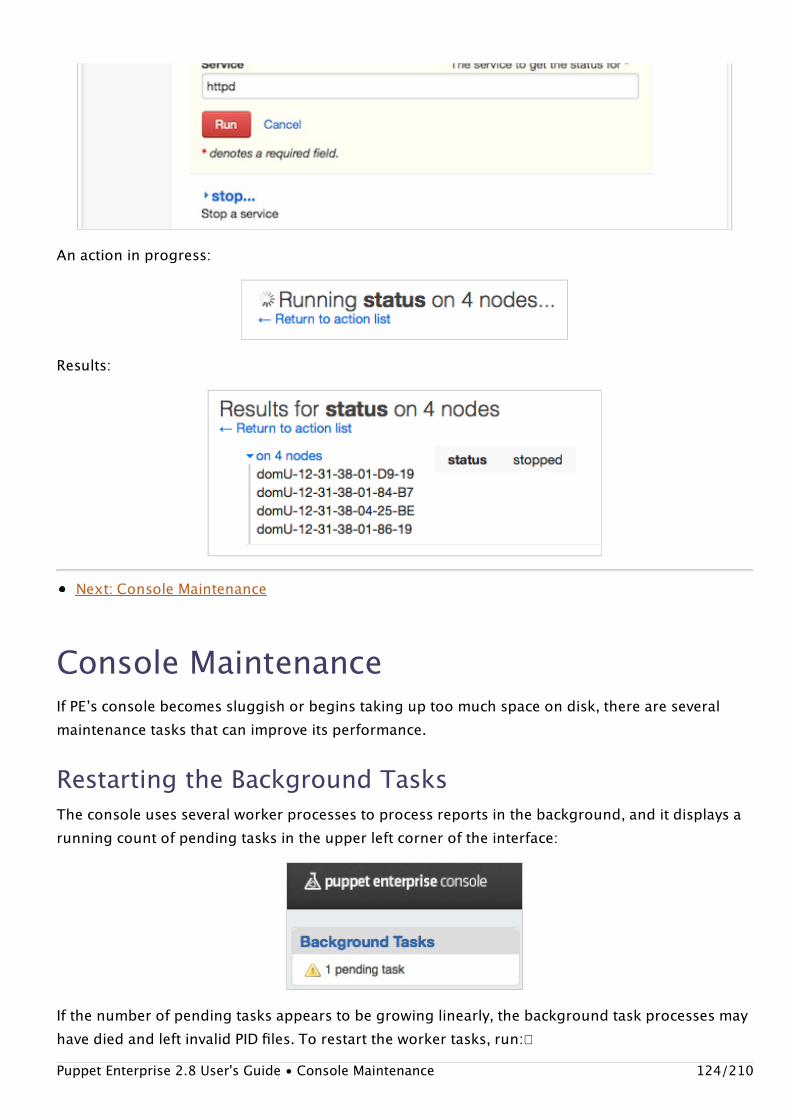
An action in progress:
Results:
Next: Console Maintenance
Console MaintenanceIf PEʼs console becomes sluggish or begins taking up too much space on disk, there are severalmaintenance tasks that can improve its performance.
Restarting the Background TasksThe console uses several worker processes to process reports in the background, and it displays arunning count of pending tasks in the upper left corner of the interface:
If the number of pending tasks appears to be growing linearly, the background task processes mayhave died and left invalid PID files. To restart the worker tasks, run:�Puppet Enterprise 2.8 User's Guide • Console Maintenance 124/210

$sudo/etc/init.d/pe-puppet-dashboard-workersrestart
The number of pending tasks shown in the console should start decreasing rapidly after restartingthe workers.
Optimizing the DatabaseSince the console turns over a lot of data, you can improve its speed and disk consumption byperiodically optimizing its MySQL database with the db:raw:optimize task.
$sudo/opt/puppet/bin/rake\-f/opt/puppet/share/puppet-dashboard/Rakefile\RAILS_ENV=production\db:raw:optimize
If you find you need to optimize the database, we recommend that you do so with a monthly cron�job.
Cleaning Old ReportsAgent node reports will build up over time in the consoleʼs database. If you wish to delete theoldest reports, for performance, storage, or policy reasons, you can use the reports:prune raketask.
For example, to delete reports more than one month old:
$sudo/opt/puppet/bin/rake\-f/opt/puppet/share/puppet-dashboard/Rakefile\RAILS_ENV=production\reports:pruneupto=1unit=mon
Although this task should be run regularly as a cron job, the frequency with which it should be runwill depend on your siteʼs policies.
If you run the reports:prune task without any arguments, it will display further usage instructions.The available units of time are mon , yr , day , min , wk , and hr .
Database backupsAlthough you can back up and restore the consoleʼs database with any standard MySQL tools, thedb:raw:dump and db:raw:restore rake tasks can simplify the process.
Dumping the Database
Puppet Enterprise 2.8 User's Guide • Console Maintenance 125/210

To dump the consoleʼs production database to a file called �production.sql :
$sudo/opt/puppet/bin/rake\-f/opt/puppet/share/puppet-dashboard/Rakefile\RAILS_ENV=production\db:raw:dump
Or dump it to a specific file:��
$sudo/opt/puppet/bin/rake\-f/opt/puppet/share/puppet-dashboard/Rakefile\RAILS_ENV=production\FILE=/my/backup/file.sqldb:raw:dump
Restoring the Database
To restore the consoleʼs database from a file called �production.sql to your productionenvironment:
$sudo/opt/puppet/bin/rake\-f/opt/puppet/share/puppet-dashboard/Rakefile\RAILS_ENV=production\FILE=production.sqldb:raw:restore
Next: Puppet Overview
An Overview of PuppetWhere Configurations Come From�Configurations for nodes are compiled from �manifests, which are documents written in Puppetʼscustom language. Manifests declare resources, each of which represents the desired state of something (software package, service, user account, file…) on a system. Resources are grouped into�classes, and classes are grouped into modules. Modules are structured collections of manifest files�where each file contains a single class (or defined type).��
How Configurations are Assigned to Nodes�In Puppet Enterprise, the console controls which classes are assigned to nodes. You can assignclasses to nodes individually, or you can collect nodes into groups and assign classes to largenumbers of nodes at a time. You can also declare variables (“parameters”) that can be read by anyof the classes assigned to the node.
Puppet Enterprise 2.8 User's Guide • An Overview of Puppet 126/210
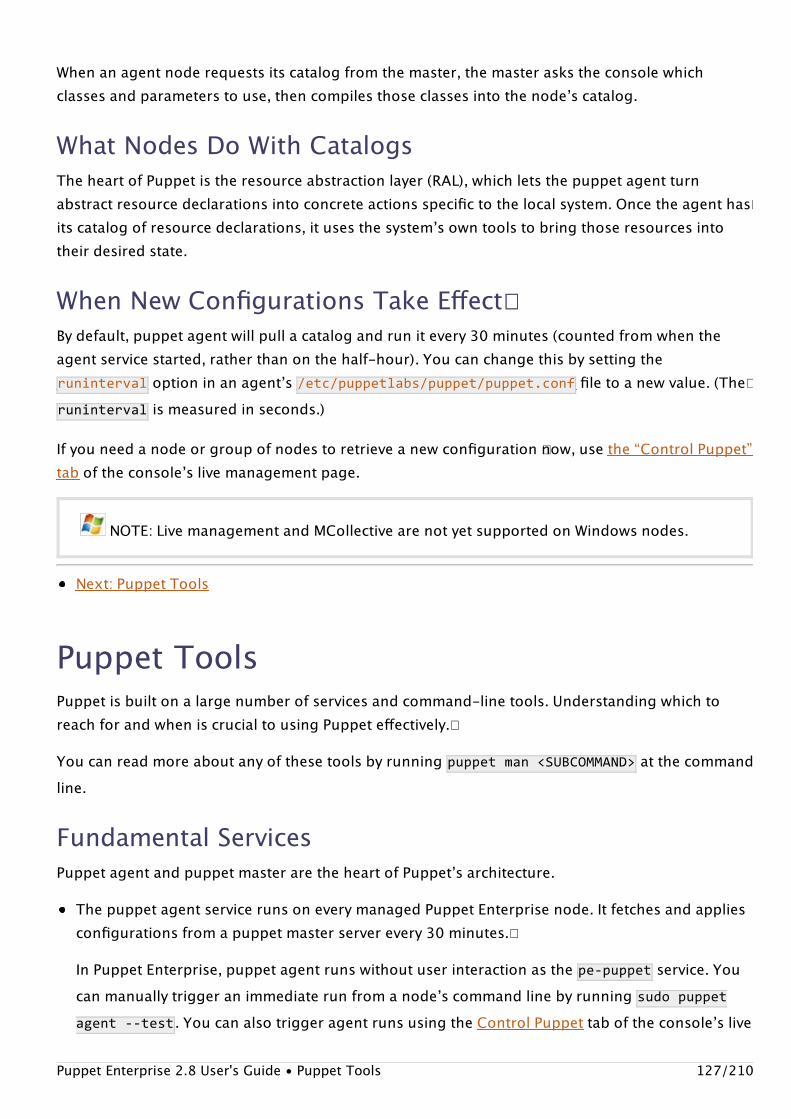
When an agent node requests its catalog from the master, the master asks the console whichclasses and parameters to use, then compiles those classes into the nodeʼs catalog.
What Nodes Do With CatalogsThe heart of Puppet is the resource abstraction layer (RAL), which lets the puppet agent turnabstract resource declarations into concrete actions specific to the local system. Once the agent has�its catalog of resource declarations, it uses the systemʼs own tools to bring those resources intotheir desired state.
When New Configurations Take Effect��By default, puppet agent will pull a catalog and run it every 30 minutes (counted from when theagent service started, rather than on the half-hour). You can change this by setting theruninterval option in an agentʼs /etc/puppetlabs/puppet/puppet.conf file to a new value. (The�runinterval is measured in seconds.)
If you need a node or group of nodes to retrieve a new configuration �now, use the “Control Puppet”tab of the consoleʼs live management page.
Next: Puppet Tools
Puppet ToolsPuppet is built on a large number of services and command-line tools. Understanding which toreach for and when is crucial to using Puppet effectively.�
You can read more about any of these tools by running puppetman<SUBCOMMAND> at the commandline.
Fundamental ServicesPuppet agent and puppet master are the heart of Puppetʼs architecture.
The puppet agent service runs on every managed Puppet Enterprise node. It fetches and appliesconfigurations from a puppet master server every 30 minutes.�
In Puppet Enterprise, puppet agent runs without user interaction as the pe-puppet service. Youcan manually trigger an immediate run from a nodeʼs command line by running sudopuppetagent--test . You can also trigger agent runs using the Control Puppet tab of the consoleʼs live
NOTE: Live management and MCollective are not yet supported on Windows nodes.
Puppet Enterprise 2.8 User's Guide • Puppet Tools 127/210
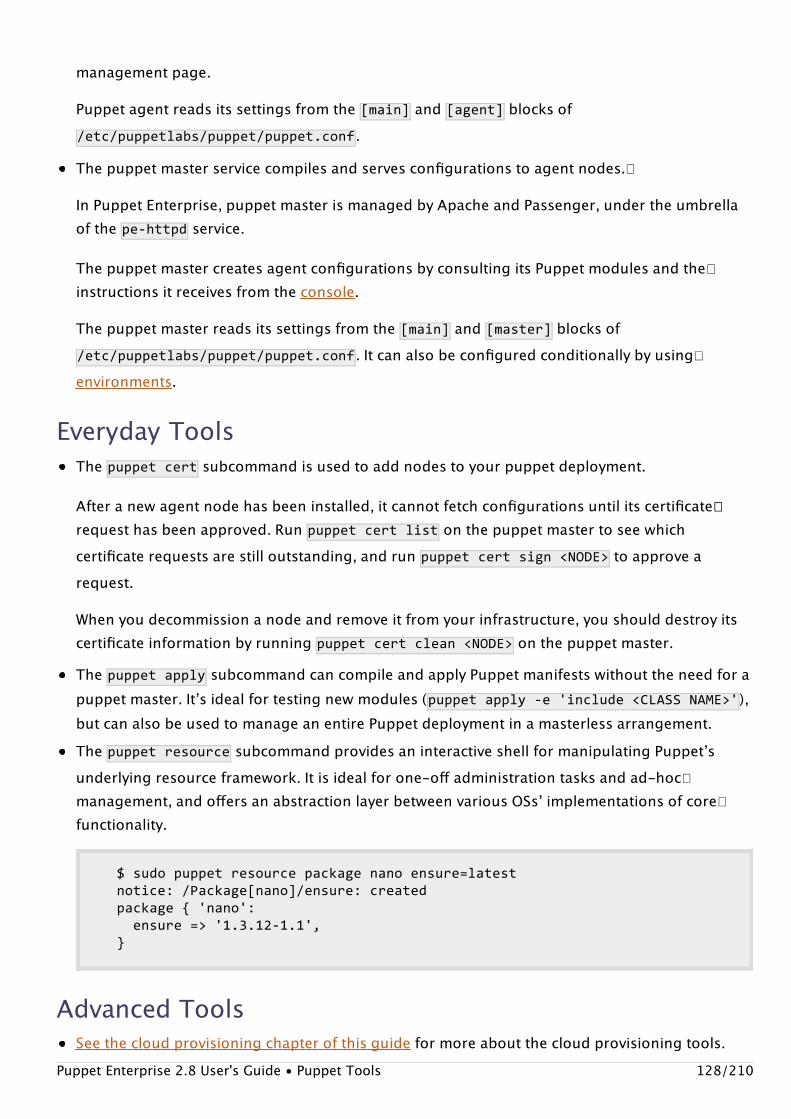
management page.
Puppet agent reads its settings from the [main] and [agent] blocks of/etc/puppetlabs/puppet/puppet.conf .The puppet master service compiles and serves configurations to agent nodes.�
In Puppet Enterprise, puppet master is managed by Apache and Passenger, under the umbrellaof the pe-httpd service.
The puppet master creates agent configurations by consulting its Puppet modules and the�instructions it receives from the console.
The puppet master reads its settings from the [main] and [master] blocks of/etc/puppetlabs/puppet/puppet.conf . It can also be configured conditionally by using�environments.
Everyday ToolsThe puppetcert subcommand is used to add nodes to your puppet deployment.
After a new agent node has been installed, it cannot fetch configurations until its certificate��request has been approved. Run puppetcertlist on the puppet master to see whichcertificate requests are still outstanding, and run �puppetcertsign<NODE> to approve arequest.
When you decommission a node and remove it from your infrastructure, you should destroy itscertificate information by running �puppetcertclean<NODE> on the puppet master.The puppetapply subcommand can compile and apply Puppet manifests without the need for apuppet master. Itʼs ideal for testing new modules (puppetapply-e'include<CLASSNAME>' ),but can also be used to manage an entire Puppet deployment in a masterless arrangement.The puppetresource subcommand provides an interactive shell for manipulating Puppetʼsunderlying resource framework. It is ideal for one-off administration tasks and ad-hoc�management, and offers an abstraction layer between various OSsʼ implementations of core�functionality.
$sudopuppetresourcepackagenanoensure=latestnotice:/Package[nano]/ensure:createdpackage{'nano':ensure=>'1.3.12-1.1',}
Advanced ToolsSee the cloud provisioning chapter of this guide for more about the cloud provisioning tools.
Puppet Enterprise 2.8 User's Guide • Puppet Tools 128/210

See the orchestration chapter of this guide for more about the command-line orchestrationtools.
Next: Puppet Modules and Manifests
Puppet Modules and ManifestsPuppet configures nodes by reading and applying �manifests written by sysadmins. Manifestscontain classes, which are chunks of code that configure a specific aspect or feature of a machine.��
One or more classes can be stored in a module, which is a self-contained bundle of Puppet code.Pre-existing modules can be downloaded from the Puppet Forge, and most users use acombination of pre-built modules and modules they wrote themselves.
A Fast Introduction to Using ModulesThis userʼs guide includes a pair of interactive quick start guides, which walk you through installing,using, hacking, and creating Puppet modules.
Quick Start: Using PEQuick Start: Writing Modules
A Leisurely Introduction to Writing Puppet CodeFor a more complete introduction to Puppet resources, manifests, classes, modules, defined types,�facts, variables, and more, read the Learning Puppet series.
Learning Puppet
Detailed DocumentationThe Puppet reference manual contains more information about using modules and the Puppetlanguage.
Installing and Managing ModulesModule FundamentalsThe Puppet Language Guide
Printable ReferencesThe module layout cheat sheet is useful when writing your own modules or hacking existingmodules.
Module Layout Cheat Sheet
Puppet Enterprise 2.8 User's Guide • Puppet Modules and Manifests 129/210

Next: Puppet Data Library
The Puppet Data LibraryThe Puppet Data Library (PDL) consists of two elements:
The large amount of data Puppet automatically collects about your infrastructure.The formats and APIs Puppet uses to expose that data.
Sysadmins can access information from the PDL with their choice of tools, including familiarscripting languages like Ruby, Perl, and Python. Use this data to build custom reports, add toexisting data sets, or automate repetitive tasks.
Right now, the Puppet Data Library consists of three different data services:�
Puppet Inventory ServiceThe Puppet Inventory Service provides a detailed inventory of the hardware and software on nodesmanaged by Puppet.
Using a simple RESTful API, you can query the inventory service for a nodeʼs MAC address,operating system version, DNS configuration, etc. The query results are returned as JSON.�Inventory information consists of the facts reported by each node when it requestsconfigurations. By installing �custom facts on your puppet master server, you can extend theinventory service to contain any kind of data that can possibly be extracted from your nodes.
Learn more about the Puppet Inventory Service here.
Puppet Run Report ServiceThe Puppet Run Report Service provides push access to the reports that every node submits aftereach Puppet run. By writing a custom report processor, you can divert these reports to any customservice, which can use them to determine whether a Puppet run was successful, or dig deeply intothe specific changes for each and every resource under management for every node.�
You can also write out-of-band report processors that consume the YAML files written to disk by�the puppet masterʼs default report handler.
EXAMPLE: Using the Puppet Inventory Service, a customer automated the validation andreporting of their serversʼ warranty status. Their automation used the Puppet InventoryService to query all servers in the data center on a regular basis and retrieve their serialnumbers. These serial numbers are then checked against the server hardware vendorʼswarranty database using the vendorʼs public API to determine the warranty status for each.
Puppet Enterprise 2.8 User's Guide • The Puppet Data Library 130/210

Learn more about the Puppet Run Report Service here.
Puppet Resource Dependency GraphThe Puppet Resource Dependency Graph provides a complete, mathematical graph of thedependencies between resources under management by Puppet. These graphs, which are stored in.dot format, can be used with any commercial or open source visualization tool to uncover hiddenlinkages and help understand how your resources interconnect to provide working services.
Learn more about the Puppet Resource Dependency Graph here
Next: Puppet References
Puppet ReferencesPuppet has a lot of moving parts and a lot of information to remember. The following resources willhelp you keep the info you need at your fingertips and use Puppet effectively.��
Terms and ConceptsThe Puppet Glossary defines the common and obscure terms for pieces of the Puppet ecosystem.�
Resource TypesResource types are the atomic unit of Puppet configurations, and there are a lot of them to�remember.
The Core Types Cheat Sheet is a fast, printable two-page guide to the most useful resourcetypes.The Type Reference is the complete dictionary of Puppetʼs built-in resource types. No other pagewill be more useful to you on a daily basis.
Puppet SyntaxThe Puppet Language Guide covers every part of the Puppet language, from conditionals toparameterized classes.
Configuration and Settings�
EXAMPLE: Using the Puppet Resource Dependency Graph and Gephi, a visualization tool, acustomer identified unknown dependencies within a complicated set of configuration��modules. They used this knowledge to re-write parts of the modules to get betterperformance.
Puppet Enterprise 2.8 User's Guide • Puppet References 131/210

Configuring Puppet� describes Puppetʼs configuration files and covers the ten or so most useful��settings.The Configuration Reference� lists every single setting available to Puppet.
Next: Advanced Configuration�
Working with Complex SettingsMany behaviors of Puppet Enterprise can be configured after installation.�
Increasing the MySQL Buffer Pool Size�The default MySQL configuration uses an unreasonably small �innodb_buffer_pool_size setting,which can interfere with the consoleʼs ability to function.
If you are installing a new PE console server and allowing the installer to configure your databases,�it will set the better value for the buffer pool size. However, PE cannot automatically manage this�setting for upgraded console servers and manually configured databases.�
To change this setting, edit the MySQL config file on your database server (usually located at��/etc/my.cnf , but your system may differ) and set the value of �innodb_buffer_pool_size to atleast 80M and possibly as high as 256M . (Its default value is 8M , or 8388608 bytes.)
The example diff below illustrates the change to a default MySQL config file:���
[mysqld]datadir=/var/lib/mysqlsocket=/var/lib/mysql/mysql.sockuser=mysql#Defaulttousingoldpasswordformatforcompatibilitywithmysql3.x#clients(thoseusingthemysqlclient10compatibilitypackage).old_passwords=1+innodb_buffer_pool_size=80M#Disablingsymbolic-linksisrecommendedtopreventassortedsecurityrisks;#todoso,uncommentthisline:#symbolic-links=0[mysqld_safe]log-error=/var/log/mysqld.logpid-file=/var/run/mysqld/mysqld.pid
After changing the setting, restart the MySQL server:
$sudo/etc/init.d/mysqldrestart
Puppet Enterprise 2.8 User's Guide • Working with Complex Settings 132/210

Changing the Consoleʼs PortBy default, a new installation of PE will serve the console on port 443. However, previous versions ofPE served the consoleʼs predecessor on port 3000. If you upgraded and want to change to the moreconvenient new default, or if you need port 443 for something else and want to shift the consolesomewhere else, perform the following steps:
Stop the pe-httpd service:
$sudo/etc/init.d/pe-httpdstop
Edit /etc/puppetlabs/httpd/conf.d/puppetdashboard.conf on the console server, and changethe port number in the Listen443 and <VirtualHost*:443> directives. (These directives willcontain the current port, which is not necessarily 443.)Edit /etc/puppetlabs/puppet/puppet.conf on the puppet master server, and change thereporturl setting to use your preferred port.Edit /etc/puppetlabs/puppet-dashboard/external_node on the puppet master server, andchange the ENC_BASE_URL to use your preferred port.Make sure to allow access to the new port in your systemʼs firewall rules.�Start the pe-httpd service:
$sudo/etc/init.d/pe-httpdstart
Recovering from a Lost Console Admin PasswordIf you have forgotten the password of the consoleʼs initial admin user, you can create a new adminuser and use it to reset the original admin userʼs password.
On the console server, run the following commands:
$cd/opt/puppet/share/console-auth$sudo/opt/puppet/bin/rakedb:create_userUSERNAME="[email protected]"PASSWORD="<password>"ROLE="Admin"
You can now log in to the console as the user you just created, and use the normal admin tools toreset other usersʼ passwords.
Note: in PE 2.5.1 and 2.5.0, use the following command instead:
$sudo/opt/puppet/bin/rake-f/opt/puppet/share/console-auth/Rakefile
Puppet Enterprise 2.8 User's Guide • Working with Complex Settings 133/210

Changing the Consoleʼs Database User/PasswordThe console uses a database user account to access its MySQL database. If this userʼs password iscompromised, or if it just needs to be changed periodically for policy reasons, do the following:
Configuring Console Authentication�Configuring the SMTP Server�
The consoleʼs account system sends verification emails to new users, and requires an SMTP server�to do so. If your siteʼs SMTP server requires a user and password, TLS, or a non-default port, youcan configure these by editing the �/etc/puppetlabs/console-auth/config.yml file:�
smtp:address:mail.example.comport:25use_tls:false##UncommenttoenableSMTPauthentication#username:smtp_username#password:smtp_password
db:[email protected]=<PASSWORD>
1. Stop the pe-httpd service on the console server:
$sudo/etc/init.d/pe-httpdstop
2. Use the MySQL administration tool of your choice to change the userʼs password. With thestandard mysql client, you can do this with:
SETPASSWORDFOR'console'@'localhost'=PASSWORD('<newpassword>');
3. Edit /etc/puppetlabs/puppet-dashboard/database.yml on the console server and change thepassword: line under “common” (or under “production,” depending on your configuration) to�contain the new password.
4. Edit /etc/puppetlabs/puppet/puppet.conf on the console server and change the dbpassword= line (under [master] ) to contain the new password.
5. Start the pe-httpd service back up:
$sudo/etc/init.d/pe-httpdstart
Puppet Enterprise 2.8 User's Guide • Working with Complex Settings 134/210

Allowing Anonymous Console Access
To allow anonymous, read-only access to the console, do the following:
Edit the /etc/puppetlabs/console-auth/cas_client_config.yml file and change the�global_unauthenticated_access setting to true .Restart Apache by running sudo/etc/init.d/pe-httpdrestart .
Disabling and Reenabling Console Auth
If necessary, you can completely disable the consoleʼs access controls. Run the following commandto disable console auth:
$sudo/opt/puppet/bin/rake-f/opt/puppet/share/console-auth/Rakefileconsole:auth:disable
To re-enable console auth, run the following:
$sudo/opt/puppet/bin/rake-f/opt/puppet/share/console-auth/Rakefileconsole:auth:enable
Using LDAP or Active Directory Instead of Console Auth
For instructions on using third-party authentication services, see the console_auth configuration�page.
Changing Orchestration SecurityPEʼs orchestration messages are encrypted and authenticated. You can easily change theauthentication method or the password used in the PSK authentication method.
Changing the Authentication Method
By default, orchestration messages are encrypted with SSL and authenticated with a pre-shared key(PSK). This balance of security and performance should work for most users, but if you need highersecurity and donʼt have a large number of nodes, you can reconfigure PE to authenticate�orchestration messages with an AES key pair.
You can change the authentication method via the console. Navigate to your default group, thencreate a new parameter called mcollective_security_provider . The value of this parameter canbe:
psk — Use the default PSK authentication.aespe_security — Use AES authentication for extra security.
Puppet Enterprise 2.8 User's Guide • Working with Complex Settings 135/210

After changing the authentication method, you cannot issue orchestration messages to a givennode until it has run Puppet at least once. This means changing the authentication method requiresa 30 minute maintenance window during which orchestration will not be used. You can checkwhether a given node has changed its orchestration settings by checking its recent reports in theconsole and ensuring that its /etc/puppetlabs/mcollective/server.cfg file was modified.��
Before changing the authentication method, you should carefully consider the pros and cons ofeach:PSK
The PSK authentication method is enabled by default. Under this method, nodes receive a secret keyvia Puppet and trust messages sent by clients who have the same key.
Pro:
Scales to many hundreds of nodes on average puppet master hardware.
Con:
Private key is known to all nodes — an attacker with elevated privileges on one node couldobtain the pre-shared key and issue valid orchestration commands to other nodes.No protection from replay attacks — an attacker could repeatedly re-send commands withoutknowing their content.
AES (AESPE_SECURITY )
The AES authentication method must be manually enabled in the console. Under this method,nodes receive one or more public keys, and trust messages sent by clients who have one of thematching private keys.
Pro:
Private key is only known to the puppet master node — an attacker with elevated privileges on anagent node cannot command other nodes.
Puppet Enterprise 2.8 User's Guide • Working with Complex Settings 136/210
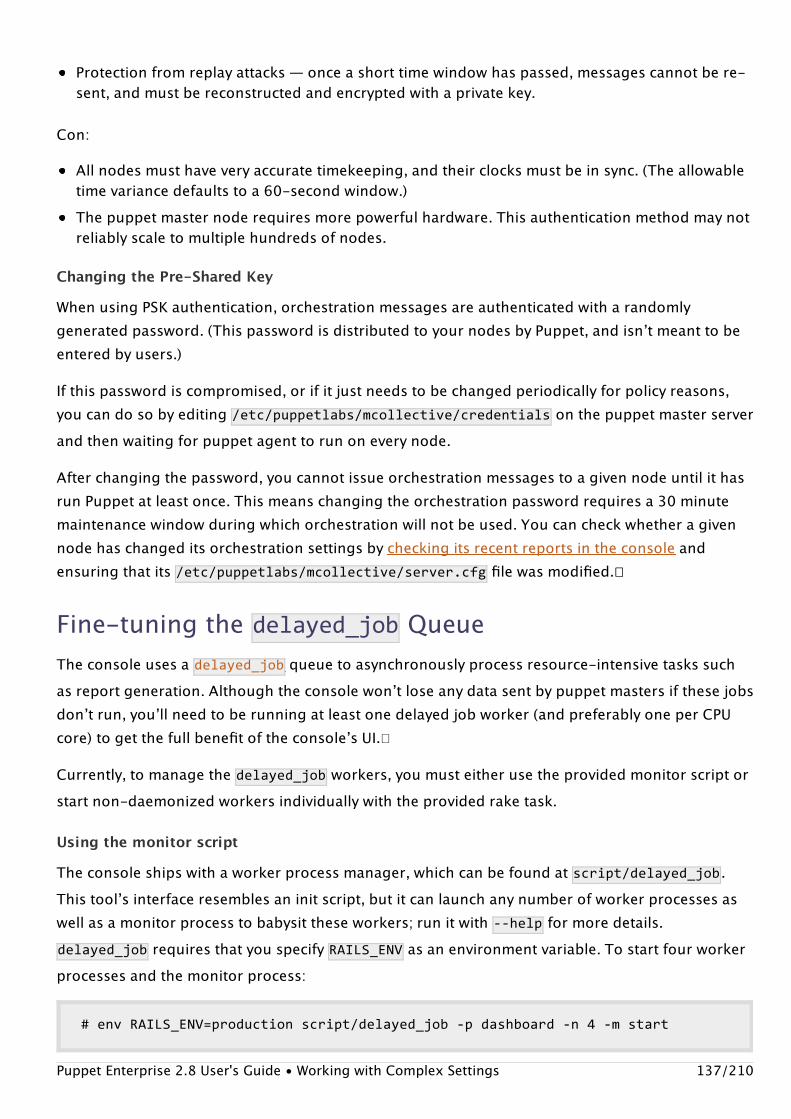
Protection from replay attacks — once a short time window has passed, messages cannot be re-sent, and must be reconstructed and encrypted with a private key.
Con:
All nodes must have very accurate timekeeping, and their clocks must be in sync. (The allowabletime variance defaults to a 60-second window.)The puppet master node requires more powerful hardware. This authentication method may notreliably scale to multiple hundreds of nodes.
Changing the Pre-Shared Key
When using PSK authentication, orchestration messages are authenticated with a randomlygenerated password. (This password is distributed to your nodes by Puppet, and isnʼt meant to beentered by users.)
If this password is compromised, or if it just needs to be changed periodically for policy reasons,you can do so by editing /etc/puppetlabs/mcollective/credentials on the puppet master serverand then waiting for puppet agent to run on every node.
After changing the password, you cannot issue orchestration messages to a given node until it hasrun Puppet at least once. This means changing the orchestration password requires a 30 minutemaintenance window during which orchestration will not be used. You can check whether a givennode has changed its orchestration settings by checking its recent reports in the console andensuring that its /etc/puppetlabs/mcollective/server.cfg file was modified.��
Fine-tuning the delayed_job QueueThe console uses a delayed_job queue to asynchronously process resource-intensive tasks suchas report generation. Although the console wonʼt lose any data sent by puppet masters if these jobsdonʼt run, youʼll need to be running at least one delayed job worker (and preferably one per CPUcore) to get the full benefit of the consoleʼs UI.�
Currently, to manage the delayed_job workers, you must either use the provided monitor script orstart non-daemonized workers individually with the provided rake task.
Using the monitor script
The console ships with a worker process manager, which can be found at script/delayed_job .This toolʼs interface resembles an init script, but it can launch any number of worker processes aswell as a monitor process to babysit these workers; run it with --help for more details.delayed_job requires that you specify RAILS_ENV as an environment variable. To start four workerprocesses and the monitor process:
#envRAILS_ENV=productionscript/delayed_job-pdashboard-n4-mstart
Puppet Enterprise 2.8 User's Guide • Working with Complex Settings 137/210
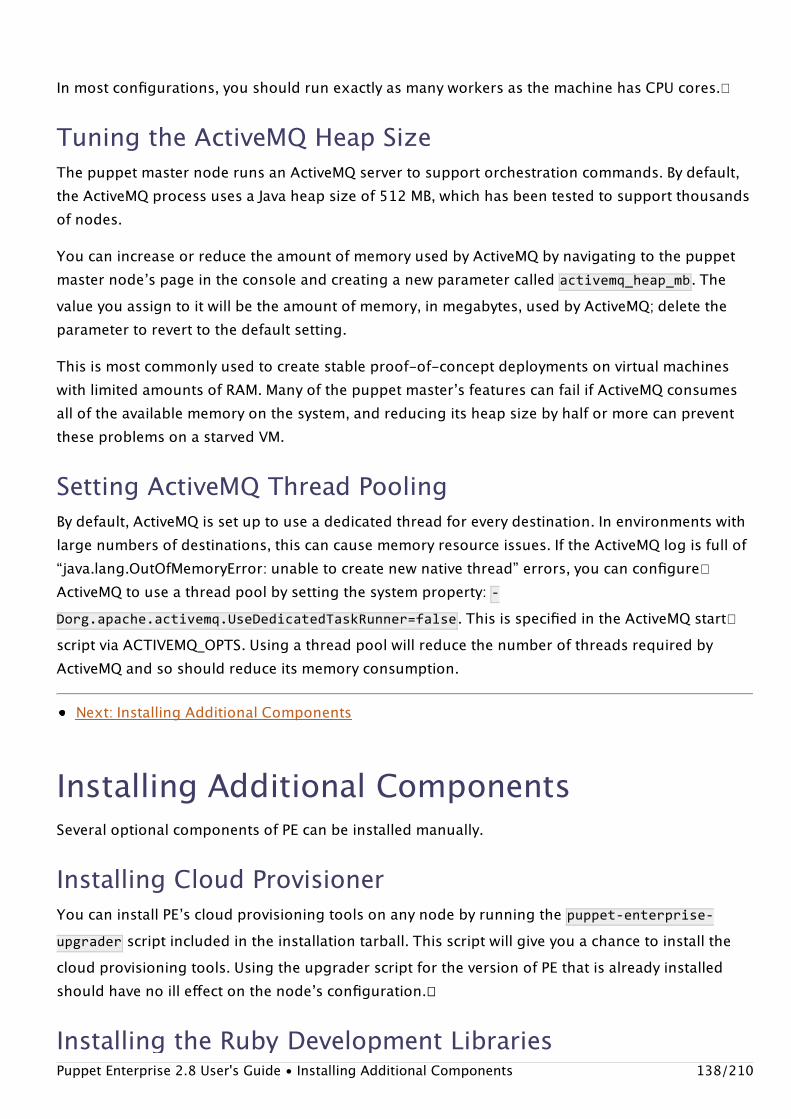
In most configurations, you should run exactly as many workers as the machine has CPU cores.�
Tuning the ActiveMQ Heap SizeThe puppet master node runs an ActiveMQ server to support orchestration commands. By default,the ActiveMQ process uses a Java heap size of 512 MB, which has been tested to support thousandsof nodes.
You can increase or reduce the amount of memory used by ActiveMQ by navigating to the puppetmaster nodeʼs page in the console and creating a new parameter called activemq_heap_mb . Thevalue you assign to it will be the amount of memory, in megabytes, used by ActiveMQ; delete theparameter to revert to the default setting.
This is most commonly used to create stable proof-of-concept deployments on virtual machineswith limited amounts of RAM. Many of the puppet masterʼs features can fail if ActiveMQ consumesall of the available memory on the system, and reducing its heap size by half or more can preventthese problems on a starved VM.
Setting ActiveMQ Thread PoolingBy default, ActiveMQ is set up to use a dedicated thread for every destination. In environments withlarge numbers of destinations, this can cause memory resource issues. If the ActiveMQ log is full of“java.lang.OutOfMemoryError: unable to create new native thread” errors, you can configure�ActiveMQ to use a thread pool by setting the system property: -Dorg.apache.activemq.UseDedicatedTaskRunner=false . This is specified in the ActiveMQ start�script via ACTIVEMQ_OPTS. Using a thread pool will reduce the number of threads required byActiveMQ and so should reduce its memory consumption.
Next: Installing Additional Components
Installing Additional ComponentsSeveral optional components of PE can be installed manually.
Installing Cloud ProvisionerYou can install PEʼs cloud provisioning tools on any node by running the puppet-enterprise-upgrader script included in the installation tarball. This script will give you a chance to install thecloud provisioning tools. Using the upgrader script for the version of PE that is already installedshould have no ill effect on the nodeʼs configuration.��
Installing the Ruby Development LibrariesPuppet Enterprise 2.8 User's Guide • Installing Additional Components 138/210
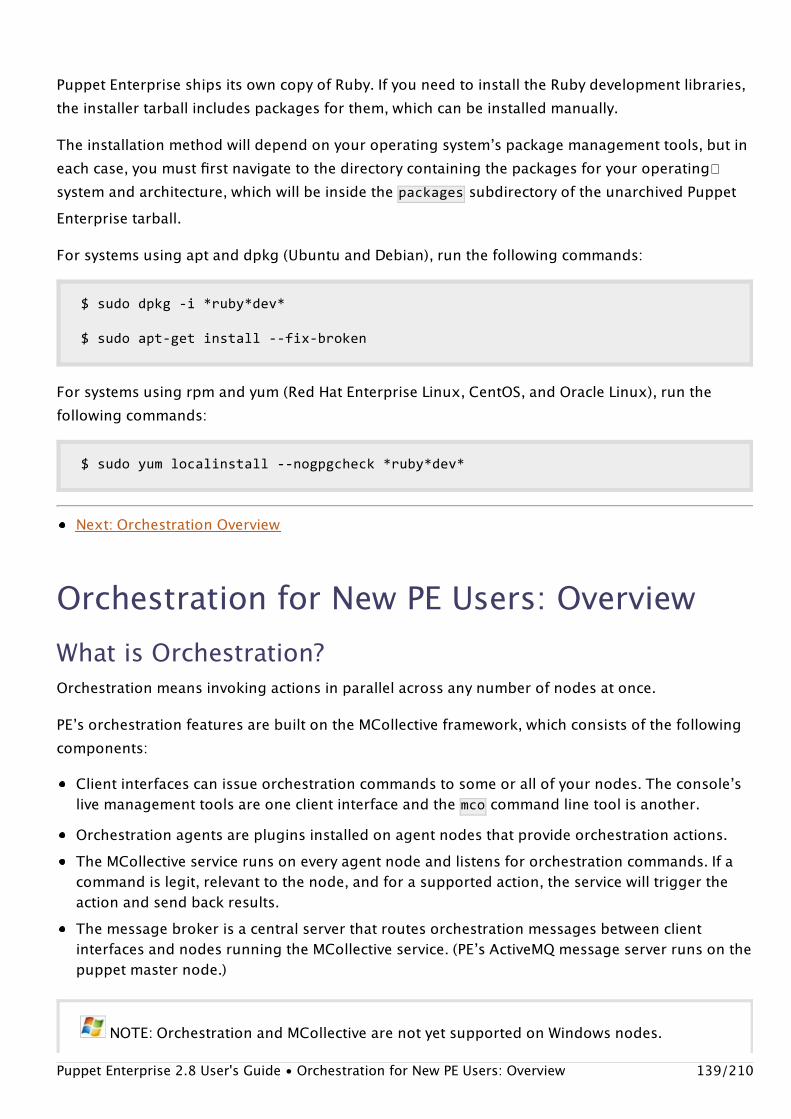
Puppet Enterprise ships its own copy of Ruby. If you need to install the Ruby development libraries,the installer tarball includes packages for them, which can be installed manually.
The installation method will depend on your operating systemʼs package management tools, but ineach case, you must first navigate to the directory containing the packages for your operating�system and architecture, which will be inside the packages subdirectory of the unarchived PuppetEnterprise tarball.
For systems using apt and dpkg (Ubuntu and Debian), run the following commands:
$sudodpkg-i*ruby*dev*
$sudoapt-getinstall--fix-broken
For systems using rpm and yum (Red Hat Enterprise Linux, CentOS, and Oracle Linux), run thefollowing commands:
$sudoyumlocalinstall--nogpgcheck*ruby*dev*
Next: Orchestration Overview
Orchestration for New PE Users: OverviewWhat is Orchestration?Orchestration means invoking actions in parallel across any number of nodes at once.
PEʼs orchestration features are built on the MCollective framework, which consists of the followingcomponents:
Client interfaces can issue orchestration commands to some or all of your nodes. The consoleʼslive management tools are one client interface and the mco command line tool is another.Orchestration agents are plugins installed on agent nodes that provide orchestration actions.The MCollective service runs on every agent node and listens for orchestration commands. If acommand is legit, relevant to the node, and for a supported action, the service will trigger theaction and send back results.The message broker is a central server that routes orchestration messages between clientinterfaces and nodes running the MCollective service. (PEʼs ActiveMQ message server runs on thepuppet master node.)
NOTE: Orchestration and MCollective are not yet supported on Windows nodes.
Puppet Enterprise 2.8 User's Guide • Orchestration for New PE Users: Overview 139/210

Orchestration isnʼt SSH
Orchestration isnʼt for running arbitrary code on nodes. Instead, each node has a collection ofactions available. Actions are distributed in plugins, and you can extend PEʼs orchestration featuresby downloading or writing new orchestration agents and distributing them with Puppet.
Live Management is Orchestration
The consoleʼs live management page offers a convenient graphical interface for orchestration tasks,�such as browsing and cloning resources across nodes. See the live management chapters of thisuserʼs guide for more details.
Orchestration is Also Scriptable
In addition to live managementʼs interactive interface, PE includes command-line tools that let youscript and automate orchestration tasks (or just run them from the comfort of your terminal).
Changes Since PE 1.2PEʼs orchestration features have been changed and improved since they were introduced in version1.2.
Orchestration is enabled by default for all PE nodes.Orchestration tasks can now be invoked directly from the console, using the “advanced tasks”tab of the live management page. PEʼs orchestration framework also powers the other livemanagement features.The mco user account on the puppet master is gone, in favor of a new peadmin user. This usercan still invoke orchestration tasks across your nodes, but will also gain more general purposecapabilities in future versions.PE now includes the puppetral plugin, which lets you use Puppetʼs Resource Abstraction Layer(RAL) in orchestration tasks.For performance reasons, the default message security scheme has changed from AES to PSK.The network connection over which messages are sent is now encrypted using SSL.
SecurityAll network traffic for orchestration is encrypted with SSL (without host verification). In addition, all���orchestration messages are authenticated using a randomly generated pre-shared key (PSK).
If necessary, you can change the password used as the pre-shared key.You can also change the authentication method to use an AES key pair instead of a pre-sharedkey. (Note that this can potentially affect performance with large numbers of nodes.)�
Network Traffic��Puppet Enterprise 2.8 User's Guide • Orchestration for New PE Users: Overview 140/210

Nodes send orchestration messages over TCP port 61613 to the ActiveMQ server, which runs on thepuppet master node. See the notes on firewall configuration in the “System Requirements” chapter��of this guide for more details about PEʼs network traffic.��
Next: Orchestration Usage and Examples
Orchestration for New PE Users: Usage andExamples
Running ActionsOrchestration actions are grouped and distributed as MCollective plugins. In the default installationof Puppet Enterprise, you can run any orchestration action from any plugin while logged in as thepeadmin user on the puppet master node.
To open a shell as the peadmin user, run:
$sudo-i-upeadmin
To run orchestration actions, use the mco command:
$mco<PLUGIN><FILTER><ACTION><ARGUMENT><OPTIONS>
Available ActionsThe following orchestration actions are available in PE:
rpcutil pluginfind action returns a list of all nodes matching a search filter�ping action returns a list of all nodes and their latenciesinventory action returns a list of Facts, Classes, and other information from all nodesthis pluginʼs actions are exposed via higher-level wrappers, such as the mcoping command
puppetral pluginfind action returns a Puppet resource of a given type and title and its variations across allnodes
NOTE: Orchestration and MCollective are not yet supported on Windows nodes.
Puppet Enterprise 2.8 User's Guide • Orchestration for New PE Users: Usage and Examples 141/210

search action returns all Puppet resources of a given type across all nodescreate action creates a given resource across all nodes
creating an exec resource allows for arbitrary management of nodes
puppetd pluginenable and disable actions will enable and disable puppet agent on a node or nodesrunonce action initiates a puppet agent run on all nodeslast_run_summary action retrieves the most recent Puppet run summary from all nodesstatus action returns puppet agentʼs run status on all nodes
service pluginstart,stop,restart, and status actions allow direct management of services across thedeployment
package plugininstall,purge,checkupdate,update, and status actions work through the systempackage manager to query and ensure the state of software packages across the deployment
controller pluginstats action returns cumulative statistics about MCollective messages passed between nodesreload_agent action refreshes from disk the code for a specific plugin�reload_agents action refreshes from disk the code for all pluginsexit action removes nodes from the MCollective network
Filtering NodesMost orchestration actions in PE can be executed on a set of nodes determined by meta-data aboutthe deployment. This filtering provides a much more convenient way to manage nodes than the�traditional approach of using host names or fully qualified domain names to identify and access�machines. Node sets can be created by filtering based on Facter facts, Puppet classes, and host�names. Filters can be specified by passing options to the �mco command. For example:
$mcofind--with-factosfamily=RedHat
This command forces the find action to only return nodes which have a fact named osfamily with a�value of RedHat. Filter options are case sensitive and support regular expression syntax.
ExamplesPing
Puppet Enterprise 2.8 User's Guide • Orchestration for New PE Users: Usage and Examples 142/210

The ping action of the rpcutil plugin is wrapped to be available at a higher level than the mcopingcommand. This command returns a list of all the nodes and their network latencies. In a typicalPuppet Enterprise deployment, latencies for issuing an orchestration action are less than half asecond:
peadmin@puppetmaster:~$mcopingpuppetmaster.example.comtime=135.94msagent.example.comtime=136.55ms----pingstatistics----2repliesmax:136.55min:135.94avg:136.25
Find
The find action of the rpcutil plugin is wrapped to be available at a higher level than the mcofindcommand. This command returns a list of all the nodes in the network:
peadmin@puppetmaster:~$mcofindpuppetmaster.example.comagent.example.com
Inventory
The inventory action of the rpcutil plugin is wrapped to be available at a higher level than the mcoinventory command. This command returns facts and classes, among other information:
peadmin@puppetmaster:~$mcoinventoryagent.example.comInventoryforagent.example.com:ServerStatistics:Version:1.2.1StartTime:MonNov1415:25:33-08002011ConfigFile:/etc/puppetlabs/mcollective/server.cfgCollectives:mcollectiveMainCollective:mcollectiveProcessID:5553TotalMessages:86MessagesPassedFilters:74MessagesFiltered:12RepliesSent:73TotalProcessorTime:1.34secondsSystemTime:0.59secondsAgents:discoverypackagepuppetdpuppetralrpcutilserviceConfigurationManagementClasses:defaulthelloworldhelloworldpe_accountspe_accountspe_accounts::datape_accounts::groupspe_compliancepe_compliancepe_compliance::agent
Puppet Enterprise 2.8 User's Guide • Orchestration for New PE Users: Usage and Examples 143/210

pe_mcollectivepe_mcollectivepe_mcollective::metadatape_mcollective::pluginssettingsFacts:architecture=>i386augeasversion=>0.7.2...
Puppetd
The puppetd plugin orchestrates Puppet itself across the deployment. This plugin is capable ofkicking off Puppet configuration runs on each node in the deployment all at the same time, on a��subset of the deployment using filtering, or using a maximum concurrency level. The maximum�concurrency feature is particularly noteworthy as it allows the execution of a configuration run on�all nodes in the population, but sets an upper limit on the number of nodes that are performingtheir run at any given time, thus mitigating the network load and resource demands on the puppetmaster. This example performs a configuration run on all nodes, but only one node at a time:�
peadmin@puppetmaster:~$mcopuppetdrunall1TueNov1511:17:11-08002011>Runningallmachineswithaconcurrencyof1TueNov1511:17:11-08002011>DiscoveringhoststorunTueNov1511:17:13-08002011>Found2hostsTueNov1511:17:13-08002011>Runningagent.example.com,concurrencyis0TueNov1511:17:14-08002011>agent.example.comschedulestatus:OKTueNov1511:17:15-08002011>Currently1nodesrunning;waitingTueNov1511:17:21-08002011>Runningpuppetmaster.example.com,concurrencyis0TueNov1511:17:22-08002011>puppetmaster.example.comschedulestatus:OKFinishedprocessing1/1hostsin98.98ms
Note, the “1 / 1 hosts” is an indication that one host was actually performing the orchestration ofthe Puppet configuration run. �This does not mean only one host in the deployment performed theconfiguration run. �The message “Found 2 hosts” indicates that two nodes carried out this action.
Once finished with the Puppet configuration run, the ��status action can be used to see the lastPuppet configuration run for each node in the deployment.�
peadmin@puppetmaster:~$mcopuppetdstatus[=============================================>]2/2agent.example.comEnabled,notrunning,lastrun10secondsagopuppetmaster.example.comEnabled,notrunning,lastrun2secondsago
Finishedprocessing2/2hostsin105.29ms
PuppetRAL
The puppetral plugin provides a command line tool to work with any resource Puppet is capable ofmanaging. A common use case for the puppetral plugin is to execute arbitrary commands on the
Puppet Enterprise 2.8 User's Guide • Orchestration for New PE Users: Usage and Examples 144/210

deployment using the exec resource. This example creates a new file on all nodes in the�deployment:
peadmin@puppetmaster:~$mcorpcpuppetral\createtype=exectitle="/bin/bash-c'echoHello>/tmp/hello'"Determiningtheamountofhostsmatchingfilterfor2seconds....2
[=================================================>]2/2
agent.example.comStatus:ResourcewascreatedResource:{"exported"=>false,"title"=>"/bin/bash-c'echoHello>/tmp/hello'","parameters"=>{:returns=>:notrun},"tags"=>["exec"],"type"=>"Exec"}
puppetmaster.example.comStatus:ResourcewascreatedResource:{"exported"=>false,"title"=>"/bin/bash-c'echoHello>/tmp/hello'","parameters"=>{:returns=>:notrun},"tags"=>["exec"],"type"=>"Exec"}
Finishedprocessing2/2hostsin249.21ms
The creation of this file can be verified with the ��find action:
peadmin@puppetmaster:~$mcorpcpuppetralfindtype=filetitle=/tmp/hello
Determiningtheamountofhostsmatchingfilterfor2seconds....2
[================================================>]2/2
agent.example.comexported:falsemanaged:falsetitle:/tmp/helloparameters:{:ctime=>TueNov1511:32:10-08002011,:type=>"file",:ensure=>:file,:group=>0,:owner=>0,:mtime=>TueNov1511:32:10-08002011,:mode=>"644",:content=>"{md5}09f7e02f1290be211da707a266f153b3"}tags:["file"]type:File
Puppet Enterprise 2.8 User's Guide • Orchestration for New PE Users: Usage and Examples 145/210

puppetmaster.example.commanaged:falseexported:falsetitle:/tmp/helloparameters:{:ctime=>TueNov1511:32:10-08002011,:type=>"file",:group=>0,:ensure=>:file,:owner=>0,:mtime=>TueNov1511:32:10-08002011,:mode=>"644",:content=>"{md5}09f7e02f1290be211da707a266f153b3"}tags:["file"]type:File
Finishedprocessing2/2hostsin166.12ms
The puppetral plugin can manage any resource Puppet itself is capable of managing. In particular,user, group, host, and package resources are exposed directly in the consoleʼs live managementpage.
Service
Puppet agent will automatically restart a service it manages when related resources are changed,but sometimes services need to be restarted outside of a normal Puppet configuration run. The �mcoservice command can be used in these cases. This example restarts the SSH daemon on all nodesrunning RedHat:
peadmin@puppetmaster:~$mcoservicesshdrestart-Wosfamily=RedHat[==================================================>]2/2----servicesummary----Nodes:2/2Statuses:started=2ElapsedTime:1.45s
The status of the restarted services can be shown with:
peadmin@puppetmaster:~$mcoservicesshdstatus-Wosfamily=RedHat[==================================================>]2/2puppetmaster.example.comstatus=runningagent.example.comstatus=running----servicesummary----Nodes:2/2Statuses:started=2ElapsedTime:0.26s
Package
Similar to the service plugin, the package plugin manages software packages outside of a normalPuppet Enterprise 2.8 User's Guide • Orchestration for New PE Users: Usage and Examples 146/210

Puppet configuration run. The following is the trimmed output from running the �checkupdatesaction:
peadmin@puppetmaster:~$mcorpcpackagecheckupdates-Wfqdn=agent.example.comDeterminingtheamountofhostsmatchingfilterfor2seconds....1*[============================================================>]1/1agent.example.comOutdatedPackages:[{:package=>"glibc.i686",:version=>"2.5-65.el5_7.1",:repo=>"base_local"},{:package=>"nscd.i386",:version=>"2.5-65.el5_7.1",:repo=>"base_local"},{:package=>"ntp.i386",:version=>"4.2.2p1-15.el5.centos.1",:repo=>"base_local"},{:package=>"openssh.i386",:version=>"4.3p2-72.el5_7.5",:repo=>"base_local"},{:package=>"openssh-clients.i386",:version=>"4.3p2-72.el5_7.5",:repo=>"base_local"},{:package=>"openssh-server.i386",:version=>"4.3p2-72.el5_7.5",:repo=>"base_local"}]Output:glibc.i6862.5-65.el5_7.1base_localnscd.i3862.5-65.el5_7.1base_localntp.i3864.2.2p1-15.el5.centos.1base_localopenssh.i3864.3p2-72.el5_7.5base_localopenssh-clients.i3864.3p2-72.el5_7.5base_localopenssh-server.i3864.3p2-72.el5_7.5base_localExitCode:100PackageManager:yum
Finishedprocessing1/1hostsin409.14ms
Controller
The mcocontroller command manages the underlying MCollective infrastructure. This can beused to load plugins obtained outside of Puppet Enterprise or custom written for the deployment.This example reloads all plugins across the Puppet Enterprise deployment:
peadmin@puppetmaster:~$mcocontrollerreload_agentsDeterminingtheamountofhostsmatchingfilterfor2seconds....2agent.example.com>reloadedallagentspuppetmaster.example.com>reloadedallagentsFinishedprocessing2/2hostsin137.86ms
Puppet Enterprise 2.8 User's Guide • Orchestration for New PE Users: Usage and Examples 147/210

Next: Cloud Provisioning Overview
A High Level Look at Puppet's CloudProvisioning ToolsPuppet Enterprise includes a suite of command-line tools you can use for provisioning new virtualnodes when building or maintaining cloud computing infrastructures based on VMware VSphereand Amazon EC2. You can use these tools to:
Create and destroy virtual machine instancesClassify new nodes (virtual or physical) in the PE consoleAutomatically install and configure PE on new nodes (virtual or physical)�
When used together, these tools provide quick and efficient workflows for adding and maintaining���fully configured, ready-to-run virtual nodes in your Puppet Enterprise-managed cloud�environment.
See the sections on VMware, and AWS provisioning for details about creating and destroying virtualmachines in these environments. Beyond that, the section on classifying nodes and installing PEcovers actions that work on any new machine, virtual or physical, in a cloud environment. To get anidea of a typical workflow in a cloud provisioning environment, see the �workflow� section.
The cloud provisioning tools can be added during installation of Puppet Enterprise. If you havealready installed PE, and you want to install the cloud provisioning tools, simply run the upgraderagain.
ToolsPEʼs provisioning tools are built on the node , node_vmware , and node_aws subcommands. Each ofthese subcommands has a selection of available actions (such as list and start ) that are used tocomplete specific provisioning tasks. You can get detailed information about a subcommand and its�actions by running puppethelp and puppetman .
The VMware and AWS subcommands are only used for cloud provisioning tasks. Node , on the otherhand, is a general purpose Puppet subcommand that includes several provisioning-specific actions.�These are:
classify
init
install
Puppet Enterprise 2.8 User's Guide • A High Level Look at Puppet's Cloud Provisioning Tools 148/210

The clean action may also be useful when decommissioning nodes.
All of the cloud provisioning tools are powered by Fog, the Ruby cloud services library. Fog isautomatically installed on any machine receiving the cloud provisioner role.
Next: Installing and Configuring Cloud Provisioner�
Installing and Configuring Cloud Provisioning�There are many options and actions associated with the main cloud provisioning sub-commands,node , node_vmware , node_aws and node_openstack . This page provides an overview but, for all thedetails, check the man pages.
PrerequisitesSoftware
The cloud provisioning tools ship with Puppet Enterprise 2.0 and later. OpenStack tools requirecloud_provisioner 1.0.2 or later (i.e. PE 2.5 or later).Puppet 2.7.2 or later is requiredThe Fog cloud services library must be installed on the machine running cloud_provisioner.(Some operating systems and environments may also require you to manually install some ofFogʼs dependencies.) To install Fog, run
# gem install fog -v 0.7.2Cloud_provisioner also requires the GUID library so it can generate unique indentifiers.�
# gem install guid
Note that later versions of fog may not be fully compatible with Cloud Provisioner. This issue iscurrently being addressed.
Services
The following services and credentials are required:
VMware requires: VMware vSphere 4.0 (or later) and VMware vCenterAmazon Web Services requires: An existing Amazon account with support for EC2OpenStack requires: A standard installation of OpenStack Keystone and the accompanying EC2credentials
InstallingCloud provisioning tools can be installed on any puppet master or agent node.Puppet Enterprise 2.8 User's Guide • Installing and Configuring Cloud Provisioning 149/210

The Puppet Enterprise installer will ask whether or not to install cloud provisioning duringinstallation. Answer ʻyesʼ to enable cloud provisioning actions on a given node.
If you have already installed PE without installing the cloud provisioning tools, run the upgraderscript puppet-enterprise-upgrader and answer “yes” when prompted to install the tools. Runningthe upgrader script will have no ill effects on your current installation, even if the upgrader is for�the version currently installed. (No user-configured files will get overwritten, and of course the��installer backs up all relevant files as well.)�
If youʼre using an answer file to install Puppet Enterprise, you can install cloud provisioning by�setting the q_puppet_cloud_install option to y .
Configuring�To create new virtual machines with Puppet Enterprise, youʼll need to first configure the services��youʼll be using.
Start by creating a file called �.fog in the home directory of the user who will be provisioning newnodes.
$touch~/.fog
This will be the configuration file for ��Fog, the cloud abstraction library that powers PEʼsprovisioning tools. Once it is filled out, it will consist of a YAML hash indicating the locations of your�cloud services and the credentials necessary to control them. For example:
:default::vsphere_server:vc01.example.com:vsphere_username:cloudprovisioner:vsphere_password:abc123:vsphere_expected_pubkey_hash:431dd5d0412aab11b14178290d9fcc5acb041d37f90f36f888de0cebfffff0a8:aws_access_key_id:AKIAIISJV5TZ3FPWU3TA:aws_secret_access_key:ABCDEFGHIJKLMNOP1234556/s
See below to learn how to find these credentials.�
Adding VMware Credentials
To connect to a VMware vSphere server, you must put the following information in your ~/.fog file:�
:vsphere_server
The name of your vCenter host (for example: vc1.example.com ). You should already knowthe value for this setting.
Puppet Enterprise 2.8 User's Guide • Installing and Configuring Cloud Provisioning 150/210

:vsphere_username
Your vCenter username. You should already know the value for this setting.
:vsphere_password
Your vCenter password. You should already know the value for this setting.
:vsphere_expected_pubkey_hash
A public key hash for your vSphere server. The value for this setting can be obtained byentering the other three settings and then running the following command:
$puppetnode_vmwarelist
This will result in an error message containing the serverʼs public key hash…
notice:Connecting...·err:Theremotesystempresentedapublickeywithhash431dd5d0412aab11b14178290d9fcc5acb041d37f90f36f888de0cebfffff0a8butwe'reexpectingahashof<unset>.Ifyouaresuretheremotesystemisauthenticsetvsphere_expected_pubkey_hash:<thehashprintedinthismessage>in~/.fogerr:Try'puppethelpnode_vmwarelist'forusage
…which can then be entered as the value of this setting.
Adding Amazon Web Services or OpenStack Credentials
To connect to Amazon Web Services or your OpenStack server, you must put the followinginformation in your ~/.fog file:�
:aws_access_key_id
Your AWS Access Key ID. See below for how to find this.�
:aws_secret_access_key
Your AWS Secret Key ID. See below for how to find this.�
For AWS installations, you can find your Amazon Web Services credentials online in your Amazon�account. To view them, go to Amazon AWS and click on the Account tab.
Puppet Enterprise 2.8 User's Guide • Installing and Configuring Cloud Provisioning 151/210

Select the “Security Credentials” menu and choose “Access Credentials.” Click on the “Access Keys”tab to view your Access Keys.
You need to record two pieces of information: the Access Key ID and the Secret Key ID. To see yourSecret Access Key, click the “Show” link under “Secret Access Key”.
For OpenStack installations, your credentials are printed to screen after running keystoneec2-credentials-create
Put both keys in your ~/.fog file as described above. You will also need to generate an SSH private�key using Horizon, or simply import a selected public key.
Additional AWS Configuration�
To provision with Puppet, your Amazon Web Services EC2 account will need to have:
At least one Amazon-managed SSH key pair.A security group that allows outbound traffic on ports ��8140 and 61613, and inbound SSH traffic��(port 22) from the machine being used for provisioning.
Youʼll need to provide the names of these resources as arguments when running the provisioningcommands.KEY PAIRS
To find or create your Amazon SSH key pair, browse to the �Amazon Web Service EC2 console.
Puppet Enterprise 2.8 User's Guide • Installing and Configuring Cloud Provisioning 152/210

Select the “Key Pairs” menu item from the dashboard. If you donʼt have any existing key pairs, youcan create one with the “Create Key Pairs” button. Specify a new name for the key pair to create it;the private key file will be automatically downloaded to your host.�
Make a note of the name of your key pair, since you will need to know it when creating newinstances.SECURITY GROUP
To add or edit a security group, select the “Security Groups” menu item from the dashboard. Youshould see a list of the available security groups. If no groups exist, you can create a new one byclicking the “Create Security Groups” button. Otherwise, you can edit an existing group.
To add the required rules, select the “Inbound” tab and add an SSH rule. Make sure that inboundSSH traffic is using port 22. You can also indicate a specific source to lock the source IP down to an���appropriate source IP or network. Click “Add Rule” to add the rule, then click “Apply Rule Changes”to save.
You should also ensure that your security group allows outbound traffic on ports ��8140 and 61613.These are the ports PE uses to request configurations and listen for orchestration messages.�
Additional OpenStack Configuration�
Puppet Enterprise 2.8 User's Guide • Installing and Configuring Cloud Provisioning 153/210

Before you can launch any instances with the provisioner module, you will need:
a fully functional OpenStack environmentat least one valid OS imagethe URL of your Nova EC2 API server (typically, http://your.nova.api.server:8773/services/Cloud)to use the Horizon console to configure the default security group to allow SSH (port 22) access.�
Demonstration
The following video demonstrates the setup process and some basic functions:
Next: Classifying Nodes and Remotely Installing Puppet
Classifying New Nodes and RemotelyInstalling PuppetNodes in a cloud infrastructure can be classified and managed as easily as any other machine in a�puppet environment. You can add new nodes to pre-existing console groups, further classify andconfigure those nodes, and install Puppet (Enterprise or open source) on them.�
Many of these tasks are accomplished using the puppetnode subcommand. While puppetnodecan be applied to physical or virtual machines, several actions have been created specifically for�working with virtual machine instances in the cloud. For complete details, view the puppetnodeman page and the Getting Started With Cloud Provisioner page.
Classifying nodesOnce you have created instances for your cloud infrastructure, you need to start configuring them�Puppet Enterprise 2.8 User's Guide • Classifying New Nodes and Remotely Installing Puppet 154/210

and adding the files, settings and/or services needed for their intended purposes. The fastest and�easiest way to do this is to add them to your existing console groups. You can do this by addingnodes to a group with the consoleʼs web interface. However, you can also do this right from thecommand line, which can be more convenient if youʼre already at your terminal and have the nodeʼsname ready at hand.
To classify nodes and add them to a console group, run puppetnodeclassify .
$puppetnodeclassify\--node-group=appserver_pool\--enc-server=localhost\--enc-port=443\--enc-ssl\--enc-auth-user=console\--enc-auth-passwd=password\ec2-50-19-149-87.compute-1.amazonaws.com
notice:Contactinghttps://localhost:443/toclassifyec2-50-19-149-87.compute-1.amazonaws.comcomplete
The above example adds an AWS EC2 instance to the console. Note that you use the name of thenode you are classifying as the commandʼs argument and the --node-group option to specify thegroup you want to add your new node to. The other options contain the connection andauthentication data needed to properly connect to the node.
Note that until the first puppet run is performed on this node, puppet itself will not yet be installed.�(Unless one of the “wrapper” commands has been used. See below.)
To see additional help for node classification, run �puppethelpnodeclassify . For more abouthow the console groups and classifies nodes, �see the section on grouping and classifying.
You may also wish review the basics of Puppet classes and configuration� to help you understandhow groups and classes interact.
The process of adding a node to the console is demonstrated in the following video:
Puppet Enterprise 2.8 User's Guide • Classifying New Nodes and Remotely Installing Puppet 155/210

Installing PuppetUse the puppetnodeinstall command to install Puppet Enterprise (or open-source puppet) ontothe new instances.
$puppetnodeinstall--install-script=puppet-enterprise--keyfile=~/.ssh/mykey.pem--login=rootec2-50-19-207-181.compute-1.amazonaws.comnotice:WaitingforSSHresponse...notice:WaitingforSSHresponse...Donenotice:InstallingPuppet...puppetagent_certname:ec2-50-19-207-181.compute-1.amazonaws.com-ee049648-3647-0f93-782b-9f30e387f644status:success
This commandʼs options specify:
Install PE, instead of an open source build of Puppet.The path to a private SSH key that can be used log in to the vm, specified with the �--keyfileoption. The install action uses SSH to connect to the host, and so needs access to an SSH key.For Amazon EC2, point to the private key from the key pair you used to create the instance. Inmost cases, the private key is in the ~/.ssh directory. (Note that for VMware, the public keyshould have been loaded onto the template you used to create your virtual machine.)The local user account used to log in, specified with the �--login option.
For the commandʼs argument, specify the name of the node on which youʼre installing PuppetEnterprise.
For the default installation, the install action uses the installation packages provided by PuppetLabs and stored in Amazon S3 storage. You can also specify packages located on a local host, or on
Puppet Enterprise 2.8 User's Guide • Classifying New Nodes and Remotely Installing Puppet 156/210

a share in your local network. Use puppethelpnodeinstall or puppetmannode to see moredetails.
In addition to these default configuration options, you can specify a number of additional options�to control how and what we install on the host. You can specify the specific version of Puppet�Enterprise to install (or you can install open source puppet). You can also control the version ofFacter to install, the specific answers file to use to configure Puppet Enterprise, the certificate name����of the agent to be installed and a variety of other options. To see a full list of the available options,use the puppethelpnodeinstall command.
The process of installing Puppet on a node is demonstrated in detail in the following video:
Classifying and Installing Puppet in One CommandUsing nodeinit
Rather than using multiple commands to classify and install Puppet on a node, there are a couple ofother options that combine actions into a “wrapper” command. Note that you will need access tothe PE installer, which is typically specified with the �--installer-payload argument.
If a node has been prepared to remotely sign certificates, you can use the �init action which willinstall Puppet, classify the node and sign the certificate in one step. For example:�
$puppetnodeinit\--node-group=appserver_pool\--enc-server=localhost\--enc-port=443\--enc-ssl\--enc-auth-user=console\--enc-auth-passwd=password\--install-script=puppet-enterprise\
Puppet Enterprise 2.8 User's Guide • Classifying New Nodes and Remotely Installing Puppet 157/210
--keyfile=~/.ssh/mykey.pem\--login=root\ec2-50-19-207-181.compute-1.amazonaws.com
The invocation above will connect to the console, classify the node in the appserver_pool group,and then install Puppet Enterprise on this node.
Using autosign.conf
Alternatively, if your deployment has been set up to use the autosign configuration parameter, you�can use it to sign the certifcate automatically. While this can greatly simplify the process, there aresome possible security risks associated with going this route, so be sure you are comfortable withthe process and know the risks.
Next: Provisioning with VMware
Provisioning With VMwarePuppet Enterprise provides support for working with VMware virtual machine instances usingvSphere and vCenter. Using actions of the puppetnode_vmware sub-command, you can create newmachines, view information about existing machines, classify and configure machines, and tear�machines down when theyʼre no longer needed.
The main actions used for vSphere cloud provisioning include:
puppetnode_vmwarelist for viewing existing instancespuppetnode_vmwarecreate for creating new instancespuppetnode_vmwareterminate for destroying no longer needed instances.
If youʼre new to VMware vSphere, you should start by looking at the vSphere documentation.
Listing VMware vSphere InstancesLetʼs get started by listing the machines currently on our vSphere server. You do this by running thepuppetnode_vmwarelist command.
$puppetnode_vmwarelist
If you havenʼt yet confirmed your vSphere serverʼs public key hash in your �~/.fog file�, youʼll receivean error message containing said hash:
$puppetnode_vmwarelist
Puppet Enterprise 2.8 User's Guide • Provisioning With VMware 158/210

notice:Connecting...·err:Theremotesystempresentedapublickeywithhash431dd5d0412aab11b14178290d9fcc5acb041d37f90f36f888de0cebfffff0a8butwe'reexpectingahashof<unset>.Ifyouaresuretheremotesystemisauthenticsetvsphere_expected_pubkey_hash:<thehashprintedinthismessage>in~/.fogerr:Try'puppethelpnode_vmwarelist'forusage
Confirm that you are communicating with the correct, trusted vSphere server by checking the�hostname in your ~/.fog file, then add the hash to the �.fog file as follows:�
:vsphere_expected_pubkey_hash:431dd5d0412aab11b14178290d9fcc5acb041d37f90f36f888de0cebfffff0a8
Now you should be able to run the puppetnode_vmwarelist command and see a list of existingvirtual machines:
$puppetnode_vmwarelistnotice:Connecting...notice:Connectedtovc01.example.comascloudprovisioner(APIversion4.1)notice:FindingallVirtualMachines...(Startedat12:16:01PM)notice:Controlwillbereturnedtoyouin10minutesat12:26PMiflocatingisunfinished.Locating:100%|ooooooooooooooooooooooooooooooooooooooooooooooooooo|Time:00:00:34notice:Complete/Datacenters/Solutions/vm/master_templatepowerstate:poweredOffname:master_templatehostname:puppetmaster.example.cominstanceid:5032415e-f460-596b-c55d-6ca1d2799311ipaddress:---.---.---.---template:true
/Datacenters/Solutions2/vm/puppetagentpowerstate:poweredOnname:puppetagenthostname:agent.example.cominstanceid:5032da5d-68fd-a550-803b-aa6f52fbf854ipaddress:192.168.100.218template:false
This shows that youʼre connected to your vSphere server and shows an available VMware template (at master_template ). Also shown are two virtual machines (puppetmaster.example.com andagent.example.com). VMware templates contain the information needed to build new virtualmachines, such as the operating system, hardware configuration, and other details.�
Specifically, �list will return all of the following information:
Puppet Enterprise 2.8 User's Guide • Provisioning With VMware 159/210

The location of the template or machineThe status of the machine (for example, poweredOff or poweredOn )The name of the template or machine on the vSphere serverThe host name of the machineThe instanceid of the machineThe IP address of the machine (note that templates donʼt have IP addresses)The type of entry - either a VMware template or a virtual machine
Creating a New VMware Virtual MachinePuppet Enterprise can create and manage virtual machines from VMware templates using thenode_vmwarecreate action.
$puppetnode_vmwarecreate--name=newpuppetmaster--template="/Datacenters/Solutions/vm/master_template"notice:Connecting...notice:Connectedtovc01.example.comascloudprovisioner(APIversion4.1)notice:LocatingVMat/Datacenters/Solutions/vm/master_template(Startedat12:38:58PM)notice:Controlwillbereturnedtoyouin10minutesat12:48PMiflocating(1/2)isunfinished.Locating(1/2):100%|ooooooooooooooooooooooooooooooooooooooooooooooooooooooooo|Time:00:00:16notice:Startingthecloneprocess(Startedat12:39:15PM)notice:Controlwillbereturnedtoyouin10minutesat12:49PMifstarting(2/2)isunfinished.Starting(2/2):100%|ooooooooooooooooooooooooooooooooooooooooooooooooooooooooo|Time:00:00:03---name:newpuppetmasterpower_state:poweredOff...status:success
Here node_vmwarecreate has built a new virtual machine named newpuppetmaster with atemplate of /Datacenters/Solutions/vm/master_template . (This is the template seen earlier withthe list action.) The virtual machine will be powered on, which may take several minutes tocomplete.
The following video demonstrates the above and some other basic functions:
Puppet Enterprise 2.8 User's Guide • Provisioning With VMware 160/210

Starting, Stopping and Terminating VMware VirtualMachinesYou can start, stop, and terminate virtual machines with the start , stop , and terminate actions.
To start a virtual machine:
$puppetnode_vmwarestart/Datacenters/Solutions/vm/newpuppetmaster
You can see weʼve specified the path to the virtual machine we wish to start, in this case�/Datacenters/Solutions/vm/newpuppetmaster .
To stop a virtual machine, use:
$puppetnode_vmwarestop/Datacenters/Solutions/vm/newpuppetmaster
This will stop the running virtual machine (which may take a few minutes).
Lastly, we can terminate a VMware instance. Be aware this will:
Force-shutdown the virtual machineDelete the virtual machine AND its hard disk images
This is a destructive and permanent action that should only be taken when you wish to delete thevirtual machine and its data!
The following video demonstrates the termination process and some other related functions:
Puppet Enterprise 2.8 User's Guide • Provisioning With VMware 161/210

Getting more helpThe puppetnode_vmware command has extensive in-line help and a man page.
To see the available actions and command line options, run:
$puppethelpnode_vmwareUSAGE:puppetnode_vmware<action>
ThissubcommandprovidesacommandlineinterfacetoworkwithVMwarevSphereVirtualMachineinstances.Thegoaloftheseactionsistoeasilycreatenewvirtualmachines,installPuppetontothem,andcleanupwhenthey'renolongerrequired.
OPTIONS:--modeMODE-Therunmodetouse(user,agent,ormaster).--render-asFORMAT-Therenderingformattouse.--verbose-Whethertologverbosely.--debug-Whethertologdebuginformation.
ACTIONS:createCreateanewVMfromatemplatefindFindaVMwareVirtualMachinelistListVMwareVirtualMachinesstartStartaVirtualMachinestopStoparunningVirtualMachineterminateTerminate(destroy)aVM
See'puppetmannode_vmware'or'manpuppet-node_vmware'forfullhelp.
You can get help on individual actions by running:
$puppethelpnode_vmware<ACTION>
Puppet Enterprise 2.8 User's Guide • Provisioning With VMware 162/210

For example:
$puppethelpnode_vmwarestart
Next: Provisioning with AWS
Provisioning With Amazon Web ServicesPuppet Enterprise provides support for working with EC2 virtual machine instances using AmazonWeb Services. Using actions of the puppetnode_aws sub-command, you can create new machines,view information about existing machines, classify and configure machines, and tear machines�down when theyʼre no longer needed.
The main actions used for AWS cloud provisioning include:
puppetnode_awslist for viewing existing instancespuppetnode_awscreate for creating new instancespuppetnode_awsterminate for destroying no longer needed instances
If you are new to Amazon Web Services, we recommend reading their Getting Starteddocumentation.
Below we take a quick look at these actions and their associated options. For comprehensiveinformation, see Getting More Help below.
Viewing Existing EC2 InstancesLetʼs start by finding out about the currently running EC2 instances. �You do this by running thepuppetnode_awslist command.
$puppetnode_awslisti-013eb462:created_at:SatNov1202:10:06UTC2011dns_name:ec2-107-22-110-102.compute-1.amazonaws.comid:i-013eb462state:runningi-019f0a62:created_at:SatNov1203:48:50UTC2011dns_name:ec2-50-16-145-167.compute-1.amazonaws.comid:i-019f0a62state:runningi-01a33662:created_at:SatNov1204:32:25UTC2011dns_name:ec2-107-22-79-148.compute-1.amazonaws.com
Puppet Enterprise 2.8 User's Guide • Provisioning With Amazon Web Services 163/210

id:i-01a33662state:running
This shows three running EC2 instances. For each instance, the following characteristics are shown:
The instance nameThe date the instance was createdThe DNS host name of the instanceThe ID of the instanceThe state of the instance, for example, running or terminated
If you have no instances running, nothing will be returned.
Creating a new EC2 instanceNew instances are created using the node_awscreate or the node_awsbootstrap actions. Thecreate action simply builds a new EC2 machine instance. The bootstrap “wrapper” action creates,classifies, and then initializes the node all in one command.�
Using create
The node_awscreate subcommand is used to build a new EC2 instance based on a selected AMIimage.
The subcommand has three required options:
The AMI image weʼd like to use. (--image )The name of the SSH key pair to start the image with (--keyname ). See here for more aboutcreating Amazon-managed key pairs.The type of machine instance we wish to create (--type ). You can see a list of types here.
Provide this information and run the command:
$puppetnode_awscreate--imageami-edae6384--keynamecloudprovisioner--typem1.smallnotice:Creatingnewinstance...notice:Creatingnewinstance...Donenotice:Creatingtagsforinstance...notice:Creatingtagsforinstance...Donenotice:Launchingserveri-df7ee898...##################notice:Serveri-df7ee898isnowlaunchednotice:Serveri-df7ee898publicdnsname:ec2-50-18-93-82.us-east-1.compute.amazonaws.comec2-50-18-93-82.us-east-1.compute.amazonaws.com
Puppet Enterprise 2.8 User's Guide • Provisioning With Amazon Web Services 164/210

Youʼve created a new instance using an AMI of ami-edae6384 , a key named cloudprovisioner , andof the machine type m1.small . If youʼve forgotten the available key names on your account, you canget a list with the node_awslist_keynames action:
$puppetnode_awslist_keynamescloudprovisioner(ad:d4:04:9f:b0:8d:e5:4e:4c:46:00:bf:88:4f:b6:c2:a1:b4:af:56)
You can also specify a variety of other options, including the region in which to start the instance.You can see a full list of these options by running puppethelpnode_awscreate .
After the instance has been created, the public DNS name of the instance will be returned. In thiscase: ec2-50-18-93-82.us-east-1.compute.amazonaws.com .
Using bootstrap
The bootstrap action is a wrapper that combines several actions, allowing you to create, classify,install Puppet on, and sign the certificate of EC2 machine instances. Classification is done via the��Console.
In addition to the three options required by create (see above), Bootstrap also requires thefollowing:
The name of the user Puppet should be using when logging in to the new node. (--login or --username )The path to a local private key that allows SSH access to the node (--keyfile ). Typically, this isthe path to the private key that gets downloaded from the Amazon EC2 site.
The example below will bootstrap a node using the ami–0530e66c image, located in the US Eastregion and running as a t1.micro machine type.
puppetnode_awsbootstrap--regionus-east-1--imageami-0530e66c--loginroot--keyfile~/.ec2/ccaum_rsa.pem--keynameccaum_rsa--typet1.micro
DemoThe following video demonstrates the EC2 instance creation process in more detail:
Puppet Enterprise 2.8 User's Guide • Provisioning With Amazon Web Services 165/210
Connecting to an EC2 instanceYou connect to EC2 instances via SSH. To do this you will need the private key downloaded earlierfrom the Amazon Web Services console. Add this key to your local SSH configuration, usually in the�.ssh directory.
$cpmykey.pem~/.ssh/mykey.pem
Ensure the .ssh directory and the key have appropriate permissions.
$chmod0700~/.ssh$chmod0600~/.ssh/mykey.pem
You can now use this key to connect to our new instance.
$ssh-i~/.ssh/[email protected]
Terminating an EC2 instanceOnce youʼve finished with an EC2 instance you can easily terminate it. Terminating an instance�destroys the instance entirely and is a destructive, permanent action that should only be performedwhen you are confident the instance, and its data, are no longer needed.�
To terminate an instance, use the node_awsterminate action.
$puppetnode_awsterminateec2-50-18-93-82.us-east-1.compute.amazonaws.comnotice:Destroyingi-df7ee898(ec2-50-18-93-82.us-east-1.compute.amazonaws.com)
Puppet Enterprise 2.8 User's Guide • Provisioning With Amazon Web Services 166/210

...notice:Destroyingi-df7ee898(ec2-50-18-93-82.us-east-1.compute.amazonaws.com)...Done
The following video demonstrates the EC2 instance termination process in more detail:</param></param></param></embed>
Getting more helpThe puppetnode_aws command has extensive in-line help documentation and a man page.
To see the available actions and command line options, run:
$puppethelpnode_awsUSAGE:puppetnode_aws<action>
ThissubcommandprovidesacommandlineinterfacetoworkwithAmazonEC2machineinstances.Thegoaloftheseactionsaretoeasilycreatenewmachines,installPuppetontothem,andtearthemdownwhenthey'renolongerrequired.
OPTIONS:--modeMODE-Therunmodetouse(user,agent,ormaster).--render-asFORMAT-Therenderingformattouse.--verbose-Whethertologverbosely.--debug-Whethertologdebuginformation.
ACTIONS:bootstrapCreateandinitializeanEC2instanceusingPuppetcreateCreateanewEC2machineinstance.fingerprintMakeabestefforttosecurelyobtaintheSSHhostkeyfingerprintlistListAWSEC2nodeinstanceslist_keynamesListavailableAWSEC2keynamesterminateTerminateanEC2machineinstance
See'puppetmannode_aws'or'manpuppet-node_aws'forfullhelp.
For more detailed help you can also view the man page .
$puppetmannode_aws
You can get help on individual actions by running:
$puppethelpnode_aws<ACTION>
For example,
Puppet Enterprise 2.8 User's Guide • Provisioning With Amazon Web Services 167/210

$puppethelpnode_awslist
Next: Sample Cloud Provisioning Workflow�
A Day in the Life of a Puppet-Powered CloudSysadminTom is a sysadmin for CloudWidget.com, a company that provides web-based application services.They use a three-tier application architecture with the following types of nodes:
All of these nodes are virtual machines running on a VMware ESX server. The nodes are all currentlybeing managed with Puppet Enterprise. Using PE, the application servers have all been assigned toa group which applies a class cloudwidget_appserv .
CloudWidget is growing rapidly and so Tom is not surprised when he checks his inbox and finds�several messages from users complaining about sluggish performance. He checks his monitoringtool and sure enough the load is too high on his application servers and performance is suffering.�Itʼs time to add a new node to the application server pool to help better distribute the load.
Tom grabs a cup of coffee and fires up his terminal. He starts by creating a new virtualized node��with puppetnode_vmwarecreate . This gives him a new node with the following characteristics:
The node has a complete OS already installedThe node includes whatever is contained in the VMware template he specified as an option of the�create action.The node does not have Puppet installed on it yet.The node is not yet configured to function as a CloudWidget application server.�
When Tom first configured Puppet, he set up his workstation with the ability to remotely sign��certificates. He did this by creating a certifcate/key pair and then modifying the CAʼs �auth.conf toallow that certificate to perform authentication tasks. (To find out more about how to do this, see��the auth.conf documentation and the HTTP API guide.)
This allows Tom to use puppetnodeinit to complete the process of getting the new node up andrunning. Puppetnodeinit is a wrapper command that will install Puppet, classify the node,and sign the certificate (�puppetcerticatesign or puppetcertsign ). “Classifying” the nodetells Puppet which configuration groups and classes should be applied to the node. In this case,�
1. A web front-end load balancer2. A pool of application servers behind the load balancer3. A database server that serves the application servers
Puppet Enterprise 2.8 User's Guide • A Day in the Life of a Puppet-Powered Cloud Sysadmin 168/210

applying the cloudwidget_appserv class configures the node with all the settings, files and��database hooks needed to create a fully configured, ready-to-run app server tailored to the�CloudWidget environment.
Note: if Tom had not done the prep work needed for remote signing of certificates he could run the�puppetnodeinstall , puppetnodeclassify and puppetcertsign commands separately.
Now Tom needs to run Puppet on the new node in order to apply the configuration. He could wait�30 minutes for Puppet to run automatically, but instead he SSHʼs into the machine and runs Puppetinteractively with puppetagent--test .
At this point we have:
A new virtual machine node with Puppet installedThe node has a signed certificate and is an authorized member of the CloudWidget deployment�Puppet has fully configured the node with all of the bits and pieces needed to go live and start�doing real work as a fully functioning CloudWidget application server.
The CloudWidget infrastructure is now scaled and running at acceptable loads. Tom leans back andtakes a sip of his coffee. Itʼs still hot.�
Next: Troubleshooting Cloud Provisioner
Finding Common ErrorsTroubleshootingMissing .fog File or Credentials
If you attempt to provision without creating a .fog file or without populating the file with��appropriate credentials youʼll see the following error:
On VMware:
$puppetnode_vmwarelistnotice:Connecting...err:Missingrequiredarguments:vsphere_username,vsphere_password,vsphere_servererr:Try'puppethelpnode_vmwarelist'forusage
On Amazon Web Services:
$puppetnode_awslisterr:Missingrequiredarguments:aws_access_key_id,
Puppet Enterprise 2.8 User's Guide • Finding Common Errors 169/210
aws_secret_access_keyerr:Try'puppethelpnode_awslist'forusage
Add the appropriate file or missing credentials to the existing file to resolve this issue.��
Note that versions of fog newer than 0.7.2 may not be fully compatible with Cloud Provisioner. Thisissue is currently being investigated.
Certificate Signing Issues�ACCESSING PUPPET MASTER ENDPOINT
For automatic signing to work, the computer running Cloud Provisioner (i.e. the CP control node)needs to be able to access the puppet masterʼs certificate_status REST endpoint. This can bedone in the masterʼs auth.conf file as follows:�
path/certificate_statusmethodsaveauthyesallow{certname}
Note that if the CP control node is on a machine other than the puppet master, it must be able toreach the puppet master over port 8140.GENERATING PER-USER CERTIFICATES
The CP control node needs to have a certificate that is signed by the puppet masterʼs CA. While itʼs�possible to use an existing certificate (if, say, the control node was or is an agent node), itʼs�preferable to generate a per-user certificate for a clearer, more explicit security policy.�
Start by running the following on the control node: puppetcertificategenerate{certname}--ca-locationremote Then sign the certificate as usual on the master (�puppetcertsign{certname} ). Lastly, back on the control node again, run:
puppetcertificatefindca--ca-locationremotepuppetcertificatefind{certname}--ca-locationremoteThisshouldletyouoperateunderthenewcertnamewhenyourunpuppetcommandswiththe--certname{certname}option.
Next: Compliance Basics
Compliance Basics and UI
Deprecation NoticePuppet Enterprise 2.8 User's Guide • Compliance Basics and UI 170/210

IMPORTANT: The compliance workflow tools are deprecated, and will be removed in Puppet�Enterprise 3.0. We are continuing to invest in flexible ways to help you predict, detect, and�control change, and our next-generation tools will not use manually maintained baselines asa foundation.
If you are using the compliance workflow tools today, you can achieve a similar workflow by��using Puppetʼs noop features to detect changes.
Alternate Workflow In Brief�
Instead of writing audit manifests: Write manifests that describe the desired baselinestate(s). This is identical to writing Puppet manifests to manage systems: you use theresource declaration syntax to describe the desired state of each significant resource.�Instead of running puppet agent in its default mode: Make it sync the significant resources�in noop mode, which can be done for the entire Puppet run, or per-resource. (See below.)This causes Puppet to detect changes and simulate changes, without automaticallyenforcing the desired state.In the console: Look for “pending” events and node status. “Pending” is how the consolerepresents detected differences and simulated changes.�
Controlling Your Manifests
As part of a solid change control process, you should be maintaining your Puppet manifestsin a version control system like Git. This allows changes to your manifests to be tracked,controlled, and audited.
Noop Features
Puppet resources or catalogs can be marked as “noop” before they are applied by the agentnodes. This means that the user describes a desired state for the resource, and Puppet willdetect and report any divergence from this desired state. Puppet will report what shouldchange to bring the resource into the desired state, but it will not make those changesautomatically.
To set an individual resource as noop, set the noop metaparameter to true .
file{'/etc/sudoers':owner=>root,group=>root,mode=>0600,noop=>true,}
This allows you to mix enforced resources and noop resources in the same Puppet run.To do an entire Puppet run in noop, set the noop setting to true . This can be done in the[agent] block of puppet.conf, or as a --noop command-line flag. If you are running�
Puppet Enterprise 2.8 User's Guide • Compliance Basics and UI 171/210

puppet agent in the default daemon mode, you would set noop in puppet.conf.
In the Console
In the console, you can locate the changes Puppet has detected by looking for “pending”nodes, reports, and events. A “pending” status means Puppet has detected a change andsimulated a fix, but has not automatically managed the resource.�
You can find a pending status in the following places:�
The node summary, which lists the number of nodes that have had changes detected:
The list of recent reports, which uses an orange asterisk to show reports with changesdetected:
The log and events tabs of any report containing pending events; these tabs will show youwhat changes were detected, and how they differ from the desired system state described�in your manifests:
Puppet Enterprise 2.8 User's Guide • Compliance Basics and UI 172/210

After Detection
When a Puppet node reports noop events, this means someone has made changes to a noopresource that has a desired state desribed. Generally, this either means an unauthorizedchange has been made, or an authorized change was made but the manifests have not yetbeen updated to contain the change. You will need to either:
Revert the system to the desired state (possibly by running puppet agent with --no-noop ).Edit your manifests to contain the new desired state, and check the changed manifestsinto version control.
Before Detection
However, your admins should generally be changing the manifests before makingauthorized changes. This serves as documentation of the changeʼs approval.
Summary
In this alternate workflow, you are essentially still maintaining baselines of your systemsʼ�desired states. However, instead of maintaining an abstract baseline by approving changes inthe console, you are maintaining concrete baselines in readable Puppet code, which can beaudited via version control records.
Puppet Enterprise 2.8 User's Guide • Compliance Basics and UI 173/210

The Compliance Workflow Cycle�PEʼs compliance workflow is designed to audit changes in systems that are managed manually. It�can also audit changes to resources being actively managed by Puppet.
A sysadmin writes manifests that define which resources to audit on which nodes.�Puppet agent retrieves and caches a catalog compiled from those manifests.Puppet inspect reads that catalog to discover which resources to audit, then submits an inspectreport.The console analyzes inspect reports, then calculates a daily report of differences between the�inspected system state and the approved baseline state. (Or, if this is the nodeʼs first inspect�report, it will create an initial baseline for it.)A sysadmin uses the consoleʼs compliance pages to approve or reject every difference, then�manually reverts any unapproved changes as necessary.The console then modifies the baseline to include any approved changes, and awaits the next�
Puppet Enterprise 2.8 User's Guide • Compliance Basics and UI 174/210

dayʼs inspect reports.
ConceptsAuditing
When using this workflow, Puppet audits the state of resources, rather than enforcing a desired�state; it does not make changes to any audited resources. Instead, changes are to be mademanually (or by some out-of-band process) and reviewed for approval after the fact.
After changes have been reviewed in the console, any approved changes will be considered thebaseline state in future reports. Rejected changes will continue to be reported as non-baselinestates until they are reverted manually on the affected machines.�
Resources and Attributes
Any native Puppet resource type can be used in the baseline compliance workflow. As with similar�compliance products, you can audit the content and metadata of files, but you can also audit user�accounts, services, cron jobs, and anything for which a custom native type can be written.
Resources are audited by attribute — you can choose one or more attributes you wish to audit, oraudit all attributes of that resource.
Compliance Manifests
The set of resources to audit is declared in standard Puppet manifests on the master and retrievedas a catalog by the agent. Instead of (or in addition to) declaring the desired state of a resource,these manifests should declare the audit metaparameter.
Inspect Reports
Each node being audited will routinely report the states of its audited resources. The documents itsends are called inspect reports and differ from standard Puppet reports.�
By default, every PE agent node sends daily inspect reports, regardless of whether it is auditing anyresources.
Baselines
Conceptually, a baseline is a blessed inspect report for a single node: it lists the approved states forevery audited resource on that node. Each node is associated with one and only one baseline andnodes cannot share baselines. However, nodes with similar baselines can be grouped forconvenience.
Baselines are maintained by the console. They change over time as administrators approve changesto audited resources. Nodes reporting for the first time are assumed to be in a compliant state� andtheir first inspect report will become the baseline against which future changes are compared.�
GroupsPuppet Enterprise 2.8 User's Guide • Compliance Basics and UI 175/210

Although nodes cannot share baselines, nodes in groups can have similar changes approved orrejected in bulk.
The Consoleʼs Compliance UIPuppetʼs compliance UI appears in the console. The compliance module adds the following newelements:
A summary and custom report control on each groupʼs pageA set of dedicated compliance pages, accessible from the “Compliance” link in the consoleʼsmain header menu
Each of these pages shows compliance information for a single day and contains a date changerdrop-down for changing the view. The most recently selected date will persist while you navigatethese pages.
New Controls on Group Pages
Puppet Enterprise 2.8 User's Guide • Compliance Basics and UI 176/210

Each group page will now have:
A compliance summary in its node information sectionA control for generating custom reports
Compliance Overview
Puppet Enterprise 2.8 User's Guide • Compliance Basics and UI 177/210

The main compliance overview page shows a single dayʼs comparison results, with aggregatesummaries for grouped nodes and individual summaries for groupless nodes.
Compliance Node Page
Individual node pages show one nodeʼs off-baseline inspection results for a single day. You can�accept or reject changes from this page.
Links to the node pages of ungrouped nodes are displayed on the main compliance overview page.To see the details of a node which is in at least one group, navigate to its group page and use the“Individual Differences” tab.�
Compliance Group Page
Puppet Enterprise 2.8 User's Guide • Compliance Basics and UI 178/210

Compliance group pages show the collected differences for a group of nodes. Two tabs are�available:
Use the “Common Differences”� tab to approve and reject aggregate changes in bulkUse the “Individual Differences”� tab to access node pages and act individually
Groups are one of the consoleʼs core constructs, and nodes can be added to or removed fromgroups in the consoleʼs main node pages.
Although the console allows groups to contain other groups, a compliance group page will only listnodes that are direct children of that group.
Next: Using the Compliance Workflow�
Using the Compliance Workflow�Puppet Enterprise 2.8 User's Guide • Using the Compliance Workflow 179/210

PrerequisitesBefore using the compliance workflow, check to make sure that the �pe_compliance Puppet classhas been assigned to all of your agent nodes.
This probably does not require any action on your part; by default, pe_compliance is assigned tothe default group, which all agent nodes are assigned to a few minutes after their first report.�
Compliance TasksPEʼs compliance workflow consists of the following routine tasks:�
Writing compliance manifestsReviewing changesComparing whole groups against a single baseline
See below for detailed explanations of these tasks.
Writing Compliance ManifestsTo tell Puppet which resources to audit, you must write a collection of modules in the Puppetlanguage and assign them to your nodes. See this manualʼs introduction to Puppet for a quicktutorial on creating a module and applying its classes.
When writing compliance classes in Puppet, you should declare the audit metaparameter for eachresource. The value of audit can be one attribute name, an array of attribute names, or all .Puppet can also actively manage attributes of an audited resource.
file{'hosts':path=>'/etc/hosts',audit=>'content',}file{'/etc/sudoers':audit=>[ensure,content,owner,group,mode,type],}user{'httpd':audit=>'all',}#Allowthisusertochangetheirpassword,buttriggeranauditeventwhentheydo:user{'admin':ensure=>present,gid=>'wheel',
IMPORTANT: The compliance workflow tools are deprecated, and have been removed in�Puppet Enterprise 3.0. See the compliance alternate workflow� for more details andsuggestions for ways to replace compliance.
Puppet Enterprise 2.8 User's Guide • Using the Compliance Workflow 180/210

groups=>['admin'],shell=>'/bin/zsh',audit=>'password',}
Reviewing ChangesTo audit changes, first scan the dayʼs node and group summaries to see which nodes have�unreviewed changes.
Once youʼve seen the overview, you can navigate to any pages with unreviewed changes. If there areany unreviewed changes on previous days, there will be a warning next to the date changer drop-down, and the drop-down will note which days arenʼt fully reviewed.
Changes can be accepted or rejected. Accepted changes will become part of the baseline for thenext dayʼs comparisons. Rejecting a change does nothing, and if an admin doesnʼt manually revertthe change, it will appear as a difference again on the next dayʼs comparisons.�
When accepting multiple daysʼ changes to the same resource, the most recently accepted changewill win.
Reviewing Individual Nodes
Changes to individual nodes are straightforward to review: navigate to the nodeʼs page, view eachchange, and use the green plus and red minus buttons when youʼve decided whether the changewas legitimate.
Each change is displayed in a table of attributes, with the previously approved (“baseline”) state onthe left and the inspected state on the right. You will also see links for viewing the original and
Puppet Enterprise 2.8 User's Guide • Using the Compliance Workflow 181/210

modified contents of any changed files, as well as a “differences” link for showing the exact���changes.
You can also accept or reject all of the dayʼs changes to this node at once with the controls belowthe nodeʼs summary. Note that rejecting all changes is “safe,” since it makes no edits to the nodeʼsbaseline; if you reject all changes without manually reverting them, youʼre effectively deferring a�decision on them to the next day.
Reviewing Groups
If youʼve collected similar nodes into groups in the console, you can greatly speed up the review ofsimilar changes with the “Common Differences” tab. You can also use the “Individual Differences”��tab to navigate to the individual nodes.SAME CHANGE ON MULTIPLE NODES
If the same change was made on several nodes in a group, you can:
Accept or reject the change for all affected nodes�View the individual node pages to approve or reject the change selectively
DIFFERENT CHANGES TO THE SAME RESOURCE
If different� changes were made to the same resource on several nodes, the changes will be groupedfor easy comparison. You can:
Accept or reject each cluster of changesView the individual node pages to approve or reject the changes selectively
CONVERGENCE OF DIFFERING BASELINES
Puppet Enterprise 2.8 User's Guide • Using the Compliance Workflow 182/210

If several nodes in a group had a different baseline value for one resource but were recently�brought into an identical state, you can click through to examine the previous baselines, and can:
Approve or reject the single new state for all affected nodes�View the individual node pages to approve or reject the changes selectively
Comparing Groups Against a Single BaselineThe console can also generate custom reports which compare an entire group to a single membernodeʼs baseline. While the day-to-day compliance views are meant for tracking changes to a nodeor group of nodes over time, custom reports are meant for tracking how far a group of nodes havedrifted away from each other.
Custom reports only examine the most recent inspection report for each group memberCustom reports do not allow you to approve or reject changes
The console will maintain one cached custom report for each group; generating a new report forthat group will erase the old one.
Custom reports are generated from the consoleʼs group pages — not from the group views in thecompliance pages. To generate a report, choose which baseline to compare against and press thegenerate button; the report will be queued and a progress indicator will display. (The indicator isstatic markup that does not automatically poll for updates; you will need to reload the pageperiodically to update status on the report.)
Once generated, custom reports can be viewed from the consoleʼs page for that group, the maincompliance overview page, and the compliance group pages.
Puppet Enterprise 2.8 User's Guide • Using the Compliance Workflow 183/210

A custom report is split into a “Common Differences” tab and an “Individual Differences” tab. This is��very similar to the layout of the group compliance review pages and can be read in the samefashion. The only difference is that all comparisons are to a single baseline instead of per-node�baselines.
Puppet Enterprise 2.8 User's Guide • Using the Compliance Workflow 184/210

Next: Compliance Tutorial
Compliance Tutorial
This brief walkthrough shows a compliance workflow auditing the state of the following resources:�
File['/etc/profile']
File['/etc/syslog.conf']
Service['crond']
Service['sshd']
User['nick']
Morning, July 14, 2011
On Thursday morning, the admin notices unreviewed changes in a group of three nodes and a pairof ungrouped nodes. She checks the group first.�
IMPORTANT: The compliance workflow tools are deprecated, and have been removed in�Puppet Enterprise 3.0. See the compliance alternate workflow� for more details andsuggestions for ways to replace compliance.
Puppet Enterprise 2.8 User's Guide • Compliance Tutorial 185/210

There, she notices that a user was completely deleted from all three nodes, and something oddhappened with a file. She immediately clicks the (-) button to reject the deletion of the user…�
…and manually SSHes to the affected nodes to re-instate the account.�
Puppet Enterprise 2.8 User's Guide • Compliance Tutorial 186/210
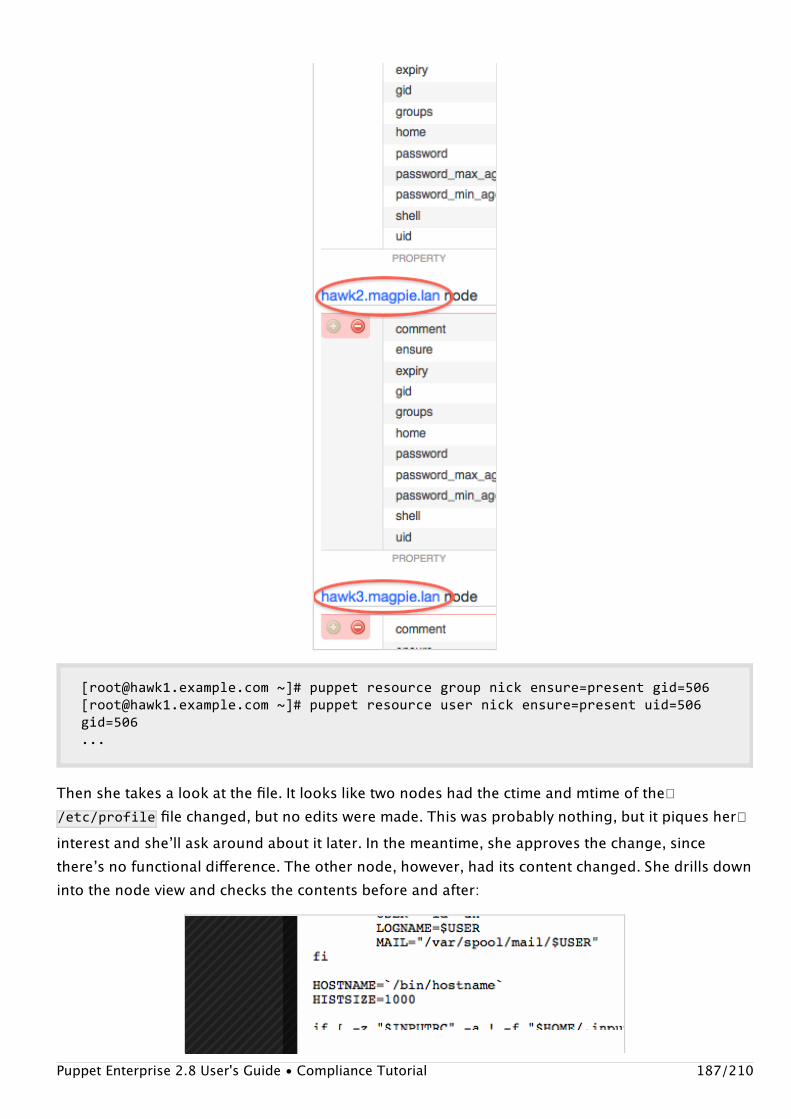
[[email protected]~]#puppetresourcegroupnickensure=presentgid=506[[email protected]~]#puppetresourceusernickensure=presentuid=506gid=506...
Then she takes a look at the file. It looks like two nodes had the ctime and mtime of the�/etc/profile file changed, but no edits were made. This was probably nothing, but it piques her�interest and sheʼll ask around about it later. In the meantime, she approves the change, sincethereʼs no functional difference. The other node, however, had its content changed. She drills down�into the node view and checks the contents before and after:
Puppet Enterprise 2.8 User's Guide • Compliance Tutorial 187/210

Thatʼs not OK. It looks like someone was trying to resolve a DNS problem or something, but thatʼsdefinitely not how she wants this machine configured. She rejects and manually reverts, and makes��a note to find out what the problem they were trying to fix was.��
Next, the admin moves on to the individual nodes.
On the osprey server, something has stopped crond, which is definitely not good, and someone has�made an edit to /etc/syslog.conf . She rejects the cron stoppage and restarts it, then checks thediff on the syslog config:��
7c7<*.info;mail.none;authpriv.none;cron.none/var/log/messages--->*.info;mail.none;authpriv.none;cron.none/etc/apache2/httpd.conf
Puppet Enterprise 2.8 User's Guide • Compliance Tutorial 188/210

That looks actively malicious. She rejects and reverts, then moves on to the eagle server to check ona hunch.
Yup: same dangerous change. She rejects and reverts, then spends the rest of her day figuring out�how the servers got vandalized.
Morning, July 15, 2011The next day, the adminʼs previous fixes to the syslog.conf and profile files on the various servers���have caused changes to the ctime and mtime of those files. She approves her own changes, then�decides that she should probably edit her manifests so that all but a select handful of file resources�use audit=>[ensure,content,owner,group,mode,type] instead of audit=>all , in orderto suppress otherwise meaningless audit events.
Itʼs an otherwise uneventful day.
Next: The pe_accounts::user Type
The pe_accounts::user TypeThis defined type is part of �pe_accounts , a pre-built Puppet module that ships with Puppet
Puppet Enterprise 2.8 User's Guide • The pe_accounts::user Type 189/210

Enterprise for use in your own manifests.
The pe_accounts::user type declares a user account. It offers several benefits over Puppetʼs core��user type:
It can create and manage the userʼs home directory as a Puppet resource.It creates and manages a primary group with the same name as the user, even on platformswhere this is not the default.It can manage a set of SSH public keys for the user.It can easily lock the userʼs account, preventing all logins.
Puppet Enterprise uses this type internally to manage some of its own system users, but alsoexposes it as a public interface.
The pe_accounts::user type can be used on all of the platforms supported by Puppet Enterprise(except Windows).
Note: In Puppet Enterprise 1.2, this type was called accounts::user . it was renamed in PE 2 toavoid namespace conflicts. If you are upgrading and wish to continue using the older name, the�upgrader can install a wrapper module to enable it. See the chapter on upgrading for more details.
Usage Example#/etc/puppetlabs/puppet/modules/site/manifests/users.ppclasssite::users{#Declaringadependency:werequireseveralsharedgroupsfromthesite::groupsclass(seebelow).Class[site::groups]->Class[site::users]
#Settingresourcedefaultsforuseraccounts:Pe_accounts::User{shell=>'/bin/zsh',}
#Declaringourpe_accounts::userresources:pe_accounts::user{'puppet':locked=>true,comment=>'PuppetServiceAccount',home=>'/var/lib/puppet',uid=>'52',gid=>'52',}pe_accounts::user{'sysop':locked=>false,comment=>'SystemOperator',uid=>'700',
NOTE: The pe_accounts module is not yet supported on Windows nodes.
Puppet Enterprise 2.8 User's Guide • The pe_accounts::user Type 190/210

gid=>'700',groups=>['admin','sudonopw'],sshkeys=>['ssh-rsaAAAAB3NzaC1yc2EAAAABIwAAAQEAwLBhQefRiXHSbVNZYKu2o8VWJjZJ/B4LqICXuxhiiNSCmL8j+5zE/VLPIMeDqNQt8LjKJVOQGZtNutW4OhsLKxdgjzlYnfTsQHp8+JMAOFE3BD1spVnGdmJ33JdMsQ/fjrVMacaHyHK0jW4pHDeUU3kRgaGHtX4TnC0A175BNTH9yJliDvddRzdKR4WtokNzqJU3VPtHaGmJfXEYSfun/wFfc46+hP6u0WcSS7jZ2WElBZ7gNO4u2Z+eJjFWS9rjQ/gNE8HHlvmN0IUuvdpKdBlJjzSiKZR+r/Bo9ujQmGY4cmvlvgmcdajM/[email protected]'],}pe_accounts::user{'villain':locked=>true,comment=>'TestLockedAccount',uid=>'701',gid=>'701',groups=>['admin','sudonopw'],sshkeys=>['ssh-rsaAAAAB3NzaC1yc2EAAAABIwAAAQEAwLBhQefRiXHSbVNZYKu2o8VWJjZJ/B4LqICXuxhiiNSCmL8j+5zE/VLPIMeDqNQt8LjKJVOQGZtNutW4OhsLKxdgjzlYnfTsQHp8+JMAOFE3BD1spVnGdmJ33JdMsQ/fjrVMacaHyHK0jW4pHDeUU3kRgaGHtX4TnC0A175BNTH9yJliDvddRzdKR4WtokNzqJU3VPtHaGmJfXEYSfun/wFfc46+hP6u0WcSS7jZ2WElBZ7gNO4u2Z+eJjFWS9rjQ/gNE8HHlvmN0IUuvdpKdBlJjzSiKZR+r/Bo9ujQmGY4cmvlvgmcdajM/X1TqP6p3OuouAk5QSPUlDRV91oEHw==villain+moduledevkey@puppetlabs.com'],}pe_accounts::user{'jeff':comment=>'JeffMcCune',groups=>['admin','sudonopw'],uid=>'1112',gid=>'1112',sshkeys=>['ssh-rsaAAAAB3NzaC1yc2EAAAABIwAAAQEAwLBhQefRiXHSbVNZYKu2o8VWJjZJ/B4LqICXuxhiiNSCmL8j+5zE/VLPIMeDqNQt8LjKJVOQGZtNutW4OhsLKxdgjzlYnfTsQHp8+JMAOFE3BD1spVnGdmJ33JdMsQ/fjrVMacaHyHK0jW4pHDeUU3kRgaGHtX4TnC0A175BNTH9yJliDvddRzdKR4WtokNzqJU3VPtHaGmJfXEYSfun/wFfc46+hP6u0WcSS7jZ2WElBZ7gNO4u2Z+eJjFWS9rjQ/gNE8HHlvmN0IUuvdpKdBlJjzSiKZR+r/Bo9ujQmGY4cmvlvgmcdajM/[email protected]','ssh-rsaAAAAB3NzaC1yc2EAAAABIwAAAQEAwLBhQefRiXHSbVNZYKu2o8VWJjZJ/B4LqICXuxhiiNSCmL8j+5zE/VLPIMeDqNQt8LjKJVOQGZtNutW4OhsLKxdgjzlYnfTsQHp8+JMAOFE3BD1spVnGdmJ33JdMsQ/fjrVMacaHyHK0jW4pHDeUU3kRgaGHtX4TnC0A175BNTH9yJliDvddRzdKR4WtokNzqJU3VPtHaGmJfXEYSfun/wFfc46+hP6u0WcSS7jZ2WElBZ7gNO4u2Z+eJjFWS9rjQ/gNE8HHlvmN0IUuvdpKdBlJjzSiKZR+r/Bo9ujQmGY4cmvlvgmcdajM/[email protected]','ssh-rsaAAAAB3NzaC1yc2EAAAABIwAAAQEAwLBhQefRiXHSbVNZYKu2o8VWJjZJ/B4LqICXuxhiiNSCmL8j+5zE/VLPIMeDqNQt8LjKJVOQGZtNutW4OhsLKxdgjzlYnfTsQHp8+JMAOFE3BD1spVnGdmJ33JdMsQ/fjrVMacaHyHK0jW4pHDeUU3kRgaGHtX4TnC0A175BNTH9yJliDvddRzdKR4WtokNzqJU3VPtHaGmJfXEYSfun/wFfc46+hP6u0WcSS7jZ2WElBZ7gNO4u2Z+eJjFWS9rjQ/gNE8HHlvmN0IUuvdpKdBlJjzSiKZR+r/Bo9ujQmGY4cmvlvgmcdajM/[email protected]','ssh-rsaAAAAB3NzaC1yc2EAAAABIwAAAQEAwLBhQefRiXHSbVNZYKu2o8VWJjZJ/B4LqICXuxhiiNSCmL8j+5zE/VLPIMeDqNQt8LjKJVOQGZtNutW4OhsLKxdgjzlYnfTsQHp8+JMAOFE3BD1spVnGdmJ33JdMsQ/fjrVMacaHyHK0jW4pHDeUU3kRgaGHtX4TnC0A175BNTH9yJliDvddRzdKR4WtokNzqJU3VPtHaGmJfXEYSfun/wFfc46+hP6u0WcSS7jZ2WElBZ7gNO4u2Z+eJjFWS9rjQ/gNE8HHlvmN0IUuvdpKdBlJjzSiKZR+r/Bo9ujQmGY4cmvlvgmcdajM/[email protected]'],}pe_accounts::user{'dan':comment=>'DanBode',uid=>'1109',gid=>'1109',sshkeys=>['ssh-rsaAAAAB3NzaC1yc2EAAAABIwAAAQEAwLBhQefRiXHSbVNZYKu2o8VWJjZJ/B4LqICXuxhiiNSCmL8j+5zE/VLPIMeDqNQt8LjKJVOQGZtNutW4OhsLKxdgjzlYnfTsQHp8+JMAOFE3BD1spVnGdmJ33JdMsQ/fjrVMacaHyHK0jW4pHDeUU3kRgaGHtX4TnC0A175BNTH9yJliDvddRzdKR4WtokNzqJU3VPtHaGmJfXEYSfun/wFfc46+hP6u0WcSS7jZ2WElBZ7gNO4u2Z+eJjFWS9rjQ/gNE8HHlvmN0IUuvdpKdBlJjzSiKZR+r/Bo9ujQmGY4cmvlvgmcdajM/[email protected]'],}pe_accounts::user{'nigel':comment=>'NigelKersten',uid=>'2001',gid=>'2001',sshkeys=>['ssh-rsaAAAAB3NzaC1yc2EAAAABIwAAAQEAwLBhQefRiXHSbVNZYKu2o8VWJjZJ/B4LqICXuxhiiNSCmL8j+5zE/VLPIMeDqNQt8LjKJVOQGZtNutW4OhsLKxdgjzlYnfTsQHp8+JMAOFE3BD1spVnGdmJ33JdMsQ/fjrVMacaHyHK0jW4pHDeUU3kRgaGHtX4TnC0A175BNTH9yJliDvddRzdKR4WtokNzqJU3VPtHaGmJfXEYSfun/wFfc46+hP6u0WcSS7jZ2WElBZ7gNO4u2Z+eJjFWS9rjQ/gNE8HHlvmN0IUuvdpKdBlJjzSiKZR+r/Bo9ujQmGY4cmvlvgmcdajM/[email protected]'],}}
#/etc/puppetlabs/puppet/modules/site/manifests/groups.ppclasssite::groups{#Sharedgroups:
Puppet Enterprise 2.8 User's Guide • The pe_accounts::user Type 191/210

Group{ensure=>present,}group{'developer':gid=>'3003',}group{'sudonopw':gid=>'3002',}group{'sudo':gid=>'3001',}group{'admin':gid=>'3000',}}
ParametersMany of the typeʼs parameters echo those of the standard user type.
name
The userʼs name. While limitations differ by operating system, it is generally a good idea to restrict�user names to 8 characters, beginning with a letter. Defaults to the resourceʼs title.
ensure
Specifies whether the user and its primary group should exist. �Valid values are present andabsent . Defaults to present . Note that when a user is created, a group with the same name as theuser is also created.
shell
The userʼs login shell. The shell must exist and be executable. Defaults to /bin/bash .
comment
A description of the user. Generally a userʼs full name. Defaults to the userʼs name .
home
The home directory of the user. Defaults to /home/<user'sname>
uid
The userʼs uid number. Must be specified numerically; defaults to being automatically determined�(undef ).
gid
Puppet Enterprise 2.8 User's Guide • The pe_accounts::user Type 192/210
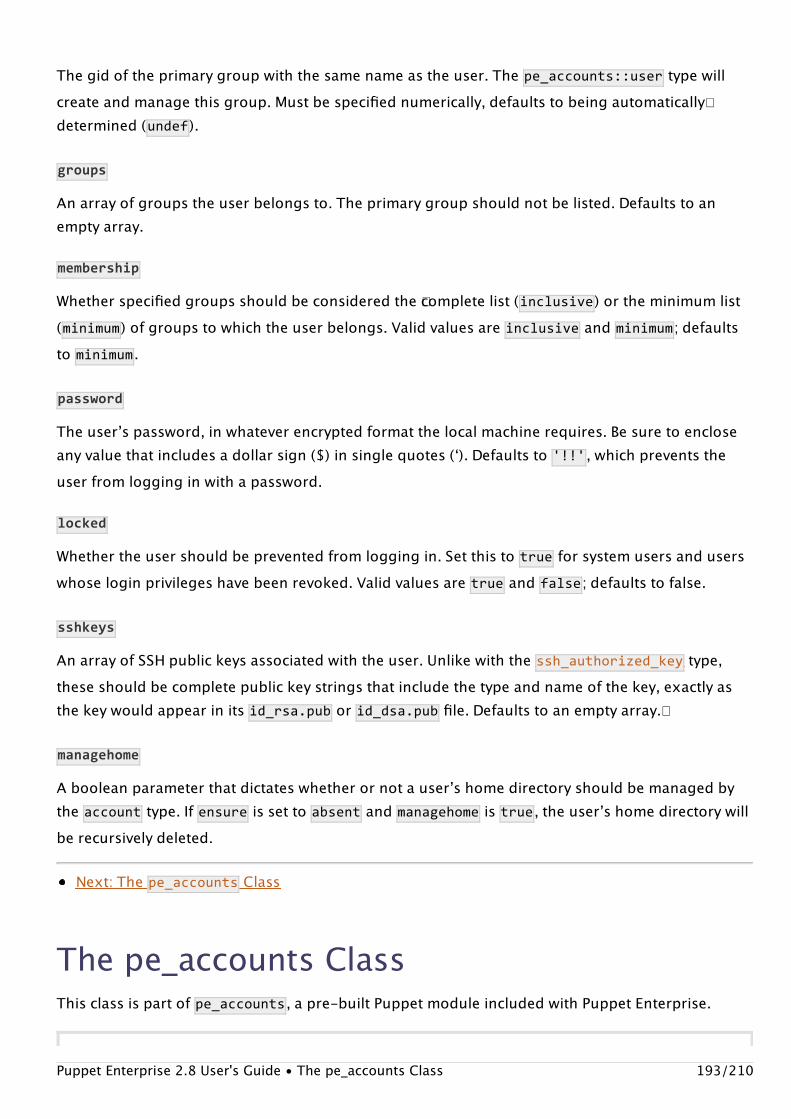
The gid of the primary group with the same name as the user. The pe_accounts::user type willcreate and manage this group. Must be specified numerically, defaults to being automatically�determined (undef ).
groups
An array of groups the user belongs to. The primary group should not be listed. Defaults to anempty array.
membership
Whether specified groups should be considered the �complete list (inclusive ) or the minimum list(minimum ) of groups to which the user belongs. Valid values are inclusive and minimum ; defaultsto minimum .
password
The userʼs password, in whatever encrypted format the local machine requires. Be sure to encloseany value that includes a dollar sign ($) in single quotes (ʻ). Defaults to '!!' , which prevents theuser from logging in with a password.
locked
Whether the user should be prevented from logging in. Set this to true for system users and userswhose login privileges have been revoked. Valid values are true and false ; defaults to false.
sshkeys
An array of SSH public keys associated with the user. Unlike with the ssh_authorized_key type,these should be complete public key strings that include the type and name of the key, exactly asthe key would appear in its id_rsa.pub or id_dsa.pub file. Defaults to an empty array.�
managehome
A boolean parameter that dictates whether or not a userʼs home directory should be managed bythe account type. If ensure is set to absent and managehome is true , the userʼs home directory willbe recursively deleted.
Next: The pe_accounts Class
The pe_accounts ClassThis class is part of pe_accounts , a pre-built Puppet module included with Puppet Enterprise.
Puppet Enterprise 2.8 User's Guide • The pe_accounts Class 193/210

The pe_accounts class can do any or all of the following:
Create and manage a set of pe_accounts::user resourcesCreate and manage a set of shared group resourcesMaintain a pair of rules in the sudoers file to grant privileges to the �sudo and sudonopw groups
This class is designed for cases where your account data is maintained separately from your Puppetmanifests. This usually means one of the following is true:
The data is being read from a non-Puppet directory service or CMDB, probably with a customfunction.The data is being maintained manually by a user who does not write Puppet code.The data is being generated by an out-of-band process.
If your siteʼs account data will be maintained manually by a sysadmin able to write Puppet code, itwill make more sense to maintain it as a normal set of pe_accounts::user and group resources,although you may still wish to use the pe_accounts class to maintain sudoers rules.
To manage users and groups with the pe_accounts class, you must prepare a data store andconfigure the class for the data store when you declare it.�
Note: In Puppet Enterprise 1.2, this class was called accounts ; it was renamed in PE 2 to avoidnamespace conflicts. If you are upgrading and wish to continue using the older name, the upgrader�can install a wrapper module to enable it. See the chapter on upgrading for more details.
Note: In Puppet Enterprise 2.0 and higher, this class is assigned to the consoleʼs default group withno parameters, which will prevent it from being redeclared with any configuration. To use the class,�you must:
Unassign it from the default group in the consoleCreate a wrapper module that declares this class with the necessary parametersRe-assign the wrapper class to whichever nodes need it
Usage ExampleTo use YAML files as a data store:�
class{'pe_accounts':data_store=>yaml,}
NOTE: pe_accounts is not yet supported on Windows nodes.
Puppet Enterprise 2.8 User's Guide • The pe_accounts Class 194/210

To use a Puppet class as a data store (and manage sudoers rules):
class{'pe_accounts':data_store=>namespace,data_namespace=>'site::pe_accounts::data',manage_sudoers=>true,}
To manage sudoers rules without managing any users or groups:
class{'pe_accounts':manage_users=>false,manage_groups=>false,manage_sudoers=>true,}
Data StoresAccount data can come from one of two sources: a Puppet class that declares three variables, or aset of three YAML files� stored in /etc/puppetlabs/puppet/data .
Using a Puppet Class as a Data Store
This option is most useful if you are able to generate or import your user data with a customfunction, which may be querying from an LDAP directory or some other data source.
The Puppet class containing the data must have a name ending in ::data . (We recommendsite::pe_accounts::data .) This class must declare the following variables:
$users_hash should be a hash in which each key is the title of a pe_accounts::user resourceand each value is a hash containing that resourceʼs attributes and values.$groups_hash should be a hash in which each key is the title of a group and each value is a hashcontaining that resourceʼs attributes and values.
See below for examples of the data formats used in these variables.
When declaring the pe_accounts class to use data in a Puppet class, use the following attributes:
data_store=>namespace,data_namespace=>{nameofclass},
Using YAML Files as a Data Store
This option is most useful if your user data is being generated by an out-of-band process or isbeing maintained by a user who does not write Puppet manifests.
Puppet Enterprise 2.8 User's Guide • The pe_accounts Class 195/210

When storing data in YAML, the following valid YAML files must exist in�/etc/puppetlabs/puppet/data :
pe_accounts_users_hash.yaml , which should contain an anonymous hash in which each key isthe title of a pe_accounts::user resource and each value is a hash containing that resourceʼsattributes and values.pe_accounts_groups_hash.yaml , which should contain an anonymous hash in which each key isthe title of a group and each value is a hash containing that resourceʼs attributes and values.
See below for examples of the data formats used in these variables.
When declaring the pe_accounts class to use data in YAML files, use the following attribute:�
data_store=>yaml,
Data Formats
This class uses three hashes of data to construct the pe_accounts::user and group resources itmanages.THE USERS HASH
The users hash represents a set of pe_accounts::user resources. Each key should be the title of ape_accounts::user resource, and each value should be another hash containing that resourceʼsattributes and values.PUPPET EXAMPLE
$users_hash={sysop=>{locked=>false,comment=>'SystemOperator',uid=>'700',gid=>'700',groups=>['admin','sudonopw'],sshkeys=>['ssh-rsaAAAAB3NzaC1yc2EAAAABIwAAAQEAwLBhQefRiXHSbVNZYKu2o8VWJjZJ/B4LqICXuxhiiNSCmL8j+5zE/VLPIMeDqNQt8LjKJVOQGZtNutW4OhsLKxdgjzlYnfTsQHp8+JMAOFE3BD1spVnGdmJ33JdMsQ/fjrVMacaHyHK0jW4pHDeUU3kRgaGHtX4TnC0A175BNTH9yJliDvddRzdKR4WtokNzqJU3VPtHaGmJfXEYSfun/wFfc46+hP6u0WcSS7jZ2WElBZ7gNO4u2Z+eJjFWS9rjQ/gNE8HHlvmN0IUuvdpKdBlJjzSiKZR+r/Bo9ujQmGY4cmvlvgmcdajM/[email protected]'],},villain=>{locked=>true,comment=>'TestLockedAccount',uid=>'701',gid=>'701',groups=>['admin','sudonopw'],sshkeys=>['ssh-rsaAAAAB3NzaC1yc2EAAAABIwAAAQEAwLBhQefRiXHSbVNZYKu2o8VWJjZJ/B4LqICXuxhiiNSCmL8j+5zE/VLPIMeDqNQt8LjKJVOQGZtNutW4OhsLKxdgjzlYnfTsQHp8+JMAOFE3BD1spVnGdmJ33JdMsQ/fjrVMacaHyHK0jW4pHDeUU3kRgaGHtX4TnC0A175BNTH9yJliDvddRzdKR4WtokNzqJU3VPtHaGmJfXEYSfun/wFfc46+hP6u0WcSS7jZ2WElBZ7gNO4u2Z+eJjFWS9rjQ/gNE8HHlvmN0IUuvdpKdBlJjzSiKZR+r/Bo9ujQmGY4cmvlvgmcdajM/X1TqP6p3OuouAk5QSPUlDRV91oEHw==villain+moduledevkey@puppetlabs.com'],},}
Puppet Enterprise 2.8 User's Guide • The pe_accounts Class 196/210

YAML EXAMPLE
---sysop:locked:falsecomment:SystemOperatoruid:'700'gid:'700'groups:-admin-sudonopwsshkeys:-ssh-rsaAAAAB3NzaC1yc2EAAAABIwAAAQEAwLBhQefRiXHSbVNZYKu2o8VWJjZJ/B4LqICXuxhiiNSCmL8j+5zE/VLPIMeDqNQt8LjKJVOQGZtNutW4OhsLKxdgjzlYnfTsQHp8+JMAOFE3BD1spVnGdmJ33JdMsQ/fjrVMacaHyHK0jW4pHDeUU3kRgaGHtX4TnC0A175BNTH9yJliDvddRzdKR4WtokNzqJU3VPtHaGmJfXEYSfun/wFfc46+hP6u0WcSS7jZ2WElBZ7gNO4u2Z+eJjFWS9rjQ/gNE8HHlvmN0IUuvdpKdBlJjzSiKZR+r/Bo9ujQmGY4cmvlvgmcdajM/X1TqP6p3OuouAk5QSPUlDRV91oEHw==sysop+moduledevkey@puppetlabs.comvillain:locked:truecomment:TestLockedAccountuid:'701'gid:'701'groups:-admin-sudonopwsshkeys:-ssh-rsaAAAAB3NzaC1yc2EAAAABIwAAAQEAwLBhQefRiXHSbVNZYKu2o8VWJjZJ/B4LqICXuxhiiNSCmL8j+5zE/VLPIMeDqNQt8LjKJVOQGZtNutW4OhsLKxdgjzlYnfTsQHp8+JMAOFE3BD1spVnGdmJ33JdMsQ/fjrVMacaHyHK0jW4pHDeUU3kRgaGHtX4TnC0A175BNTH9yJliDvddRzdKR4WtokNzqJU3VPtHaGmJfXEYSfun/wFfc46+hP6u0WcSS7jZ2WElBZ7gNO4u2Z+eJjFWS9rjQ/gNE8HHlvmN0IUuvdpKdBlJjzSiKZR+r/Bo9ujQmGY4cmvlvgmcdajM/X1TqP6p3OuouAk5QSPUlDRV91oEHw==villain+moduledevkey@puppetlabs.com
THE GROUPS HASH
The groups hash represents a set of shared group resources. Each key should be the title of agroup resource, and each value should be another hash containing that resourceʼs attributes andvalues.PUPPET EXAMPLE
$groups_hash={developer=>{gid=>3003,ensure=>present,},sudonopw=>{gid=>3002,ensure=>present,},sudo=>{gid=>3001,ensure=>present,},admin=>{gid=>3000,ensure=>present,},
Puppet Enterprise 2.8 User's Guide • The pe_accounts Class 197/210
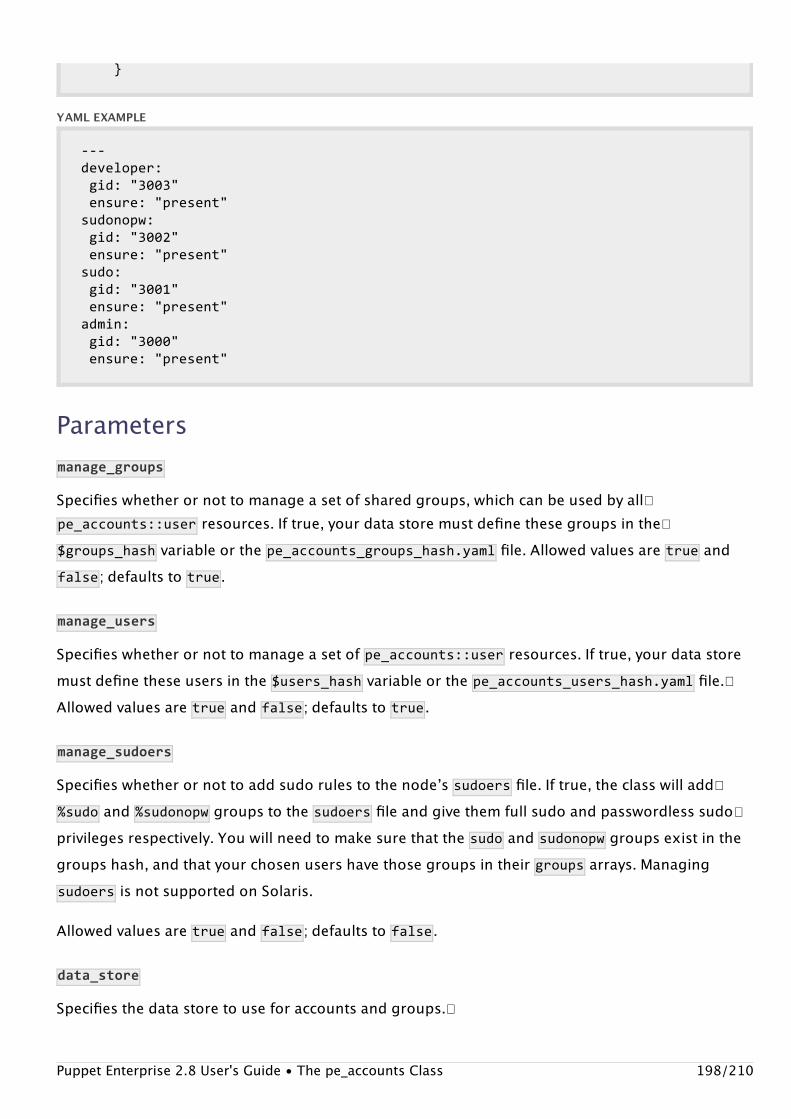
}
YAML EXAMPLE
---developer:gid:"3003"ensure:"present"sudonopw:gid:"3002"ensure:"present"sudo:gid:"3001"ensure:"present"admin:gid:"3000"ensure:"present"
Parametersmanage_groups
Specifies whether or not to manage a set of shared groups, which can be used by all�pe_accounts::user resources. If true, your data store must define these groups in the�$groups_hash variable or the pe_accounts_groups_hash.yaml file. Allowed values are �true andfalse ; defaults to true .
manage_users
Specifies whether or not to manage a set of �pe_accounts::user resources. If true, your data storemust define these users in the �$users_hash variable or the pe_accounts_users_hash.yaml file.�Allowed values are true and false ; defaults to true .
manage_sudoers
Specifies whether or not to add sudo rules to the nodeʼs �sudoers file. If true, the class will add�%sudo and %sudonopw groups to the sudoers file and give them full sudo and passwordless sudo�privileges respectively. You will need to make sure that the sudo and sudonopw groups exist in thegroups hash, and that your chosen users have those groups in their groups arrays. Managingsudoers is not supported on Solaris.
Allowed values are true and false ; defaults to false .
data_store
Specifies the data store to use for accounts and groups.�
Puppet Enterprise 2.8 User's Guide • The pe_accounts Class 198/210

When set to namespace , data will be read from the puppet class specified in the �data_namespaceparameter. When set to yaml , data will be read from specially-named YAML files in the�/etc/puppetlabs/puppet/data directory. (If you have changed your $confdir , it will look in$confdir/data .) Example YAML files are provided in the �ext/data/ directory of this module.
Allowed values are yaml and namespace ; defaults to namespace .
data_namespace
Specifies the Puppet namespace from which to read data. This must be the name of a Puppet class,�and must end with ::data (we recommend using site::pe_accounts::data ); the class willautomatically be declared by the pe_accounts class. The class cannot have any parameters, andmust declare variables named:
$users_hash
$groups_hash
See the pe_accounts::data class included in this module (in manifests/data.pp ) for an example;see the data formats section for information on each hashʼs data structure.
Defaults to pe_accounts::data .
sudoers_path
Specifies the path to the �sudoers file on this system. Defaults to �/etc/sudoers .
Next: Troubleshooting Common Problems and Solutions
Troubleshooting Common ErrorsThe Installer is FailingHere are the main problems that can cause an install to blow up.
Is DNS Wrong?
If name resolution at your site isnʼt quite behaving right, PEʼs installer can go haywire.
Puppet agent has to be able to reach the puppet master server at one of its valid DNS names.(Specifically, the name you identified as the masterʼs hostname during the installer interview.)��The puppet master also has to be able to reach itself at the puppet master hostname you choseduring installation.If youʼve split the master and console roles onto different servers, they have to be able to talk to�each other as well.
Puppet Enterprise 2.8 User's Guide • Troubleshooting Common Errors 199/210

Are the Security Settings Wrong?
The installer fails in a similar way when the systemʼs firewall or security group is restricting the�ports Puppet uses.
Puppet communicates on ports 8140, 61613, and 443. If you are installing the puppet masterand the console on the same server, it must accept inbound traffic on all three ports. If youʼve��split the two roles, the master must accept inbound traffic on 8140 and 61613 and the console��must accept inbound traffic on 8140 and 443.��If your puppet master has multiple network interfaces, make sure it is allowing traffic via the IP��address that its valid DNS names resolve to, not just via an internal interface.
Did You Try to Install the Console Before the Puppet Master?
If you are installing the console and the puppet master on separate servers and tried to install theconsole first, the installer may fail.�
How Do I Recover From a Failed Install?
First, fix any configuration problem that may have caused the install to fail. See above for a list of��the most common errors.
Next, run the uninstaller script. See the uninstallation instructions in this guide for full details.
After you have run the uninstaller, you can safely run the installer again.
Agent Nodes Canʼt Retrieve Their Configurations�Is the Puppet Master Reachable From the Agents?
Although this would probably have caused a problem during installation, itʼs worth checking it first.�You can check whether the master is reachable and active by trying:
$telnet<puppetmaster'shostname>8140
If the puppet master is alive and reachable, youʼll get something like:
Trying172.16.158.132...Connectedtoscreech.example.com.Escapecharacteris'^]'.
Otherwise, it will return something like “name or service not known.”
To fix this, make sure the puppet master server is reachable at the DNS name your agents know it�by and make sure that the pe-httpd service is running.
Can the Puppet Master Reach the Console?
Puppet Enterprise 2.8 User's Guide • Troubleshooting Common Errors 200/210

The puppet master depends on the console for the names of the classes an agent node should get.If it canʼt reach the console, it canʼt compile configurations for nodes.�
Check the puppet agent logs on your nodes, or run puppetagent--test on one of them; if yousee something like err:Couldnotretrievecatalogfromremoteserver:Error400onSERVER:Couldnotfindnode'agent01.example.com';cannotcompile , the master may befailing to find the console.�
To fix this, make sure that the console is alive by �navigating to its web interface. If it canʼt bereached, make sure DNS is set up correctly for the console server and ensure that the pe-httpdservice on it is running.
If the console is alive and reachable from the master but the master canʼt retrieve node info from it,the master may be configured with the wrong console hostname. Youʼll need to:�
Edit the reporturl setting in the masterʼs /etc/puppetlabs/puppet/puppet.conf file to point�to the correct host.Edit the ENC_BASE_URL variable in the masterʼs /etc/puppetlabs/puppet-dashboard/external_node file to point to the correct host.�
Do Your Agents Have Signed Certificates?�
Check the puppet agent logs on your nodes and look for something like the following:
warning:peercertificatewon'tbeverifiedinthisSSLsession
If you see this, it means the agent has submitted a certificate signing request which hasnʼt yet been�signed. Run puppetcertlist on the puppet master to see a list of pending requests, then runpuppetcertsign<NODENAME> to sign a given nodeʼs certificate. The node should successfully�retrieve and apply its configuration the next time it runs.�
Do Agents Trust the Masterʼs Certificate?�
Check the puppet agent logs on your nodes and look for something like the following:
err:Couldnotretrievecatalogfromremoteserver:SSL_connectreturned=1errno=0state=SSLv3readservercertificateB:certificateverifyfailed.Thisisoftenbecausethetimeisoutofsyncontheserverorclient
This could be one of several things.ARE AGENTS CONTACTING THE MASTER AT A VALID DNS NAME?
When you installed the puppet master role, you approved a list of valid DNS names to be included inthe masterʼs certificate. �Agents will ONLY trust the master if they contact it at one of THESEPuppet Enterprise 2.8 User's Guide • Troubleshooting Common Errors 201/210

the masterʼs certificate. �Agents will ONLY trust the master if they contact it at one of THESEhostnames.
To see the hostname agents are using to contact the master, run puppetagent--configprintserver . If this does not return one of the valid DNS names you chose during installation of themaster, edit the server setting in the agentsʼ /etc/puppetlabs/puppet/puppet.conf files to point�to a valid DNS name.
If you need to reset your puppet masterʼs valid DNS names, run the following:
$/etc/init.d/pe-httpdstop$puppetcertclean<puppetmaster'scertname>$puppetcertgenerate<puppetmaster'scertname>--dns_alt_names=<comma-separatedlistofDNSnames>$/etc/init.d/pe-httpdstart
IS TIME IN SYNC ON YOUR NODES?
…and was time in sync when your certificates were created?�
Compare the output of date on your nodes. Then, run the following command on the puppetmaster to check the validity dates of a given certificate:�
$opensslx509-text-noout-in$(puppetmaster--configprintssldir)/certs/<NODENAME>.pem
If time is out of sync, get it in sync. Keep in mind that NTP can behave unreliably on virtualmachines.If you have any certificates that arenʼt valid until the future:�
Delete the certificate on the puppet master with �puppetcertclean<NODENAME> .Delete the SSL directory on the offending agent with �rm-rf$(puppetagent--configprintssldir) .Run puppetagent--test on that agent to generate a new certificate request, then sign that�request on the master with puppetcertsign<NODENAME> .
DID YOU PREVIOUSLY HAVE AN UNRELATED NODE WITH THE SAME CERTNAME?
If a node re-uses an old nodeʼs certname and the master retains the previous nodeʼs certificate, the�new node will be unable to request a new certificate.�
Run the following on the master:
$puppetcertclean<NODENAME>
Then, run the following on the agent node:
Puppet Enterprise 2.8 User's Guide • Troubleshooting Common Errors 202/210
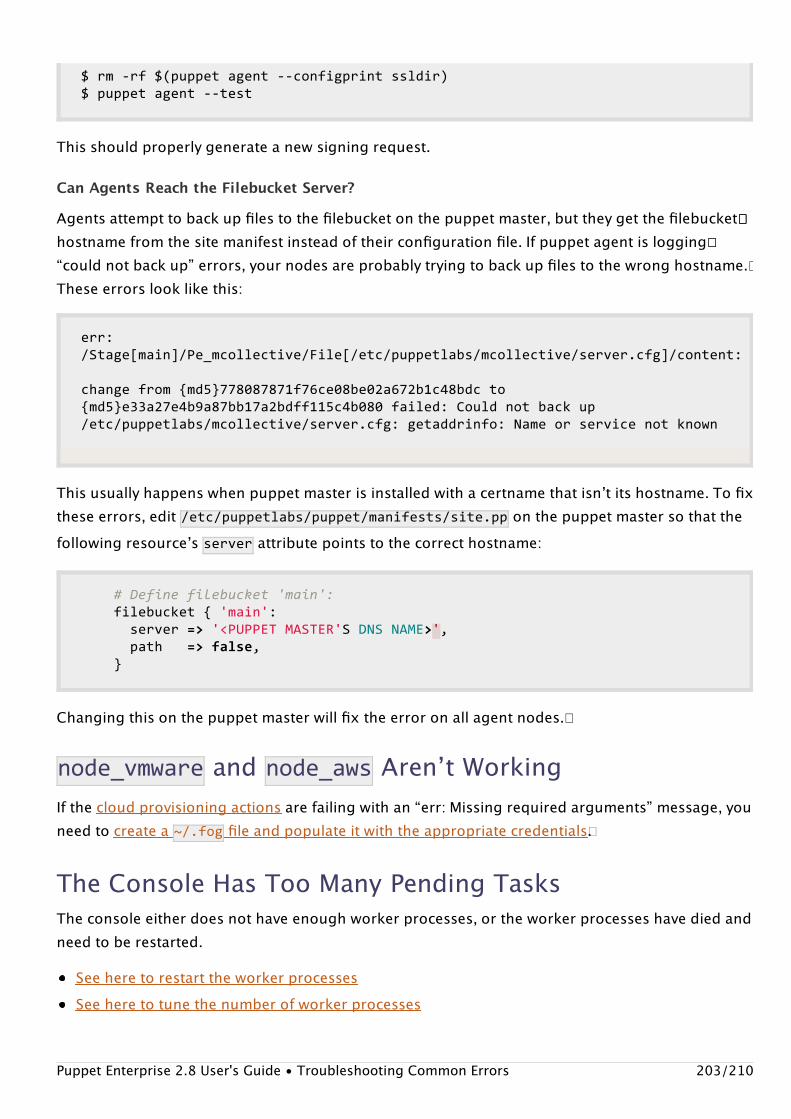
$rm-rf$(puppetagent--configprintssldir)$puppetagent--test
This should properly generate a new signing request.
Can Agents Reach the Filebucket Server?
Agents attempt to back up files to the filebucket on the puppet master, but they get the filebucket���hostname from the site manifest instead of their configuration file. If puppet agent is logging��“could not back up” errors, your nodes are probably trying to back up files to the wrong hostname.�These errors look like this:
err:/Stage[main]/Pe_mcollective/File[/etc/puppetlabs/mcollective/server.cfg]/content:
changefrom{md5}778087871f76ce08be02a672b1c48bdcto{md5}e33a27e4b9a87bb17a2bdff115c4b080failed:Couldnotbackup/etc/puppetlabs/mcollective/server.cfg:getaddrinfo:Nameorservicenotknown
This usually happens when puppet master is installed with a certname that isnʼt its hostname. To fix�these errors, edit /etc/puppetlabs/puppet/manifests/site.pp on the puppet master so that thefollowing resourceʼs server attribute points to the correct hostname:
#Definefilebucket'main':filebucket{'main':server=>'<PUPPETMASTER'SDNSNAME>',path=>false,}
Changing this on the puppet master will fix the error on all agent nodes.�
node_vmware and node_aws Arenʼt WorkingIf the cloud provisioning actions are failing with an “err: Missing required arguments” message, youneed to create a ~/.fog file and populate it with the appropriate credentials�.
The Console Has Too Many Pending TasksThe console either does not have enough worker processes, or the worker processes have died andneed to be restarted.
See here to restart the worker processesSee here to tune the number of worker processes
Puppet Enterprise 2.8 User's Guide • Troubleshooting Common Errors 203/210

Console Account Confirmation Emails Have Incorrect�LinksThis can happen if the consoleʼs authentication layer thinks it lives on a hostname that isnʼtaccessible to the rest of the world. The authentication systemʼs hostname is automatically detectedduring installation, and the installer can sometimes choose an internal-only hostname.
To fix this:�
InnoDB is Taking Up Too Much Disk SpaceOver time, the innodb database can get quite hefty, especially in larger deployments with manynodes. In some cases it can get large enough to consume all the space in var , which makes badthings happen. When this happens, you can follow the steps below to slim it back down.
1. Open the /etc/puppetlabs/console_auth/cas_client_config.yml file for editing. Locate the�cas_host line, which is likely commented-out:
authentication:
##UsethisconfigurationoptioniftheCASserverisonahostdifferent##fromtheconsole-authserver.#cas_host:console.example.com:443
Change its value to contain the public hostname of the console server, including the correct port.2. Open the /etc/puppetlabs/console_auth/config.yml file for editing. Locate the�
console_hostname line:
authentication:console_hostname:console.example.com
Change its value if necessary. If you are serving the console on a port other than 443, be sure toadd the port. (For example: console.example.com:3000 )
1. Move your existing data to a backup file by running: �#mysqldump-p--databasesconsoleconsole_authconsole_inventory_service>/path/to/backup.sql
2. Stop the MySQL service3. Remove just the PE-specific database files. If you have no other databases, you can run ��#cd
/var/lib/mysql#rm-rf./ib* . Warning: this will remove everything, including any dbʼs youmay have added.
4. Restart the MySQL service.5. Create new, empty databases by running this rake task: #/opt/puppet/bin/rake-fPuppet Enterprise 2.8 User's Guide • Troubleshooting Common Errors 204/210

Troubleshooting Issues on WindowsRefer to the Windows Troubleshooting page for tips and advice to help you resolve common issueswhen running PE on Windows.
Next: Appendix
User's Guide AppendixThis page contains additional miscellaneous information about Puppet Enterprise 2.8.
Puppet TerminologyFor help with Puppet-specific terms and language, visit �the glossary
For a complete guide to the Puppet language, visit the reference manual
Release NotesPuppet 2.8.2 (6/18/2013)SECURITY FIX
CVE-2013-3567 Unauthenticated Remote Code Execution Vulnerability.
A critical vulnerability was found in puppet wherein it was possible for the puppet master to takeYAML from an untrusted client via the REST API. This YAML could be deserialized to construct anobject containing arbitrary code.
PE 2.8.1 (4/17/2013)OPEN-SOURCE AGENTS BUG FIX
A bug in 2.8.0 prevented the pe_mcollective module from working correctly when running open-source agents with a PE master. This has been fixed. For more information, see �issue 19230.STOMP/MCOLLECTIVE BUG FIX
A bug in 2.8.0 related to the Stomp component upgrade prevented Live Management andMCollective filters from functioning. A �hotfix� was released and the issue has been fixed in PE 2.8.1.�SPACES NOW ALLOWED IN PASSWORDS
Previously, spaces could not be used in console passwords. This has been changed and spaces are
/opt/puppet/share/puppet-dashboard/RakefileRAILS_ENV=production
/opt/puppet/bin/rakedb:reset .6. Repopulate the databases by importing the data from the backup you created in step 1 by
running: #mysql-p</path/to/backup.sql .
Puppet Enterprise 2.8 User's Guide • User's Guide Appendix 205/210

now accepted.RED HAT INSTALLATION ON AMAZON AMI BUG FIX
A bug in 2.8.0 caused the installer to reject Amazon Linux AMIs when the redhat-lsb package isinstalled. This issue has been fixed in 2.8.1. For details see �issue 19963.
PE 2.8.0 (3/26/2013)AIX SUPPORT
2.8.0 adds support for the AIX operating system. Only puppet agents are supported; you cannotrun a master, console, or other component on an AIX node. Support for three AIX packageproviders, NIM, RPM and BFF, is also added. Note that while AIX supports two modes for packageinstallation, “install” (for test runs) and “committed” (for actual installation), the PE AIXimplementation only supports “committed” mode.UPDATED MODULES
The following modules have been updated to newer versions as indicated:
Puppet 2.7.19 updated to 2.7.21. Provides performance improvements and bug fixes.�Facter 1.6.10 updated to 1.6.17. Provides bug fixes.�Hiera 0.3.0 updated to 1.1.2. Provides support for merging arrays and hashes across back-ends,bug fixes.�Hiera-Puppet 0.3.0 updated to 1.0.0. Provides bug fixes.�Stomp 1.1.9 updated to 1.2.3. Provides performance improvements and bug fixes.�
SECURITY FIX
CVE-2013-2716 CAS Client Config Vulnerability�. A vulnerability can be introduced when upgradingPE versions 2.5.0 through 2.7.2 from PE versions 1.2.x or 2.0.x. In such cases, the CAS client config�file, �/etc/puppetlabs/console-auth/cas_client_config.yml , is installed without a randomizedsecret. Consequently, an attacker could craft a cookie that would be inappropriately authorized bythe console.
This issue has been resolved in PE 2.8.0. Users running older affected versions can resolve the issue�by running /opt/puppet/bin/rake-f/opt/puppet/share/console-auth/Rakefileconsole:auth:generate_secret
Known IssuesAs we discover them, this page will be updated with known issues in Puppet Enterprise 2.8.x. Fixedissues will be removed from this list and noted above in the release notes. If you find new problems�yourself, please file bugs in Puppet �here and bugs specific to Puppet Enterprise �here.
To find out which of these issues may affect you, run ��/opt/puppet/bin/puppet--version , theoutput of which will look something like 2.7.21(PuppetEnterprise2.8.1) . To upgrade to anewer version of Puppet Enterprise, see the chapter on upgrading.Puppet Enterprise 2.8 User's Guide • User's Guide Appendix 206/210

The following issues affect the currently shipped version of PE and all prior releases in the 2.x.x�series, unless otherwise stated.
PE 2.8.0 Only: Broken Live Management and MCollective
A packaging bug in the initial PE 2.8.0 release prevented the consoleʼs live management featurefrom functioning. This issue also prevents MCollective from using filters.�
This issue was fixed in PE 2.8.1. Anyone running 2.8.0 is strongly encouraged to upgrade.�
Bad Data in Facterʼs architecture Fact
On AIX agents, a bug causes facter to return the systemʼs model number (e.g., IBM 3271) instead ofthe processorʼs architecture (e.g. Power6). There is no known workaround.
Augeas File Access Issue
On AIX agents, the Augeas lens is unable to access or modify etc/services . There is no knownworkaround.
After Upgrading, Nodes Report a “Not a PE Agent” Error
When doing the first puppet run after upgrading using the “upgrader” script included in PE tarballs,�agents are reporting an error: “<node.name> is not a Puppet Enterprise agent.” This was caused bya bug in the upgrader that has since been fixed. If you downloaded a tarball prior to November 28,�2012, simply download the tarball again to get the fixed upgrader. If you prefer, you can download�the latest upgrader module from the Forge. Alternatively, you can fix it by changing�/etc/puppetlabs/facter/facts.d/is_pe.txt to contain: is_pe=true .
Issues with Compliance UI
There are two issues related to incorrect Compliance UI behavior:
Rejecting a difference by clicking (-) results in an erroneous display (Google Chrome only).�The user account pull-down menu in the top level compliance tab ceases to function after a hostreport has been selected.
EC2/Dual-homed Systems Report Incorrect URIs for the Console.
During installation, the PE installer attempts to automatically determine the URI where the consolecan be reached. On EC2 (and likely all other dual-homed systems), the installer incorrectly selectsthe internal, non-routable URI. Instead, you should manually enter the correct, external facing URIof the system hosting the console.
Answer file required for some SMTP servers.�
Any SMTP server that requires authentication, TLS, or runs over any port other than 25 needs to beexplicitly added to an answers file. See the �advanced configuration page� for details.
Puppet Enterprise 2.8 User's Guide • User's Guide Appendix 207/210

Upgrading the Console Server Requires an Increased MySQL Buffer Pool Size�
An inadequate default MySQL buffer pool size setting can interfere with upgrades to Puppet�Enterprise console servers.
The PE 2.8 upgrader will check for this bad setting. If you are affected, it will warn you and give you�a chance to abort the upgrade.
If you see this warning, you should:
Abort the upgrade.Follow these instructions to increase the value of the innodb_buffer_pool_size setting.Re-run the upgrade.
If you have attempted to upgrade your console server without following these instructions, it ispossible for the upgrade to fail. The upgraderʼs output in these cases resembles the following:
(in/opt/puppet/share/puppet-dashboard)==AddReportForeignKeyConstraints:migrating=================================Goingtodeleteorphanedrecordsfrommetrics,report_logs,resource_statuses,resource_eventsPreparingtodeletefrommetrics2012-01-2717:51:31:Deleting0orphanedrecordsfrommetricsDeleting100%|###################################################################|Time:00:00:00Preparingtodeletefromreport_logs2012-01-2717:51:31:Deleting0orphanedrecordsfromreport_logsDeleting100%|###################################################################|Time:00:00:00Preparingtodeletefromresource_statuses2012-01-2717:51:31:Deleting0orphanedrecordsfromresource_statusesDeleting100%|###################################################################|Time:00:00:00Preparingtodeletefromresource_events2012-01-2717:51:31:Deleting0orphanedrecordsfromresource_eventsDeleting100%|###################################################################|Time:00:00:00--execute("ALTERTABLEreportsADDCONSTRAINTfk_reports_node_idFOREIGNKEY(node_id)REFERENCESnodes(id)ONDELETECASCADE;")rakeaborted!Anerrorhasoccurred,alllatermigrationscanceled:Mysql::Error:Can'tcreatetable'console.#sql-328_ff6'(errno:121):ALTERTABLEreportsADDCONSTRAINTfk_reports_node_idFOREIGNKEY(node_id)REFERENCESnodes(id)ONDELETECASCADE;(Seefulltracebyrunningtaskwith--trace)===================================================================================
!!ERROR:Cancellinginstallation===================================================================================
Puppet Enterprise 2.8 User's Guide • User's Guide Appendix 208/210

If you have suffered a failed upgrade, you can fix it by doing the following:��
On your database server, log into the MySQL client as either the root user or the console user:
#mysql-uconsole-pEnterpassword:<password>
Execute the following SQL statements:
USEconsoleALTERTABLEreportsDROPFOREIGNKEYfk_reports_node_id;ALTERTABLEresource_eventsDROPFOREIGNKEYfk_resource_events_resource_status_id;ALTERTABLEresource_statusesDROPFOREIGNKEYfk_resource_statuses_report_id;ALTERTABLEreport_logsDROPFOREIGNKEYfk_report_logs_report_id;ALTERTABLEmetricsDROPFOREIGNKEYfk_metrics_report_id;
Follow the instructions for increasing the innodb_buffer_pool_size and restart the MySQLserver.Re-run the upgrader, which should now finish successfully.�
For more information about the lock table size, see this MySQL bug report.
pe-httpd Must Be Restarted After Revoking Certificates�
(Issue #8421)
Due to an upstream bug in Apache, the pe-httpd service on the puppet master must be restartedafter revoking any nodeʼs certificate.�
After using puppetcertrevoke or puppetcertclean to revoke a certificate, restart the service�by running:
$sudo/etc/init.d/pe-httpdrestart
Internet Explorer 8 Canʼt Access Live Management Features
The consoleʼs live management page doesnʼt load in Internet Explorer 8. Although we are workingon supporting IE8, you should currently use another browser (such as Internet Explorer 9 orGoogle Chrome) to access PEʼs live management features.
Dynamic Man Pages are Incorrectly Formatted
Puppet Enterprise 2.8 User's Guide • User's Guide Appendix 209/210

Man pages generated with the puppetman subcommand are not formatted as proper man pages,and are instead displayed as Markdown source text. This is a purely cosmetic issue, and the pagesare still fully readable.
To improve the display of Puppet man pages, you can use your system gem command to install theronn gem:
$sudogeminstallronn
© 2010 Puppet Labs [email protected] 411 NW Park Street / Portland, OR 97209 1-877-575-9775
Puppet Enterprise 2.8 User's Guide • User's Guide Appendix 210/210