PT 6058 GROSS ANATOMY - University of Minnesota
31
PT 6058 GROSS ANATOMY STUDENT DISSECTOR MANUAL
Transcript of PT 6058 GROSS ANATOMY - University of Minnesota
PT 6058
GROSS ANATOMY
STUDENT DISSECTOR MANUAL

Gross Anatomy for Physical Therapy
Student Dissector Manual, Edition 2021
Ward M. Glasoe PT, ATC, PhD; James R. Carey PT, PhD, FAPTA, and Brendan J. Dougherty PT, PhD
This human dissection manual was authored by three Ph.D. trained physical therapists, each having distinctly different clinical training and academic research backgrounds. Ward M. Glasoe was trained in orthopaedics, James R. Carey in neurology, and Brendan J. Dougherty in respiratory neurophysiology. Their careers intersect in the teaching Anatomy for Physical Therapy at The University of Minnesota. Anatomy is the first course offered in the Doctor of Physical Therapy (DPT) educational curriculum at the University of Minnesota and the class meets every day for a total of six weeks. The course materials are delivered through lecture, laboratory dissection, and surface anatomy palpation training. Lecture is delivered from 8:00am to 10:00am, the students subsequently dissect human cadavers from 10:00am to 12:00pm, and the instruction of surface anatomy palpation is held for two hours each week in a single afternoon classroom session. This manual guides graduate physical therapy students through the process of whole body dissection. All students successfully completed prerequisite training in under-graduate anatomy. The Anatomy for Physical Therapy course is supported by the University of Minnesota’s Anatomy Bequest Program. This organization provides the cadavers and the human dissection teaching laboratories in association with The University of Minnesota Medical School. The laboratories are equipped with dissection tables and tools, and an assortment of anatomical models described throughout this manual. Because dissection governs the timing of content delivered in the course, this manual makes frequent reference to the instruction of anatomical structure and function that occurs in lecture. Readers not directly involved in this course may find the references made to lecture (course content not provided in this manual) to be a distraction. In acceptance of this reality, know that in teaching your own course, you are free to reproduce or adapt any information in this manual for your own purposes, provided this manual is properly referenced as your source. In addition to the utility this manual provides in guiding the dissection efforts of graduate students, this dissector was written to pay tribute to Dr. James R. Carey. Dr. Carey taught this course for 30 years, until his retirement in 2017. The systematic body dissections described herein were developed by Dr. Carey. He participated in writing the first draft of this manual after retirement. One of his contributions was the addition of the italicized clinical notes that present in boxes throughout the manual. Many students consider the study of anatomy to be dull, so these notes were inserted to engage the students in their development as physical therapists. The final draft of the dissection manual was written by Dr. Ward M. Glasoe, in collaboration with Dr. James R. Carey and Dr. Brendan J Dougherty. As of the final writing of this 2021 Edition, Dr. Dougherty serves as Course Coordinator of the Gross Anatomy for Physical Therapy course and Dr. Glasoe assists.
1
STUDENT DISSECTOR Introduction As a student, you assume the responsibility for the proper care and handling of the body assigned to you to dissect. The cadaver was donated (donor) by a person wishing to contribute their body to further the advancement of medical education and research. This gift, and the entire dissection experience, should be treated with the same respect afforded by society to any living person.
Lab Rules and Guidelines o Visitors are not permitted, and the doors entering the lab should be kept closed at all times. o Never bring food or drink into the lab; never bring cell phones or electronic devices or take
photographs in the lab. Always remove gloves and aprons when exiting the lab. o The donor has been embalmed, draped with a cloth, and stored inside a dissection-table.
Uncover only the region of the body assigned for dissection. o Keep the body moistened as necessary, draped, and lowered in the dissection-table when the
body is not in use. Draping slows the tissues from drying-out, which preserves the look and feel of the body tissues.
o Each table has two sets of dissection instruments. Scalpel blades are kept stored in a sealed package until loaded on the scalpel handle. Blades dull quickly, so replace as needed.
o Dispose of used blades in the designated sharps container; always rinse any tools used for dissection before placing them in storage.
o Keep the laboratory clean with used gloves and aprons disposed of in the garbage. o Keep all tissues dissected from the body in the containers designated for that body. o Review the anatomy assigned for dissection in advance of each lab period. Read the part of
this manual that describes the dissection procedure for the lab that day, and by viewing the region of the body assigned for dissection in an anatomy atlas.
o Use your time in lab efficiently. When you are not dissecting, return to studying the structures previously dissected, or study the prosected models provided for you in lab.
Dissection Procedure The removal of skin is the first step in dissection. Since physical therapy training is centered on the study of the human movement, the goal in dissection is to incise and remove the skin and fat and subcutaneous connective tissues from the body while leaving the muscles intact for study. A traction force applied to the skin delivered in combination with a sweeping cutting motion with a scalpel works well to lift and remove the skin and subcutaneous tissues from the muscle. This skin removal technique will be demonstrated by the instructor during the first lab period. Tissue Identification Muscles are easy to identify, as their red color and fiber striations makes them stand apart from the surrounding tissues. The names of muscles are bolded black in this dissection manual. Identification of the other body tissues is more challenging, as adipose and connective tissue covers almost everything. These tissues are variable in color, appearance, and texture. Because fat and connective tissues are non-essential to producing movement, the dissection technique used in lab will intentionally involve the removal of these accessory tissues for cleaning the muscles. The removal of fat and connective tissue also makes it easier to locate and identify the nerve and blood vessels that will also be studied in detail.
2
In this manual, the name of the nerve (n.) is bolded green, the artery (a.) is bolded red, and the vein (v.) is bolded blue. These structures most often travel together in a neurovascular bundle. o The nerve (n.) can be distinguished by its silvery cord or thread-like appearance. A nerve is
comparatively strong and seldom breaks when tugged on, and feels solid when squeezed. o The artery (a.) is pinkish in color, has a tubular look, and feels hollow when squeezed. o The vein (v.) is bluish in appearance and often, filled with clotted blood. It has thin walls that
tear when pulled-on, and is usually targeted for removal during dissection. Lab Organization This manual describes the systematic dissection of the body. There are 30 labs; each lab is 2 hours long. Four students are assigned to a table, and work in pairs to dissect one side of the body. Dissection starts in the upper trunk, moving into the upper extremity. Diagrams in this manual illustrate the incisions made to remove the skin. All of the tissues removed from a body are kept stored with that body in a container under the table.
Lab 1. Upper Extremity Osteology; Posterior Shoulder ● The study of bone is called osteology. The upper extremity is studied in this lab. ● Knowing the shape of the bones and the names of the assorted tubercles, processes, and
condyles of the skeleton is foundational to learning the action of muscles, joints, and ligaments (musculoskeletal system) that govern human movement. In this manual, the word ligament is abbreviated lig in this manual.
● Working independently in small groups, the students study the clavicle, scapula, humerus, ulna,
radius, and bones of the wrist and hand with their classmates. An anatomical atlas is available at each table to use as a reference. The instructors are available to assist as needed.
● After studying osteology for the 20 minutes, the instructors will bring the class together to
distribute aprons and gloves, and demonstrate operation of the dissection-tables, and instruct a method for loading and unloading a blade on a scalpel. Handle the scalpel with utmost caution, and always keep it stored in a safe place during dissection when it is not in use.
● Following this demonstration, the students return to their assigned table and work together to
load a blade on one or two scalpels, and to lift the body in preparation to begin dissection.
3
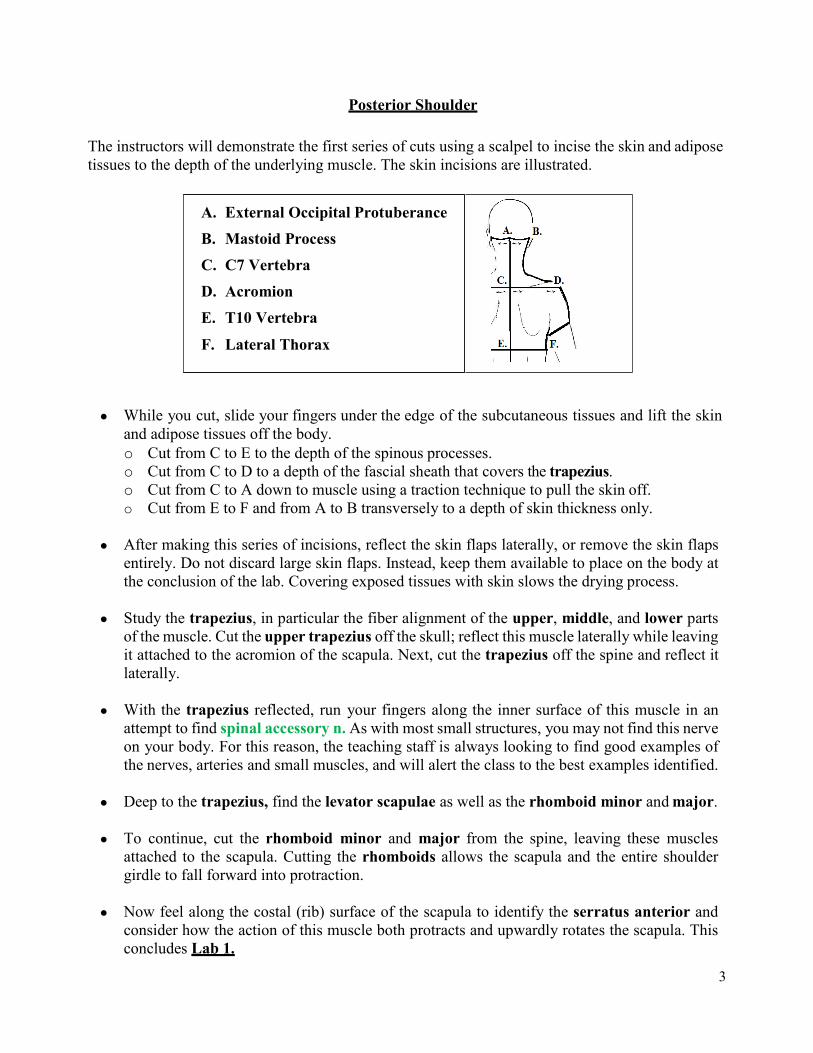
Posterior Shoulder
The instructors will demonstrate the first series of cuts using a scalpel to incise the skin and adipose tissues to the depth of the underlying muscle. The skin incisions are illustrated.
● While you cut, slide your fingers under the edge of the subcutaneous tissues and lift the skin
and adipose tissues off the body. o Cut from C to E to the depth of the spinous processes. o Cut from C to D to a depth of the fascial sheath that covers the trapezius. o Cut from C to A down to muscle using a traction technique to pull the skin off. o Cut from E to F and from A to B transversely to a depth of skin thickness only.
● After making this series of incisions, reflect the skin flaps laterally, or remove the skin flaps
entirely. Do not discard large skin flaps. Instead, keep them available to place on the body at the conclusion of the lab. Covering exposed tissues with skin slows the drying process.
● Study the trapezius, in particular the fiber alignment of the upper, middle, and lower parts
of the muscle. Cut the upper trapezius off the skull; reflect this muscle laterally while leaving it attached to the acromion of the scapula. Next, cut the trapezius off the spine and reflect it laterally.
● With the trapezius reflected, run your fingers along the inner surface of this muscle in an
attempt to find spinal accessory n. As with most small structures, you may not find this nerve on your body. For this reason, the teaching staff is always looking to find good examples of the nerves, arteries and small muscles, and will alert the class to the best examples identified.
● Deep to the trapezius, find the levator scapulae as well as the rhomboid minor and major.
● To continue, cut the rhomboid minor and major from the spine, leaving these muscles
attached to the scapula. Cutting the rhomboids allows the scapula and the entire shoulder girdle to fall forward into protraction.
● Now feel along the costal (rib) surface of the scapula to identify the serratus anterior and
consider how the action of this muscle both protracts and upwardly rotates the scapula. This concludes Lab 1.
A. External Occipital Protuberance B. Mastoid Process C. C7 Vertebra D. Acromion E. T10 Vertebra
F. Lateral Thorax
4
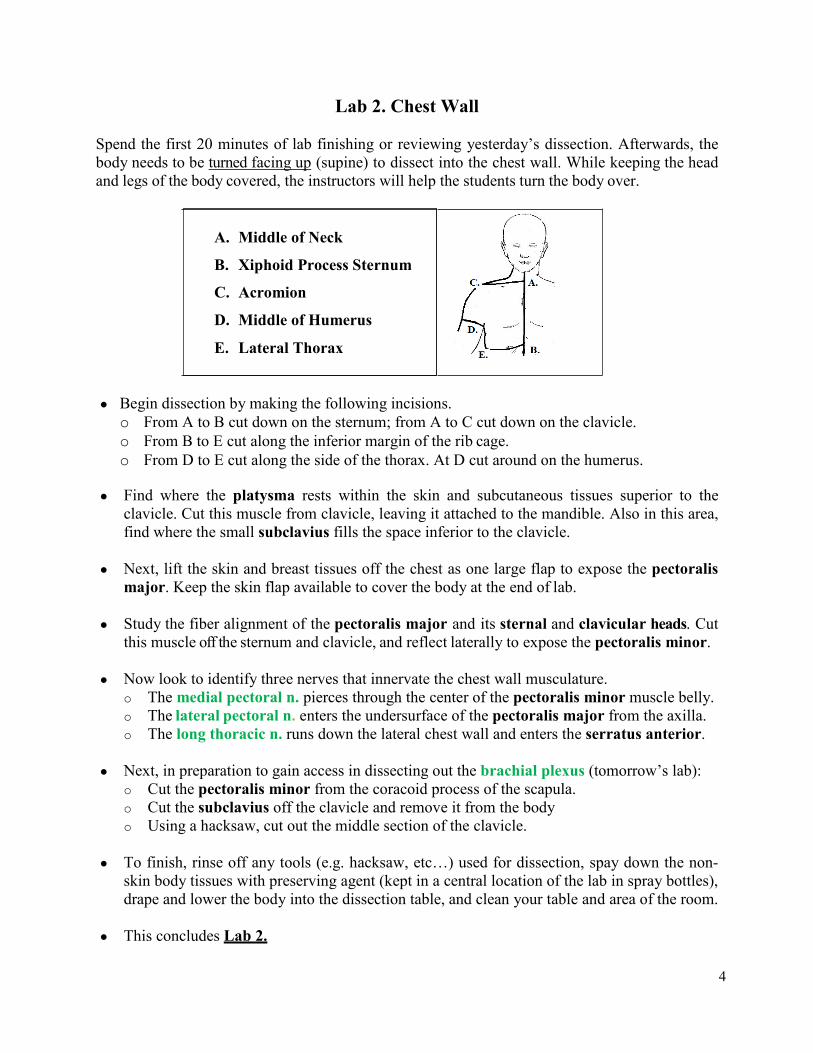
Lab 2. Chest Wall Spend the first 20 minutes of lab finishing or reviewing yesterday’s dissection. Afterwards, the body needs to be turned facing up (supine) to dissect into the chest wall. While keeping the head and legs of the body covered, the instructors will help the students turn the body over.
● Begin dissection by making the following incisions. o From A to B cut down on the sternum; from A to C cut down on the clavicle. o From B to E cut along the inferior margin of the rib cage. o From D to E cut along the side of the thorax. At D cut around on the humerus.
● Find where the platysma rests within the skin and subcutaneous tissues superior to the
clavicle. Cut this muscle from clavicle, leaving it attached to the mandible. Also in this area, find where the small subclavius fills the space inferior to the clavicle.
● Next, lift the skin and breast tissues off the chest as one large flap to expose the pectoralis major. Keep the skin flap available to cover the body at the end of lab.
● Study the fiber alignment of the pectoralis major and its sternal and clavicular heads. Cut
this muscle off the sternum and clavicle, and reflect laterally to expose the pectoralis minor. ● Now look to identify three nerves that innervate the chest wall musculature.
o The medial pectoral n. pierces through the center of the pectoralis minor muscle belly. o The lateral pectoral n. enters the undersurface of the pectoralis major from the axilla. o The long thoracic n. runs down the lateral chest wall and enters the serratus anterior.
● Next, in preparation to gain access in dissecting out the brachial plexus (tomorrow’s lab):
o Cut the pectoralis minor from the coracoid process of the scapula. o Cut the subclavius off the clavicle and remove it from the body o Using a hacksaw, cut out the middle section of the clavicle.
● To finish, rinse off any tools (e.g. hacksaw, etc…) used for dissection, spay down the non-
skin body tissues with preserving agent (kept in a central location of the lab in spray bottles), drape and lower the body into the dissection table, and clean your table and area of the room.
● This concludes Lab 2.
A. Middle of Neck
B. Xiphoid Process Sternum
C. Acromion
D. Middle of Humerus
E. Lateral Thorax
5
Lab 3. Anterior Shoulder; Brachial Plexus The brachial plexus runs from the neck into the axilla. The structure is complex and difficult to dissect, so be patient with the process, and in growing your knowledge of this region of anatomy.
Anterior Shoulder / Brachial Plexus
● Remove the skin from the front of the arm below the elbow, exposing the muscles. The anterior border of the axilla is formed by the pectoralis major and minor.
● Moving into the axilla, remove the excessive fat with your fingers, and use a dull probe to strip
away the adipose and lymphatic tissues. ● The brachial plexus resides in the axillary sheath. Split apart the sheath that surrounds the
brachial plexus and neighboring vessels (artery and vein) with a dull probe. There are a large number of superficial and deep veins in this region. Pull the veins out, while working to preserve the network of nerves and arteries for study.
● Unravel the brachial plexus network of nerves working distal-to-proximal. Starting at the
elbow, tease the nerves away from biceps brachii and brachialis. Trace the nerves back to the axilla and begin to identify. Moving from the medial side of the arm lateral, find the medial brachial and medial antebrachial cutaneous nn. (these two nerves may present as one), and the ulnar, median, and musculocutaneous nn.
● The musculocutaneous n. itself enters the coracobrachialis and travels down the arm. The
smaller nerves and neighboring arteries located in the axilla will take time to identify, but begin the task by comparing your dissection to illustrations shown in the atlas.
● Conclude this part of the lab by reviewing the anterior shoulder muscles. Study the nerve
innervation and action of the subscapularis, deltoid, and pectoralis major and minor.
Posterior Shoulder
With 20 minutes remaining in this lab period, turn the body over (prone) and return to studying the posterior shoulder. Students are required to learn the origin and insertion, nerve innervation, and action of the muscles, so help each other.
• Study the fiber orientation of the axioscapular (trunk to scapula) muscles. They include the
trapezius, levator scapulae, rhomboids, serratus anterior, and latissimus dorsi. • Next, identify the scapulohumeral muscles to include the deltoid, supraspinatus,
infraspinatus, and teres major and minor. • Also, locate the individual rotator cuff muscles and the distinct heads of triceps brachii.
These muscles are studied in detail in the next lab. This concludes Lab 3.
6
Lab 4. Arm and Elbow ● Remove the skin from the back of the arm to the middle of the forearm. This exposes the
deltoid, the long-, lateral-, and medial head of the triceps brachii, as well as the small anconeus muscle at the elbow.
● Cut the posterior deltoid off the scapula and reflect it laterally. Near where the deltoid inserts
on the humerus, identify the axillary n. and posterior humeral circumflex a. This nerve and artery exit the axilla posteriorly via quadrangular space, and enters the deltoid.
● Review the nerve innervations and actions of scapulohumeral (from scapula to humerus)
muscles. Study the three distinct heads of the triceps brachii now fully exposed. Dissect apart the triceps by sliding a probe under the lateral head at the radial groove of the humerus. Cut through the lateral head down on the probe to expose the radial n. and profunda brachii a.
● At the elbow, observe the triangular-shaped anconeus between the lateral epicondyle and
olecranon. With one hour remaining in lab, turn the body back over supine.
● To continue, review the borders of the axilla. The anterior border is formed by the internal rotators of the shoulder. This powerful muscle group includes the subscapularis, teres major, latissimus dorsi, anterior deltoid, and pectoralis major.
● Next, review the nerve and arteries in the axilla. For example, find where the axillary n.
combine with the posterior humeral circumflex a. exits the axilla at the quadrangular space. Work as partners to identify other critical nerves and arteries that reside in the axilla.
Cubital Fossa / Elbow
● Remove the skin from the front (volar) of the forearm down to the wrist. Now use your fingers to tease apart the biceps from the brachialis and brachioradialis.
● Clean-up the dissection around the elbow, working to preserve the nerves (motor and sensory)
that cross the elbow joint. Identify the anatomy; start by naming the borders of the cubital fossa, and the structures that comprise the “MATR” taught in lecture.
● Cut the biceps aponeurosis (not tendon) from where it spreads and covers the common flexor
tendon (CFT). The CFT projects from the medial epicondyle, and then splits to become the superficial layer of anterior forearm muscles. The superficial layer has the pronator teres, flexor carpi radialis (FDR), palmaris longus (PL), and flexor carpi ulnaris (FCU).
● Digging deeper, follow the brachial a. to where it splits into the radial a, and ulnar a. In the
cubital fossa, the median n. is easy to identify but as a challenge, find the musculocutaneous n. where it crosses the elbow and travels down the lateral side of the forearm.
● This concludes the dissection part of Lab 4, leaving time to review the brachial plexus
network of nerves, or study the major arteries of the shoulder and arm.
7
Lab 5. Anterior Forearm Spend the first 15 minutes of lab reviewing the brachial plexus and neighboring arteries in the axilla and the cubital fossa of the elbow, and the muscles of the anterior arm and forearm.
● Begin dissection by removing any remaining skin from the palmar surface of the forearm,
hand and thumb, while leaving the fingers untouched for dissection later. When removing the skin from the palm, note the presence of the palmaris brevis that once covered the hypothenar muscles on the ulnar side of the hand.
● At the elbow, find where the median n. travels between the heads of the pronator teres, and
deep to the fibrous tendinous arch of the flexor digitorum superficialis (FDS). The FDS tendinous arch bridges between the radius and ulna, and this structure is a nerve entrapment site for the median n (AIN branches).
● Cut the pronator teres off the radius, leaving the tendon intact such that its two heads encircle
the median n. While studying the pronator teres, name the superficial layer of forearm muscles and discuss their actions on the forearm and wrist.
● The flexor digitorum superficialis (FDS) is the intermediate layer. Cut the FDS off the radius lengthwise and reflect towards the ulna. Just distal to the tendinous arch of the FDS, see where the median n. gives off the anterior interosseous n. (motor threads) that innervate some (but not all) of deepest layer of anterior forearm muscles.
● In the deep layer, slide the flexor digitorum profundus (FDP) towards the ulna with your
fingers and looking under it, confirm the flexor pollicis longus (FPL) originates on the radius and interosseous membrane. Also, identify the pronator quadratus proximal to the wrist and deep to the long finger flexor tendons (FDS plus FDP).
● At the elbow, trace the radial a. down the forearm to where it bifurcates at the base of the
thumb. Both of these smaller vessels retain the name radial a. though the volar branch can be called the superficial radial a. and the other, can be referred to as the deep radial a.
● Also find where the ulnar a. gives off the common interosseous a. which dives deep. The
common interosseous a. immediately splits into the anterior and posterior interosseous aa. Find the anterior interosseous aa. running deep to the pronator quadratus.
● On the ulnar side of the forearm, find where the ulnar a. joins with the ulnar n. and travels
under the flexor carpi ulnaris (FCU). Confirm the ulnar n. innervates the FCU, and look for additional motor branches that innervate half (the two medial heads) of the FDP.
● Returning to the elbow/forearm, identify each muscle and recite their action on the forearm,
wrist, and digits of the hand. This anatomy is complex, so be deliberate in your study. ● Though dissection is done for today, use any time remaining to review the osteology of the
wrist and hand, and name the joints of the wrist, hand, and fingers. This concludes Lab 5.
8
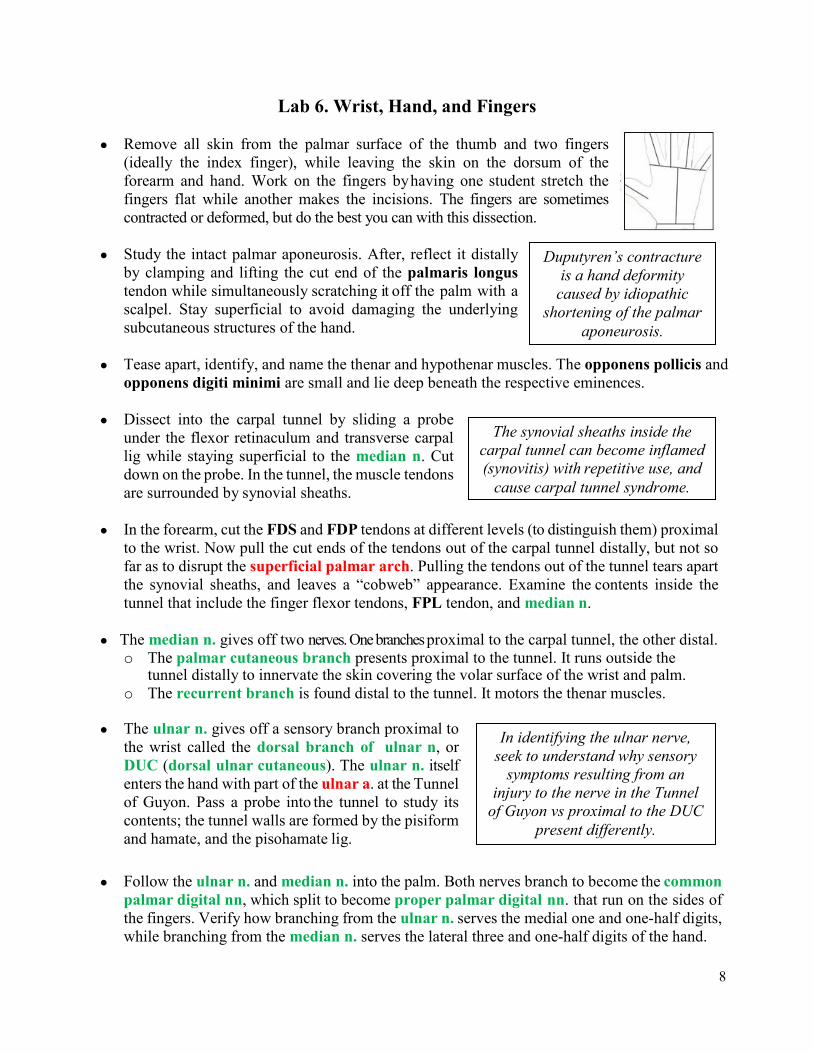
Lab 6. Wrist, Hand, and Fingers ● Remove all skin from the palmar surface of the thumb and two fingers
(ideally the index finger), while leaving the skin on the dorsum of the forearm and hand. Work on the fingers by having one student stretch the fingers flat while another makes the incisions. The fingers are sometimes contracted or deformed, but do the best you can with this dissection.
● Study the intact palmar aponeurosis. After, reflect it distally
by clamping and lifting the cut end of the palmaris longus tendon while simultaneously scratching it off the palm with a scalpel. Stay superficial to avoid damaging the underlying subcutaneous structures of the hand.
● Tease apart, identify, and name the thenar and hypothenar muscles. The opponens pollicis and
opponens digiti minimi are small and lie deep beneath the respective eminences. ● Dissect into the carpal tunnel by sliding a probe
under the flexor retinaculum and transverse carpal lig while staying superficial to the median n. Cut down on the probe. In the tunnel, the muscle tendons are surrounded by synovial sheaths.
● In the forearm, cut the FDS and FDP tendons at different levels (to distinguish them) proximal
to the wrist. Now pull the cut ends of the tendons out of the carpal tunnel distally, but not so far as to disrupt the superficial palmar arch. Pulling the tendons out of the tunnel tears apart the synovial sheaths, and leaves a “cobweb” appearance. Examine the contents inside the tunnel that include the finger flexor tendons, FPL tendon, and median n.
● The median n. gives off two nerves. One branches proximal to the carpal tunnel, the other distal.
o The palmar cutaneous branch presents proximal to the tunnel. It runs outside the tunnel distally to innervate the skin covering the volar surface of the wrist and palm.
o The recurrent branch is found distal to the tunnel. It motors the thenar muscles. ● The ulnar n. gives off a sensory branch proximal to
the wrist called the dorsal branch of ulnar n, or DUC (dorsal ulnar cutaneous). The ulnar n. itself enters the hand with part of the ulnar a. at the Tunnel of Guyon. Pass a probe into the tunnel to study its contents; the tunnel walls are formed by the pisiform and hamate, and the pisohamate lig.
● Follow the ulnar n. and median n. into the palm. Both nerves branch to become the common
palmar digital nn, which split to become proper palmar digital nn. that run on the sides of the fingers. Verify how branching from the ulnar n. serves the medial one and one-half digits, while branching from the median n. serves the lateral three and one-half digits of the hand.
The synovial sheaths inside the carpal tunnel can become inflamed (synovitis) with repetitive use, and
cause carpal tunnel syndrome.
Duputyren’s contracture is a hand deformity
caused by idiopathic shortening of the palmar
aponeurosis.
In identifying the ulnar nerve, seek to understand why sensory
symptoms resulting from an injury to the nerve in the Tunnel
of Guyon vs proximal to the DUC present differently.
9
● On the thumb side, examine where the radial a. splits near the scaphoid bone at the wrist. o The smaller branch of radial a. passes volarly into thenar muscles and beyond, into the
superficial palmar arch. o The main part of the radial a. passes across the anatomical snuffbox and distally into the
first interosseous space, supplying the deep palmar arch. This arterial anastomosis also receives small contributions from the ulnar a.
● The first interosseous space is located between the thumb and index finger. The first dorsal
interosseous spans the space, and note its bipennate fiber alignment. The remaining dorsal interossei are studied in a future lab so if possible, leave the skin on the dorsal surface of the hand and forearm.
● Dissect the palm of the hand.
o The horse-shoe shaped superficial palmar arch is fed mostly by the ulnar a. By contrast, the deep palmar arch runs deep, and it cannot be seen unless cutting deep into the palm and destroying the dissection.
o The princeps pollicis and radialis indicis aa. The small arteries arise within the first interosseous space (fed from both palmar arches) and supply the thumb and index finger.
o Identify the palmar intrinsics. Find four lumbricales alongside the FDP tendons. Once
identified, study the assigned name/number of the individual lumbricales, and their nerve innervations and actions on the fingers.
o Find the adductor pollicis deep inside the first interosseous space. Identify its oblique and transverse heads, and where they insert on the ulnar side of the proximal phalanx of the thumb. Seeing the size, fiber alignment, and direction-of-pull of the adductor pollicis will help you realize its importance in grip.
o The palmar interossei are located too deep to dissect out, so study where these muscles originate (metacarpals 2, 4, 5) and insert (fingers 2, 4, 5) in the atlas.
o Finish the dissection by reviewing the previously identified nerves. Just saying the name
proper palmar cutaneous branch of the median n. presents as a challenge.
● Dissect the palmar surface of one or two fingers. o Incise the length of the fibrous digital sheath to expose the long finger flexor tendons. o Observe how the bands of fibrous sheath encircle the tendons, and contain their actions in
flexing the finger joints. o Name the finger joints (MCP, PIP, and DIP). Naming the joints should no longer be
difficult but if needed, study the joints on a skeleton. o After slicing the fibrous digital sheath, lift the long flexor tendons away from the finger in
a “bowstring” manner to see how the FDS tendon splits, allowing the FDP tendon to pass. o Study the extensor hood. Observe the hood-like appearance that surrounds the MCP joint,
and investigate where the lumbricales and interossei insert on the palmar aspect of the hood mechanism.
● Finish lab today by spraying the hands with the preserving agent and cover the hands with
gloves, as much as possible. Covering the hands will slow the tissues from drying out. ● This concludes Lab 6.
10
Lab 7. Posterior Forearm; Dorsum Hand Start lab by reviewing yesterday’s dissection. For example, inspect the extensor hood mechanism on the index finger to recognize how the line of pull of the first lumbrical and first dorsal interosseous falls on the palmar side of the axis of flexion/extension at the MCP joint but, because of the oblique nature of the hood, the line of pull falls dorsal to the axes at the PIP and DIP joints, thus making these muscles flexors of the MCP and extensors of the IP joints.
● Remove skin from the forearm. At the elbow, use a dull probe to penetrate the fascial plane
between the brachioradialis (BR) and brachialis to dissect out the radial n. Find where the radial n. splits into the deep and superficial branches. To differentiate, the deep radial n. enters the supinator, whereas the superficial radial n. continues down the lateral forearm.
● Dissect apart the muscles of the posterior forearm. Start by releasing the tendons from the
extensor retinaculum at the wrist. Examine how the superficial fibrous band creates six fibro-osseous tunnels. After dislocating the tendons from the tunnels, tease apart the muscles of the distal forearm with your fingers. Working proximally up the forearm, find where the superficial layer of muscles unite at the common extensor tendon.
● At the common extensor tendon, identify the
extensor carpi radialis longus (ECRL) and brevis (ECRB), extensor digitorum (ED), extensor digiti minimi (EDM), and extensor carpi ulnaris (ECU).
● Superficially cut lengthwise between the BR
and ECRL near their origin to find the supinator. At the Arcade of Froshe, the deep radial n. dives into the supinator. Follow the deep radial n. from where it exits beneath the supinator and its name changes to posterior interosseous n. (PIN). The PIN displays as threads of motor nerves distally deep within the forearm muscles.
● The posterior interosseous a. is the only named artery in the posterior forearm. Small, it can
be found along the posterior surface of the interosseous membrane. Recall, this artery comes from the common interosseous a. which in turn, comes from the ulnar a. in the cubital fossa of the anterior elbow.
● The extensor digitorum (ED) sits under the extensor carpi radialis longus. The ED has four
distinct tendons that insert into the extensor hood mechanism of the fingers. Running in close proximity, find the extensor indicis (EI) tendon going to the index finger, and the extensor digiti minimi tendon going to the little finger.
● Find the superficial radial n. superficial to the wrist and hand. It passes along the radial side of
the forearm and wrist, and is sensory to the lateral three and a half digits dorsally.
The posterior interosseous nerve (PIN) may be entrapped at the Arcade of
Froshe. Realize that muscles receiving their motor innervation proximal to the
Arcade of Froshe are spared in PIN syndrome, but muscles located distal in
the posterior forearm to the compression point of injury may be weakened.
Lateral epicondylitis, referred to as golfer’s elbow, is a painful overuse condition involving inflammation of
the common extensor tendon.
11
Impingement syndrome is a shoulder problem that involves inflammation or injury of the
rotator cuff where the muscles emerge from under the
acromion and coracoacromial ligament.
● Study the deepest forearm muscles. Two are packed together, the abductor pollicis longus (APL) and extensor pollicis brevis (EPB). Split them apart and note where they insert. The extensor pollicis longus (EPL) also acts on the thumb. It travels the “long” way around Lister’s tubercle of the radius, and inserts on the distal phalanx of the thumb.
● On the dorsum of the hand, find the four dorsal interossei. These muscles are bipennate, with
each muscle arising from the adjacent sides of the five metacarpals. ● This concludes Lab 7. Use any extra time to move about the lab and view the dissections on
several cadavers. Restudy anterior forearm muscles or the intrinsics of the hand. Quiz your lab partners on the nerve innervation and muscle actions of the hand extrinsics and intrinsics, or spend time reviewing the brachial plexus network of nerves.
Labs 8 and 9. Upper Extremity Joints; Review The lab activities for the next two days run together. The primary objective of these combined lab days is to dissect apart the major joints of the upper extremity. To assist in the study of the joints, in addition to dissections, prosected joints and anatomical models are made available in the lab. During lab, the instructors will teach the anatomy on the prosected joints in small-group breakout sessions. Students are also given the freedom to mingle throughout the lab to view the assortment of anatomic models, as well as the variety of joint dissections performed on selected cadavers.
● Movement of the shoulder involves the sternoclavicular (SC) joint. There is little gained by
dissecting apart the SC joint. Instead, apply force with your fingers to sternal end of the clavicle on the manubrium (sternum) to stress the intact joint and assess the stability afforded to the clavicle by the sternoclavicular, interclavicular, and costoclavicular ligs.
● If the glenohumeral joint is stiff, the entire shoulder girdle can be stretched by aggressively
pulling the humerus away from the body. Similarly, without dissection, apply stress force to the acromioclavicular (AC) joint to assess the stability afforded this joint by the coracoacromial (trapezoid and conoid) bands of extracapsular ligs, and the acromioclavicular capsular joint ligs. The AC joint structures are best seen and studied on the prosected joints.
● Dissect the glenohumeral joint using an anterior
approach. Start by reflecting the anterior deltoid off the clavicle and humerus to expose the coracoacromial lig. Find where the supraspinatus tendon emerges from under the acromion along with neighboring joint tissues. The “subacromial space” contains the glenohumeral joint capsule and lig, the coracohumeral lig and bursae.
De Quervain’s syndrome is tenosynovitis (inflammation of tendon and synovial sheath) of
the APL and EPB tendons in the area of the anatomical snuffbox.
12
Stretch a muscle by moving it opposite to its actions. For
example, stretch the biceps by extending the shoulder while moving the elbow into extension and
pronation.
● Continue into the glenohumeral joint by first cutting through the subscapularis. Cut down on a probe slid between the muscle and capsule. The cut exposes the capsule. Note how the capsule wrinkles with movement of the humerus, and observe the redundant folds of the inferior joint capsule. Incise the joint and observe the smooth articular cartilage of the humeral head, the labrum surrounding the glenoid, and find the long head of the biceps tendon. Move the joint into flexion and abduction to watch how movements change the orientation of the biceps long head tendon with respect to the humeral head. Apply a stretch to the biceps
● Dissect the elbow using an anterior approach. Start by removing the muscles three inches
above and below the joint. Carefully shave away any remaining tissues while preserving the joint capsule. With capsule exposed: o Watch how flexing the elbow puckers the anterior capsule, whereas extending the elbow
elongates (stretches) the anterior capsule. o Continue to clean off the capsule, while trying to tease out the annual and collateral ligs. o Now, apply a valgus and varus stress force to feel the resistive action of the collateral ligs. o Next, pronate and supinate the forearm watching the annual lig constrain the head of the
radius, and see how the radius rotates about the ulna. Observe this pivot and twisting type of joint motion at the proximal radioulnar joint (elbow), and at the distal radioulnar joint (wrist).
● Dissect the wrist by first reflecting (or cutting) the extrinsic tendons.
o Use a volar approach to slice through the thick wrist capsule at the radiocarpal joint. o Observe the proximal row of carpal bones, and corresponding concavity of the radius. o Recognize the scaphoid forms the floor of the anatomical snuffbox, and that when moving
the hand into radial deviation the radial styloid process makes contact with the scaphoid. o Identify the triangular fibrocartilage complex (TFCC) between the triquetrum and ulna. o The carpus of the hand and surrounding joint ligaments are complex. Finish by reviewing
the names and relative locations of the carpal bones, and restraining action of the joint ligs.
● Dissect into the base of the thumb. o At the first-CMC joint, recognize its unique saddle shape. This joint allows considerable
movement, including opposition, with movement of the thumb critical for grasp function. o At the first-MCP joint, though it is difficult to discriminate the joint capsule from the
collateral ligs, apply force to stress this joint. o When stressing the ulnar collateral lig, recognize how the offset position of the thumb
relative to the hand makes this lig vulnerable to traumatic injury. ● Dissect into the fingers.
o Find the collateral ligs on the finger joints, and assess the stability of the individual joints. o Cut transversely the thick palmar plate at one or more joints of the fingers and afterwards,
observe how easily that finger joint can dislocate into hyperextension. o Review the fibrous digital sheath, and the extensor hood mechanism on a finger.
● This concludes Labs 8 and 9.
13
Lab 10. Skull Osteology; Anterior Neck This lab starts by studying the osteology of the skulls. The skulls are provided for you in the lab. ● Lab dissection begins by removing the skin from the anterior neck. Incise the skin midline, and
along the edge of the mandible. Remove the platysma with the skin, while keeping the sternocleidomastoid (SCM). The SCM is a paired muscle that lies on each side of the neck.
● Beneath the angle of mandible, remove the submandibular gland with a dull probe and fingers
by digging deep into the submandibular space. Now look to find the intermediate tendon of the digastric where it binds to the hyoid. This tendinous attachment separates the anterior and posterior digastric muscle bellies.
● Next, examine how the stylohyoid splits and runs parallel and around posterior digastric.
Probe deep along the stylohyoid with one finger in an attempt to feel for the pointed styloid process. Observe the long slender omohyoid. Its intermediate tendon that connects the omohyoid to the clavicle is often torn away, so the omohyoid may hang loose along the side of the neck.
● Connecting to the mandible, the mylohyoid sits deep beneath the anterior digastric. Slice the
mylohyoid midline to find geniohyoid deep. The geniohyoid fibers run anteroposterior.
● Find the subclavian a. between the anterior and middle scalenes. The posterior scalene is not easily visible from an anterior view, but can be found running deep to the levator scapula when the body is turned prone.
● Also locate the brachial plexus between the anterior and middle scalenes. The upper trunk
is formed by the C5 and C6 nerve roots. Though the C7, C8, and T1 roots are deep and difficult to find, with effort, see where the C8 and T1 converge to form the lower trunk.
● The suprascapular n. branches off the upper trunk and runs
to supraspinatus. Follow the nerve distal to the scapula, and find the distinct edge of the superior transverse scapular lig. Verify how the suprascapular a. travels over this ligament while the suprascapular n. runs under it (Army over Navy).
● Dig out the carotid sheath that runs lengthwise beneath the sternocleidomastoid. Open the
sheath and inside, identify the vagus n. (CN X), common carotid a. and internal jugular v. ● Several other important structures can be examined in the anterior neck.
o Find the phrenic n. rests on the anterior surface of the anterior scalene. o Palpate the cricoid cartilage, and the cartilaginous rings that form the trachea. o Identify the hyoid bone, and the accompanying infra- and suprahyoid muscles.
● This concludes the dissection part of Lab 10.
The superior transverse scapular ligament can
thicken and ossify making the scapular notch a site
for nerve entrapment.
Scalene syndrome involves entrapment of the brachial plexus and subclavian
artery resulting in paresthesia, a diminished radial pulse (not rate but
volume) and temporary weakness.
14
Lab 11. Head, Neck, and Face Continue dissection of the anterior neck and afterwards, proceed to study the head and face.
● Not on every cadaver, but on those where the neck dissection did not turn out well, dissect out
the deep neck flexor (prevertebral) muscles that rest deep beneath the trachea and esophagus on the anterior surface of the vertebral column. o If the trachea is mobile, slide it laterally to expose the deep neck flexors. Or, as far inferior
as possible, cut the trachea and esophagus transversely. This cut exposes the fixed cross-sectional area of the trachea, compared to the flattened esophagus.
o With either approach, find where the longus colli runs obliquely along the spine, and the longus capitis where it sits more laterally and has muscle fibers that ascend to the skull.
● Dissection of the face muscles is optional. Start
by removing the skin from the nose around the mouth, and covering the cheek.
● Several nerves can now be located. The facial
n. (or at least one of its branches) is found where it emerges through the parotid gland anterior and inferior to the ear.
● The trigeminal n. (CN V) innervates the muscles of mastication, and is sensory to the face.
Its branches are the ophthalmic (V.1), maxillary (V.2), and mandibular (V.3). The V.1 branch exits the supraorbital foramen; V.2 the infraorbital foramen; V.3 the mental foramen.
● This concludes Lab 11, leaving time to review.
Lab 12. Brain; Eye The calvaria skull cap is cut by an instructor using an electric bone saw, and the brain is removed for you. When holding the brain, reflect on the uniqueness of this moment. The better quality brains are kept stored in a container of liquid, as floating the brain preserves its natural shape.
● Study the gross features of the brain.
o Observe the gyri and sulci of the brain’s cortex. The central sulcus that runs obliquely superiorly from the lateral fissure at the temporal lobe to the longitudinal fissure that separates the hemispheres. The central sulcus divides the frontal and parietal lobes.
o Tenderly separate the right and left hemispheres, and look for the sulcus separating parietal lobe from the occipital lobe.
● Recognize the cerebellum, and the midbrain, pons and medulla of the brain stem. On the inferior
surface of the brain, recognize the olfactory tracts (part of CN I) under the frontal lobe and the optic chiasm (part of CN II). These structures including the cranial nerves (CN) are taught in small group sessions (content taught in lecture, and not described in this manual).
The facial nerve (CN VII) can be inadvertently injured with surgical
removal of the parotid gland, or from any source of idiopathic pressure on
the nerve where it exits the skull, leading to paralysis (Bell’s palsy) of
the facial muscles plus other symptoms.

15
Loss of eye tracking, or a stationary eye deviation may be symptomatic of
an injury to the brain or cranial nerve. For example, medial deviation (strabismus) of the eye could suggest
the medial rectus is intact but unopposed because of a weak lateral rectus potentially due to an injury of
the abducens nerve (CN VI).
● To dissect inside the skull (cranium), use a chisel to remove the bone covering the eye socket. Penetrate the socket, and then break off pieces of bone with a pliers to create a triangular-shaped opening above the eye. Inside the socket, use a hemostat to remove the fatty adipose tissues surrounding the eyeball.
● In the cranium, recognize the frontal n. on its way to the supraorbital foramen. Now find the
supraorbital n. on the face from earlier dissection. Tug it, and see the frontal n. move, confirming this is actually one nerve (branch of V I – ophthalmic division). Inside the socket, Find the optic n. (CNII) where it enters the eye, and admire the white sclera covering of the eyeball.
● Dissect the eye muscles.
o Find the levator palpebrae above the socket. Pull on it while observing the eyelid move.
o Deeper, the superior rectus inserts on the superior surface of the eyeball.
o Medial to the eye, find the superior oblique and going deeper, identify the medial rectus.
o Lateral to the eye, locate the lateral rectus. o Going still deeper on the lateral side of the
eyeball you may sometimes find the inferior oblique and inferior rectus eye muscles.
● This concludes Lab 12.
Lab 13. Temporomandibular Joint; Midterm Review Review all preceding materials, and take the mock lab exam set up for you on one body. Work in small groups to prepare for the midterm exam. The instructors will be available in the lab to field questions, and to help you identify structures.
● During lab, study the muscles of mastication and temporomandibular joint (TMJ) dissected
(making cuts into the skull with a bone saw) on one or two bodies by an instructor. o Appreciate the considerable cross-sectional area of the temporalis and masseter. o Inside the ramus of the mandible, distinguish the medial- and lateral pterygoids. While
studying these muscles, describe their primary actions in moving the mandible. o On the TMJ itself, identify the articular disc located between the condyle (head) of the
mandible and the mandibular fossa of the temporal bone. This concludes Lab 13.
Lab 14. Midterm Exam The students take the midterm lab exam in the lab today. The exam requires the identification of tagged structures, with students writing the name of the structure on an answer sheet. The answer sheet is then handed in for grading. Points are not taken off for misspelling words, but always study with intent to pronounce and spell anatomical structures correctly.
16
Lab 15. Suboccipital Region The course continues with dissection of the posterior neck. This dissection is performed with body positioned prone. To reduce the concavity of the neck, place a block under the chest and force the head into flexion.
● Reflect the upper and middle trapezius off the scapula laterally so it hangs attached only to
the acromion. The superficial layer of neck muscles are now exposed along the spine. Note the spinous processes of the spine; the large C7 is called the vertebra prominens.
● The splenius capitis and cervicis cover the neck region running
obliquely up- and lateral. Cut these muscles from the spinous processes, leaving the insertions on the head and neck intact. This exposes the thick semispinalis capitis.
● Inferior to the occipital bone, find the fascial plane between the
semispinalis capitis and the underlying suboccipital muscles. Cut the semispinalis capitis from the skull, and reflect laterally to find the suboccipitals, named by their location below the occiput.
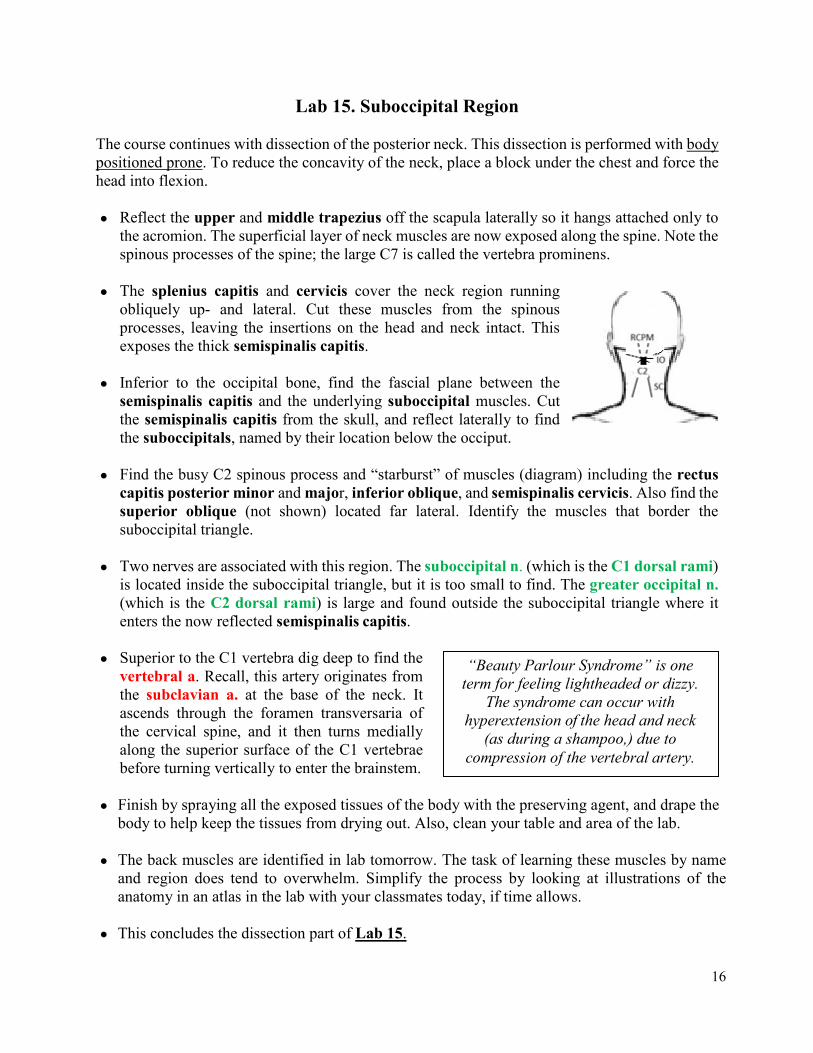
● Find the busy C2 spinous process and “starburst” of muscles (diagram) including the rectus
capitis posterior minor and major, inferior oblique, and semispinalis cervicis. Also find the superior oblique (not shown) located far lateral. Identify the muscles that border the suboccipital triangle.
● Two nerves are associated with this region. The suboccipital n. (which is the C1 dorsal rami)
is located inside the suboccipital triangle, but it is too small to find. The greater occipital n. (which is the C2 dorsal rami) is large and found outside the suboccipital triangle where it enters the now reflected semispinalis capitis.
● Superior to the C1 vertebra dig deep to find the
vertebral a. Recall, this artery originates from the subclavian a. at the base of the neck. It ascends through the foramen transversaria of the cervical spine, and it then turns medially along the superior surface of the C1 vertebrae before turning vertically to enter the brainstem.
● Finish by spraying all the exposed tissues of the body with the preserving agent, and drape the
body to help keep the tissues from drying out. Also, clean your table and area of the lab. ● The back muscles are identified in lab tomorrow. The task of learning these muscles by name
and region does tend to overwhelm. Simplify the process by looking at illustrations of the anatomy in an atlas in the lab with your classmates today, if time allows.
● This concludes the dissection part of Lab 15.
“Beauty Parlour Syndrome” is one term for feeling lightheaded or dizzy.
The syndrome can occur with hyperextension of the head and neck
(as during a shampoo,) due to compression of the vertebral artery.

17
Lab 16. Back Muscles ● If not done, make the incisions shown and remove the skin and
adipose tissue from the back to the depth of the thoracolumbar fascia. Uncover only the superior fibers of the gluteus maximus.
● Also remove the thin serratus posterior that runs transversely
across the thorax. This muscle assists with accessory respiration. ● With the trapezius, rhomboids, and latissimus dorsi reflected
laterally, find the erector spinae. This muscle group comprises the spinalis, longissimus, and iliocostalis (SLI). Separate the parts of this muscle into individual bundles with your fingers.
● Proper naming of the back muscles includes the identification of body region. For example,
the iliocostalis lumborum, or longissimus thoracis. At first glance, the task of naming of the individual muscles seems arbitrary, but give it some time. The regions are called lumborum, thoracis, cervicis, and capitis. During lab, identify all of the erector spinae muscles (taught in lecture) by their complete name and according to region.
● Incise into thoracolumbar fascia to find the multifidus. See how the direction of pull of this
muscle rotates the body away to the opposite side. Insert a probe through the multifidus, and appreciate its overall size. The rotatores rest under the multifidus; these small intersegmental rotator muscles are present in all regions of the spine, but they are too deep to dissect-out.
● During today’s lab, view the lumbar laminectomy dissected by an instructor on one cadaver.
Removal of the posterior part of the vertebral column (spinous process and lamina) in the lumbar region exposes the structures inside the vertebral canal, and allows you to study the terminal end of the spinal cord encased in dura mater. o When the dura mater is first incised, observe the collection of cerebrospinal fluid. Now
proceed to tear the meninges covering off the spinal cord. o On the spinal cord, identify the conus medullaris, cauda equina, and filum terminale. o Look closely at the cauda equina strands in attempt to distinguish between the ventral
(motor) and dorsal (sensory) rootlets that form the succession of nerve roots that exit the vertebral column via the intervertebral foramen.
o Using a probe, slide the spinal cord and its parts to one side of the vertebral canal to examine the posterior longitudinal lig (PLL).
o This lig runs lengthwise along the posterior surface of the vertebral body and discs. ● With the help of an instructor,
place this cadaver on its side and perform the straight leg raise test. This maneuver tensions the spinal nerves, and spinal cord.
● This concludes Lab 16.
A straight leg raise (SLR) test is a maneuver used by clinicians to provoke pain that radiates down
the leg in patients having problems with the sciatic nerve where it exits the spine and/or pelvis.
18
Lab 17. Abdomen Removal of the abdominal and pelvic viscera is the primary objective today. The majority of this dissection is done by the instructors, with the students helping as able.
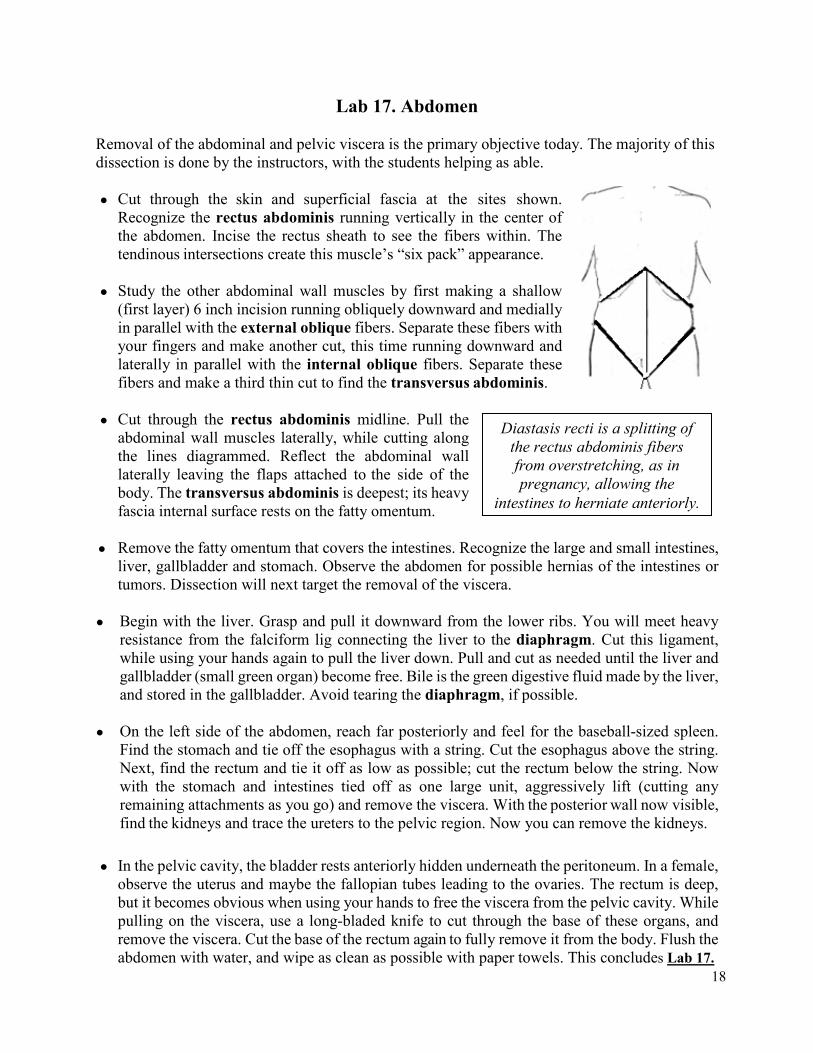
● Cut through the skin and superficial fascia at the sites shown.
Recognize the rectus abdominis running vertically in the center of the abdomen. Incise the rectus sheath to see the fibers within. The tendinous intersections create this muscle’s “six pack” appearance.
● Study the other abdominal wall muscles by first making a shallow
(first layer) 6 inch incision running obliquely downward and medially in parallel with the external oblique fibers. Separate these fibers with your fingers and make another cut, this time running downward and laterally in parallel with the internal oblique fibers. Separate these fibers and make a third thin cut to find the transversus abdominis.
● Cut through the rectus abdominis midline. Pull the
abdominal wall muscles laterally, while cutting along the lines diagrammed. Reflect the abdominal wall laterally leaving the flaps attached to the side of the body. The transversus abdominis is deepest; its heavy fascia internal surface rests on the fatty omentum.
● Remove the fatty omentum that covers the intestines. Recognize the large and small intestines,
liver, gallbladder and stomach. Observe the abdomen for possible hernias of the intestines or tumors. Dissection will next target the removal of the viscera.
● Begin with the liver. Grasp and pull it downward from the lower ribs. You will meet heavy
resistance from the falciform lig connecting the liver to the diaphragm. Cut this ligament, while using your hands again to pull the liver down. Pull and cut as needed until the liver and gallbladder (small green organ) become free. Bile is the green digestive fluid made by the liver, and stored in the gallbladder. Avoid tearing the diaphragm, if possible.
● On the left side of the abdomen, reach far posteriorly and feel for the baseball-sized spleen.
Find the stomach and tie off the esophagus with a string. Cut the esophagus above the string. Next, find the rectum and tie it off as low as possible; cut the rectum below the string. Now with the stomach and intestines tied off as one large unit, aggressively lift (cutting any remaining attachments as you go) and remove the viscera. With the posterior wall now visible, find the kidneys and trace the ureters to the pelvic region. Now you can remove the kidneys.
● In the pelvic cavity, the bladder rests anteriorly hidden underneath the peritoneum. In a female,
observe the uterus and maybe the fallopian tubes leading to the ovaries. The rectum is deep, but it becomes obvious when using your hands to free the viscera from the pelvic cavity. While pulling on the viscera, use a long-bladed knife to cut through the base of these organs, and remove the viscera. Cut the base of the rectum again to fully remove it from the body. Flush the abdomen with water, and wipe as clean as possible with paper towels. This concludes Lab 17.
Diastasis recti is a splitting of the rectus abdominis fibers from overstretching, as in pregnancy, allowing the
intestines to herniate anteriorly.
19
Lab 18. Abdominal and Pelvic Cavities Start by using paper towels to vigorously wipe away any remaining loose tissues from the abdominal and pelvic cavities of the body. Afterwards, take time to clean your table and area of the lab.
● Observe the size and shape of the abdominal cavity, and dome configuration of the diaphragm.
o Study the central tendon of the diaphragm, and distinguish the right and left crura tendinous attachments the anchor the diaphragm to the lumbar vertebrae.
o Examine where the abdominal aorta, inferior vena cava, and esophagus pass through the diaphragm. Follow the aorta to where it descends between the right and left crura (aortic hiatus) at the level of the T12 vertebra. Squeeze the aorta to feel for stiffness and crunchiness, as this life-sustaining artery can sometimes be narrowed internally by layers of calcium.
● The aorta splits into the common iliac aa. They in turn, split into the external and internal
iliac aa. Follow these arteries distally to find where the external iliac a. exits the abdomen beneath the inguinal lig, and where the internal iliac a. dives deep into the pelvis.
● Many vessels housed in the pelvic cavity were broken with removal of the viscera. Removing
this debris will help you identify the structures that remain. To clean the pelvis, cut the aorta transversally at the L2 vertebra. Pull the cut end distally away from the spine, leaving the aorta attached to the body via the common iliac aa. Remove the veins and other debris from the pelvis.
● Find the subcostal n. (T12) along the lower border of rib 12. Next identify the lumbar plexus
nerve branches: o The iliohypogastric and ilioinguinal nn. project laterally on the posterior wall. These two
nerves often combine and present as one single structure. o The lateral femoral cutaneous n. runs into skin and superficial fascia of the thigh. o The genitofemoral n. exits from the anterior surface of the psoas major. o The femoral n. enters the anterior thigh at the femoral triangle, studied in the next lab. o The obturator n. emerges on the medial side of the psoas major. Find where it crosses
the pelvis and enters the medial thigh through the obturator foramen via the obturator canal. ● The lower lumbar and sacral nerve roots exit the vertebral column from inside the pelvis. o Examine how the L4-L5 nerve roots combine to form the lumbosacral trunk, and where the
S1-4 nerve roots pass through the foramina of the sacrum. o See where the L4-5, S1-3 nerve roots combine to form the sciatic n, and examine where
the sciatic n. exits the pelvis through the greater sciatic foramen. ● Finish this lab by identifying muscles. The quadratus lumborum runs between rib 12 and
iliac crest. The psoas major rests along the lumbar spine, and joins the iliacus to form the iliopsoas. The tendon-like psoas minor rests anterior to the psoas major.
● Muscles, supported by bone and connective tissue, form the walls and floor inside the pelvis. The
sacrum holds the piriformis posteriorly, with a tendinous arch providing a “sling” of support along the sides of the pelvis. The obturator internus fills in the sidewalls, deep to the tendinous arch. The pelvic floor is consists of several small muscles. o The iliococcygeus sits posteriorly and abuts up against the piriformis. o The pubococcygeus runs between the pubis and coccyx bones of the pelvis.
20
o The coccygeus lies deepest and this paired muscle has a triangular shape. o The puborectalis forms a loop around the rectum (though it is not found with dissection).
● The muscles inside the pelvis are difficult to identify, but try. It helps to compare what you see in dissection to the anatomy illustrated in an atlas. This concludes Lab 18.
Lab 19. Chest, Heart, and Lung Prior to cutting into the chest cavity, observe the different oblique fiber alignment of the external and internal intercostals. These intercostals assist with deep breathing function. ● Cut the ribs along the lateral chest with a hand snipper, and to sever the first rib from the clavicle.
After the ribs are cut, reflect the chest wall downward so it rests on the abdomen. Find the internal mammary a. on the internal surface of the chest wall.
● See the lungs that are now collapsed, and the
pericardial sac covering the heart. Note the sponginess of the lungs, and verify that the right lung is larger and has 3 lobes; the left lung has only 2 lobes.
● Detach the SCM muscles from the clavicle and manubrium. Now trace the vagus n. and the
phrenic n. from the anterior neck into the chest cavity. Preserve both nerves so their pathways can be studied later in this lab period.
● Slice open the pericardial sac, and peel it off the heart and major vessels. Distinguish the
pulmonary trunk from the ascending aorta. The pulmonary trunk divides into the right and left pulmonary aa, which lead to the lungs. The right coronary a. is easy to find, but the left coronary a. is covered by the pulmonary trunk. Returning to the aortic arch, find its three main branches (brachiocephalic trunk, left carotid, left subclavian aa).
● Depending on the condition of the heart, look to find the circumflex a, and the left anterior
descending a. (LAD) separating the right and left ventricles anteriorly. Also find the posterior interventricular a. on the posteroinferior surface of the heart. These smaller arteries will be easier to identify after the heart has been dissected apart from the lungs later in this lab period.
• Dissect into the heart. o Begin by cutting the inferior vena cava near where it enters the heart. o While lifting the heart from the diaphragm, cut the four pulmonary veins posteriorly. o Keeping the heart attached to the body by the superior vena cava and ascending aorta,
make an incision along the inferior aspect of the heart, entering both the right and left ventricles separately.
o Take time to appreciate the thickness of the exterior walls of the heart. This special type of tissue is called cardiac muscle.
• Pick the dried blood out of the heart. Start this task by passing the tip of your finger into the
In the normal state, the apex of the lung ascends to above the clavicle. A Pancoast tumor involves a cancerous tumor in the
apex of the lung that can impinge upon the lower trunk of the brachial plexus.
21
heart through the inferior vena cava and beyond. Explore the valves that connect the adjoining chambers. o The left ventricle has two (bicuspid) valves; the right ventricle has three (tricuspid) valves. o Observe how the string-like chordae tendineae connect the valves to the papillary muscle,
and recognize how contraction of these muscles prevent prolapse of the valves into the atria during ventricular contraction.
● With the heart and lungs now dissected, locate these
major nerves inside the chest cavity. o The phrenic n. (C3-5) traverses the neck and
heart to reach the diaphragm. o The vagus n. (CN X) descends the neck within the
carotid sheath, and then passes through the chest to reach the abdomen.
o The recurrent laryngeal n. branches from the vagus n. in the lower neck to innervate the larynx (voice box).
• Though it takes effort, dissect out the complete pathway of the recurrent laryngeal n. Look
deep on the left side of the chest cavity posterior to the lung, and find where it branches from the vagus n. and then travels under the aorta, before ascending to the larynx.
• This concludes Lab 19, leaving time for review. The instructors are available to help the
students review during each lab period. The concepts taught in this course are not overly difficult. Instead, what challenges students most is the sheer volume of the material covered, as well as the pace of the course. To help you embrace the challenge, reflect some on the uniqueness of the human dissection educational experience.
Lab 20. Low Extremity Osteology; Review The osteology of the lower extremity is studied during this lab. The bones of the pelvis include the innominate consisting of the fused ilium, ischium, and pubic bones. Also studied are the femur, patella, tibia, fibula, and the bones of the foot and toes. Following, the remainder of this lab period is for review. Students are encouraged to work together and share any tricks you have learned in studying the dissections. Additionally, a large number of anatomical models are now available in the lab. The classroom models include skeleton parts, skulls, prosected joints and plasticized models of human tissues. Moving forward, these models can be studied in small group breakout sessions, with the instructors assisting as needed. Some of the classroom models are expensive, or composed of real bone and connective tissues. Always handle the models, including plasticized human tissues, with clean gloves, and with care. This concludes Lab 20.
Ortner’s syndrome involves injury to the left recurrent branch of the
laryngeal n. with a consequent hoarseness of voice. One cause
stems from an “aortic dissection” whereby the wall of the arch of the aorta distends and stretches
this nerve as it loops underneath.
22
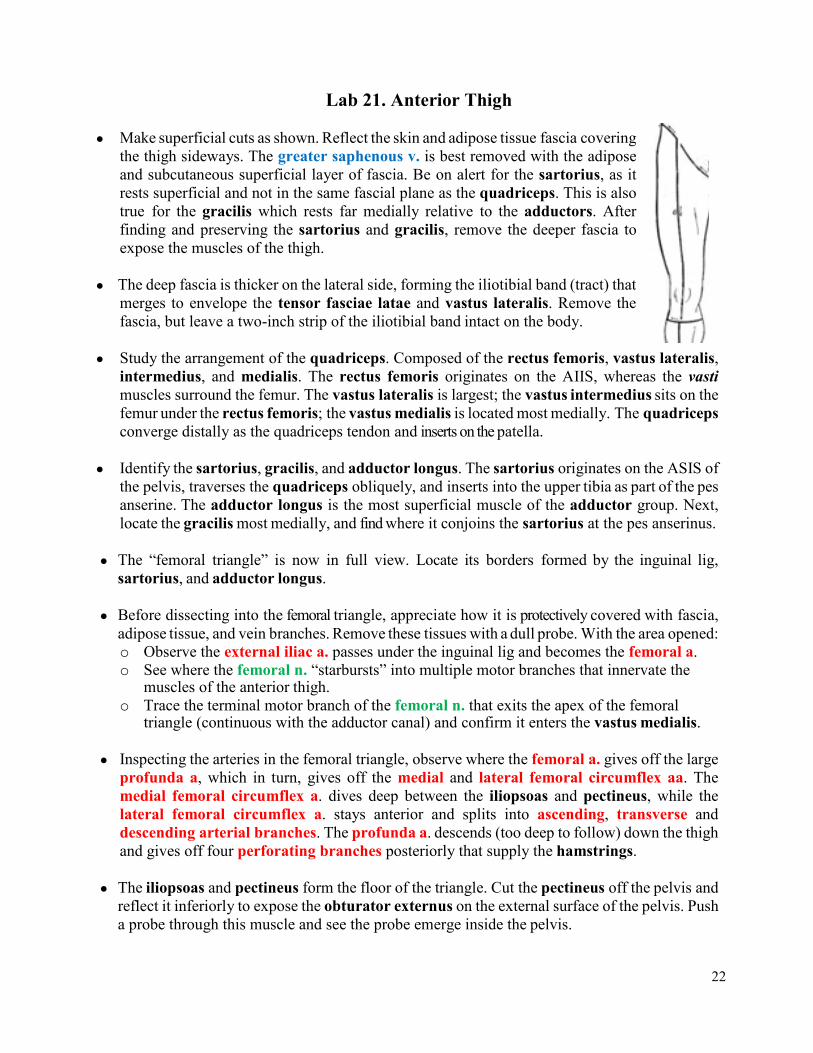
Lab 21. Anterior Thigh ● Make superficial cuts as shown. Reflect the skin and adipose tissue fascia covering
the thigh sideways. The greater saphenous v. is best removed with the adipose and subcutaneous superficial layer of fascia. Be on alert for the sartorius, as it rests superficial and not in the same fascial plane as the quadriceps. This is also true for the gracilis which rests far medially relative to the adductors. After finding and preserving the sartorius and gracilis, remove the deeper fascia to expose the muscles of the thigh.
● The deep fascia is thicker on the lateral side, forming the iliotibial band (tract) that
merges to envelope the tensor fasciae latae and vastus lateralis. Remove the fascia, but leave a two-inch strip of the iliotibial band intact on the body.
● Study the arrangement of the quadriceps. Composed of the rectus femoris, vastus lateralis,
intermedius, and medialis. The rectus femoris originates on the AIIS, whereas the vasti muscles surround the femur. The vastus lateralis is largest; the vastus intermedius sits on the femur under the rectus femoris; the vastus medialis is located most medially. The quadriceps converge distally as the quadriceps tendon and inserts on the patella.
● Identify the sartorius, gracilis, and adductor longus. The sartorius originates on the ASIS of
the pelvis, traverses the quadriceps obliquely, and inserts into the upper tibia as part of the pes anserine. The adductor longus is the most superficial muscle of the adductor group. Next, locate the gracilis most medially, and find where it conjoins the sartorius at the pes anserinus.
● The “femoral triangle” is now in full view. Locate its borders formed by the inguinal lig,
sartorius, and adductor longus. ● Before dissecting into the femoral triangle, appreciate how it is protectively covered with fascia,
adipose tissue, and vein branches. Remove these tissues with a dull probe. With the area opened: o Observe the external iliac a. passes under the inguinal lig and becomes the femoral a. o See where the femoral n. “starbursts” into multiple motor branches that innervate the
muscles of the anterior thigh. o Trace the terminal motor branch of the femoral n. that exits the apex of the femoral
triangle (continuous with the adductor canal) and confirm it enters the vastus medialis. ● Inspecting the arteries in the femoral triangle, observe where the femoral a. gives off the large
profunda a, which in turn, gives off the medial and lateral femoral circumflex aa. The medial femoral circumflex a. dives deep between the iliopsoas and pectineus, while the lateral femoral circumflex a. stays anterior and splits into ascending, transverse and descending arterial branches. The profunda a. descends (too deep to follow) down the thigh and gives off four perforating branches posteriorly that supply the hamstrings.
● The iliopsoas and pectineus form the floor of the triangle. Cut the pectineus off the pelvis and
reflect it inferiorly to expose the obturator externus on the external surface of the pelvis. Push a probe through this muscle and see the probe emerge inside the pelvis.
23
● Distal to the femoral triangle, the sartorius forms the roof of the “adductor canal”. Examine the canal to find the femoral a, femoral v (if present), and two prominent nerves. Follow the femoral a. distal to the adductor hiatus (gap), and trace the nerve to the vastus medialis, and the sensory saphenous n. distal into the skin and fascia along the medial knee and leg.
● Cut through the mid-belly of the adductor longus, leaving its origin and insertion attached.
This exposes the adductor brevis. Re-identify the obturator n. inside the pelvis. Now trace the obturator n. into the thigh to see it split into the anterior and posterior n. divisions. Recognize the posterior division innervates the proximal part of the adductor magnus.
● Located deep, the adductor magnus is large, as its name suggests. This muscle is best
examined on the posterior thigh where it rests deep to the hamstrings. This concludes Lab 21.
Lab 22. Gluteal Region Start by reviewing the structures identified yesterday. When ready, turn the body prone and begin dissection of the gluteal region by removing the skin and adipose from the buttock and thigh.
● Note the coarse texture of the gluteus maximus fibers. The gluteus medius can now also be
seen at the upper lateral edge of the gluteus maximus. ● At the borders of the gluteus maximus insert your fingers between the gluteus maximus and
medius until the fingers of your two hands touch. Now cut the superior margin of the gluteus maximus of the sacrum taking care not to cut the small muscles, nerves, and vessels that reside deep. Though part of the inferior gluteal n. and vessels that enter the gluteus maximus will be sacrificed, aggressively reflect the gluteus maximus laterally and off the greater trochanter.
● On the greater trochanter, locate the trochanteric bursa. This bursa can only be identified now,
as it all but disappears when the tissues dry out. With the gluteus maximus reflected, cut the gluteus medius from its origin transversely by making a fan-shaped incision. Reflect this muscle to find the gluteus minimus deep where it rests superior to the greater trochanter.
● At the center of the buttock, observe the terminal-end of the piriformis where it emerges
through the greater sciatic foramen. Also find the sciatic n. where it exits this foramen inferior to the piriformis. The piriformis serves as a key landmark in the gluteal region.
● Find the superior gluteal n. and inferior gluteal n. that are named according to where they
exit the pelvis in relation to the piriformis. Inferior to the piriformis, locate the obturator internus tendon that emerges from the lesser sciatic foramen and unites with the gemellus superior and inferior. Together, the obturator internus and gemelli form the triceps coxae.
● Find the quadratus femoris coming from the ischial tuberosity. With your hands bending the knee and holding the leg, internally rotate the hip to stretch the external rotators of the hip. Stretching the cadaver in this manner may be required to find many of the deepest structures.
24
After exiting the true pelvis, the pudendal n. travels along the
medial margin of the ramus of the ischium and pubis (Alcock’s
Canal). This location makes it vulnerable to compression when
riding a bicycle or a horse, causing pain in the genitalia.
● At the ischial tuberosity, clean the gluteus maximus off the white sacrotuberous lig, and proceed to cut the inferior end of this lig at the ischial tuberosity. Inside the pelvis find the internal pudendal a, internal pudendal n, and the nerve to obturator internus where they exit the greater sciatic foramen (over the sacrospinous lig) and then re-enter the pelvis via the lesser sciatic foramen. This concludes Lab 22.
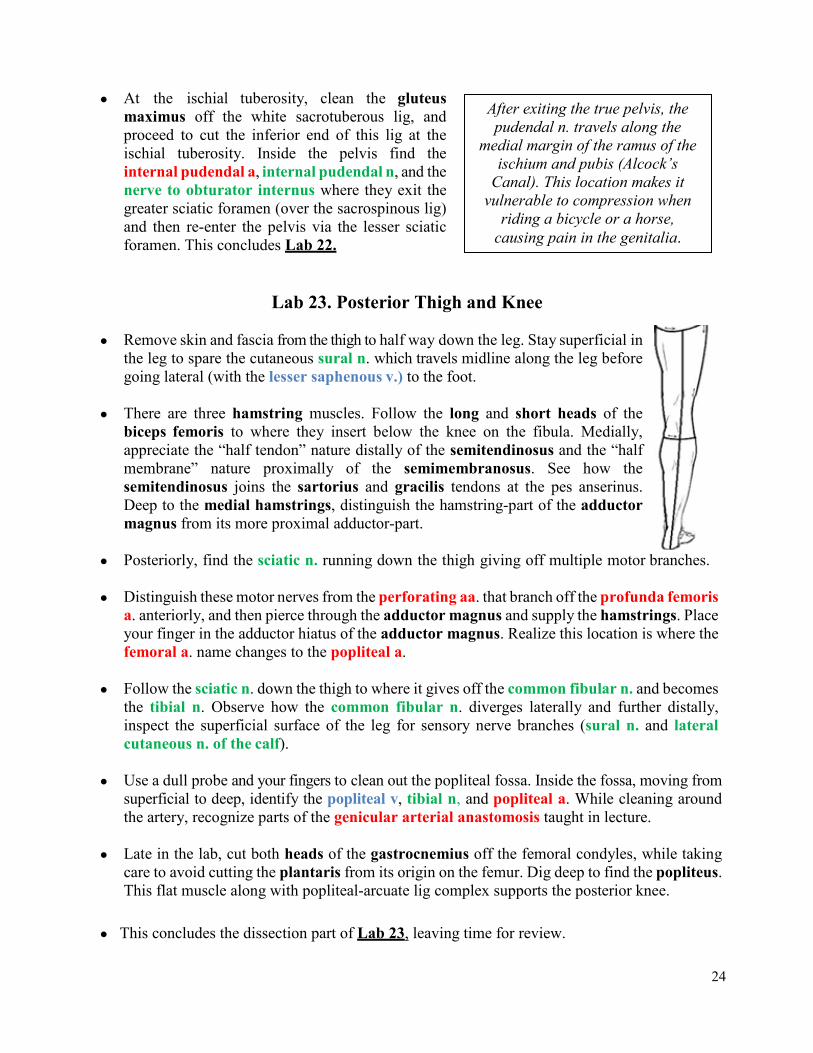
Lab 23. Posterior Thigh and Knee ● Remove skin and fascia from the thigh to half way down the leg. Stay superficial in
the leg to spare the cutaneous sural n. which travels midline along the leg before going lateral (with the lesser saphenous v.) to the foot.
● There are three hamstring muscles. Follow the long and short heads of the
biceps femoris to where they insert below the knee on the fibula. Medially, appreciate the “half tendon” nature distally of the semitendinosus and the “half membrane” nature proximally of the semimembranosus. See how the semitendinosus joins the sartorius and gracilis tendons at the pes anserinus. Deep to the medial hamstrings, distinguish the hamstring-part of the adductor magnus from its more proximal adductor-part.
● Posteriorly, find the sciatic n. running down the thigh giving off multiple motor branches.
● Distinguish these motor nerves from the perforating aa. that branch off the profunda femoris
a. anteriorly, and then pierce through the adductor magnus and supply the hamstrings. Place your finger in the adductor hiatus of the adductor magnus. Realize this location is where the femoral a. name changes to the popliteal a.
● Follow the sciatic n. down the thigh to where it gives off the common fibular n. and becomes
the tibial n. Observe how the common fibular n. diverges laterally and further distally, inspect the superficial surface of the leg for sensory nerve branches (sural n. and lateral cutaneous n. of the calf).
● Use a dull probe and your fingers to clean out the popliteal fossa. Inside the fossa, moving from
superficial to deep, identify the popliteal v, tibial n, and popliteal a. While cleaning around the artery, recognize parts of the genicular arterial anastomosis taught in lecture.
● Late in the lab, cut both heads of the gastrocnemius off the femoral condyles, while taking
care to avoid cutting the plantaris from its origin on the femur. Dig deep to find the popliteus. This flat muscle along with popliteal-arcuate lig complex supports the posterior knee.
● This concludes the dissection part of Lab 23, leaving time for review.
25
Lab 24. Posterior Leg ● With the body prone, remove any remaining skin from the back of leg and plantar surface of the
foot. Also, remove the plantar fat pad from the calcaneus while leaving the plantar fascia intact. ● In the popliteal fossa of the knee, study how medial and lateral heads of the gastrocnemius
attach to the condyles of the femur, whereas the soleus attaches to the soleal line of the tibia. Despite the discriminant attachments, together these two muscles form the triceps surae. Between the heads of the gastrocnemius, follow the plantaris down the leg and realize why this muscle tendon is called the “freshman nerve”.
● Clean and remove any unwanted tissues from the popliteal fossa preserving the plantaris as
well as the major arteries and nerves that supply the leg and foot. Follow the popliteal a. to where it becomes the posterior tibial a. at the inferior edge of the popliteus.
● Dissect into the superficial posterior compartment by cutting the Achilles tendon from the
calcaneus. Next, cut the soleus from the soleal line of the tibia while lifting and cutting it lengthwise from the shaft of the tibia. Reflect the triceps surae laterally, leaving it attached only to the proximal fibula. Inside the posterior compartment, identify the posterior tibial a. and tibial n. within a neurovascular bundle, and the fibular a. where it runs along the fibula yet inside the posterior compartment.
● Now dissect apart the contents of the deep posterior compartment. Start by removing the flexor
retinaculum from the medial malleolus and calcaneus, taking care not to cut the underlying structures. Dislocate the tibialis posterior and flexor digitorum longus (FDL) tendons out from the retromalleolar groove, and follow these tendons up the leg and study the muscle origins.
● Near the medial malleolus, identify the posterior
tibial a. and tibial n. and deeper, find where the flexor hallucis longus (FHL) tendon travels beneath the sustentaculum tali. Trace this tendon into the foot, and consider how it acts with the tibialis posterior to support the hindfoot and the medial longitudinal arch.
● With the posterior compartment leg opened for study:
o Observe where the posterior tibial a. gives off the anterior tibial a, which then perforates the interosseous membrane to supply the anterior compartment.
o Further distal, find where the posterior tibial a. gives off the fibular a. Though the fibular a. travels in the posterior compartment, it supplies the lateral compartment.
o Finally, trace the posterior tibial a. the length of the posterior compartment, and confirm that it divides into the medial and lateral plantar aa. near the medial malleolus with these smaller branches continuing into the plantar surface of the foot.
● This concludes the dissection part of Lab 24.
Posterior tarsal tunnel syndrome involves compression of the tibial
nerve at the ankle. This entrapment syndrome causes paresthesia on
the plantar foot and intrinsic muscle weakness.
26
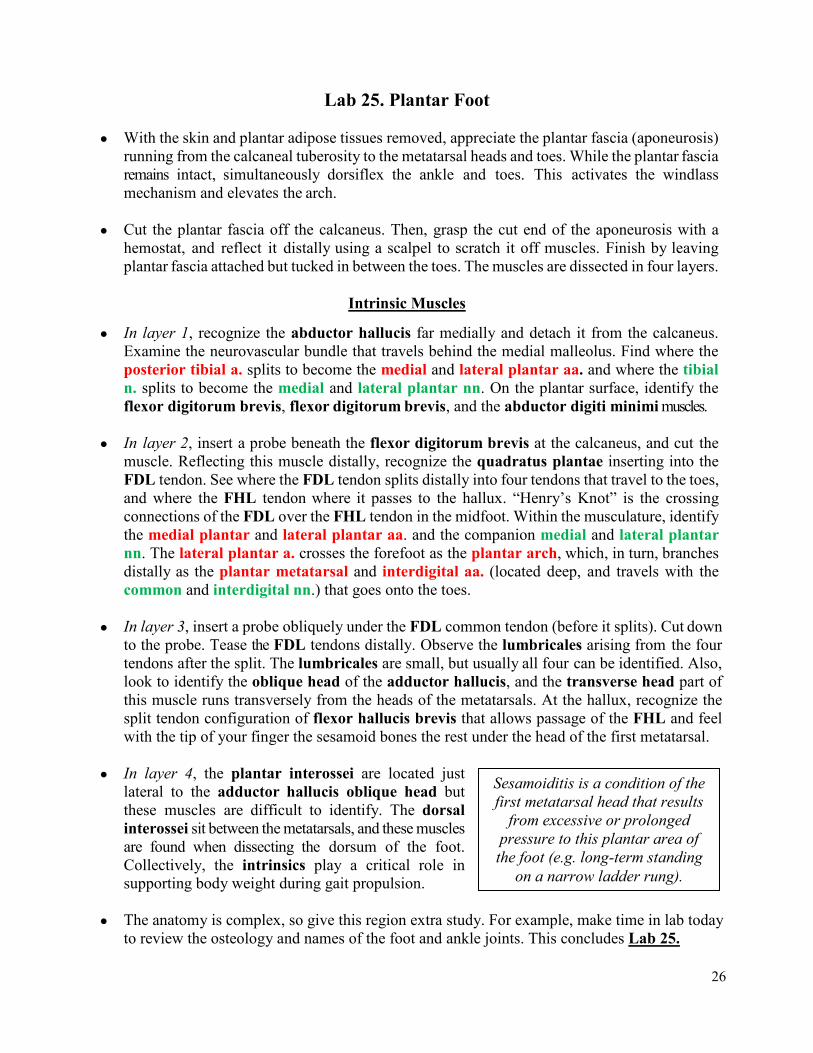
Lab 25. Plantar Foot ● With the skin and plantar adipose tissues removed, appreciate the plantar fascia (aponeurosis)
running from the calcaneal tuberosity to the metatarsal heads and toes. While the plantar fascia remains intact, simultaneously dorsiflex the ankle and toes. This activates the windlass mechanism and elevates the arch.
● Cut the plantar fascia off the calcaneus. Then, grasp the cut end of the aponeurosis with a
hemostat, and reflect it distally using a scalpel to scratch it off muscles. Finish by leaving plantar fascia attached but tucked in between the toes. The muscles are dissected in four layers.
Intrinsic Muscles
● In layer 1, recognize the abductor hallucis far medially and detach it from the calcaneus. Examine the neurovascular bundle that travels behind the medial malleolus. Find where the posterior tibial a. splits to become the medial and lateral plantar aa. and where the tibial n. splits to become the medial and lateral plantar nn. On the plantar surface, identify the flexor digitorum brevis, flexor digitorum brevis, and the abductor digiti minimi muscles.
● In layer 2, insert a probe beneath the flexor digitorum brevis at the calcaneus, and cut the
muscle. Reflecting this muscle distally, recognize the quadratus plantae inserting into the FDL tendon. See where the FDL tendon splits distally into four tendons that travel to the toes, and where the FHL tendon where it passes to the hallux. “Henry’s Knot” is the crossing connections of the FDL over the FHL tendon in the midfoot. Within the musculature, identify the medial plantar and lateral plantar aa. and the companion medial and lateral plantar nn. The lateral plantar a. crosses the forefoot as the plantar arch, which, in turn, branches distally as the plantar metatarsal and interdigital aa. (located deep, and travels with the common and interdigital nn.) that goes onto the toes.
● In layer 3, insert a probe obliquely under the FDL common tendon (before it splits). Cut down
to the probe. Tease the FDL tendons distally. Observe the lumbricales arising from the four tendons after the split. The lumbricales are small, but usually all four can be identified. Also, look to identify the oblique head of the adductor hallucis, and the transverse head part of this muscle runs transversely from the heads of the metatarsals. At the hallux, recognize the split tendon configuration of flexor hallucis brevis that allows passage of the FHL and feel with the tip of your finger the sesamoid bones the rest under the head of the first metatarsal.
● In layer 4, the plantar interossei are located just
lateral to the adductor hallucis oblique head but these muscles are difficult to identify. The dorsal interossei sit between the metatarsals, and these muscles are found when dissecting the dorsum of the foot. Collectively, the intrinsics play a critical role in supporting body weight during gait propulsion.
● The anatomy is complex, so give this region extra study. For example, make time in lab today
to review the osteology and names of the foot and ankle joints. This concludes Lab 25.
Sesamoiditis is a condition of the first metatarsal head that results
from excessive or prolonged pressure to this plantar area of the foot (e.g. long-term standing
on a narrow ladder rung).
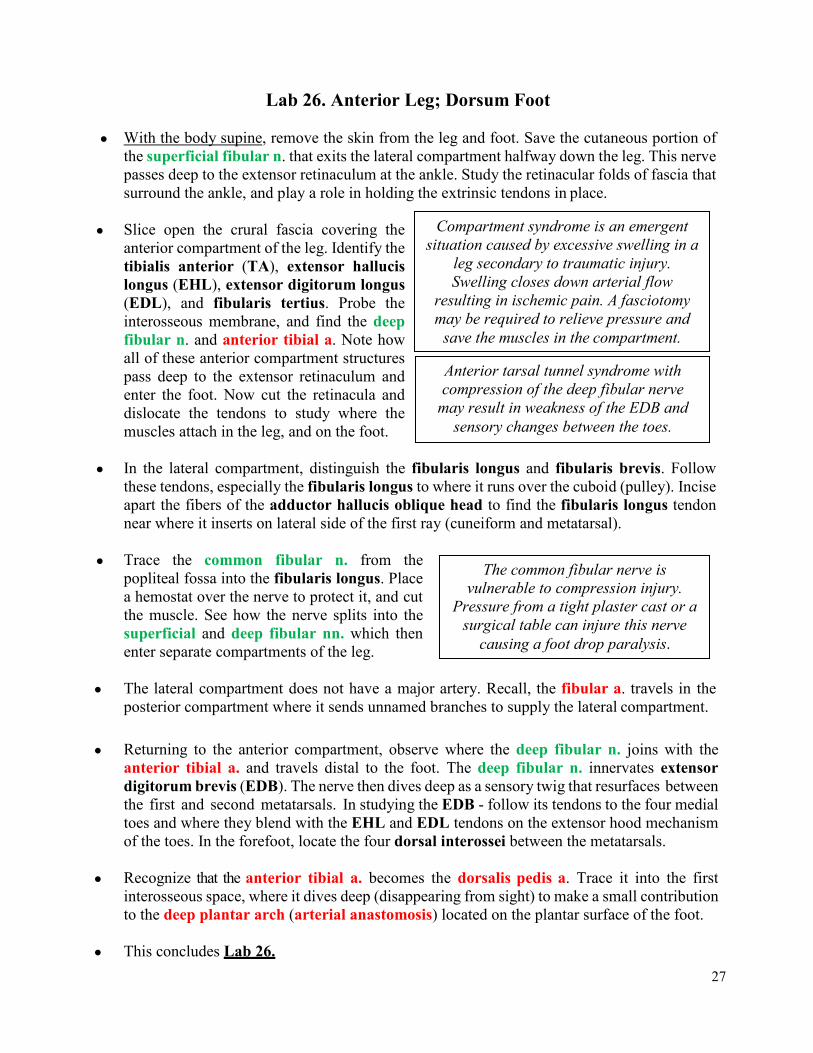
27
Lab 26. Anterior Leg; Dorsum Foot ● With the body supine, remove the skin from the leg and foot. Save the cutaneous portion of
the superficial fibular n. that exits the lateral compartment halfway down the leg. This nerve passes deep to the extensor retinaculum at the ankle. Study the retinacular folds of fascia that surround the ankle, and play a role in holding the extrinsic tendons in place.
● Slice open the crural fascia covering the
anterior compartment of the leg. Identify the tibialis anterior (TA), extensor hallucis longus (EHL), extensor digitorum longus (EDL), and fibularis tertius. Probe the interosseous membrane, and find the deep fibular n. and anterior tibial a. Note how all of these anterior compartment structures pass deep to the extensor retinaculum and enter the foot. Now cut the retinacula and dislocate the tendons to study where the muscles attach in the leg, and on the foot.
● In the lateral compartment, distinguish the fibularis longus and fibularis brevis. Follow
these tendons, especially the fibularis longus to where it runs over the cuboid (pulley). Incise apart the fibers of the adductor hallucis oblique head to find the fibularis longus tendon near where it inserts on lateral side of the first ray (cuneiform and metatarsal).
● Trace the common fibular n. from the
popliteal fossa into the fibularis longus. Place a hemostat over the nerve to protect it, and cut the muscle. See how the nerve splits into the superficial and deep fibular nn. which then enter separate compartments of the leg.
● The lateral compartment does not have a major artery. Recall, the fibular a. travels in the
posterior compartment where it sends unnamed branches to supply the lateral compartment.
● Returning to the anterior compartment, observe where the deep fibular n. joins with the anterior tibial a. and travels distal to the foot. The deep fibular n. innervates extensor digitorum brevis (EDB). The nerve then dives deep as a sensory twig that resurfaces between the first and second metatarsals. In studying the EDB - follow its tendons to the four medial toes and where they blend with the EHL and EDL tendons on the extensor hood mechanism of the toes. In the forefoot, locate the four dorsal interossei between the metatarsals.
● Recognize that the anterior tibial a. becomes the dorsalis pedis a. Trace it into the first
interosseous space, where it dives deep (disappearing from sight) to make a small contribution to the deep plantar arch (arterial anastomosis) located on the plantar surface of the foot.
● This concludes Lab 26.
The common fibular nerve is vulnerable to compression injury.
Pressure from a tight plaster cast or a surgical table can injure this nerve
causing a foot drop paralysis.
Anterior tarsal tunnel syndrome with compression of the deep fibular nerve
may result in weakness of the EDB and sensory changes between the toes.
Compartment syndrome is an emergent situation caused by excessive swelling in a
leg secondary to traumatic injury. Swelling closes down arterial flow
resulting in ischemic pain. A fasciotomy may be required to relieve pressure and
save the muscles in the compartment.
28
Labs 27 and 28. Lower Extremity Joints; Review
● Dissect the hip anteriorly by cutting the muscles away from the joint capsule immediately inferiorly and laterally to the ASIS. Find the capsular “Y” ligament by shaving away any non-capsular tissues. Cut the joint capsule from the rim of the acetabulum, leaving the labrum intact. Dislocate the hip by aggressively flexing and externally rotating the hip to force the femoral head out of the acetabulum. Inspect the femoral head for joint erosions; note the fovea capitis and lig of teres; observe the acetabulum and labral ring that surrounds it.
● Dissect the knee anteriorly making a U-shaped cut beginning at the medial retinaculum, across
the quadriceps tendon and down the lateral retinaculum. Reflect the patella down, leaving it attached by the patellar tendon. Looking inside the knee: o Examine the articular cartilage for arthritic erosions. Maybe observe a thin band of plica
(fold in synovial membrane) along the anteromedial aspect of the knee. o Recognize the medial and lateral menisci attached to the tibia via the coronary ligs; find
the transverse lig between the anterior poles (horns) of the menisci. o Find the anterior cruciate lig (ACL) attaching anteriorly on the intercondylar eminence of
the tibia. See the posterior cruciate ligament (PCL), and intercondylar notch of the femur. o Palpate the broad medial collateral lig (MCL); search into the pes anserinus in attempt to
find the bursae that resides between the group of muscle tendons and the tibia. o Dissect out the lateral collateral lig (LCL) by first palpating this cable-like extracapsular lig
superior to the fibular head, now expose it by removing the surrounding fascial tissues. o Assess the stability by manually delivering valgus-varus and anterior-posterior joint
stresses to the knee while observing how certain maneuvers stress certain ligaments. ● Dissect the hindfoot by reflecting (or removing) the extrinsic muscles that cross the ankle.
o On the lateral side, remove any tissues that cover the lateral collateral ligs (LCL). The three bands are named the anterior-talofibular, calcaneofibular, and posterior-talofibular ligs.
o On the medial side, confirm the triangular (deltoid) arrangement of the medial collateral lig (MCL) fibers.
o To dissect into the ankle, cut the MCL inferior to the medial malleolus while forcing the hindfoot into eversion and pulling the talus away from the tibia, disarticulating the joint.
o To dissect apart the subtalar joint and all its articulations, while prying the talus and calcaneus bones apart cut the interosseous lig housed inside the joint. When disarticulation is complete, feel the smoothness of the joint surfaces and imagine how the bones move in relation to each other during pronation and supination movement of the foot.
o Remove the intrinsic muscles (layers 1 and 2) to observe the plantar ligaments of the foot. Carve the muscles off distal to the anterior tubercle of the calcaneus, and see: • The long-plantar lig that spans the midfoot and covers the fibularis longus tendon. • The short-plantar lig where it runs just medial in the crevice of the medial arch, • The calcaneonavicular “spring” lig that sits immediately deep to tibialis posterior
tendon. Apply force to the spring-lig with your fingers (or using a hemostat) and feel how it stretches under an imposed load.
Time is provided in these combined lab periods to finish any remaining dissections and to review. This concludes Labs 27 and 28.
29
Lab 29. Final Review
Students can now turn their full attention to studying the full body dissections in preparation for the final examinations (both lecture and lab). About 15% of the structures tagged in the final lab exam and questions asked in the written exam will come from material covered prior to the midterm exam.
Lab 30. Final Exam
The final lab examination involves the identification of structures on the body dissections, and the anatomical models used in the lab. Today is the last day you will be in the lab, so be sure to remove all belongings from the lab and take time to reflect on this a unique learning experience, knowing that a person contributed their body to advance your medical education.