Production process of film poster
10
Production process of film poster I produced the horror film poster using Adobe Photoshop, and will show a quick tutorial on how I used the tools in the software to construct it.
Transcript of Production process of film poster

Production process of film poster
I produced the horror film poster using Adobe Photoshop, and will show a quick tutorial on how I used the tools in the software to construct it.

The first step is to simply open a blank document. By going to ‘file’ then ‘new’ allows us to create a new Photoshop page. We can play around with the options for instance the preset, resolution, colour mode and also size background. I chose the classic A4 international preset.

Next I simply got an image and pasted this to the blank document. Stretching the image through the whole page. To paste an image you can even use the short-cut ctrl + v or go to ‘edit’ and then ‘paste’. To transform the image I use the shortcut ctrl + t or go to ‘edit’ then ‘transform’.

I copied the layer just because if I made a mistake when editing, I can easily go back. Copying a layer is simply done by right clicking the layer and going to ‘duplicate’. I amended the image of the woods in order to make it look more horrific. I used hue/saturation, levels and also a black smoke pen brush. The hue/saturation was simply ctrl + u and this allows the image hue, saturation and lightness change. I amended these to find a suitable effect. I also used the ‘levels’ tool which is ctrl + l. This plays with the image light colours and dark colours. I made the dark colours darker, and some of the light colours lighter. I also used a black smoke brush nd went around the edges of the background to allow space for the other poster conventions to fit in.
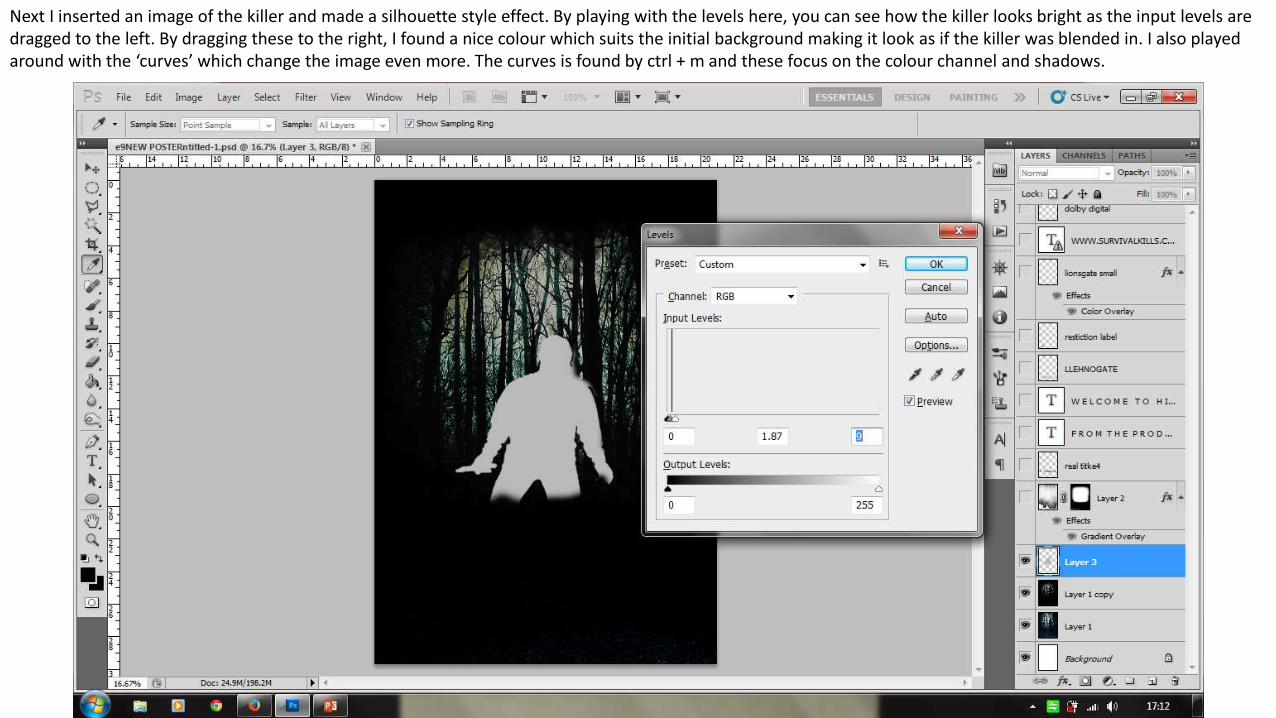
Next I inserted an image of the killer and made a silhouette style effect. By playing with the levels here, you can see how the killer looks bright as the input levels are dragged to the left. By dragging these to the right, I found a nice colour which suits the initial background making it look as if the killer was blended in. I also played around with the ‘curves’ which change the image even more. The curves is found by ctrl + m and these focus on the colour channel and shadows.

I also decided to add a smoke type of effect to the background. I done this by making a layer mask. To do this I click the layer and then the layer mask icon to create. The layer is almost like a layer on top of a layer, and by amending the layer on top by rubbing an area, I hole is shown. The hole is the area I have rubbed out which makes the thickness decrease in the centre where the hole is.
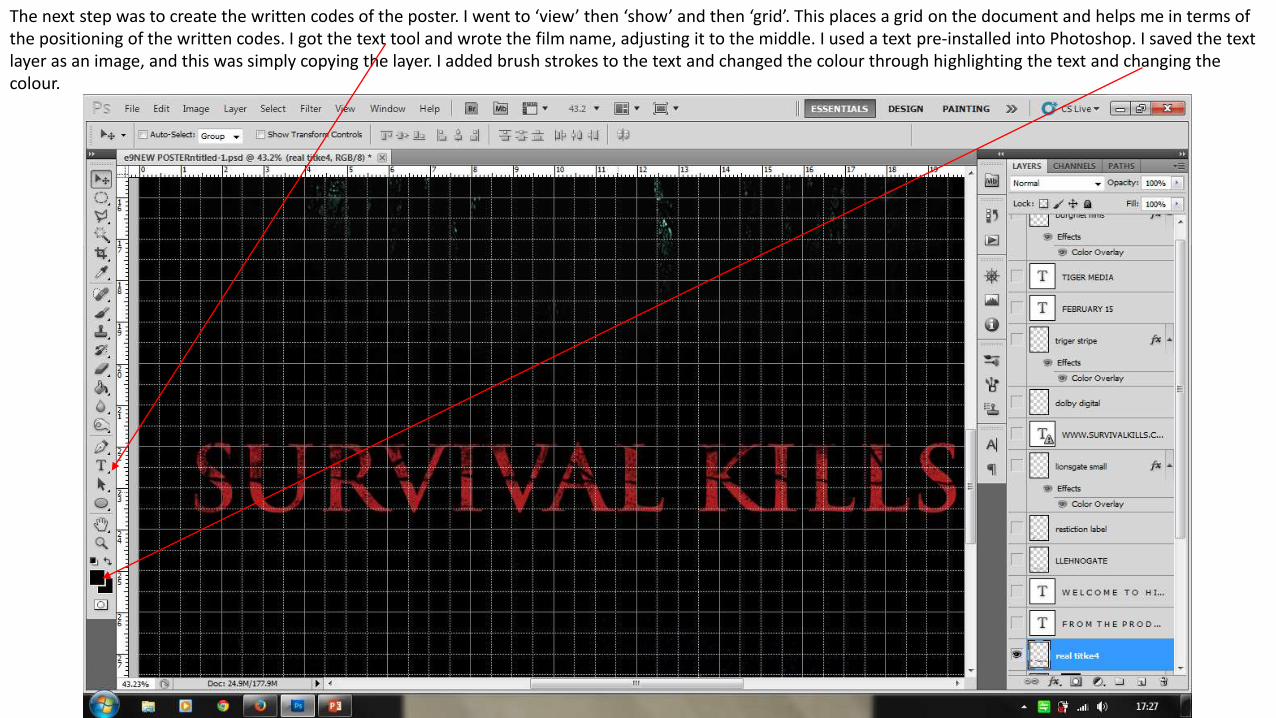
The next step was to create the written codes of the poster. I went to ‘view’ then ‘show’ and then ‘grid’. This places a grid on the document and helps me in terms of the positioning of the written codes. I got the text tool and wrote the film name, adjusting it to the middle. I used a text pre-installed into Photoshop. I saved the text layer as an image, and this was simply copying the layer. I added brush strokes to the text and changed the colour through highlighting the text and changing the colour.
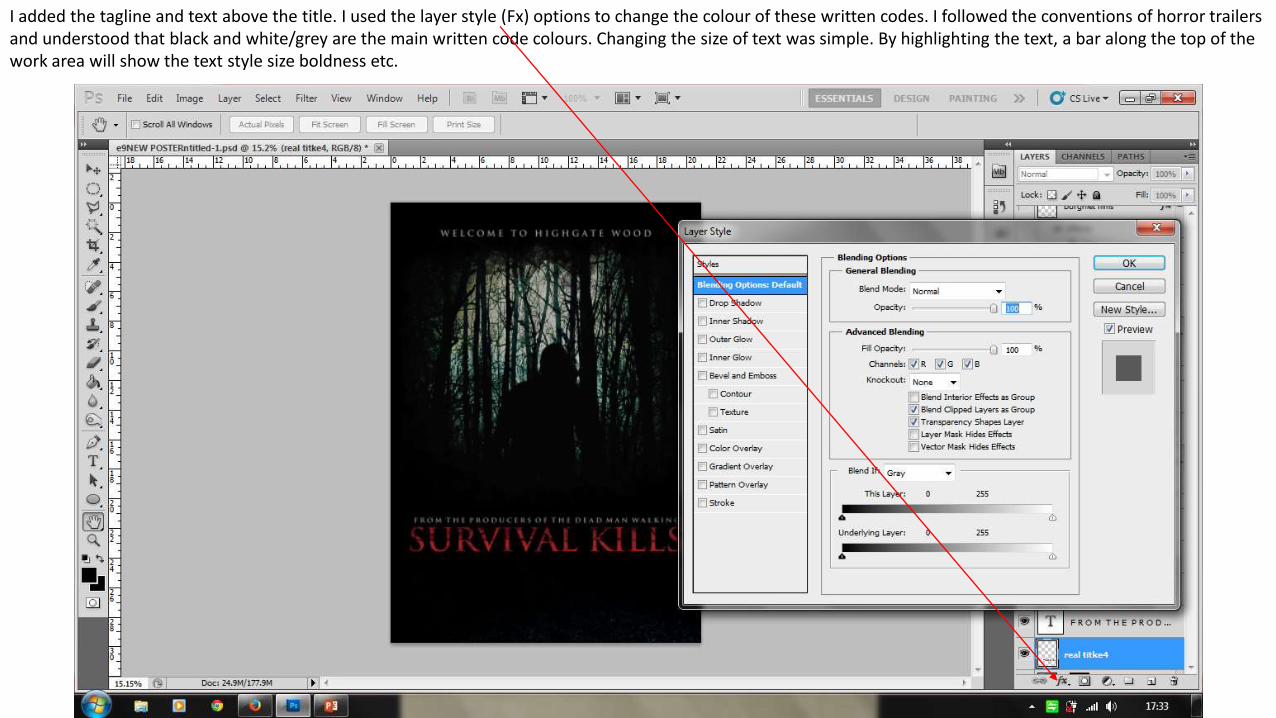
I added the tagline and text above the title. I used the layer style (Fx) options to change the colour of these written codes. I followed the conventions of horror trailers and understood that black and white/grey are the main written code colours. Changing the size of text was simple. By highlighting the text, a bar along the top of the work area will show the text style size boldness etc.

I finally added the film producer details, production company logos, website, release date and restriction of the film. I inserted many text layers and positioned them in the correct position according to my research. I installed the specific film font used in most film posters. I then copied the production company logo images, restriction label onto the document. Lastly, I added a red text similar to the title for the release date of the film, and added a website.
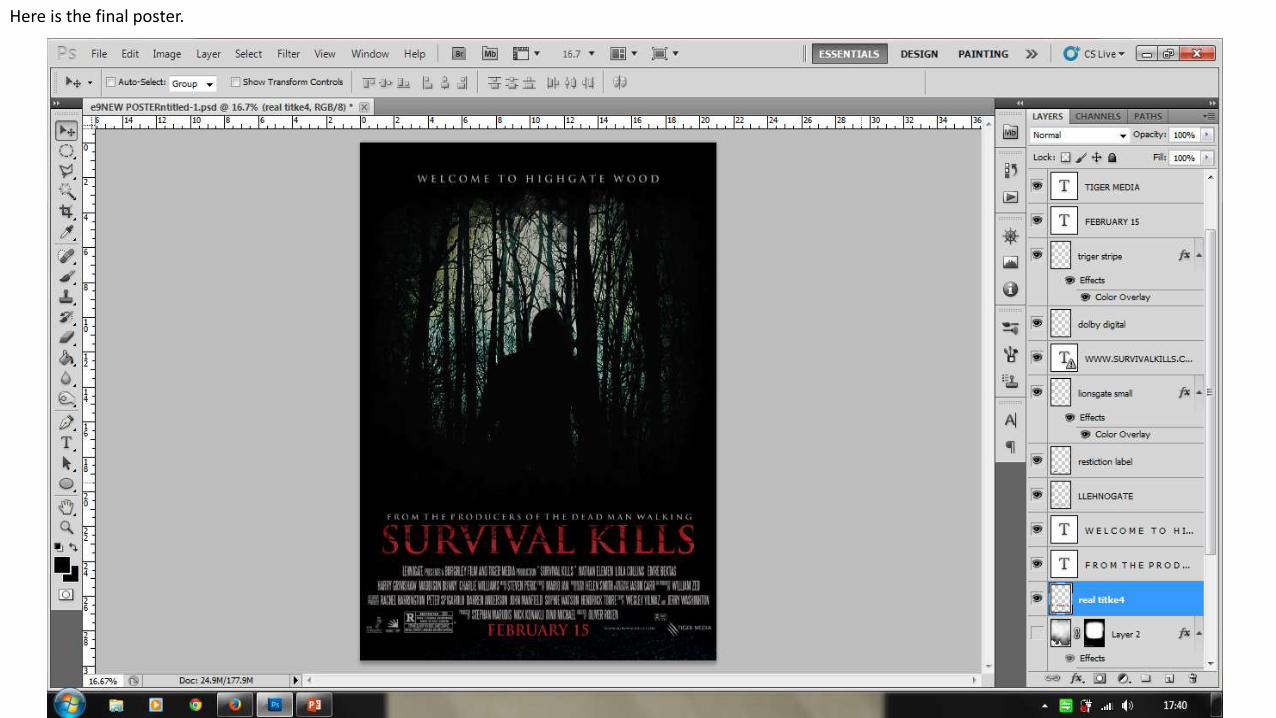
Here is the final poster.