
PRO-12 ASB - sonic-core.net · To connect your Pro-12 ASB to a mains supply, please use the power...
42
PRO-12 ASB Authentic Sound Box Rev 1.2
Transcript of PRO-12 ASB - sonic-core.net · To connect your Pro-12 ASB to a mains supply, please use the power...

PRO-12 ASBAuthentic Sound Box
Rev 1.2
Disclaimer
PRO-12 ASB is manufactured by CreamWare Audio GmbH, Siegburg, Germany.(C) CreamWare 1999 - 2006 - all rights reserved.
The following documentation, compiled by CreamWare Audio GmbH (henceforth called CreamWare), representsthe current state of the described product. The documentation may be updated on a regular basis. Any changeswhich might ensue, including those necessitated by update specifications, are included in the latest version ofthis documentation. CreamWare is under no obligation to notify any person, organization, or institution of suchchanges or to make these changes public in any other way.
We must caution you that this publication may include technical inaccuracies or typographical errors.
CreamWare offers no warranty, either expressed or implied, for the contents of this documentation. You will findthe warranty regulations for the product at the end of this documentation.
In no event will CreamWare be liable for any loss of data or for errors in data use or processing resulting from theuse of this product or the documentation. In particular, CreamWare will not be responsible for any direct orindirect damages (including lost profits, lost savings, delays or interruptions in the flow of business activities,including but not limited to, special, incidental, consequential, or other similar damages) arising out of the use ofor inability to use this product or the associated documentation, even if CreamWare or any authorized CreamWarerepresentative has been advised of the possibility of such damages.
The use of registered names, trademarks, etc., in this publication does not imply, even in the absence of aspecific statement, that such names are exempt from the relevant protective laws and regulations (patent laws,trademark laws etc.) and therefore free for general use. In no case does CreamWare guarantee that the informationgiven in this documentation is free of such third-party rights.
Neither this documentation nor any part thereof may be copied, translated, or reduced to any electronic mediumor machine form without the prior written consent from CreamWare Audio GmbH.
This product (and the associated documentation) is governed by the GTC (General Terms and Conditions) ofCreamWare Audio GmbH.
3
Index
Owner’s ManualDisclaimer 2Index 3Introduction 4
Getting startedMaking connections 5Power adaptor 5MIDI connection 5Audio connection 6Power switch 6USB connection and drivers 6Installation of Remote Software 6Presets 7
The Control PanelOscillator A & B 8Filter Section 11Amplifier 13LFO / Modulation 15Glide / Unison 18
Configuration Strip 19
Prodyssey Remote SoftwareGeneral information 23Panel layout 23Main page 24Add page 24Effects Page 30Prefs Page 33MIDI Monitor 35
MIDI Keyboard 36Preset administration 37
SpecificationsMIDI implementation table 39Specifications 40Warranty regulations 41CE certificate 41
4
Introduction
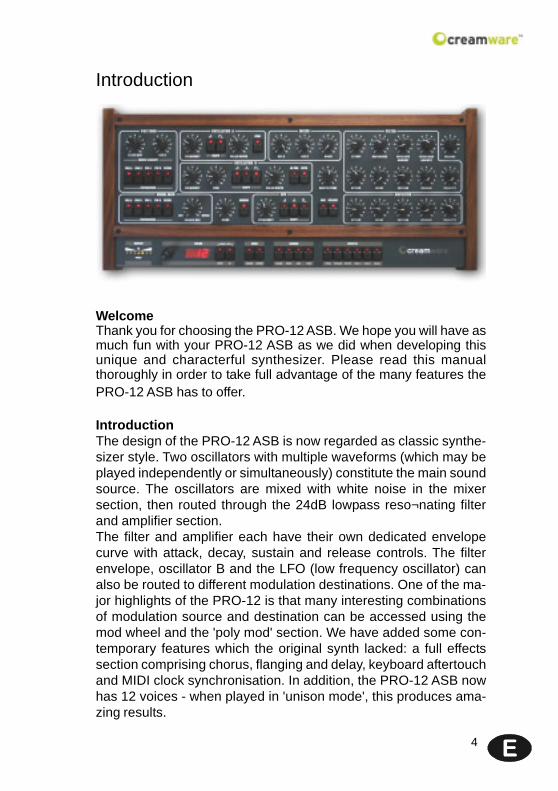
WelcomeThank you for choosing the PRO-12 ASB. We hope you will have asmuch fun with your PRO-12 ASB as we did when developing thisunique and characterful synthesizer. Please read this manualthoroughly in order to take full advantage of the many features thePRO-12 ASB has to offer.
IntroductionThe design of the PRO-12 ASB is now regarded as classic synthe-sizer style. Two oscillators with multiple waveforms (which may beplayed independently or simultaneously) constitute the main soundsource. The oscillators are mixed with white noise in the mixersection, then routed through the 24dB lowpass reso¬nating filterand amplifier section.The filter and amplifier each have their own dedicated envelopecurve with attack, decay, sustain and release controls. The filterenvelope, oscillator B and the LFO (low frequency oscillator) canalso be routed to different modulation destinations. One of the ma-jor highlights of the PRO-12 is that many interesting combinationsof modulation source and destination can be accessed using themod wheel and the 'poly mod' section. We have added some con-temporary features which the original synth lacked: a full effectssection comprising chorus, flanging and delay, keyboard aftertouchand MIDI clock synchronisation. In addition, the PRO-12 ASB nowhas 12 voices - when played in 'unison mode', this produces ama-zing results.

5
Getting started
Making Connections
Connecting the power adaptorTo connect your Pro-12 ASB to a mains supply, please use the poweradaptor supplied with the unit. First connect the power adaptor toyour Pro-12 ASB. Before plugging the adaptor's plug into a mainssocket, make sure it is compatible with the mains voltage in yourcountry. If you lose the power supply, a standard AC or DC 12V /1.5A power adaptor can be used as a replacement. The PRO-12ASB's power socket requires a hollow plug (5.5 mm x 2.1mm x 11.5mm, centre positive).
MIDI connectionsThere are two ways to play your PRO-12 using MIDI:
1. Connect your PRO-12 directly to a master keyboard.
2. Connect your PRO-12 to your computer's MIDI port inorder to use it with a sequencer or with the PRO-12Remote Software.
Connect the MIDI in and out of your PRO-12 ASB to the MIDI in andout of your keyboard or computer. The MIDI input of your PRO-12ASB should be connected to the MIDI output of your keyboard /computer, and vice versa.
The PRO-12 ASB's incoming MIDI signal can also control anotherinstrument if you connect the PRO-12 ASB's 'MIDI thru' to theinstrument's MIDI in. If your computer does not have a MIDI port,you can use USB connection as an alternative.
6
Audio ConnectionsIn order to hear the PRO-12 ASB, connect itsstereo outputs to the left / right inputs of a mixer,a computer sound card or a HiFi system. Youcan also process external signals by pluggingan audio sound source into your PRO-12 ASB'sinput.
Power SwitchThis is rather obvious, but in order to activate thePRO-12 ASB please turn the power switch on!
USB Connections and driver installation (Windows XP)An alternative to using MIDI to connect your PRO-12 ASB to acomputer is to use the built-in USB interface. On a PC, this requiresWindows XP with Service Pack 2; the Mac version supports OS10.4.After connecting the PRO-12 to a computer, Windows willautomatically recognize the PRO-12ASB as an audio USB instrument.No extra drivers are required - youcan start playing right away! Afterstarting your sequencer program(shown here: Cubase SX), you canuse the USB audio instrument driveras a MIDI port. Once in a while,under older versions of Windows XP (before Service Pack 2), theUSB port will not re-appear on screen after disconnecting the PRO-12 ASB. In this case, please reboot Windows XP. After rebooting,your USB port should appear again.
Installation of the Remote SoftwareTo install the Remote Software supplied with the PRO-12 ASB onyour PC, please put the CD-ROM labelled ' PRO-12 ASB' into theCD-R drive of your computer. The 'Install dialogue' should thenautomatically appear on your screen. (If you have de-activated theautomatic start function of your CD-R drive, please start the installationby double-clicking the file 'setup.exe' on the CD.) On the first page,please choose the language you'd like to use for the install procedureand then confirm your choice by pressing the 'Next' button.

7
You will then see the message 'Welcome to the Installation' - pleasecontinue by pressing 'Next'.
On the following page you will find the license agreement. Pleaseread it carefully and if you agree, select "I accept the license terms"- then continue by pressing the 'Next' button. You can now set theinstallation path within the 'Installation path' drop-down menu. If you
don’t set a dedicated path here, the RemoteSoftware will be installed to“C:\Programs\Creamware\PRO-12 ASBRemote”. Installation requires 6.7 MB of emptyhard disk space.
The 'Choose Start MenuFolder' lets you choose
your own directory. If you don't make a choice,a ' PRO-12' directory will be created.
PresetsPreset administration is handled in the 'sound' section of the'configuration strip'. There are 128 user and 128 factory presets. Toload a preset, press the 'preset' button, then use the 'down/up'button or the data wheel to scroll through the presets. A presetholds all parameter and effects settings, including the additionalsettings found in the Remote Software’s 'Add page' (see below).
You can only save presets in the user bank - consequently, 'user' isautomatically selected when saving a preset.

8
Control Panel
Oscillator A&BApart from a few small differences, oscillators A & B are largelyidentical. Both have sawtooth and pulse waveforms, and oscillatorB has an additional triangle wave. Each oscillator waveform has itsown dedicated on/off button and all of them can be active at thesame time, which allows a mix of up to five waveforms in parallel.The pulse wave has a variable width which can be adjusted manu-ally or via modulation - full width produces a fat 'square wave'sound, while more narrow settingscreate a thinner, more nasal tone. Inaddition, oscillator B can operate ina lower frequency band which allowsyou to use it as a typical LFO (lowfrequency oscillator). If oscillator Bis used as a modulation source, you can disable its keyboard trackingto make it produce a fixed pitch. The pitch of oscillator A can besynchronized with oscillator B, which creates some interesting tim-bres.
Frequency (both oscillators)Each oscillator has a basic frequency (tuning / pitch) control whichoperates in semitone steps over a five-octave range.
Fine (oscillator B)Oscillator B has its own fine tuning knob with a range of one semito-ne. Detuning oscillator B slightly and mixing it with oscillator A pro-duces a characteristic 'beating' effect - this instantly recognisableanalogue synthesizer sound helps make their sound rich and vi-brant.
Sawtooth wave button (both oscillators)Switches the oscillators' sawtooth wave on and off.

9
CoarseUse this to set the oscillator frequency. The range can be adjustedover 6 octaves.
FineUse this knob to detune the oscillators with respect to one another.Detuning and then mixing two oscillators produces vibrations thatresult in a more lively sound. The range can be adjusted overapproximately one octave.
Octave Up/DownUnlike the original model, our remake is equipped with a switch thatallows you to set each oscillators’ frequency in octave steps over arange of 3 octaves.
Keyboard On/OffYou can use this switch to disconnect Oscillator 1 from the key-board in order to use it as an LFO. The oscillator is now running ata much slower rate. Instead of frequencies spanning several octa-ves in the higher ranges, the “coarse” setting now ranges from just0.2 Hz to 20 Hz.
Sync On/OffThis setting activates the hard sync from Oscillator 2 to Oscillator 1.Hard sync makes the Oscillator 2 waveform re-start with each cycleof the Oscillator 1 waveform. This process transfers the pitch fromOscillator 1 to Oscillator 2. Depending on the “coarse” setting andOscillator 2’s frequency modulation, you can create different over-tone spectra each time you re-start the waveform.
10
Audio mixerThe audio mixer is used to mix the oscillators' signal before they arerouted to the filter section. Each oscillator has its own volume control.A third knob controls the amount of unpitched 'white noise' (usefulfor creating percussion sounds and other effects) in the mix.
The 'Add page' of the Remote Software contains an additional volumecontrol for external sound sources.

11
Filter sectionAlong with the envelope curve and other modulation sources, thePRO-12 ASB's filter controls the way the synthesizer's tone chan-ges over time. The filter is the 'lowpass' type with a slope of 24dBper octave; this means that all frequencies above the 'cutoff' fre-quency (see below) are reduced in volume by 24dB per octave,while frequencies below the cutoff point are left untouched. Filter'resonance' is created by feedback between the filter's input andoutput, which accentuates frequencies around the region of thecutoff frequency. When the resonance is turned right up, the filterself-oscillates (i.e. produces a musical pitch).To modulate the filter cutoff you can use the filter's envelope curve,keyboard tracking, the LFO and the two sources in the 'Poly Mod'modulation matrix (see below).
CutoffFiIlter 'cutoff frequency' is the frequency above which the PRO-12ASB's tonal spectrum is filtered and its overtones are reduced involume. You can adjust the cutoff frequency manually.
Resonance
This knob determines the amount of resonance in the filter's sound.Filter resonance is created by feedback between the filter's inputand output, which accentuates frequencies around the region of thecutoff frequency. When resonance is turned right up the filter self-oscillates, producing a sine wave at the selected cutoff frequency.The filter can therefore be regarded as an additional sound source

12
Envelope Amount:This controls the intensity of the filter's envelope curve. When theknob is turned up the filter envelope curve acts on the filter cutoff,causing its frequency to change over time and producing a mobiletimbre. The cutoff frequency returns to normal at the end point ofthe envelope curve.
Keyboard Amount:
This determines the strength of the filter cutoff's 'keyboard tracking'.When the knob is turned up, the cutoff frequency increases in valuein response to higher notes, producing a brighter and more 'open'tone in the upper keyboard range.
This determines the strength of the filter cutoff's 'keyboard tracking'.When the knob is turned up, the cutoff frequency increases in valuein response to higher notes, producing a brighter and more 'open'tone in the upper keyboard range.
13
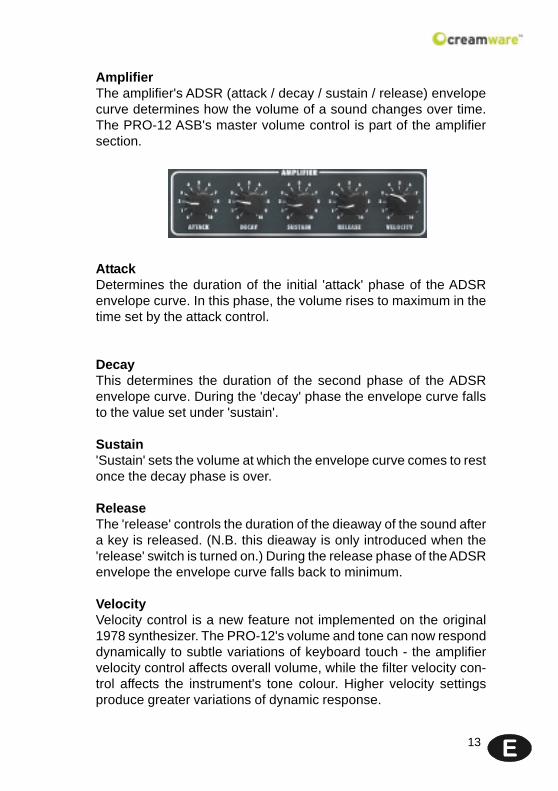
AmplifierThe amplifier's ADSR (attack / decay / sustain / release) envelopecurve determines how the volume of a sound changes over time.The PRO-12 ASB's master volume control is part of the amplifiersection.
AttackDetermines the duration of the initial 'attack' phase of the ADSRenvelope curve. In this phase, the volume rises to maximum in thetime set by the attack control.
DecayThis determines the duration of the second phase of the ADSRenvelope curve. During the 'decay' phase the envelope curve fallsto the value set under 'sustain'.
Sustain'Sustain' sets the volume at which the envelope curve comes to restonce the decay phase is over.
ReleaseThe 'release' controls the duration of the dieaway of the sound aftera key is released. (N.B. this dieaway is only introduced when the'release' switch is turned on.) During the release phase of the ADSRenvelope the envelope curve falls back to minimum.
VelocityVelocity control is a new feature not implemented on the original1978 synthesizer. The PRO-12's volume and tone can now responddynamically to subtle variations of keyboard touch - the amplifiervelocity control affects overall volume, while the filter velocity con-trol affects the instrument's tone colour. Higher velocity settingsproduce greater variations of dynamic response.

14
Options for Amp- and Filter Envelope
ADR
Pressing this button automatically sets the sus-tain to zero. This is a good way to switch ra-pidly between a sustaining and a percussivesound without having to change the sustainlevel each time. ('ADR' is another feature notavailable on the original 1978 synth.)
ReleaseThis button determines whether 'release' is on or off. When releaseis switched on, notes die away after releasing the key at a rate setby the amplifier release control.
VolumeThis controls the master volume of the syn¬thesizer. It also sets thevolume of the signal routed to the effects section, so you can use itto keep effects at a workable level, avoid distortion when using theflanger effect with lots of feed¬back, etc.
15
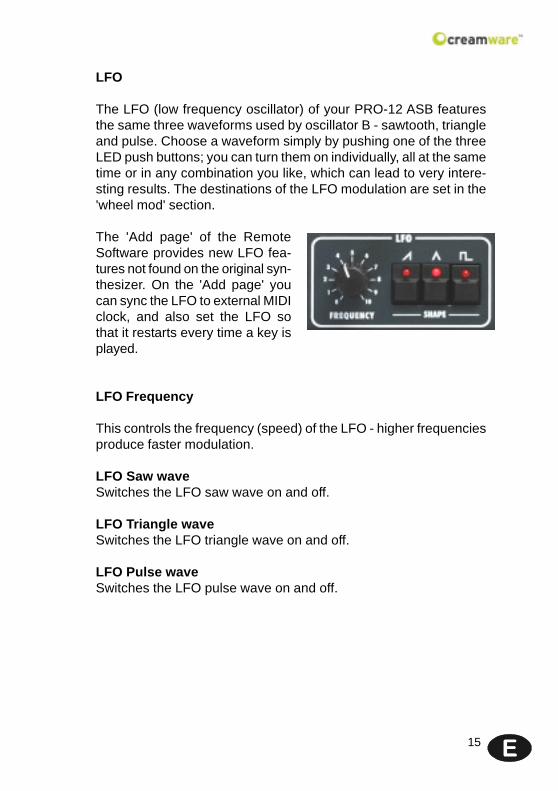
LFO
The LFO (low frequency oscillator) of your PRO-12 ASB featuresthe same three waveforms used by oscillator B - sawtooth, triangleand pulse. Choose a waveform simply by pushing one of the threeLED push buttons; you can turn them on individually, all at the sametime or in any combination you like, which can lead to very intere-sting results. The destinations of the LFO modulation are set in the'wheel mod' section.
The 'Add page' of the RemoteSoftware provides new LFO fea-tures not found on the original syn-thesizer. On the 'Add page' youcan sync the LFO to external MIDIclock, and also set the LFO sothat it restarts every time a key isplayed.
LFO Frequency
This controls the frequency (speed) of the LFO - higher frequenciesproduce faster modulation.
LFO Saw waveSwitches the LFO saw wave on and off.
LFO Triangle waveSwitches the LFO triangle wave on and off.
LFO Pulse waveSwitches the LFO pulse wave on and off.
16
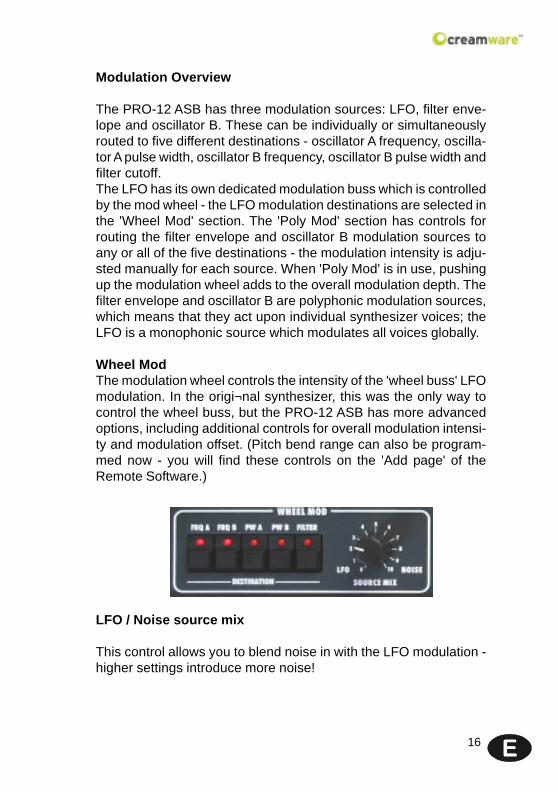
Modulation Overview
The PRO-12 ASB has three modulation sources: LFO, filter enve-lope and oscillator B. These can be individually or simultaneouslyrouted to five different destinations - oscillator A frequency, oscilla-tor A pulse width, oscillator B frequency, oscillator B pulse width andfilter cutoff.The LFO has its own dedicated modulation buss which is controlledby the mod wheel - the LFO modulation destinations are selected inthe 'Wheel Mod' section. The 'Poly Mod' section has controls forrouting the filter envelope and oscillator B modulation sources toany or all of the five destinations - the modulation intensity is adju-sted manually for each source. When 'Poly Mod' is in use, pushingup the modulation wheel adds to the overall modulation depth. Thefilter envelope and oscillator B are polyphonic modulation sources,which means that they act upon individual synthesizer voices; theLFO is a monophonic source which modulates all voices globally.
Wheel ModThe modulation wheel controls the intensity of the 'wheel buss' LFOmodulation. In the origi¬nal synthesizer, this was the only way tocontrol the wheel buss, but the PRO-12 ASB has more advancedoptions, including additional controls for overall modulation intensi-ty and modulation offset. (Pitch bend range can also be program-med now - you will find these controls on the 'Add page' of theRemote Software.)
LFO / Noise source mix
This control allows you to blend noise in with the LFO modulation -higher settings introduce more noise!
17
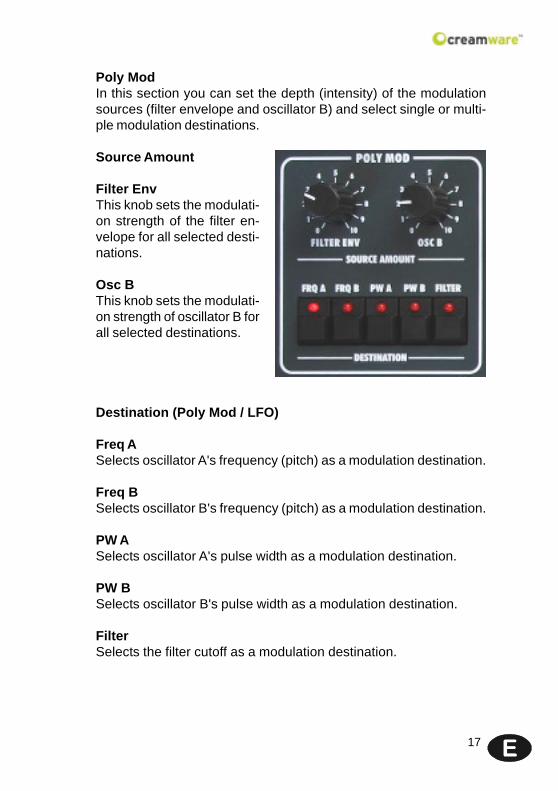
Poly ModIn this section you can set the depth (intensity) of the modulationsources (filter envelope and oscillator B) and select single or multi-ple modulation destinations.
Source Amount
Filter EnvThis knob sets the modulati-on strength of the filter en-velope for all selected desti-nations.
Osc BThis knob sets the modulati-on strength of oscillator B forall selected destinations.
Destination (Poly Mod / LFO)
Freq ASelects oscillator A's frequency (pitch) as a modulation destination.
Freq BSelects oscillator B's frequency (pitch) as a modulation destination.
PW ASelects oscillator A's pulse width as a modulation destination.
PW BSelects oscillator B's pulse width as a modulation destination.
FilterSelects the filter cutoff as a modulation destination.
18
Glide
The 'glide' effect creates fluent sliding pitches (glissandi) betweennotes at a speed determined by the glide control.
This knob sets the rate of the pitch glides - higher settings produceslower glides. The glide function doesn‘t have a separate on-offswitch, but is activated simply by turning up this control. If the glidecontrol is set to zero position, no glides will be heard!
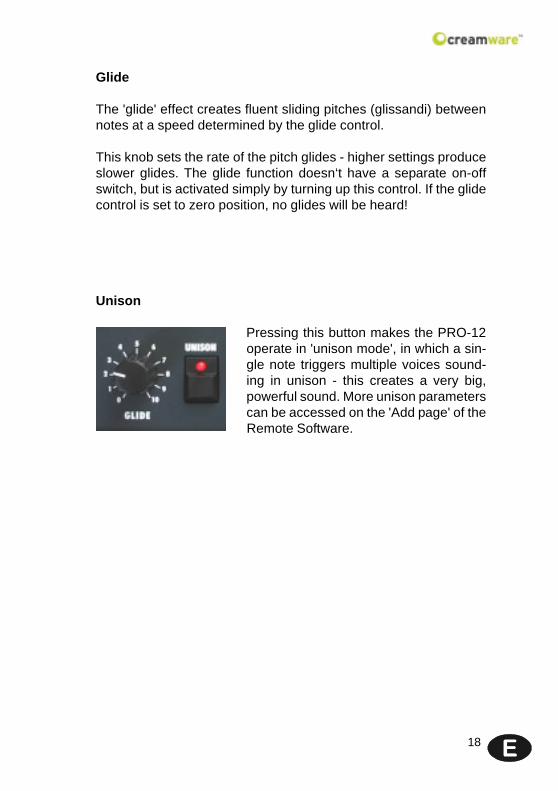
Unison
Pressing this button makes the PRO-12operate in 'unison mode', in which a sin-gle note triggers multiple voices sound-ing in unison - this creates a very big,powerful sound. More unison parameterscan be accessed on the 'Add page' of theRemote Software.
19
Configuration Strip
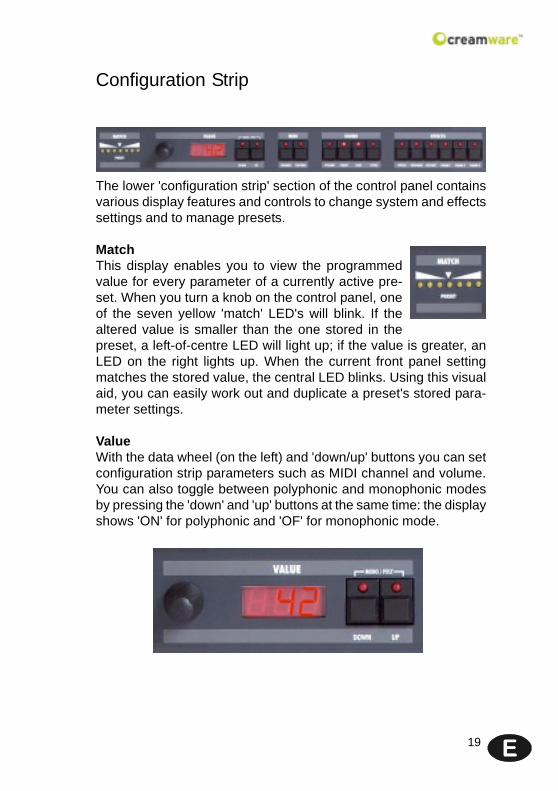
The lower 'configuration strip' section of the control panel containsvarious display features and controls to change system and effectssettings and to manage presets.
MatchThis display enables you to view the programmedvalue for every parameter of a currently active pre-set. When you turn a knob on the control panel, oneof the seven yellow 'match' LED's will blink. If thealtered value is smaller than the one stored in thepreset, a left-of-centre LED will light up; if the value is greater, anLED on the right lights up. When the current front panel settingmatches the stored value, the central LED blinks. Using this visualaid, you can easily work out and duplicate a preset's stored para-meter settings.
ValueWith the data wheel (on the left) and 'down/up' buttons you can setconfiguration strip parameters such as MIDI channel and volume.You can also toggle between polyphonic and monophonic modesby pressing the 'down' and 'up' buttons at the same time: the displayshows 'ON' for polyphonic and 'OF' for monophonic mode.
20
MIDITo change MIDI channel, press the 'channel' but-ton and select the channel using the 'down/up'buttons or the data wheel. If a small vertical lineappears in the display to the left of the channelnumber, it indicates that the instrument receivesMIDI data on all channels simultaneously (this iscalled MIDI 'omni mode'). In omni mode, MIDIdata is received on all sixteen channels, but trans-mitted only on the selected channel. When no vertical line is shown,the instrument receives and sends MIDI data on one selected chan-nel.
MIDI Values: MIDI Channel 1 … 16 (omni off)
MIDI Channel I1 … I16 (vertical lines = omni on)
Press the 'control' button to select the MIDI local mode using the'down/up' buttons or the data wheel. The display toggles between'ON' (indicating that the PRO-12 ASB is set to 'local on' mode) and'OF', indicating that 'local off' is selected. In 'local on' mode, inco-ming MIDI messages are transmitted via the Prodyssey ASB's MIDIout socket; in 'local off' mode, only front panel control changes aresent to MIDI out.
SoundTo adjust the PRO-12's overall volu-me, press the 'volume' button anduse the 'down/up' buttons or datawheel. This global volume setting isnot saved within presets.
PresetTo load a preset, press the 'preset' button, then use the 'down/up'button or the data wheel to scroll through the preset list. A presetholds all parameter and effects settings, including the settings inthe Remote Software’s 'Add page' (see below). Presets can only besaved in the user bank, which is why 'user' is automatically selectedwhen saving a preset.

21
Having selected 'preset', you can press the 'user' button to switchbetween the factory and user banks. (Please note that this functionwill not work unless you press the 'preset' button first.)
User (secondary function)The 'user' button has a secondary function which is activated byholding it down for one second. This sends current front panelsettings to the PRO-12's sound engine (and to the Remote Soft-ware) so you can hear them in action. (Hidden parameters on theRemote Software's 'Add page' will be set to their default values).
StoreTo save a preset, press the 'store' button. The LED will start blinking- now choose a preset number by turning the data wheel or by usingthe 'down/up' buttons and press 'store' again. At this point the LEDwill start flickering - press the 'store' button until the LED light goesoff. The preset is now stored under the chosen preset number.
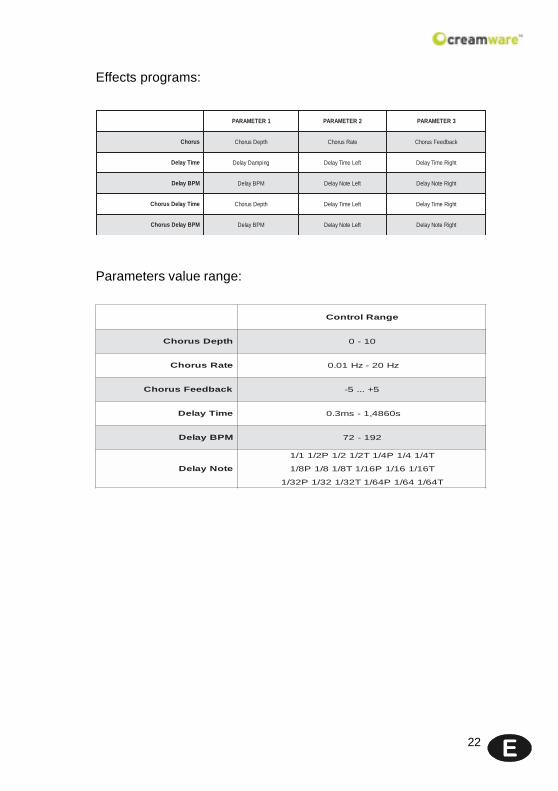
EffectsPressing the 'bypass' button turns all effects off. (Depending onyour effects settings, this might make some presets sound a littlelouder.) Once selected, the 'bypass' LED will light and all effects willbe muted - pressing the button again cancels the 'bypass' and turnsthe effects back on.To choose an effects program, press the 'program' button and usethe data wheel or 'down/up' buttons to make a selection. There area total of five programs offering various combinations of chorus anddelay. As you can see from the 'effects programs' table below, thethree effects parameters (labelled 'Param 1 - 3' on the control pa-nel) differ from program to program.
22
egnaRlortnoC
htpeDsurohC 01-0
etaRsurohC zH02-zH10.0
kcabdeeFsurohC 5+...5-
emiTyaleD s0684,1-sm3.0
MPByaleD 291-27
etoNyaleD
T4/14/1P4/1T2/12/1P2/11/1
T61/161/1P61/1T8/18/1P8/1
T46/146/1P46/1T23/123/1P23/1
1RETEMARAP 2RETEMARAP 3RETEMARAP
surohC htpeDsurohC etaRsurohC kcabdeeFsurohC
emiTyaleD gnipmaDyaleD tfeLemiTyaleD thgiRemiTyaleD
MPByaleD MPByaleD tfeLetoNyaleD thgiRetoNyaleD
emiTyaleDsurohC htpeDsurohC tfeLemiTyaleD thgiRemiTyaleD
MPByaleDsurohC MPByaleD tfeLetoNyaleD thgiRetoNyaleD
Effects programs:
Parameters value range:
23
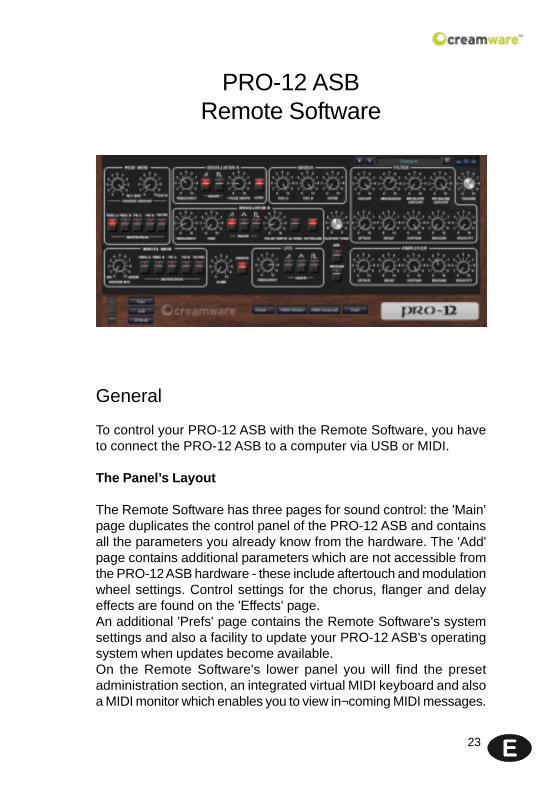
PRO-12 ASBRemote Software
General
To control your PRO-12 ASB with the Remote Software, you haveto connect the PRO-12 ASB to a computer via USB or MIDI.
The Panel’s Layout
The Remote Software has three pages for sound control: the 'Main'page duplicates the control panel of the PRO-12 ASB and containsall the parameters you already know from the hardware. The 'Add'page contains additional parameters which are not accessible fromthe PRO-12 ASB hardware - these include aftertouch and modulationwheel settings. Control settings for the chorus, flanger and delayeffects are found on the 'Effects' page.An additional 'Prefs' page contains the Remote Software's systemsettings and also a facility to update your PRO-12 ASB's operatingsystem when updates become available.On the Remote Software's lower panel you will find the presetadministration section, an integrated virtual MIDI keyboard and alsoa MIDI monitor which enables you to view in¬coming MIDI messages.

24
More detailsAs the 'Main' page controls are identical to the hardware controlsdescribed earlier in this manual, this chapter focuses on the additio-nal functions of the Remote Software.
The ADD PAGE
Keyboard Mode
Retrig/Normal
This control toggles between the twotrigger modes of the envelope curve.In 'normal' mode, the envelope curveis retriggered only when a detachedfingering style is used: this means thatwhen using a legato playing technique,only the initial note will have an attack.In 'retrigger' mode the envelope curve
restarts on every note regardless of playing style, so sounds keeptheir attack even when played legato. This is useful when a consi-stently percussive attack is required.

25
Low Note/Last NoteThis switch toggles between 'low note' and 'last note' priority. With'low note priority', lower notes take priority over higher notes, whichmeans that a high note will not sound if a low note is being held. If'last note priority' is selected, the last note played always sounds nomatter what other notes are being sustained. Along with the enve-lope trigger modes on the 'Add page', this opens up some intere-sting musical possibilities! (The difference between the two settingsis most noticeable in 'single' and 'unison' modes.)
SingleIf you select 'single' the instrument uses only one voice. It's advi-sable to use single mode when playing solo sounds with glide.

26
AftertouchThe original 1978 synthesizer did not have aftertouch facilities, so the PRO-12 ASB's aftertouch function has been modelled onthat of the later Prophet™ T8. However, unlike the T8, the PRO-12ASB's aftertouch works globally (this is called 'channel aftertouch')rather than polyphonically ('key aftertouch'). This means that whenaftertouch is introduced on one note, the resulting modulation willaffect all the other notes currently being played.
PitchThe degree to which aftertouch affects both oscilllators' pitch canbe adjusted here. This facility allows you to use aftertouch to createpitch bends.
Freq ASelects oscillator A's frequency (pitch) as an aftertouch modulationdestination.
Freq BSelects oscillator B's frequency (pitch) as an aftertouch modulationdestination.
PWControls the amount of aftertouch applied to both oscillators' pulsewidth.
PW ASelects oscillator A's pulse width as an aftertouch modulation desti-nation.
PW BSelects oscillator B's pulse width as an aftertouch modulation desti-nation.
27
FilterControls the amount of aftertouch applied to the filter cutoff - thisallows aftertouch to be used to create filter sweeps.
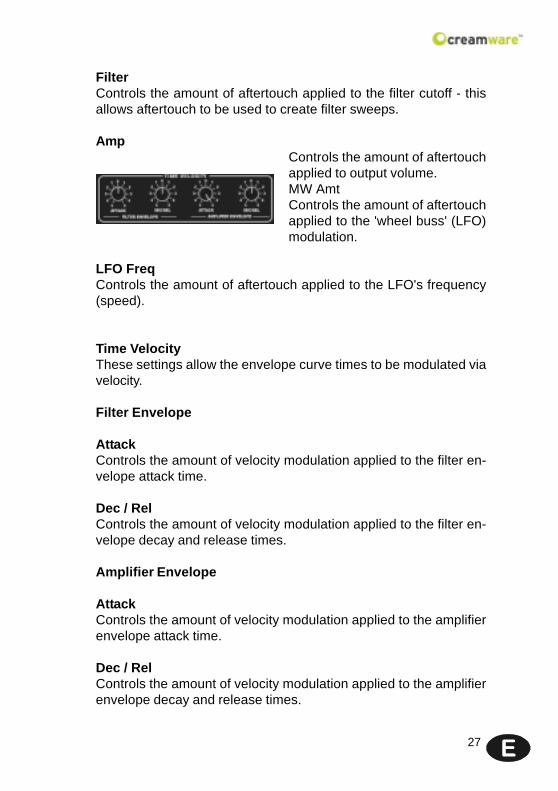
AmpControls the amount of aftertouchapplied to output volume.MW AmtControls the amount of aftertouchapplied to the 'wheel buss' (LFO)modulation.
LFO FreqControls the amount of aftertouch applied to the LFO's frequency(speed).
Time VelocityThese settings allow the envelope curve times to be modulated viavelocity.
Filter Envelope
AttackControls the amount of velocity modulation applied to the filter en-velope attack time.
Dec / RelControls the amount of velocity modulation applied to the filter en-velope decay and release times.
Amplifier Envelope
AttackControls the amount of velocity modulation applied to the amplifierenvelope attack time.
Dec / RelControls the amount of velocity modulation applied to the amplifierenvelope decay and release times.

28
MIDI Clock
BPMThis knob controls the tempo of the the PRO-12 ASB's internalMIDI clock in BPM.
LFO Settings
RetrigThis control toggles between the the LFO'stwo modes. In 'free run' mode, the LFO cy-cles freely and independently; in 'retrigger'mode the LFO is restarted / retriggered whe-never a note is played.
PhaseThis control sets the phase of the LFO from 0 to 180 degrees.
MIDIUse this switch to select whether the frequency (speed) of the LFOis set manually (via its front panel 'frequency' control) or via MIDIclock. If 'MIDI' is selected, the LFO uses the note length set in 'BPML' on the Effects page (see below). The combination of MIDI clocktempo and note length will control the speed of the LFO.

29
Wheel MOD
MW IntensityThis sets the maximum intensity the 'wheel buss' modulationcan reach when the modulation wheel is pushed all the way up.
MW OffsetYou can use this control to add built-in modulation to a patch,which saves having to push up the modulation wheel every time! If a patch uses the MW offset, you can still use the mod wheel to add more modulation.
Bend RangeThis knob sets the instrument's pitch bend range in semitonesteps from 0 to 24 semitones (two octaves).
Unison
Voices
Determines how many voices soundsimultaneously when one note isplayed in unison mode.Detune Controls the amount of de-tuning between the unison voices.

30
EFFECTS PAGE
The 'Effects' page contains controls for the chorus / flanger andstereo delay effects built into your PRO-12 ASB.
Chorus / Flanger
FlangerThis switch toggles between the chorus and flanger effects.
RateControls the speed of the chorus / flanger modulation.
DepthSets the intensity of the modulation.
PhaseSets the phase of the modulation from 0 to 180 degrees.
FeedbackControls the amount of feedback (regeneration).
Dry / WetThis controls the mix balance between the dry and effected signals- a maximum setting gives 100% chorused / flanged sound with nodry signal.

31
Delay Left / RightThis section contains separate controls for the left and right chan-nels of the PRO-12 ASB's stereo delay effect.
BPM LClick on this button to set the left channel delay to a musical notelength - if you click on the arrow to the right of the 'note' window, adrop-down menu appears with values ranging from whole notes (1/1) down to 64th note triplets (1/64T). (N.B. when the LFO is set to'MIDI' on the 'Add page', the note length selected here will affect theLFO speed.)
BPM RClick here to set the right channel delay to a musical note length.
CrossControls the amount of left channel delay feedback signal sent tothe right channel.
Time (left / right)Adjusts the time of the delay from 1 to 1365 milliseconds (= 1.365seconds). If 'BPM' is selected, you can enter the value as a notelength.

32
Feedback (left / right)Controls the amount of feedback applied to the delay effect. (Thisaffects the number of repeats you will hear.)
Hi Damp (left / right)Controls the amount of 'treble damping' applied to the delay. (Thissimulates the effect of old tape echo devices, whose repeats usedto grow successively duller on each reiteration!)
Level (left / right)Controls the delay volume level.
Dry / WetAs with the chorus / flanger effects, this controls the mix betweenthe dry and effected signals - a maximum setting gives a delay-onlysound with no dry signal mixed in.

33
PREFS PAGE
The 'Prefs' page is used to edit the PRODYSSEY ASB's systemsettings.
MIDI In / Out
Device (in / out)Use these windows to select the MIDI device (and port) you use forconnecting the Prodyssey ASB's MIDI in and out to your computer.
Channel (in / out)Set the PRO-12 ASB's MIDI in and out channels.Please make sure that you have set both MIDI in and MIDI outchannels correctly.
Hardware InfoIn this section you will find details of your PRO-12 ASB's hardwareversion, which you may need when downloading firmware updates.
DeviceDisplays the name of your unit.
VersionShows the version number of your PRO-12 ASB's firmware.
Serial NumberDisplays the serial number of your PRO-12 ASB.

34
RefreshClick on this button to update the displayed information for the unit,while reconnecting the software with the PRO-12 ASB again.
Firmware UpdateThis facility enables you to download software updates for yourPRO-12 ASB's operating system when they become available.
Activation KeyEnter the activation key code of your PRO-12 ASB here.
Firmware Source FileDisplays the name of the update file to be downloaded.
BrowseClick on the 'Browse...' button to select the directory where theupdate file will be saved.
WriteClick on the 'write' button to install the update on your PRO-12ASB.

35
MIDI MONITOR
The 'MIDI monitor' button is on the lower panel of the RemoteSoftware's display. Click on it to view a list of incoming and outgoingMIDI messages.
Controls
ClearRemoves all entries from the MIDI monitor's display list.

36
MIDI KEYBOARD
The Remote Software's built-in MIDI keyboard enables you to playthe PRO-12 ASB without using an external keyboard or sequencersoftware - you can play the synthesizer with the computer mouse.Turn on the MIDI keyboard by clicking on its switch of the RemoteSoftware's display.
ChannelSets the MIDI keyboards's MIDI channel.
OctaveSets the range of the MIDI keyboard in octave steps.

37
PRESET ADMINISTRATION
The Remote Software always displays the currently active preset'sname at the top right of its panel. Use the forward / back arrows tothe left of the preset name to step through the presets. When itcomes to more advanced preset management, the RemoteSoftware's integrated preset administration section is an easy andconvenient way of storing, exchanging and editing your presets.
Preset WindowClick on 'Preset' (on the lower part of the Remote Software's frontpanel) to open the preset window and view lists of presets.
Open / Save FileWhen you click on the 'preset' button in the top left corner of thepreset window, a drop-down file menu appears. Select 'open file' toopen an existing preset file (which can contain multiple banks ofpresets) from your computer's hard drive. You can save preset filesto create back-up copies, or to exchange with other PRO-12 ASBusers. The extension for preset files is *.pdy.
The Preset BankTo save a preset to your computer hard drive, you first have tocreate a bank. If no bank exists or you want to create additionalbanks, select 'create bank' from the drop-down menu. Presets maybe dragged and dropped from one bank to another. (To change thename of an existing bank, click and hold on its name, enter the newname and press 'enter' - the new bank name is now stored.) Use'new file', 'open file', 'save file' and 'save file as' to manage yourbanks of presets.
38
Storing, deletion and changing of Presets
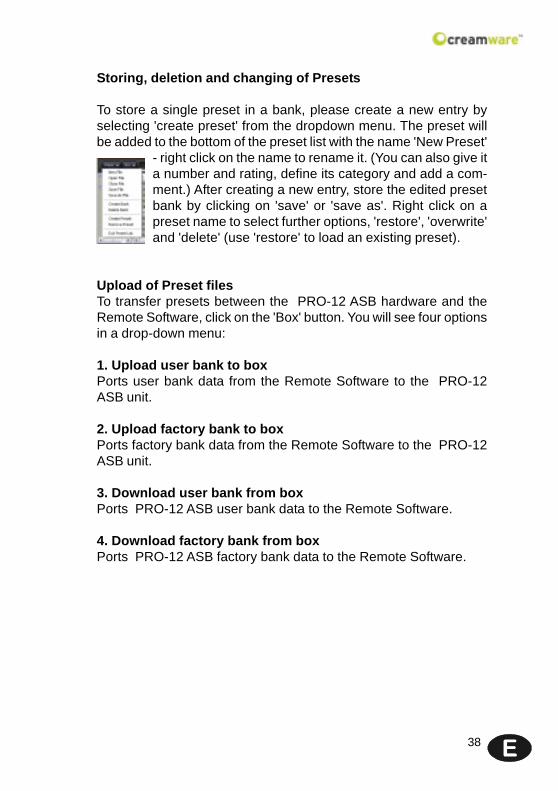
To store a single preset in a bank, please create a new entry byselecting 'create preset' from the dropdown menu. The preset willbe added to the bottom of the preset list with the name 'New Preset'
- right click on the name to rename it. (You can also give ita number and rating, define its category and add a com-ment.) After creating a new entry, store the edited presetbank by clicking on 'save' or 'save as'. Right click on apreset name to select further options, 'restore', 'overwrite'and 'delete' (use 'restore' to load an existing preset).
Upload of Preset filesTo transfer presets between the PRO-12 ASB hardware and theRemote Software, click on the 'Box' button. You will see four optionsin a drop-down menu:
1. Upload user bank to boxPorts user bank data from the Remote Software to the PRO-12ASB unit.
2. Upload factory bank to boxPorts factory bank data from the Remote Software to the PRO-12ASB unit.
3. Download user bank from boxPorts PRO-12 ASB user bank data to the Remote Software.
4. Download factory bank from boxPorts PRO-12 ASB factory bank data to the Remote Software.

39
C C P a r a m e t e r C C P a r a m e t e r0 B a n k S e l e c t 6 4 S u s t a i n P e d a l1 M o d u l a t i o n 6 52 U n i s o n v o i c e s 6 6 S o s t e n u t o3 U n i s o n D e t u n e 6 7 S o f t P e d a l4 6 8 S i n g l e M o d e5 G l i d e T i m e 6 9 U n i s o n6 D a t a E n t r y 7 0 D r y / W e t7 D e v i c e V o l u m e 7 1 R a t e8 L F O S e t t i n g s R e t r i g 7 2 P h a s e9 L F O S e t t i n g s P h a s e 7 3 D e p t h
1 0 7 4 F e e d b a c k1 1 V o l u m e 7 5 P o l y M o d D e s t i n a t i o n F r e q A1 2 O s c A F r e q u e n c y 7 6 P o l y M o d D e s t i n a t i o n F r e q B1 3 O s c A S h a p e S a w 7 7 P o l y M o d D e s t i n a t i o n P W A1 4 O s c A S h a p e P u l s e 7 8 P o l y M o d D e s t i n a t i o n P W B1 5 O s c A P u l s e W i d t h 7 9 P o l y M o d D e s t i n a t i o n F i l t e r1 6 O s c A S y n c 8 0 D r y / W e t1 7 O s c B F r e q u e n c y 8 1 T i m e L e f t1 8 O s c B F i n e 8 2 N o t e L e f t1 9 O s c B S h a p e S a w 8 3 F e e d b a c k L e f t2 0 O s c B S h a p e T r i a n g l e 8 4 D a m p L e f t2 1 M a s t e r T u n e 8 5 L e v e l L e f t2 2 O s c B S h a p e P u l s e 8 6 B P M L e f t2 3 A f t e r t o u c h P i t c h 8 7 L F O S h a p e S a w2 4 B e n d R a n g e 8 8 L F O S h a p e T r i a n g l e2 5 O s c A V o l u m e 8 9 L F O S h a p e P u l s e2 6 O s c B V o l u m e 9 0 C r o s s2 7 O s c B P u l s e W i d t h 9 1 T i m e R i g h t2 8 O s c B L o F r e q 9 2 N o t e R i g h t2 9 O s c B K e y b o a r d 9 3 F e e d b a c k R i g h t3 0 A f t e r t o u c h D e s t F r e q A 9 4 D a m p R i g h t3 1 A f t e r t o u c h D e s t F r e q B 9 5 L e v e l R i g h t3 2 B a n k S e l e c t 9 6 B P M R i g h t3 3 N o i s e V o l u m e 9 7 L F O F r e q u e n c y3 4 A f t e r t o u c h P W 9 8 B y p a s s3 5 A ft e r t o u c h M W A m t 9 9 P r o g r a m3 6 E x t e r n a l V o l u m e 1 0 0 C h o r u s / F l a n g e r3 7 A f t e r t o u c h D e s t P W A 1 0 13 8 A f t e r t o u c h D e s t P W B 1 0 2 W h e e l M o d F r e q A3 9 K e y b o a r d A m o u n t 1 0 3 W h e e l M o d F r e q B4 0 C u t o f f 1 0 4 W h e e l M o d P W A4 1 R e s o n a n c e 1 0 5 W h e e l M o d P W B4 2 E n v e l o p e A m o u n t 1 0 6 W h e e l M o d F i l t e r4 3 F i l t e r E n v A t t a c k 1 0 7 B P M4 4 F i l t e r E n v D e c a y 1 0 8 W h e e l M o d S o u r c e M i x4 5 F i l t e r E n v S u s t a i n 1 0 9 E x t e r n a l S o u r c e4 6 F i l t e r E n v V e l o c i t y 1 1 0 L F O S e t t i n g s M ID I4 7 F i l t e r R e l e a s e 1 1 14 8 A ft e r t o u c h L F O F e q 1 1 24 9 R e l e a s e 1 1 3 T i m e V e l o c i t y A t t a c k F i l t e r E n v5 0 A f t e r t o u c h F i l t e r 1 1 4 T i m e V e l o c i t y D e c / R e l F i l t e r E n v5 1 A f t e r t o u c h A m p 1 1 55 2 A m p E n v A t t a c k 1 1 6 T i m e V e l o c i t y D e c / R e l A m p E n v5 3 A m p E n v D e c a y 1 1 7 T i m e V e l o c i t y A t t a c k A m p E n v5 4 A m p E n v S u s t a i n 1 1 85 5 A m p E n v V e l o c i t y 1 1 95 6 M W In t e n s i t y 1 2 0 A l l S o u n d s O f f5 7 M W O ffs e t 1 2 15 8 P o l y M o d O S C B 1 2 2 L o c a l C o n t r o l O f f5 9 A D R 1 2 3 A l l N o t e s O ff6 0 K e y b M o d e R e t r i g 1 2 4 O m n i O f f6 1 L o w N o t e 1 2 5 O m n i O n6 2 A m p E n v R e l e a s e 1 2 6 M o n o O n6 3 P o l y M o d F i l t e r E n v 1 2 7 P o l y O n

40
Specifications
Synthesizer Type Virtual analog synthesizer
Technology Physical Modelling,Virtual Circuit Modelling
Number of Voices 12
Sampling Rate 44.1 kHz (internal oversampling)
Resolution 32 bit (Audio)
Analog Output 2 x 1/4 inch (6,3mm) unbalanced
Analog Input 2 x 1/4 inch (6,3mm) unbalanced
Control Inputs Pedal, Switch
MIDI In, Out, Thru
USB Full Speed USB rev 1.1
Power Supply AC or DC, 12V, 1.5 A < 20 W
Dimensions (mm) 480 wide (448 without wood panels)209 deep (203 without wood panels)40/76 high (front/rear)
Weight 3,4 kg
41
Warranty RegulationsThe hardware described within this documentation and the warranty regulations are governed by and grantedaccording to German Law.
CreamWare Audio GmbH (“CreamWare”) warrants, that the described product has been free of failures withinparts or components of the hardware and was found to be fully functional. Any single units has been checked byQuality Assurance Department several times and with various measures, before this product has been deliveredto you. Therefore please carefully read the following information, which are important in the case of probabledamages or malfunctions:
If goods are being found defective, missing features described within the present documentation or becomingdefective due to eventual fabrication deficiency or material defects within the first six months after purchase,then CreamWare shall at its sole discretion and evaluation replace or repair the defective parts or goods.Multiple repairs shall be permissible. In case the malfunction or physical failure can not be fixed, customerreceives the right to refrain from the purchase with refund of the amount originally paid for the defective product.Within the time frame of 6 to 24 months customer has to provide proof, that the claimed malfunction or defectivepart or component has already been defective upon first delivery. In this case CreamWare will execute requiredrepair or replacement at no cost upon acceptance of customer’s proof by CreamWare.
Any deficiencies caused by transportation have to be declared within a 14 days period after receipt of goods bywritten notice. Please note, that any warranty repair at no cost ruled by the above regulations requires registrationof name and address either online at the “My Page” area on the CreamWare website (www.creamware.com) orby sending the proof of purchase together with the defective product.
To return defective goods, please contact the retailer where you purchased the product. As an alternative youcan also contact CreamWare directly to receive the RMA number for the defective product. PLEASE NOTE: It ismandatory to return the product with the referring RMA number to avoid delays in repair. If possible, please alsoadd a description of the failure occurred to enable us executing the repair as soon as possible.
Non-compliance with the operation and maintenance instructions, any alterations or modifications to the goodsdelivered, changing or utilizing any parts or materials not conforming to Sellers specifications will immediatelyrender any warranties null and void. For a warranty claim, customer has to prove to CreamWare beyond areasonable doubt that none of these aforesaid actions caused the goods to be defective or deficient.
CreamWare Audio GmbH
Fon ++49 2241 59 58 0
Fax ++49 2241 59 58 57
email [email protected]
The hardware described within this documentation is herewith certified to conform to the requirements
set forth in the guidelines for electromagnetic acceptability (89/336/EWG)
CreamWare Audio GmbH, July 2006
sgn. Wolf Roth

CreamWare Audio GmbHAm Turm 11 - 1353721 Siegburg
Germany
Register HRB 5804, AG SiegburgVAT-ID: DE813874968
Tel.: +49 2241 59 58 0Fax +49 2241 59 58 57
www.creamware.dewww.creamware.com


![ASB The Changing Landscape - Chartered Institute of Housing Support/EM resources/ASB... · Recent ASB Case Law Wandsworth LBC v Maggott [2013] • ASB not found to be “in the locality”](https://static.fdocuments.us/doc/165x107/5c050c6d09d3f2133a8cde9d/asb-the-changing-landscape-chartered-institute-of-supportem-resourcesasb.jpg)