Printing with Water Base & Discharge Inks · • Mesh Selection for printing with water base and...
32
Water Base & Discharge Inks Printing with Stencil Making & Print Techniques
Transcript of Printing with Water Base & Discharge Inks · • Mesh Selection for printing with water base and...

Water Base amp Discharge InksPrinting with
Stencil Making amp Print Techniques
Objectivesbull To improve screen production
performance minimize down time and optimize screen life by preparing durable stencils with water base screen making techniques
bull Mesh Selection for printing with water base and discharge inks
bull Understanding coating and drying techniques for water base printing
bull How the screen room and humidity affect durability
bull Lamps and exposure considerationsbull Pre-Press requirements for water basebull Print techniques for water base and
dischargebull Pending Regulations regarding ink
components
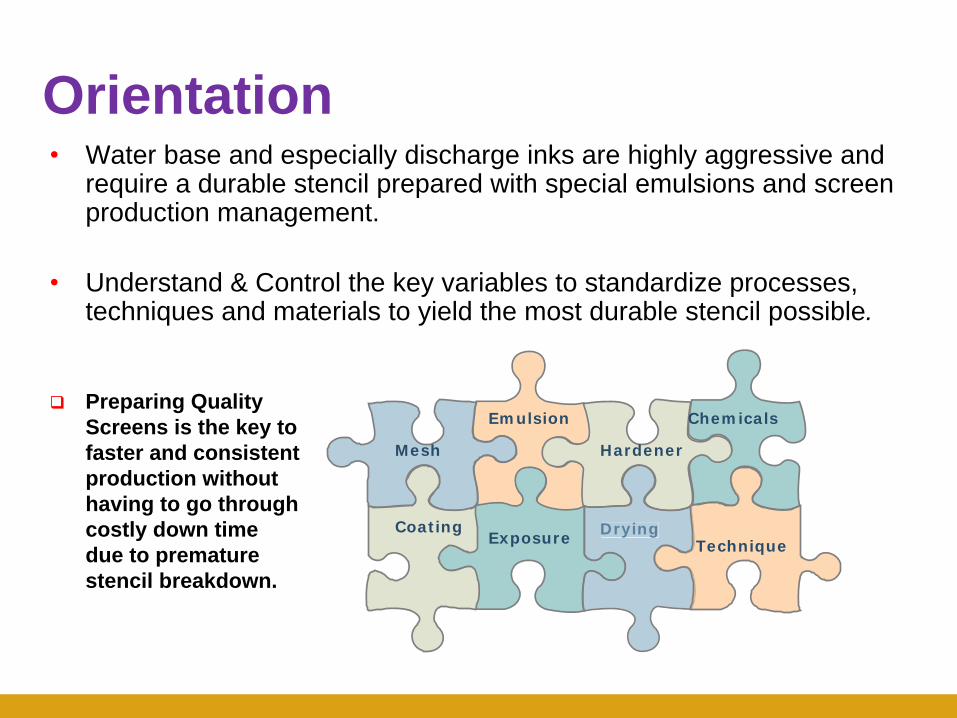
bull Water base and especially discharge inks are highly aggressive and require a durable stencil prepared with special emulsions and screen production management
bull Understand amp Control the key variables to standardize processes techniques and materials to yield the most durable stencil possible
Drying
Emulsion
Exposure
Hardener
Drying
Chemicals
Technique
Mesh
Coating
Preparing Quality Screens is the key to faster and consistent production without having to go through costly down time due to premature stencil breakdown
Orientation
Topic 1ndash Smartmesh S ThreadMesh Count
(per inch)Type Diameter
(micron)MO
(micron)Open
Area ()Thickness
(micron)Ink Vol
(cmsup3msup2)
36 T 250 597 50 485 24140 T 200 435 47 380 17960 T 120 303 51 205 105
70 S 71 292 65 119 7780 S 71 247 60 119 7186 T 100 195 44 165 73
110 S 71 160 48 115 55110 T 80 151 43 140 60125 T 71 132 42 122 51135 T 54 134 51 88 45150 S 48 121 51 77 39150 T 54 115 46 84 39160 S 48 111 49 75 36160 T 54 105 44 84 37180 S 48 93 44 74 33180 T 54 87 38 82 31200 S 48 79 39 73 28200 T 54 73 33 82 27
bull Mesh selection is the first important step for making stencils
bull Water base and Discharge base inks require different types of mesh especially on roll to roll printing where S thread (noted in red) is needed for optimum ink lay down
bull Depending on the mesh count by itself is not sufficient most of the time Looking at thread diameter mesh openings and percentage of open area are also important
Whatrsquos happening with my screens Causes amp Answers
Haze and ghost images left after reclaiming screen
Haze is caused by ink locking into mesh creases Apply HR-700 or 701 haze remover to screen allow several minutes before using pressure washer
Image is not washing out from the screen
Check film make sure film is opaque with a D-max of 30-40 If you can see through the film it is not opaque
Screens are degreased but still shows fisheyes and air bells after emulsion coating and drying
Degrease with DGR-801 Rinse frame edges and mesh with clean water Dry screen horizontally coat when dry
Screen is breaking down and melting after only a few hundred prints
Check exposure times and age and strength of lamp Dry emulsion completely before exposing
Why is my screen full of pinholes
Degrease with DGR 801 and rinse completely Slow down coating speed and use dull edge on scoop coaterExpose completely
Quick checklist
Topic 2ndash Screen Preparation
Product Application
Topic 4 ndash CoatingTopic 4ndash Emulsion CoatingCoating Techniquesbull Use dull edge of coater for mesh counts of 25 ndash200in
bull Use sharp edge of coater for mesh counts of 200 ndash 300in
bull Begin with one coat on print side using proper edge Follow with one coat on squeegee side rotate screen frame 180 degrees and apply second coat to squeegee side
bull Coat slowly using firm pressure on mesh Coating too fast will leave air bubbles in mesh causing pinholes
bull Tilt coater over so the end cap guide is flat on the mesh This improves consistency of emulsion thickness if all personnel use the flat perfect angle of the coater end cap
Correct
Incorrect
Technical Tips ndash Coating
Recommended coatingEven surface profile Right way of building EOM on print side ndash smoother and flatter on squeegee side
Poor coatingUneven surface profile Poor EOM on print side ndash excessive EOM on squeegee side
An improved RZ value on the squeegee side can help mechanical abrasion resistance
This can be accomplished with additional face coats coating technique or drying position
This technique works well with High Viscosity Emulsions like Aquasol HV or Photocure PRO-HV
Lower Viscosity Emulsions should be face coated on the squeegee side and dried print side down
Topic 5ndash Drying for Waterbase Screens
bull Screen room conditions can affect screen durability
bull Humidity should be kept to a minimum Use of a dehumidifier is recommended Set dehumidifier to 35 Use two in larger rooms placing them at opposite ends of the room
bull Keep floors free of water Avoid spray from wash out booth entering screen drying area Emulsion is hydrophilic meaning it will absorb water in the air like a sponge
bull Avoid drying wet reclaimed screens in the screen coating and coated screen storage areas as this will increase humidity in drying area and moisture levels in any coated screens
bull Avoid cold screen rooms Keep warm at 68+ F or use a hot box at 90-100 degrees F to thoroughly dry screens
bull Keep room free of dust and lint A fan in an unkempt screen room will contaminate screens and create pinholes
Screen Room Variables
bull Use clean clear positives with a D-max of 30 ndash 40 Keep the vacuum frame glass clean
bull Use an exposure calculator or hardness gauge to determine proper exposure time to cure the total thickness of emulsion
bull The spectral sensitivity of SBQ emulsion is between 360 and 420 nanometers Use multi spectral lamps for improved exposures
bull Use a strong exposure lamp 5kw is recommended for discharge screens Fluorescent tubes exposures need additional post exposure after development to expose any unexposed emulsion
Typical Exposure Times for SBQ pure photopolymer using a multi spectral 5KW Metal Halide Lamp at 40rdquo
Mesh Color Timesec1 86 W 50-802 110 W 35-503 200 Y 30-45
bull Lower wattage lamps Exposure times will be significantly longer and will need post exposure in sun or with exposure unit
bull Monitor bulb life and change regularly for proper light strength and multi spectral output
bull SBQ emulsions can be post exposed in the sun diazo based emulsions lose sensitivity during development
Topic 6ndash Emulsion Exposure
Emulsions designed for waterbase work best when fully exposed Use a pressure washer on fan spray at 12-18 inches to develop fine detailOptimum durability starts with a fully exposed screen stencil Underexposing the emulsion results in early stencil breakdownUsing excessive blockout on an underexposed screen will not prevent mechanical abrasion breakdown on the squeegee sideCheck your film If you see transparency through the black areas of the image the d-max of your film is too low and may burn through and expose emulsionMurakami sells Epson printers with Filmgate RIP and Colorgate Screenfilm from Germany Excellent high speed imaging with strong D-max so you can expose the emulsion completely and still get excellent details
Wet stencil on both sides wait a minute for emulsion to soften
Use pressure washer on fan spray setting
Continue to wash from print side until image is clear
Do a final rinse on the squeegee side to remove any residue
Blot with clean newsprint
Blow water from mesh with an air hose
Force dry with fan in sun best for post exposure or in hot box
SBQ emulsion remains light sensitive after development Post expose squeegee side to sun or lamp on long WB or discharge print runs Allow 1 hour in sunlight or 2-3 hours in heat
Drying in a hot box or in bright warm sun will help reduce moisture trapped in emulsion during developing
Topic 7ndash Development and Drying
Topic 8ndash Post Exposure
bull Post exposing SBQ Emulsion continues curing any unfinished cross linking It should not be used as a substitute for the proper exposure time See lsquoEmulsion Exposure Tips PDFrsquo on wwwmurakamiscreencom under support on home page to determine proper exposure times A wedge step test method is described as well as how to evaluate an exposure calculator
bull Post exposing will improve all screens to varying degrees it significantly improves screens shot on a fluorescent light source
bull Expose squeegee side toward lamp or sun after development
bull If using an exposure lamp to post harden wait until screen is dry and double the exposure time Strong sun is best however
bull If using the sun you can place the wet screen in sun squeegee side towards sun
bull Allow screen to dry before applying Hardeners so that excess moisture doesnrsquot dilute hardeners when applied
Three degrees of Screen Hardening
1 Adding 8 grams of diazo to Aquasol HV Aquasol HVP Aquasol TS or TXR will improve water resistance These SBQ emulsions with diazo can provide excellent water resistance without hardeners when exposed well on multi spectral light sources2 Add 8 grams of diazo to emulsion before coating expose well then use MS Hardener on the dry and developed screen Apply with wet cloth to both sides place in sun or in hot box for maximum hardening This yields a reclaimable screen3 Add 8 grams of diazo to the above emulsions before coating expose well then mix equal amounts of A amp B Hardener and apply with wet rag to both sides of screen Dry in in sun or in a hotbox for maximum hardening This yields a semi-permanent screen The emulsion can be broken down by applying haze remover for five minutes then emulsion remover to break down emulsion
Topic 9ndash Screen Hardening
Reclaimable Screens
Once screen is dry apply thin coats of the same emulsion around image using a sharp card or piece of plastic Avoid thick coats and brush droplets as they will not expose completely
bull For more abrasion resistance apply emulsion to squeegee side where the floodbar and squeegee start and stop
bull Required Re-expose dried emulsion used for blockout in exposure unit or in sunlight If applied to both sides expose both sides
bull Sponge both sides of screen with MS Hardener or equal amounts of mixed AampB Hardener over entire emulsion area and dry completely in sun or a hot box before printing
Topic 9ndash Screen Hardening
MS Hardener ndash AampB Hardeners
bull After applying liquid hardeners dry screen well in a hot box warm sun top of oven if not too hot or in front of force fan heater away from water sources for several hours prior to use on press
bull Screens should not be covered with tape over the entire bottom of the screen If exposed properly and hardened excess tape is not needed Poor exposure and hardening methods along with excess tape may trap moisture accelerating breakdown
bull Pinholes should be prevented by shooting on a clean exposure unit and carding the same emulsion over non image areas When emulsion is dry post expose both sides with lamp source or left in sun before applying hardeners
Post Hardening
When is the screen ready to print
bull Allow plenty of time before rushing the screen into production Dry screens completely before exposing and after applying hardeners Dry well ahead of production needs will yield the best emulsion performance for water base and discharge inks
bull If possible use a hot box to thoroughly dry the screen Putting screens into a hot box prior to production will also help remove any moisture absorbed during storage
bull Or put in warm sunlight or force dry in front of a fan to help evaporate water from emulsion The screen may feel dry to touch but have high moisture levels within the emulsion film
bull Moisture trapped inside emulsion from washout development will create a weak screen and lead to de lamination or breakdown on press
bull Use of a moisture meter (Murakami sells these) is the most accurate measurement of dryness within the the emulsion film A screen can be dry to the touch but have too much moisture inside
Moisture Meter
Topic 10ndash Pre Press Check-up
bull Water base is designed to print on white and light neutral color fabrics Color shading will occur on colored fabrics since water base is very transparent Ex yellow over a light blue
bull Try sequencing smallest print area to largest print area to avoid large print pick up areas that will soak the bottom of the next screen
bull Try black key lines or heavily pigmented dark inks in the first head followed by a flash to keep sharp details Black key lines and dark areas flash much faster than a multi-color print prior to a printed dark key line With a highly pigmented black keyline it is possible to lsquospreadrsquo fill colors and print over the black slightly for easier register and not see any loss of black intensity
Topic 11ndash Printing Techniques Water Base
bull Pure Waterbase ndash designed for whites and lights
bull Discharge ndash removes shirt dye color (must be reactive or direct dyes when shirt was manufactured) This leaves a waterbase colored print when discharge is pigmented with water base pigments Or use discharge ink as a base flash and print plastisol over the top
bull Dye Gain ndash Printed before dyeing the shirt Best on lights and mid tones print will exhibit tonal gain of the dye color used to post dye shirt Shirts must be prepared for dyeing and 100 cotton
bull Dye Resist ndash Print full colored prints and then dye shirt Shirt must be dyed with reactive or direct dyes no pigment dyes Print retains close to original colors some shading of inks will occur Shirt must be prepared for dye 100 cotton
bull Super Wetting agent ndashachieve interesting tie dye like effects Print as enlarged base print waterbase over the top Agent lsquowicksrsquo
Topic 11ndash Printing Techniques Water Base
Topic 12ndash Press set-up
Typical Plastisol Squeegee Angle and bend position
Waterbase amp Discharge squeegee settings
bull10-15 degrees more angle
bull Minimal pressure to clean image consistently
bull More angle less pressure creates less mechanical abrasion of stencil
bull Slow down stroke speed slightly to allow ink time to penetrate fabric or use lsquoSrsquo thread mesh with larger open area to improve ink transfer
Topic 12ndash Press set-up
The corners of the squeegee need to be rounded and dulled for waterbase and discharge printing
Rounded corners protect screen from breakdown Sharp unrounded squeegee edges will promote breakdown very quickly
bull Requires a 100 cotton fabric dyed with reactive dyes You can check the fabricrsquos ability to discharge by putting a small dot of activated ink on inside hem and run the shirt through the oven
bull Waterbase and discharge prints need to be cured with a hot air gas fired oven at 325-350 degrees for 1frac12 to 2 minutes depending on oven
bull All water must be evaporated and steamed off to achieve discharge colors Electric ovens without forced re-circulating air do not work well
bull Try to print pre-made shirts within the same lot number for color consistency on smaller runs
bull For large runs and multiple dye lots test one shirt from each box to make sure fabric is dischargeable and print colors remain consistent
Topic 13ndash Discharge Printing Shirts
bull Different colored dischargeable shirts yield different discharged color Discharge effect on different colored shirts is rated from 1-5 with 5 being the best Check with your manufacturer about the discharge rating of the shirt color to be used Ink color shading can occur on different colored shirts
bull Even within the same colored shirts the discharge color obtained can vary during production Communicating the uniqueness of discharge printing with your customer is recommended to avoid color complaints Avoid jobs with tight corporate color requirements as both the shirt and the ink will cause slight color shading during a print run
bull Avoid printing on silicon washed custom dyed shirts Silcone inhibits the ink from penetrating the fabric and can cause issues with the ink in the screen Where possible print shirt before a silicone wash for best results
Topic 13ndash Shirts
Keep detailed recipes of ink pigments and the exact percentage ratio by gram weight of activator for repeatable results Use this recipe to mix ldquomaster bucketsrdquo of ink but never add activator to this master color bucket Discharge Ink has a short pot life Always stir master ink buckets before filling a quart bucket to mix the activator into a working quart
Activate one hourrsquos worth of ink for printing about a quart+ depending on production speeds use more for base plates Discharge ink loses itrsquos potency over time and can color shift as components evaporate during production Keep ink levels high in the screen adding new ink every 5 minutes or so Stir in activator completely before using for print
Topic 13ndash Handling Discharge Inks
1QT
Pre weigh activator precisely for one quart of ink Use small paperplastic cups and seal with plastic and a rubber band Monitor ink levels in screens and activate a new quart when half a quart is still left printing in the screen
Keep ink levels in screens high Use winged flood bars or create ink dams with tape to keep discharge ink consolidated Push ink to center of screen often to mix with new ink
Discard all inks in screens when cleaning screens for the night Wash screens top and bottom with warm water Use a large oscillating fan to circulate air by press to dry screens overnight
Discharge Ink Handling continued
Try sequencing from smallest print area to largest to avoid excessive wetting on bottom of screens Where possible also print darkest to lightest leaving white reds and yellows in the last positions with white always in the last head Keep ink levels in screens at a constant volume and add fresh ink regularly to keep color over the print run consistentThere is no need to use a base plate for a multi colored design Print colors are more vibrant without a discharge base plateYou can use a flashed discharge base plate in combination with WB and Plastisol as the color over prints if not printing a 100 discharge ink designAvoid flashing if possible unless you are using discharge just for a base Excess heat in the shirt can cause discharge ink to start drying in screens following a flashOne area a flash is useful is in the next to the last head so that the puller can see the print otherwise the first inspection wonrsquot occur until it comes out of the ovenA forced air gas oven is the best curing system The longer the tunnel the better since belt speeds need to be slow enough to heat shirt for 1 frac12 to 2 minutes Maintain oven change filters often maximum airflow is needed
Topic 14ndash Printing with Discharge Inks
Print Techniques Continued
Squeegee Selection 65 durometer for solid areas Triple Durometer 659065 for fine lines and halftones
Increase angle more than you would use for Plastisol With a soft 65 and more angle you can use minimal squeegee pressure Slow down print stroke slightly to allow ink to penetrate garment or use lsquoSrsquo Thread from Smartmesh to print with faster squeegee speeds
Rounded blade ends produce less mechanical abrasion and wear the most common source of stencil breakdown
Avoid sharp hard squeegees used for detailed Plastisolprinting When set to Plastisol printing angles they will accelerate stencil breakdown
Topic 15ndash Printing Tips Discharge InksReducing Mechanical Abrasion
65
65-95-65
Color consistency is dependent on the greige goods color of the original fabric This is most often a neutral tan but can vary in shade over different colored shirts as not all shirts discharge completely dischargability is rated from 1-5 check with garment manufacturer and test test test
Follow recipes exactly pigments base and activator all need to be in perfect balance from beginning during and end of print run This is crucial if you expect to print reorders as matching discharge color is harder than creating it the first time
Add new ink to screen regularly activate only what you will use in an hour or two Keep ink between squeegee and floodbar with tape dams
Push ink to center often mixing old and new ink watch color and discard all ink in the screen if discharge is not occuring Adding good discharge ink to non-discharging ink in screen will quickly cause the new ink to lose its ability to discharge
Document squeegee number side angle speed pressure and head number used in sampling to get repeatable color match prints
Topic 16ndash Color Consistency Control
In the coming year a lot of mass merchant buyers will require ink to be pthalate PVC and heavy metal free Currently waterbase inks can achieve this at lower costs than comparable plastisolsDischarge Inks have zinc sufoxylate and during the curing process can emit formaldahyde and unwanted exposures to personnel Use of an extra exhaust fan and hood at the end of the oven tunnel as well as good shop ventilation is recommended Post washing of printed shirts with a silicone wash or just a rinse minimizes end user exposure lsquoWash before wearingrsquo stickers also help prevent exposure to end usersDischarge activators should be used at minimum levels to achievethe discharge affect Less activator equates to less potential exposure to workers
Safety Considerations
- Slide Number 1
- Slide Number 2
- Topic 1ndash Smartmesh S Thread
- Slide Number 6
- Product Application
- Topic 4 ndash Coating
- Slide Number 9
- Slide Number 10
- Slide Number 11
- Slide Number 12
- Slide Number 13
- Slide Number 14
- Slide Number 15
- Slide Number 16
- Slide Number 17
- Slide Number 18
- Slide Number 19
- Slide Number 20
- Slide Number 21
- Slide Number 22
- Slide Number 23
- Slide Number 24
- Slide Number 25
- Slide Number 26
- Slide Number 27
- Slide Number 28
- Slide Number 29
- Slide Number 30
- Slide Number 31
- Slide Number 32
-

Objectivesbull To improve screen production
performance minimize down time and optimize screen life by preparing durable stencils with water base screen making techniques
bull Mesh Selection for printing with water base and discharge inks
bull Understanding coating and drying techniques for water base printing
bull How the screen room and humidity affect durability
bull Lamps and exposure considerationsbull Pre-Press requirements for water basebull Print techniques for water base and
dischargebull Pending Regulations regarding ink
components
bull Water base and especially discharge inks are highly aggressive and require a durable stencil prepared with special emulsions and screen production management
bull Understand amp Control the key variables to standardize processes techniques and materials to yield the most durable stencil possible
Drying
Emulsion
Exposure
Hardener
Drying
Chemicals
Technique
Mesh
Coating
Preparing Quality Screens is the key to faster and consistent production without having to go through costly down time due to premature stencil breakdown
Orientation
Topic 1ndash Smartmesh S ThreadMesh Count
(per inch)Type Diameter
(micron)MO
(micron)Open
Area ()Thickness
(micron)Ink Vol
(cmsup3msup2)
36 T 250 597 50 485 24140 T 200 435 47 380 17960 T 120 303 51 205 105
70 S 71 292 65 119 7780 S 71 247 60 119 7186 T 100 195 44 165 73
110 S 71 160 48 115 55110 T 80 151 43 140 60125 T 71 132 42 122 51135 T 54 134 51 88 45150 S 48 121 51 77 39150 T 54 115 46 84 39160 S 48 111 49 75 36160 T 54 105 44 84 37180 S 48 93 44 74 33180 T 54 87 38 82 31200 S 48 79 39 73 28200 T 54 73 33 82 27
bull Mesh selection is the first important step for making stencils
bull Water base and Discharge base inks require different types of mesh especially on roll to roll printing where S thread (noted in red) is needed for optimum ink lay down
bull Depending on the mesh count by itself is not sufficient most of the time Looking at thread diameter mesh openings and percentage of open area are also important
Whatrsquos happening with my screens Causes amp Answers
Haze and ghost images left after reclaiming screen
Haze is caused by ink locking into mesh creases Apply HR-700 or 701 haze remover to screen allow several minutes before using pressure washer
Image is not washing out from the screen
Check film make sure film is opaque with a D-max of 30-40 If you can see through the film it is not opaque
Screens are degreased but still shows fisheyes and air bells after emulsion coating and drying
Degrease with DGR-801 Rinse frame edges and mesh with clean water Dry screen horizontally coat when dry
Screen is breaking down and melting after only a few hundred prints
Check exposure times and age and strength of lamp Dry emulsion completely before exposing
Why is my screen full of pinholes
Degrease with DGR 801 and rinse completely Slow down coating speed and use dull edge on scoop coaterExpose completely
Quick checklist
Topic 2ndash Screen Preparation
Product Application
Topic 4 ndash CoatingTopic 4ndash Emulsion CoatingCoating Techniquesbull Use dull edge of coater for mesh counts of 25 ndash200in
bull Use sharp edge of coater for mesh counts of 200 ndash 300in
bull Begin with one coat on print side using proper edge Follow with one coat on squeegee side rotate screen frame 180 degrees and apply second coat to squeegee side
bull Coat slowly using firm pressure on mesh Coating too fast will leave air bubbles in mesh causing pinholes
bull Tilt coater over so the end cap guide is flat on the mesh This improves consistency of emulsion thickness if all personnel use the flat perfect angle of the coater end cap
Correct
Incorrect
Technical Tips ndash Coating
Recommended coatingEven surface profile Right way of building EOM on print side ndash smoother and flatter on squeegee side
Poor coatingUneven surface profile Poor EOM on print side ndash excessive EOM on squeegee side
An improved RZ value on the squeegee side can help mechanical abrasion resistance
This can be accomplished with additional face coats coating technique or drying position
This technique works well with High Viscosity Emulsions like Aquasol HV or Photocure PRO-HV
Lower Viscosity Emulsions should be face coated on the squeegee side and dried print side down
Topic 5ndash Drying for Waterbase Screens
bull Screen room conditions can affect screen durability
bull Humidity should be kept to a minimum Use of a dehumidifier is recommended Set dehumidifier to 35 Use two in larger rooms placing them at opposite ends of the room
bull Keep floors free of water Avoid spray from wash out booth entering screen drying area Emulsion is hydrophilic meaning it will absorb water in the air like a sponge
bull Avoid drying wet reclaimed screens in the screen coating and coated screen storage areas as this will increase humidity in drying area and moisture levels in any coated screens
bull Avoid cold screen rooms Keep warm at 68+ F or use a hot box at 90-100 degrees F to thoroughly dry screens
bull Keep room free of dust and lint A fan in an unkempt screen room will contaminate screens and create pinholes
Screen Room Variables
bull Use clean clear positives with a D-max of 30 ndash 40 Keep the vacuum frame glass clean
bull Use an exposure calculator or hardness gauge to determine proper exposure time to cure the total thickness of emulsion
bull The spectral sensitivity of SBQ emulsion is between 360 and 420 nanometers Use multi spectral lamps for improved exposures
bull Use a strong exposure lamp 5kw is recommended for discharge screens Fluorescent tubes exposures need additional post exposure after development to expose any unexposed emulsion
Typical Exposure Times for SBQ pure photopolymer using a multi spectral 5KW Metal Halide Lamp at 40rdquo
Mesh Color Timesec1 86 W 50-802 110 W 35-503 200 Y 30-45
bull Lower wattage lamps Exposure times will be significantly longer and will need post exposure in sun or with exposure unit
bull Monitor bulb life and change regularly for proper light strength and multi spectral output
bull SBQ emulsions can be post exposed in the sun diazo based emulsions lose sensitivity during development
Topic 6ndash Emulsion Exposure
Emulsions designed for waterbase work best when fully exposed Use a pressure washer on fan spray at 12-18 inches to develop fine detailOptimum durability starts with a fully exposed screen stencil Underexposing the emulsion results in early stencil breakdownUsing excessive blockout on an underexposed screen will not prevent mechanical abrasion breakdown on the squeegee sideCheck your film If you see transparency through the black areas of the image the d-max of your film is too low and may burn through and expose emulsionMurakami sells Epson printers with Filmgate RIP and Colorgate Screenfilm from Germany Excellent high speed imaging with strong D-max so you can expose the emulsion completely and still get excellent details
Wet stencil on both sides wait a minute for emulsion to soften
Use pressure washer on fan spray setting
Continue to wash from print side until image is clear
Do a final rinse on the squeegee side to remove any residue
Blot with clean newsprint
Blow water from mesh with an air hose
Force dry with fan in sun best for post exposure or in hot box
SBQ emulsion remains light sensitive after development Post expose squeegee side to sun or lamp on long WB or discharge print runs Allow 1 hour in sunlight or 2-3 hours in heat
Drying in a hot box or in bright warm sun will help reduce moisture trapped in emulsion during developing
Topic 7ndash Development and Drying
Topic 8ndash Post Exposure
bull Post exposing SBQ Emulsion continues curing any unfinished cross linking It should not be used as a substitute for the proper exposure time See lsquoEmulsion Exposure Tips PDFrsquo on wwwmurakamiscreencom under support on home page to determine proper exposure times A wedge step test method is described as well as how to evaluate an exposure calculator
bull Post exposing will improve all screens to varying degrees it significantly improves screens shot on a fluorescent light source
bull Expose squeegee side toward lamp or sun after development
bull If using an exposure lamp to post harden wait until screen is dry and double the exposure time Strong sun is best however
bull If using the sun you can place the wet screen in sun squeegee side towards sun
bull Allow screen to dry before applying Hardeners so that excess moisture doesnrsquot dilute hardeners when applied
Three degrees of Screen Hardening
1 Adding 8 grams of diazo to Aquasol HV Aquasol HVP Aquasol TS or TXR will improve water resistance These SBQ emulsions with diazo can provide excellent water resistance without hardeners when exposed well on multi spectral light sources2 Add 8 grams of diazo to emulsion before coating expose well then use MS Hardener on the dry and developed screen Apply with wet cloth to both sides place in sun or in hot box for maximum hardening This yields a reclaimable screen3 Add 8 grams of diazo to the above emulsions before coating expose well then mix equal amounts of A amp B Hardener and apply with wet rag to both sides of screen Dry in in sun or in a hotbox for maximum hardening This yields a semi-permanent screen The emulsion can be broken down by applying haze remover for five minutes then emulsion remover to break down emulsion
Topic 9ndash Screen Hardening
Reclaimable Screens
Once screen is dry apply thin coats of the same emulsion around image using a sharp card or piece of plastic Avoid thick coats and brush droplets as they will not expose completely
bull For more abrasion resistance apply emulsion to squeegee side where the floodbar and squeegee start and stop
bull Required Re-expose dried emulsion used for blockout in exposure unit or in sunlight If applied to both sides expose both sides
bull Sponge both sides of screen with MS Hardener or equal amounts of mixed AampB Hardener over entire emulsion area and dry completely in sun or a hot box before printing
Topic 9ndash Screen Hardening
MS Hardener ndash AampB Hardeners
bull After applying liquid hardeners dry screen well in a hot box warm sun top of oven if not too hot or in front of force fan heater away from water sources for several hours prior to use on press
bull Screens should not be covered with tape over the entire bottom of the screen If exposed properly and hardened excess tape is not needed Poor exposure and hardening methods along with excess tape may trap moisture accelerating breakdown
bull Pinholes should be prevented by shooting on a clean exposure unit and carding the same emulsion over non image areas When emulsion is dry post expose both sides with lamp source or left in sun before applying hardeners
Post Hardening
When is the screen ready to print
bull Allow plenty of time before rushing the screen into production Dry screens completely before exposing and after applying hardeners Dry well ahead of production needs will yield the best emulsion performance for water base and discharge inks
bull If possible use a hot box to thoroughly dry the screen Putting screens into a hot box prior to production will also help remove any moisture absorbed during storage
bull Or put in warm sunlight or force dry in front of a fan to help evaporate water from emulsion The screen may feel dry to touch but have high moisture levels within the emulsion film
bull Moisture trapped inside emulsion from washout development will create a weak screen and lead to de lamination or breakdown on press
bull Use of a moisture meter (Murakami sells these) is the most accurate measurement of dryness within the the emulsion film A screen can be dry to the touch but have too much moisture inside
Moisture Meter
Topic 10ndash Pre Press Check-up
bull Water base is designed to print on white and light neutral color fabrics Color shading will occur on colored fabrics since water base is very transparent Ex yellow over a light blue
bull Try sequencing smallest print area to largest print area to avoid large print pick up areas that will soak the bottom of the next screen
bull Try black key lines or heavily pigmented dark inks in the first head followed by a flash to keep sharp details Black key lines and dark areas flash much faster than a multi-color print prior to a printed dark key line With a highly pigmented black keyline it is possible to lsquospreadrsquo fill colors and print over the black slightly for easier register and not see any loss of black intensity
Topic 11ndash Printing Techniques Water Base
bull Pure Waterbase ndash designed for whites and lights
bull Discharge ndash removes shirt dye color (must be reactive or direct dyes when shirt was manufactured) This leaves a waterbase colored print when discharge is pigmented with water base pigments Or use discharge ink as a base flash and print plastisol over the top
bull Dye Gain ndash Printed before dyeing the shirt Best on lights and mid tones print will exhibit tonal gain of the dye color used to post dye shirt Shirts must be prepared for dyeing and 100 cotton
bull Dye Resist ndash Print full colored prints and then dye shirt Shirt must be dyed with reactive or direct dyes no pigment dyes Print retains close to original colors some shading of inks will occur Shirt must be prepared for dye 100 cotton
bull Super Wetting agent ndashachieve interesting tie dye like effects Print as enlarged base print waterbase over the top Agent lsquowicksrsquo
Topic 11ndash Printing Techniques Water Base
Topic 12ndash Press set-up
Typical Plastisol Squeegee Angle and bend position
Waterbase amp Discharge squeegee settings
bull10-15 degrees more angle
bull Minimal pressure to clean image consistently
bull More angle less pressure creates less mechanical abrasion of stencil
bull Slow down stroke speed slightly to allow ink time to penetrate fabric or use lsquoSrsquo thread mesh with larger open area to improve ink transfer
Topic 12ndash Press set-up
The corners of the squeegee need to be rounded and dulled for waterbase and discharge printing
Rounded corners protect screen from breakdown Sharp unrounded squeegee edges will promote breakdown very quickly
bull Requires a 100 cotton fabric dyed with reactive dyes You can check the fabricrsquos ability to discharge by putting a small dot of activated ink on inside hem and run the shirt through the oven
bull Waterbase and discharge prints need to be cured with a hot air gas fired oven at 325-350 degrees for 1frac12 to 2 minutes depending on oven
bull All water must be evaporated and steamed off to achieve discharge colors Electric ovens without forced re-circulating air do not work well
bull Try to print pre-made shirts within the same lot number for color consistency on smaller runs
bull For large runs and multiple dye lots test one shirt from each box to make sure fabric is dischargeable and print colors remain consistent
Topic 13ndash Discharge Printing Shirts
bull Different colored dischargeable shirts yield different discharged color Discharge effect on different colored shirts is rated from 1-5 with 5 being the best Check with your manufacturer about the discharge rating of the shirt color to be used Ink color shading can occur on different colored shirts
bull Even within the same colored shirts the discharge color obtained can vary during production Communicating the uniqueness of discharge printing with your customer is recommended to avoid color complaints Avoid jobs with tight corporate color requirements as both the shirt and the ink will cause slight color shading during a print run
bull Avoid printing on silicon washed custom dyed shirts Silcone inhibits the ink from penetrating the fabric and can cause issues with the ink in the screen Where possible print shirt before a silicone wash for best results
Topic 13ndash Shirts
Keep detailed recipes of ink pigments and the exact percentage ratio by gram weight of activator for repeatable results Use this recipe to mix ldquomaster bucketsrdquo of ink but never add activator to this master color bucket Discharge Ink has a short pot life Always stir master ink buckets before filling a quart bucket to mix the activator into a working quart
Activate one hourrsquos worth of ink for printing about a quart+ depending on production speeds use more for base plates Discharge ink loses itrsquos potency over time and can color shift as components evaporate during production Keep ink levels high in the screen adding new ink every 5 minutes or so Stir in activator completely before using for print
Topic 13ndash Handling Discharge Inks
1QT
Pre weigh activator precisely for one quart of ink Use small paperplastic cups and seal with plastic and a rubber band Monitor ink levels in screens and activate a new quart when half a quart is still left printing in the screen
Keep ink levels in screens high Use winged flood bars or create ink dams with tape to keep discharge ink consolidated Push ink to center of screen often to mix with new ink
Discard all inks in screens when cleaning screens for the night Wash screens top and bottom with warm water Use a large oscillating fan to circulate air by press to dry screens overnight
Discharge Ink Handling continued
Try sequencing from smallest print area to largest to avoid excessive wetting on bottom of screens Where possible also print darkest to lightest leaving white reds and yellows in the last positions with white always in the last head Keep ink levels in screens at a constant volume and add fresh ink regularly to keep color over the print run consistentThere is no need to use a base plate for a multi colored design Print colors are more vibrant without a discharge base plateYou can use a flashed discharge base plate in combination with WB and Plastisol as the color over prints if not printing a 100 discharge ink designAvoid flashing if possible unless you are using discharge just for a base Excess heat in the shirt can cause discharge ink to start drying in screens following a flashOne area a flash is useful is in the next to the last head so that the puller can see the print otherwise the first inspection wonrsquot occur until it comes out of the ovenA forced air gas oven is the best curing system The longer the tunnel the better since belt speeds need to be slow enough to heat shirt for 1 frac12 to 2 minutes Maintain oven change filters often maximum airflow is needed
Topic 14ndash Printing with Discharge Inks
Print Techniques Continued
Squeegee Selection 65 durometer for solid areas Triple Durometer 659065 for fine lines and halftones
Increase angle more than you would use for Plastisol With a soft 65 and more angle you can use minimal squeegee pressure Slow down print stroke slightly to allow ink to penetrate garment or use lsquoSrsquo Thread from Smartmesh to print with faster squeegee speeds
Rounded blade ends produce less mechanical abrasion and wear the most common source of stencil breakdown
Avoid sharp hard squeegees used for detailed Plastisolprinting When set to Plastisol printing angles they will accelerate stencil breakdown
Topic 15ndash Printing Tips Discharge InksReducing Mechanical Abrasion
65
65-95-65
Color consistency is dependent on the greige goods color of the original fabric This is most often a neutral tan but can vary in shade over different colored shirts as not all shirts discharge completely dischargability is rated from 1-5 check with garment manufacturer and test test test
Follow recipes exactly pigments base and activator all need to be in perfect balance from beginning during and end of print run This is crucial if you expect to print reorders as matching discharge color is harder than creating it the first time
Add new ink to screen regularly activate only what you will use in an hour or two Keep ink between squeegee and floodbar with tape dams
Push ink to center often mixing old and new ink watch color and discard all ink in the screen if discharge is not occuring Adding good discharge ink to non-discharging ink in screen will quickly cause the new ink to lose its ability to discharge
Document squeegee number side angle speed pressure and head number used in sampling to get repeatable color match prints
Topic 16ndash Color Consistency Control
In the coming year a lot of mass merchant buyers will require ink to be pthalate PVC and heavy metal free Currently waterbase inks can achieve this at lower costs than comparable plastisolsDischarge Inks have zinc sufoxylate and during the curing process can emit formaldahyde and unwanted exposures to personnel Use of an extra exhaust fan and hood at the end of the oven tunnel as well as good shop ventilation is recommended Post washing of printed shirts with a silicone wash or just a rinse minimizes end user exposure lsquoWash before wearingrsquo stickers also help prevent exposure to end usersDischarge activators should be used at minimum levels to achievethe discharge affect Less activator equates to less potential exposure to workers
Safety Considerations
- Slide Number 1
- Slide Number 2
- Topic 1ndash Smartmesh S Thread
- Slide Number 6
- Product Application
- Topic 4 ndash Coating
- Slide Number 9
- Slide Number 10
- Slide Number 11
- Slide Number 12
- Slide Number 13
- Slide Number 14
- Slide Number 15
- Slide Number 16
- Slide Number 17
- Slide Number 18
- Slide Number 19
- Slide Number 20
- Slide Number 21
- Slide Number 22
- Slide Number 23
- Slide Number 24
- Slide Number 25
- Slide Number 26
- Slide Number 27
- Slide Number 28
- Slide Number 29
- Slide Number 30
- Slide Number 31
- Slide Number 32
-
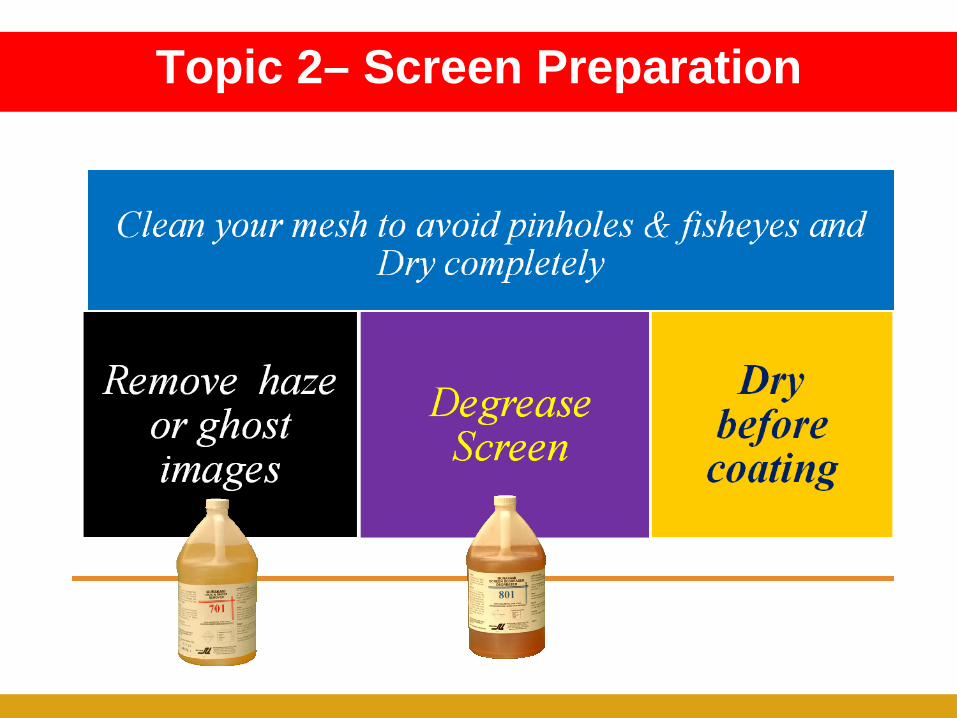
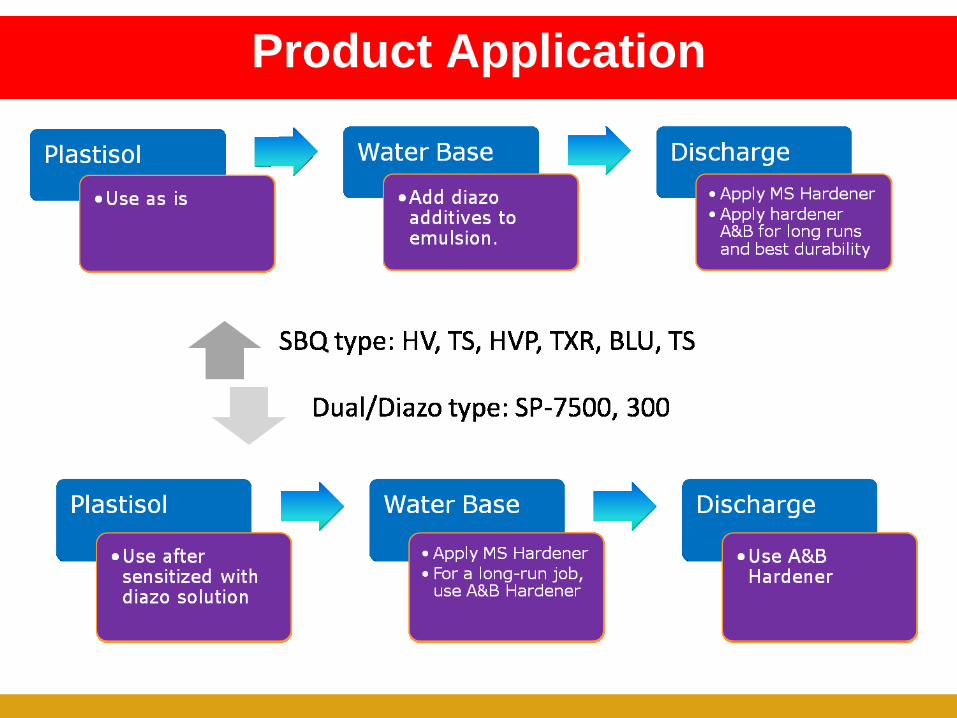
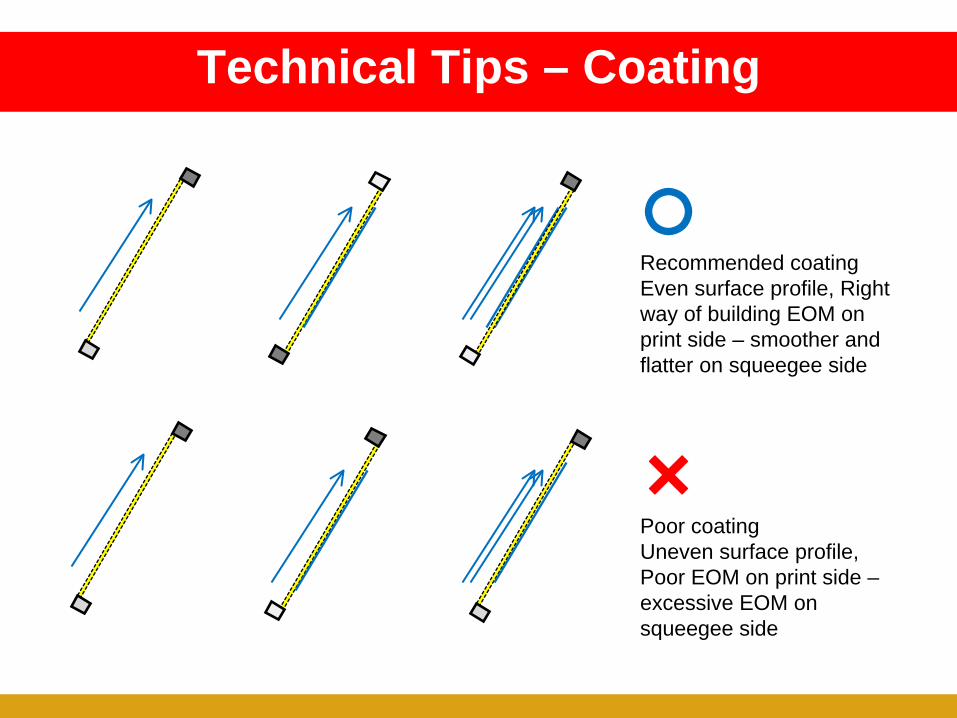
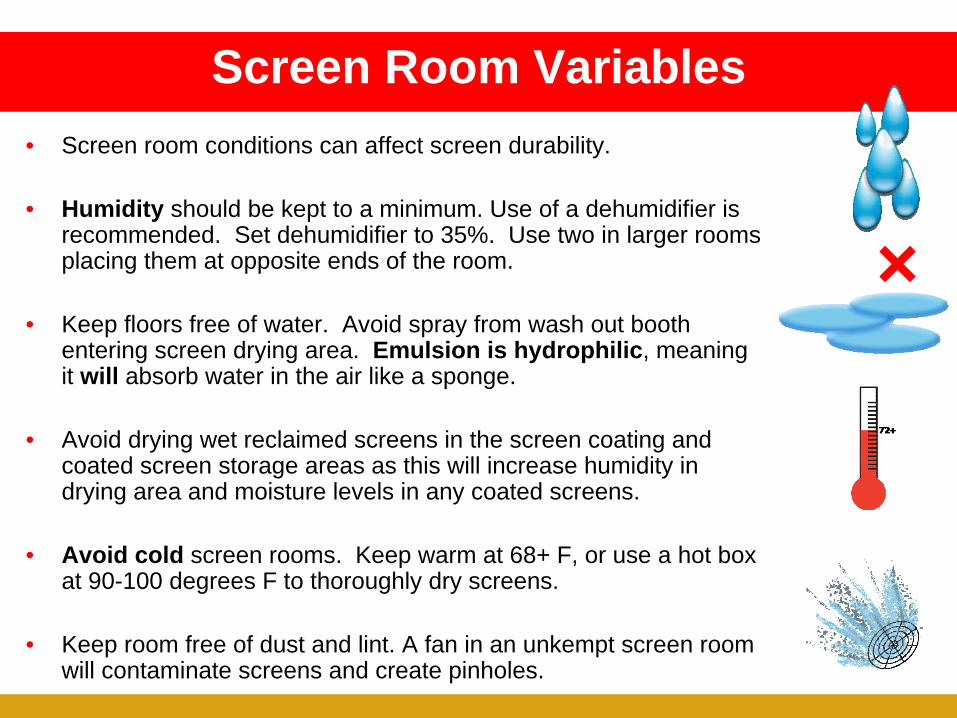
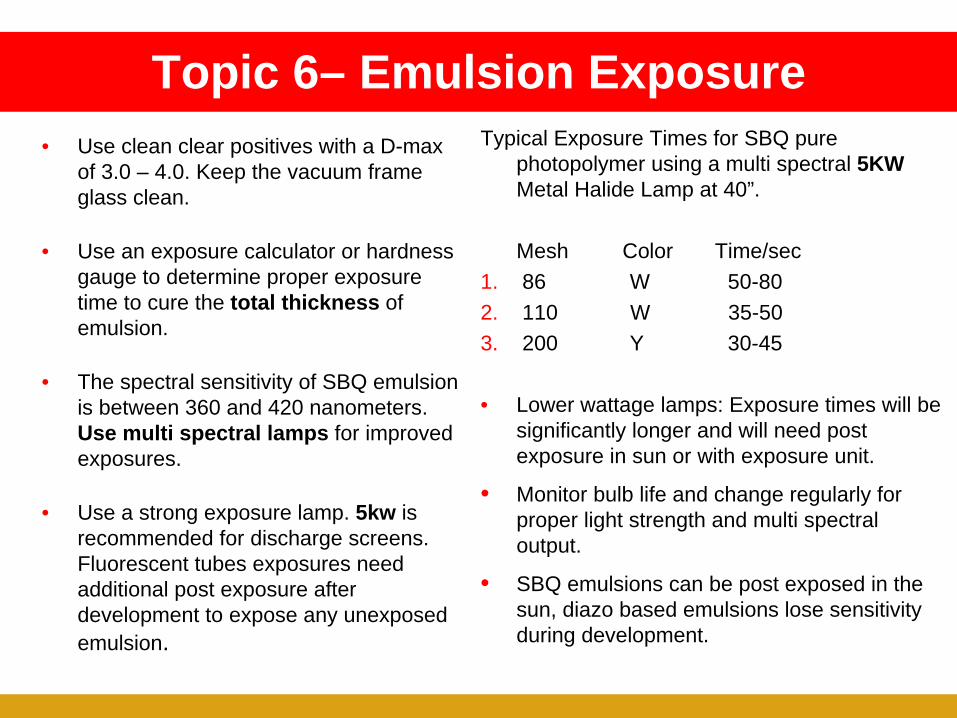
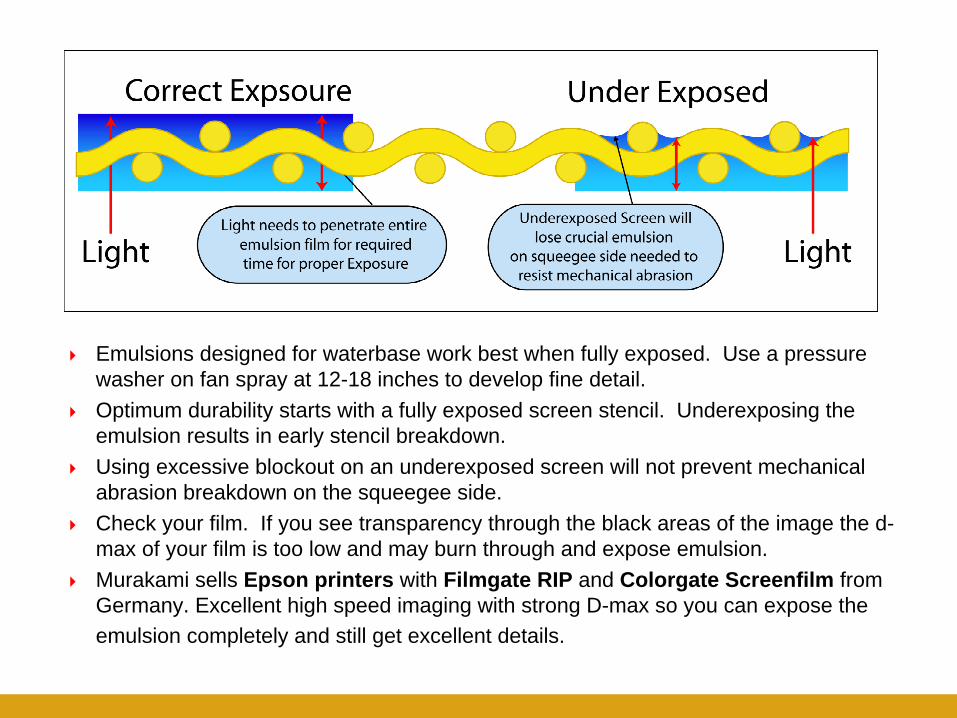
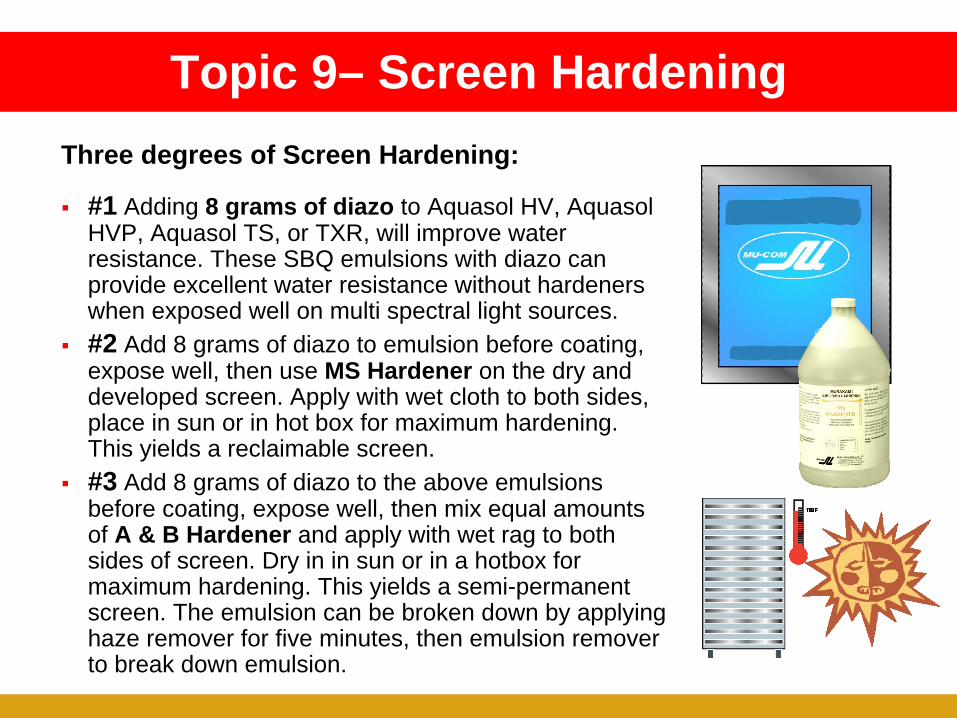
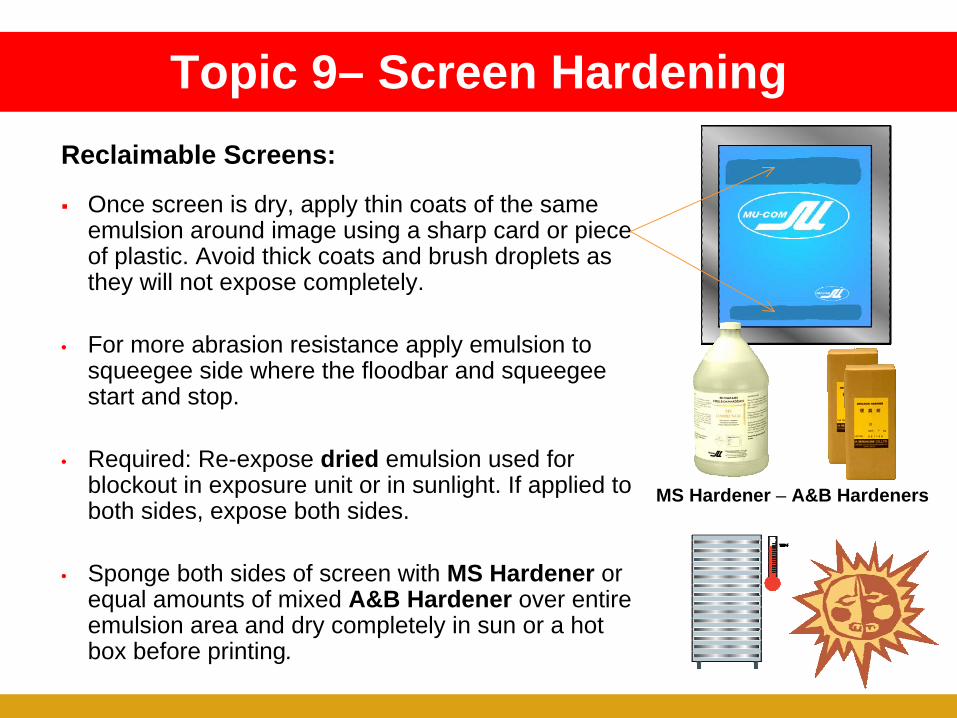
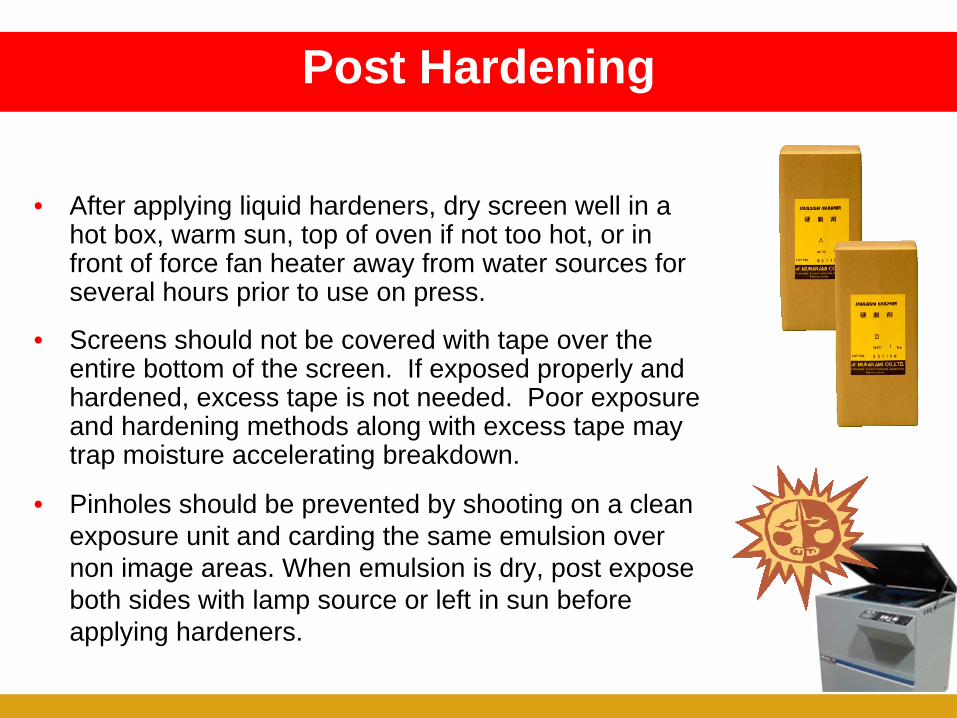
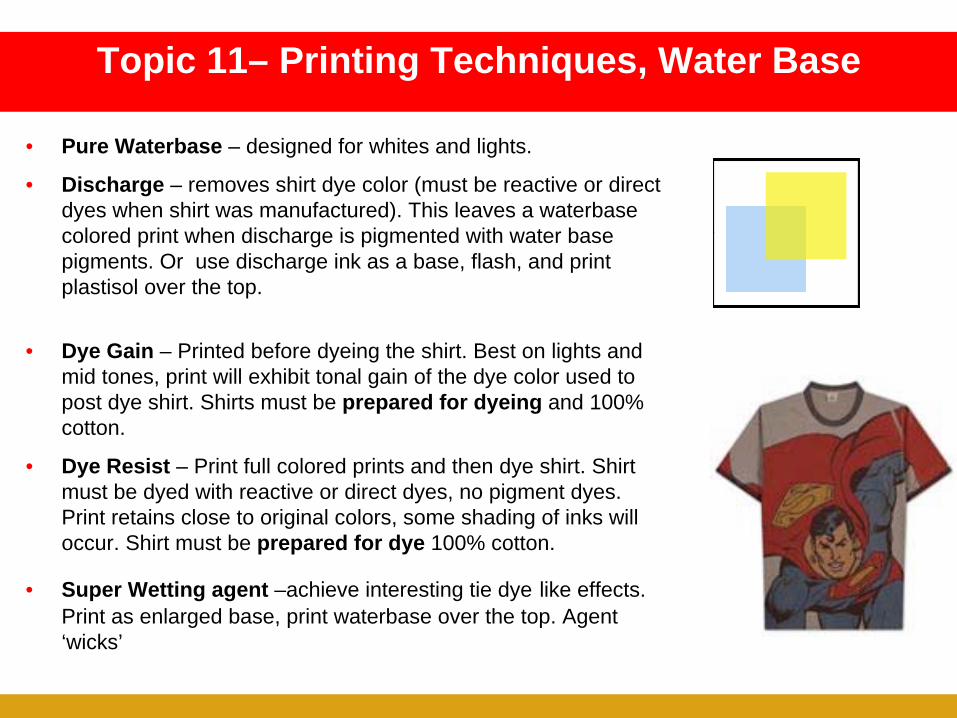

Topic 12ndash Press set-up
Typical Plastisol Squeegee Angle and bend position
Waterbase amp Discharge squeegee settings
bull10-15 degrees more angle
bull Minimal pressure to clean image consistently
bull More angle less pressure creates less mechanical abrasion of stencil
bull Slow down stroke speed slightly to allow ink time to penetrate fabric or use lsquoSrsquo thread mesh with larger open area to improve ink transfer
Topic 12ndash Press set-up
The corners of the squeegee need to be rounded and dulled for waterbase and discharge printing
Rounded corners protect screen from breakdown Sharp unrounded squeegee edges will promote breakdown very quickly
bull Requires a 100 cotton fabric dyed with reactive dyes You can check the fabricrsquos ability to discharge by putting a small dot of activated ink on inside hem and run the shirt through the oven
bull Waterbase and discharge prints need to be cured with a hot air gas fired oven at 325-350 degrees for 1frac12 to 2 minutes depending on oven
bull All water must be evaporated and steamed off to achieve discharge colors Electric ovens without forced re-circulating air do not work well
bull Try to print pre-made shirts within the same lot number for color consistency on smaller runs
bull For large runs and multiple dye lots test one shirt from each box to make sure fabric is dischargeable and print colors remain consistent
Topic 13ndash Discharge Printing Shirts
bull Different colored dischargeable shirts yield different discharged color Discharge effect on different colored shirts is rated from 1-5 with 5 being the best Check with your manufacturer about the discharge rating of the shirt color to be used Ink color shading can occur on different colored shirts
bull Even within the same colored shirts the discharge color obtained can vary during production Communicating the uniqueness of discharge printing with your customer is recommended to avoid color complaints Avoid jobs with tight corporate color requirements as both the shirt and the ink will cause slight color shading during a print run
bull Avoid printing on silicon washed custom dyed shirts Silcone inhibits the ink from penetrating the fabric and can cause issues with the ink in the screen Where possible print shirt before a silicone wash for best results
Topic 13ndash Shirts
Keep detailed recipes of ink pigments and the exact percentage ratio by gram weight of activator for repeatable results Use this recipe to mix ldquomaster bucketsrdquo of ink but never add activator to this master color bucket Discharge Ink has a short pot life Always stir master ink buckets before filling a quart bucket to mix the activator into a working quart
Activate one hourrsquos worth of ink for printing about a quart+ depending on production speeds use more for base plates Discharge ink loses itrsquos potency over time and can color shift as components evaporate during production Keep ink levels high in the screen adding new ink every 5 minutes or so Stir in activator completely before using for print
Topic 13ndash Handling Discharge Inks
1QT
Pre weigh activator precisely for one quart of ink Use small paperplastic cups and seal with plastic and a rubber band Monitor ink levels in screens and activate a new quart when half a quart is still left printing in the screen
Keep ink levels in screens high Use winged flood bars or create ink dams with tape to keep discharge ink consolidated Push ink to center of screen often to mix with new ink
Discard all inks in screens when cleaning screens for the night Wash screens top and bottom with warm water Use a large oscillating fan to circulate air by press to dry screens overnight
Discharge Ink Handling continued
Try sequencing from smallest print area to largest to avoid excessive wetting on bottom of screens Where possible also print darkest to lightest leaving white reds and yellows in the last positions with white always in the last head Keep ink levels in screens at a constant volume and add fresh ink regularly to keep color over the print run consistentThere is no need to use a base plate for a multi colored design Print colors are more vibrant without a discharge base plateYou can use a flashed discharge base plate in combination with WB and Plastisol as the color over prints if not printing a 100 discharge ink designAvoid flashing if possible unless you are using discharge just for a base Excess heat in the shirt can cause discharge ink to start drying in screens following a flashOne area a flash is useful is in the next to the last head so that the puller can see the print otherwise the first inspection wonrsquot occur until it comes out of the ovenA forced air gas oven is the best curing system The longer the tunnel the better since belt speeds need to be slow enough to heat shirt for 1 frac12 to 2 minutes Maintain oven change filters often maximum airflow is needed
Topic 14ndash Printing with Discharge Inks
Print Techniques Continued
Squeegee Selection 65 durometer for solid areas Triple Durometer 659065 for fine lines and halftones
Increase angle more than you would use for Plastisol With a soft 65 and more angle you can use minimal squeegee pressure Slow down print stroke slightly to allow ink to penetrate garment or use lsquoSrsquo Thread from Smartmesh to print with faster squeegee speeds
Rounded blade ends produce less mechanical abrasion and wear the most common source of stencil breakdown
Avoid sharp hard squeegees used for detailed Plastisolprinting When set to Plastisol printing angles they will accelerate stencil breakdown
Topic 15ndash Printing Tips Discharge InksReducing Mechanical Abrasion
65
65-95-65
Color consistency is dependent on the greige goods color of the original fabric This is most often a neutral tan but can vary in shade over different colored shirts as not all shirts discharge completely dischargability is rated from 1-5 check with garment manufacturer and test test test
Follow recipes exactly pigments base and activator all need to be in perfect balance from beginning during and end of print run This is crucial if you expect to print reorders as matching discharge color is harder than creating it the first time
Add new ink to screen regularly activate only what you will use in an hour or two Keep ink between squeegee and floodbar with tape dams
Push ink to center often mixing old and new ink watch color and discard all ink in the screen if discharge is not occuring Adding good discharge ink to non-discharging ink in screen will quickly cause the new ink to lose its ability to discharge
Document squeegee number side angle speed pressure and head number used in sampling to get repeatable color match prints
Topic 16ndash Color Consistency Control
In the coming year a lot of mass merchant buyers will require ink to be pthalate PVC and heavy metal free Currently waterbase inks can achieve this at lower costs than comparable plastisolsDischarge Inks have zinc sufoxylate and during the curing process can emit formaldahyde and unwanted exposures to personnel Use of an extra exhaust fan and hood at the end of the oven tunnel as well as good shop ventilation is recommended Post washing of printed shirts with a silicone wash or just a rinse minimizes end user exposure lsquoWash before wearingrsquo stickers also help prevent exposure to end usersDischarge activators should be used at minimum levels to achievethe discharge affect Less activator equates to less potential exposure to workers
Safety Considerations
- Slide Number 1
- Slide Number 2
- Topic 1ndash Smartmesh S Thread
- Slide Number 6
- Product Application
- Topic 4 ndash Coating
- Slide Number 9
- Slide Number 10
- Slide Number 11
- Slide Number 12
- Slide Number 13
- Slide Number 14
- Slide Number 15
- Slide Number 16
- Slide Number 17
- Slide Number 18
- Slide Number 19
- Slide Number 20
- Slide Number 21
- Slide Number 22
- Slide Number 23
- Slide Number 24
- Slide Number 25
- Slide Number 26
- Slide Number 27
- Slide Number 28
- Slide Number 29
- Slide Number 30
- Slide Number 31
- Slide Number 32
-
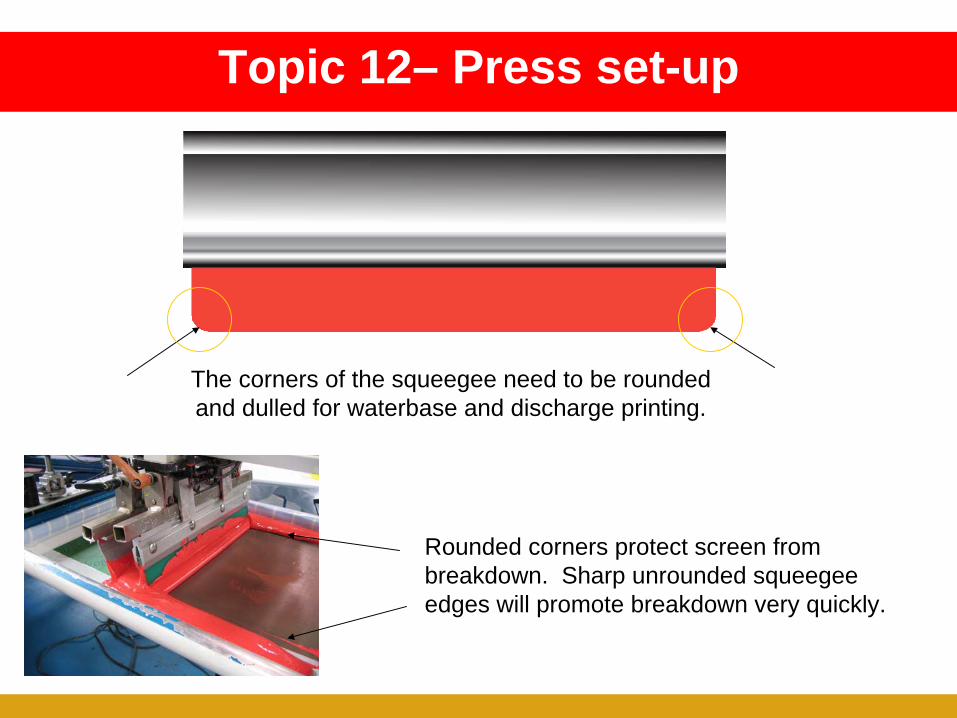
Topic 12ndash Press set-up
The corners of the squeegee need to be rounded and dulled for waterbase and discharge printing
Rounded corners protect screen from breakdown Sharp unrounded squeegee edges will promote breakdown very quickly
bull Requires a 100 cotton fabric dyed with reactive dyes You can check the fabricrsquos ability to discharge by putting a small dot of activated ink on inside hem and run the shirt through the oven
bull Waterbase and discharge prints need to be cured with a hot air gas fired oven at 325-350 degrees for 1frac12 to 2 minutes depending on oven
bull All water must be evaporated and steamed off to achieve discharge colors Electric ovens without forced re-circulating air do not work well
bull Try to print pre-made shirts within the same lot number for color consistency on smaller runs
bull For large runs and multiple dye lots test one shirt from each box to make sure fabric is dischargeable and print colors remain consistent
Topic 13ndash Discharge Printing Shirts
bull Different colored dischargeable shirts yield different discharged color Discharge effect on different colored shirts is rated from 1-5 with 5 being the best Check with your manufacturer about the discharge rating of the shirt color to be used Ink color shading can occur on different colored shirts
bull Even within the same colored shirts the discharge color obtained can vary during production Communicating the uniqueness of discharge printing with your customer is recommended to avoid color complaints Avoid jobs with tight corporate color requirements as both the shirt and the ink will cause slight color shading during a print run
bull Avoid printing on silicon washed custom dyed shirts Silcone inhibits the ink from penetrating the fabric and can cause issues with the ink in the screen Where possible print shirt before a silicone wash for best results
Topic 13ndash Shirts
Keep detailed recipes of ink pigments and the exact percentage ratio by gram weight of activator for repeatable results Use this recipe to mix ldquomaster bucketsrdquo of ink but never add activator to this master color bucket Discharge Ink has a short pot life Always stir master ink buckets before filling a quart bucket to mix the activator into a working quart
Activate one hourrsquos worth of ink for printing about a quart+ depending on production speeds use more for base plates Discharge ink loses itrsquos potency over time and can color shift as components evaporate during production Keep ink levels high in the screen adding new ink every 5 minutes or so Stir in activator completely before using for print
Topic 13ndash Handling Discharge Inks
1QT
Pre weigh activator precisely for one quart of ink Use small paperplastic cups and seal with plastic and a rubber band Monitor ink levels in screens and activate a new quart when half a quart is still left printing in the screen
Keep ink levels in screens high Use winged flood bars or create ink dams with tape to keep discharge ink consolidated Push ink to center of screen often to mix with new ink
Discard all inks in screens when cleaning screens for the night Wash screens top and bottom with warm water Use a large oscillating fan to circulate air by press to dry screens overnight
Discharge Ink Handling continued
Try sequencing from smallest print area to largest to avoid excessive wetting on bottom of screens Where possible also print darkest to lightest leaving white reds and yellows in the last positions with white always in the last head Keep ink levels in screens at a constant volume and add fresh ink regularly to keep color over the print run consistentThere is no need to use a base plate for a multi colored design Print colors are more vibrant without a discharge base plateYou can use a flashed discharge base plate in combination with WB and Plastisol as the color over prints if not printing a 100 discharge ink designAvoid flashing if possible unless you are using discharge just for a base Excess heat in the shirt can cause discharge ink to start drying in screens following a flashOne area a flash is useful is in the next to the last head so that the puller can see the print otherwise the first inspection wonrsquot occur until it comes out of the ovenA forced air gas oven is the best curing system The longer the tunnel the better since belt speeds need to be slow enough to heat shirt for 1 frac12 to 2 minutes Maintain oven change filters often maximum airflow is needed
Topic 14ndash Printing with Discharge Inks
Print Techniques Continued
Squeegee Selection 65 durometer for solid areas Triple Durometer 659065 for fine lines and halftones
Increase angle more than you would use for Plastisol With a soft 65 and more angle you can use minimal squeegee pressure Slow down print stroke slightly to allow ink to penetrate garment or use lsquoSrsquo Thread from Smartmesh to print with faster squeegee speeds
Rounded blade ends produce less mechanical abrasion and wear the most common source of stencil breakdown
Avoid sharp hard squeegees used for detailed Plastisolprinting When set to Plastisol printing angles they will accelerate stencil breakdown
Topic 15ndash Printing Tips Discharge InksReducing Mechanical Abrasion
65
65-95-65
Color consistency is dependent on the greige goods color of the original fabric This is most often a neutral tan but can vary in shade over different colored shirts as not all shirts discharge completely dischargability is rated from 1-5 check with garment manufacturer and test test test
Follow recipes exactly pigments base and activator all need to be in perfect balance from beginning during and end of print run This is crucial if you expect to print reorders as matching discharge color is harder than creating it the first time
Add new ink to screen regularly activate only what you will use in an hour or two Keep ink between squeegee and floodbar with tape dams
Push ink to center often mixing old and new ink watch color and discard all ink in the screen if discharge is not occuring Adding good discharge ink to non-discharging ink in screen will quickly cause the new ink to lose its ability to discharge
Document squeegee number side angle speed pressure and head number used in sampling to get repeatable color match prints
Topic 16ndash Color Consistency Control
In the coming year a lot of mass merchant buyers will require ink to be pthalate PVC and heavy metal free Currently waterbase inks can achieve this at lower costs than comparable plastisolsDischarge Inks have zinc sufoxylate and during the curing process can emit formaldahyde and unwanted exposures to personnel Use of an extra exhaust fan and hood at the end of the oven tunnel as well as good shop ventilation is recommended Post washing of printed shirts with a silicone wash or just a rinse minimizes end user exposure lsquoWash before wearingrsquo stickers also help prevent exposure to end usersDischarge activators should be used at minimum levels to achievethe discharge affect Less activator equates to less potential exposure to workers
Safety Considerations
- Slide Number 1
- Slide Number 2
- Topic 1ndash Smartmesh S Thread
- Slide Number 6
- Product Application
- Topic 4 ndash Coating
- Slide Number 9
- Slide Number 10
- Slide Number 11
- Slide Number 12
- Slide Number 13
- Slide Number 14
- Slide Number 15
- Slide Number 16
- Slide Number 17
- Slide Number 18
- Slide Number 19
- Slide Number 20
- Slide Number 21
- Slide Number 22
- Slide Number 23
- Slide Number 24
- Slide Number 25
- Slide Number 26
- Slide Number 27
- Slide Number 28
- Slide Number 29
- Slide Number 30
- Slide Number 31
- Slide Number 32
-
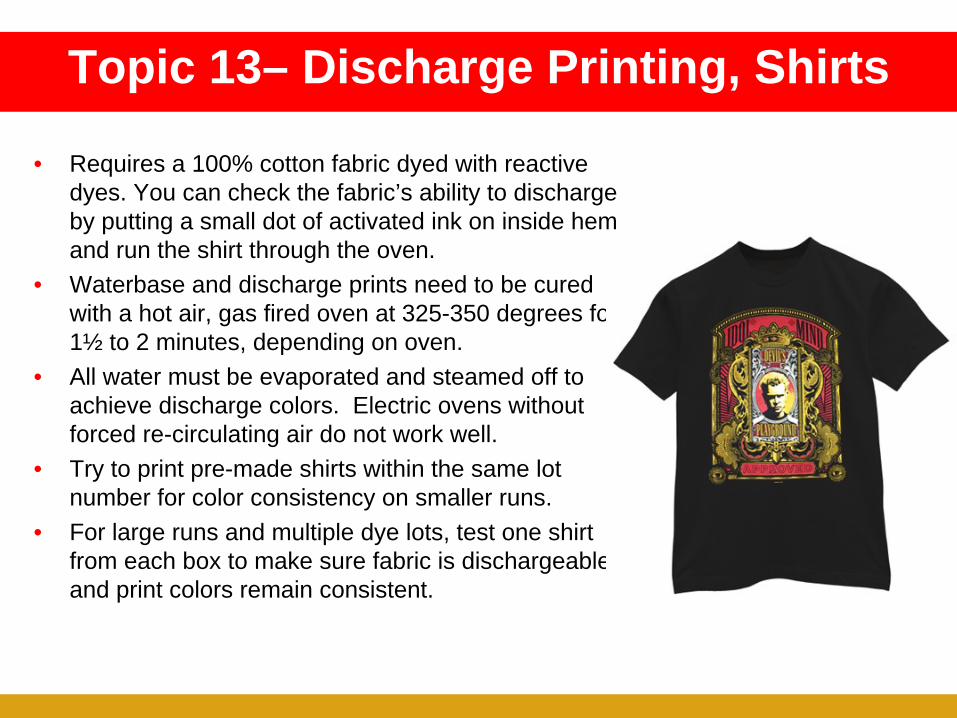
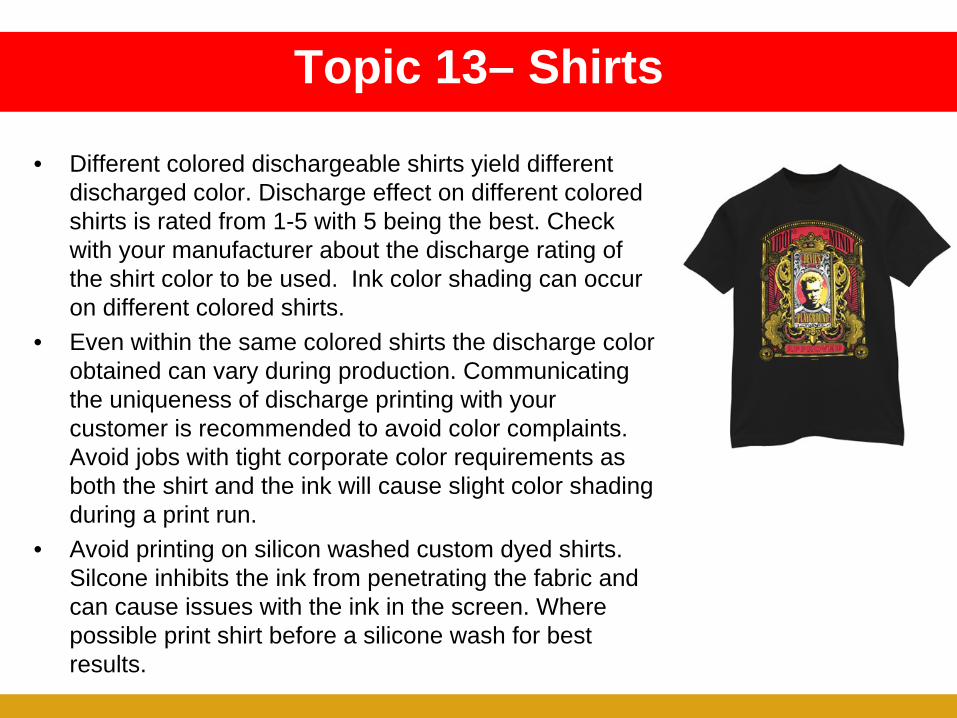