Printing to the Riso SF9450 from Scanner Bed to the Riso SF9450 from Scanner Bed If you are not...
5
Printing to the Riso SF9450 from Scanner Bed If you are not working from a digital file, you can use the scanner on the Risograph to create masters directly from a physical original. All originals should be on tabloid-sized paper. If your original is a smaller size, you can attach it to a blank piece of tabloid paper to help position it correctly. Always follow the guidelines in the Risograph Printing Guide regarding the positioning of your artwork (ie. avoid heavy ink near the lead edge of the paper, or straight down the middle). Fig 1 - Prepare Originals Fig 2- Place Artwork Place your first layer on the scanner bed face down under the gridded gauge cover. Align the lead edge of the paper with the left side of the scanner bed and center it vertically between the two “11” marks. Fig 3- Place Artwork When your original is in place, close the lid of the scanner.
Transcript of Printing to the Riso SF9450 from Scanner Bed to the Riso SF9450 from Scanner Bed If you are not...
Printing to the Riso SF9450 from Scanner BedIf you are not working from a digital file, you can use the scanner on the Risograph to create masters directly from a physical original.
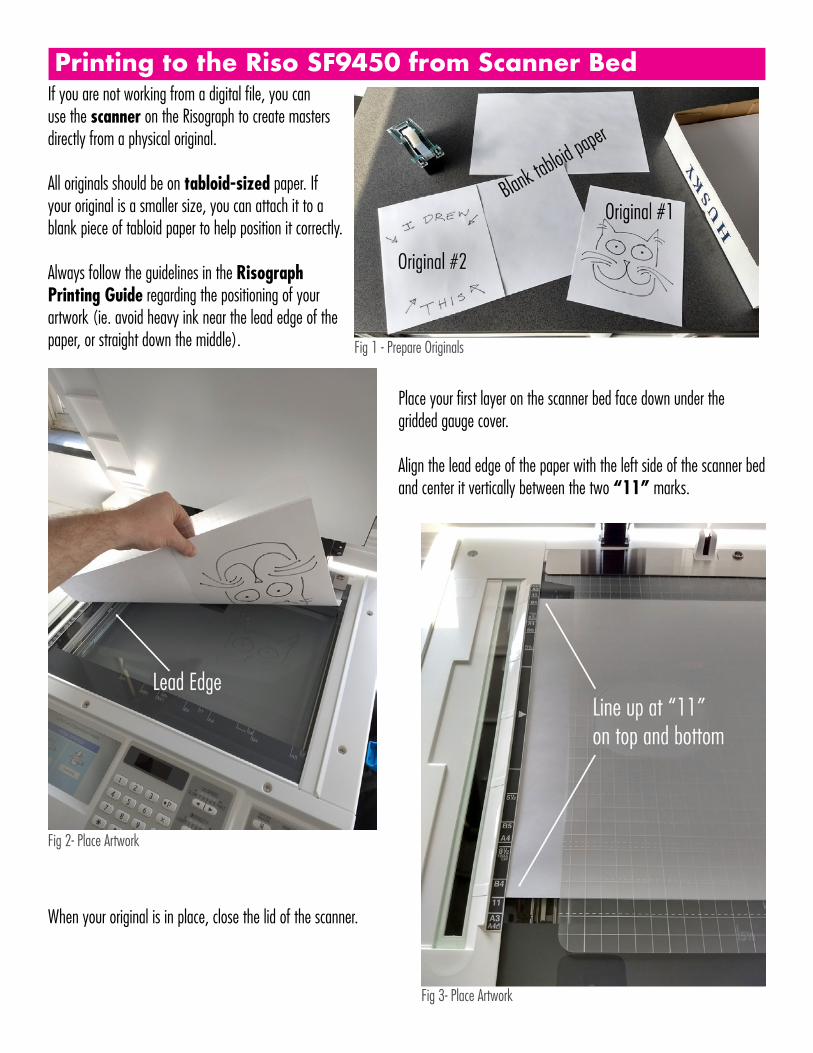
All originals should be on tabloid-sized paper. If your original is a smaller size, you can attach it to a blank piece of tabloid paper to help position it correctly.
Always follow the guidelines in the Risograph Printing Guide regarding the positioning of your artwork (ie. avoid heavy ink near the lead edge of the paper, or straight down the middle). Fig 1 - Prepare Originals
Fig 2- Place Artwork
Place your first layer on the scanner bed face down under the gridded gauge cover.
Align the lead edge of the paper with the left side of the scanner bed and center it vertically between the two “11” marks.
Fig 3- Place Artwork
When your original is in place, close the lid of the scanner.
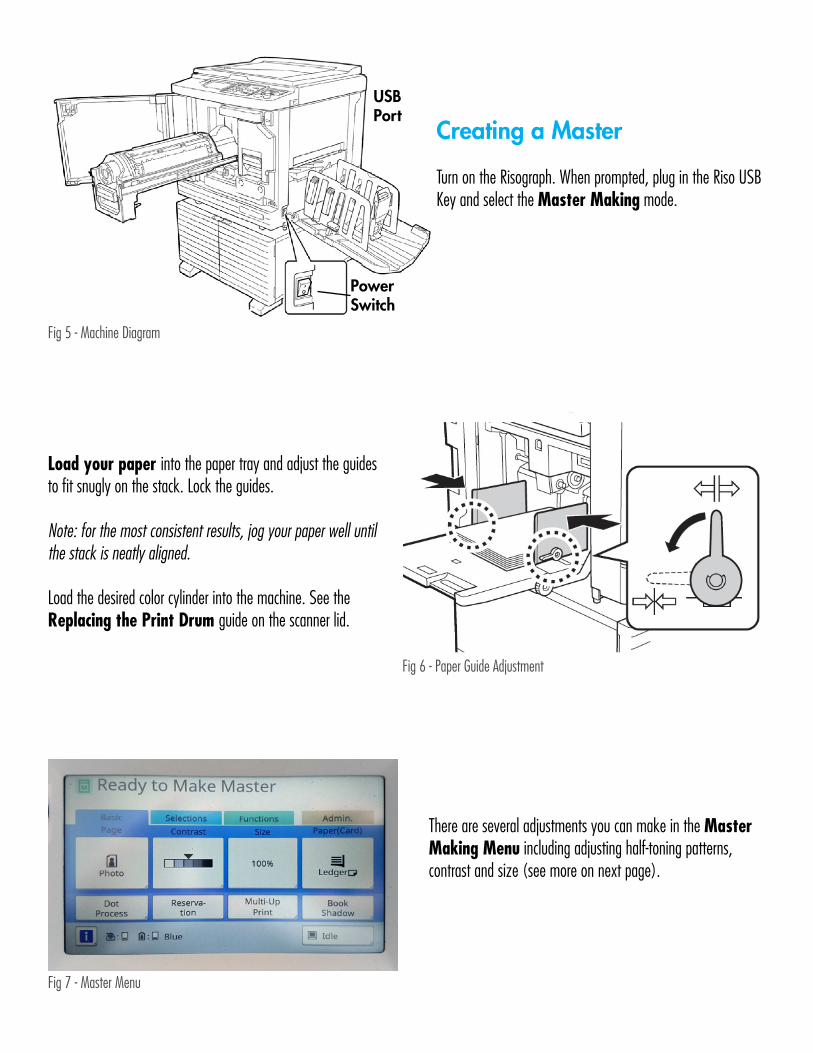
Load your paper into the paper tray and adjust the guides to fit snugly on the stack. Lock the guides.
Note: for the most consistent results, jog your paper well until the stack is neatly aligned.
Load the desired color cylinder into the machine. See the Replacing the Print Drum guide on the scanner lid.
Fig 6 - Paper Guide Adjustment
Power Switch
USBPort
Fig 5 - Machine Diagram
Creating a Master
Turn on the Risograph. When prompted, plug in the Riso USB Key and select the Master Making mode.
Fig 7 - Master Menu
There are several adjustments you can make in the Master Making Menu including adjusting half-toning patterns, contrast and size (see more on next page).

Fig 8 - Image Settings Menu
Fig 9 - Dot Process Menu
The Image Menu settings adjust how the scanner will interpret your image.
Line will scan very high contrast and is good for line drawings and text.
Photo will scan at a lower contrast and is good for photo-graphic imagery and images with a range of tonal gradations.
Duo will attempt to combine Line/Photo and can sometimes be useful for layouts that include both photographic imagery and text/line work.
If you are unsure of which setting to use, Photo is generally the best all-purpose setting.
If you select Photo or Duo, you can make more settings in the Dot Process Menu (under the image menu on the Master Making screen) to adjust you half-toning options.
Off will give you the Grain-touch (diffusion dither) randomized dot pattern.
Selecting options 1-4 will give you varying sizes of half-tone patterns.
See the Half-Toning section of the Risograph Print Guide for more details.
Once you have made all of your settings, press the blue start button to make the master.
After your master is created, the machine will print out one proof copy and will automatically change into Print Mode.
Note: This first print may appear more heavily saturated than subsequent prints.
Fig 10 - Make a Master
Making Prints
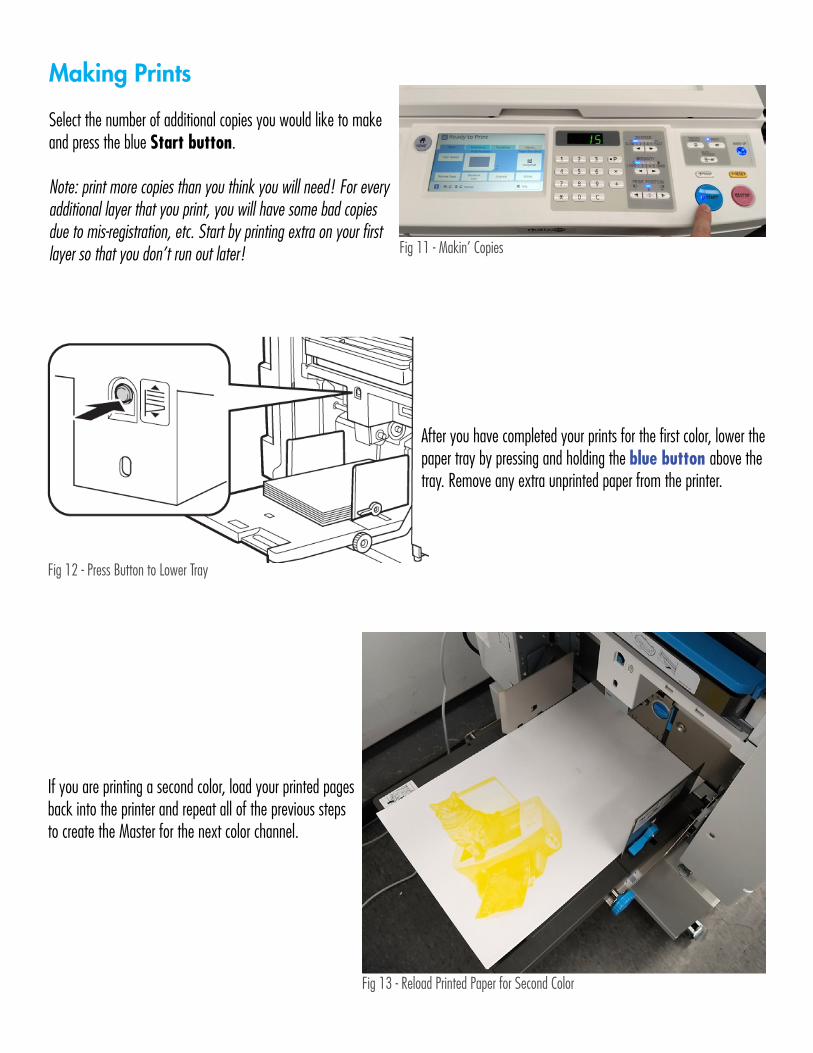
Select the number of additional copies you would like to make and press the blue Start button.
Note: print more copies than you think you will need! For every additional layer that you print, you will have some bad copies due to mis-registration, etc. Start by printing extra on your first layer so that you don’t run out later!
Fig 13 - Reload Printed Paper for Second Color
Fig 12 - Press Button to Lower Tray
Fig 11 - Makin’ Copies
If you are printing a second color, load your printed pages back into the printer and repeat all of the previous steps to create the Master for the next color channel.
After you have completed your prints for the first color, lower the paper tray by pressing and holding the blue button above the tray. Remove any extra unprinted paper from the printer.
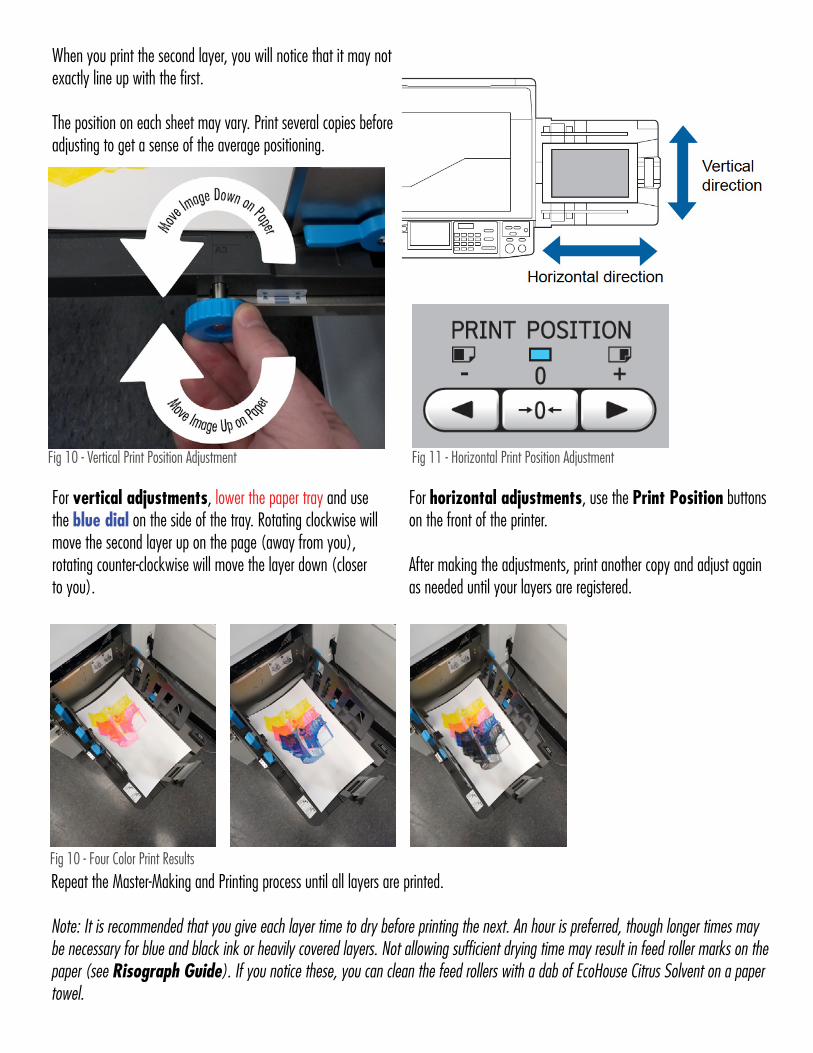
Fig 11 - Horizontal Print Position AdjustmentFig 10 - Vertical Print Position Adjustment
Fig 10 - Four Color Print Results
For vertical adjustments, lower the paper tray and use the blue dial on the side of the tray. Rotating clockwise will move the second layer up on the page (away from you), rotating counter-clockwise will move the layer down (closer to you).
When you print the second layer, you will notice that it may not exactly line up with the first.
The position on each sheet may vary. Print several copies before adjusting to get a sense of the average positioning.
For horizontal adjustments, use the Print Position buttons on the front of the printer.
After making the adjustments, print another copy and adjust again as needed until your layers are registered.
Repeat the Master-Making and Printing process until all layers are printed.
Note: It is recommended that you give each layer time to dry before printing the next. An hour is preferred, though longer times may be necessary for blue and black ink or heavily covered layers. Not allowing sufficient drying time may result in feed roller marks on the paper (see Risograph Guide). If you notice these, you can clean the feed rollers with a dab of EcoHouse Citrus Solvent on a paper towel.