Presentation Screen Master User Manual€¦ · Presentation Screen Master User Manual 1 1. Overview...
12
Presentation Screen Master User Manual Version 2.0.0 February 2016 www.presentation-assistant.com
Transcript of Presentation Screen Master User Manual€¦ · Presentation Screen Master User Manual 1 1. Overview...
Presentation Screen Master User Manual
Version 2.0.0
February 2016
www.presentation-assistant.com

Contents
Contents Contents ....................................................................................................................................................................... ii 1. Overview ............................................................................................................................................................. 1 2. Getting Started ..................................................................................................................................................... 1 3. Display Settings ................................................................................................................................................... 2 4. Choose Area for Presenting ................................................................................................................................. 4 5. Presenting Option Settings .................................................................................................................................. 4 6. Add a Cursor Effect While Presenting ................................................................................................................. 5 7. Annotate on the View Window ............................................................................................................................ 6 Technology Support ................................................................................................................................................... 10
Presentation Screen Master User Manual
www.presentation-assistant.com 1
1. Overview
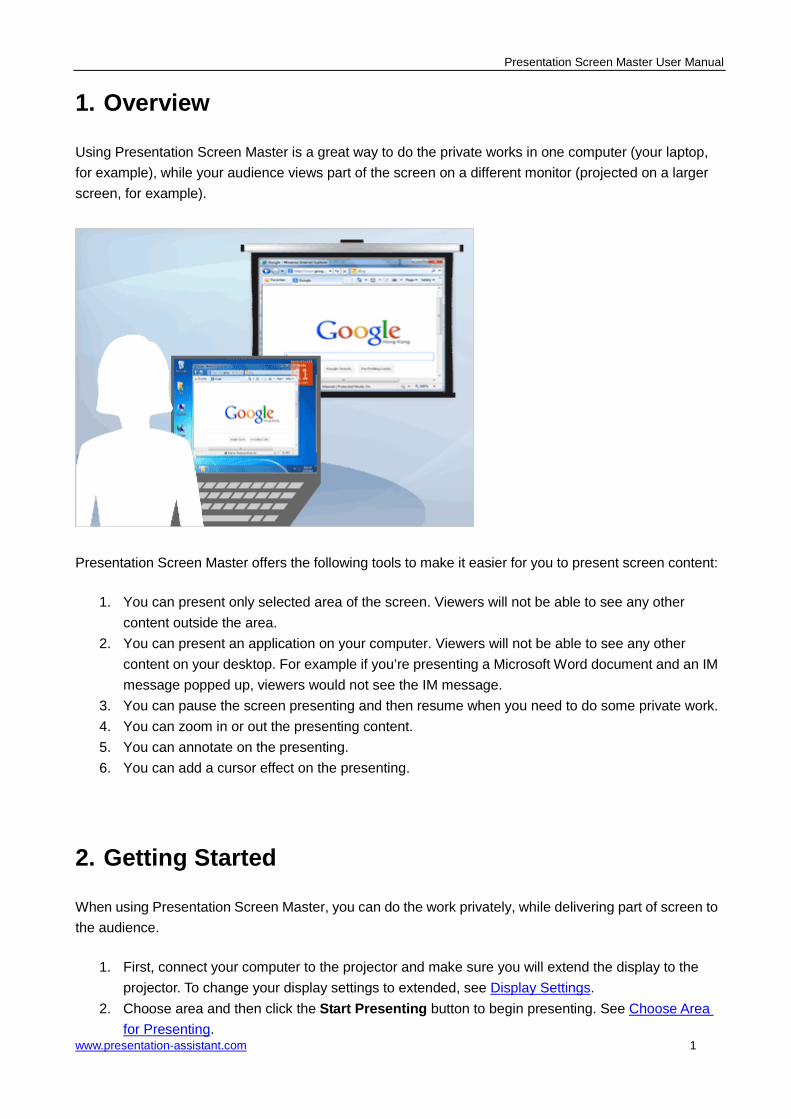
Using Presentation Screen Master is a great way to do the private works in one computer (your laptop, for example), while your audience views part of the screen on a different monitor (projected on a larger screen, for example).
Presentation Screen Master offers the following tools to make it easier for you to present screen content:
1. You can present only selected area of the screen. Viewers will not be able to see any other content outside the area.
2. You can present an application on your computer. Viewers will not be able to see any other content on your desktop. For example if you’re presenting a Microsoft Word document and an IM message popped up, viewers would not see the IM message.
3. You can pause the screen presenting and then resume when you need to do some private work. 4. You can zoom in or out the presenting content. 5. You can annotate on the presenting. 6. You can add a cursor effect on the presenting.
2. Getting Started
When using Presentation Screen Master, you can do the work privately, while delivering part of screen to the audience.
1. First, connect your computer to the projector and make sure you will extend the display to the projector. To change your display settings to extended, see Display Settings.
2. Choose area and then click the Start Presenting button to begin presenting. See Choose Area for Presenting.
Presentation Screen Master User Manual
www.presentation-assistant.com 2
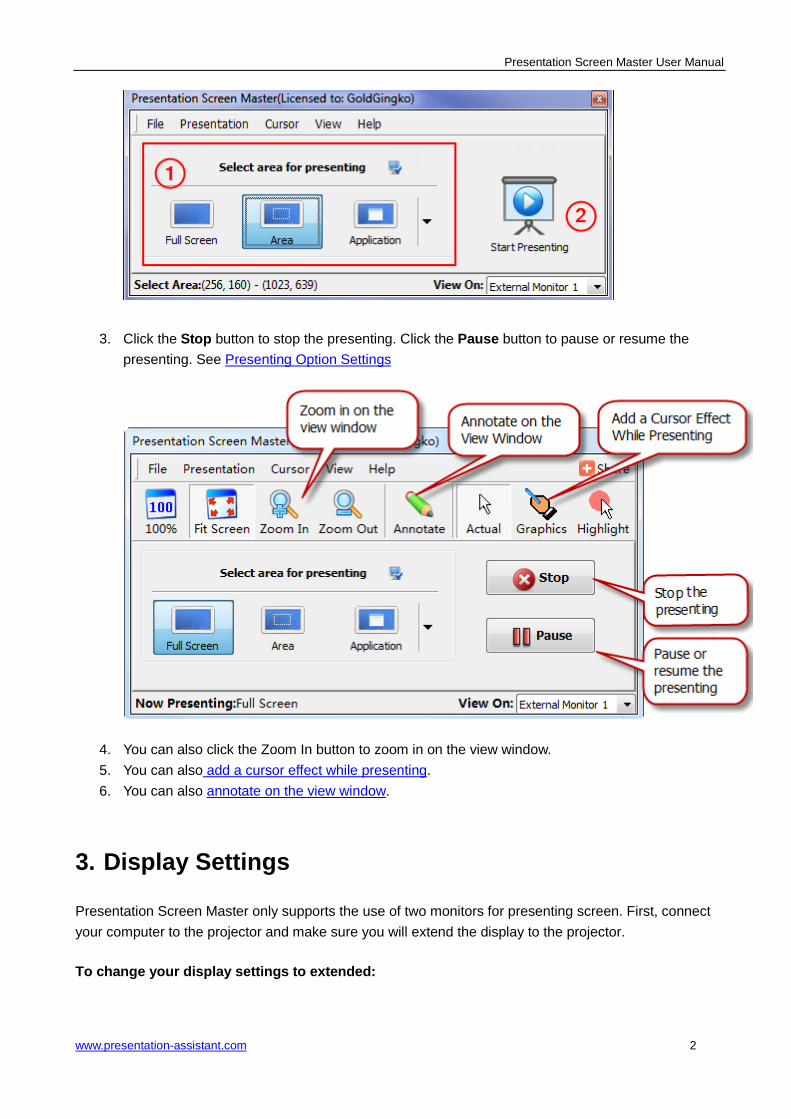
3. Click the Stop button to stop the presenting. Click the Pause button to pause or resume the presenting. See Presenting Option Settings
4. You can also click the Zoom In button to zoom in on the view window. 5. You can also add a cursor effect while presenting. 6. You can also annotate on the view window.
3. Display Settings
Presentation Screen Master only supports the use of two monitors for presenting screen. First, connect your computer to the projector and make sure you will extend the display to the projector.
To change your display settings to extended:
Presentation Screen Master User Manual
www.presentation-assistant.com 3
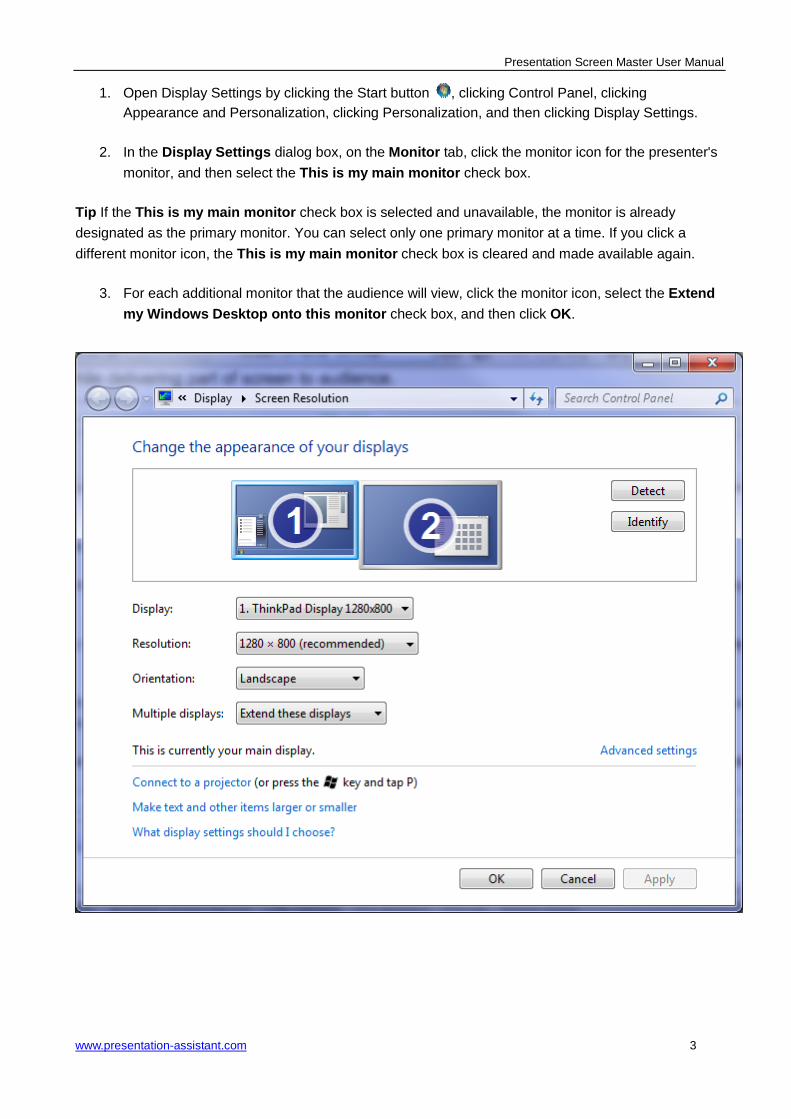
1. Open Display Settings by clicking the Start button , clicking Control Panel, clicking Appearance and Personalization, clicking Personalization, and then clicking Display Settings.
2. In the Display Settings dialog box, on the Monitor tab, click the monitor icon for the presenter's monitor, and then select the This is my main monitor check box.
Tip If the This is my main monitor check box is selected and unavailable, the monitor is already designated as the primary monitor. You can select only one primary monitor at a time. If you click a different monitor icon, the This is my main monitor check box is cleared and made available again.
3. For each additional monitor that the audience will view, click the monitor icon, select the Extend my Windows Desktop onto this monitor check box, and then click OK.
Presentation Screen Master User Manual
www.presentation-assistant.com 4
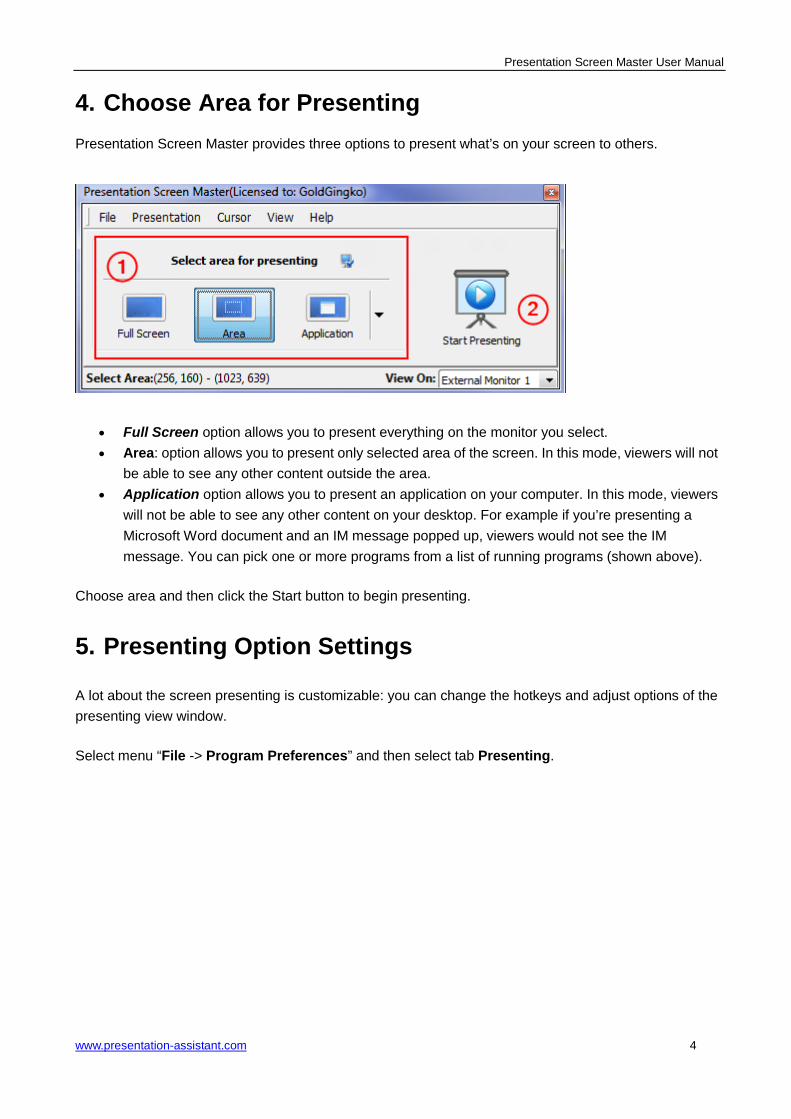
4. Choose Area for Presenting Presentation Screen Master provides three options to present what’s on your screen to others.
• Full Screen option allows you to present everything on the monitor you select. • Area: option allows you to present only selected area of the screen. In this mode, viewers will not
be able to see any other content outside the area. • Application option allows you to present an application on your computer. In this mode, viewers
will not be able to see any other content on your desktop. For example if you’re presenting a Microsoft Word document and an IM message popped up, viewers would not see the IM message. You can pick one or more programs from a list of running programs (shown above).
Choose area and then click the Start button to begin presenting.
5. Presenting Option Settings
A lot about the screen presenting is customizable: you can change the hotkeys and adjust options of the presenting view window.
Select menu “File -> Program Preferences” and then select tab Presenting.
Presentation Screen Master User Manual
www.presentation-assistant.com 5
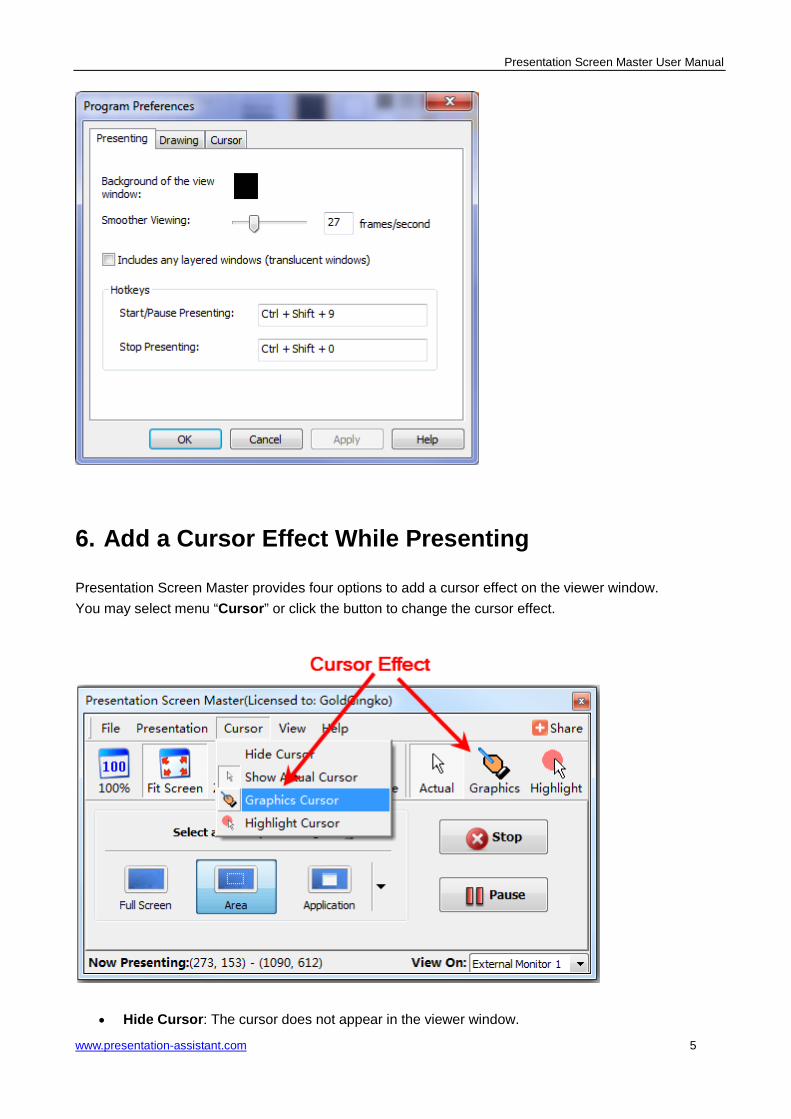
6. Add a Cursor Effect While Presenting
Presentation Screen Master provides four options to add a cursor effect on the viewer window. You may select menu “Cursor” or click the button to change the cursor effect.
• Hide Cursor: The cursor does not appear in the viewer window.
Presentation Screen Master User Manual
www.presentation-assistant.com 6
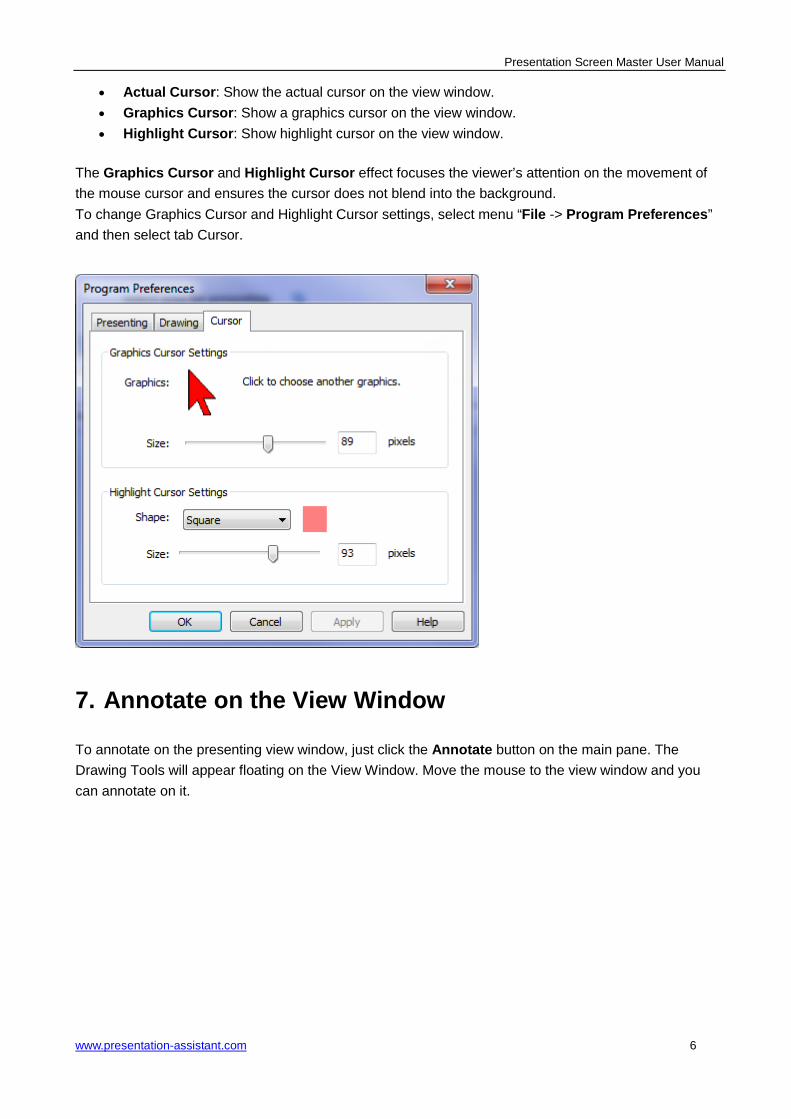
• Actual Cursor: Show the actual cursor on the view window. • Graphics Cursor: Show a graphics cursor on the view window. • Highlight Cursor: Show highlight cursor on the view window.
The Graphics Cursor and Highlight Cursor effect focuses the viewer’s attention on the movement of the mouse cursor and ensures the cursor does not blend into the background. To change Graphics Cursor and Highlight Cursor settings, select menu “File -> Program Preferences” and then select tab Cursor.
7. Annotate on the View Window
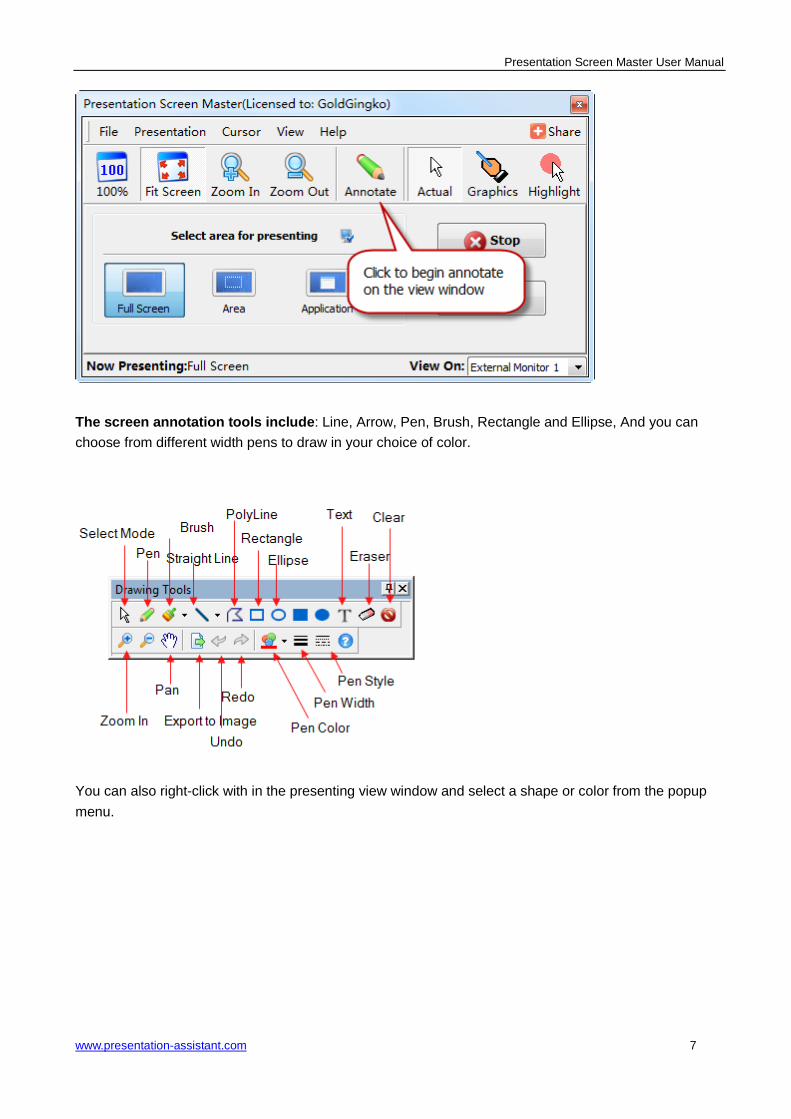
To annotate on the presenting view window, just click the Annotate button on the main pane. The Drawing Tools will appear floating on the View Window. Move the mouse to the view window and you can annotate on it.
Presentation Screen Master User Manual
www.presentation-assistant.com 7
The screen annotation tools include: Line, Arrow, Pen, Brush, Rectangle and Ellipse, And you can choose from different width pens to draw in your choice of color.
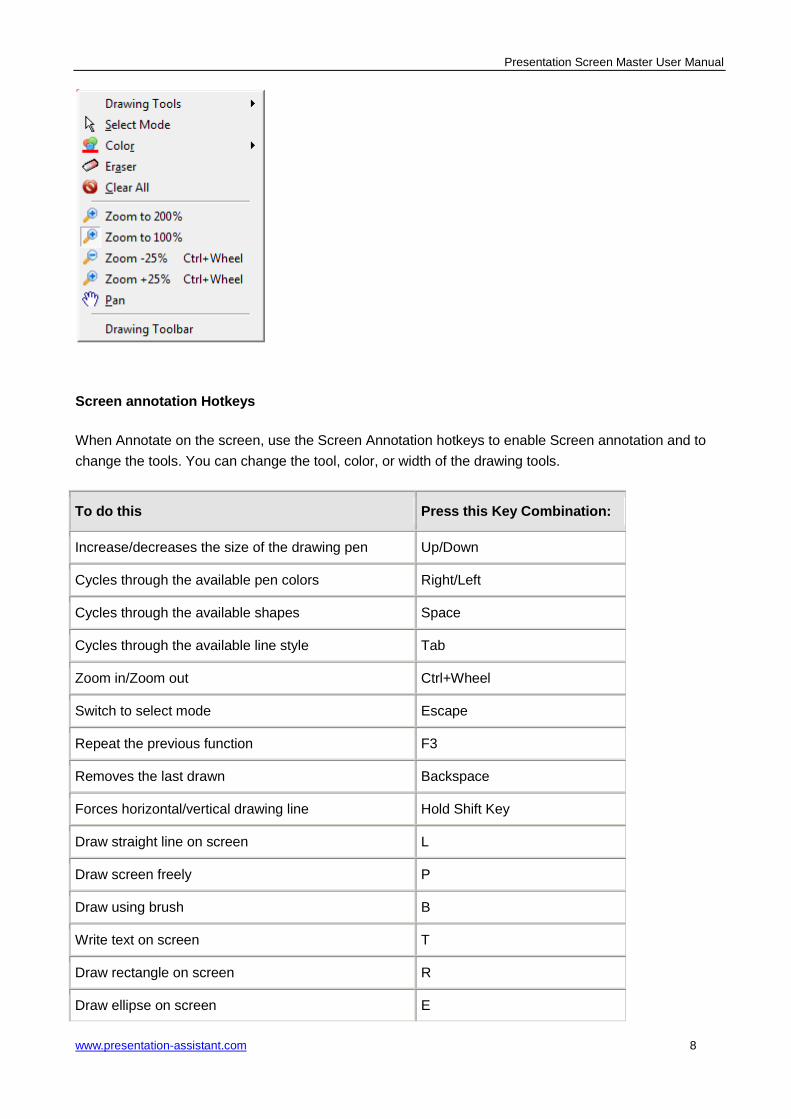
You can also right-click with in the presenting view window and select a shape or color from the popup menu.
Presentation Screen Master User Manual
www.presentation-assistant.com 8
Screen annotation Hotkeys
When Annotate on the screen, use the Screen Annotation hotkeys to enable Screen annotation and to change the tools. You can change the tool, color, or width of the drawing tools.
To do this Press this Key Combination:
Increase/decreases the size of the drawing pen Up/Down
Cycles through the available pen colors Right/Left
Cycles through the available shapes Space
Cycles through the available line style Tab
Zoom in/Zoom out Ctrl+Wheel
Switch to select mode Escape
Repeat the previous function F3
Removes the last drawn Backspace
Forces horizontal/vertical drawing line Hold Shift Key
Draw straight line on screen L
Draw screen freely P
Draw using brush B
Write text on screen T
Draw rectangle on screen R
Draw ellipse on screen E
Presentation Screen Master User Manual
www.presentation-assistant.com 9
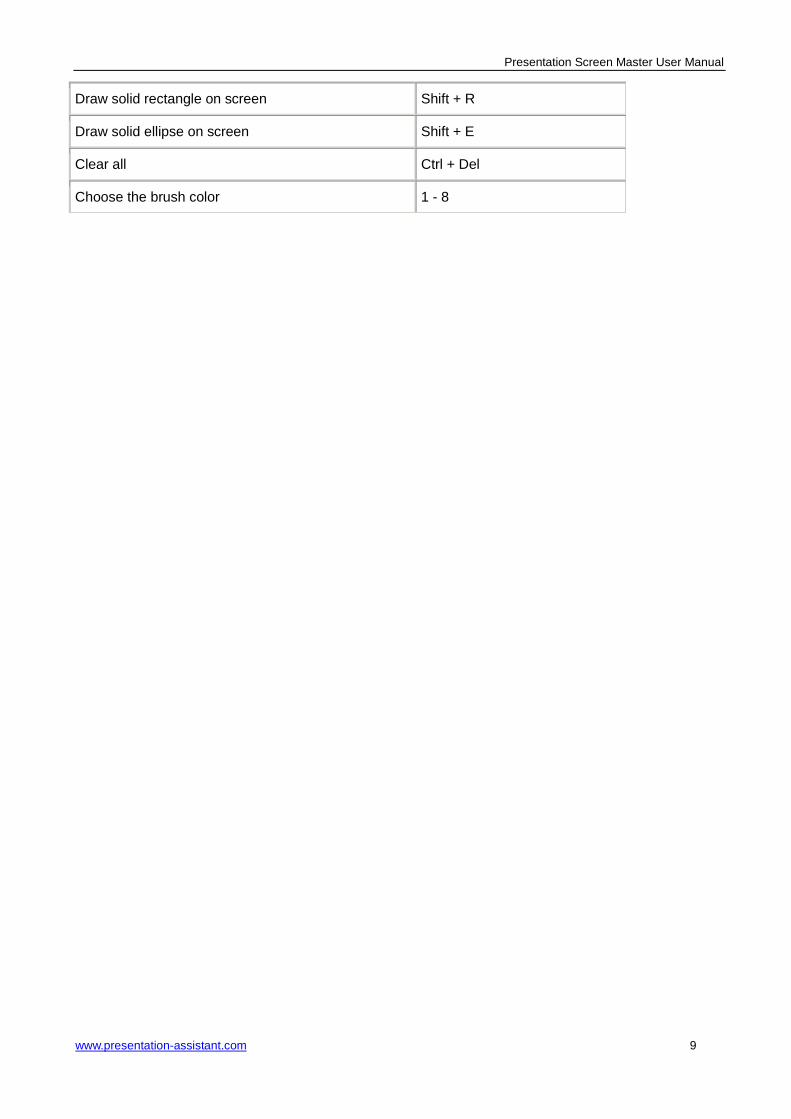
Draw solid rectangle on screen Shift + R
Draw solid ellipse on screen Shift + E
Clear all Ctrl + Del
Choose the brush color 1 - 8

Presentation Screen Master User Manual
www.presentation-assistant.com 10
Technology Support Customers' satisfaction is the best gift for us. We would like to try our best to provide you with the best products and service. So we welcome any question or suggestion. We promise to our customers that we will deal with emails within 24 hours after receiving them. Free trial customers are also welcome to enjoy our effective One Business Day Email Service! Please do not hesitate to contact us.
http://www.presentation-assistant.com/
E-mail: [email protected]