
Presentation EduShake
20
Presentation of EduShake
description
Manual of EduShake Software
Transcript of Presentation EduShake

Presentation of
EduShake

EduShake
How to download
● Address: http://www.proshake.com/
● At the menu select: Download EduShake
♦ setup.exe
♦ users manual
● Note 1
Be sure that you have defined period (.) as the decimal point
(can be changed at Regional Settings)
● Note 2
The file names must be up to 8-charcters long, without any
symbols
● Note 3
For Windows 7 and Windows Vista you must install a virtual
XP environment. Directions can be found at proshake.com

EduShake
Input of data
Select “Input manager”
EduShake
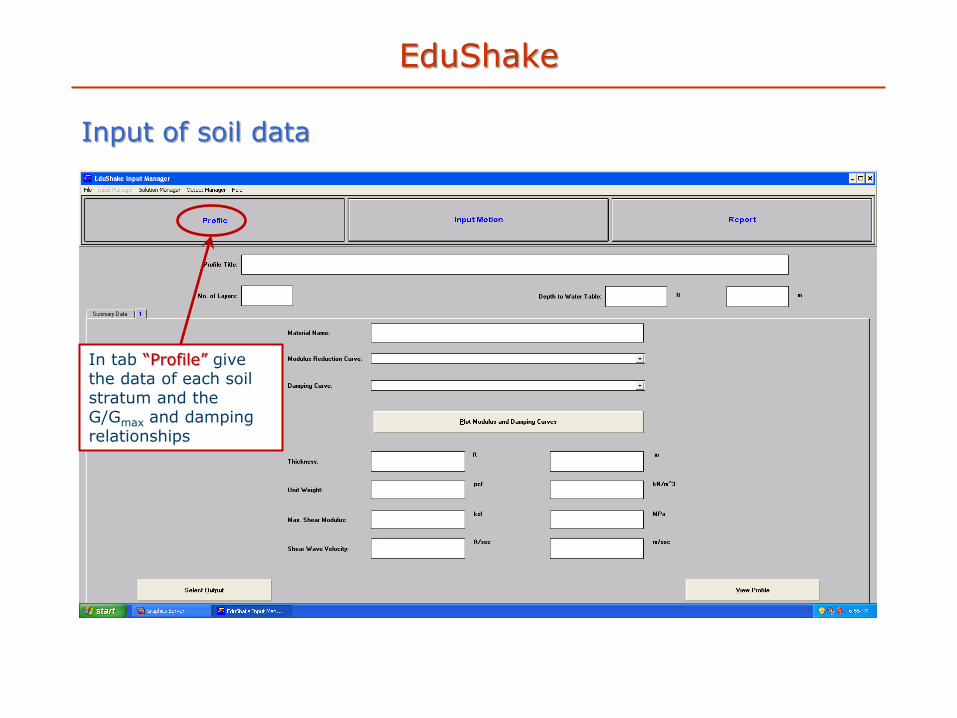
Input of soil data
In tab “Profile” give the data of each soil stratum and the G/Gmax and damping relationships

EduShake
Input of soil data
Project title
No. of layers = total number of layers + 1 for the bedrock
Depth of water table

EduShake
Input data for each soil layer
Name of soil layer
No. of soil layer
Data for each soil layer
G/Gmax & damping relationships
In tab “Select output” you define the parameters that will be calculated for each layer

EduShake
Input data for each soil layer
Tick if the top of the layer is on the outcrop
Define the damping values for which response spectra will be calculated

EduShake
Summary of input data of soil layers
Summary Data
Select S.I. units

EduShake
Input of earthquake data
In tab “Input motion” give the data for the seismic motion

EduShake
Input of earthquake data
No. of seismic motions
Select file with seismic motion data
Parameters of seismic motion. Here you can change pga if you want
Definition of position of application of seismic motion
In tab “File” you must save your file
γeff/γmax (M-1)/10, where M = earthquake magnitude
No. of iterations (8–10 are usually sufficient)

EduShake
Solution
Select “Solution manager”
Select data file

EduShake
Solution

EduShake
Results
Select “Output manager”

EduShake
Results
Select file with analysis data
EduShake
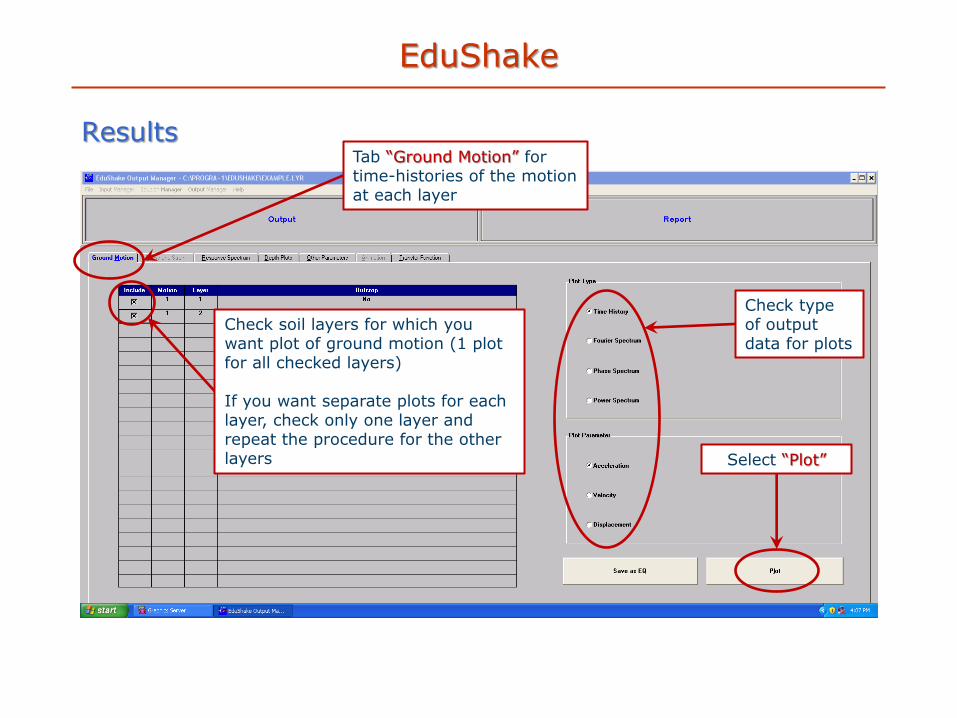
Results
Check soil layers for which you want plot of ground motion (1 plot for all checked layers) If you want separate plots for each layer, check only one layer and repeat the procedure for the other layers
Check type of output data for plots
Select “Plot”
Tab “Ground Motion” for time-histories of the motion at each layer

EduShake
Results
Select “Write data to file” to save data for further processing
Select “Return” for more plots

EduShake
Results
Check soil layers for which you want response spectra
Select “Plot”
Tab “Response spectrum”

EduShake
Results
Select “Write data to file” to save data for further processing
Select “Return” for more plots

EduShake
Results
Check soil layers for which you want plot
Check type of output data for plots
Select “Plot”
Tab “Depth Plots” for distribution with depth

EduShake
Results
Select “Write data to file” to save data for further processing
Select “Return” for more plots