PowerPoint Animations Facilitator Guide By Alexa Taylor
19
PowerPoint Animations Facilitator Guide By Alexa Taylor
Transcript of PowerPoint Animations Facilitator Guide By Alexa Taylor

PowerPoint Animations Facilitator Guide
By Alexa Taylor

Course Overview
Audience: Training Professionals.
Skill required: Intermediate level PowerPoint.
A secondary target audience includes anyone who uses PowerPoint to
design presentations, videos, or other effects that can be utilized to
enhance the visual aspect and engagement in PowerPoint designs.
Class Size
The maximum class size is 30 participants. The participant guide should be
distributed to each student prior to beginning the course.
Facilitator Recommendations
Periodically you will have opportunities to add your own stories and
examples to this content to make to more relevant to your participants and
provide more energy to the discussion. If it will improve the learning
opportunity, this practices is encouraged.
Target Audience and Prerequisite Requirements
2
PowerPoint Animations Facilitator Guide
This module provides an introduction to using animations to create a scene in PowerPoint to enhance a presentation.

Lesson Plan/Agenda Section 1 – Movement Animations (60 min)
Activity Description PowerPoint
Slide
Number
Maximum Time
Allocation
WELCOME: Welcome everyone to the
session. Introduce the topic.
1 3 minutes
OPENING POLL (1): What is your
PowerPoint Animation skill level?
2 and Poll
Tool
3 minutes
GROUND RULES: Mute, distractions, chat
box, etc.
3 2 minutes
AGENDA: Talk about the technique we are
going to learn
4 1 minute
ANIMATION EXAMPLES: Demonstrate the
final product
5-9 3 minutes
ANIMATION STEPS: 3 steps to create the
animation scene
10 3 minutes
CHAT ACTIVITY: What kinds of scenes
might you create?
11 2 minutes
TECHNICAL TRAINING: Insert and Edit an Image
12 (Blank
Slide)
25 minutes total
for all 3 partsTECHNICAL TRAINING: Add Movement/Animation
12 (Blank
Slide)
TECHNICAL TRAINING: Designate Timings/Adjust Effects
12 (Blank
Slide)
PRACTICE ACTIVITY: Use one of my ideas
or choose your own idea
13 15 minutes
CLOSING POLL (2): What new animation
idea or technique did you learn today? If
you didn’t gain any new idea please say
so.
N/A – Poll
Tool
1 minute
CONCLUSION OF SCENE/STORYTELLING –
Review of steps and ending thoughts.
14 2 minute
NEXT SESSION PREVIEW – fading pictures 15-20 2 minutes
3PowerPoint Animations Facilitator Guide
PowerPoint Animations Facilitator Guide 4
PowerPoint Slide View
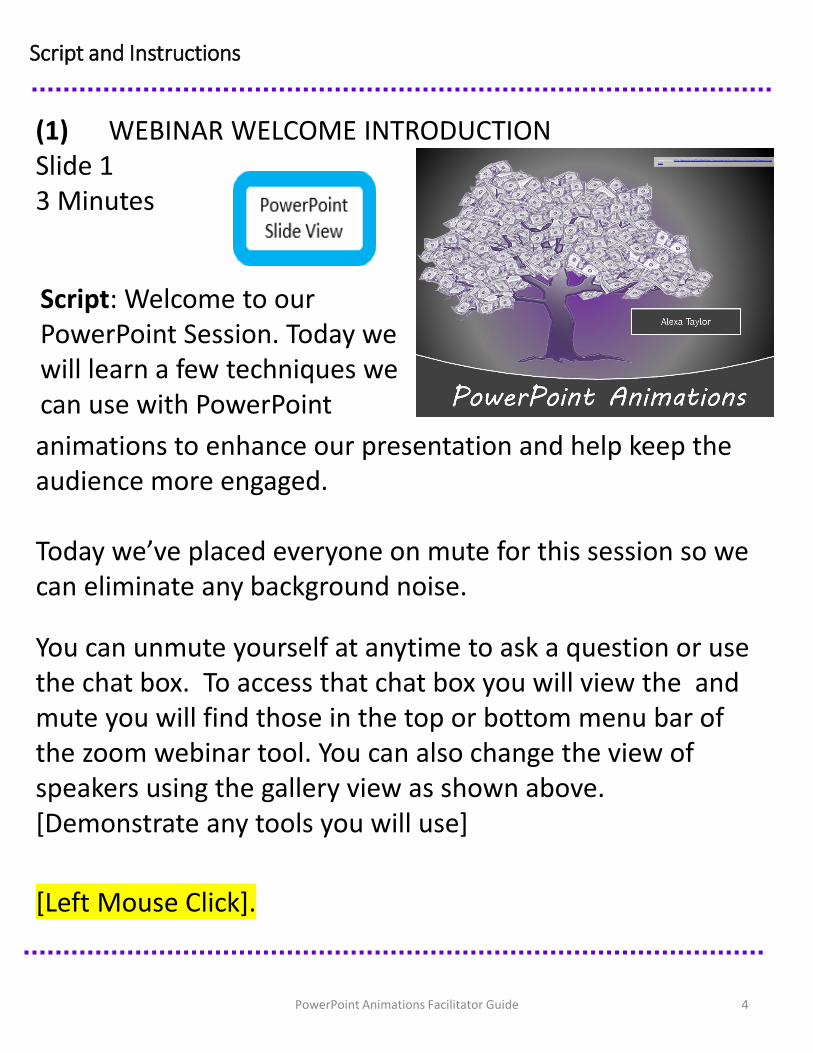
(1) WEBINAR WELCOME INTRODUCTIONSlide 13 Minutes
Script: Welcome to our PowerPoint Session. Today we will learn a few techniques we can use with PowerPoint
Script and Instructions
animations to enhance our presentation and help keep the audience more engaged.
Today we’ve placed everyone on mute for this session so we can eliminate any background noise.
[Left Mouse Click].
You can unmute yourself at anytime to ask a question or use the chat box. To access that chat box you will view the and mute you will find those in the top or bottom menu bar of the zoom webinar tool. You can also change the view of speakers using the gallery view as shown above. [Demonstrate any tools you will use]

PowerPoint Animations Facilitator Guide 5
(2) OPENING POLL Slide 23 Minutes
Script: Let’s take a survey of your level first. The lines are now open for voting. To cast your vote, type this link into your browser from your computer or smart phone.
[Display the results. Take note and see what results we get at the end]. [Return to Slideshow] [Left Mouse Click] .
Poll question: What is your PowerPoint Animation skill level? [Go to poll tool].
PowerPoint Slide View
(3) GROUND RULESSlide 32 Minutes
Script: [PAUSE] Who says money doesn’t grow on trees? Let’s go ahead and stop that. [Left Mouse Click] Which leads
me into my reminder for you. Please turn the ringer off of your phones and eliminate any other distractions at this time. This is our only time to focus on this together so let’s use this time wisely.

PowerPoint Animations Facilitator Guide 6
PowerPoint Slide View
(4) AGENDA: Slide 41 Minute
Script: As I mentioned before, today we will focus on a few animation techniques. This course is assuming you have
taken our prerequisites and you are an intermediate level PowerPoint user.
The first technique, similar to the tree with money falling is making items on the screen move to tell a story or create a scene. This will help us focus on a certain aspect of the training or subtly make a point to our audience. Let’s look at a few examples of animation techniques we can use for the first agenda item. [Left Mouse Click].

7
PowerPoint Slide View
Script:. Here we can imagine taking our viewers on a trip.
(5) INTRODUCTION TO MOVEMENT CONCEPT: Slide 5 - 93 Minutes
We can make this more real by showing a plane flying in the sky. [PAUSE… Left Mouse Click]Or perhaps we want a more cartoon like image of that leprechaun chasing a pot of gold. [Left Mouse Click].
Or a visit to the alps to join those skiers down the hill. [Left Mouse Click].
Or we could even enjoy nature. Watch the blossoms, wildlife, and even catch a fish.
You might be wondering how this can be used in a presentation. You can use this to set up the scene while telling a story. The nature scene we just saw was modified, but at one time it demonstrated the concept of the states of matter. That scene started as snow and an icy river, the snow melted with animation, blossoms bloomed in the spring and the fish was caught, then the river evaporated due to extreme heat. This was a great way to demonstrate the different phases of matter.

(5) … Continued
Or have you ever struggled with content that was just boring and you couldn’t get the presentation, right? I’ve had this happen, and when I added simple animations,
presentation became powerful and our message was communicated the way it should have been. Its important to note, animation is not as important as the content, but it can make people understand your content much easier. It’s also important to note that PowerPoint slides can be saved as a video, so this is a way to create a video as well. [Left Mouse Click].
PowerPoint Slide View
(6) ANIMATION MOVEMENT STEPS: Slide 101 Minute
Script: There are three major steps to create our animation effect. After envisioning our design, [Left Mouse Click] we
will find an appropriate picture and edit to size. Then we’ll make any other photo edits of your choice.

PowerPoint Animations Facilitator Guide 9PowerPoint Animations Facilitator Guide 9
It’s also important our animations complement the topic. We don’t want them to be too distracting, but to help emphasize our key points.
And finally, you want your image to be contrasting in color to the item that will be moving on the screen. So think through all of these items before continuing.
[Left Mouse Click] Step 2 is to add movement. Once we have placed our images into our PowerPoint slide we will add animation to create the effect. Be sure to explore all of the different types of animation including paths, appear, fade, blink, or any of the other animation listed in the animation bar at the top of the screen.
[Left Mouse Click] Step 3, is to simply play your animation and adjust the timings for the best effect.
Ok, let’s go ahead and do this now. [Select Escape to end slide show and open a new PowerPoint slide to create golf example].
(6) … Continued

(7) THINKING ABOUT YOUR OWNDESIGNS
Slide 112 Minutes
Script: Now take a moment to think of a scene you might want to create with animations. This might be for a Christmas card, a video to
[End Chat] Now as we go through the steps to build an animation think about an animation scene that was provided as an example. Think
PowerPoint Animations Facilitator Guide 10
(8) GOLF SCENE EXAMPLESlide 122 Minutes
convince your spouse to go on a trip to Africa, a professional presentation, whatever it is you want. Once you have at least one idea, please enter it into the chat box.
about the different animations available and how you might utilize these animation tools to create your scene.

------------- BEGIN TECHNICAL SECTION -------------
(20-25 minutes total)
[NOTE: DETAILED TECHNICAL INSTRUCTIONS ARE PROVIDED IN THE PARTICPANT GUIDE]
PowerPoint Slide View
(9) GOLF BACKGROUND
Technical Steps:1. Open a blank PowerPoint Slide. 2. Locate image at:
https://pixabay.com/photos/mountain-golf-california-1210968/.
3. Copy the image or save the image to your computer.4. Paste the image or insert the image into your blank slide.5. Edit the image if needed.6. Resize the image to the width of your slide. Explain this is
larger than the slide because we don’t want the bottom grass section.
7. Align the image top line with the top of the slide.
PowerPoint Animations Facilitator Guide 11
PowerPoint Animations Facilitator Guide 12
PowerPoint Slide View
PowerPoint Slide View
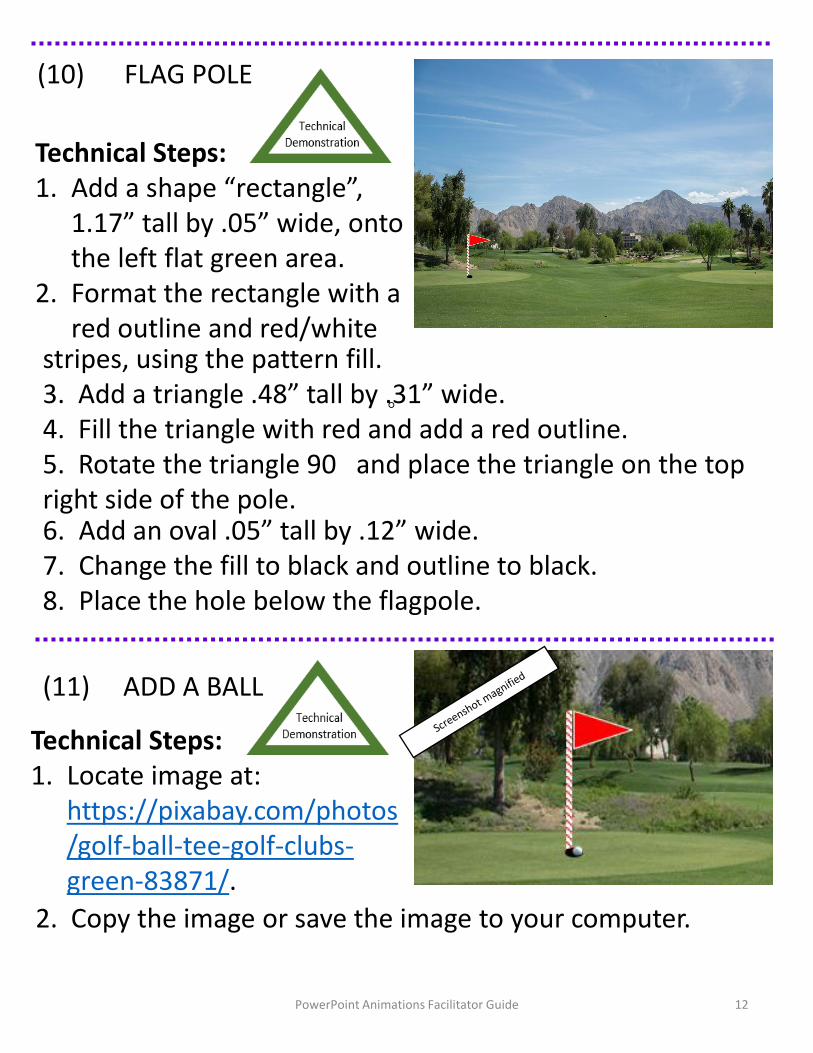
(10) FLAG POLE
Technical Steps:1. Add a shape “rectangle”,
1.17” tall by .05” wide, onto the left flat green area.
2. Format the rectangle with a red outline and red/white
6. Add an oval .05” tall by .12” wide. 7. Change the fill to black and outline to black.8. Place the hole below the flagpole.
stripes, using the pattern fill.3. Add a triangle .48” tall by .31” wide. 4. Fill the triangle with red and add a red outline. 5. Rotate the triangle 90 and place the triangle on the top right side of the pole.
◦
(11) ADD A BALL
Technical Steps:1. Locate image at:
https://pixabay.com/photos/golf-ball-tee-golf-clubs-green-83871/.
2. Copy the image or save the image to your computer.
PowerPoint Animations Facilitator Guide 13
PowerPoint Slide View
PowerPoint Slide View
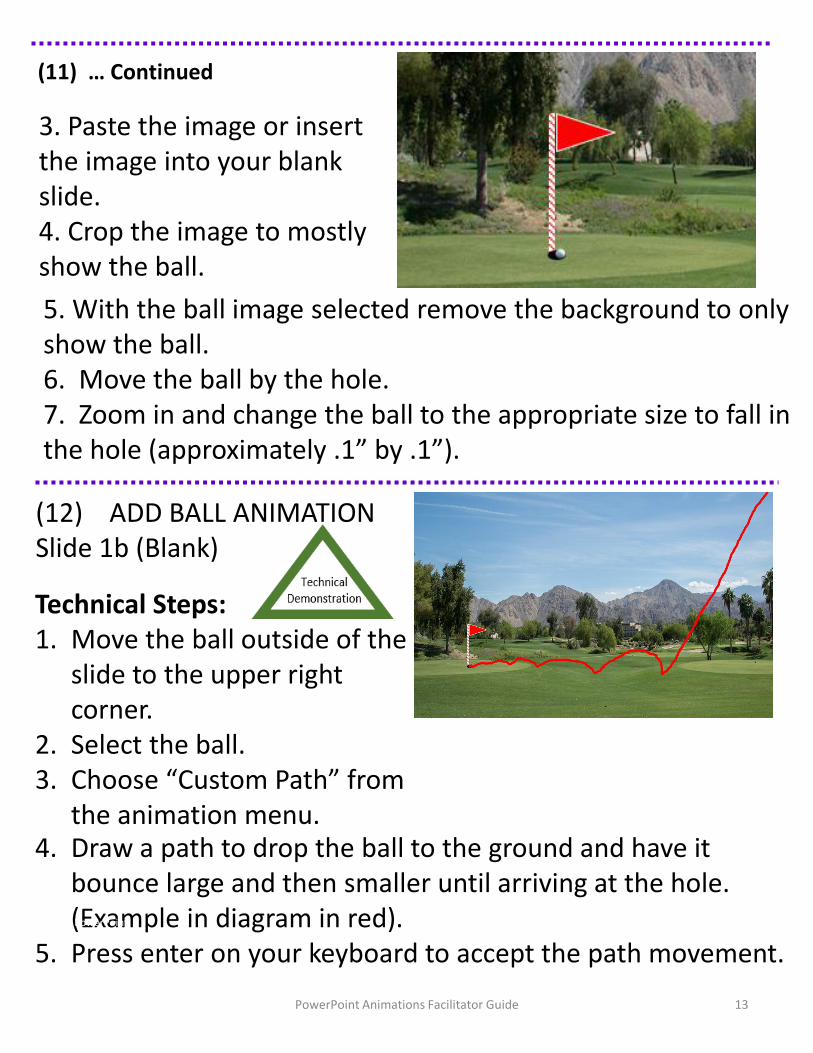
(12) ADD BALL ANIMATIONSlide 1b (Blank)
Technical Steps:1. Move the ball outside of the
slide to the upper right corner.
2. Select the ball. 3. Choose “Custom Path” from
the animation menu.4. Draw a path to drop the ball to the ground and have it
bounce large and then smaller until arriving at the hole. (Example in diagram in red).
5. Press enter on your keyboard to accept the path movement.PowerPoint Slide View
3. Paste the image or insert the image into your blank slide.4. Crop the image to mostly show the ball.
(11) … Continued
5. With the ball image selected remove the background to only show the ball. 6. Move the ball by the hole.7. Zoom in and change the ball to the appropriate size to fall in the hole (approximately .1” by .1”).

PowerPoint Animations Facilitator Guide 14
6. Make any changes as needed by deleting and trying again or changing the points. 7. Finally to make the ball drop in the hole, select the ball.8. Choose add animation, then disappear.
(12) … Continued
Script: Note the timing of the ball is too fast, but don’t worry we’ll fix that in our third step.
(13) ANIMATE THE GOLF POLE
Technical Steps:1. Select both the triangle flag and
the pole.2. Select the animation pulse. 3. Preview the entire slide.

PowerPoint Animations Facilitator Guide 15
(15) BALL INTO HOLE TIMING
Technical Steps:1. Select the animation menu,
and then select the ball.2. Change the animation to 3. “After Previous” .
(14) BALL DROP TIMING
Technical Steps:1. Select the animation pane,
and then select the ball.2. Change the duration to 8
seconds. 3. View the slideshow. 4. Change the duration to 4.5 seconds. 5. View the slideshow.

PowerPoint Animations Facilitator Guide 16
(16) FLAG TIMING
Technical Steps:1. Select the animation
menu, and then select the flag and pole.
2. Change the animation to “With Previous”
3. View the Slideshow and adjust timings, animations, and images as needed.
(17) PRACTICE ACTIVITYSlide 1312 Minutes
Script: Now its your turn to practice so we can discover any problems while we are all here to learn. For this activity think of a scene you want to create.
------------- END TECHNICAL SECTION -------------
You can use an idea someone else mentioned in the chat box earlier or something you just thought of. Spend about five minutes creating a scene. What you don’t finish we can work on before we meet next time. At that time we will share our ideas and learnings. [Ideas you can suggest: A Camel walking across a desert, a sunrise, an email arriving on computer]

PowerPoint Animations Facilitator Guide 17
Please enter your answers in the chat box. The more we share the earlier we can learn from each other’s discoveries.
(18) PRACTICE ACTIVITYSlide 133 Minutes
Script: You will need more time to work on this, but what problems did you encounter? What did you learn?
(19) CONCLUSIONSlide 12 (Blank)1 Minute
utilize these tools in your next presentation.
Script: [Summarize poll results with something like] I am glad to see you all gained a new concept. Hopefully, you can
As you continue to explore PowerPoint make sure you pay attention to each animation effect and how you can use it differently than you did before.
Be sure to finish your practice animations so we can share those next time we meet and learn from each other.

18PowerPoint Animations Facilitator Guide
(13) NEXT SESSION PREVIEWSlide 12 2 Minutes
• We might do the same thing with nature, making it appear we watched a sunset. Or the same thing in Italy. [Left Mouse Click]
• This effect makes us really focus on the bear’s fur so the technique can be used to draw eyes to a certain place. [Left Mouse Click].
• We can even use images that are not standard and make it look like a change is happening before our eyes.
Have a wonderful week everyone! You can contact me at…. (provide your email, etc.)
Script: Next time we meet we’ll start by sharing our examples from this week. Then we will learn how to make pictures fade. For
example [Left Mouse Click] we can take a photo and change it from black and white slowly as if the sun were rising or the kids were blossoming in front of our eyes. [Left Mouse Click]
------------- END OF DOCUMENT-------------
Image Source: https://www.shutterstock.com/image-illustration/raster-graphic-depicting-stylized-concept-money-1531694?irgwc=1&utm_medium=Affiliate&utm_campaign=TinEye&utm_source=77643&utm_term=, https://pixabay.com/photos/airplane-jet-airliner-sky-travel-4074297/, https://pixabay.com/photos/sky-clouds-atmosphere-air-oxygen-1441936/, https://pixabay.com/illustrations/mountain-river-landscape-rainbow-3995571/, and https://giphy.com/explore/leprechaun.

Sample 3: Participant Guide
PowerPoint Animations
Partial Sample