Portrain of Troll
3
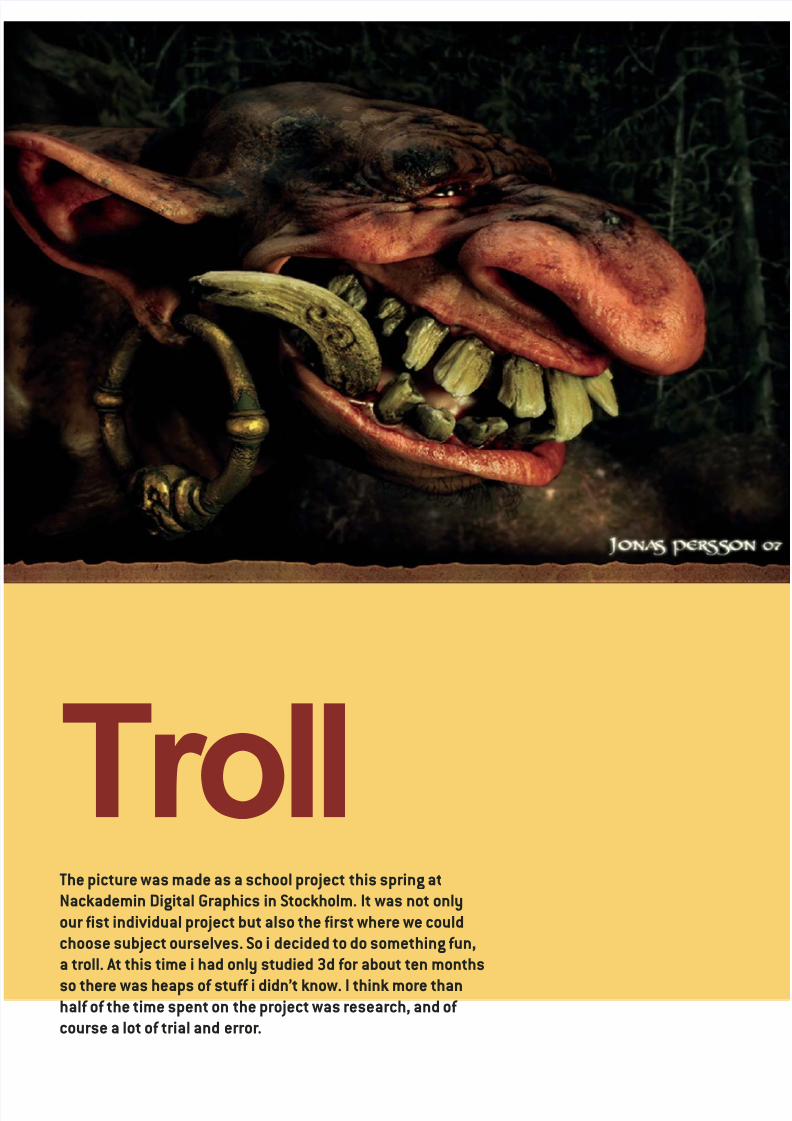
Troll The picture was made as a school project this spring at Nackademin Digital Graphics in Stockholm. It was not only our fist individual project but also the first where we could choose subject ourselves. So i decided to do something fun, a troll. At this time i had only studied 3d for about ten months so there was heaps of stuff i didn’t know. I think more than half of the time spent on the project was research, and of course a lot of trial and error .
Transcript of Portrain of Troll
8/14/2019 Portrain of Troll
http://slidepdf.com/reader/full/portrain-of-troll 1/3
TrollThe picture was made as a school project this spring at
Nackademin Digital Graphics in Stockholm. It was not only
our fist individual project but also the first where we could
choose subject ourselves. So i decided to do something fun,
a troll. At this time i had only studied 3d for about ten months
so there was heaps of stuff i didn’t know. I think more thanhalf of the time spent on the project was research, and of
course a lot of trial and error.
8/14/2019 Portrain of Troll
http://slidepdf.com/reader/full/portrain-of-troll 2/3
www.gomotionmag.com 59
TROLL
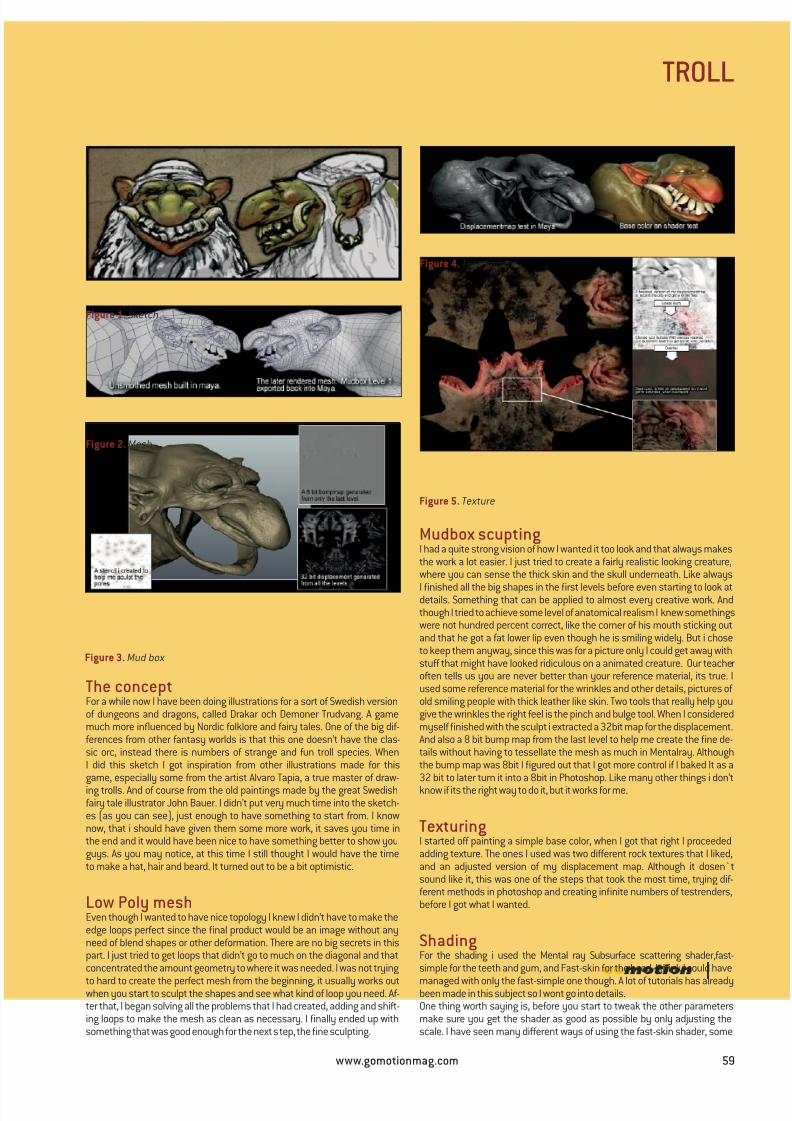
The conceptFor a while now I have been doing illustrations for a sort of Swedish versionof dungeons and dragons, called Drakar och Demoner Trudvang. A gamemuch more influenced by Nordic folklore and fairy tales. One of the big dif-ferences from other fantasy worlds is that this one doesn’t have the clas-sic orc, instead there is numbers of strange and fun troll species. WhenI did this sketch I got inspiration from other illustrations made for thisgame, especially some from the artist Alvaro Tapia, a true master of draw-ing trolls. And of course from the old paintings made by the great Swedishfairy tale illustrator John Bauer. I didn’t put very much time into the sketch-es (as you can see), just enough to have something to start from. I knownow, that i should have given them some more work, it saves you time inthe end and it would have been nice to have something better to show youguys. As you may notice, at this time I still thought I would have the timeto make a hat, hair and beard. It turned out to be a bit optimistic.
Low Poly meshEven though I wanted to have nice topology I knew I didn’t have to make theedge loops perfect since the final product would be an image without anyneed of blend shapes or other deformation. There are no big secrets in thispart. I just tried to get loops that didn’t go to much on the diagonal and thatconcentrated the amount geometry to where it was needed. I was not trying
to hard to create the perfect mesh from the beginning, it usually works outwhen you start to sculpt the shapes and see what kind of loop you need. Af-ter that, I began solving all the problems that I had created, adding and shift-ing loops to make the mesh as clean as necessary. I finally ended up withsomething that was good enough for the next step, the fine sculpting.
Figure 1. Sketch
Figure 2. Mesh
Figure 3. Mud box
Figure 4. Testrenders
Figure 5. Texture
Mudbox scuptingI had a quite strong vision of how I wanted it too look and that always makesthe work a lot easier. I just tried to create a fairly realistic looking creature,where you can sense the thick skin and the skull underneath. Like always
I finished all the big shapes in the first levels before even starting to look atdetails. Something that can be applied to almost every creative work. Andthough I tried to achieve some level of anatomical realism I knew somethingswere not hundred percent correct, like the corner of his mouth sticking outand that he got a fat lower lip even though he is smiling widely. But i choseto keep them anyway, since this was for a picture only I could get away withstuff that might have looked ridiculous on a animated creature. Our teacheroften tells us you are never better than your reference material, its true. Iused some reference material for the wrinkles and other details, pictures of old smiling people with thick leather like skin. Two tools that really help yougive the wrinkles the right feel is the pinch and bulge tool. When I consideredmyself finished with the sculpt i extracted a 32bit map for the displacement.And also a 8 bit bump map from the last level to help me create the fine de-tails without having to tessellate the mesh as much in Mentalray. Althoughthe bump map was 8bit I figured out that I got more control if I baked It as a32 bit to later turn it into a 8bit in Photoshop. Like many other things i don’tknow if its the right way to do it, but it works for me.
TexturingI started off painting a simple base color, when I got that right I proceededadding texture. The ones I used was two different rock textures that I liked,and an adjusted version of my displacement map. Although it dosen`tsound like it, this was one of the steps that took the most time, trying dif-ferent methods in photoshop and creating infinite numbers of testrenders,before I got what I wanted.
ShadingFor the shading i used the Mental ray Subsurface scattering shader,fast-simple for the teeth and gum, and Fast-skin for the head. I think I could have
managed with only the fast-simple one though. A lot of tutorials has alreadybeen made in this subject so I wont go into details.One thing worth saying is, before you start to tweak the other parametersmake sure you get the shader as good as possible by only adjusting thescale. I have seen many different ways of using the fast-skin shader, some
8/14/2019 Portrain of Troll
http://slidepdf.com/reader/full/portrain-of-troll 3/3
60 www.gomotionmag.com
CHARACTER ANIMATION
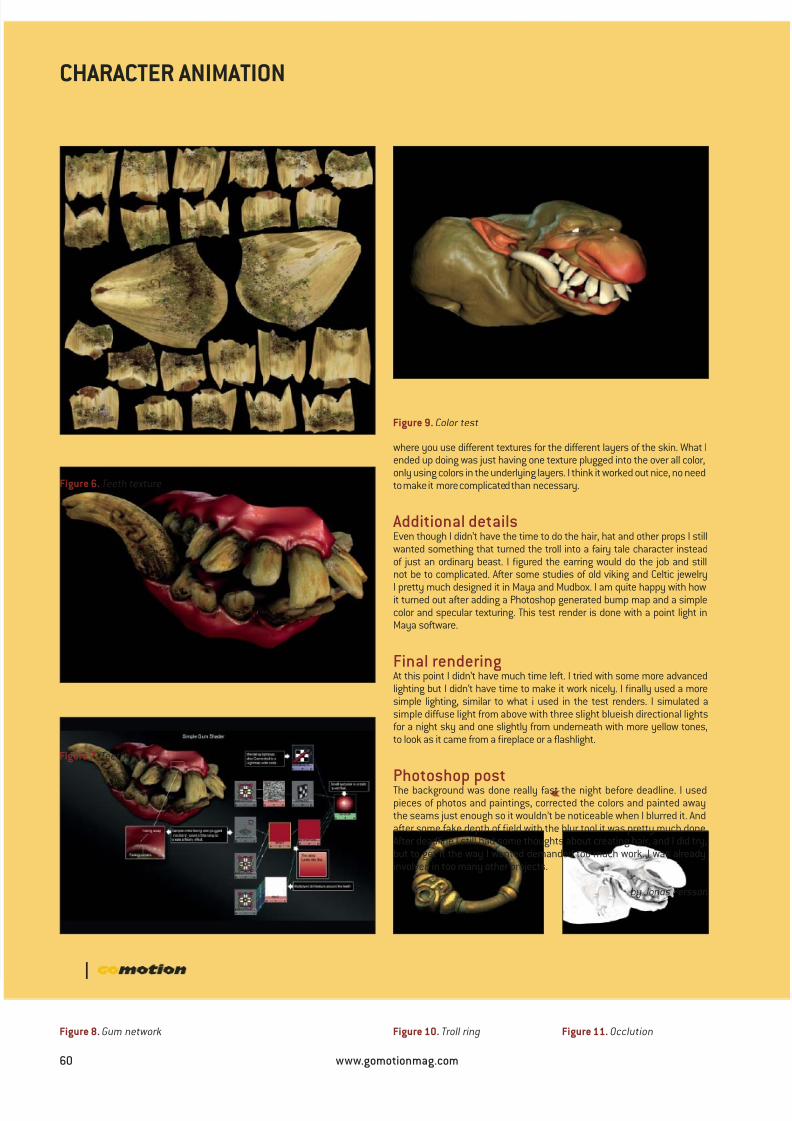
Figure 6. Teeth texture
Figure 7. Teeth
Figure 8. Gum network
Figure 9. Color test
Figure 10. Troll ring Figure 11. Occlution
where you use different textures for the different layers of the skin. What Iended up doing was just having one texture plugged into the over all color,only using colors in the underlying layers. I think it worked out nice, no needto make it more complicated than necessary.
Additional detailsEven though I didn’t have the time to do the hair, hat and other props I stillwanted something that turned the troll into a fairy tale character insteadof just an ordinary beast. I figured the earring would do the job and stillnot be to complicated. After some studies of old viking and Celtic jewelry
I pretty much designed it in Maya and Mudbox. I am quite happy with howit turned out after adding a Photoshop generated bump map and a simplecolor and specular texturing. This test render is done with a point light inMaya software.
Final renderingAt this point I didn’t have much time left. I tried with some more advancedlighting but I didn’t have time to make it work nicely. I finally used a moresimple lighting, similar to what i used in the test renders. I simulated asimple diffuse light from above with three slight blueish directional lightsfor a night sky and one slightly from underneath with more yellow tones,to look as it came from a fireplace or a flashlight.
Photoshop postThe background was done really fast the night before deadline. I usedpieces of photos and paintings, corrected the colors and painted awaythe seams just enough so it wouldn’t be noticeable when I blurred it. Andafter some fake depth of field with the blur tool it was pretty much done.After deadline I still had some thoughts about creating hair, and I did try,but to get it the way I wanted demanded too much work. I was alreadyinvolved in too many other projects.
by Jonas Persson