Pole Mounted Camera - Make · Pole Mounted Camera A practical way to obtain some beautiful aerial...
7
Pole Mounted Camera A practical way to obtain some beautiful aerial photographs is to attach a camera to a painter’s extension pole. A pole-mounted camera provides a simpler alternative to mounting a camera to a kite or helium balloon. This design will work with most digital cameras and doesn’t require any modifications to the camera. Instead, it makes use of one of the most useful devices in the Maker’s arsenal of tools: the radio controlled servo motor. FOR MORE PROJECTS, VISIT: makezine.tv Pole Mounted Camera page 1 Tools Hand Saw Electric drill, drill bits Screwdriver Hammer Materials Wood - 1” x 1” pine or similar 1” x 1” x 13” 1” x 1” x 5” 1” x ½” x 10” 1” x ½” x 4 ½” (3) #8 x 2” machine screws with nuts (4) #6 x 1 ¼” machine screws with nuts (2) ¼” carriage bolt, 2” long Cable ties Hose washers (2) ¼” diameter nylon bolt, 1½” long, nut, and washers (2) Radio control transmitter, receiver, and battery designed for ground use (not airplane or helicopter frequencies) Hobby servomotors (2) Telescoping painter’s extension pole – 25’ maximum Painter’s brush extension with socket that screws onto extension pole Glue and nails, wood screws, dowels or pegs Estimated Cost: $150 (does not include camera). Before you begin: You may find it necessary to modify these instructions, depending on what materials and tools you have at hand, and any improvements you might want to make in the design. Go ahead and customize the project and make it your own!
Transcript of Pole Mounted Camera - Make · Pole Mounted Camera A practical way to obtain some beautiful aerial...

Pole Mounted Camera
A practical way to obtain some beautiful aerial photographs is to attach a camera to a painter’s extension pole.
A pole-mounted camera provides a simpler alternative to mounting a camera to a kite or helium balloon. This design will work with most digital cameras and doesn’t require any modifications to the camera. Instead, it makes use of one of the most useful devices in the Maker’s arsenal of tools: the radio controlled servo motor.
FOR MORE PROJECTS, VISIT: makezine.tv
Pole Mounted Camerapage 1
ToolsHand SawElectric drill, drill bitsScrewdriverHammer
MaterialsWood - 1” x 1” pine or similar 1” x 1” x 13” 1” x 1” x 5” 1” x ½” x 10” 1” x ½” x 4 ½” (3)#8 x 2” machine screws with nuts (4)#6 x 1 ¼” machine screws with nuts (2)¼” carriage bolt, 2” longCable tiesHose washers (2)¼” diameter nylon bolt, 1½” long, nut, and washers (2)Radio control transmitter, receiver, and battery designed for ground use (not airplane or helicopter frequencies)Hobby servomotors (2) Telescoping painter’s extension pole – 25’ maximumPainter’s brush extension with socket that screws onto extension poleGlue and nails, wood screws, dowels or pegs
Estimated Cost: $150 (does not include camera).
Before you begin:You may find it necessary to modify these instructions, depending on what materials and tools you have at hand, and any improvements you might want to make in the design. Go ahead and customize the project and make it your own!
Pole Mounted Camera
FOR MORE PROJECTS, VISIT: makezine.tv
Pole Mounted Camerapage 2
Note: These instructions are based on the dimensions of common point-and-shoot digital cameras and standard hobby servomotors. You may have to make changes to the design to fit different cameras or servos.
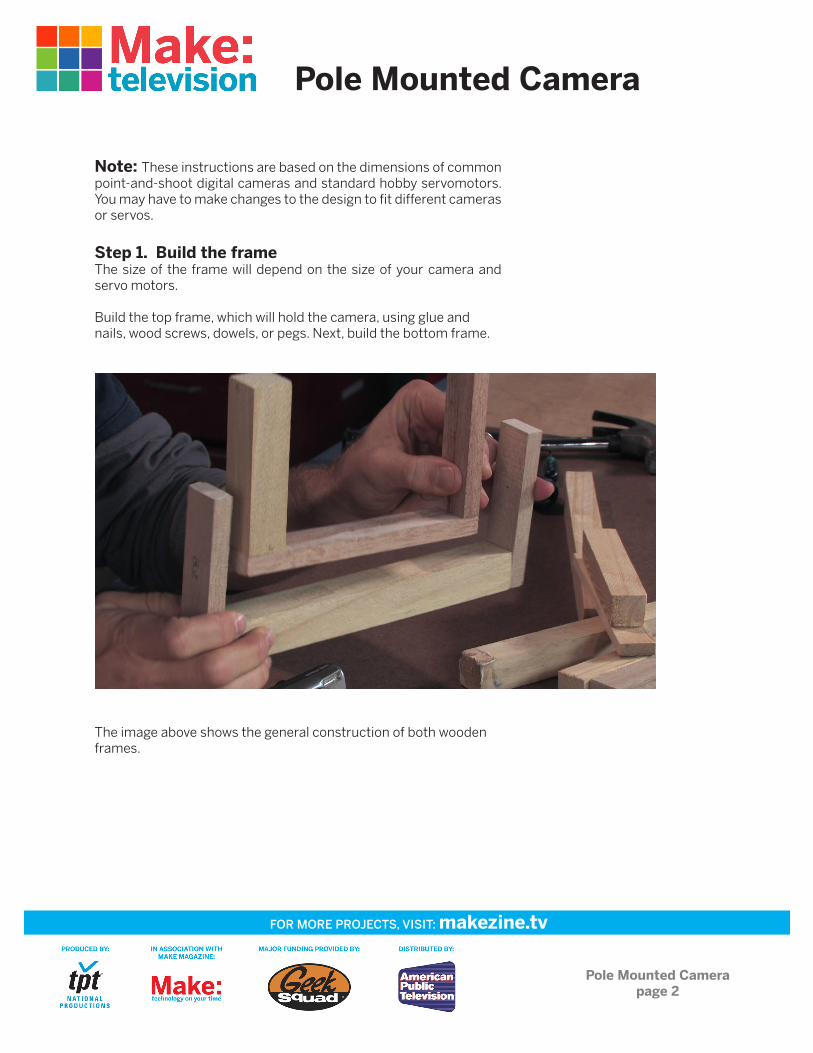
Step 1. Build the frameThe size of the frame will depend on the size of your camera and servo motors.
Build the top frame, which will hold the camera, using glue and nails, wood screws, dowels, or pegs. Next, build the bottom frame.
The image above shows the general construction of both wooden frames.
Pole Mounted Camera
FOR MORE PROJECTS, VISIT: makezine.tv
Pole Mounted Camerapage 3
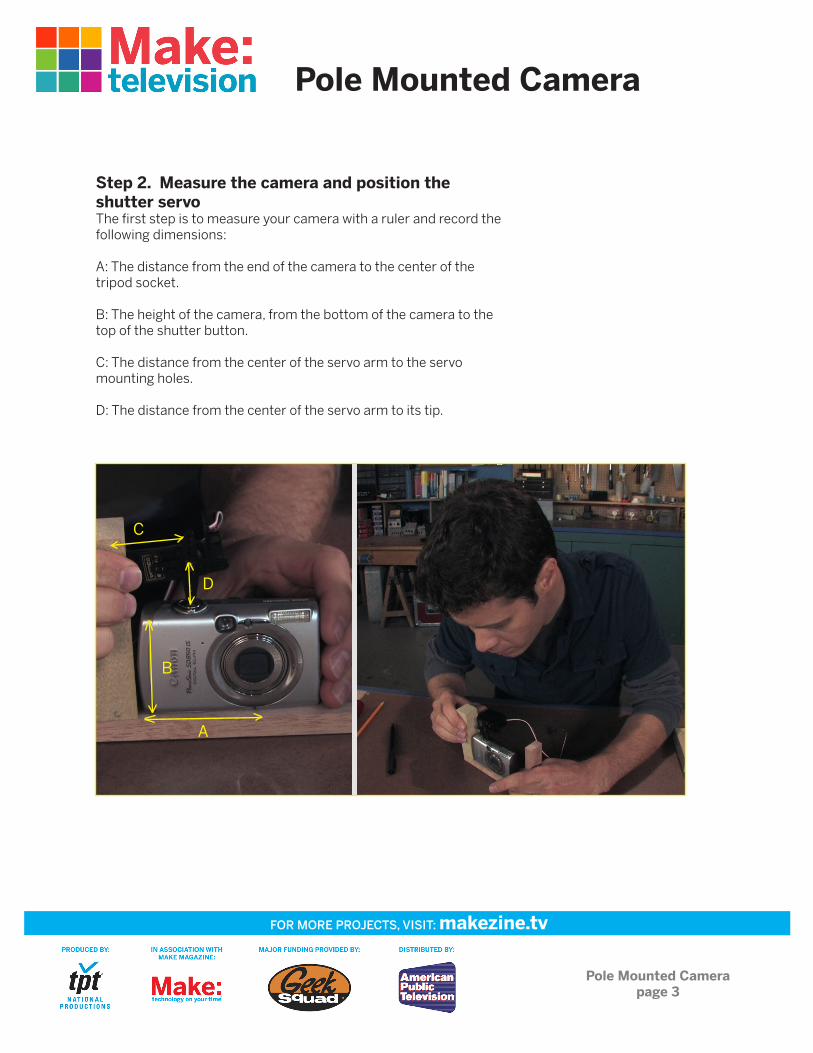
Step 2. Measure the camera and position the shutter servoThe first step is to measure your camera with a ruler and record the following dimensions:
A: The distance from the end of the camera to the center of the tripod socket.
B: The height of the camera, from the bottom of the camera to the top of the shutter button.
C: The distance from the center of the servo arm to the servo mounting holes.
D: The distance from the center of the servo arm to its tip.
A
D
C
B

Step 3. Mount the camera and servo motorsMount the shutter servo to the 1” x 1” upright of the top frame. Posi-tion it so that its centerline is the combined length of your camera’s height (dimension B) plus the length of the servo arm (dimension D) plus the thickness of 2 hose washers from the surface of the piece on which the camera is mounted.
Mount the shutter servo by drilling 2 holes in the top frame with a #25 drill (about 5/32”), corresponding to dimension C. Attach the servo to the top frame with 2 #6 machine screws and nuts.
Drill a ¼” - diameter hole for the camera mounting bolt. You want the shutter button to be directly underneath the servo arm when the arm is fully extended. This corresponds to dimension A.
Insert the 1”-long ¼”-diameter bolt into the camera mounting hole on the top frame and place 1 or 2 hose washers over the bolt before securing the camera. As you tighten the camera by turning the bolt, the hose washers compress. This will provide a degree of fine adjustment for the shutter servo motor.
Pole Mounted Camera
FOR MORE PROJECTS, VISIT: makezine.tv
Pole Mounted Camerapage 4
Pole Mounted Camera
FOR MORE PROJECTS, VISIT: makezine.tv
Pole Mounted Camerapage 5
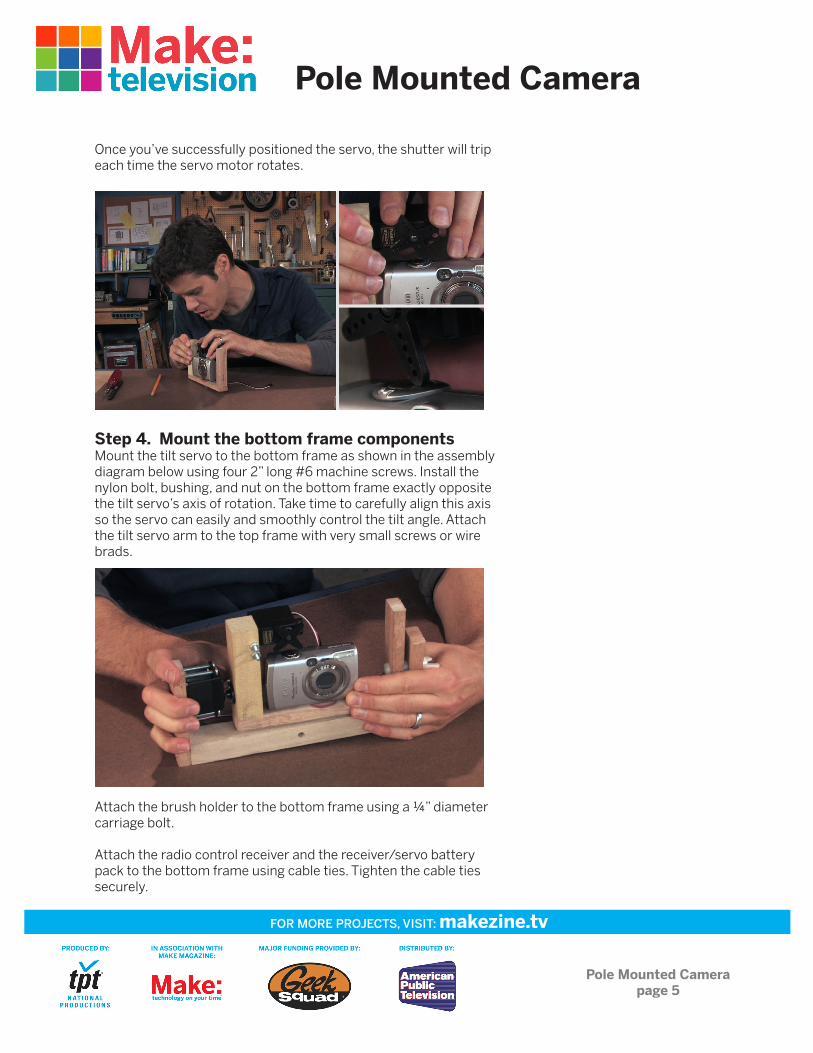
Once you’ve successfully positioned the servo, the shutter will trip each time the servo motor rotates.
Step 4. Mount the bottom frame componentsMount the tilt servo to the bottom frame as shown in the assembly diagram below using four 2” long #6 machine screws. Install the nylon bolt, bushing, and nut on the bottom frame exactly opposite the tilt servo’s axis of rotation. Take time to carefully align this axis so the servo can easily and smoothly control the tilt angle. Attach the tilt servo arm to the top frame with very small screws or wire brads.
Attach the brush holder to the bottom frame using a ¼” diameter carriage bolt.
Attach the radio control receiver and the receiver/servo battery pack to the bottom frame using cable ties. Tighten the cable ties securely.
Pole Mounted Camera
FOR MORE PROJECTS, VISIT: makezine.tv
Pole Mounted Camerapage 6
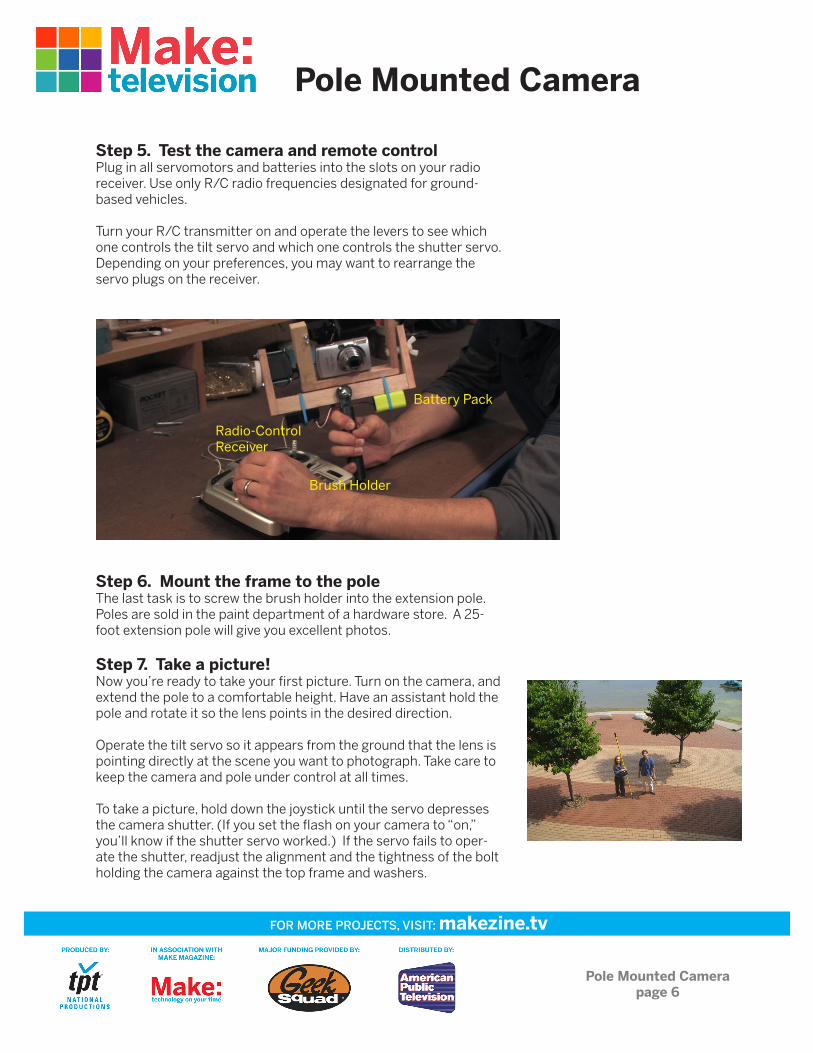
Step 5. Test the camera and remote controlPlug in all servomotors and batteries into the slots on your radio receiver. Use only R/C radio frequencies designated for ground-based vehicles.
Turn your R/C transmitter on and operate the levers to see which one controls the tilt servo and which one controls the shutter servo. Depending on your preferences, you may want to rearrange the servo plugs on the receiver.
Step 6. Mount the frame to the poleThe last task is to screw the brush holder into the extension pole. Poles are sold in the paint department of a hardware store. A 25-foot extension pole will give you excellent photos.
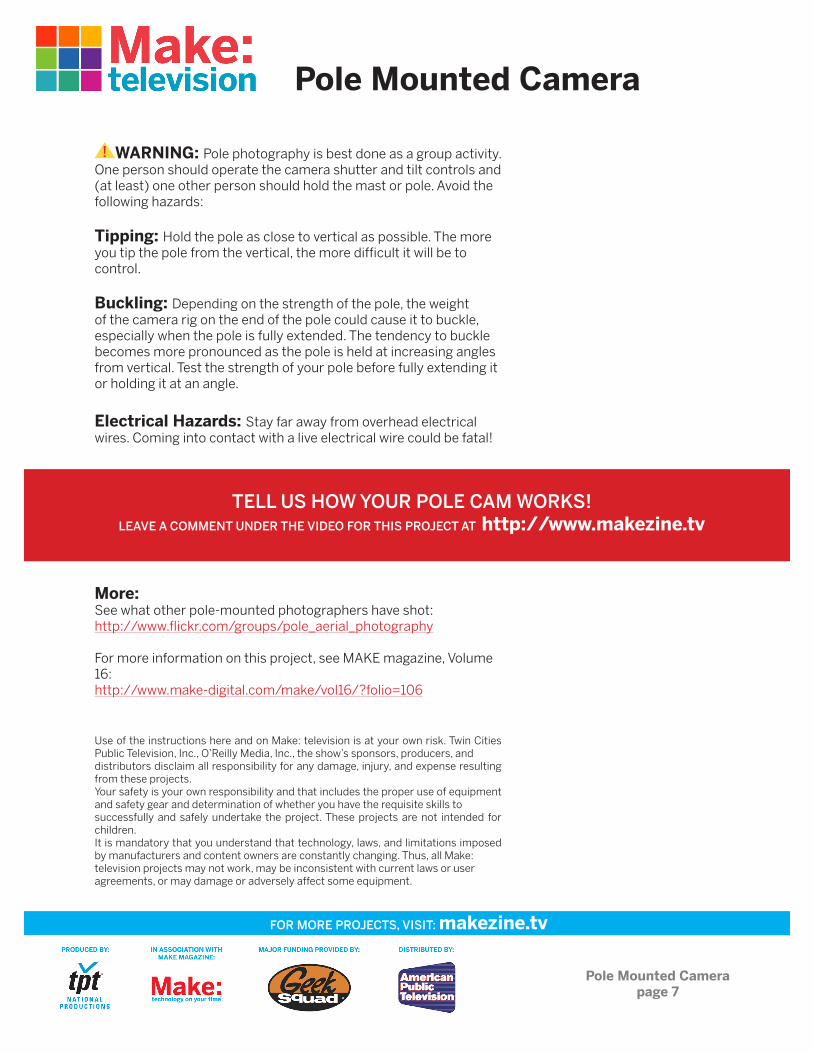
Step 7. Take a picture!Now you’re ready to take your first picture. Turn on the camera, and extend the pole to a comfortable height. Have an assistant hold the pole and rotate it so the lens points in the desired direction.
Operate the tilt servo so it appears from the ground that the lens is pointing directly at the scene you want to photograph. Take care to keep the camera and pole under control at all times.
To take a picture, hold down the joystick until the servo depresses the camera shutter. (If you set the flash on your camera to “on,” you’ll know if the shutter servo worked.) If the servo fails to oper-ate the shutter, readjust the alignment and the tightness of the bolt holding the camera against the top frame and washers.
Battery Pack
Brush Holder
Radio-Control Receiver
Pole Mounted Camera
FOR MORE PROJECTS, VISIT: makezine.tv
Pole Mounted Camerapage 7
WARNING: Pole photography is best done as a group activity. One person should operate the camera shutter and tilt controls and (at least) one other person should hold the mast or pole. Avoid the following hazards:
Tipping: Hold the pole as close to vertical as possible. The more you tip the pole from the vertical, the more difficult it will be to control.
Buckling: Depending on the strength of the pole, the weight of the camera rig on the end of the pole could cause it to buckle, especially when the pole is fully extended. The tendency to buckle becomes more pronounced as the pole is held at increasing angles from vertical. Test the strength of your pole before fully extending it or holding it at an angle.
Electrical Hazards: Stay far away from overhead electrical wires. Coming into contact with a live electrical wire could be fatal!
More:See what other pole-mounted photographers have shot:http://www.flickr.com/groups/pole_aerial_photography
For more information on this project, see MAKE magazine, Volume 16: http://www.make-digital.com/make/vol16/?folio=106
Use of the instructions here and on Make: television is at your own risk. Twin Cities Public Television, Inc., O’Reilly Media, Inc., the show’s sponsors, producers, and distributors disclaim all responsibility for any damage, injury, and expense resulting from these projects. Your safety is your own responsibility and that includes the proper use of equipment and safety gear and determination of whether you have the requisite skills to successfully and safely undertake the project. These projects are not intended for children. It is mandatory that you understand that technology, laws, and limitations imposed by manufacturers and content owners are constantly changing. Thus, all Make: television projects may not work, may be inconsistent with current laws or user agreements, or may damage or adversely affect some equipment.
TELL US HOW YOUR POLE CAM WORKS!LEAVE A COMMENT UNDER THE VIDEO FOR THIS PROJECT AT http://www.makezine.tv