PL/SQL , Database Objects & Security · PDF file01/10/2012 · other PL/SQL blocks...
80
PL/SQL , Database Objects & Security PL/SQL - Overview The PL/SQL programming language was developed by Oracle Corporation in the late 1980s as procedural extension language for SQL and the Oracle relational database. Following are notable facts about PL/SQL: PL/SQL is a completely portable, high-performance transaction-processing language. PL/SQL provides a built-in interpreted and OS independent programming environment. PL/SQL can also directly be called from the command-line SQL*Plus interface. Direct call can also be made from external programming language calls to database. PL/SQL's general syntax is based on that of ADA and Pascal programming language. Apart from Oracle, PL/SQL is available in TimesTen in-memory database and IBM DB2. Features of PL/SQL PL/SQL has the following features: PL/SQL is tightly integrated with SQL. It offers extensive error checking. It offers numerous data types. It offers a variety of programming structures. It supports structured programming through functions and procedures. It supports object-oriented programming. It supports developing web applications and server pages.
Transcript of PL/SQL , Database Objects & Security · PDF file01/10/2012 · other PL/SQL blocks...
PL/SQL , Database Objects & Security
PL/SQL - Overview
The PL/SQL programming language was developed by Oracle Corporation in the late 1980s as
procedural extension language for SQL and the Oracle relational database. Following are
notable facts about PL/SQL:
PL/SQL is a completely portable, high-performance transaction-processing language.
PL/SQL provides a built-in interpreted and OS independent programming environment.
PL/SQL can also directly be called from the command-line SQL*Plus interface.
Direct call can also be made from external programming language calls to database.
PL/SQL's general syntax is based on that of ADA and Pascal programming language.
Apart from Oracle, PL/SQL is available in TimesTen in-memory database and IBM
DB2.
Features of PL/SQL
PL/SQL has the following features:
PL/SQL is tightly integrated with SQL.
It offers extensive error checking.
It offers numerous data types.
It offers a variety of programming structures.
It supports structured programming through functions and procedures.
It supports object-oriented programming.
It supports developing web applications and server pages.
Advantages of PL/SQL
PL/SQL has the following advantages:
SQL is the standard database language and PL/SQL is strongly integrated with SQL.
PL/SQL supports both static and dynamic SQL. Static SQL supports DML operations
and transaction control from PL/SQL block. Dynamic SQL is SQL allows embedding
DDL statements in PL/SQL blocks.
PL/SQL allows sending an entire block of statements to the database at one time. This
reduces network traffic and provides high performance for the applications.
PL/SQL gives high productivity to programmers as it can query, transform, and update
data in a database.
PL/SQL saves time on design and debugging by strong features, such as exception
handling, encapsulation, data hiding, and object-oriented data types.
Applications written in PL/SQL are fully portable.
PL/SQL provides high security level.
PL/SQL provides access to predefined SQL packages.
PL/SQL provides support for Object-Oriented Programming.
PL/SQL provides support for Developing Web Applications and Server Pages.
PL/SQL is a block-structured language, meaning that PL/SQL programs are divided and
written in logical blocks of code. Each block consists of three sub-parts:

Advantages of PL/SQL
These are the Advantages of PL/SQL
Block Structures: PL SQL consists of blocks of code, which can be nested within each
other. Each block forms a unit of a task or a logical module. PL/SQL Blocks can be stored in
the database and reused.
Procedural Language Capability: PL SQL consists of procedural language constructs such
as conditional statements (if else statements) and loops like (FOR loops).
Better Performance: PL SQL engine processes multiple SQL statements simultaneously as
a single block, thereby reducing network traffic.
Error Handling: PL/SQL handles errors or exceptions effectively during the execution of a
PL/SQL program. Once an exception is caught, specific actions can be taken depending
upon the type of the exception or it can be displayed to the user with a message.
S.N. Sections & Description
1 Declarations
This section starts with the keyword DECLARE. It is an optional section and defines all
variables, cursors, subprograms, and other elements to be used in the program.
2 Executable Commands
This section is enclosed between the keywords BEGIN and END and it is a mandatory
section. It consists of the executable PL/SQL statements of the program. It should have at
least one executable line of code, which may be just a NULL command to indicate that
nothing should be executed.
3 Exception Handling
This section starts with the keyword EXCEPTION. This section is again optional and
contains exception(s) that handle errors in the program.

Every PL/SQL statement ends with a semicolon (;). PL/SQL blocks can be nested within
other PL/SQL blocks using BEGIN and END. Here is the basic structure of a PL/SQL
block:
DECLARE
<declarations section>
BEGIN
<executable command(s)>
EXCEPTION
<exception handling>
END;
The 'Hello World' Example:
DECLARE
message varchar2(20):= 'Hello, World!';
BEGIN
dbms_output.put_line(message);
END;/
The end; line signals the end of the PL/SQL block. To run the code from SQL command line,
you may need to type / at the beginning of the first blank line after the last line of the code.
When the above code is executed at SQL prompt, it produces the following result:
Hello World
PL/SQL procedure successfully completed.
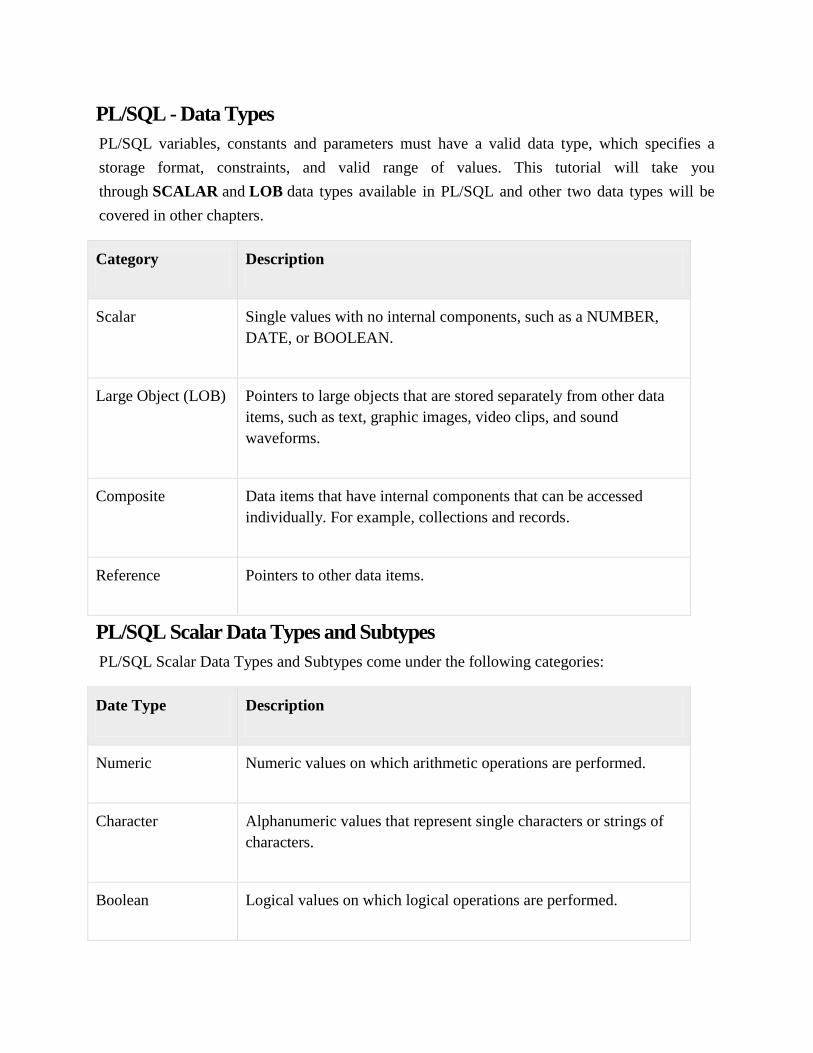
PL/SQL - Data Types
PL/SQL variables, constants and parameters must have a valid data type, which specifies a
storage format, constraints, and valid range of values. This tutorial will take you
through SCALAR and LOB data types available in PL/SQL and other two data types will be
covered in other chapters.
Category Description
Scalar Single values with no internal components, such as a NUMBER,
DATE, or BOOLEAN.
Large Object (LOB) Pointers to large objects that are stored separately from other data
items, such as text, graphic images, video clips, and sound
waveforms.
Composite Data items that have internal components that can be accessed
individually. For example, collections and records.
Reference Pointers to other data items.
PL/SQL Scalar Data Types and Subtypes
PL/SQL Scalar Data Types and Subtypes come under the following categories:
Date Type Description
Numeric Numeric values on which arithmetic operations are performed.
Character Alphanumeric values that represent single characters or strings of
characters.
Boolean Logical values on which logical operations are performed.
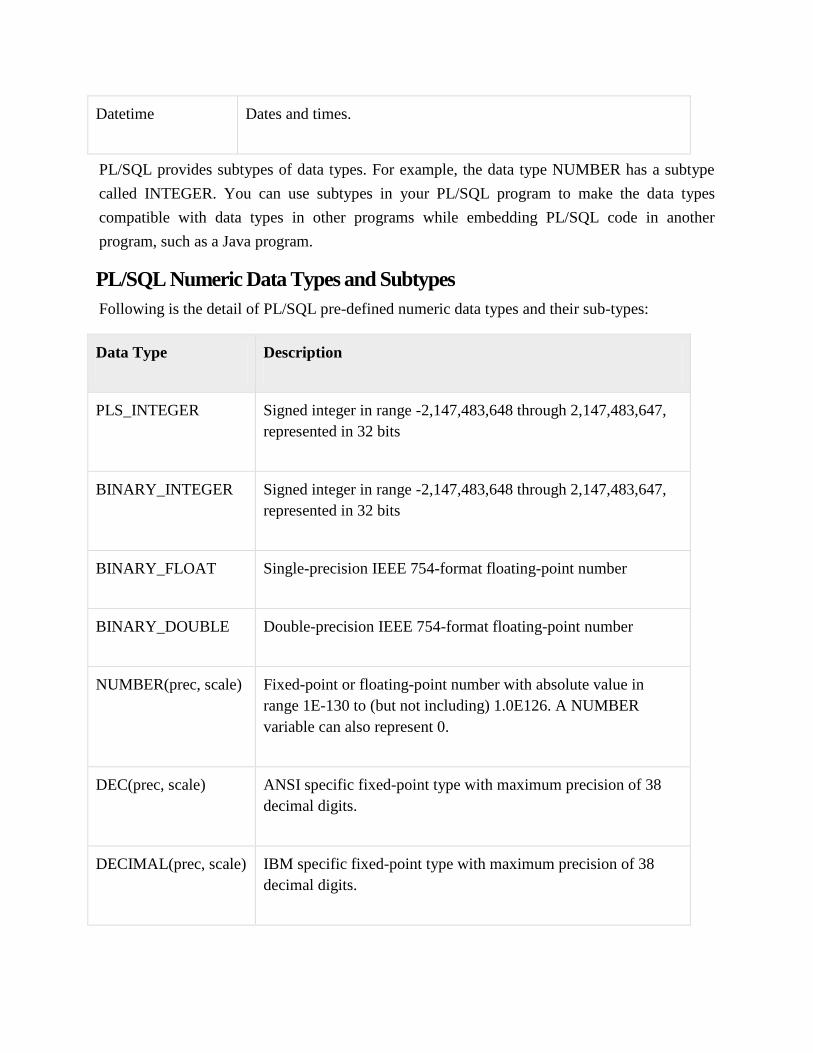
Datetime Dates and times.
PL/SQL provides subtypes of data types. For example, the data type NUMBER has a subtype
called INTEGER. You can use subtypes in your PL/SQL program to make the data types
compatible with data types in other programs while embedding PL/SQL code in another
program, such as a Java program.
PL/SQL Numeric Data Types and Subtypes
Following is the detail of PL/SQL pre-defined numeric data types and their sub-types:
Data Type Description
PLS_INTEGER Signed integer in range -2,147,483,648 through 2,147,483,647,
represented in 32 bits
BINARY_INTEGER Signed integer in range -2,147,483,648 through 2,147,483,647,
represented in 32 bits
BINARY_FLOAT Single-precision IEEE 754-format floating-point number
BINARY_DOUBLE Double-precision IEEE 754-format floating-point number
NUMBER(prec, scale) Fixed-point or floating-point number with absolute value in
range 1E-130 to (but not including) 1.0E126. A NUMBER
variable can also represent 0.
DEC(prec, scale) ANSI specific fixed-point type with maximum precision of 38
decimal digits.
DECIMAL(prec, scale) IBM specific fixed-point type with maximum precision of 38
decimal digits.

NUMERIC(pre, secale) Floating type with maximum precision of 38 decimal digits.
DOUBLE PRECISION ANSI specific floating-point type with maximum precision of
126 binary digits (approximately 38 decimal digits)
FLOAT ANSI and IBM specific floating-point type with maximum
precision of 126 binary digits (approximately 38 decimal digits)
INT ANSI specific integer type with maximum precision of 38
decimal digits
INTEGER ANSI and IBM specific integer type with maximum precision of
38 decimal digits
SMALLINT ANSI and IBM specific integer type with maximum precision of
38 decimal digits
REAL Floating-point type with maximum precision of 63 binary digits
(approximately 18 decimal digits)
Following is a valid declaration:
DECLARE
num1 INTEGER;
num2 REAL;
num3 DOUBLE PRECISION;
BEGIN
null;
END;
/
When the above code is compiled and executed, it produces the following result:

PL/SQL procedure successfully completed
PL/SQL Character Data Types and Subtypes
Following is the detail of PL/SQL pre-defined character data types and their sub-types:
Data Type Description
CHAR Fixed-length character string with maximum size of 32,767 bytes
VARCHAR2 Variable-length character string with maximum size of 32,767 bytes
RAW Variable-length binary or byte string with maximum size of 32,767
bytes, not interpreted by PL/SQL
NCHAR Fixed-length national character string with maximum size of 32,767
bytes
NVARCHAR2 Variable-length national character string with maximum size of
32,767 bytes
LONG Variable-length character string with maximum size of 32,760 bytes
LONG RAW Variable-length binary or byte string with maximum size of 32,760
bytes, not interpreted by PL/SQL
ROWID Physical row identifier, the address of a row in an ordinary table
UROWID Universal row identifier (physical, logical, or foreign row identifier)

PL/SQL Boolean Data Types
The BOOLEAN data type stores logical values that are used in logical operations. The logical
values are the Boolean values TRUE and FALSE and the value NULL.
However, SQL has no data type equivalent to BOOLEAN. Therefore, Boolean values cannot be
used in:
SQL statements
Built-in SQL functions (such as TO_CHAR)
PL/SQL functions invoked from SQL statements
PL/SQL Datetime and Interval Types
The DATE datatype to store fixed-length datetimes, which include the time of day in seconds
since midnight. Valid dates range from January 1, 4712 BC to December 31, 9999 AD.
The default date format is set by the Oracle initialization parameter NLS_DATE_FORMAT.
For example, the default might be 'DD-MON-YY', which includes a two-digit number for the
day of the month, an abbreviation of the month name, and the last two digits of the year, for
example, 01-OCT-12.
Each DATE includes the century, year, month, day, hour, minute, and second. The following
table shows the valid values for each field:
Field Name Valid Datetime Values Valid Interval Values
YEAR -4712 to 9999 (excluding
year 0)
Any nonzero integer
MONTH 01 to 12 0 to 11
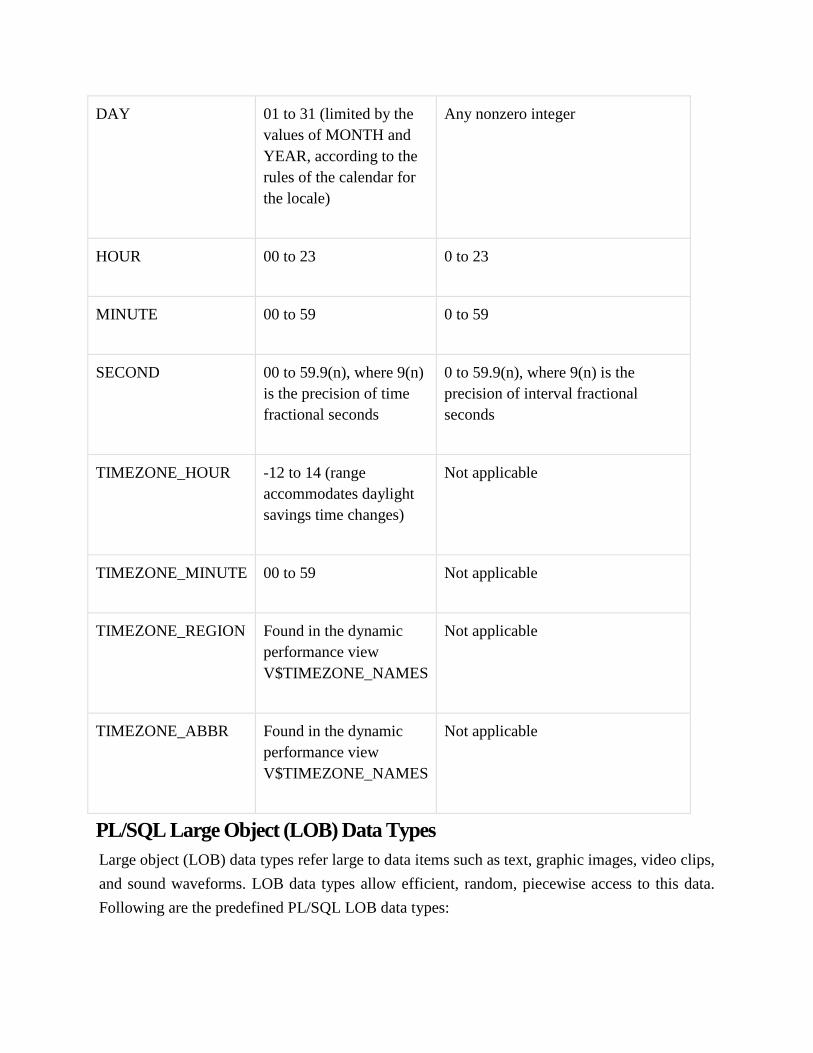
DAY 01 to 31 (limited by the
values of MONTH and
YEAR, according to the
rules of the calendar for
the locale)
Any nonzero integer
HOUR 00 to 23 0 to 23
MINUTE 00 to 59 0 to 59
SECOND 00 to 59.9(n), where 9(n)
is the precision of time
fractional seconds
0 to 59.9(n), where 9(n) is the
precision of interval fractional
seconds
TIMEZONE_HOUR -12 to 14 (range
accommodates daylight
savings time changes)
Not applicable
TIMEZONE_MINUTE 00 to 59 Not applicable
TIMEZONE_REGION Found in the dynamic
performance view
V$TIMEZONE_NAMES
Not applicable
TIMEZONE_ABBR Found in the dynamic
performance view
V$TIMEZONE_NAMES
Not applicable
PL/SQL Large Object (LOB) Data Types
Large object (LOB) data types refer large to data items such as text, graphic images, video clips,
and sound waveforms. LOB data types allow efficient, random, piecewise access to this data.
Following are the predefined PL/SQL LOB data types:

Data Type Description Size
BFILE Used to store
large binary
objects in
operating system
files outside the
database.
System-dependent. Cannot exceed 4 gigabytes (GB).
BLOB Used to store
large binary
objects in the
database.
8 to 128 terabytes (TB)
CLOB Used to store
large blocks of
character data in
the database.
8 to 128 TB
NCLOB Used to store
large blocks of
NCHAR data in
the database.
8 to 128 TB
PL/SQL User-Defined Subtypes
A subtype is a subset of another data type, which is called its base type. A subtype has the same
valid operations as its base type, but only a subset of its valid values.
PL/SQL predefines several subtypes in package STANDARD. For example, PL/SQL
predefines the subtypes CHARACTER and INTEGER as follows:
SUBTYPE CHARACTER IS CHAR;
SUBTYPE INTEGER IS NUMBER(38,0);
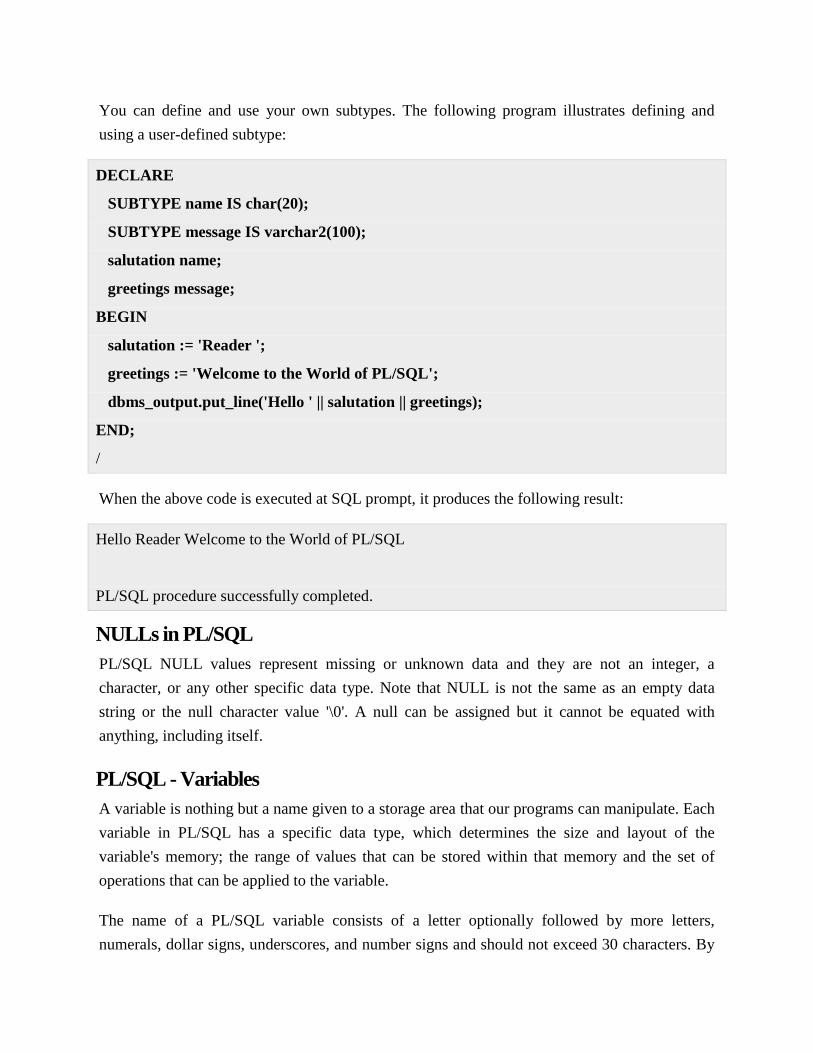
You can define and use your own subtypes. The following program illustrates defining and
using a user-defined subtype:
DECLARE
SUBTYPE name IS char(20);
SUBTYPE message IS varchar2(100);
salutation name;
greetings message;
BEGIN
salutation := 'Reader ';
greetings := 'Welcome to the World of PL/SQL';
dbms_output.put_line('Hello ' || salutation || greetings);
END;
/
When the above code is executed at SQL prompt, it produces the following result:
Hello Reader Welcome to the World of PL/SQL
PL/SQL procedure successfully completed.
NULLs in PL/SQL
PL/SQL NULL values represent missing or unknown data and they are not an integer, a
character, or any other specific data type. Note that NULL is not the same as an empty data
string or the null character value '\0'. A null can be assigned but it cannot be equated with
anything, including itself.
PL/SQL - Variables
A variable is nothing but a name given to a storage area that our programs can manipulate. Each
variable in PL/SQL has a specific data type, which determines the size and layout of the
variable's memory; the range of values that can be stored within that memory and the set of
operations that can be applied to the variable.
The name of a PL/SQL variable consists of a letter optionally followed by more letters,
numerals, dollar signs, underscores, and number signs and should not exceed 30 characters. By
default, variable names are not case-sensitive. You cannot use a reserved PL/SQL keyword as a
variable name.
PL/SQL programming language allows to define various types of variables, which we will
cover in subsequent chapters like date time data types, records, collections, etc. For this chapter,
let us study only basic variable types.
Variable Declaration in PL/SQL
PL/SQL variables must be declared in the declaration section or in a package as a global
variable. When you declare a variable, PL/SQL allocates memory for the variable's value and
the storage location is identified by the variable name.
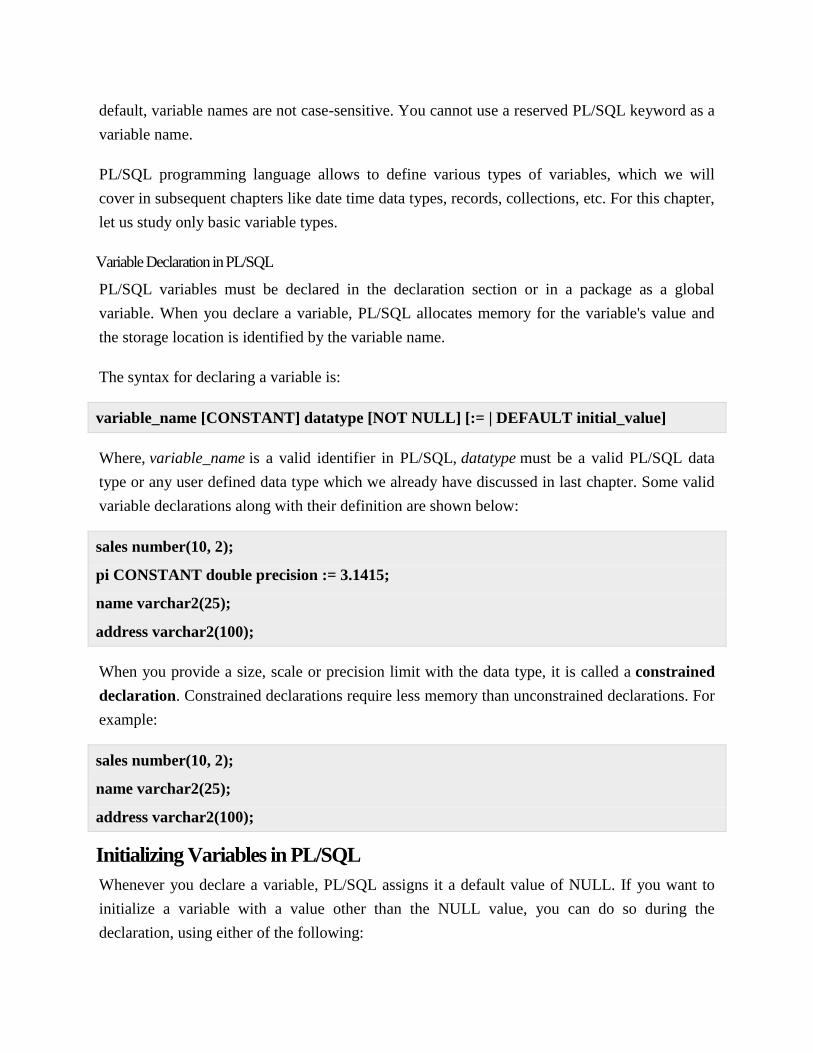
The syntax for declaring a variable is:
variable_name [CONSTANT] datatype [NOT NULL] [:= | DEFAULT initial_value]
Where, variable_name is a valid identifier in PL/SQL, datatype must be a valid PL/SQL data
type or any user defined data type which we already have discussed in last chapter. Some valid
variable declarations along with their definition are shown below:
sales number(10, 2);
pi CONSTANT double precision := 3.1415;
name varchar2(25);
address varchar2(100);
When you provide a size, scale or precision limit with the data type, it is called a constrained
declaration. Constrained declarations require less memory than unconstrained declarations. For
example:
sales number(10, 2);
name varchar2(25);
address varchar2(100);
Initializing Variables in PL/SQL
Whenever you declare a variable, PL/SQL assigns it a default value of NULL. If you want to
initialize a variable with a value other than the NULL value, you can do so during the
declaration, using either of the following:
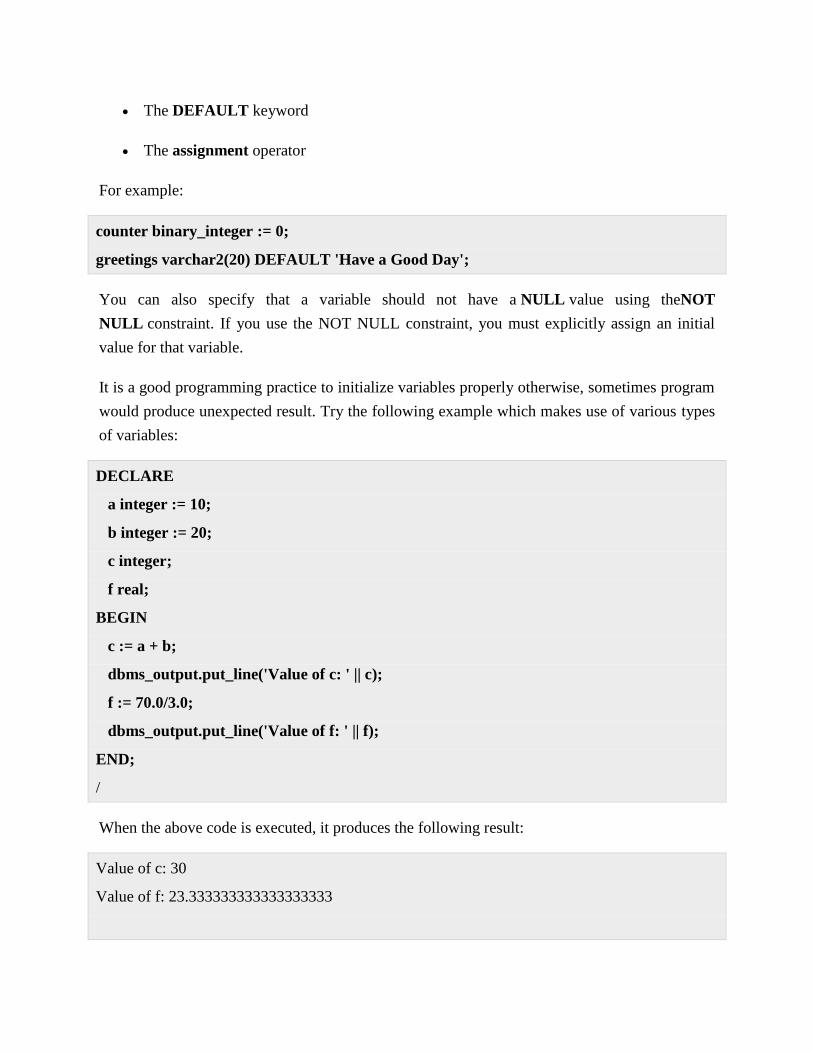
The DEFAULT keyword
The assignment operator
For example:
counter binary_integer := 0;
greetings varchar2(20) DEFAULT 'Have a Good Day';
You can also specify that a variable should not have a NULL value using theNOT
NULL constraint. If you use the NOT NULL constraint, you must explicitly assign an initial
value for that variable.
It is a good programming practice to initialize variables properly otherwise, sometimes program
would produce unexpected result. Try the following example which makes use of various types
of variables:
DECLARE
a integer := 10;
b integer := 20;
c integer;
f real;
BEGIN
c := a + b;
dbms_output.put_line('Value of c: ' || c);
f := 70.0/3.0;
dbms_output.put_line('Value of f: ' || f);
END;
/
When the above code is executed, it produces the following result:
Value of c: 30
Value of f: 23.333333333333333333
PL/SQL procedure successfully completed.
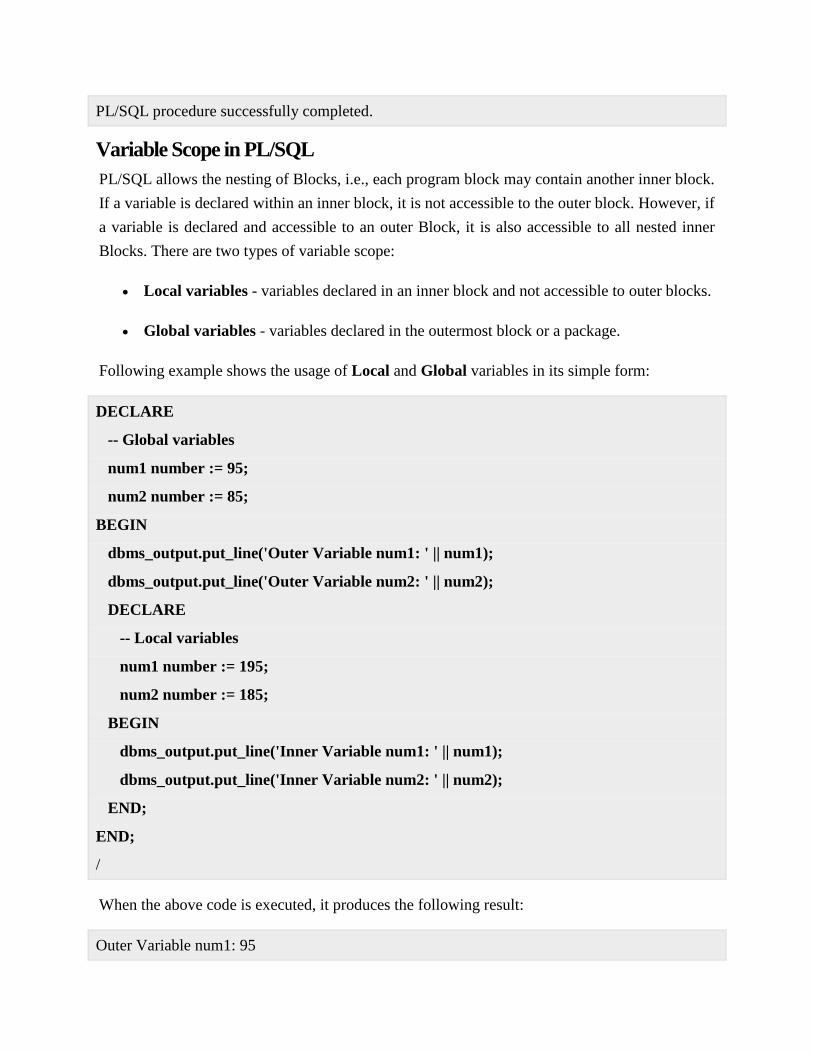
Variable Scope in PL/SQL
PL/SQL allows the nesting of Blocks, i.e., each program block may contain another inner block.
If a variable is declared within an inner block, it is not accessible to the outer block. However, if
a variable is declared and accessible to an outer Block, it is also accessible to all nested inner
Blocks. There are two types of variable scope:
Local variables - variables declared in an inner block and not accessible to outer blocks.
Global variables - variables declared in the outermost block or a package.
Following example shows the usage of Local and Global variables in its simple form:
DECLARE
-- Global variables
num1 number := 95;
num2 number := 85;
BEGIN
dbms_output.put_line('Outer Variable num1: ' || num1);
dbms_output.put_line('Outer Variable num2: ' || num2);
DECLARE
-- Local variables
num1 number := 195;
num2 number := 185;
BEGIN
dbms_output.put_line('Inner Variable num1: ' || num1);
dbms_output.put_line('Inner Variable num2: ' || num2);
END;
END;
/
When the above code is executed, it produces the following result:
Outer Variable num1: 95

Outer Variable num2: 85
Inner Variable num1: 195
Inner Variable num2: 185
PL/SQL procedure successfully completed.
Assigning SQL Query Results to PL/SQL Variables
You can use the SELECT INTO statement of SQL to assign values to PL/SQL variables. For
each item in the SELECT list, there must be a corresponding, type-compatible variable in the
INTO list. The following example illustrates the concept: Let us create a table named
CUSTOMERS:
(For SQL statements please look at the SQL tutorial)
CREATE TABLE CUSTOMERS(
ID INT NOT NULL,
NAME VARCHAR (20) NOT NULL,
AGE INT NOT NULL,
ADDRESS CHAR (25),
SALARY DECIMAL (18, 2),
PRIMARY KEY (ID)
);
Table Created
Next, let us insert some values in the table:
INSERT INTO CUSTOMERS (ID,NAME,AGE,ADDRESS,SALARY)
VALUES (1, 'Ramesh', 32, 'Ahmedabad', 2000.00 );
INSERT INTO CUSTOMERS (ID,NAME,AGE,ADDRESS,SALARY)
VALUES (2, 'Khilan', 25, 'Delhi', 1500.00 );
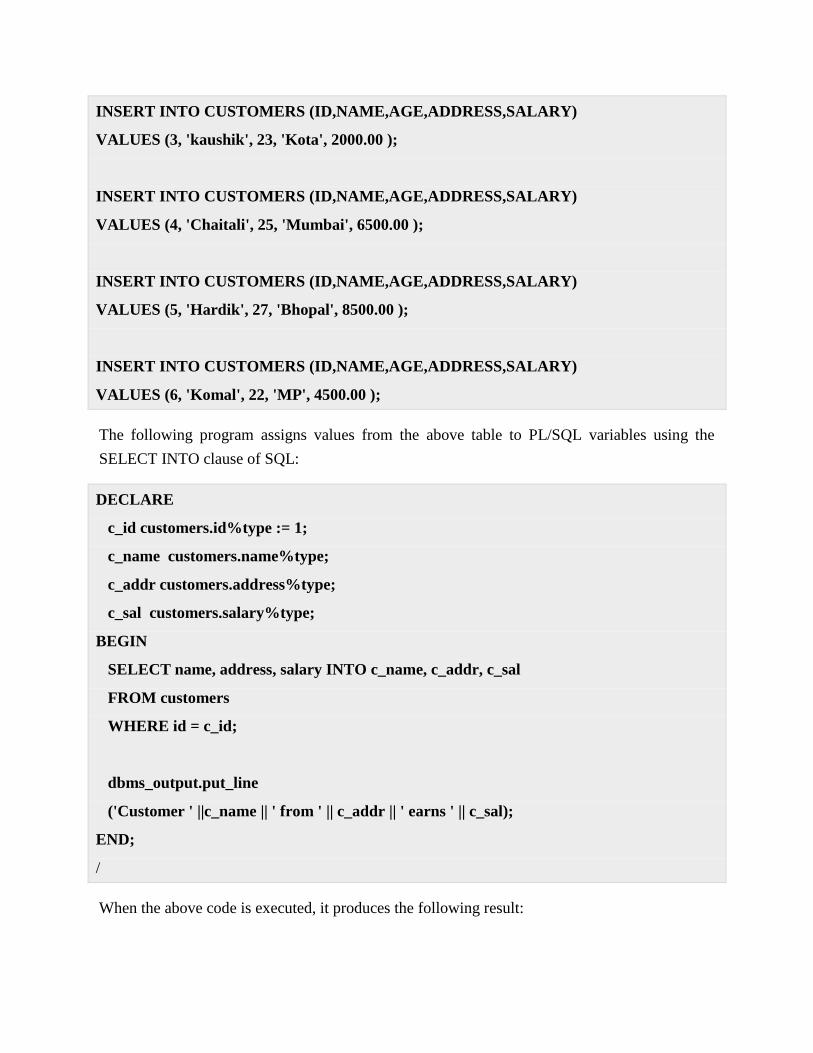
INSERT INTO CUSTOMERS (ID,NAME,AGE,ADDRESS,SALARY)
VALUES (3, 'kaushik', 23, 'Kota', 2000.00 );
INSERT INTO CUSTOMERS (ID,NAME,AGE,ADDRESS,SALARY)
VALUES (4, 'Chaitali', 25, 'Mumbai', 6500.00 );
INSERT INTO CUSTOMERS (ID,NAME,AGE,ADDRESS,SALARY)
VALUES (5, 'Hardik', 27, 'Bhopal', 8500.00 );
INSERT INTO CUSTOMERS (ID,NAME,AGE,ADDRESS,SALARY)
VALUES (6, 'Komal', 22, 'MP', 4500.00 );
The following program assigns values from the above table to PL/SQL variables using the
SELECT INTO clause of SQL:
DECLARE
c_id customers.id%type := 1;
c_name customers.name%type;
c_addr customers.address%type;
c_sal customers.salary%type;
BEGIN
SELECT name, address, salary INTO c_name, c_addr, c_sal
FROM customers
WHERE id = c_id;
dbms_output.put_line
('Customer ' ||c_name || ' from ' || c_addr || ' earns ' || c_sal);
END;
/
When the above code is executed, it produces the following result:

Customer Ramesh from Ahmedabad earns 2000
PL/SQL procedure completed successfully
PL/SQL - Constants
Declaring a Constant
A constant is declared using the CONSTANT keyword. It requires an initial value and does not
allow that value to be changed. For example:
eneral Syntax to declare a constant is:
constant_name CONSTANT datatype := VALUE;
constant_name is the name of the constant i.e. similar to a variable name.
The word CONSTANT is a reserved word and ensures that the value does not change.
VALUE - It is a value which must be assigned to a constant when it is declared. You
cannot assign a value later.
For example, to declare salary_increase, you can write code as follows:
DECLARE
salary_increase CONSTANT number (3) := 10;
You must assign a value to a constant at the time you declare it. If you do not assign a value to a
constant while declaring it and try to assign a value in the execution section, you will get a error.
If you execute the below Pl/SQL block you will get error.
DECLARE
salary_increase CONSTANT number(3);
BEGIN
salary_increase := 100;
dbms_output.put_line (salary_increase);
END;

PI CONSTANT NUMBER := 3.141592654;
Ex.- pi constant number := 3.141592654;
PL/SQL - Operators
An operator is a symbol that tells the compiler to perform specific mathematical or logical
manipulation. PL/SQL language is rich in built-in operators and provides the following types of
operators:
Arithmetic operators
Relational operators
Comparison operators
Logical operators
String operators
This tutorial will explain the arithmetic, relational, comparison and logical operators one by
one. The String operators will be discussed under the chapter:PL/SQL - Strings.
Arithmetic Operators
Following table shows all the arithmetic operators supported by PL/SQL. Assume variable A
holds 10 and variable B holds 5 then:
Show Examples
Operator Description Example
+ Adds two operands A + B
will give
15
- Subtracts second operand from the first A - B will
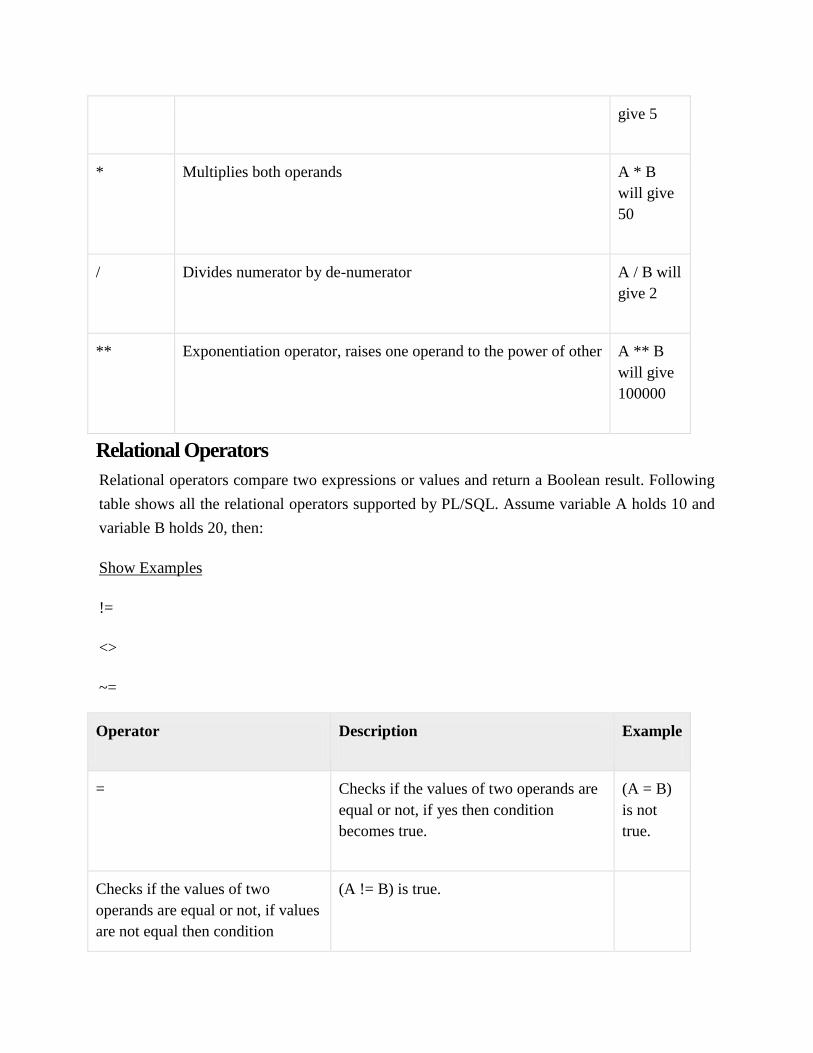
give 5
* Multiplies both operands A * B
will give
50
/ Divides numerator by de-numerator A / B will
give 2
** Exponentiation operator, raises one operand to the power of other A ** B
will give
100000
Relational Operators
Relational operators compare two expressions or values and return a Boolean result. Following
table shows all the relational operators supported by PL/SQL. Assume variable A holds 10 and
variable B holds 20, then:
Show Examples
!=
<>
~=
Operator Description Example
= Checks if the values of two operands are
equal or not, if yes then condition
becomes true.
(A = B)
is not
true.
Checks if the values of two
operands are equal or not, if values
are not equal then condition
(A != B) is true.
becomes true.
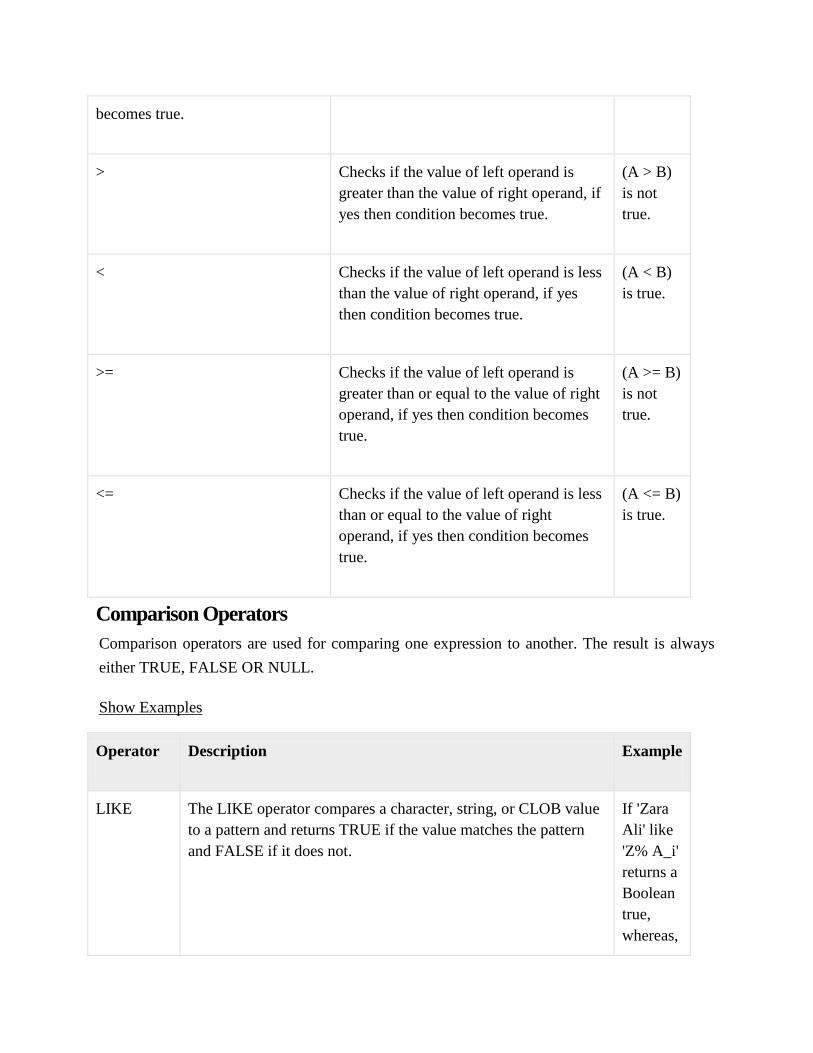
> Checks if the value of left operand is
greater than the value of right operand, if
yes then condition becomes true.
(A > B)
is not
true.
< Checks if the value of left operand is less
than the value of right operand, if yes
then condition becomes true.
(A < B)
is true.
>= Checks if the value of left operand is
greater than or equal to the value of right
operand, if yes then condition becomes
true.
(A >= B)
is not
true.
<= Checks if the value of left operand is less
than or equal to the value of right
operand, if yes then condition becomes
true.
(A <= B)
is true.
Comparison Operators
Comparison operators are used for comparing one expression to another. The result is always
either TRUE, FALSE OR NULL.
Show Examples
Operator Description Example
LIKE The LIKE operator compares a character, string, or CLOB value
to a pattern and returns TRUE if the value matches the pattern
and FALSE if it does not.
If 'Zara
Ali' like
'Z% A_i'
returns a
Boolean
true,
whereas,

'Nuha
Ali' like
'Z% A_i'
returns a
Boolean
false.
BETWEEN The BETWEEN operator tests whether a value lies in a specified
range. x BETWEEN a AND b means that x >= a and x <= b.
If x = 10
then, x
between
5 and 20
returns
true, x
between
5 and 10
returns
true, but
x
between
11 and
20
returns
false.
IN The IN operator tests set membership. x IN (set) means that x is
equal to any member of set.
If x = 'm'
then, x in
('a', 'b',
'c')
returns
boolean
false but
x in ('m',
'n', 'o')
returns
Boolean
true.
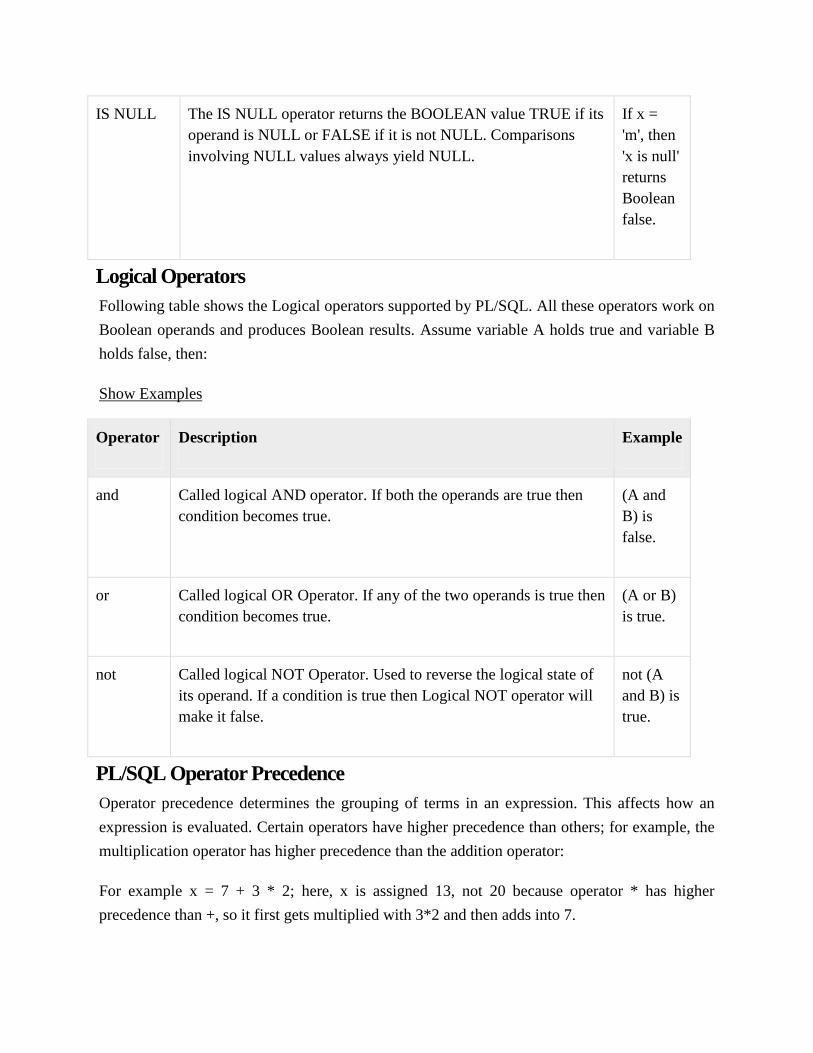
IS NULL The IS NULL operator returns the BOOLEAN value TRUE if its
operand is NULL or FALSE if it is not NULL. Comparisons
involving NULL values always yield NULL.
If x =
'm', then
'x is null'
returns
Boolean
false.
Logical Operators
Following table shows the Logical operators supported by PL/SQL. All these operators work on
Boolean operands and produces Boolean results. Assume variable A holds true and variable B
holds false, then:
Show Examples
Operator Description Example
and Called logical AND operator. If both the operands are true then
condition becomes true.
(A and
B) is
false.
or Called logical OR Operator. If any of the two operands is true then
condition becomes true.
(A or B)
is true.
not Called logical NOT Operator. Used to reverse the logical state of
its operand. If a condition is true then Logical NOT operator will
make it false.
not (A
and B) is
true.
PL/SQL Operator Precedence
Operator precedence determines the grouping of terms in an expression. This affects how an
expression is evaluated. Certain operators have higher precedence than others; for example, the
multiplication operator has higher precedence than the addition operator:
For example x = 7 + 3 * 2; here, x is assigned 13, not 20 because operator * has higher
precedence than +, so it first gets multiplied with 3*2 and then adds into 7.
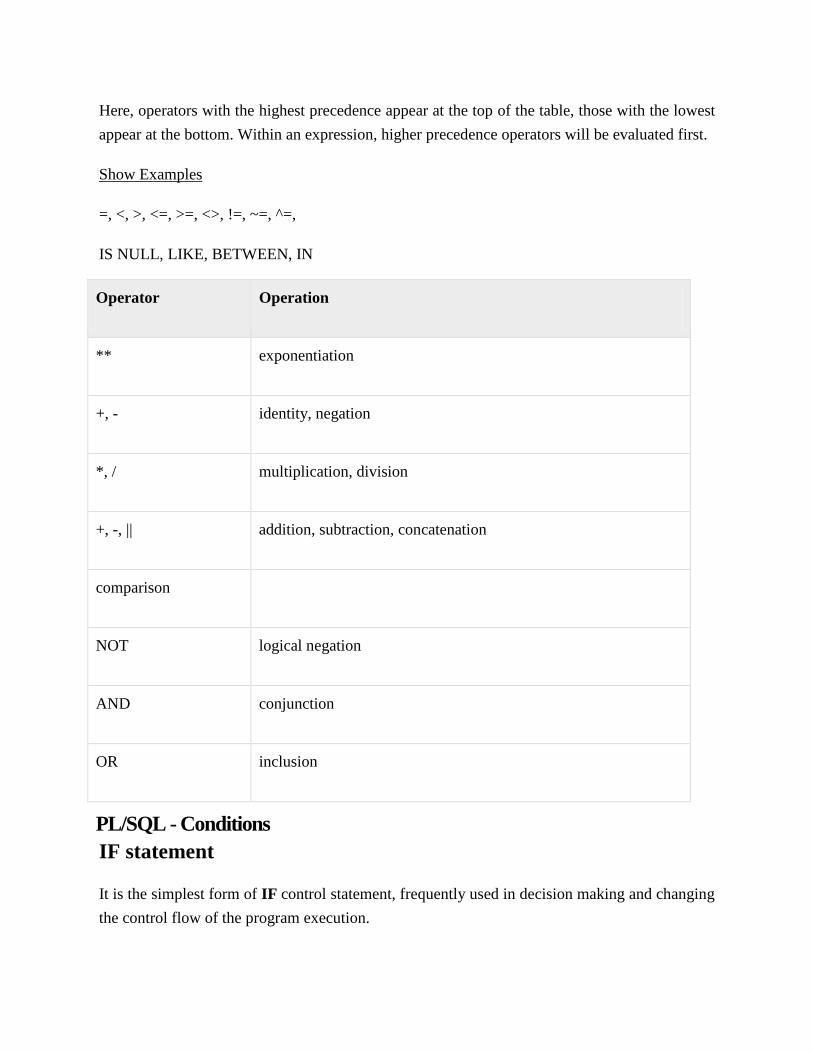
Here, operators with the highest precedence appear at the top of the table, those with the lowest
appear at the bottom. Within an expression, higher precedence operators will be evaluated first.
Show Examples
=, <, >, <=, >=, <>, !=, ~=, ^=,
IS NULL, LIKE, BETWEEN, IN
Operator Operation
** exponentiation
+, - identity, negation
*, / multiplication, division
+, -, || addition, subtraction, concatenation
comparison
NOT logical negation
AND conjunction
OR inclusion
PL/SQL - Conditions
IF statement
It is the simplest form of IF control statement, frequently used in decision making and changing
the control flow of the program execution.

The IF statement associates a condition with a sequence of statements enclosed by the
keywords THEN and END IF. If the condition is TRUE, the statements get executed, and if
the condition is FALSE or NULL, then the IFstatement does nothing.
Syntax:
Syntax for IF-THEN statement is:
IF condition THEN
S;
END IF;
Where condition is a Boolean or relational condition and S is a simple or compound statement.
Example of an IF-THEN statement is:
IF (a <= 20) THEN
c:= c+1;
END IF;
If the Boolean expression condition evaluates to true then the block of code inside the if
statement will be executed. If Boolean expression evaluates to false then the first set of code
after the end of the if statement (after the closing end if) will be executed.
Flow Diagram:
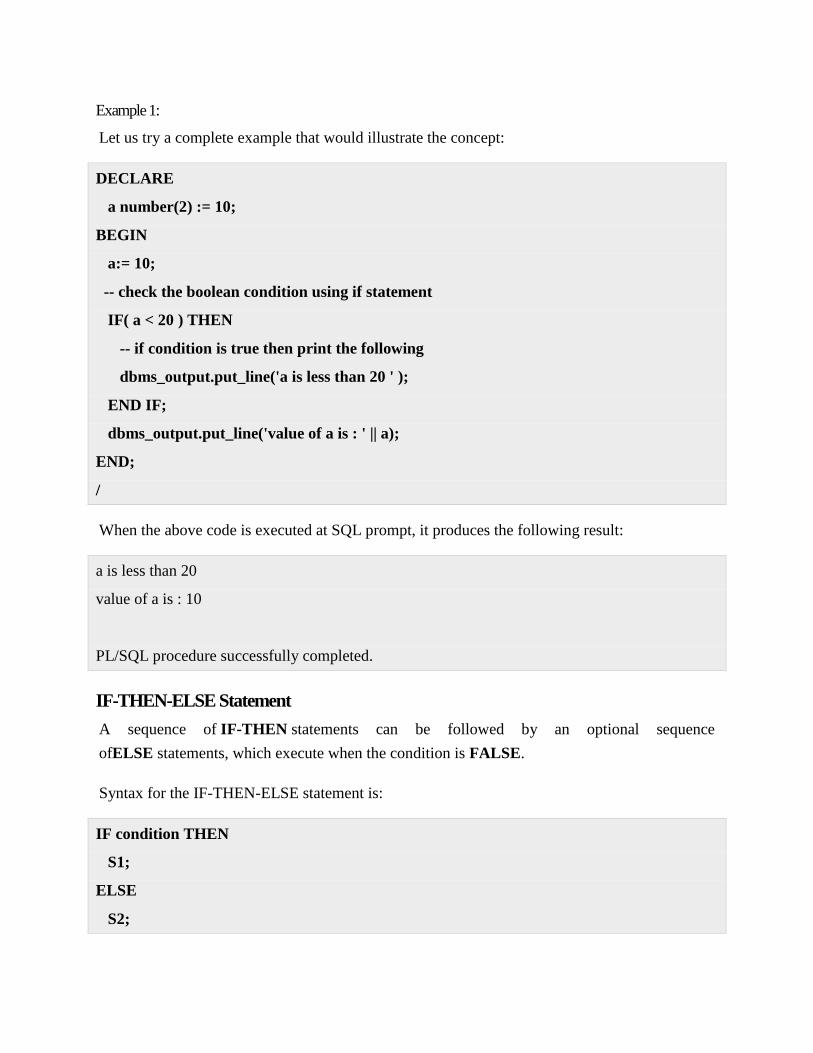
Example 1:
Let us try a complete example that would illustrate the concept:
DECLARE
a number(2) := 10;
BEGIN
a:= 10;
-- check the boolean condition using if statement
IF( a < 20 ) THEN
-- if condition is true then print the following
dbms_output.put_line('a is less than 20 ' );
END IF;
dbms_output.put_line('value of a is : ' || a);
END;
/
When the above code is executed at SQL prompt, it produces the following result:
a is less than 20
value of a is : 10
PL/SQL procedure successfully completed.
IF-THEN-ELSE Statement
A sequence of IF-THEN statements can be followed by an optional sequence
ofELSE statements, which execute when the condition is FALSE.
Syntax for the IF-THEN-ELSE statement is:
IF condition THEN
S1;
ELSE
S2;

END IF;
Where, S1 and S2 are different sequence of statements. In the IF-THEN-ELSE statements, when
the test condition is TRUE, the statement S1 is executed andS2 is skipped; when the
test condition is FALSE, then S1 is bypassed and statement S2 is executed. For example:
IF color = red THEN
dbms_output.put_line('You have chosen a red car')
ELSE
dbms_output.put_line('Please choose a color for your car');
END IF;
If the Boolean expression condition evaluates to true, then the if-then block of code will be
executed otherwise the else block of code will be executed.
Flow Diagram:
Example:
Let us try a complete example that would illustrate the concept:
DECLARE
a number(3) := 100;
BEGIN

-- check the boolean condition using if statement
IF( a < 20 ) THEN
-- if condition is true then print the following
dbms_output.put_line('a is less than 20 ' );
ELSE
dbms_output.put_line('a is not less than 20 ' );
END IF;
dbms_output.put_line('value of a is : ' || a);
END;
/
When the above code is executed at SQL prompt, it produces the following result:
a is not less than 20
value of a is : 100
PL/SQL procedure successfully completed.
IF-THEN-ELSIF
The IF-THEN-ELSIF statement allows you to choose between several alternatives. An IF-
THEN statement can be followed by an optionalELSIF...ELSE statement. The ELSIF clause
lets you add additional conditions.
When using IF-THEN-ELSIF statements there are few points to keep in mind.
It's ELSIF, not ELSEIF
An IF-THEN statement can have zero or one ELSE's and it must come after any ELSIF's.
An IF-THEN statement can have zero to many ELSIF's and they must come before the
ELSE.
Once an ELSIF succeeds, none of the remaining ELSIF's or ELSE's will be tested.

Syntax:
The syntax of an IF-THEN-ELSIF Statement in PL/SQL programming language is:
IF(boolean_expression 1)THEN
S1; -- Executes when the boolean expression 1 is true
ELSIF( boolean_expression 2) THEN
S2; -- Executes when the boolean expression 2 is true
ELSIF( boolean_expression 3) THEN
S3; -- Executes when the boolean expression 3 is true
ELSE
S4; -- executes when the none of the above condition is true
END IF;
Example:
DECLARE
a number(3) := 100;
BEGIN
IF ( a = 10 ) THEN
dbms_output.put_line('Value of a is 10' );
ELSIF ( a = 20 ) THEN
dbms_output.put_line('Value of a is 20' );
ELSIF ( a = 30 ) THEN
dbms_output.put_line('Value of a is 30' );
ELSE
dbms_output.put_line('None of the values is matching');
END IF;
dbms_output.put_line('Exact value of a is: '|| a );
END;
/
When the above code is executed at SQL prompt, it produces the following result:

None of the values is matching
Exact value of a is: 100
PL/SQL procedure successfully completed.
PL/SQL - CASE Statement
Like the IF statement, the CASE statement selects one sequence of statements to execute.
However, to select the sequence, the CASE statement uses a selector rather than multiple
Boolean expressions. A selector is an expression, whose value is used to select one of several
alternatives.
Syntax:
The syntax for case statement in PL/SQL is:
CASE selector
WHEN 'value1' THEN S1;
WHEN 'value2' THEN S2;
WHEN 'value3' THEN S3;
...
ELSE Sn; -- default case
END CASE;
Flow Diagram:

Example:
DECLARE
grade char(1) := 'A';
BEGIN
CASE grade
when 'A' then dbms_output.put_line('Excellent');
when 'B' then dbms_output.put_line('Very good');
when 'C' then dbms_output.put_line('Well done');
when 'D' then dbms_output.put_line('You passed');
when 'F' then dbms_output.put_line('Better try again');
else dbms_output.put_line('No such grade');
END CASE;
END;
/
When the above code is executed at SQL prompt, it produces the following result:
Excellent
PL/SQL procedure successfully completed.
PL/SQL - Searched CASE Statement
The searched CASE statement has no selector and its WHEN clauses contain search conditions
that give Boolean values.
Syntax:
The syntax for searched case statement in PL/SQL is:
CASE
WHEN selector = 'value1' THEN S1;
WHEN selector = 'value2' THEN S2;
WHEN selector = 'value3' THEN S3;
...

ELSE Sn; -- default case
END CASE;
Flow Diagram:
Example:
DECLARE
grade char(1) := 'B';
BEGIN
case
when grade = 'A' then dbms_output.put_line('Excellent');
when grade = 'B' then dbms_output.put_line('Very good');
when grade = 'C' then dbms_output.put_line('Well done');
when grade = 'D' then dbms_output.put_line('You passed');
when grade = 'F' then dbms_output.put_line('Better try again');
else dbms_output.put_line('No such grade');
end case;

END;
/
When the above code is executed at SQL prompt, it produces the following result:
Very good
PL/SQL procedure successfully completed.
PL/SQL - Nested IF-THEN-ELSE Statements
It is always legal in PL/SQL programming to nest IF-ELSE statements, which means you can
use one IF or ELSE IF statement inside another IF or ELSE IFstatement(s).
Syntax:
IF( boolean_expression 1)THEN
-- executes when the boolean expression 1 is true
IF(boolean_expression 2) THEN
-- executes when the boolean expression 2 is true
sequence-of-statements;
END IF;
ELSE
-- executes when the boolean expression 1 is not true
else-statements;
END IF;
Example:
DECLARE
a number(3) := 100;
b number(3) := 200;
BEGIN
-- check the boolean condition
IF( a = 100 ) THEN
-- if condition is true then check the following
IF( b = 200 ) THEN
-- if condition is true then print the following
dbms_output.put_line('Value of a is 100 and b is 200' );
END IF;
END IF;
dbms_output.put_line('Exact value of a is : ' || a );
dbms_output.put_line('Exact value of b is : ' || b );
END;
/
When the above code is executed at SQL prompt, it produces the following result:
Value of a is 100 and b is 200
Exact value of a is : 100
Exact value of b is : 200
PL/SQL procedure successfully completed.
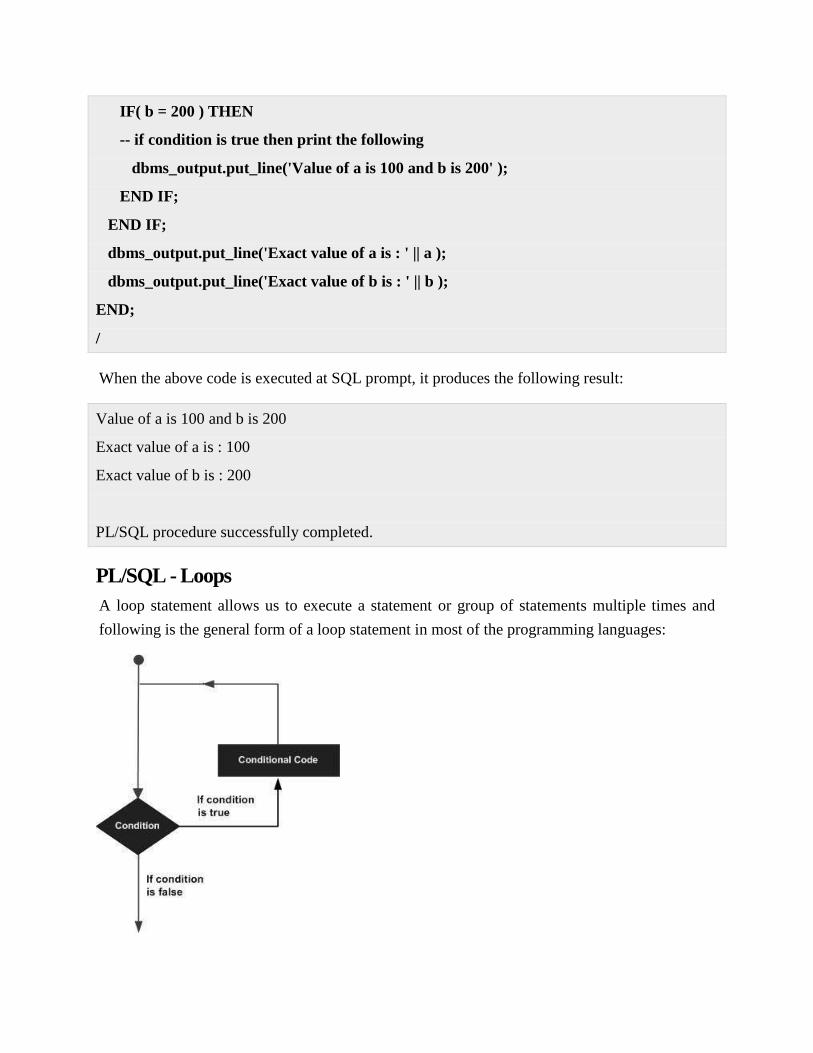
PL/SQL - Loops
A loop statement allows us to execute a statement or group of statements multiple times and
following is the general form of a loop statement in most of the programming languages:
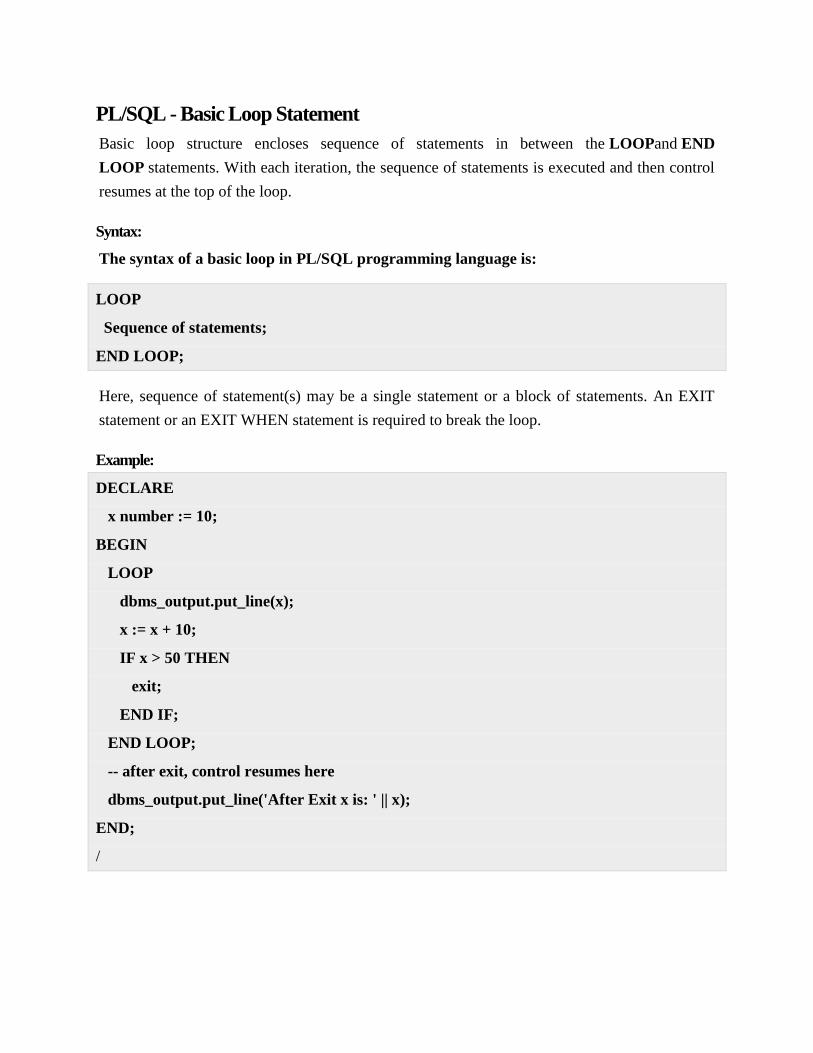
PL/SQL - Basic Loop Statement
Basic loop structure encloses sequence of statements in between the LOOPand END
LOOP statements. With each iteration, the sequence of statements is executed and then control
resumes at the top of the loop.
Syntax:
The syntax of a basic loop in PL/SQL programming language is:
LOOP
Sequence of statements;
END LOOP;
Here, sequence of statement(s) may be a single statement or a block of statements. An EXIT
statement or an EXIT WHEN statement is required to break the loop.
Example:
DECLARE
x number := 10;
BEGIN
LOOP
dbms_output.put_line(x);
x := x + 10;
IF x > 50 THEN
exit;
END IF;
END LOOP;
-- after exit, control resumes here
dbms_output.put_line('After Exit x is: ' || x);
END;
/

When the above code is executed at SQL prompt, it produces the following result:
10
20
30
40
50
After Exit x is: 60
PL/SQL procedure successfully completed.
You can use the EXIT WHEN statement instead of the EXIT statement:
DECLARE
x number := 10;
BEGIN
LOOP
dbms_output.put_line(x);
x := x + 10;
exit WHEN x > 50;
END LOOP;
-- after exit, control resumes here
dbms_output.put_line('After Exit x is: ' || x);
END;
/
When the above code is executed at SQL prompt, it produces the following result:
10
20
30
40
50
After Exit x is: 60

PL/SQL procedure successfully completed.
PL/SQL - WHILE LOOP Statement
A WHILE LOOP statement in PL/SQL programming language repeatedly executes a target
statement as long as a given condition is true.
Syntax:
WHILE condition LOOP
sequence_of_statements
END LOOP;
Example:
DECLARE
a number(2) := 10;
BEGIN
WHILE a < 20 LOOP
dbms_output.put_line('value of a: ' || a);
a := a + 1;
END LOOP;
END;
/
When the above code is executed at SQL prompt, it produces the following result:
value of a: 10
value of a: 11
value of a: 12
value of a: 13
value of a: 14
value of a: 15
value of a: 16
value of a: 17
value of a: 18

value of a: 19
PL/SQL procedure successfully completed.
PL/SQL - FOR LOOP Statement
A FOR LOOP is a repetition control structure that allows you to efficiently write a loop that
needs to execute a specific number of times.
Syntax:
FOR counter IN initial_value .. final_value LOOP
sequence_of_statements;
END LOOP;
Here is the flow of control in a for loop:
The initial step is executed first, and only once. This step allows you to declare and
initialize any loop control variables.
Next, the condition, i.e., initial_value .. final_value is evaluated. If it is TRUE, the body
of the loop is executed. If it is FALSE, the body of the loop does not execute and flow of
control jumps to the next statement just after the for loop.
After the body of the for loop executes, the value of the counter variable is increased or
decreased.
The condition is now evaluated again. If it is TRUE, the loop executes and the process
repeats itself (body of loop, then increment step, and then again condition). After the
condition becomes FALSE, the FOR-LOOP terminates.
Following are some special characteristics of PL/SQL for loop:
The initial_value and final_value of the loop variable or counter can be literals,
variables, or expressions but must evaluate to numbers. Otherwise, PL/SQL raises the
predefined exception VALUE_ERROR.
The initial_value need not to be 1; however, the loop counter increment (or
decrement) must be 1.
PL/SQL allows determine the loop range dynamically at run time.
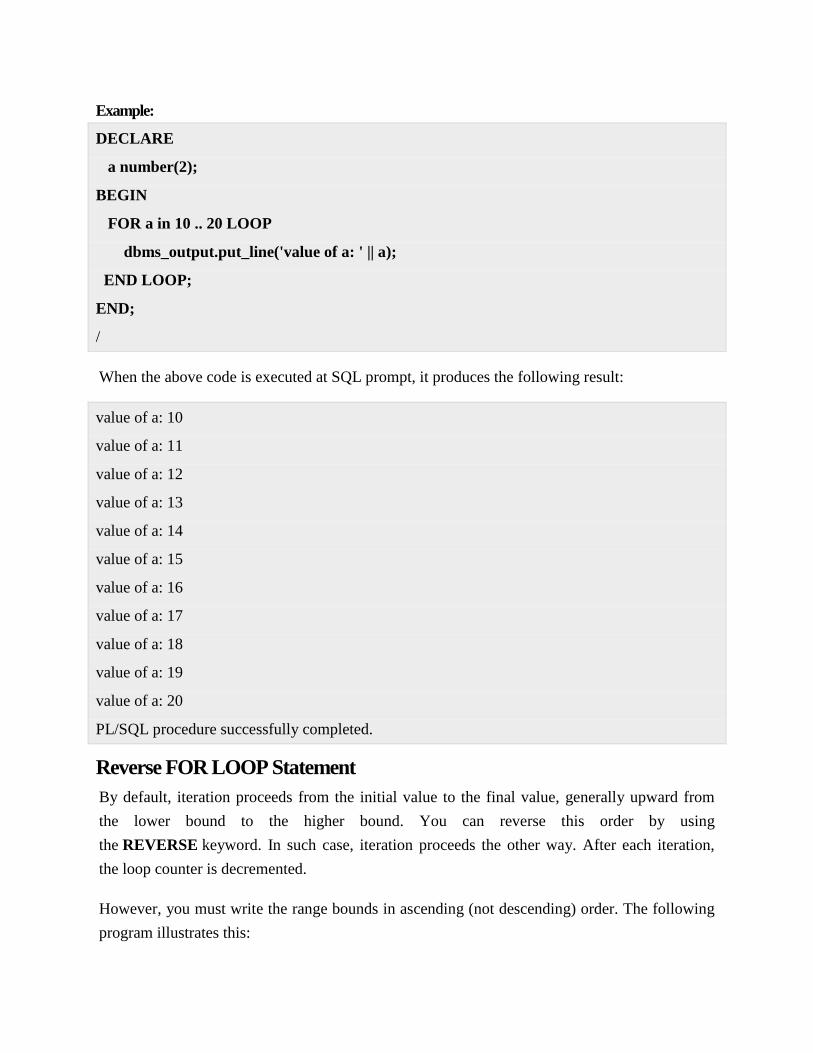
Example:
DECLARE
a number(2);
BEGIN
FOR a in 10 .. 20 LOOP
dbms_output.put_line('value of a: ' || a);
END LOOP;
END;
/
When the above code is executed at SQL prompt, it produces the following result:
value of a: 10
value of a: 11
value of a: 12
value of a: 13
value of a: 14
value of a: 15
value of a: 16
value of a: 17
value of a: 18
value of a: 19
value of a: 20
PL/SQL procedure successfully completed.
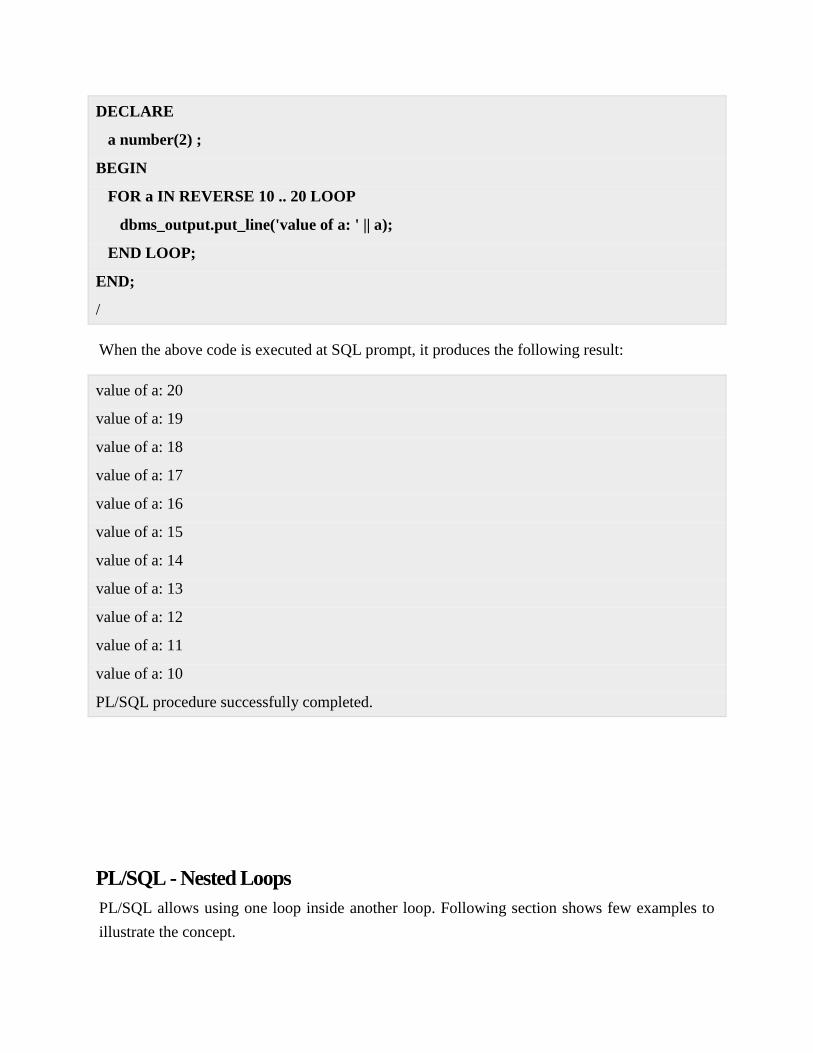
Reverse FOR LOOP Statement
By default, iteration proceeds from the initial value to the final value, generally upward from
the lower bound to the higher bound. You can reverse this order by using
the REVERSE keyword. In such case, iteration proceeds the other way. After each iteration,
the loop counter is decremented.
However, you must write the range bounds in ascending (not descending) order. The following
program illustrates this:
DECLARE
a number(2) ;
BEGIN
FOR a IN REVERSE 10 .. 20 LOOP
dbms_output.put_line('value of a: ' || a);
END LOOP;
END;
/
When the above code is executed at SQL prompt, it produces the following result:
value of a: 20
value of a: 19
value of a: 18
value of a: 17
value of a: 16
value of a: 15
value of a: 14
value of a: 13
value of a: 12
value of a: 11
value of a: 10
PL/SQL procedure successfully completed.
PL/SQL - Nested Loops
PL/SQL allows using one loop inside another loop. Following section shows few examples to
illustrate the concept.
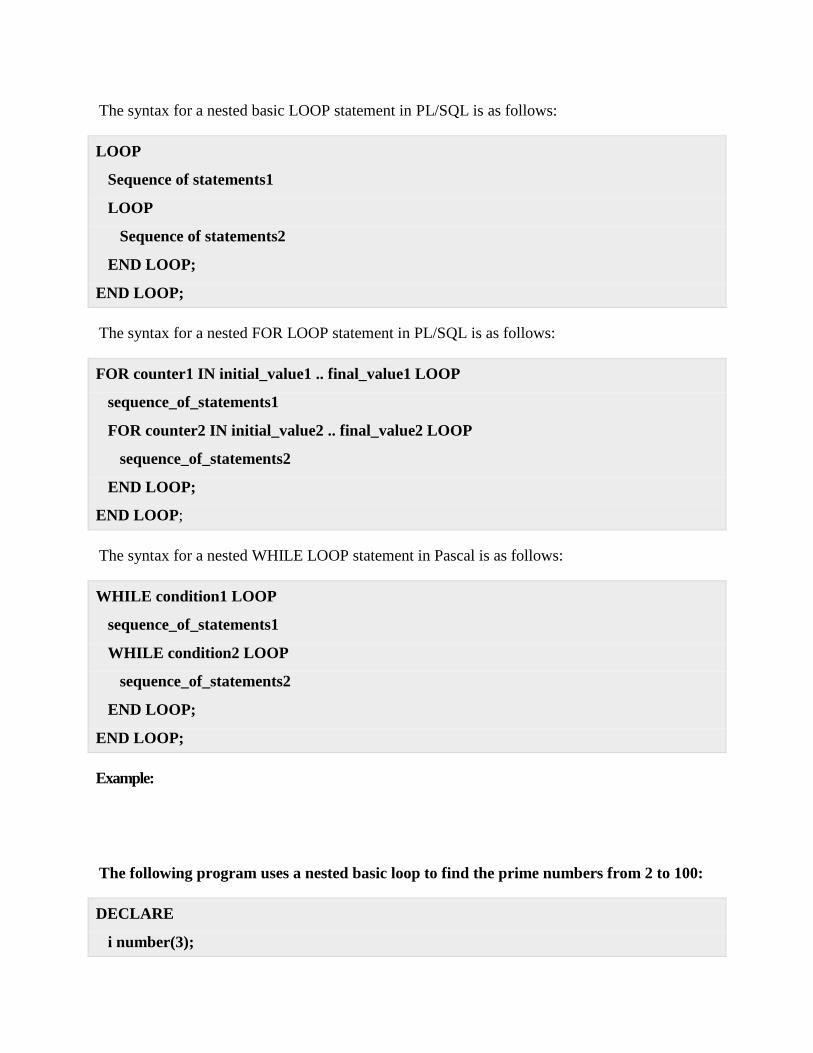
The syntax for a nested basic LOOP statement in PL/SQL is as follows:
LOOP
Sequence of statements1
LOOP
Sequence of statements2
END LOOP;
END LOOP;
The syntax for a nested FOR LOOP statement in PL/SQL is as follows:
FOR counter1 IN initial_value1 .. final_value1 LOOP
sequence_of_statements1
FOR counter2 IN initial_value2 .. final_value2 LOOP
sequence_of_statements2
END LOOP;
END LOOP;
The syntax for a nested WHILE LOOP statement in Pascal is as follows:
WHILE condition1 LOOP
sequence_of_statements1
WHILE condition2 LOOP
sequence_of_statements2
END LOOP;
END LOOP;
Example:
The following program uses a nested basic loop to find the prime numbers from 2 to 100:
DECLARE
i number(3);
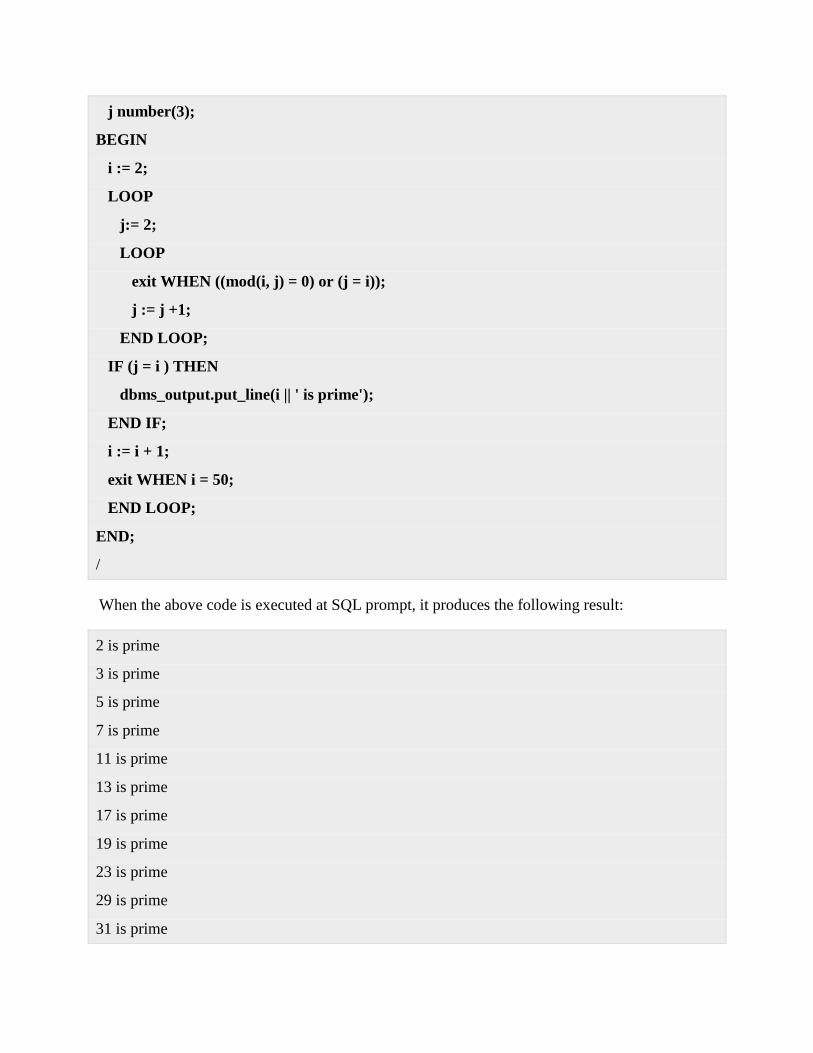
j number(3);
BEGIN
i := 2;
LOOP
j:= 2;
LOOP
exit WHEN ((mod(i, j) = 0) or (j = i));
j := j +1;
END LOOP;
IF (j = i ) THEN
dbms_output.put_line(i || ' is prime');
END IF;
i := i + 1;
exit WHEN i = 50;
END LOOP;
END;
/
When the above code is executed at SQL prompt, it produces the following result:
2 is prime
3 is prime
5 is prime
7 is prime
11 is prime
13 is prime
17 is prime
19 is prime
23 is prime
29 is prime
31 is prime

37 is prime
41 is prime
43 is prime
47 is prime
PL/SQL procedure successfully completed.
Labeling a PL/SQL Loop
PL/SQL loops can be labeled. The label should be enclosed by double angle brackets (<< and
>>) and appear at the beginning of the LOOP statement. The label name can also appear at the
end of the LOOP statement. You may use the label in the EXIT statement to exit from the loop.
The following program illustrates the concept:
DECLARE
i number(1);
j number(1);
BEGIN
<< outer_loop >>
FOR i IN 1..3 LOOP
<< inner_loop >>
FOR j IN 1..3 LOOP
dbms_output.put_line('i is: '|| i || ' and j is: ' || j);
END loop inner_loop;
END loop outer_loop;
END;
/
When the above code is executed at SQL prompt, it produces the following result:
i is: 1 and j is: 1
i is: 1 and j is: 2
i is: 1 and j is: 3
i is: 2 and j is: 1
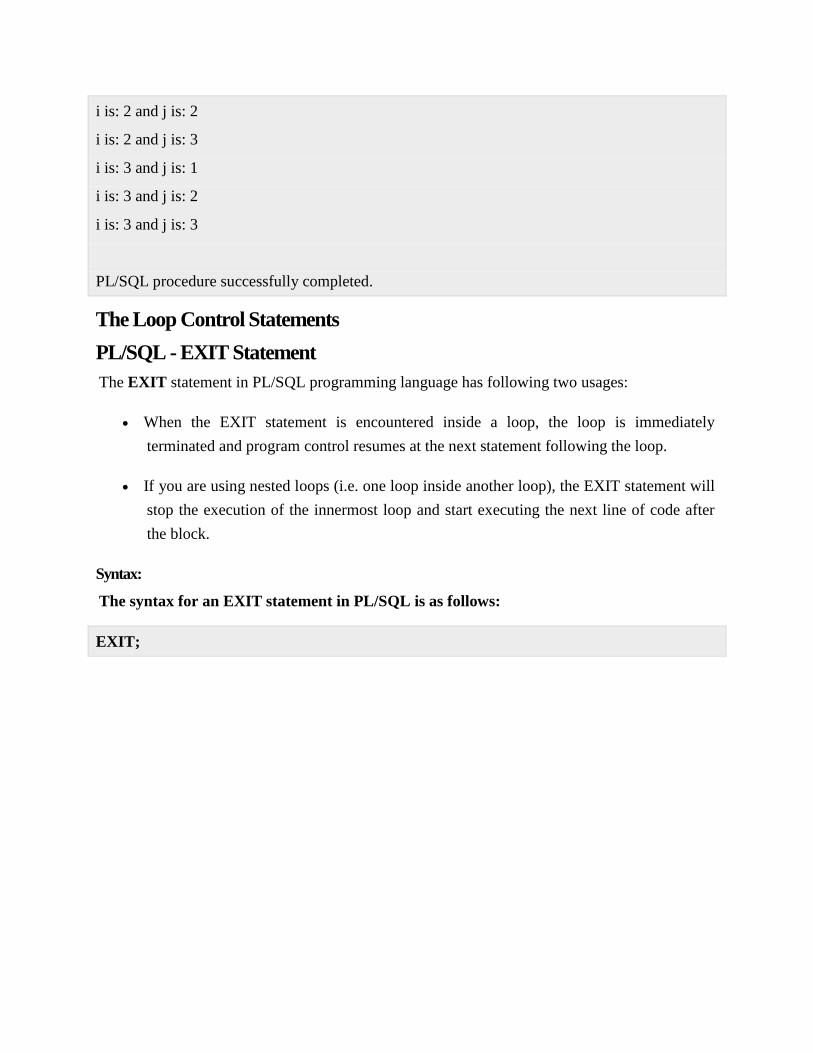
i is: 2 and j is: 2
i is: 2 and j is: 3
i is: 3 and j is: 1
i is: 3 and j is: 2
i is: 3 and j is: 3
PL/SQL procedure successfully completed.
The Loop Control Statements
PL/SQL - EXIT Statement
The EXIT statement in PL/SQL programming language has following two usages:
When the EXIT statement is encountered inside a loop, the loop is immediately
terminated and program control resumes at the next statement following the loop.
If you are using nested loops (i.e. one loop inside another loop), the EXIT statement will
stop the execution of the innermost loop and start executing the next line of code after
the block.
Syntax:
The syntax for an EXIT statement in PL/SQL is as follows:
EXIT;

Flow Diagram:
Example:
DECLARE
a number(2) := 10;
BEGIN
-- while loop execution
WHILE a < 20 LOOP
dbms_output.put_line ('value of a: ' || a);
a := a + 1;
IF a > 15 THEN
-- terminate the loop using the exit statement
EXIT;
END IF;
END LOOP;
END;
/
When the above code is executed at SQL prompt, it produces the following result:

value of a: 10
value of a: 11
value of a: 12
value of a: 13
value of a: 14
value of a: 15
PL/SQL procedure successfully completed.
The EXIT WHEN Statement
The EXIT-WHEN statement allows the condition in the WHEN clause to be evaluated. If the
condition is true, the loop completes and control passes to the statement immediately after END
LOOP.
Following are two important aspects for the EXIT WHEN statement:
Until the condition is true, the EXIT-WHEN statement acts like a NULL statement,
except for evaluating the condition, and does not terminate the loop.
A statement inside the loop must change the value of the condition.
Syntax:
The syntax for an EXIT WHEN statement in PL/SQL is as follows:
EXIT WHEN condition;
The EXIT WHEN statement replaces a conditional statement like if-thenused with the EXIT
statement.
Example:
DECLARE
a number(2) := 10;
BEGIN
-- while loop execution
WHILE a < 20 LOOP
dbms_output.put_line ('value of a: ' || a);

a := a + 1;
-- terminate the loop using the exit when statement
EXIT WHEN a > 15;
END LOOP;
END;
/
When the above code is executed at SQL prompt, it produces the following result:
value of a: 10
value of a: 11
value of a: 12
value of a: 13
value of a: 14
value of a: 15
PL/SQL procedure successfully completed.
PL/SQL - CONTINUE Statement
The CONTINUE statement causes the loop to skip the remainder of its body and immediately
retest its condition prior to reiterating. In other words, it forces the next iteration of the loop to
take place, skipping any code in between.
Syntax:
The syntax for a CONTINUE statement is as follows:
CONTINUE;

Flow Diagram:
Example:
DECLARE
a number(2) := 10;
BEGIN
-- while loop execution
WHILE a < 20 LOOP
dbms_output.put_line ('value of a: ' || a);
a := a + 1;
IF a = 15 THEN
-- skip the loop using the CONTINUE statement
a := a + 1;
CONTINUE;
END IF;
END LOOP;
END;
/
When the above code is executed at SQL prompt, it produces the following result:
value of a: 10
value of a: 11
value of a: 12
value of a: 13
value of a: 14
value of a: 16
value of a: 17
value of a: 18
value of a: 19
PL/SQL procedure successfully completed.
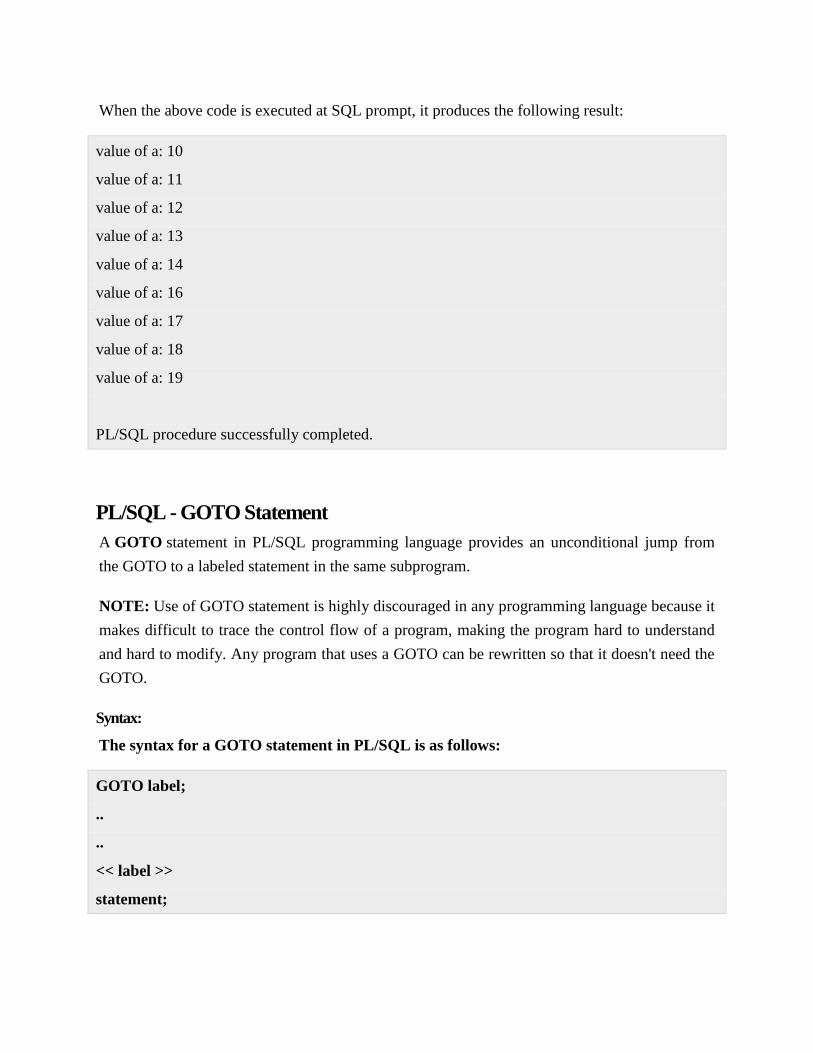
PL/SQL - GOTO Statement
A GOTO statement in PL/SQL programming language provides an unconditional jump from
the GOTO to a labeled statement in the same subprogram.
NOTE: Use of GOTO statement is highly discouraged in any programming language because it
makes difficult to trace the control flow of a program, making the program hard to understand
and hard to modify. Any program that uses a GOTO can be rewritten so that it doesn't need the
GOTO.
Syntax:
The syntax for a GOTO statement in PL/SQL is as follows:
GOTO label;
..
..
<< label >>
statement;

Flow Diagram:
Example:
DECLARE
a number(2) := 10;
BEGIN
<<loopstart>>
-- while loop execution
WHILE a < 20 LOOP
dbms_output.put_line ('value of a: ' || a);
a := a + 1;
IF a = 15 THEN
a := a + 1;
GOTO loopstart;
END IF;
END LOOP;
END;
/
When the above code is executed at SQL prompt, it produces the following result:

value of a: 10
value of a: 11
value of a: 12
value of a: 13
value of a: 14
value of a: 16
value of a: 17
value of a: 18
value of a: 19
PL/SQL procedure successfully completed.
Restrictions with GOTO Statement
GOTO Statement in PL/SQL imposes the following restrictions:
A GOTO statement cannot branch into an IF statement, CASE statement, LOOP
statement or sub-block.
A GOTO statement cannot branch from one IF statement clause to another or from one
CASE statement WHEN clause to another.
A GOTO statement cannot branch from an outer block into a sub-block (that is, an inner
BEGIN-END block).
A GOTO statement cannot branch out of a subprogram. To end a subprogram early,
either use the RETURN statement or have GOTO branch to a place right before the end
of the subprogram.
A GOTO statement cannot branch from an exception handler back into the current
BEGIN-END block. However, a GOTO statement can branch from an exception handler
into an enclosing block.

PL/SQL - Exceptions
An error condition during a program execution is called an exception in PL/SQL. PL/SQL
supports programmers to catch such conditions using EXCEPTIONblock in the program and
an appropriate action is taken against the error condition. There are two types of exceptions:
System-defined exceptions
User-defined exceptions
Syntax for Exception Handling
The General Syntax for exception handling is as follows. Here you can list down as many as
exceptions you want to handle. The default exception will be handled using WHEN others
THEN:
DECLARE
<declarations section>
BEGIN
<executable command(s)>
EXCEPTION
<exception handling goes here >
WHEN exception1 THEN
exception1-handling-statements
WHEN exception2 THEN
exception2-handling-statements
WHEN exception3 THEN
exception3-handling-statements
........
WHEN others THEN
exception3-handling-statements
END;
Example
Let us write some simple code to illustrate the concept. We will be using the CUSTOMERS
table we had created and used in the previous chapters:
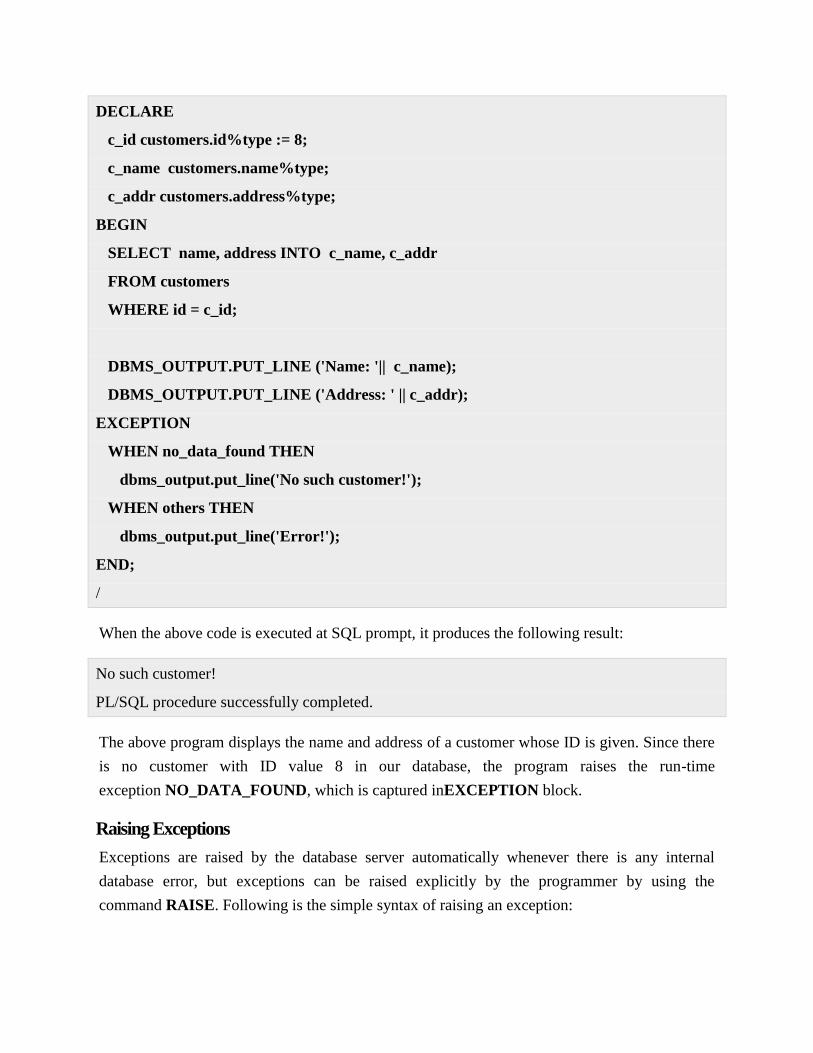
DECLARE
c_id customers.id%type := 8;
c_name customers.name%type;
c_addr customers.address%type;
BEGIN
SELECT name, address INTO c_name, c_addr
FROM customers
WHERE id = c_id;
DBMS_OUTPUT.PUT_LINE ('Name: '|| c_name);
DBMS_OUTPUT.PUT_LINE ('Address: ' || c_addr);
EXCEPTION
WHEN no_data_found THEN
dbms_output.put_line('No such customer!');
WHEN others THEN
dbms_output.put_line('Error!');
END;
/
When the above code is executed at SQL prompt, it produces the following result:
No such customer!
PL/SQL procedure successfully completed.
The above program displays the name and address of a customer whose ID is given. Since there
is no customer with ID value 8 in our database, the program raises the run-time
exception NO_DATA_FOUND, which is captured inEXCEPTION block.
Raising Exceptions
Exceptions are raised by the database server automatically whenever there is any internal
database error, but exceptions can be raised explicitly by the programmer by using the
command RAISE. Following is the simple syntax of raising an exception:

DECLARE
exception_name EXCEPTION;
BEGIN
IF condition THEN
RAISE exception_name;
END IF;
EXCEPTION
WHEN exception_name THEN
statement;
END;
You can use above syntax in raising Oracle standard exception or any user-defined exception.
Next section will give you an example on raising user-defined exception, similar way you can
raise Oracle standard exceptions as well.
User-defined Exceptions
PL/SQL allows you to define your own exceptions according to the need of your program. A
user-defined exception must be declared and then raised explicitly, using either a RAISE
statement or the procedure DBMS_STANDARD.RAISE_APPLICATION_ERROR.
The syntax for declaring an exception is:
DECLARE
my-exception EXCEPTION;
Example:
The following example illustrates the concept. This program asks for a customer ID, when the
user enters an invalid ID, the exception invalid_id is raised.
DECLARE
c_id customers.id%type := &cc_id;
c_name customers.name%type;
c_addr customers.address%type;

-- user defined exception
ex_invalid_id EXCEPTION;
BEGIN
IF c_id <= 0 THEN
RAISE ex_invalid_id;
ELSE
SELECT name, address INTO c_name, c_addr
FROM customers
WHERE id = c_id;
DBMS_OUTPUT.PUT_LINE ('Name: '|| c_name);
DBMS_OUTPUT.PUT_LINE ('Address: ' || c_addr);
END IF;
EXCEPTION
WHEN ex_invalid_id THEN
dbms_output.put_line('ID must be greater than zero!');
WHEN no_data_found THEN
dbms_output.put_line('No such customer!');
WHEN others THEN
dbms_output.put_line('Error!');
END;
/
When the above code is executed at SQL prompt, it produces the following result:
Enter value for cc_id: -6 (let's enter a value -6)
old 2: c_id customers.id%type := &cc_id;
new 2: c_id customers.id%type := -6;
ID must be greater than zero!
PL/SQL procedure successfully completed.
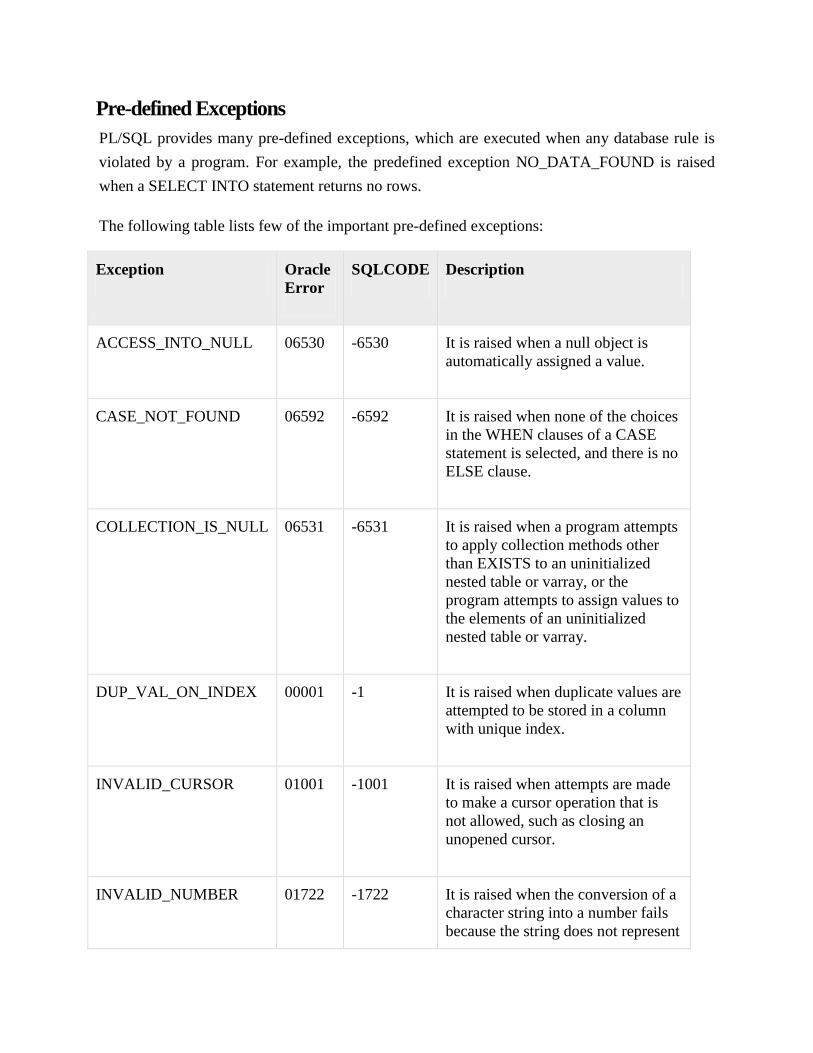
Pre-defined Exceptions
PL/SQL provides many pre-defined exceptions, which are executed when any database rule is
violated by a program. For example, the predefined exception NO_DATA_FOUND is raised
when a SELECT INTO statement returns no rows.
The following table lists few of the important pre-defined exceptions:
Exception Oracle
Error
SQLCODE Description
ACCESS_INTO_NULL 06530 -6530 It is raised when a null object is
automatically assigned a value.
CASE_NOT_FOUND 06592 -6592 It is raised when none of the choices
in the WHEN clauses of a CASE
statement is selected, and there is no
ELSE clause.
COLLECTION_IS_NULL 06531 -6531 It is raised when a program attempts
to apply collection methods other
than EXISTS to an uninitialized
nested table or varray, or the
program attempts to assign values to
the elements of an uninitialized
nested table or varray.
DUP_VAL_ON_INDEX 00001 -1 It is raised when duplicate values are
attempted to be stored in a column
with unique index.
INVALID_CURSOR 01001 -1001 It is raised when attempts are made
to make a cursor operation that is
not allowed, such as closing an
unopened cursor.
INVALID_NUMBER 01722 -1722 It is raised when the conversion of a
character string into a number fails
because the string does not represent

a valid number.
LOGIN_DENIED 01017 -1017 It is raised when s program attempts
to log on to the database with an
invalid username or password.
NO_DATA_FOUND 01403 +100 It is raised when a SELECT INTO
statement returns no rows.
NOT_LOGGED_ON 01012 -1012 It is raised when a database call is
issued without being connected to
the database.
PROGRAM_ERROR 06501 -6501 It is raised when PL/SQL has an
internal problem.
ROWTYPE_MISMATCH 06504 -6504 It is raised when a cursor fetches
value in a variable having
incompatible data type.
SELF_IS_NULL 30625 -30625 It is raised when a member method
is invoked, but the instance of the
object type was not initialized.
STORAGE_ERROR 06500 -6500 It is raised when PL/SQL ran out of
memory or memory was corrupted.
TOO_MANY_ROWS 01422 -1422 It is raised when s SELECT INTO
statement returns more than one
row.
VALUE_ERROR 06502 -6502 It is raised when an arithmetic,
conversion, truncation, or size-
constraint error occurs.
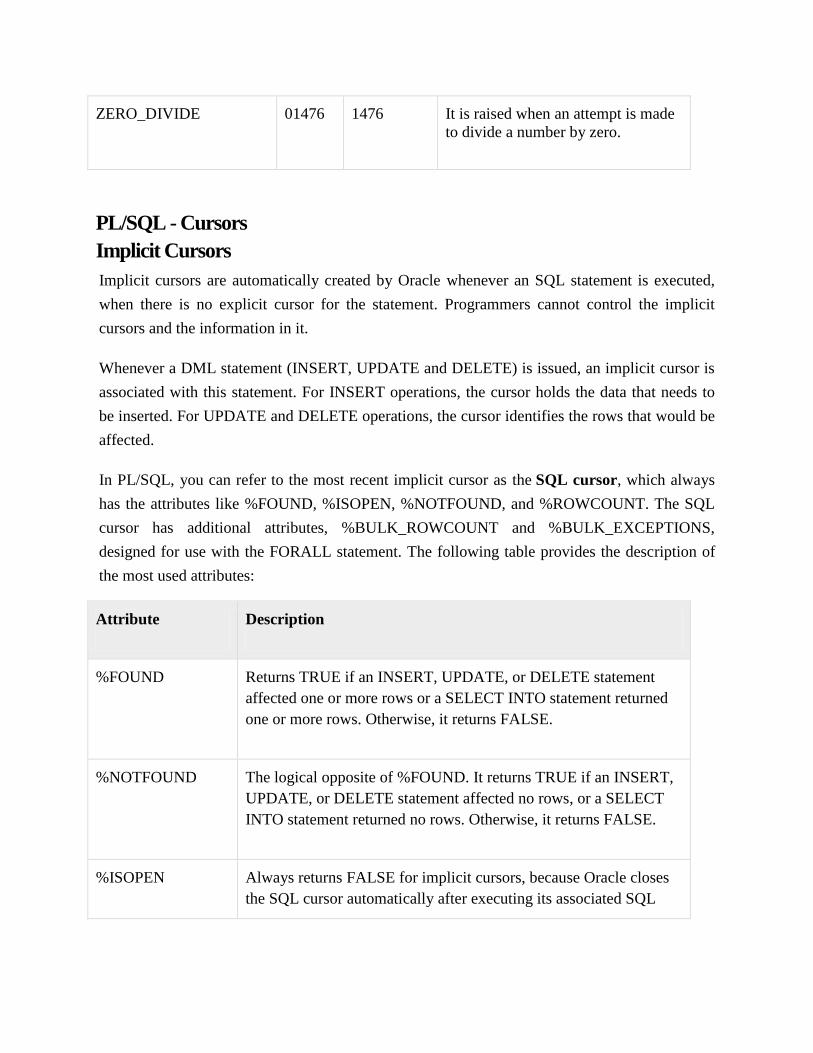
ZERO_DIVIDE 01476 1476 It is raised when an attempt is made
to divide a number by zero.
PL/SQL - Cursors
Implicit Cursors
Implicit cursors are automatically created by Oracle whenever an SQL statement is executed,
when there is no explicit cursor for the statement. Programmers cannot control the implicit
cursors and the information in it.
Whenever a DML statement (INSERT, UPDATE and DELETE) is issued, an implicit cursor is
associated with this statement. For INSERT operations, the cursor holds the data that needs to
be inserted. For UPDATE and DELETE operations, the cursor identifies the rows that would be
affected.
In PL/SQL, you can refer to the most recent implicit cursor as the SQL cursor, which always
has the attributes like %FOUND, %ISOPEN, %NOTFOUND, and %ROWCOUNT. The SQL
cursor has additional attributes, %BULK_ROWCOUNT and %BULK_EXCEPTIONS,
designed for use with the FORALL statement. The following table provides the description of
the most used attributes:
Attribute Description
%FOUND Returns TRUE if an INSERT, UPDATE, or DELETE statement
affected one or more rows or a SELECT INTO statement returned
one or more rows. Otherwise, it returns FALSE.
%NOTFOUND The logical opposite of %FOUND. It returns TRUE if an INSERT,
UPDATE, or DELETE statement affected no rows, or a SELECT
INTO statement returned no rows. Otherwise, it returns FALSE.
%ISOPEN Always returns FALSE for implicit cursors, because Oracle closes
the SQL cursor automatically after executing its associated SQL

statement.
%ROWCOUNT Returns the number of rows affected by an INSERT, UPDATE, or
DELETE statement, or returned by a SELECT INTO statement.
Any SQL cursor attribute will be accessed as sql%attribute_name as shown below in the
example.
Example:
We will be using the CUSTOMERS table we had created and used in the previous chapters.
Select * from customers;
+----+----------+-----+-----------+----------+
| ID | NAME | AGE | ADDRESS | SALARY |
+----+----------+-----+-----------+----------+
| 1 | Ramesh | 32 | Ahmedabad | 2000.00 |
| 2 | Khilan | 25 | Delhi | 1500.00 |
| 3 | kaushik | 23 | Kota | 2000.00 |
| 4 | Chaitali | 25 | Mumbai | 6500.00 |
| 5 | Hardik | 27 | Bhopal | 8500.00 |
| 6 | Komal | 22 | MP | 4500.00 |
+----+----------+-----+-----------+----------+
The following program would update the table and increase salary of each customer by 500 and
use the SQL%ROWCOUNT attribute to determine the number of rows affected:
DECLARE
total_rows number(2);
BEGIN
UPDATE customers
SET salary = salary + 500;
IF sql%notfound THEN

dbms_output.put_line('no customers selected');
ELSIF sql%found THEN
total_rows := sql%rowcount;
dbms_output.put_line( total_rows || ' customers selected ');
END IF;
END;
/
When the above code is executed at SQL prompt, it produces the following result:
6 customers selected
PL/SQL procedure successfully completed.
If you check the records in customers table, you will find that the rows have been updated:
Select * from customers;
+----+----------+-----+-----------+----------+
| ID | NAME | AGE | ADDRESS | SALARY |
+----+----------+-----+-----------+----------+
| 1 | Ramesh | 32 | Ahmedabad | 2500.00 |
| 2 | Khilan | 25 | Delhi | 2000.00 |
| 3 | kaushik | 23 | Kota | 2500.00 |
| 4 | Chaitali | 25 | Mumbai | 7000.00 |
| 5 | Hardik | 27 | Bhopal | 9000.00 |
| 6 | Komal | 22 | MP | 5000.00 |
+----+----------+-----+-----------+----------+
Explicit Cursors
Explicit cursors are programmer defined cursors for gaining more control over the context
area. An explicit cursor should be defined in the declaration section of the PL/SQL Block. It is
created on a SELECT Statement which returns more than one row.

The syntax for creating an explicit cursor is :
CURSOR cursor_name IS select_statement;
Working with an explicit cursor involves four steps:
Declaring the cursor for initializing in the memory
Opening the cursor for allocating memory
Fetching the cursor for retrieving data
Closing the cursor to release allocated memory
Declaring the Cursor
Declaring the cursor defines the cursor with a name and the associated SELECT statement. For
example:
CURSOR c_customers IS
SELECT id, name, address FROM customers;
Opening the Cursor
Opening the cursor allocates memory for the cursor and makes it ready for fetching the rows
returned by the SQL statement into it. For example, we will open above-defined cursor as
follows:
OPEN c_customers;
Fetching the Cursor
Fetching the cursor involves accessing one row at a time. For example we will fetch rows from
the above-opened cursor as follows:
FETCH c_customers INTO c_id, c_name, c_addr;
Closing the Cursor
Closing the cursor means releasing the allocated memory. For example, we will close above-
opened cursor as follows:
CLOSE c_customers;

Example:
Following is a complete example to illustrate the concepts of explicit cursors:
DECLARE
c_id customers.id%type;
c_name customers.name%type;
c_addr customers.address%type;
CURSOR c_customers is
SELECT id, name, address FROM customers;
BEGIN
OPEN c_customers;
LOOP
FETCH c_customers into c_id, c_name, c_addr;
EXIT WHEN c_customers%notfound;
dbms_output.put_line(c_id || ' ' || c_name || ' ' || c_addr);
END LOOP;
CLOSE c_customers;
END;
/
When the above code is executed at SQL prompt, it produces the following result:
1 Ramesh Ahmedabad
2 Khilan Delhi
3 kaushik Kota
4 Chaitali Mumbai
5 Hardik Bhopal
6 Komal MP
PL/SQL procedure successfully completed.
PL/SQL - Records
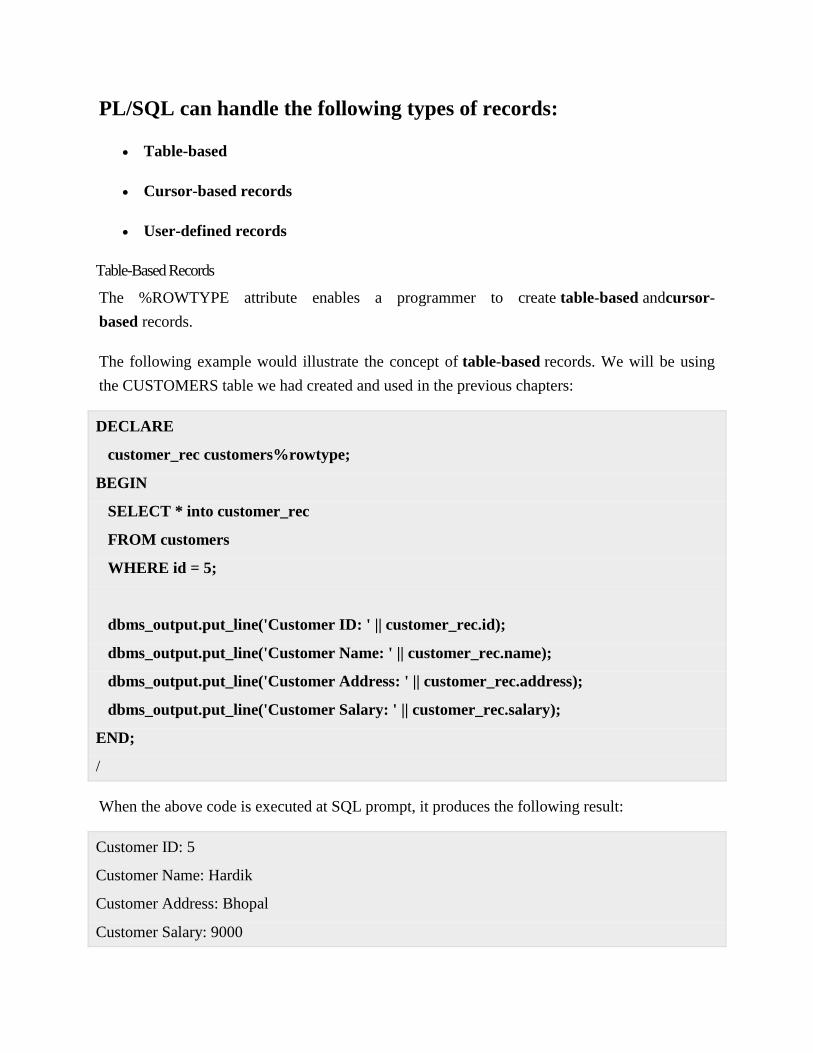
PL/SQL can handle the following types of records:
Table-based
Cursor-based records
User-defined records
Table-Based Records
The %ROWTYPE attribute enables a programmer to create table-based andcursor-
based records.
The following example would illustrate the concept of table-based records. We will be using
the CUSTOMERS table we had created and used in the previous chapters:
DECLARE
customer_rec customers%rowtype;
BEGIN
SELECT * into customer_rec
FROM customers
WHERE id = 5;
dbms_output.put_line('Customer ID: ' || customer_rec.id);
dbms_output.put_line('Customer Name: ' || customer_rec.name);
dbms_output.put_line('Customer Address: ' || customer_rec.address);
dbms_output.put_line('Customer Salary: ' || customer_rec.salary);
END;
/
When the above code is executed at SQL prompt, it produces the following result:
Customer ID: 5
Customer Name: Hardik
Customer Address: Bhopal
Customer Salary: 9000

PL/SQL procedure successfully completed.
Cursor-Based Records
The following example would illustrate the concept of cursor-based records. We will be using
the CUSTOMERS table we had created and used in the previous chapters:
DECLARE
CURSOR customer_cur is
SELECT id, name, address
FROM customers;
customer_rec customer_cur%rowtype;
BEGIN
OPEN customer_cur;
LOOP
FETCH customer_cur into customer_rec;
EXIT WHEN customer_cur%notfound;
DBMS_OUTPUT.put_line(customer_rec.id || ' ' || customer_rec.name);
END LOOP;
END;
/
When the above code is executed at SQL prompt, it produces the following result:
1 Ramesh
2 Khilan
3 kaushik
4 Chaitali
5 Hardik
6 Komal
PL/SQL procedure successfully completed.
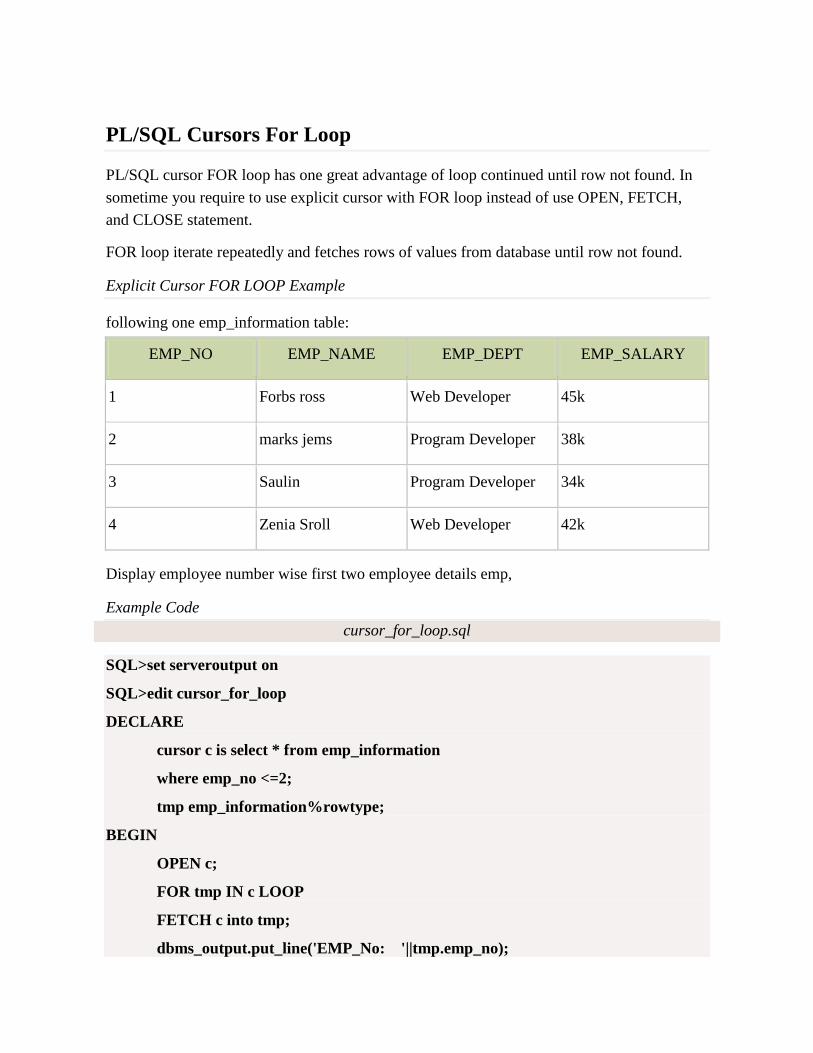
PL/SQL Cursors For Loop
PL/SQL cursor FOR loop has one great advantage of loop continued until row not found. In
sometime you require to use explicit cursor with FOR loop instead of use OPEN, FETCH,
and CLOSE statement.
FOR loop iterate repeatedly and fetches rows of values from database until row not found.
Explicit Cursor FOR LOOP Example
following one emp_information table:
EMP_NO EMP_NAME EMP_DEPT EMP_SALARY
1 Forbs ross Web Developer 45k
2 marks jems Program Developer 38k
3 Saulin Program Developer 34k
4 Zenia Sroll Web Developer 42k
Display employee number wise first two employee details emp,
Example Code
cursor_for_loop.sql
SQL>set serveroutput on
SQL>edit cursor_for_loop
DECLARE
cursor c is select * from emp_information
where emp_no <=2;
tmp emp_information%rowtype;
BEGIN
OPEN c;
FOR tmp IN c LOOP
FETCH c into tmp;
dbms_output.put_line('EMP_No: '||tmp.emp_no);

dbms_output.put_line('EMP_Name: '||tmp.emp_name);
dbms_output.put_line('EMP_Dept: '||tmp.emp_dept);
dbms_output.put_line('EMP_Salary:'||tmp.emp_salary);
END Loop;
CLOSE c;
END;
/
Example Result
SQL>@cursor_for_loop
EMP_No: 1
EMP_Name: Forbs ross
EMP_Dept: Web Developer
EMP_Salary:45k
EMP_No: 2
EMP_Name: marks jems
EMP_Dept: Program Developer
EMP_Salary:38k
PL/SQL procedure successfully completed.
PL/SQL Parameterized Cursor
PL/SQL Parameterized cursor pass the parameters into a cursor and use them in to query.
PL/SQL Parameterized cursor define only datatype of parameter and not need to define it's
length.
Default values is assigned to the Cursor parameters. and scope of the parameters are locally.
Parameterized cursors are also saying static cursors that can passed parameter value when
cursor are opened.
Following example introduce the parameterized cursor. following emp_information table,
EMP_NO EMP_NAME EMP_DEPT EMP_SALARY
1 Forbs ross Web Developer 45k
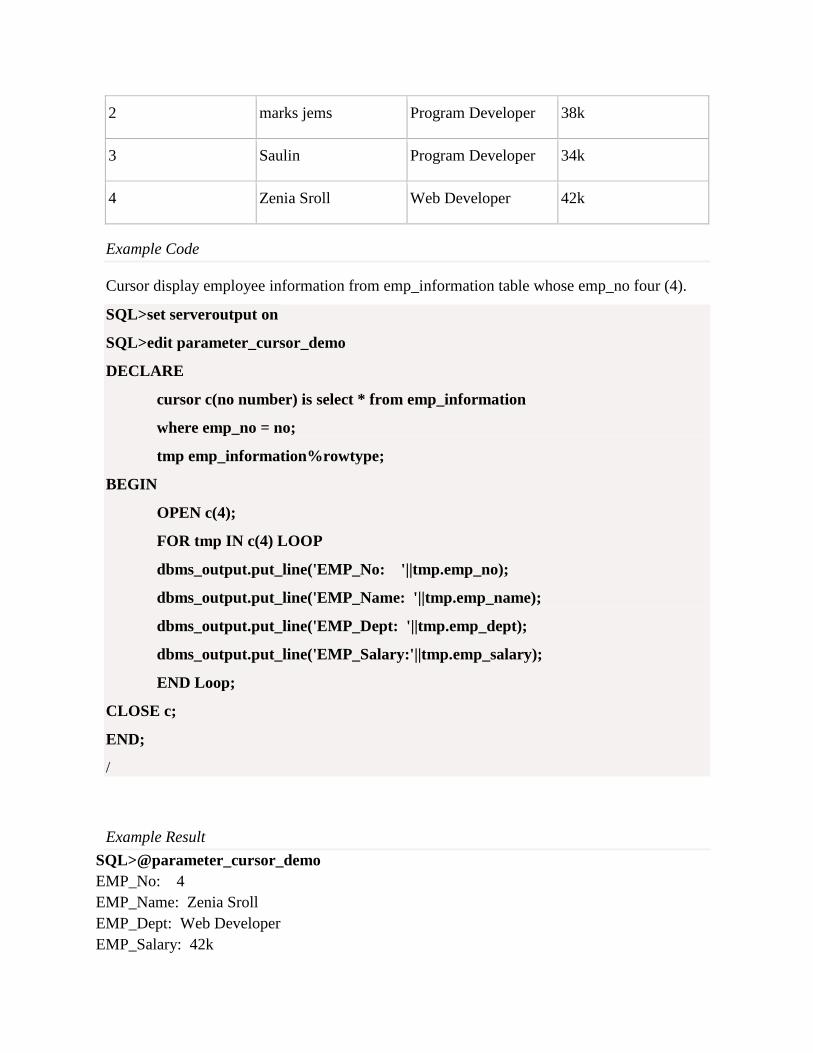
2 marks jems Program Developer 38k
3 Saulin Program Developer 34k
4 Zenia Sroll Web Developer 42k
Example Code
Cursor display employee information from emp_information table whose emp_no four (4).
SQL>set serveroutput on
SQL>edit parameter_cursor_demo
DECLARE
cursor c(no number) is select * from emp_information
where emp_no = no;
tmp emp_information%rowtype;
BEGIN
OPEN c(4);
FOR tmp IN c(4) LOOP
dbms_output.put_line('EMP_No: '||tmp.emp_no);
dbms_output.put_line('EMP_Name: '||tmp.emp_name);
dbms_output.put_line('EMP_Dept: '||tmp.emp_dept);
dbms_output.put_line('EMP_Salary:'||tmp.emp_salary);
END Loop;
CLOSE c;
END;
/
Example Result
SQL>@parameter_cursor_demo
EMP_No: 4
EMP_Name: Zenia Sroll
EMP_Dept: Web Developer
EMP_Salary: 42k

PL/SQL procedure successfully completed.
Important key point you must remember
1. Scope of the parameters are locally
2. You can assign default value to a cursor parameter.
PL/SQL Procedures
PL/SQL procedures create using CREATE PROCEDURE statement. The major difference
between PL/SQL function or procedure, function return always value where as procedure may
or may not return value.
When you create a function or procedure, you have to define IN/OUT/INOUT parameters
parameters.
1. IN : IN parameter referring to the procedure or function and allow to overwritten the value of
parameter.
2. OUT : OUT parameter referring to the procedure or function and allow to overwritten the
value of parameter.
3. IN OUT : Both IN OUT parameter referring to the procedure or function to pass both IN
OUT parameter, modify/update by the function or procedure and also get returned.
IN/OUT/INOUT parameters you define in procedure argument list that get returned back to a
result. When you create the procedure default IN parameter is passed in argument list. It's
means value is passed but not returned. Explicitly you have define OUT/IN OUT parameter in
argument list.
PL/SQL Procedure Syntax
CREATE [OR REPLACE] PROCEDURE [SCHEMA..] procedure_name
[ (parameter [,parameter]) ]
IS
[declaration_section
variable declarations;
constant declarations;
]
BEGIN
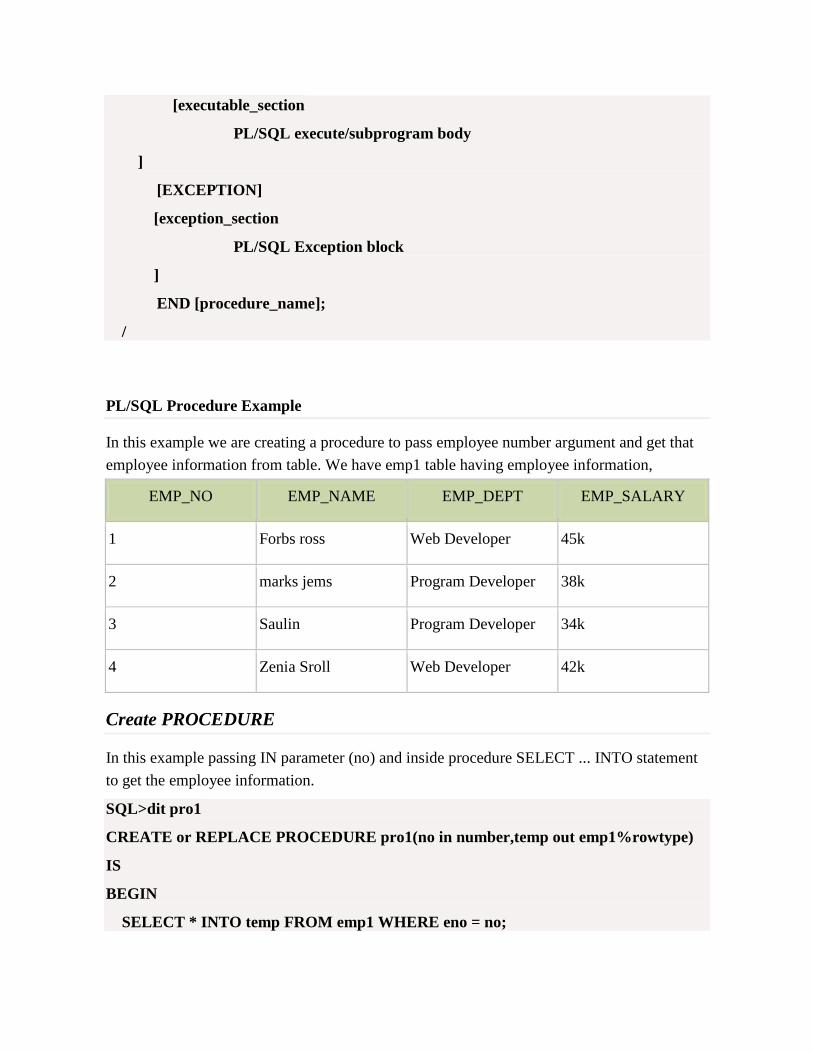
[executable_section
PL/SQL execute/subprogram body
]
[EXCEPTION]
[exception_section
PL/SQL Exception block
]
END [procedure_name];
/
PL/SQL Procedure Example
In this example we are creating a procedure to pass employee number argument and get that
employee information from table. We have emp1 table having employee information,
EMP_NO EMP_NAME EMP_DEPT EMP_SALARY
1 Forbs ross Web Developer 45k
2 marks jems Program Developer 38k
3 Saulin Program Developer 34k
4 Zenia Sroll Web Developer 42k
Create PROCEDURE
In this example passing IN parameter (no) and inside procedure SELECT ... INTO statement
to get the employee information.
SQL>dit pro1
CREATE or REPLACE PROCEDURE pro1(no in number,temp out emp1%rowtype)
IS
BEGIN
SELECT * INTO temp FROM emp1 WHERE eno = no;
END;
/
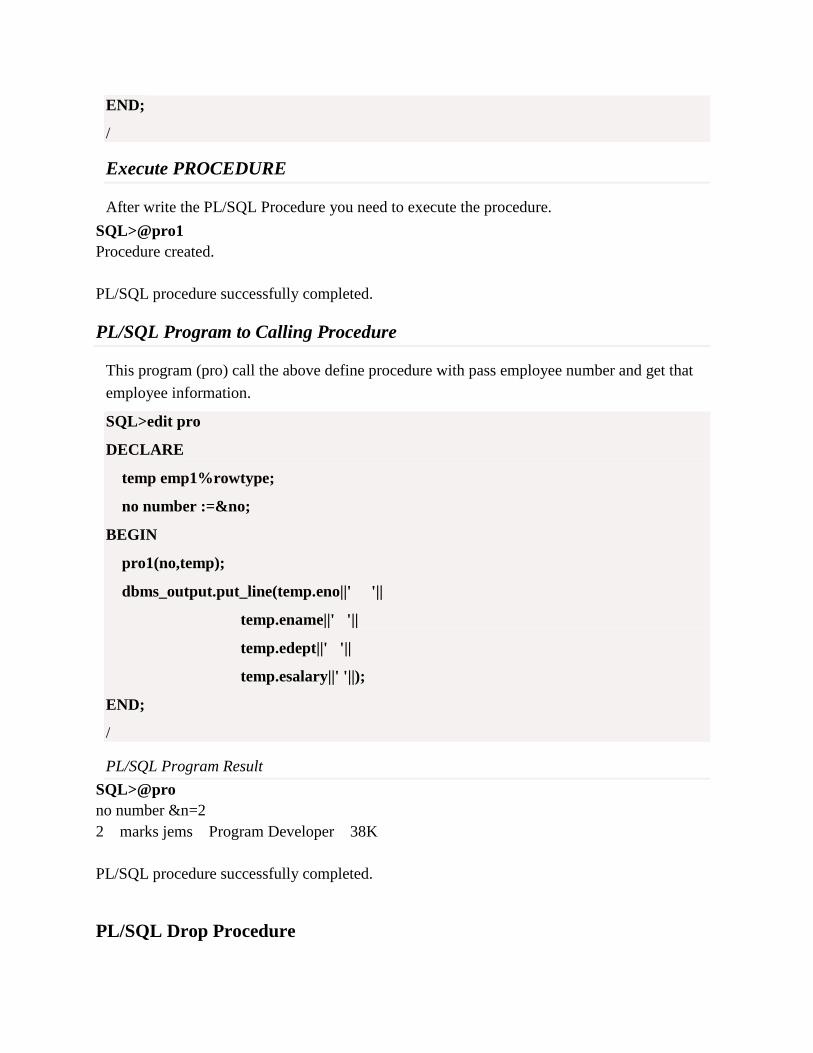
Execute PROCEDURE
After write the PL/SQL Procedure you need to execute the procedure.
SQL>@pro1
Procedure created.
PL/SQL procedure successfully completed.
PL/SQL Program to Calling Procedure
This program (pro) call the above define procedure with pass employee number and get that
employee information.
SQL>edit pro
DECLARE
temp emp1%rowtype;
no number :=&no;
BEGIN
pro1(no,temp);
dbms_output.put_line(temp.eno||' '||
temp.ename||' '||
temp.edept||' '||
temp.esalary||' '||);
END;
/
PL/SQL Program Result
SQL>@pro
no number &n=2
2 marks jems Program Developer 38K
PL/SQL procedure successfully completed.
PL/SQL Drop Procedure

You can drop PL/SQL procedure using DROP PROCEDURE statement,
Functions Drop Syntax
DROP PROCEDURE procedure_name;
Procedure Drop Example
SQL>DROP PROCEDURE pro1;
Procedure dropped.
PL/SQL Functions
PL/SQL functions block create using CREATE FUNCTION statement. The major difference
between PL/SQL function or procedure, function return always value where as procedure may
or may not return value.
When you create a function or procedure, you have to define IN/OUT/INOUT parameters
parameters.
1. IN : IN parameter referring to the procedure or function and allow to overwritten the value of
parameter.
2. OUT : OUT parameter referring to the procedure or function and allow to overwritten the
value of parameter.
3. IN OUT : Both IN OUT parameter referring to the procedure or function to pass both IN
OUT parameter, modify/update by the function or procedure and also get returned.
IN/OUT/INOUT parameters you define in function argument list that get returned back to a
result. When you create the function default IN parameter is passed in argument list. It's
means value is passed but not returned. Explicitly you have define OUT/IN OUT parameter in
argument list.
PL/SQL Functions Syntax
CREATE [OR REPLACE] FUNCTION [SCHEMA..] function_name
[ (parameter [,parameter]) ]
RETURN return_datatype
IS | AS
[declaration_section
variable declarations;
constant declarations;
]
BEGIN
[executable_section
PL/SQL execute/subprogram body
]
[EXCEPTION]
[exception_section
PL/SQL Exception block
]
END [function_name];
/
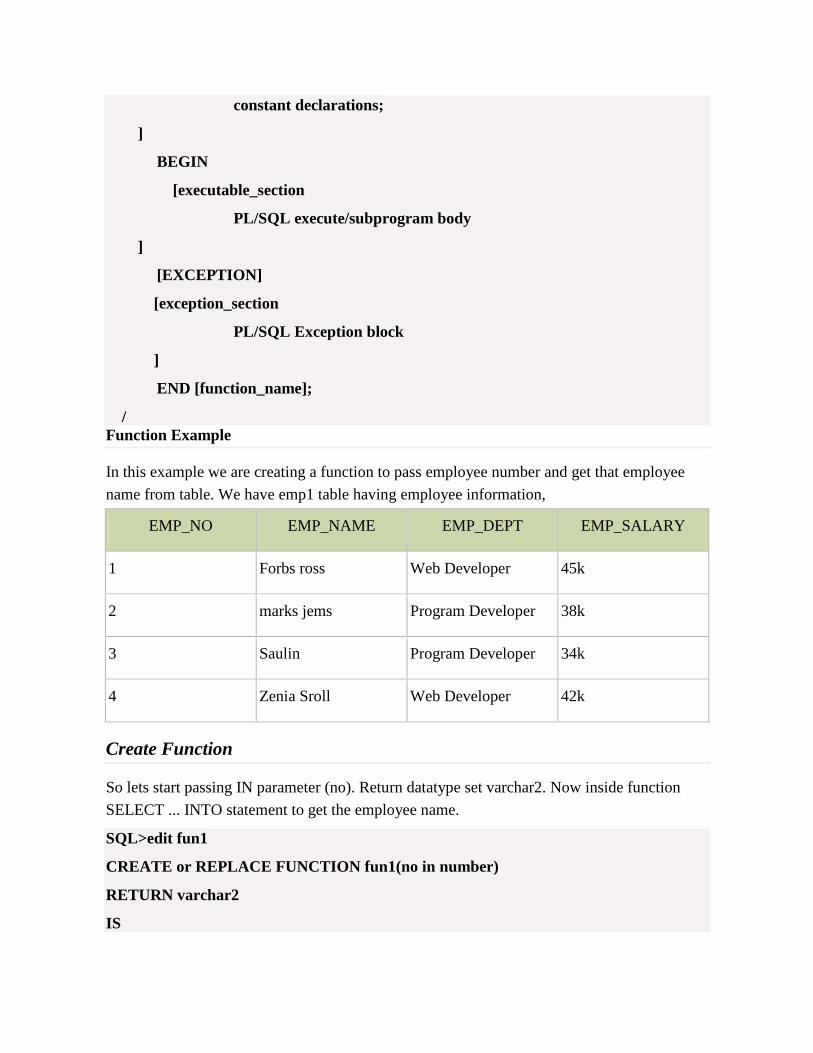
Function Example
In this example we are creating a function to pass employee number and get that employee
name from table. We have emp1 table having employee information,
EMP_NO EMP_NAME EMP_DEPT EMP_SALARY
1 Forbs ross Web Developer 45k
2 marks jems Program Developer 38k
3 Saulin Program Developer 34k
4 Zenia Sroll Web Developer 42k
Create Function
So lets start passing IN parameter (no). Return datatype set varchar2. Now inside function
SELECT ... INTO statement to get the employee name.
SQL>edit fun1
CREATE or REPLACE FUNCTION fun1(no in number)
RETURN varchar2
IS

name varchar2(20);
BEGIN
select ename into name from emp1 where eno = no;
return name;
END;
/
Execute Function
After write the PL/SQL function you need to execute the function.
SQL>@fun1
Function created.
PL/SQL procedure successfully completed.
PL/SQL Program to Calling Function
This program call the above define function with pass employee number and get that
employee name.
SQL>edit fun
DECLARE
no number :=&no;
name varchar2(20);
BEGIN
name := fun1(no);
dbms_output.put_line('Name:'||' '||name);
end;
/
PL/SQL Program Result
SQL>@fun
no number &n=2
Name: marks jems
PL/SQL procedure successfully completed.
PL/SQL Drop Function

You can drop PL/SQL function using DROP FUNCTION statements.
Functions Drop Syntax
DROP FUNCTION function_name;
Functions Drop Example
SQL>DROP FUNCTION fun1;
Function dropped.
PL/SQL Triggers
What is Trigger?
Oracle engine invokes automatically whenever a specified event occurs.
Trigger is stored into database and invoked repeatedly, when specific condition match.
You can change trigger mode activate/deactivate but you can't explicitly run.
Trigger automatically associated with DML statement, when DML statement execute trigger
implicitly execute.
You can create trigger using the CREATE TRIGGER statement. If trigger activated,
implicitly fire DML statement and if trigger deactivated can't fire.
Component of Trigger
Triggering SQL statement : SQL DML (INSERT, UPDATE and DELETE) statement that
execute and implicitly called trigger to execute.
Trigger Action : When the triggering SQL statement is execute, trigger automatically call and
PL/SQL trigger block execute.
Trigger Restriction : We can specify the condition inside trigger to when trigger is fire.
Type of Triggers
1. BEFORE Trigger : BEFORE trigger execute before the triggering DML statement (INSERT,
UPDATE, DELETE) execute. Triggering SQL statement is may or may not execute,
depending on the BEFORE trigger conditions block.
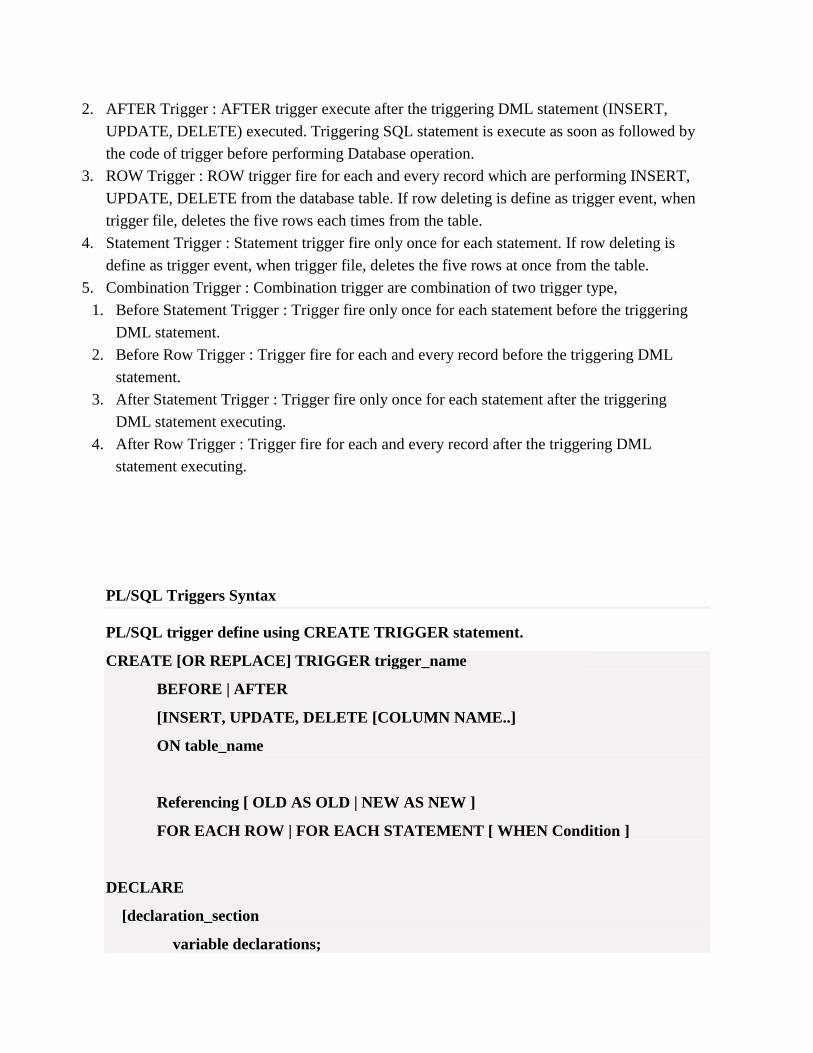
2. AFTER Trigger : AFTER trigger execute after the triggering DML statement (INSERT,
UPDATE, DELETE) executed. Triggering SQL statement is execute as soon as followed by
the code of trigger before performing Database operation.
3. ROW Trigger : ROW trigger fire for each and every record which are performing INSERT,
UPDATE, DELETE from the database table. If row deleting is define as trigger event, when
trigger file, deletes the five rows each times from the table.
4. Statement Trigger : Statement trigger fire only once for each statement. If row deleting is
define as trigger event, when trigger file, deletes the five rows at once from the table.
5. Combination Trigger : Combination trigger are combination of two trigger type,
1. Before Statement Trigger : Trigger fire only once for each statement before the triggering
DML statement.
2. Before Row Trigger : Trigger fire for each and every record before the triggering DML
statement.
3. After Statement Trigger : Trigger fire only once for each statement after the triggering
DML statement executing.
4. After Row Trigger : Trigger fire for each and every record after the triggering DML
statement executing.
PL/SQL Triggers Syntax
PL/SQL trigger define using CREATE TRIGGER statement.
CREATE [OR REPLACE] TRIGGER trigger_name
BEFORE | AFTER
[INSERT, UPDATE, DELETE [COLUMN NAME..]
ON table_name
Referencing [ OLD AS OLD | NEW AS NEW ]
FOR EACH ROW | FOR EACH STATEMENT [ WHEN Condition ]
DECLARE
[declaration_section
variable declarations;

constant declarations;
]
BEGIN
[executable_section
PL/SQL execute/subprogram body
]
EXCEPTION
[exception_section
PL/SQL Exception block
]
END;
Syntax Description
1. CREATE [OR REPLACE] TRIGGER trigger_name : Create a trigger with the given name. If
already have overwrite the existing trigger with defined same name.
2. BEFORE | AFTER : Indicates when the trigger get fire. BEFORE trigger execute before
when statement execute before. AFTER trigger execute after the statement execute.
3. [INSERT, UPDATE, DELETE [COLUMN NAME..] : Determines the performing trigger
event. You can define more then one triggering event separated by OR keyword.
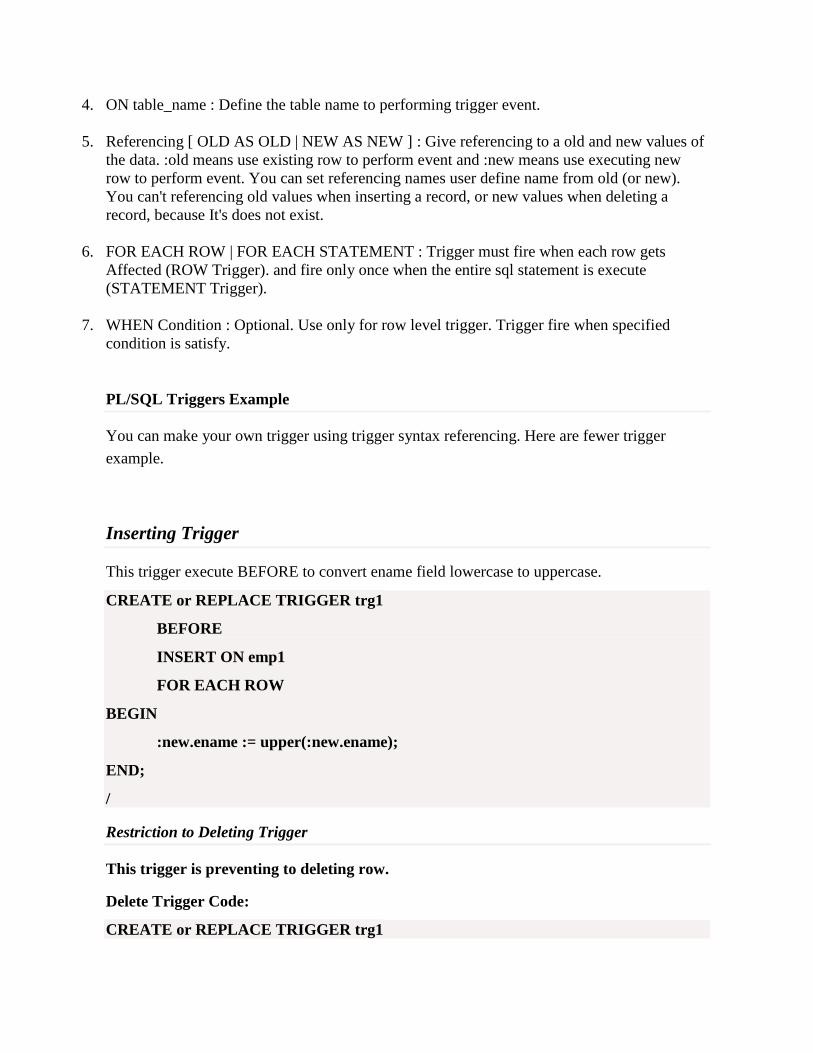
4. ON table_name : Define the table name to performing trigger event.
5. Referencing [ OLD AS OLD | NEW AS NEW ] : Give referencing to a old and new values of
the data. :old means use existing row to perform event and :new means use executing new
row to perform event. You can set referencing names user define name from old (or new).
You can't referencing old values when inserting a record, or new values when deleting a
record, because It's does not exist.
6. FOR EACH ROW | FOR EACH STATEMENT : Trigger must fire when each row gets
Affected (ROW Trigger). and fire only once when the entire sql statement is execute
(STATEMENT Trigger).
7. WHEN Condition : Optional. Use only for row level trigger. Trigger fire when specified
condition is satisfy.
PL/SQL Triggers Example
You can make your own trigger using trigger syntax referencing. Here are fewer trigger
example.
Inserting Trigger
This trigger execute BEFORE to convert ename field lowercase to uppercase.
CREATE or REPLACE TRIGGER trg1
BEFORE
INSERT ON emp1
FOR EACH ROW
BEGIN
:new.ename := upper(:new.ename);
END;
/
Restriction to Deleting Trigger
This trigger is preventing to deleting row.
Delete Trigger Code:
CREATE or REPLACE TRIGGER trg1
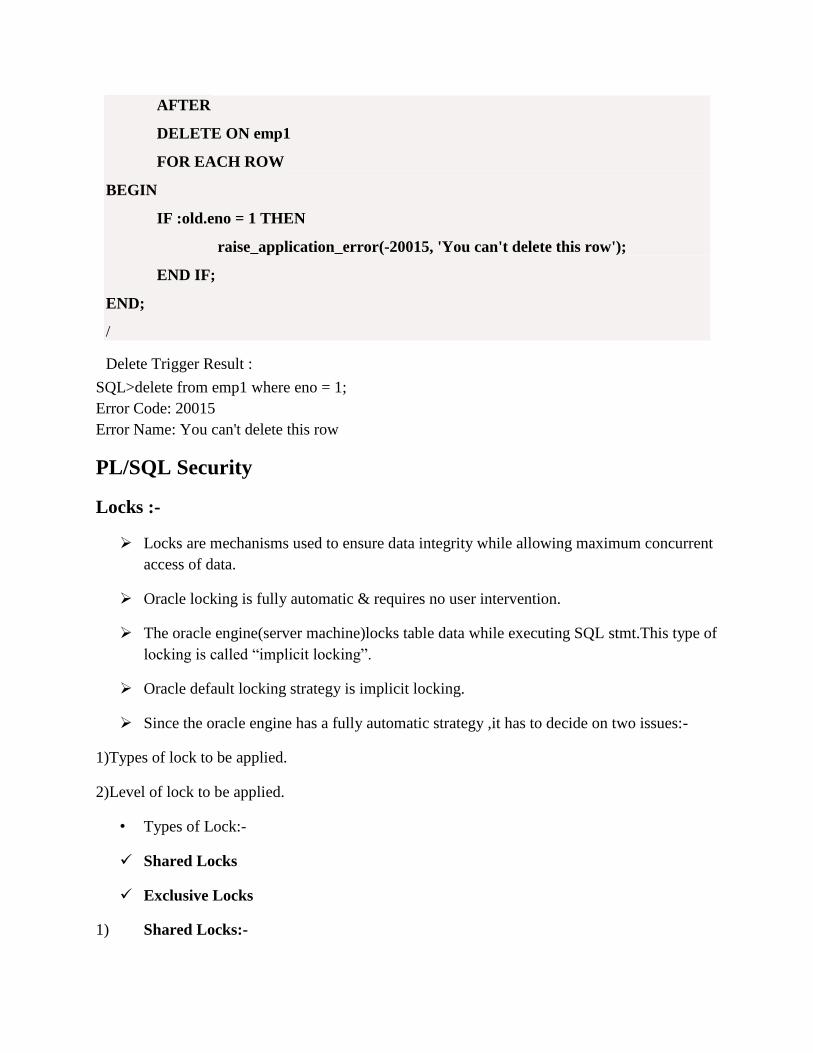
AFTER
DELETE ON emp1
FOR EACH ROW
BEGIN
IF :old.eno = 1 THEN
raise_application_error(-20015, 'You can't delete this row');
END IF;
END;
/
Delete Trigger Result :
SQL>delete from emp1 where eno = 1;
Error Code: 20015
Error Name: You can't delete this row
PL/SQL Security
Locks :-
Locks are mechanisms used to ensure data integrity while allowing maximum concurrent
access of data.
Oracle locking is fully automatic & requires no user intervention.
The oracle engine(server machine)locks table data while executing SQL stmt.This type of
locking is called “implicit locking”.
Oracle default locking strategy is implicit locking.
Since the oracle engine has a fully automatic strategy ,it has to decide on two issues:-
1)Types of lock to be applied.
2)Level of lock to be applied.
• Types of Lock:-
Shared Locks
Exclusive Locks
1) Shared Locks:-

a)Shared locks are placed on resource whenever a READ operation(select)is performed.
b)Multiple shared locks can be simultaneously set on a resource.
2) Exclusive Locks:-
a)Exclusive locks are placed on resource whenever WRITE operations (Insert, Update &
Delete) are performed.
b)Only 1 exclusive lock can be placed on a resource at a time.
• Level Of Locks:-
A table can be decomposed into rows & a row can be further decomposed into fields.
1)Row Level
2)Page Level
3)Table Level
1)Row Level:-If the Where clause evaluates to only one row in the table.
2)Page Level:- If the Where clause evaluates to a set of data.
3)Table Level:- If there is no Where clause(i.e. the query accesses the entire table).
• Explicit Locking:-
The technique of lock taken on a table or its resources by a user is called “Explicit Locking”.
Who can Explicitly Lock?
Users can lock tables they own or any table on which they have been granted table
privilege(select ,insert, update , delete)
Table or rows can be explicitly locked by using either the select …for update stmt. Or Lock table
stmt.
The select …. For Update statement:-
This clause is generally used to signal the oracle engine that data currently being used needs to
be updated.

Example
LOCK TABLE employees IN EXCLUSIVE MODE NOWAIT;
Output:-
Table Locked.
Releasing locks:-
All locks are released under the following circumstances:
1)The transaction is committed successfully.
2)A rollback is performed
3)A rollback to a savepoint will release locks set after the
specified savepoint.
Note:- commit:-Save Work done.
Savepoint: Identify a point in a transaction to which you can later rollback.
Rollback: Restore database to original since the last COMMIT
GRANT/REVOKE: Grant or back permission to or from the oracle users.
Example
SQL> lock table emp in share mode;
Table(s) Locked.
SQL> update emp set sal=sal+10;
14 rows updated.