Pins & Bonded Amalgam
65
-
Upload
jitender-reddy -
Category
Documents
-
view
172 -
download
2
Transcript of Pins & Bonded Amalgam
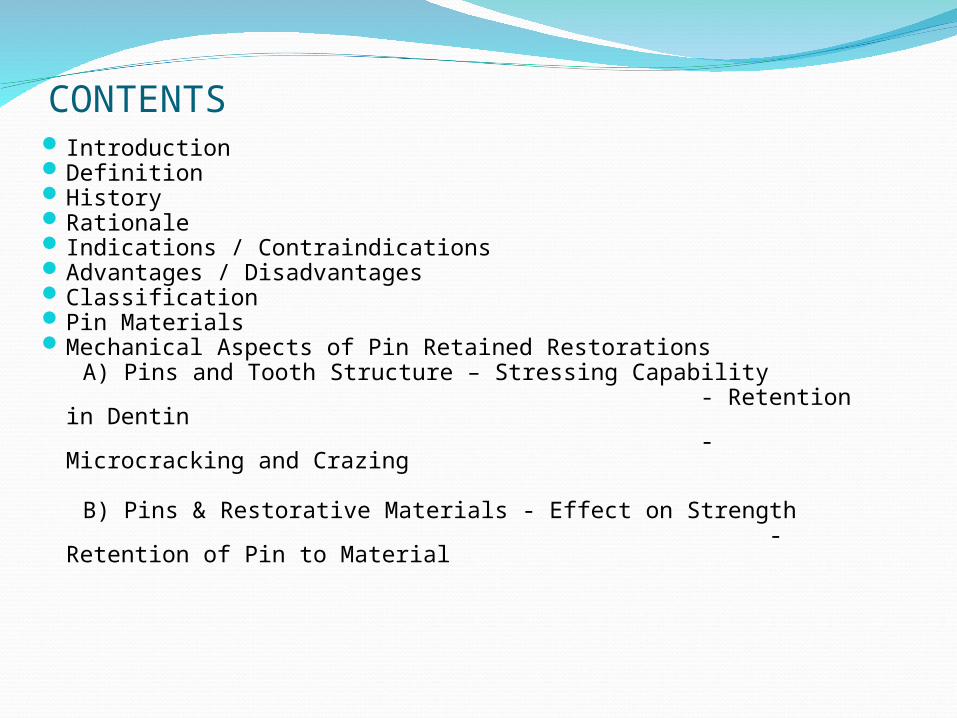
CONTENTS IntroductionDefinitionHistoryRationale Indications / ContraindicationsAdvantages / DisadvantagesClassificationPin MaterialsMechanical Aspects of Pin Retained Restorations A) Pins and Tooth Structure – Stressing Capability - Retention in Dentin - Microcracking and Crazing
B) Pins & Restorative Materials - Effect on Strength - Retention of Pin to Material
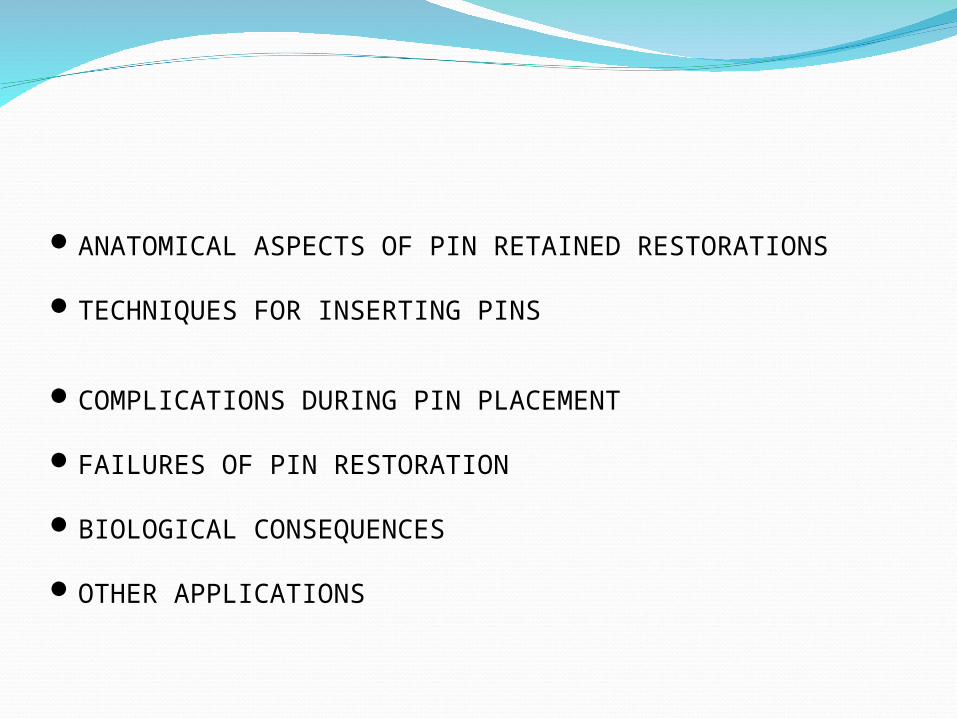
ANATOMICAL ASPECTS OF PIN RETAINED RESTORATIONS
TECHNIQUES FOR INSERTING PINS COMPLICATIONS DURING PIN PLACEMENT
FAILURES OF PIN RESTORATION
BIOLOGICAL CONSEQUENCES
OTHER APPLICATIONS
INTRODUCTION
The operative dentist is confronted with restoration of extensively damaged teeth in routine. Many a times, the damage, which may be because of caries or fracture, involves half or more than half of the tooth structure and the remaining tooth structure is not sufficient enough to retain the restoration. Use of Pins has been tried to achieve required retention in such teeth.
DEFINITION
Pin retained restoration :-Any restoration requiring the placement of one or more Pins in the dentin to provide adequate resistance and retention forms.
Pins :- A small rod that fits into a channel drilled into dentin away from the pulp space.
Other names – Dentinal Pin / Parapulpal Pin
HISTORY
Burgess first to consider Pin retention in 1915
RATIONALE
Support the restorative material ( Retention form )
Resist their dislodgement in teeth that have been severely damaged ( Resistance form )
Cavity preparation can also be limited to only damaged surfaces thereby preserving Esthetics and Contours
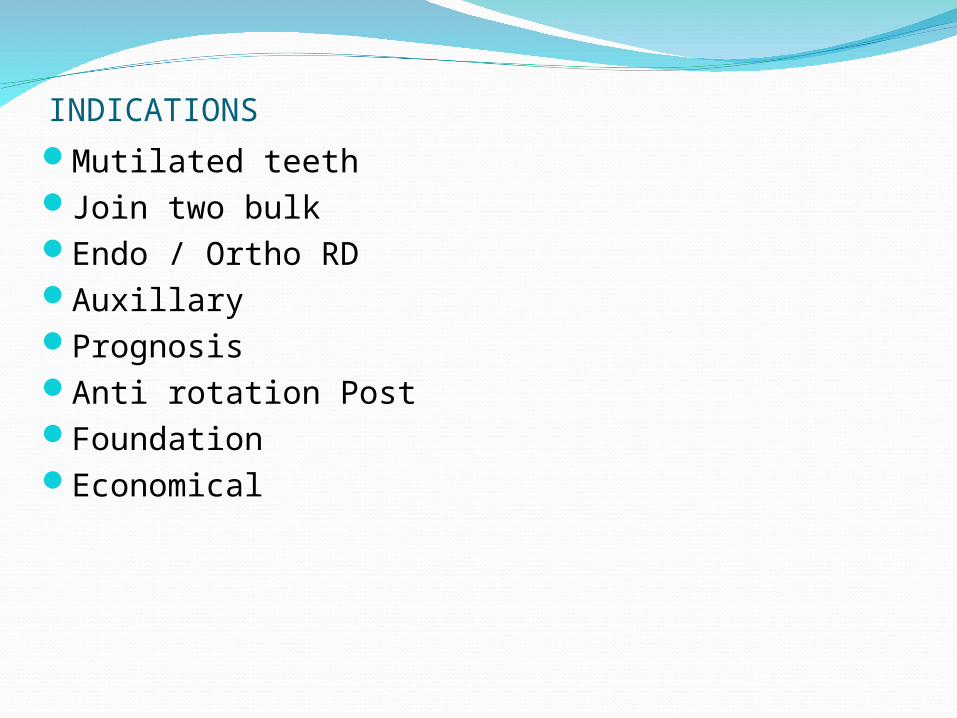
INDICATIONSMutilated teethJoin two bulkEndo / Ortho RDAuxillaryPrognosisAnti rotation PostFoundationEconomical
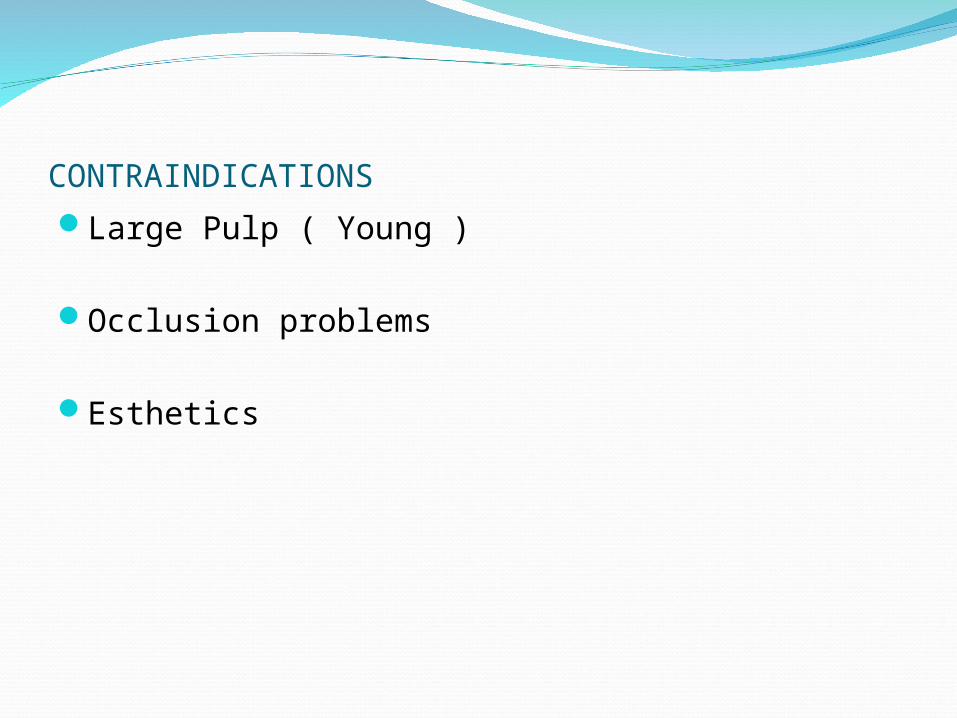
CONTRAINDICATIONS
Large Pulp ( Young )
Occlusion problems
Esthetics
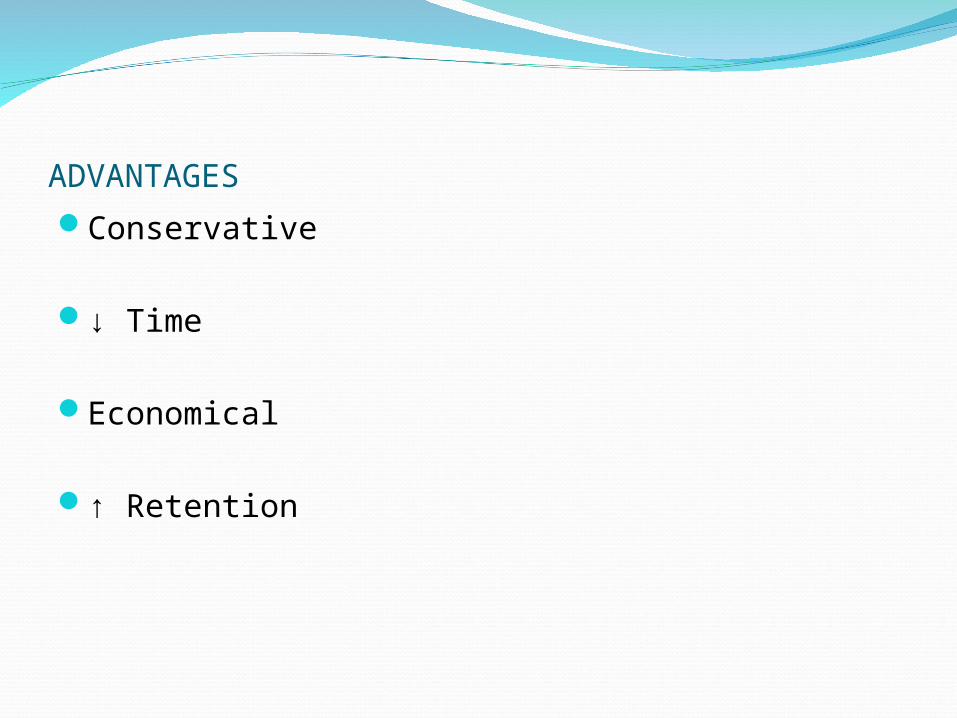
ADVANTAGES
Conservative
↓ Time
Economical
↑ Retention
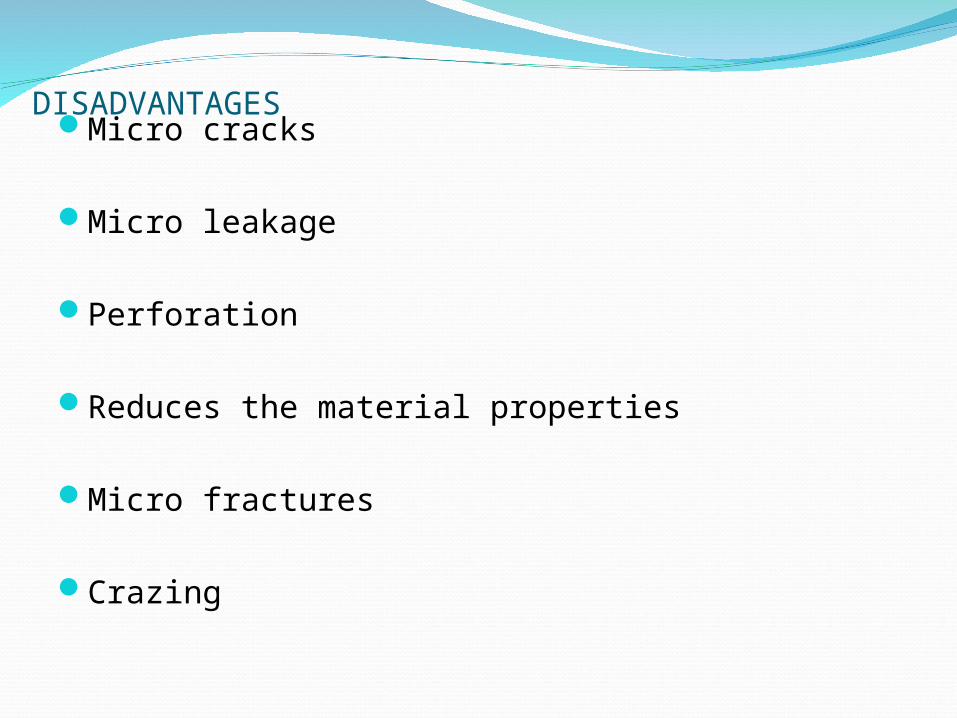
DISADVANTAGESMicro cracks
Micro leakage
Perforation
Reduces the material properties
Micro fractures
Crazing
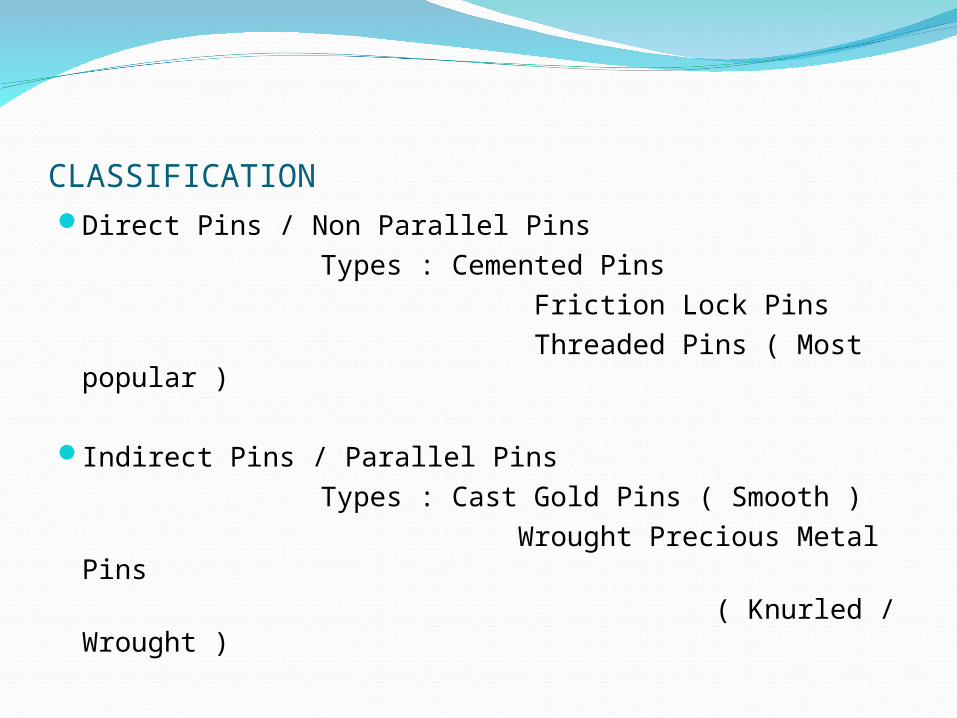
CLASSIFICATION
Direct Pins / Non Parallel Pins Types : Cemented Pins Friction Lock Pins Threaded Pins ( Most popular ) Indirect Pins / Parallel Pins Types : Cast Gold Pins ( Smooth ) Wrought Precious Metal Pins ( Knurled / Wrought )
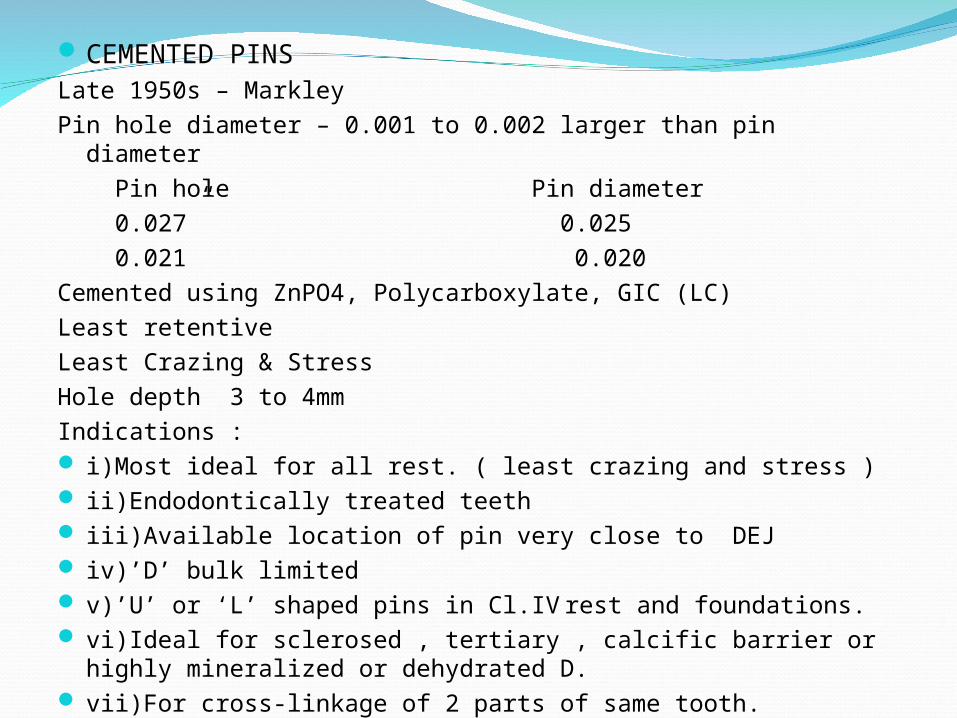
CEMENTED PINSLate 1950s – MarkleyPin hole diameter – 0.001 to 0.002 larger than pin diameter Pin hole Pin diameter 0.027” 0.025 0.021 0.020Cemented using ZnPO4, Polycarboxylate, GIC (LC)Least retentiveLeast Crazing & StressHole depth 3 to 4mmIndications : i)Most ideal for all rest. ( least crazing and stress ) ii)Endodontically treated teeth iii)Available location of pin very close to DEJ iv)’D’ bulk limited v)’U’ or ‘L’ shaped pins in Cl.IV rest and foundations. vi)Ideal for sclerosed , tertiary , calcific barrier or highly
mineralized or dehydrated D. vii)For cross-linkage of 2 parts of same tooth.
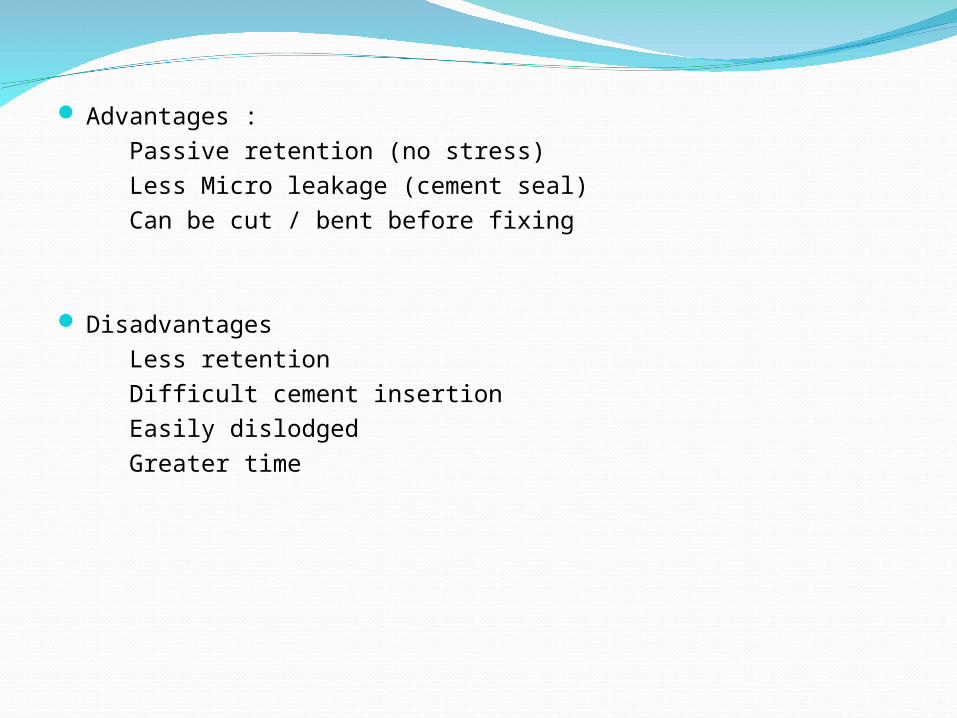
Advantages : Passive retention (no stress) Less Micro leakage (cement seal) Can be cut / bent before fixing
Disadvantages Less retention Difficult cement insertion Easily dislodged Greater time
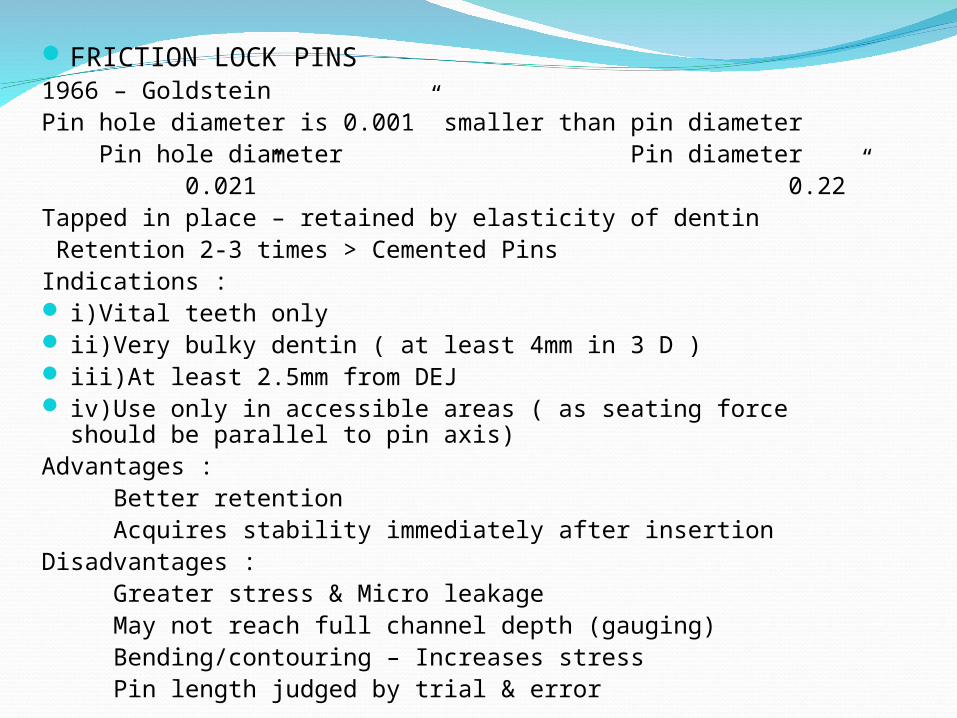
FRICTION LOCK PINS1966 – GoldsteinPin hole diameter is 0.001” smaller than pin diameter Pin hole diameter Pin diameter 0.021” 0.22”Tapped in place – retained by elasticity of dentin Retention 2-3 times > Cemented PinsIndications : i)Vital teeth only ii)Very bulky dentin ( at least 4mm in 3 D ) iii)At least 2.5mm from DEJ iv)Use only in accessible areas ( as seating force should be parallel
to pin axis)Advantages : Better retention Acquires stability immediately after insertionDisadvantages : Greater stress & Micro leakage May not reach full channel depth (gauging) Bending/contouring – Increases stress Pin length judged by trial & error
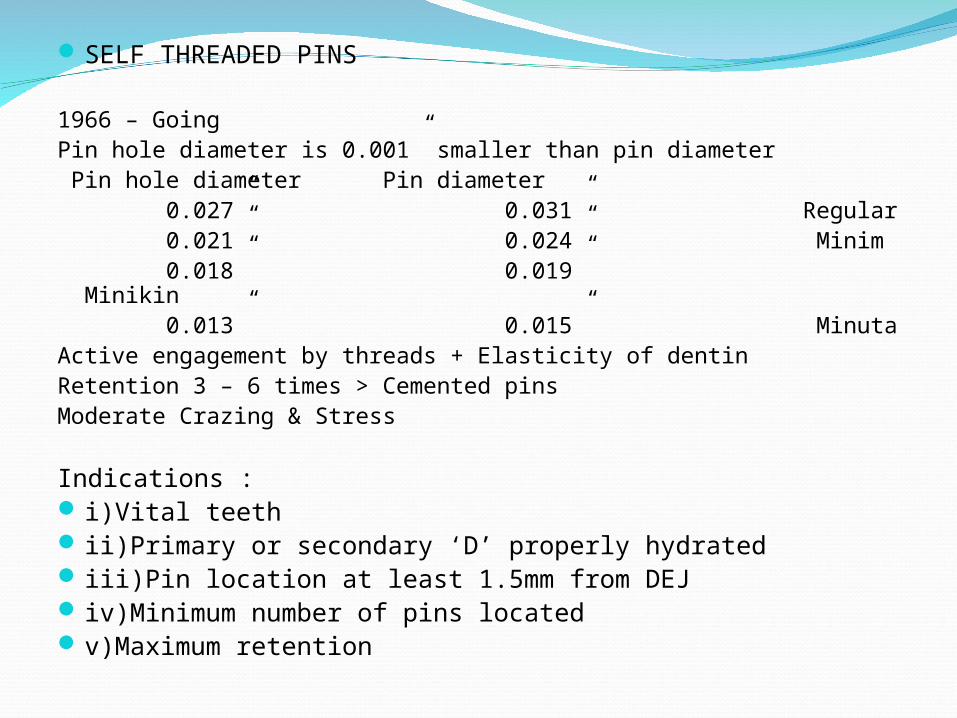
SELF THREADED PINS
1966 – GoingPin hole diameter is 0.001” smaller than pin diameter Pin hole diameter Pin diameter 0.027” 0.031” Regular 0.021” 0.024” Minim 0.018” 0.019” Minikin 0.013” 0.015” MinutaActive engagement by threads + Elasticity of dentinRetention 3 – 6 times > Cemented pinsModerate Crazing & Stress
Indications : i)Vital teeth ii)Primary or secondary ‘D’ properly hydrated iii)Pin location at least 1.5mm from DEJ iv)Minimum number of pins located v)Maximum retention
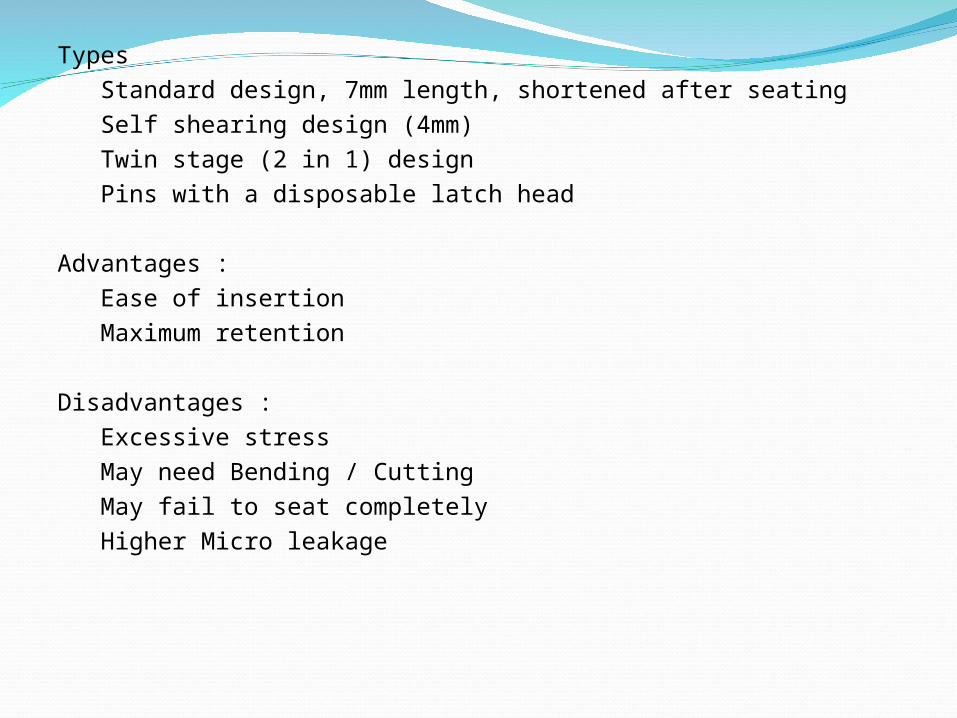
Types Standard design, 7mm length, shortened after seating Self shearing design (4mm) Twin stage (2 in 1) design Pins with a disposable latch head
Advantages : Ease of insertion Maximum retention
Disadvantages : Excessive stress May need Bending / Cutting May fail to seat completely Higher Micro leakage
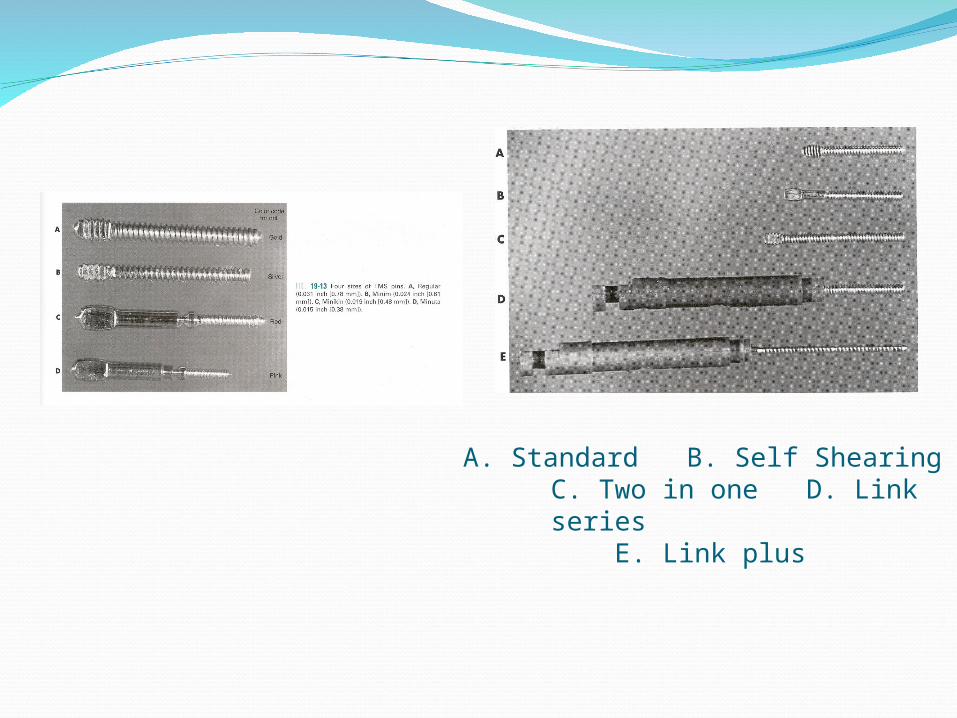
A. Standard B. Self Shearing C. Two in one D. Link series E. Link plus
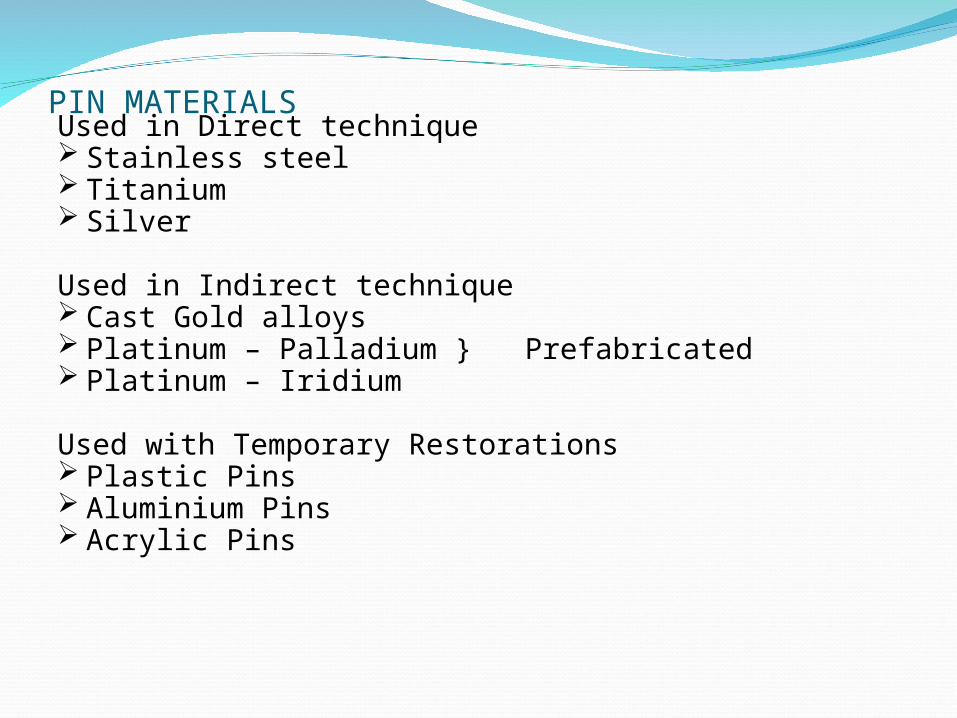
PIN MATERIALSUsed in Direct technique Stainless steel Titanium Silver
Used in Indirect technique Cast Gold alloys Platinum – Palladium } Prefabricated Platinum – Iridium Used with Temporary Restorations Plastic Pins Aluminium Pins Acrylic Pins
MECHANICAL ASPECTS OF PIN RETAINED
RESTORATIONS
PINS AND TOOTH STRUCTURES
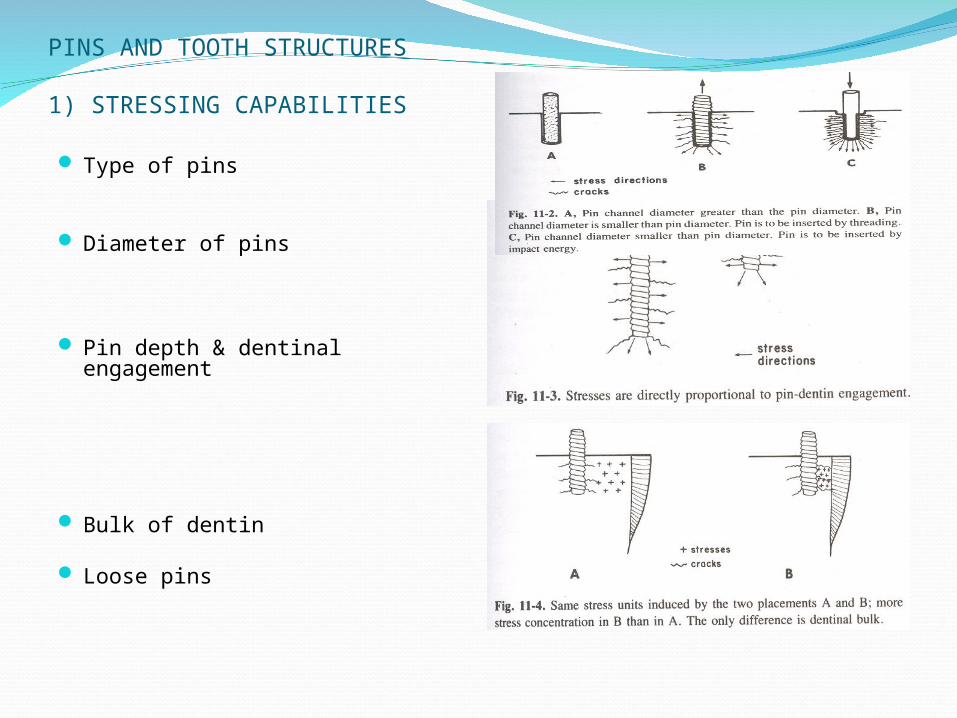
1) STRESSING CAPABILITIES
Type of pins
Diameter of pins
Pin depth & dentinal engagement
Bulk of dentin
Loose pins
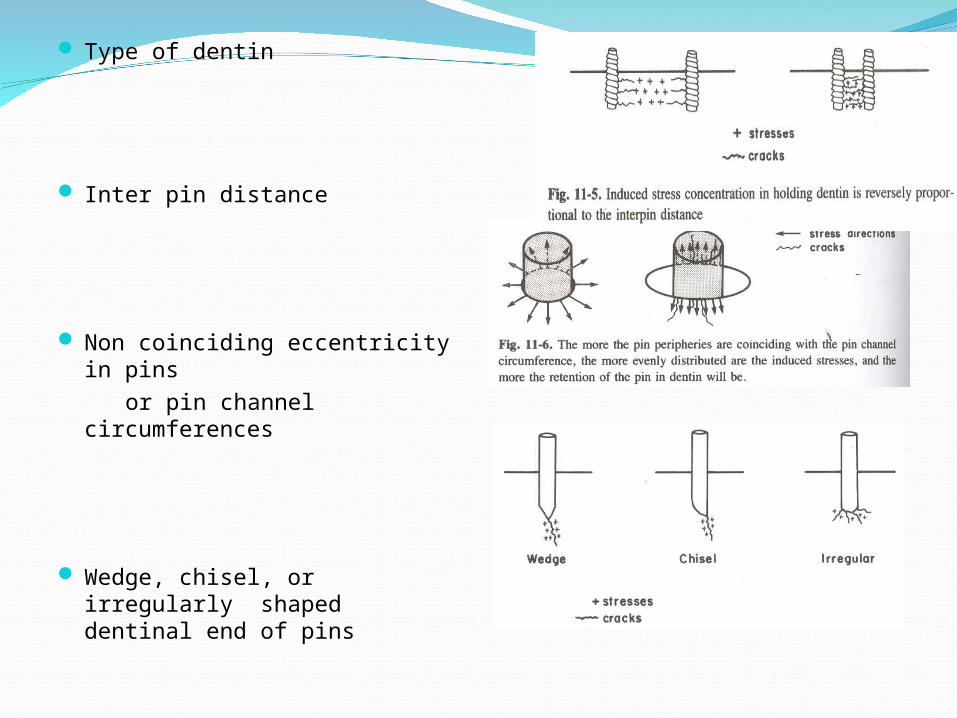
Type of dentin
Inter pin distance
Non coinciding eccentricity in pins
or pin channel circumferences
Wedge, chisel, or irregularly shaped dentinal end of pins
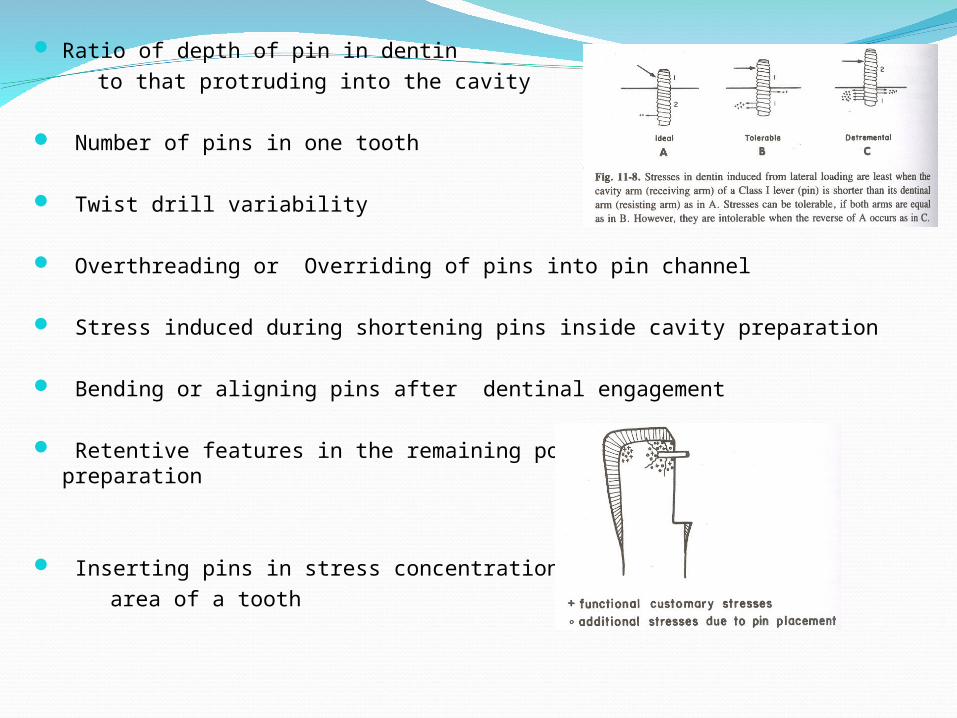
Ratio of depth of pin in dentin to that protruding into the cavity Number of pins in one tooth
Twist drill variability
Overthreading or Overriding of pins into pin channel
Stress induced during shortening pins inside cavity preparation
Bending or aligning pins after dentinal engagement
Retentive features in the remaining portion of the cavity preparation
Inserting pins in stress concentration area of a tooth
2) RETENTION IN DENTINType of Pins
Depth of engagement in dentin
Pin channel circumference shape relative to that of
Pin
Number of Pins
Type of Cement
Type of involved of Dentin
Surface roughness of Pins
Ratio of dentinal engagement of pins to their protruding lengths in the cavity
Mode of shortening the pins after insertion
Bulk of dentin around Pin
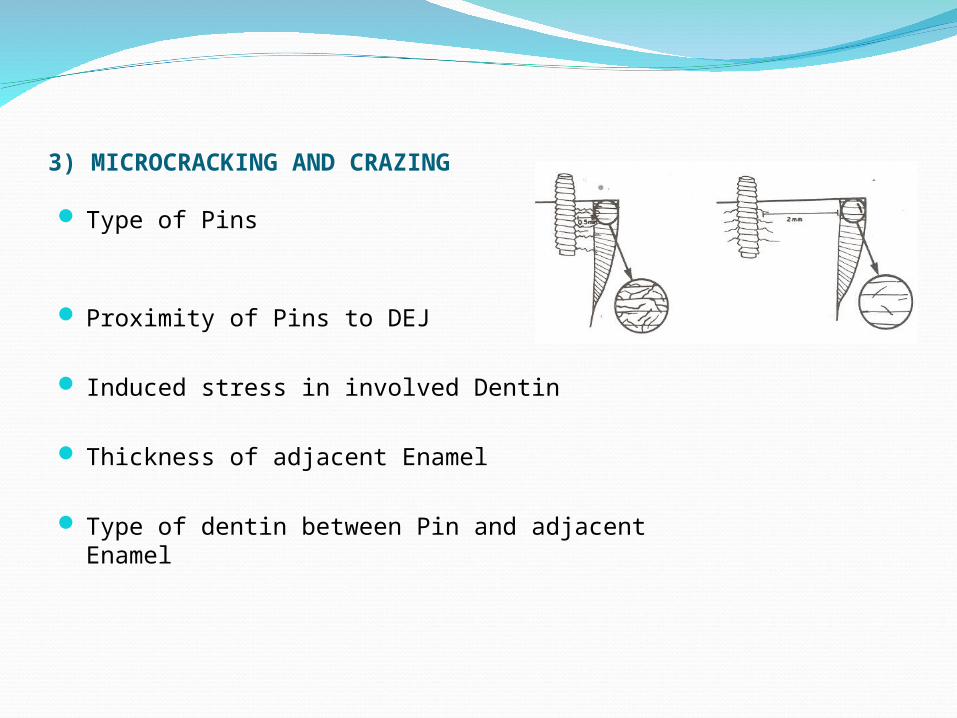
3) MICROCRACKING AND CRAZING
Type of Pins
Proximity of Pins to DEJ
Induced stress in involved Dentin
Thickness of adjacent Enamel
Type of dentin between Pin and adjacent Enamel
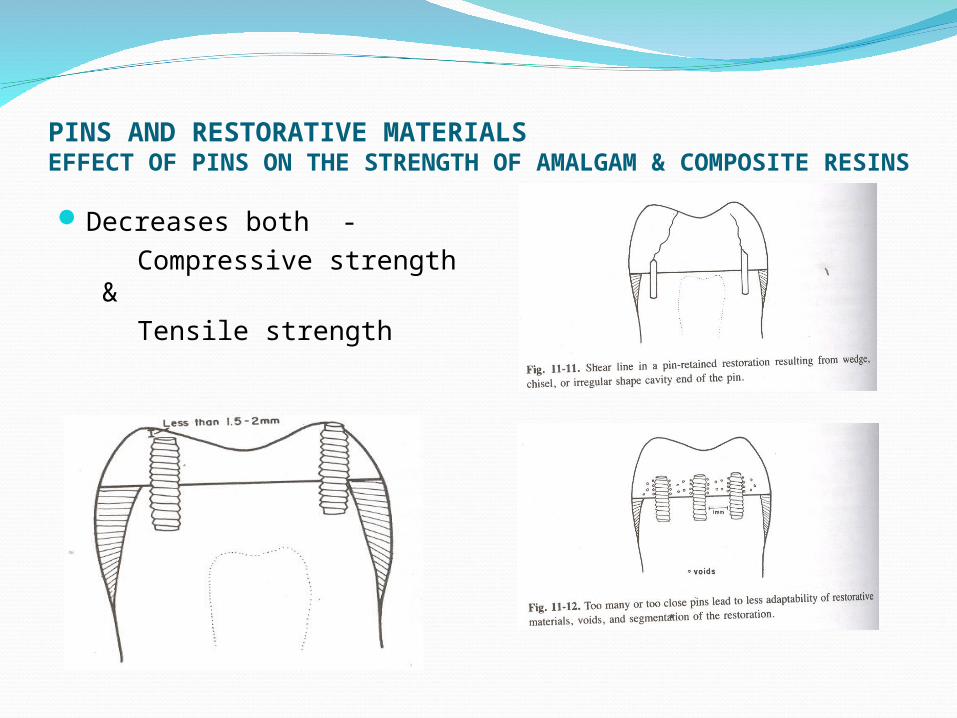
PINS AND RESTORATIVE MATERIALSEFFECT OF PINS ON THE STRENGTH OF AMALGAM & COMPOSITE RESINS
Decreases both - Compressive strength & Tensile strength
RETENTION OF PINS TO RESTORATIVE MATERIALSType of Pin
Pin length in restorative material
Pin diameter
Inter Pin distance
Proximity of restorative material to Pin surface
Surface material of Pins
Bending of Pins
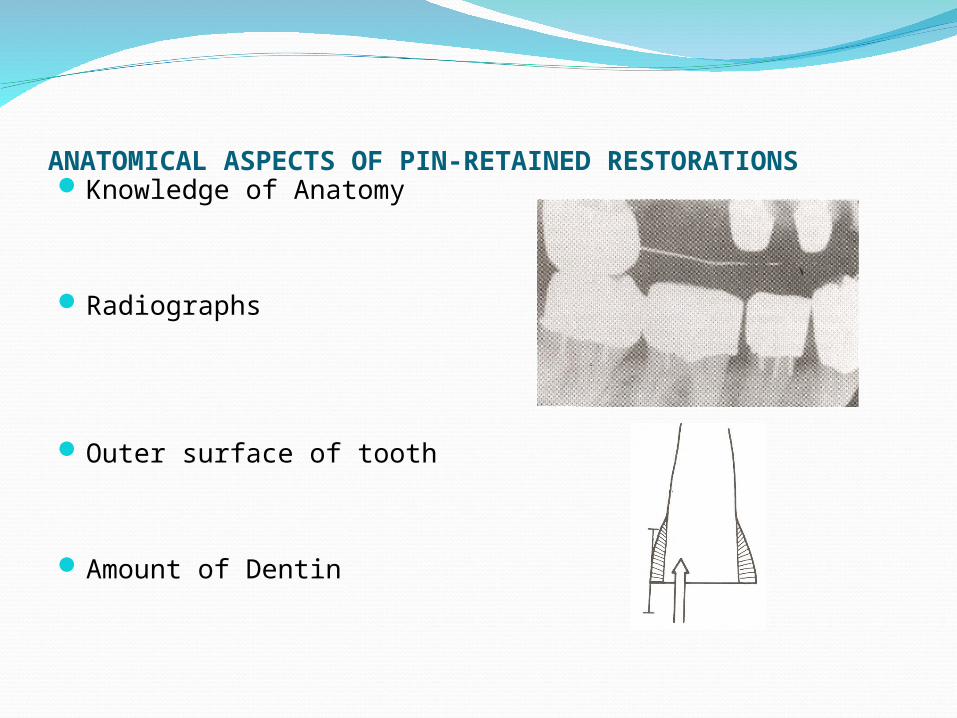
ANATOMICAL ASPECTS OF PIN-RETAINED RESTORATIONSKnowledge of Anatomy
Radiographs
Outer surface of tooth
Amount of Dentin
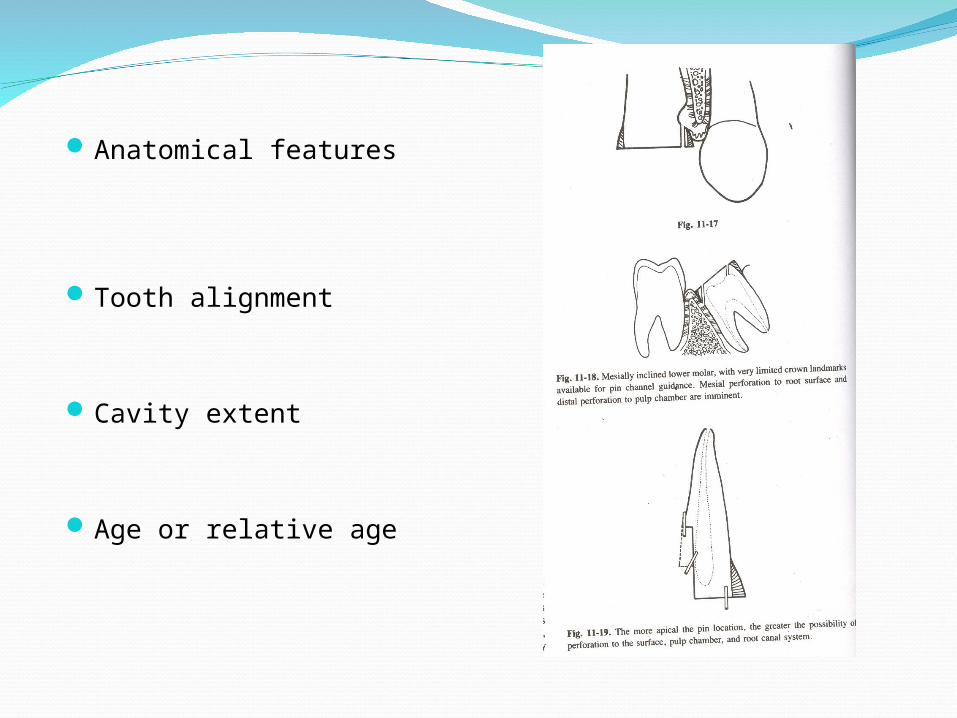
Anatomical features
Tooth alignment
Cavity extent
Age or relative age
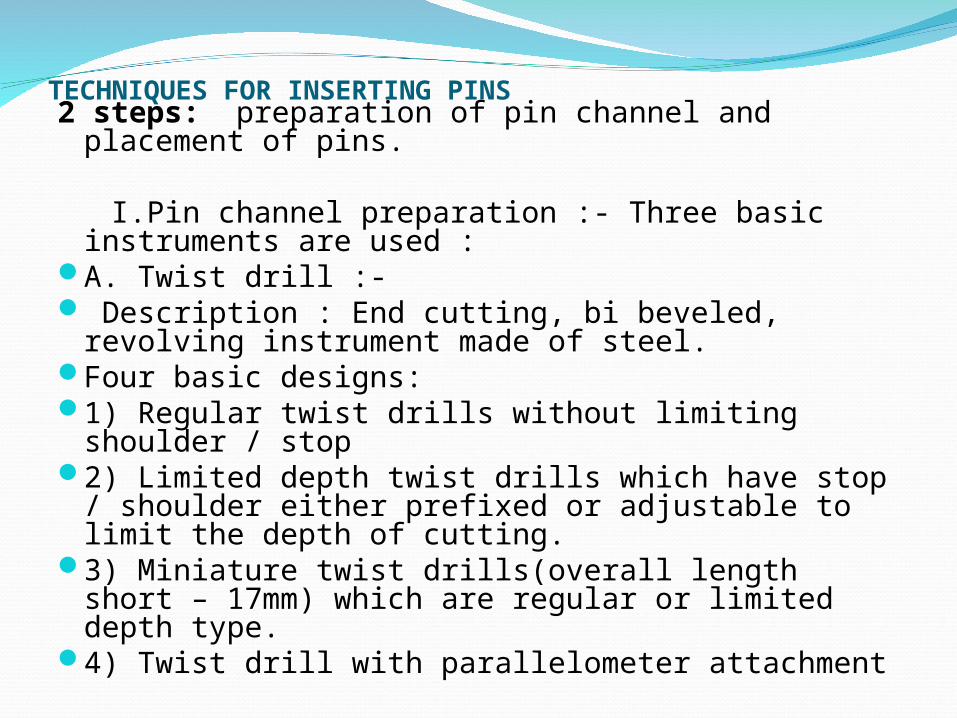
TECHNIQUES FOR INSERTING PINS2 steps: preparation of pin channel and placement
of pins.
I.Pin channel preparation :- Three basic instruments are used :
A. Twist drill :- Description : End cutting, bi beveled, revolving
instrument made of steel. Four basic designs:1) Regular twist drills without limiting shoulder /
stop2) Limited depth twist drills which have stop /
shoulder either prefixed or adjustable to limit the depth of cutting.
3) Miniature twist drills(overall length short – 17mm) which are regular or limited depth type.
4) Twist drill with parallelometer attachment
Rules :-1) Ultra low speed ( 300 to 500 rpm )2) Should be revolving while inside the pin
channel3) Do not use pumping strokes4) Never use in enamel – causes drill fractureUsed in direct cutting strokes
B. Number 1, 2, or 3 round burs – Used to establish the lead / pilot holes in enamel
C. Measuring probes or depth gauge
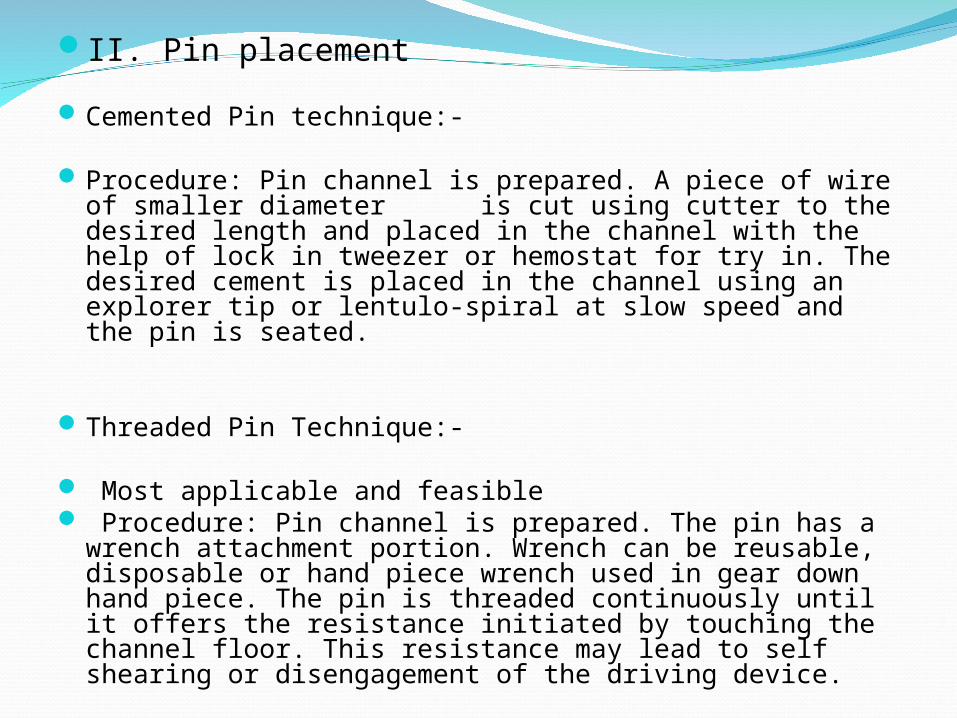
II. Pin placement
Cemented Pin technique:-
Procedure: Pin channel is prepared. A piece of wire of smaller diameter is cut using cutter to the desired length and placed in the channel with the help of lock in tweezer or hemostat for try in. The desired cement is placed in the channel using an explorer tip or lentulo-spiral at slow speed and the pin is seated.
Threaded Pin Technique:-
Most applicable and feasible Procedure: Pin channel is prepared. The pin has a wrench
attachment portion. Wrench can be reusable, disposable or hand piece wrench used in gear down hand piece. The pin is threaded continuously until it offers the resistance initiated by touching the channel floor. This resistance may lead to self shearing or disengagement of the driving device.

Hand Wrenches for TMS Pins
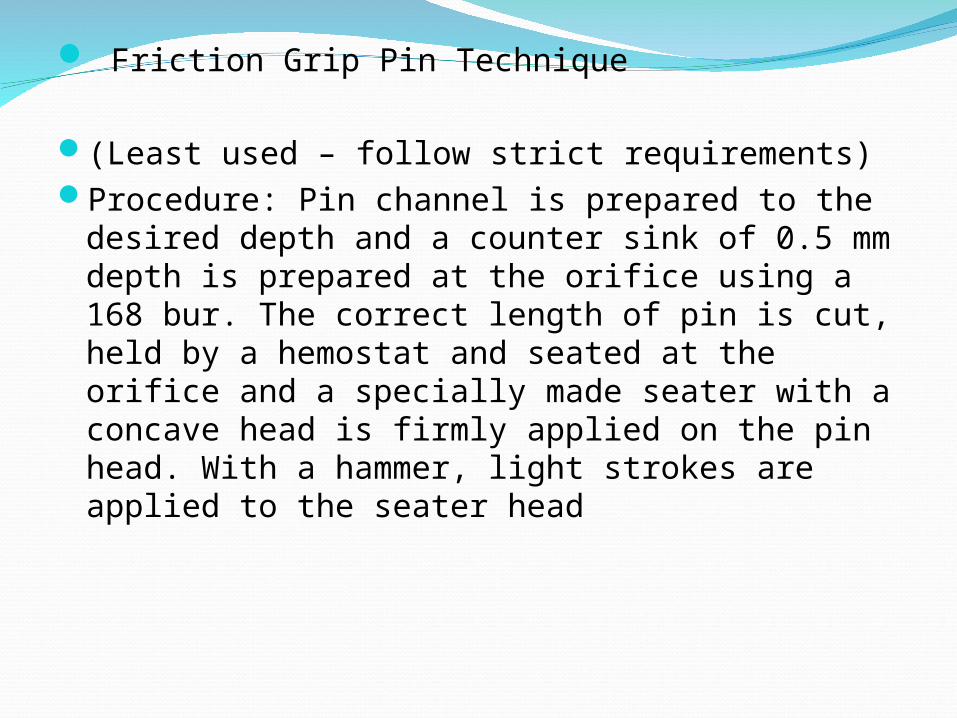
Friction Grip Pin Technique
(Least used – follow strict requirements)Procedure: Pin channel is prepared to the desired
depth and a counter sink of 0.5 mm depth is prepared at the orifice using a 168 bur. The correct length of pin is cut, held by a hemostat and seated at the orifice and a specially made seater with a concave head is firmly applied on the pin head. With a hammer, light strokes are applied to the seater head
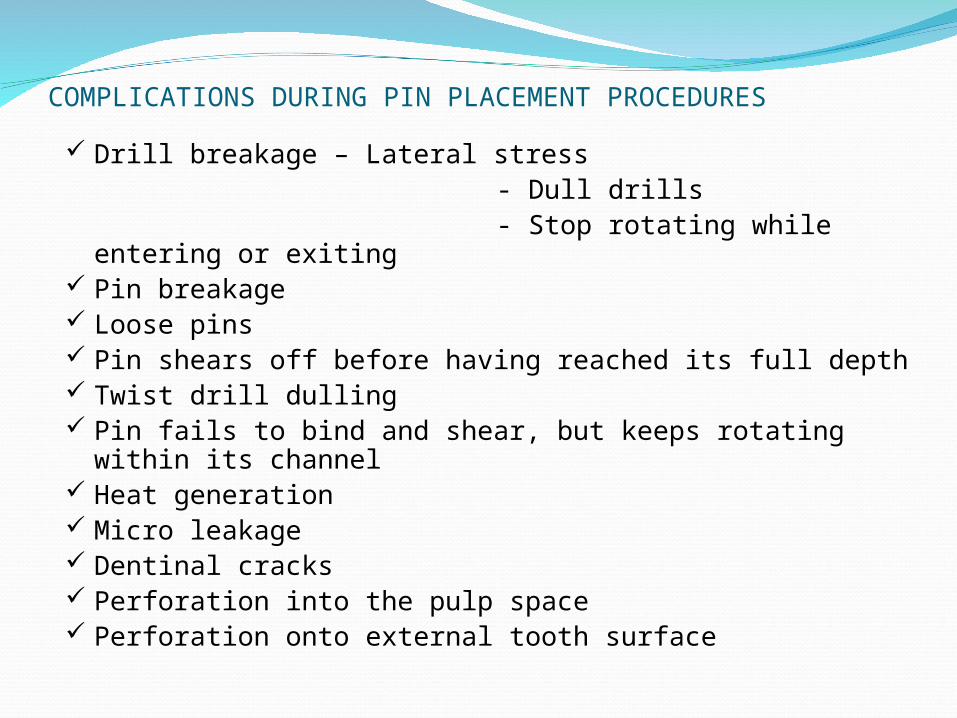
COMPLICATIONS DURING PIN PLACEMENT PROCEDURES
Drill breakage – Lateral stress - Dull drills - Stop rotating while entering or exiting Pin breakage Loose pins Pin shears off before having reached its full depth Twist drill dulling Pin fails to bind and shear, but keeps rotating within its
channel Heat generation Micro leakage Dentinal cracks Perforation into the pulp space Perforation onto external tooth surface
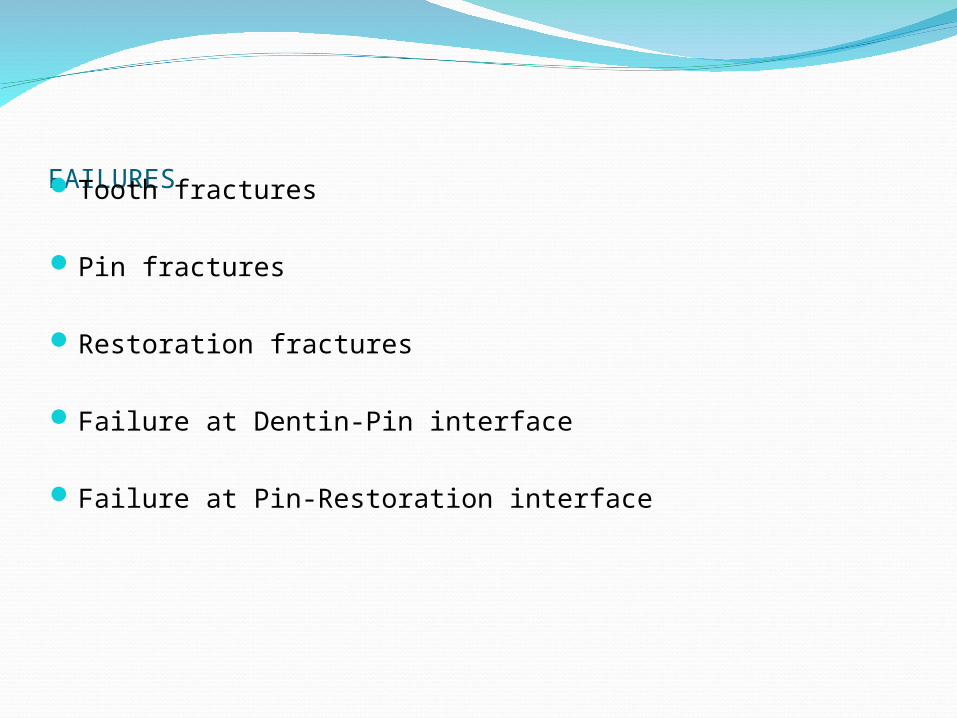
FAILURESTooth fractures
Pin fractures
Restoration fractures
Failure at Dentin-Pin interface
Failure at Pin-Restoration interface
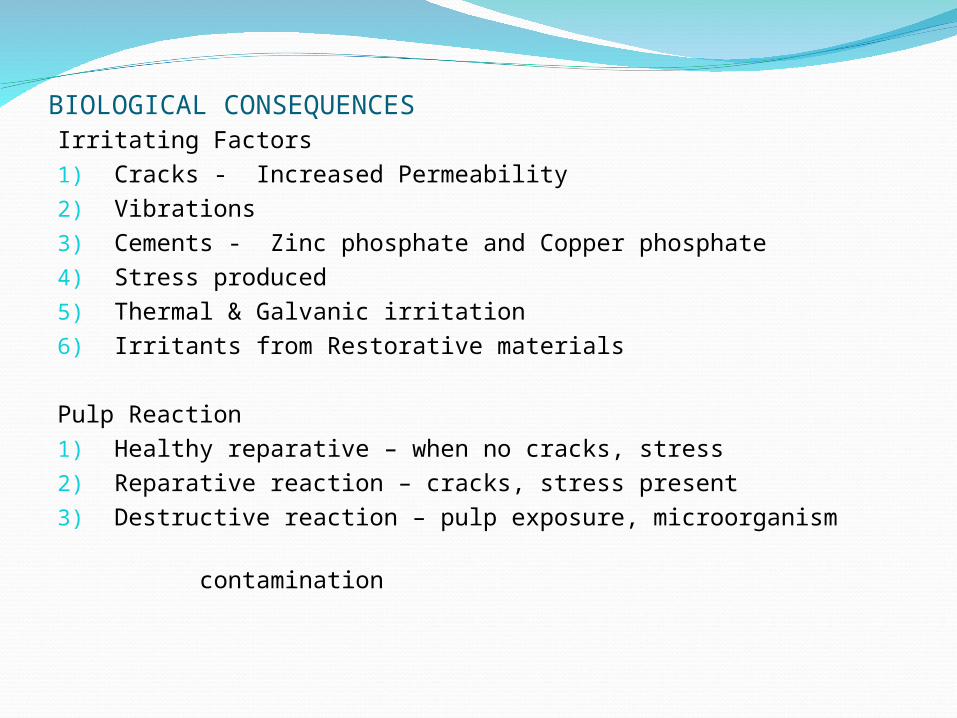
BIOLOGICAL CONSEQUENCESIrritating Factors1) Cracks - Increased Permeability2) Vibrations3) Cements - Zinc phosphate and Copper phosphate4) Stress produced 5) Thermal & Galvanic irritation6) Irritants from Restorative materials
Pulp Reaction1) Healthy reparative – when no cracks, stress2) Reparative reaction – cracks, stress present3) Destructive reaction – pulp exposure, microorganism contamination
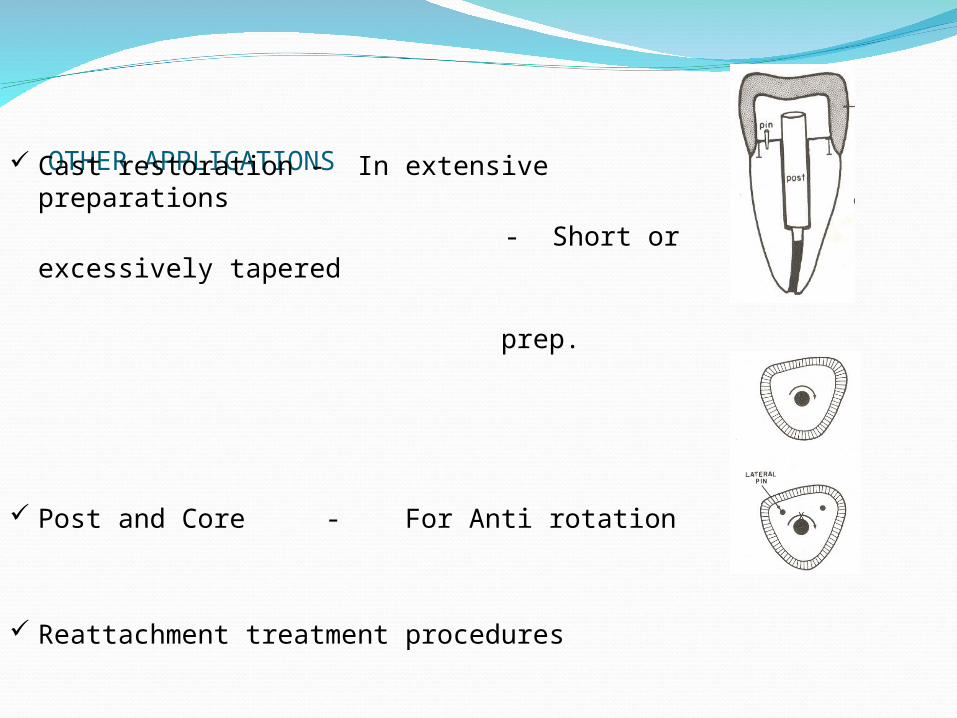
OTHER APPLICATIONS Cast restoration - In extensive preparations - Short or excessively tapered
prep.
Post and Core - For Anti rotation
Reattachment treatment procedures
Universally accepted and less technique sensitive
Controlled & predictable clinical performance
InexpensiveSelf – sealing marginsLess amount of training & skill requiredEase of use


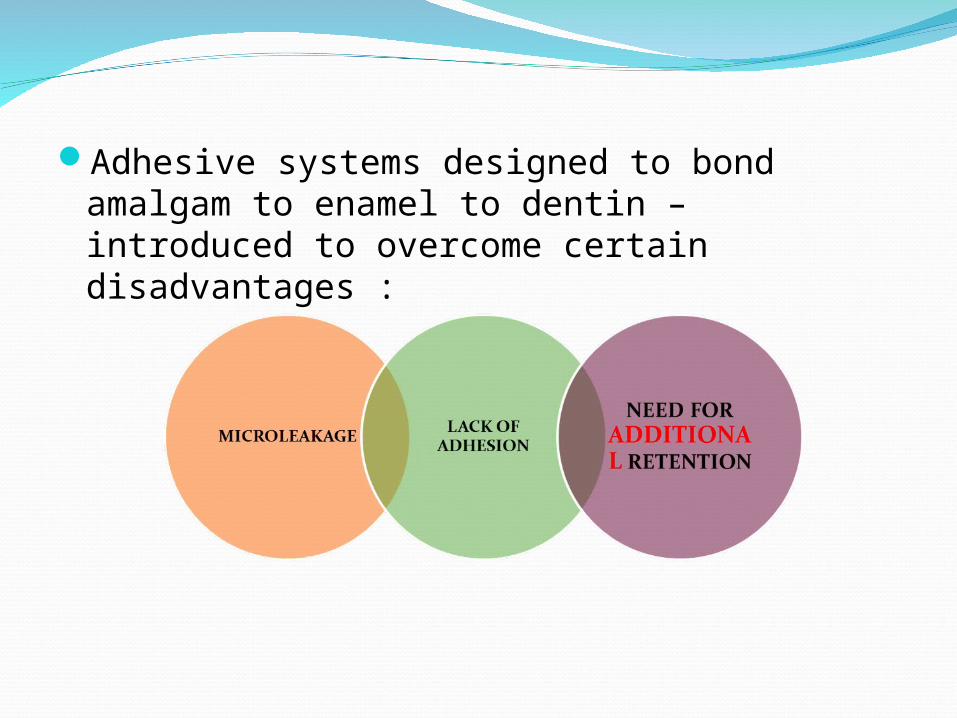
Adhesive systems designed to bond amalgam to enamel to dentin – introduced to overcome certain disadvantages :
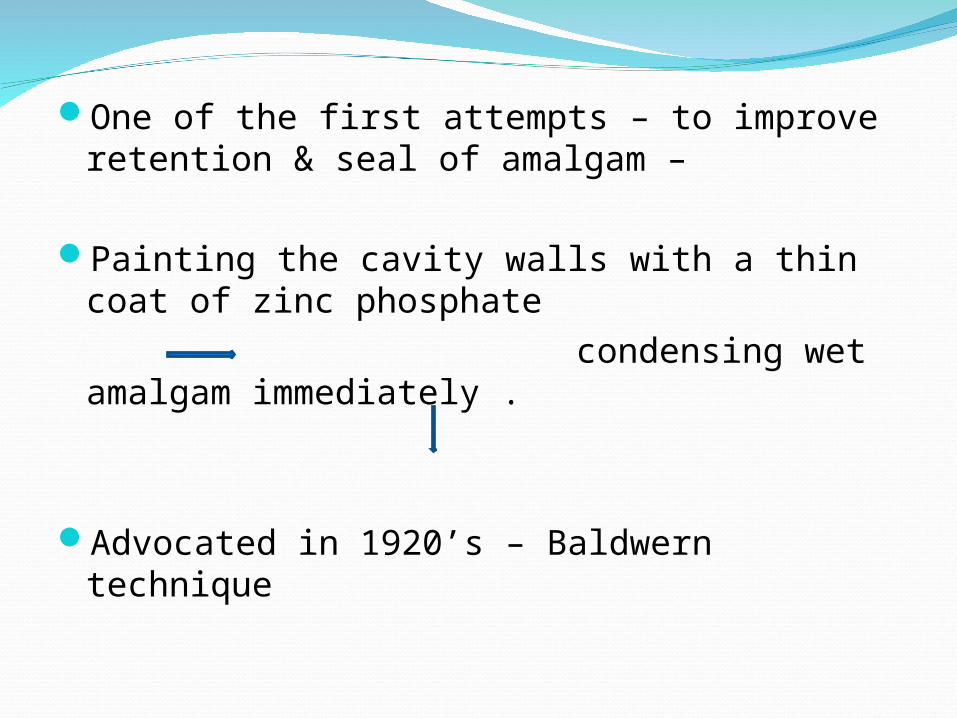
One of the first attempts – to improve retention & seal of amalgam –
Painting the cavity walls with a thin coat of zinc phosphate
condensing wet amalgam immediately .
Advocated in 1920’s – Baldwern technique
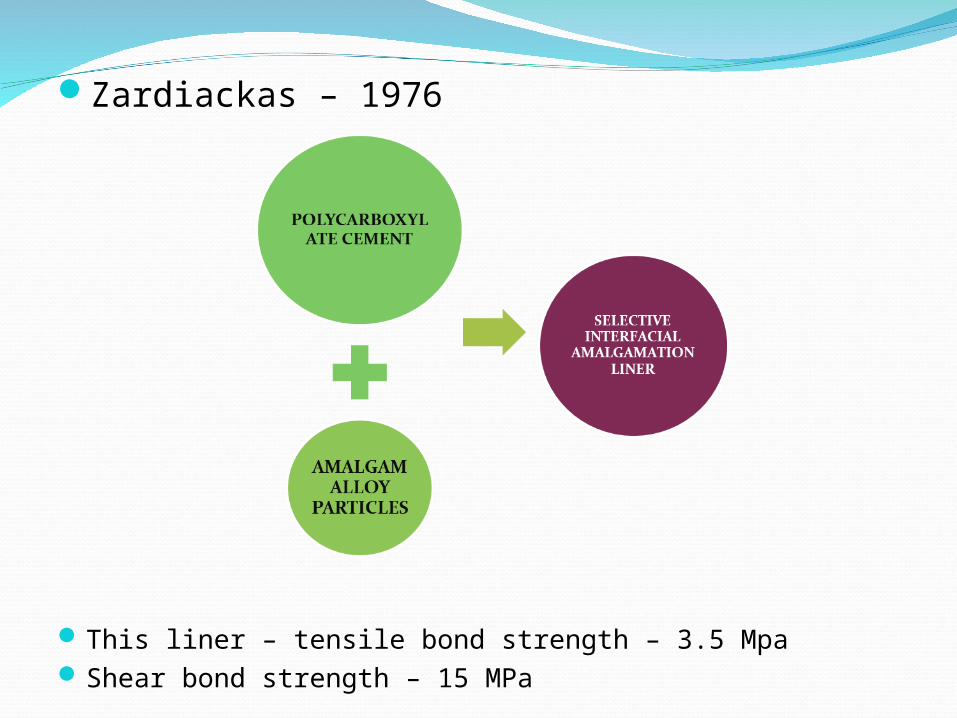
Zardiackas – 1976
This liner – tensile bond strength – 3.5 MpaShear bond strength – 15 MPa
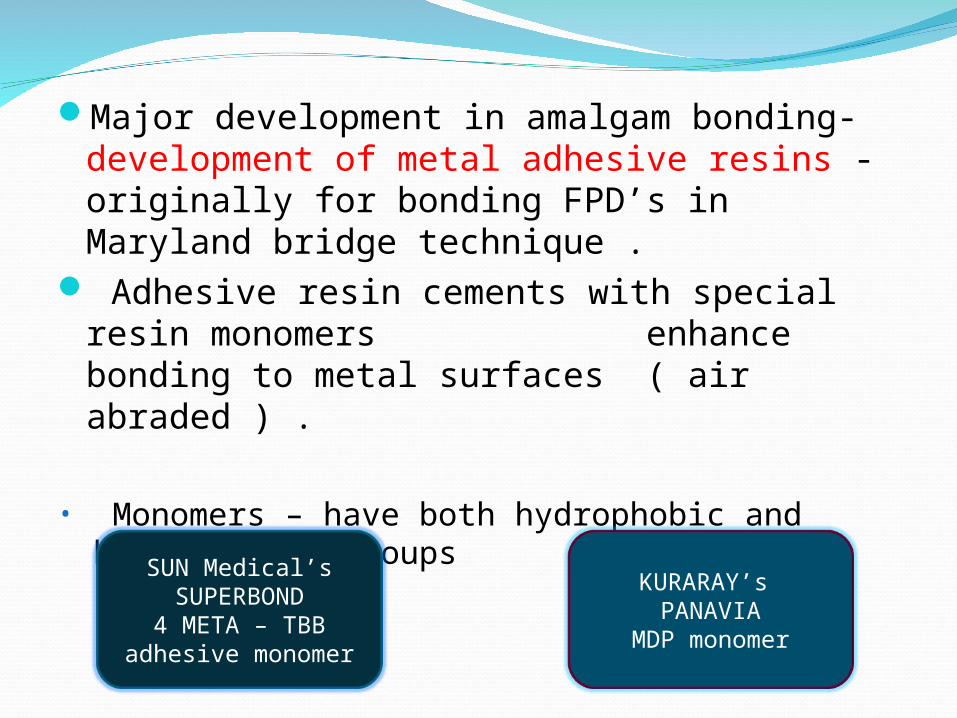
Major development in amalgam bonding- development of metal adhesive resins - originally for bonding FPD’s in Maryland bridge technique .
Adhesive resin cements with special resin monomers enhance bonding to metal surfaces ( air abraded ) .
• Monomers – have both hydrophobic and hydrophillic groups
SUN Medical’sSUPERBOND4 META – TBB
adhesive monomer
KURARAY’s PANAVIA
MDP monomer
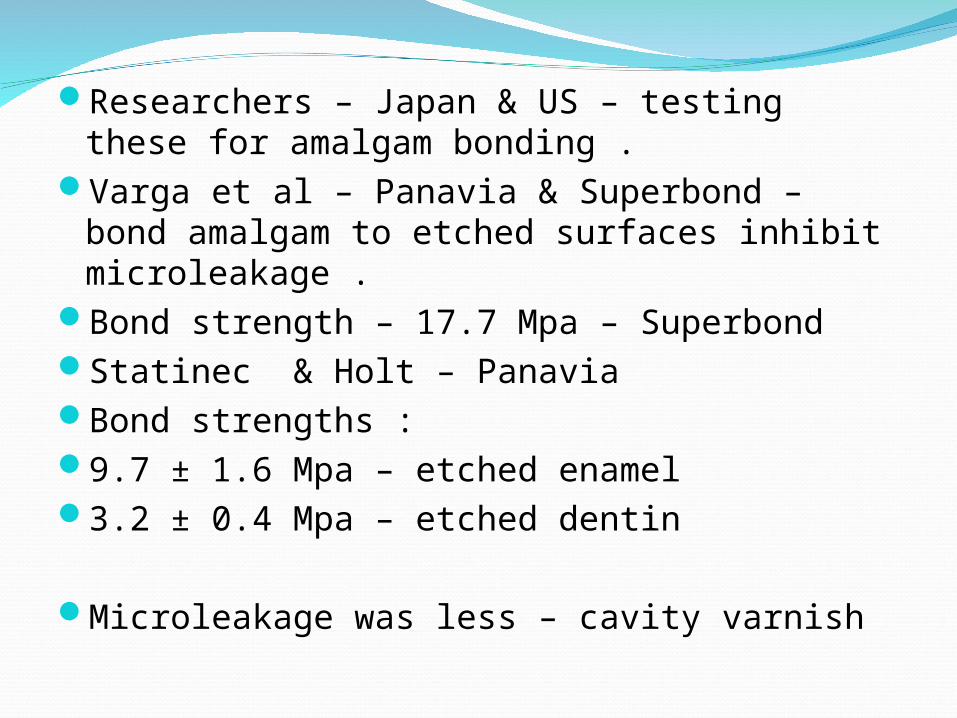
Researchers – Japan & US – testing these for amalgam bonding .
Varga et al – Panavia & Superbond – bond amalgam to etched surfaces inhibit microleakage .
Bond strength – 17.7 Mpa – SuperbondStatinec & Holt – Panavia Bond strengths :9.7 ± 1.6 Mpa – etched enamel3.2 ± 0.4 Mpa – etched dentin
Microleakage was less – cavity varnish
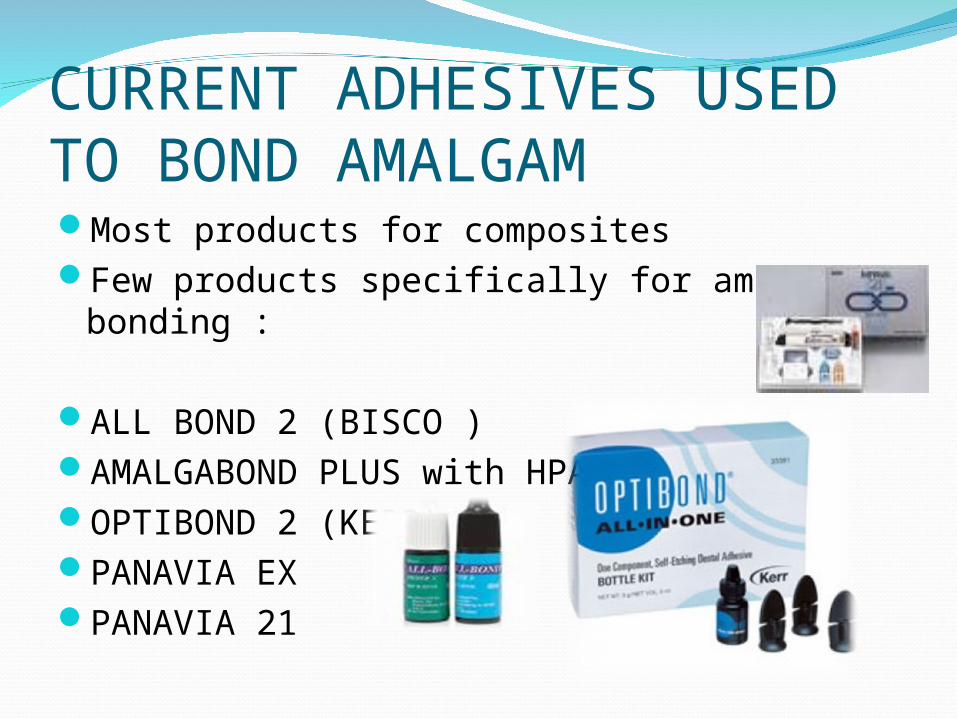
CURRENT ADHESIVES USED TO BOND AMALGAMMost products for compositesFew products specifically for amalgam
bonding :
ALL BOND 2 (BISCO )AMALGABOND PLUS with HPA Powder .OPTIBOND 2 (KERR)PANAVIA EXPANAVIA 21
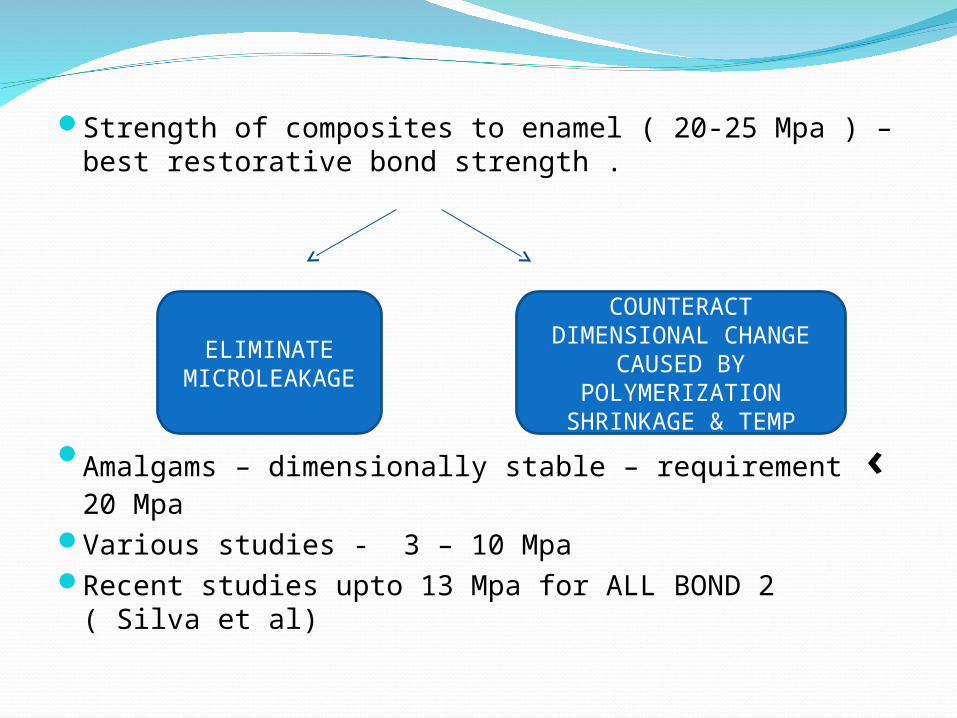
Strength of composites to enamel ( 20-25 Mpa ) – best restorative bond strength .
Amalgams – dimensionally stable – requirement ‹ 20 Mpa
Various studies - 3 – 10 MpaRecent studies upto 13 Mpa for ALL BOND 2 ( Silva et
al)
ELIMINATE MICROLEAKA
GE
COUNTERACT DIMENSIONAL
CHANGE CAUSED BY POLYMERIZATION
SHRINKAGE & TEMP
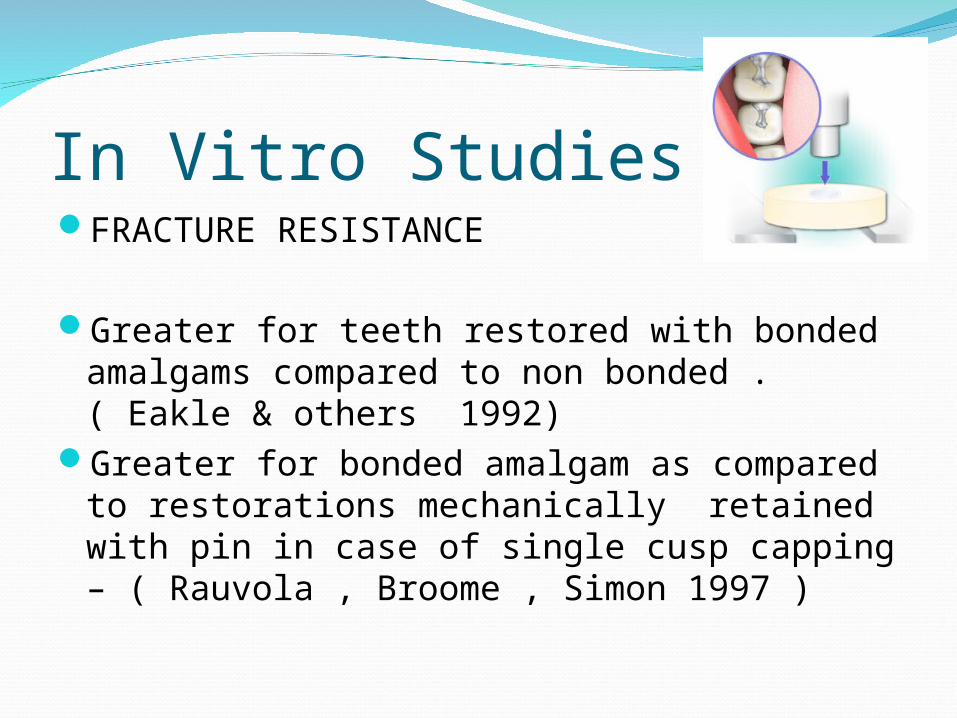
In Vitro StudiesFRACTURE RESISTANCE
Greater for teeth restored with bonded amalgams compared to non bonded . ( Eakle & others 1992)
Greater for bonded amalgam as compared to restorations mechanically retained with pin in case of single cusp capping – ( Rauvola , Broome , Simon 1997 )
MICROLEAKAGE STUDIES
Bonded amalgam – less than varnish lined restorations ( Yu , Wei & Xu , 1987 )
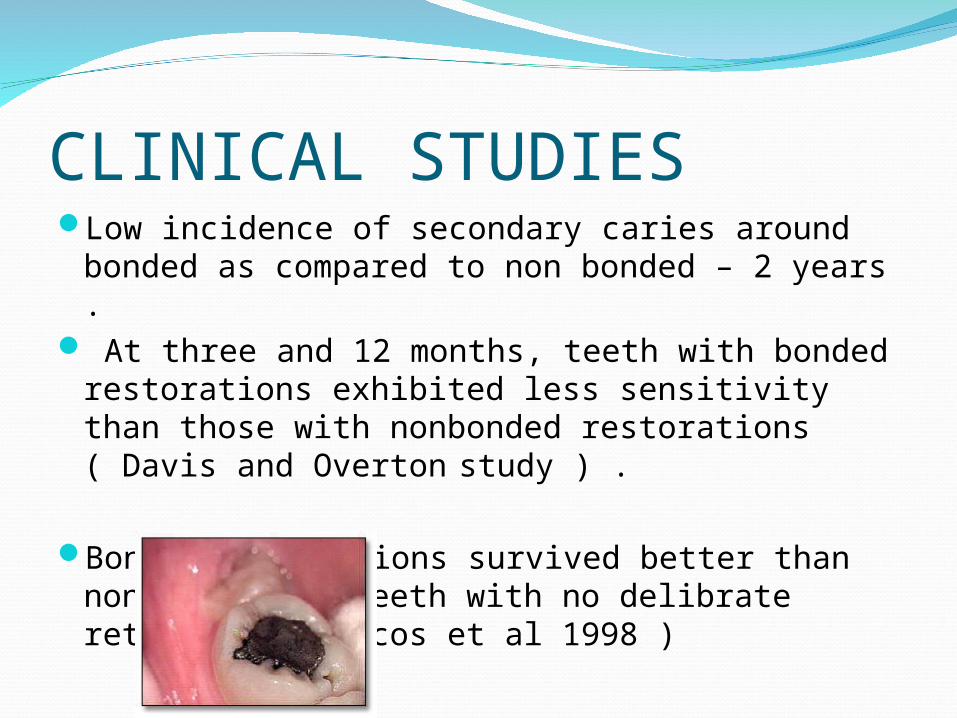
CLINICAL STUDIESLow incidence of secondary caries around
bonded as compared to non bonded – 2 years . At three and 12 months, teeth with bonded
restorations exhibited less sensitivity than those with nonbonded restorations ( Davis and Overton study ) .
Bonded restorations survived better than non bonded in teeth with no delibrate retention ( Setcos et al 1998 )
Indications
Large compound restorations: In extensive cavities with gross tooth loss.
Repair of restorations (to bond new to old amalgam and to seal cavity margins in the old restorations).
Preparations without retention. Repeated fracture of amalgam restorations. Geriatric and debilitated patients – Bonded
amalgam is preferred over more expensive and time consuming cast restorations.
Repairing marginal defects.
Amalgam sealants
ADVANTAGES It is a treatment option for extensively carious posterior teeth,
with a lower cost than either cast metal restorations / metal ceramic crowns.
It allows the use of amalgam in teeth with low gingival- occlusal height (unlike conventional amalgam with pins amalgapin, inlays; onlays) etc.
It permits more conservative cavity preparations - does not always require additional mechanical retention (unlike amalgam with pins; etc).
It eliminates the use of retentive pins and their inherent risks e.g.: periodontal perforation and pulpal exposure.
It reduces marginal leakage to minimum.
It reinforces tooth structure weakened by caries and cavity preparation .
It reduces the incidence of postoperative sensitivity commonly observed with amalgam restorations.
It reduces the incidence of marginal fracture.
It reduces the incidence of recurrent caries.
It allows definitive restorations of a tooth with a badly broken down crown in one clinical session ( compared to cast restorations ).
It allows the biologic sealing of pulpodentinal complex
DISADVANTAGES Increases the time to perform a conventional
amalgam and may be technique sensitive.It requires practitioners to adapt to the new
technique.It increases the cost of amalgam restoration.It makes the use of amalgam seem feasible in
situations where it would not be indicated such for large restorations involving functional cusps.
It has not been in use long enough to allow a proper evaluation of its clinical performance.
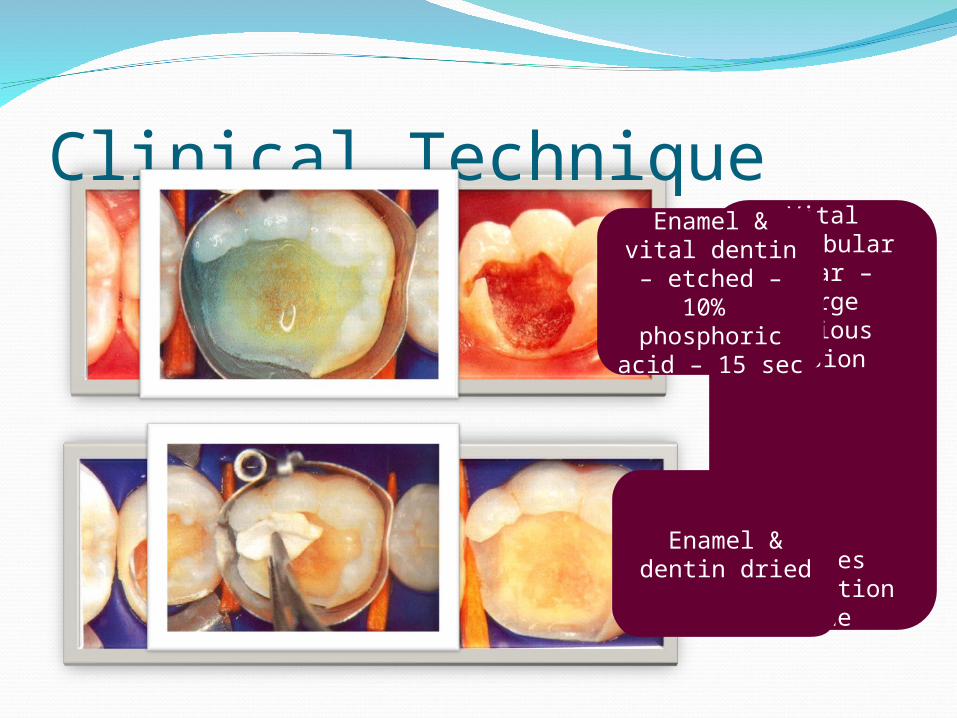
Clinical TechniqueVital
mandibular molar – large carious lesion
Caries excavation
done
Enamel & vital dentin – etched
– 10% phosphoric
acid – 15 sec
Enamel & dentin dried
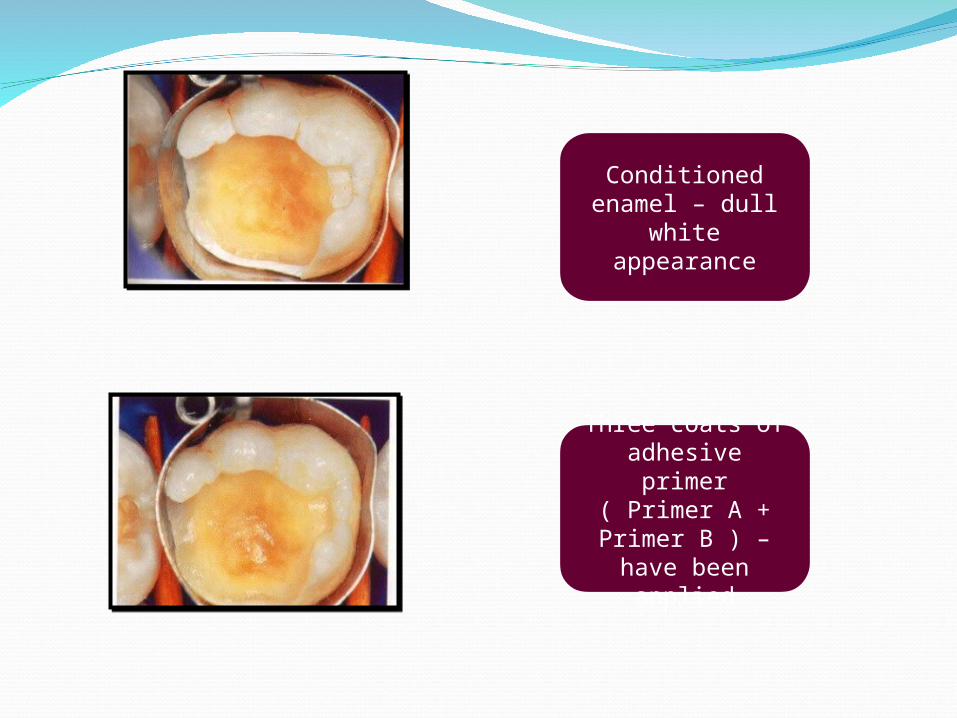
Conditioned enamel – dull
white appearance
Three coats of adhesive primer
( Primer A + Primer B ) – have
been applied
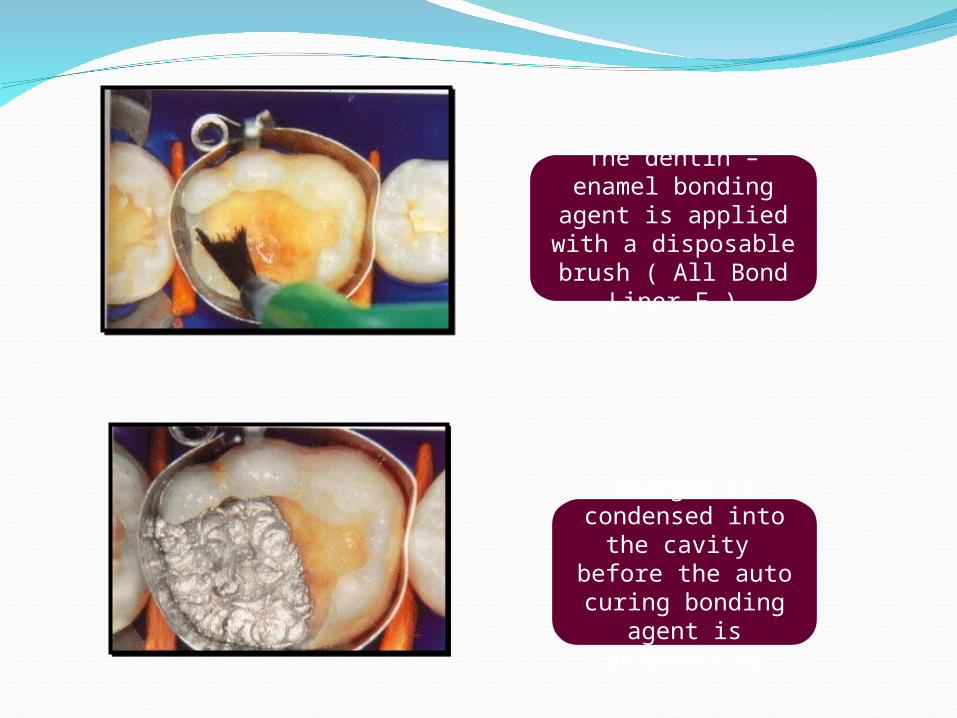
The dentin – enamel bonding agent is
applied with a disposable brush
( All Bond Liner F )
Amalgam is condensed into
the cavity before the auto curing
bonding agent is polymerized
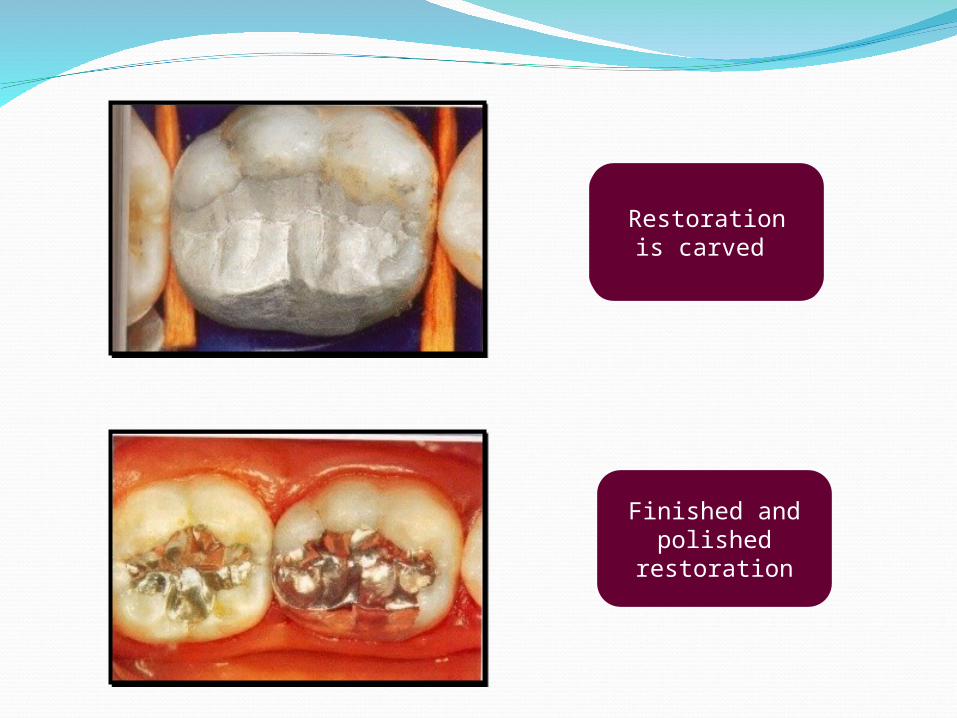
Restoration is carved
Finished and polished
restoration
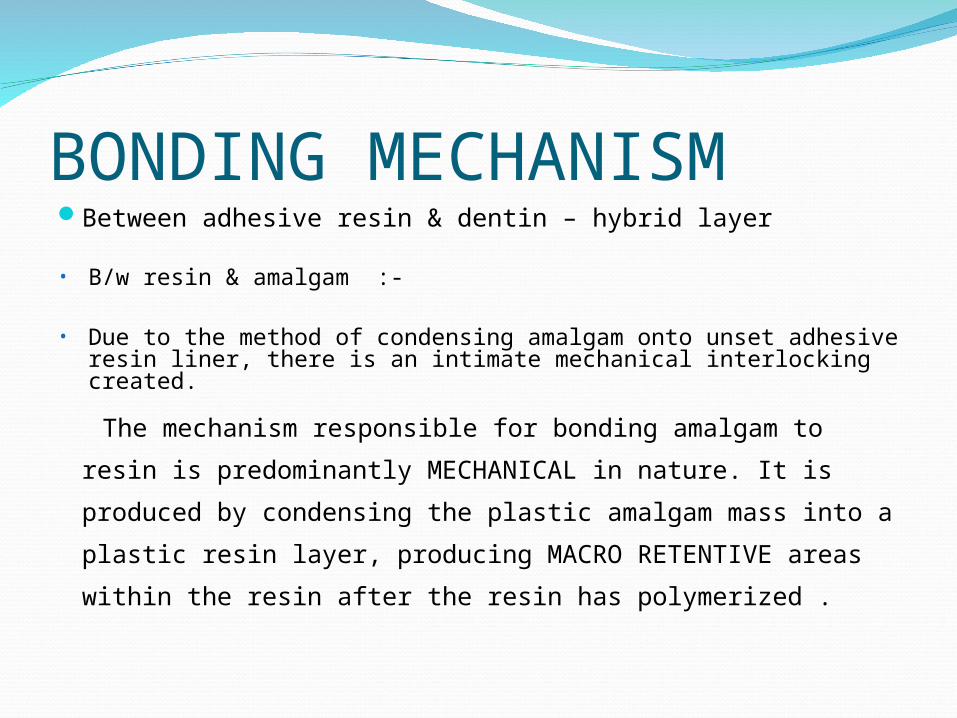
BONDING MECHANISMBetween adhesive resin & dentin – hybrid layer
• B/w resin & amalgam :-
• Due to the method of condensing amalgam onto unset adhesive resin liner, there is an intimate mechanical interlocking created.
The mechanism responsible for bonding amalgam to
resin is predominantly MECHANICAL in nature. It is
produced by condensing the plastic amalgam mass into
a plastic resin layer, producing MACRO RETENTIVE
areas within the resin after the resin has polymerized .
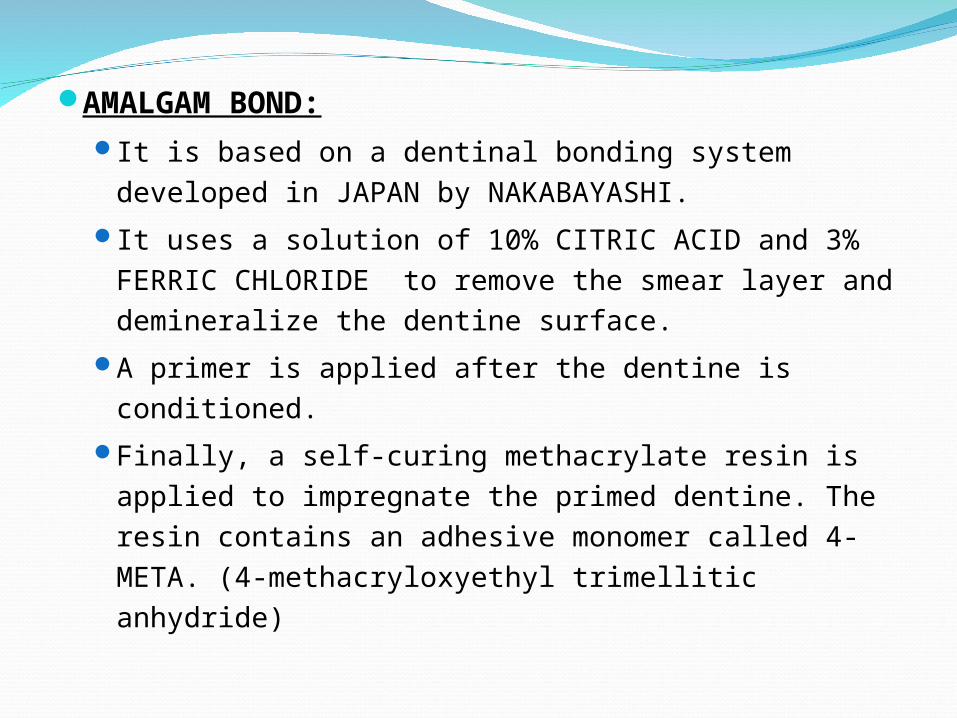
AMALGAM BOND:It is based on a dentinal bonding system
developed in JAPAN by NAKABAYASHI.
It uses a solution of 10% CITRIC ACID and 3% FERRIC CHLORIDE to remove the smear layer and demineralize the dentine surface.
A primer is applied after the dentine is conditioned.
Finally, a self-curing methacrylate resin is applied to impregnate the primed dentine. The resin contains an adhesive monomer called 4-META. (4-methacryloxyethyl trimellitic anhydride)
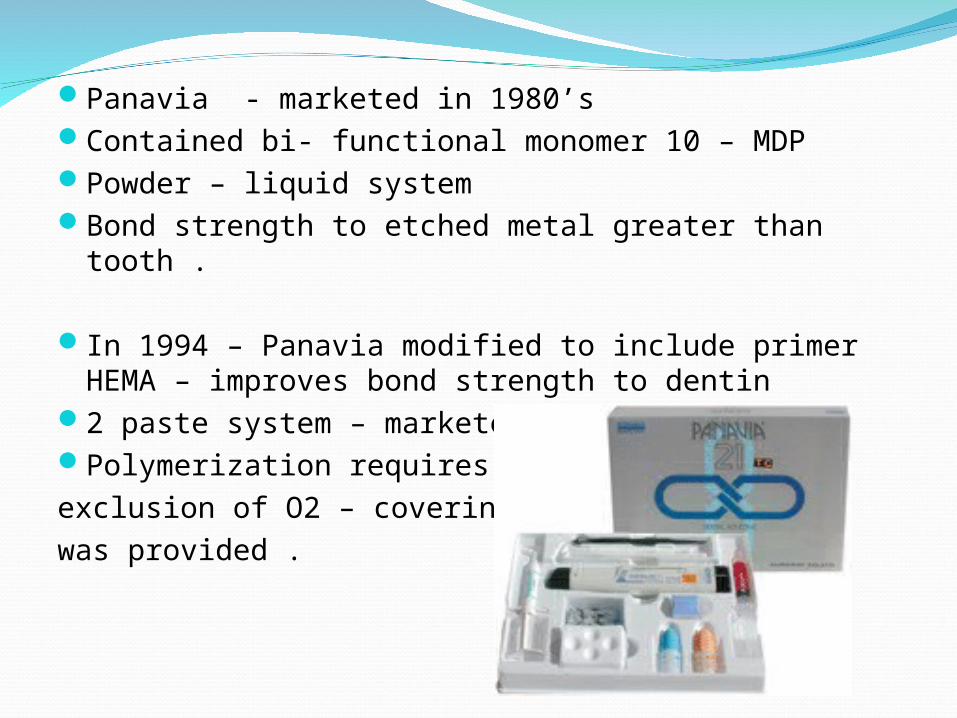
Panavia - marketed in 1980’s Contained bi- functional monomer 10 – MDPPowder – liquid system Bond strength to etched metal greater than tooth .
In 1994 – Panavia modified to include primer HEMA – improves bond strength to dentin
2 paste system – marketed as Panavia 21 Polymerization requires – exclusion of O2 – covering gelwas provided .
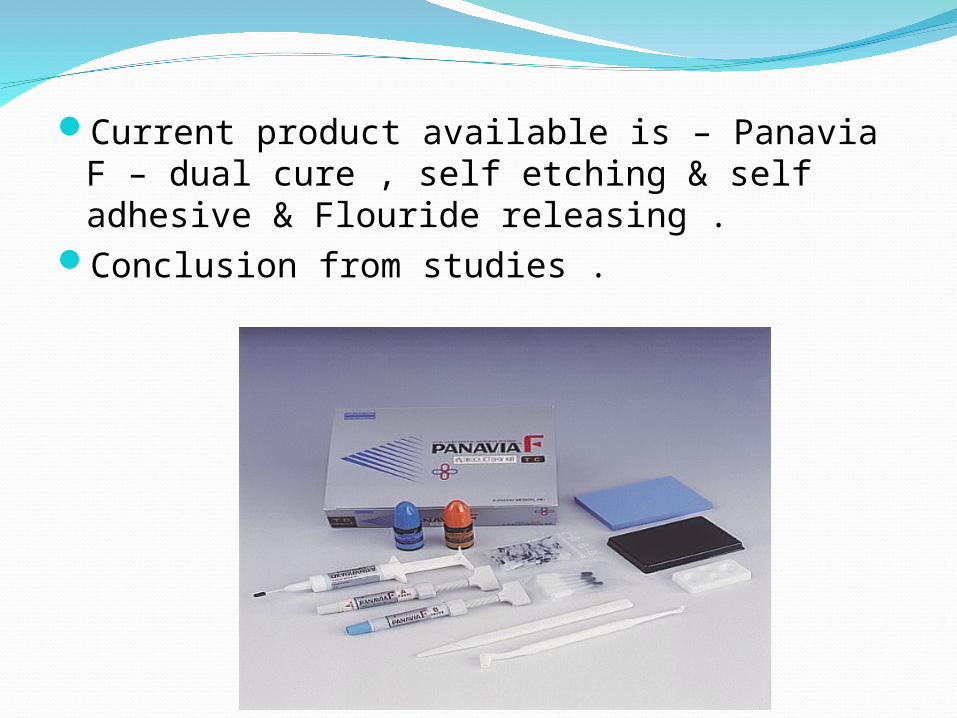
Current product available is – Panavia F – dual cure , self etching & self adhesive & Flouride releasing .
Conclusion from studies .


THANK YOU