Pilot Select V1566 Configurator Programming Manual XX190-20-00
56
Vicon part number 8009-8190-20-01 Rev 0408 Section 2 XX190-20-00 V1566 CONFIGURATOR Vicon Industries Inc. does not warrant that the functions contained in this equipment will meet your requirements or that the operation will be entirely error free or perform precisely as described in the documentation. This system has not been designed to be used in life-critical situations and must not be used for this purpose. Copyright © 2008 Vicon Industries Inc. All rights reserved. Product specifications subject to change without notice. Vicon and its logo are registered trademarks of Vicon Industries Inc. Pilot and its logo are trademarks of Vicon Industries Inc. VICON INDUSTRIES INC., 89 ARKAY DRIVE, HAUPPAUGE, NEW YORK 11788 TEL: 631-952-CCTV (2288) FAX: 631-951-CCTV (2288) TOLL FREE: 800-645-9116 24-Hour Technical Support: 800-34-VICON (800-348-4266) UK: +44 (0) 1489 566300 WEB: www.vicon-cctv.com
Transcript of Pilot Select V1566 Configurator Programming Manual XX190-20-00

Vicon part number 8009-8190-20-01 Rev 0408 Section 2
XX190-20-00
V1566 CONFIGURATOR Vicon Industries Inc. does not warrant that the functions contained in this equipment will meet your requirements or that the operation will be entirely error free or perform precisely as described in the documentation. This system has not been designed to be used in life-critical situations and must not be used for this purpose.
Copyright © 2008 Vicon Industries Inc. All rights reserved. Product specifications subject to change without notice. Vicon and its logo are registered trademarks of Vicon Industries Inc. Pilot and its logo are trademarks of Vicon Industries Inc.
VICON INDUSTRIES INC., 89 ARKAY DRIVE, HAUPPAUGE, NEW YORK 11788 TEL: 631-952-CCTV (2288) FAX: 631-951-CCTV (2288) TOLL FREE: 800-645-9116
24-Hour Technical Support: 800-34-VICON (800-348-4266) UK: +44 (0) 1489 566300 WEB: www.vicon-cctv.com


Pilot Select Configurator XX190-20-00 Contents • i
Contents Introduction 4
Related Publications.................................................................................................................................4 Pilot Select V1566 Configurator ...............................................................................................................4
Installation 5 PC Requirements .....................................................................................................................................5 Hardware Installation................................................................................................................................5 Software Installation .................................................................................................................................6
Features and Functions 7 Title Bar ....................................................................................................................................................7 Menu Bar ..................................................................................................................................................7
File..........................................................................................................................................................7 Administration.......................................................................................................................................11 Keypad .................................................................................................................................................11 Receivers .............................................................................................................................................11 Video Switch.........................................................................................................................................11 Alarms ..................................................................................................................................................11 Titler......................................................................................................................................................12 Help ......................................................................................................................................................12
Access Buttons.......................................................................................................................................12
Administration 13 User Administration ................................................................................................................................13
Users List .............................................................................................................................................13 User Type.............................................................................................................................................13 Administrator Details ............................................................................................................................14
Host Port.................................................................................................................................................14 Baud Rate ............................................................................................................................................14 Data Bits ...............................................................................................................................................14 Stop Bits ...............................................................................................................................................15 Parity ....................................................................................................................................................15 Logoff Dwell..........................................................................................................................................15 Passcode..............................................................................................................................................15
Timed Events..........................................................................................................................................15 Event Number ......................................................................................................................................16 Type......................................................................................................................................................16 Tour Settings ........................................................................................................................................16 Salvo Settings ......................................................................................................................................16 Preset Settings .....................................................................................................................................16 Alarm Enable Settings..........................................................................................................................17 Alarm Type Settings .............................................................................................................................17 Scheduled Time ...................................................................................................................................17
Triggered Events ....................................................................................................................................18 Input List ...............................................................................................................................................18 Trigger Active .......................................................................................................................................18 Trigger Settings ....................................................................................................................................18 Tour Settings ........................................................................................................................................19 Salvo Details ........................................................................................................................................19 Preset Settings .....................................................................................................................................19

ii • Contents Pilot Select Configurator XX190-20-00
Keypads 20 Keypad Profile ........................................................................................................................................20
Keypad Number ...................................................................................................................................20 Baud Rate ............................................................................................................................................20 Communication Delay ..........................................................................................................................20 Seize Control........................................................................................................................................20 Priority Level.........................................................................................................................................21 Auto or Manual .....................................................................................................................................21 Alarm Acknowledgement .....................................................................................................................21 Default Monitor .....................................................................................................................................21 Online State..........................................................................................................................................21
Monitor Partition .....................................................................................................................................22 Keypad Number ...................................................................................................................................22 Partitioned and Available Monitors.......................................................................................................22
Receivers 23 Receiver Profile ......................................................................................................................................23
Receiver Number .................................................................................................................................23 Baud Rate ............................................................................................................................................23 Communication Delay ..........................................................................................................................23 Model....................................................................................................................................................23 Home Position ......................................................................................................................................24 Home Aux 1..........................................................................................................................................24
Alarms 25 Alarm Stacking Mode .............................................................................................................................25
Monitor Stack Mode .............................................................................................................................25 Alarm Input Order.................................................................................................................................29
Alarm Action ...........................................................................................................................................29 Alarm List..............................................................................................................................................29 Clear From All Monitors Upon Acknowledge .......................................................................................30 Priority Level.........................................................................................................................................30 Callup Table .........................................................................................................................................30
Alarm Monitor Actions ............................................................................................................................30 Monitor List ...........................................................................................................................................31 Alarm Monitor Enabled.........................................................................................................................31 Sequencing Enabled ............................................................................................................................31 Sequence Dwell ...................................................................................................................................31 Auto Acknowledge Enabled .................................................................................................................31 Acknowledge Time...............................................................................................................................31 Acknowledge Action.............................................................................................................................31
Receiver Actions ....................................................................................................................................32 Receiver List.........................................................................................................................................32 Options .................................................................................................................................................32 Aux 1 Acknowledge Action...................................................................................................................32
Input Controls .........................................................................................................................................33 Alarm Input Number .............................................................................................................................33 Normally Closed ...................................................................................................................................33
Alarm Serial Port ....................................................................................................................................34 Baud Rate ............................................................................................................................................34 Data Bits ...............................................................................................................................................34 Stop Bits ...............................................................................................................................................34 Parity ....................................................................................................................................................35
Video Switch 36 Default Callup.........................................................................................................................................36
Pilot Select Configurator XX190-20-00 Contents • iii
Monitors................................................................................................................................................36 Type......................................................................................................................................................36 Camera Settings...................................................................................................................................36 Tour Settings ........................................................................................................................................36 Salvo Settings ......................................................................................................................................36
Camera Partition ....................................................................................................................................37 Monitor Number....................................................................................................................................37 Partitioned and Available Cameras......................................................................................................37
Salvo Switch ...........................................................................................................................................38 Salvo List ..............................................................................................................................................38 Salvo Details ........................................................................................................................................38
Sequential Tour ......................................................................................................................................39 Tours ....................................................................................................................................................39 Type......................................................................................................................................................39 Last Step Action ...................................................................................................................................39 Monitor Tour Details .............................................................................................................................39 Salvo Tour Details ................................................................................................................................41
Dial Up Video..........................................................................................................................................42 Video Input Number .............................................................................................................................42 Dial Up Number....................................................................................................................................42
Dial Up Salvo..........................................................................................................................................43 Salvo Number.......................................................................................................................................43 Dial Up Number....................................................................................................................................43
Dial Up Tour ...........................................................................................................................................43 Tour Number ........................................................................................................................................44 Dial Up Number....................................................................................................................................44
High Speed Switcher Output ..................................................................................................................44 Monitor Number....................................................................................................................................44 Starting and Ending Input Number.......................................................................................................44
Time Date Titler 45 Time and Date Controls .........................................................................................................................45
Date Format .........................................................................................................................................45 Time Format .........................................................................................................................................45 DST Format..........................................................................................................................................45
Display Controls .....................................................................................................................................46 Monitor Position....................................................................................................................................46 Title Position.........................................................................................................................................47 Display Enablement .............................................................................................................................47 Fade Control.........................................................................................................................................48
Camera Titles .........................................................................................................................................49 Cameras...............................................................................................................................................49
Alarm Titles.............................................................................................................................................49 Preset and Sector Titles .........................................................................................................................50
Glossary of Terms 51

4 • Introduction Pilot Select Configurator XX190-20-00
Introduction The Pilot Select™ V1566 Digital Control and Matrix Switching System is a full-featured, digital control unit and matrix switcher for systems with up to 512 cameras and 64 monitors (using 4 card cages). The V1566 consists of one, two or four Pilot66/99 card cages that are populated with: internal CPU, time/date/titler, switcher cards, or other control cards depending upon configuration. The system is designed for rack mounting and multiple units can be mounted in a large rack. Additional cards and cables are also used when expanding the system to two or four cages. The system must be programmed prior to using it. This can be accomplished using by using the menu-driven programming firmware built into the system CPU or by using the Pilot Select V1566 Configurator program running on a host computer. This manual describes how to program the system using the Configurator. Refer to Pilot Select V1566 Digital Control and Matrix Switching System Programming Manual XX190-10-00 to choose the appropriate settings for your site from the V1566 menu-driven programming screens.
Related Publications Pilot Select V1566 Digital Control and Matrix Switching System Installation and Operation Manual XX190-00-00, Part Number 8009-7190-00-00 Pilot Select V1566 Digital Control and Matrix Switching System Programming Manual XX190-10-00, Part Number 8009-7190-10-00 Pilot Select V1566 Digital Control and Matrix Switching System Host Computer Interface Software Manual XX190-30-00, Part Number 8009-8190-30-00
Pilot Select V1566 Configurator The Pilot Select V1566 Configurator is used to create or modify the program configuration file for the Pilot Select V1566 system. The configuration file contains data required to define the CCTV equipment, user preferences, hardwired connections, alarm modes, and other information required by the control system. Connection to the control system is not necessary during creation or modification of the configuration file. After connecting to the control system, the configuration file is sent from the PC over the supplied RS-232 data cable. After the configuration file is transferred to the control system, the CCTV installation may be controlled in the traditional manner using the control system. You may also send an existing configuration file from the control system to the PC so that it may be easily edited using the software and then transferred back to the control system. It is advisable to transfer the configuration file to the PC for backup purposes.
Note: The host computer and V1566 system must be configured to communicate with each other. Refer to Pilot Select V1566 Digital Control and Matrix Switching System Programming Manual XX190-10-00 for instructions on configuring the host computer and V1566 system.

Pilot Select Configurator XX190-20-00 Installation • 5
Installation PC Requirements A computer running the Microsoft® Windows® 2000, Windows XP, Windows Server® 2003 or Windows Vista® operating system can be used. The computer should meet the following minimum requirements.
CPU Pentium or higher Clock Speed (MHz) 133 MHz or higher RAM (MB) 64 Disk Space Available 650 MB
Hardware Installation Warning: Disconnect all power to the PC and the control system. Do not apply power until directed to do so.
Connect the provided RS-232 data cable provided from the 9-pin serial port on the computer to the PC-HOST-1 connector on the CPU panel on the V1566 as shown in Figure 1. After connections have been made, you can power up the host computer and the V1566 system.
Figure 1: Connecting Host Computer to Pilot Select

6 • Installation Pilot Select Configurator XX190-20-00
Software Installation Perform the following procedure to install the software on your PC.
1. Insert CD in your CD-ROM drive.
2. If CD does not autorun, click My Computer and navigate to the CD drive. Right-click and select Explore.
3. Browse to the Setup1566.exe file on the CD-ROM and press OK.
4. Follow the onscreen directions to install the software.
5. View Readme file for latest changes.

Pilot Select Configurator XX190-20-00 Features and Functions • 7
Features and Functions
Title Bar The title bar is located across the top of the screen. It identifies the screen currently open in the software. It contains three buttons in the right corner, used to adjust the size and location of your software screen or to exit the software.
Menu Bar The menu bar is located beneath the title bar. It contains eight menus, as shown below. Any menu may be opened by clicking on its name in the menu bar, or by typing the underlined letter in the name while depressing the Alt key on your PC keyboard.
File The File menu is used to create, open and transfer configuration files. It also includes the Exit command.
New The New command is used to create a new profile. The profile, or configuration file, contains data that is required to completely define the CCTV equipment, user preferences, hardwired connections, alarm modes, and other information required by the control system. The default name presented to you in the dialog box shown below is new. Note that all profiles have a default extension of pro. You may type a different filename or accept new.pro. Click OK.

8 • Features and Functions Pilot Select Configurator XX190-20-00
Open When you choose the Open command, a dialog box will display to allow you to choose an existing profile. To open an existing profile, type the filename or select it from the appropriate directory. You may only open profiles that were created with this software and that have the pro file extension. Note that a default file named “default.pro” was created the first time you ran this software.
Send Configuration
Note: You must close all programs and disable the Windows screen saver before a file transfer. You must also verify that the PC’s clock is set to the correct time.
You must transfer the profile to the control system after you have completely defined the operating parameters. If you have not already connected to the control system, refer to Hardware Installation. To initiate the transfer, select Send Configuration from the File menu. The following Scan Comm Ports message box will display before the image has been compiled. Check the communication ports that you want the software to scan for a connection to the control system. Then click Next. A message box will display as the software scans each port that you selected in the previous message box. Transfer will begin when the control system is detected. If it is not detected, an error box will display. Check your hardware connections and try again. A message box will display after the port has been found.

Pilot Select Configurator XX190-20-00 Features and Functions • 9
Note: The Scan Comm Ports message box will only appear the first time a configuration is sent. After a successful transfer, the baud rate and comm port setting are stored on the PC.
Receive Configuration
Note: You must close all programs and disable the Windows screen saver before a file transfer. You must also verify that the PC’s clock is set to the correct time.
You may create a configuration file, or profile, by two different methods: from the menu-driven programming screens at the control system, or using the software on a personal computer. You may use the software, even if you have previously created the profile at the control system, by transferring the profile from the control system to the PC over the supplied data cable (refer to Hardware Installation to connect the data cable). This will allow you to update the profile using the more convenient software. You may also transfer the profile to the PC for backup purposes. To begin the transfer, select the Receive Configuration command. Enter the name you wish to assign to the profile and click OK.

10 • Features and Functions Pilot Select Configurator XX190-20-00
The following Scan Comm Ports message box will display. Check the communication ports that you want the software to scan for a connection to a control system. Then click Next.
A message box will display as the software scans each port that you selected in the previous message box. Transfer will begin when the control system is detected. If it is not detected, an error box will display. Check your hardware connections and try again. When you have successfully connected to the system, a message box will display as the file is retrieved.
Exit Use this command to save your file and exit the software.
Pilot Select Configurator XX190-20-00 Features and Functions • 11
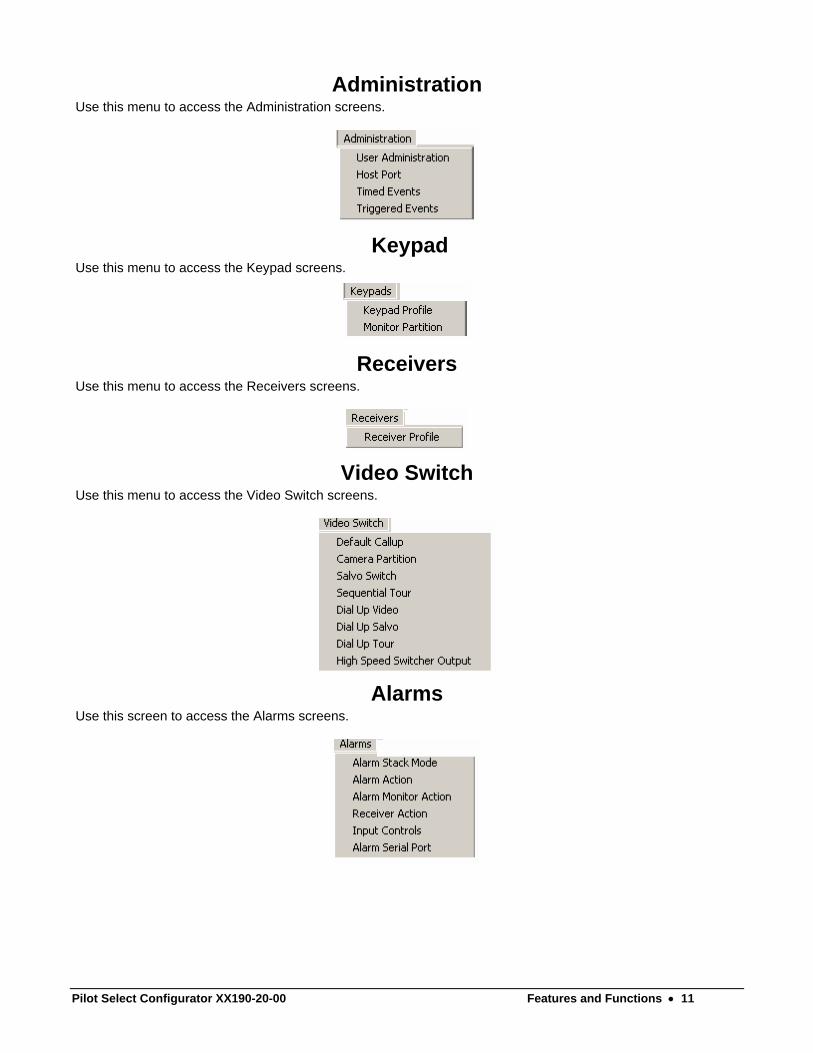
Administration Use this menu to access the Administration screens.
Keypad Use this menu to access the Keypad screens.
Receivers
Use this menu to access the Receivers screens.
Video Switch Use this menu to access the Video Switch screens.
Alarms Use this screen to access the Alarms screens.

12 • Features and Functions Pilot Select Configurator XX190-20-00
Titler Use this menu to access the Time, Date, Titler screens. You may access additional submenus from the Display Controls command.
Help Use this menu to view information about your software using the About command.
Access Buttons In addition to the menu bar, you may also use the access buttons located down the left of the screen to enter the programming screens. From top to bottom, these buttons are: Administration, Keypads, Receivers, Alarms, Video, and Time Date Title.

Pilot Select Configurator XX190-20-00 Administration • 13
Administration User Administration User profiles contain the information necessary to identify each user in the CCTV system. The three privilege levels are Operator, Manager, and Administrator. Up to 64 users with unique profiles are allowed in a configuration, however, only three users may have administrator privileges. After three administrators have been defined, the Privilege settings will be limited to operator and manager selections.
Note: If a manager or operator logs on to the system, the Main Menu will only display four menu selections. Administrator privilege permits unrestricted access to all programming menus. Note that all Configurator screens are available at all times. You must limit access to the PC in order to limit access to this software.
Users List Click on each user in turn from the users list and define the parameters on the screen. The currently selected user is highlighted in the list.
User Type Login ID
Note: A login ID should be set for each user in the system. Otherwise, the default login ID of “0000000000” will allow access to the control system.
The login identification number must be entered for each user in the system. The number must be 10 digits or less. The login ID must be entered each time the control system's programming menus are accessed. You do not need a login ID to use the Configurator software.
Privilege A privilege level must be specified for each user login ID. The privilege level is used to limit access to various menus at the control system. There are three privilege levels; operator, manager and administrator. Only administrators may access all programming menus; operators and managers cannot access the Administration, Install Defaults or System Diagnostics menus and submenus. At least one user must be assigned administrator privilege. The maximum number of administrators is three.

14 • Administration Pilot Select Configurator XX190-20-00
Administrator Details The Administrator Details fields are used to define a passcode, automatic logout and the dwell time for the automatic logoff option. Operators and managers do not have access to these features.
Passcode A login ID must be entered in order to access the control system’s programming screens, regardless of the privilege level. For administrators, a passcode must also be entered. The passcode is used to provide a second level of access security to the programming menus and must be 10 digits or less.
Automatic Logout Enabled This setting is used to automatically log an administrator off of the control system if operations cease for the amount of time specified in Logoff Dwell. Click the field to place an “x” in the box to enable this function or click to remove the “x” to disable the function.
Logoff Dwell If the Automatic Logout Enabled field is enabled, the Logoff Dwell time and units must be specified. If no communication takes place between the programming keyboard and the control system for the period of time indicated in the Logoff Dwell field, the administrator will be automatically logged off of the system. This does not apply to remote keypads.
Host Port The host port of the V1566 system is typically connected to the host computer or other control device. The terminal emulation software will typically automatically detect the communications settings of the system. If you are not using a software that auto detects the communications settings, then you will have to set the parameters manually so that both agree.
Baud Rate The baud rate is the speed at which data is transferred between the PC and the control system. The software will automatically detect the baud rate.
Data Bits The data bits are the number of bits in each data character. The software will automatically detect the data bits. For other software that does not auto detect, use 8 data bits.

Pilot Select Configurator XX190-20-00 Administration • 15
Stop Bits The stop bit is the number of bits used to signal the last bit in a data character. The software will automatically detect the stop bits.
Parity The software will automatically detect the parity.
Logoff Dwell If the logoff dwell time is specified, a user of the PC (regardless of privilege) will be automatically logged off of the host port after a specified length of time has elapsed without interaction. Select a logoff dwell time (units of minutes are listed at the bottom of the list) or Disabled from the drop down list.
Passcode Administrators must enter their passcode before using RS-232 command codes to communicate with the control system from a host computer. This is set on the system. Refer to Pilot Select V1566 Digital Control and Matrix Switching System Programming Manual XX190-10-00 to set the Administrator passcode. Refer to Pilot Select V1566 Digital Control and Matrix Switching System Host Computer Interface Software Manual XX190-30-00 for information on the RS-232 command codes that allow you to control the CCTV equipment from the host computer. Enter the 10-digit number in the space provided.
Note: To disable the passcode, set the Logoff Dwell to Disabled and set the passcode to 0000000000.
Timed Events Five timed event types are programmable in the software: tours, salvos, presets, alarm enable, and alarm type. Tour, salvo, and preset specify the method of video switching to be performed. Alarm enable and type events control which alarm patterns are enabled and which will operate as momentary or latching.
Note: The settings on this screen vary with the setting chosen in the Type field. Each setting is explained in the following pages.

16 • Administration Pilot Select Configurator XX190-20-00
Event Number The event number list is located down the left side of the screen. The maximum number of timed events is 64. This maximum does not apply to events which are not timed. Any combination of events may be identified as timed events. For example, a configuration might include 20 timed presets, 30 timed salvos, 4 timed tours, and 10 timed enabled alarms. Select each event in turn and define it using the fields to the right. Use the scroll bar to view events not currently visible in the list.
Type There are five timed event types available in the control system. Tours, salvos and presets define video switching functions. The Tour setting is used to select a video switching function defined as a series of preset video displays from various camera stations on a specified monitor or on various monitors, depending upon the tour type. The tour type may be monitor or salvo, as discussed in Video Switch, Sequential Tour, Type. A group of monitors displaying video from predefined camera stations may be defined as a Salvo. The Preset setting specifies the pan, tilt, and lens preset position and settings to be recalled when the event is selected. The Alarm Enable setting specifies the pattern of alarms to be enabled. For example, this allows an event to be programmed which automatically enables one pattern of alarms for daytime monitoring and another pattern for nighttime surveillance. The Alarm Type setting defines that a pattern of alarms, with each alarm in the pattern set to operate as momentary or latching, will be scheduled as a timed event. If an alarm activates during this time period, it will operate as defined in Alarms, Input Controls. A separate timed event must be specified to enable these alarms using the Alarm Enable setting.
Tour Settings Tour Number Select the tour number from the drop down list. The maximum number of tours is 128.
Monitor Number
Note: This setting is not applicable if the tour is a salvo tour. The tour will be defined as a monitor or salvo tour in the Video, Sequential Tour screen.
Select the monitor number from the drop down list. This monitor will display the tour currently identified in the Tour Number field. The maximum number of monitors available is 128.
Salvo Settings Salvo Number Select the salvo number from the drop down list. The maximum number of salvos is 64.
Preset Settings Preset Number Select the preset number from the drop down list. The maximum number of presets depends upon the receiver model. The maximum number of salvos is 80.
Receiver Number In addition to the preset number defined in the Preset Number field, you must also define a receiver number. You must do so because each receiver may use the same range of preset numbers. For example, receiver 1 and receiver 2 could both have presets numbered 1-10. Choose the receiver number from the drop down list. The maximum number of receivers is 256.
Pilot Select Configurator XX190-20-00 Administration • 17
Alarm Enable Settings Alarm Pattern Alarms may be grouped in patterns A, B, or C, as discussed in Alarms, Input Controls. Select the pattern from the drop down list for this timed event.
Alarm Type Settings Alarm Pattern Select the pattern (A, B or C) from the drop down list. Refer to Alarms, Input Controls.
Scheduled Time Time of Day Select the hour (in 24-hour mode) from the drop down list to the left. To the right is a second drop down list, used to define the minutes. This defines the time of day that the timed event will take place.
Run Weekly Click on this setting to place an “x” in the box if the scheduled even should run weekly. If this field is left blank, the event will run only on the next occurrence of the day specified in the Day Of Week setting.
Day of Week Specify the day of the week for the timed event to activate. If the event should take place each day of the week, select Every Day.

18 • Administration Pilot Select Configurator XX190-20-00
Triggered Events Three triggered event types are programmable in the control system: tours, salvos and presets. Unlike a timed event, which activates at a specified time of day, triggered events activate when a specified V1300X-IA input (referred to as an “X-IA” input) is activated. For example, an X-IA alarm input may be connected to a switch that is used by operators to activate a specified preset. The Triggered Events screen for this example could be defined with Input Number 1, Event Type as Preset, Preset Number as #1 and Receiver Number as #100. If an operator activates the switch, receiver 100 would direct the pan-and-tilt drive to the preset position defined as preset 1. Note that even though the alarm interface device is used, triggered events do not activate alarms. The Triggered Events screen (shown below) defines which X-IA inputs will be used as triggered events and the alarm call-up table defines which X-IA inputs will be used for alarms.
Note: The settings on this screen vary with the setting chosen in the Type field. Each setting is explained in the following pages.
Input List The Input List is a list of all X-IA alarm inputs. There are 256 X-IA inputs available in the system. These inputs may not be used to activate alarms and will be unavailable on the alarm call-up table. Select each input in turn and define the triggered event.
Trigger Active If the Trigger Active field is enabled, the currently selected input is defined as a triggered event. If this input should not be defined as a triggered event, click on the field to remove the “x”.
Trigger Settings Type Tours, salvos and presets define video switching functions and are available as triggered event types. The Tour setting is used to select a video switching function defined as a series of preset video displays from various camera stations on a specified monitor or on various monitors, depending upon the tour type. The tour type may be monitor or salvo, as discussed in Video Switch, Sequential Tour, Type. A group of monitors displaying video from predefined camera stations may be defined as a Salvo. The Preset setting specifies the pan, tilt, and lens preset position and settings to be recalled when the event is triggered. Select the type of triggered event for this X-IA input.

Pilot Select Configurator XX190-20-00 Administration • 19
Tour Settings Tour Number Select the number of this tour from the drop down list.
Monitor Number
Note: This setting is not applicable if the tour is a salvo tour. The tour will be defined as a monitor or salvo tour in the Video, Sequential Tour screen.
Select the monitor which will display the tour specified in the Tour Number setting.
Salvo Details Salvo Number Select the salvo number from the drop down list.
Preset Settings Preset Number Select the preset number from the drop down list. This is the preset number defined at the receiver.
Receiver Number Select the receiver number from the drop down list. You must specify a preset number and a receiver number in order to define which preset should be recalled as a triggered event, because receivers in the system use the same range of numbers to define their presets.

20 • Keypads Pilot Select Configurator XX190-20-00
Keypads Keypad Profile Keypad profiles define the functionality of keypads with respect to other components in the CCTV system. The communications settings define the data transmission speed and delay time. The seize and priority functions define the keypad’s interaction with other keypads. The ability to acknowledge alarms and the default monitor assignment are also specified from this screen.
Keypad Number The keypad number list includes all of the 16 keypads. Highlight each in turn and define the profile using the fields to the right. The 17th keypad in the list is “RS232”, typically used for the host port.
Baud Rate Caution: You must define the same baud rate for all keypads! Use the Set All button to do so.
The baud rate defines the speed of data transmission between the keypad and the control system. The baud rate for the RS-232 port (the last keypad in the keypad list) is defined in Administration, Host Port. Use the drop down list to define the baud rate.
Communication Delay The communication delay time is the length of time that the control system will wait before assuming that a keypad is off-line. This provides the delay time needed if a modem is connected to the keypad jack of the control system. Use the arrows to select the delay in milliseconds.
Seize Control Keypads in the system may seize control of monitors and cameras from keypads with a lower priority level if the Seize Control setting is defined as Enabled. (Priority levels are discussed in the next section.) For example, keypad 1 has a lower priority than keypad 2. Keypad 1 is viewing camera 1 on monitor 1. Keypad 2 seizes control of camera 1 automatically or manually (refer to Auto/Manual). Keypad 1 can still view camera 1 on monitor 1 but

Pilot Select Configurator XX190-20-00 Keypads • 21
cannot change to another camera. Keypad 1 could change to a different monitor and change cameras, but still could not control camera 1. Select Enabled or Disabled.
Priority Level A priority level should be assigned to each keypad in the system. The control system uses priority levels to rank the ability of each keypad to seize control of a camera station from another keypad. If the Seize Control setting is set to Enabled (refer to Seize Control), any keypad may take control of a camera station currently being controlled by a keypad with a lower priority level. Ten priority levels are available. Note that fewer priority levels may be used; for example, it might be desirable to use only three levels for all the keypads in the system. Whether all ten levels or less are used, the effect is the same: any keypad whose Seize Control setting is enabled may seize control of a camera station from a keypad with a lower priority level. Select the priority level from the drop down list.
Note: Priority decreases as priority level number increases; the highest level is 00 and the lowest is 09.
Auto or Manual As discussed in Seize Control and Priority Level, a keypad can seize control of a camera and monitor from a keypad with a lower priority level. The Auto or Manual setting specifies whether the seize will occur automatically or must be initiated by a special command. For example, if Automatic is specified, a user at a keypad with higher priority can automatically seize control of a camera from a keypad with a lower priority simply by sending a pan, tilt, or any other command to the station. The seize is also initiated when a keypad with a higher priority selects a monitor being viewed by a keypad with a lower priority. The keypad with the lower priority can still be used to view the monitor (assuming the monitor is partitioned to that keypad), but the keypad cannot be used to change the camera number or control the receiver. If Manual is specified, the keypad with higher priority cannot seize control until the AUX4 key is pressed.
Note: If the speed type is set to 1200 at the remote keypad, the Automatic setting must be chosen.
Alarm Acknowledgement This setting enables or disables a keypad’s ability to acknowledge alarms. Select Enabled or Disabled.
Default Monitor This setting defines the monitor which will automatically be selected at the specified keypad when the control system is rebooted or initially powered. The default monitor must be partitioned to the currently selected keypad. Partitioning is discussed. Select the default monitor from the drop down list.
Online State Use this selection to define how the keypad’s state should appear to the control system (online or off-line) or whether the state should be determined by routine polling. For example, you may be using one keypad for multiple control systems. When you switch from one control system to another, you’d have to wait for the control system to perform its routine polling before you could use the keypad. Using the Always On setting would cause the keypad’s state to appear online to the control system, so that you do not have to wait for polling before you can use the keypad. Note that you should consider that numerous keypads in Always On state will slow the response time of your keypads - Auto Detect is the normal operating mode in most systems. You may also set the online state to Always Off when you have keypads that do not need to be polled because they will never be used.

22 • Keypads Pilot Select Configurator XX190-20-00
Monitor Partition Monitor partitioning assigns selected monitors to the keypad specified in the keypad number list. Available monitor numbers are listed onscreen to the right. Adding monitors to the Partitioned monitors list assigns, or partitions, those monitors to a keypad. The cameras that are partitioned to a monitor may be controlled from keypads that include this monitor number in the partition list.
Keypad Number This is a list of available keypads in the system. Highlight each in turn and define which monitors will be partitioned to each keypad.
Partitioned and Available Monitors Monitors that are assigned to the selected keypad are listed in the Partitioned list of monitors. Monitors that are not assigned, or partitioned, to the selected keypad are listed under Available. You will add and remove monitors from these two lists in order to customize partitioning for your system. Select one or more monitors as follows, and then use the buttons between the lists to move the monitor(s).
To select: Do this: One monitor Click the gray cell to the left of the monitor number to select the monitor. Multiple consecutive monitors Click the gray cell to the left of the first monitor number. Hold the Shift key
down and select the last monitor number. Multiple non-consecutive monitors Click the gray cell to the left of the first monitor number. Hold the Ctrl key
down and select each of the additional monitors.

Pilot Select Configurator XX190-20-00 Receivers • 23
Receivers Receiver Profile Communication parameters must be set for each receiver in the CCTV system.
Receiver Number This is a list of the available receivers in the system.
Baud Rate Caution: You must define the same baud rate for all receivers! Use the Set All button to do so.
The baud rate is the speed of data transfer between the receiver and the control system. The baud rate specified at the receiver and on this programming screen must agree. At the receiver, baud rates are set using the appropriate DIP switch on a printed circuit board. Refer to the appropriate instruction manual to set the DIP switch or determine the current setting. Select the baud rate from the drop down list.
Communication Delay The communication delay time is the length of time that the control system will wait before assuming that a receiver is off-line. This provides the delay time needed if a modem is connected to the receiver jack. Use the arrows to select a delay time in milliseconds. The V1200R-LM receiver supports eight individual cameras, each of which has its own receiver address. The control system allows the delay time to be set individually for each receiver. The delay time must be set for each receiver address (receiver number) represented by the V1200R-LM. For example, if the receiver numbers for the V1200R-LM are 21, 22, 23, 24, 25, 26, 27 and 28, you must set the delay time for each of these receiver numbers. Use 200 msec as the delay time for V1200R-LM receivers.
Model Select the model number of the receiver from the drop down list. Select Undefined if the model number is unknown. The Vicoax setting is for future use. The V1300R should be selected for both V1300R and V1301R model receivers. Choose the V1300R-PV model number for the V1300R or V1301R receiver with the variable-speed option board installed.

24 • Receivers Pilot Select Configurator XX190-20-00
Choose the Simplex setting when receiver response is not required by the control system. Receiver alarms and communication failures will not be reported back to the system if the Simplex setting is chosen. This setting is typically used when there is a problem that has not yet been identified and corrected with the receiver response (perhaps from incorrect wiring), because the system will not expect responses from this receiver.
Home Position The home position is defined as preset 1 for all camera stations. If the home position is enabled, this feature may be used to automatically direct the camera stations to preset position 1 when alarms are acknowledged or on power-up. Select Enabled or Disabled from the drop down list.
Home Aux 1 As discussed in Home Position, the home position is defined as preset position 1 for all camera stations. The Home Aux 1 setting defines the condition of aux 1 when the home position feature is activated (during alarm acknowledgment or on power-up). Select N/C for no change, On or Off from the drop down list.

Pilot Select Configurator XX190-20-00 Alarms • 25
Alarms Alarm Stacking Mode When multiple alarms are activated, a list of the activated alarm input numbers is created in temporary memory. A separate list may be maintained for each alarm monitor, or one list may be used for all alarm monitors, depending upon the alarm stacking mode chosen for the system.
Monitor Stack Mode An alarm monitor stack is a list of active alarms. The order in which alarms are added to the stack is defined in Alarm Stack Mode, Alarm Input Order or Alarm Monitor Actions, Alarm Order. The monitor stack mode chosen determines whether one stack will be used for all monitors (common stack) or if each monitor will have its own stack (independent stacks). An example of each stack mode is shown in the following pages. Review these examples and select the appropriate stack mode for your system.
Common Stack Example The following figure illustrates the video from specific camera stations at specific preset positions. In part A, the Edit Alarm Callup tables are shown for two alarms. The initial conditions are as follows:
• Common stack mode
• FIFO (first-in, first-out) order
• Alarm 01 is activated before alarm 02 In part B, the video from specific camera stations at specific preset positions are shown. All of these camera/preset combinations are associated with either alarm 01 or alarm 02 as shown in part A, except for the video from camera 10 at preset 01. The video from camera 10 at preset 01 is defined to be the video displaying on monitor 3 before any alarms are activated. Part C illustrates the video displayed on monitors 1, 2 and 3 when alarm 01 is activated. As shown in Part A, an active alarm 01 was programmed to display video as follows: Camera 01, Preset 01 on monitor 1

26 • Alarms Pilot Select Configurator XX190-20-00
Camera 20, Preset 02, on monitor 2. Because the Edit Alarm Callup table for alarm 01 does not include monitor 3, it will continue to display the pre-alarm video (camera 10, preset 01). Note that even though the list of active alarms (the stack) is common to all alarm monitors, a specific monitor will only display the alarm video from a particular alarm input if it was defined to do that in the Edit Alarm Callup table.
Common Stack Mode Example

Pilot Select Configurator XX190-20-00 Alarms • 27
Independent Stack Example The following figure illustrates independent stack mode. The initial conditions are:
• Independent stack mode
• FIFO (first-in, first-out) order for monitors 1 and 3; priority order for monitor 2
• Acknowledged alarms will NOT be cleared from all monitor lists
• Alarm 1 is activated before alarm 2
• Alarm 2 has a higher priority than alarm 1 As shown in the following figure, each monitor has its own stack in independent stack mode. Functions which affect display order act upon individual alarm monitors. For example, acknowledging alarm video removes it from the stack of the alarm monitor that is displaying the alarm video, but does not affect the stacks of any other alarm monitors unless specifically programmed to do so, as discussed in Alarm Action. Part A illustrates the Edit Alarm Callup tables for two alarms. Part B illustrates the video from specific cameras at specific preset positions. All of the alarms shown in Part B are associated with either alarm 01 or alarm 02 except for the video from camera station 10 at preset 01. When alarms 01 and 02 are activated, alarm 01 displays on monitor 01 because the alarm order was established in the initial conditions as FIFO. In Part C the Alarm Order for monitors 01, 02 and 03 is shown. Monitor 02 is set to Priority, so alarm 02 displays on monitor 02. Monitor 03 displays only alarm 02 because this monitor was not included in the Edit Alarm Call-Up for alarm 01, and monitor 03 has no camera associated with alarm 01. In Part D it is shown that alarm 02 is acknowledged from monitor 02, it is cleared from monitor 02’s stack only. Because of the specified initial conditions, monitors 01 and 03 are not affected..

28 • Alarms Pilot Select Configurator XX190-20-00
Independent Stack Example

Pilot Select Configurator XX190-20-00 Alarms • 29
Alarm Input Order Note: This setting is unavailable if independent stack mode is chosen, as the alarm order must be defined for
each alarm monitor’s stack. Refer to Alarm Monitor Actions, Alarm Order for independent stack mode. If common stack mode is chosen for the monitor stack mode, as discussed in Alarm Stacking Mode, Monitor Stack Mode, there is only one stack for all alarm monitors. The order in which alarms are added to the stack may be First In First Out, which adds alarm video to the stack in the order in which the alarms were activated, or Sort By Priority, which adds alarm video to the stack in an order defined by priority. A priority level is assigned to each alarm input in the system, as discussed in Alarm Actions, Priority Level. Select the appropriate alarm input order for your system.
Alarm Action The Alarm Action screen is used to select the priority level and global alarm acknowledgment. Alarm call-up, which defines the video and actions to take place when alarms are activated, is also defined. The alarm actions available with the software provide versatile responses to activated alarms while maintaining simple alarm programming procedures. Alarms can be activated from the following sources:
• 256 receiver alarms
• 256 X-IA alarms (alarms from alarm interface devices V1300X-IA)
• 256 RS-232 Alarms (via host port)
Alarm List The alarm input numbers on this screen refer to the alarm input regardless of alarm source. For example, the alarm input may be from a receiver alarm, a PC, or an alarm interface device (X-IA alarm device). X-IA inputs may be used as event triggers or to activate alarms. The alarm input list includes only those input numbers that have not been defined as event triggers in the Triggered Events screen. Select each alarm input in turn from the alarm input list and then define its callup table, acknowledgement mode and priority level.
30 • Alarms Pilot Select Configurator XX190-20-00
Clear From All Monitors Upon Acknowledge If common stack mode was chosen, acknowledging an active alarm will remove that alarm from the common stack. If independent stack mode was chosen, functions that affect display order act upon alarm monitors individually, not globally. In other words, the stacks are independent; each alarm monitor has its own stack. However, acknowledging an alarm may be specified as a global function even for the independent stack mode. By selecting this option, an alarm will be removed from all alarm monitor stacks when it is acknowledged, thereby performing a global acknowledgment while in independent stack mode. If the parameter is not selected, acknowledging the alarm will remove it from the stack of the alarm monitor at which the alarm was acknowledged, without removing the alarm from other monitor stacks.
Priority Level Priority levels are used to define a relative scale of importance to alarms, allowing alarms to be added to the monitor stack in order of priority level. The alarms in the alarm stack are sorted by priority as they are detected, if the alarm input order is Sort By Priority for common stack mode or Priority for independent stack mode. A higher priority level is identified by a lower number, for example, an alarm with priority level 9 will be added to the stack before an alarm with priority level 10. Select the appropriate priority level from the drop down list.
Callup Table The alarm call-up table defines the actions to be taken and the alarm video to be displayed when the alarm selected from the alarm input list is activated. All alarm monitors are listed, and the video from any camera may be displayed on any monitor for the specified alarm, if the camera has been partitioned to the monitor. Refer to Camera Partition. The state of one auxiliary relay in each receiver can be programmed to respond to an alarm input to control equipment at the camera station. A preset position may be recalled for each camera. Select the appropriate camera, preset and auxiliary action for each monitor from the drop down lists, using camera number “0” to blank the monitor or “NC” for no change. You will need to use the right/left scroll bar at the bottom of the table to access the preset fields.
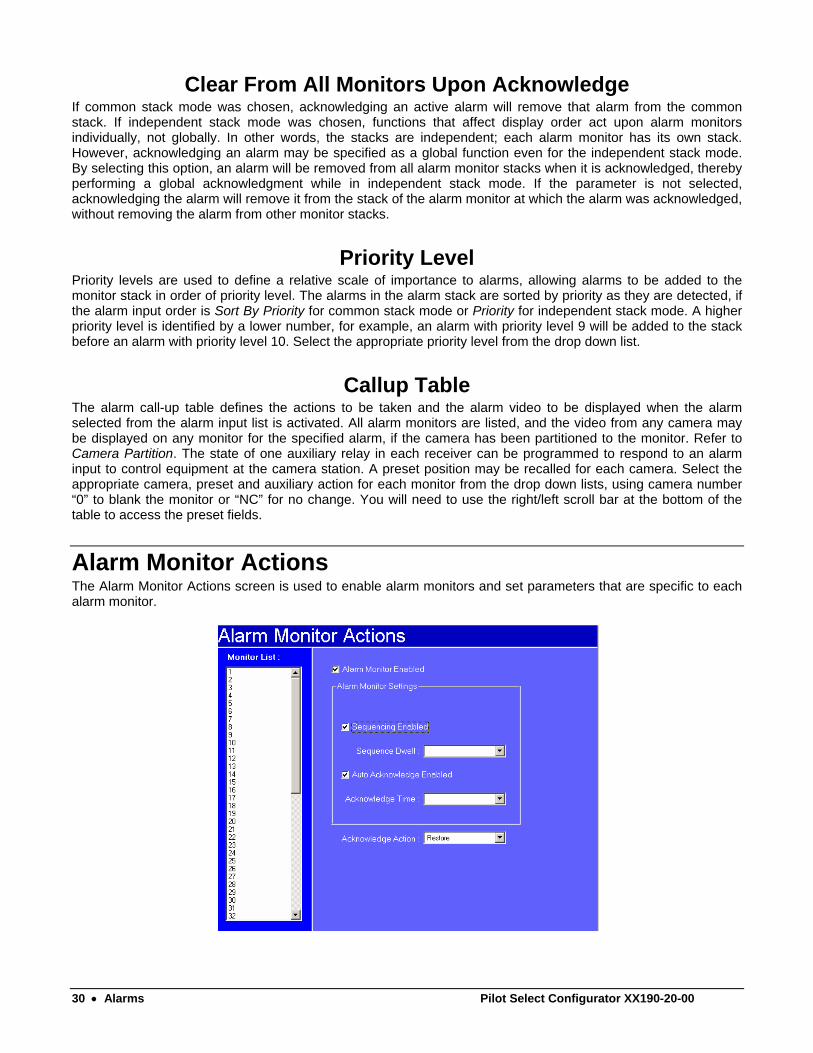
Alarm Monitor Actions The Alarm Monitor Actions screen is used to enable alarm monitors and set parameters that are specific to each alarm monitor.

Pilot Select Configurator XX190-20-00 Alarms • 31
Monitor List Select a monitor from the monitor list and set the parameters in the action fields to the right of the list. Repeat for each monitor in your CCTV system.
Alarm Monitor Enabled Alarm monitors are monitors that may display alarm video. Any monitor may be designated as an alarm monitor. Click to place an “x” in the field to define the currently selected monitor as an alarm monitor or remove the “x” to specify that this monitor is not an alarm monitor.
Sequencing Enabled Alarm monitors may be set to sequence multiple active alarm video or to display an alarm steadily until acknowledged, in the order determined in Alarm Stacking Mode, Monitor Stacking Order or Alarm Input Order. The alarm video will display for the length of time specified in the Sequence Dwell setting. The dwell time must be long enough to allow the pan-and-tilt drive to move to the preset position and be viewed before the sequence proceeds to the next alarm. Click to place an “x” in the field to enable sequencing or remove the “x” if alarm monitor video should display steadily.
Sequence Dwell If you enabled sequencing as discussed in the previous section, select a dwell time in seconds from the list.
Auto Acknowledge Enabled Alarms may be acknowledged manually or automatically. If auto acknowledge is enabled, an alarm will display until the acknowledge time passes, then the alarm will be automatically acknowledged by the system. Manual acknowledgment by a user is required if this function is disabled. Click to place an “x” in the field to enable automatic acknowledgment or remove the “x” if manual acknowledgment procedures will be used. Refer to the appropriate remote keypad documentation for manual acknowledgment procedures.
Acknowledge Time If the auto acknowledge feature was enabled, select the time that must pass before an alarm is automatically acknowledged.
Acknowledge Action The acknowledge action specifies the action to take place after all alarms in the monitor stack are acknowledged. The Restore setting restores prealarm video. The Blank setting displays a blank monitor (no video signal) and the No Action setting leaves the video from the alarm site on the monitor. Select the appropriate action from the list.

32 • Alarms Pilot Select Configurator XX190-20-00
Receiver Actions This screen refers to receiver alarms or RS-232 alarms only; X-IA alarms (alarms connected to alarm interface devices V1300X-IA) are programmed using other screens.
Receiver List Select each receiver from the list in turn and define the parameters in the fields to the right.
Options The Options fields are used to enable receiver alarms and to define that the receiver will direct the pan-and-tilt drive to return to the home position upon alarm acknowledgement.
Alarm Enabled
Caution: Vicon recommends that X-IA alarms (not receiver alarms) be used for critical surveillance areas. Receiver alarms must be enabled in order to be processed by the control system. Place an “x” in the field to enable the receiver alarm; leave the field blank to disable the alarm.
Home on Ack Each receiver may be enabled to return to the home position when the receiver’s alarm has been acknowledged. The home position is defined as preset 1 for all receivers. The system defaults enable this function for all receivers. Auxiliary equipment designated aux 1 may also be activated or deactivated when the home position is recalled.
Aux 1 Acknowledge Action The acknowledge action specifies the action to take place after all alarms in the monitor stack are acknowledged. The Restore setting restores Aux 1 to its prealarm video, On (which turns AUX 1 on), Off (which turns AUX 1 off), and No Action (which leaves AUX 1 in the state defined in the call-up table).

Pilot Select Configurator XX190-20-00 Alarms • 33
Input Controls Caution: Use X-IA alarms rather than receiver alarms for critical surveillance areas. The Input Controls screen applies to X-IA alarms only. X-IA alarms are V1200X-IA and/or V1300X-IA alarm interface devices connected to the control system equipment. Receiver alarm controls are specified in Receiver Actions. X-IA alarm inputs must be enabled in order to be processed. X-IA alarms may be enabled in groups referred to as patterns. Three patterns are available. The use of patterns allows X-IA alarms to operate as a group. For example, an Alarm Enable event using pattern A could be scheduled for daylight hours and pattern B could be reserved for night.
Alarm Input Number This is a list of the available X-IA alarm inputs.
Normally Closed Alarms may be set to activate when the alarm contacts open or close. Closure type must be specified for each X-IA alarm used in your CCTV system. Place an “x” in the field to indicate a normally closed relay or remove the “x” to indicate a normally open relay.
Enabled on Pattern (A, B or C)
Note: Upon power-up, the control system will default to pattern A. When it is time for the next pattern to begin, the control system will follow the system programming.
Define your A, B and C patterns by enabling (“x” in the field) or disabling (empty field) each input in the appropriate patterns.
Momentary on Pattern (A, B or C) A momentary alarm remains active only as long as the alarm switch contacts are in the position which defines an alarm. For example, some alarms are activated when the contacts close (normally open) and others when the contacts open (normally closed). If a normally-closed momentary alarm is connected to a door, the alarm is active only while the door is open. Latching alarms remain in their current state, for example, a latching normally-closed door alarm will activate when the door is opened and remain active until the alarm is acknowledged. The default state of X-IA alarms is latching. Note that all receiver alarms are latching.

34 • Alarms Pilot Select Configurator XX190-20-00
Patterns of X-IA alarms must be specified as momentary or latching. Three patterns are available. The use of patterns allows X-IA alarms to operate as a group. For example, an Alarm Type event using pattern A could be scheduled for daylight hours and pattern B could be reserved for night. Pattern A might set all X-IA alarms to act as momentary in this example, while pattern B sets all X-IA alarms to act as latching. Note that both momentary/latching patterns and X-IA enable patterns (discussed in the previous section) use the settings A, B, and C. However, the A, B, and C momentary/latching patterns are completely independent of the A, B, or C X-IA enable patterns. Each alarm input must be specified as either latching or momentary (all alarms are latching by default and must be deliberately selected as momentary). Also, all alarms must be individually enabled as discussed in Alarm Monitor Actions, Alarm Monitor Enabled, independent of the momentary/latching assignment. Selecting an alarm as momentary does not enable it. Select the appropriate momentary pattern(s) for the currently selected alarm input.
Alarm Serial Port The ALARM PRINTER PORT, located on the rear panel of the unit, may be connected to a serial line printer in order to provide automatic alarm reports.
Baud Rate The baud rate is the data transfer speed. The baud rate of the printers or host computers must agree with the setting specified in this screen. If you connect a host computer to each alarm serial port, the computers must be set to the same setting. Select the appropriate baud rate from the drop down list.
Data Bits Either setting (7 or 8) may be used as the number of data bits; however, the same number must be specified at the printers or host computers. The number of data bits defines the number of bits in a data character. Select the data bits from the drop down list.
Stop Bits This setting specifies the number of bits used to signal the end of a data character. The stop bits at the printers/computers and the setting chosen in this screen must agree. Select the stop bits from the list.

Pilot Select Configurator XX190-20-00 Alarms • 35
Parity The setting chosen for the parity must agree with the parity of the printers or host computers. Select the parity from the drop down list.

36 • Video Switch Pilot Select Configurator XX190-20-00
Video Switch
Default Callup Note: The fields shown on this screen depend upon the Type setting. For example, if you choose Tour as the
Type, the fields under the Type field will change to Tour Settings. The Default Callup specifies the condition of each monitor in the CCTV system when power is applied.
Monitors Select a monitor and define the actions as described in the following section(s). Repeat for each monitor.
Type Upon system startup, monitors may be set to display no video (Blank), display the video from a specified camera (Camera), begin a tour (Tour), or display the video from the camera as defined in a salvo (Salvo).
Camera Settings If Camera is selected in the Type field, Camera Settings will display.
Startup Number From the drop down list, choose the number of the camera to be selected upon system startup.
Home Recall Enabled Camera stations may be directed to the home position when the control system is powered or rebooted, by enabling the home recall function in this screen. The home position is preset position 1 for all camera stations. Click on the field to place an “x” in the box to enable this feature or leave blank to disable.
Tour Settings Choose the number of the tour to be selected upon system startup.
Salvo Settings Choose the salvo to be selected upon system startup (this applies only to the currently selected monitor).

Pilot Select Configurator XX190-20-00 Video Switch • 37
Camera Partition The procedure of assigning cameras to monitors is known as partitioning. Video from camera stations may not be displayed on monitors unless the camera stations are partitioned to those monitors. Monitors are partitioned to keypads as discussed in Keypads, Monitor Partition. Keypads may only control a camera station if it has been partitioned to a monitor which was in turn partitioned to that keypad.
Monitor Number The monitor list includes all available monitors in the system. Select the monitor to which the cameras are to be partitioned and use the lists to the right to make camera assignments. Repeat this procedure for each monitor in the monitor list that you will use in your CCTV system.
Partitioned and Available Cameras Cameras that are assigned to the selected monitor are listed in the Partitioned list of cameras. Cameras that are not assigned, or partitioned to the selected monitor are listed under Available. You will add and remove cameras from these two lists in order to customize partitioning for your system. Select one or more cameras as follows, and then use the buttons between the lists to move the camera(s).
To select: Do this: One camera Click the gray cell to the left of the camera number to select the camera. Multiple consecutive cameras
Click the gray cell to the left of the first camera number. Hold the Shift key down and select the last camera number.
Multiple non-consecutive cameras
Click the gray cell to the left of the first camera number. Hold the Ctrl key down and select each of the additional cameras.

38 • Video Switch Pilot Select Configurator XX190-20-00
Salvo Switch Salvos are defined using the Salvo Switch screen. After a salvo is defined to the system using this screen, it may be activated manually at a keypad or may be used as a step in a salvo tour.
Salvo List Select each salvo in turn from the salvo list and define the steps in the salvo.
Salvo Details A salvo is defined by (preset) video displays from various cameras on various monitors. For example, salvo 1 might be defined as the display of video from camera 8 on monitor 1, the display of video from camera 4 at preset 55 on monitor 2, and the display of video from camera 5 on monitor 3. Note that the camera may be directed to a preset position upon activation of the salvo, but this is not mandatory. In the table, each row is a “step” in the salvo tour. Click the leftmost column to place an arrow in the row and then type or select the appropriate monitor, camera, preset and speed setting numbers for the currently selected salvo.
Note: To exclude a monitor from the salvo, choose “0” as the monitor number. Do not use the same monitor number more than once per salvo.

Pilot Select Configurator XX190-20-00 Video Switch • 39
Sequential Tour Salvo and monitor tours are defined from the Sequential Tour screen.
Note: The fields shown on this screen depend upon the Type setting. For example, if you choose Monitor Tour as the Type, the fields to the right of the Step Number list will change.
Tours Select each tour in turn from the tour list and define the tour using the onscreen fields.
Type Two tour types are available, Monitor Tour and Salvo Tour. In a monitor tour, video from various cameras and various preset positions display on a selected monitor in a predefined order. Tours are initiated with a remote keypad. For example, monitor tour 1 might be defined as camera 1 preset 10 (step 1) then camera 44 preset 1 (second step). If an operator selects any monitor and then selects monitor tour 1, then that monitor displays camera 1’s preset 10 and then displays camera 44’s preset 1. Each video display is a “step” in the tour. In a salvo tour, each step is a predefined salvo. For example, salvo 1 activates, then salvo 63, then salvo 22, etc.
Last Step Action The action that will take place when the final step in a tour has been performed is defined as the last step action. Three last step actions are possible: another tour may activate (Chain #, where # denotes the number of the tour to be activated next), all touring may cease (Halt), or the tour may repeat (Repeat). Select the appropriate last step action for the currently selected tour from the drop down list.
Monitor Tour Details The tour is defined as a monitor or salvo tour as discussed in Type. The Monitor Tour Details fields will display if the tour is defined as a monitor tour. Monitor tours must be defined by specifying the video to be displayed for each step in the tour. When the monitor tour is selected at the keypad, the tour will run on the currently selected monitor. Each step of the tour defines the video to be displayed at a relative time in the tour. For example, step 3 is performed after step 2 and before step 4. The Preset Number and Camera Number settings define the pan-and-tilt and lens preset which the camera station (receiver) will recall at each specified step. The speed defines the relative speed at which the pan-and-tilt unit will travel to the preset position. A higher number corresponds to a faster speed. The Monitor Dwell controls the length of time in seconds for each step in the tour. Note that the dwell time begins after the pan-and-tilt drive has reached the preset position.

40 • Video Switch Pilot Select Configurator XX190-20-00
Note: It is not required that the total number of steps be defined. For unused steps, select “No Receiver” for the Camera Number setting.
Step Number This is a list of the steps available in the tour. Click on each step in turn and define the parameters in the adjacent fields.
Camera Number This field defines a specific receiver/camera station whose video will be viewed on the tour.
Preset Number This setting defines the pan-and-tilt preset position and lens setting which the camera station will recall at each step.
Speed The speed defines the relative speed at which the pan-and-tilt unit will travel to the preset position. A higher number corresponds to a faster speed.
Monitor Dwell The dwell time controls the length of time in seconds for each step in the tour. Note that the dwell time begins after the pan-and-tilt drive has reached the preset position.

Pilot Select Configurator XX190-20-00 Video Switch • 41
Salvo Tour Details Salvo tours must be defined by selecting the Salvo Number and Dwell time for each step in the tour. Each step defines the actions to take place at a relative time in the tour. For example, step 3 is performed after step 2 and before step 4. Salvos are defined in the Salvo Switch screen.
Step Number This is a list of the steps available in the tour. Click on each step in turn and define the parameters in the adjacent fields.
Salvo Number Select the salvo number from the drop down list. This salvo must be defined in the Salvo Switch screen. Choose “Unused” for unused steps in the tour.
Dwell The dwell time controls the length of time in seconds for each step in the tour. Note that the dwell time begins after the pan-and-tilt drive has reached the preset position. Select the dwell time from the drop down list.

42 • Video Switch Pilot Select Configurator XX190-20-00
Dial Up Video Dial up numbers are used to redefine the identifying numbers (i.e., to assign an alias) for cameras as a consequence of software defaults and hardware connections. For example, if dial up numbers are not used to redefine video input numbers, video from cameras will always be identified by the number of the video input connector at the control system. This would limit the numbers to 1 through 512. Using dial up numbers, the camera stations may be identified using a unique four-digit number from 1 to 999.
Note: Each dial up number must be unique in the system. Dial up numbers are used during operation; they may not be used during programming.
Video Input Number This is the list of video inputs for which dial up numbers can be assigned.
Dial Up Number The control system limits the programmer to the range of numbers between 1 and 512 for camera identification. You may use any number up to 999 as the dial up numbers for cameras. It may be convenient to use a number which is outside that range during operation. Type the dial up number for the currently selected input number.

Pilot Select Configurator XX190-20-00 Video Switch • 43
Dial Up Salvo Dial up numbers are used to redefine the identifying numbers (i.e., to assign an alias) for salvos. Using dial up numbers, salvos may be identified using a unique four-digit number from 1 to 999. Dial up numbers are used during normal operation and may not be used during programming.
Salvo Number Select the desired salvo and assign the dial up number in the field to the right of the salvo list.
Dial Up Number Type the dial up number for the salvo currently selected in the salvo list.
Dial Up Tour Dial up tour numbers allow you to define your own tour numbers for use during normal operation. You may not use dial up numbers during programming.

44 • Video Switch Pilot Select Configurator XX190-20-00
Tour Number Select the desired tour and assign the dial up number in the field to the right of the tour list. Repeat for each tour needing a dial up number assignment.
Dial Up Number Any dial up number between 1 and 999 may be assigned in order to identify tours with a customized numbering scheme. Type the dial up number for the currently selected tour.
High Speed Switcher Output The high speed switching output is used to route video from a range of video inputs to 2 high speed switching monitors. These monitor outputs can be connected to a Vicon video loss detector and, if an X-IA input is connected to the video loss detector’s alarm output, the loss of video from any camera within the range will activate an alarm.
Monitor Number Select the monitor number to be associated with the currently selected output.
Starting and Ending Input Number Use the arrows to define the starting and ending video input (camera or other source) numbers.

Pilot Select Configurator XX190-20-00 Time Date Titler • 45
Time Date Titler Time and Date Controls The Time and Date Controls screen is used to define the date and time format.
Date Format Select the date format from one of the three available options, where MM represents two digits for the month, DD represents two digits for the day of the month and YYYY represents four digits for the year. For example, January 2, 1997 would appear in DD/MM/YYYY format as 02/01/1997.
Time Format Select the time format from one of the available options.
DST Format Select the Daylight Saving Time standard that you wish to follow: US (Oceania), Europe (Eurasia) or None.

46 • Time Date Titler Pilot Select Configurator XX190-20-00
Display Controls The Display Controls screens are used to specify the placement, size and fade of onscreen text. The time and date display, title display and seize status are also enabled or disabled.
Monitor Position
Monitor List The control system allows the size, appearance and position of onscreen text to be specified for each of the individual monitors. Select each monitor from the list and define the titling parameters.
Monitors (all) Selects the video standard, NTSC or PAL, for the monitors.
Use Large Characters Click to place an “x” in the field to use large characters. Smaller characters will be used if the field is blank.
Background/Border Toggle the display of a background, a border, or the lack of background and border with the titles by selecting the appropriate setting while viewing the titles on the monitor to the right of the Background/Border field.
Display Type Select the format for the title display sequence on the selected monitor, viewing the monitor icon for examples. The format defines the relative order of the title information and its placement on the screen. The Top Split and Bottom Split selections split the titles so that the Date will either appear at the top of the screen or the bottom. The Title Split controls allow you to determine the position of the titles on the screen.

Pilot Select Configurator XX190-20-00 Time Date Titler • 47
Title Position Use the slide bars and monitor icon to position the placement of the control system’s programming screens in the X (lower slide bar) and Y (right-hand slide bar) dimensions for the selected monitor. The range of either X or Y positions is 0 to 31.
Display Enablement The date/time display, camera titles, preset titles, sector titles, and seize status can be enabled or disabled for each monitor in the system. Enable or disable these settings as appropriate for your system.

48 • Time Date Titler Pilot Select Configurator XX190-20-00
Fade Control The camera, alarm, and preset titles may be set to fade from the screen after a specified period of time. These controls are set for each monitor selected from the monitor list.
Camera/Alarm Title Fade Click to enable or disable the camera and alarm titles to fade from the selected monitor’s screen after the fade time elapses.
Preset Fade Click to enable or disable the preset title to fade from the selected monitor’s screen after the fade time elapses.
Fade Time Select the time in seconds (0-99) from the drop down list. This is the time that must elapse before the camera, alarm and preset titles fade from the monitors.

Pilot Select Configurator XX190-20-00 Time Date Titler • 49
Camera Titles Camera titles are usually used to identify the physical location of the area under surveillance by the cameras within the CCTV system. The appropriate user-defined or default camera title will be displayed on the monitor screen when the camera is selected, if the monitor’s camera title display has been enabled. Each camera may have a unique, single-line title of up to twenty alphanumeric characters.
Cameras Select each camera in turn from the camera list and define the camera title.
Alarm Titles Alarm titles are usually used to identify the location of a site in an alarm situation. Each alarm may have a unique, unique, single-line title of up to twenty alphanumeric characters.

50 • Time Date Titler Pilot Select Configurator XX190-20-00
Preset and Sector Titles Preset and sector titles are used to identify either the system presets or sectors. Each preset and sector may have a unique, single-line 20-character title.

Pilot Select Configurator XX190-20-00 Glossary of Terms • 51
Glossary of Terms Alarm Monitor A monitor that may display video from camera(s) in an alarm state. Alarm monitors are enabled in the Alarm Monitor Actions screen.
Configuration File The configuration file is used to define the CCTV system to the control system. This file, also referred to as a profile, is present in the control system at the time of purchase and contains factory defaults until it is edited or overwritten. The file may be edited at the control system (using the control system’s programming screens and a programming keyboard) or it may be created at a PC (using the Configurator software) and then transferred to the control system.
Dwell Time The period of time that video from a camera will display on a monitor before being replaced by video from the next camera in the sequence.
Fade Time The period of time which elapses before onscreen titles disappear from a monitor. The camera and alarm titles may be set to fade, as well as the preset titles (refer to Time, Date, Titler, Display Controls, Fade Control).
Partition The assignment of cameras to monitors or the assignment of monitors to keypads. Video output from a camera may only be displayed on a monitor to which it is assigned (partitioned). A camera may only be controlled by a keypad if that camera has been partitioned to a monitor that has in turn been partitioned to that keypad. A keypad cannot be used to control a monitor unless that monitor has been assigned (partitioned) to that keypad.
Preset A predefined pan-and-tilt position (and zoom/focus setting, if the camera includes a motorized zoom lens). The pan-and-tilt drive and lens must be equipped with preset potentiometers in order to use preset functions.
Profile The profile is used to define the CCTV system to the control system. This file, also referred to as a configuration file, is present in the control system at the time of purchase and contains factory defaults until it is edited or overwritten. The file may be edited at the control system (using the control system’s programming screens and a keyboard) or it may be created at a PC (using the Configurator software) and then transferred to the control system.
Salvo A group of monitors that display video from predefined camera stations.
Stack Mode The manner in which alarms will be processed by the control system.
Tour A series of video switching and preset positioning functions. A tour is comprised of “steps”, where each step is a predefined video switch (camera callup) and preset position/lens setting.

52 • Glossary of Terms Pilot Select Configurator XX190-20-00
Vicon Standard Equipment Warranty
Vicon Industries Inc. (the “Company”) warrants your equipment to be free from defects in material and workmanship under Normal Use from the date of original retail purchase for a period of three years, with the following exceptions:
1. VCRs, all models: Labor and video heads warranted for 120 days from date of original retail purchase. All other parts warranted for one year from date of original retail purchase.
2. Video monitor CRT (cathode ray tube) and LCD monitors, all models: One year from date of original retail purchase.
3. Uninterruptible Power Supplies: Two years from date of original retail purchase.
4. VDR-304 and VDR-308 Recorder Series: One year from date of original retail purchase.
5. Normal Use excludes prolonged use of lens and pan-and-tilt motors, gear heads, and gears due to continuous use of “autopan” or “tour” modes of operation. Such continuous operation is outside the scope of this warranty.
Date of retail purchase is the date original end-user takes possession of the equipment, or, at the sole discretion of the Company, the date the equipment first becomes operational by the original end-user.
The sole remedy under this Warranty is that defective equipment be repaired or (at the Company’s option) replaced, at Company repair centers, provided the equipment has been authorized for return by the Company, and the return shipment is prepaid in accordance with policy.
The Company will not be obligated to repair or replace equipment showing abuse or damage, or to parts which in the judgment of the Company are not defective, or any equipment which may have been tampered with, altered, misused, or been subject to unauthorized repair.
Software supplied either separately or in hardware is furnished on an “As Is” basis. Vicon does not warrant that such software shall be error (bug) free. Software support via telephone, if provided at no cost, may be discontinued at any time without notice at Vicon’s sole discretion. Vicon reserves the right to make changes to its software in any of its products at any time and without notice.
This Warranty is in lieu of all other conditions and warranties express or implied as to the Goods, including any warranty of merchantability or fitness and the remedy specified in this Warranty is in lieu of all other remedies available to the Purchaser. No one is authorized to assume any liability on behalf of the Company, or impose any obligations on it in connection with the sale of any Goods, other than that which is specified above. In no event will the Company be liable for indirect, special, incidental, consequential, or other damages, whether arising from interrupted equipment operation, loss of data, replacement of equipment or software, costs or repairs undertaken by the Purchaser, or other causes.
This warranty applies to all sales made by the Company or its dealers and shall be governed by the laws of New York State without regard to its conflict of laws principles. This Warranty shall be enforceable against the Company only in the courts located in the State of New York.
The form of this Warranty is effective August 15, 2007.
THE TERMS OF THIS WARRANTY APPLY ONLY TO SALES MADE WHILE THIS WARRANTY IS IN EFFECT. THIS WARRANTY SHALL BE OF NO EFFECT IF AT THE TIME OF SALE A DIFFERENT WARRANTY IS POSTED ON THE COMPANY’S WEBSITE, WWW.VICON-CCTV.COM. IN THAT EVENT, THE TERMS OF THE POSTED WARRANTY SHALL APPLY EXCLUSIVELY.
Vicon Part Number: 8006-9010-03-03 Rev 807

Pilot Select Configurator XX190-20-00 Glossary of Terms • 53
Microsoft, Windows, Windows Server and Windows Vista are registered trademarks of Microsoft Corporation.

Vicon Industries Inc.
Corporate Headquarters 89 Arkay Drive
Hauppauge, New York 11788 631-952-CCTV (2288) 800-645-9116
Fax: 631-951-CCTV (2288)
Vicon Europe Headquarters
Brunel Way Fareham, PO15 5TX
United Kingdom +44 (0) 1489 566300
Fax: +44 (0) 1489 566322
Germany vin-videotronic infosystems gmbh
Lahnstrasse 1 D-24539 Neumuenster
Phone: +49 (0) 4321 8790 Fax: +49 (0) 4321 879 47
Far East Office Unit 5, 17/F, Metropole Square
2 On Yiu Street, Shatin New Territories,
Hong Kong (852) 2145-7118
Fax: (852) 2145-7117
Internet Address: www.vicon-cctv.com