![DRAGON PERGOLA - twowests.co.uk · PKITDRGNA - 337.8cm [H] x 270cm [W] x 270cm [D] DRAGON PERGOLA Self-Assembly required Home Delivery available All products and related emblems featured](https://static.fdocuments.us/doc/165x107/5acf63787f8b9ac1478cbea3/dragon-pergola-3378cm-h-x-270cm-w-x-270cm-d-dragon-pergola-self-assembly.jpg)
PERGOLA ASSEMBLY INSTRUCTIONS - The Home Depot€¦ · PERGOLA ASSEMBLY INSTRUCTIONS ©2010 Suncast...
16
PERGOLA ASSEMBLY INSTRUCTIONS ©2010 Suncast Corporation, Batavia, IL
Transcript of PERGOLA ASSEMBLY INSTRUCTIONS - The Home Depot€¦ · PERGOLA ASSEMBLY INSTRUCTIONS ©2010 Suncast...
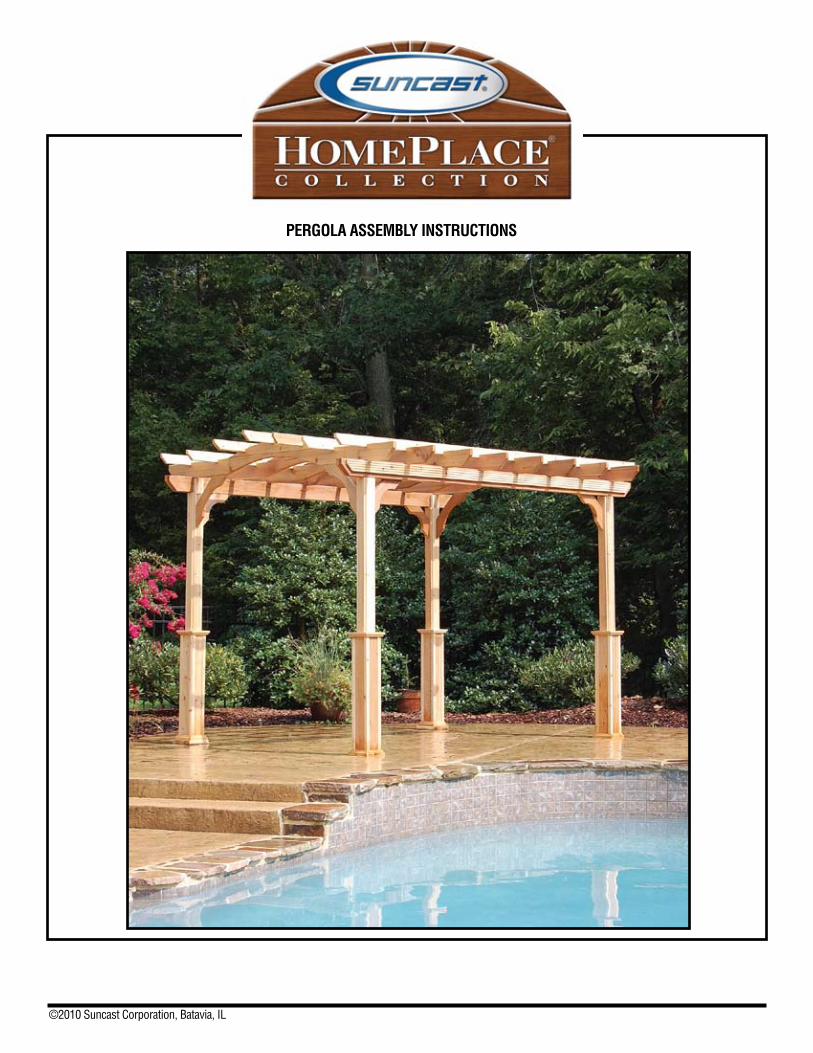
PERGOLA ASSEMBLY INSTRUCTIONS
©2010 Suncast Corporation, Batavia, IL
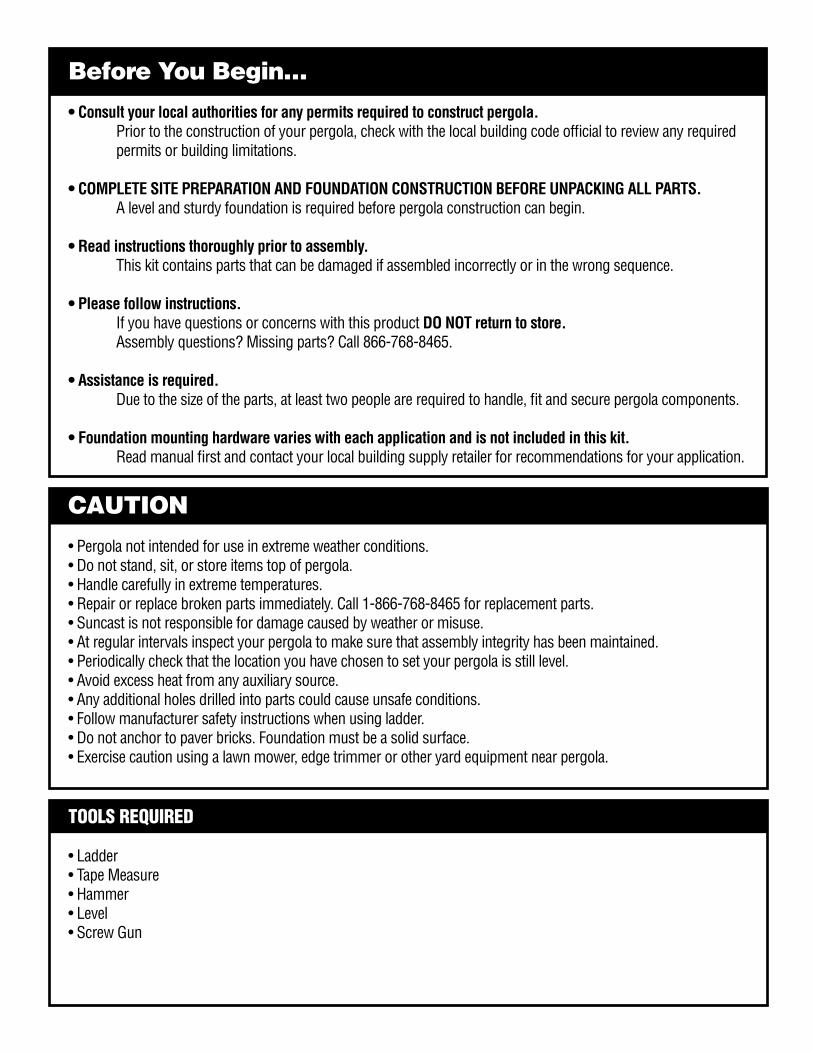
Before You Begin…
• Consult your local authorities for any permits required to construct pergola. Prior to the construction of your pergola, check with the local building code official to review any required permits or building limitations.
• COMPLETE SITE PREPARATION AND FOUNDATION CONSTRUCTION BEFORE UNPACKING ALL PARTS. A level and sturdy foundation is required before pergola construction can begin.
• Read instructions thoroughly prior to assembly. This kit contains parts that can be damaged if assembled incorrectly or in the wrong sequence.
• Please follow instructions. If you have questions or concerns with this product DO NOT return to store. Assembly questions? Missing parts? Call 866-768-8465.
• Assistance is required. Due to the size of the parts, at least two people are required to handle, fit and secure pergola components.
• Foundation mounting hardware varies with each application and is not included in this kit. Read manual first and contact your local building supply retailer for recommendations for your application.
CAUTION
• Pergola not intended for use in extreme weather conditions.• Do not stand, sit, or store items top of pergola.• Handle carefully in extreme temperatures.• Repair or replace broken parts immediately. Call 1-866-768-8465 for replacement parts.• Suncast is not responsible for damage caused by weather or misuse.• At regular intervals inspect your pergola to make sure that assembly integrity has been maintained.• Periodically check that the location you have chosen to set your pergola is still level.• Avoid excess heat from any auxiliary source.• Any additional holes drilled into parts could cause unsafe conditions.• Follow manufacturer safety instructions when using ladder.• Do not anchor to paver bricks. Foundation must be a solid surface.• Exercise caution using a lawn mower, edge trimmer or other yard equipment near pergola.
TOOLS REQUIRED
• Ladder• Tape Measure • Hammer• Level • Screw Gun
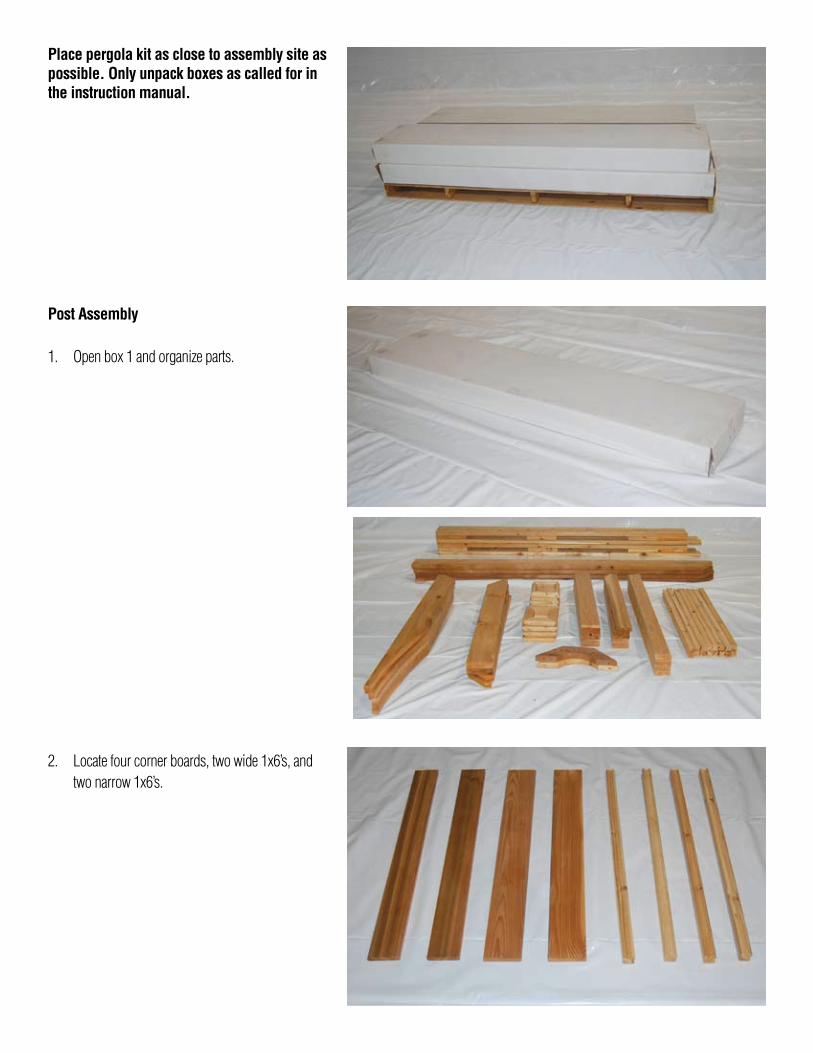
Place pergola kit as close to assembly site as possible. Only unpack boxes as called for in the instruction manual.
Post Assembly
1. Open box 1 and organize parts.
2. Locate four corner boards, two wide 1x6’s, and two narrow 1x6’s.
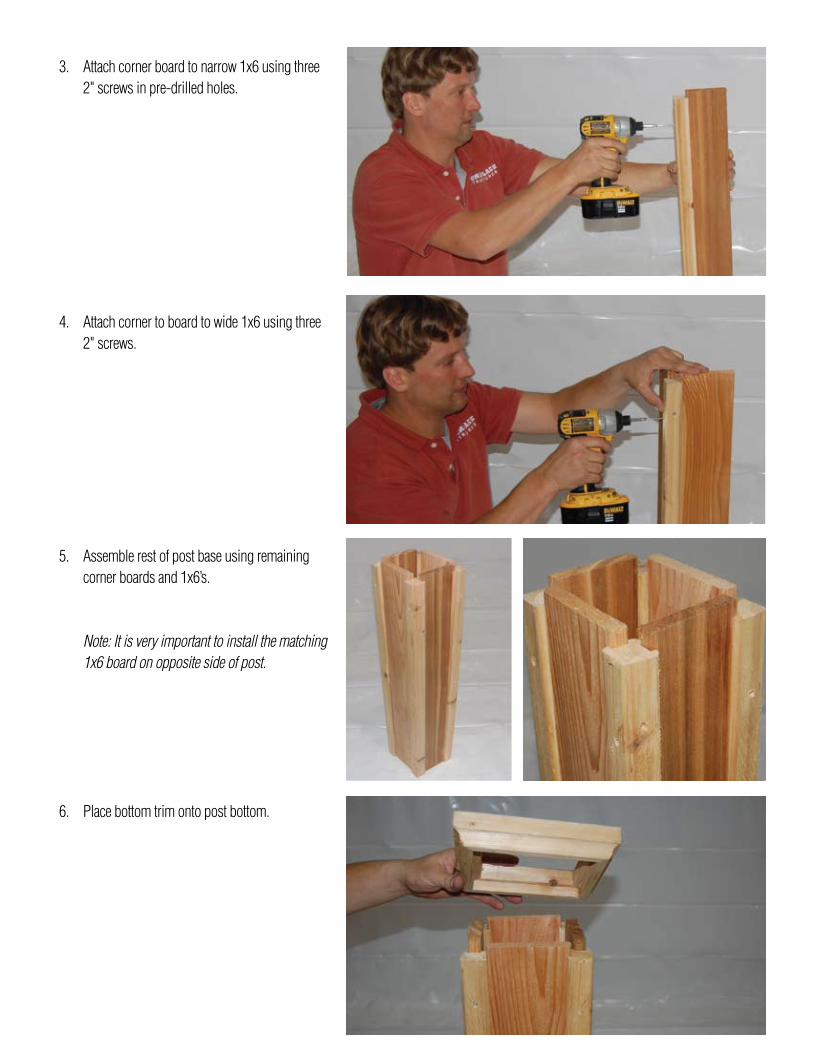
3. Attach corner board to narrow 1x6 using three 2" screws in pre-drilled holes.
4. Attach corner to board to wide 1x6 using three 2" screws.
5. Assemble rest of post base using remaining corner boards and 1x6’s.
Note: It is very important to install the matching 1x6 board on opposite side of post.
6. Place bottom trim onto post bottom.

7. Attach bottom trim to base as shown using four 2" screws into pre-drilled holes.
8. Flip post base around.
9. Align top trim on post base and attach using four 2" screws into pre-drilled holes in trim.
10. Post base is complete.

11. Repeat steps 2-9 for three remaining post bases.
12. Insert posts into post bases.
Rafter Assembly
1. Open boxes 2 & 3 and organize parts.
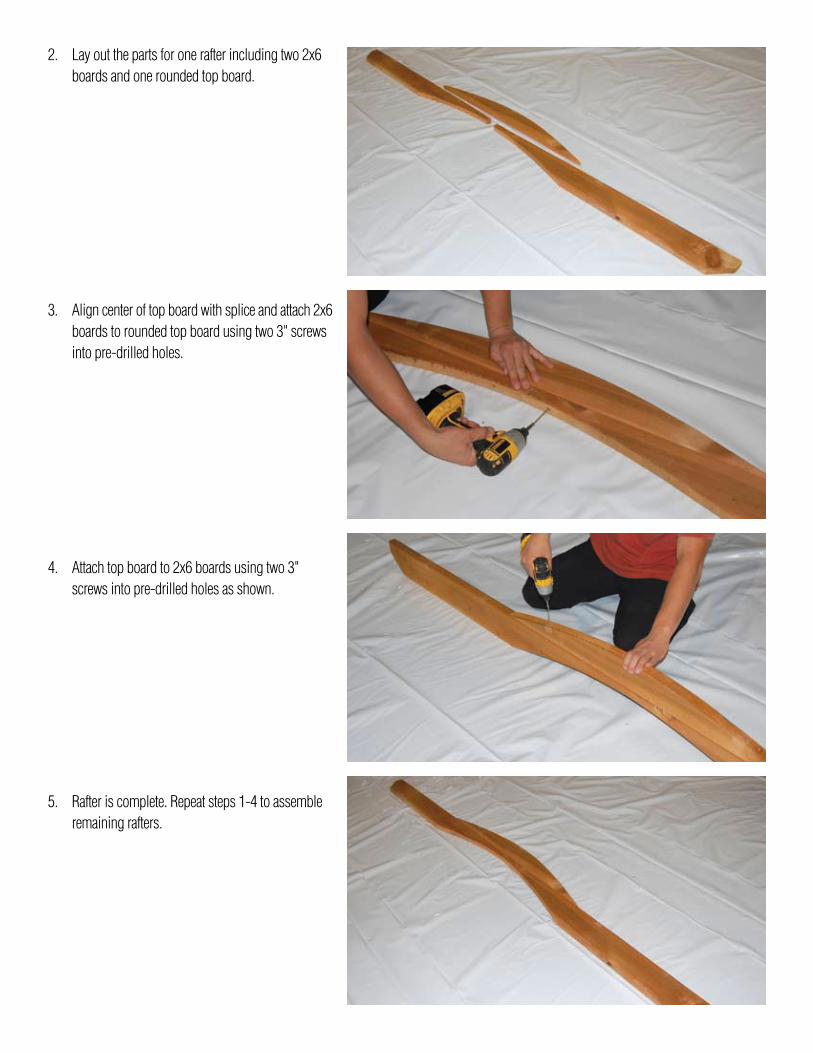
2. Lay out the parts for one rafter including two 2x6 boards and one rounded top board.
3. Align center of top board with splice and attach 2x6 boards to rounded top board using two 3" screws into pre-drilled holes.
4. Attach top board to 2x6 boards using two 3" screws into pre-drilled holes as shown.
5. Rafter is complete. Repeat steps 1-4 to assemble remaining rafters.

Beam Assembly
1. Lay out the parts for one beam including two long 2x6’s and two short 2x6’s.
2. Stagger long and short 2x6’s and set top layer onto bottom layer.
3. Align 2x6 boards flush at ends and along top and bottom (grooved cuts in 2x6’s should align).
4. Attach boards together using fourteen 2-1/2" screws into pre-drilled holes.
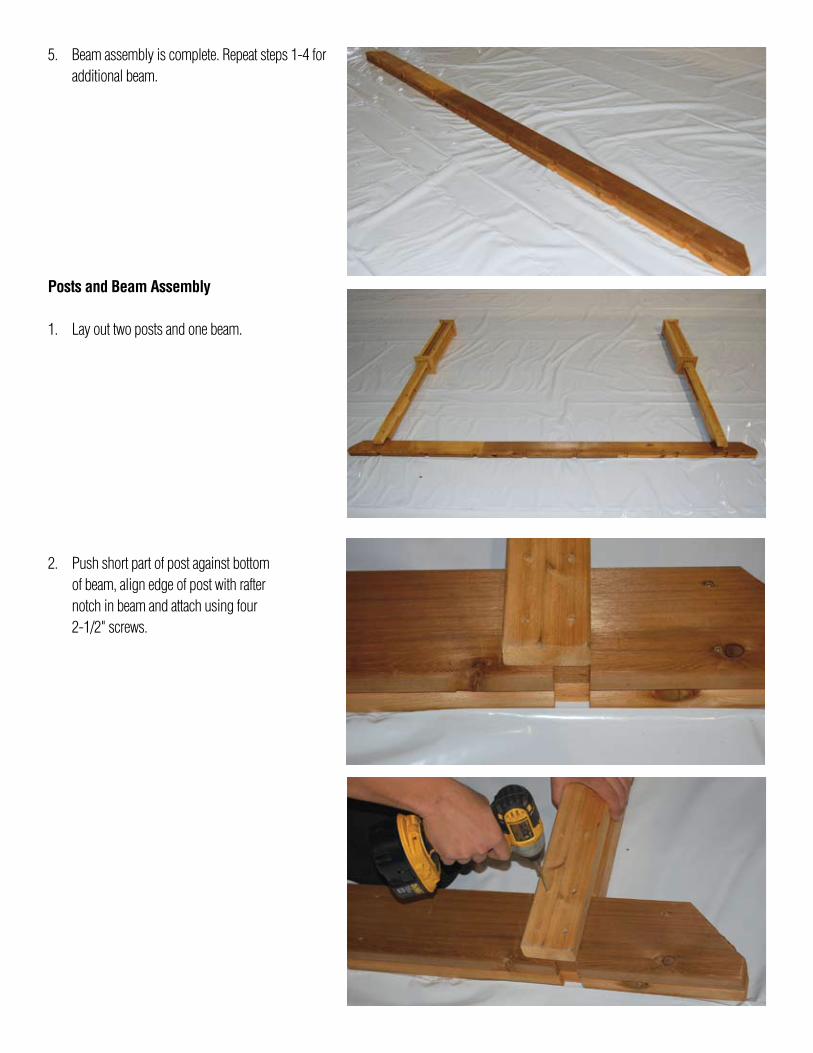
5. Beam assembly is complete. Repeat steps 1-4 for additional beam.
Posts and Beam Assembly
1. Lay out two posts and one beam.
2. Push short part of post against bottom of beam, align edge of post with rafter notch in beam and attach using four 2-1/2" screws.

3. Repeat steps 1-2 on opposite side of beam.
4. Post and beam assembly is complete. Repeat steps 1-3 for remaining section.
Rafter, Trim, & Brace Installation
1. Stand up and balance post and beam sections. If sections will not remain upright, it may require one person to hold section in place.
2. Place first rafter into groove cut on top of beam.

3. Space rafter overhang as desired (common overhang distance is 12 in.). Note: Posts can be moved in and out as desired to fit your space.
4. After desired overhang is achieved, toe-screw rafter into beam using one 2-1/2" screw per side of rafter and then repeat on opposite end of rafter.
5. Repeat steps 1-4 and install rafter at opposite end of pergola.
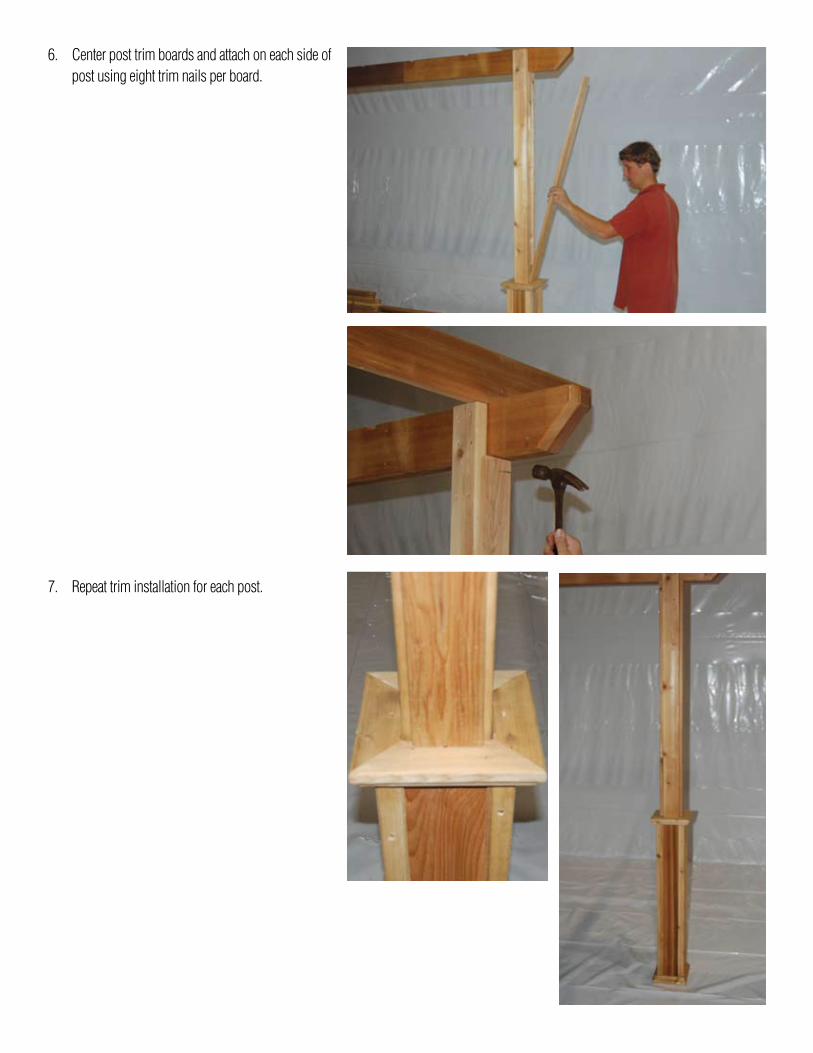
6. Center post trim boards and attach on each side of post using eight trim nails per board.
7. Repeat trim installation for each post.

8. Align large corner brace with arch cut out and flush on edges of post and rafter.
9. Attach brace to post and rafter using four 3" screws into pre-drilled holes.
10. Align small brace flush with inside edge of beam and centered on post. Attach using four 2-1/2" screws into pre-drilled holes.

11. Repeat steps 8-10 at each post.
12. Install remaining rafters repeating steps 2-4.
Stringer Installation
1. Align notches in stringer with rafters and above beam.
2. Attach stringer to rafter using 2-1/2" screws into pre-drilled holes.
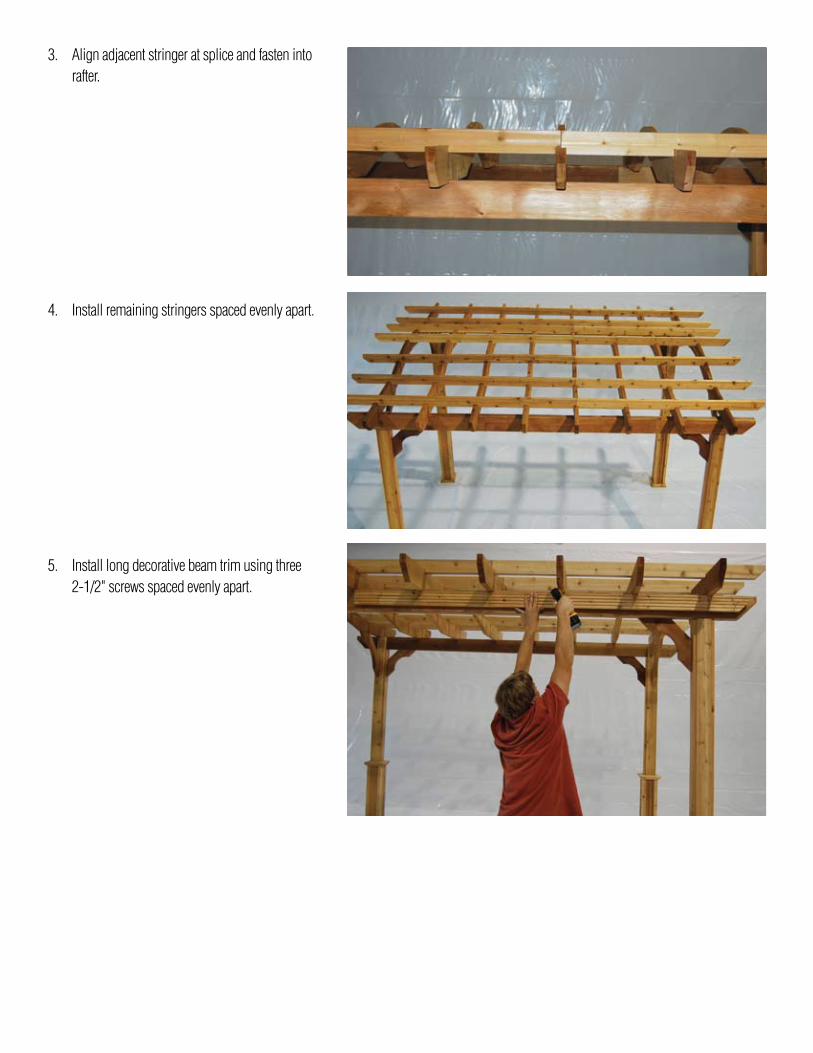
3. Align adjacent stringer at splice and fasten into rafter.
4. Install remaining stringers spaced evenly apart.
5. Install long decorative beam trim using three 2-1/2" screws spaced evenly apart.

6. Install short trim using two 2-1/2" screws. Repeat steps 4-5 on opposite beam.
ATTENTION: If you have questions or concerns with this product DO NOT return to store. Assembly questions? Missing parts? pCall 866-768-8465.
www.suncast.com