
Pedicraft Canopy Enclosed Bed - Wheelchairs
15
Pedicraft Canopy Enclosed Bed Operations Manual Before using the Canopy Enclosed Bed, carefully read the Instructions for Use. Be sure you understand all the information in this manual before using the bed. Instructions for Use ....................................................................................................3 Cleaning Instructions ................................................................................................. 4 Maintenance & Warranty ............................................................................................5 Bed Assembly Instructions ........................................................................................6 Canopy Cover Installation Instructions...................................................................10 For technical assistance call 800-223-7649 -1-
Transcript of Pedicraft Canopy Enclosed Bed - Wheelchairs
Pedicraft Canopy Enclosed Bed
Operations Manual
Before using the Canopy Enclosed Bed, carefully read the Instructions for Use. Be sure you understand all the information in this manual before using the bed. Instructions for Use ....................................................................................................3 Cleaning Instructions .................................................................................................4 Maintenance & Warranty ............................................................................................5 Bed Assembly Instructions ........................................................................................6 Canopy Cover Installation Instructions...................................................................10
For technical assistance call 800-223-7649
-1-

-2-
Note to end user: Record the following information about your bed and retain this manual for reference. Please have this information available if you contact Pedicraft about your bed. Model number ____________________ Serial number ____________________ Date received ____________________ Purchased from ____________________________________ Address ____________________________________ City, State Zip ____________________________________ Contact name ____________________________________ Contact phone ____________________________________
-3-
Instructions for Use The Canopy Bed is intended for use during a patient’s sleeping hours to prevent falls and wandering while others in the house are sleeping. It is not intended to be used for extended periods when the patient is awake and unsupervised. Enclosed beds are intended for medically fragile patients with chronic illness such as cerebral palsy, brain trauma or other severe disability. They are not intended to restrain a difficult but otherwise healthy child or adult. · Do not leave patient unattended when any one of the mesh panels is open. · Always raise side rails when patient is unattended and position bed at
lowest level. · If Bed is equipped with optional Head Elevation Crank, do not leave an
active patient unattended when the head of the bed is raised. · Zippers must be secured with attached ties to prevent patient from exiting
bed unsupervised. Ties should be routinely inspected to make sure that they are secure. The Side Rail Instruction Tag can be marked and erased with a pen or a pencil to record the last date of inspection.
· If double-zipper opening is used for equipment access, make certain that
the opening does not allow the patient to reach the zipper pulls. You may want to secure the two zipper pulls together with velcro ties to prevent the patient from opening the enclosure.
· The mattress should be routinely inspected for tears in the vinyl cover. · Do not substitute the mattress provided with this bed with any other type
or size of mattress. The mattress must fit snugly to prevent gaps which may entrap the patient.
-4-
Cleaning of Metal Surfaces Use a damp sponge or soft cloth with a mild soap or detergent solution. Be sure to follow the manufacturer’s directions for diluting cleaning solutions. Thoroughly rinse with clean water and dry. Failure to properly rinse and dry will leave a corrosive residue which may cause damage. Cleaning of Canopy Cover The cover may be removed and immersed in warm, soapy water for thorough cleaning. The cover may be disinfected with standard household bleach when diluted according to the directions on the label of the bottle. Be sure to dilute any cleaning or disinfectant solution according to manufacturer’s directions. AIR DRY ONLY. Do not use any form of heat drying. Heat will damage the vinyl cover. If you hang the cover over the bed frame to dry, cover the corners of the bed to prevent water from getting into the openings at the top of the corner posts. You may reinstall the cover on the frame while it is still damp but do not reinstall the mattress until the cover is completely dry. Allow at least 2 hours drying time. Cleaning of Mattress Clean the Sure-Chek® mattress with mild soap and lukewarm water. Rinse with clean water. Do not use harsh detergents, cleansers or solvents. To disinfect mattress: Remove from the crib. Dilute disinfectants and/or germicides as specified on manufacturer’s label. Use only in those dilutions recommended by the manufacturer.
-5-
Maintenance The frequency of routine maintenance will vary depending on how active the patient is. A patient who is very active in the bed may cause the bolts and zipper ties to loosen sooner than expected. The Side Rail Instruction Tag can be marked and erased with a pen or a pencil to record the last date of inspection. · All bolts and screws should be checked at least once every six months. Tighten
if necessary. · Zipper ties should be routinely inspected to make sure that they are secure. · The mattress should be inspected for tears in the vinyl cover. Fluid can leak
through small tears. If hygiene is a problem, the mattress will need to be replaced as soon as tears are evident.
· The mesh cover should be inspected for holes and tears. Warranty Pedicraft, Inc. guarantees the Canopy Bed to be free of defects in workmanship or materials for a period of three years from the date of shipment to the purchaser. In case any purchaser finds a defect in workmanship or materials, promptly notify Pedicraft.
The purchaser must return the article as per instructions and Pedicraft will replace, repair or refund the purchase price, at its sole discretion. All replaced or repaired items will be shipped freight prepaid from the factory to the purchaser. Any extra costs resulting from failure to obtain prior shipping instructions from Pedicraft will be borne by the customer. Any changes or modifications of the equipment by the purchaser without the express written permission of Pedicraft, Inc., will void this warranty. Failure to follow cleaning instructions may void warranty.
Page 6 of 15
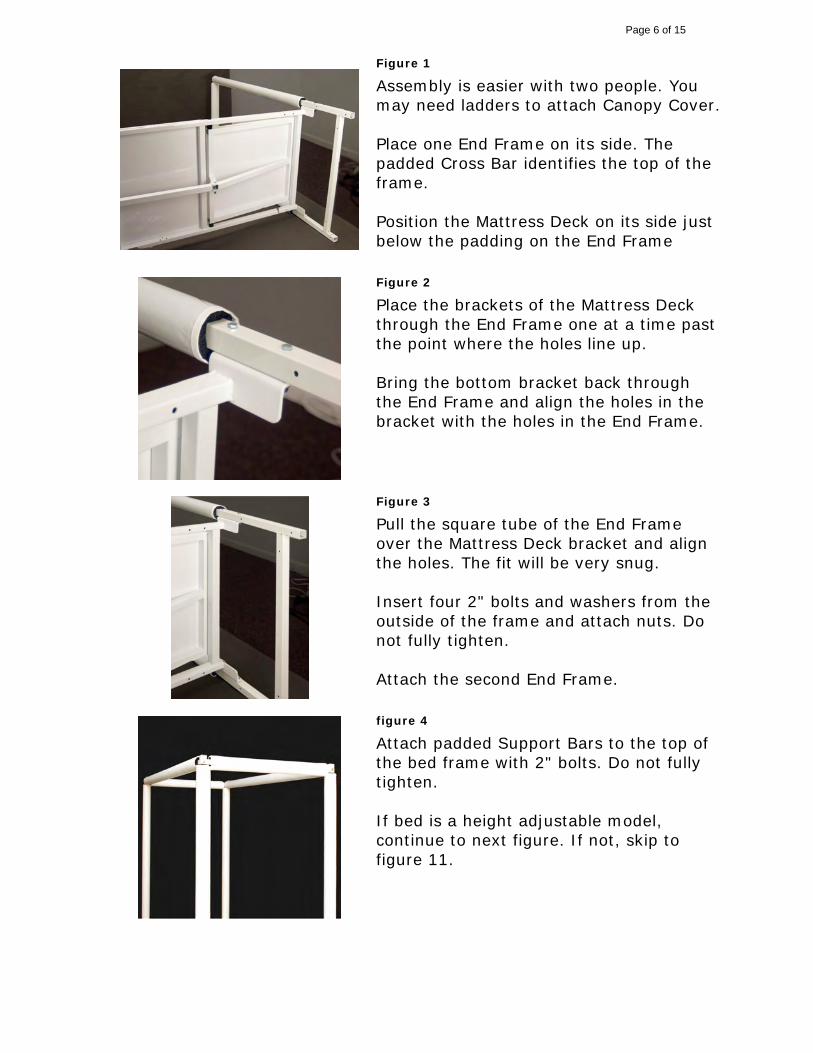
Figure 1
Assembly is easier with two people. You may need ladders to attach Canopy Cover.
Place one End Frame on its side. The padded Cross Bar identifies the top of the frame.
Position the Mattress Deck on its side just below the padding on the End Frame
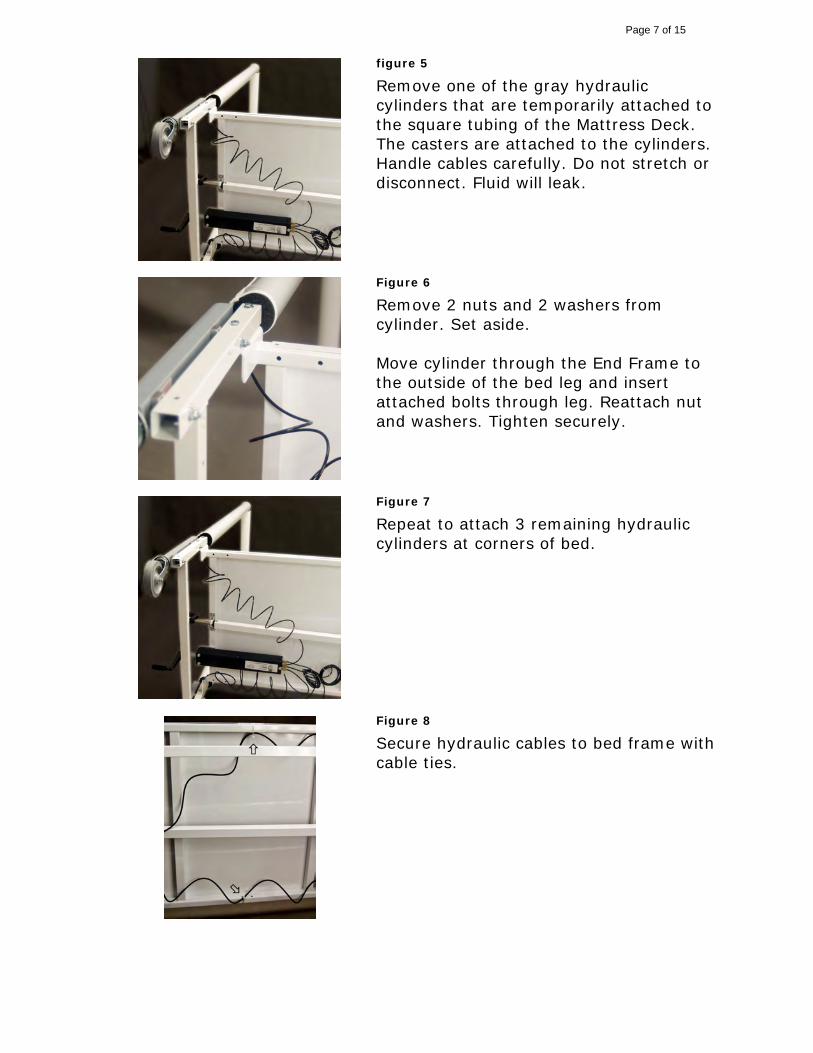
Figure 2
Place the brackets of the Mattress Deck through the End Frame one at a time past the point where the holes line up.
Bring the bottom bracket back through the End Frame and align the holes in the bracket with the holes in the End Frame.
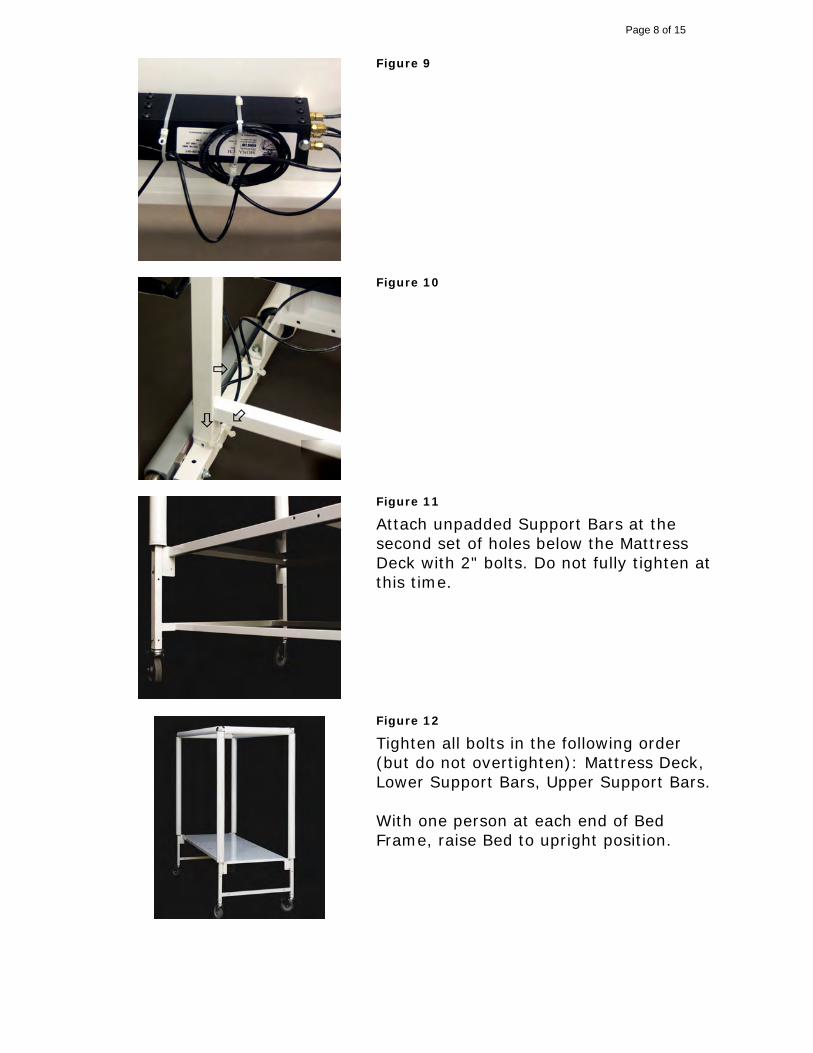
Figure 3
Pull the square tube of the End Frame over the Mattress Deck bracket and align the holes. The fit will be very snug.
Insert four 2" bolts and washers from the outside of the frame and attach nuts. Do not fully tighten.
Attach the second End Frame.
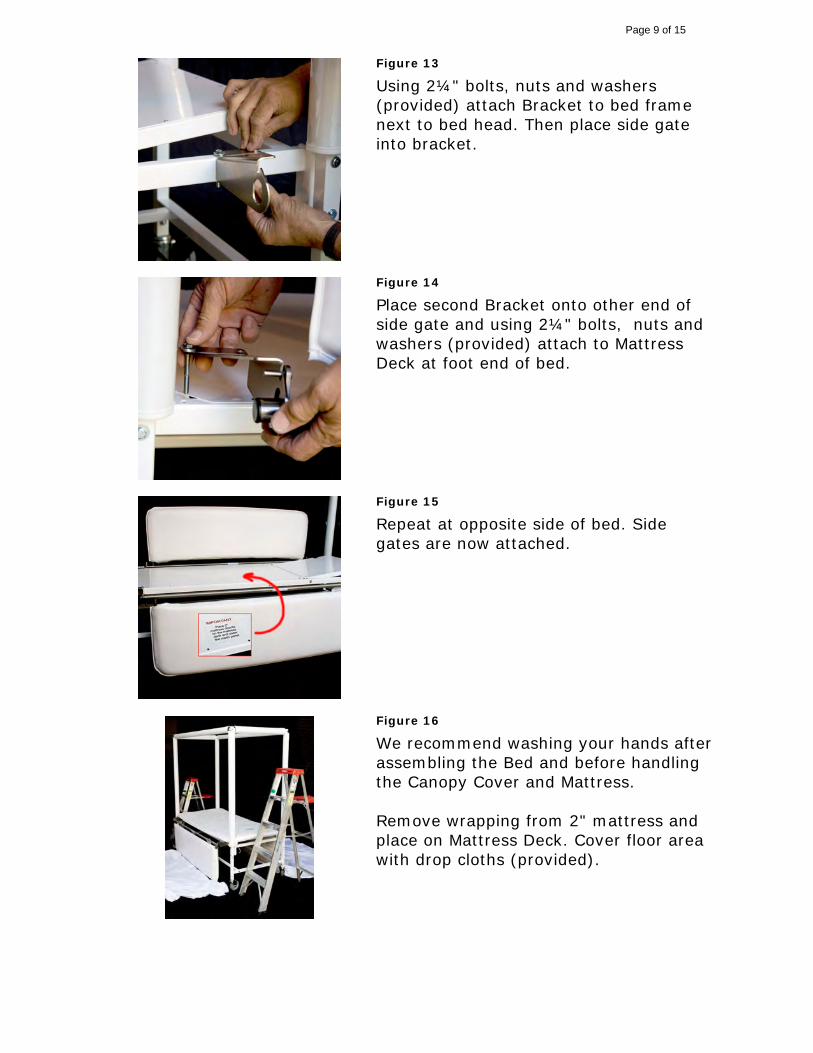
figure 4
Attach padded Support Bars to the top of the bed frame with 2" bolts. Do not fully tighten.
If bed is a height adjustable model, continue to next figure. If not, skip to figure 11.
Page 7 of 15
figure 5
Remove one of the gray hydraulic cylinders that are temporarily attached to the square tubing of the Mattress Deck. The casters are attached to the cylinders. Handle cables carefully. Do not stretch or disconnect. Fluid will leak.
Figure 6
Remove 2 nuts and 2 washers from cylinder. Set aside.
Move cylinder through the End Frame to the outside of the bed leg and insert attached bolts through leg. Reattach nut and washers. Tighten securely.
Figure 7
Repeat to attach 3 remaining hydraulic cylinders at corners of bed.
Figure 8
Secure hydraulic cables to bed frame with cable ties.
Page 8 of 15
Figure 9
Figure 10
Figure 11
Attach unpadded Support Bars at the second set of holes below the Mattress Deck with 2" bolts. Do not fully tighten at this time.
Figure 12
Tighten all bolts in the following order (but do not overtighten): Mattress Deck, Lower Support Bars, Upper Support Bars.
With one person at each end of Bed Frame, raise Bed to upright position.
Page 9 of 15
Figure 13
Using 2¼" bolts, nuts and washers (provided) attach Bracket to bed frame next to bed head. Then place side gate into bracket.
Figure 14
Place second Bracket onto other end of side gate and using 2¼" bolts, nuts and washers (provided) attach to Mattress Deck at foot end of bed.
Figure 15
Repeat at opposite side of bed. Side gates are now attached.
Figure 16
We recommend washing your hands after assembling the Bed and before handling the Canopy Cover and Mattress.
Remove wrapping from 2" mattress and place on Mattress Deck. Cover floor area with drop cloths (provided).
Page 10 of 15
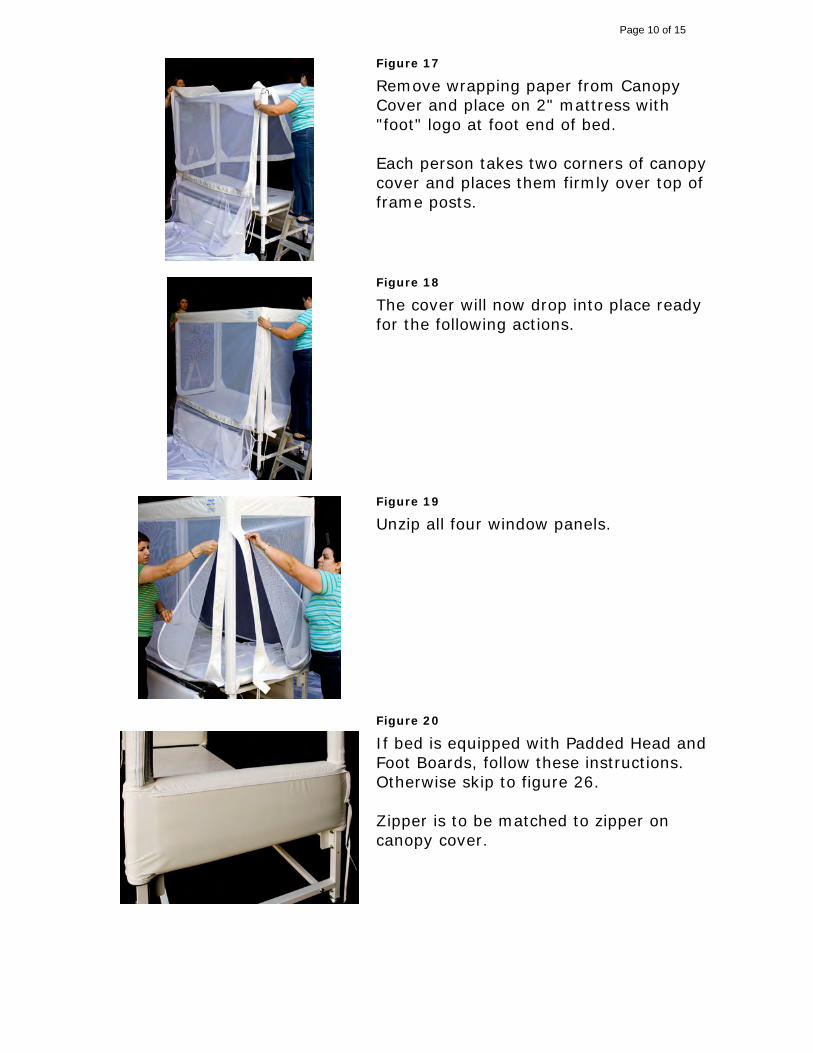
Figure 17
Remove wrapping paper from Canopy Cover and place on 2" mattress with "foot" logo at foot end of bed.
Each person takes two corners of canopy cover and places them firmly over top of frame posts.
Figure 18
The cover will now drop into place ready for the following actions.
Figure 19
Unzip all four window panels.
Figure 20
If bed is equipped with Padded Head and Foot Boards, follow these instructions. Otherwise skip to figure 26.
Zipper is to be matched to zipper on canopy cover.
Page 11 of 15
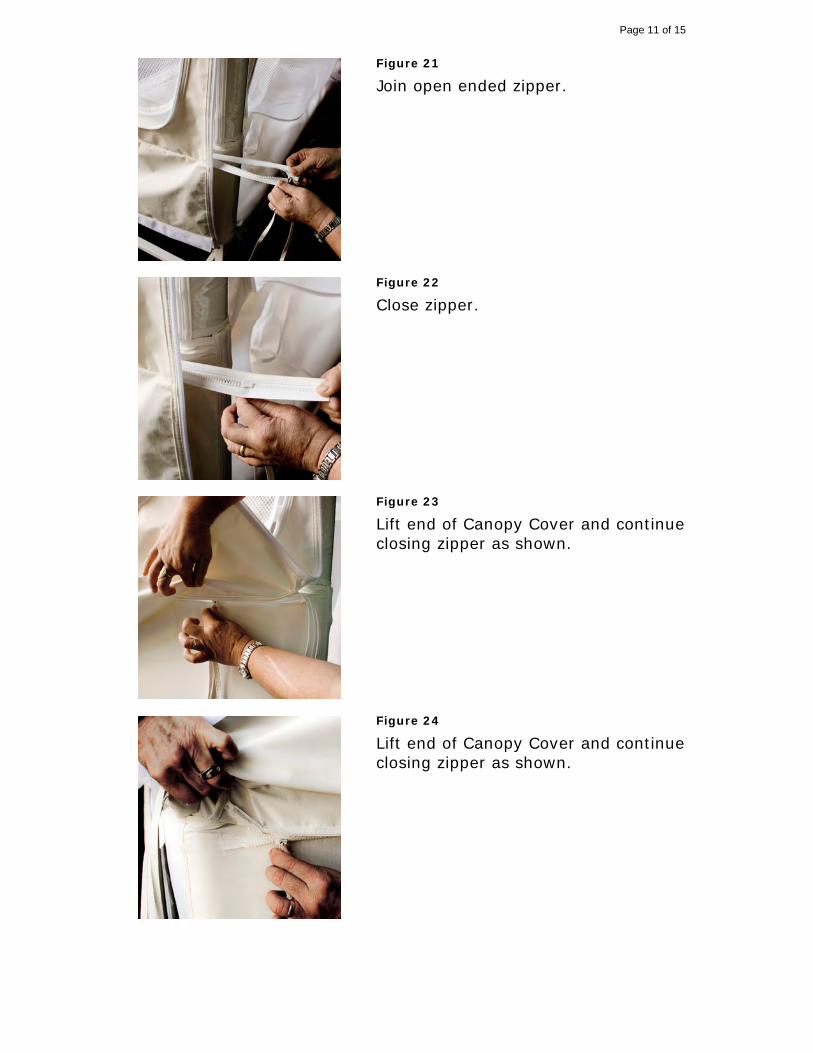
Figure 21
Join open ended zipper.
Figure 22
Close zipper.
Figure 23
Lift end of Canopy Cover and continue closing zipper as shown.
Figure 24
Lift end of Canopy Cover and continue closing zipper as shown.
Page 12 of 15
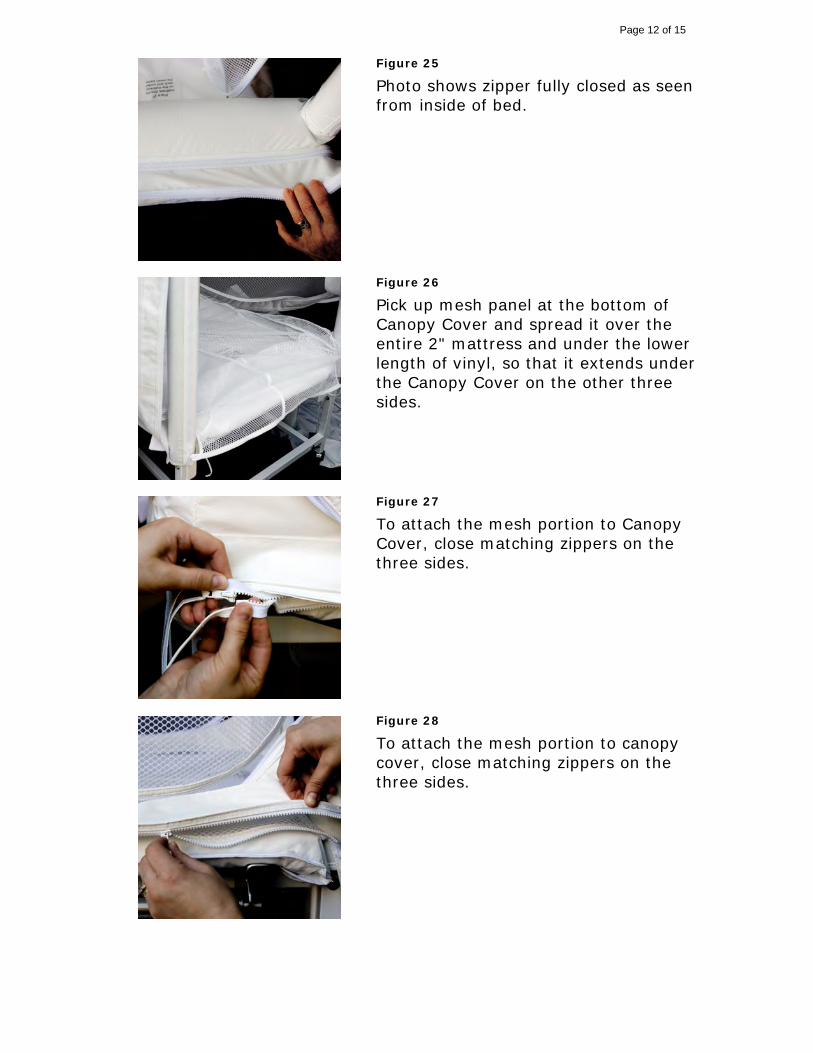
Figure 25
Photo shows zipper fully closed as seen from inside of bed.
Figure 26
Pick up mesh panel at the bottom of Canopy Cover and spread it over the entire 2" mattress and under the lower length of vinyl, so that it extends under the Canopy Cover on the other three sides.
Figure 27
To attach the mesh portion to Canopy Cover, close matching zippers on the three sides.
Figure 28
To attach the mesh portion to canopy cover, close matching zippers on the three sides.
Page 13 of 15
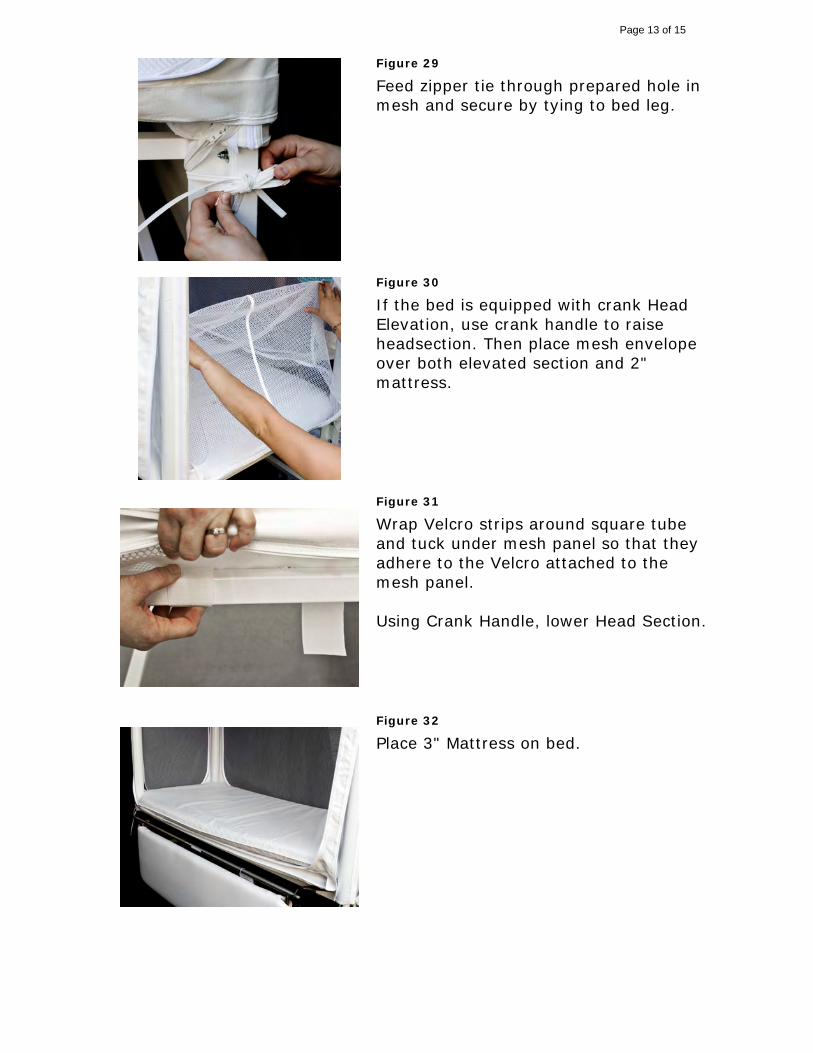
Figure 29
Feed zipper tie through prepared hole in mesh and secure by tying to bed leg.
Figure 30
If the bed is equipped with crank Head Elevation, use crank handle to raise headsection. Then place mesh envelope over both elevated section and 2" mattress.
Figure 31
Wrap Velcro strips around square tube and tuck under mesh panel so that they adhere to the Velcro attached to the mesh panel.
Using Crank Handle, lower Head Section.
Figure 32
Place 3" Mattress on bed.
Page 14 of 15
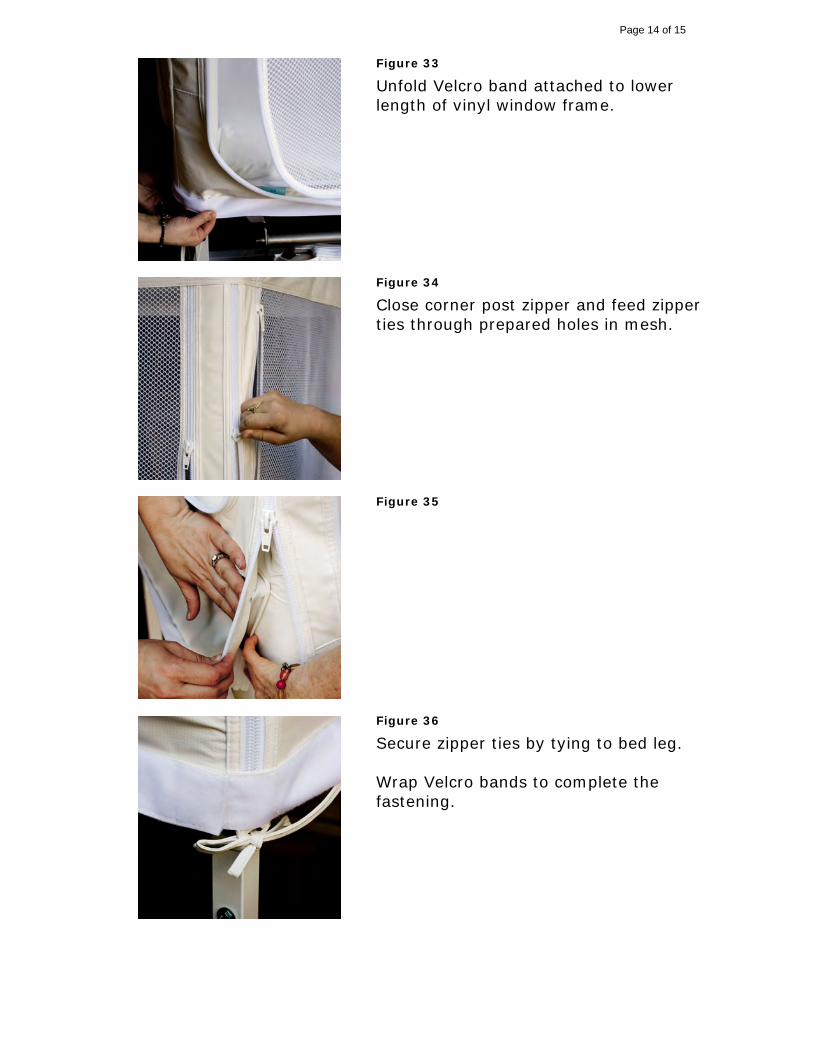
Figure 33
Unfold Velcro band attached to lower length of vinyl window frame.
Figure 34
Close corner post zipper and feed zipper ties through prepared holes in mesh.
Figure 35
Figure 36
Secure zipper ties by tying to bed leg.
Wrap Velcro bands to complete the fastening.
Page 15 of 15
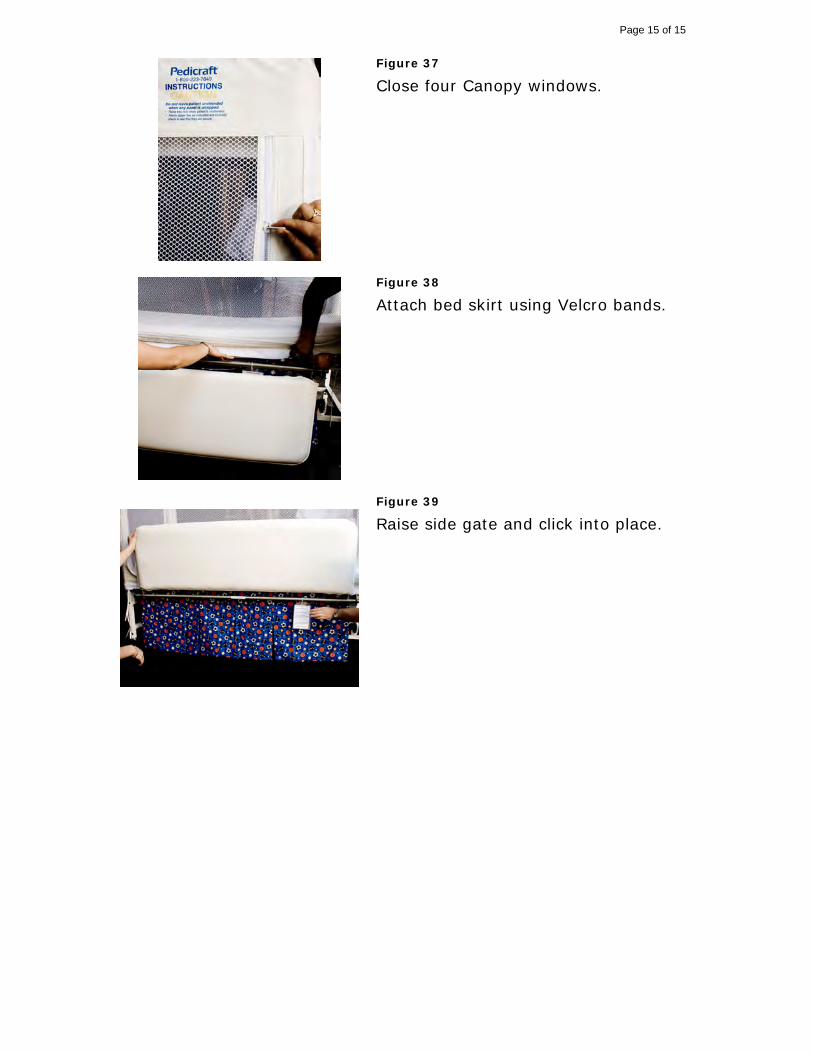
Figure 37
Close four Canopy windows.
Figure 38
Attach bed skirt using Velcro bands.
Figure 39
Raise side gate and click into place.