PROJECT DESIGN, MONITORING, AND S GUIDE MODULE 2: GREEN GUIDE TO PROJECT DESIGN, MONITORING, AND...
39
PROJECT DESIGN, MONITORING, AND EVALUATION TRAINER’S GUIDE 2 GREEN GUIDE TO
Transcript of PROJECT DESIGN, MONITORING, AND S GUIDE MODULE 2: GREEN GUIDE TO PROJECT DESIGN, MONITORING, AND...

PROJECT DESIGN, MONITORING, AND EVALUATION
TRAINER’S GUIDE
2GREEN
GUIDE TO

TRAINER’S GUIDE
MODULE 2: GREEN GUIDE TO PROJECT DESIGN, MONITORING, AND EVALUATION
TRAINER’S GUIDE
Table of Contents
Introduction ................................................................................................................................................1
Overall Learning Objectives for a One-Day Workshop ........................................................................................ 1
Option A. Combine Module 1 with Module 2 for a One-day Workshop ........................................................... 1
Before the Workshop ..................................................................................................................................2
Agenda ...................................................................................................................................................................... 2
Workshop Supplies .................................................................................................................................................. 2
Content Paper and Handouts ................................................................................................................................. 2
Electronic Copies of Materials ................................................................................................................................ 2
Participant Experiences ........................................................................................................................................... 2
Local Expertise ......................................................................................................................................................... 3
Adapting Materials to the Audience ...................................................................................................................... 3
Slide Animation ........................................................................................................................................................ 4
Day Before the Workshop ....................................................................................................................................... 4
Small-Group Formation ........................................................................................................................................... 4
Workshop Materials ....................................................................................................................................5
Handouts ................................................................................................................................................................... 5
Resource Materials on CD ....................................................................................................................................... 5
Workshop Plan Overview ......................................................................................................................................... 6
Option A. Workshop Plan Overview When Combined with Module 1 .......................................................8
Plan for Session 1: Introduction, Your Project, and the Environment .........................................................9
Activity 1.1 Registration and Greetings .............................................................................................................. 10
Activity 1.2 Opening and Welcome .................................................................................................................... 10
Activity 1.3 Introductions, Workshop Expectations, and Overview .................................................................. 10
Activity 1.4 Exercise – Environmental Impacts of Disaster Assistance ............................................................. 12
Activity 1.5 Exercise – Your Project ...................................................................................................................... 13

[ GREEN GUIDE TO PROJECT DESIGN, MONITORING, AND EVALUATION ]
Table of Contents (continued)
Plan for Session 2: Environmental Monitoring and Project Strategy ........................................................14
Activity 2.1 Introduction to Environmental Monitoring and Project Strategy .................................................. 14
Activity 2.2 Incorporating the Environment in Project Analysis .......................................................................... 16
Activity 2.3 Integrating Environmental Issues into Your Project ........................................................................ 17
Workshop Option A. Plan for Session 2A: Environmental Monitoring and Project Strategy ...................20
Activity 2.1 Introduction to Environmental Monitoring and Project Strategy .................................................. 20
Activity 2.2 Incorporating the Environment into Project Analysis ..................................................................... 23
Activity 2.3 Integrating Environmental Issues into Your Project ........................................................................ 24
Plan for Session 3: SMART Environmental Indicators ...............................................................................28
Activity 3.1 Introduction to SMART Environmental Indicators .......................................................................... 28
Activity 3.2 SMART Indicators .............................................................................................................................. 30
Activity 3.3 Constraints to Monitoring Environmental Indicators ...................................................................... 30
Plan for Session 4: Monitoring Environmental Indicators and Constraints. Evaluation and Closing ........32
Activity 4.1 Overview of Environmental Monitoring Tools and Methods ......................................................... 33
Activity 4.2 Promoting the Monitoring of Environmental Indicators ................................................................. 34
Activity 4.3 Workshop Review .............................................................................................................................. 35
Activity 4.4 Evaluation and Closing ...................................................................................................................... 36

1 TRAINER’S GUIDE
INTRODUCTION
This Trainer’s Guide provides the information, suggested content, activities, and support materials needed to facilitate a one-day workshop. This workshop was developed as part of the Green Recovery and Reconstruction Toolkit (GRRT) developed by the World Wildlife Fund and American Red Cross.
The one-day workshop covered in this guide is designed as a standalone event, but can be combined with other GRRT training materials to create a multiday workshop. When combined with other GRRT workshops, the opening session should be modified to reflect the subject matter of the combined workshops.
Overall Learning Objectives for a One-Day WorkshopAfter participating in this workshop, participants should be able to do the following:
1. Understand why it is important to incorporate environmental considerations into project design, monitoring, and evaluation in order to improve outcomes for people and communities recovering from disaster.
2. Integrate environmental indicators into the project strategy and the key steps of the project cycle’s development and implementation.
3. Select and measure environmental indicators using the same criteria as other indicators (e.g., SMART indicators).
4. Demonstrate that integrating environmental monitoring into a project does not have to be difficult, costly, or time consuming.
OPTION A. COMBINE MODULE 1 WITH MODULE 2 FOR A ONE-DAY WORKSHOP
This trainer’s guide provides guidelines for a one-day workshop on Module 2. In addition, there are guidelines for Option A, which combines Module 1, Introduction to the GRRT, with Module 2, also as a one-day workshop. This option provides more background about the context of green recovery and reconstruction, its principles, and applications.
There is some overlap between Module 1 (which is a 60-minute introduction) and Session 1 of Module 2. If Option A is chosen, then the workshop schedule starts with Module 1 as Session 1. The next session would be Session 2A of Module 2, which has incorporated the important information of the original Session 1 of the Module 2 plan.

2[ GREEN GUIDE TO PROJECT DESIGN, MONITORING, AND EVALUATION ]
BEFORE THE WORKSHOP
As part of your workshop preparation, you will need to review each of the points below and decide how each one will be addressed. You may need to coordinate some of these issues with the workshop sponsor, host, lead facilitator, and/or the manager at the workshop venue.
AgendaUpdate the agenda to incorporate changes in the workshop. A template for the agenda can be found in the electronic file of the workshop materials.
Prepare sufficient copies of the agenda to give one to each participant.
Workshop SuppliesEnsure that each participant has sufficient pens, paper, and other materials and that there are sufficient flip charts and marking pens for the workshop exercises. See guidelines for other supplies in Module A, Toolkit Guide.
Content Paper and HandoutsIt is expected that the content paper for this module will be provided to the participants at the beginning of the workshop. The paper contains a number of references that will be used during the workshop.
The trainer should decide in advance of the workshop whether the participants will...
• Be provided with a separate workshop workbook (e.g., ring binder) or a folder for holding handouts
• Receive thumbnail copies of the PowerPoint presentations (Note: Many slides ask questions of participants and the following slides provide the answers. By handing out the thumbnails the trainer will lose control over the ability to control how the answers are presented.)
Electronic Copies of MaterialsEach of the Green Recovery and Reconstruction Toolkit training modules includes a CD with the files of the content paper, trainer’s guide, PowerPoint presentation, and other workshop materials and reference materials.
Electronic copies of all the module materials will also be available for downloading from an Internet site. The trainer needs to confirm the site address and provide it to the participants together with the handouts.
Participant ExperiencesFor some of the GRRT workshops, the agenda provides 15 – 30 minutes for participants to give brief presentations of their experiences in post-disaster recovery and reconstruction related to the workshop’s theme. If at all possible, the selection of individuals who will make presentations should take place before the training. If a training-needs assessment or survey is undertaken before the workshop, this would be an ideal time to also inquire of participants’ interest in presenting their case studies or personal experiences.

3 TRAINER’S GUIDE
These presentations, typically about seven minutes long, should focus on practical challenges that the presenter faced in dealing with environmental issues, either positively or negatively, when developing or executing activities related to this workshop topic. The presenters should be encouraged to link their presentations to one or more environmental issues. A basic format for the presentation is to do the following:
• Describe the context of the project or activity.
• Summarize the problem/issue encountered.
• Indicate how the issue is related to the environment.
• Explain any solutions found or identified in retrospect, especially in terms of how the well-being of the affected population was impacted by the project or activity.
The presentations can focus on positive as well as negative environmental impacts arising from the relevant activities. For practical reasons, each presenter should use no more than four PowerPoint slides. The use of flip charts or other presentation tools instead of slides should be encouraged.
While the time allocated for the Participant Experience sessions is relatively long given the overall time for training, this session is an excellent opportunity to identify environment-related lessons and to solicit participant experiences regarding how they encountered and addressed environmental issues in their work.
If a Participant Experience session cannot be organized, the following sessions should be moved forward and the time allocated to them increased.
Local ExpertisePerhaps as important as providing an opportunity for participants to share their experience is the value of inviting topic experts from the region to attend the workshop as resource persons. One or two individuals who have knowledge of the workshop topic, experience with the issues discussed in the workshop, and, most important, understand how these issues apply to the local context, can offer invaluable contributions to the workshop. “Local context” is meant to include an understanding of the implications of applying this knowledge and experience to a post-disaster/conflict situation.
Adapting Materials to the AudienceThe trainer’s guide and materials are designed to have as universal an application as is practical. However, some trainers may feel that the workshop will be more effective if some of the examples, case studies, or other details are adapted to match the specific training needs and interests of the local audience. If so, trainers should feel welcome to make those adaptations. One adaption is described by the running example in this module that focuses on a disaster for which the identified need was assisting people with malnutrition. The analysis of this need resulted in agriculture-based approaches. The principles of modifying project goals, activities, and outcomes to incorporate environmental considerations apply to all sectors. However, if some trainers believe that the workshop will be more effective if a different sector is used to illustrate the principles, they are welcome to make those adaptations.

4[ GREEN GUIDE TO PROJECT DESIGN, MONITORING, AND EVALUATION ]
Slide AnimationSlide animation (i.e., the need to “click” to make materials appear) is engaged for many slides. The facilitator should feel free to change the animation as needed.
Day Before the WorkshopMake sure the data projector, computer, screen, extension cords, flip charts, markers, and all the participants’ supplies are in place. Do a test run of all your PowerPoint files to make sure that all animation is working properly and all needed changes to the files have been made to tailor the presentation to your audience. Confirm that all printed materials have been copied and are ready to be handed out. For additional workshop planning tips, see Module A, Toolkit Guide.
Small-Group FormationA significant part of the workshop is devoted to group activities. The formation of these groups is an important consideration. You will need to balance the number of participants in the workshop with the mechanics and learning objectives for each group activity.
It is generally recommended that participants sit at large tables in groups of four to six. Whenever practical you may simply form the workgroup based on those table groupings. However, note that some activities specify either an exact number of groups or an exact number of participants in that group. You will need to anticipate this range of circumstances and be prepared to assign participants to groups in order to achieve the activities’ objectives.
An additional consideration may be the desire for groups to reflect the diversity of the participants, i.e., each group would incorporate gender balance, and a proportionate representation of humanitarian workers with conservation/environmental workers, government workers, and/or private-sector workers. Similarly, you might want to balance groups with people who have a lot of relevant experience with people who are newcomers to the field. The main concern is that each group include participants who have the skills necessary to ensure that the group as a whole can complete the assigned activity.
It is up to you to decide whether to change group membership during the workshop. However, the one-day length of the workshops makes it likely that keeping workgroups together from the beginning of the workshop would be most productive, as it would allow for the progressive development of intragroup relations and mutual capacities during the workshop. For multiday workshops, we recommend placing different individuals in the groups each day. One way to do this is to place each participant’s name card (or table tent) in the location of your choosing at the start of each workshop.
5 TRAINER’S GUIDE
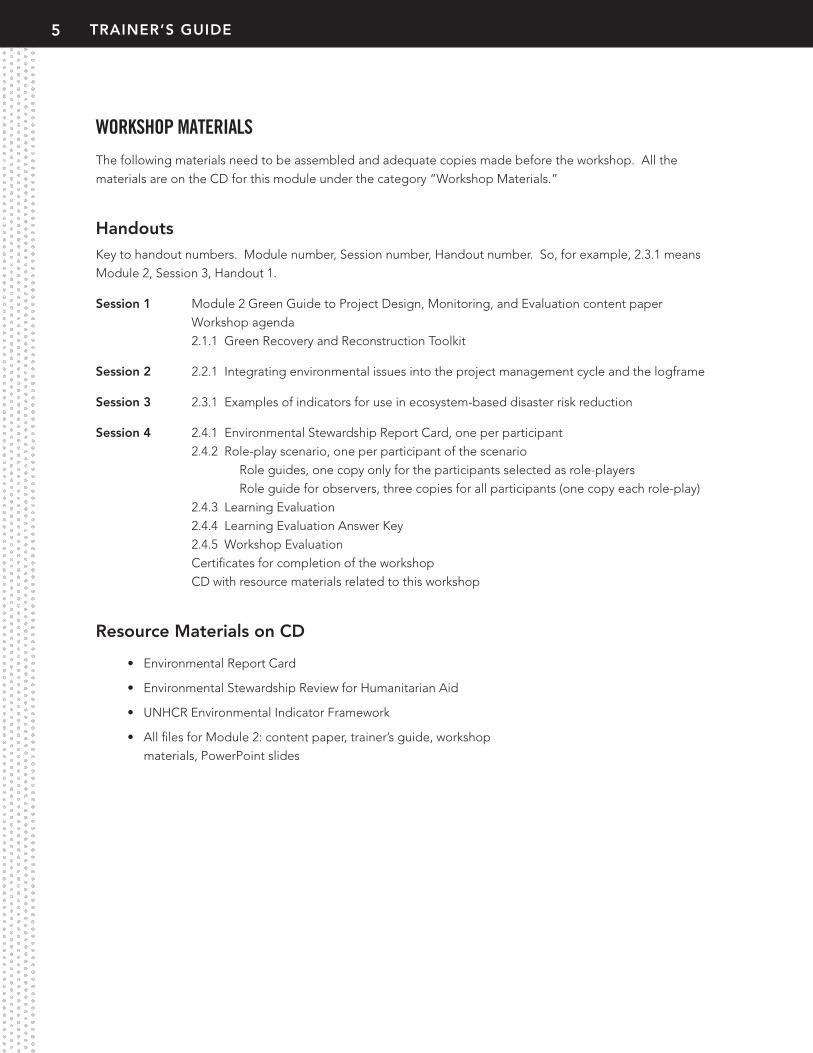
WORKSHOP MATERIALS
The following materials need to be assembled and adequate copies made before the workshop. All the materials are on the CD for this module under the category “Workshop Materials.”
HandoutsKey to handout numbers. Module number, Session number, Handout number. So, for example, 2.3.1 means Module 2, Session 3, Handout 1.
Session 1 Module 2 Green Guide to Project Design, Monitoring, and Evaluation content paper Workshop agenda 2.1.1 Green Recovery and Reconstruction Toolkit
Session 2 2.2.1 Integrating environmental issues into the project management cycle and the logframe
Session 3 2.3.1 Examples of indicators for use in ecosystem-based disaster risk reduction
Session 4 2.4.1 Environmental Stewardship Report Card, one per participant 2.4.2 Role-play scenario, one per participant of the scenario Role guides, one copy only for the participants selected as role-players Role guide for observers, three copies for all participants (one copy each role-play) 2.4.3 Learning Evaluation 2.4.4 Learning Evaluation Answer Key 2.4.5 Workshop Evaluation Certificates for completion of the workshop CD with resource materials related to this workshop
Resource Materials on CD
• Environmental Report Card
• Environmental Stewardship Review for Humanitarian Aid
• UNHCR Environmental Indicator Framework
• All files for Module 2: content paper, trainer’s guide, workshop materials, PowerPoint slides

6[ GREEN GUIDE TO PROJECT DESIGN, MONITORING, AND EVALUATION ]
WORKSHOP PLAN OVERVIEW
TIMES ACTIVITY METHODOLOGY RESPONSIBLE TIMING
SESSION 1: INTRODUCTION, YOUR PROJECT AND THE ENVIRONMENT
8:30 – 9:001.1 Registration and Greetings
Participants sign registration form; collect materials and name badge
30’
9:00 – 9:15 1.2 Opening and Welcome Brief remarks and presentation 15’
9:15 – 9:501.3 Introductions, Workshop Expectations, and Approach
Participant self-introductions and writing of their workshop objectives
35’
9:50 – 10:151.4 Environmental Impact of Disasters and Assistance
Exercise, brainstorming 15’
10:15 – 10:30 1.5 Your Project Small-group exercise 15’
10:20 – 10:50 Break 30’
SESSION 2: ENVIRONMENT MONITORING AND PROJECT STRATEGY
10:50 – 12:30
2.1 Intro to Environmental Monitoring and Project Strategy
Presentation and exercise linking environment to M&E
20’
2.2 Incorporating the Environment in Project Analysis
Presentation and interactive discussion
15’
2.3 Integrating Environmental Issues into Your Project
Alternating presentations and small-group exercises applying information to a project activity
65’
12:30 – 1:30 Lunch 60’
SESSION 3: SMART ENVIRONMENTAL INDICATORS
1:30 – 3:00
3.1 Introduction to SMART Environmental Indicators
Presentation and interactive discussion
15’
3.2 SMART Indicators Exercise to create indicators 45’
3.3 Constraints to Monitoring Environmental Indicators
Brainstorm and small-group problem-solving exercise
30’
3:00 – 3:30 Break 30’

7 TRAINER’S GUIDE
WORKSHOP PLAN OVERVIEW
TIMES ACTIVITY METHODOLOGY RESPONSIBLE TIMING
SESSION 4: MONITORING ENVIRONMENTAL INDICATORS AND CONSTRAINTS
3:30 – 5:00
4.1 Overview of Environmental Monitoring Tools and Methods
Brainstorming, discussion 15’
4.2 Promoting the Use of Monitoring Environmental Indicators
Role-plays 40’
4.3 Workshop ReviewShort discussion and presentation
5’
4.4 Evaluation and ClosingLearning evaluation, workshop evaluations, and closing comments
30’

8[ GREEN GUIDE TO PROJECT DESIGN, MONITORING, AND EVALUATION ]
OPTION A. WORKSHOP PLAN OVERVIEW WHEN COMBINED WITH MODULE 1
TIMES ACTIVITY METHODOLOGY RESPONSIBLE TIMING
SESSION 1: MODULE 1 – INTRODUCTION TO GREEN RECOVERY AND RECONSTRUCTION
8:30 – 10:30 See module 1 workshop plan 120’
10:30 – 11:00 Break 30’
SESSION 2A: ENVIRONMENT MONITORING AND PROJECT STRATEGY
11:00 – 12:30
2.1 Intro to Environmental Monitoring and Project Strategy
Presentation and exercise linking environment to M&E
25’
2.2 Incorporating the Environment in Project Analysis
Presentation and interactive discussion
15’
2.3 Integrating Environmental Issues into Your Project
Alternating presentations and small-group exercises applying information to a project activity
60’
12:40 – 1:30 Lunch 50’

9 TRAINER’S GUIDE
PLAN FOR SESSION 1: INTRODUCTION, YOUR PROJECT, AND THE ENVIRONMENT
SESSION TIME 110’
OBJECTIVES
• Describe the scope, purpose, and training approach of the workshop.
• Introduce participants.
• Describe why monitoring of the environment is important for assessing how the environment may affect your project and how your project may affect the environment.
• Describe a wide range of environmental impacts of disaster response.
ESSENTIAL
CONTENT
This session provides a context and background from which the facilitator can tackle the topic of monitoring and evaluating the environment in the context of humanitarian projects. The facilitator will introduce the topic with a brief overview and interactive discussion of when, why, and how to monitor the environment.
OUTPUTS
Participants will have identified a range of examples of:
• How humanitarian response may impact the environment
• Indicators that can be used to measure the impact of these humanitarian response activities
PREPARATION
• Create signs directing participants to the workshop room if necessary.
• Create a welcome sign with the name of the workshop.
• Prepare flip charts on which participants can stick sticky notes with questions raised in the introduction, which at the end of the day will be reviewed with the participants to ascertain if they have been answered.
• Review the icebreaker activity and choose what is most appropriate for the trainer and audience given the unique workshop situation.
• Consider inviting a guest speaker to provide a firsthand account if the trainer is inexperienced in monitoring and evaluating the environmental aspects of humanitarian projects.
RESOURCES
• Data projector and screen
• Flip charts and markers
• Name badges and table tent cards
• Sticky notes, etc.
HANDOUTS• Module 2 Green Guide to Project Design, Monitoring, and Evaluation content paper
• 2.1.1 Green Recovery and Reconstruction Toolkit
FACILITATOR NOTE
• Determine well in advance of the workshop what the local customs and expectations are for opening the workshop. In some locations, customs require government participation and traditional ceremonies. Make sure the appropriate people are invited, but endeavor to make their involvement as brief as practical. Prepare suggested opening comments for a guest speaker, if appropriate. Otherwise, or in addition, invite the workshop host to officially open the workshop, welcome the participants, and comment on the reason the workshop is being held.
• If the opening ceremony requires more than the time shown in this Trainer’s Guide, then the daily schedule will need to be modified.
10[ GREEN GUIDE TO PROJECT DESIGN, MONITORING, AND EVALUATION ]
Activity 1.1 Registration and Greetings
(30 minutes)
It is important to show the workshop agenda starting at least 30 minutes before the actual beginning of the formal welcome and opening remarks. Otherwise, many participants will show up a few minutes late, then register, collect their materials, greet acquaintances, and take several minutes before they take their seats and become prepared to start the workshop.
Activity 1.2 Opening and Welcome
(15 minutes)
Slides # 1 – 2, Welcome and Introduction. Open the workshop by welcoming people and acknowledging that they have taken time out of busy schedules to be here, traveled long distances, etc.
Remind participants that this should be an interesting and fun day; diversity is to be celebrated within the group and all are requested to play a part, especially in terms of sharing experiences and getting answers to questions they may have about the workshop’s topic.
The appropriate person who has been identified to open the workshop should make brief remarks about the purpose for and value of the workshop. The comments should set the stage for the workshop and perhaps suggest a link between the purpose of the workshop and the relevant policies of the host organization as they relate to monitoring and evaluating the environment in humanitarian projects.
Activity 1.3 Introductions, Workshop Expectations, and Overview
(35 minutes)
Slide # 3, Introductions. Inform the participants that the workshop will be highly interactive, and that they will be expected to share their own knowledge and experiences. To help launch this approach to the workshop, each participant should summarize very briefly his or her experience in environmental management, disaster recovery and/or reconstruction, and monitoring and evaluation.
Ask each participant to:
5. Give his or her name
6. Tell which agency he or she is working for
7. Give his or her current job responsibility
8. Summarize his or her work experience related to the following:
• Environmental management
• Disaster recovery and reconstruction
• Project design, monitoring and evaluation
Remind participants that they will have to limit their presentations to less than one minute. You will need to monitor the time to ensure that nobody turns this into an opportunity to make a long speech.

11 TRAINER’S GUIDE
Slides # 4 – 5, Green Recovery and Reconstruction Toolkit. It should be helpful to place this workshop within the context of the overall GRRT training program. Discuss the bullet points on the first slide and then name the other modules on the second slide. Point out that Module 2 is an overview module that provides background for all the others.
Slide # 6, GRRT Principles. These six principles have guided the development of the GRRT modules and are foundational to the successful implementation of green recovery and reconstruction.
Slides # 7 – 10, Workshop Learning Objectives. Review the prepared learning objectives for the workshop with the participants, as follows:
1. Describe why monitoring of the environment is important in assessing how the environment may affect your project and how your project may affect the environment.
2. Integrate monitoring environmental indicators into the project strategy and into every step of the project cycle’s development and implementation.
3. Select and measure environmental indicators using the criteria that are used for other indicators (e.g., SMART).
4. Demonstrate that integration of environmental monitoring into your project does not have to be difficult, costly, or time-consuming.
Ask the participants if they have additional objectives for this workshop. Discuss briefly how you may be able to accommodate those suggestions.
Slide # 11, Methodology. Briefly review the proposed methodology for the workshop, emphasizing the importance of hands-on learning and minimal lectures. The main points are the following:
• Presentations should be brief and should promote action learning.
• Discuss and test M&E concepts, policies, and tools.
• Share experiences.
• Participant feedback and evaluation.
Slide # 12, Workshop Ground Rules. Propose that there be agreed-upon ground rules for the workshop, such as:
• Please turn off your cell phone ringer.
• Do not make or receive cell phone calls during a session.
• Any other rules that may apply.
Emphasize the importance of not using cell phones or texting during sessions, as both actions are very disruptive. Ask participants to suggest additional ground rules. Note these rules on a flip chart and post the resulting list on a wall as a reminder for the duration of the workshop. Typical additional ground rules include a “policy” on starting and finishing sessions on schedule, not smoking in the classroom, and encouraging everybody to contribute ideas and to not be critical of other peoples’ ideas.

12[ GREEN GUIDE TO PROJECT DESIGN, MONITORING, AND EVALUATION ]
Activity 1.4 Exercise – Environmental Impacts of Disaster Assistance
(15 minutes)
Slide # 13, Consequences of Response. Explain that there is going to be a brainstorming session to see how many answers participants can come up with for the following question:
What are some possible environmental consequences of the disaster-response activities you see in the following photos?
Explain that you will show a few photos of disaster-response activities and that you will also ask them to describe how they would measure this impact.
Slides # 14 – 17. For each slide, ask: How has this disaster-response activity impacted the environment? Encourage participants to come up with between two and four answers. Then ask: How would you measure this impact? (This introduces the concept of environmental indicators, which follows this exercise.)
Background information on the photos
Slide 14 shows a temporary shelter built from local materials. When large numbers of homes are destroyed in a disaster, there may be a huge demand for local natural resources to build temporary or permanent shelter. Resources can be depleted, leading to deforestation, soil erosion, and loss of habitat.
Slide 15 shows a kiln to fire bricks to rebuild houses destroyed in an earthquake. Fired bricks may be a superior building material for many reasons, but their manufacture normally requires a very large volume of wood for the kilns. Especially after disasters, there may be a need to find solutions that require less consumption of natural resources to produce building materials.
Slide 16 shows trees blown down by a tropical storm. These blown-over trees are debris that need to be cleared. These trees can be salvaged and converted into lumber, thus reducing the need to harvest other timber for reconstruction.
Slide 17 shows debris removal from an earthquake site. There are both positive and negative potential environmental consequences to clearing debris, such as:
Negative: 1. Use of earthmoving equipment creates a lot of dust/air pollution; 2. workers may seriously damage a habitat if they are careless about where they take the debris; 3. if the debris is carted away before materials are salvaged, then potential building materials might be lost/destroyed and have to be replaced.
Positive: 1. Disaster debris is one of the first types of materials used for emergency shelter; wood is also used for heat, cooking, and boiling of water; 2. most disaster debris has intrinsic value to the owner and considerable use in the recovery effort; 3. sites need to be cleared before construction and economic activities can begin.
Slides # 18 – 19, Key Concepts of the Module. The preceding exercise is intended to lay the groundwork for understanding of the need for and value of incorporating environmental perspectives in the analysis of post-disaster situations. The following summarizes the key points of the module:
• Disaster-response projects impact the environment – both positively and negatively.

13 TRAINER’S GUIDE
• Disaster-response projects need to be assessed and designed to ensure that environmental issues are identified, negative environmental impacts are minimized, and positive environmental opportunities are supported.
• Monitoring of disaster-response projects needs to include indicators that identify and measure achievement of specific environment-related goals or sub-goals.
• These projects need to be evaluated to determine if the environment-related actions were appropriate and what their impact was, and to draw lessons learned for future projects.
Activity 1.5 Exercise – Your Project
(15 minutes)
Slide # 20, Indicators. Ask participants: What are indicators as applied to M&E? Discuss two or three contributions from participants and then show the description on the slide. Relate this to the statements made during the discussion of the previous slides regarding measurements of the impact of post-disaster projects.
Inform participants that the next session will be about how to develop indicators for the M&E of disaster-response projects within the context of an overall approach to project management.
Slide # 21, Exercise: Your project. The purpose of this exercise is to relate the topic of the workshop to the participants’ own work and experience. By making connections between an analysis of the environmental impacts of disasters and humanitarian assistance in general and the participants’ own projects, you can increase their engagement with the next sessions. Explain that the exercise consists of three steps:
1. Within each small group, identify one project that one of your group members has worked on related to humanitarian assistance.
2. Identify one activity of that project that had an environmental consequence, either positive or negative.
3. As a group, identify one indicator of environmental impact and one measurement you might take to gauge the impact.
Allow about five minutes for group discussion and then ask each group to report their results. The main responsibility of the facilitator is to ensure that the participants have correctly identified environmental consequences and appropriate indicators, and the means to measure them.
Slide # 22, Break Time. Inform participants what time they should be back at their places after the break.
14[ GREEN GUIDE TO PROJECT DESIGN, MONITORING, AND EVALUATION ]
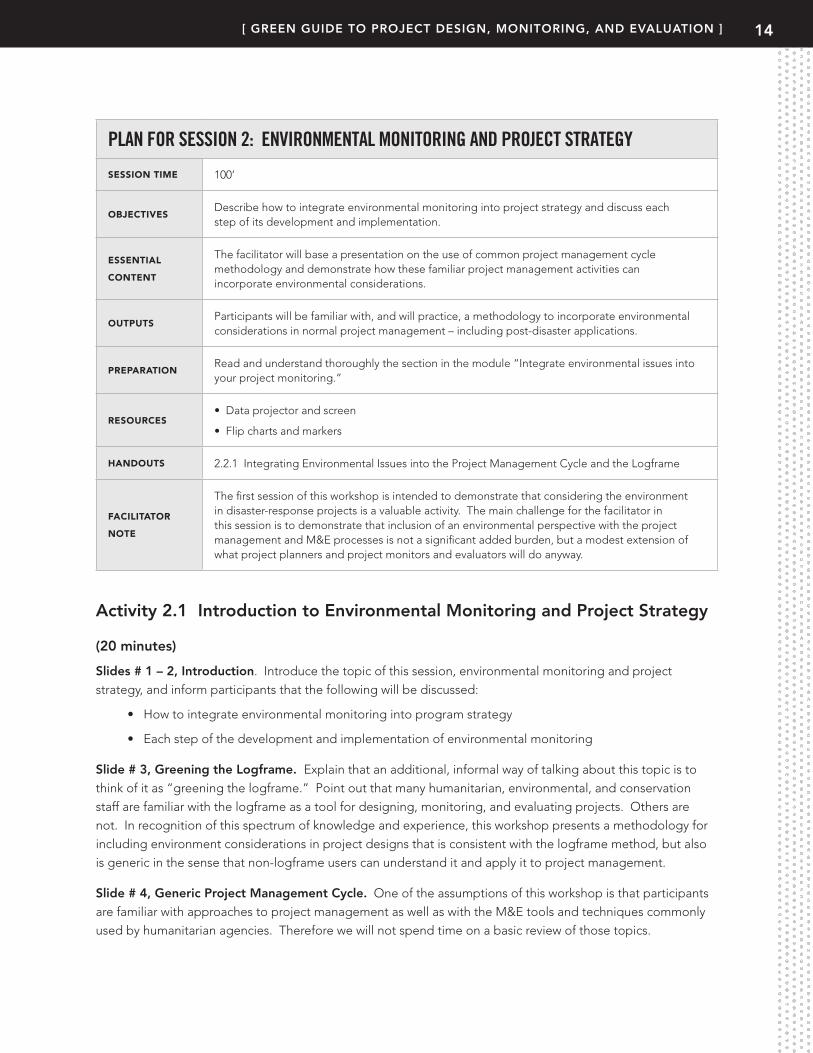
PLAN FOR SESSION 2: ENVIRONMENTAL MONITORING AND PROJECT STRATEGY
SESSION TIME 100’
OBJECTIVESDescribe how to integrate environmental monitoring into project strategy and discuss each step of its development and implementation.
ESSENTIAL
CONTENT
The facilitator will base a presentation on the use of common project management cycle methodology and demonstrate how these familiar project management activities can incorporate environmental considerations.
OUTPUTSParticipants will be familiar with, and will practice, a methodology to incorporate environmental considerations in normal project management – including post-disaster applications.
PREPARATIONRead and understand thoroughly the section in the module “Integrate environmental issues into your project monitoring.”
RESOURCES• Data projector and screen
• Flip charts and markers
HANDOUTS 2.2.1 Integrating Environmental Issues into the Project Management Cycle and the Logframe
FACILITATOR
NOTE
The first session of this workshop is intended to demonstrate that considering the environment in disaster-response projects is a valuable activity. The main challenge for the facilitator in this session is to demonstrate that inclusion of an environmental perspective with the project management and M&E processes is not a significant added burden, but a modest extension of what project planners and project monitors and evaluators will do anyway.
Activity 2.1 Introduction to Environmental Monitoring and Project Strategy
(20 minutes)
Slides # 1 – 2, Introduction. Introduce the topic of this session, environmental monitoring and project strategy, and inform participants that the following will be discussed:
• How to integrate environmental monitoring into program strategy
• Each step of the development and implementation of environmental monitoring
Slide # 3, Greening the Logframe. Explain that an additional, informal way of talking about this topic is to think of it as “greening the logframe.” Point out that many humanitarian, environmental, and conservation staff are familiar with the logframe as a tool for designing, monitoring, and evaluating projects. Others are not. In recognition of this spectrum of knowledge and experience, this workshop presents a methodology for including environment considerations in project designs that is consistent with the logframe method, but also is generic in the sense that non-logframe users can understand it and apply it to project management.
Slide # 4, Generic Project Management Cycle. One of the assumptions of this workshop is that participants are familiar with approaches to project management as well as with the M&E tools and techniques commonly used by humanitarian agencies. Therefore we will not spend time on a basic review of those topics.
15 TRAINER’S GUIDE
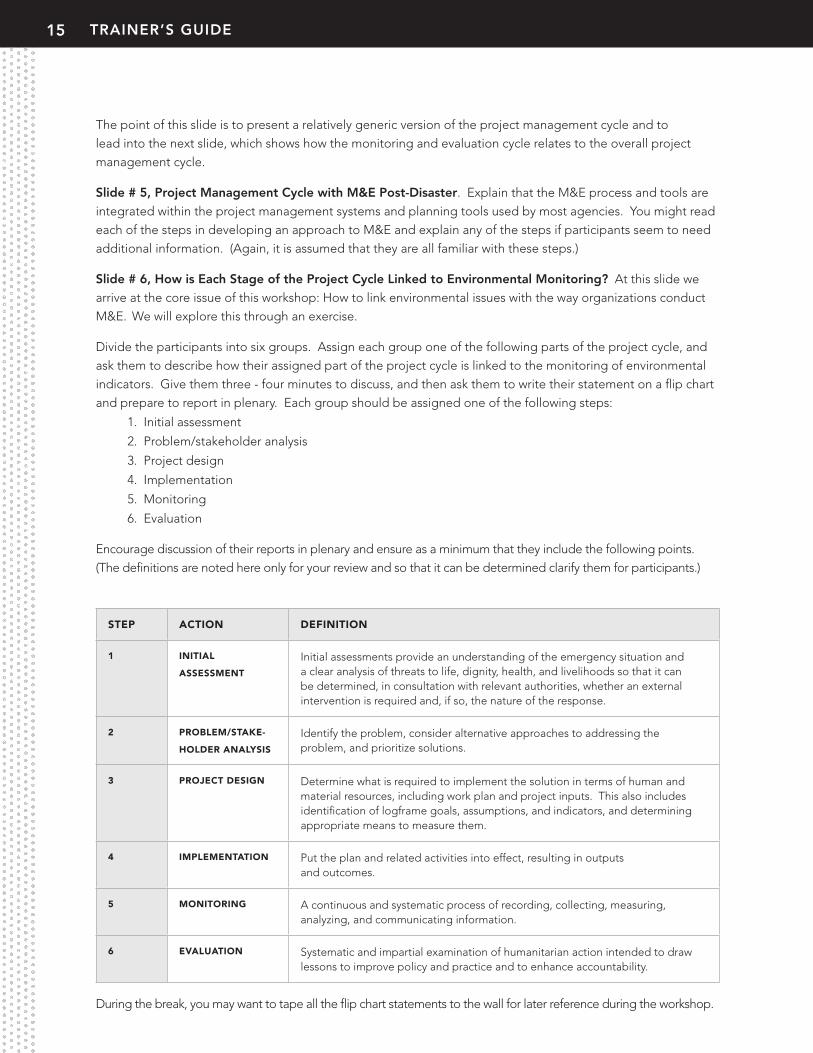
The point of this slide is to present a relatively generic version of the project management cycle and to lead into the next slide, which shows how the monitoring and evaluation cycle relates to the overall project management cycle.
Slide # 5, Project Management Cycle with M&E Post-Disaster. Explain that the M&E process and tools are integrated within the project management systems and planning tools used by most agencies. You might read each of the steps in developing an approach to M&E and explain any of the steps if participants seem to need additional information. (Again, it is assumed that they are all familiar with these steps.)
Slide # 6, How is Each Stage of the Project Cycle Linked to Environmental Monitoring? At this slide we arrive at the core issue of this workshop: How to link environmental issues with the way organizations conduct M&E. We will explore this through an exercise.
Divide the participants into six groups. Assign each group one of the following parts of the project cycle, and ask them to describe how their assigned part of the project cycle is linked to the monitoring of environmental indicators. Give them three - four minutes to discuss, and then ask them to write their statement on a flip chart and prepare to report in plenary. Each group should be assigned one of the following steps:
1. Initial assessment
2. Problem/stakeholder analysis
3. Project design
4. Implementation
5. Monitoring
6. Evaluation
Encourage discussion of their reports in plenary and ensure as a minimum that they include the following points. (The definitions are noted here only for your review and so that it can be determined clarify them for participants.)
STEP ACTION DEFINITION
1 INITIAL
ASSESSMENT
Initial assessments provide an understanding of the emergency situation and a clear analysis of threats to life, dignity, health, and livelihoods so that it can be determined, in consultation with relevant authorities, whether an external intervention is required and, if so, the nature of the response.
2 PROBLEM/STAKE-
HOLDER ANALYSIS
Identify the problem, consider alternative approaches to addressing the problem, and prioritize solutions.
3 PROJECT DESIGN Determine what is required to implement the solution in terms of human and material resources, including work plan and project inputs. This also includes identification of logframe goals, assumptions, and indicators, and determining appropriate means to measure them.
4 IMPLEMENTATION Put the plan and related activities into effect, resulting in outputs and outcomes.
5 MONITORING A continuous and systematic process of recording, collecting, measuring, analyzing, and communicating information.
6 EVALUATION Systematic and impartial examination of humanitarian action intended to draw lessons to improve policy and practice and to enhance accountability.
During the break, you may want to tape all the flip chart statements to the wall for later reference during the workshop.

16[ GREEN GUIDE TO PROJECT DESIGN, MONITORING, AND EVALUATION ]
Activity 2.2 Incorporating the Environment in Project Analysis
(15 minutes)
Slide # 7, Case Study: Tropico. Inform participants that we will use a case study to illustrate how to incorporate environmental concerns in the project analysis. Our case study involves the fictitious country of Tropico, a small country where there has been a drought for the past three years. The population is mainly rural. A needs assessment has revealed that there is a high incidence of malnutrition among children under five.
Slide # 8, Analysis: Defining the Problem. Relate the discussion of this slide to the previous exercise by saying that you will discuss the project-analysis stage that occurs after an assessment has been completed. We will focus on an example in which the assessment identified malnutrition among the disaster-affected population as an issue to be addressed.
The slide is animated to lead the discussion by starting with the problem statement and then illustrating the analysis of what caused the problem, leading back to a root-cause identification.
If the participants are highly experienced in project planning and M&E, you can go through the next five slides very quickly, as they present the basic and familiar notion of analyzing a problem and identifying an appropriate response. The purpose of these slides is to set the stage for the next level of analysis, i.e., to determine the environmental implications of the proposed project activities that result from this project analysis.
Slide # 9, Plan the Response. This slide is based on the previous slide, but highlights “malnutrition” as the problem for which participants need to plan the response. Ask the question “How and where do we attack the problem?” Encourage two or three people to respond and then show the next slide.
Slide # 10, Plan the Response, continued. Note that the slide shows that the proposal is to meet the goal of “reducing the incidence of malnutrition” by “increasing the availability of food.” There are many ways of increasing food supply, such as importing food. But then note that this does not address the root causes – which appear again on the slide.
Slide # 11, Plan the Response, continued. This slide highlights “poor crop production” as an appropriate point of entry, and moves further back in the root-cause. But now the challenge is to design an approach to address this problem.
Slide # 12, Plan the Response, continued. The approach then becomes “increase crop productivity.” [The ways to increase crop productivity require attention to the root-cause reasons that the crop production was low in the first place.]
Slide # 13, Plan the Response, continued. The last slide in this series illustrates how each of the root causes becomes an opportunity for intervention points to address the problem, and can be defined in terms of project activities and sub-activities. You may need to go back and forth between this slide and the previous slide to illustrate how the “green” solution solved one of the root causes.
Slide # 14, Identify Environmental Impacts of the Intervention Points. Explain that the purpose of the previous slides is to illustrate an example of a humanitarian response, that we need to analyze further so we can examine potential environmental impacts.
The example we use is “Increase availability of agricultural inputs.” Click through the animation of the slide and explain that the matrix is set up to break down this activity into “inputs,” “activity,” and “outputs,” each

17 TRAINER’S GUIDE
one illustrated as it applies to our example. The analysis, then, considers the potential environmental impacts of these elements (inputs, activities, and outputs).
The analysis is the essence of this workshop. We need to systematically review project plans and approaches to see the potential environmental implications. The next activity takes us through a step-by-step process that systematizes integration of the environment into project management.
Activity 2.3 Integrating Environmental Issues into Your Project
(65 minutes)
In this activity, you will present steps 1 – 4 of the methodology presented in this module’s content paper on how to integrate environmental issues into project monitoring. (Step 5 will be discussed in the next session.) After each step is presented, participants will be given an example of an activity from a humanitarian project, they will need to apply the step to that sample project.
Slide # 15, How to Integrate Environmental Issues into Project Monitoring and Evaluation. Explain that you will present a methodology of how to integrate environmental issues into projects. As noted before, the methodology is based on standard project management approaches. Introduce the methodology by reading through the five steps and explaining that the group will next look at what is required for each step.
• Step 1: Adapt your goal statement to include environmental conditions.
• Step 2: Adapt the outputs.
• Step 3: Integrate the environment into your project activities.
• Step 4: Consider the role of the environment in your assessment risks.
• Step 5: Integrate environmental indicators into project monitoring.
• Step 6: Integrate the environment into project evaluation.
At this point, give out Handout 2.2.1, which presents the project management cycle, the above five steps on how to integrate environmental issues into project monitoring, and a sample logframe matrix. The handout is intended to help participants keep track of the different terms and frameworks.
Slide # 16, Exercise, Taking the Steps. This slide is to help set up the series of mini-exercises that follow. Ask each group to set up a flip chart with the headings shown on the slide. Ask them to leave space between each heading so that they can write in their answers to the following exercises. This exercise consists of you explaining each step and then asking the participants to apply the process/method of each step to an assigned example.
Slide # 17, Step 1: Adapt Your Goal Statement to Include Environmental Conditions. This can be explained by using an example taken from our previous illustration of a problem statement.
Example of a goal: Improve food security of vulnerable populations in post-conflict areas.
No “entry point” for environment here.
BUT, we can change this goal to: Improve food security of vulnerable populations in post-conflict areas without compromising integrity of local natural resources.

18[ GREEN GUIDE TO PROJECT DESIGN, MONITORING, AND EVALUATION ]
THEN we can address the following:
• Depletion of freshwater resources
• Introduction of invasive species
• Increasing forest conversion to agriculture
Slide # 18, Exercise, Step 1. One method of learning these steps is to practice them through exercises. We will do that for each of the steps in this process. For step 1, ask participants to adapt one of the assigned goals below to include environmental considerations.
• Group 1: Reduce incidence of disease caused by poor sanitation.
• Group 2: Provide shelter for all disaster-affected families.
• Group 3: Provide employment opportunities for 1,000 disaster-impacted unemployed workers.
Allow about five minutes for discussion of the problem and then ask each group to report back to plenary. There can be many correct answers. The following are example answers:
• Group 1: Reduce the incidence of disease caused by poor sanitation by protecting water supplies.
• Group 2: Provide shelter for all disaster-affected families using sustainable building materials.
• Group 3: Provide employment opportunities for 1,000 disaster-impacted unemployed workers using principles of environmental sustainability.
Slide # 19, Step 2, Adapt the Outputs. In our ongoing example, three outputs are highlighted on the slide. By directly addressing environmental considerations in the output we can:
1. Highlight environmental considerations to inform project design and implementation
2. Assist with the identification of environmental priorities, elements, and factors to be measured in indicators
For example, for the activity “Improve soil fertility,” the output could be “an increase in hectares of land using organic fertilizer.”
Slide # 20, Step 2, Adapt the Outputs. This slide illustrates how output statements can be modified to include environmental conditions.
The initial outputs are as follows:
1. Increased availability of agricultural inputs (seeds and tools)
2. Improved soil fertility
3. Increased availability of water
The revised outputs:
1. Increased availability of local seeds (noninvasive)
2. Improved soil fertility without use of harmful chemicals
3. Increased availability of sustainably sourced water for crop production
19 TRAINER’S GUIDE
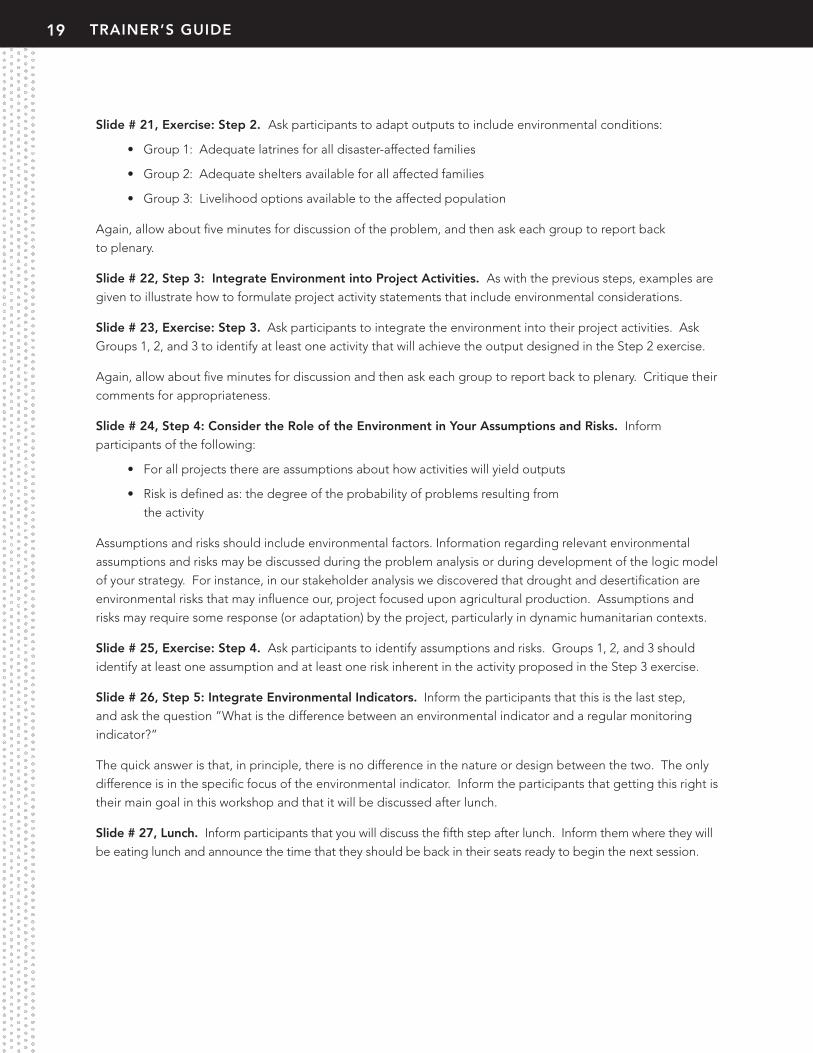
Slide # 21, Exercise: Step 2. Ask participants to adapt outputs to include environmental conditions:
• Group 1: Adequate latrines for all disaster-affected families
• Group 2: Adequate shelters available for all affected families
• Group 3: Livelihood options available to the affected population
Again, allow about five minutes for discussion of the problem, and then ask each group to report back to plenary.
Slide # 22, Step 3: Integrate Environment into Project Activities. As with the previous steps, examples are given to illustrate how to formulate project activity statements that include environmental considerations.
Slide # 23, Exercise: Step 3. Ask participants to integrate the environment into their project activities. Ask Groups 1, 2, and 3 to identify at least one activity that will achieve the output designed in the Step 2 exercise.
Again, allow about five minutes for discussion and then ask each group to report back to plenary. Critique their comments for appropriateness.
Slide # 24, Step 4: Consider the Role of the Environment in Your Assumptions and Risks. Inform participants of the following:
• For all projects there are assumptions about how activities will yield outputs
• Risk is defined as: the degree of the probability of problems resulting from the activity
Assumptions and risks should include environmental factors. Information regarding relevant environmental assumptions and risks may be discussed during the problem analysis or during development of the logic model of your strategy. For instance, in our stakeholder analysis we discovered that drought and desertification are environmental risks that may influence our, project focused upon agricultural production. Assumptions and risks may require some response (or adaptation) by the project, particularly in dynamic humanitarian contexts.
Slide # 25, Exercise: Step 4. Ask participants to identify assumptions and risks. Groups 1, 2, and 3 should identify at least one assumption and at least one risk inherent in the activity proposed in the Step 3 exercise.
Slide # 26, Step 5: Integrate Environmental Indicators. Inform the participants that this is the last step, and ask the question ”What is the difference between an environmental indicator and a regular monitoring indicator?”
The quick answer is that, in principle, there is no difference in the nature or design between the two. The only difference is in the specific focus of the environmental indicator. Inform the participants that getting this right is their main goal in this workshop and that it will be discussed after lunch.
Slide # 27, Lunch. Inform participants that you will discuss the fifth step after lunch. Inform them where they will be eating lunch and announce the time that they should be back in their seats ready to begin the next session.

20[ GREEN GUIDE TO PROJECT DESIGN, MONITORING, AND EVALUATION ]
WORKSHOP OPTION A. PLAN FOR SESSION 2A: ENVIRONMENTAL MONITORING AND PROJECT STRATEGY
SESSION TIME 100’
OBJECTIVES
• Introduce the objectives of this workshop.
• Describe how to integrate environmental monitoring into project strategy, development, and implementation.
ESSENTIAL
CONTENT
The facilitator will base a presentation on the use of common project management cycle methodology and will demonstrate how these familiar project management activities can incorporate environmental considerations.
OUTPUTSParticipants will be familiar with, and will practice, a methodology to incorporate environmental considerations into normal project management – including post-disaster applications.
PREPARATIONRead and understand thoroughly the section in the content paper “Integrate environmental issues into your project monitoring.”
RESOURCES• Data projector and screen
• Flip charts and markers
HANDOUTS 2.2.1 Integrating Environmental Issues into the Project Management Cycle and the Logframe
FACILITATOR NOTE
It is assumed the first session of this workshop was Module 1, which was intended to demonstrate that consideration of the environment in disaster-response projects is a valuable activity (in addition to introducing the GRRT). The main challenge for the facilitator in this session is to demonstrate that inclusion of an environmental perspective with the project management and M&E processes is not a significant added burden but a modest extension of what project planners and project monitors and evaluators will do anyway.
Workshop Option A. Module 1 and Session 1 of Module 2 include a lot of common material. In order for Module 1 to replace Session 1 of Module 2, some material from Session 1 will need to be added to Session 2. Those additional slides have been incorporated in this session plan.
The PowerPoint file that supports this session is labeled “Mod2 Project Design, M&E Session 2A (Date).”
Activity 2.1 Introduction to Environmental Monitoring and Project Strategy
(25 minutes)
Slide # 1, Introduction. This session introduces the topic of Green Guide to Project Design, Monitoring, and Evaluation. This module, along with Module 1, provides a foundational approach to standard project management practices to incorporate environmental considerations. This first session will focus on environmental monitoring and project strategy.
Slides # 2 – 5, Workshop Learning Objectives. Review the prepared learning objectives for the workshop with the participants:
21 TRAINER’S GUIDE
1. Describe why monitoring of the environment is important in assessing how the environment may affect your project and how your project may affect the environment.
2. Integrate monitoring environmental indicators into the project strategy and every step of the project cycle’s development and implementation.
3. Select and measure environmental indicators using the criteria used for all other indicators (e.g., SMART).
4. Demonstrate that integration of environmental monitoring into your project does not have to be difficult, costly, or time consuming.
Ask the participants if they have additional goals for this workshop. Discuss briefly how you may be able to accommodate those suggestions.
Slide # 6, Greening the Logframe. Explain that an additional, informal way of talking about this topic is to think of it as “greening the logframe.” Point out that many humanitarian, environmental, and conservation staff are familiar with the logframe as a tool for designing, monitoring, and evaluating projects. Others are not. In recognition of this spectrum of knowledge and experience, this workshop presents a methodology for including environment considerations in project designs that is consistent with the logframe method, but also is generic in the sense that non-logframe users can understand and apply this method to their own approaches to project management.
Slide # 7, Methodology. Briefly review the proposed methodology for the workshop, emphasizing the importance of hands-on learning and minimal lectures. The main points are:
• Presentations should be brief and should promote action learning.
• Discuss and test M&E concepts, policies, and tools.
• Share experiences
• Participant feedback and evaluation
Slides # 8 – 9, Key Concepts of the Module. The discussion so far is intended to lay the groundwork for participant understanding of the need for and value of incorporating environmental perspectives as they analyze post-disaster situations. The following summarizes the key points of the module:
• Disaster-response projects impact the environment – both positively and negatively.
• Disaster-response projects need to be assessed and designed to ensure that environmental issues are identified, negative environmental impacts are minimized, and positive environmental opportunities are supported.
• Monitoring of disaster-response projects needs to include indicators that identify and measure achievement or changes for specific environment-related goals or sub-goals.
• These projects need to be evaluated to determine if the environment-related actions were appropriate and what their impact was, and to draw lessons for future projects.
Slide # 10, Indicators. As indicated in the third bullet point from the last slide, it is central to the workshop that participants know what indicators are and how to use them. Ask participants: What are indicators as applied to M&E?

22[ GREEN GUIDE TO PROJECT DESIGN, MONITORING, AND EVALUATION ]
Discuss two or three contributions from participants and then show the description on the slide. Relate this to the statements made during the discussions of previous slides regarding measurements of the impact of post-disaster projects.
Inform participants that the next session will be about how to develop indicators for the M&E of disaster-response projects within the context of overall approach to project management.
Slide # 11, Generic Project Management Cycle. One of the assumptions of this workshop is that participants are familiar with approaches to project management as well as with M&E tools and techniques commonly used by humanitarian agencies. Therefore, we will not spend time on a basic review of those topics.
The point of this slide is to present a relatively generic version of the project management cycle and to lead into the next slide, which shows how the monitoring and evaluation cycles relate to the overall project management cycle.
Slide # 12, Project Management Cycle with M&E Post-Disaster. Explain that the M&E process and tools are integrated within the project management systems and planning tools used by most agencies. You might read each of the steps in developing an approach to M&E and explain any of the steps if participants seem to need additional information. (Again, it is assumed that they are all familiar with these steps.)
Slide # 13, How is Each Stage of the Project Cycle Linked to Environmental Monitoring? At this slide we arrive at the core issue of this workshop: How to link environmental issues with the way organizations conduct M&E. We will explore this through an exercise.
Divide the participants into six groups. Assign each group one of the following parts of the project cycle, and ask them to describe how their assigned part of the project cycle is linked to the monitoring of environmental indicators. Give them three to four minutes to discuss, and then ask them to write their statement on a flip chart and then prepare to report in plenary. Each group should be assigned one of the following steps:
• Initial assessment
• Problem/stakeholder analysis
• Project design
• Implementation
• Monitoring
• Evaluation
Encourage discussion of their reports in plenary and ensure as a minimum that they include the following points. (The definitions are noted here only for your review and so that you can clarify them for participants.)

23 TRAINER’S GUIDE
ACTION DEFINITION LINK TO ENVIRONMENTAL MONITORING
INITIAL
ASSESSMENT
Initial assessments provide an understanding of the emergency situation and a clear analysis of threats to life, dignity, health, and livelihoods so that it can be determined, in consultation with relevant authorities, whether an external intervention is required and, if so, the nature of the response.
The assessment needs to explicitly include environmental issues, such as water quality, proximity to protected habitats, dependency on locally obtained fuelwood, farming systems, etc.
ANALYSIS Identify the problem, consider alternative approaches to addressing the problem, and prioritize solutions.
Interpretation of assessment results needs to explicitly include analysis of observed impact on the environment or possible risks to the environment, and to identify opportunities to improve environmental conditions.
PROJECT DESIGN Determine what is required to implement the solution in terms of human and material resources, including work plan and project inputs. This also includes identifying logframe goals, assumptions, and indicators, and means to measure them.
The design of activities to implement a project needs to consider inclusion of sub-activities to mitigate environmental damage or support opportunities for sustainable practices.
IMPLEMENTATION Put the plan and related activities into effect, resulting in outputs and outcomes.
Identify the outputs that address environmental goals.
MONITORING A continuous and systematic process of recording, collecting, measuring, analyzing, and communicating information.
Use environmental indicators in project monitoring.
EVALUATION Systematic and impartial examination of humanitarian action intended to draw lessons to improve policy and practice and to enhance accountability.
Use environmental indicators in project evaluation.
During the break, you may wish to tape all the flip chart statements to the wall for later reference during the workshop.
Activity 2.2 Incorporating the Environment into Project Analysis
(15 minutes)
Slide # 14, Case Study: Tropico. Inform participants that we will use a case study to illustrate how to incorporate environmental concerns in the project analysis. Our case study involves the fictitious country of Tropico, a small country where there has been a drought for the past three years. The population is mainly rural. A needs assessment has revealed that there is a high rate of malnutrition among children under five.
Slide # 15, Analysis: Defining the Problem. Relate the discussion of this slide to the previous exercise by saying that you will discuss the project-analysis stage that occurs after an assessment has been completed. We will focus on an example in which the assessment identified malnutrition among the disaster-affected population as an issue to be addressed.

24[ GREEN GUIDE TO PROJECT DESIGN, MONITORING, AND EVALUATION ]
The slide is animated to lead the discussion by starting with the problem statement and then illustrating the analysis of what caused the problem, leading back to a root-cause identification.
If the participants are highly experienced in project planning and M&E, you can go through the next five slides very quickly, as they present the basic and familiar notion of analyzing a problem and identifying an appropriate response. The purpose of these slides is to set the stage for the next level of analysis, i.e., to determine the environmental implications of the proposed project activities that result from this project analysis.
Slide # 16, Plan the Response. This slide is based on the previous slide, but highlights “malnutrition” as the problem for which participants need to plan the response. Ask the question “How and where do we attack the problem?” Encourage two or three people to respond and then show the next slide.
Slide # 17, Plan the Response, continued. Note that the idea is to state the objective of “reducing the incidence of malnutrition” by “increasing the availability of food.” There are many ways of increasing food supply, such as importing food. But then note that this does not address the root causes – which appear again on the slide.
Slide # 18, Plan the Response, continued. This slide highlights “poor crop production” as an appropriate point of entry, and moves further back in the root cause. But now the challenge is to design an approach to address this problem.
Slide # 19, Plan the Response, continued. The approach then becomes to “increase crop productivity.” The ways to do that require attention to the root-cause reasons why the crop production was low in the first place.
Slide # 20, Plan the Response, continued. The last slide in this series illustrates how each of the root causes becomes an opportunity for intervention points to address the problem, and can be defined in terms of project activities and sub-activities. You may need to go back and forth between this slide and the previous slide to illustrate how the “green” solution solved one of the root causes.
Slide # 21, Identify Environmental Impacts of the Intervention Points. Explain that the purpose of the previous slides is to illustrate an example of a humanitarian response, but one we need to analyze further to examine potential environmental impacts.
The example we use is “Increase availability of agricultural inputs.” Click through the animation of the slide and explain that the matrix is set up to break down this activity into “inputs,” “activity,” and “outputs,” each one illustrated as it applies to our example. The analysis, then, considers the potential environmental impacts of these elements (inputs, activities, and outputs).
The analysis is the essence of this workshop. We need to systematically review project plans and approaches to see the potential environmental implications. The next activity takes us through a step-by-step process that systematizes integrating the environment in project management.
Activity 2.3 Integrating Environmental Issues into Your Project
(60 minutes)
In this activity, you will present steps 1 – 4 of the methodology presented in this module’s content paper on how to integrate environmental issues into project monitoring. (Step 5 will be discussed in the next session.)

25 TRAINER’S GUIDE
After each step is presented, participants will be given an example of an activity from a project. They will need to apply the step to that sample project.
Slide # 22, How to Integrate Environmental Issues into Project Monitoring and Evaluation. Explain that you will present a methodology of how to integrate environmental issues into projects. As noted before, the methodology is based on standard project management approaches. Introduce the methodology by reading through the five steps and explaining that you will next look at what is required for each step.
• Step 1: Adapt your objective statement to include environmental conditions.
• Step 2: Adapt the outputs.
• Step 3: Integrate the environment into your project activities.
• Step 4: Consider the role of the environment in your assessment risks.
• Step 5: Integrate environmental indicators into project monitoring.
• Step 6: Integrate the environment into project evaluation.
At this point, give out Handout 2.2.1, which presents the project management cycle, the above six steps on how to integrate environmental issues into project monitoring, and a sample logframe matrix. The handout is intended to be helpful for participants to keep track of the different terms and frameworks.
Slide # 23, Exercise, Taking the Steps. This slide is to help set up the series of mini-exercises that follow. Ask each group to set up a flip chart with the headings shown on the slide. Ask them to leave space between each heading so that they can write in their answers to the following exercises. This exercise consists of you explaining each step and then asking the participants to apply the process/method of each step to an example assigned to them.
Slide # 24, Step 1: Adapt Your Goal Statement to Include Environmental Conditions. This can be explained by using an example taken from our previous illustration of a problem statement.
Example of a goal: Improve food security of vulnerable populations in post-conflict areas.
No “entry point” for environment here.
BUT, if we change it to: Improve food security of vulnerable populations in post-conflict areas while maintaining integrity of local natural resources.
THEN we can address, for example, the following:
• Depletion of freshwater resources
• Introduction of invasive species
• Increasing forest conversion to agriculture
Slide # 25, Exercise: Step 1. One way to learn these steps is to practice them through exercises.We will do that for each of the steps in this process. For step 1, ask participants to adapt one of the assigned objectives below to include environmental considerations.
• Group 1: Reduce incidence of disease caused by poor sanitation.
• Group 2: Provide shelter for all disaster-affected families.
• Group 3: Provide employment opportunities for 1,000 disaster-impacted unemployed workers.

26[ GREEN GUIDE TO PROJECT DESIGN, MONITORING, AND EVALUATION ]
Allow about five minutes for discussion and then ask each group to report back to plenary. There can be many correct answers. The following are examples of answers:
• Group 1: Reduce incidence of disease caused by poor sanitation by protecting water supplies.
• Group 2: Provide shelter for all disaster-affected families using sustainable building materials.
• Group 3: Provide employment opportunities for 1,000 disaster-impacted unemployed workers using principles of environmental sustainability.
Slide # 26, Adapt the Outputs. In our ongoing example, three outputs are highlighted on the slide. By directly addressing environmental considerations in the output statements, we will:
• Highlight environmental considerations to inform project design and implementation
• Assist with the identification of environmental priorities, elements, and factors to be measured in indicators
Take the example of the activity “Improve soil fertility”; the output could be “an increase in hectares of land using organic fertilizer.”
Slide # 27, Step 2, Adapt the Outputs. These slides illustrate how output statements can be modified to include environmental conditions.
The initial outputs:
• Increased availability of agricultural inputs (seeds and tools)
• Improved soil fertility
• Increased availability of water
Revised outputs:
• Increased availability of local seeds (noninvasive)
• Improved soil fertility without use of harmful chemicals
• Increased availability of sustainably sourced water for crop production
Slide # 28, Exercise: Step 2. Ask participants to adapt outputs to include environmental conditions:
• Group 1: Adequate latrines for all disaster-affected families
• Group 2: Adequate shelters available for all affected families
• Group 3: Livelihood options available to the affected population
Again, allow about five minutes for discussion and then ask each group to report back to plenary.
Slide # 29, Step 3: Integrate Environment into Project Activities. As with the previous steps, examples are given illustrating the formation of project activity statements that include environmental considerations.
Slide # 30, Exercise: Step 3. Ask participants to integrate the environment into their project activities. Ask Groups 1, 2, and 3 to identify at least one activity that will achieve the output designed in the Step 2 exercise.

27 TRAINER’S GUIDE
Again, allow about five minutes for discussion and then ask each group to report back to plenary. Critique their comments for appropriateness.
Slide # 31, Step 4: Consider the Role of the Environment in Your Assumptions and Risks. Inform participants that:
• For all projects there are assumptions about how activities will yield the outputs.
• Risk is defined as the probability that problems will arise from the activity.
Assumptions and risks should include environmental factors. Relevant environmental assumptions and risks may be discussed during the problem analysis or during development of the logic model of your strategy. For instance, in our stakeholder analysis we discovered that drought and desertification are environmental risks that may influence a project focused upon agricultural production. Assumptions and risks may require some response (or adaptation) by the project, particularly in dynamic humanitarian contexts.
Slide # 32, Exercise: Step 4. Instead of asking participants to undertake this exercise in small groups, facilitate a plenary discussion. Ask participants to identify assumptions and risks based on one activity that each group proposed in the Step 3 exercise. Because of time constraints, it will be helpful if you keep this discussion short and limit the discussion to one or two examples.
Slide # 33, Step 5: Integrate Environmental Indicators. Inform the participants that this is the last step, and ask the question ”What is the difference between an environmental indicator and a regular monitoring indicator?”
The quick answer is that, in principle, there is no difference in the nature or design of the two. The only difference is in the specific focus of the environmental indicator. Inform the participants that getting this right is the main message of the workshop and that it will be discussed after lunch.
Slide # 34, Lunch. Inform participants you will discuss the fifth step after lunch. Inform them where they will be eating lunch and announce the time that they should be back in their seats ready to begin the next session.

28[ GREEN GUIDE TO PROJECT DESIGN, MONITORING, AND EVALUATION ]
PLAN FOR SESSION 3: SMART ENVIRONMENTAL INDICATORS
SESSION TIME 90’
OBJECTIVES
• How to select and measure environmental indicators using the criteria used for other indicators, i.e., SMART
• How to overcome constraints to using them
ESSENTIAL
CONTENT
In this session we will define and discuss the criteria for SMART indicators, examine examples of SMART environmental indicators, and discuss how to overcome constraints to using environmental indicators.
OUTPUTSParticipants will generate SMART environmental indicators applied to their case study project and identify strategies for overcoming constraints to using them.
PREPARATION• Review the material related to this session in the module content paper.
• Photocopy the handout.
RESOURCES• Data projector and screen
• Flip charts and markers
HANDOUTS 2.3.1 Examples of indicators for use in ecosystem-based disaster risk reduction
FACILITATOR NOTEThe main objective is to thoroughly establish an understanding among participants of what indicators are and how to make them SMART in order to successfully develop environmental indicators that meet these SMART criteria.
Activity 3.1 Introduction to SMART Environmental Indicators
(15 minutes)
Slides # 1 – 2. Introduce the topic of this session, SMART environmental indicators, and inform participants that you will discuss the following:
• How to select and measure environmental indicators using the criteria used for other indicators, i.e., SMART
• How to overcome constraints to using them
Slide # 3, Step 5. This slide is just to remind participants that we are going to focus on the fifth step of our methodology.
Slide # 4, An Environmental Indicator. This slide defines indicators in terms of the environment.
Slide # 5, SMART Indicators. Explain that we approach the development of environmental indicators using SMART, a well-established set of criteria. Ask participants to call out what each letter stands for before you show the full word.
• Specific
• Measurable
• Achievable

29 TRAINER’S GUIDE
• Relevant
• Time-bound
If everybody in the audience is conversant with this acronym, you can move on quickly. Otherwise you can provide additional descriptions of each element as per the information in the following box. As you can see from the box, there can be more than one right answer for some of these criteria, but the above terms are the most commonly used.
Specific: The system captures the essence of the desired result by clearly and directly relating to achievement of an objective, and only that objective.
Measurable: The monitoring system and its indicators are unambiguously specified so that all parties agree on what the system covers and there are practical ways to measure the indicators and results.
Achievable and Attributable: The system identifies what changes are anticipated as a result of the intervention and whether the result(s) are realistic. Attribution requires that changes in the targeted developmental issue can be linked to the intervention.
Relevant and Realistic: The system establishes levels of performance that are likely to be achieved in a practical manner and that reflect the expectations of stakeholders.
Time-bound, Timely, Trackable, and Targeted: The system allows progress to be tracked in a cost-effective manner at a desired frequency for a set period, with clear identification of the particular stakeholder group that will be impacted by the project or program.
At the bottom of the slide is a “help button” and a suggestion that participants should seek technical assistance when dealing with sectoral technologies beyond the scope of their experience and for which they may not feel qualified to identify the indicators.
Slide # 6, Environmental Indicators May Measure… Present each of the bullet points and discuss each example. Make sure participants understand that there can be indicators for each of these elements of a project.
• Inputs/activities: What you put into a project e.g., Quantity of native, local seeds distributed
• Outputs: The anticipated results of your activity e.g., Increased crop yields through better management practices
• Project objectives: The changes in people’s lives that result from a project e.g., Improved nutrition of local population without increased risk of future insecurity
Slide # 7, Examples. Discuss the sample cases of a water/sanitation and a shelter project and note the common negative environmental impacts of those types of projects. For each “effect”, an indicator is shown that would facilitate its monitoring.
30[ GREEN GUIDE TO PROJECT DESIGN, MONITORING, AND EVALUATION ]
Activity 3.2 SMART Indicators
(45 minutes)
Slide # 8, Exercise: SMART Indicators. Inform the participants that they will practice developing SMART environmental indicators. They should work in the same small groups as the last session, with the assignment to identify one or two SMART indicators for their sectoral project, looking for one or more of the following:
• Activities
• Outputs
• Impact
Slide # 9, Example. To help launch the exercise, you can demonstrate the example of “increase crop productivity” that has been used previously.
Slide # 10, Worksheet. Show this blank matrix and ask participants to create a similar matrix on a flip chart to help organize their exercise.
Ask the groups to collect their work from Session 2 when they produced proposals for the middle column, “your plan.” Then ask them to write their indicators in the third column. Allow about ten to fifteen minutes and then ask each group to report to plenary.
Encourage other groups to participate in the discussion of each group’s report. Ask the other groups if the indicator meets the SMART criteria. If it doesn’t, work out an indicator that does. Since this exercise focuses on the central issue of this workshop, you should take all the time required to ensure that all participants have grasped the concepts to this point and are able to generate meaningful and SMART environmental indicators.
Activity 3.3 Constraints to Monitoring Environmental Indicators
(30 minutes)
Discuss with participants the idea that if incorporating the environment in all project monitoring and tracking environmental indicators were easy, more agencies would probably be doing it. But there are constraints to being able to do a good job of monitoring in general and developing environmental indicators in particular.
Slide # 11, Constraints to Monitoring Environmental Indicators. Inform participants that in order to implement the recommendations and practices advocated by this workshop, they need to be realistic about what is achievable and to understand the obstacles to reaching their environmental goals. Tell participants that one way of dealing with these realities is to identify challenges to monitoring the environment, and then come up with solutions to overcome the challenges. First show the question on the slide:
What challenges have you faced while monitoring humanitarian assistance projects?
Ask participants to brainstorm the challenges they have faced or know of that others have faced. Write these points on a flip chart. This question is essentially a warm-up for the next question.
What challenges have you faced in monitoring environmental aspects of projects?
Again, ask the participants to contribute answers to this question, but you may need to allow them to also brainstorm answers as well if they don’t have experience in dealing with or thinking about environmental concerns. Write these points on a flip chart.

31 TRAINER’S GUIDE
Slide # 12, Exercise: Overcoming Constraints. Show this slide, which lists several constraints to the monitoring of environmental indicators, and compare it to the lists created by the participants.
1. Lack of data (difficult to establish baseline and norms and thresholds) makes it difficult to come up with definitive statements, you often have to collect data on your own.
2. Time – environment is undergoing long-term change that may not be measured in a project life span.
3. Scale – often environmental impacts and change occur beyond project area.
4. Cause-effect – some claim that it is impossible to definitively say that there is a cause and effect.
5. Difficult to distinguish between changes in other things versus changes due to project activities.
Slide # 13, Exercise: Overcoming Constraints Continued. In consultation with the participants, select the three or four constraints that are the priority concerns for the participants from the list generated by the participants and the list on the previous slide. Divide the participants into three or four groups, assign one constraint to each group, and ask them to discuss how they would overcome the given constraint. Allow up to 10 minutes for small-group discussion (or less if they seem to conclude their discussion in less time) and ask them to return to plenary.
Ask each group to identify the constraint they discussed and to present their thoughts on how to address it. After each report, encourage other groups to add their ideas to the discussion. Summarize the ideas and conclude the exercise.
Slide # 14, Examples of Indicators. Hand out 2.3.1 Examples of indicators for use in ecosystem-based disaster risk reduction by IUCN and allow a few minutes for participants to review this document and ask questions about these indicators.
Slide # 15. Announce that it is time for afternoon break.

32[ GREEN GUIDE TO PROJECT DESIGN, MONITORING, AND EVALUATION ]
PLAN FOR SESSION 4: MONITORING ENVIRONMENTAL INDICATORS AND CONSTRAINTS. EVALUATION AND CLOSING
SESSION TIME 90’
OBJECTIVES
• Describe at least two tools that can be used to monitor environmental indicators.
• Demonstrate that the integration of environmental monitoring into your project does not have to be difficult, costly, or time consuming.
ESSENTIAL
CONTENT
This session will include a brief review of monitoring tools and techniques that are particularly useful for environmental indicators. The Report Card will be emphasized as an example of a tool. A brief orientation to persuasive communication will be used as an introduction to role-plays that will examine the relative ease and cost-effectiveness of monitoring environmental indicators.
OUTPUTS Role-play performances, Learning Evaluation results, and workshop evaluation.
PREPARATION
• Photocopy the handouts.
• Plan how you will set up the “stage” for the role plays, e.g., two chairs and a small table at the front of the room, simulating an office situation.
• Plan the workshop closing arrangements, and ask the workshop host and/or a participant to make closing remarks.
• Prepare certificates if they are to be given out.
RESOURCES
• Data projector and screen
• Flip charts and markers
• Sticky notes, etc.
HANDOUTS
• 2.4.1 Environmental Stewardship Report Card, 1 per participant
• 2.4.2 Role-play scenario, 1 per participant of the scenario
• Role guides, 1 copy only of the role guides for the participants selected to be the role players
• Role Guide for Observers, 3 copies of the observers’ role guide for all participants (1 copy for each role-play)
• 2.4.3 Learning Evaluation
• 2.4.4 Learning Evaluation Answer Key
• 2.4.5 Workshop Evaluation
• Certificates for completion of the workshop
• CD with resource materials related to this workshop
FACILITATOR
NOTE
The role-play as a learning activity will do three things:
• Help the participants recognize that they may encounter opposition to incorporating environmental aspects in their task as monitors.
• Show that they may need to be strong and persuasive promoters for environmental monitoring if they are going to get the other stakeholders to buy in to the effort.
• Provide a creative and fun way for participants to review all the information they have learned during the workshop and apply it to a simulated situation.

33 TRAINER’S GUIDE
Activity 4.1 Overview of Environmental Monitoring Tools and Methods
(15 minutes)
Slides #1 – 2. Introduce this session by explaining that the session is not about monitoring tools and methods per se, since this audience should already be conversant in the basics of these. Rather, we want to focus on the specific tools and methods that are germane to environmental indicators.
Slide # 3, What To Do If… This slide raises the question of what to do if environmental considerations were not incorporated into the project objective and activities from the start. This scenario is probably going to happen more frequently that than of incorporation from the start.
Ask the participants to brainstorm in plenary the question: How can we incorporate environmental considerations at a later stage? Capture ideas on a flip chart and conclude the discussion by highlighting those ideas that seem promising.
Slide # 4, Monitoring Tools. As a warm-up to the session, ask participants what monitoring tools and methods they have used and found useful. This list would likely include the following:
• Comparison of project status to project plan as described in a logframe, workplan, budget, staffing table, and project outputs at the current stage of the project
• Interviews with stakeholders
• Household and market surveys
• Questionnaires
• Rapid rural appraisal tools
• Direct observation and measurement
• Physical testing/sampling, e.g., soil and water
Write the participants’ list on a flip chart.
Slide # 5, Tools for Monitoring Environmental Indicators.
1. How can these tools and methods be used effectively for monitoring environmental indicators?Ask participants if they are aware of tools and methods that are particularly effective for monitoring environmental indicators. If any participants volunteer examples, ask them to describe the tool/method, to explain what their experience has been regarding its usefulness, and, if appropriate, to explain how others can obtain this tool/method.
2. Environmental Stewardship Report CardRefer participants to their handout 2.4.1 Environmental Stewardship Report Card and discuss how it can be used to monitor environmental indicators.
3. Environmental Indicator Framework: A monitoring system for environment-related activities in refugee operations Also refer them to the Environmental Indicator Framework: A monitoring system for environment-related activities in refugee operations, by UNHCR, one example of which is in this module’s content paper. Inform participants that the whole

34[ GREEN GUIDE TO PROJECT DESIGN, MONITORING, AND EVALUATION ]
document and other resources are on the CD provided for this workshop. Note that these indicators are highly developed and linked to a scoring system that generates a quantifiable analysis of performance in the specific area of the indicator.
Activity 4.2 Promoting the Monitoring of Environmental Indicators
(45 minutes)
Slide # 6, More Constraints to Monitoring Environmental Indicators. Refer to the previous session, in which you discussed challenges and constraints to monitoring environmental indicators in humanitarian projects. Perhaps not explicitly included in the earlier discussion were the bureaucratic or institutional obstacles that participants might encounter when implementing their monitoring objectives. Resistance from within your own organization might be based on the belief that it is too difficult, time consuming, and costly to monitor environmental indicators.
Inform participants that in this session they will examine these legitimate concerns and generate counter-arguments that justify the value and priority of such monitoring.
Suggest to participants that if they are to succeed in implementing their monitoring objectives, they may need to overcome skeptics, including their supervisors, colleagues, and donors, who hold these views. The first step to monitoring environmental indicators may be to get permission and institutional support to do it, i.e., they must create an enabling environment.
It is easier to present your case for putting time and effort into monitoring if you have prepared and rehearsed your arguments. We will perform three role-plays that simulate situations you may encounter in trying to get support for your monitoring objectives.
Slide # 7, Persuasive Communication. In order to monitor environmental indicators you will need to get buy-in from your colleagues and stakeholders. This may require that you be effective at persuading this audience of the merits of your objectives. The following are tips that could help you be more persuasive:
• Understand the perspective, interests, and underlying reasons for resistance of the person you are talking to.
• Present a clear argument based on one to three compelling points and tailor it to your audience.
• Support your proposal with evidence or results.
• Use the information you have learned today to make your case.
Supplement these points as necessary by illustrating them with an example from your experience.
Slide # 8, Exercise: Role-Plays. As in the cartoon on the PowerPoint, you may start with a scenario in which you have conflicting objectives, but suggest that the role-players should look for solutions that are “win-win”. Ask for three volunteers who are willing to play the role of a “promoter” – a project monitor who is asked to explain and defend his or her request to include environmental indicators in routine monitoring activities. The three scenarios are the same concerns mentioned in an earlier slide:
1. It’s too costly.
2. It’s too time consuming.
3. It’s too difficult.

35 TRAINER’S GUIDE
Then, either ask for three volunteers who will play the role of “discussant,” – someone who is skeptical about the value of monitoring environmental indicators – OR play the role of the discussant yourself, as some participants may be reluctant to be “the bad guy.” Furthermore, if you are the discussant, you will have more control over that role, and can ensure that reasonable counter arguments are made.
Hand out the scenario to all participants. Give each role-player his or her role guide (found in the electronic file of workshop materials) and allow the roll-players five minutes to plan their approach to the “meeting” that has been called to discuss this matter. Also give an “observers’ role guide” to the rest of the participants, who will play the role of observers. Their assignment is just as important that of the other role players.
Set up two chairs in the front of the room and, if possible, a small table between them, simulating an office situation. Ask the first “promoter” and “discussant” to come to the front of the room and begin their discussion.
Start the first role-play. Explain that this is a meeting between the project monitor and the shelter project manager. After about five minutes, or as soon as both sides seem to have exhausted their ideas in support of their position, stop the role-play. Ask the observer participants to comment on what they felt were the strong or successful arguments made by the monitor and to suggest additional ideas or tactics that could have been used to arrive at a win-win conclusion.
Repeat the process for the remaining two role-plays if there is time. Explain that the second meeting is between the monitor and the NGO country director and the third meeting is between the monitor and a community leader who is the liaison with the shelter NGO.
It is not a “requirement” to do all three role-plays. If you run out of time, just doing one or two is okay.
Conclude the exercise and summarize the way participants used the information they had learned/discussed earlier in the workshop to make their case and be more effective monitors.
Activity 4.3 Workshop Review
(5 minutes)
Slide # 9 – 10, Workshop Review. First, ask participants: What were the most useful things you learned today? After taking a few responses, review the key points presented at the beginning of the workshop and ask if they have any final questions about these points or about the workshop.
• Disaster-response projects impact the environment – both positively and negatively.
• Disaster-response projects need to be assessed and designed to ensure that environmental issues are identified, negative environmental impacts are minimized, and positive environmental opportunities are supported.
• Monitoring of disaster-response projects needs to include indicators that identify and measure achievement of environment-related objectives or sub-objectives.
• These projects need to be evaluated to determine if the environment-related actions were appropriate and what their impact was, and to draw lessons for future projects.

36[ GREEN GUIDE TO PROJECT DESIGN, MONITORING, AND EVALUATION ]
Activity 4.4 Evaluation and Closing
(45 minutes)
Learning Evaluation
Asking participants to take the Learning Evaluation (quiz) is optional. If you decide to do it, explain that the chief value is that the quiz helps the workshop planners and facilitators see how well the information was presented and communicated. We are trying to evaluate not the participants, but ourselves. Then pass out 2.4.3 Learning Evaluation and allow about 10 minutes for completion. Collect the quizzes and hand out 2.4.4 Learning Evaluation Answer Key, and move on to the workshop evaluation.
Workshop Evaluation
Distribute the workshop evaluation and request that all participants complete it. This should also take 10 minutes or less. Collect the evaluations.
Closure
Ask your host and/or perhaps a participant to speak on behalf of all participants and make closing remarks.
Hand out certificates (and the CD of resources if it wasn’t given out earlier) if that is part of your plan.
Thank all the people who helped plan and implement the workshop for their efforts. Congratulate the participants on completing the workshop and wish them well in their work, especially as they implement environmental indicators in their future project monitoring.