PART 01: CAMERA PLACEMENT IN RHINO - · PDF fileCamera Settings in VRay for Rhino. The Vray...
9
3 - Set Camera and Target: Allows the user to simultaneously place the camera position and specify the camera’s foci on the model. Access this feature via one of the following methods: • In the viewport drop down menu: Set Camera > Place Camera and Target (See Image 1) • In the Set View menu bar: right click the icon . Set your camera on your polyline, and select your target. HUMAN EYE PERSPECTIVE Simulating Human Perspective in Rhino, Sketchup & Vray for Rhino Creating a human-eye view simulation for 3-D architectural digital models is imperative to understand how a building will appear to pedestrians and users at ground level. Both camera positions and focal length settings are necessary to simulate human eye perspective views for Rhino models. This tutorial shows how to simulate “human-eye” perspective via 1.) Camera Placement in Rhino, and 2.) Camera Settings in VRay for Rhino. The Vray Camera Settings deal primarily with how to transpose your human eye simulation in Rhino to a successful graphic photograph. Lastly, this tutorial will demonstrate 3.) Camera Placement in Sketchup to achieve synonymous results in a different program. A view is defined by the camera position, the target position and a viewing angle (corresponding to a lens length). camera stick PART 01: CAMERA PLACEMENT IN RHINO To create a “human-eye” view: 1 - Create a polyline measuring approximately human eye level (60” - 74”). 2 - Position the polyline horizontally at desired viewing location (z value must equal 0).
Transcript of PART 01: CAMERA PLACEMENT IN RHINO - · PDF fileCamera Settings in VRay for Rhino. The Vray...
3 - Set Camera and Target: Allows the user to simultaneously place the camera position and specify the camera’s foci on the model. Access this feature via one of the following methods:
• In the viewport drop down menu: Set Camera > Place Camera and Target (See Image 1)
• In the Set View menu bar: right click the icon . Set your camera on your polyline, and select your target.
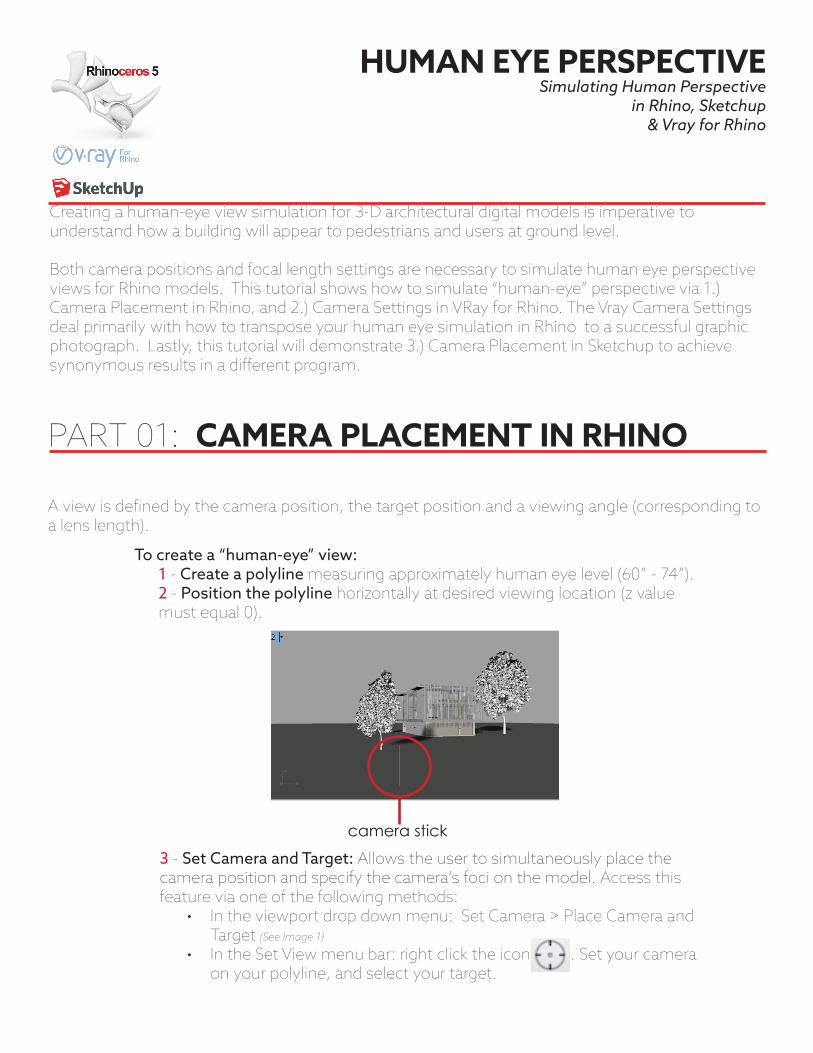
HUMAN EYE PERSPECTIVESimulating Human Perspective
in Rhino, Sketchup& Vray for Rhino
Creating a human-eye view simulation for 3-D architectural digital models is imperative to understand how a building will appear to pedestrians and users at ground level.
Both camera positions and focal length settings are necessary to simulate human eye perspective views for Rhino models. This tutorial shows how to simulate “human-eye” perspective via 1.) Camera Placement in Rhino, and 2.) Camera Settings in VRay for Rhino. The Vray Camera Settings deal primarily with how to transpose your human eye simulation in Rhino to a successful graphic photograph. Lastly, this tutorial will demonstrate 3.) Camera Placement in Sketchup to achieve synonymous results in a different program.
A view is defined by the camera position, the target position and a viewing angle (corresponding to a lens length).
camera stick
PART 01: CAMERA PLACEMENT IN RHINO
To create a “human-eye” view: 1 - Create a polyline measuring approximately human eye level (60” - 74”). 2 - Position the polyline horizontally at desired viewing location (z value must equal 0).
Human Eye Perspectivecontinued
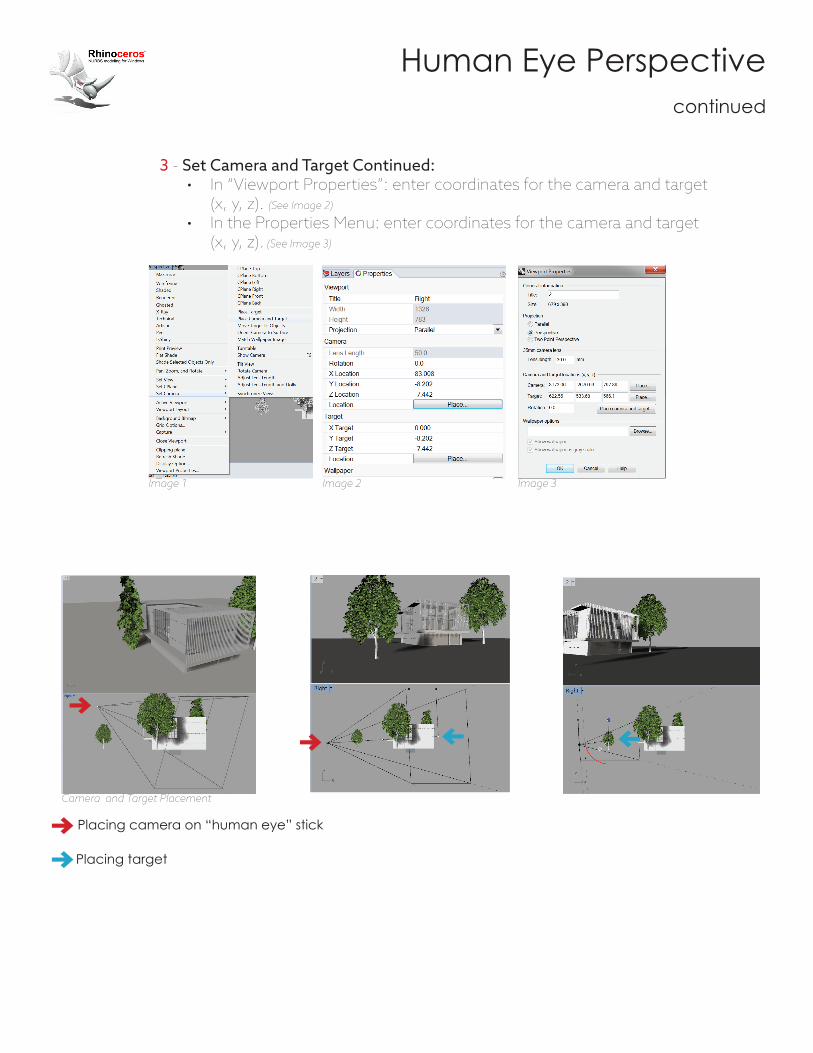
Placing camera on “human eye” stick
Placing target
3 - Set Camera and Target Continued:• In “Viewport Properties”: enter coordinates for the camera and target
(x, y, z). (See Image 2)
• In the Properties Menu: enter coordinates for the camera and target (x, y, z). (See Image 3)
Image 1
Camera and Target Placement
Image 2 Image 3
Human Eye Perspectivecontinued
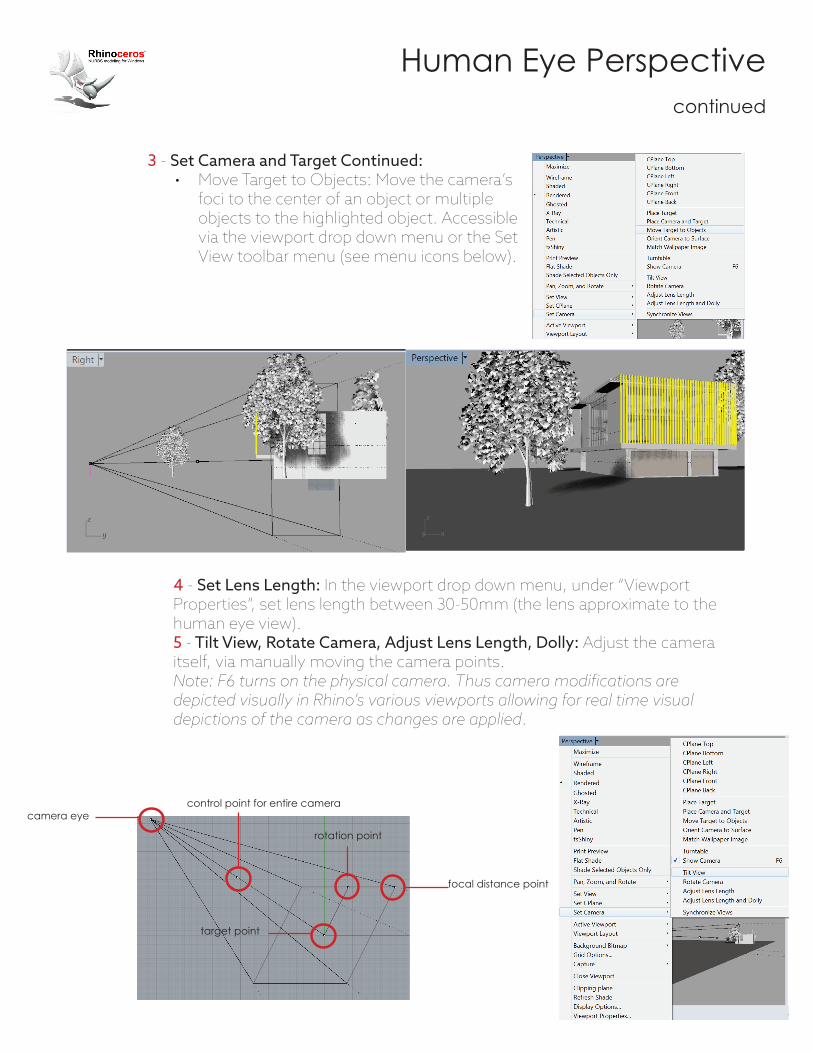
4 - Set Lens Length: In the viewport drop down menu, under “Viewport Properties”, set lens length between 30-50mm (the lens approximate to the human eye view).5 - Tilt View, Rotate Camera, Adjust Lens Length, Dolly: Adjust the camera itself, via manually moving the camera points. Note: F6 turns on the physical camera. Thus camera modifications are depicted visually in Rhino’s various viewports allowing for real time visual depictions of the camera as changes are applied.
camera eye
rotation point
target point
focal distance point
control point for entire camera
3 - Set Camera and Target Continued:• Move Target to Objects: Move the camera’s
foci to the center of an object or multiple objects to the highlighted object. Accessible via the viewport drop down menu or the Set View toolbar menu (see menu icons below).
Human Eye Perspectivecontinued
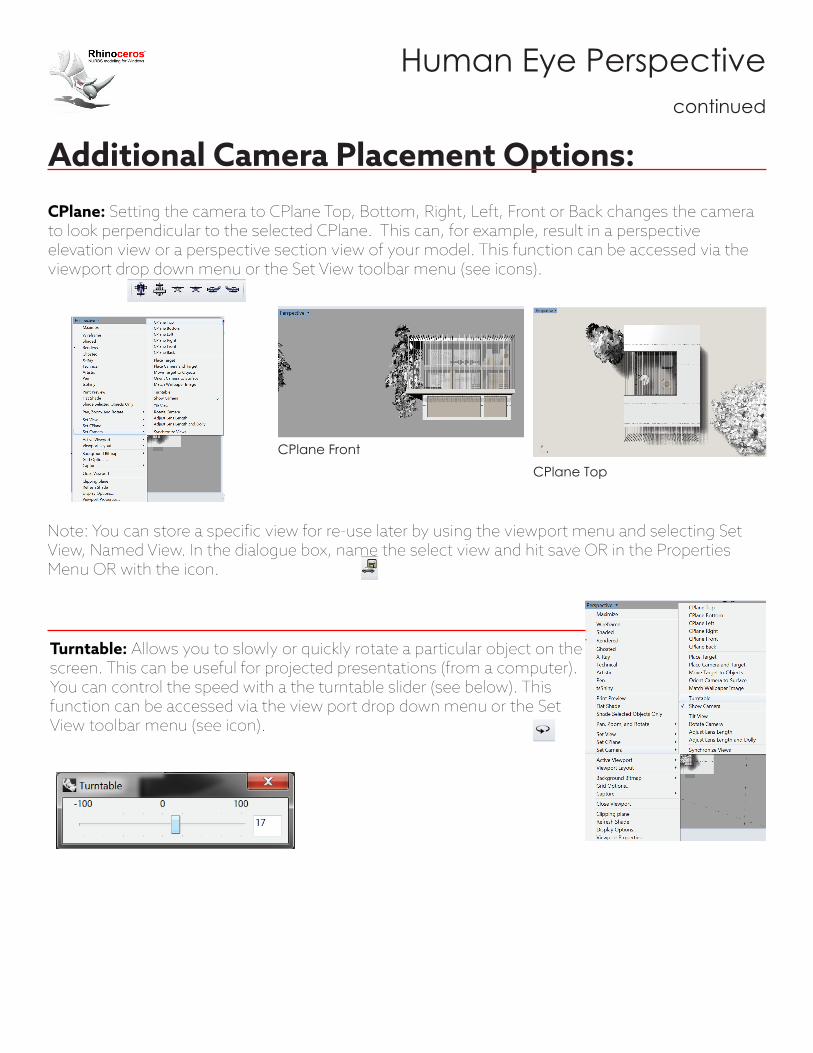
CPlane: Setting the camera to CPlane Top, Bottom, Right, Left, Front or Back changes the camera to look perpendicular to the selected CPlane. This can, for example, result in a perspective elevation view or a perspective section view of your model. This function can be accessed via the viewport drop down menu or the Set View toolbar menu (see icons).
CPlane FrontCPlane Top
Note: You can store a specific view for re-use later by using the viewport menu and selecting Set View, Named View. In the dialogue box, name the select view and hit save OR in the Properties Menu OR with the icon.
Additional Camera Placement Options:
Turntable: Allows you to slowly or quickly rotate a particular object on the screen. This can be useful for projected presentations (from a computer). You can control the speed with a the turntable slider (see below). This function can be accessed via the view port drop down menu or the Set View toolbar menu (see icon).
Human Eye Perspectivecontinued
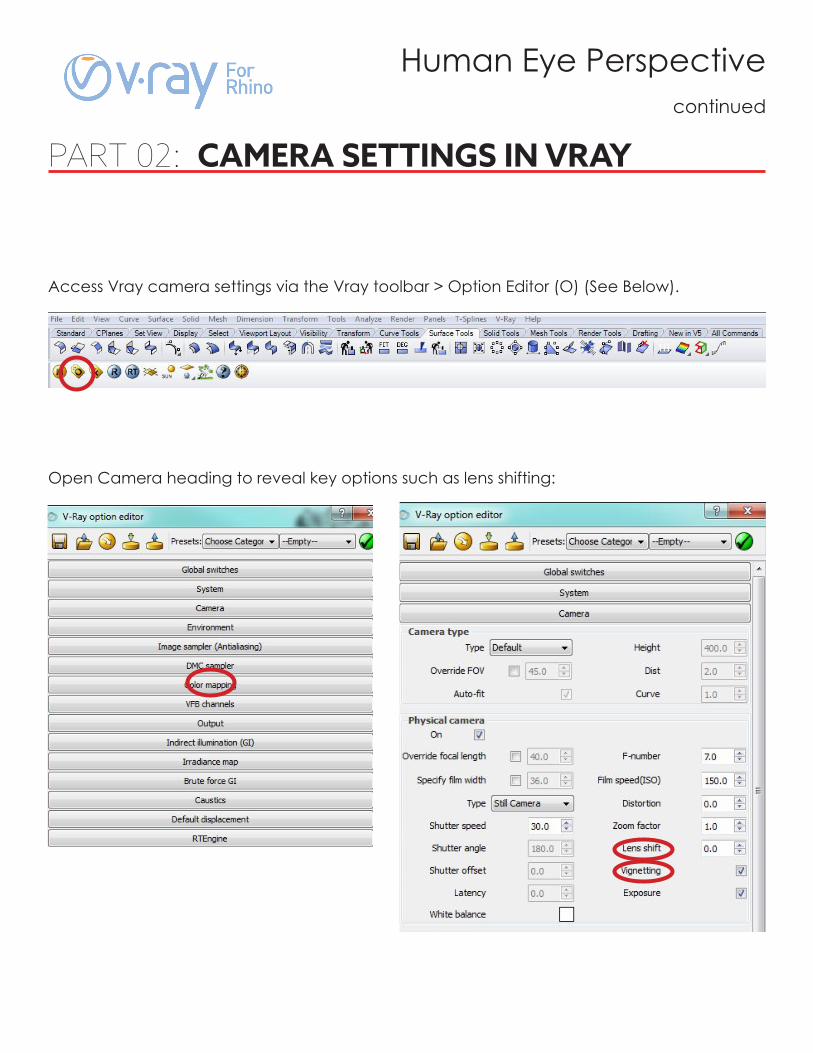
Access Vray camera settings via the Vray toolbar > Option Editor (O) (See Below).
Open Camera heading to reveal key options such as lens shifting:
PART 02: CAMERA SETTINGS IN VRAY
Human Eye Perspectivecontinued
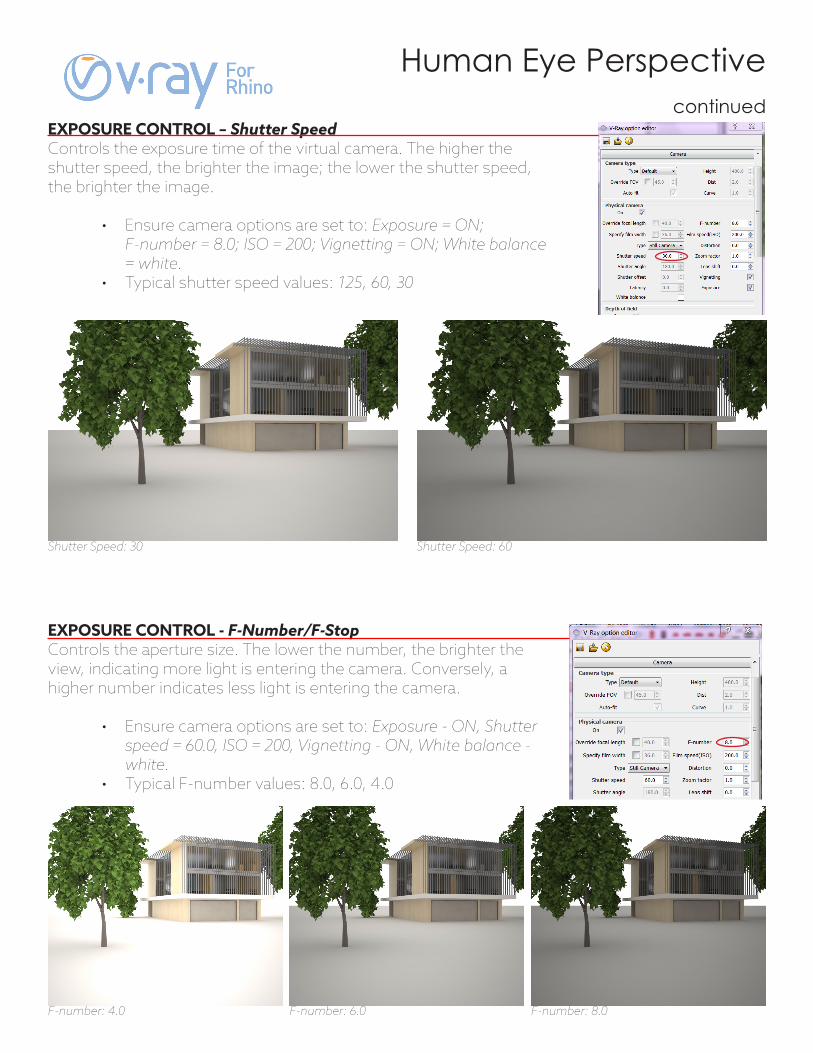
EXPOSURE CONTROL – Shutter SpeedControls the exposure time of the virtual camera. The higher the shutter speed, the brighter the image; the lower the shutter speed, the brighter the image.
• Ensure camera options are set to: Exposure = ON; F-number = 8.0; ISO = 200; Vignetting = ON; White balance = white.
• Typical shutter speed values: 125, 60, 30
EXPOSURE CONTROL - F-Number/F-StopControls the aperture size. The lower the number, the brighter the view, indicating more light is entering the camera. Conversely, a higher number indicates less light is entering the camera.
• Ensure camera options are set to: Exposure - ON, Shutter speed = 60.0, ISO = 200, Vignetting - ON, White balance - white.
• Typical F-number values: 8.0, 6.0, 4.0
F-number: 4.0
Shutter Speed: 30 Shutter Speed: 60
F-number: 6.0 F-number: 8.0
Human Eye Perspectivecontinued
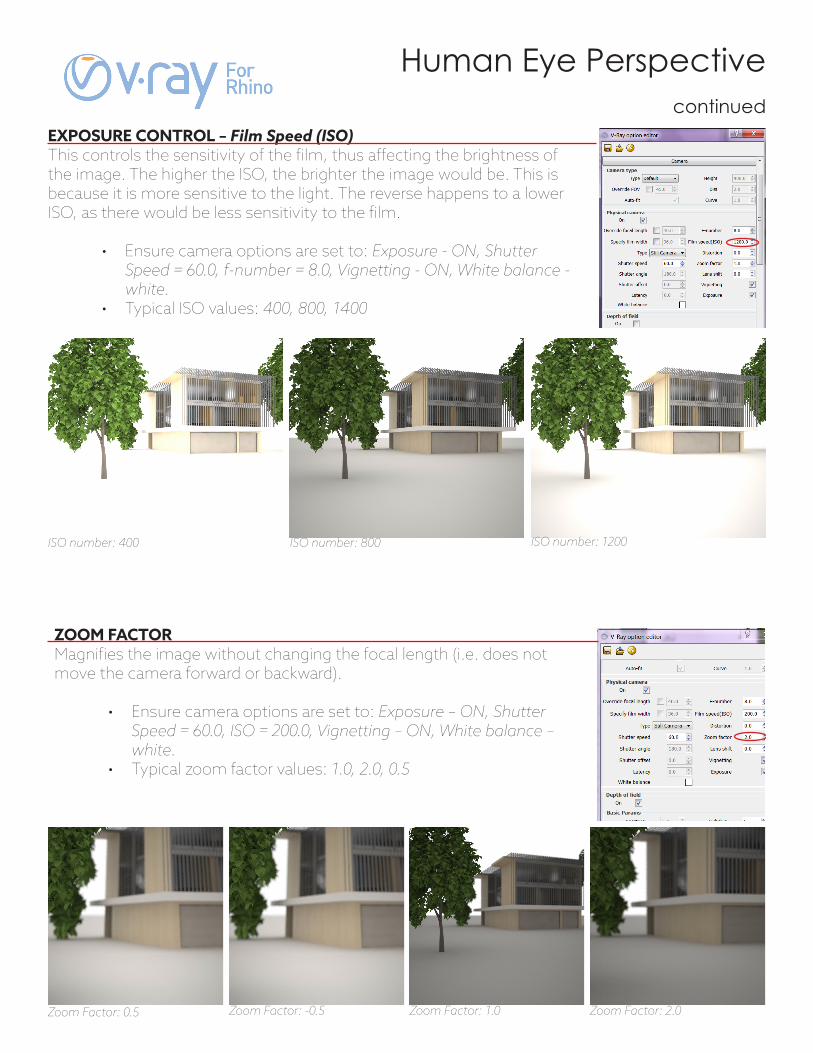
EXPOSURE CONTROL – Film Speed (ISO)This controls the sensitivity of the film, thus affecting the brightness of the image. The higher the ISO, the brighter the image would be. This is because it is more sensitive to the light. The reverse happens to a lower ISO, as there would be less sensitivity to the film.
• Ensure camera options are set to: Exposure - ON, Shutter Speed = 60.0, f-number = 8.0, Vignetting - ON, White balance - white.
• Typical ISO values: 400, 800, 1400
ZOOM FACTORMagnifies the image without changing the focal length (i.e. does not move the camera forward or backward).
• Ensure camera options are set to: Exposure – ON, Shutter Speed = 60.0, ISO = 200.0, Vignetting – ON, White balance – white.
• Typical zoom factor values: 1.0, 2.0, 0.5
ISO number: 400 ISO number: 800 ISO number: 1200
Zoom Factor: 0.5 Zoom Factor: 1.0 Zoom Factor: 2.0Zoom Factor: -0.5
Human Eye Perspectivecontinued
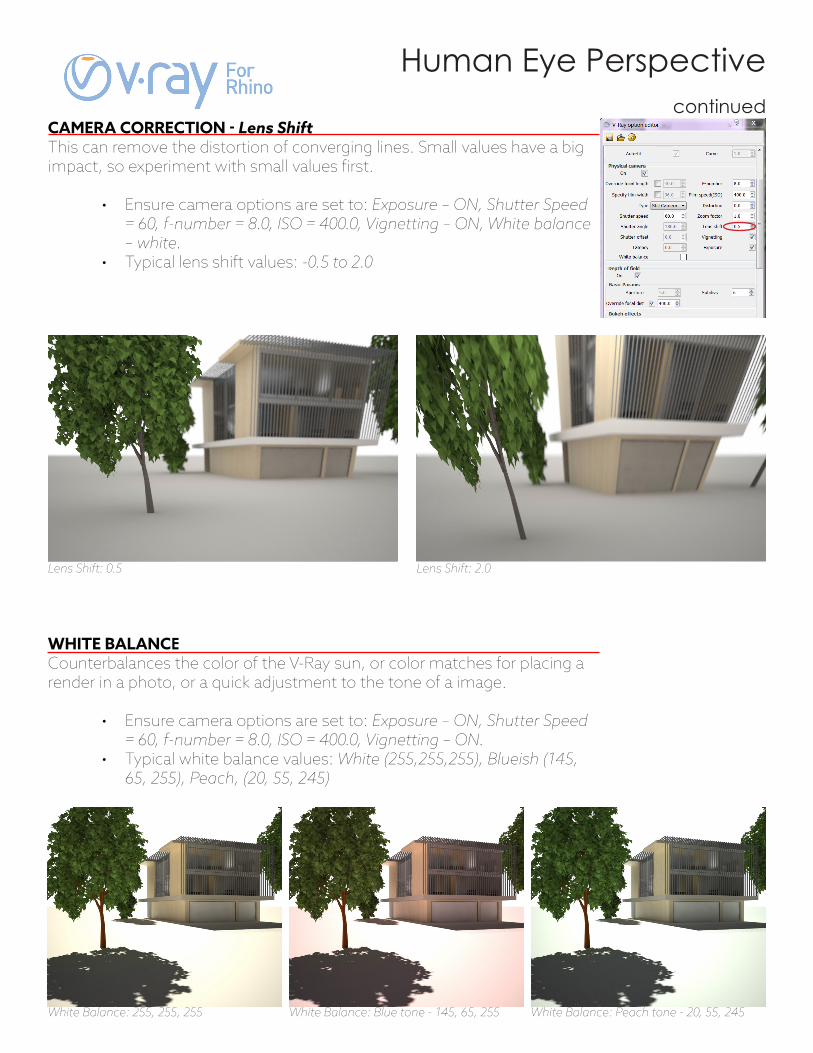
CAMERA CORRECTION - Lens ShiftThis can remove the distortion of converging lines. Small values have a big impact, so experiment with small values first.
• Ensure camera options are set to: Exposure – ON, Shutter Speed = 60, f-number = 8.0, ISO = 400.0, Vignetting – ON, White balance – white.
• Typical lens shift values: -0.5 to 2.0
WHITE BALANCECounterbalances the color of the V-Ray sun, or color matches for placing a render in a photo, or a quick adjustment to the tone of a image.
• Ensure camera options are set to: Exposure – ON, Shutter Speed = 60, f-number = 8.0, ISO = 400.0, Vignetting – ON.
• Typical white balance values: White (255,255,255), Blueish (145, 65, 255), Peach, (20, 55, 245)
White Balance: 255, 255, 255 White Balance: Blue tone - 145, 65, 255 White Balance: Peach tone - 20, 55, 245
Lens Shift: 0.5 Lens Shift: 2.0
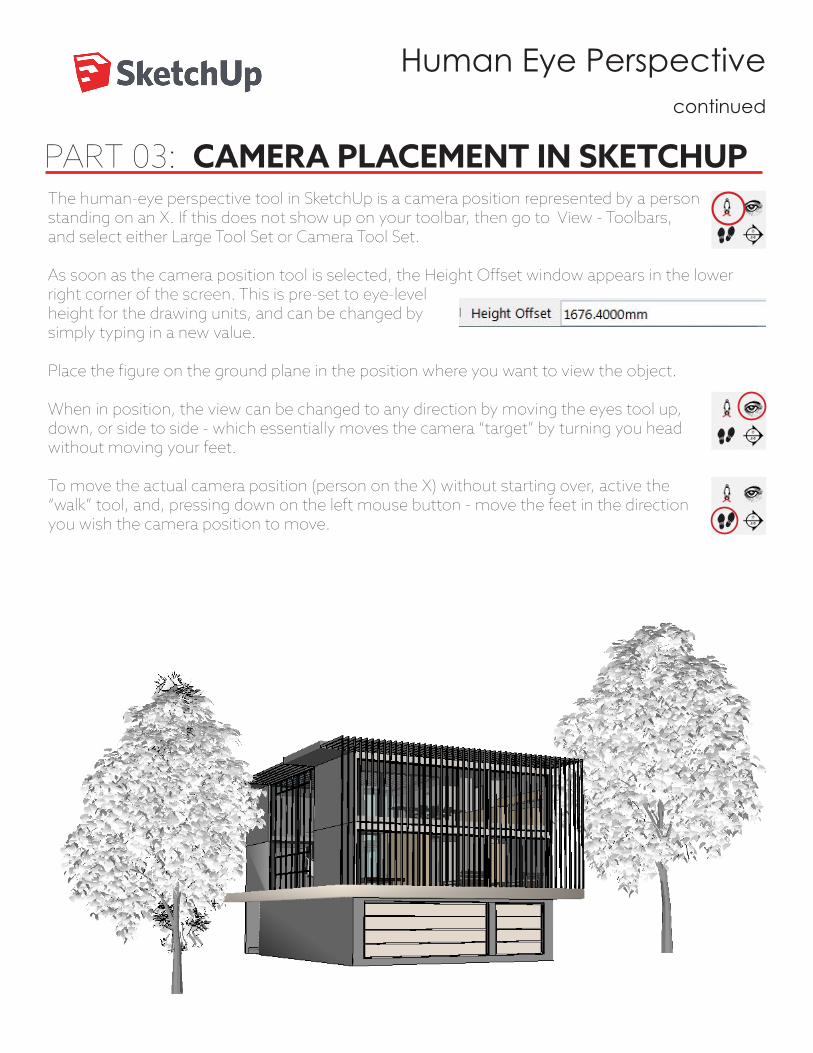
The human-eye perspective tool in SketchUp is a camera position represented by a person standing on an X. If this does not show up on your toolbar, then go to View - Toolbars, and select either Large Tool Set or Camera Tool Set.
As soon as the camera position tool is selected, the Height Offset window appears in the lower right corner of the screen. This is pre-set to eye-level height for the drawing units, and can be changed by simply typing in a new value.
Place the figure on the ground plane in the position where you want to view the object.
When in position, the view can be changed to any direction by moving the eyes tool up, down, or side to side - which essentially moves the camera “target” by turning you head without moving your feet.
To move the actual camera position (person on the X) without starting over, active the “walk” tool, and, pressing down on the left mouse button - move the feet in the direction you wish the camera position to move.
Human Eye Perspectivecontinued
PART 03: CAMERA PLACEMENT IN SKETCHUP